|
|
|
|
|
|
Here's my retro car!
The next couple of posts are copied from another forum. I thought some may be interested in my journey with this car.
A bit of background first though.
I found the Mk.1 MR2 when looking around for a 'beginners' rear wheel drive coupe. I had a Clio, wanted a Cayman, and had no rwd experience. On the advice of a chappy in insurance I went looking for a 'cheap' car with a similar configuration to the Cayman so that I could get some background experience with rear wheel drive cars. Mid-engined was an added bonus.
Frankly, before the Mk.1 I hadn't really shown any interest in cars - waited until I was 24 before learning to drive. I only learnt to drive so I could go contracting at work instead of being a permi.
The AW11 'turned' me!
My first AW11 was a red 88 NA which I think/hope is still going somewhere in the Midlands. I drove this for a while and then parked it up in a friendly farmers barn for a while before selling it.
I had and then sold the Cayman wanting out of Finance for a while. I just couldn't find another car I actually wanted to have (and be seen in!) until this SC came up for sale. I drove it for 9 months or so - about 9k miles, but, with a driving holiday in Scotland coming up, I decided it wouldn't do (we had loads of stuff to take!) and I'd been itching for a 911 for a while, so went and got a 996. I still have both of these cars, and, with a move towards breaking away from the 'corporate' world and into my own rapid prototyping/pattern making business venture its going to take some serious man-maths to keep the 996, but the AW11 is going nowhere!
|
| |
Last Edit: Jan 8, 2012 18:27:53 GMT by Deleted
|
|
|
|
|
|
|
|
|
Drove it through the winter and up until April. It worked very well in the snow with Yoko C-drives! After finding a few problems with the car (e.g. Metric bolt in an imperial hole - major bolt in drivers side seatbelt inertia reel and one of the major bolts holding the rear bumper on wasn't there as examples.) and 2nd synchro has been shot since before I bought it, I've decided to do a proper restoration to make sure of the state of the car and add my own touches here and there. It'll take a while, but I'll put a resto thread up somewhere.   |
| |
Last Edit: Jan 8, 2012 18:17:28 GMT by Deleted
|
|
|
|
|
|
|
|
|
| |
Last Edit: Jan 8, 2012 18:17:51 GMT by Deleted
|
|
|
|
|
|
|
So... It looks like I'll be moving the 911 on come the spring time. I figured out that it costs about £850 to run the 911 for 1000 miles per month. about half is finance rest is fuel and insurance. I'm not fussed by that figure because I love driving the car soo much - how it drives and the noise it makes is just spot on for me. I could probably save £6k a year for the house+land fund that we've decided we really want out of life by selling the 911. On the other hand I am going to try and figure out the man-maths to keep it on a much reduced mileage policy - just use it as a Friday car. I think I might get away with this! Which means that the SC would come back on to the road as my daily driver. I had initially wanted to do everything planned to the car before putting it back on to the road, and then use it infrequently, but, there'll be time in the future to make it 'show' standard. On a more philosophical note. I've been reading around a bit, and I'm not sure I fully understand what I meant by JDM style 80's tuning - I'm not sure of what late 80's/early 90's J tuning really is. It seems that no one really does. Lots of old school 70's and also lots of 90's stuff around, but the 80's seems a little undefined and possibly unloved if you didn't like drifting. Maybe that's it - 80's J tuning was about drifting to the exclusion of any other styles of tuning? Also, it seems like it was a cross over period between the 70's 'mechanical' focussed tuning and the 90's 'electronic' focussed tuning methods. So I'm going to re-define the aims of my project a little to period-tasteful as much as possible. I'll do work in the following phases I think: Phase 1 - Bodywork I want to get the obvious rust sorted, and do a thorough search for rust before it goes back into use, so it's safe and looking pretty good. The front lip needs a good fill and sand because its a bit lumpy, and there are some trim bits missing and shabby. I clearly need to price up a new rear bumper assembly and get that sorted. I want a new front bumper cover because the one on the car is oddly rippled. I intend to fill in the gaps for the headlight eyebrows, and install foglights in the front lip apertures. Lots of tidying really. Phase 2 - Exhaust I need to get that Fujitsubo exhaust ordered and over here asap really. Phase 3 - Roadworthiness Make sure the running gear and suspension are in tip top condition. I take it that the wheel bearings will be the same as the Mk.1b? How about the CV joints? which ones should I use there? I have brake rebuild kits, so that should be a fairly easy win. Full Service/fluid change etc. Still not sure on whether to go JDM coilovers or not if the really are that harsh. Phase 4 - Interior Install Omori gauges and some of the HKS Electronics. I need to make an enclosure to sit on top of the central column, which will take the DIN panel I have. I could fit it instead of a radio but it'd be too low in the cockpit for me. The storage bin DIN slot is being used by a HKS holder - will take a small gauge and two electronics gizmos. I need to find a good Boost gauge. I missed out on a HKS 2.5b boost gauge that looked perfect - text was the right kind of script and it really looked the part. I wasn't sure it was worth £80 for a used one. Kind of re-evaluating that now though, looking at the available alternatives! A canadian chap over on TB did a good install of one on the upper steering wheel cover. I'm going to do something very similar. I like the idea of a light crackle paint finish on the uncovered plastic parts. I've seen this a lot on light aircraft panels and it looks pretty good and hard wearing. I also want to include some temperature probes/gauges to get an idea of IAT's etc. One of the reasons I'm happy to go down this route of modding is that I thought it was a shame that I couldn't dyno it before taking it off the road. With this approach, I can and also I can get an idea of what the engine in it's current shape is up to in normal use as a baseline. Phase 5 - Seats I have some SE Recaro's from a Hilux surf that need a good clean and refurb (the usual bits are worn out) and hopefully the rails Toni offered me should allow me to mount them without modding - we'll see! Phase 6 - Easy Engine mods Eventually we'll get to installing the rest of the HKS electronics which will alter fuelling etc as a first stage mod which should take care of any lean/rich issues Identified by the gauge install. If the gauge install shows problems this stage will be done pretty quick. Phase 7 - Not so easy engine mods I am tempted to buy another engine/box and ancillaries set and refurb those so that the car is off the road for the minimum amount of time possible. This will probably be a standard rebuild to get the job done. Then swap and spend some cash on the original engine. I'm quite keen to go full out with the induction side of the engine, to see just how far I can go with that. I'm also keen to have a look at a small Vortec charger. Phew......if you are still here - well done! Brain dump over! Some of the bits...  |
| |
Last Edit: Jan 8, 2012 18:18:17 GMT by Deleted
|
|
|
|
|
|
|
|
So it looks like this forum doesn't like picasa web hosting?
|
| |
|
|
|
|
|
|
|
|
|
| |
Last Edit: Jan 7, 2012 14:16:39 GMT by Deleted
|
|
|
|
|
|
|
|
Welcome to RR. Your car looks great! I like a nice mk1 and supercharged too, superb! Also, I use Photobucket for hosting pics here, not sure what everyone else uses.
|
| |
1974 Skoda S100 tarmac car
1998 BMW 750 daily
1994 Mitsubishi Evo2
|
|
|
|
|
|
|
|
Riiiiiiight - found the problem with picasa web image hosting. Google uses 'https' in their links. Proboards like 'http' instead!
Apologies to those who have clicked and haven't seen much!
|
| |
Last Edit: Jan 8, 2012 18:20:48 GMT by Deleted
|
|
|
|
|
|
|
|
Cool! i have a soft spot for the mk1 MR2 it will will be good to see how this progresses.
|
| |
|
|
|
|
|
|
|
|
I hope it'll be moving along now Christmas is out of the way. A big part of this thread is to give me a plan of attack, hence the brain dump!
I have a soft spot for 944s - would love to see what a 944 Turbo 250 goes like!
And thanks Raymond - bit of a lurker so thought I'd chip in.
|
| |
|
|
|
|
|
Jan 23, 2012 22:11:19 GMT
|
Last weekends work consisted of: 1. How hard is it going to be to put my recaro seats in?  Well, the rails I have won't work with the seats, so it looks like I'm going to have to chop the runners off the standard seats and bolt 'em to the recaros - if the width of the recaros doesn't match. Which is highly likely! 2. So then I decided to get a view of whats going on behind the front bumper.  Headlights out:   They are in not too bad condition all things considered. Radiator and support bars aren't too bad I suppose. 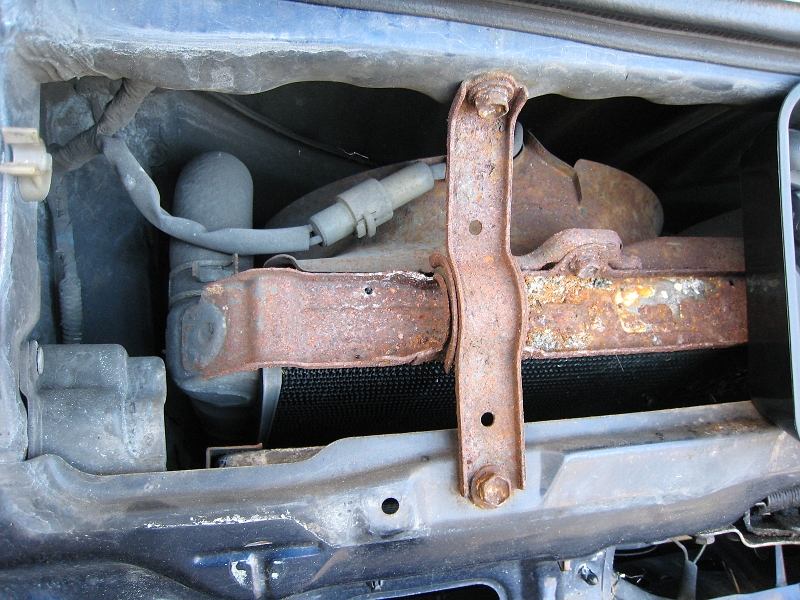 The matrix is in good nick because it's been protected by the a/c condensor, and the rest appears to be just surface rust. Then on to the bumper removal. Undo a row of fasteners and it's quite easy to push the whole bumper assembly forward. Not particularly good because the bumper bar should be properly bolted to the front of the chassis!! 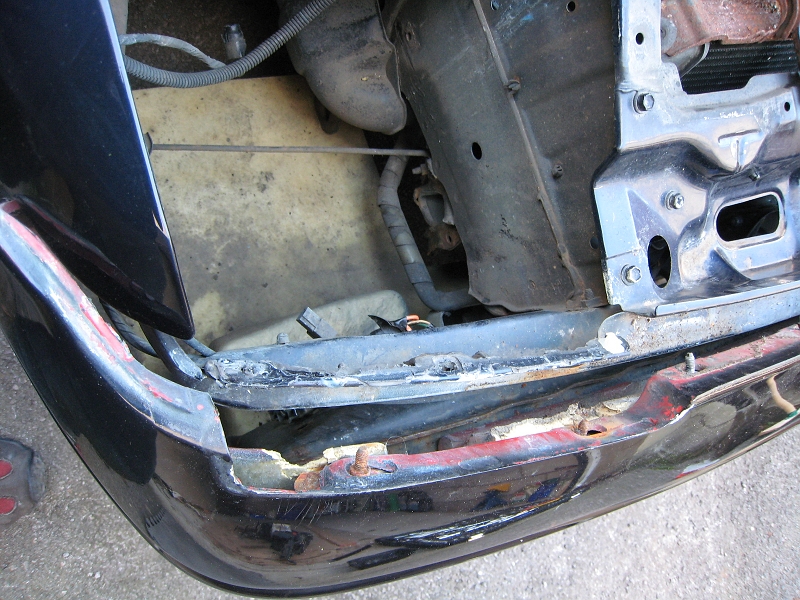 And with little effort because of all the missing fasteners, the bumper just falls off!  Good job I never needed a tow - I would have gone nowhere!  The usual rusting fasteners etc - this will all be replaced new as much as poss. because I want to do the job properly. |
| |
|
|
|
|
|
Jan 23, 2012 22:21:18 GMT
|
In the week I started disassembling the headlight units.  These should clean up well. I have Raybrigg units to go back in, and I shall treat the car to new chrome and headlight bowls.  These ball ends are pressed on to the drive motor so I'll just clean em up and pack with grease. Taking the front bumper off cracked off the GF lower spoiler, showing just how much filler had been used to smooth it in. 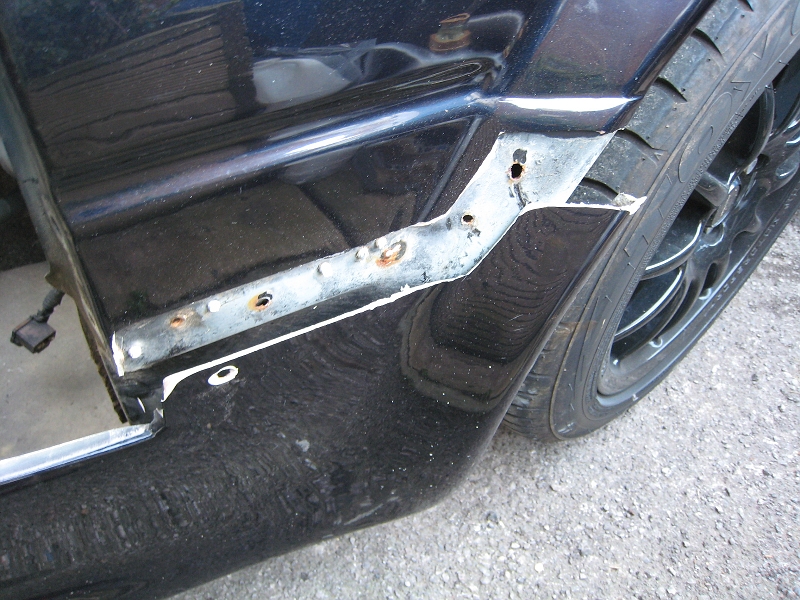 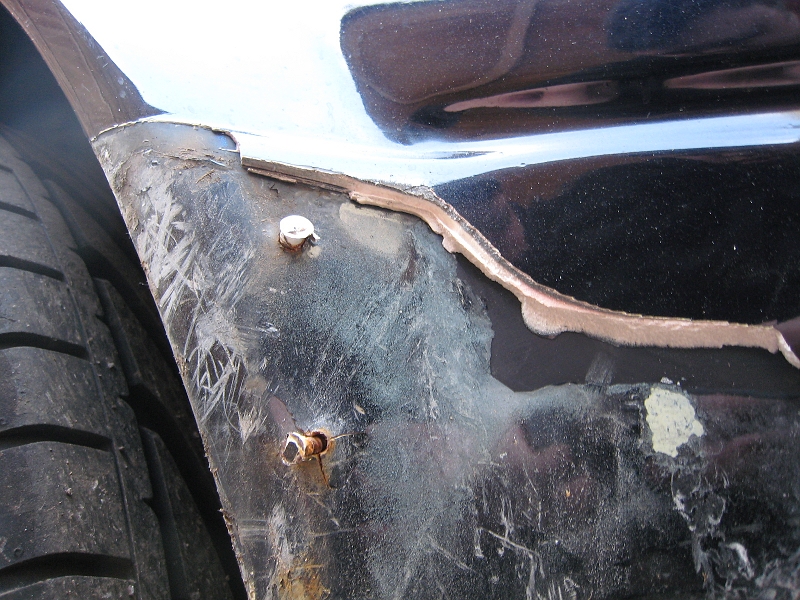 I'm going to put the proper lower lip back on the car so I'll be binning the wings aswell because of the filler. A little bit of crustiness under the condensor - it's taking a bit of a beating over the years.  |
| |
|
|
|
|
|
Jan 23, 2012 22:30:11 GMT
|
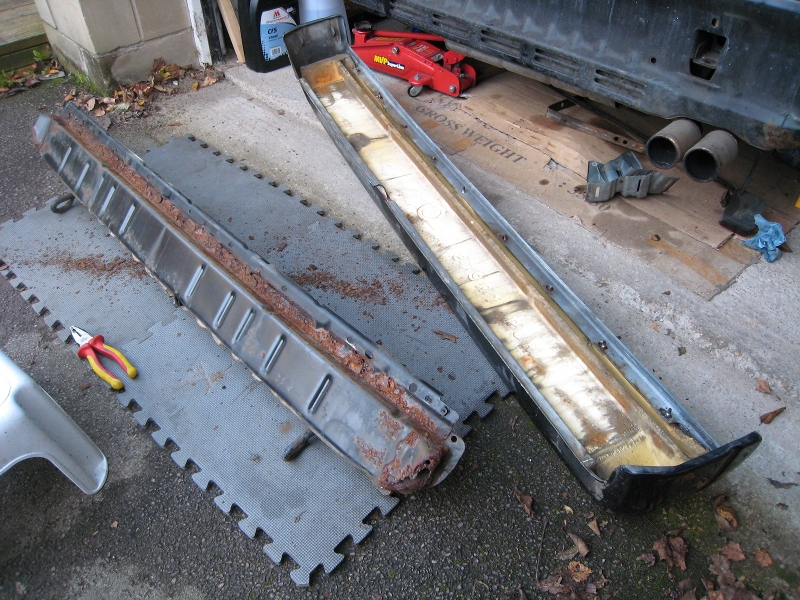
To bring this up to date, I've got round to using my new toy - angle grinder!  Nice hole. Looks like a repair panel job there. This is quite a regular place for AW11s to go - I think in this case it's suffered from water not draining out of the chassis, from the aerial/air inlet drain.  I also took the toblerones and mud flaps off - classic places for rust on these cars. Pleased to say the cills are solid, but this did rear it's ugly head behind the passenger door.  Looks like sitting mud has done the damage - nice little trap here which must have evaded the underseal 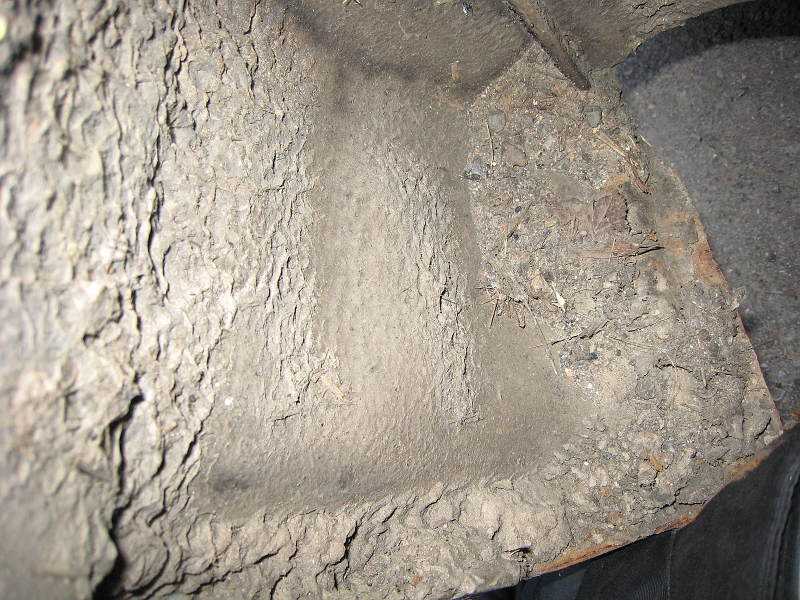 So we're up to date for the moment - front wings off this weekend, and everything needs a really good wash out to get rid of all the caked in mud. |
| |
|
|