The car I had was a Mk2 Golf 1300 base spec and I decided to do a budget bike carb conversion on it, as having done the research it looked simple to do, and with other mods might release a few more ponies from the little 8 valve engine. I’ve been asked countless times how it can be done and what parts in my experience work best, so I thought I’d better write it down all in one place, in case I wake up one morning and have forgotten it all.
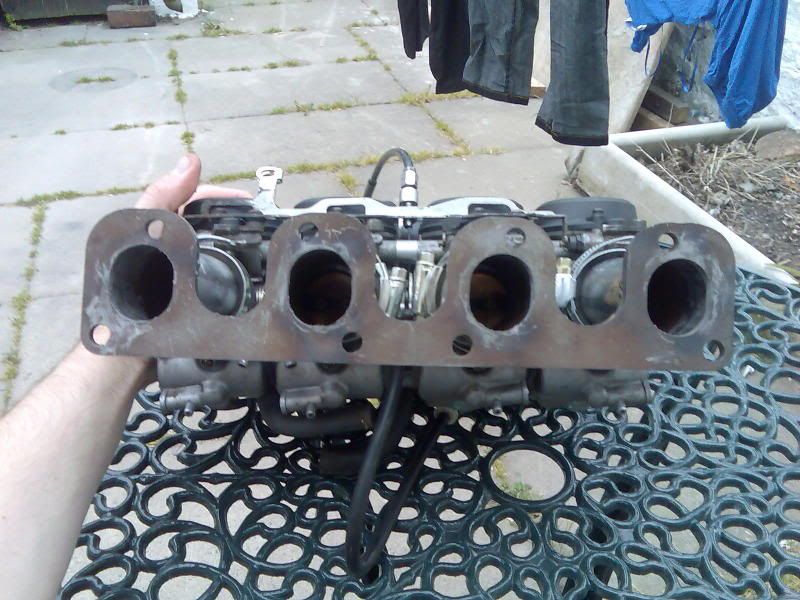
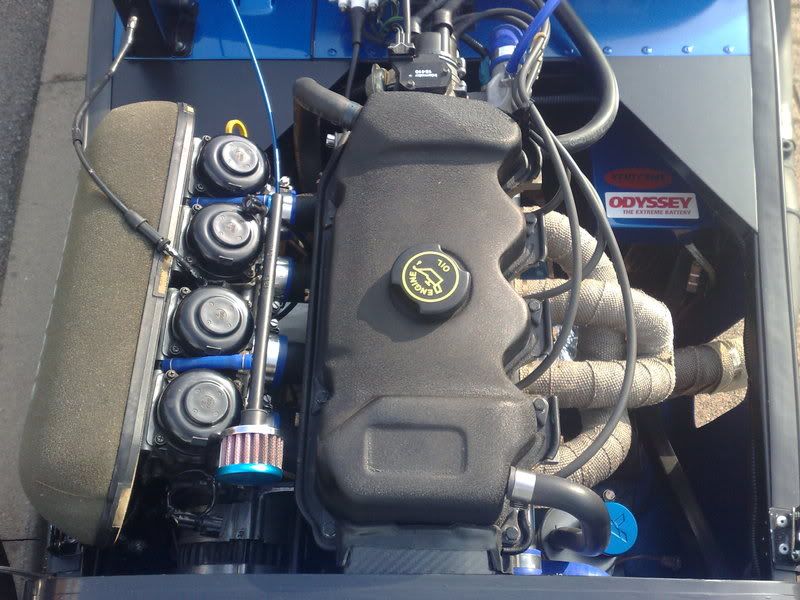
First off you need some carbs. They’re fairly plentiful on ebay, but these days tend to be scene taxed to hell, so your best bet is to try and find a specialist bike breaker locally and pick up a set from them. I scored a set of Honda CBR 600 carburettors from a bike shop at the back of Preston. If at all possible try and get the rubber connectors that joined the carb to the inlet manifold on the bike, as in my experience they always work better than silicone hose, as they were designed for the application, and also they are quite pricey to buy new. From the guides I have read Yamaha R1 carbs also work and probably a few others too. The key when buying them is to make sure that they are actually carbs, as I’ve seen a few people buy bike throttle bodies by mistake, which are another kettle of fish entirely and won’t work for this application without a lot more kit. As a general rule, you’re after 4 barrel carburettors from a bike between 600 and 1000cc, I’m sure other people will be able to recommend others. Depending on the size of the engine you’re bolting them to, you’ll probably have to drill the main jets out on the carbs to suit the larger cc of the car engine, or buy new ones. Needless to say I went for the cheap option!
Having spoken to Bogg Bros, telling them the size of my engine, they said the main jets would need to be 160s (in other words 1.6mm in diameter.) The jets are readliy available, I'm told Weber replacements generally fit. The kind man at Bogg bros suggested I get a set of fine engineers drills and drill the existing ones out to 1.6mm. I downloaded the pdf of the repair manual for my carbs to make sure which jet was the main one, then took off the float chamber covers one by one, un screwed the main jet (which in my case was the largest jet in the centre) and carefully drilled each one out, and screwed it back into position. Make sure the float chamber seals are seated right, and they're screwed down correctly, as leaks here could be a nightmare later.
Next up you need a fuel pump. This is where a lot of conversions differ as the majority of people fork out for a Facet fuel pump and a pressure regulator, and then mess about tweaking the fuel pressure to suit the carbs. In my case I’m far too tight fisted to fork out £50 plus on that lot so I looked into using the existing fuel pump off the donor bike. I found out that for the CBR 600 (1998 model) it ran a 12 volt electric pump which is pressure sensitive, so that as soon as the float chambers are full and the valves close, it stops pumping, and only pumps once the outlet pressure drops. I managed to pick the pump up again from my friendly bike shop, for about 8 quid, and ran an inline paper filter between tank and pump.
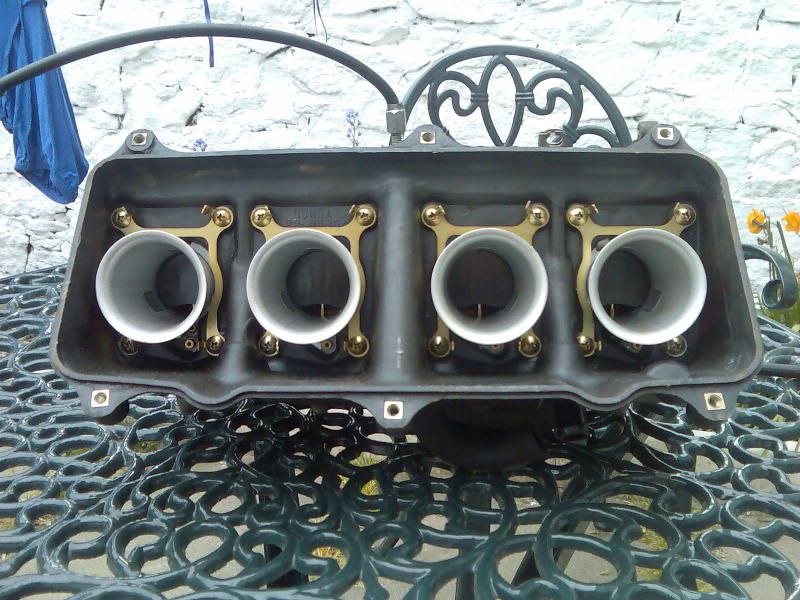
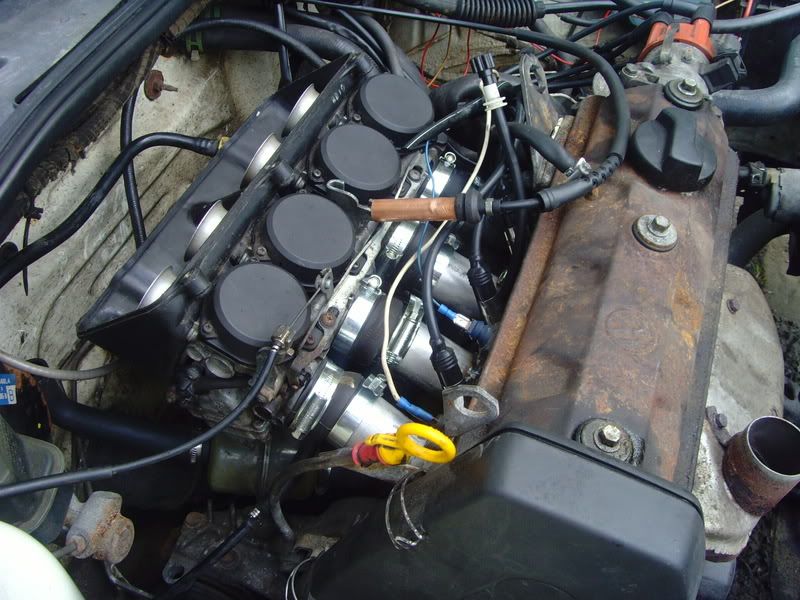
Once you have these two you’ll need a manifold. This is where things can get pricey, but again I was loath to spend a lot when I could make do myself. What you need is a flat plate that bolts to the side of the head, with tubes, or runners, welded to it, in such a way that they line up with the outlets from the carbs.
A lot of people who have done this conversion buy a manifold from a specialist who makes them to order. The most popular I’ve found is Bogg Brothers, based near Malton in North Yorkshire. They will make up a spangly alloy inlet for you for in the region of £175, and the feedback I’ve had about Bogg Bros thus far is almost universally good. Their bread and butter is doing this kind of thing to high powered Caterhams and the like, and rolling road tuning too. My only dealing with them was by phone asking for advice about my conversion, and they were more than willing to offer advice and seemed knowledgeable and friendly to boot.
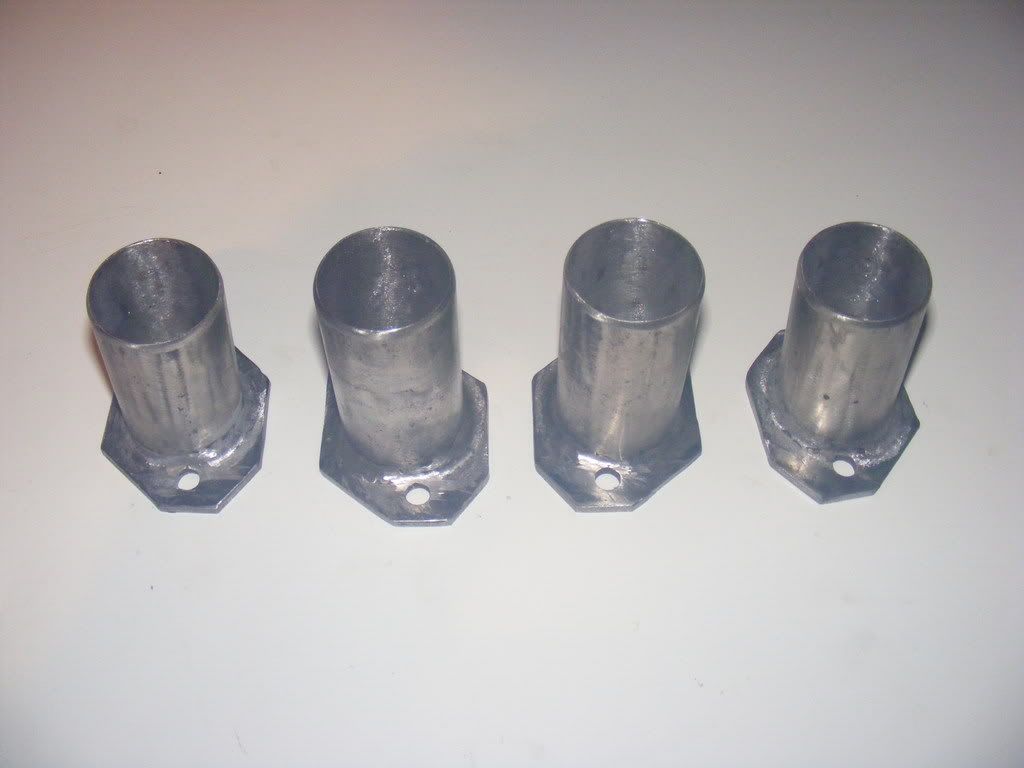
I opted (largely due to being skint) to make my own manifold to a similar design. I sent an inlet manifold gasket to a mate who works at an engineering firm, and he had a 5mm steel plate cut out to the shape of the gasket for me for the price of a few beers, you could opt for a thicker plate, to make sure the plate doesn’t distort when welded. I then sourced some exhaust tubing the same diameter as the carb outlet, worked out the angles I needed to match the port spacing on the cylinder head, and the outlet from the carbs. Some people choose to space the carbs out to suit their engine, but this was a bit more involved than I wanted to get into. The manifold was my first ever welding job, and it was critical the welded joint was air tight, so the resulting job was functional, but by no means pretty!
It’s important when making the manifold to think about leaving room around the runners for the securing bolts where it screws to the head. I used cap head bolts to give me extra room, but even then it was a tight squeeze.
Another thing to think about when making the manifold is the vacuum for your brake servo, if you have one. For me it was an afterthought, but I drilled and tapped one of the runners, and fitted a metal tube in the hole, and connected the rubber pipe to the servo from there. Ideally I guess you’d need a feed from all the runners, but I found the vacuum from one to work just fine, and not affect the running of the engine.
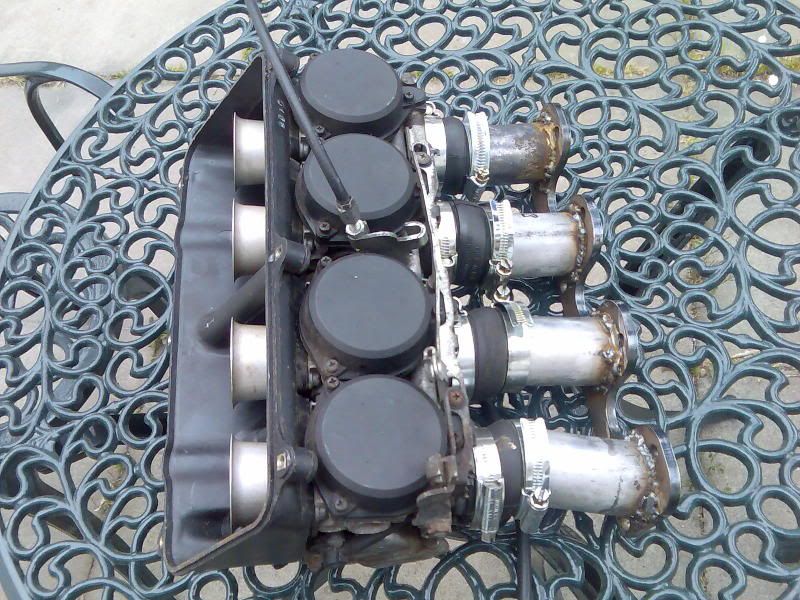
At that point all that is left is to consider cables, throttle, and choke, air filter and the way to fit the carbs. On mine, I used the existing cable, which honestly was a bodge, if I’d fitted them long term I’d have fitted a generic cable and made it fit properly. As for air filters, you can get individual filter socks fairly cheaply off ebay. I ran mine with some coarse gauze over the trumpets to stop big pieces of dirt getting in, but it wasn’t my daily driver!
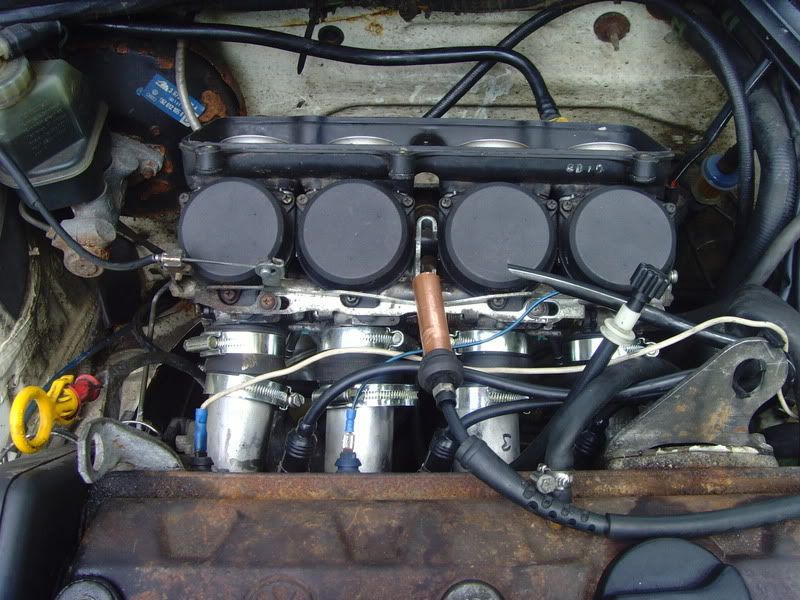
On the golf ‘small block’ 8 valve engine, the head is crossflow, with inlet at the back and exhaust down the front. It was fairly tight against the bulkhead, but as long as you take into account clearance when making the manifold you’ll be fine. There are coolant pipes on the engine that run into water channels on the original inlet manifold, but you can either blank these off, or bridge them with some pipe.
I’ve looked into making another manifold and fitting the carbs to my current 1600 ‘big block’ 8 valve Golf engine, but I’m currently in two minds about it. My main worry is on this engine the carbs are on the same side of the head, and above the hot exhaust manifold, the carbs are partly made from plastic, and the fuel inlet pipes are underneath the carbs.
I’ve heard in some cases that the heat can cause fuel vaporisation and other problems, and there’s obviously a risk that a fuel leak onto the hot exhaust may cause a big fire. An option is to fabricate some form of heat shield, but again that will inevitably get hot.
The preferred way of doing it, in a VW at least is use the 1400 or older 1800 16v engines, which have crossflow heads, and in the case of the 1800 the inlet is on the front of the head in the flow of air.
If anyone wants to add to this with their own experience and recommendations specific to other engines, or disagrees with any of it, feel free to comment. I have some pictures lurking in the back of my photobucket somewhere, I'll try and dig any relevant ones out. In the meantime, apologies for the essay
Hope this helps somebody!
Tom
First off you need some carbs. They’re fairly plentiful on ebay, but these days tend to be scene taxed to hell, so your best bet is to try and find a specialist bike breaker locally and pick up a set from them. I scored a set of Honda CBR 600 carburettors from a bike shop at the back of Preston. If at all possible try and get the rubber connectors that joined the carb to the inlet manifold on the bike, as in my experience they always work better than silicone hose, as they were designed for the application, and also they are quite pricey to buy new. From the guides I have read Yamaha R1 carbs also work and probably a few others too. The key when buying them is to make sure that they are actually carbs, as I’ve seen a few people buy bike throttle bodies by mistake, which are another kettle of fish entirely and won’t work for this application without a lot more kit. As a general rule, you’re after 4 barrel carburettors from a bike between 600 and 1000cc, I’m sure other people will be able to recommend others. Depending on the size of the engine you’re bolting them to, you’ll probably have to drill the main jets out on the carbs to suit the larger cc of the car engine, or buy new ones. Needless to say I went for the cheap option!
Having spoken to Bogg Bros, telling them the size of my engine, they said the main jets would need to be 160s (in other words 1.6mm in diameter.) The jets are readliy available, I'm told Weber replacements generally fit. The kind man at Bogg bros suggested I get a set of fine engineers drills and drill the existing ones out to 1.6mm. I downloaded the pdf of the repair manual for my carbs to make sure which jet was the main one, then took off the float chamber covers one by one, un screwed the main jet (which in my case was the largest jet in the centre) and carefully drilled each one out, and screwed it back into position. Make sure the float chamber seals are seated right, and they're screwed down correctly, as leaks here could be a nightmare later.
Next up you need a fuel pump. This is where a lot of conversions differ as the majority of people fork out for a Facet fuel pump and a pressure regulator, and then mess about tweaking the fuel pressure to suit the carbs. In my case I’m far too tight fisted to fork out £50 plus on that lot so I looked into using the existing fuel pump off the donor bike. I found out that for the CBR 600 (1998 model) it ran a 12 volt electric pump which is pressure sensitive, so that as soon as the float chambers are full and the valves close, it stops pumping, and only pumps once the outlet pressure drops. I managed to pick the pump up again from my friendly bike shop, for about 8 quid, and ran an inline paper filter between tank and pump.
Once you have these two you’ll need a manifold. This is where things can get pricey, but again I was loath to spend a lot when I could make do myself. What you need is a flat plate that bolts to the side of the head, with tubes, or runners, welded to it, in such a way that they line up with the outlets from the carbs.
A lot of people who have done this conversion buy a manifold from a specialist who makes them to order. The most popular I’ve found is Bogg Brothers, based near Malton in North Yorkshire. They will make up a spangly alloy inlet for you for in the region of £175, and the feedback I’ve had about Bogg Bros thus far is almost universally good. Their bread and butter is doing this kind of thing to high powered Caterhams and the like, and rolling road tuning too. My only dealing with them was by phone asking for advice about my conversion, and they were more than willing to offer advice and seemed knowledgeable and friendly to boot.
I opted (largely due to being skint) to make my own manifold to a similar design. I sent an inlet manifold gasket to a mate who works at an engineering firm, and he had a 5mm steel plate cut out to the shape of the gasket for me for the price of a few beers, you could opt for a thicker plate, to make sure the plate doesn’t distort when welded. I then sourced some exhaust tubing the same diameter as the carb outlet, worked out the angles I needed to match the port spacing on the cylinder head, and the outlet from the carbs. Some people choose to space the carbs out to suit their engine, but this was a bit more involved than I wanted to get into. The manifold was my first ever welding job, and it was critical the welded joint was air tight, so the resulting job was functional, but by no means pretty!
It’s important when making the manifold to think about leaving room around the runners for the securing bolts where it screws to the head. I used cap head bolts to give me extra room, but even then it was a tight squeeze.
Another thing to think about when making the manifold is the vacuum for your brake servo, if you have one. For me it was an afterthought, but I drilled and tapped one of the runners, and fitted a metal tube in the hole, and connected the rubber pipe to the servo from there. Ideally I guess you’d need a feed from all the runners, but I found the vacuum from one to work just fine, and not affect the running of the engine.
At that point all that is left is to consider cables, throttle, and choke, air filter and the way to fit the carbs. On mine, I used the existing cable, which honestly was a bodge, if I’d fitted them long term I’d have fitted a generic cable and made it fit properly. As for air filters, you can get individual filter socks fairly cheaply off ebay. I ran mine with some coarse gauze over the trumpets to stop big pieces of dirt getting in, but it wasn’t my daily driver!
On the golf ‘small block’ 8 valve engine, the head is crossflow, with inlet at the back and exhaust down the front. It was fairly tight against the bulkhead, but as long as you take into account clearance when making the manifold you’ll be fine. There are coolant pipes on the engine that run into water channels on the original inlet manifold, but you can either blank these off, or bridge them with some pipe.
I’ve looked into making another manifold and fitting the carbs to my current 1600 ‘big block’ 8 valve Golf engine, but I’m currently in two minds about it. My main worry is on this engine the carbs are on the same side of the head, and above the hot exhaust manifold, the carbs are partly made from plastic, and the fuel inlet pipes are underneath the carbs.
I’ve heard in some cases that the heat can cause fuel vaporisation and other problems, and there’s obviously a risk that a fuel leak onto the hot exhaust may cause a big fire. An option is to fabricate some form of heat shield, but again that will inevitably get hot.
The preferred way of doing it, in a VW at least is use the 1400 or older 1800 16v engines, which have crossflow heads, and in the case of the 1800 the inlet is on the front of the head in the flow of air.
If anyone wants to add to this with their own experience and recommendations specific to other engines, or disagrees with any of it, feel free to comment. I have some pictures lurking in the back of my photobucket somewhere, I'll try and dig any relevant ones out. In the meantime, apologies for the essay

Hope this helps somebody!
Tom


 Thanks for the reminder. You said you would get to the jets later but there is no mention of them ?