


I have no clue where to put this as its not retro or cool it a big red transit so i stuck it in here feel free to move it to it right location
So I'll start the i bought this van May or April 2010 for €600 and an engine it was to replace my Toyota Starlet for a bit till i put in the new engine in to it well that went out the window as i fell in love with the van and started add bits to it soon i had relished ineed wanted a camper van so this is what have done so far
This is my van in June

Well this are some of the bits I'm keeping from the caravan that me and a mate smashed up

Well first thing first was the body work well one wheel arch as started with the help of my dad will get around to the other side and some point
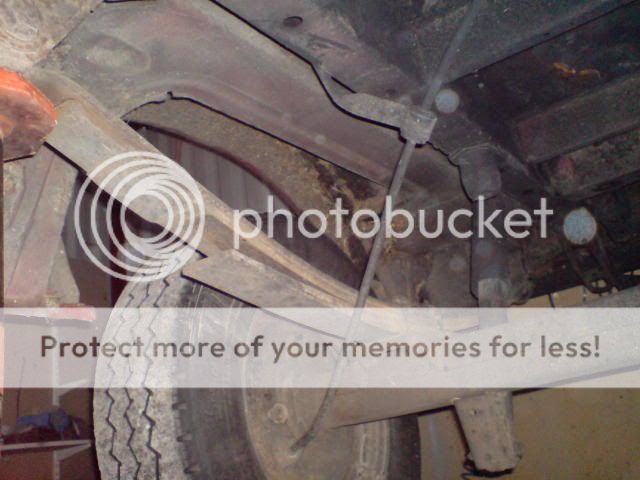
The home made wheel arch is going i will miss it anyone want to by it ;D


What it was like behind the home made wheel arch


I got to play with the air chisel

After a few seconds with the air chisel i had this

Cat making a break for it before the sparks start ;D

Had to cut the wheel arch to fit

And more cutting

Wheel arch all weld up

Here my dad working on a merc had to do some welding to the front his using a grinder and having a fag at the same time :roll:

My dads cortina his been rebuilding for years now on the right in gray

Its sitting this low

First of my dads shed nice and warm and lots of shine tools

My poor little van

Driver side filler mess


Bad boy bonnet

Sheet metal cut and clamped in place for welding

All weld and filled with filler

Boat sides done grill back on

My dad doing the welding the mask is for show his the man who shuts his eyes and hopes he hits the spot

I had some fun with all the dust

I picture for all under side work as started that van on the lift i can seat underneath it

my dads little mig welder better know as MI as it takes no gas as died again he'll fix it again and it might live
Sliding door sill on and passage door sill done at long last just need a skim of filler and a lick of paint
Ah my missing bolt

Safety man is on the job the mask is for show his a close the eyes type

a lick of paint to stop rust

And the passage sill welding or the a star being formed

Fix the air box good buy rope and now my power steering is not leaking any more and Put in the second battery tray

Had a pock around under neat and I'm shocked to say it was solid as a rock under there so stone chip it Wednesday
e can you spot something missing in the photo
I put this back on today had it in the van hanging around so i put it back where it belongs makes the van cleaner looking

Started the camper van parts today as my dad said i had the BEEP of welding and bang the van
So did this well empty this first

I did this a while back wasn't happy with it so is came down sorry to my mate who helped me put it up

Made a frame to go around the sky light

and then started to make a frame on the side got this far and my dad had to go fix his car so that ended the days work well evening as he spent all day fixing the welder and starting into space

Cat found some where to sleep lazy cat still there

Made up all my sides and there well stuck on went though 2 tubes of a thing that's like tiger seal my dad said better to over do it then have it fall upon you in your sleep


Two parts of the roof done this stands are handy there for holding up plaster bored

Making the frames

This was a hard bit to make as its at the back of the van by the doors note the extra two bits in the middle there for the air vent I'm making to go on the right

This is where it sits

All up and waiting for the glue to set

i ran most of my 240V and 12V wiring the blue wiring is 240v fire proof wiring The black is 12V
The two plugs wiring on show here

a big ball of wiring for the fuse box's

the 240V lights wiring

My new bulk head

This is a part of the caravan that me and mate smashed to bits it my vent at the back to allow fresh air into the van parts

So I'll start the i bought this van May or April 2010 for €600 and an engine it was to replace my Toyota Starlet for a bit till i put in the new engine in to it well that went out the window as i fell in love with the van and started add bits to it soon i had relished i
This is my van in June
Well this are some of the bits I'm keeping from the caravan that me and a mate smashed up
Well first thing first was the body work well one wheel arch as started with the help of my dad will get around to the other side and some point
The home made wheel arch is going i will miss it anyone want to by it ;D
What it was like behind the home made wheel arch
I got to play with the air chisel

After a few seconds with the air chisel i had this
Cat making a break for it before the sparks start ;D
Had to cut the wheel arch to fit
And more cutting
Wheel arch all weld up
Here my dad working on a merc
 had to do some welding to the front his using a grinder and having a fag at the same time :roll:
 My dads cortina his been rebuilding for years now on the right in gray
Its sitting this low

First of my dads shed nice and warm and lots of shine tools
My poor little van

Driver side filler mess
Bad boy bonnet
Sheet metal cut and clamped in place for welding
All weld and filled with filler
Boat sides done grill back on
My dad doing the welding the mask is for show his the man who shuts his eyes and hopes he hits the spot
I had some fun with all the dust
I picture for all under side work as started that van on the lift i can seat underneath it
my dads little mig welder better know as MI as it takes no gas as died again he'll fix it again and it might live
Sliding door sill on and passage door sill done at long last just need a skim of filler and a lick of paint
Ah my missing bolt
Safety man is on the job the mask is for show his a close the eyes type
a lick of paint to stop rust
And the passage sill welding or the a star being formed
Fix the air box good buy rope and now my power steering is not leaking any more and Put in the second battery tray
Had a pock around under neat and I'm shocked to say it was solid as a rock under there so stone chip it Wednesday
e can you spot something missing in the photo
I put this back on today had it in the van hanging around so i put it back where it belongs makes the van cleaner looking
Started the camper van parts today as my dad said i had the BEEP of welding and bang the van
So did this well empty this first
I did this a while back wasn't happy with it so is came down sorry to my mate who helped me put it up
Made a frame to go around the sky light
and then started to make a frame on the side got this far and my dad had to go fix his car so that ended the days work well evening as he spent all day fixing the welder and starting into space
Cat found some where to sleep lazy cat still there
Made up all my sides and there well stuck on went though 2 tubes of a thing that's like tiger seal
my dad said better to over do it then have it fall upon you in your sleepTwo parts of the roof done this stands are handy there for holding up plaster bored
Making the frames
This was a hard bit to make as its at the back of the van by the doors note the extra two bits in the middle there for the air vent I'm making to go on the right
This is where it sits
All up and waiting for the glue to set
i ran most of my 240V and 12V wiring the blue wiring is 240v fire proof wiring The black is 12V
The two plugs wiring on show here
a big ball of wiring for the fuse box's
the 240V lights wiring
My new bulk head
This is a part of the caravan that me and mate smashed to bits it my vent at the back to allow fresh air into the van parts


