Well the weekend's plan of action had a belated start as I had to wait for a spot to open up on the road outside my house as the drive is a bit too sloped for my new axle-stands and DEFINITELY too sloped for the atrocious jack supplied with mk2 Polos, anyway at least the weather has been nice 
After watching the Malaysian GP and enjoying a little windfall courtesy of backing Fernando Alonso to win, (but like a chump still willing Checca in his Sauber to beat him) I cracked on with the mission.

To re-shoe the Polo! And to check on the drums to see all was well.
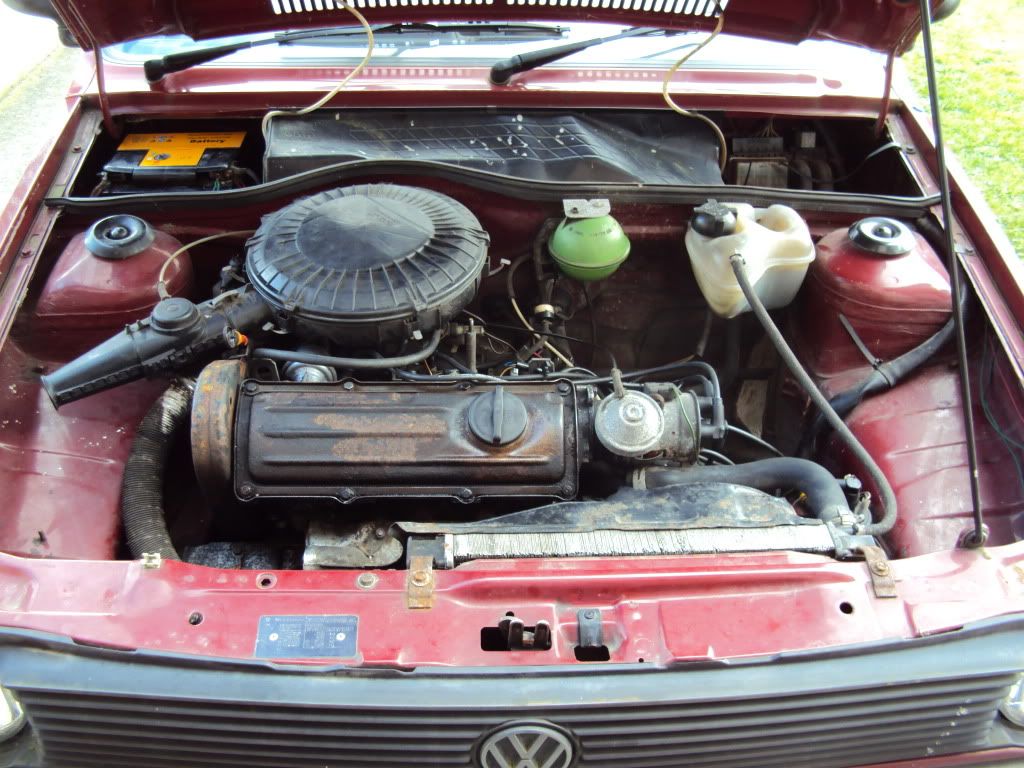
I took the opportunity to have a gander at the fuel tank and neck more closely as I've been alarmed by the number of stories I'd read of these being hot for rot..


But in this case not! As you see the pipe was absolutely lagged in "farmer's plaster" but luckily I think its been essentially dry for years and years beneath it and has preserved it in a 'bog-body' way.
The driver's side drums were a little thin and very old but would probably have been roadworthy - actually this one thing that is definitely better on the new Polo is the brakes, but as they're cheap I figured why not replace and give the a new lease of life, they are old and now I at least know the history for sure which is reassuring.
I've replaced drums in the past, a few years back on a Citroen AX - surprisingly easy - and in the distant past on a sloppy old Austin miniMetro - straightforward but brittle - so I approached the task confident, I knew the bigger challenge might lurk on the passenger side as grease had leaked onto the wheel:

And was across the outside of the drum

But I was pleased that it was really only someone being a bit clumsey or eager with the grease gun on the hub. It had also been poorly repaint - wheel and hub together probably more than once so I think the seal was poor and the excess slipped out with the centrefugal force.
Underneath when tackling the drum mechanism itself I found them to be perhaps a shade over-complicated, certainly in comparison to the Citroen AX, but them thats probably a hallmark of Volkswagen to go towards over engineered to promote quality, the mechanism needed a good clean with a wire-brush and the brake shoes on the passenger side showed signs of 'peeling away' and probably were due a replacement. Previously I've had a 'shoe-pad' break away in transit and its not only startling but I also ruined a tyre recovering it!
Best advice for doing the job take loads of pictures, particularly of the placement of springs and levers in relation to each other..
... idiot-proof the hub components by storing the parts (somewhere dirt free if like me you're going al-fresco) in order of assembly


...and if you can mug someone into being a second pair of hands, even just briefly, I think it would make it much much easier when it comes to replacing the handbrake cable ending as you have to restrain the spring on the cable to slip the 'ending' into it's housing on the brake-shoe. I used a small vice-grip/mole-grip with a needle nosed pliers, SWEARING and brute force, but I guess there is a more genteel method using more appropriate tools and a third arm.
But eventually I went from this:

To this:


In between times I thought I'd try to clean the appearance of the rather rusty/greasey/tired looking drums and try out some really clean satin primer I'd found in one of those Swag-Shop €uro marts which looked like a close match to the Volkswagen Burgundy.
Before and After:

As I was doing this I thought I'd crack on with a small split on the exhaust-pipe, which turns out is an original VW part (on from 1985?) which has frayed in the middle section

Sounds nice! But seriously I wanted to bodge it through the NCT for a little while, and needed to run the engine to warm the exhaust before applying this kit:

Which includes a sheet of foil (far too big) as a heat shield beneath a double-sided 'tar-bandage' (really could do with be a little longer) and a length of chicken-wire to strap the result once applied to the break, which lends a strangely World-War-I-esque feeling to the process but after scuffling under the car and finally abandoning my gloves, (which made me burn-proof but clumsy) the result was:

Not too shabby for bodgery!
And the results of my rattle can adventures didn't look too bad either, beneath this (p1ss) artistry are contained the heart-stopping-world-famous Polo drums:


Sharp huh? Weeeell tidy at least! Although of course its a job no-one will see it was an unobtrusive way to get the measure of the Swag-Shop paint @ €1.50 a tin, not a colour match, but a good primer base for any future repairs maybe, even if the two brake drums needed around a can-and-a-half which makes me question how full they are to begin with...
So no quite as much done this weekend as I hoped but a good job all the same with satisfying results and a good test of the new axle-stands ahead of the engine-gasket-extravaganza coming soon!
And a chance to FINALLY slip on the other two 1000Miglia's and take gratuitous glamour shots! Hell to the YEAH!


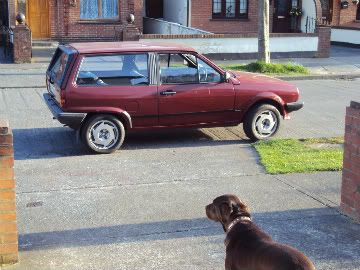
I REALLY like them - they add a meanness, a sort or mini-monster truck vibe and although they do need a re-furb (which is on the slate for doing soon) right now their roughness suits SHEDvan quite well!


After watching the Malaysian GP and enjoying a little windfall courtesy of backing Fernando Alonso to win, (but like a chump still willing Checca in his Sauber to beat him) I cracked on with the mission.
To re-shoe the Polo! And to check on the drums to see all was well.
I took the opportunity to have a gander at the fuel tank and neck more closely as I've been alarmed by the number of stories I'd read of these being hot for rot..
But in this case not! As you see the pipe was absolutely lagged in "farmer's plaster" but luckily I think its been essentially dry for years and years beneath it and has preserved it in a 'bog-body' way.
The driver's side drums were a little thin and very old but would probably have been roadworthy - actually this one thing that is definitely better on the new Polo is the brakes, but as they're cheap I figured why not replace and give the a new lease of life, they are old and now I at least know the history for sure which is reassuring.
I've replaced drums in the past, a few years back on a Citroen AX - surprisingly easy - and in the distant past on a sloppy old Austin miniMetro - straightforward but brittle - so I approached the task confident, I knew the bigger challenge might lurk on the passenger side as grease had leaked onto the wheel:
And was across the outside of the drum
But I was pleased that it was really only someone being a bit clumsey or eager with the grease gun on the hub. It had also been poorly repaint - wheel and hub together probably more than once so I think the seal was poor and the excess slipped out with the centrefugal force.
Underneath when tackling the drum mechanism itself I found them to be perhaps a shade over-complicated, certainly in comparison to the Citroen AX, but them thats probably a hallmark of Volkswagen to go towards over engineered to promote quality, the mechanism needed a good clean with a wire-brush and the brake shoes on the passenger side showed signs of 'peeling away' and probably were due a replacement. Previously I've had a 'shoe-pad' break away in transit and its not only startling but I also ruined a tyre recovering it!
Best advice for doing the job take loads of pictures, particularly of the placement of springs and levers in relation to each other..
... idiot-proof the hub components by storing the parts (somewhere dirt free if like me you're going al-fresco) in order of assembly
...and if you can mug someone into being a second pair of hands, even just briefly, I think it would make it much much easier when it comes to replacing the handbrake cable ending as you have to restrain the spring on the cable to slip the 'ending' into it's housing on the brake-shoe. I used a small vice-grip/mole-grip with a needle nosed pliers, SWEARING and brute force, but I guess there is a more genteel method using more appropriate tools and a third arm.
But eventually I went from this:
To this:
In between times I thought I'd try to clean the appearance of the rather rusty/greasey/tired looking drums and try out some really clean satin primer I'd found in one of those Swag-Shop €uro marts which looked like a close match to the Volkswagen Burgundy.
Before and After:
As I was doing this I thought I'd crack on with a small split on the exhaust-pipe, which turns out is an original VW part (on from 1985?) which has frayed in the middle section
Sounds nice! But seriously I wanted to bodge it through the NCT for a little while, and needed to run the engine to warm the exhaust before applying this kit:
Which includes a sheet of foil (far too big) as a heat shield beneath a double-sided 'tar-bandage' (really could do with be a little longer) and a length of chicken-wire to strap the result once applied to the break, which lends a strangely World-War-I-esque feeling to the process but after scuffling under the car and finally abandoning my gloves, (which made me burn-proof but clumsy) the result was:
Not too shabby for bodgery!
And the results of my rattle can adventures didn't look too bad either, beneath this (p1ss) artistry are contained the heart-stopping-world-famous Polo drums:
Sharp huh? Weeeell tidy at least! Although of course its a job no-one will see it was an unobtrusive way to get the measure of the Swag-Shop paint @ €1.50 a tin, not a colour match, but a good primer base for any future repairs maybe, even if the two brake drums needed around a can-and-a-half which makes me question how full they are to begin with...
So no quite as much done this weekend as I hoped but a good job all the same with satisfying results and a good test of the new axle-stands ahead of the engine-gasket-extravaganza coming soon!
And a chance to FINALLY slip on the other two 1000Miglia's and take gratuitous glamour shots! Hell to the YEAH!
I REALLY like them - they add a meanness, a sort or mini-monster truck vibe and although they do need a re-furb (which is on the slate for doing soon) right now their roughness suits SHEDvan quite well!