|
|
|
Apr 30, 2012 16:49:13 GMT
|
|
I did think about doing the full shell but its normally the bottom 6 inches that take the brunt of corrosion so hopefully getting the channels and pans coated should keep the rust at bay.
The other problem with doing the whole shell is the amount of parts that need to come off would make the reto a lot longer process and as much as I want to do it properly I'm hoping it will be back on the road in 8 - 12 months.
Dave.
|
| |
|
|
|
|
|
|
|
|
|
Done a bit of investigation work and it looks like galvanizing will be too expensive and require too much work so hope to visit an industrial paint suppliers this week or next. I have been told about brush on galvanizer and resin marine paints so will price these up as a DIY option. Did get some more prep work done this evening. 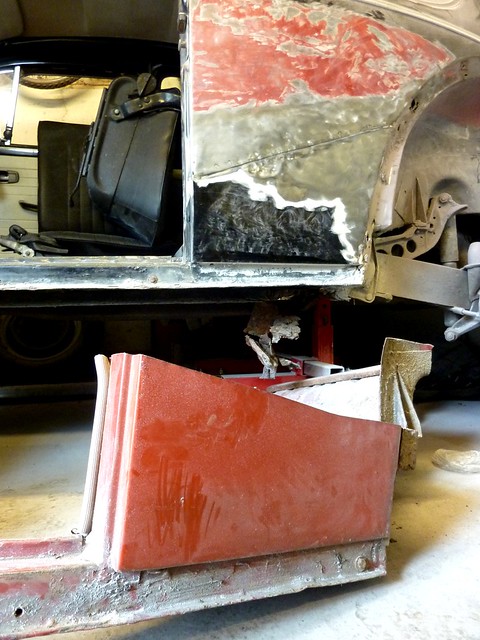 P1140736 P1140736 by route9autos.co.uk, on Flickr With the new panel on the floor I need to accurately transfer the shape of the new panel onto the car as a guide to where I will cut. For that I need to make up a template. First job is to cover the panel with tape. The bottom of the 1/4 panel will serve as a line to match with whats on the car and to double check measurements I will measure the door opening down from the gutter line. 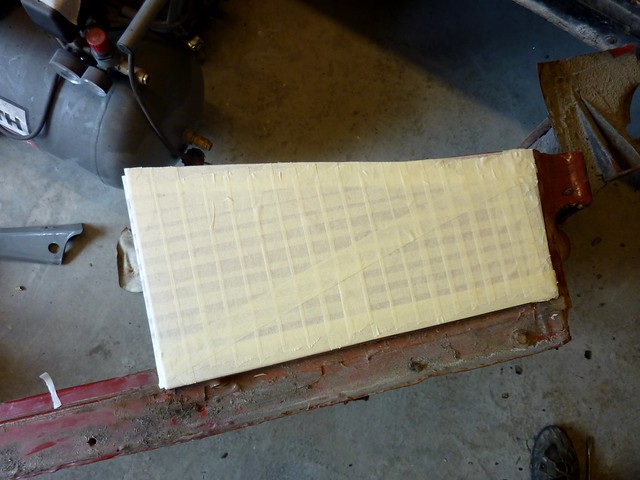 P1140737 P1140737 by route9autos.co.uk, on Flickr I then transferred the template onto the car as a cutting guide. I will need to check and re-check measurements before I cut but this will give me a really good idea of where to cut. 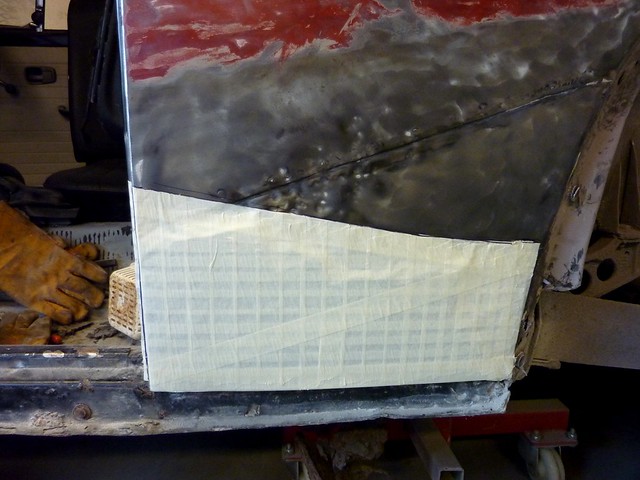 P1140738 P1140738 by route9autos.co.uk, on Flickr I will also fit the door after tacking the sill in place before the final weld to check measurements. 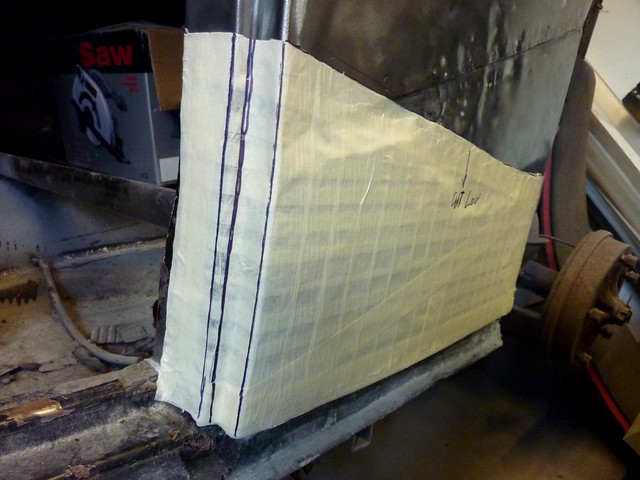 P1140739 P1140739 by route9autos.co.uk, on Flickr Unfortunately the new panel wont cover the bad previous repair but I will remove all of the past replacement panel, clean up whats there and make a new plate to fill the space. I also got the front 1/4 panel and inner arch template in place and as hoped the previous repair line falls within the area that will be cut off. 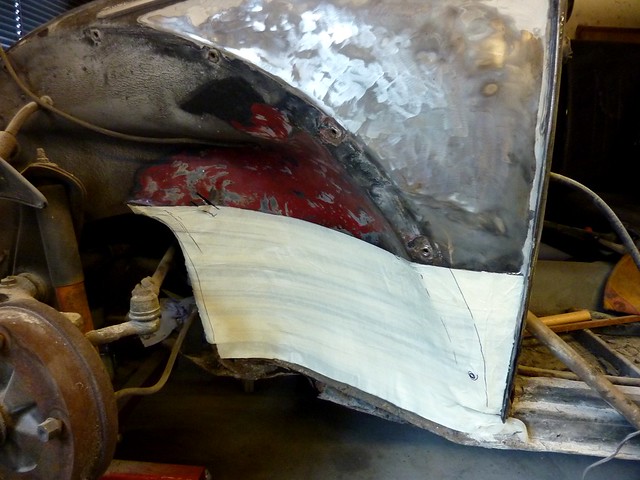 P1140741 P1140741 by route9autos.co.uk, on Flickr  P1140743 P1140743 by route9autos.co.uk, on Flickr Moved onto a template for the front bulkhead; 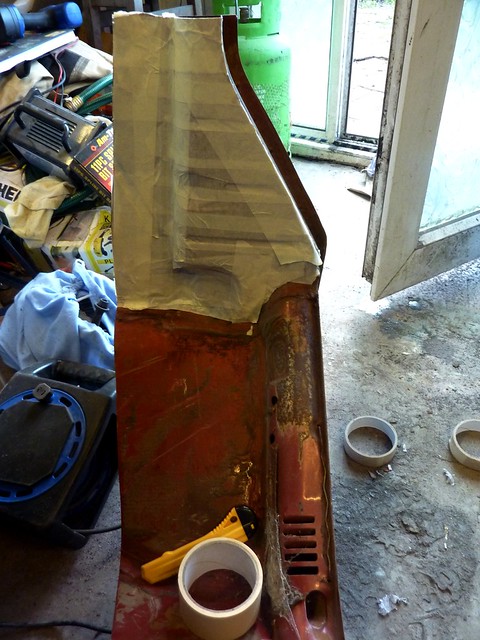 P1140744 P1140744 by route9autos.co.uk, on Flickr  P1140748 P1140748 by route9autos.co.uk, on Flickr With the inner template and the outer template in place the top edges look pretty closely lined up. This will be checked before cutting by drilling a small hole at the top of the outer template and seeing how close it lines up. I may remove some of the metal from the new panel in this area to make it easier to work with. Once I sort out the right paint for the new panels I will start cutting. Dave. |
| |
|
|
Adz
Part of things

Posts: 71
|
|
May 10, 2012 21:11:39 GMT
|
|
nice re build
|
| |
|
|
|
|
|
|
|
Its about time I started back at this resto and with 3 weeks holiday I have no excuses* As it is a few weeks since I had got to the garage the inevitable tidying up needed done then I dug out the sill/heater channel I will be starting with; 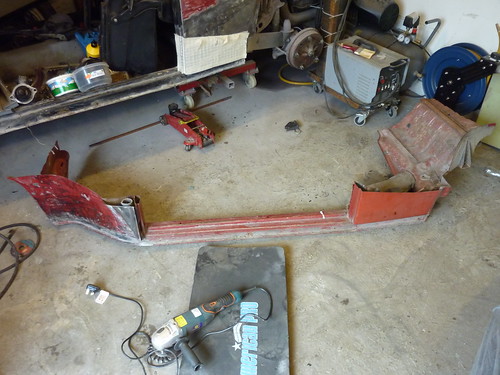 P1150332 heater channel P1150332 heater channel by route9autos.co.uk, on Flickr My plan is to coat the pans and heater channels with Jotamastic or similar resin paint prior to fitting (I will leave a couple of inches along the weld areas un painted) so I want to get the panels clean and double check their integrity. Good old wire twist brush to start with on the underside; Before;  P1150333 underside before P1150333 underside before by route9autos.co.uk, on Flickr After; 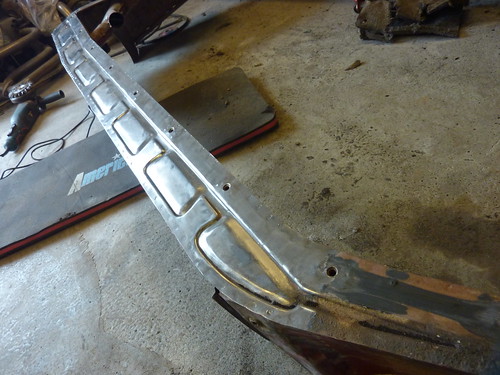 P1150336 heater channel bottom after cleaning P1150336 heater channel bottom after cleaning by route9autos.co.uk, on Flickr Nothing is as good as finding metal as good as the day it left the factory. I think for speed and ease I will visit a few shotblasters tomorrow to get a few quotes. Doing flat open areas is fine but the more intricate corners will not be very easy with the grinder and with the floorpans being such a large surface area I would be there about 2 weeks. I had been hoping to have paint here to be getting on with but the Jotamastic supplier on ebay wasnt very forthcoming with information when I emailed him a few questions so I will see if I can find a supplier in Glasgow that I can visit and annoy before I hand over hard earned. I really hope to have pans and channels done before I return to work but depends how much real life gets in the way. Dave *appart from a wedding, couple of weekends away and wanting to get out on my bike a few days. |
| |
|
|
|
|
|
|
|
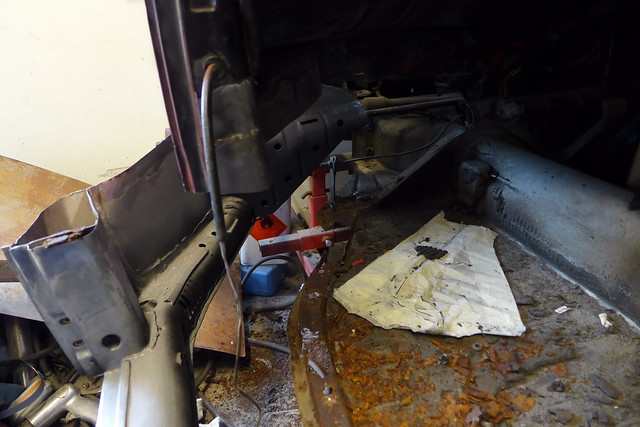
Wedding and honeymoon over and time to get some work done. Started the strip down today and not surprisingly the rear wing bolts were either seized solid or the captive nuts were no longer captive. One thing for it, grind 'em off. 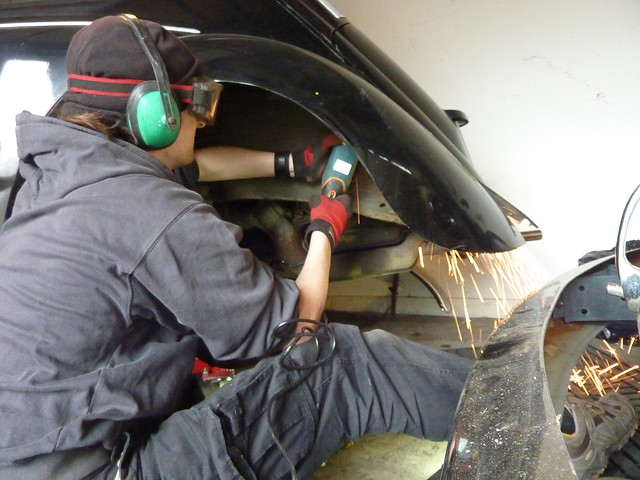 P1140450 P1140450 by route9autos.co.uk, on Flickr Taking a bit of a chance with the old safety equipment!!! what no "HI VIS" tabard? Read more: retrorides.proboards.com/index.cgi#ixzz209SZ1inN |
| |
|
|
|
|
|
Jul 10, 2012 15:44:51 GMT
|
|
Dropped both heater channels off at a sandblasters today. It will cost me £70 to have both channels cleaned but it will save me many hours work and they will be cleaner than I would get them with the twist brush on the angle grinder.
I will use my random orbit sander on the floor pans as they are a less complex shape.
Visited a Trimite suppliers as well.
5 litres or epoxy primer is around £60 but I will need to buy 5 litres of hardener as they don't sell it in smaller batches so another £60! If anybody is thinking of buying paint, let me know and we could split the hardener.
Mates wedding tomorrow so no updates for a few days.
Dave.
|
| |
|
|
|
|
|
Jul 10, 2012 16:51:58 GMT
|
|
Those beetlejac Beetle jacks are pretty cool!
|
| |
Koos
|
|
|
|
|
Jul 12, 2012 20:19:03 GMT
|
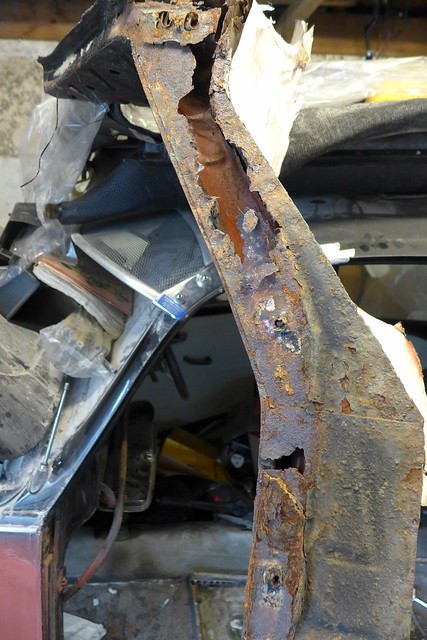
So whie I was at my mates wedding the heater channels were blasted and ready for collection this morning. Every time I think about getting rid of my Audi it prooves itself incredibly usefull. Thats both Beetle heater channels in the boot.  P1150409 P1150409 by route9autos.co.uk, on Flickr This is a good shot showing the sills/heater channels after sandblasting. Sandblasting has left a rough texture over the panel but thats no problem. The only areas I need to work on to get smooth are the top of the sill as it passes the door opening, the rear 1/4 section and the door post section. The santblasted texture will act as a great key for the paint system I have on the way. 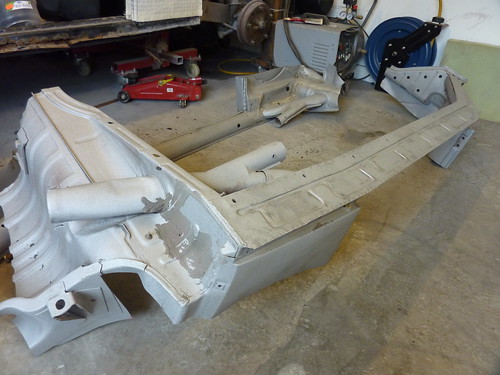 P1150414 P1150414 by route9autos.co.uk, on Flickr With a quick buzz over with a flap disk the sandblasted texture is smooth enough for a paint finish and rough enough to provide a key for the epoxy primer thats on the way. 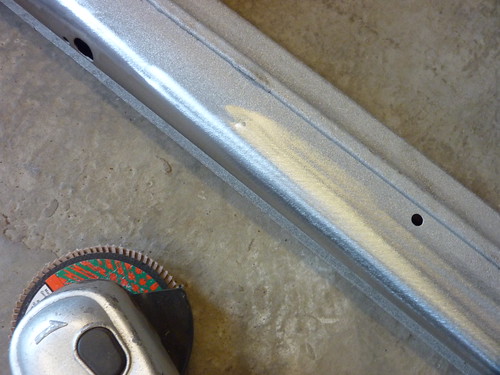 P1150416 P1150416 by route9autos.co.uk, on Flickr Looks like the rust is still munching its way through the old sills. 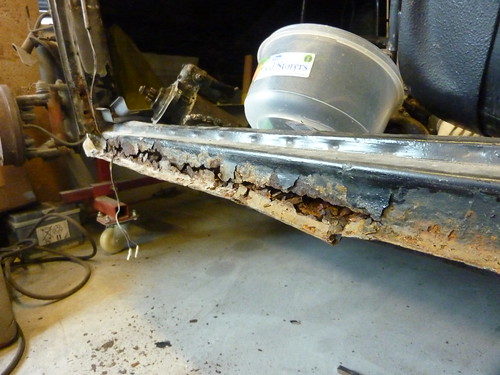 P1150415 P1150415 by route9autos.co.uk, on Flickr I don't remember them even being soft when I was jacking the car up! I have also ordered up Jotomastic epoxy boat primer so when it gets here the sills and floor panels will be prepped and painted in the hope I can get to cutting and welding by the weekend. Dave. |
| |
|
|
|
|
|
Jul 13, 2012 19:31:58 GMT
|
looks good keep it going  |
| |
.  |
|
|
|
|
Jul 14, 2012 11:36:46 GMT
|
|
Lovely resto.. looks like a lot of work but great fun at the same time! I like your plan to keep it black.. that will look stunning,
|
| |
Last Edit: Jul 14, 2012 11:37:27 GMT by rustless5
|
|
|
|
|
|
|
Jul 18, 2012 22:09:25 GMT
|
Cheers Guys. Update time and its been a long day. To start with I wanted to finish getting both heater channels ready for paint. After looking at them I decided to trim off some of the un needed metal work. In particular I thought I would separate the remains of the boot floor panel from each heater channel to make lining up the new panel easier. I cut the section by removing the spotwelds along the original build line so that I can do the same on the car. 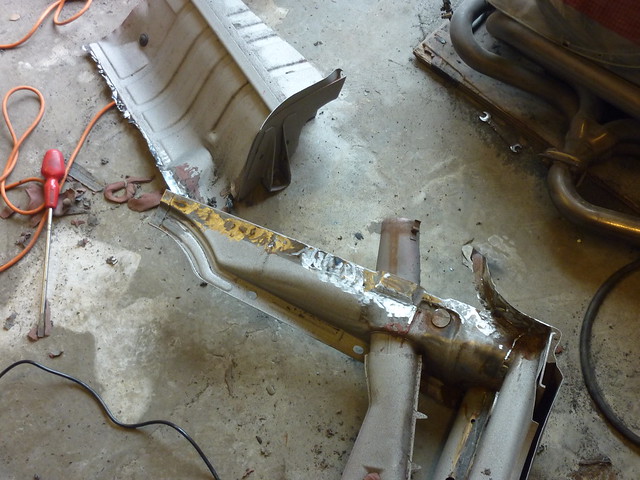 P1150860 P1150860 by route9autos.co.uk, on Flickr While cleaning up I found a couple of small holes; 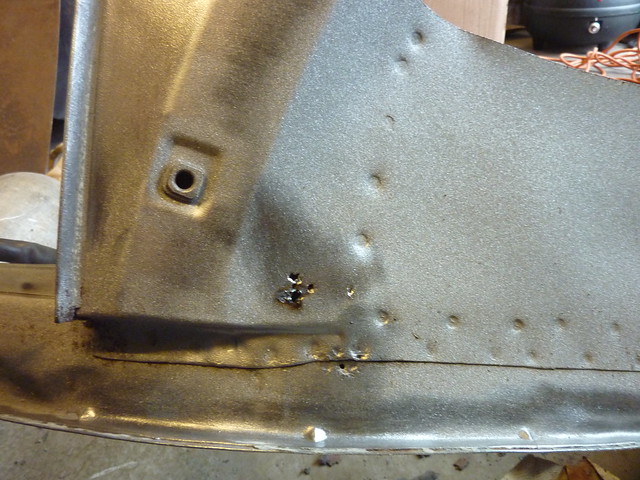 P1150861 P1150861 by route9autos.co.uk, on Flickr Nothing major and pretty insignificant for 40 year old panels. Quick weld and sand and they are gone; 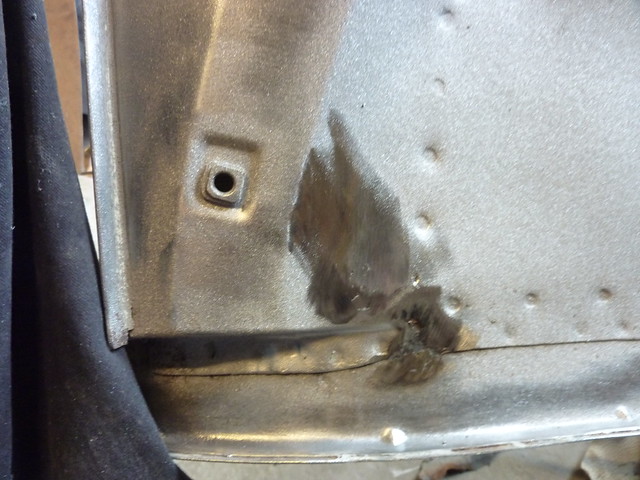 P1150863 P1150863 by route9autos.co.uk, on Flickr Then onto the paint. I have bought jotamastic 87 to paint on the heater chanels which is an epoxy paint system designed for use on boats and industrial structures so it should be up to the job. Dosnt look like £80 worth of paint (note the paint sprayer in the background); 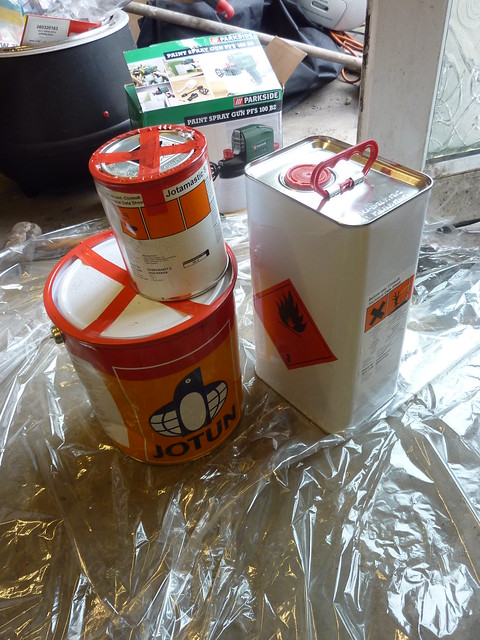 P1150865 P1150865 by route9autos.co.uk, on Flickr I was only intending to do the underside of the panel as I wont be able to do this once its fitted to the car and bolted to the floor but there was the start of surface rust in places so decided to do the whole panel and I will clean the edges when welding. I mixed the paint hardner and thinners to the correct ratio, filled the paint sprayer and got ready to spray; 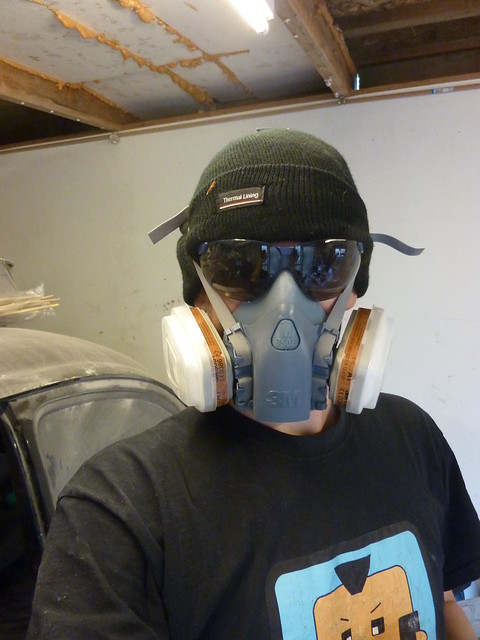 P1150867 P1150867 by route9autos.co.uk, on Flickr Good look? Ready to go and the sprayer imediately packed in so it was out with the gloss roller. The foam on the gloss roller reacted with the paint and disintegrated so it was onto a brush so the finish isnt perfect but as said its not the finished job.  P1150868 P1150868 by route9autos.co.uk, on Flickr Left them to dry and ideally I will give the undersides a second coat and get the floor pans done so that I can start cutting out the old parts and get onto fitting the new. Dave. |
| |
|
|
|
|
|
|
|
Been a pretty long time since I added updates but other things have been keeping me busy. I have however completed a few bits and bobs. First thing was once the paint had dried on the outside of the channels I put my mind to painting the insides. This meant sealing any holes in the panel temporarily; 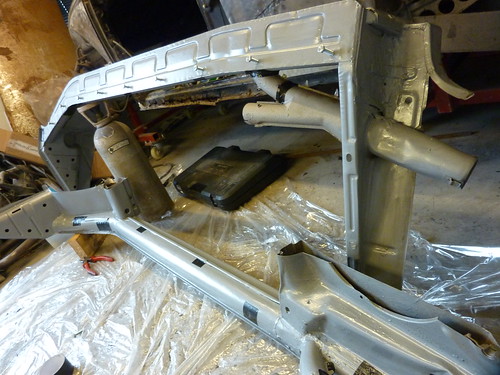 P1170595 P1170595 by route9autos.co.uk, on Flickr With all the escape routes for the paint sealed up either by fitting bolts to protect the threads or by using gaffa tape on the non threaded holes it was time to get the paint ready. The Jotun resin based paints need mixed to the correct ratio. This can be done by volume or by weight and I decided it was easier to work it out by weight as it saved cleaning out measuring pots. 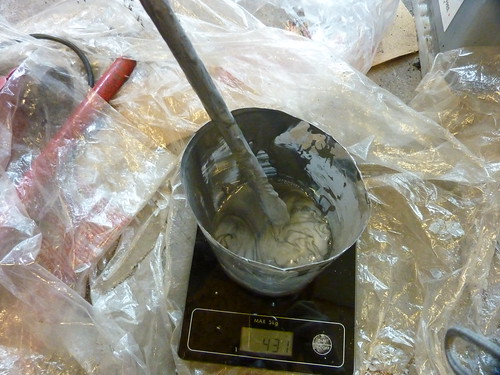 P1170597 P1170597 by route9autos.co.uk, on Flickr With the paint mixed up and thinned down I pored the paint into the heater pipe via the outlet in the A post for the windscreen de mister. 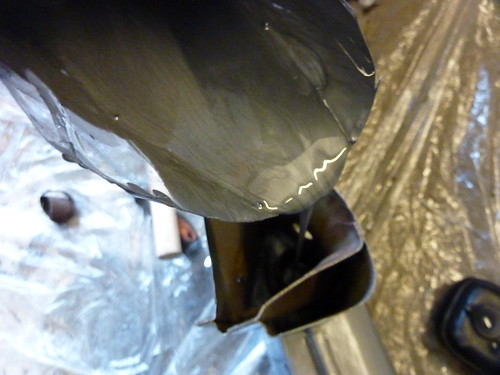 P1170599 P1170599 by route9autos.co.uk, on Flickr So the insides were painted a few weeks ago and when peeling off the gaffa tape after the paint had time to dry I could make sure the paint had reached all areas. I have also picked up a roof panel on Sunday so that I can have a few gutter sections to repair areas of Jo's car. 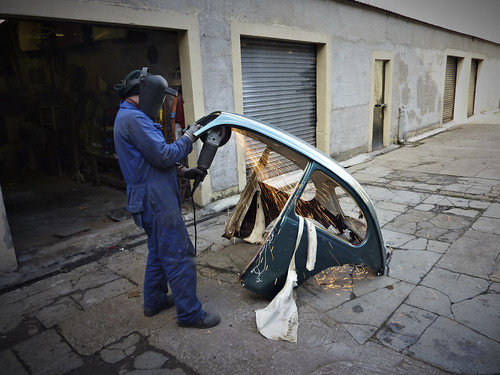 roof rails roof rails by route9autos.co.uk, on Flickr It needed cut into three sections to get it in the back of my car. Thats not me doing the cutting..... I managed to stab a 3 inch shard of steel through my left knee when lifting the roof out of the workshop so I didnt get any pictures of the parts laid out as I had to head for casualty. So looks like any updates will be in a week or so after my knee heals but trust me, this is still a current project, I just need to build up courage to make the big cut along the sills. Dave. |
| |
|
|
|
|
|
Jan 12, 2013 17:17:35 GMT
|
So three months have passed and finally I have made some progress on this project. A combination of Christmas, work and waiting for my knee to heal has kept me away from the garage but today I got back to it. Job one today was pulling out the back seat, carpet and parcel shelf. As usual the glue holding the carpet to the sound deadening was no where near as strong as the glue holding the messy stuff to the car. 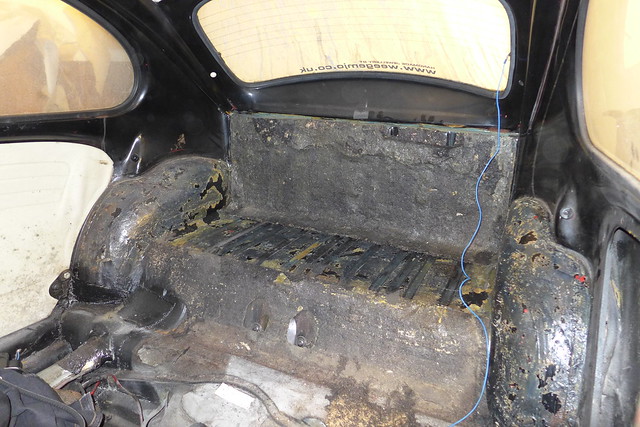 Project progress 12/01/13 1 Project progress 12/01/13 1 by route9autos.co.uk, on Flickr So a bit of time was needed to scrape off the tar hairy stuff sound deadening and see what the steel underneath is like. 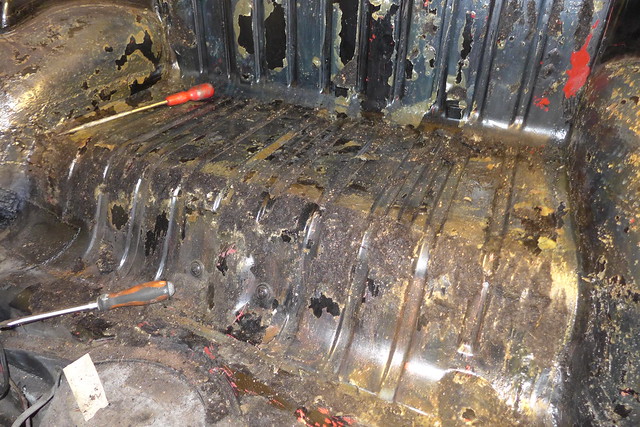 Project progress 12/01/13 2 Project progress 12/01/13 2 by route9autos.co.uk, on Flickr In all the steel was very good. The only crusty stuff is in this corner and I think I would have been more surprised if this hadnt been rusty. On the bottom right you can see where the wiring loom passes through the heater channel into the quarter where it runs into the engine bay. 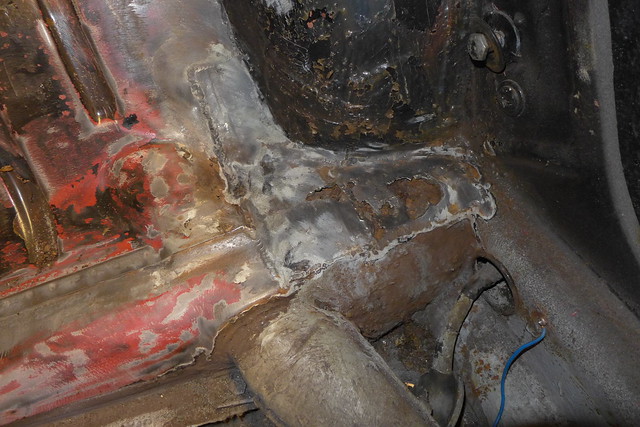 Project progress 12/01/13 3 Project progress 12/01/13 3 by route9autos.co.uk, on Flickr This is a problem as I either need to cut and re-connect the loom here or dissconnect the full loom in the engine bay and feed it through the hole. Think I may cut it but need to sleep on the idea first. So while thinking about the loom I thought I would remove the last of the floor pan bolts. These bolts wouldnt come out with a socket as the captive nuts have stopped being captive. 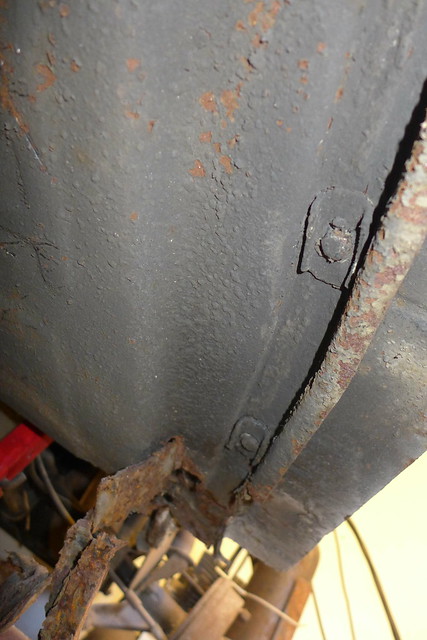 Project progress 12/01/13 4 Project progress 12/01/13 4 by route9autos.co.uk, on Flickr Best method I could think of to remove these bolts was to cut through them with my reciprocating saw. 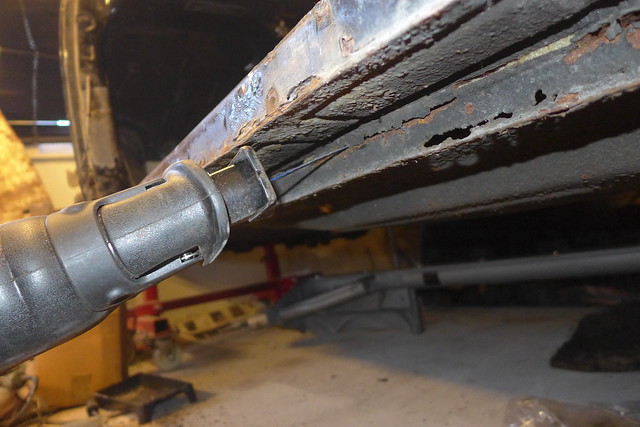 Project progress 12/01/13 5 Project progress 12/01/13 5 by route9autos.co.uk, on Flickr That was easy peasy so now there are no bolts holding the body down on this side of the car. Last job today was to mark out a template where the new panel will be let in at the back. 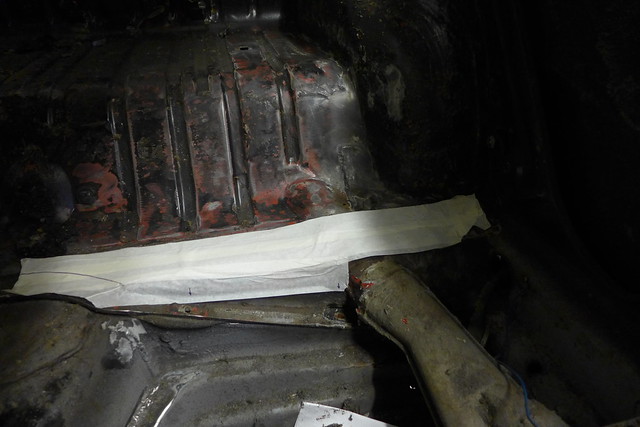 Project progress 12/01/13 6 Project progress 12/01/13 6 by route9autos.co.uk, on Flickr So thats where I left it today and it better not be another 3 months before I get to it again. Dave. |
| |
|
|
|
|
|
Jan 13, 2013 21:16:40 GMT
|
|
Good work M8, keep us posted. :0
|
| |
|
|
|
|
|
Jan 14, 2013 19:50:29 GMT
|
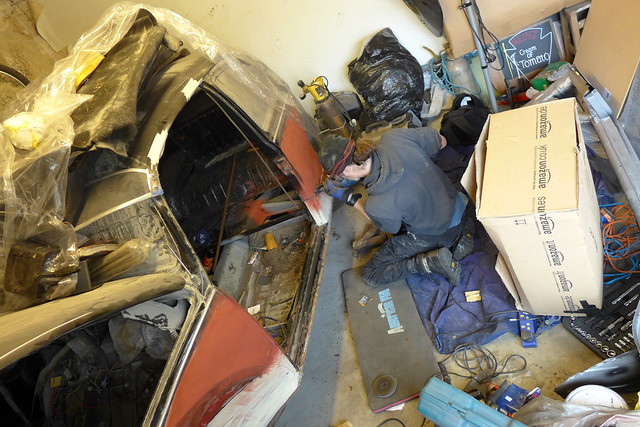
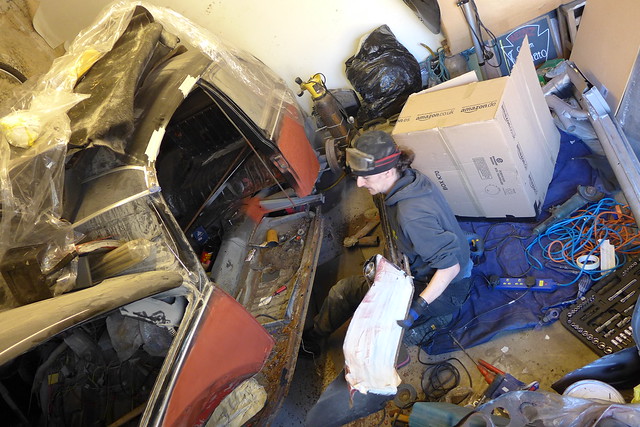
Got back to the garage today and it was bloody cold but took another big step towards that BIG cut.; 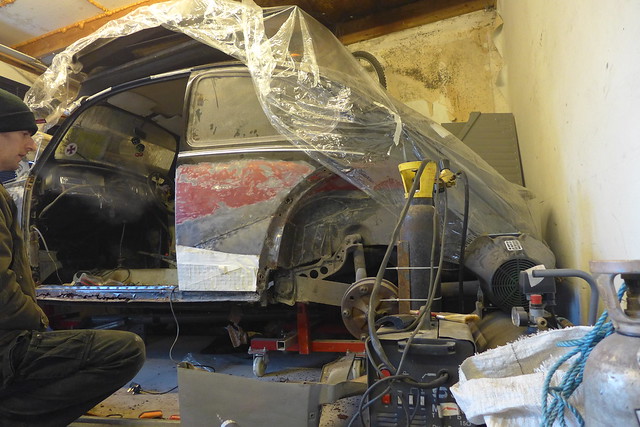 Cold day in the garage. Cold day in the garage. by route9autos.co.uk, on Flickr I don't smoke so what you are seeing coming from my mouth is an example of how cold it was today in the garage. My first task was to remove these spot welds. I want to keep as much of the boot floor panel as possible to try and keep the join looking like it did when it left the factory.  P1000307 P1000307 by route9autos.co.uk, on Flickr So with a 5mm drill I ran along all the spot welds. I wasnt worried about going through to the lower panel as this will be on the scrap pile by the end. 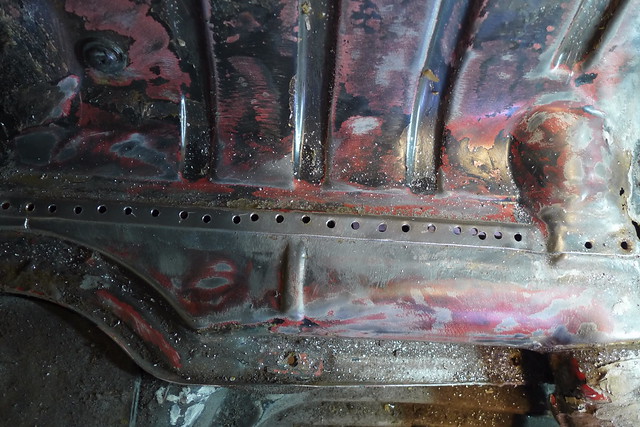 P1000308 P1000308 by route9autos.co.uk, on Flickr With the welds driled through I separated the panels with the best chisel in the world....A big screwdriver. 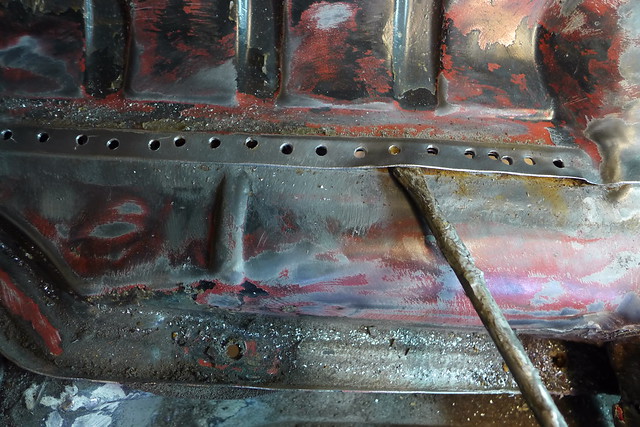 P1000310 P1000310 by route9autos.co.uk, on Flickr After sleeping on the problem of what to do with the loom I decided that soldering the wires back together here was easier than trying top feed the loom back through to the engine bay.  P1000316 P1000316 by route9autos.co.uk, on Flickr I cleaned out the rot and the previous repair plate in the rear corner. It will help getting the new panel in place and I wanted it to be fresh so that I don't have to worry about it again.  P1000340 P1000340 by route9autos.co.uk, on Flickr To get ready for welding this part on I needed to clean off the paint along the edge so that I could get a clean weld. 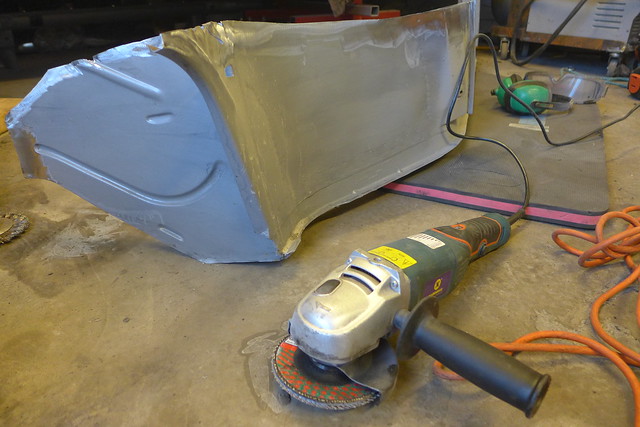 P1000337 P1000337 by route9autos.co.uk, on Flickr Before I left today I was worried about the cold and the moisture causing rust on the 1/4 panels so a quick coat of primer for protection then home for a heat. 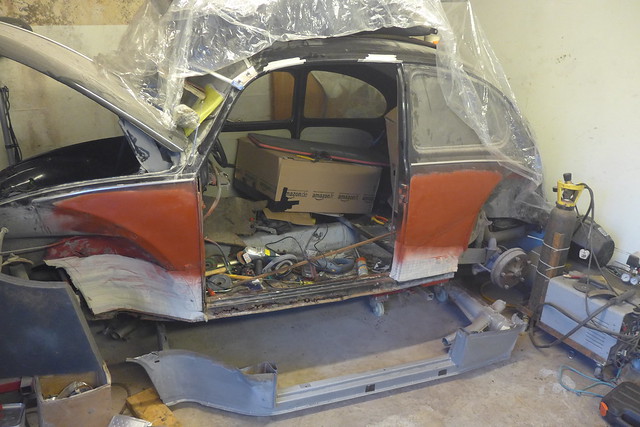 P1000341 P1000341 by route9autos.co.uk, on Flickr Hopefully get back to it soon and get on with the big cut. Dave. |
| |
|
|
|
|
|
Jan 22, 2013 17:35:09 GMT
|
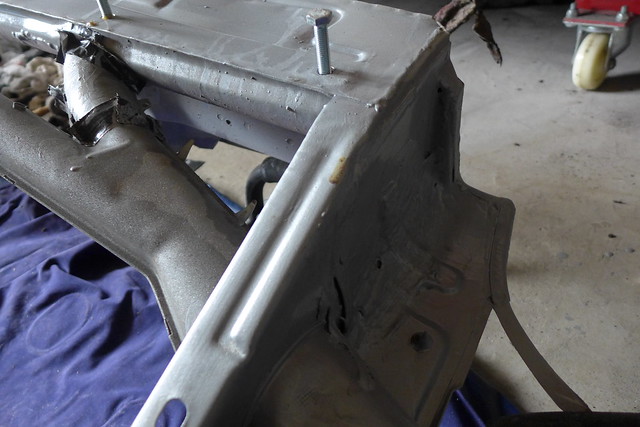
Todays update and the first bit of welding complete. Its only a small bit but its a start. Todays job, replace the rear crossmember. I chose to start here so that I could use the bolt holes on the body to line up this part and once this is in place I can line up the body with the crossmember bolt holes. 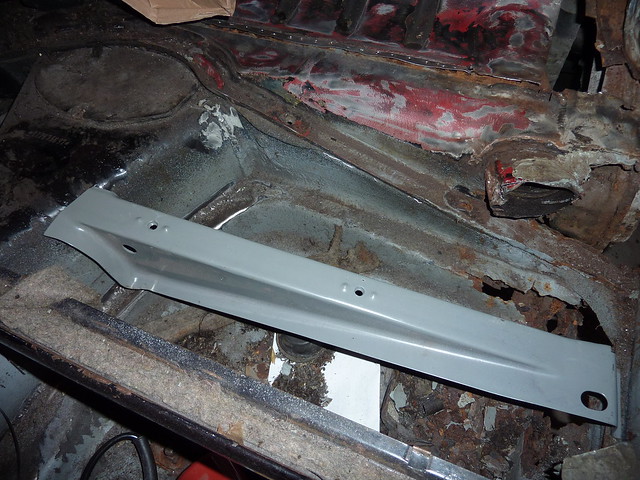 cross member on cross member on by route9autos.co.uk, on Flickr This part will be welded to the floor pan and bolted to the body. Started by cleaning the paint from the areas that will be welded.  cross member on cross member on by route9autos.co.uk, on Flickr I cut a small section from the body to allow me access to the weld seam.  cross member on cross member on by route9autos.co.uk, on Flickr The body part I cut will be replaced anyway. I could have cut the complete section here but I would have lost the bolt holes for reference. With the section removed I could get to the weld line to clean it up.  cross member on cross member on by route9autos.co.uk, on Flickr Annoyingly when the floorpans were replaced in the past they were seam welded instead of plug welded so there will be a lot of cleaning up needed when I get to that point. With the old panel cut out I could thoruoghly clean up the chassis where the cross member will be welded to it.  cross member on cross member on by route9autos.co.uk, on Flickr The new crossmember is in place, seam welded and quickly covered with primer.  cross member on cross member on by route9autos.co.uk, on Flickr I will do a bit of cleaning up in this area then seam seal it when its not -2 in the garage. I'm now waiting for heater pipe to run up the A pillars and maybe a warmer day to start on the sill/heater channel replacement......The big job. Dave. |
| |
|
|
|
|
|
Apr 28, 2013 20:41:55 GMT
|
|
|
| |
|
|
|
|
|
Apr 29, 2013 20:57:38 GMT
|
|
|
| |
|
|
|
|
|
Apr 29, 2013 21:27:48 GMT
|
The time lapse idea is great! I just might steal it  Good on ya for braving the sill cut as well! |
| |
|
|
|
|
|
Apr 30, 2013 20:02:28 GMT
|
Cheers wheeler. I didnt get much done today, a combination of being sunny outside, having a banging headache from yesterdays work and then running out of gas for the welder. I did take some pics to show how close I managed to get the panel gaps around the door. 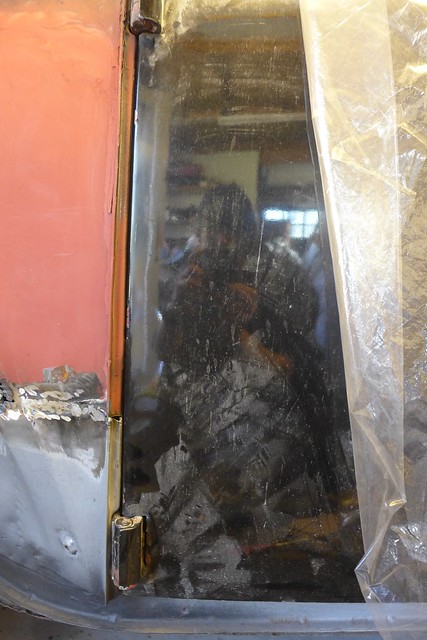 Panel gaps Panel gaps by route9autos.co.uk, on Flickr 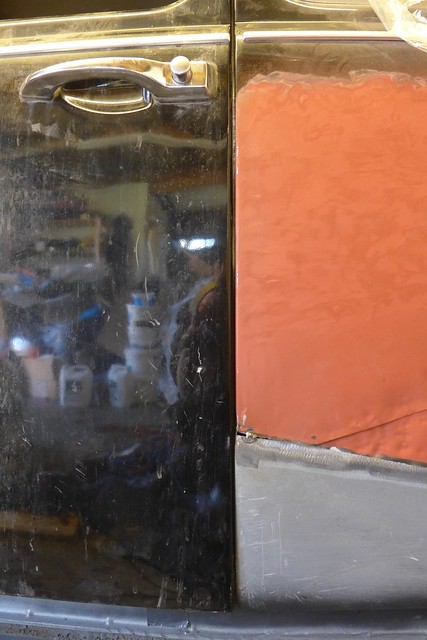 Panel gaps Panel gaps by route9autos.co.uk, on Flickr Dave |
| |
|
|
|
|