Dez
Club Retro Rides Member
And I won't sit down. And I won't shut up. And most of all I will not grow up.
Posts: 11,712
Club RR Member Number: 34
|
|
Mar 27, 2012 19:19:11 GMT
|
I'm stealing that one!  |
| |
|
|
|
|
|
|
|
Mar 27, 2012 20:01:01 GMT
|
|
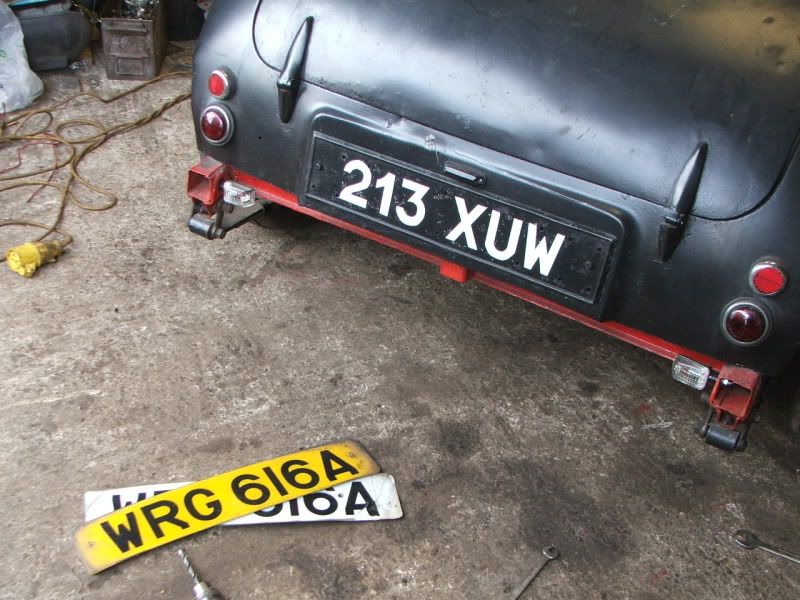
Originally the lights had a bar across the outside and a divider inside. One bit was the tail light the other the brake light. No twin filament bulbs back in the '50s I guess...
New regs meant the brake light area wasnt big enough, so most lights got converted by removing the bar and divider, like yours.
BTW, if you don't want the old Iron Cross lights, shove them in the MDH pile (recently vacated by the Hustler) and I'll shove them on my LR!! :-)
|
| |
Koos
|
|
|
|
|
Mar 27, 2012 20:02:07 GMT
|
|
Dude! I seen this going past bath train station recently, and wondered if it was the same one!
Sparks coming off the underside when you hit the raised tarmac just outside the bus station, and no rear lights at dusk.............2012 style running lights? Lol!
Also seen a 60's chevy pickup aswell, i think? Been working on the hotel refurb on the square in bath, opposite the marble players!
|
| |
|
|
|
|
|
Mar 27, 2012 20:13:38 GMT
|
Et voila  |
| |
Koos
|
|
|
|
|
Mar 27, 2012 20:33:54 GMT
|
^ I've never seen that style before! Quite cool ^ This is the style I have....and I can guarantee that the bulb holder was a twin filament and a single one next to each other (look at the contacs on the photo I took) - the lens isn't original but some flat plastic lens that's been cut to fit in palce of where the glass lens would usually sit. 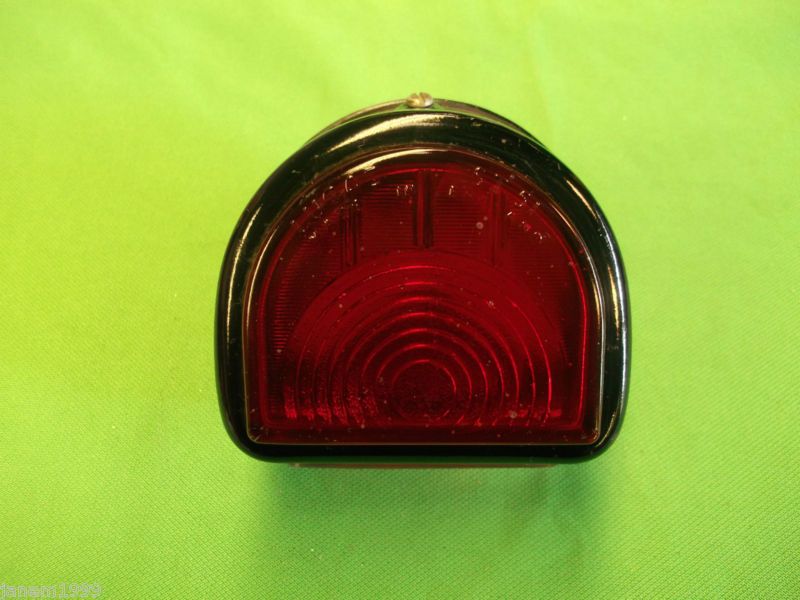 Anyway, I'm leaving it there for the lights.....they're fitted and working so I'm happy. They look better than the Maltese cross lights so I'm happy. Dude! I seen this going past bath train station recently, and wondered if it was the same one! Sparks coming off the underside when you hit the raised tarmac just outside the bus station, and no rear lights at dusk.............2012 style running lights? Lol! Yep, that would have been me & Dave on our way back from collecting the car last Weds. It was only when we got back to Area 52 that we realised the lights weren't working on the rear (I turned the lights on, saw the headlights were on so assumed all was good!) I even undertook then cut up a police car in Bristol and didn't realise at the time the lights were off. I guess he liked the car because he was behind me for a good mile or so and didn't seem to bat an eye! Happy days. |
| |
|
|
funkyhunk
Part of things
 Old Ford's R Us
Posts: 265
|
|
|
|
|
The steeringwheel, is that a grant?
|
| |
|
|
|
|
|
|
|
|
thats one sweet ride !
proof that everything looks better slammed ;D
|
| |
if sparks don't fly you're ridin too high !
|
|
|
|
|
|
|
These bolts in fact: 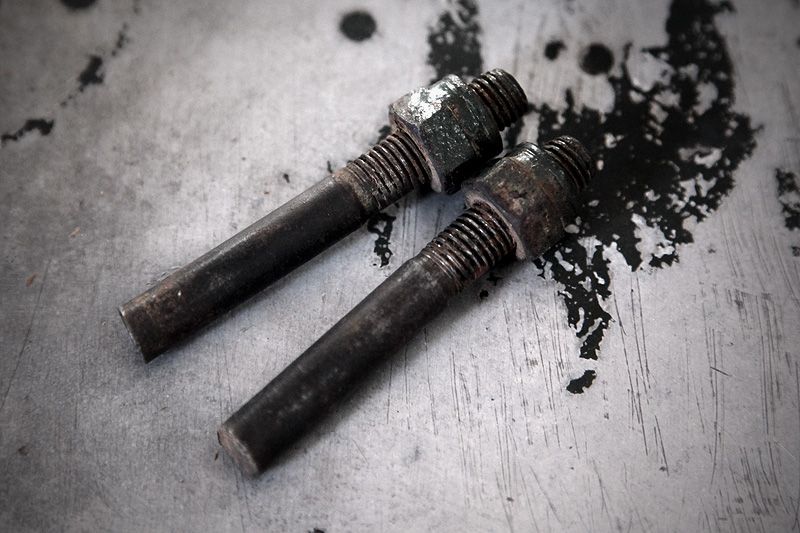 somehow they look like excellent door-pins to me! I just don't know anything about a landy, so i have no idea if they would fit. Love the way all of you at area 52 work on this, not to scared to make improvements on the car luckily |
| |
|
|
|
|
|
|
|
The steeringwheel, is that a grant? I believe it is, I seem to recall the Landie had a chain link steering wheel and Bryn swapped it for this when he got it. It's a lovely thing to hold....I'm used to varnished shiny wood wheels, but this has a much more tactile feel to it. The dimples on the back are very pronounced and the seperate sections of wood move very slightly, it feels great! The next mod to be done was to relocate the rear indicators. They were tucked up behind the rear bumper and shone down onto the ground, illuminating an area of the tarmac when switched on. This was more effective than it sounds...even in bright light but I wanted other motorists to be able to see the actual indicators. This was one of those 'compromise' mods where a gain in function means a slight loss in aesthetics. Dropping the indicators down meant slightly more clutter on the back end, but this gives no excuse to other motorists that they didn't see my indicators. I raided the 'drawer of wonder' for a suitable solution - a drawer full of various random brackets and assorted bits of metal that BiAS/Ian keeps topping up whenever he visits. He works at a place that builds/converts motorbility vehicles and always has various bits & pieces left over once a conversion is done because most manufacturers supply bits to cover a range of different vehicles. These leftovers seem to find their way to Area 52 and prove VERY handy in times like this....why make a bracket when the 'drawer of wonder' more than likely has something perfect for the job? In this case, some 5mm thick plate with the perfect size hole each end to relocate the indicator. A bit of jiggling to set the optimum position, the indicators are dropped down and also moved back further under the car 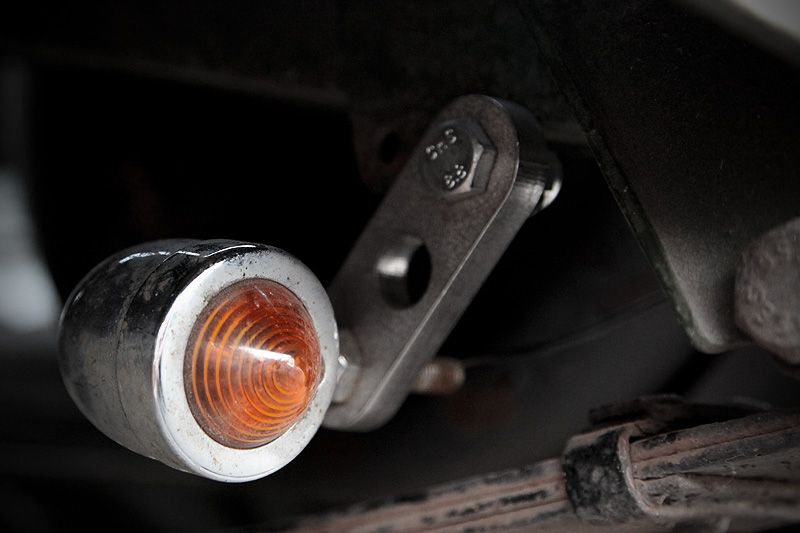 The new location means they are perfectly visible from behind the car. The only downside - the rear end has now gained some more clutter. 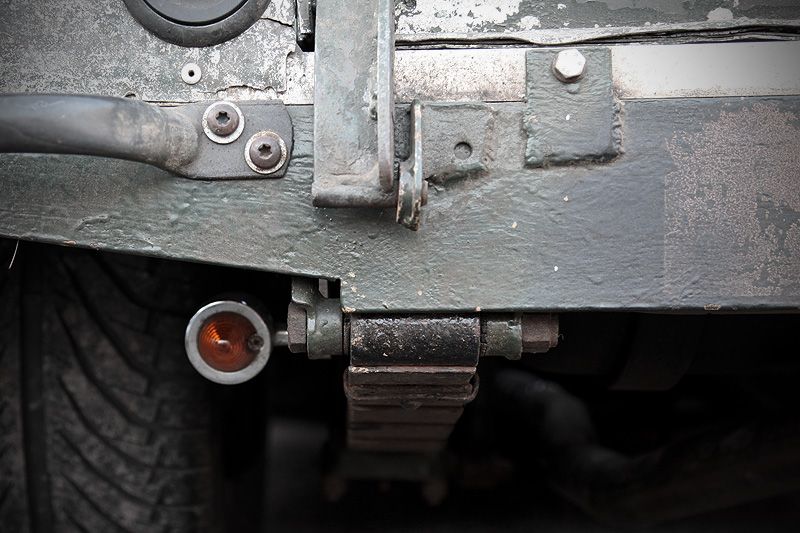 In order to try and redress the balance between function and form, I strip the units down, give them a key with some wet & dry and paint them satin black, along with the new brackets. This means the light units are no longer shiny chrome and your eye is drawn to them less than before - especially now that they are tucked further back under the car. I also put a dusting of black over the amber lens, again, to try and 'knock it back' a bit visually. 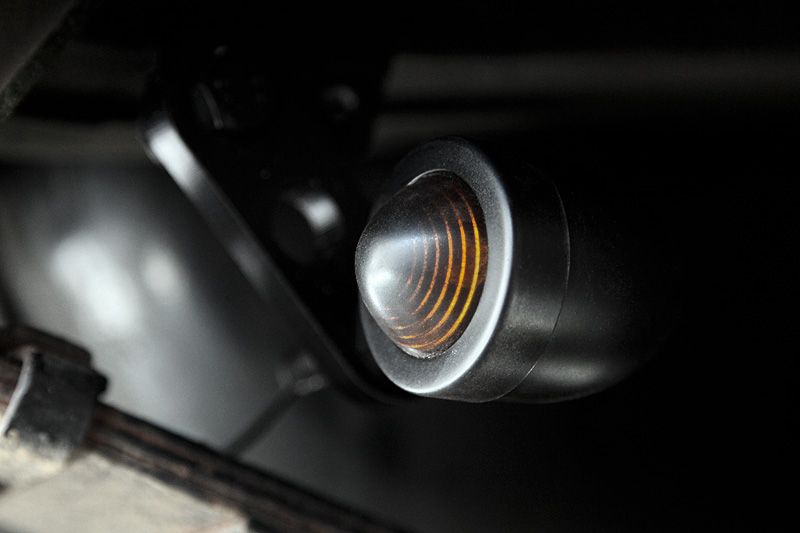 The light is now a lot less visible when off. Even more so when outdoors (this shot taken inside the unit) - in daylight the indicators are hardly visible and you have to specifically look for them to actually see them they are so well hidden 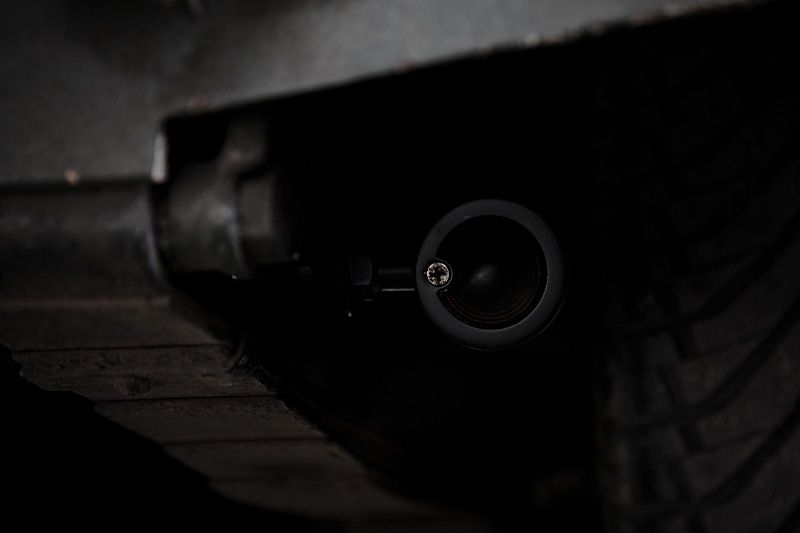 The lights are VERY bright - far brighter than you'd expect which is why I was confident that a light dusting of black over the amber lens would be OK. When on, the light output is still very, very bright & visible....certainly not like conventional lights that have tint spray on them. In all light conditions, there is no missing these lights when they flash yet they are pretty much invisible when off. Happy days. 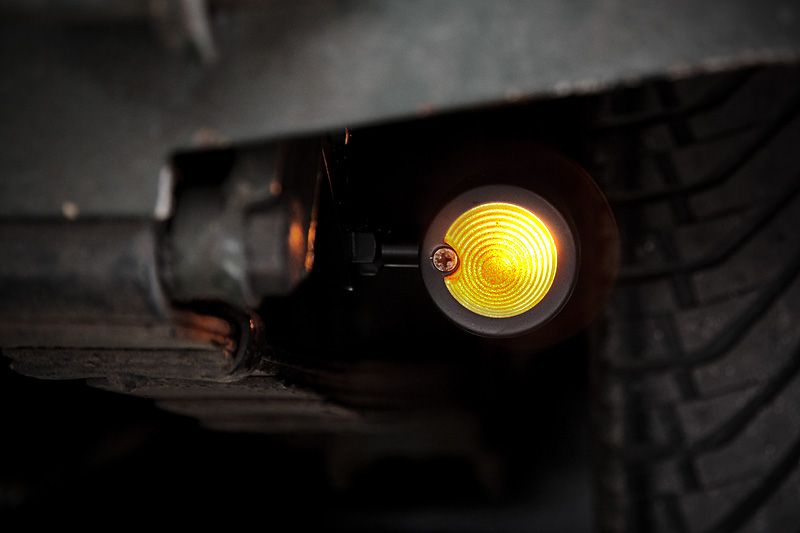 It's late on Saturday night, we're all hungry and KFC is voted for as the meal to see us through the night as we work on the Land Rover and Chris/Diabolu's Fugitive (which is in for an engine rebuild after dropping a valve on the way to Area 52 and smashing the head & piston to pieces!!) - the RR Beach Party is in a few hours and there is still work to do....but we need to keep ourselves fed. The Landie doubles up as the perfect table and general place to congregate while we fill our bellies... 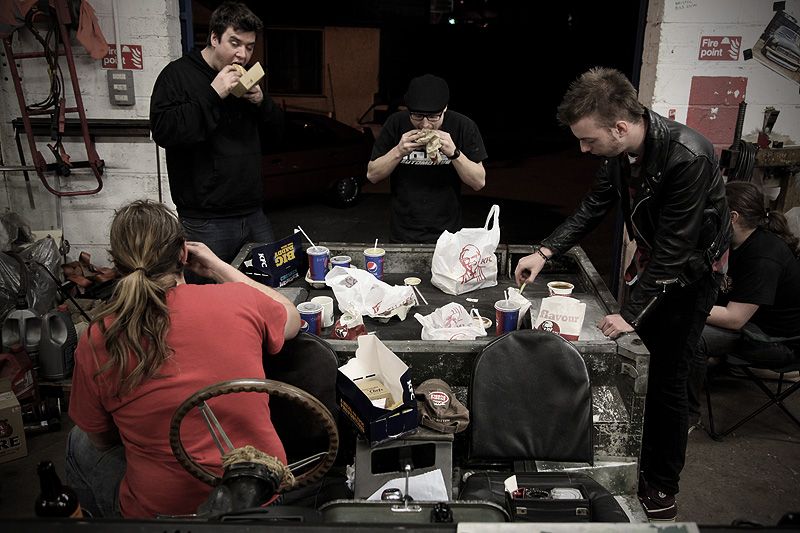 Chris & Ian decide to carry on working on the Fugitive engine while they eat. It's going to be another long night....(Friday night saw us all turn to our sleeping bags around 5.30am!) 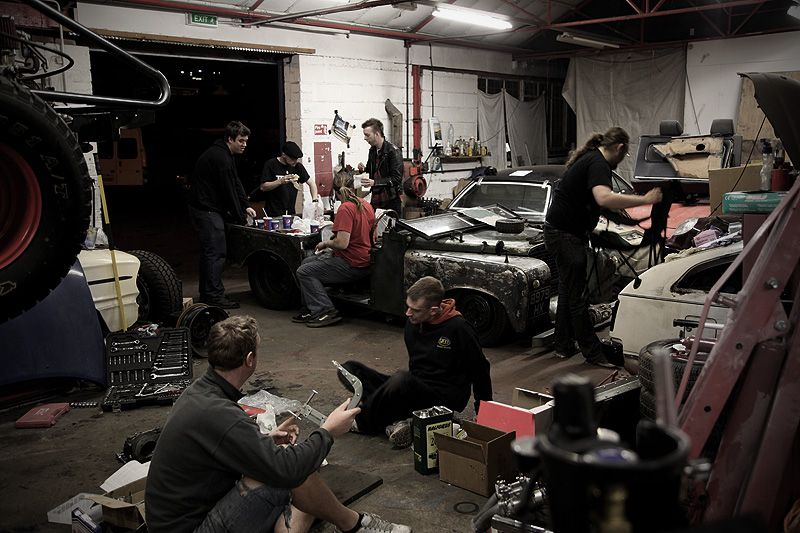 |
| |
|
|
|
|
|
Mar 28, 2012 13:37:04 GMT
|
While out with Robin trying to suss out the locations of the nearest LPG stations in Bristol (kind of essential when the car runs on 100% LPG) we got stuck in Saturday traffic in the city centre. Being a rather warm day, which was great for tooling around in the Land Rover, I noticed the temp gauge rising and rising. Eventually I decided it was hot enough to warrant pulling over and letting the engine cool. It seemed the electric fan wasn't cutting in.... Once we got back to Area 52 Rich and James started checking over the wiring then established that the fan wasn't connected. James offered to rewire it with a new relay too and I requested an manual over ride switch which meant I could turn the fan on anytime I felt the temp was getting a little high. The two of them headed off to Halfords with the trade card and came back with a new toggle switch to fit into the dash. A black plastic one was the only one they had in (other than fancy illuminated LED ones) but function was paramount to form in this instance and I was more than happy to have it if it meant I could control the fan. I can always change it at a later date to something more 'in keeping'. While they were at Halfords, Rich also picked up a pair of new headlight bulbs. The current ones worked perfectly well but had a blue tint which didn't really suit the Land Rover. His idea and I was more than happy to go along with it. I have to say, they do look better for having plain clear bulbs in there. Here is the fan switch James fitted along with a new relay and wiring....cooling should hopefully be all sorted now: 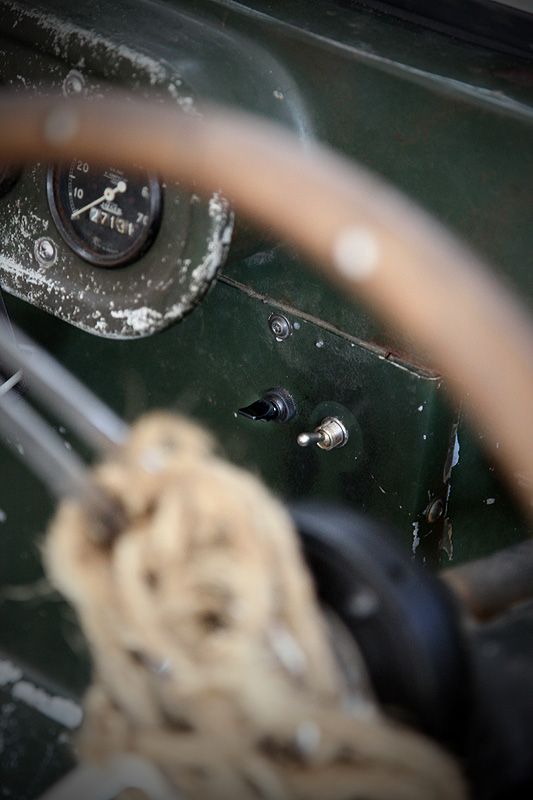 Another small issue which I hadn't really thought, about due to putting it down to having a steering box, was the play in the steering. It always felt a bit vague and indirect whenever driving. I'd driven cars with steering boxes before and knew they weren't a match for cars with rack & pinion, but after a few others had sat in the car, they all said there was more play than there should be. On closer inspection it turned out the way the steering boss had been mounted allowed for more play than was necessary. Approx 1/4 turn of the steering wheel was accounted for by the play in the boss before the column even started to turn. I hadn't even looked at it that closely. The bolt in the pinch bolt on the clamp of the boss was also the wrong bolt and didn't seat properly allowing for even more play. The boss was removed and the nut from the pinch bolt/clamp driven out and replaced with a new M10 nut which was pressed into place. An M10 bolt was shortened to the right length to allow proper fitment without interfering with the indicator cancel function of the boss/column. This allowed the P4 boss to fix properly to the column once again. The puzzle now remained of how to mount the wooden wheel to the P4 boss? The existing boss is like a large bowl with the open part where the centre of a modern wheel should be. The boss actually used to form the centre of the original steering wheel and the spokes had been cut off from the outside edges....the bowl shape simply housed a centre piece, badge/hornpush. It's bit difficult to explain, but it wasn't going to be that straight forward to mount the wooden wheel securely without some fabrication. Ian & I came to the conclusion that a large steel disc would fill the open face of the bowl and if it was drilled and tapped into the the cast alloy boss behind, could be bolted down securely onto the boss. We found a suitable bit of plate in the unit and Ian carefully measured it then started chopping bits off to give a rough shape. Time consuming on 5mm thick plate. I then used a flap wheel to smooth the plate into a nice round disc that fitted snugly into the small recess in the front of the boss. Five holes were then drilled through the plate and into the chunkiest part of the boss to give a secure fixing for the plate. Ian tapped the holes in the boss while I opened up the holes in the plate to the right size to clearance the new bolts. Tapping the holes wasn't straight forward because where the chunky sections of alloy were also happened to be where the original spokes sat in the boss, so at times he was tapping half alloy and half steel from the remnants of the spokes. Not much fun! With that done, it was simply a case of bolt the plate in place and measure where the steering wheel was going to be mounted. Once marked, three more holes were drilled and then tapped into the centre of the plate (the steering wheel only has three mounting holes). Once done, the wheel was then bolted to the boss and the boss fitted to the column....along with the new pinch bolt. The result....only a fraction of a turn before the wheels started moving. SO much more direct and a real contrast to the previous set-up. A true transformation. A HUGE thanks must go to the guys for pushing this mod to be done. It really has made a massive difference as well as being a lot safer/more secure. Here you can see part of the new 5mm plate bolted into the original boss. I will get some photos soon of the whole set-up so you can get an idea of how tricky it was to make this work properly. The solution seems to simple now, but working out the best way to go about it at the time took some head scratching. 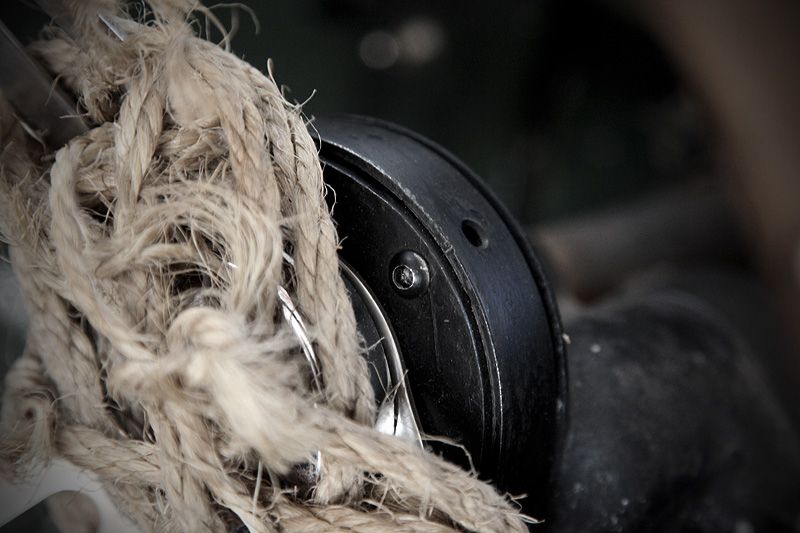 This is the cubby box that originally sat between the seats. It was fitted when Bryn bought the car but he removed it in favour of the open space not having it gave. I can see why, having a nice open space betweeen the seats is great, but I also want some practicality to store bits and pieces. It's a handy thing to have and I certainly couldn't be without storage for the sort of things I will be using the car for. The only downside, it looks so out of place in the interior. I have some ideas to make it look a bit more 'in keeping' but for now it has been removed.... 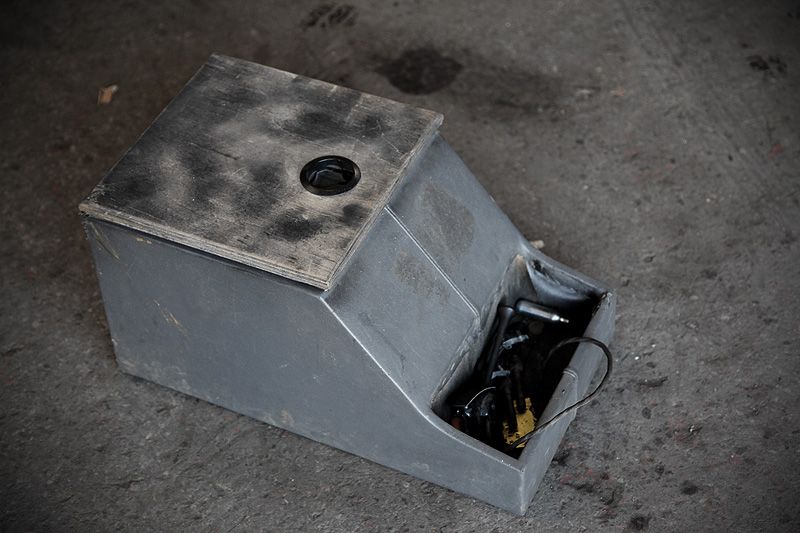 In its place I have fitted a temporary solution. Not as much space in it as the original cubby, but more in the spirit of the car....a rusty little tool case which I have bolted down to the transmission tunnel. It's a bit smaller than the cubby in every respect but it's still useful for holding sunglasses, keys, cans of drink etc.... I will, however, be on the lookout for something similar in style but a bit bigger so that I can carry my camera in there too. It also acts as a good arm rest. 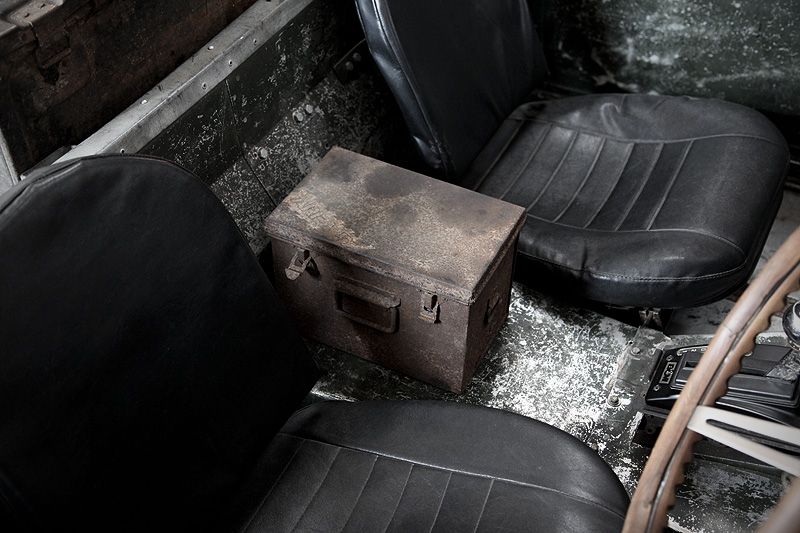 I couldn't resist putting an Area 52 logo on it. I placed a sticker over the rust then carefully dusted some satin black over the top. Removed the sticker to reveal the logo then rubbed it in a little to make it even more mellowed. In the flesh it looks like an old stencil that's faded over the years. Just the look I was aiming for. 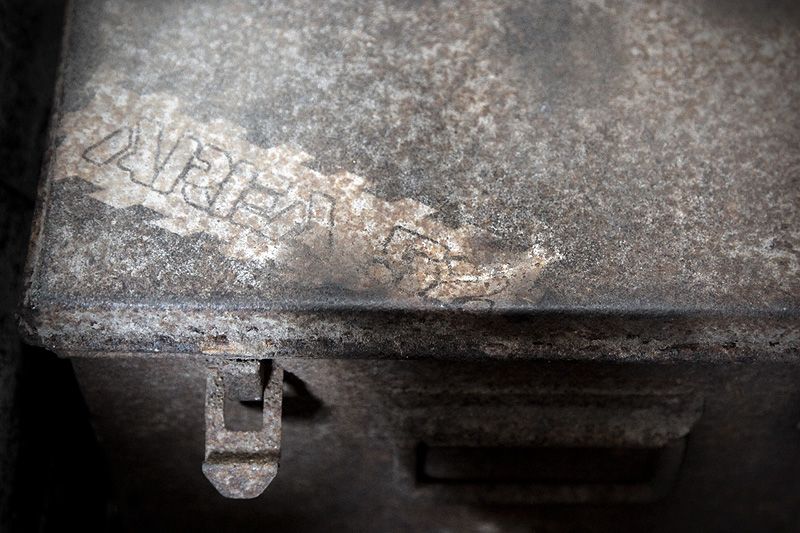 |
| |
|
|
|
|
|
|
|
Mar 28, 2012 14:20:11 GMT
|
|
|
| |
To get a standard A40 this low, you'd have to dig a hole to put it in |
|
|
|
|
Mar 28, 2012 16:12:03 GMT
|
Great stuff Bruce, glad to see you're delving straight in. I so badly want a spin in this! Would it clear the ramp on the ferry do you think......  |
| |
Club Retro Rides Member
|
|
Anglia68
Posted a lot
Powered By Boredom.
Posts: 2,049
|
|
Mar 28, 2012 19:27:30 GMT
|
|
It's great to see THAT Landrover in safe hands and being sympathetically worked on.
The choice of rear lights are spot on.
I hope you don't mind me asking but is it not old enough to convert the rear lights to operate as indicators as well as tail lights?
A couple of my mates have done this on their rods using kits from Pop Browns and it saves having to have separate indicators and keeps the back end looking nice and clean.
|
| |
|
|
stealthstylz
Club Retro Rides Member
Posts: 14,829
Club RR Member Number: 174
|
|
|
|
|
It would be old enough but the number of near rear enders I had due to wiring them like that in the T means I wouldn't bother now.
|
| |
|
|
|
|
|
|
|
|
This is precisely the selection of people and subtle mods that this car needs and why you're the perfect custodian for it. It's not often I feel I can trust the fate of a known car to a new owner, but this one I think I can. That sounds a bit presumptuous I suppose, but I hope you understand the sentiment behind it.
As others have said, those rear lights are such a huge improvement over the maltese ones and I can empathise with a car being too fun to care about one little detail like that. Sometimes, it needs a new owner to get a little job done while they're learning the car, I guess.
|
| |
|
|
|
|
|
|
|
Great stuff Bruce, glad to see you're delving straight in. I so badly want a spin in this! Would it clear the ramp on the ferry do you think...... If I can get the autobox sorted (possibly got something in the pipeline for this) then I'll certainly consider making a trip over in it. It's just finding the funds that's the killer  The ferry is the least of my worries....I can just see us blasting around some of those roads with HUUUUGE grins! I hope you don't mind me asking but is it not old enough to convert the rear lights to operate as indicators as well as tail lights? It's funny you should mention this...Matt (Stealthstylz) and I were discussing this on the phone yesterday and we both agreed that it's better to have seperate indicators. In this modern world where everything has to be clearly and carefully spelt out to some people, having the indicator built into the rear light & brake light would be too much for some people to fathom. I don't want to rick someone rear ending me because they can't work out the difference between a brake and an indicator. I am far more comfortable having the indicator seperate, it's VERY clear to see when it flashes but luckily pretty much invisible when off. When you see it in person, in daylight, you literally have to look for them they are that hidden (which means they don't visually clutter the rear end) yet when on, there is no mistaking that they are indicators. I'll get a video to show....it's a solution I am very happy with because it meets the balance between function and aesthetics perfectly. It would be old enough but the number of near rear enders I had due to wiring them like that in the T means I wouldn't bother now. As discussed yesterday (althought the subject of the 'T' was never mentioned) ^^ THIS ^^ is reason enough to make me think I've done the right thing with the indicators. I can empathise with a car being too fun to care about one little detail like that. Sometimes, it needs a new owner to get a little job done while they're learning the car, I guess. Me too....the four days I've driven it, I've not wanted to stop. Not wanted to get out...just wanted to keep enjoying it. More than any car I have ever driven, this thing really does get under your skin! I am determined to strike a balance between using it and evolving it. It's frustrating that I'll never be able to take Jed in it, he's far too nervous a dog and I wouldn't ever consider putting him through that. This leads to me not being able to use it as much as I'd like because Jed is with me pretty much all day, every day. But on the flipside, this means I have more time to work on it because when he's with me I can't take it out. It's looking like tomorrow I'm off to collect a new gearbox for it. 300 mile round trip to Welling in Kent and back in the Demio to pick it up. More than happy with that if I can get the gears to work properly and Jed & I get to spend the day on the road. We like our little road trips |
| |
|
|
Dez
Club Retro Rides Member
And I won't sit down. And I won't shut up. And most of all I will not grow up.
Posts: 11,712
Club RR Member Number: 34
|
|
|
|
 seriously. id try it! jed being the little poser he is, i recon he'd like em. and if it means he'll then ride shotgun, its gotta be worth a go ;D |
| |
Last Edit: Mar 29, 2012 9:42:37 GMT by Dez
|
|
|
|
|
|
|
|
It's not just the noise....it's the vibrations, the ride, the way everything shakes.....and also the openness of it. I know Jed and I know there is no way he'd ever 'get used' to it unfortunately. For that reason, I'm not even going to try. He didn't even like the MX5's and spent most of the time trembling in them....this car is on a whole different level. What would make us grin like a loon will make him very scared and I just don't think it'd be fair to think about putting him through that.
It's a shame, but I've made my decision and I think know it's the right one. A more confident dog would be a different story.
|
| |
|
|
MiataMark
Club Retro Rides Member
Posts: 2,961
Club RR Member Number: 29
|
|
Mar 29, 2012 10:59:15 GMT
|
|
He's your dog and you will know best.
We had a dog who loved going in the car but put him in a convertible and he just cowered in the passenger foot well.
Normally our dogs ride in the boot (of a Discovery) but this week I had Basil our Border Terrier on my lap in the passenger seat with the window down, he loved it, paws on edge of window face in the wind. (I was holding very tightly to his lead).
Mark
|
| |
1990 Mazda MX-52012 BMW 118i (170bhp) - white appliance 2011 Land Rover Freelander 2 TD4 2003 Land Rover Discovery II TD52007 Alfa Romeo 159 Sportwagon JTDm
|
|
|
|
|
Mar 29, 2012 12:06:26 GMT
|
Gearbox now sorted and I am looking forward to getting it. It's a 4 speed ZF box (ZF 4HP22) which comes in various guises. There are three basic options for getting a 4HP22 onto a 2WD Rover V8 set-up: 1) Range Rover box which bolts straight up to the engine but needs the transfer box removing and the tail section from a 2WD box grafting on which can be a bit tricky 2) Jag/BMW box which has the 2WD output but then needs the Range Rover bellhousing, torque converter, flex plate etc... ^^ Both of which leads you to buying pretty much two 4HP22's and chopping/changing parts. ^^ 3) Sherpa/LDV V8 from an ambulance. Straight fit to the engine (V8 bellhousing) and 2WD output....the best solution....BUT rare! I've managed to source an LDV box that was removed from a V8 ambulance only yesterday. Very, VERY lucky! A good price too compared to what they normally fetch. It comes complete with the torque converter, flexplate, spacers, shift cable, kickdown cable....everything needed to get it to fit. The only issues will be size. Until I've got it, I won't know if I need to modify (shorten) the prop, or if I'll need to widen the transmission tunnel. None of it will be drastic or too difficult, but I am hoping I'll be able to get it all in just in time to drive the Land Rover to Wheels Day next Friday! I do like a challenge. Some more bits that were done to the car at the weekend: I had an ammo crate which I'd got on a house clearance a few years back (the same house clearance that got the sofas and other bits for the snug) and it seemed to fit in nicely on the rear bed. I will make some hidden fixings so it can be bolted down onto the rear deck, but in the meantime I used a strap to hold it in place. 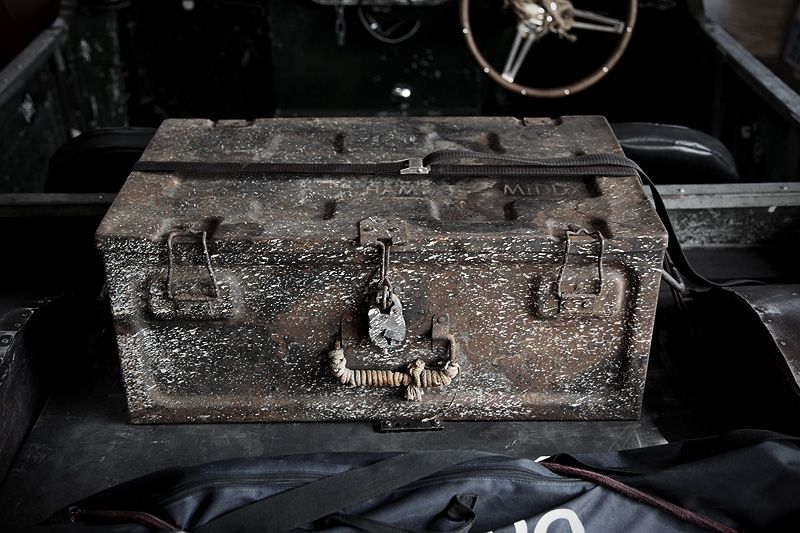 There were no logical fixing points, so some tie-down points were found in the 'BiAS Drawer of Wonder' and promptly fixed to the rear bed. The strap was a brand new black strap that looked too clean and out of place, so we employed the services of a light dusting of red oxide primer, followed by rubbing it through the Area 52 rusty 'detailing chain'....then some manhandling with "DIRTY GLOVE" (said in a husky Bob Hoskins voice) and finally trampled on the floor for a few minutes. Suddenly it looked 'right'. 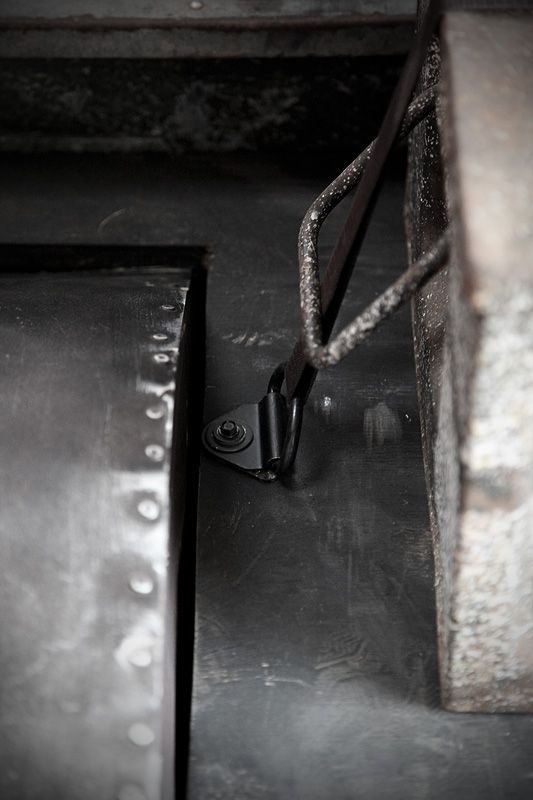 Increasing storage space even further, a small ammo box was bolted to the floor next to the drivers seat. This fitted to well and has become known as the handbag. 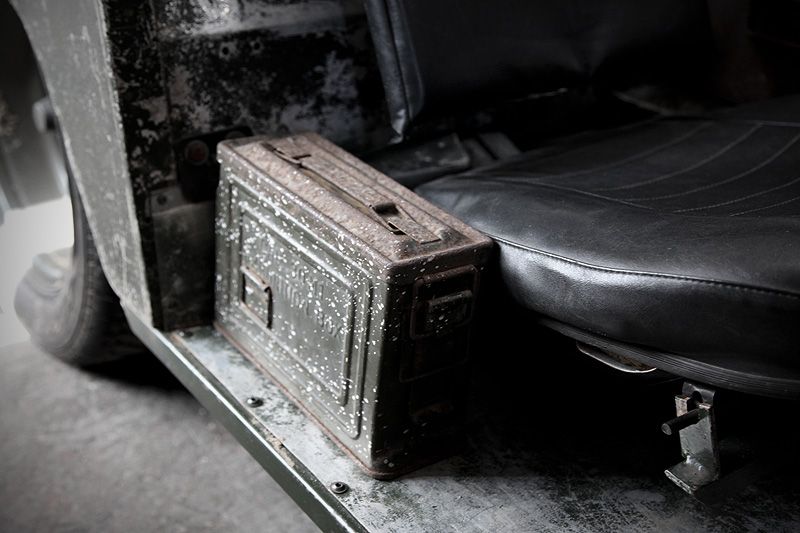 I will, when time permits, make it quick release so that it can be used, quite literally, as a 'manbag' handbag.  Another bit of cosmetic work carried out was to remove the shiny chrome plastic B&M shifter surround and paint it satin black. it was a bit too blingy for me, so a rub down and dose of black made it look better. I kept the shifter and knob chrome because I think they work quite well. Even more so now the surround is black  The shifter cable was bright red and now that the surround was black, it really stood out in the interior. Rich & I both had the same idea for how to change that....and he quickly found a piece of fabric braided hose which was slit down its length and slid over the shifter cable. The transmission tunnel was cut in a way that it was already chafing through the shifter cable, so with the new cable cover on, I opened the hole up quite a bit and tried to make it look a bit neater at the same time, removing some of the rough cut corners into a more sympathetic shape. 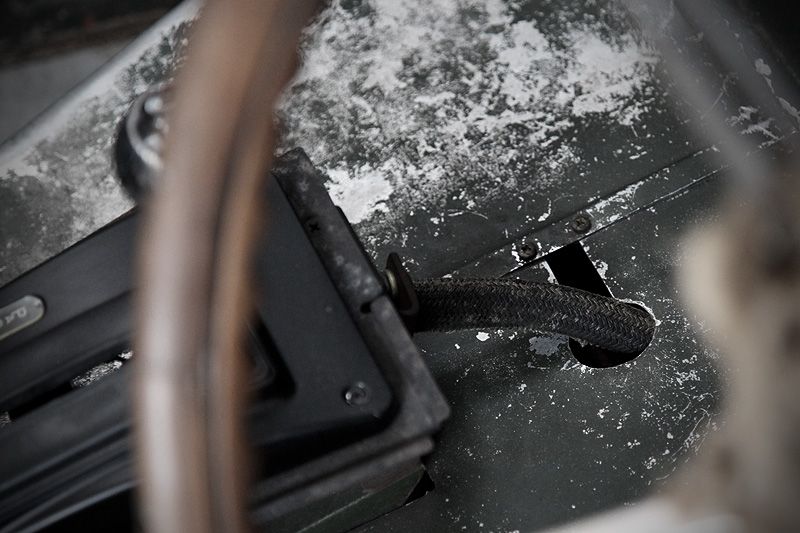 Being truly sad, I even sat and painted in the B&M logo with some NATO green just to make it stand out a tiny bit. In the flesh it's very subtle but it's one of those touches I just like: 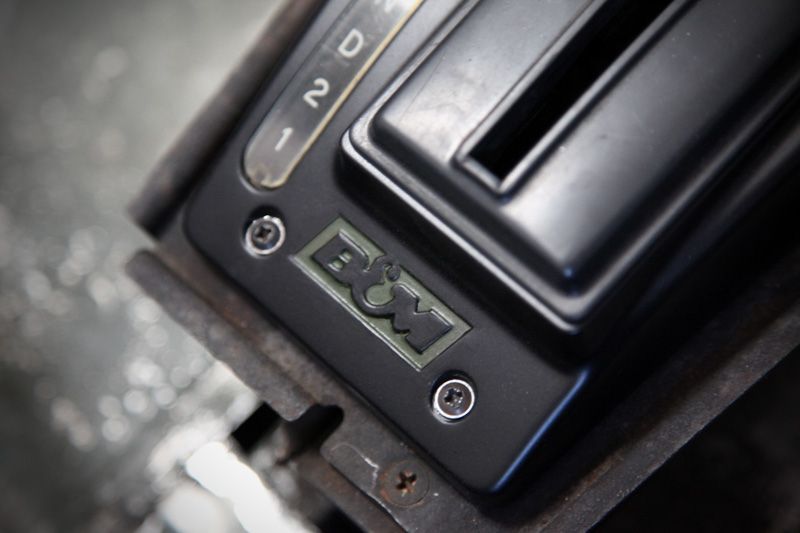 Finally, I put some small washers onto the selector shaft so that the knob screwed on and sat with the logo straight. With it screwed on previously it sat 90 degrees further round and this annoyed me a bit, so packing the base with washers allowed me to have it sat 'correctly'. The only trouble was you could clearly see the washers, so I found this bearing plate 'thing' which fitted perfectly over the washers disguising/hiding them and making a bit of a hidden feature. I like it....and because it spins around the bottom of the knob, it's brilliant for fiddling with in traffic. Sad heh? (cue jokes about fiddling with my knob!) 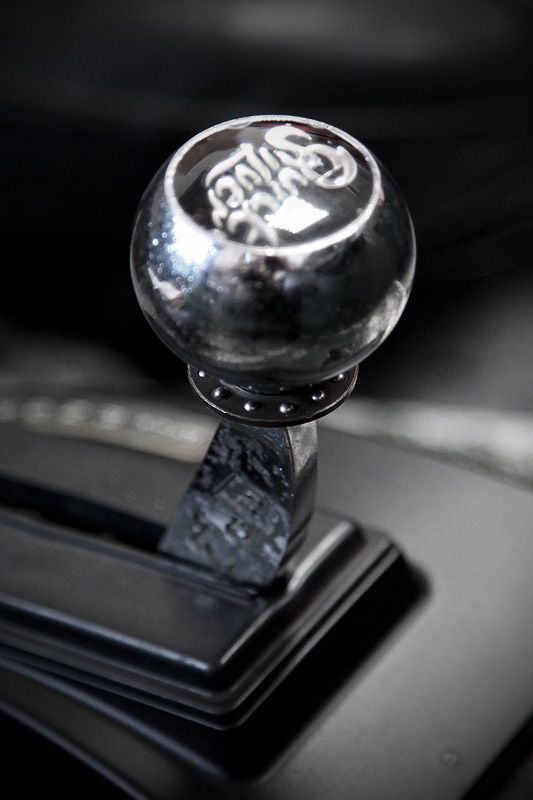 With all those bits in place I was much happier with the appearance of the shifter. I will make a shroud when I can to sit around the base between the shifter and the transmission tunnel, but even now it's a bit visual improvement. Here is a (fuzzy) close-up shot of the set-up before I started tinkering with it to show the difference (chrome shifter surround, red shifter cable, square cut transmission tunnel over cable, shift knob sat at the wrong angle.... 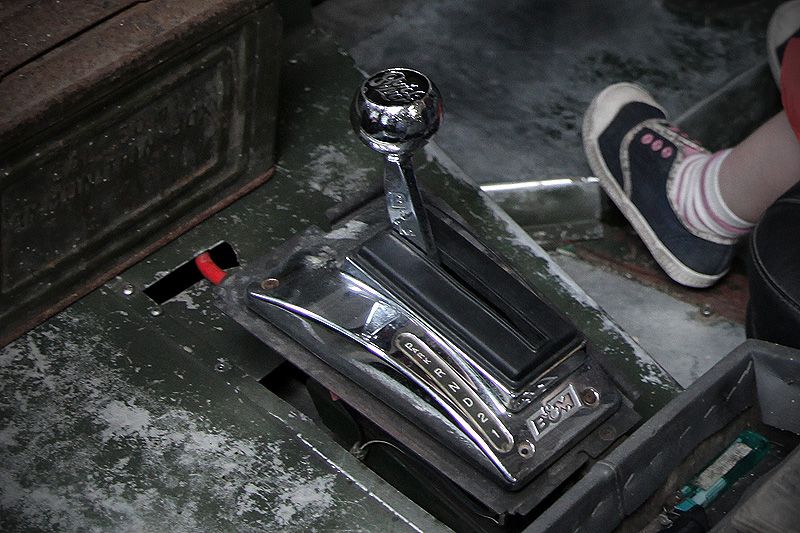 As Bizzle would say, "The devil is in the detail". |
| |
|
|
|
|


 [*]
[*] [*]
[*]


 The ferry is the least of my worries....I can just see us blasting around some of those roads with HUUUUGE grins!