Mammoth quote session here we go.....
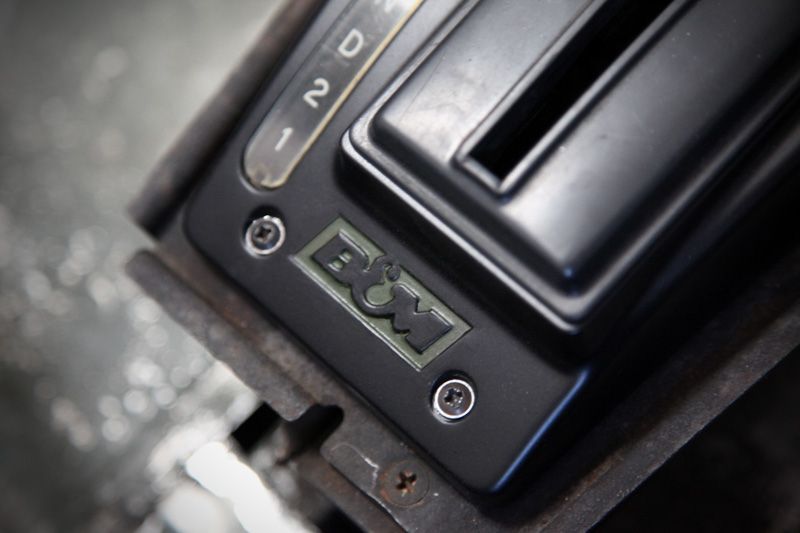
Rather childishly, I think this looks like 'bum'
Fantastic work as ever, Bruce. Perfect attention to detail

Thanks Dude, I'm trying to get that balance of attention to detail and keeping things 'looking right' for the car. With the MX5 it was easy, everything had to be perfect, simple. With this car, getting it right is a whole new challenge because I have to consider the character of the car and make sure that I don't overcook it or make it look too new or out of place. Or too fake. It's really enjoyable doing this....
Oh, and we all joked about how the logo looks like 'bum' too....especially since I've picked it out in NATO green. Another quirk of the car, having a 'bum shifter'

Looking better each change you make. There does a come a point where it will be Bruce's Land Rover, and it is the small but significant touches that you add that will move it there.
I was going to add that it is not normally the sort of car that I like, but I do anyway. Then I thought, this doesn't belong to any 'sort of thing', so I just like ;D
I think that's the thing....the car is 'there' in terms of aeshtetics but it's the challenge of evolving it and making subtle changes without detracting from everyone knows and loves about the car. It certainly doesn't belong to any 'sort' and that's what is so refreshing about it. It seems to transcend all 'types' while fitting into a lot of them at the same time.
As brilliant as this is (and the fact I'm probably going to get shot down in flames here) I can't help but feel it would look better a little less nose down.
Either back down further - or dare I even say it - the front raised up a little!
All in hand.
The car used to sit lower at the rear but the 'arrangement' wasn't exactly ideal, to say the least. Bryn made it a lot safer by putting proper spring plates back in and replacing the stack of box section lowering blocks with some proper blocks. This meant the rear came up a bit. I will be addressing this in due course and all the necessary arrangements have been made (phonecall was made within hours of finding out I was going to be buying the car). Once I have some money there will be some significant changes occurring.

Awesome..............That is all. ;D
My thoughts exactly. I love this car, it's awesome and I still have to pinch myself to realise it's now in my hands! Words cannot express how happy this makes me.
personally I have always hated everything about landys the way they look go drive and smell, but this one I love, absolutely awesome. (please keep this mail invisible to the midlands toyota 4X4 club they will eat me alive for being a traitor LOL)
It literally gets massive thumbs up, toots from horns and big grins from all types of 4x4 owners on the road. Land Rover owners love it, but Toyota, Nissan and other 4x4 owners seem to really dig it too...along with most other motorists it would seem. And pedestrians.
I'll keep your secret safe though
THIS is RetroRides!
That's what I've always felt about this car. It's one of those defining cars, and as I've already said, I still cannot believe that my name is (or will be, once the paperwork is back) on the logbook!
Still trying to remember what that washer-with-bearings is called.. I always seem have one left over when I do the lower arms on newer fords and have never actually
seen one in situ to know where to put them

There is a scene in a cheesy 80's film called Cocktail where two people are discussing all the small, insignificant things in the world and that someone, somewhere, must have invented them at some point. And named them too.
One thing they comment on is the tiny plastic tip on the end of laces. Someone must have invented that, and named it too. The guy is probably a millionaire. They decide that the name of these lace ends is probably something obscure, like 'Flugelbinders'. It's a curse word film, but the whole flugelbinder thing has always stuck with me and until you find out what those washer/bearing things are really called, then the one on the gearshift is going to be known as a 'Flugelbinder'. Random I know, but it makes me chuckle.
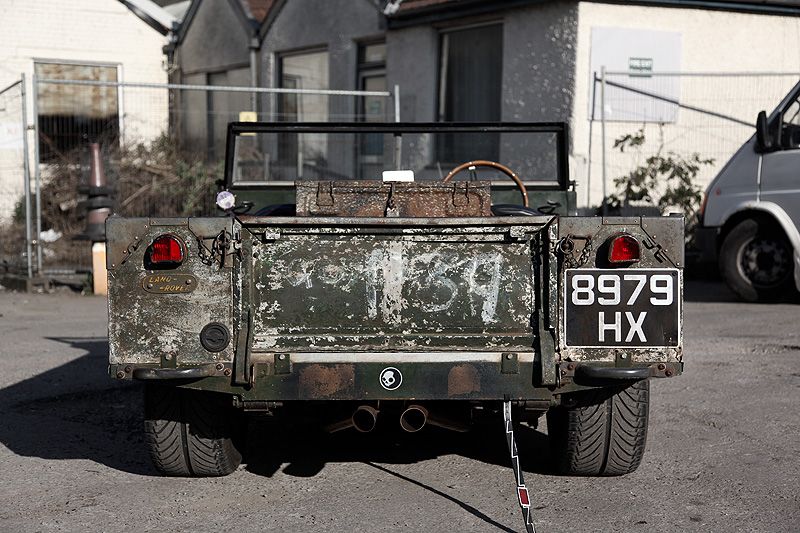
Them rear lights are a 110% improvement. Nice work.
Pretty happy with them. I'll get them off again and properly cleaned up inside when I get chance....but just having them on the car already has made a huge improvement to the rear end I reckon.
Nice to see it receiving some typical MM attention to detail.
Thanks Seth. Coming from you, that's quite a compliment...I just hope I can continue to keep it going in the right direction.
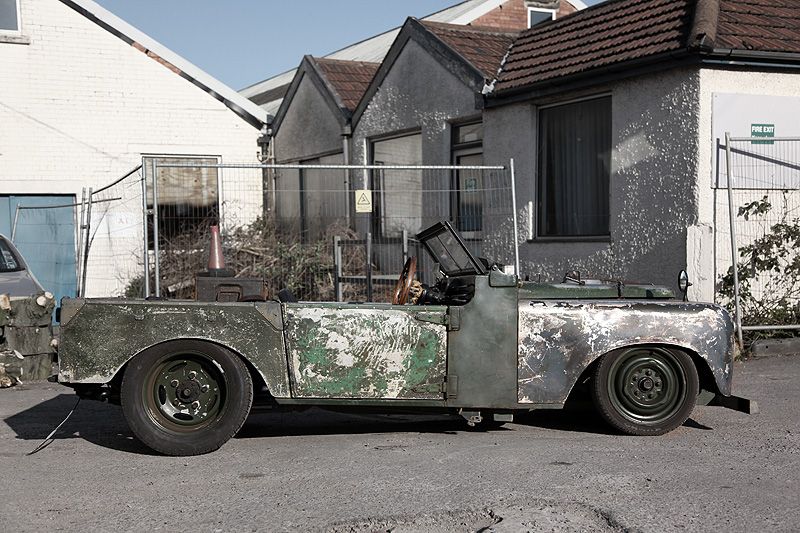
Did you ever consider putting some bomber style seats in it?
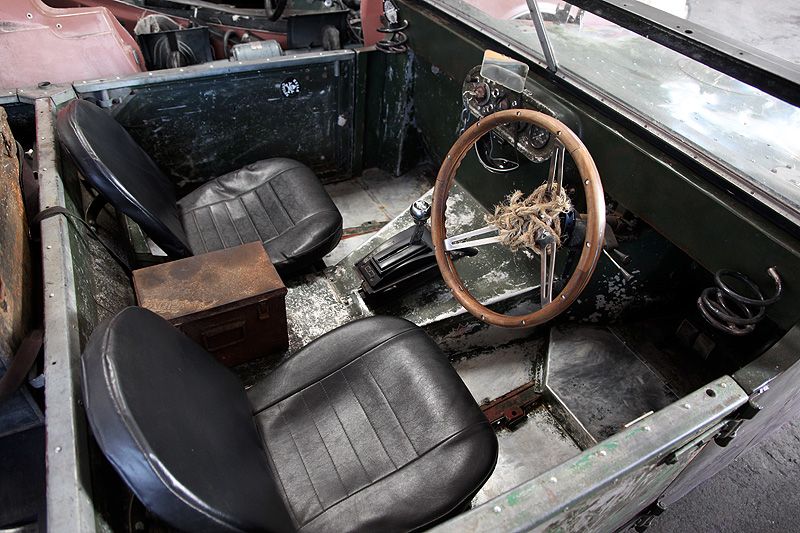
I think they would look good, but with the way the current seats fit on and around the chassis & floorpan, I think it'll be difficult getting anything else to fit as well. Plus the fact that they are Land Rover items (the backs are original Series I and the bases from a Defender or later Series?) - I like the hybrid approach their fitment and would like to keep it that way, certainly for the time being.
Heard, then saw this pull alongside on the ring road monday just gone. Not a regular here these days so only found out via a third party. Congrats Bruce. PM coming your way.
Good to hear from you Jimmy, you should have called out but then if you didn't know it was me, why would you? I'll pop round once the car is up & running again. It's been a while!
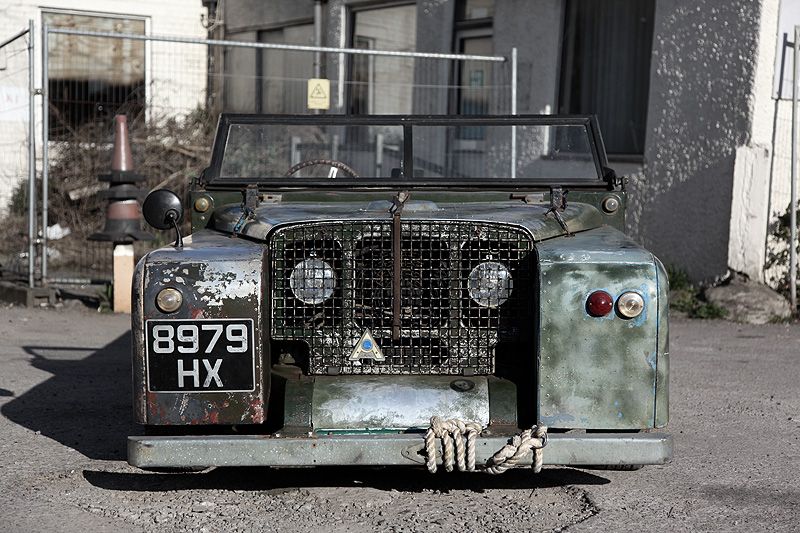
This may be a stoopid question, but here goes: on the front view, there's what appears to be 4 sidelights and one indicator; which ones are actually the indicators?
The ones on the bulkhead are currently 'dummies' from what I can make out and the two clear ones on the front wings are twin filament which cater for sidelights
and indicators. I might move the sidelights up to the bulkhead area and leave the indicators at the front.
The red one is 'spare' used to cover the hole in the front wing which is a Series II wing cut down. Series II's had two lights on the front wing...I like the asymetric look and will keep it that way. It just seems to work visually with the rest of the car.
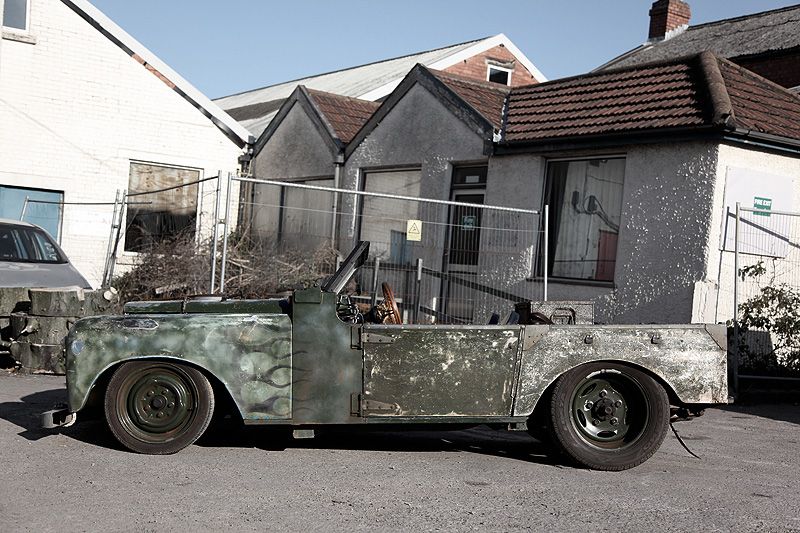
thats really cool, the patina on that is awesome and I'm not hating on it but why did you decide to lower it?
seriously? I cant believe youve just said that. the
whole point of this thing is the fact it is excessively low. if you don't get that, well, I just don't have the words to convey my dismay.
I'm not sure if it was the main reason the original owner built it, but the main reason I've always loved it is because in 2002(?) they had to let it into the ESRA hot rod show, which is strictly for pre '49 hot rods only. Because the Series 1 came out in '48 it was allowed, and was the most talked about car there.
thats one of the reasons ive always loved it too. apart from it just looking frikken awesome of course. proper two fingers up at the 'traditional' hot rod bean counters.
Matt & Dez are right there, it was built as a hotrod and to get people to question what a hotrod really is. Pre-1949 has always been a benchmark figure and this pretty much always leads to the classic rods most people picture when you mention the word 'hotrod'. This fits into the category set out by rodders to prevent more modern body styles being classed as a true rod, but seeing as this body is a 1948, it can't be argued despite the fact it looks very much unlike a traditional hotrod.
That alone makes it one of the coolest 'rods in my book. As for the lowering, there are more than enough standard Landies out there to please the purists. This one was saved from being crushed (chassis had completely dissolved) so even if it's not 'authentic' it's at least still on the road, being enjoyed and not currently doing the rounds as thousand or so drinks cans which is where it nearly ended up.
I'd wager that what appear to be sidelights on the wings are actually the indicators.......
I'm fairly sure the pass wing is a s2 one, cut down to fit, cos the original s1 one was missing or damaged something at the time of build(bruce does actually mention theres the odd s2 bit in there to fill up some gaps)....etc...
Dez is spot on (sorry, should have read this before answering it above!) but I'll be changing the light arrangement around in due course. The red lens on the front will most definitely be staying. A matching one on the offside wing will certainly not be appearing.
One other thing I forgot to mention...there is a new badge which has found its way onto the front grille. There is a bit of a story behind that - a story I'll explain another time. It's not a long one, but it does have some relevance to its existence and reason for putting it on the Land Rover. Another mini-chapter in the cars ever evolving history.
Right, I'm off to London to buy a gearbox.


 [*]
[*] [*]
[*]