MrOtter
West Midlands
"Your car is your story, so don't let someone else write the book." - Moog
Posts: 281
|
|
Sept 14, 2013 20:55:47 GMT
|
Since the gathering I've been quite busy on the BX, mostly only doing one job though - repainting the roof. First thing was to remove the old failed lacquer and paint, which I decided to do the lazy way with paint stripper, like so: 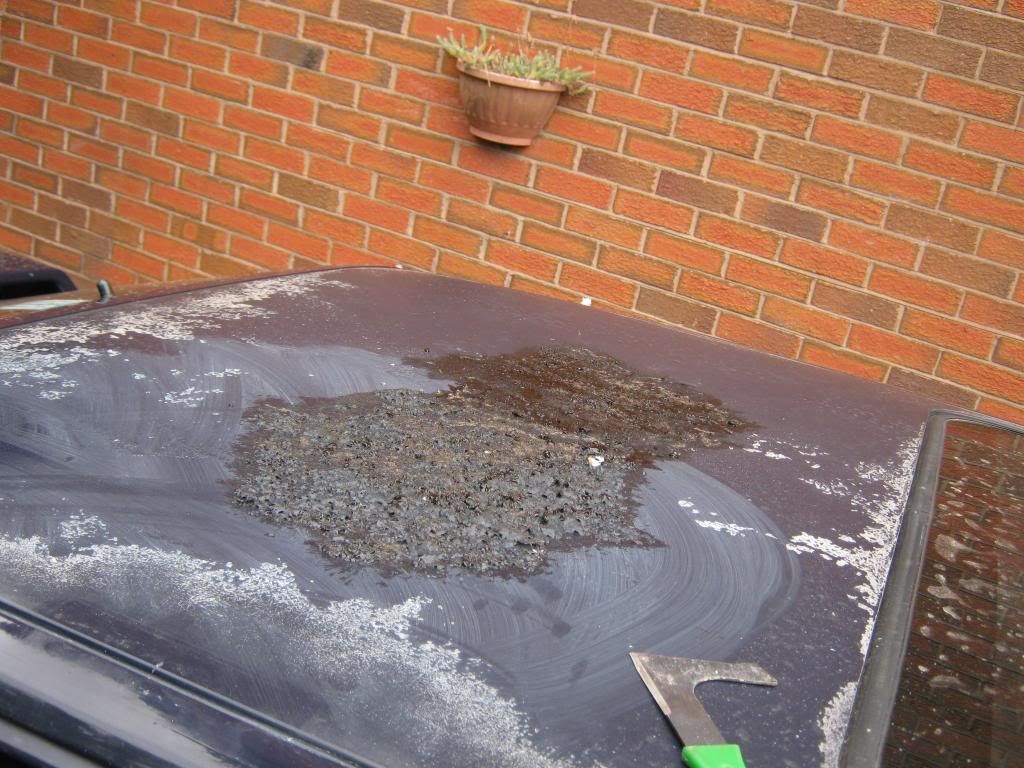 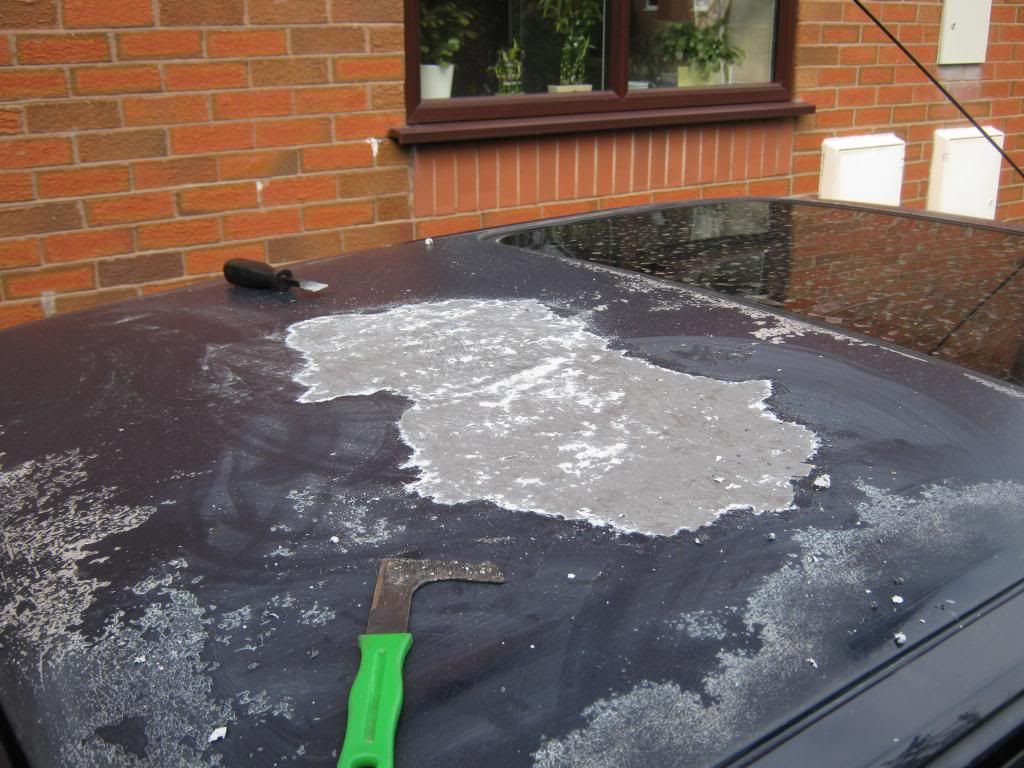 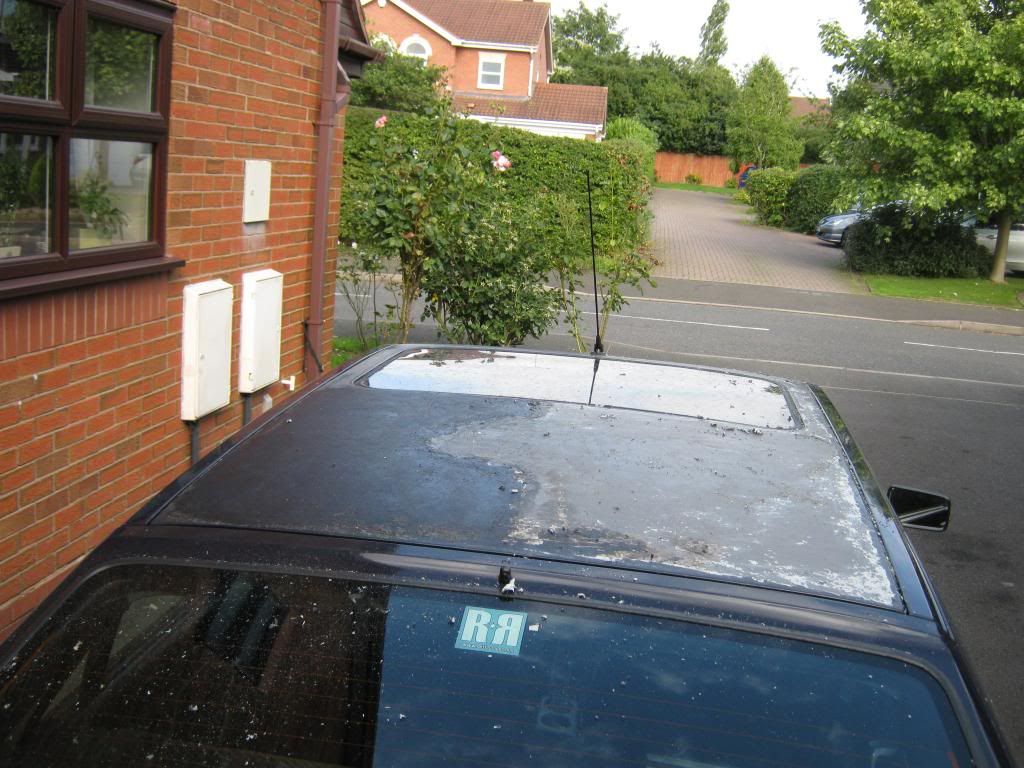 Unfortunately for me, this is where the tin of Ronseal paint stripper ran out. I really didn't want to spend any more money doing this budget roof respray, so I went to B&Q and found their cheapest paint stripper. Which of course was pretty rubbish, and only took off the crusty lacquer and left the blue paint behind. Oh well, at least I got half of the paint off! So I just decided to make do with what I had and just blend in the edges of the paint to the bare metal, which I had to do all round the edges of the panel anyway. So after a lot of sanding (days of sanding...), masked up: 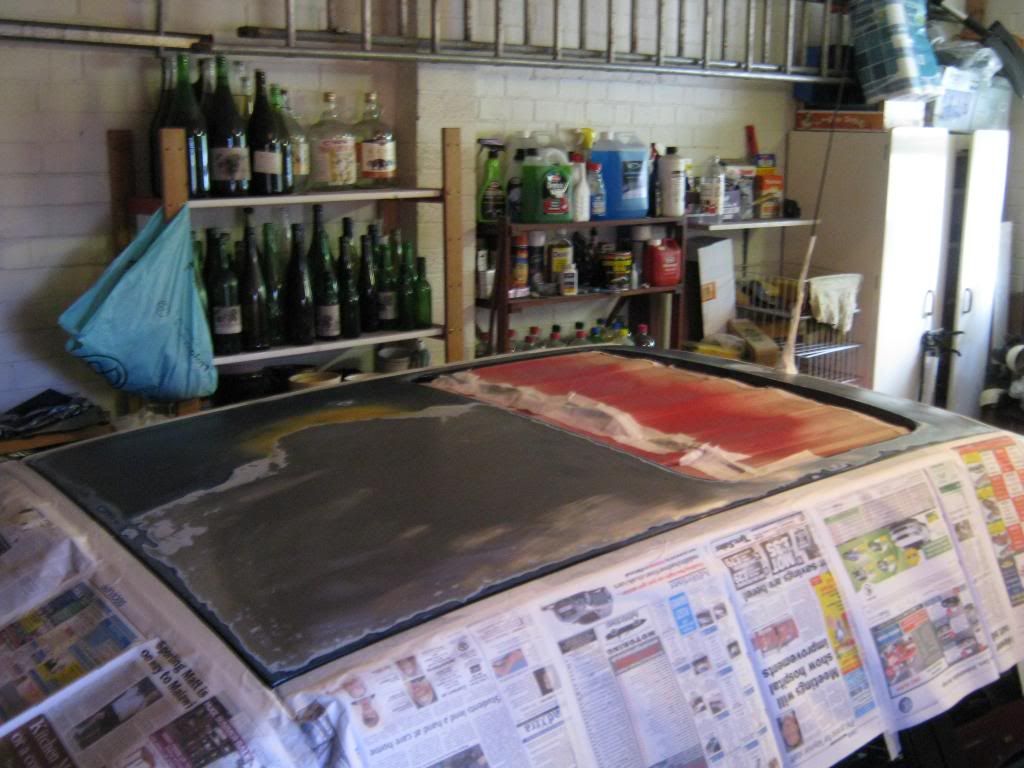 Filler primer: 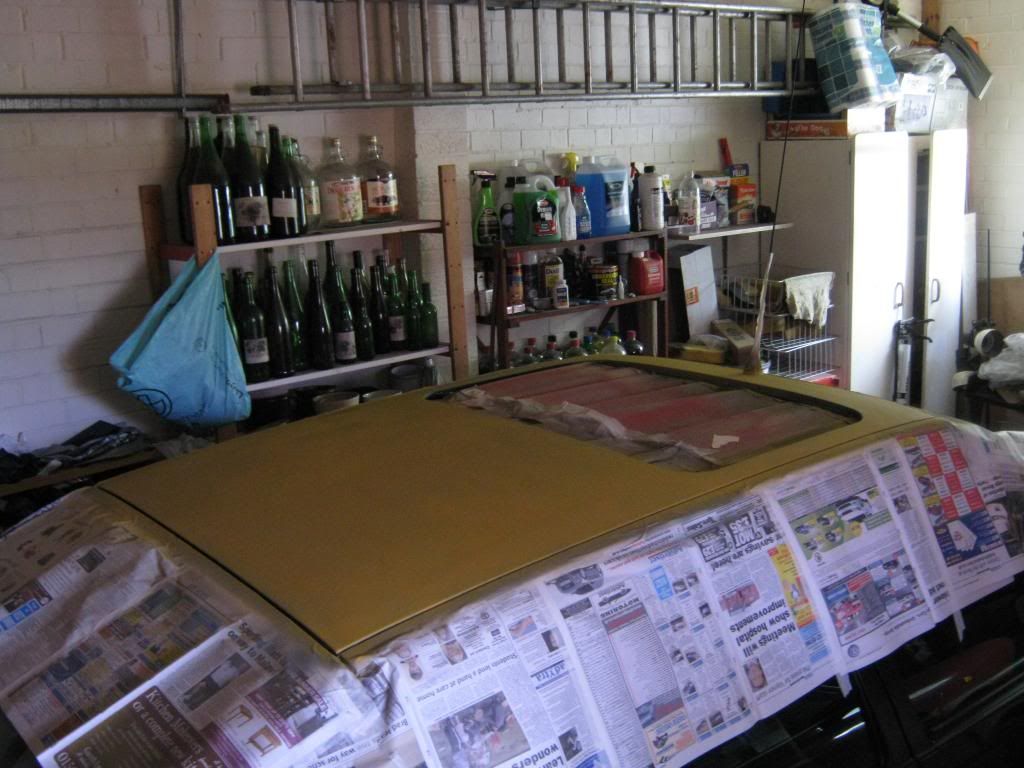 After lots more sanding, white primer: 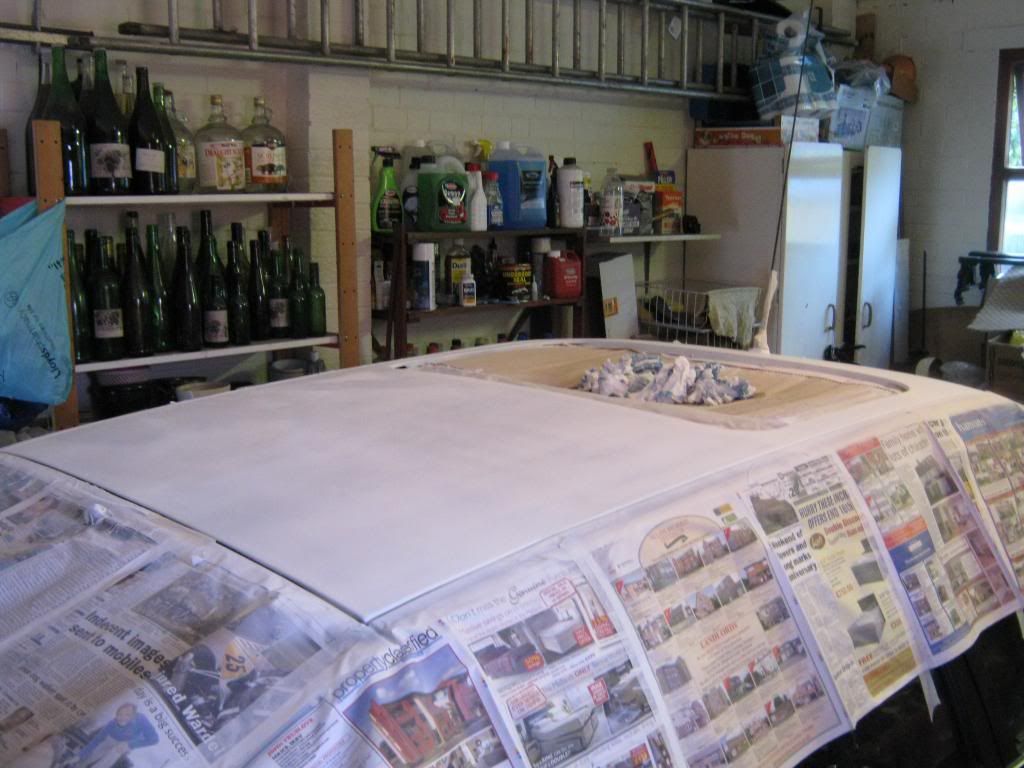 After even more sanding, first top coat of black (to try and darken the final blue, as I knew it would end up too light): 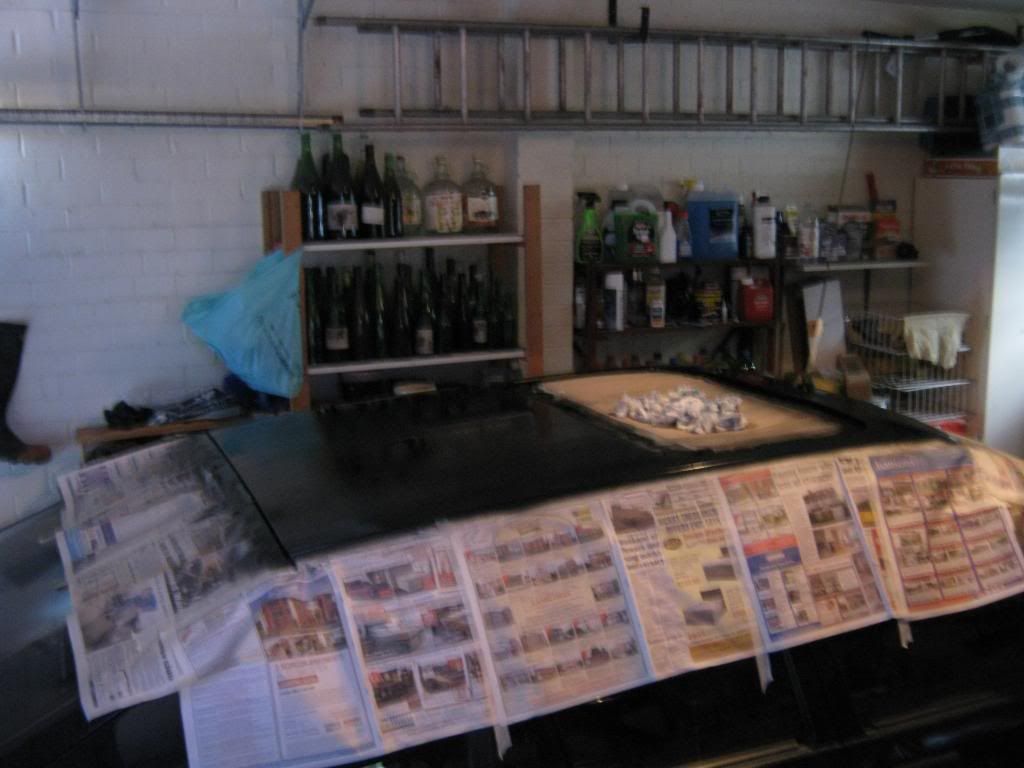 Then after more sanding, finally in blue - took about a week and a half to get to this stage from the beginning: 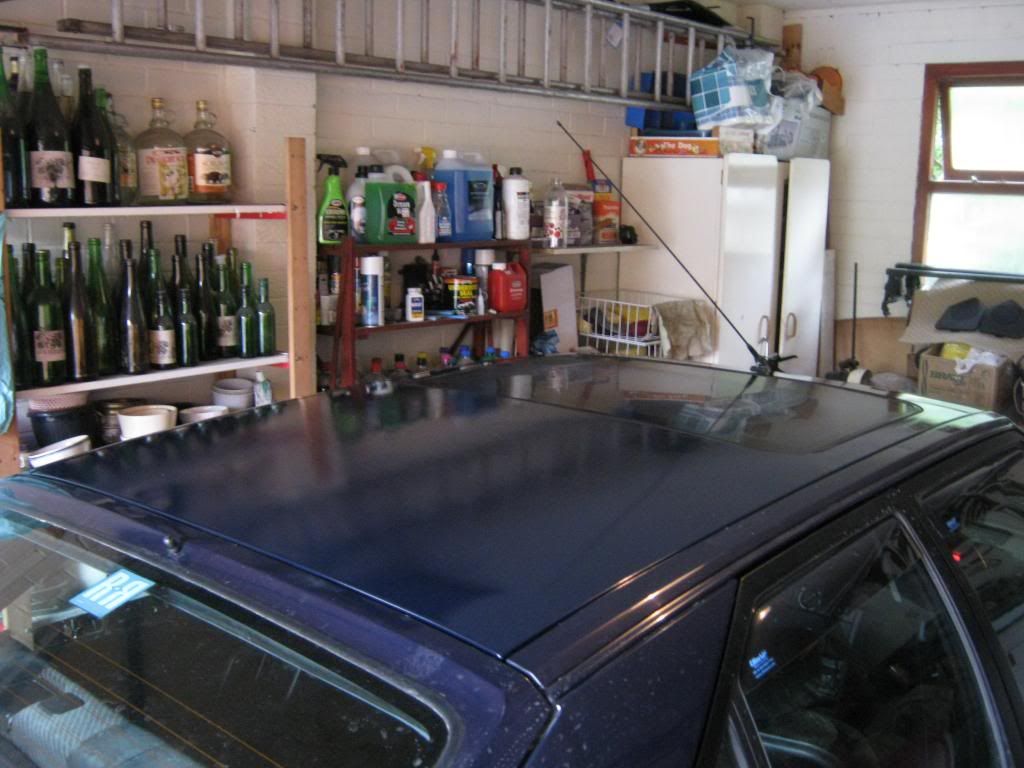 The damage... 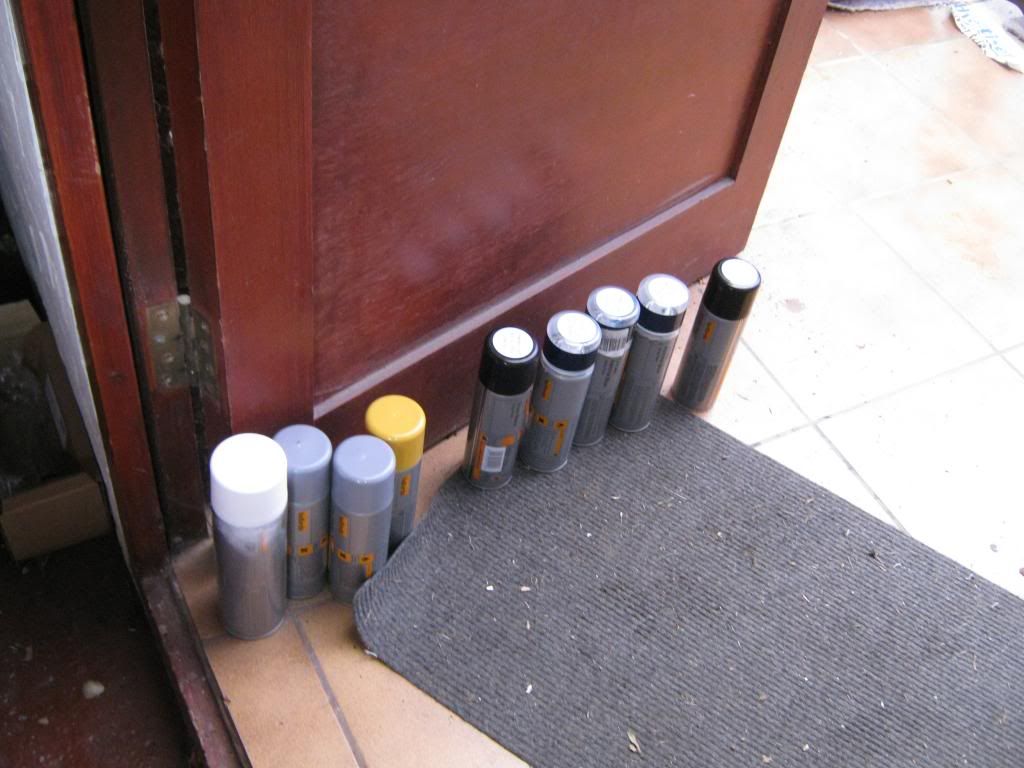 ... about £50-£60 in Halfords paint. So, whilst I let that blue settle in a bit, some wind deflectors arrived from Germany (apparently). Whilst the rear ones were very easy to fit, the front ones wouldn't go in place without removing the door mirrors first, which involved removing the door cards - bit of a faff but not too bad. I did also have to file down the corners of the mirror plinths as they were very tight up against the deflectors, which was a bit annoying. Door cards off: 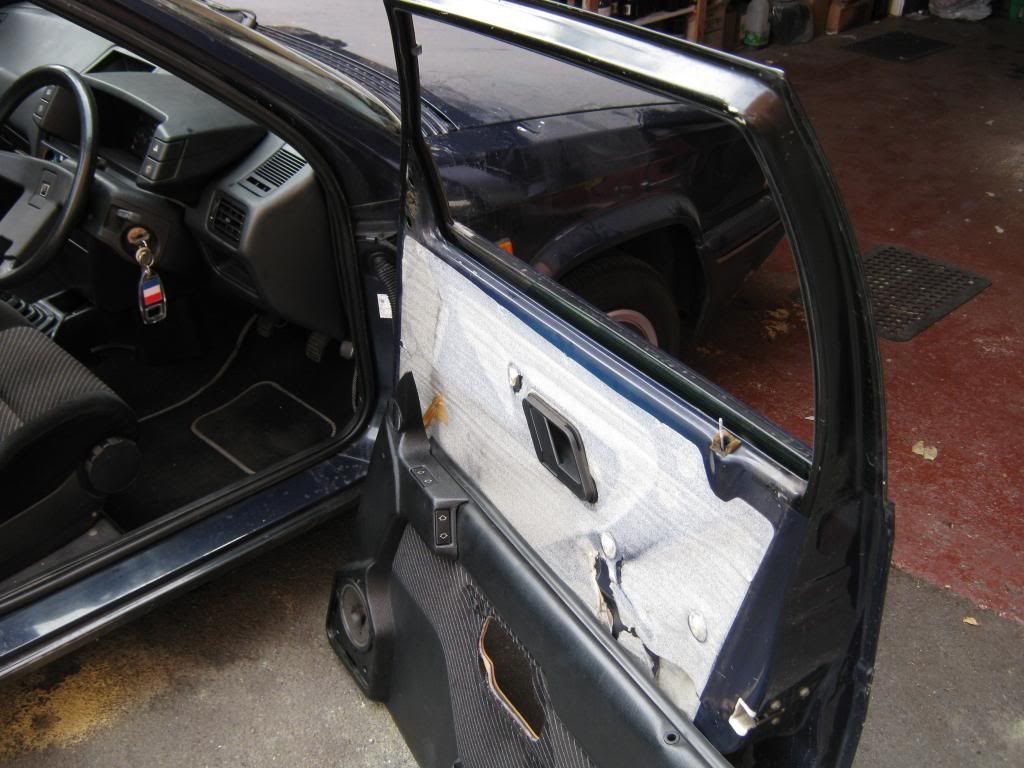 When I removed the drivers side mirror I found that it wasn't even bolted in and I couldn't find any traces of glue either - was pretty rock solid though, had to tap it out with a hammer/punch on the studs, no idea how it was held in! 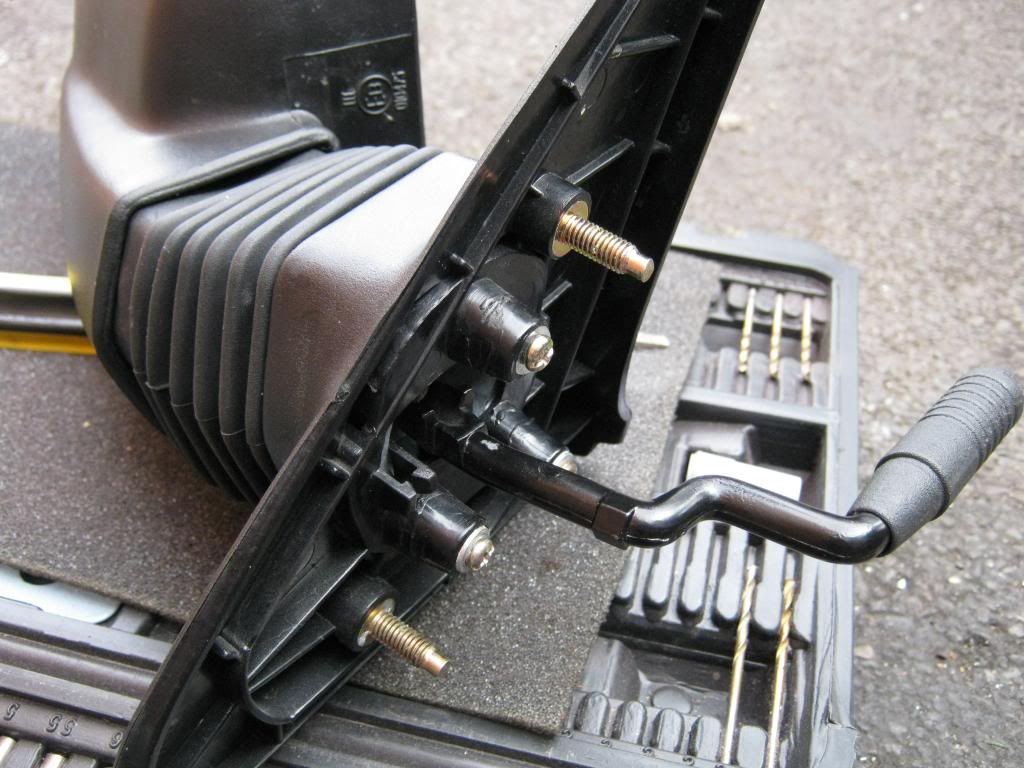 Finally got the deflectors all in, they work very nicely too. 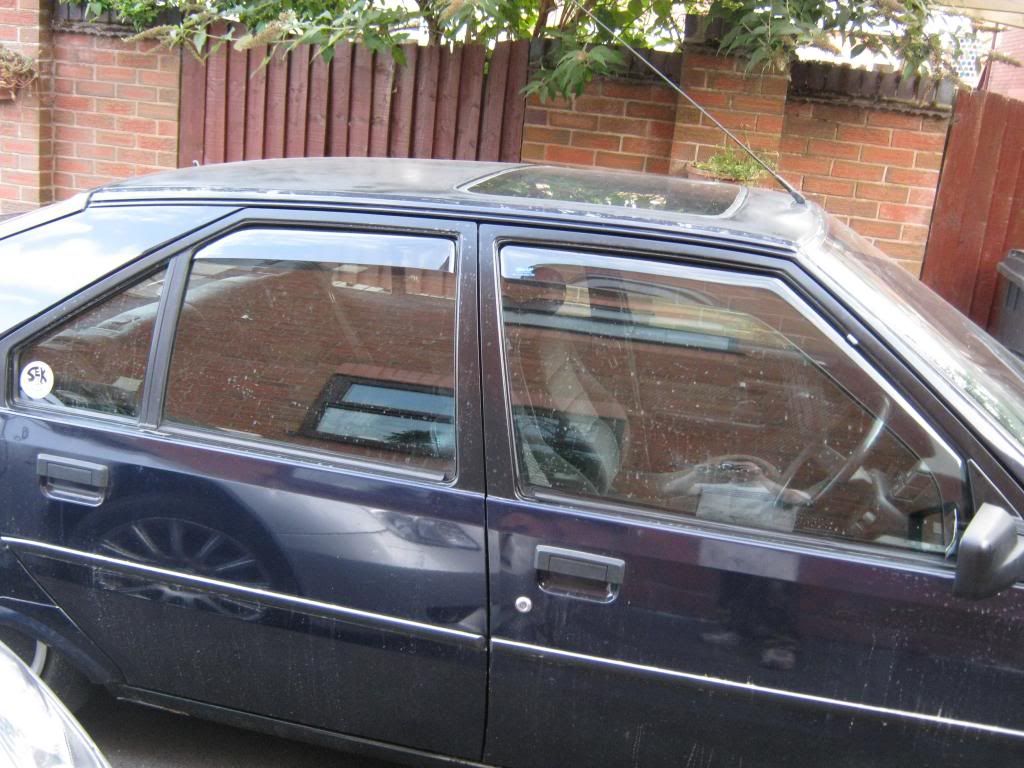 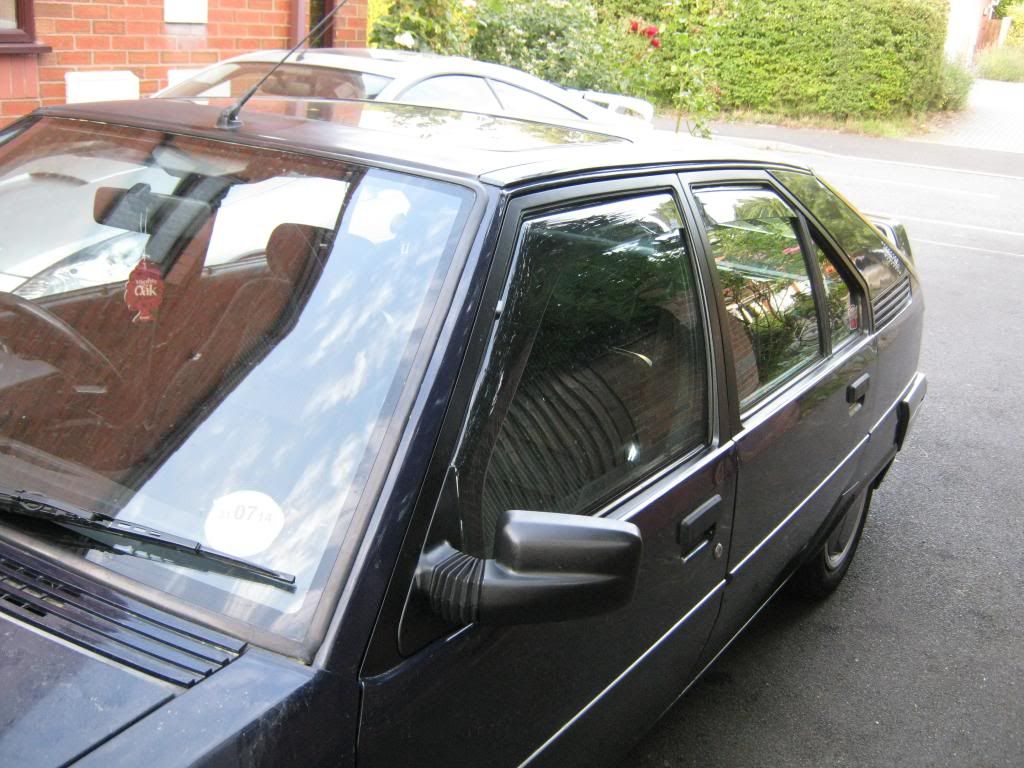 No pictures of this, but I also had to adjust the clutch as the car was getting increasingly hard to get it in to gear. This was because the locknut on the adjuster was loose, of course! Not difficult though and now the gear change is smoother and it no longer crunches going in to reverse. I also bought and fitted some new front speakers, as the originals were starting to fall apart. 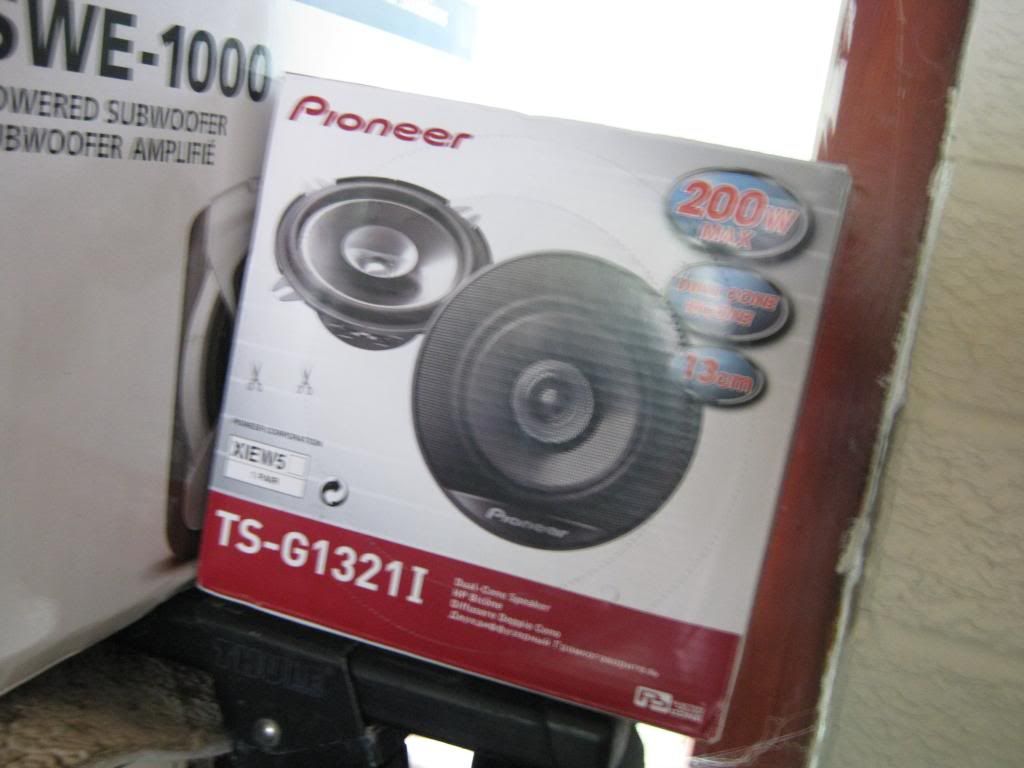 Then today I got on with a bit of wet flatting and polishing, which seems to have done the trick on the roof. 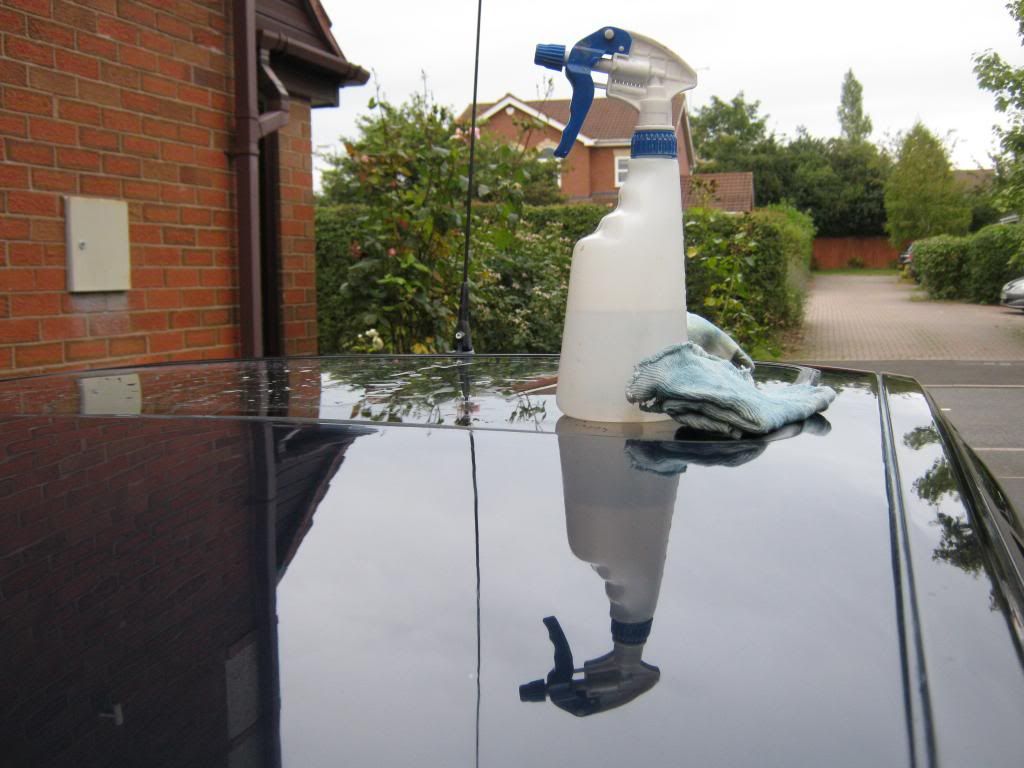  I also fitted a replacement wiper motor that I very kindly got donated to me from a scrap BX. It took a friend of mine to point out that the current wiper motor had a lot of play in it, and comparing the two it was evident that mine was in very bad condition. 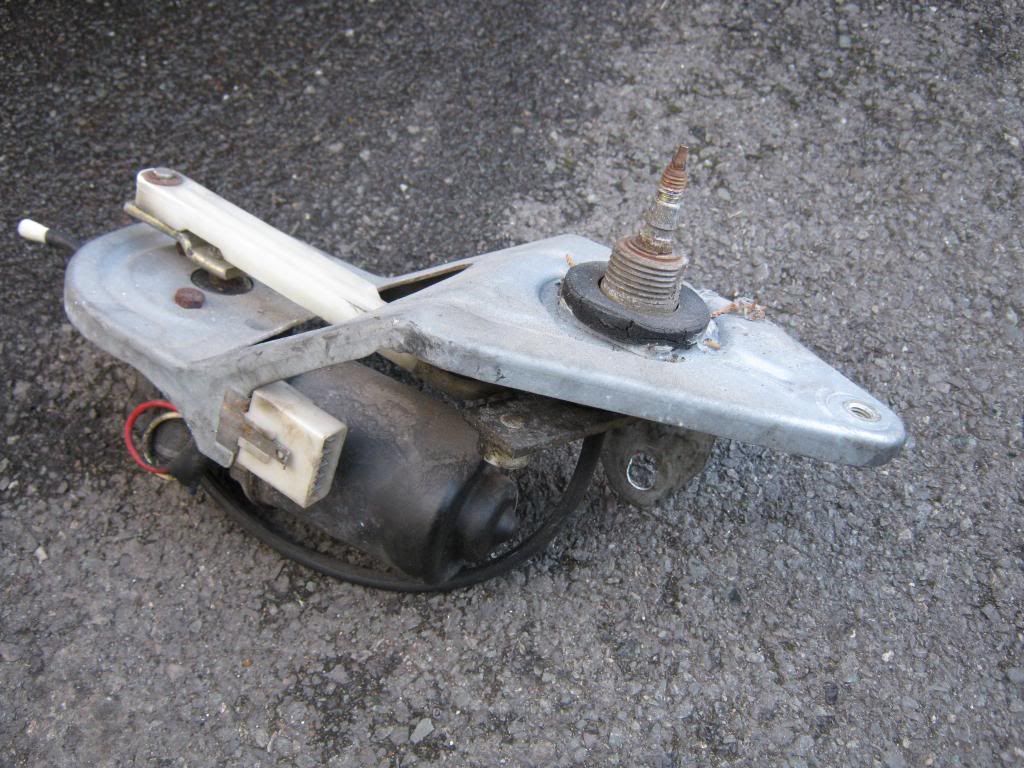 Gave the car a good wash at the end of the day after the last couple of weeks painting had given it a lovely coat of dust.  Aaaaaaand we're done. Thanks for reading if you made it this far! |
| |
|
|
|
|
|
|
|
Sept 14, 2013 21:52:15 GMT
|
|
Not normally a fan of these, but remember a neighbour having one, so they are intriguing! Love the thread, you seem very thorough with your work, just like myself. Ill keep a eye out for updates, Charlie.
|
| |
|
|
rob963
Part of things

Posts: 37
Club RR Member Number: 97
|
1993 Citroen BX 19TXDrob963
@rob963
Club Retro Rides Member 97
|
Sept 15, 2013 12:52:02 GMT
|
excellent work on the roof bud! looks good in person too  |
| |
|
|
MrOtter
West Midlands
"Your car is your story, so don't let someone else write the book." - Moog
Posts: 281
|
|
Sept 25, 2013 21:24:07 GMT
|
Teeny weeny update - there wasn't much meat left on the front pads and the discs had quite a lip on the edges, so I fitted new front discs and pads at Area 52 last weekend. Old: 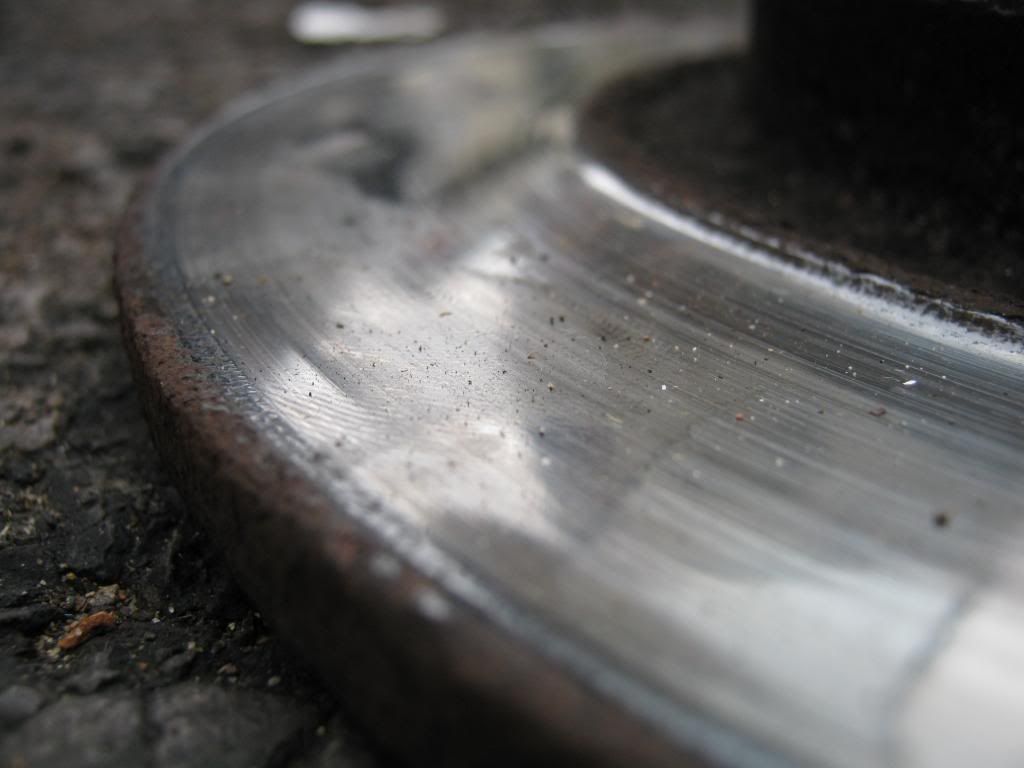 Shiny: 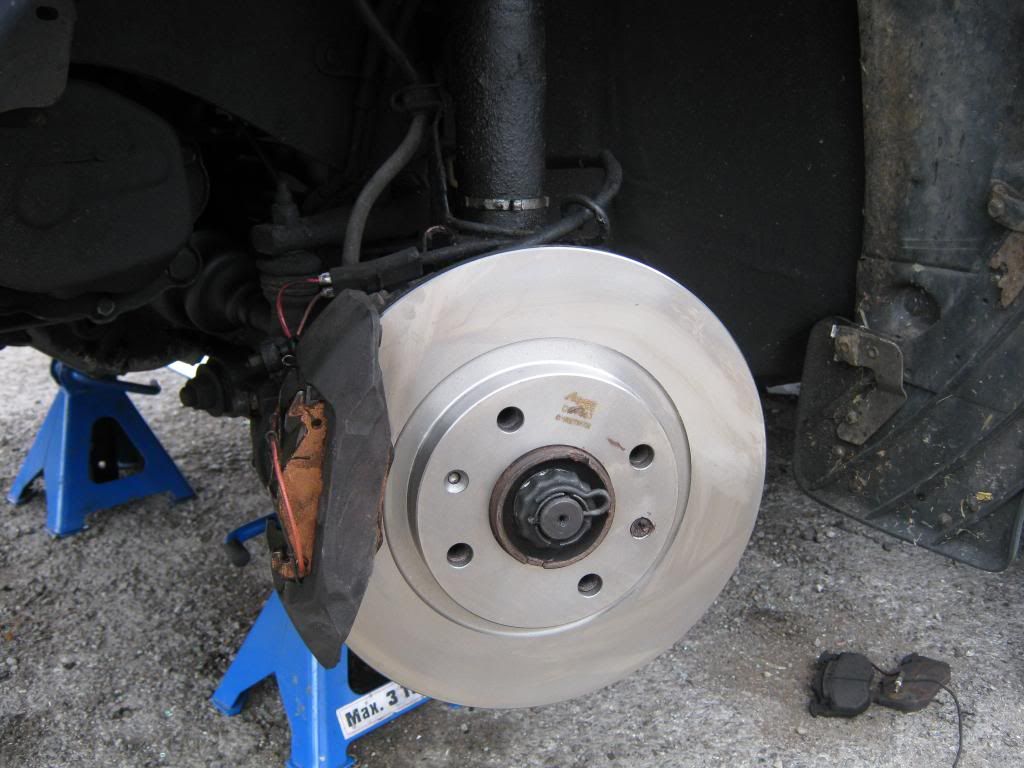 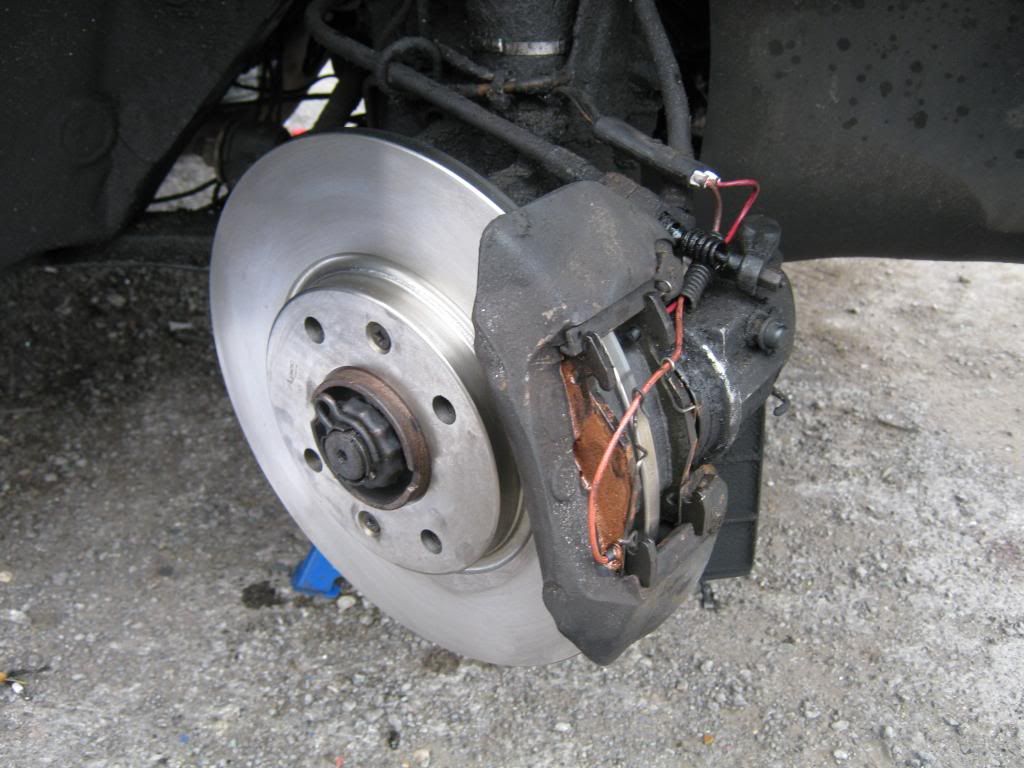 All went fairly smoothly, only hampered slightly by a seized disc retaining screw that had to be drilled out. Lucky it's not really needed so the stub of what's left shall be in the hub forever. |
| |
|
|
MrOtter
West Midlands
"Your car is your story, so don't let someone else write the book." - Moog
Posts: 281
|
|
|
|
Little update - me and rob963 went to Harry Buckland's scrapyard a couple of weeks ago, with a tip off of there being a red BX estate in there. Rob was interested in some parts because he also has a red BX estate, and I was just there because I knew I'd see something I wanted, even if I couldn't think of anything beforehand. You know how it is, you start looking at bits and think "oh yeah, I need one of those". So we got there and got told where the car was, and luckily we found that it was still pretty much in tact (minus the top half of the engine). After picking out a few little screws/clips that I knew I needed, I also pillaged the clocks and a rear seat belt. Not much, but hard bits to find when there aren't many of these cars left, and not too bad a price at £18 for the lot. I bought the rear seat belt because one of mine is quite frayed - not dangerously so, but it was enough to be an advisory on the last MOT and it doesn't look very nice. The clocks I bought because the trip counter on this set actually worked! I'd never have known if it'd worked or not, if someone had reset the mileage before it got to its final resting place, but luckily it was still on 900 something miles. I got in the drivers seat and looked in front of me and thought "hmm, I wonder..." so I pressed the button and the numbers magically pinged back to 0000 - bingo! Today I got round to making use of those clocks. First thing I did was to go and get the original clocks out of the car, then remove the speedo unit (with broken trip counter): 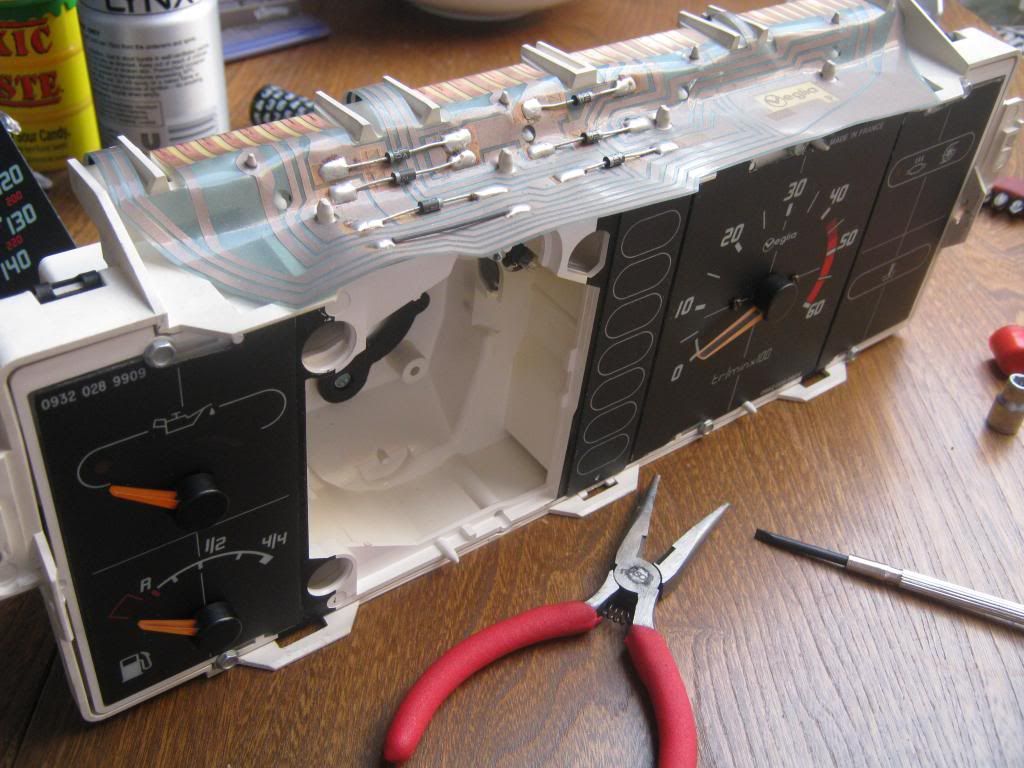 Then I pulled apart the clocks from the scrapper and removed the speedo unit (with working trip counter). I then switched over the mileage counters, so I didn't add on 50,000 miles to my cars mileage! Counter out of fully functioning unit: 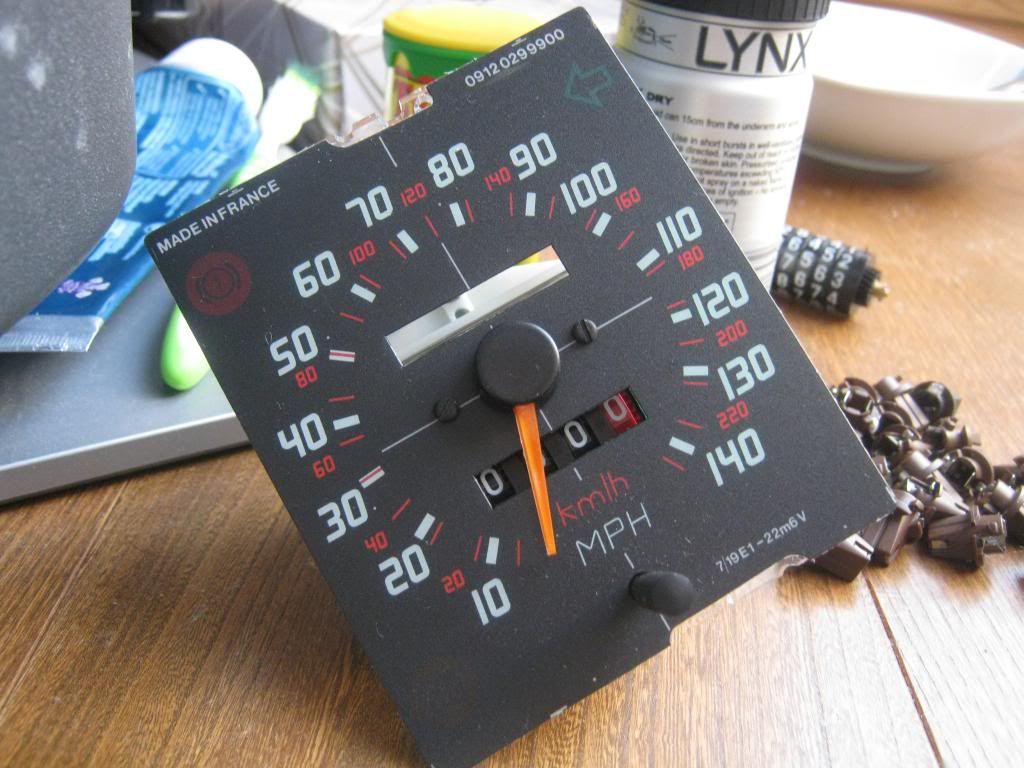 Then removing the counter from the original unit, using a bit of tape to keep all the wheels in the right place: 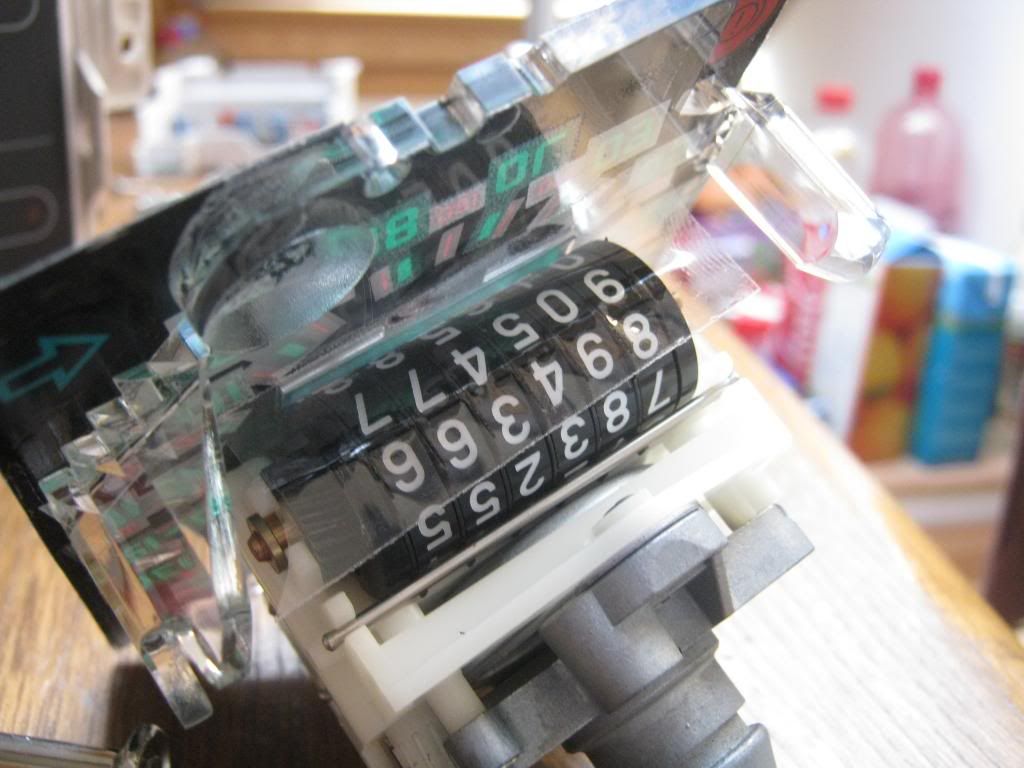 Screw it all back together, and ready to go back in the car: 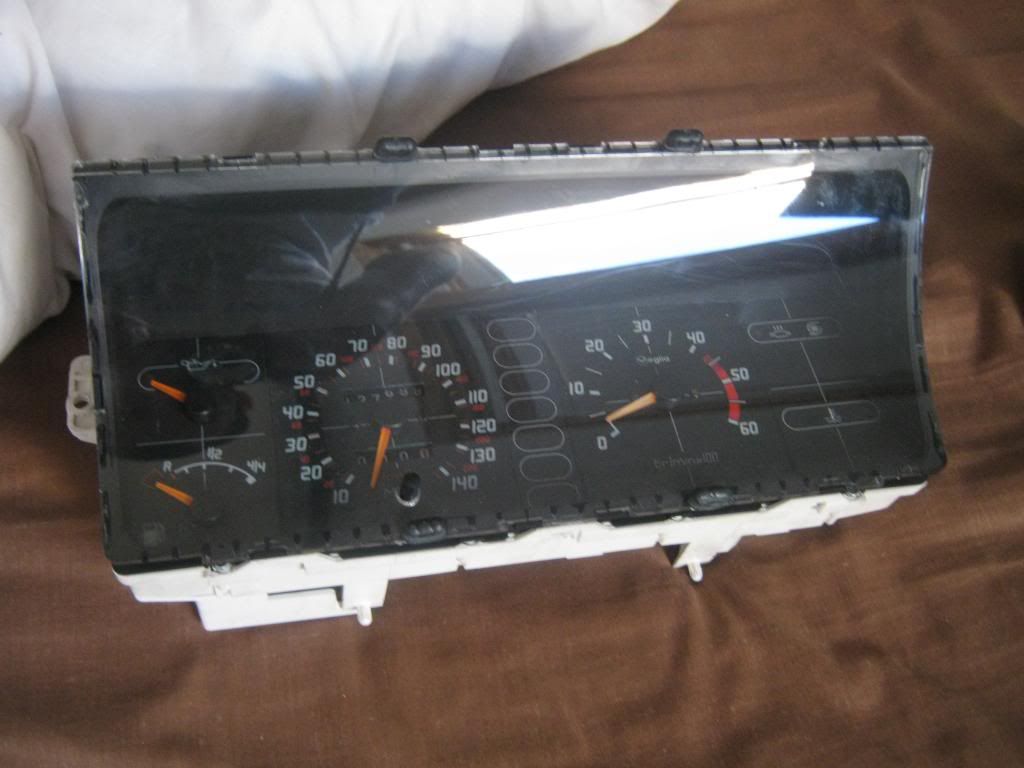 So I now have a fully functioning trip counter - a luxury I've never before experienced. Haven't fitted the seat belt yet, but that'll only take 10 mins when I get back to my garage at home in a couple of weeks for a tinkering session. The car is now due an oil change, and overdue a coolant change, so I'll also get those done in a couple of weeks. Thanks for reading. |
| |
Last Edit: Oct 31, 2013 1:53:59 GMT by MrOtter
|
|
eternaloptimist
Posted a lot
Too many projects, not enough time or space...
Posts: 2,578
|
|
|
|
|
Love these - you're doing a great job with it.
|
| |
XC70, VW split screen crew cab, Standard Ten
|
|
qwerty
Club Retro Rides Member
Posts: 2,410
Club RR Member Number: 52
|
1993 Citroen BX 19TXDqwerty
@qwerty
Club Retro Rides Member 52
|
Oct 31, 2013 18:10:47 GMT
|
|
My wife doesn't want me to lower my next daily. These hydro Citroen's are getting more and more tempting, especially seeing how good they look when they're nice and tidy.
|
| |
|
|
Rich
Club Retro Rides Member
Posts: 6,251  Club RR Member Number: 160
|
1993 Citroen BX 19TXDRich
@foxmcintyre
Club Retro Rides Member 160
|
Oct 31, 2013 18:23:48 GMT
|
My wife doesn't want me to lower my next daily. These hydro Citroen's are getting more and more tempting, especially seeing how good they look when they're nice and tidy. You missed a spankers tidy GTi on eBay for peanuts the other day too  get on it  |
| |
|
|
MrOtter
West Midlands
"Your car is your story, so don't let someone else write the book." - Moog
Posts: 281
|
|
|
|
Haven't been doing much car-wise lately due to uni getting in the way, although I did manage to somehow buy an E30 Touring project to mess around with - retrorides.proboards.com/thread/159899/1989-bmw-325i-touring-e30 - hopefully I'll be fixing that up over the summer to use as my next daily, then selling the BX in July-ish if I can. So if anyone thinks they'll be interested in buying this lovely old barge in about 7-8 months time then let me know! Before I get on with todays update, I noticed I didn't mention that I bought some extra mudflaps on ebay a couple of months ago. I fitted them to the rear of the car so that I had flaps all round, as I'd always thought the car looked a bit odd with only front mudflaps. I know they don't match the front ones, but at least they say Citroen on them! 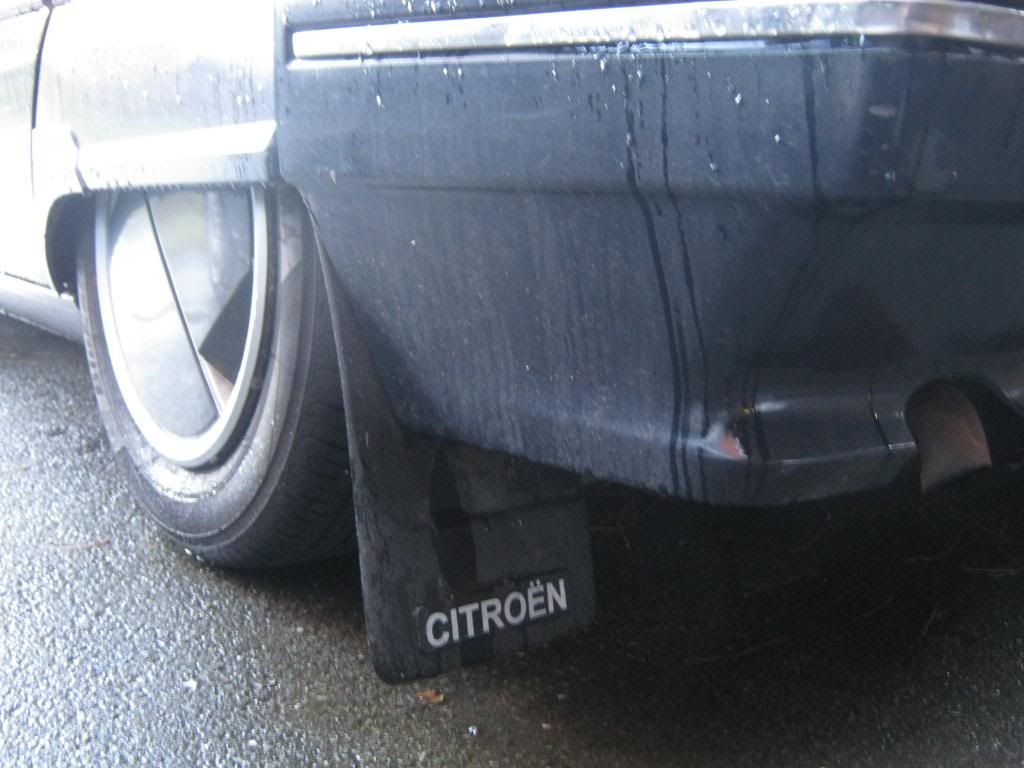  I've been up to a few things today now that I'm off uni for Christmas and have some spare time. TopJobHobNob on here is breaking a 16v BX, so I took the opportunity to buy a couple of bits off him that I've been wanting for a while, to freshen the car up a bit. The bits I bought off him arrived a couple of weeks ago and I got round to fitting them today. Firstly, is this rather random looking piece of rubbery plastic. 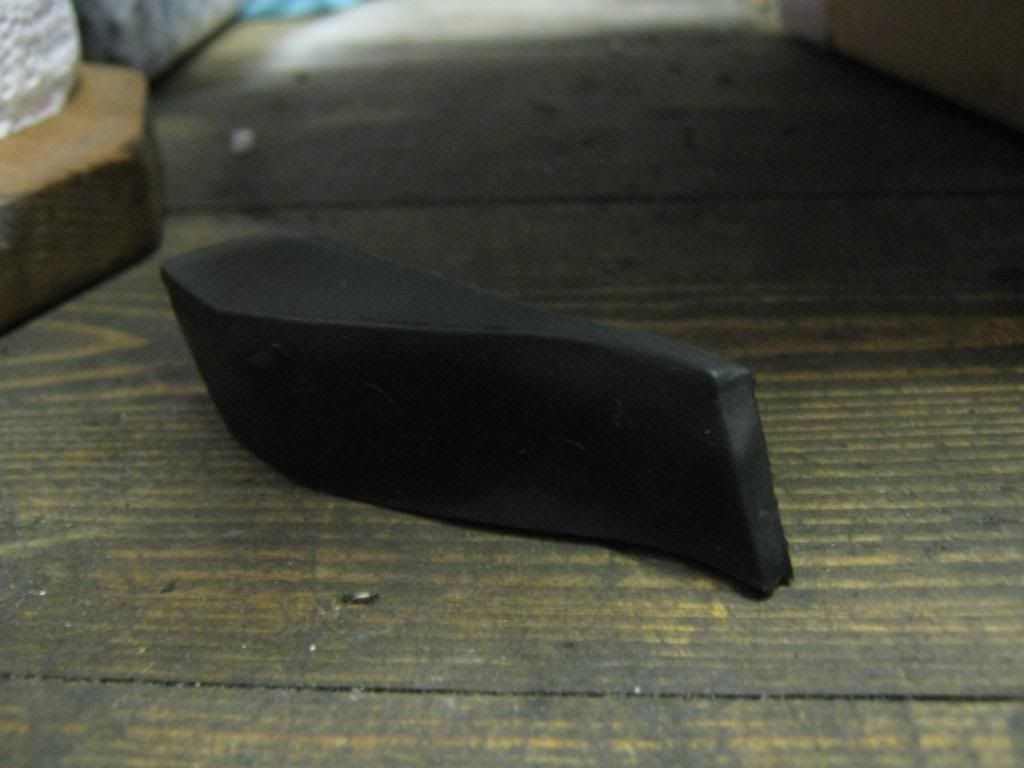 It sits on the top corner of the front bumper as a finishing piece - it's one of those small missing things that's bugged me more and more as time went on. You can see here where it should sit, on the blue bit of plastic protruding from the top corner of the bumper. 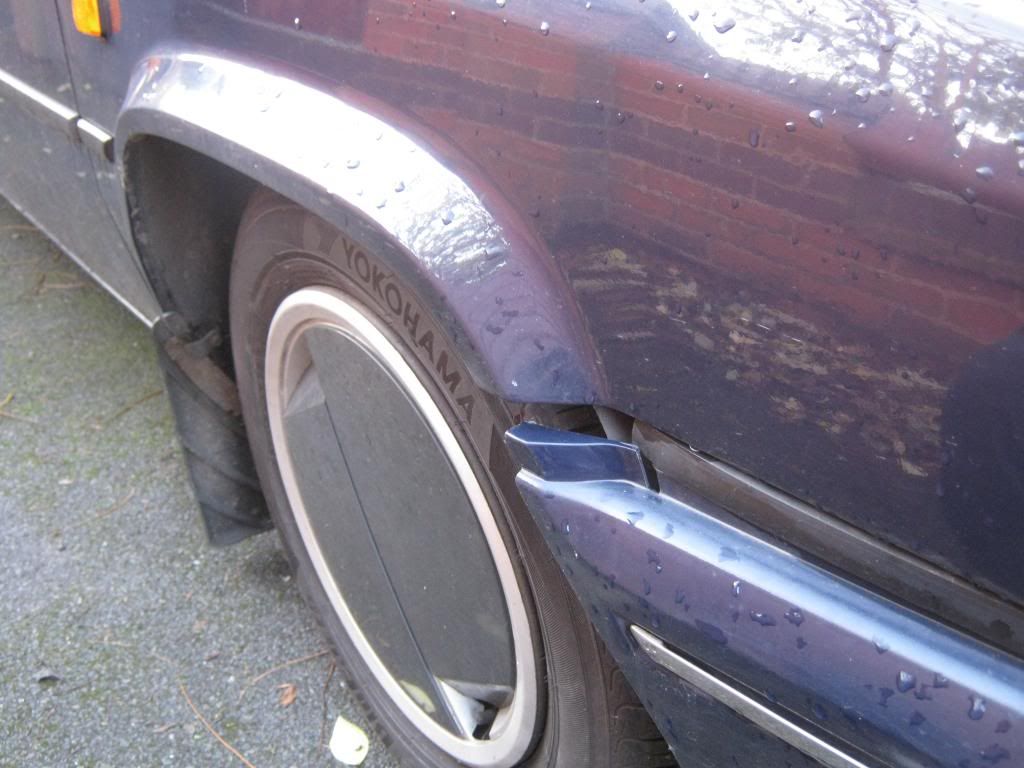 It's just a push fit on there, so in about 30 seconds I had the replacement slipped on to the car - not exactly a transformation but it needed doing in my eyes! 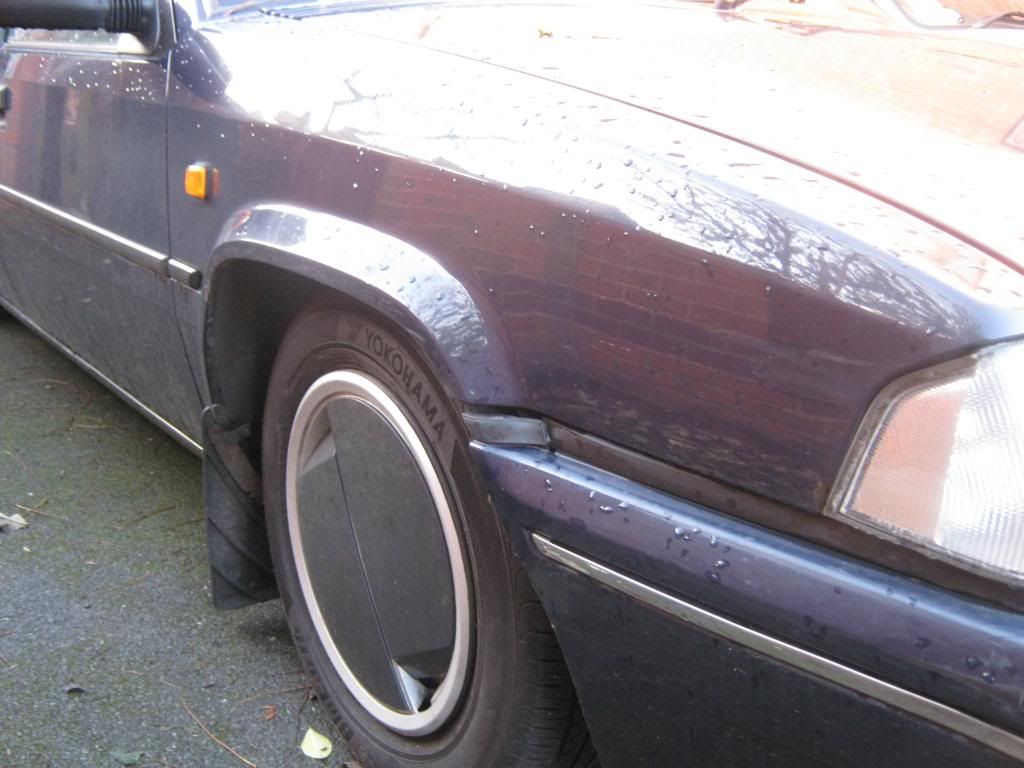 I'd also got a replacement rear demister switch, as the one in the car originally always had very temperamental light bulb wiring which basically meant the bulb would never light up. This meant that I had no idea whether the heated rear window was on or not - again not a massive issue but one of those annoying little things.  Fitted in the car, and tested - yay it lights up! Fully working switch! 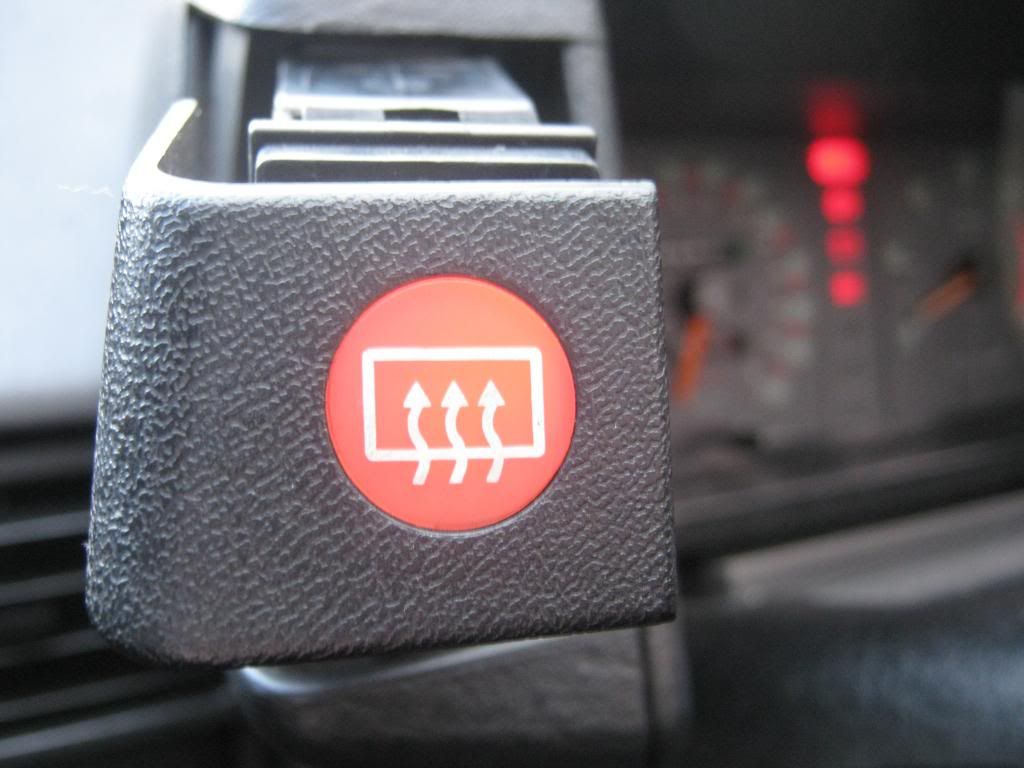 A slightly odd thing I noticed doing this was the switch I pulled out of my car had the connection on the back 90 degrees out of sync in comparison to the replacement switch. Not sure if that means one or other of the switches has been messed with in the past, but I just thought it was odd! 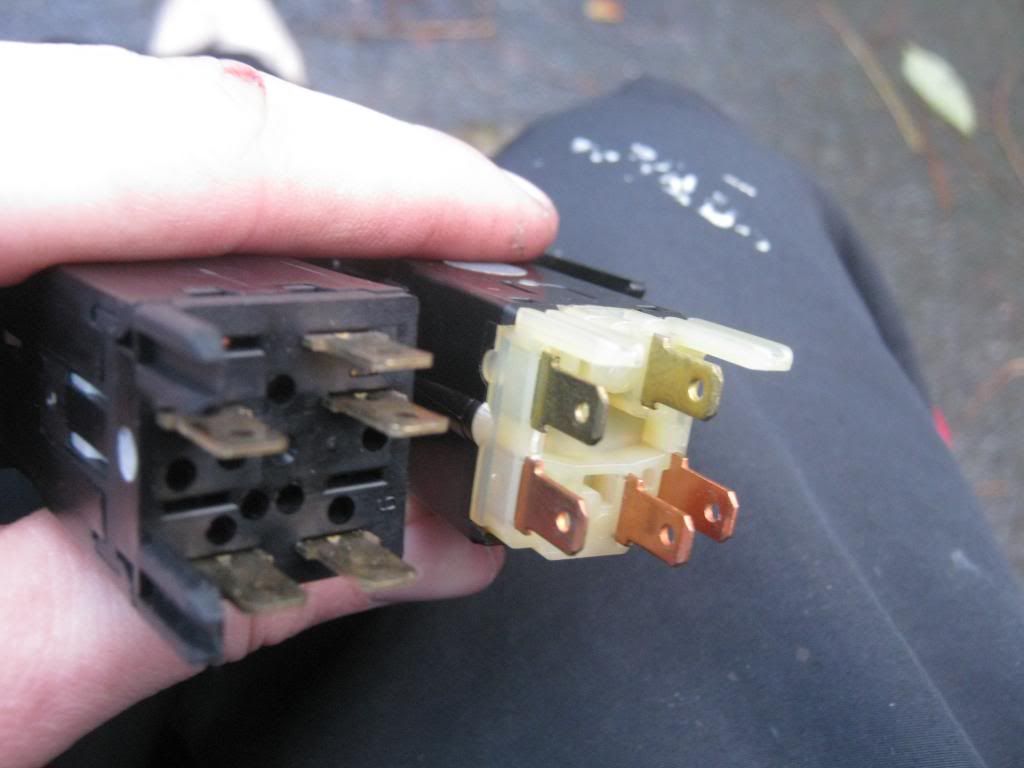 Then the final thing I got sent to me from the breaker was a nice little upgrade - a one-touch drivers window switch/loom. Only the top spec BXs came with these automatic window switches, and seeing as my car is a mid-spec model it only had the lowly window switch that you have to hold constantly, which of course is too much of an effort in this day and age. So, I got the switch itself, an enormous black relay box, and all the relevant wiring needed to make the switch work. It's all simple plug and play stuff, but the switch wiring and connector plug is different so needed swapping over. 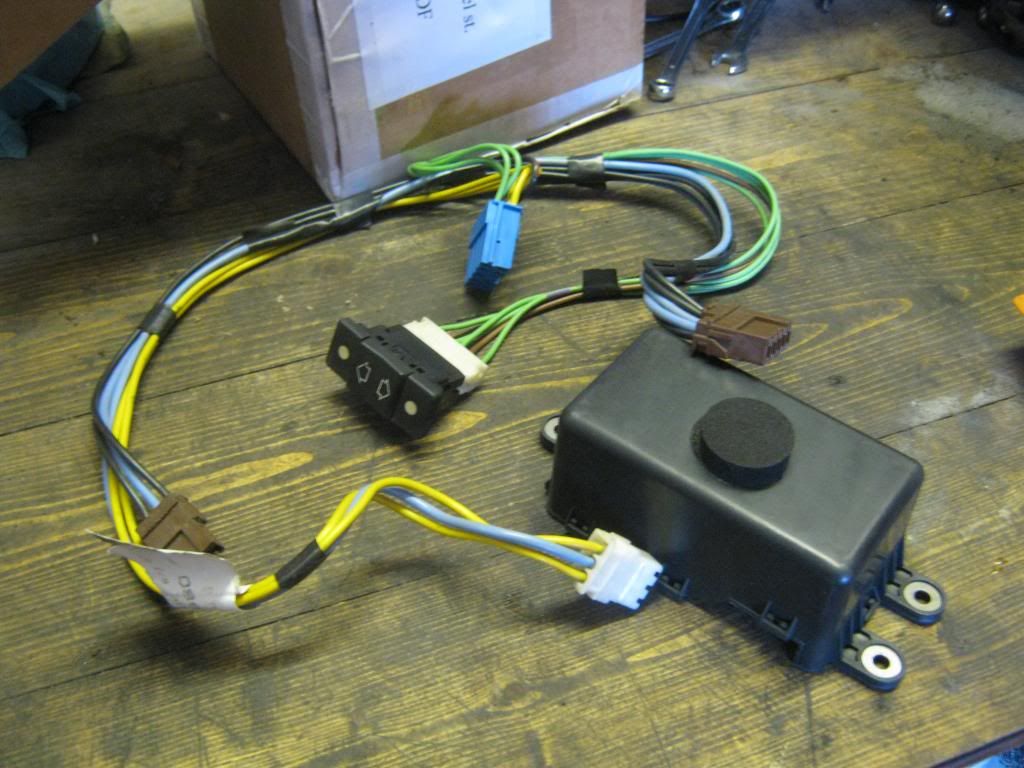 So I pulled the door card off and split the front plastic section from the main card part to get at the wiring/switches. 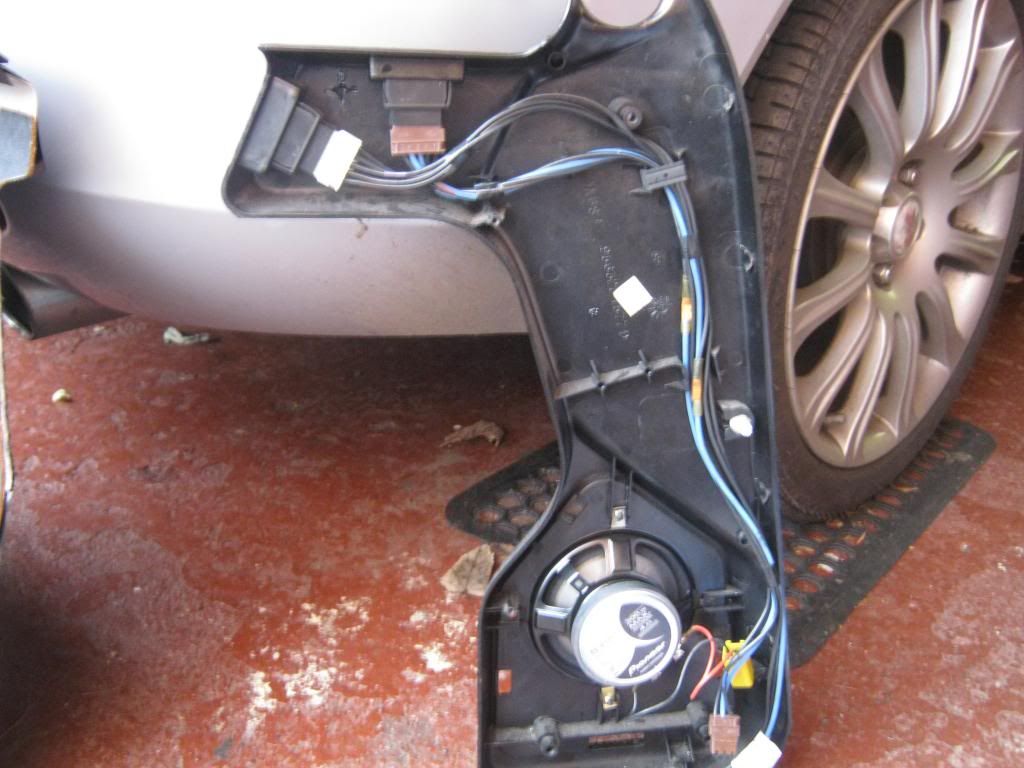 Whilst I was there I remembered that I had something else to fix. The plastic section of the door card, shown above, is held on the rest of the card with three self-tapping screws through the card and in to raised mounting lugs on the back of the plastic section. The upper one of these has always been snapped off (but still there thankfully) meaning that the top of the plastic section has been free to flap about and stick out and be generally annoying/messy. I'd tried supergluing it in place in the past, but it just snapped off as soon as I tried to screw a screw in to it for the first time. None-the-less I thought I'd give it another go. Hopefully you can understand what I'm talking about from the pictures below, it's difficult to explain... The plastic lug was snapped off flush at the surface, and there's a clamp in place in the photo to hold the lug in place while the glue dried. 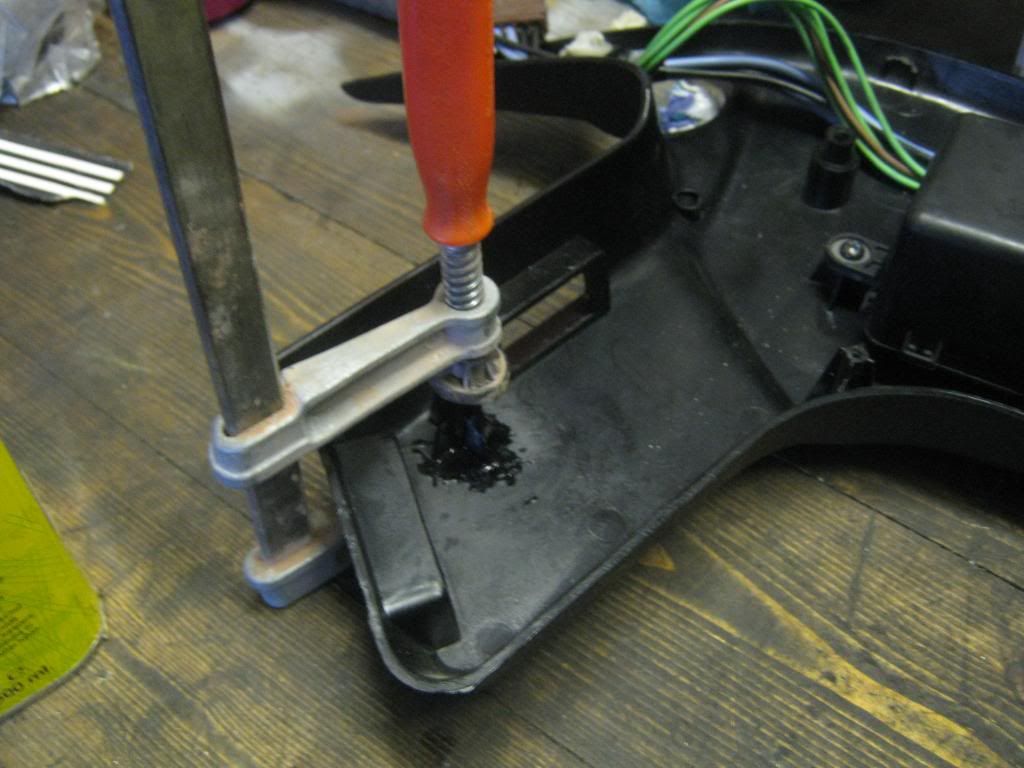 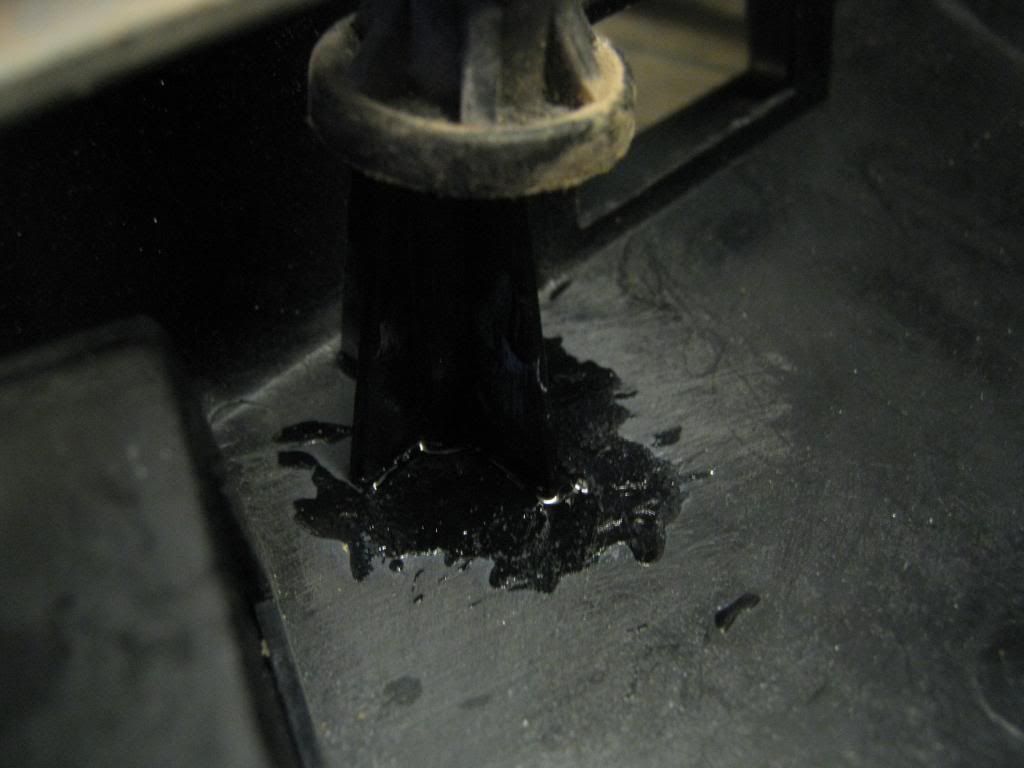 Whilst aimlessly waiting around for the glue to dry, I had an idea on how to fix the lug in place a bit more securely - fibreglass. I still had an old fibreglassing "kit" lying around that I'd bought from Halfords 3 or 4 years ago to cover up the rust holes on my Mini - bad habits short lived and long gone I can assure you! So I got to work and ended up with this monstrosity. 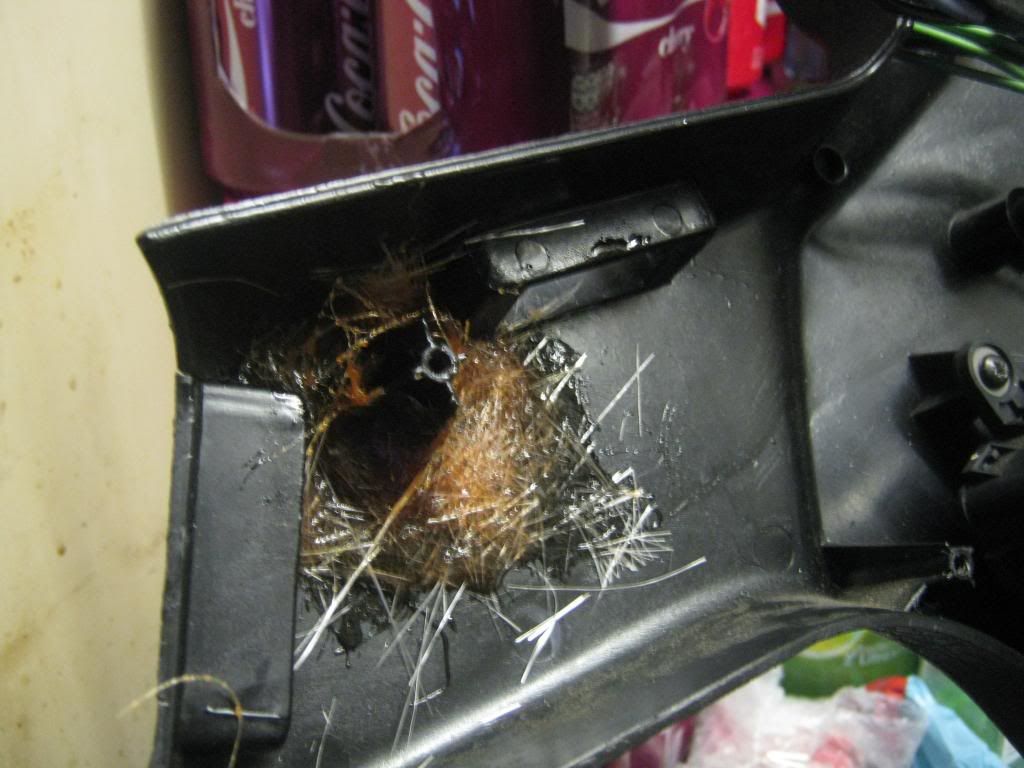 It worked though, the lug was held in place solid as a rock, so I'm quite pleased with myself for sorting that. It now means that the big plastic part of the door card is now seated flush against the top of the vinyl section of the card. Neat. So, after that I had to finally install the wiring for that automatic window switch. The wiring itself was easy, just a straight swap for the old, however I need to find where to mount the big black relay box. I'd read that there were factory mounting holes for it, that were obviously just left unused on the lower spec cars like mine. So I spent about 15 minutes examining the door itself and was quite confused when I couldn't find any spare holes, or anywhere that looked like it would fit. Then I wandered back over to the bench (where the door card was) and I noticed something... 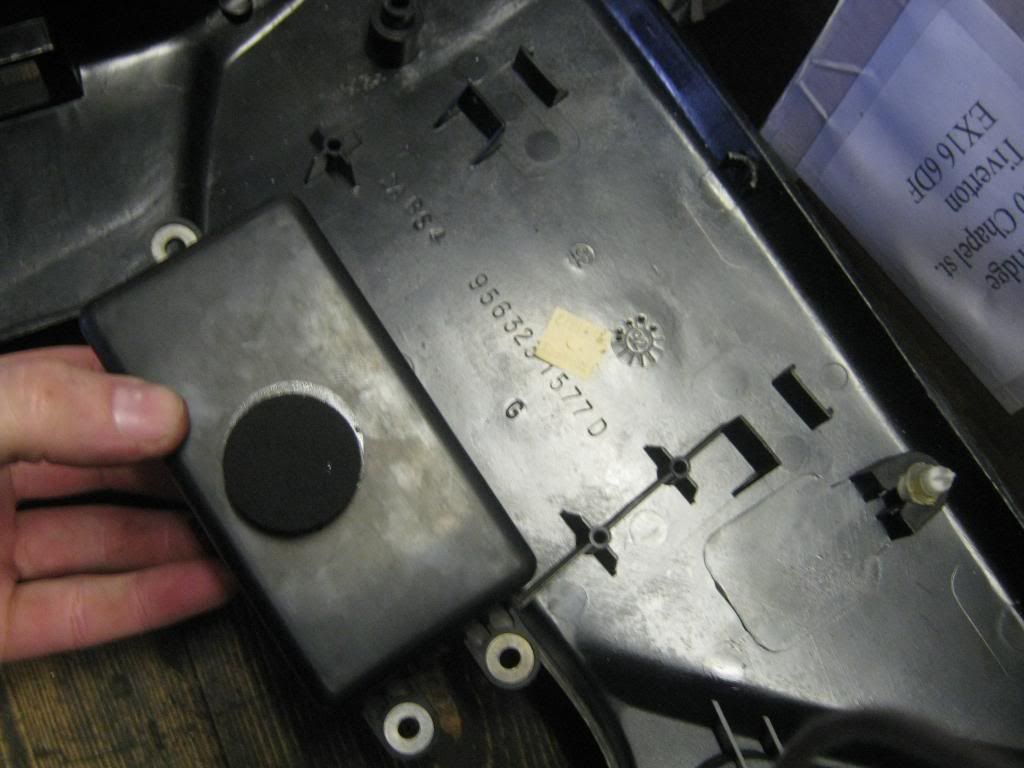 Yep, that looks about right. The box sits on the back of the door card, not in the door! Silly me. So, three self tappers and that was in place too. All assembled with the new switch in place. 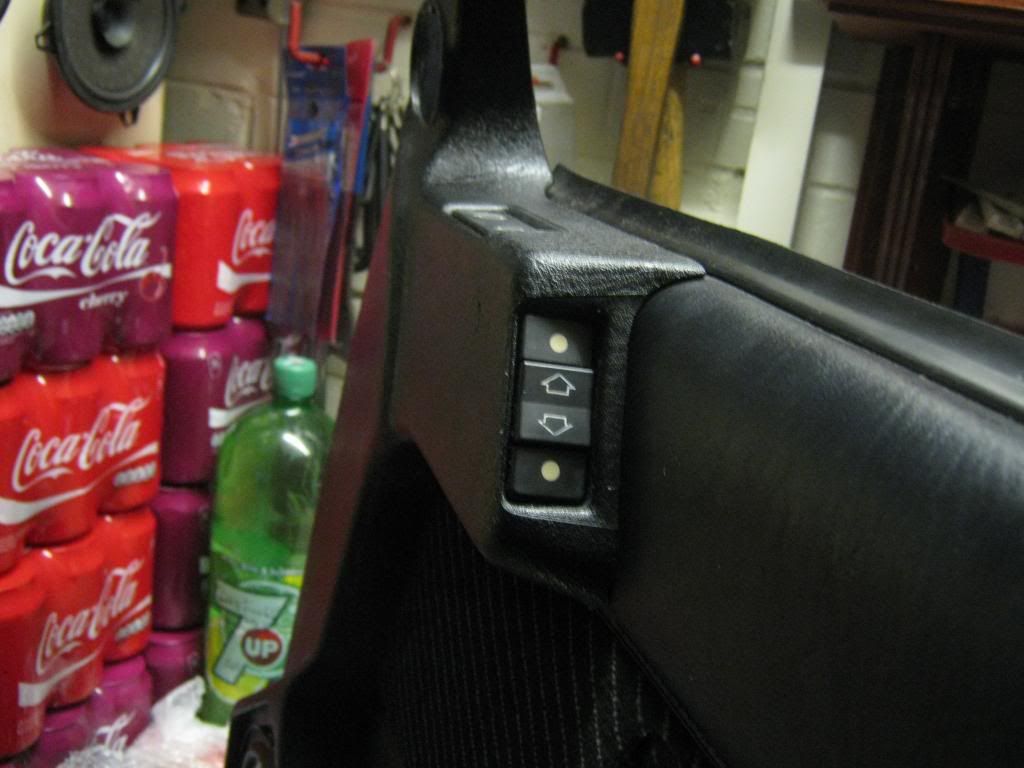 It got dark by the time I'd gotten the door card back in the car, but I'm pleased to say it works perfectly and gives me another avenue of laziness to explore now that I can watch the window go up and down all by itself! That's all for now folks. Thanks for reading. |
| |
Last Edit: Apr 20, 2015 12:14:02 GMT by MrOtter
|
|
|
|
|
Dec 23, 2013 13:16:22 GMT
|
Great progress there with the BX. My dad had a GTI in the 90's and I want a diesel one someday myself. Keep up the good work |
| |
Project - 1990 Trabant 601 Daily - 2006 Saab 93 |
|
|
|
MrOtter
West Midlands
"Your car is your story, so don't let someone else write the book." - Moog
Posts: 281
|
|
Jan 16, 2014 20:29:42 GMT
|
Great progress there with the BX. My dad had a GTI in the 90's and I want a diesel one someday myself. Keep up the good work Cheers, I've read about how much power the GTIs have, I bet they'd be a right laugh! Getting thin on the ground now-a-days, much like all models of BX unfortunately. If you want a diesel one someday "soon", I'm going to be selling this sometime in the next few months, hint hint The engine knocked like crazy during start-up and at idle ever since I bought it, and I'd only recently traced it to a disintegrated lower engine mount. I had a mission of a job changing the mount (actually more like an engine steady bush) over Christmas. It's a metalastic bush and a press fit into an alloy housing that's also some sort of support for the r/h drive shaft, with the shaft passing through the housing. The proper way to do this job is to pull the drive-shaft out of the diff, un-bolt the housing and use a press to get the old mount out and the new one in. However, it was apparently possible to do it in-situ underneath the car, without needing to remove the shaft, so thought I'd give it a go... This is the new mount/bush. 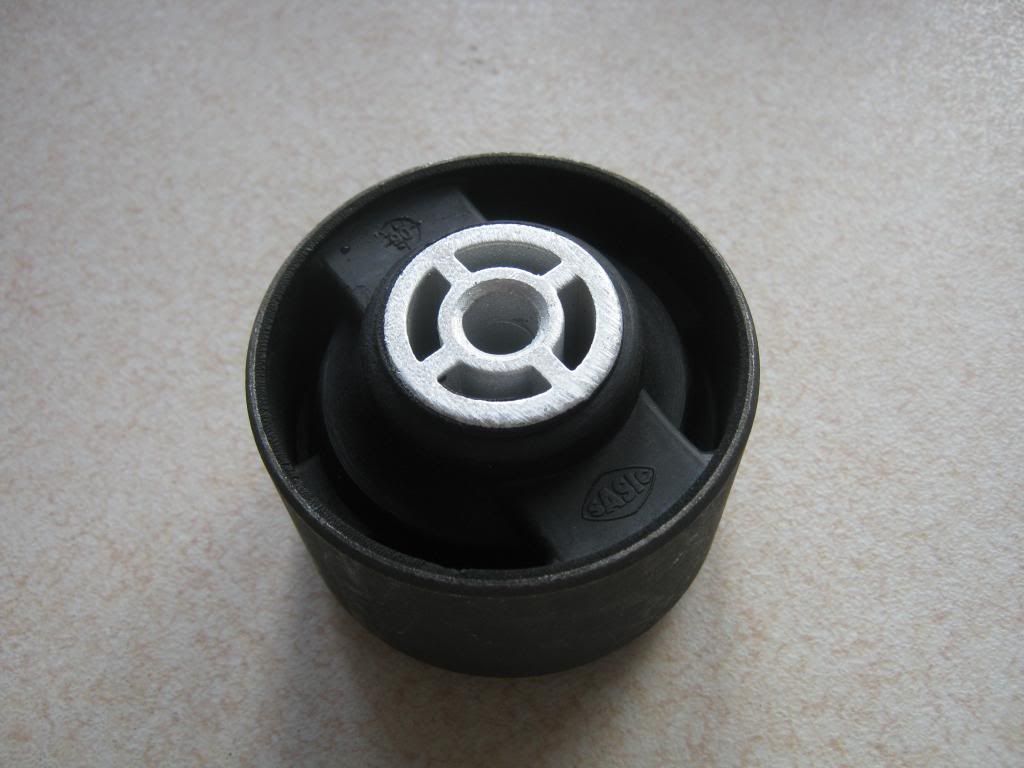 I got the car up in high and on to some ramps. 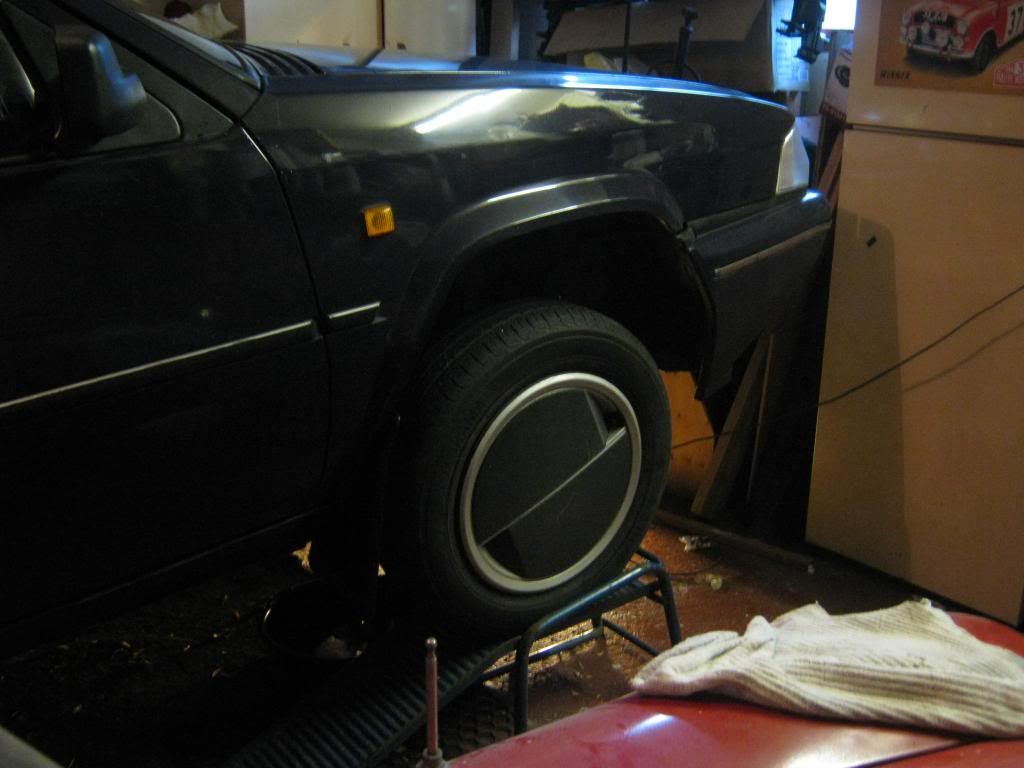 Then climbed underneath to have a look at what needed to come out. Not pretty... 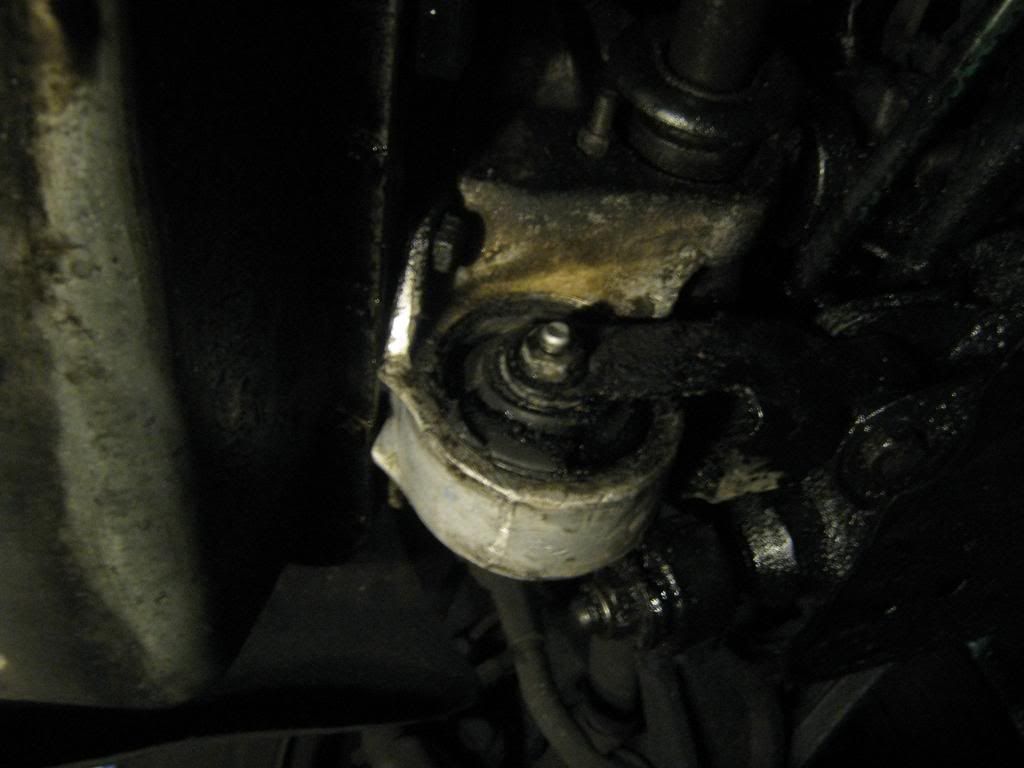 So I unbolted the bracket that holds the engine to the subframe, and got a ratchet strap round the driveshaft and up to a hole on the front subframe to swing the engine out the way so I had room to get the bracket and the old mount out. 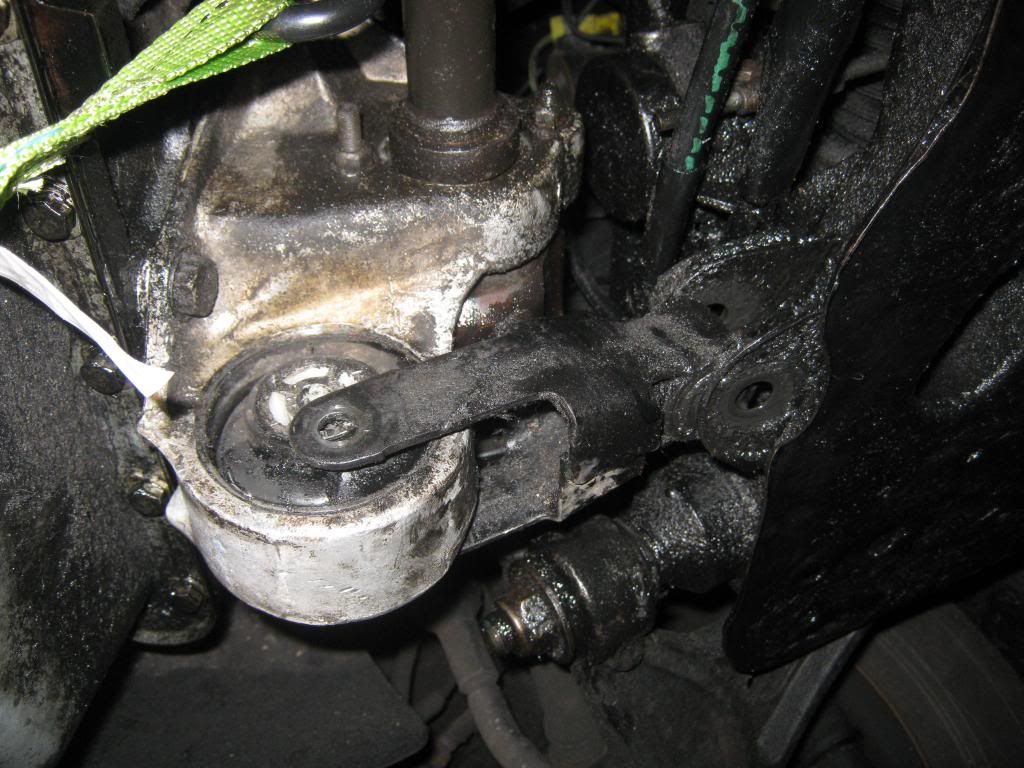 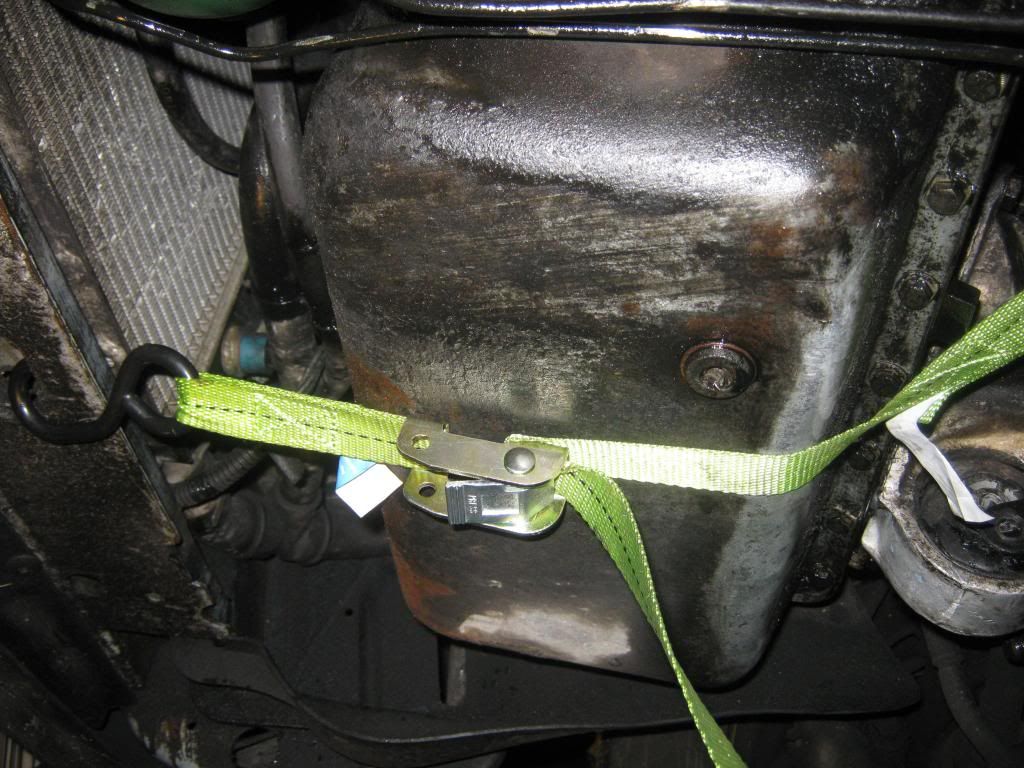 I then fashioned a flimsy "puller" to rip out the centre of the mount, which was already half delaminated from the outer metal band anyway. 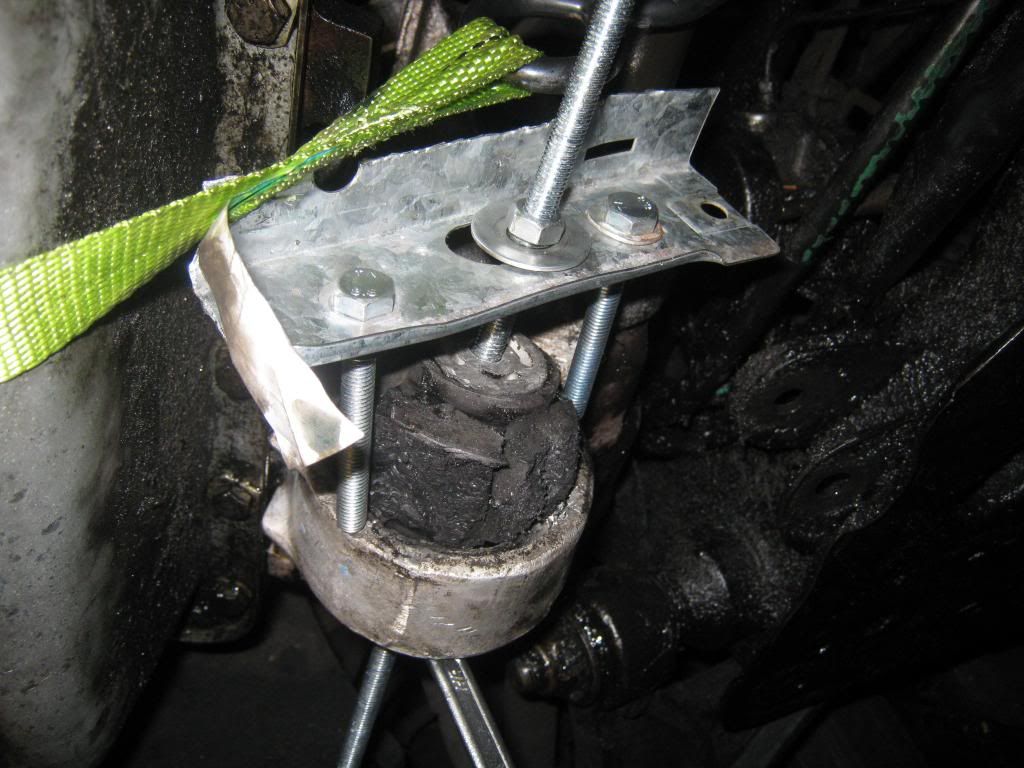 I then spent many hours with a hacksaw, hammers and punches, etc. to get the outer ring out of the housing. It took a beating but I got it out in the end!  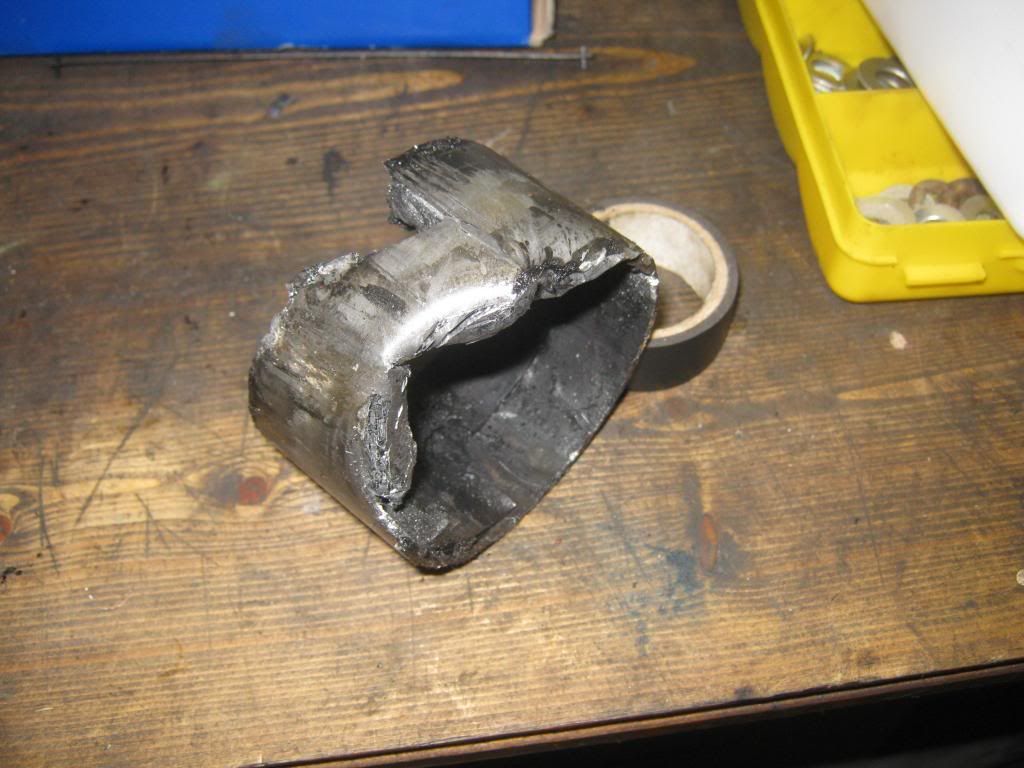 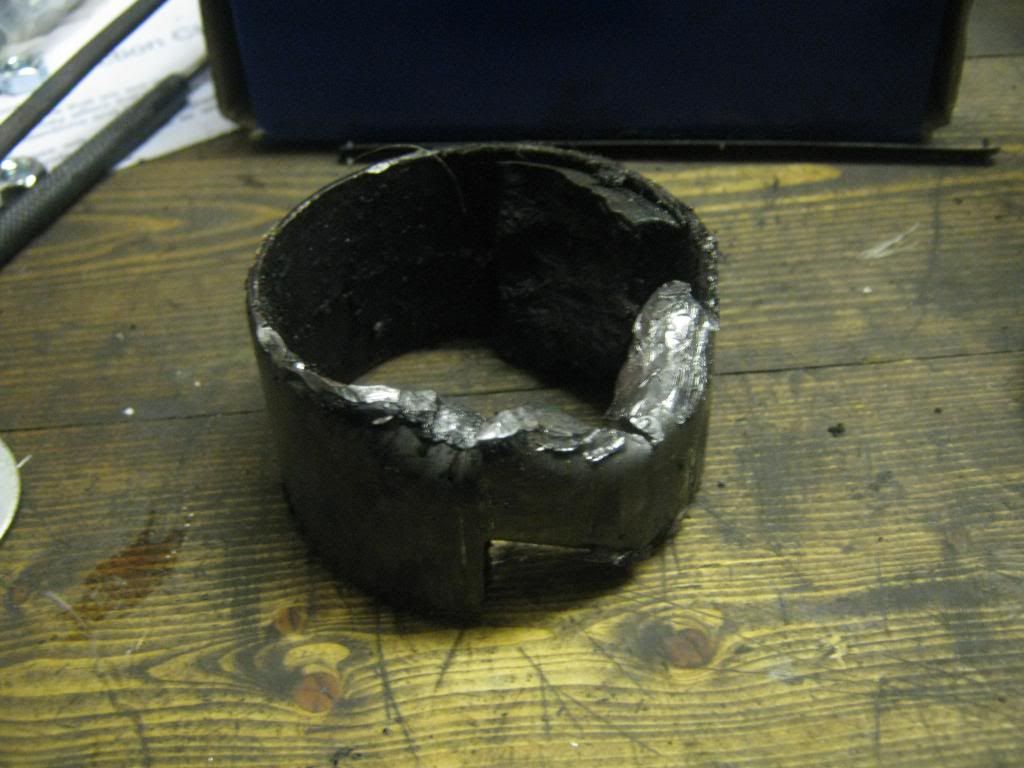 I'd frozen the new mount over night to try and make it a bit easier to get in place, but that turned out a bit pointless in the end - there's a reason you're meant to use a press to get the new one in... I don't have any pictures of me getting the new one in, but it took me a couple of hours messing around with hammers and another flimsy puller I fashioned to try and squeeze the mount in. I got there in the end, winding up the puller as much as I dared before the threads fell off so I could get some pressure on the mount, then tapping it with a lump hammer to knock it in a bit at a time. Funny thing is, now the whole car vibrates like a massage chair instead of constantly knocking at you.  |
| |
Last Edit: Jan 16, 2014 20:34:06 GMT by MrOtter
|
|
|
|
|
Jan 16, 2014 20:40:32 GMT
|
|
Ok, a BX is now on my list of possibilities for the next car!
|
| |
|
|
|
|
|
Jan 16, 2014 21:20:11 GMT
|
I bet you could have cracked the lower balljoint, pulled the shaft out, whipped the casting off into the oven for a bit, pushed the bush in by hand and got it all back together in the time it took to hammer the bush in, it is indeed preferable and quicker to do it the prescribed method tbh! (or if you're a hoarder and have been into French things for years, you have a spare casting you can fit a bush into ready ) loving the DIY pullers you made! did you check the fork bush too? |
| |
|
|
Sinky
Posted a lot
Run Baby Run......Please!
Posts: 1,395
|
|
Jan 16, 2014 21:46:17 GMT
|
|
Your doing a great job.
Iv owned about 9 or 10 Bixers all diffrent models.
I had 3 x 16valvers at one time .
I actually drove one from Edinburgh to Andulucia Spain via France,Italy and Monte Carlo
The wife 2 kids me 2 x mountain bikes and everything we owned in the boot and in the roofbox.
A silver BX 16 VALVE never missed a beat. Fantastic cars.
.
|
| |
2001 Volvo XC70 wagon
2003 Piaggio X9 Evo
|
|
|
|
|
Jan 24, 2014 17:24:12 GMT
|
|
What a superb thing this is and with all the jobs done to make it really exceptional. You don't even really have a rust issue, that rear cross member is astonishingly good. You'll regret selling it if you still decide you must, they really are an unbeatable machine for comfort, economy and a surprising turn of speed when you feel like putting your foot down.
In the unlikely event - due to a bit of a rubbish old car overload at present - that I'm in the market for a BX when you do sell I'd definitely be interested in this one, I'm thoroughly impressed.
|
| |
|
|
MrOtter
West Midlands
"Your car is your story, so don't let someone else write the book." - Moog
Posts: 281
|
|
Jan 24, 2014 17:31:37 GMT
|
|
As it happens, I'm actually trying to get rid of it as soon as possible. I'm fed up of the air leak in to the fuel system that I can't find the cause of (that is causing it to stall every 5/10 mins), it needs a new accumulator sphere, there's a small LHM leak from somewhere, along with at least one oil leak, and I'm getting a bit bored of it anyway. I know it seems silly seeing as I've spent such a long time making it so cosmetically tidy, but I can't justify spending more time/money on a car that's almost worthless anyway.
My Aunt has first dibs on it, as she used to have a couple some years ago and wouldn't mind one again, but if she doesn't want it then I'll be trying to shift it through Area 52/Retro Rides before going to ebay. I know you say you have an overload of cars at the moment Mr V, but if you are interested then shoot me a PM.
|
| |
Last Edit: Apr 20, 2015 12:17:02 GMT by MrOtter
|
|
MrOtter
West Midlands
"Your car is your story, so don't let someone else write the book." - Moog
Posts: 281
|
|
|
|
Well, she's gone now chaps, so no more updates to this thread (from me at least!). Slightly sad to do all the work to it and let it go for peanuts, but I had some fun owning a quirky old Citroen; the satisfaction in knowing I've hopefully prolonged the life of the car by making it cosmetically tidy is a nice feeling too! Just a shame the engine developed such a persistent issue when I really don't have the time to be messing around with cars... oh well, onwards and upwards! She's in safe hands now, the engine will be back on form in no time, eh mrcarlos Time to look forward to doing up the E30 I think... |
| |
|
|


 get on it


