|
|
|
Oct 28, 2014 23:59:04 GMT
|
Nearly a month since the last update? Unacceptable... Costs are starting to mount up. I ran out of the welding wire I bought in August, and yesterday, I ran out of the welding wire I bought to replace it! To get things continuing, I bought some 50x50x3 angle. I'm using it to box in the ends of the cross bars on the ladder, as well as give me something to bolt the bird-cage to. The below are pics or what I did yesterday. I previously did the other side on Sunday, but forgot to take pics and covered everything in white paint. (you can see them later on. Again, some of the welds turned out great, others I'll need to clean and redo. I know most people won't see them, but at least I'll know they're done properly and are strong. 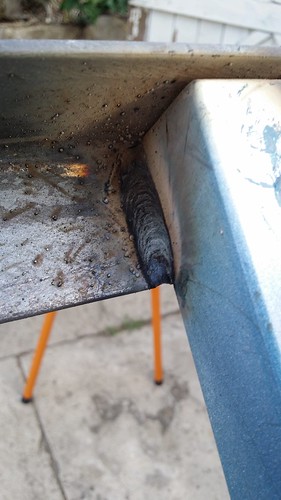 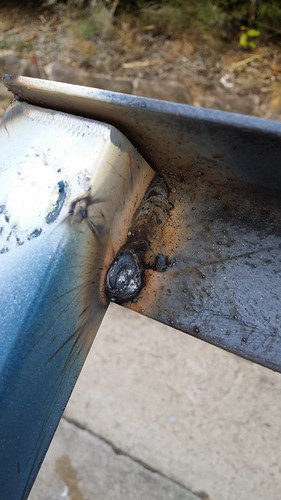  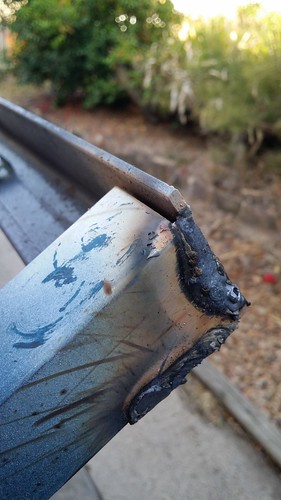  After the metal has cooled down and been cleaned. 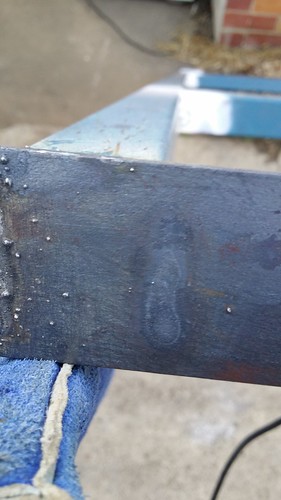 Slight blow-through I'll have to clean up and redo   Definitely need to fix this one, the penetration was crud.. 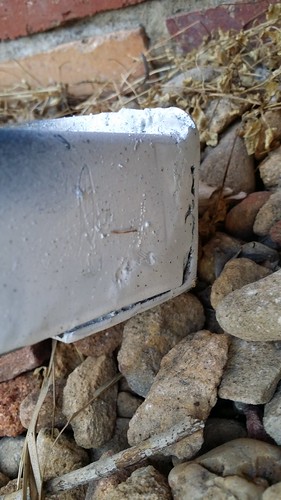 Attack the ends with a flap disc 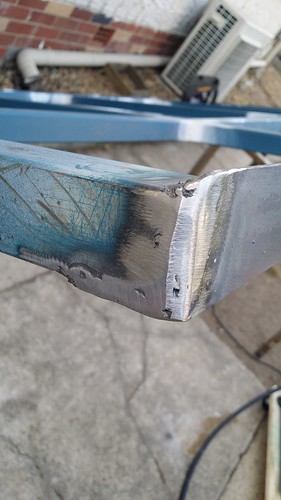  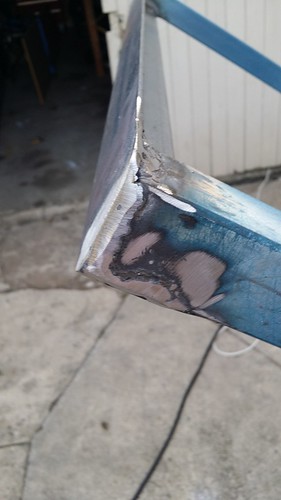 Unfortunately, the slight twist in the RH rail has caused the rear of the frame to angle upwards. 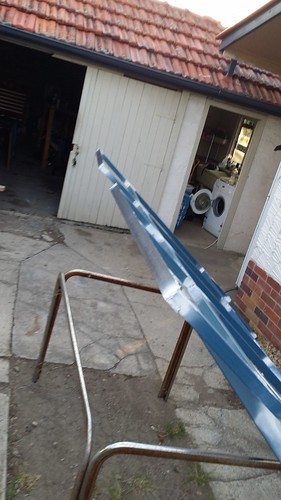 I don't think it will make that much difference in the long run, as the rear is where heavy things, like motorbikes, steel bunk beds and stuff will be, so it will provide a bit of spring... well that's my story and I'm sticking to it. It was at this point I ran out of welding wire, so called it a day. Last week, I had to go do a few deliveries in the work ute, so as well as picking up a new mini mal surfboard for myself, I picked up some 50x6 aluminium flats. 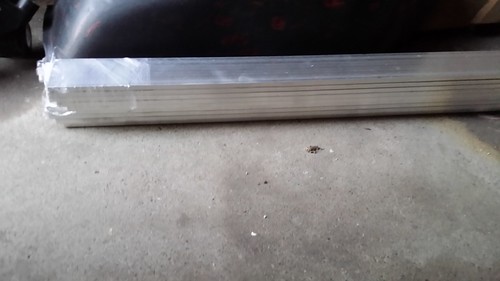 These will be bent to form the frame of my "bird cage".. Still have to make the bending bucks though, but that can wait for later in the week. I'll need to get more, but this is all they had, and will do until I get more funds for some more. Total cost: $1423 ($20 of welding wire, $37 for angle, and $266 for the aluminium flats.) Total time: 34 hours |
| |
Last Edit: Oct 29, 2014 0:04:50 GMT by sciclone
|
|
|
|
|
|
|
Oct 29, 2014 10:48:25 GMT
|
|
Let's see how long you keep going with the running cost tally before it scares you!
With most projects it's best not to think about it too much!
|
| |
|
|
|
|
|
|
|
Let's see how long you keep going with the running cost tally before it scares you! With most projects it's best not to think about it too much! Yeh, I hear you. Although having said that, I've got to spend probably another $2000 on materials, and another $1500 or so on fit out.. A caravan for $5000 is not bad, especially when all the ones I see that have the same specs etc as my one are $35000! |
| |
|
|
|
|
|
|
|
Ok, so a lot less time between updates.. Last week at the end of play, I ran out of welding wire, so whilst I was at the hardware shop, I also picked up an air die grinder and "flame" shaped bit, to hopefully get in those tight little areas where the angle grinder can't fit. Unfortunately my compressor doesn't quite have the gusto to continually power it, so I'll save it for the tight areas only.. I'm not a perfectionist, but after looking at some of the welds, I just wasn't happy with them. Some looked like bird poo, whilst other although they looked neat, looked like they were sitting on top of the metal, rather than being a melting of the two parts with the weld being part of it. I put it down to bad wire (the bird poo ones were mostly done with the curse word wire I mentioned in previous posts), and incorrect settings. After using the 3mm setting (it reckons #8 wss and #3 voltage)for the angle, I remembered just how a proper set up should sound. The incorrect settings previously sounded like it was spitting/spluttering rather than a constant buzz, which could account for the lack of proper melting/penetration. After about an hour or more of cutting out the welds and grinding them back, I broke out the sparky stick with the new wire and went to work. The first couple I did using the 3mm setting were getting too hot/blowing through, so I fiddled. The inside of the machine says for 1.6mm use 6wss and #1 voltage, whilst 3mm is 8&3. So for 2mm or 2.5, I thought "I'll turn the voltage down to 2". This made it sound like it was spluttering again, so I turned the Voltage back to 3mm, and the wirespeed down to 7. Ahh that's better.. Still getting a couple of blow throughs, but much nicer than before. As you can see, it's got a bit more penetration now, and even uncleaned, without any of the flux or splatter taken off, it looks like it's gone through a lot better. 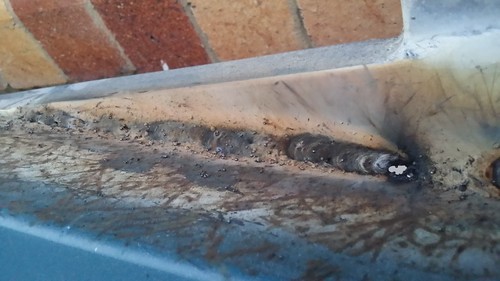 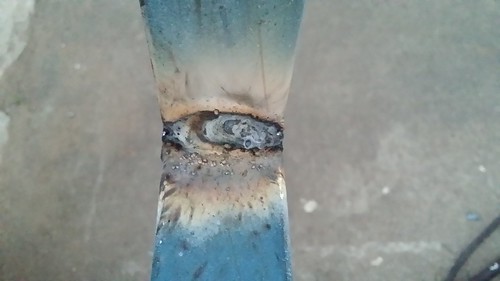  This one is where I fixed up a blow through.  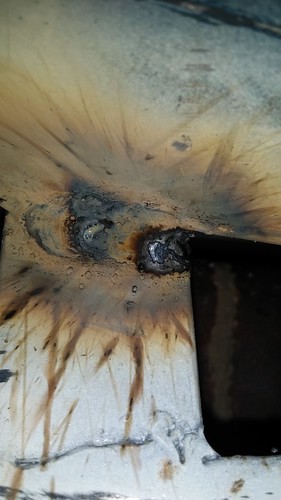 So that was where I got to before I thought it best to pack up. Fortunately the days are getting longer here, so I was able to continue until around 6:30pm. Total Cost: $1443 ($20 for more welding wire) Total time: 37 hours |
| |
|
|
|
|
|
|
|
|
Welds look a lot better now
|
| |
|
|
|
|
|
|
|
With my flux core welder I found this was the best way to get a nice setting. Turn it up as far as it will go and do tests of a bit of scrap until it doesn't blow through (but still gets nice and hot). Adjust the wire feed until it stops stuttering (too slow) or stop making marbles (too fast). Some things you already know i'm sure but is always worth having in your mind: Unless you're welding thick metal with an underpowered machine, try and get the workpiece level. Trying to weld up/down hill is harder and it'll run and look gash. Tack things first on two axes then move it round to run a bead where you can get to it easily. Before pulling the trigger, get setup and move the torch in the way you will need to in order to complete your weld. You'll see if there's anywhere your torch gets stuck or trap the wire or something and adjust beforehand. This little trick has meant my welds are much nicer  . Grind the mill scale off before your weld with a flap disk. Cleaner = better . Mig can tolerate a certain amount but it's best to get it as clean as you can. Ok that's about all I can think of now . Build looks great. More than I would take on. I built a gate a while ago and struggled to get it all level on my patio so I can't imagine how annoying it must be to get that true. |
| |
|
|
|
|
|
|
|
|
Thanks guys.
I know it's not going to be ever seen after the paint and cabin shell is on, but at least I'll feel a lot better about towing it down the road when finished.
Thanks for the tips as well. It's been quite a while since I did my welding subjects for my apprenticeship, so I've probably forgotten a lot of handy hints.
|
| |
|
|
|
|
|
|
|
|
Ok, so not the most exciting update (no pics), but here it goes.
Since last time, we've have alternating weather, between 36°C days (which make working outside with no shade hellish) and rain (no sparky stick allowed..) I've still be pottering along with this and after cleaning up some of the previous welds, I continued on welding or rewelding various joints. Again it seems like my welds are getting more consistent, because with the exception of a couple where the wire got stuck in the tip, they've all been pretty neat with plenty of penetration and little to no blowouts.
I have discovered that I hate wire cups. Yes they are handy for cleaning weld spatter/flux off, but I had so many little spikes of wire through my clothes, that I thought I'd pee'd off an echidna. So I think I'll be getting a poly stripping disc or 240g flap disc when I need to get the rough paint off to get the chassis ready for final paint.
But one good thing has eventuated... I'm pretty much finished with my chassis! There are a couple of suspension brackets and things I need to weld on, but for the most part, the main frame is welded.
Now the bad things...
My brother couldn't get his head around what I was trying to do, so after getting me to have a crack at Sketchup, I've come to the stunning realisation that the shell design is cack. After scrapping the steam-punk zepplin idea, the "airstream-esque" was in the pipeline, but it was never going to look decent. After spitballing a few ideas including Daft Punk helmet front end, Commodore Vanderbilt/Mercury front end and others, I ended up drawing inspiration from Japanese trains. In particular the N'Ex (which is cool but not quite what I need) and the E655 which tows the Imperial carriage. So the plan (well for now...) is to make the front and rear resemble the E655 and style accordingly. I'll have to see whether the cadillac rocket lights I bought earlier will make it on, but for now this is the direction I'm heading.
This caused me to analyse my weight distribution. In Australia, the max down ball weight is 150kg, whilst the max on my Dualis is 120kg. Previously I had the 2 batteries (30kg each) the fridge, and a queen mattress sitting forward of the wheels, with the weight being counter-balanced by whatever I was taking (I designed it to hold 2 or 3 motorbikes, or mountain bikes or surfboards etc). However, when it goes through scrutineering, it won't have any of this stuff inside, meaning that all that weight will be front biased. So a redesign of the interior was needed to either centre the weight over the wheels, or put it to the rear. It will still be able to hold the stuff, but now the wheels will be supporting all the weight (rather than being like a see-saw)
That's all for now. I'll update again when I can get some plate to do bits and bobs.
|
| |
|
|
|
|
|
|
|
|
Good save! It's definitely best to get the design fully finalised on paper or CAD. Design changes are much easier to make there!
With the strip-it discs, they are excellent for removing paint but will not deal with rust or any sharp edges. The moment you touch them to a sharp edge they disintegrate. Just something to keep in mind.
|
| |
|
|
|
|
|
|
|
For those that don't know, this is the Nagomi E655 ![]()  |
| |
|
|
|
|
|
|
|
|
|
|
Oh my goodness, it's been 5 months since I last touched this. To be fair, I have got some valid excuses/series of events.
1) Where I'm working outside has no shade, so although it might sound enjoyable, working in the direct sun in 35degC is a surefire way to get heatstroke. Seeing as most of summer was like that (it's now mid-autumn and still 25deg), this meant that I could only do stuff early in the morning (everyone loves a neighbour busting out an angle grinder at 6:30) or later in the afternoon. Unfortunately I was using this time to get myself in shape for snowboarding.
2) When it wasn't blinking hot, the rain has been pouring.
3) With a 3.5 week trip to Japan planned in February (I was paying for my mum, sis and bro to come) money was tight. So I couldn't afford any new materials or shop supplies, and I really need to get some tyres on my rims before I can start making up suspension components. This brought work to a standstill as well.
4) 3.5 weeks in Japan. Can't work on it if I'm not there...
5) Whilst in Japan, I had a pretty nasty snowboarding accident. Upon returning home, I've gotten checked out, and I've right royally stuffed my knee. This means that I can't really move around very nicely at the moment. I had surgery last week, but I can't do any type of heavy lifting at the moment. Makes it hard to lift/move 20kg pieces of steel around and also stand for long periods of time. Also the frame is pretty cumbersome. Usually I can lift it by myself, but moving a 4.8x2.0m steel chassis around is hard work.
So there you have it. But as many as the excuses are I still want to finish this thing. I've started dreaming about it again, which starts getting the design juices flowing and leads to action. It may be small stuff at the moment, like perhaps getting some bending bucks made up, but whilst I'm off work recovering from surgery (5 weeks!), I'm going to try getting ground work done.
Sorry for the long worded post, but hopefully I can get something done to take pictures of...
|
| |
|
|
|
|
|
|
|
|
Why is it whenever you have time, you either don't have the ability, or don't have the money...
I haven't done anything on this yet, still due to my leg, but now that it's feeling slightly better, it's been pouring rain so I haven't been able to get into the shed to do anything... Man I hate my house.
|
| |
|
|
|
|
|
|
|
Sounds like you need to build a carport first.  Sucks that you took a heavy hit snowboarding. It's always discouraging when you get back on the slopes, too. Worst I've managed was cracking a rib when I fell on my friends camera. Proved it was definitely shockproof, though!  How'd the flooding go for you? Our house is fine since we uprated our drainage, but about 1/4 of the floor at work was a bit wet after the deluge on friday, haha. I think we sucked up at least 300L of water with the shopvac over friday and saturday. |
| |
|
|
|
|
|
|
|
|
Interesting thread, how do you propose to make the compound curves you'll need to make it look like the Nagomi E655, I reckon it'll be pretty darn cool when it's done!
|
| |
|
|
|
|
|
|
|
Sounds like you need to build a carport first. Sucks that you took a heavy hit snowboarding. It's always discouraging when you get back on the slopes, too. Worst I've managed was cracking a rib when I fell on my friends camera. Proved it was definitely shockproof, though! How'd the flooding go for you? Our house is fine since we uprated our drainage, but about 1/4 of the floor at work was a bit wet after the deluge on friday, haha. I think we sucked up at least 300L of water with the shopvac over friday and saturday. Yeah, it sucks, but not much use whining about it. Our house is on the side of hill, so we don't flood, although the water comes down our driveway and around the house toward the opposite back corner. We were trying to drive at the time, and it was nearly impossible to see. I'm planning on making wooden bending bucks at regular intervals eg. every 20 cm. This will allow me to bend the aluminium frame, then hopefully lay the composite panels onto the curves. I'll be glueing the panels first, then once I'm happy with the fitment, I'll drill and rivet them, aircraft style. Went camping on the weekend, and realised how much I still want to see this through. The ability to be able to set up camp easily (not trying to set up a tent by myself) and to haul all the bits and pieces I want would be awesome.. Plus a nice double bed would be pure luxury. Also found out a friend of mine works for a company that used to do canvas products. He's going to see if they have any sewing machines left (they still do thick leather products for tool belts) and if so, hopefully I can use the machine to make mine, rather than having to pay someone to custom make them... |
| |
|
|
|
|
|
|
|
Cor blimey, an update! Sorry, but it's not that exciting. After nearly a year in the garage, I've finally got some tyres for my wheels. Cost me $50 for the pair, and they're mostly new (probably less than 100km old)  20150817_173447 20150817_173447 by Sciclone, on Flickr I did that Thursday last week, so yesterday afternoon, I bolted the brakes/hub/axle back together so I could start getting the measurements for suspension. The frame is currently sitting next to the house (as it has for the last 8 months!),  20150817_173455 20150817_173455 by Sciclone, on Flickr I'm hoping to really get stuck into it and have it ready to use by the summertime. I'll be out there this afternoon, seeing if I can get the frame to sit flat. |
| |
|
|
|
|
|
Sept 23, 2015 8:58:42 GMT
|
OMG!! A proper update. After getting a few friends help me move and manoeuvre the chassis from where it's stood for the past 8 months, I had to do some thinking. The place where we live doesn't have a straight bit of concrete or anything in the place (we live on a hill, with the slope going from the front left to the back right). I don't have any special engineering benches or anything so trying to get suspension components measured/made/jigged straight was going to be near on impossible. For the sake of my sanity and some movement on this project, I bit the bullet and bought some off-road leaf springs and associated kit. Whilst this caravan was supposed to be independent coils, leaf's are easier to set and forget. After getting them, the first thing to do was bolt everything roughly together and get some dimensions. With the wheels, tyres, axle, brakes and springs all bolted together, I could check how the wheels would sit within the chassis (after dropping it on my foot!). I'd like to put it out there. I'm awesome... The spring/tyre will sit nearly perfect in the cross bars. The thing I didn't count one was that my draw bars would interfere where my springs need to sit, so I had to start cutting at the end of the drawbars. This was both annoying and good at the same time. Annoying because I had to undo work I'd previously done, but on the bright side, it was a major pain in the backside to remove/cut, so that made me happy to see that my welding was up to scratch. 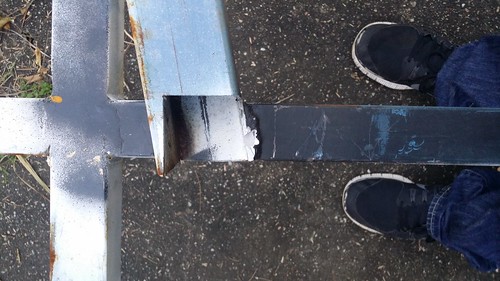 20150910_171007 20150910_171007 by Sciclone, on Flickr How's that for free-hand cutting. Pretty straight/square. I failed to get pictures for the next couple of sections but lots of measuring etc doesn't make for nice photos. I clamped one of my aluminium flats to the centre line of my chassis so I could get some straight markings for where the suspension hangers need to sit. After a lot of checking and double checking, I clamped the hangers into place.  20150921_175900 20150921_175900 by Sciclone, on Flickr With that done, I packed up for the night, leaving it like this 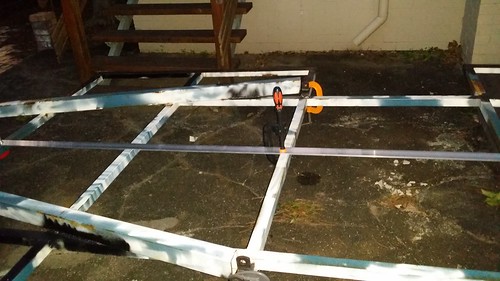 20150921_175910 20150921_175910 by Sciclone, on Flickr The next afternoon, I pulled out the welder. This is the first time I've picked up the sparky stick since October/Nov last year, but straight off the bat, I was laying down decent welds. (Gratuitous weld shots) 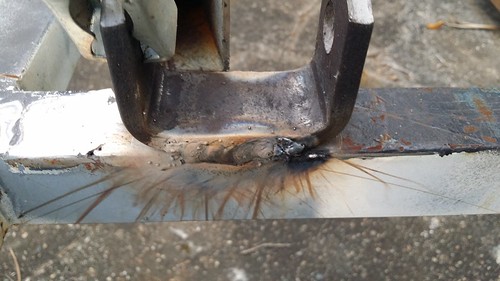 20150922_171514 20150922_171514 by Sciclone, on Flickr  20150922_171533 20150922_171533 by Sciclone, on Flickr Now the eagle eyed among you may notice that the drawbars are awfully close to the hangers and won't allow me to weld the other side. "I'll get around to it," I say, "but I'll bolt the rear hangers to the spring so I can get the positioning right". 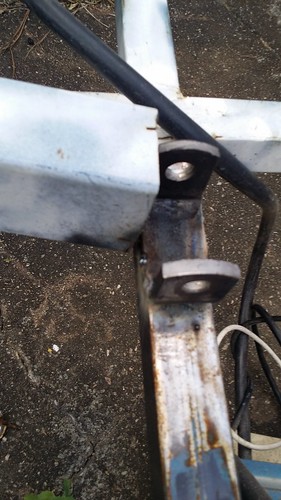 20150922_171542 20150922_171542 by Sciclone, on Flickr 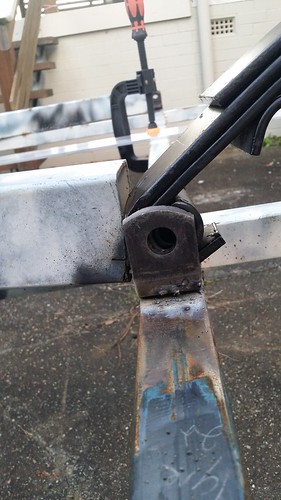 20150922_173133 20150922_173133 by Sciclone, on Flickr Permission to say "Oh c0ck". 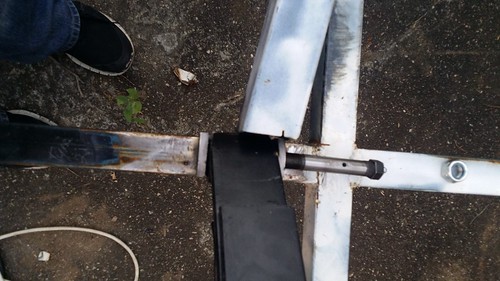 20150922_173140 20150922_173140 by Sciclone, on Flickr So that put an end to play last night (It's still getting dark at 5:45). But I couldn't resist getting a shot of the suspension sitting roughly where it'll be. This made me happy. 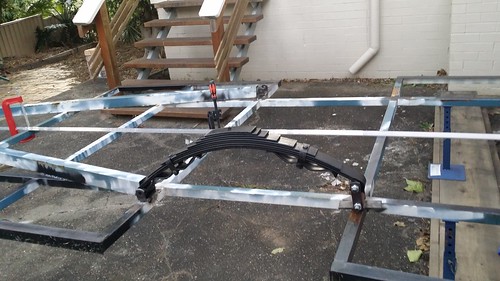 20150922_173754 20150922_173754 by Sciclone, on Flickr Hoping to get out the grinder tomorrow afternoon and then weld/measure/weld then the suspension should be done! |
| |
|
|
|
|
|
|
|
Looks like I've forgotten to take some pictures of progress. Well, after the above, I spent quite a few hours getting the suspension set and welded. I still need to add some gussets to the rear hanger base, but it's welded in and what not. We've had some rain in between, and I've noticed that the frame was holding water a little, so I drilled some holes to let it run out, rather than sitting, but this made me think I may need to rust convert/proof the inside of the tubes. I wish I could get some dinitrol or something, but it tends to be less of a problem over here, so we don't really have any foaming rust converter or similar. In the end I may need to slosh some converter down the holes and leave it at that. Next up was to weld a plate to the draw bars to mount the hitch on. I used one of the long bits of aluminium flat seen in the pictures above to get the centre line, then used my square to mark the front of the bars where I need the plate to sit flat. That was fine, but I didn't clean the metal properly or adjust the settings on my welder. I kept getting a lot of burn back before upping the wire speed, leading to wire stuck in the gun, snapping and generally being painful.. 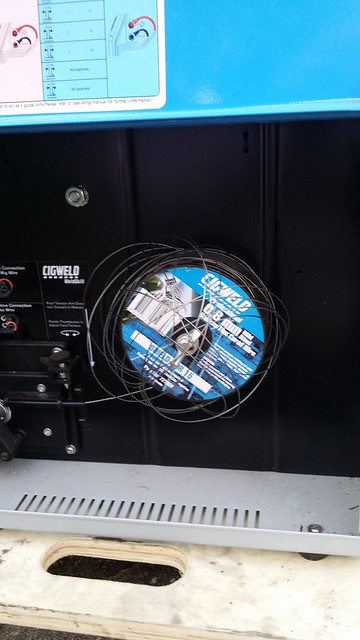 20151026_173445 20151026_173445 by Sciclone, on Flickr The welds, after I had upped the wire speed were better, but I they're a little messy especially due to the metal not being clean. As it was too dark to continue, I covered everything in a spray of cold gal and packed up for the evening. 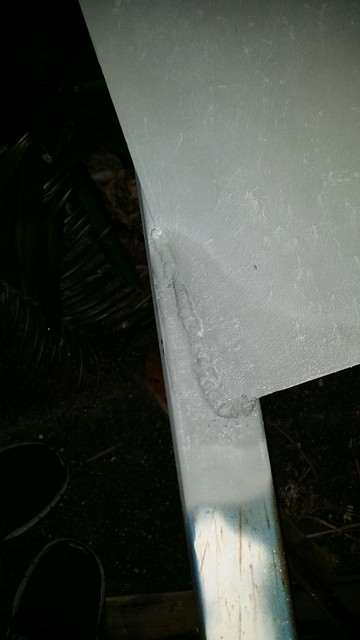 20151027_182702 20151027_182702 by Sciclone, on Flickr  20151027_182713 20151027_182713 by Sciclone, on Flickr  20151027_182730 20151027_182730 by Sciclone, on Flickr Next time I get a chance (when it stops storming in the afternoons!) I'll get my power file out, grind back some of the welds and redo. Once that and the gussets for the suspension are all welded, I will start rust converting and coach painting it. I chose Flame red for the chassis colour... |
| |
|
|
|
|
|
|
|
So I've been making progress, just doing an hour or so every afternoon when I can. Here's the run down since last Wednesday. Wednesday: Raining. Did some work on my bass build instead. Thursday: Raining. Suffering from a severe case of CBFs.. Friday: Not raining! So I faffed around making up the gussets for my suspension hangers. Got 4 gussets done. Still another 4 to do. Saturday: Busy in the morning, needed to get out for the afternoon, so I went for a 3 hour drive in the countryside. Sunday: Busy in the morning. Went for a swim at a friends in the afternoon, didn't do much after that. Monday: Finished welding the gussets for the other suspension hanger. Didn't take as long to position/weld because I learnt from my mistakes on the other side. Also I adjusted my welder power as it was still having burn back/breakage issues. Used up all my 0.8mm tips, with 1 bead to do, so popped a 0.9mm tip on to finish it off. Sprayed areas with temporary cold gal spray. Tuesday: Got home, was intending to grind back/dress welds on the hangers, but my sister was hanging washing out straight above where I wanted to work. So I went to the drawbar end and started marking up/cutting/drilling the area where the hitch will bolt on. Pics should give you an idea.. 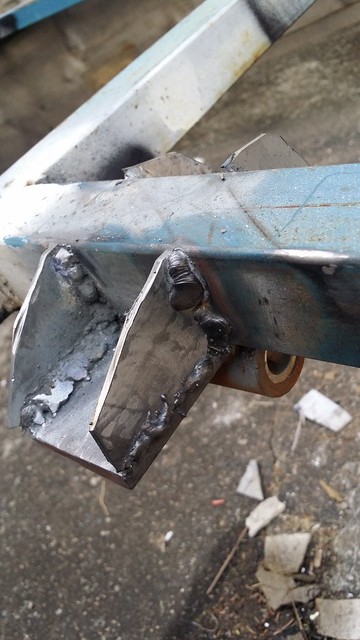 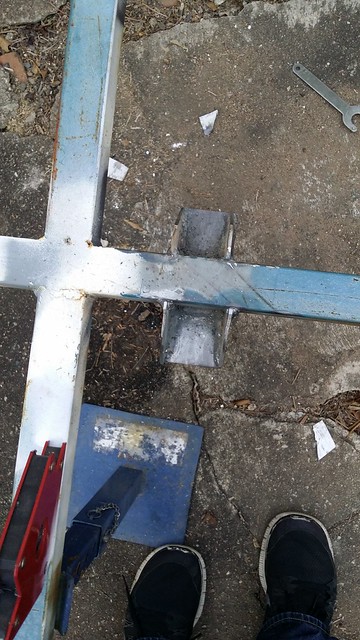 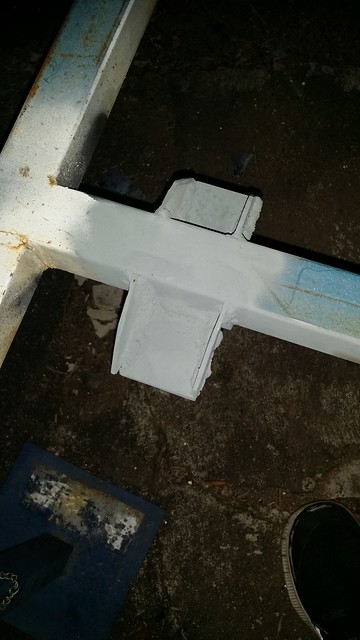 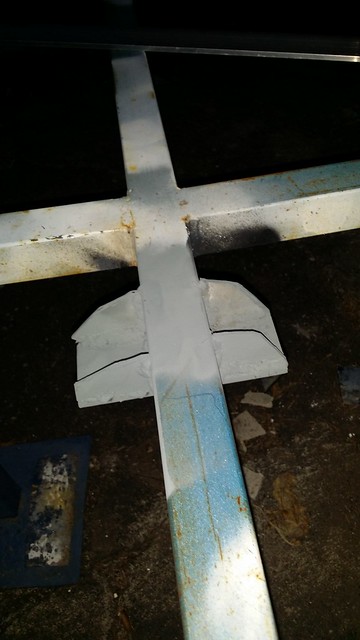 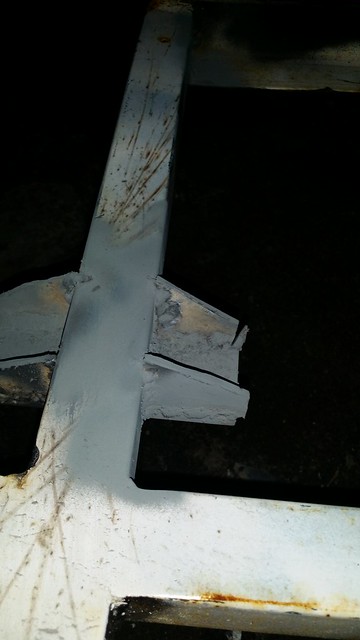 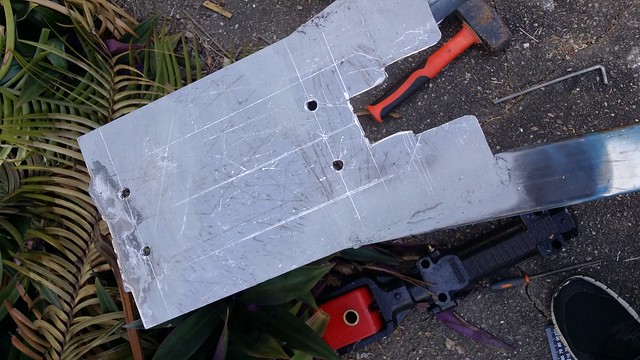 Hopefully some more progress this afternoon, provided there's no washing in the way... |
| |
|
|
|
|
|
|
|
So I've been pottering away at this and things have been moving, albeit slowly. I have been tossing up how to neutralise any surface rust that may be present inside the chassis. I couldn't find anyone that could supply foaming rust converter type stuff, and had thought about bathing the frame in some sort of makeshift pool thing in the back yard, using tarps and bricks. To cover the frame, I'd need roughly 570L of rust converter! That was looking a bit pricey Now if anyone is still reading my ramblings, you've probably read that nothing in our house is level, not even the concrete. So trying to make a pool, using phosphoric acid or similar was also sounding like a bad idea. So I emailed a galvinising place around the corner from where I work that has a big enough kettle, for a quote. I was expecting north of $1000, but when he replied it would be $723.80, I baulked, then thought "Hang on, I'll probably pay that in medical fees for spilling acid on myself..." so I started to get things organised. I had an old friend visit last week, and he asked why didn't I support the hitch with something a little more beefy. This guy had a point, so I knocked up a plate with 2 bits of tube tacked to it, that I could weld to the bottom of the drawbars. It only took about 1hr to make, but last week was raining for 2 day after I made it so I couldn't trial fit it or anything. No pictures, but when I eventually welded it to the frame, it looked like this. 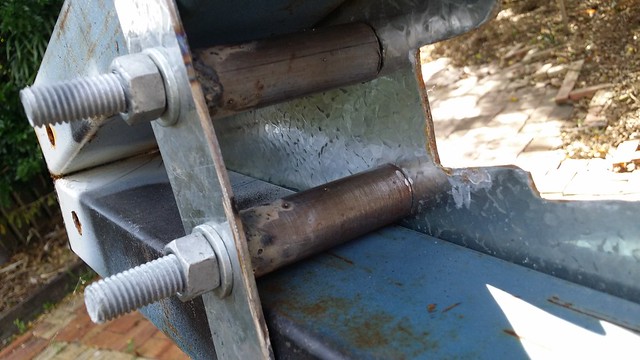 20151115_155001 20151115_155001 by Sciclone, on Flickr  20151116_171531 20151116_171531 by Sciclone, on Flickr To do this I had to flip the frame on it's side. No mean feat by yourself, as although this is probably only 75-100kg, it's cumbersome. When I did, water that had been caught in the frame come trickling out.. 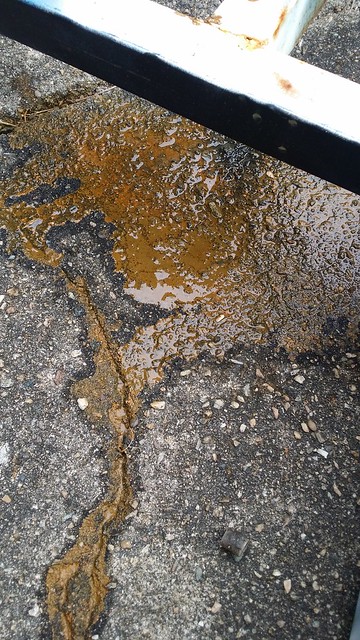 20151115_153238 20151115_153238 by Sciclone, on Flickr 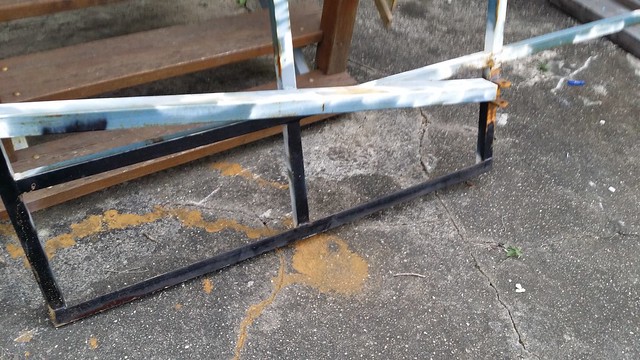 20151116_171544 20151116_171544 by Sciclone, on Flickr Good call on the acid/galv dip then.. So it's sat like that since Sunday, then yesterday afternoon I borrowed the work truck and had a friend help load it into the back. Then I took the truck back to work, ready to take it to the galvanisers first thing in the morning. This morning I get to work at 7:20, get the truck and go. Then the guy who was going to help unload the frame lets me know I haven't got enough holes for the acid and zinc to drain out of. So I have to take the frame back to work and unload it, ready to do the necessary drilling. Except that all our drill bits have probably been in use since Noah was a lad, and are blunt as all get out. I start drilling and get nowhere fast. I'll just have to go home, get some of my own drill bits and try again tomorrow. Some days you're the dog, others the lamp post. Today, I was most definitely the lamp post. |
| |
|
|
|
|


 .
.


