|
|
|
Jul 16, 2014 17:54:40 GMT
|
Scimega progress has been quiet of late, because of this...

It's not so retro, but I'm posting it here 'cos it's my excuse for Scimega lethargy.
For some time I've been planning a new campervan conversion, to replace our Citroen Relay i1183.photobucket.com/albums/x476/Darryl_Webb/Other%20Cars/IMG_9537sml_zps78c57bc6.jpg. The Relay conversion was a great success, has never let us down and took us to all 4 cardinal points of the UK. But it's getting on, so time for something fresher.
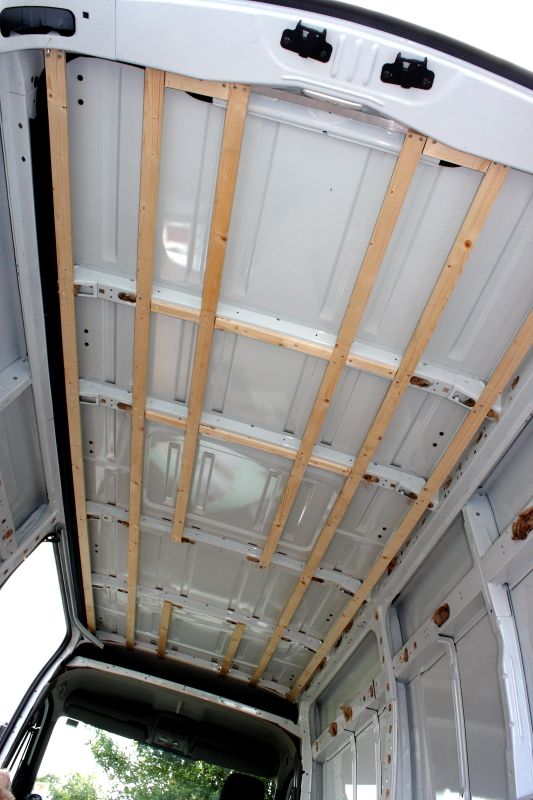
Work has started to frame the ceiling...
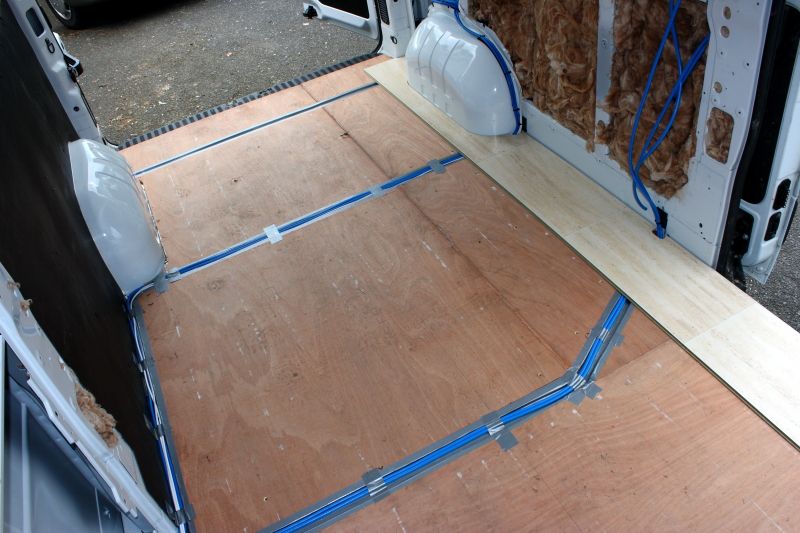
Flooring, using the original ply floor, but with cut-outs to track the wiring through the van.
You really need to decide the layout early in the build. That helps plan the services and keep them hidden.
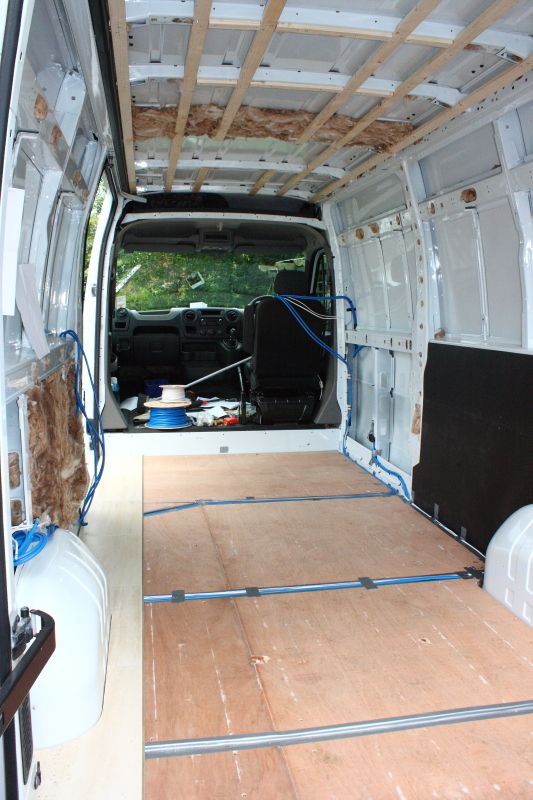
We'll push to have this ready for next season. The Scimega will likely take a back seat until then.
|
| |
|
|
|
|
bstardchild
Club Retro Rides Member
Posts: 14,971
Club RR Member Number: 71
|
|
|
|
|
Excellent bookmarked for the journey
|
| |
|
|
|
|
|
|
|
|
Bookmarked. I'd love to do something like this; looking forward to updates!
|
| |
Al.
|
|
|
|
|
Sept 1, 2014 19:36:04 GMT
|
Thanks for the interest chaps. So I'll post up some more progress.
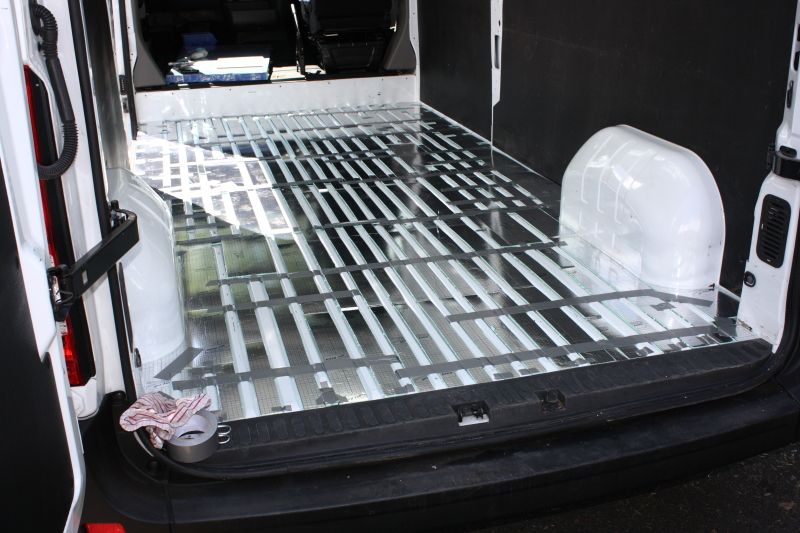
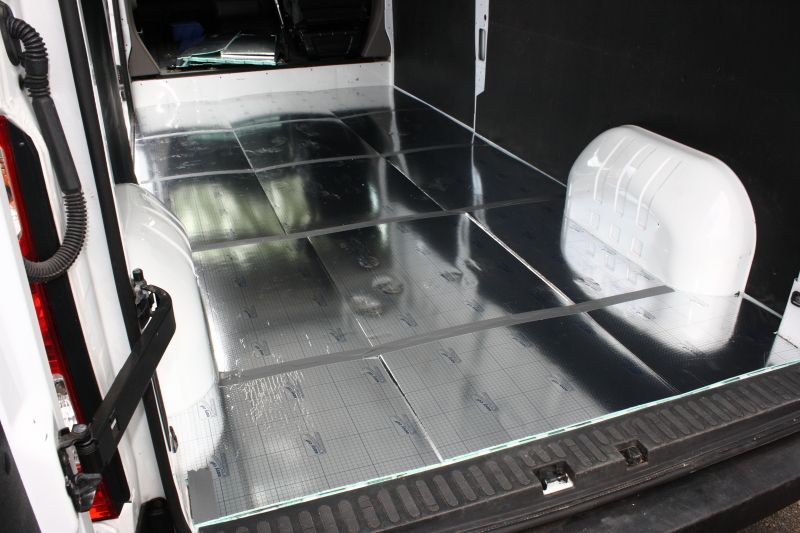
Going back a bit : floor insulation. Strips of that foil-faced green foam stuff from B&Q, set into the floor channels, then full sheet over the lot, then the ply as in the first post.
Ceiling batoned like so, with countersunk screws into the crossmembers.
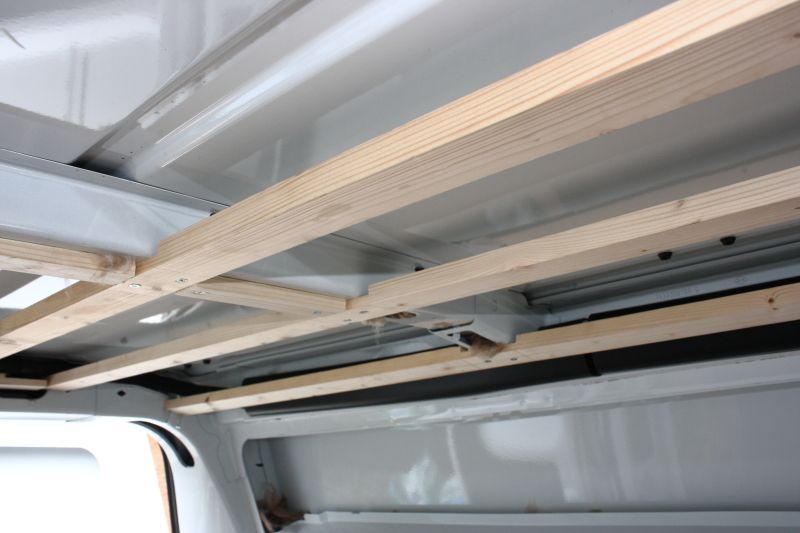
At this point, you have to consider the roof-light. The Master has ribs in the roof that suit a 500mm wide roof-light, and Fiamma do a nice one. The problem is gaps going across the van, so I made these nice blocks.
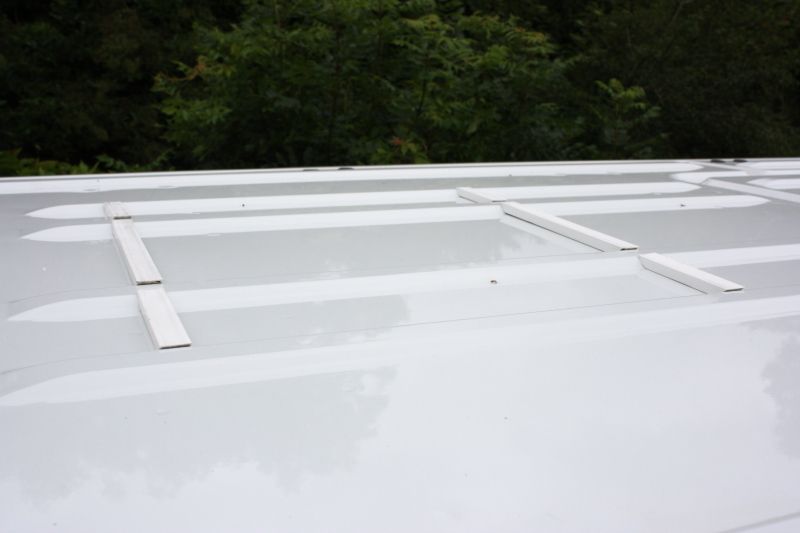
which are plastic channel from B&Q filled with P40, then filler. Adopt, adapt & improve  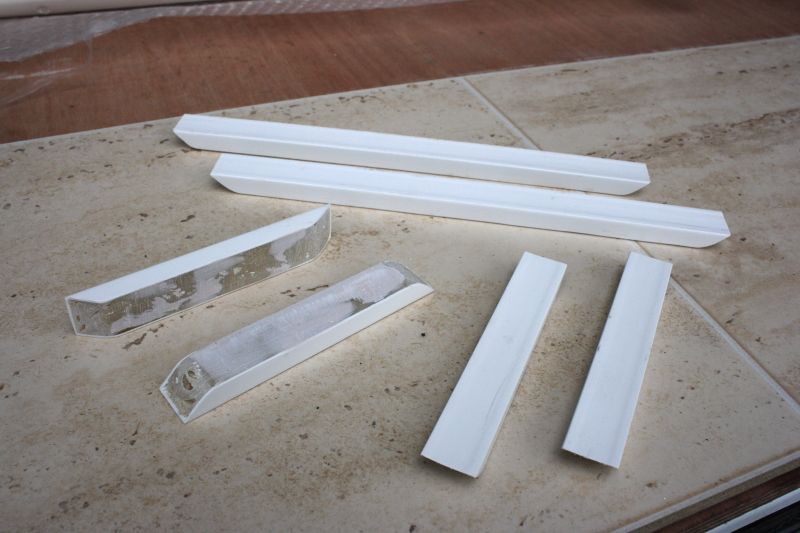
Measure numerous times, cut once. Most folks seem to use a jigsaw, but I find that bounces all over the place.
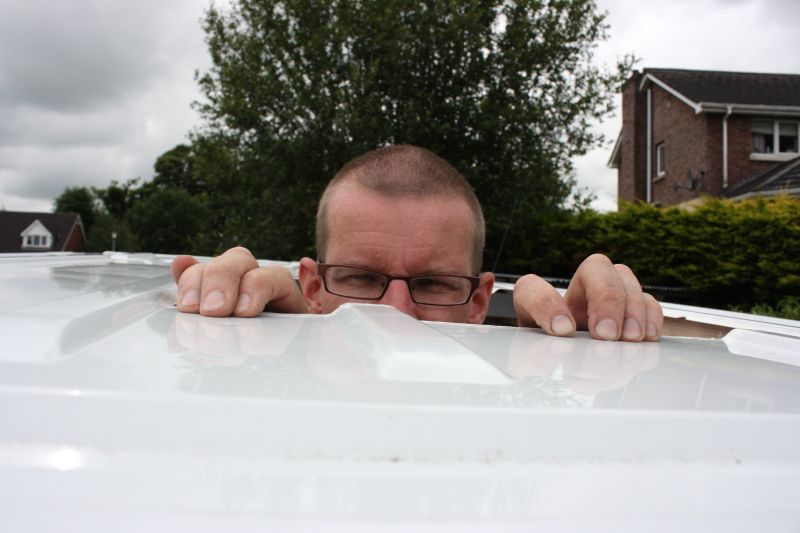
I use an angle-grinder, but the cuttings get everywhere. Next day the outside of the van was covered in fine rust! So I had to clean the van down.
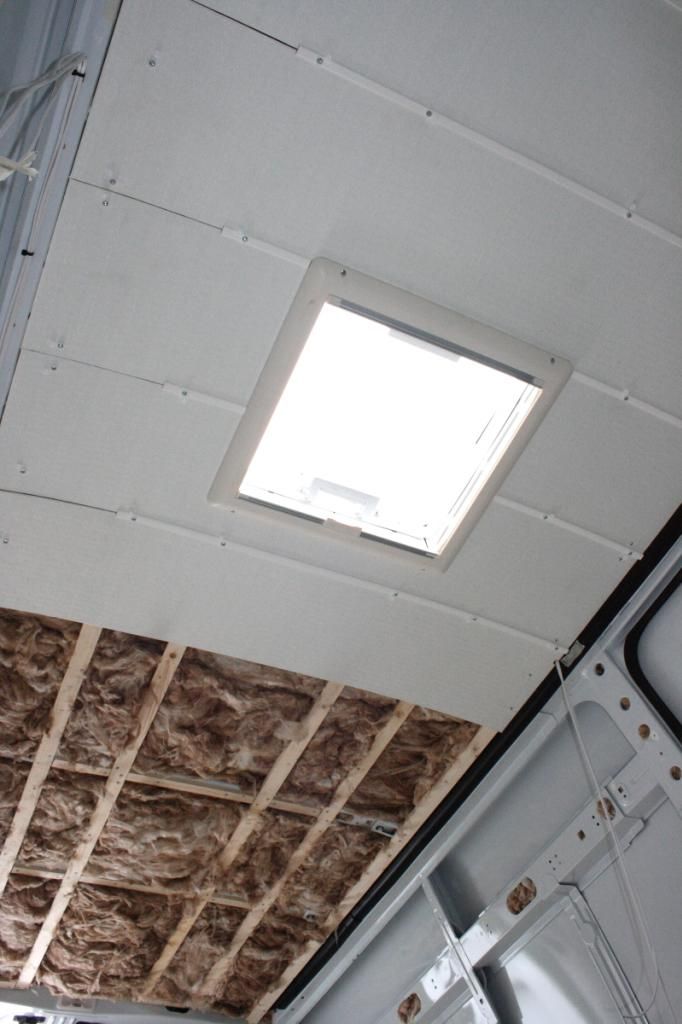
So the roof-light gets bonded with Tiger-seal, and the frame on the under-side helps to clamp it all down. As you can see here, the ceiling is well under way : 3.6mm ply with curtain material spray-glued in place, and the whole lot screwed in. The strips are from B&Q too, and help to hold it all in. This time I decided to make the ceiling removable in case I want to recover it in future.
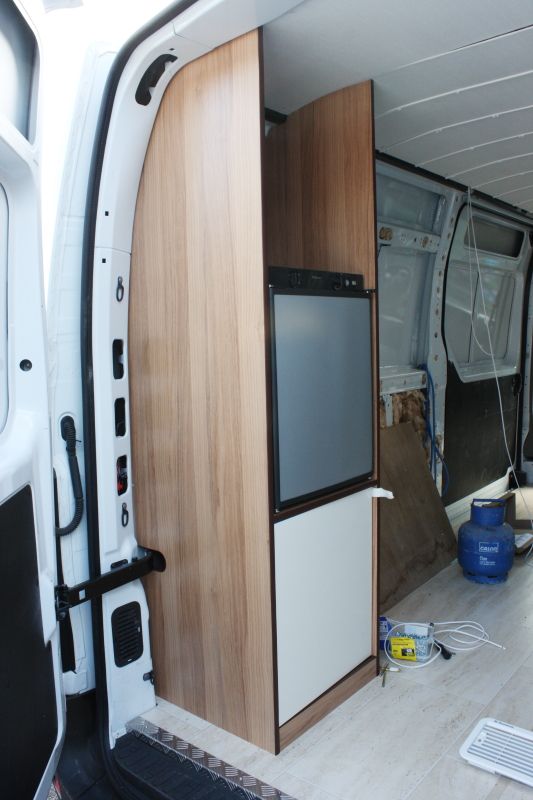
Starting to the furniture. Buying some good value Seitz windows off eBay, the seller is a van converter, and was happy to sell me a few sheets of the proper light-weight ply furniture board. Not cheap, but it keeps the weight of the conversion down, and is really easy to work with. It's veneered on both sides, but needs the edge trimmed. More on this shortly.
Starting in the back corner, full height fridge unit. The gas bottles will go in the bottom cupboard. Note I'm going with B&Q kitchen doors rather than make up doors too. We're going for a bit of contrast in the finishes as you can see 
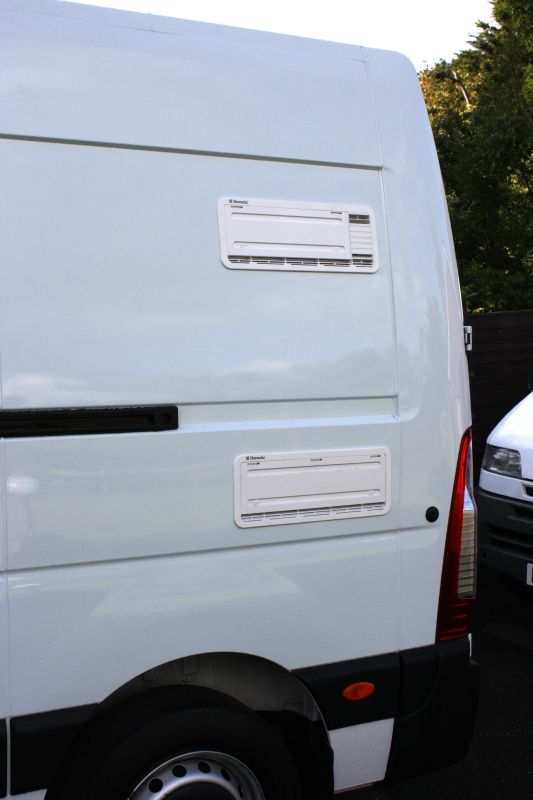
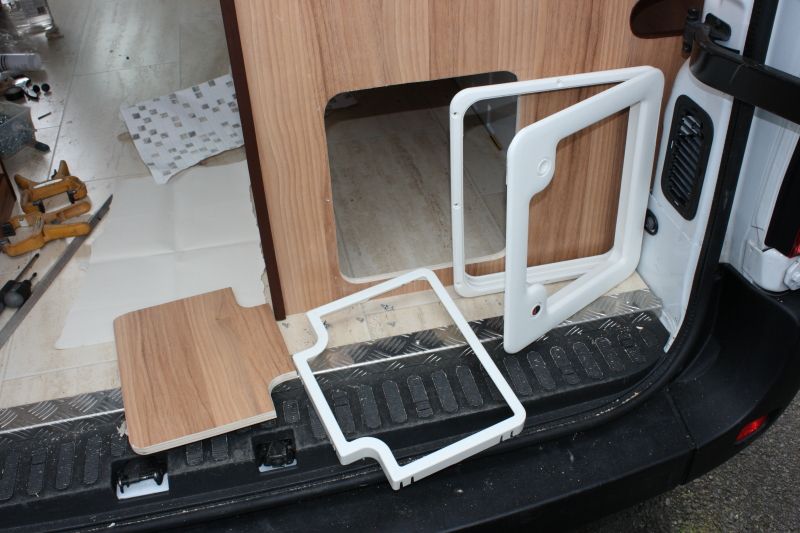
The fridge needs vents, so more careful measuring,
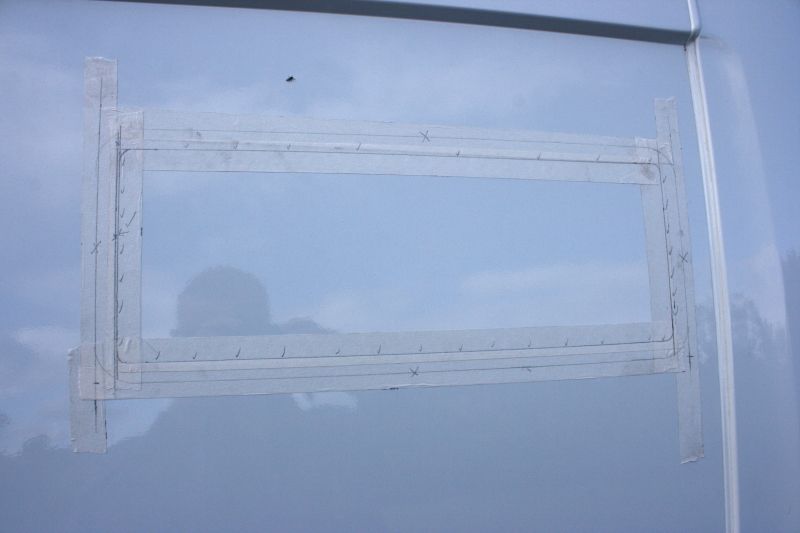
Cut, deburr, then paint the raw edges with the Combi-colour left over from rollering the Scimitar 
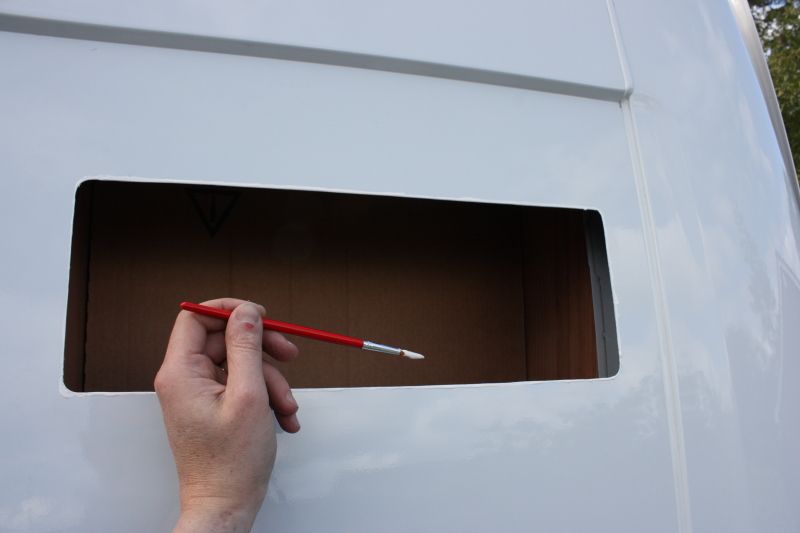
More Tiger-seal. SPLODGE. Oops. A bit too much, but cleans up.
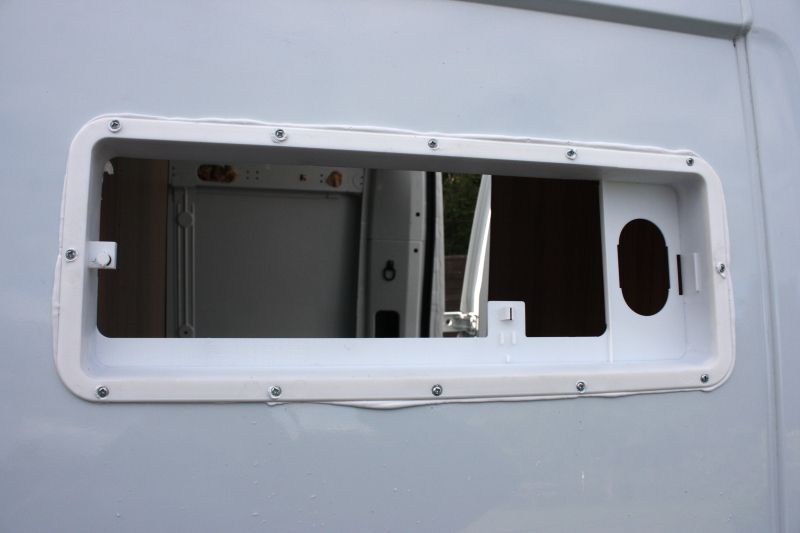
Job done on the outside. Work still to do to duct it all inside.
On the other side inside, the loo walls and cupboard wall take shape nicely. The curved sides of the van are awkward to shape, but I started with template made from scrap ply which was a good start for each of these side panels, then each was fine-tuned.
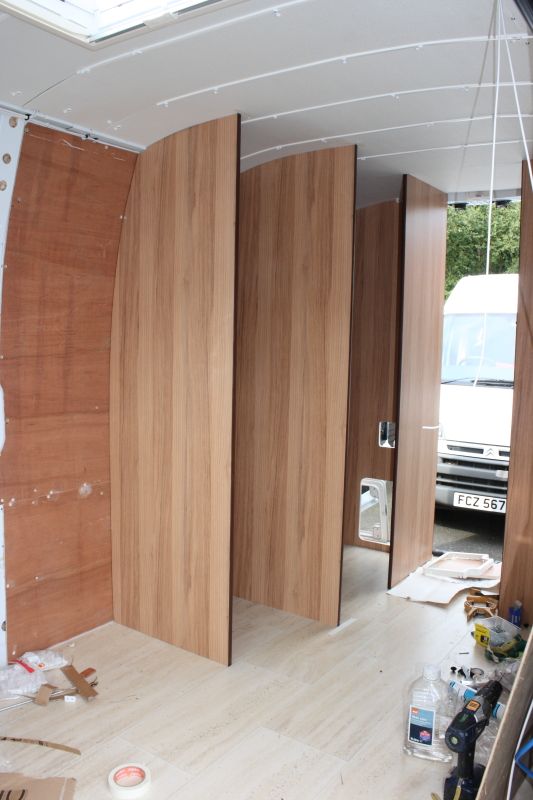
Caravan/motorhome loos come with good templates for panel cut-outs and a nice door to put one of the cut-outs into
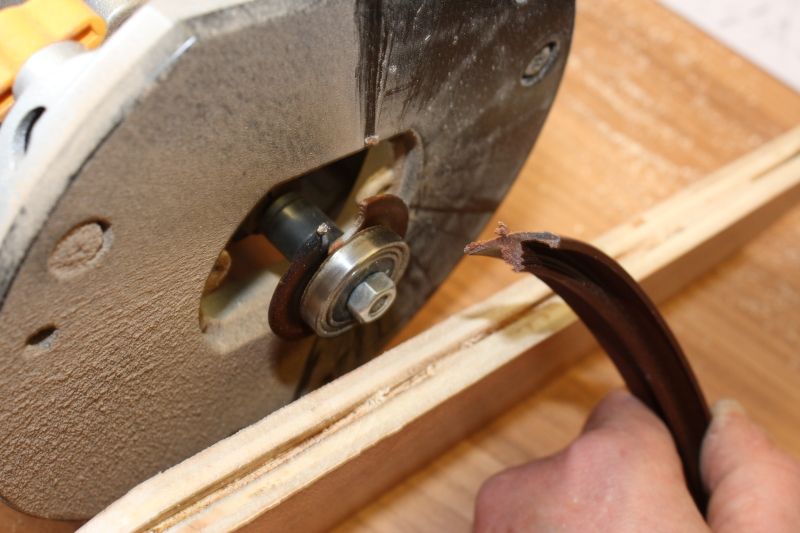
And this is how to trim the edge of the furniture board. Slotted router bit and T-seal. Excuse the poor cutting in this piece - it was just for setting up the depth of the router bit.
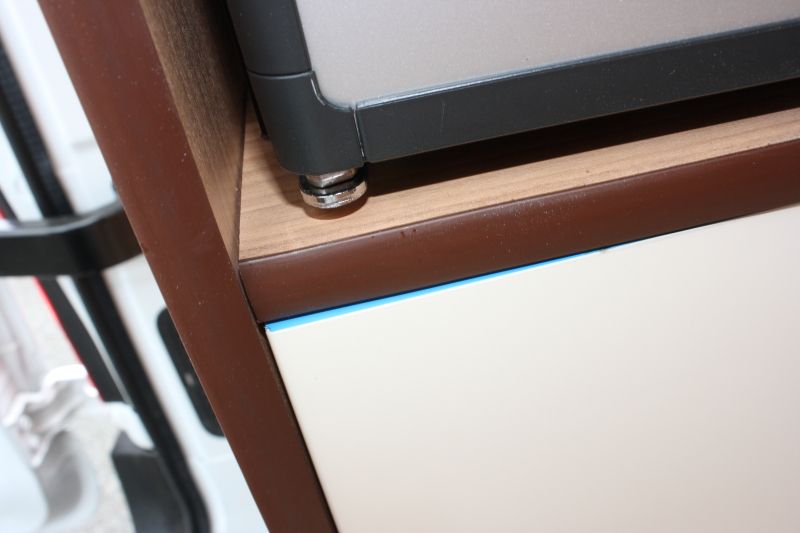
which gets you a nice tidy edge like so
|
| |
|
|
|
|
|
Sept 1, 2014 20:06:55 GMT
|
|
Some nice work going on there.
|
| |
|
|
|
|
|
Sept 2, 2014 10:58:38 GMT
|
|
I have no interest in building a camper but find this all oddly appealing! Good work.
|
| |
|
|
|
|
|
Sept 7, 2014 20:46:19 GMT
|
|
Keep it up, earlier this year I bought a '92 Talbot camper and a possible future plan is to use the expensive interior parts to convert a larger van, so this is really interesting, it looks like your doing it in a well thought out thorough way, more please. Where are you?
|
| |
|
|
eternaloptimist
Posted a lot
   Too many projects, not enough time or space...
Posts: 2,578
|
|
Sept 7, 2014 20:55:11 GMT
|
|
Good work there chap. Love the way you've fixed the roof light onto the corrugated roof.
|
| |
XC70, VW split screen crew cab, Standard Ten
|
|
|
|
|
|
|
|
nice work, wish i was as handy with wood, keep the updates coming
|
| |
'90 Audi B3 Coupe 2.3 Auto [gone]
'92 Audi S4 Avant 2.2 AAN Turbo Auto [gone]
'93 Audi 80 Avant 1.9TDi [gone]
'96 Audi A4 Avant 2.6 Quattro [gone]
'97 VW T4 1.9td LWB [gone]
'03 Skoda Octavia 1.9TDi [gone]
'05 VW T5 Shuttle LWB 1.9TDi
'15 VW Caddy Maxi Kombi 1.6TDi
|
|
|
|
|
Sept 8, 2014 23:30:49 GMT
|
|
Takes me back to my horsebox building days, but we didn't need to fit a toilet...or a fridge!
Going to look smart when it's finished.
|
| |
|
|
|
|
|
|
|
Sept 9, 2014 17:50:00 GMT
|
Cannabilising campers or caravans for self-builds is a good budget way to go.
I've only got basic woodworking tools, but there's nothing really tricky to it. This sort of project is clean and doesn't involve much rolling around underneath the vehicle  This is the first time I've ever used a router. This is the first time I've ever used a router.
I'm in Northern Ireland (and surprised I've not got that in my avatar).
Last weekend I started moving forward from the fridge unit on the left side.
I re-used the van's black fibre-board for the back of the cupboard. Well it was cut to the right shape already.
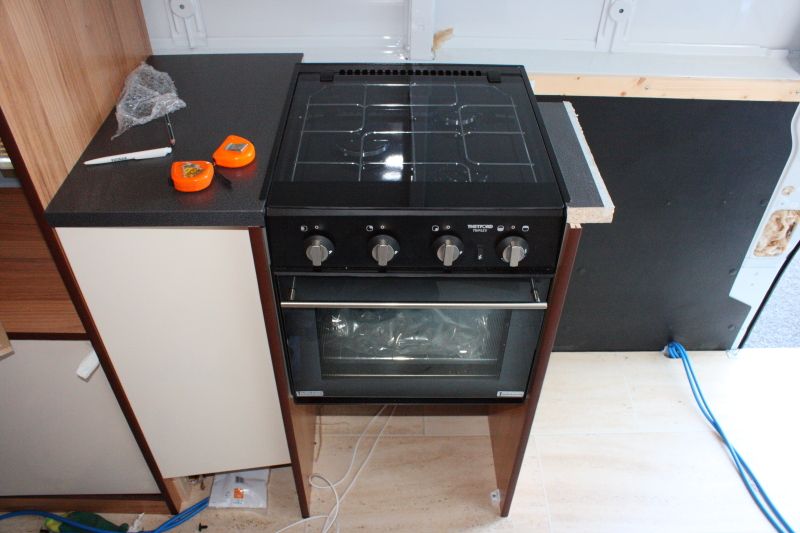
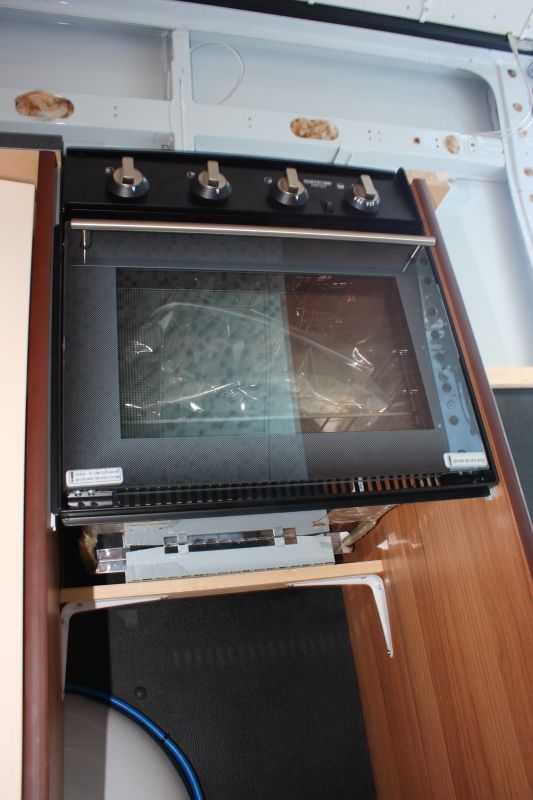
A 300mm wide unit (set by the size of the B&Q kitchen door) sets the cooker away from the side of the fridge unit so as not to burn the furniture! Shaping those side panels for the cooker took ages. Having the van off-level in the drive doesn't help to get everything square and parallel.
28mm worktop (still surprisingly heavy) helps to set the cooker height, and I've some fixings in place to hold it together.
|
| |
|
|
|
|
|
Sept 10, 2014 20:44:22 GMT
|
|
nice work so far, and man your brave cutting in to a nearly new van. good luck with it, it looks like it will be a nice job when done
|
| |
|
|
|
|
|
Sept 12, 2014 9:54:15 GMT
|
|
I've been looking at doing something similar for a while now. One thing I read though is that you need some sort of vapour barrier to stop condensation being held against the body by the insulation and rusting it out.
What are your thoughts?
|
| |
|
|
|
|
|
Sept 13, 2014 17:56:49 GMT
|
Talking of cutting up a van, Gazza, this happened today.
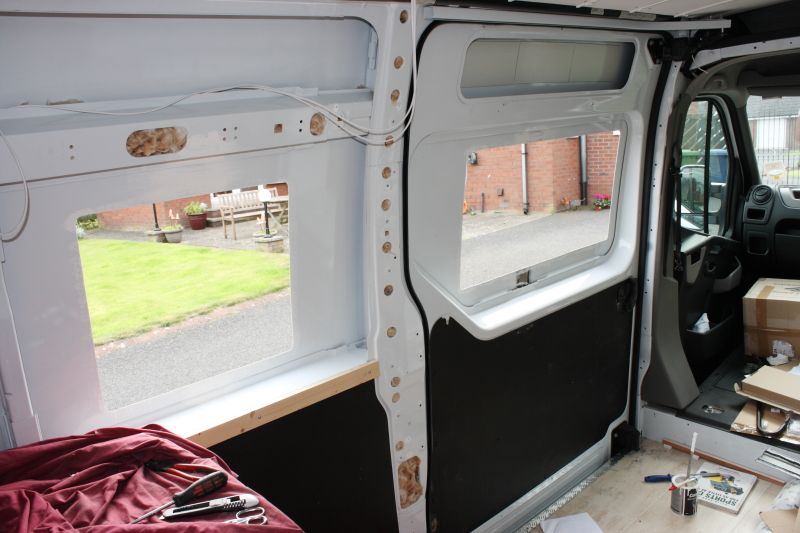
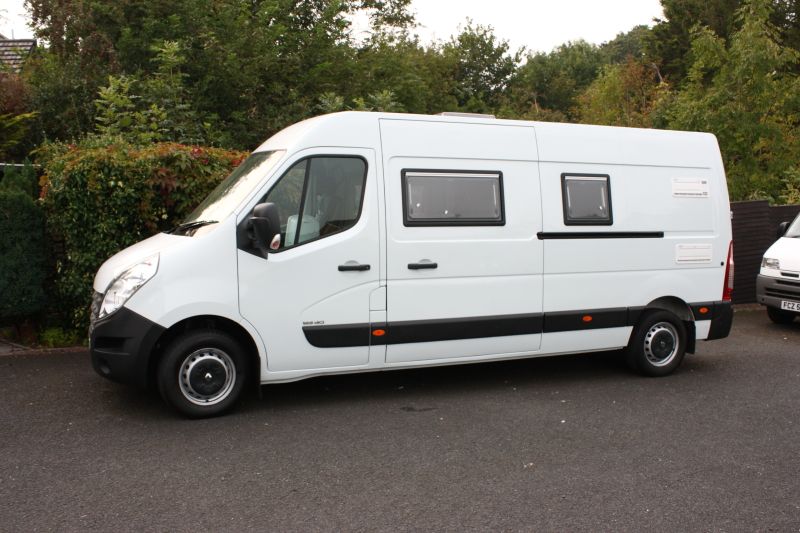
which went so smoothly I got the window into the other side too.
Valid question, soopahfly, but I don't have an answer. I saw a thread recently which mentioned that, and it got me thinking. However, I just stuffed insulation into our old van too, and didn't notice anything untoward when I had a wee job to do behind the panels recently.
|
| |
|
|
|
|
|
Oct 11, 2014 19:25:30 GMT
|
Another Photobucket-busting update. I forgot to point out just how easy these Seitz windows are to fit. Just cut a hole to size (interestingly Seitz size their windows by the size of the hole, not the window i.e. a 900mm x450mm window requires a 900 x 450 hole) and the two halves clamp together, with a bit of sealant on the outside for good measure of course. The Seitz windows are designed to fit a wall of about 25mm, so for a van wall, a bit of baton packs it out. 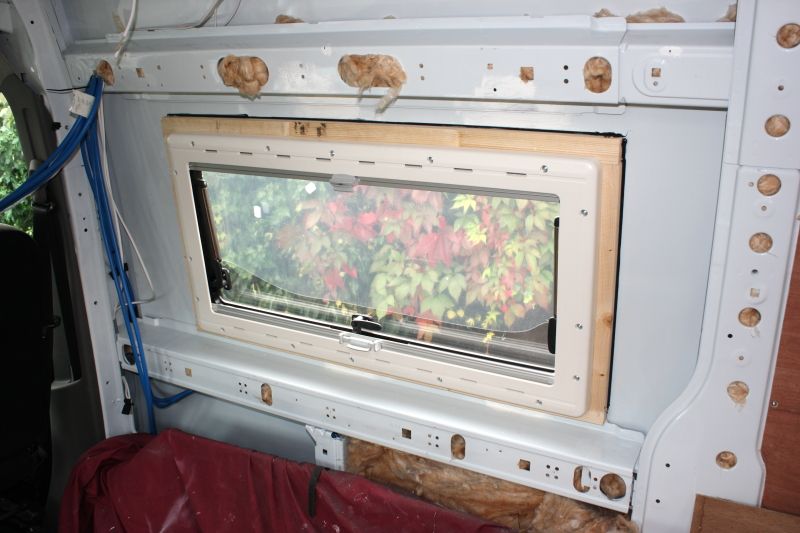 Joinery continues. Toilet door fitted with some nice s/s hinges from a chandlers, and wardrobe doors (actually B&Q kitchen doors) hung. 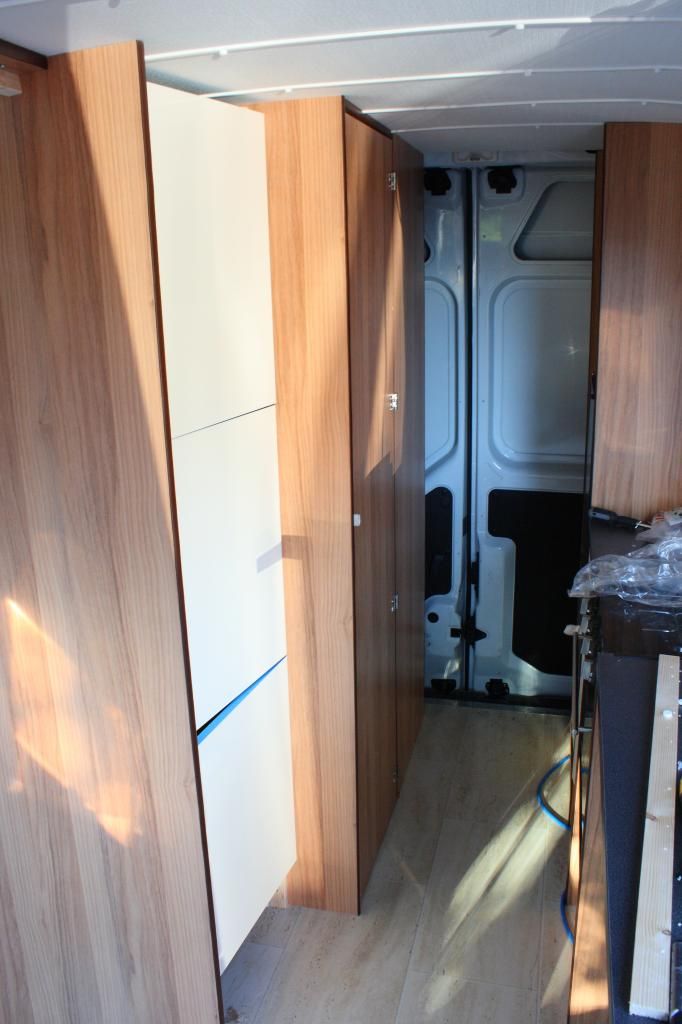 Sink unit built. 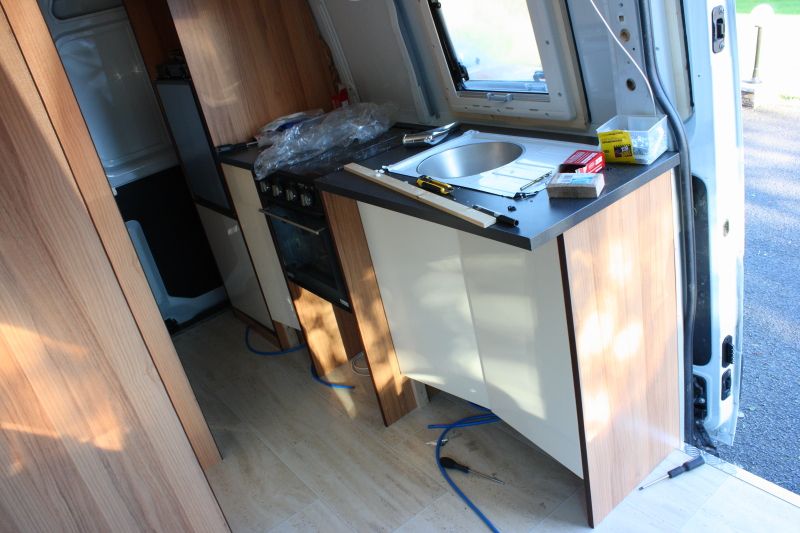 Starting the overhead cupboards on the right. This is tricky as I'm starting from the roof and building down. The starting point is all curved wall and roof. But I got the end panel done (via 2 templates). 300mm B&Q kitchen doors will hang from the timber. 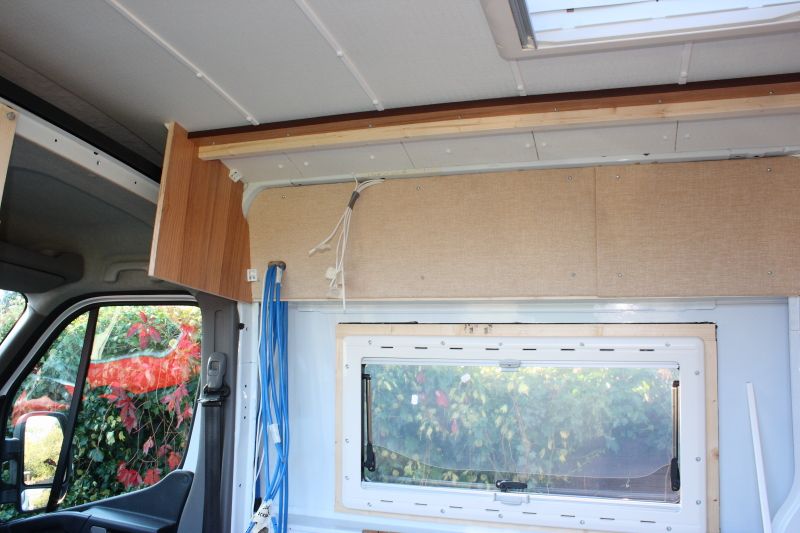 So for a bit of variety, I started looking at the front seats. So the cab can become part of the living area, it's best to be able to spin the seats. High-end versions of the early Ford Galaxy have swivel seats, so I got my hands on a cheap pair from a local breaker a couple of months ago. My original plan was to chop the swivel mechanism out to fit to some tidy seats. In the end I've decided to have these re-trimmed. They're grubby, but in good shape otherwise. 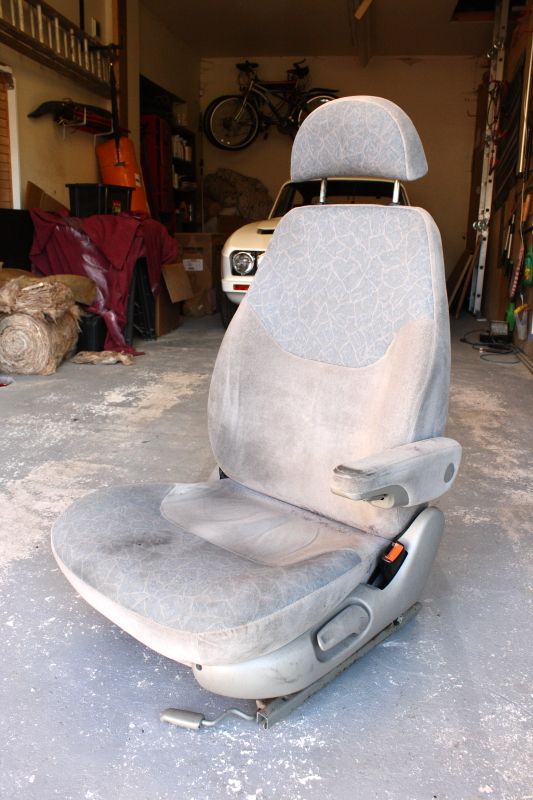 I've stripped it down, which eases the task for the upholsterer, plus it needs some mods. 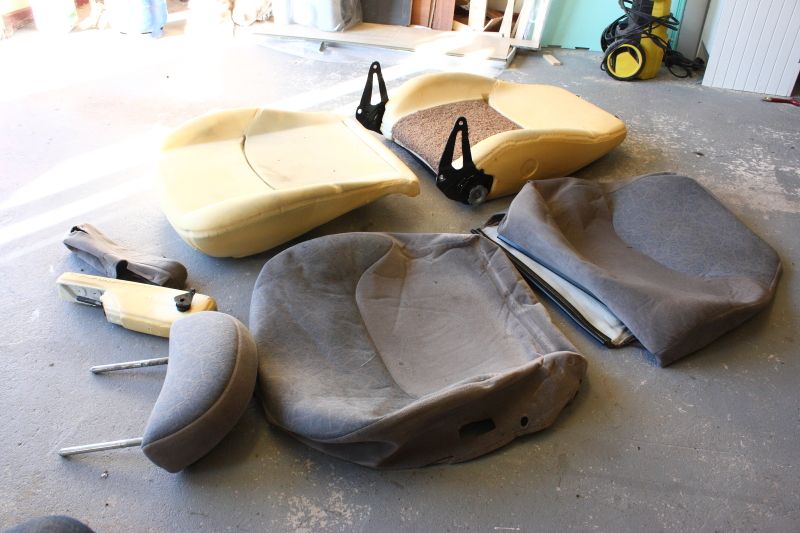 The base fits rather nicely on the Master's seat box. The holes just needed a little embiggening at the rear to fit. 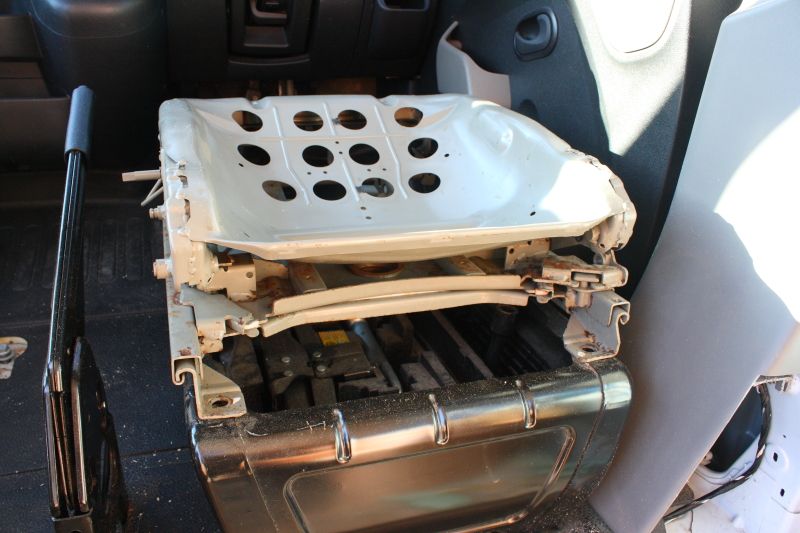 At the front, it also needs to be a little wider, but also a little longer. A bit of chopping and welding sorts that. 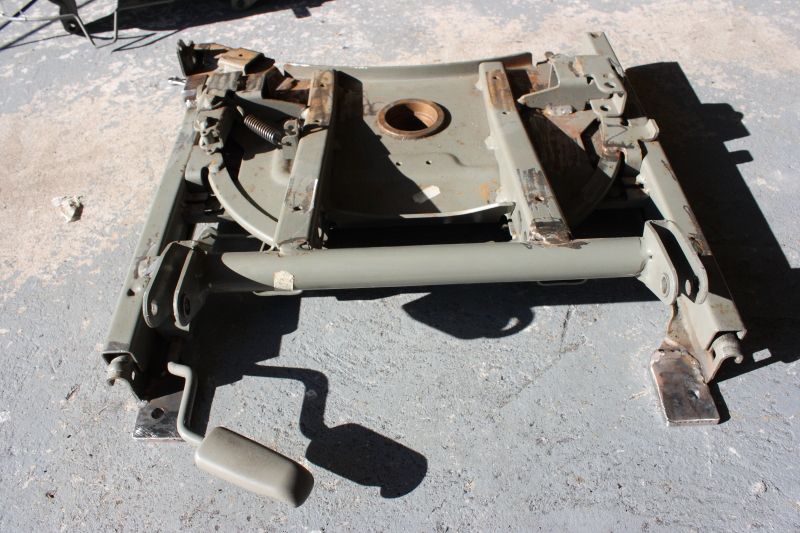 There's one other important modification. The Galaxy seats swivel to the outside of the car to ease entry/exit. For a camper, they need to swivel inwards. This lug is the problem, and is easily chopped off. However, it secures the corner of the seat which carries the seat belt latch. 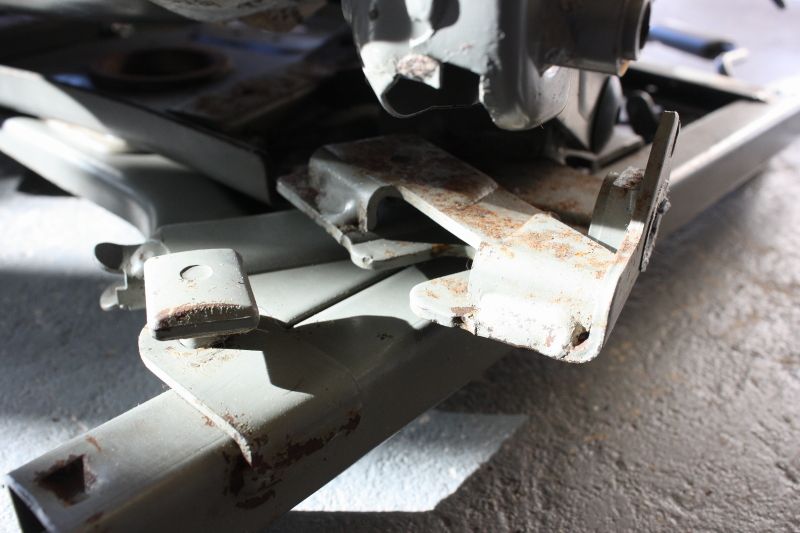 In an accident, you don't want that all folding forwards. So I've added this little box. When the seat returns from the other direction, the forward edge of the seat belt bracket tucks underneath it. 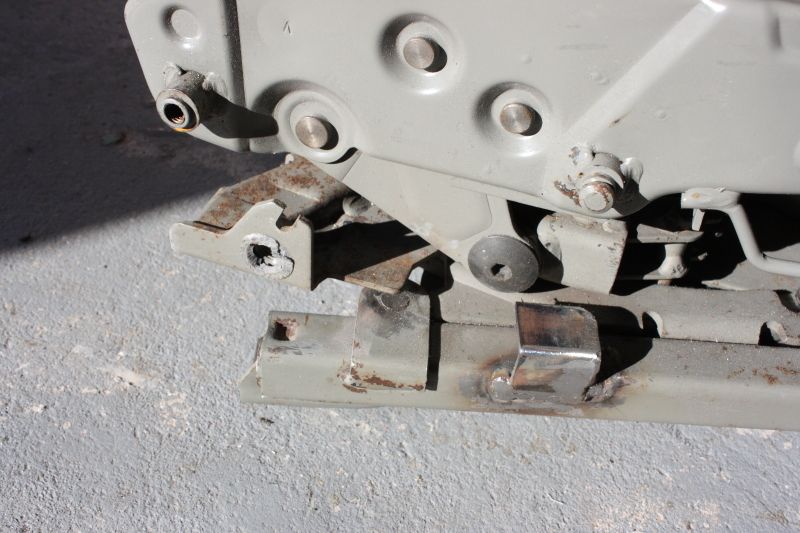 Now it's all done and painted black, ready to go to the trimmer. Not yet though : t'other side is still to be modified.  |
| |
|
|
MK2VR6
Posted a lot
   Mk2 Golf GTi 90 Spec
Posts: 3,329
|
|
Oct 12, 2014 10:51:40 GMT
|
|
Bookmarked and intrigued!
|
| |
|
|
eternaloptimist
Posted a lot
   Too many projects, not enough time or space...
Posts: 2,578
|
|
|
|
|
Nice work on the seats there.
|
| |
XC70, VW split screen crew cab, Standard Ten
|
|
|
|
|
Oct 20, 2014 18:26:34 GMT
|
Cheers for the interest, chaps. I do appreciate I'm being non-retro on this thread. More pictorial progress. What's this all about? 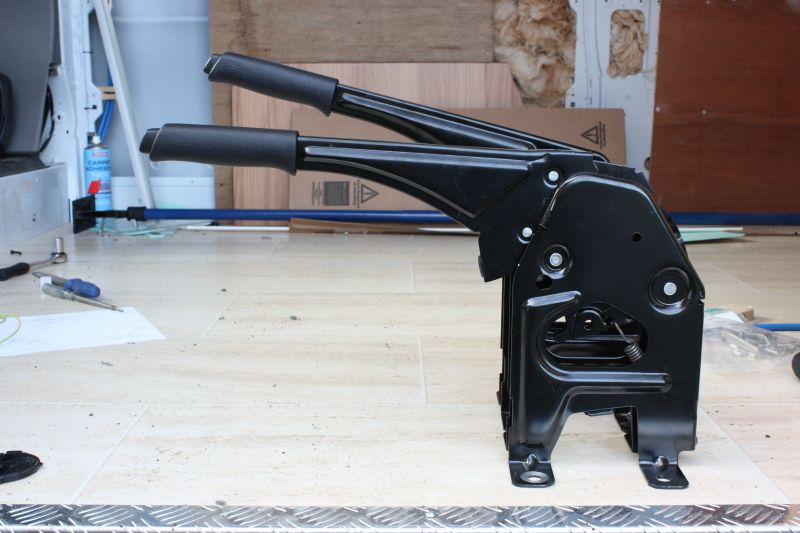 Well, with the spinning front seats, there's the small problem of the handbrake being in the way. Renault deal with this by offering a fold-flat hand-brake. Actually they provide this as an option on the campervan platform used by the pro converters (check under 'Camper Preparation' in the micro-fiche), and seems to be suitable for the Mk2 and Mk3 Master (and the Vauxhall Movano too I guess) I discovered it here and further proof here www.opel.dk/content/dam/Opel/Europe/denmark/nscwebsite/da/11_Brochure_Library/X62_CG_Part_3h_53_79_142_148_EN.pdfArmed with that, I enquired at the local dealer (Shelbourne in Portadown). They were damned helpful and ordered the part in for me to check before committing to buy it. It's a direct swap (despite what the parts manual suggests about different hand-brake cables), and saves about 70mm of height. Here it is, in place within 5 minutes of starting the job. It reminds me how quick it is building things when stuff just bolts together instead of fabricating it first. 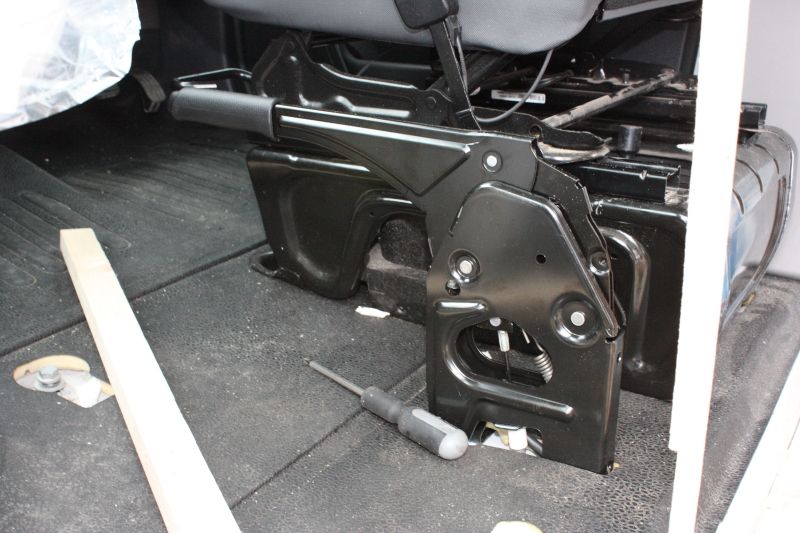 Part number for future reference in case Google search leads another home converter here  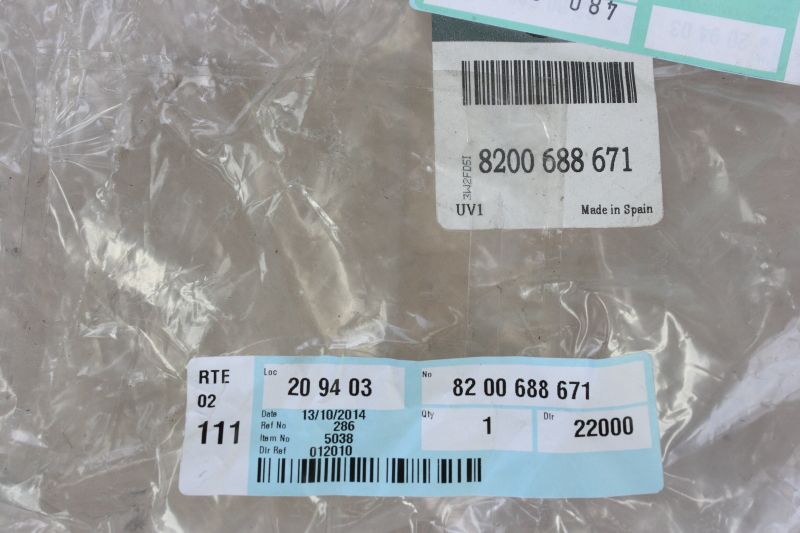 The price of this bolt-on main-dealer goodness? Are you sitting down?. £324 (inc VAT)  Well it's really the only solution, so with the rest of the van being home-built, it hasn't really bugged me. So more joinery on the cupboard, and fitting the mains consumer unit and 12V control panel ahead of electrics. Euuugh. 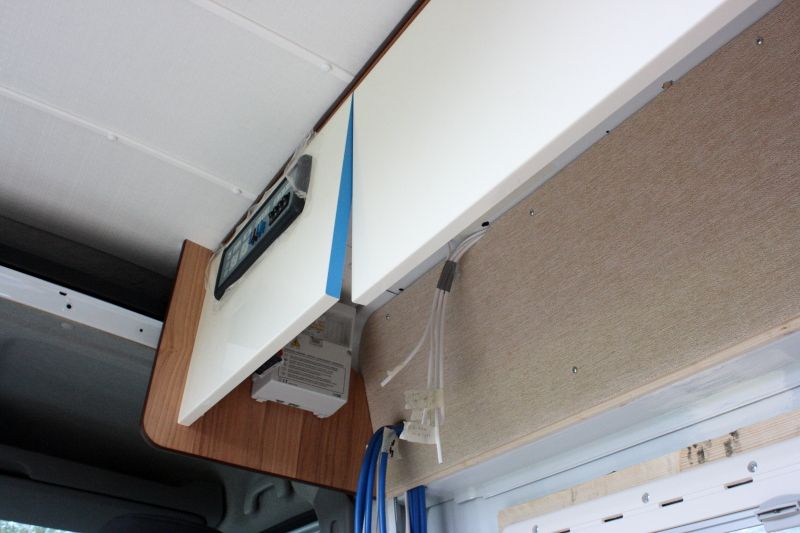 |
| |
|
|
|
|
|
Oct 23, 2014 14:22:45 GMT
|
Your pictures have died  |
| |
|
|
TS
Part of things
 
Posts: 558
|
|
Oct 24, 2014 18:31:25 GMT
|
|
Just stick them on Imgur. Photobucket is awfully restrictive.
|
| |
|
|
|
|




 Well it's really the only solution, so with the rest of the van being home-built, it hasn't really bugged me.

