Hello folks,
So, funny story, I posted a pic of one of my home made canoes in another thread and was told that it looked interesting, and I should maybe expand on it a bit.
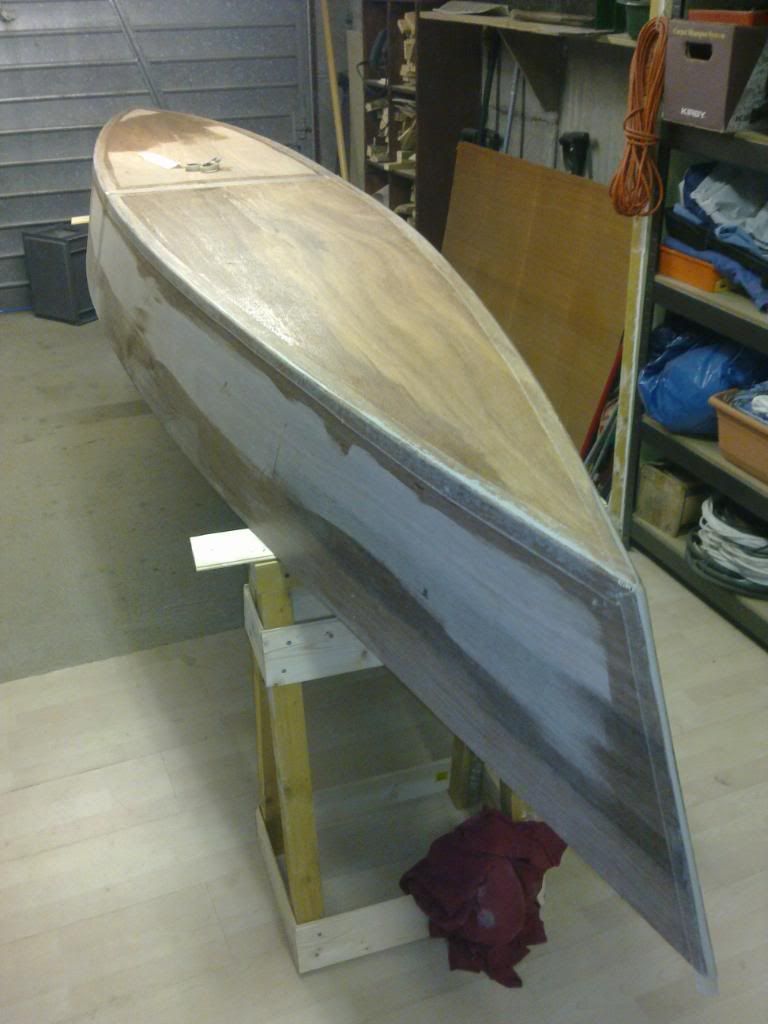
My reason for posting the pic was that sometimes you just need a break from being under a car, and building something out of wood is excellent therapy. Here's a potted history of one of the canoes i built using the following "easy to find" items:-
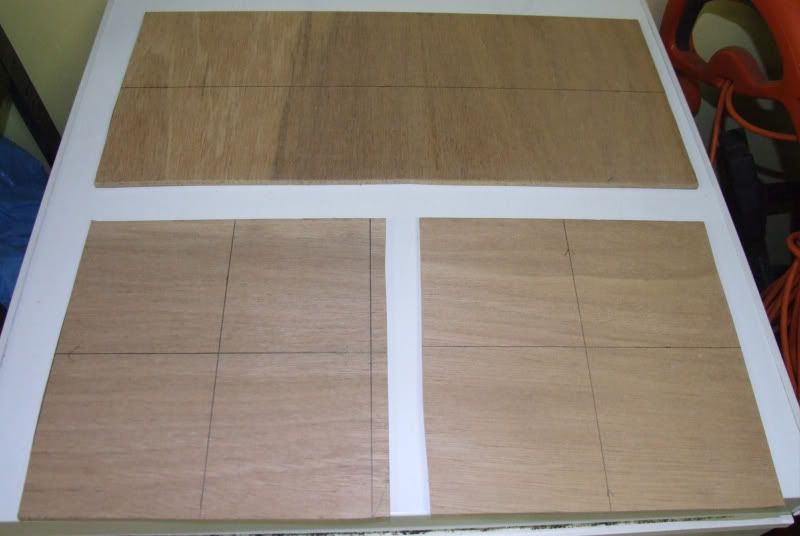
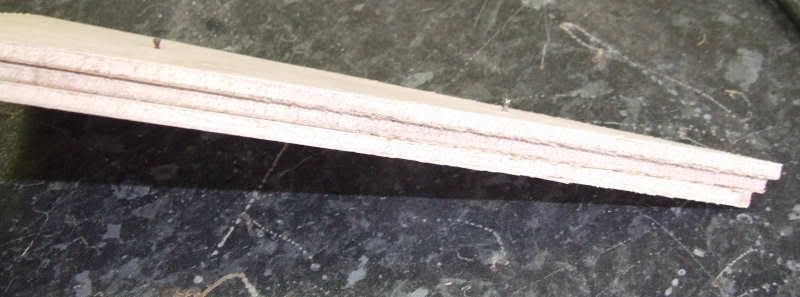
* Two sheets of 8'x4' 6mm plywood
* A decent bonding agent (such as sikaflex or cascamite powder)
* Fibre glass webbing tape
* Polyester resin & hardener
* Cable ties or wire ties (or gaffer tape)
The original plans came from here:- www.bateau2.com/free/cheapcanoe.htm
Much respect to www.bateau.com for making these plans available.
These canoes are very easy to build, no special tools or skills required, and if you start on a Saturday morning you can be paddling up the river in your canoe by Sunday afternoon. If anyone has any questions, please feel free to ask or PM me. Hopefully between the link for the plans above, and seeing how I applied those plans to building, you can quite easily, quickly and cheaply knock up a canoe for some summer fun.
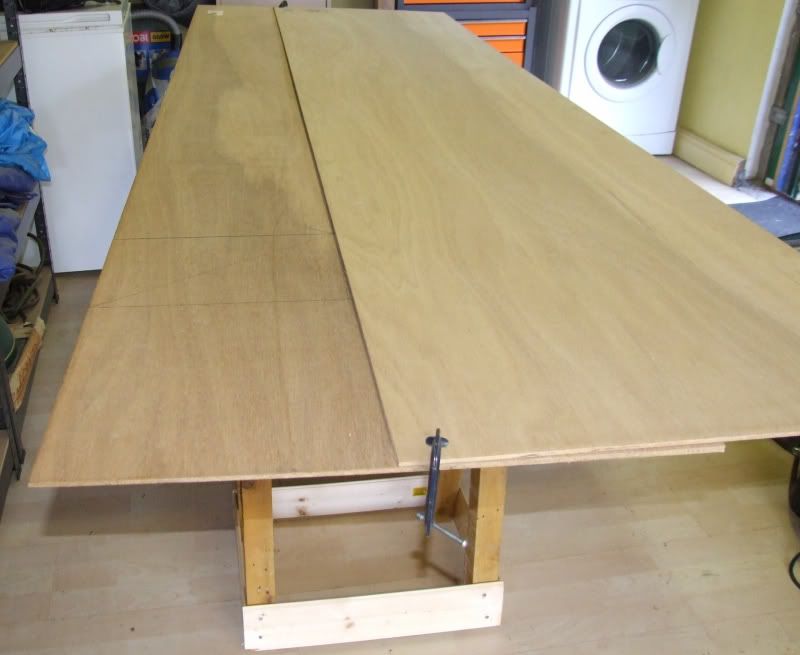
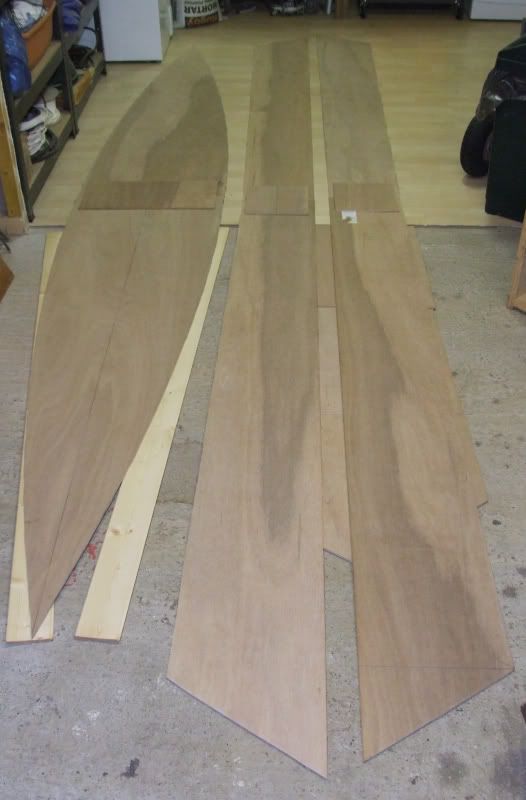
Step 1) Cut some plywood
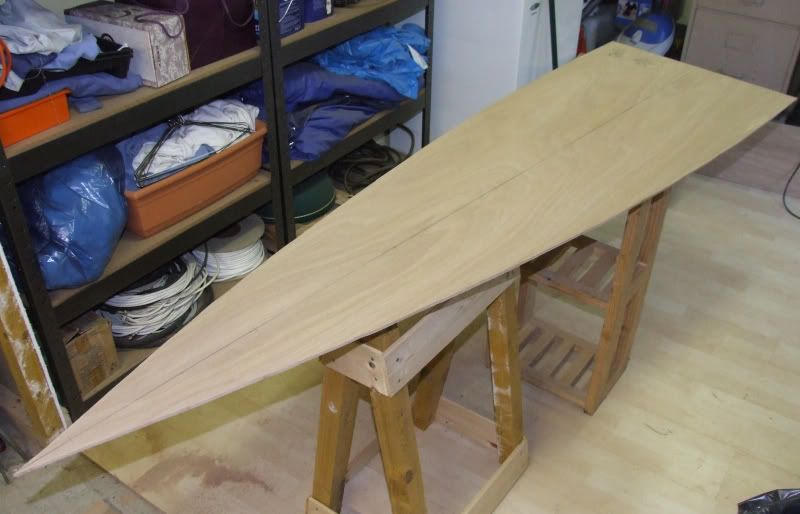
So you're going to be using one sheet of ply for the base, and the other sheet for the sides. Start off with the sides, cut the 8'x 4'sheet in half along its length.
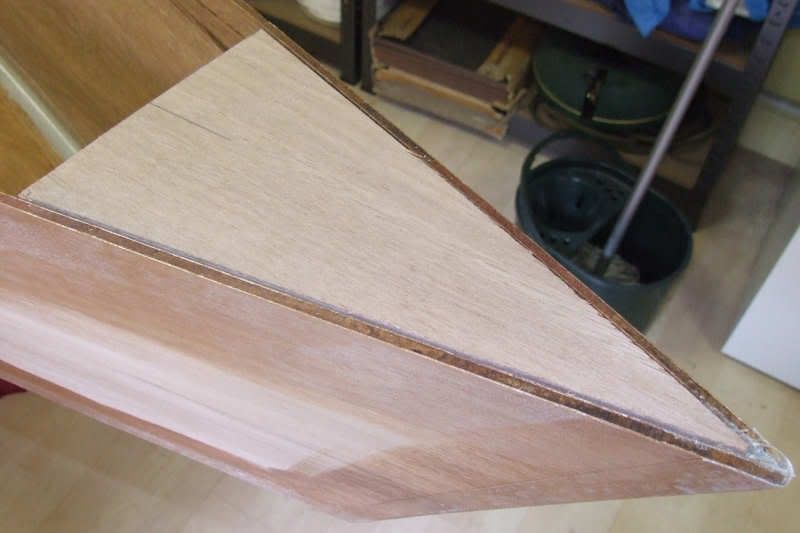
Using the measurements from the plans, mark out the lengths and the shape for the end of the canoe, then cut to size. They need to be close, but don't beat yourself up if they're not exact. This is a canoe, not a wedding cake.
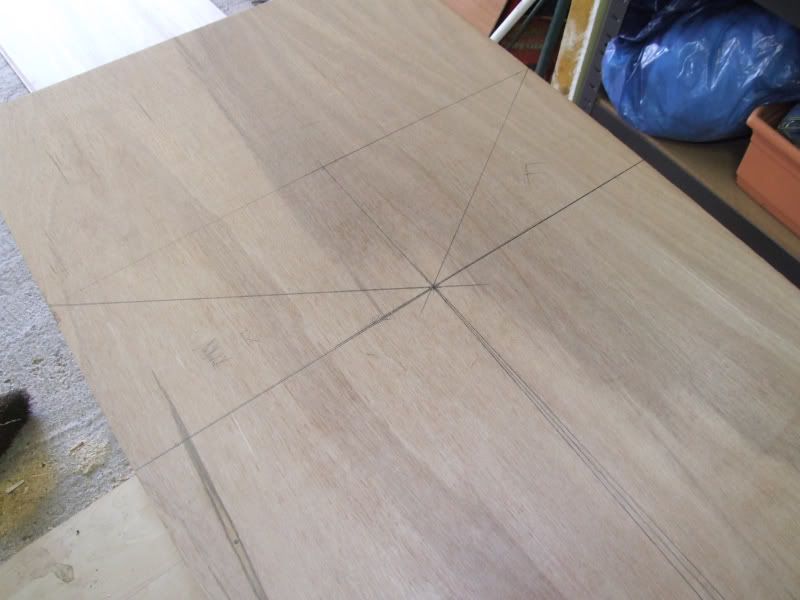
Cut the other 8'x 4' sheet in half down the middle too, and again using the measurements from the plans, scribe out the shape of the base of the canoe. I used a length of plastic pipe, but a length of bendy wood will do just the same. I generally make one half of the base and use it to mark out the other half. Again, it doesn't have to be perfect, chances are if you do it this way it wont be anyway. It doesn't matter.
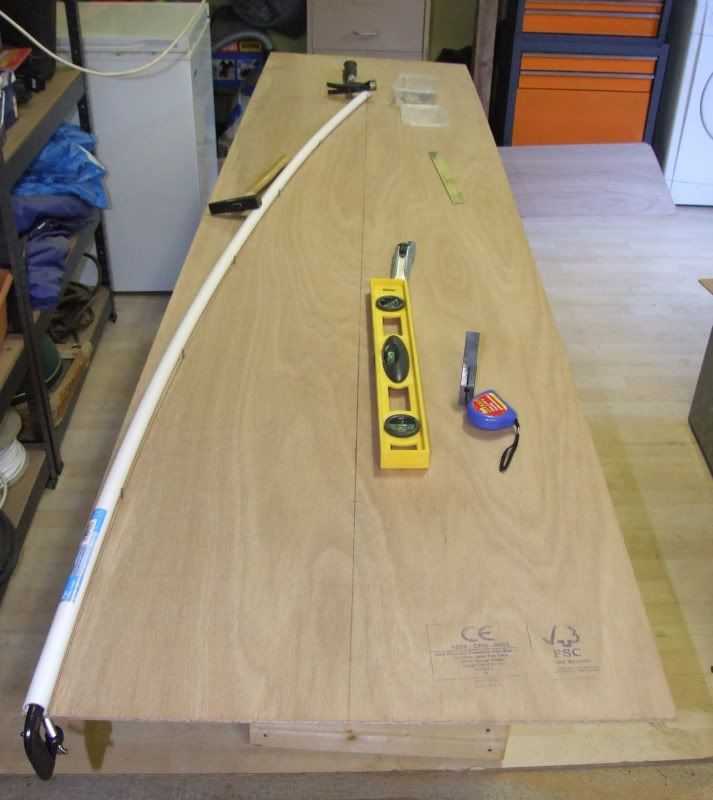
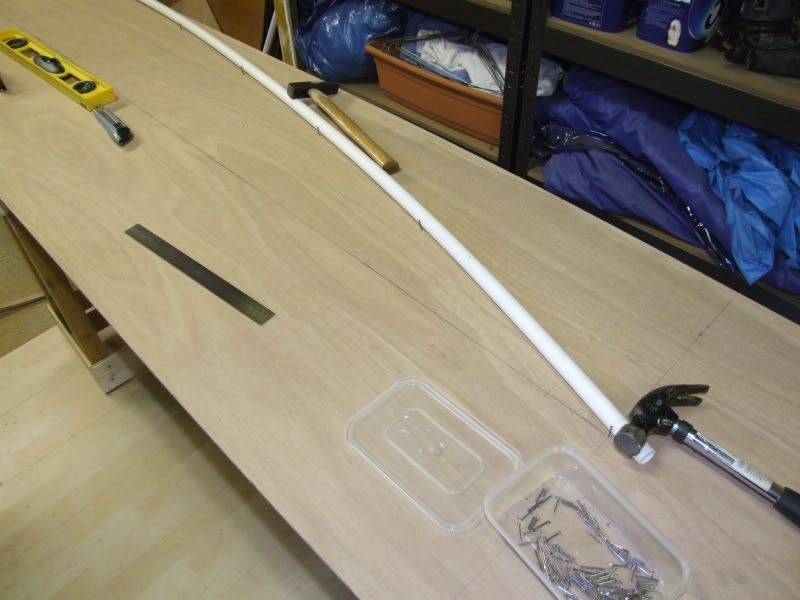
You are also going to have some spare bits, we will be needing these for sticking the lengths together.
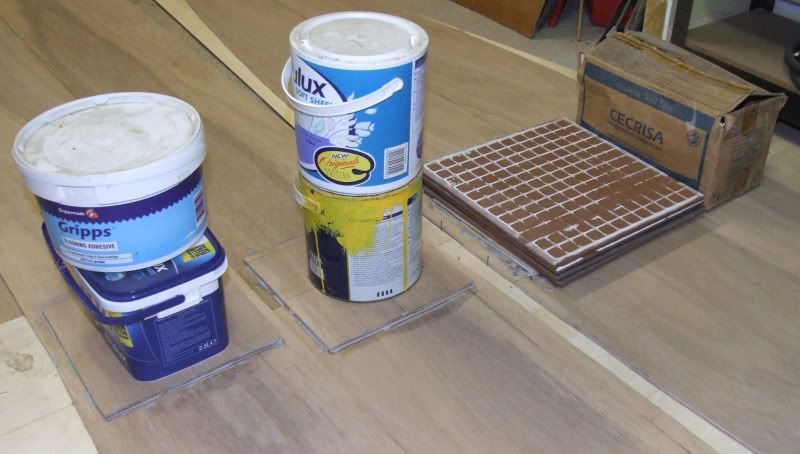
Step 2) Join the lengths
Bond the sections together using Sikaflex or some other insanely good bonding agent like Gorilla glue. It needs to be water resistant at the very least. Then get some weight on the joins until it sets.
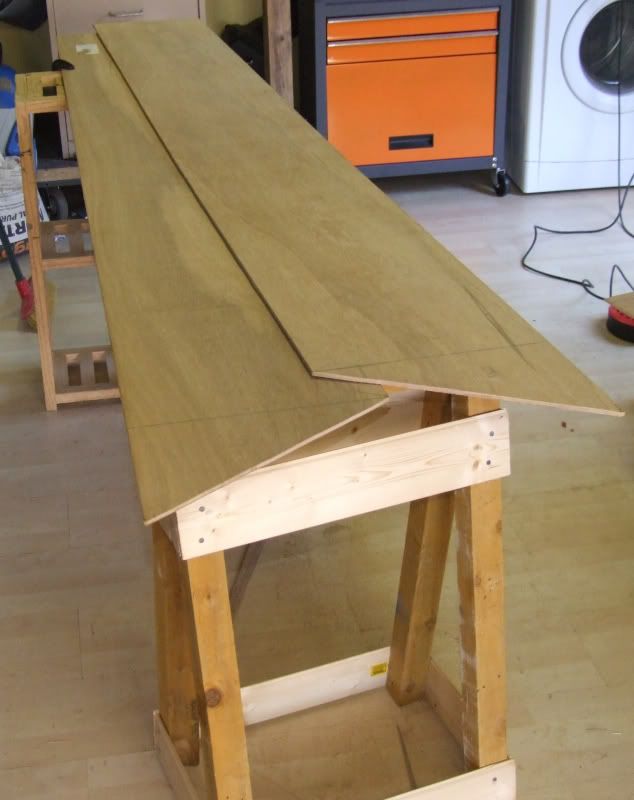
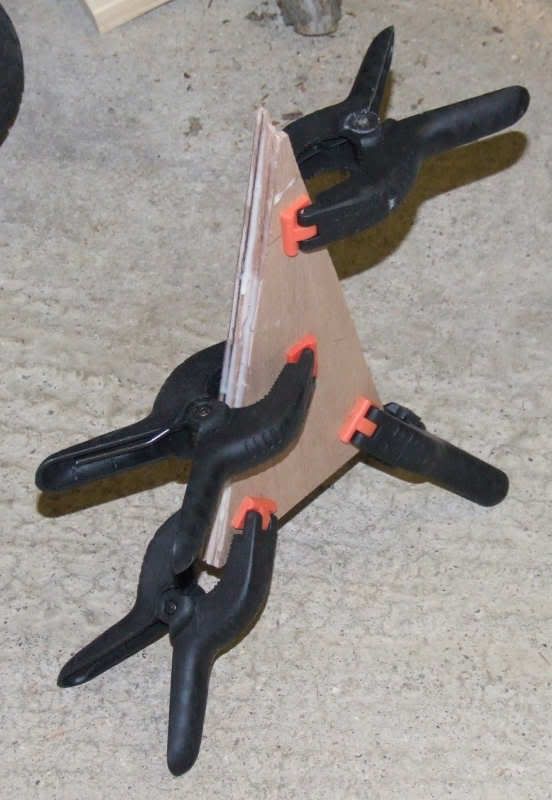
Step 3) Tie it together
This method of construction is called "stitch and glue", because you're supposed to drill holes and use zip ties or copper wire twists. Here's a pic of the method.
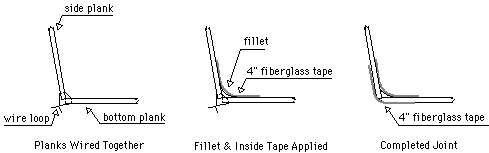
I found that gaffer tape did just fine. You may need the help of a friend, neighbour, loved one or other press-ganged family member at this stage. Some jiggling and swearing may be required until you get all the sections sat together properly. Hang in there.
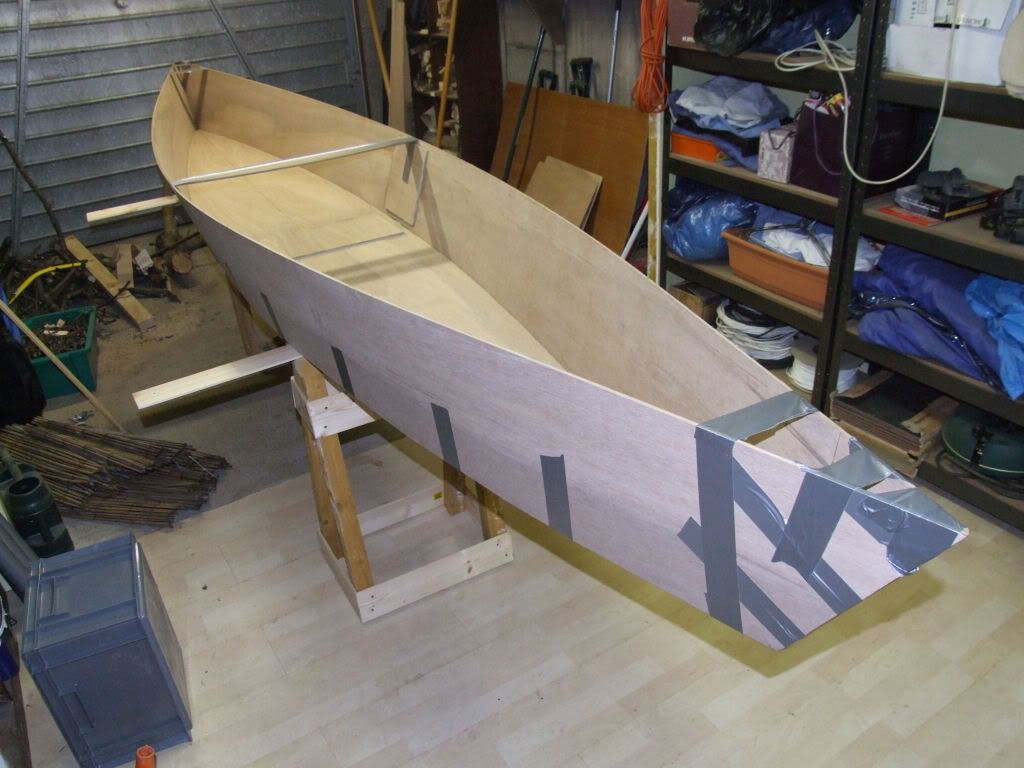
Step 4) Bond those joints!
Start by tacking up the pointy ends of the canoe (stem and stern!) and a few tacks long the length. Focus on the inside for now, don't worry about the outside yet. Make sure the seams are smooth as possible, because we need to tape and resin them later. It's also worth tacking a length of wood across the centre of the canoe, just to help keep the shape.
Once the bonding agent has dried, you can remove the gaffer tape or ties that you used.
Fill any external gaps with the bonding agent, and if at all possible, sand the seams so there are no rough edges.
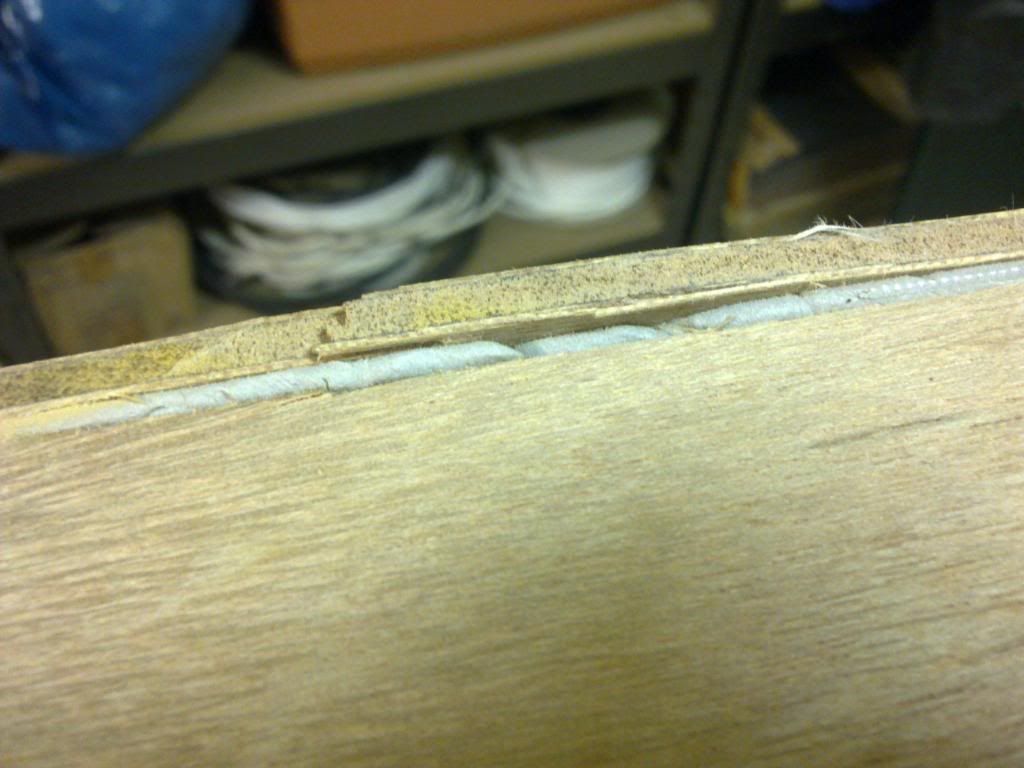
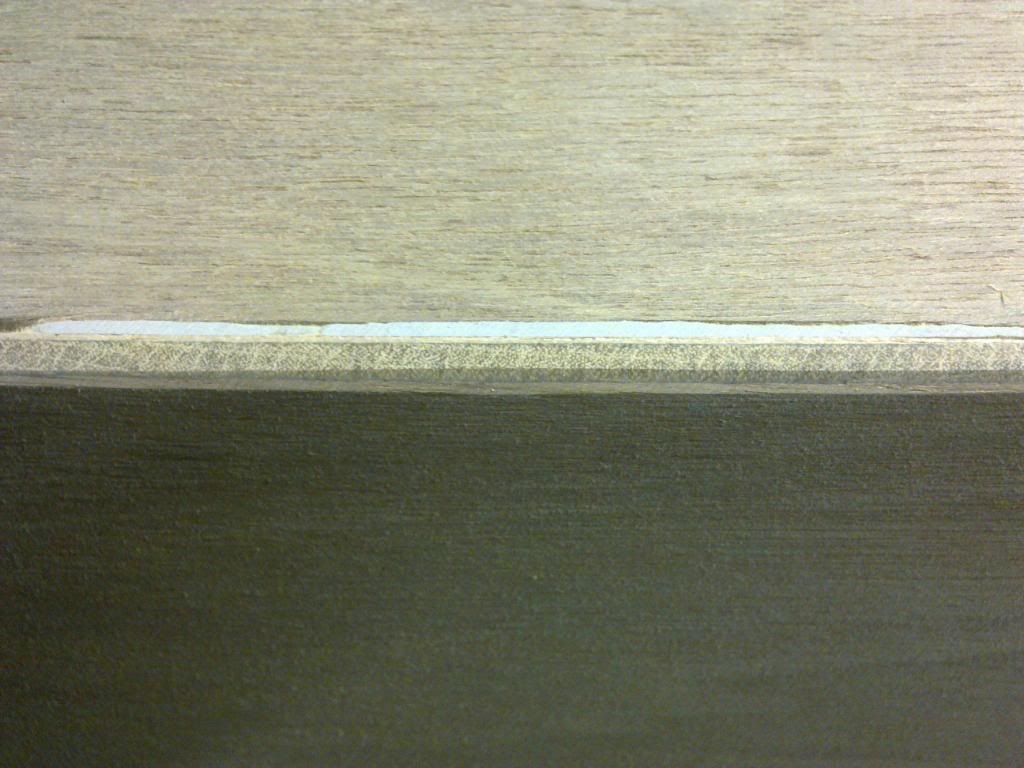
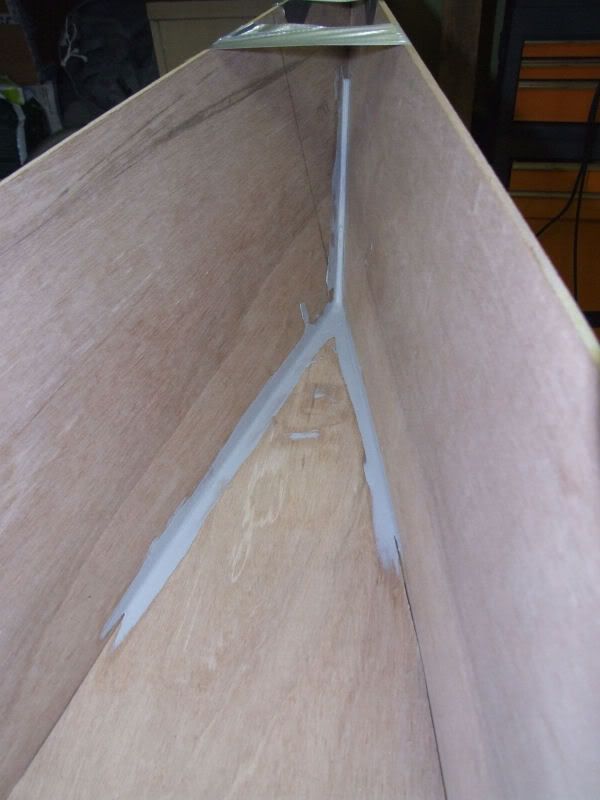
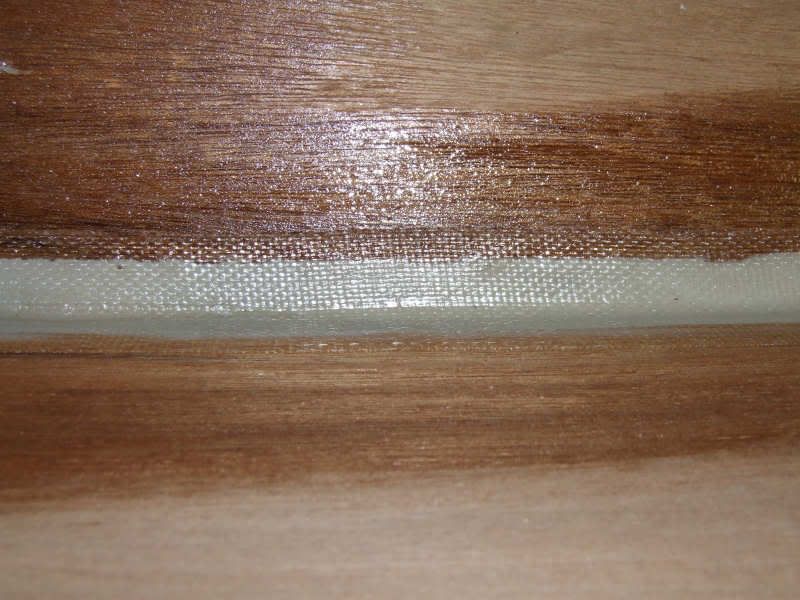
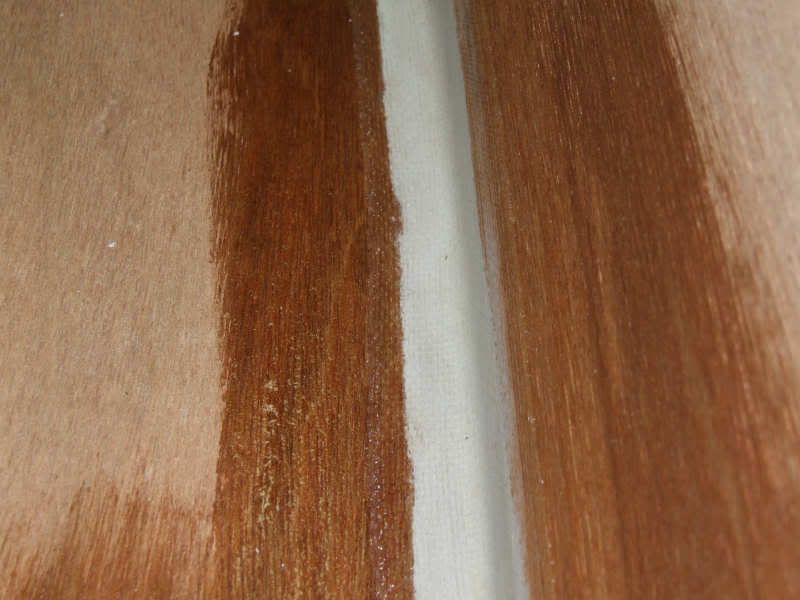
Step 5) Tape the seams
Using glass fibre tape and resin, tape the seams so that the bonding agent is covered. The tape is white but goes transparent when soaked in resin. These taped seams will make the canoe super strong.
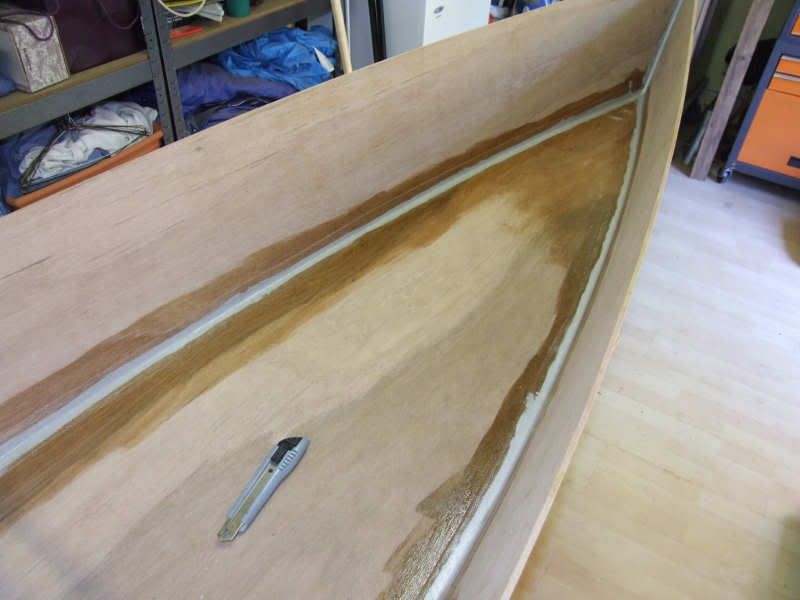
Step 6) Resin the whole thing
Once the seams are all done, get some resin over the whole thing. Ideally the temperature needs to be 15c or more, and if it's sunny get the canoe outdoors in the sunshine to help it dry.
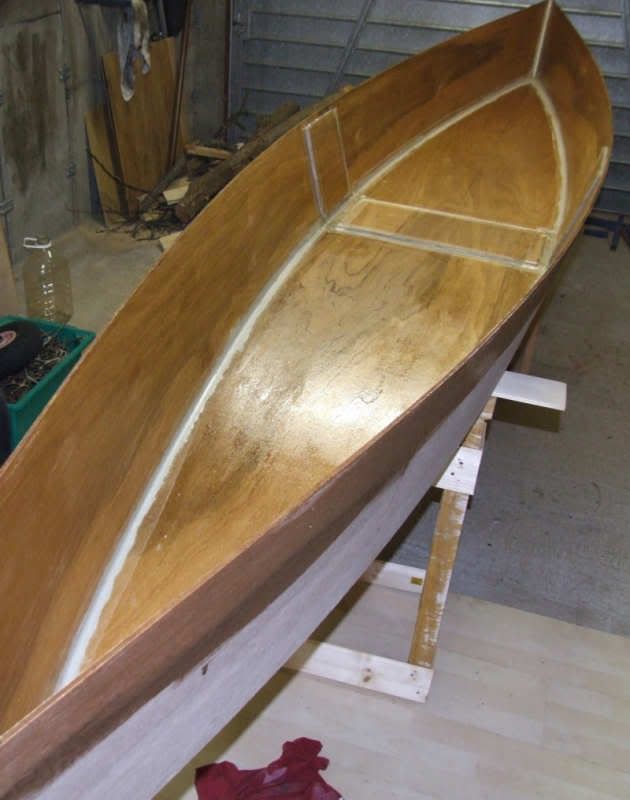
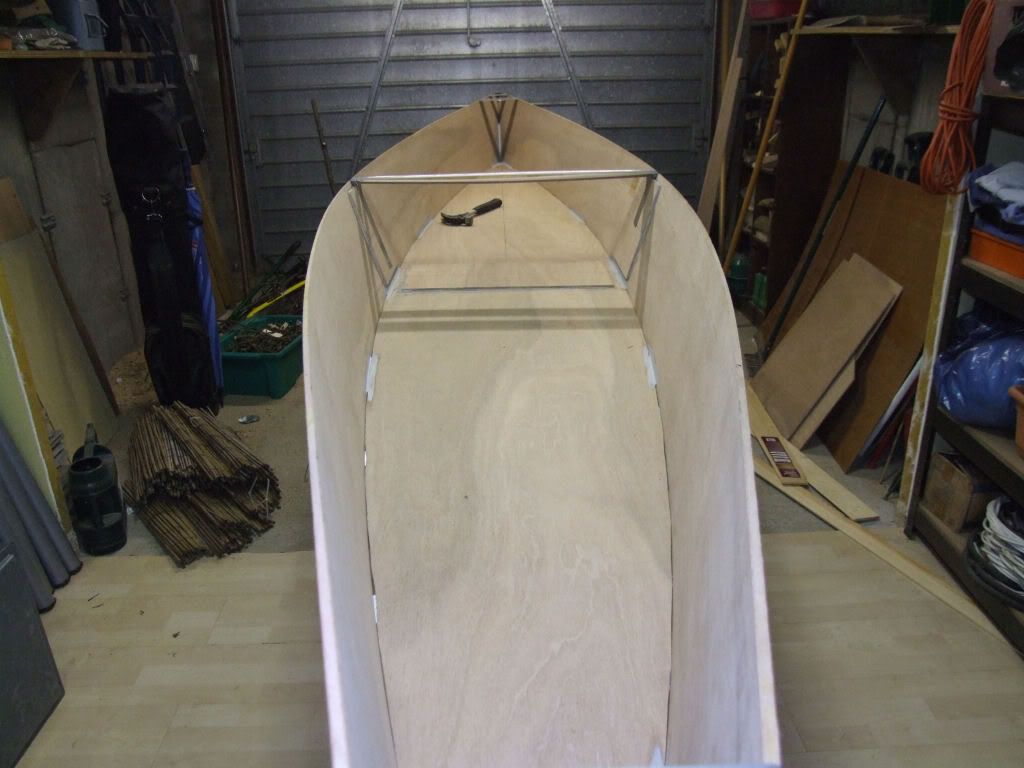
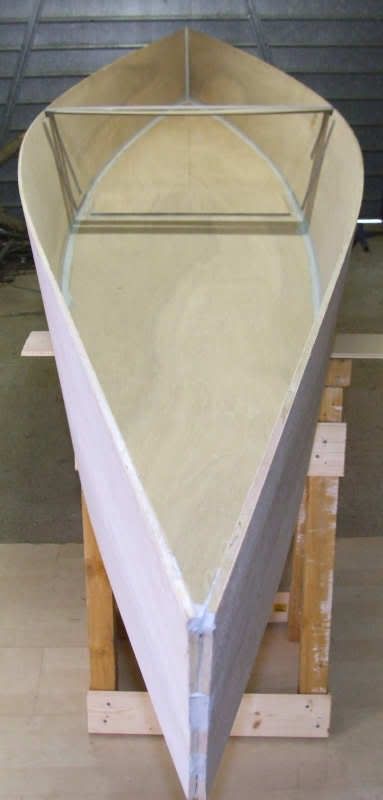
Step 7) Add some thwarts
Next we need some thwarts for the pointy ends. I cut three sections to size, glued them togther, then bonded them in place at each end.
For some reason I also re-coated the inside with some pigment added into the resin. You can add different colours into the resin, although looking back i'm not entirely sure I liked it.
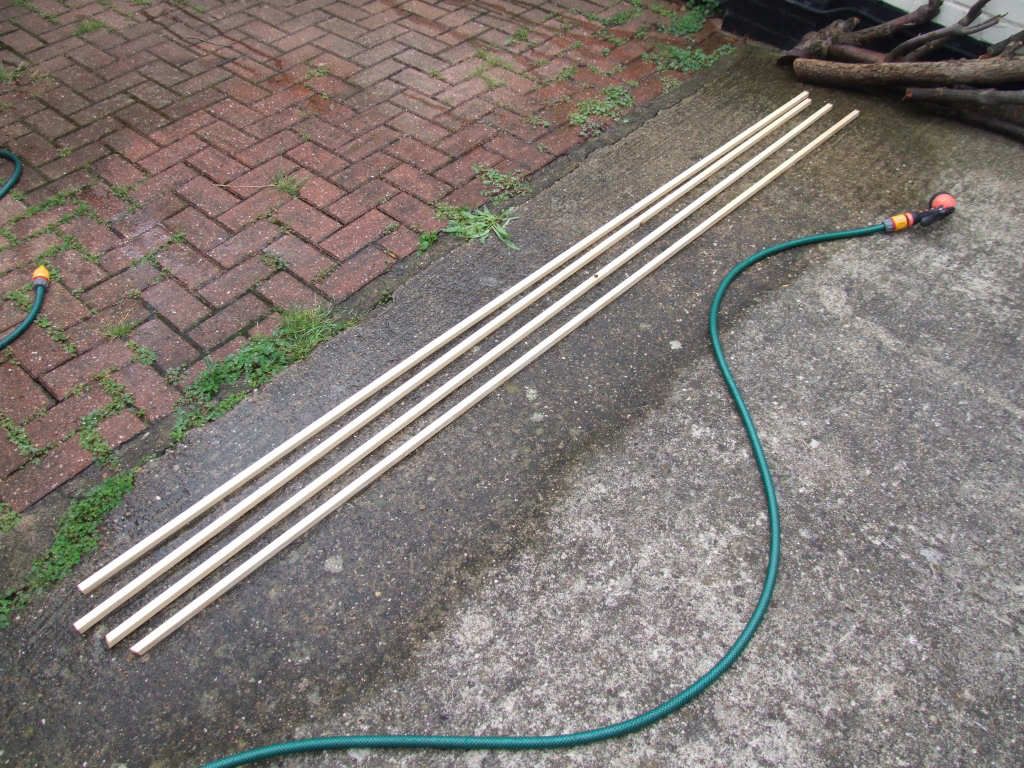
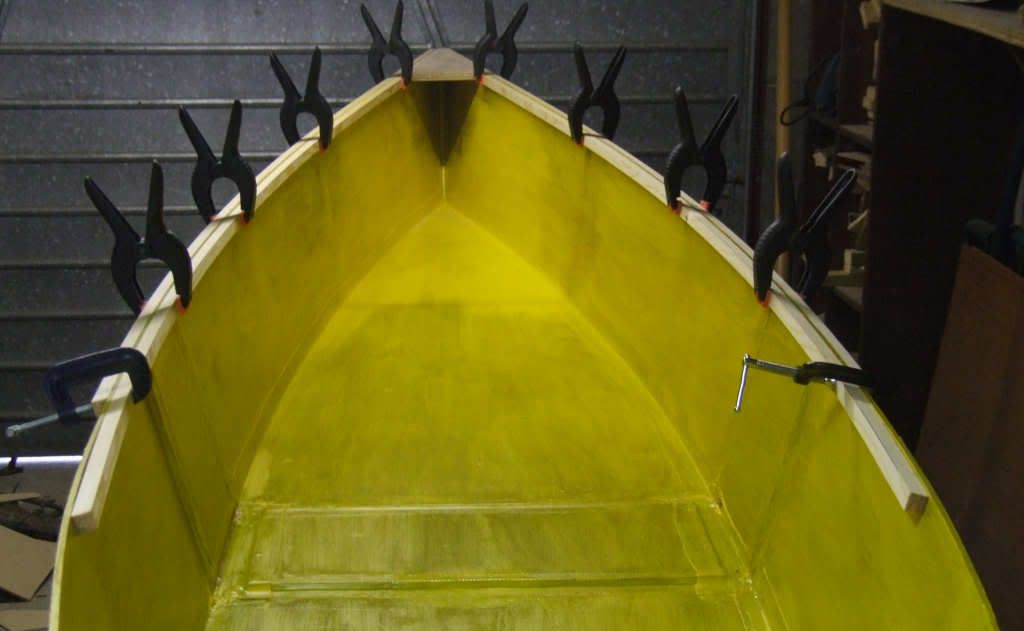
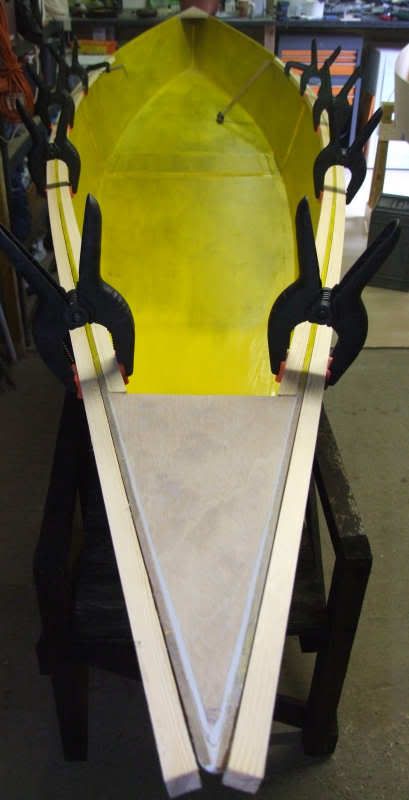
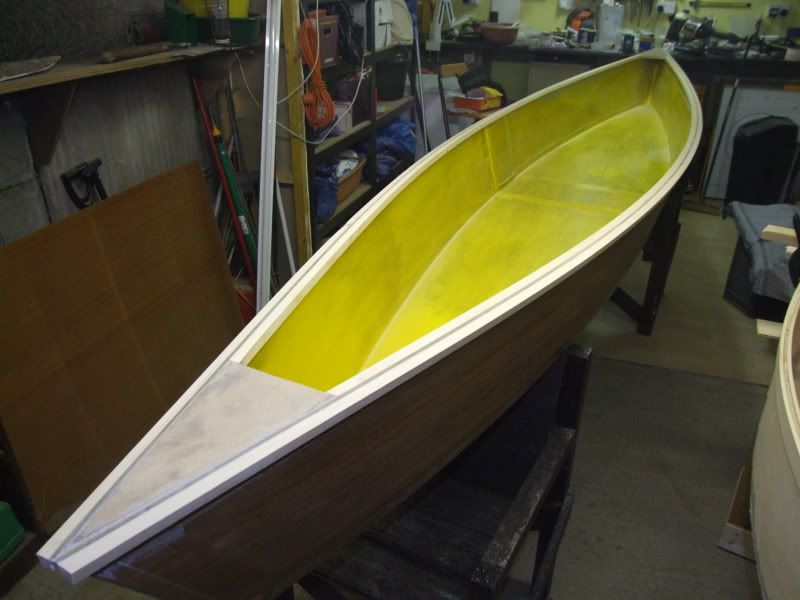
Step 8) Add some gunwales!
The gunwales are optional really, but they add a lot of strength. I used 15mm x 15mm timber strips, soaked in water to make them more flexible, then bonded in place and clamped until dry.
Step 9) Add some extras!
That's about it really, you can spend a lot of time finishing off, sanding bits and making them look nice, or you can go find some water and throw it in and have a go.
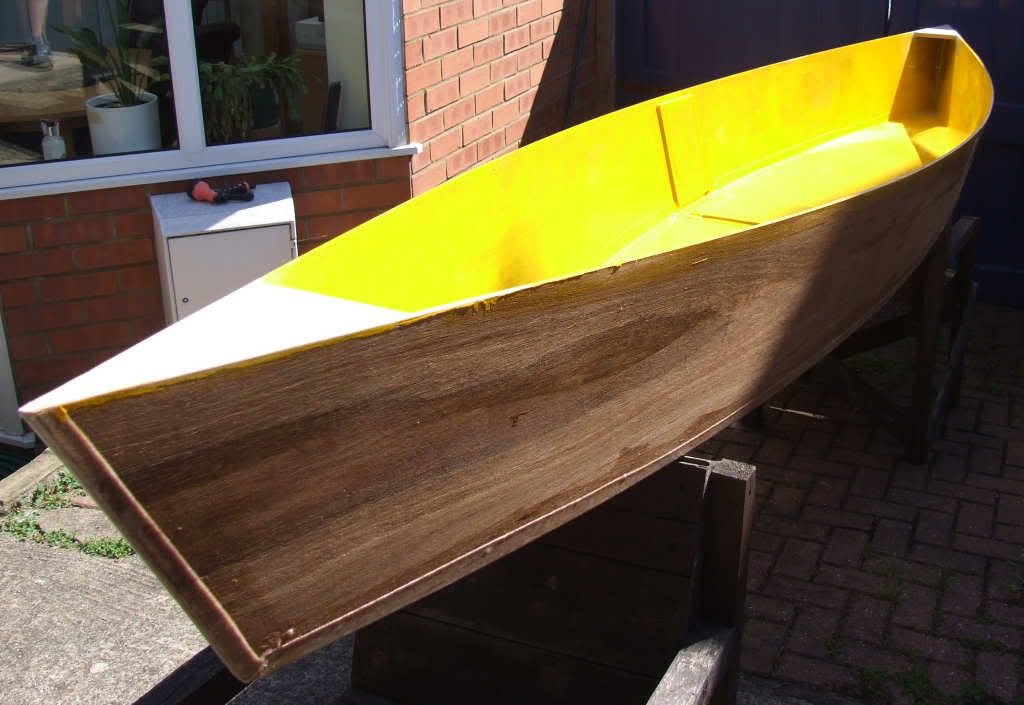
Some extras to consider - you can use some of the scrap wood to make a seat or seats. This canoe will hold one 20 stone bloke (for sure) or maybe two 10-11 stone persons, so add seats to taste really I guess. A central brace or maybe two will add strength, but if you are adding seats you may not need them.
These canoes are quite sensitive to balance, but if you want to add some stability you can add three strips of wood the length of the canoe on the underside. These act like a keel and also protect the underside during launching etc.

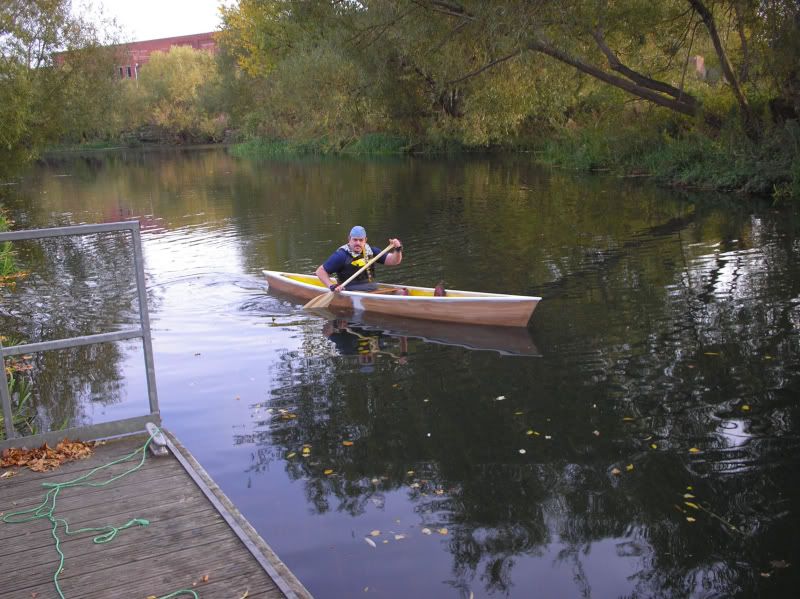
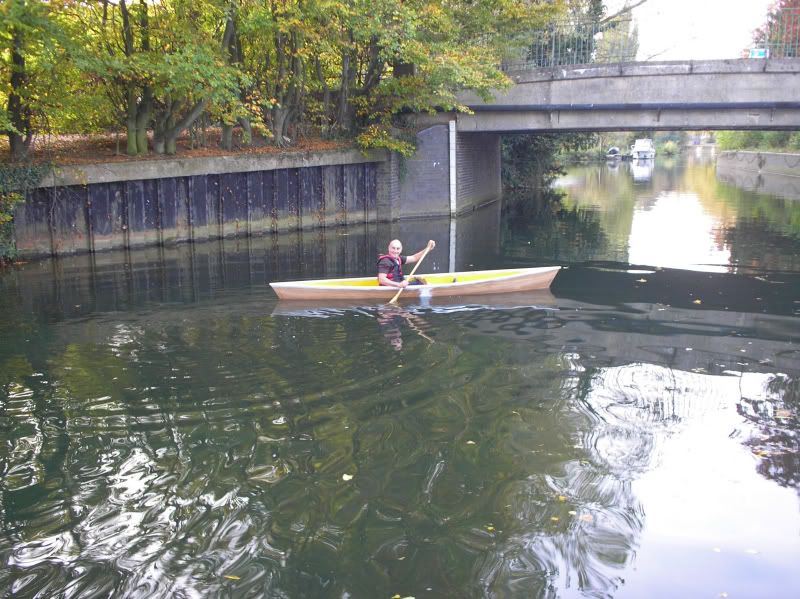
Step 10) Paddle!
Finished your canoe? Lets get paddling then! (Always wear a PFD! (personal flotation device) Water is dangerous!)
I really hope this little ramble proves useful to anyone keen on building their own canoe, they really are easy and fun to build, and will certainly get you thinking about what else you could make.
Anyone needs any help or specifics etc, please feel free to PM me. I will probably be in the garage making something!
Chris.
So, funny story, I posted a pic of one of my home made canoes in another thread and was told that it looked interesting, and I should maybe expand on it a bit.
My reason for posting the pic was that sometimes you just need a break from being under a car, and building something out of wood is excellent therapy. Here's a potted history of one of the canoes i built using the following "easy to find" items:-
* Two sheets of 8'x4' 6mm plywood
* A decent bonding agent (such as sikaflex or cascamite powder)
* Fibre glass webbing tape
* Polyester resin & hardener
* Cable ties or wire ties (or gaffer tape)
The original plans came from here:- www.bateau2.com/free/cheapcanoe.htm
Much respect to www.bateau.com for making these plans available.

These canoes are very easy to build, no special tools or skills required, and if you start on a Saturday morning you can be paddling up the river in your canoe by Sunday afternoon. If anyone has any questions, please feel free to ask or PM me. Hopefully between the link for the plans above, and seeing how I applied those plans to building, you can quite easily, quickly and cheaply knock up a canoe for some summer fun.
Step 1) Cut some plywood
So you're going to be using one sheet of ply for the base, and the other sheet for the sides. Start off with the sides, cut the 8'x 4'sheet in half along its length.
Using the measurements from the plans, mark out the lengths and the shape for the end of the canoe, then cut to size. They need to be close, but don't beat yourself up if they're not exact. This is a canoe, not a wedding cake.
Cut the other 8'x 4' sheet in half down the middle too, and again using the measurements from the plans, scribe out the shape of the base of the canoe. I used a length of plastic pipe, but a length of bendy wood will do just the same. I generally make one half of the base and use it to mark out the other half. Again, it doesn't have to be perfect, chances are if you do it this way it wont be anyway. It doesn't matter.
You are also going to have some spare bits, we will be needing these for sticking the lengths together.
Step 2) Join the lengths
Bond the sections together using Sikaflex or some other insanely good bonding agent like Gorilla glue. It needs to be water resistant at the very least. Then get some weight on the joins until it sets.
Step 3) Tie it together
This method of construction is called "stitch and glue", because you're supposed to drill holes and use zip ties or copper wire twists. Here's a pic of the method.
I found that gaffer tape did just fine. You may need the help of a friend, neighbour, loved one or other press-ganged family member at this stage. Some jiggling and swearing may be required until you get all the sections sat together properly. Hang in there.
Step 4) Bond those joints!
Start by tacking up the pointy ends of the canoe (stem and stern!) and a few tacks long the length. Focus on the inside for now, don't worry about the outside yet. Make sure the seams are smooth as possible, because we need to tape and resin them later. It's also worth tacking a length of wood across the centre of the canoe, just to help keep the shape.
Once the bonding agent has dried, you can remove the gaffer tape or ties that you used.
Fill any external gaps with the bonding agent, and if at all possible, sand the seams so there are no rough edges.
Step 5) Tape the seams
Using glass fibre tape and resin, tape the seams so that the bonding agent is covered. The tape is white but goes transparent when soaked in resin. These taped seams will make the canoe super strong.
Step 6) Resin the whole thing
Once the seams are all done, get some resin over the whole thing. Ideally the temperature needs to be 15c or more, and if it's sunny get the canoe outdoors in the sunshine to help it dry.
Step 7) Add some thwarts
Next we need some thwarts for the pointy ends. I cut three sections to size, glued them togther, then bonded them in place at each end.
For some reason I also re-coated the inside with some pigment added into the resin. You can add different colours into the resin, although looking back i'm not entirely sure I liked it.
Step 8) Add some gunwales!
The gunwales are optional really, but they add a lot of strength. I used 15mm x 15mm timber strips, soaked in water to make them more flexible, then bonded in place and clamped until dry.
Step 9) Add some extras!
That's about it really, you can spend a lot of time finishing off, sanding bits and making them look nice, or you can go find some water and throw it in and have a go.
Some extras to consider - you can use some of the scrap wood to make a seat or seats. This canoe will hold one 20 stone bloke (for sure) or maybe two 10-11 stone persons, so add seats to taste really I guess. A central brace or maybe two will add strength, but if you are adding seats you may not need them.
These canoes are quite sensitive to balance, but if you want to add some stability you can add three strips of wood the length of the canoe on the underside. These act like a keel and also protect the underside during launching etc.
Step 10) Paddle!
Finished your canoe? Lets get paddling then! (Always wear a PFD! (personal flotation device) Water is dangerous!)
I really hope this little ramble proves useful to anyone keen on building their own canoe, they really are easy and fun to build, and will certainly get you thinking about what else you could make.
Anyone needs any help or specifics etc, please feel free to PM me. I will probably be in the garage making something!
Chris.


 ? New project...