|
|
|
Jul 21, 2020 17:06:55 GMT
|
Now that all parts are cleaned and waxed, ive started getting some of it back together. I resisted the urge to put any paint on anything. Although ive got the instructions, I'm only using them if I really need them and putting it together as I see fit. Technically known as 'faffing'. The bar across the grill will have the headinghts on it instead of the bolts, but I'm still trying to straighten the buckets out so that they sit straight. 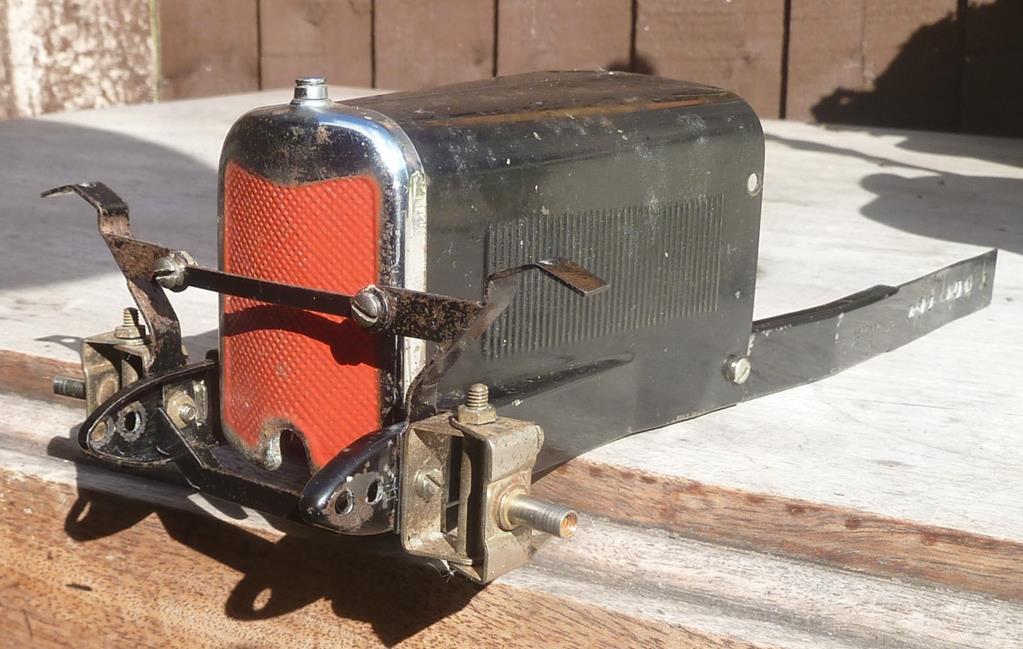 I had some old wax, and old oil so it only seemed right to use them  I'm going to use a touch of threadlock on some of the steering parts to stop them comming undone, and a touch of oil on moving parts. The hubs have no rust on them at all which is good. 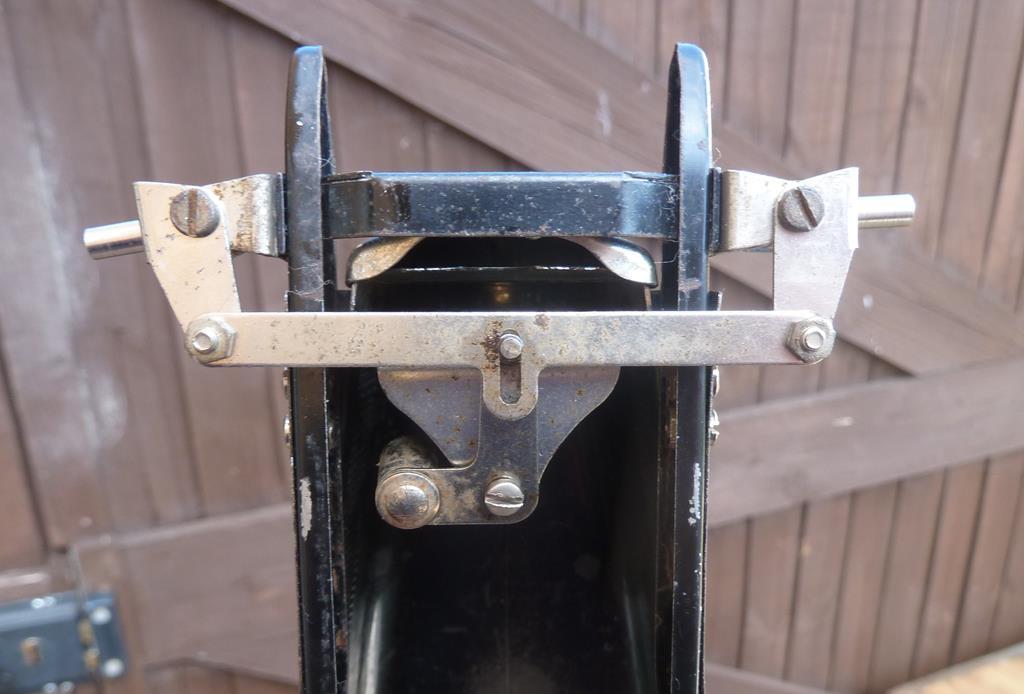 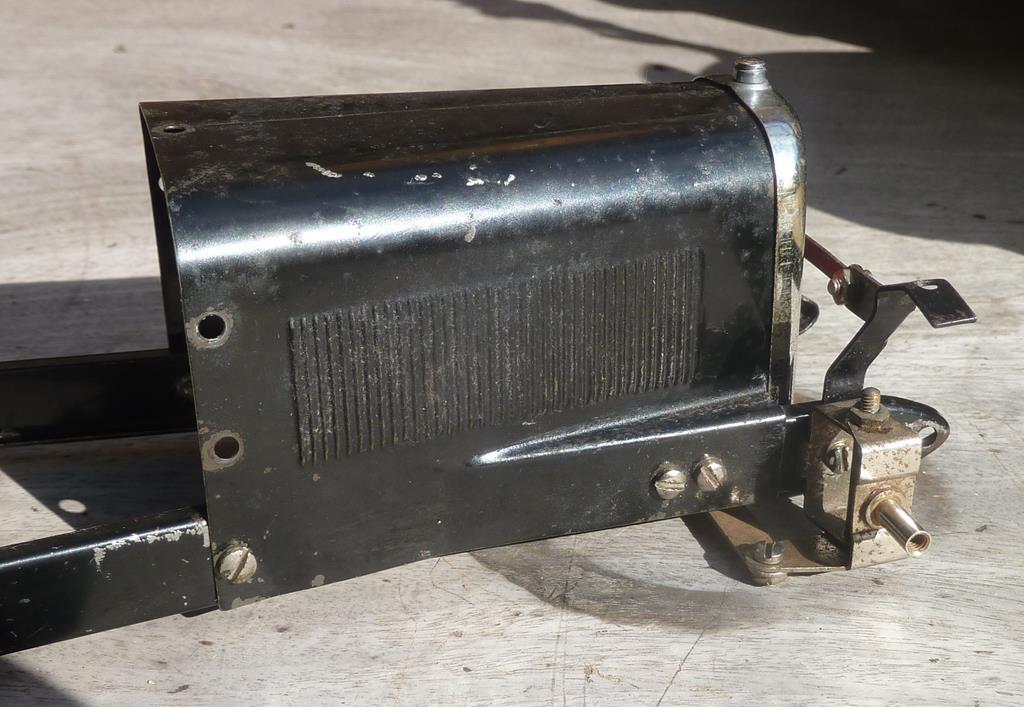 Thanks to a very helpful Meccano expert, ive found out the car was made in late 1937 and the cars were made by Meccano in the Meccano factory, the reason for the hex nut may have been because they were smaller and neater and looked better on the cars than the square nuts. This makes it more difficult to get genuine Meccano nuts and bolts for it, but easier to buy from some nut and bolt people on ebay now that I know what size they are  |
| |
Last Edit: Jul 21, 2020 17:21:32 GMT by bmcnut
|
|
|
|
|
|
|
Jul 22, 2020 18:07:16 GMT
|
|
Spoke to my dad tonight, he is a meccano enthusiast.
I described your car and he said that's a number 2 alright. Not as common as the aeroplane sets so quite sought after by collectors. Most were red and blue (I think he said) but the super rare one sought after by anoraks is black....
The tyres are probably available re-manufactured, he can't remember where.
The wheels are mazak, but quality control was poor so lots have literally turned to dust.
Hope this helps. I can pm you if you need an idea of value.
|
| |
|
|
|
|
|
Jul 22, 2020 18:14:07 GMT
|
|
Ps be careful about the threadlock if you are planning on selling, as collectors sometimes like them laid out in their component parts in the box. having the box is important too.
|
| |
|
|
|
|
|
Jul 25, 2020 14:03:25 GMT
|
|
This is cooooool! A good thing you’re doing too. I never knew of these but am very interested now!
|
| |
|
|
|
|
|
Jul 26, 2020 12:11:01 GMT
|
Ss I'm getting more of it together, I'm noticing more of it is missing. There are quite afew nuts and bolts missing, the back of the switch for the lights is missing, and one of the brackets for the arches is missing. It looks like this 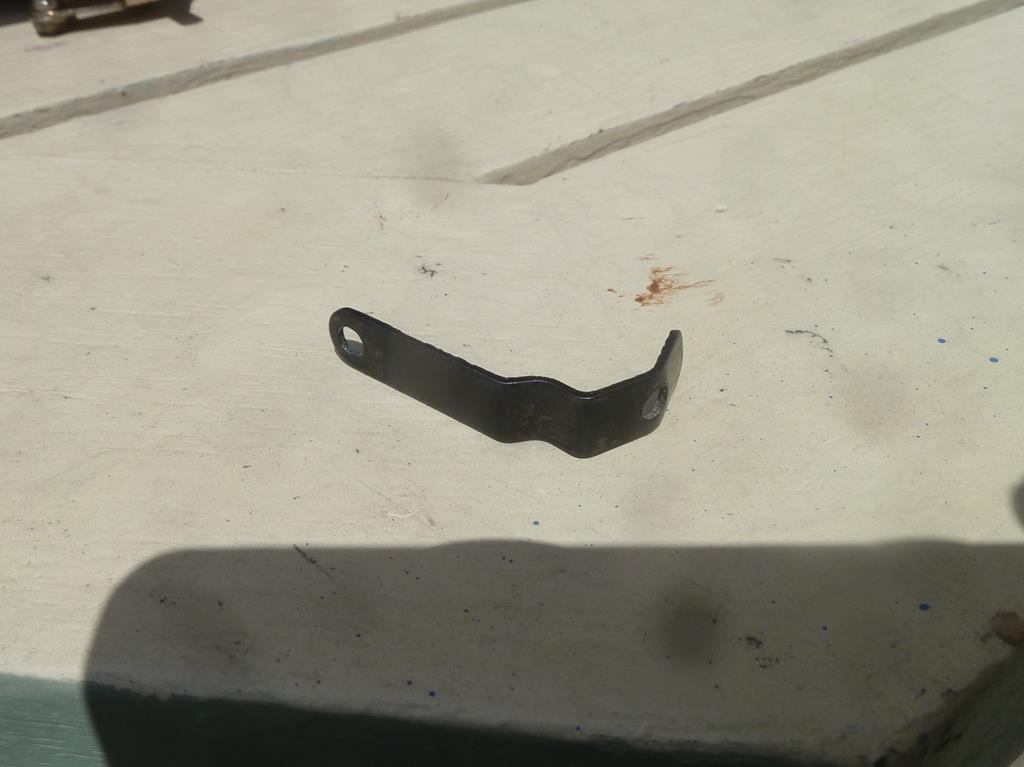 I have 3 options. Try and get a genuine one, probably not easy. Make one, its not going to look exactly the same but it will do the job. Or, put is back together without the bracket. It will need the bracket to ensure the arches are solidly mounted, but it doesnt need it to function. Its still worth doing though, now that in getting more of it back together I can see what a nicely engineered, tactile thing it really is. Its nice to have the opportunity to do this with out having to spend the money nessesary to do so. 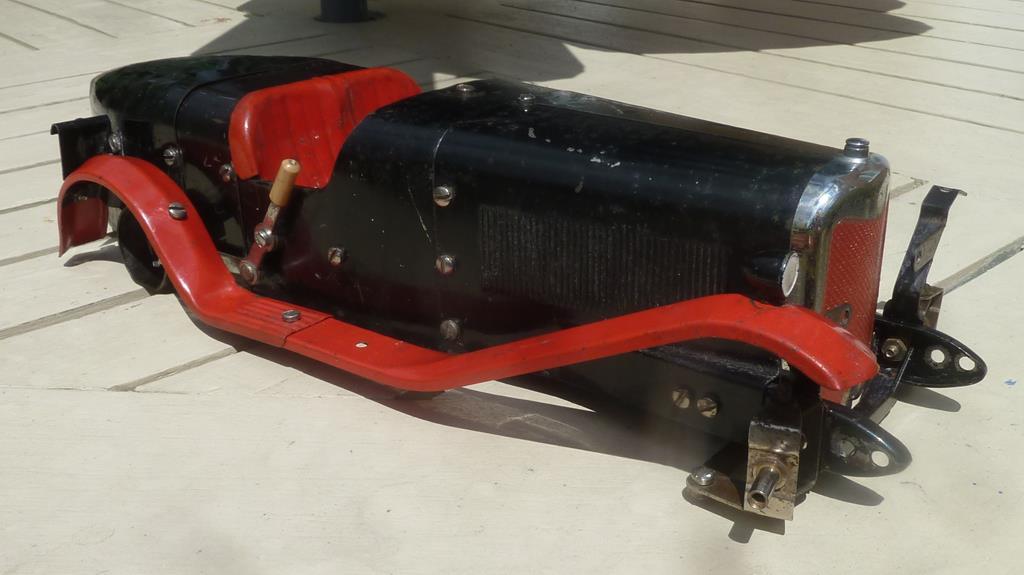 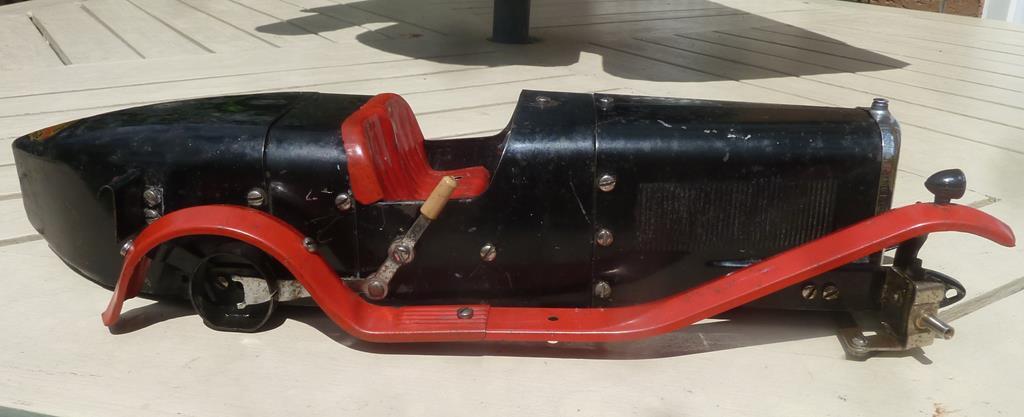 Got the dash in as well, the gauge bezels look to be chrome, at lest they shine like chrome. The screen is also attached using the same bolts as the dash, but I need to straighten it out first. 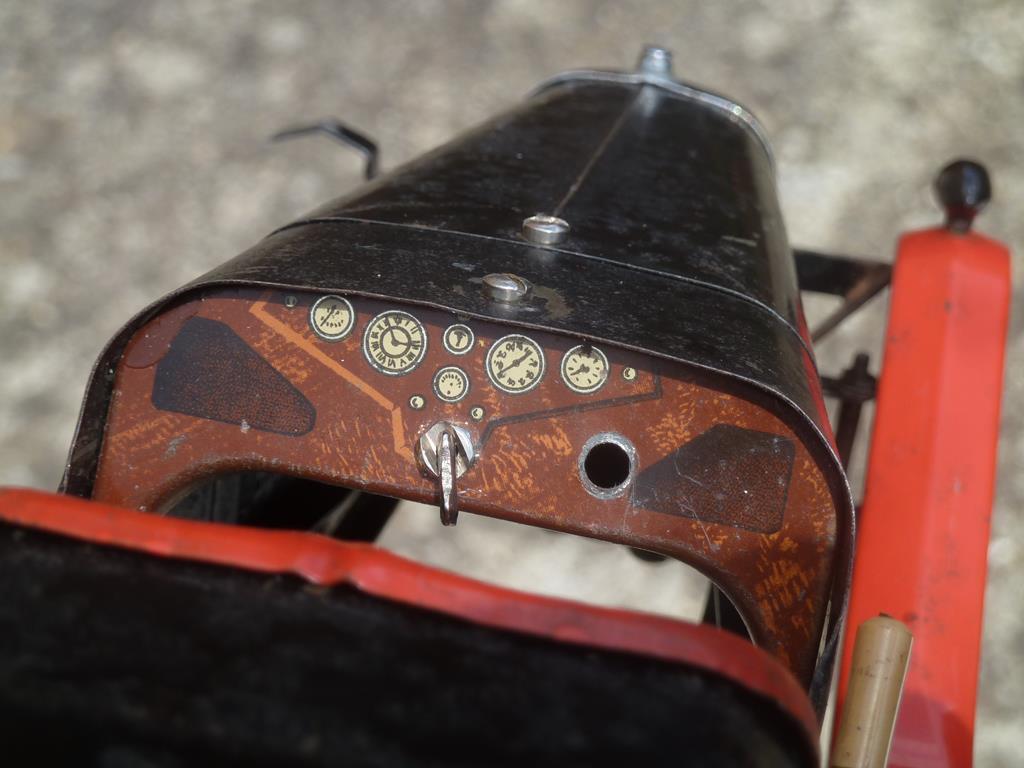 |
| |
|
|
Ritchie
Club Retro Rides Member
Posts: 765  Club RR Member Number: 12
|
|
Jul 26, 2020 12:45:18 GMT
|
|
Very cool, I'd make a bracket and try to age it so it looks close.
|
| |
|
|
|
|
|
Sept 20, 2020 17:32:22 GMT
|
After a bit of a break from it I got back on it this week. Ive been doing little bits to it over the last few weeks and getting bits together like the nuts and bolts I needed and the metal to make the brackets. I didnt want to buy any metal, so was on the look out for an offcut the right thickness, eventually my uncle came up trumps so the bracket was made. Everybody loves brackets. 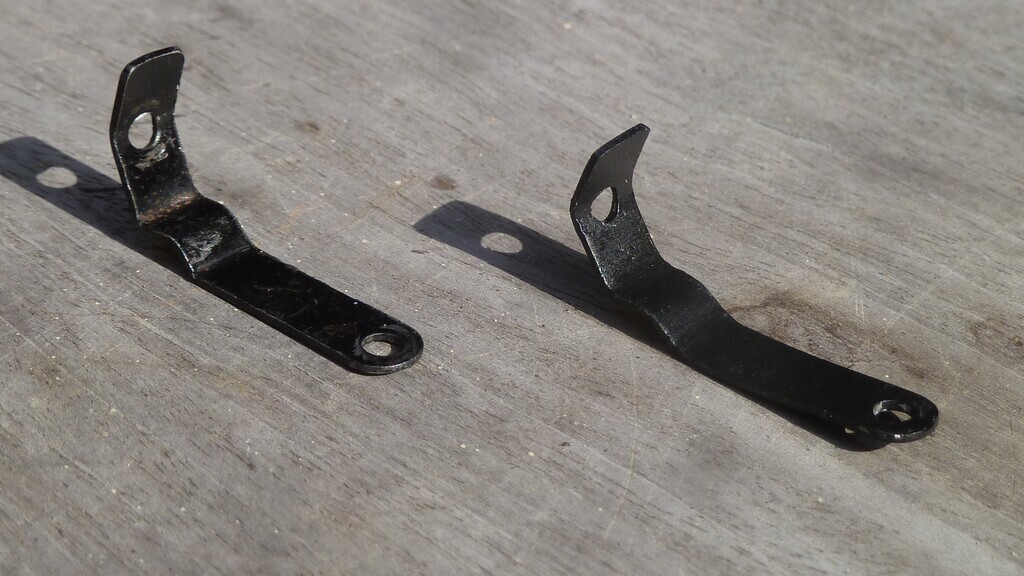 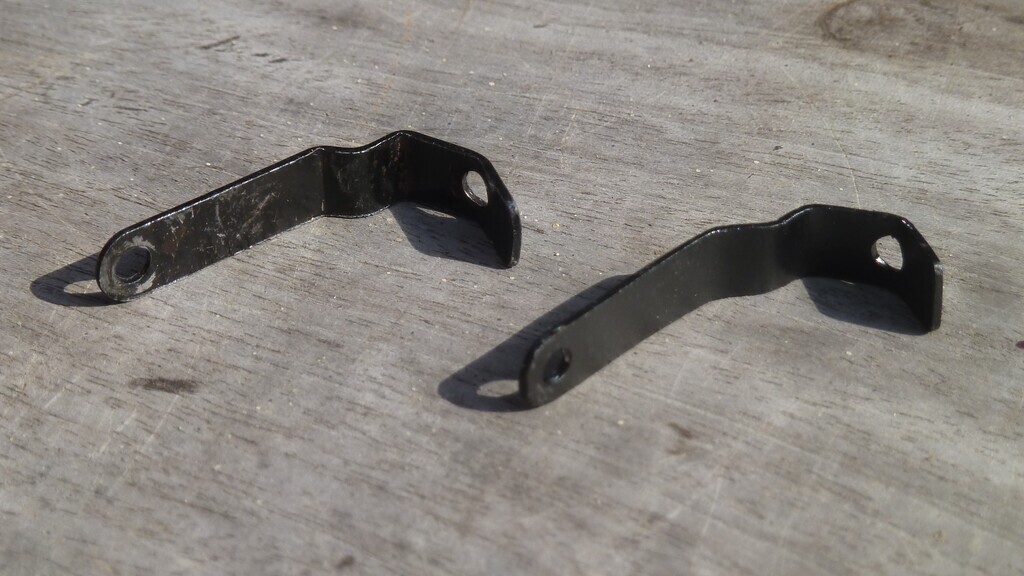 It was a bit of a game to get the tight bends right with the tools I had because they were so close together, after a bit of faffing I got there and I'm happy with the result, it was important to get it right not just so that it looks right, but it closely follows the line of the arces so wouldnt have fitted otherwise. I lightly sanded them and waxed them after this pic, you can tell the difference, but youd never notice it. Other jobs that needed doing was to tidy up the headlights. Simply washing the lenses in soapy water sorted that out. The bodywork had various brackets had been straightened and were already been waxed so that was easily completed. I cant get the tires off the wheels to do the grub screw up on the rear wheels, so for now they are simply pushed onto the axle with a bit of tape around the axle. The front wheels should have special bolts on them with larger heads but i'll be lucky to find any. But for now, it was enough to take a leisurely drive across the kitchen floor. 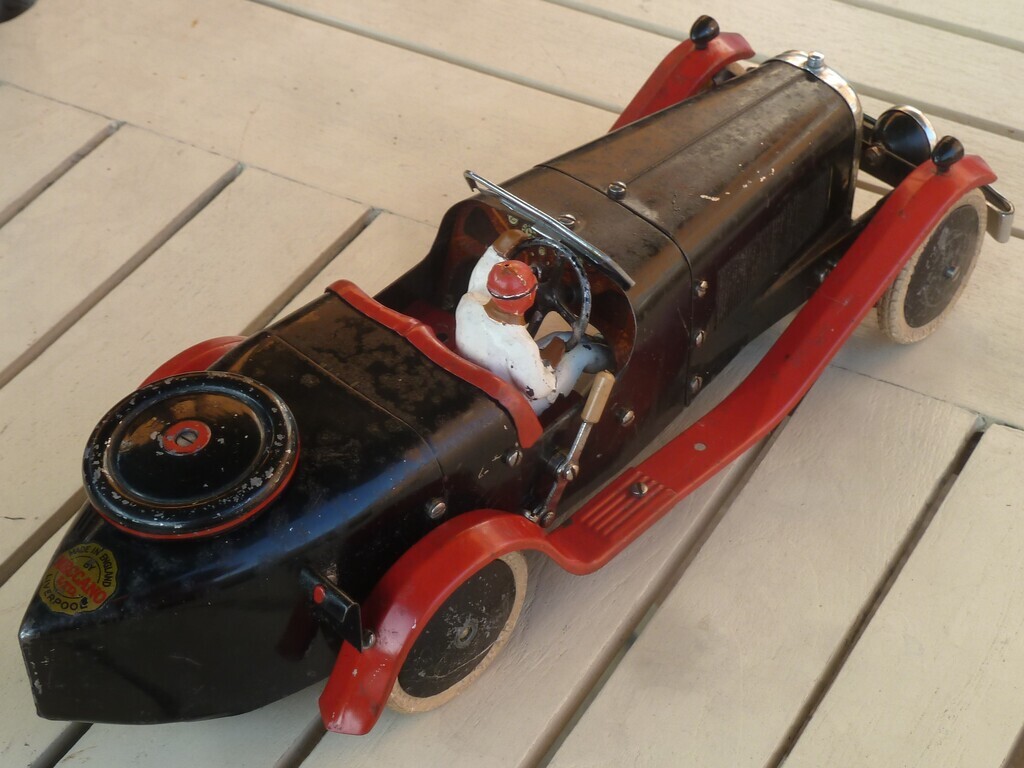 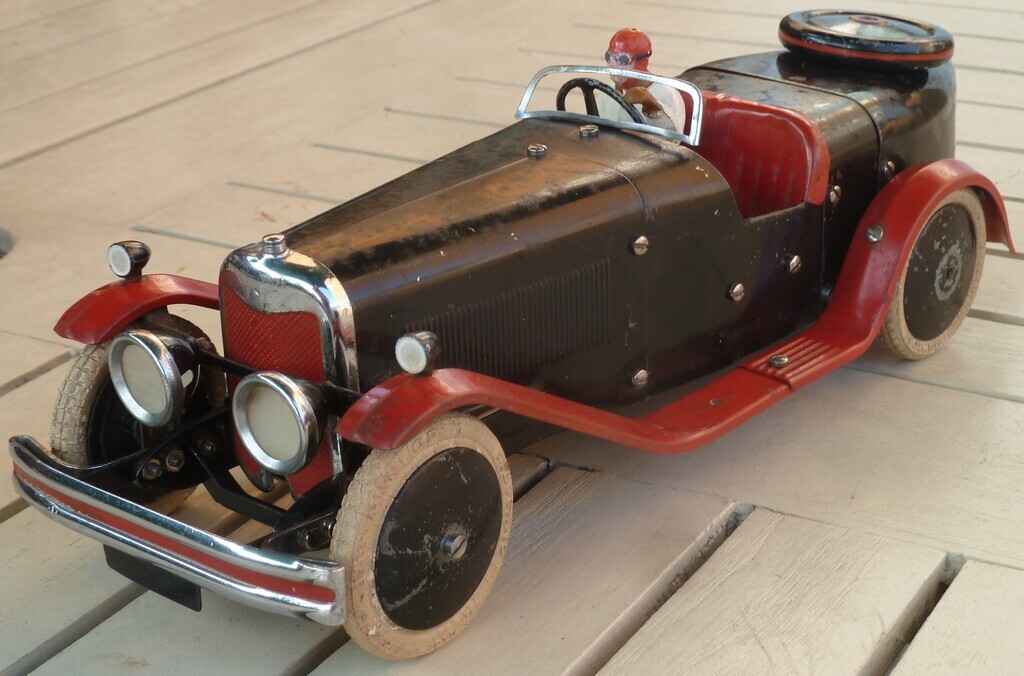 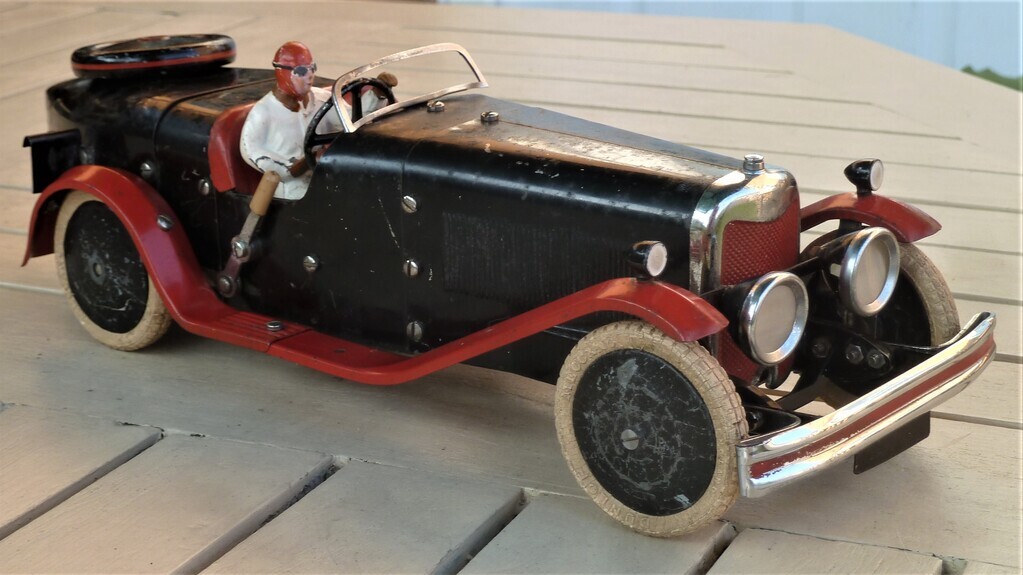 Ive still got to straighten the screen surround and make a screen for it, and fine tune a few bits, but i'll be taking it into work tomorrow to see what my boss thinks.  |
| |
Last Edit: Sept 20, 2020 17:34:45 GMT by bmcnut
|
|
Ritchie
Club Retro Rides Member
Posts: 765
Club RR Member Number: 12
|
|
Sept 20, 2020 18:23:13 GMT
|
|
Great job, looks fantastic!
|
| |
|
|
|
|
|
|
|
When I returned the car to my boss he was over the moon with it, really chuffed. I pulled out the box with the bulbs in just to tell him they worked and the asked if I could put them in. So I took the car home again. The car didnt have its original battery and half of the original switch was missing. I worked out the best way I could do it with what I had but it would have meant drilling out an existing hole in the undertray. I wasnt keen on the idea, but I thought it best to ask as so far the car has got no mods at all, unlike others ive seen on t'bay. Understandably he said no to drilling holes, or any mods, so i Had to change my ideas slightly. The plan was to do it as a standalone item that could be removed at a moments notice and returned to standard. I got a 3V battery to suit the bulbs, battery holder, and the smallest on/off switch I could find. There were already 5 unused holes in the undertray, so I made a plate up to bolt in using 4 of the holes, so the switch could go in the 5th hole. The first time I did it, it fouled on the underside of the seat, so I redid it with a satisfying amount of success. Once I was happy and knew it would fit in the car I got to wiring it up 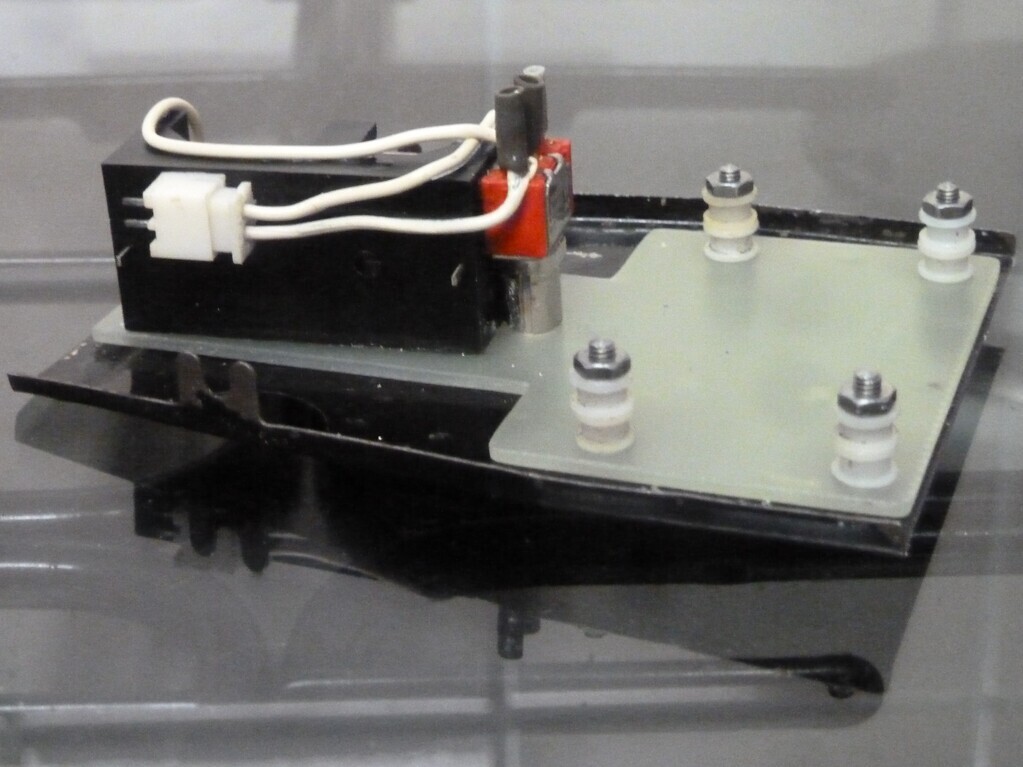  I couldve cut the bolts down, but I found that a couple of scalextric axle bushes were just the right length. The battery holder is mounted at an angle to clear the steering colum, and I used a plug just to make it easier to solder it up before putting it in the car, but it also means the original bulb wires are untouched. Original, WORKING bulbs.  From the underside, its very discreet, ideal. 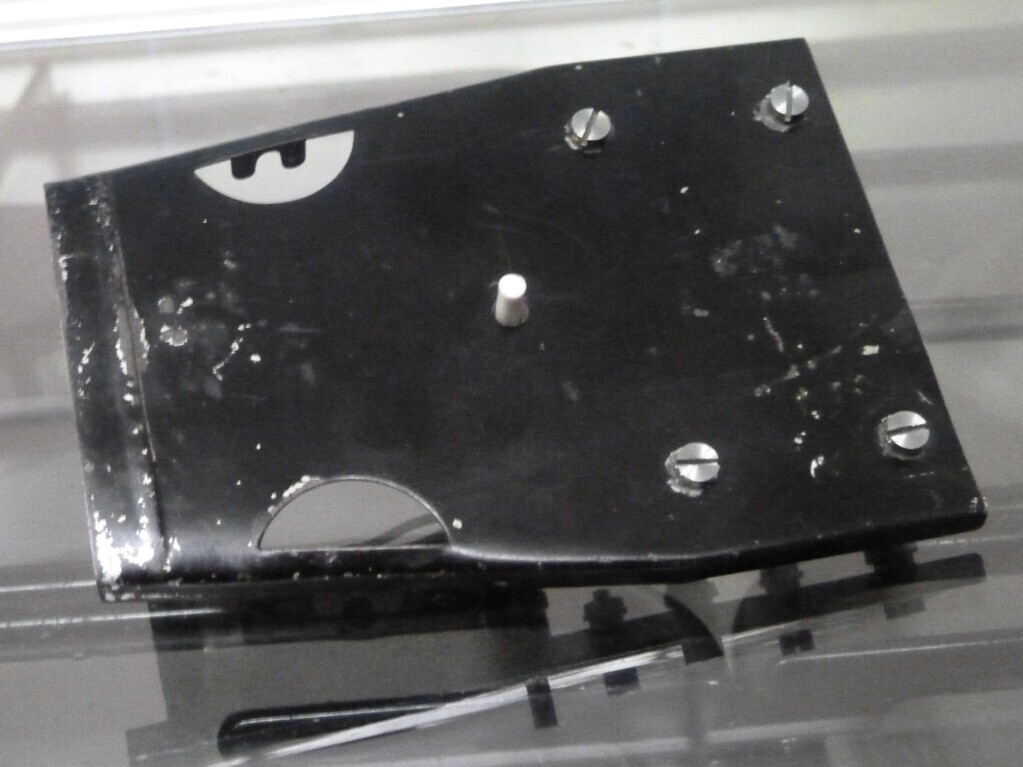 As I said, the original bulbs work, but I'm not actually sure if they were ever fitted 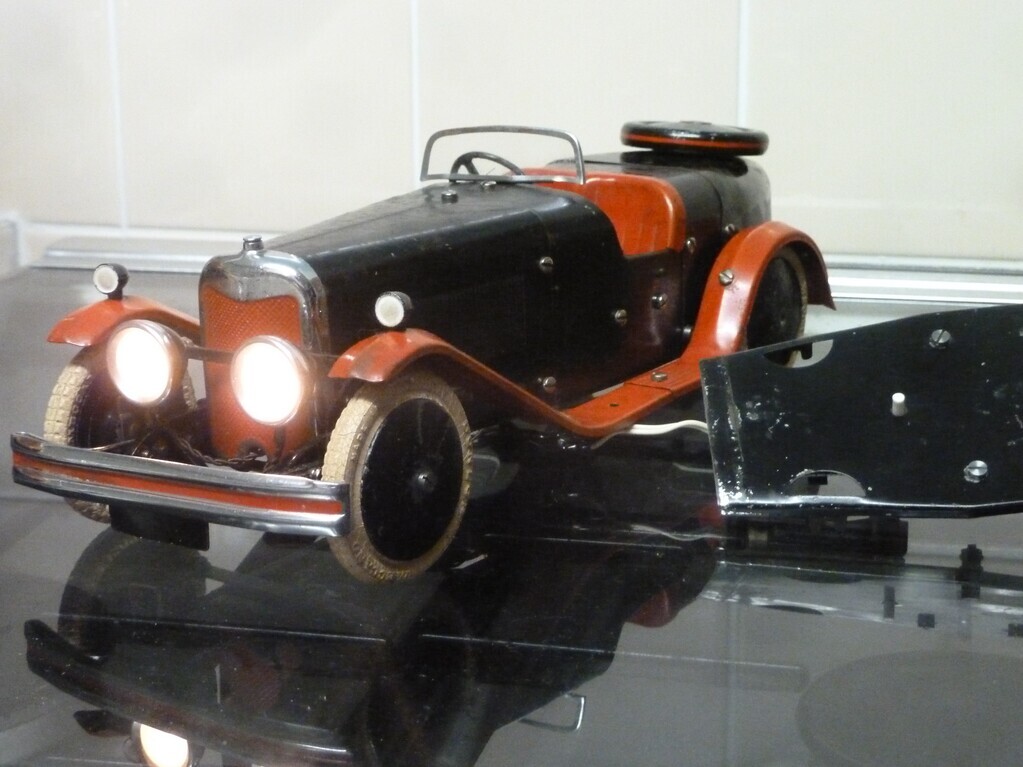 Moody night shot 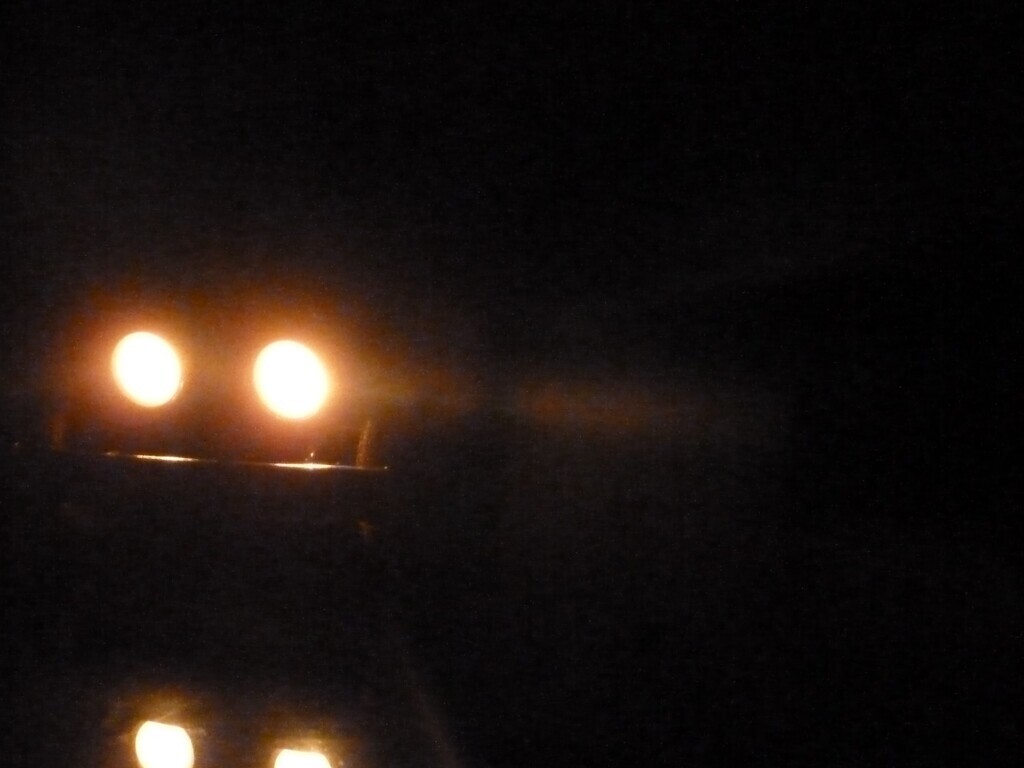  |
| |
|
|
Jem45
Posted a lot

Posts: 1,021
|
|
|
|
|
Great little thread. Thanks for sharing.
|
| |
Carbs 'n chrome
|
|
|
|
PHUQ
Part of things
Posts: 859
|
|
|
|
I keep forgetting about this section of the forum and missing gems like this. What a lovely thing. Nicely fettled |
| |
|
|
|
|
|
|
|
|
A gem.
Nice sympathetic work.
I'd never seen meccano this old before.
Very cool.
|
| |
|
|
|
|
|
Nov 20, 2020 17:47:18 GMT
|
|
Thats a great detailed thread and a good job done. Thanks for posting.
|
| |
|
|
rfc1
Kinda New
Posts: 3
|
|
Jan 14, 2021 22:17:00 GMT
|
|
Hi, bit late to the party, but do you still have this Meccano car ? Cheers
|
| |
|
|
Rich
Club Retro Rides Member
Posts: 6,244
Club RR Member Number: 160
|
Barn find 1937 Meccano Motor car.Rich
@foxmcintyre
Club Retro Rides Member 160
|
|
|
Hi, bit late to the party, but do you still have this Meccano car ? Cheers It wasn’t his, it was his bosses. |
| |
|
|
rfc1
Kinda New
Posts: 3
|
|
|
|
|
Hi, yeah just figured that... Cheers. I have an identical meccano car.
|
| |
|
|