|
|
|
|
|
|
funny thing is that Car Kulture Deluxe is published by the same people who do Ol Skool Rodz...
Problem with OSR is a lot of "attitude" and the fact they couldn't tell the difference between slot mags and billet rims... Ooops...
Anywat, back on topic, car is looking great. ANother "I can't believe i never saw this thread before" from me.
|
| |
1937 Austin Street Rod - 1941 Wolseley Not Rod - 1956 Humber Hawk - 1957 Daimler Conquest - 1966 Buick LeSabre - 1968 Plymouth Sport Fury - 1968 Ford Galaxie - 1969 Ford Country Squire - 1969 Mercury Marquis - 1970 Morris Minor - 1970 Buick Skylark - 1970 Ford Galaxie - 1971 Ford Galaxie - 1976 Continental Mark IV - 1976 Ford Capri - 1976 Rover V8 - 1994 Ford Fiesta
|
|
|
|
street
Posted a lot
 6.2 ft/lbs of talk
Posts: 4,662
|
|
|
|
Love the work your doing, great stuff! Nice to see it unfold like this in a thread, it really illustrates how much work must go into a good rod build  Keep it up! |
| |
|
|
loon
Posted a lot
Posts: 1,092
|
|
|
|
this is looking like something i would like to own ;D i agree with you reguarding the rear lights the cady ones look cool what are the other choices ? please tell me your using the old tractor seats |
| |
what the fcuk have you done lately
|
|
Dez
Club Retro Rides Member
And I won't sit down. And I won't shut up. And most of all I will not grow up.
Posts: 11,712
Club RR Member Number: 34
|
|
|
|
funny thing is that Car Kulture Deluxe is published by the same people who do Ol Skool Rodz... Problem with OSR is a lot of "attitude" and the fact they couldn't tell the difference between slot mags and billet rims... Ooops... Anywat, back on topic, car is looking great. ANother "I can't believe I never saw this thread before" from me. i found it hard to believe when i found out the same- CKD is totally different, so much so you'd think it was different people doing it. it is pretty much the attitude of OSR i don't like, and the lack of staff knowledge is pitiful. one guy on the HAMB had his car featured, and apparently they just took pics and asked him little about it, then made up the entire backstory and build, getting a lot of parts wrong whilst doing so!! |
| |
|
|
Dez
Club Retro Rides Member
And I won't sit down. And I won't shut up. And most of all I will not grow up.
Posts: 11,712
Club RR Member Number: 34
|
|
|
|
Love the work your doing, great stuff! Nice to see it unfold like this in a thread, it really illustrates how much work must go into a good rod build Keep it up! cheers man, your not doing too bad yourself!!  |
| |
|
|
Dez
Club Retro Rides Member
And I won't sit down. And I won't shut up. And most of all I will not grow up.
Posts: 11,712
Club RR Member Number: 34
|
|
|
|
this is looking like something I would like to own ;D I agree with you reguarding the rear lights the cady ones look cool what are the other choices ? please tell me your using the old tractor seats ile put up pics of the other choices when I update in a bit (ive only just got in from the workshop- must eat first!) I wont be using the tractor seats(that would be a bit too OSR for me ), they were bought for my bobber project I sold earlier this year- id forgotten id got them until I unearthed them in the house move. ile include pics of the seats I plan to run later as well. |
| |
Last Edit: Aug 9, 2007 21:20:12 GMT by Dez
|
|
|
|
|
|
|
I've a feeling this is going to be the dog's b0ll0cks. |
| |
|
|
Dez
Club Retro Rides Member
And I won't sit down. And I won't shut up. And most of all I will not grow up.
Posts: 11,712
Club RR Member Number: 34
|
|
|
|
smallish update today- reason why in a mo. first, i made this-  its the rear kickup bit. 2" of straight bar at the start, then tapering form 4" to 3" over a 12" length. it was made using the same method as the front tapers, so i didn't bother taking extra pics of it in progress. then, i repeated the process on the offcut from making the first chassis rail, as it was too short to do anything else with, to give me a pair. so out of the first of 4 lengths of steel, ive got one complete chassis rail + the extra kickup bit, with about 4" of waste, which I'm very pleased about as i hate wasting materials.  i then planned to crack on and make the rest of the other chassis rail, until i realised id run out of cutting discs. bum. does anywhere in ipswich sell 1mm cutting discs? do they curse word! so ive got to wait 3 days to get some direct from the manufacturer. worth waiting for though as i get 125mmx1mm cutting discs for 63p each. so, i started to clean up the rear model A x-member, grinding off the rivet heads and drifting out the rivets to remove the bit of chassis rail still attached to it. like so-  so thats all i got done on it. ile post pics of the other light options and seats in a min. |
| |
|
|
Dez
Club Retro Rides Member
And I won't sit down. And I won't shut up. And most of all I will not grow up.
Posts: 11,712
Club RR Member Number: 34
|
|
|
|
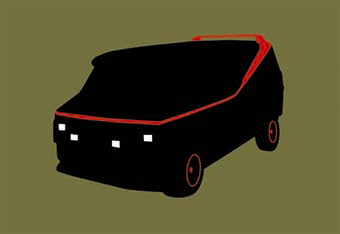
light options- 1.'60 impala with both trim rings.  2.'60 impala without centre trim ring.  3.'60 impala without either trim ring.  4.'30s utility lights.  5. daimler taillights- the top red ones. cant find my spare set that isnt on a car!!  I still prefer the caddy ones though   the seats- '50s austin a35 seats, narrowed 4". they still need some work to the bases yet, but the top bit is about done. got the pair for the princely sum of £5. may or may not get re-upholstered.  |
| |
Last Edit: Aug 9, 2007 23:24:29 GMT by Dez
|
|
Stiff
Posted a lot
'kin 'ell
Posts: 3,007
|
|
|
|
I like the '60 impala without centre trim ring but any of those would look cool.  |
| |
|
|
|
|
|
|
|
|
|
|
I do admire your projects Mr Dez. Sweet Commer, now this rod. Respeck!
|
| |
|
|
Dez
Club Retro Rides Member
And I won't sit down. And I won't shut up. And most of all I will not grow up.
Posts: 11,712
Club RR Member Number: 34
|
|
Aug 10, 2007 10:53:42 GMT
|
|
thanks man.
the commer is kinda on hold at the minute, it needs loads of things doing, and i plan to do a motor swap at the same time as some of the other stuff i've got planned- i just need to find the right donor vehicle. until i do, i don't really plan to use it much.
|
| |
|
|
|
|
|
Aug 10, 2007 12:48:44 GMT
|
|
this is the first time ive seen caddy lights work on something which isnt a caddy. brilliant stuff
those seat will look great too
|
| |
|
|
loon
Posted a lot
Posts: 1,092
|
|
Aug 10, 2007 16:14:19 GMT
|
|
caddy is my first choice now
option 3 fitted from inside could work as well
|
| |
what the fcuk have you done lately
|
|
|
|
|
Aug 10, 2007 16:25:04 GMT
|
|
I'd go Caddy all the way. Mounted as you propose would look brilliant.
|
| |
|
|
|
|
|
Aug 10, 2007 18:50:24 GMT
|
Enjoying this build, keep up the good work |
| |
|
|
|
|
|
Aug 10, 2007 20:22:39 GMT
|
mine is from a 55 merc 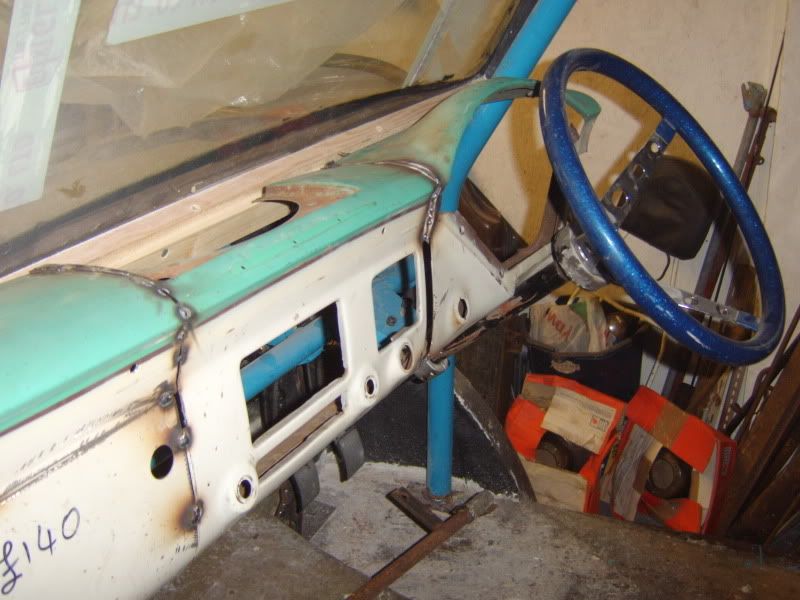 scottie |
| |
|
|
Dez
Club Retro Rides Member
And I won't sit down. And I won't shut up. And most of all I will not grow up.
Posts: 11,712
Club RR Member Number: 34
|
|
Aug 11, 2007 21:05:02 GMT
|
it will definately be getting the caddy lights nice dash that scottie, seeing that brings back memories of how much cutting and fiddling mine was to get fitted!! |
| |
|
|
Dez
Club Retro Rides Member
And I won't sit down. And I won't shut up. And most of all I will not grow up.
Posts: 11,712
Club RR Member Number: 34
|
|
Aug 11, 2007 21:19:23 GMT
|
so what do you do whilst everone else is at R-R show, cos youve made a conscious decision not to do any more shows this year, but use the time and money spent on shows on your car instead? well, as i still haven't got any cutting discs, i had to pick jobs i could do without them, so i couldnt carry on with the chassis rails as i didnt fancy cutting fast amounts of 3mm wall box section with a hacksaw, so i cleaned up my front crossmemebr and carried on steeling out the body. both of which are a story in themselves! the front crossmember is an original one off the chassis that came with the car. i thought it would be a simple case of cutting the chassis rail off up close and grinding down a few welds to get the crossmember off without damaging it. what i actually found was that each join between crossmember and chassis rail had 3 runs of terrible, badly penetrated weld that were heaped up on top of each other, then skimmed over with filler to make it look like a decent weld!!! in most places i had to grind off welds that were half an inch wide and half an inch deep! it took me over 3 hours of solid grinding to get the crossmember cleaned up properly. before-   after-   as you can see its a little thin at the edge on one or 2 bits, but nothing to worry about, once theres a weld on each side of it holding it to the chassis, it will be fine. it does need some repair though as someones see fit to cut the front lip off it, which adds quite a bit of strength and stops it flexing, so ile need to fab some bits up and graft them on. after all that grinding my hands were aching and my brain was rattled, so i packed in and we took the dog out for a walk instead of me doing anything else on it. that concludes yesterday, apart form when i got back i did a bit of messing about mocking up the grille, rad, and front crossmemeber to check clearances. |
| |
|
|
Dez
Club Retro Rides Member
And I won't sit down. And I won't shut up. And most of all I will not grow up.
Posts: 11,712
Club RR Member Number: 34
|
|
Aug 11, 2007 21:44:45 GMT
|
today, I decided to set-to 'steeling out' the body framework. I suppose id best expain what that means first. from the factory, model A bodies had a hefty amount of structural wood in them. the B pillar is made up of a 18ga steel U channel which in itself is pretty weak, its given its strength by being wrapped around a 1-1/4" square chunk of hardwood. the C-pillar is constructed in a similar way, and pretty much all of the roof is just a single skin bolted and nailed to hardwood blocks and batons. the massive centre sunroof hole is filled entirely by wood and material. on a hot rod, the body has to put up with a lot more than it ever did in stock form, even though the majority of the forces are taken by a much beefier chassis. add to that the wood in these bodies is 80 years old, and therefore tends to be a bit crumbly or non-existant, you can see why most rodders replace it all with thinwall steel box section tubing. if you don't, the body is pretty damn flexy and insecure!! so, this is what I did. first, I had to remove all the old nails and screws, and chisel out the remaining wood- which is bloody hard work!  then, with the channel clear, I could then clean up the inside, grind up the edge so it can be welded to, and then cut a piece of 1-1/4" box section to go in the hole. it has to be notched out to go round the door catch area, but is otherwise a pretty straightforward job. I then clamped it in and welded it. just fitting this lower section had made a massive difference to body stiffness. you can just see it in this pic looking down from above on the passenger side, and you can also see the bar I added across the door gap to form the edge of the floor, which has stiffened up the door aperture considerably.  I then put another bar the same in on the other side as well as doing the same boxing in to this side B-pillar-  I then made the top section of B-pillar that runs form the door catch up to the roof. this bit is more complicated, as it tapers in a little at the top, and also steps out at the bottom around the catch. section made-  all welded in, and ground down-  overall I think they look pretty tidy. I still have to finish making the passenger side top section and fit it, which I will do tomorrow, and then I think I will move on and box in the C-pillar and maybe some more of the floor and roof. I'm a bit limited as to what I can do on the floor until the body is on the new chassis and has the gearbox and motor fitted, as I don't know exactly where they will sit. finally for today, I eventually got round to wleding on the passenger side door top-  so another job for tomorrow could be to piecut all the pillars to get the window channels lined up properly. |
| |
Last Edit: Aug 11, 2007 21:46:07 GMT by Dez
|
|
|
|