|
|
|
Oct 14, 2012 14:57:37 GMT
|
Sorry for the picture dump. Sunny day, first day off in over a week, thought I'd see if I could continue with the welding. Plan was to do the easy stuff first to gain some confidence. So I started on the spare wheel well. Two small holes that I knew of, lets see where we get. 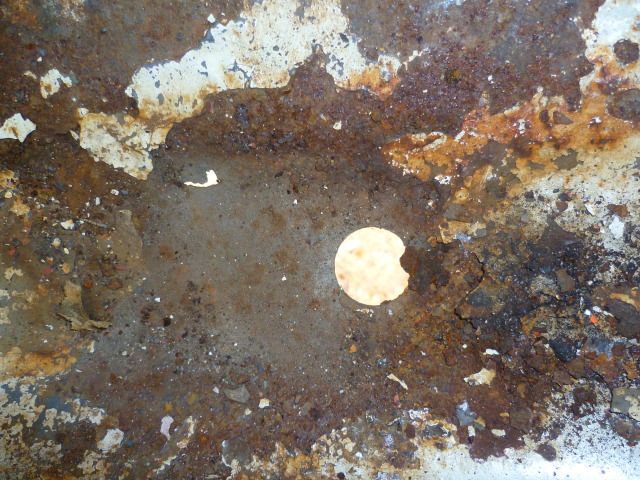 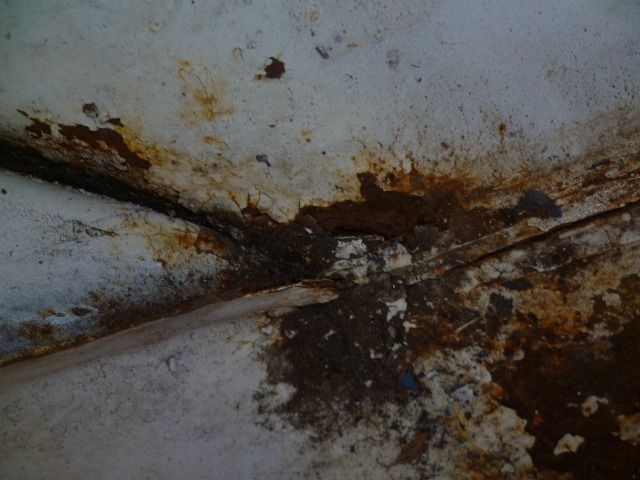 Wire wheel - starts to look a bit nasty but not awful 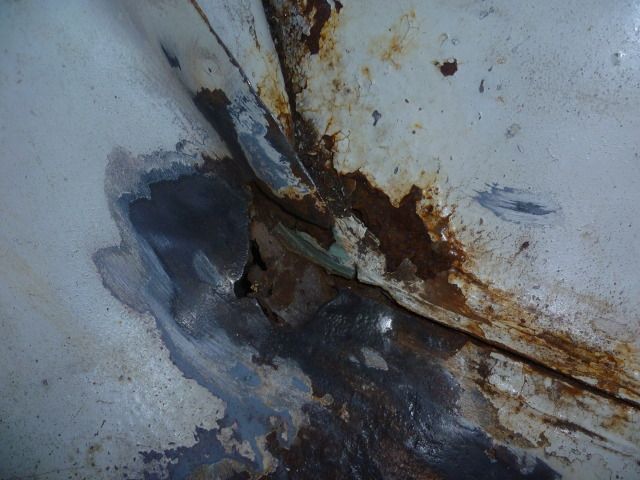 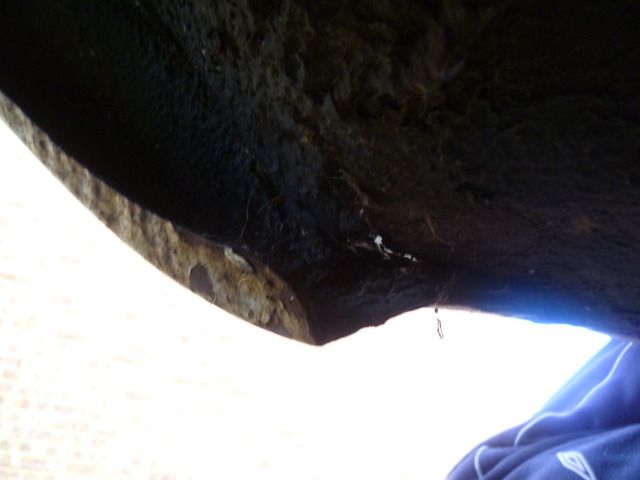 Forgot to take pictures of inside the wheel well, but it was rust over multiple layers of metal and a lot of sealant gunge, didn't quite look right. Looked frilly from the outside so started going at that. 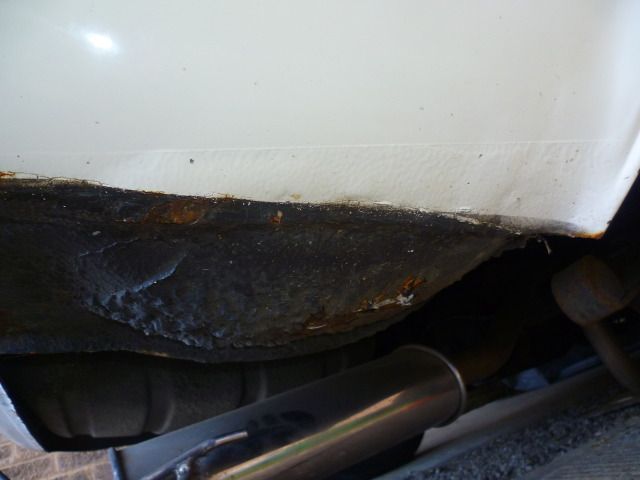 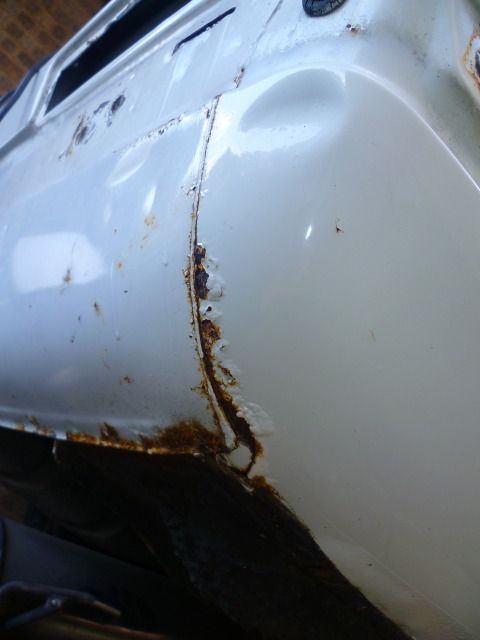 A foot of sealant take out of the arch and various layers of metal and rust. 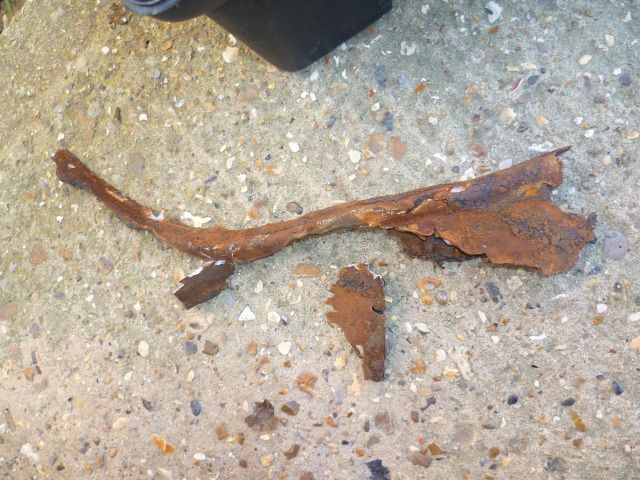 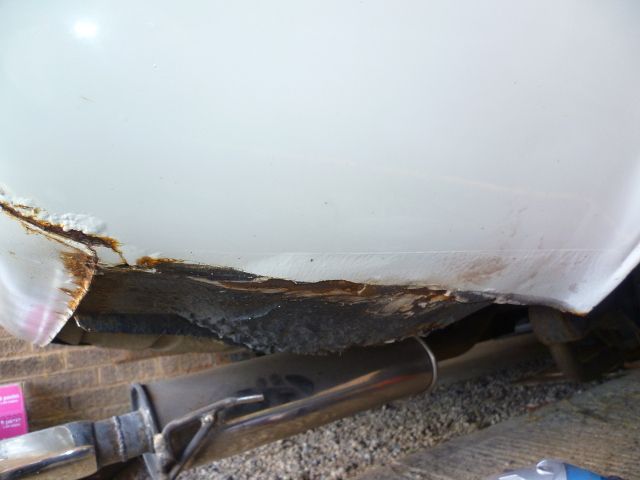 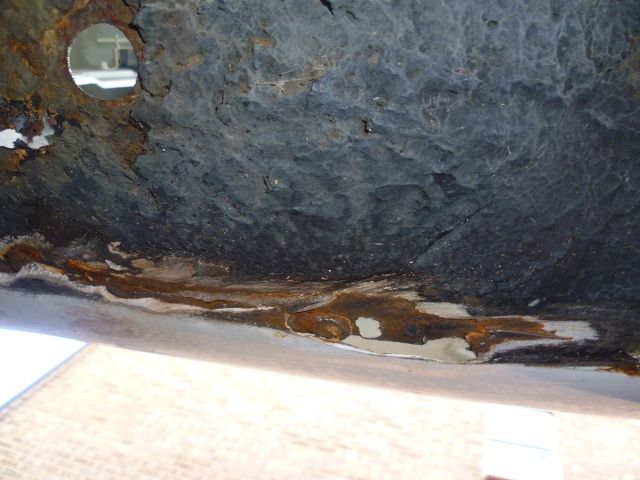 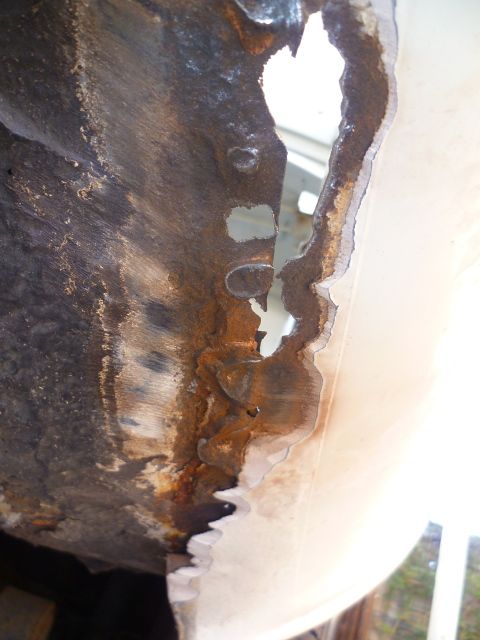 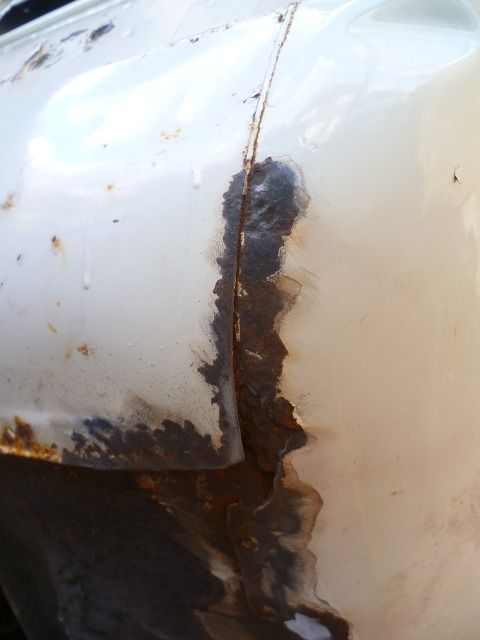 Filler started becoming apparent 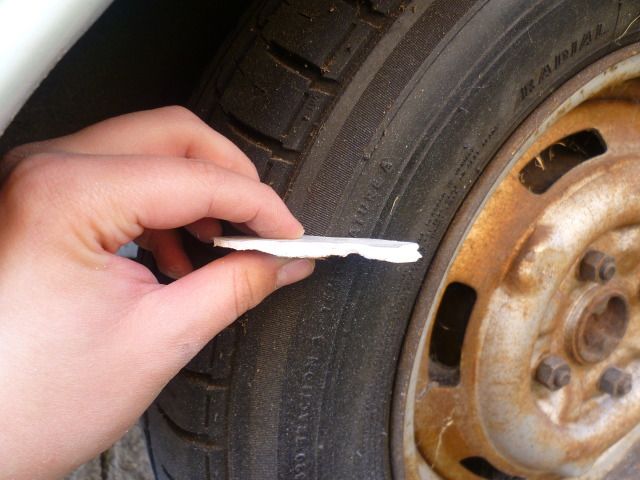 All the metalwork and the what was left of it was put together was making me suspicious, so I explored...Oh  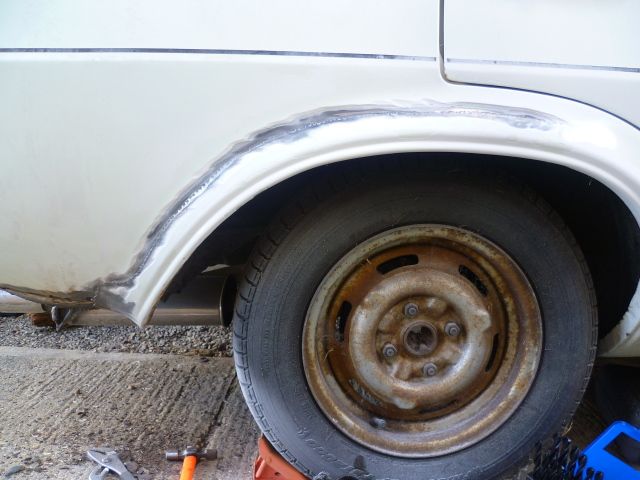 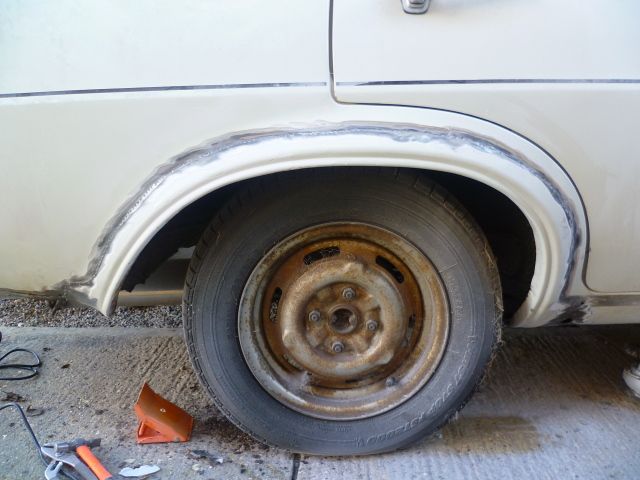 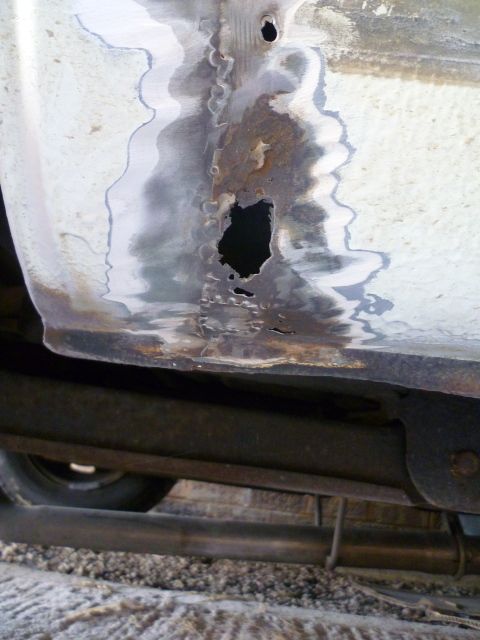 Less than successful day. I'm now wondering how much of this car I actually know. I've always suspected the front end was replaced, I'm now thinking of stripping everything back to get a proper look at the previous repair work. Looking at the inner arch knowing what I know now, you can clearly see where it's been welded and that there's next to no penetration. The arch panel has been placed on top of the original, hence the mass of filler. 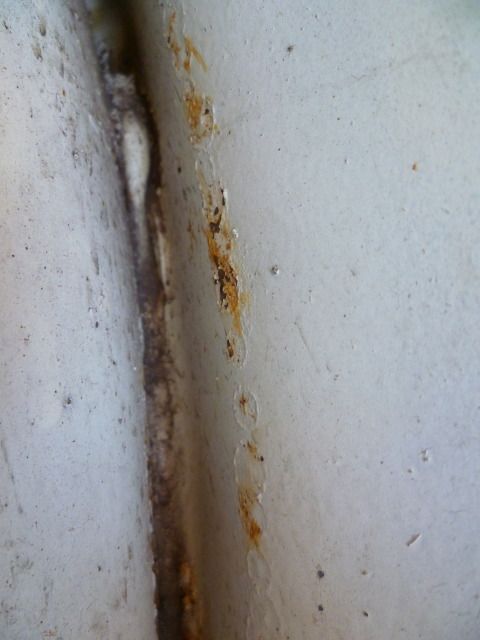 How easy/possible is it to gently remove the arch panel without distorting either of the panels, tidying them up, aligning them, and welding them back together properly and it looking right? |
| |
Project Diary1975 Viva / 1988 T25 Camper / 1989 Mini / 1991 MX5 / 1992 Mini / 1994 Saab 9000 / 1997 Saab 9000 / 2008 Saab 9-5
|
|
|
|
|
|
|
Oct 20, 2012 20:04:22 GMT
|
Started grinding off the underseal on the inner arch today, but really didn't get very far. It's been laid on very thickly and isn't the most accessible so nearly succeeded in grinding my face. As I'm tired and grumpy after coming off night shifts I gave up and stripped off the remaining filler on the outside instead. What it revealed was a slight scrape running along the top of the arch and a deeper scrape further forward, so it looks like the arch may have been replaced due to accident damage rather than rust. The opposite arch doesn't look as flared (with filler) and a long standing chip in the paint points towards minimal filler. Fingers crossed it's only one arch that needs doing. As for the scrapes, I need to remove the door step panel to weld another hole anyway and I'm hoping with this off I'll have access to carefully knock out the dents, or at least the deeper one. Although I'm not sure how the panels go together. With the dents and arch sorted, it should only need a skim of filler to finish. 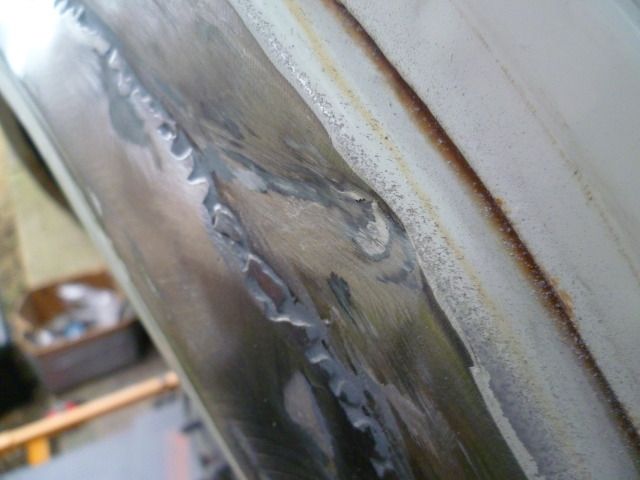 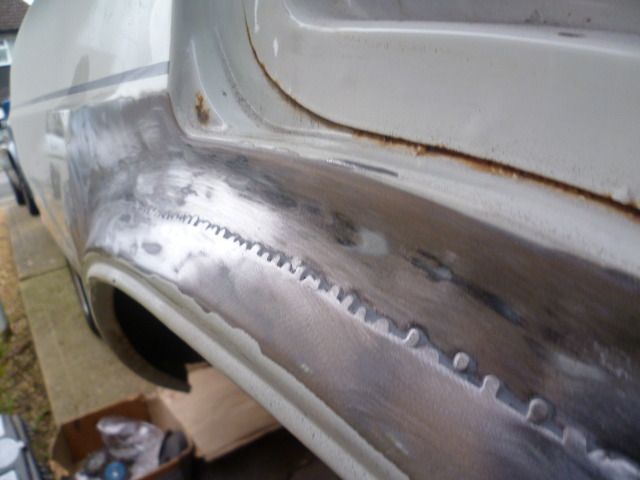 |
| |
Project Diary1975 Viva / 1988 T25 Camper / 1989 Mini / 1991 MX5 / 1992 Mini / 1994 Saab 9000 / 1997 Saab 9000 / 2008 Saab 9-5
|
|
|
|
|
Feb 19, 2013 19:38:33 GMT
|
Amazing. The first good day working on the Viva in god knows how long. Everything went to plan and better (other than my drill being useless). Many thanks to Droopsnoot and the others that advised I grind the welds down carefully so as not to damage the original arch behind. Turns out there's a good inch of it left, it was originally cut in the groove of the arch. So fantastic news there and I should be able to reuse it instead of the replacement arch I bought. 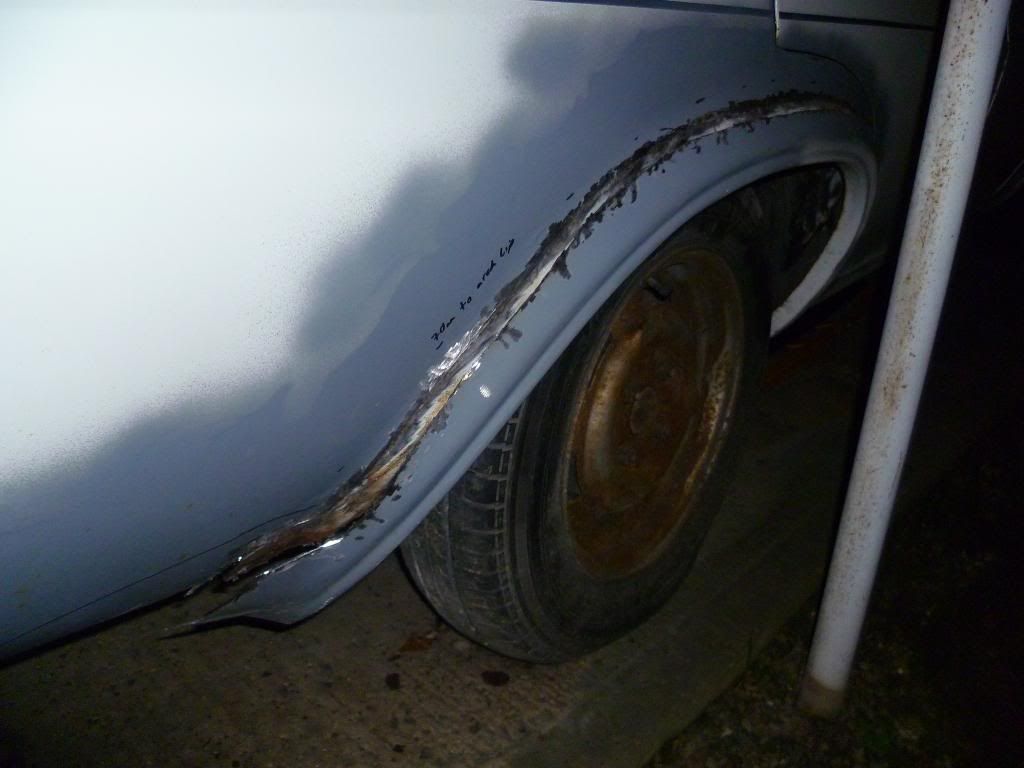 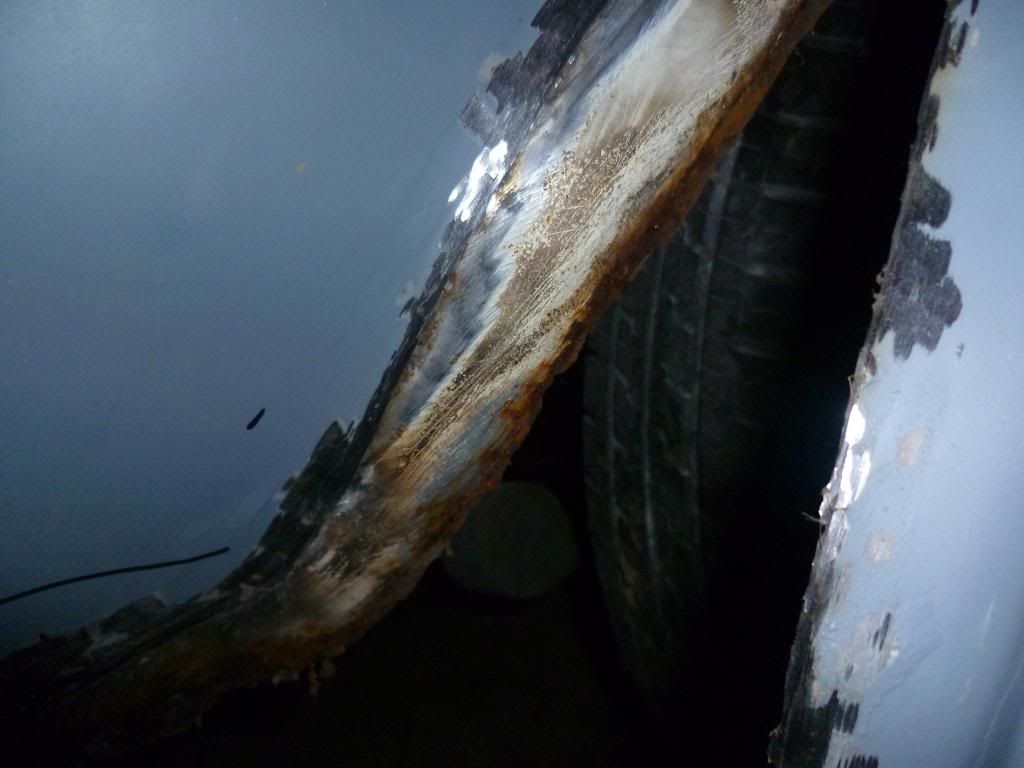 So now, what do people suggest I do about the inner arch? It was cut in line with the original arch, I guess it should come down further to meet close to the lip on the original arch. Do I try to make and weld an extension on to meet the arch lip as should be originally, or do I cut it a tiny bit shorter and make a filler piece to weld between the inner and outer, further up the outer than original? Or carefully trim back the original arch as desired leaving the inner there, clean up the inner, weld new outer then weld inner to new outer from the underside?  They weren't rewelded during the repair (I thought it was structural?) and just had a load of sealent gunked into the gap between replacement outer, original outer and inner. I also poked at some rust and made a small hole where the door shut meets the roof gutter panel. Taking the entire gutter panel off just for that repair is going to be a massive pain but is there any other way? 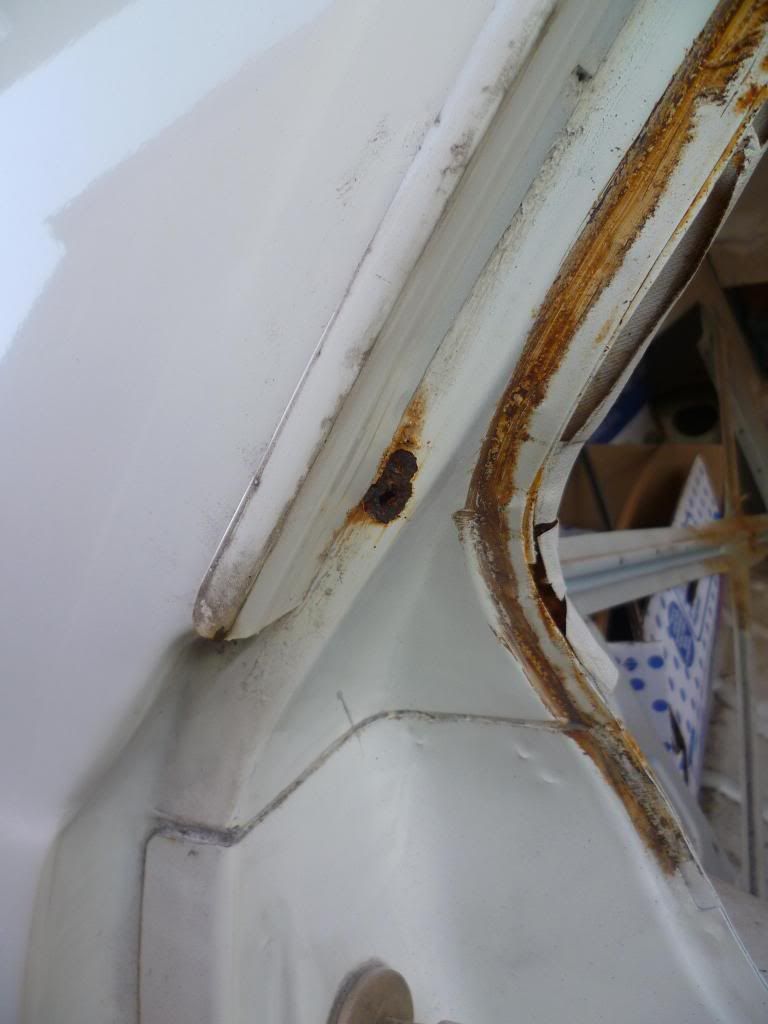 |
| |
Project Diary1975 Viva / 1988 T25 Camper / 1989 Mini / 1991 MX5 / 1992 Mini / 1994 Saab 9000 / 1997 Saab 9000 / 2008 Saab 9-5
|
|
|
|
|
Feb 20, 2013 19:24:25 GMT
|
Didn't get as much done as I wanted to today but I did package more or less my entire shed of parts into watertight boxes, so hopefully no more rogue rusting. Fully removing the arch gave me a good look at the sill. I knew it already but it's a bit messy, holes through to the underside and holes through to the inside just in front of the inner arch. So plenty to chop out to gain access to other areas. Need to grind off those triangular plates under the rear seat to get a proper look at how the panels join, then start making repairs. Only other thing I got done today was drilling the holes for the rear door switches, something else ticked off the list at least. 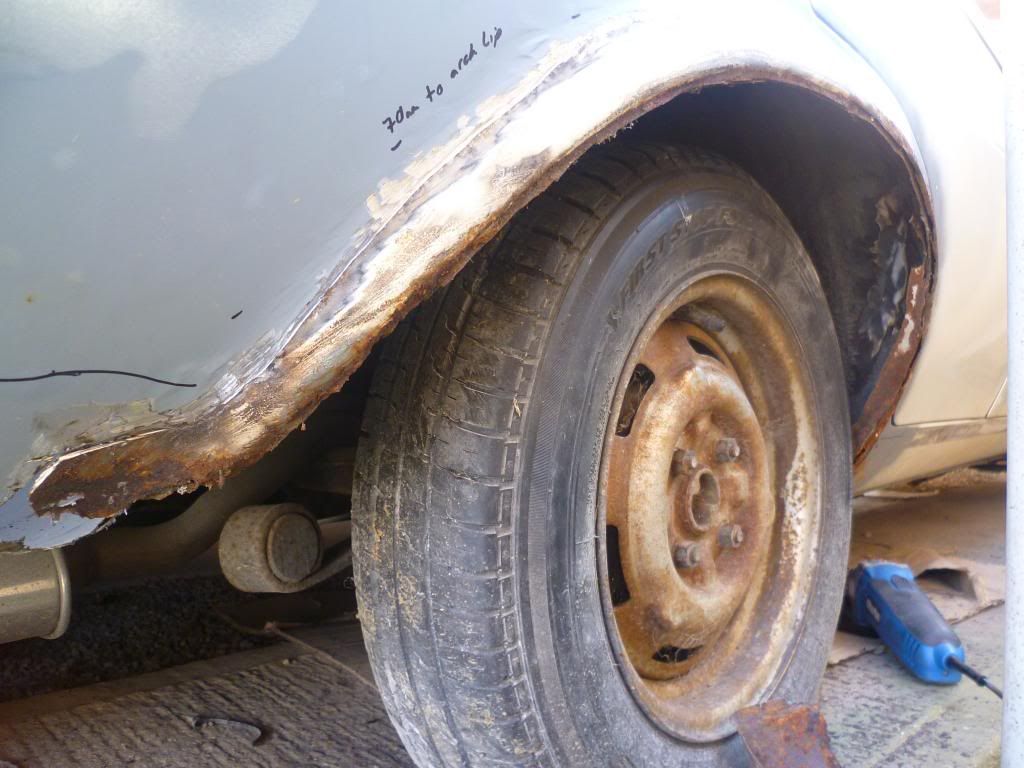 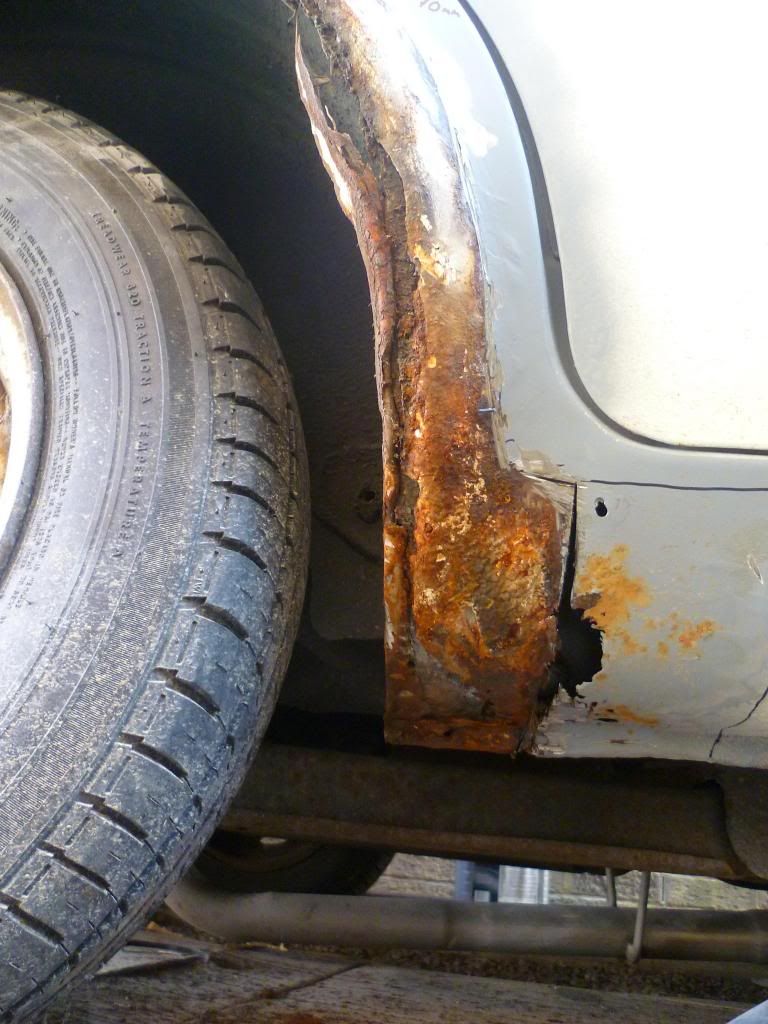 That frilly looking lip falling off was all sealant 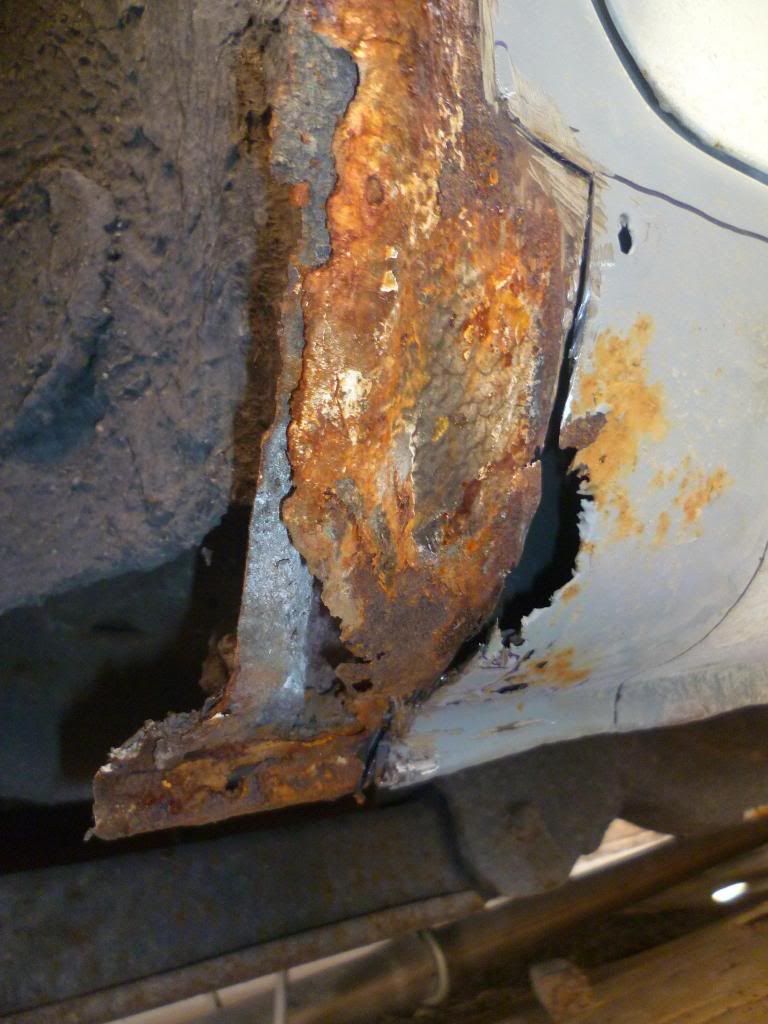 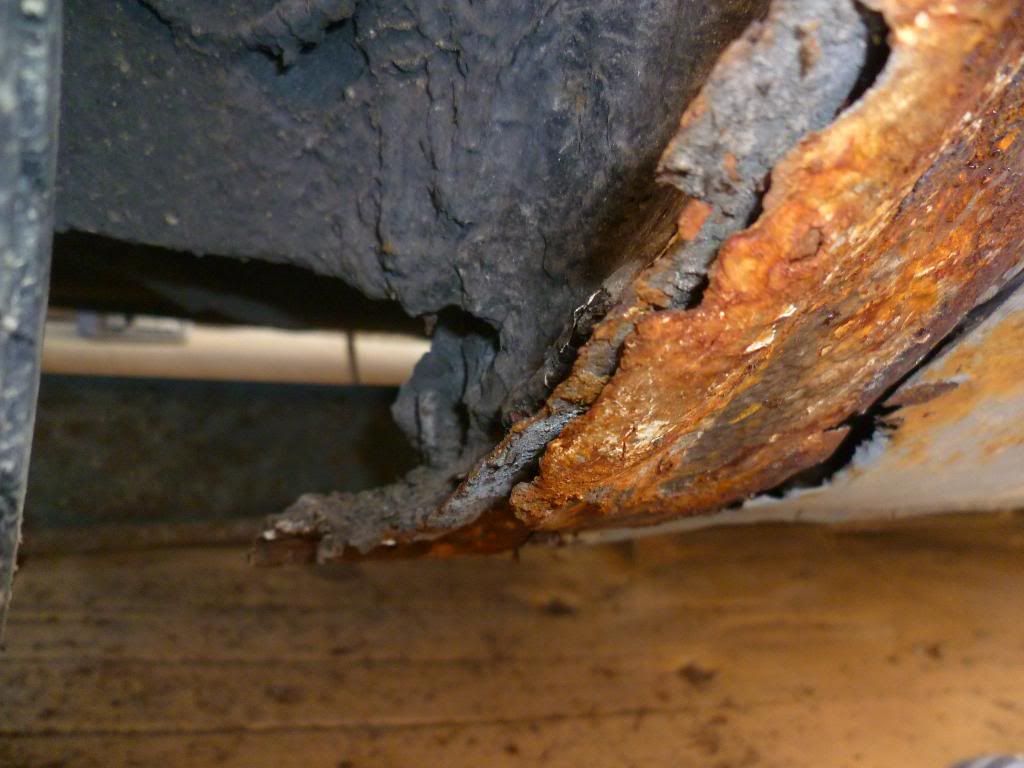  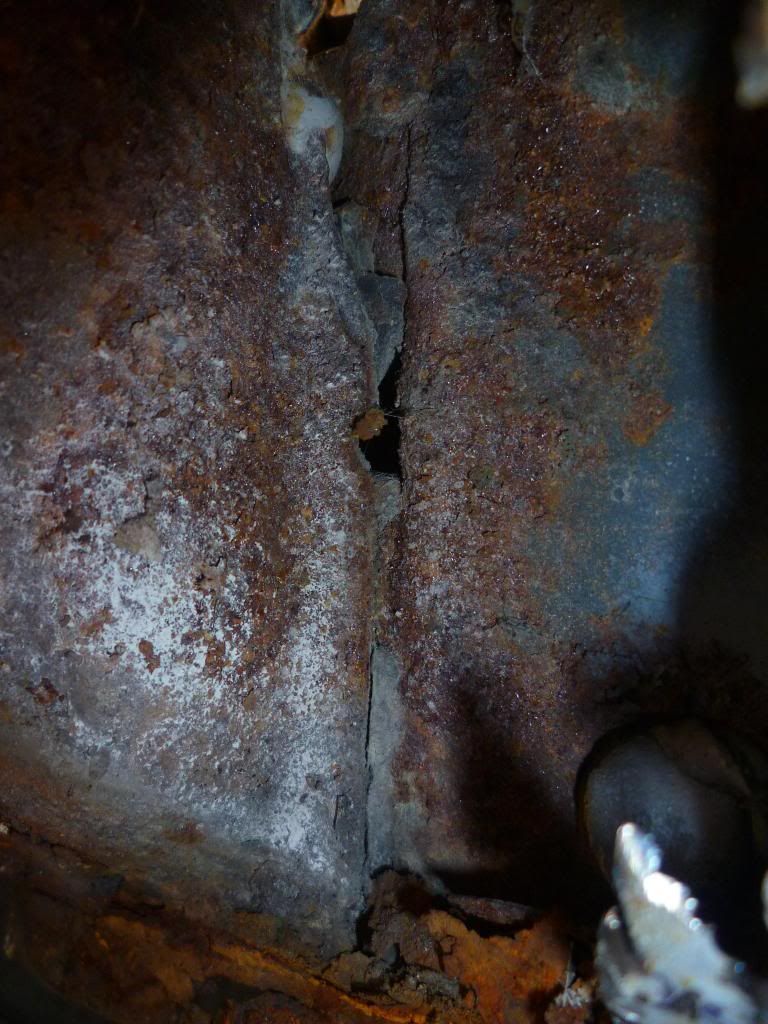 I've taken a wire brush to it and doused it in zinc primer to try to keep off any more rust for the time being. |
| |
Project Diary1975 Viva / 1988 T25 Camper / 1989 Mini / 1991 MX5 / 1992 Mini / 1994 Saab 9000 / 1997 Saab 9000 / 2008 Saab 9-5
|
|
matty2300
South East
Red ones go faster!
Posts: 157
|
|
Feb 20, 2013 19:34:55 GMT
|
bleh, every now and then you have to have one of those days where you just uncover more rust  l know how that feels, even if you kinda expected it to be there its still a pain! glad your sorting it properly though! Will be a beaut when it's finished  |
| |
2002 Saab 93 - Daily
1972 Vauxhall Firenza Sport SL - in storage
1978 Vauxhall Magnum - PROJECT
1993 Vauxhall Cavalier 2.0 GLS - DEAD
1994 Vauxhall Astra 1.4 LS - DEAD
1999 Saab 93 2.0 SE - DEAD
1999 Mercedes W202/C200 - DEAD
|
|
|
|
|
Feb 21, 2013 22:13:13 GMT
|
To be honest it's been nice to make some kind of progress. I hit such a downer when a hole in the wheel well turned into loosing part of my rear quarter panel and finding a poorly repaired arch, I want to keep things moving now but it's going to be very hard. I'm now at the point where I need to decide how and in what order I'm going to repair bits, and my fear of cutting metal has returned :lol: 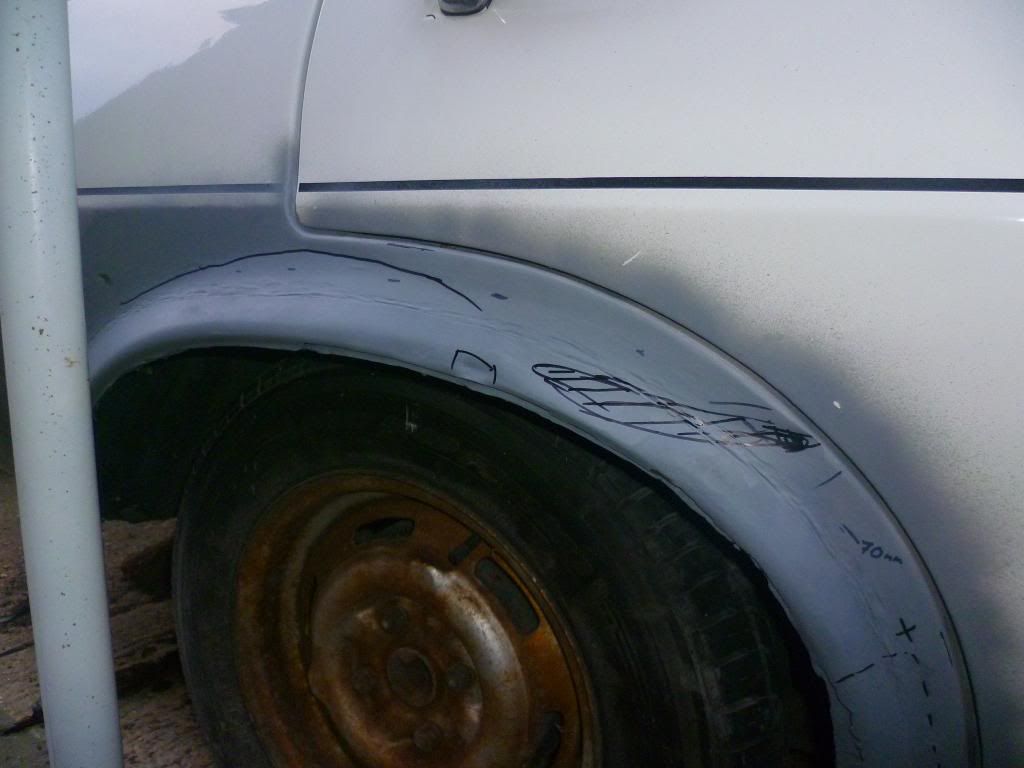 ^Here's what I currently have. The pen over the arch is the damage from the scrape it once had. I'm wondering how to and how much I should repair and how much to leave to fillering smooth. Also wondering where I should cut the outer arch and make the weld with the arch lip panel. 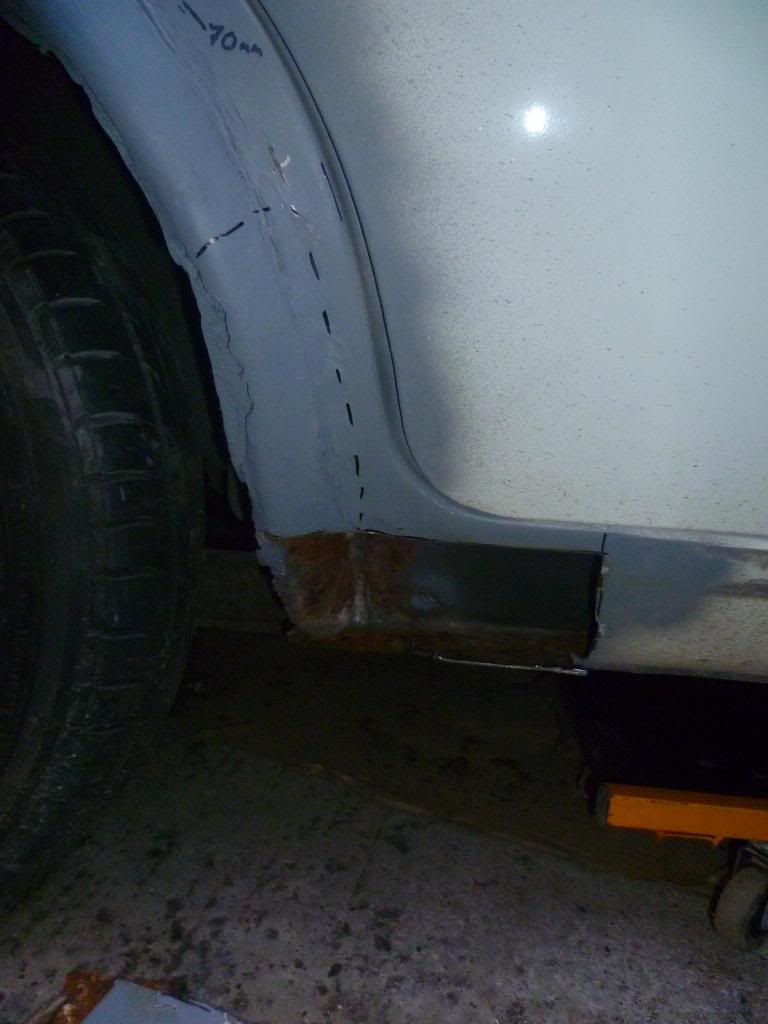 ^This is the nasty bit. I've cut out a bit more sill that had holes in anyway. The dashed area I've drawn out I was thinking of cutting out carefully to give me more or less full access to the inner arch-inner sill-floorpan area that's rusted. So then it's a case of working out what panel joins what panel and where, cutting out the rot and making repair sections of each panel to weld in then weld together. Good plan or should I do it differently? This is the area from the inside 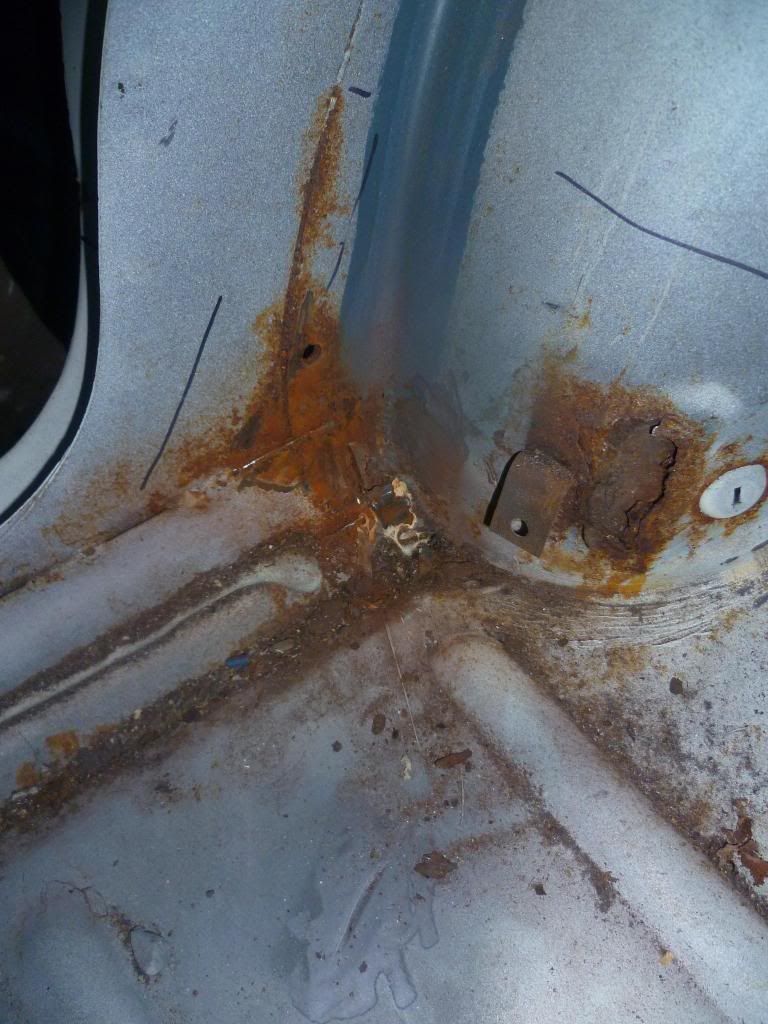 And once that's done; sort inner arch, weld on outer arch, weld up outer sill, then move onto repairing the spare wheel well, rear panel, inner arch (rear of) so I can make a repair for the bottom of the rear quarter. Sounds like a lot of work, and that's only one corner of the car :lol: |
| |
Project Diary1975 Viva / 1988 T25 Camper / 1989 Mini / 1991 MX5 / 1992 Mini / 1994 Saab 9000 / 1997 Saab 9000 / 2008 Saab 9-5
|
|
MonzaPhil
Posted a lot
 Think like a man of action, act like a man of thought
Posts: 2,454
|
|
|
|
|
Just keep at it. After a bit of a rush at work, my green car has been outside... not good for the primered rear arches.... so I've had to re-do loads of it and it still isn't finished.
It'll all be worth the work when it's done (in time for The Gathering)
|
| |
This is now a clicky linky!  |
|
|
|
|
Feb 22, 2013 23:39:01 GMT
|
Ha! I hope in time for The Gathering, maybe next year. As you say thought, it'll be worth it one day... Inner arch and outer arch inner skin. Half the seatbelt mounting plate fell off, the other half I cut out. 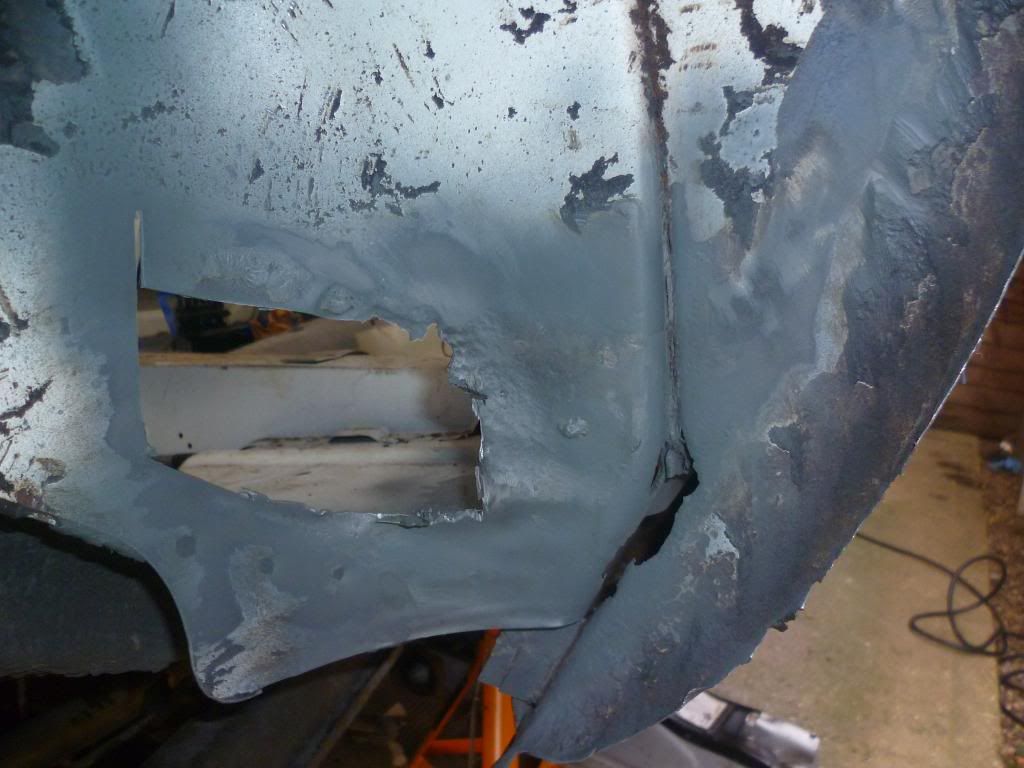 And again, bit easier to see the holes in the sill area. 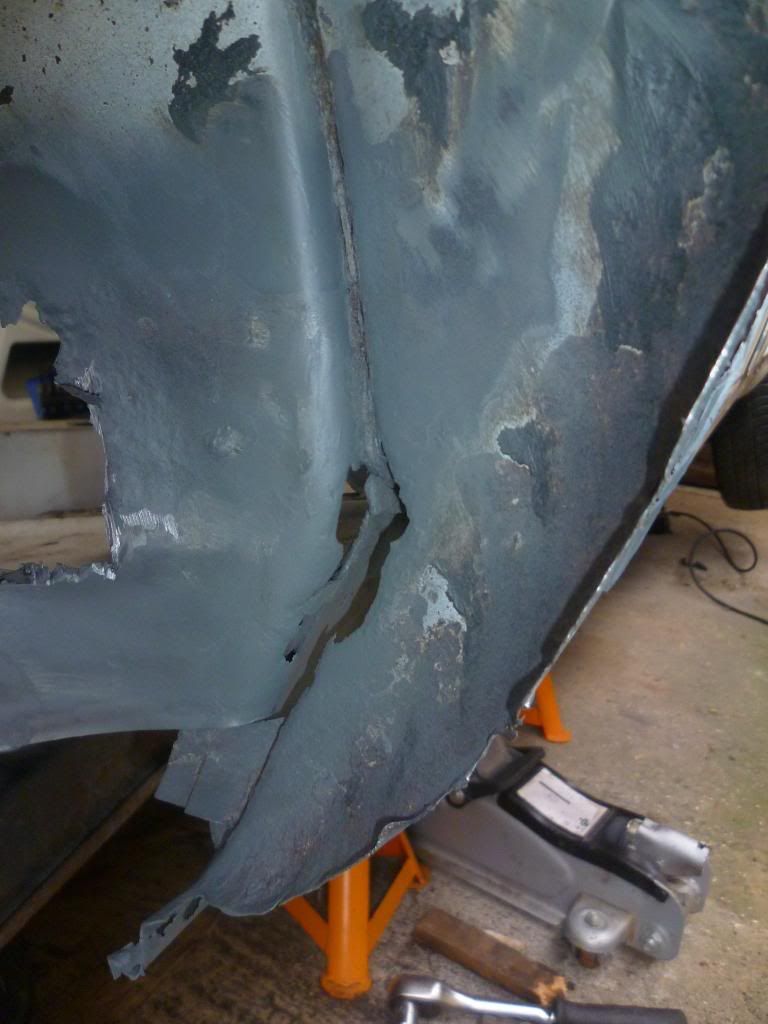 Same area, looking in to the sill (the red lines are the start of me trying to work out what panel goes where) 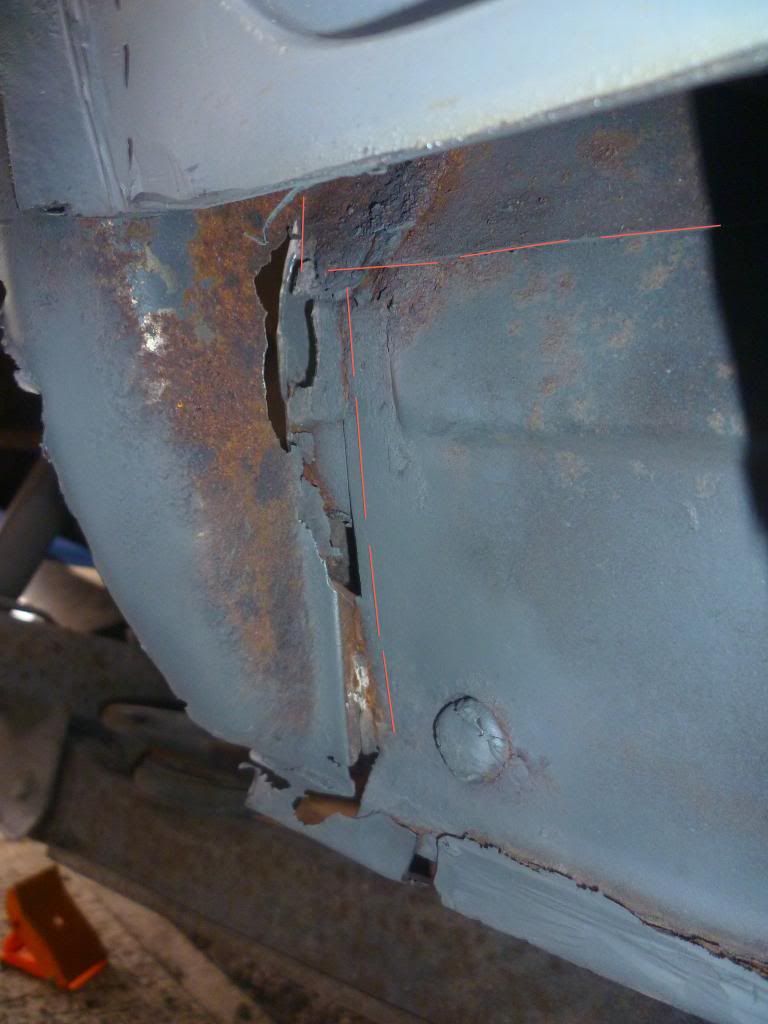 From the inside 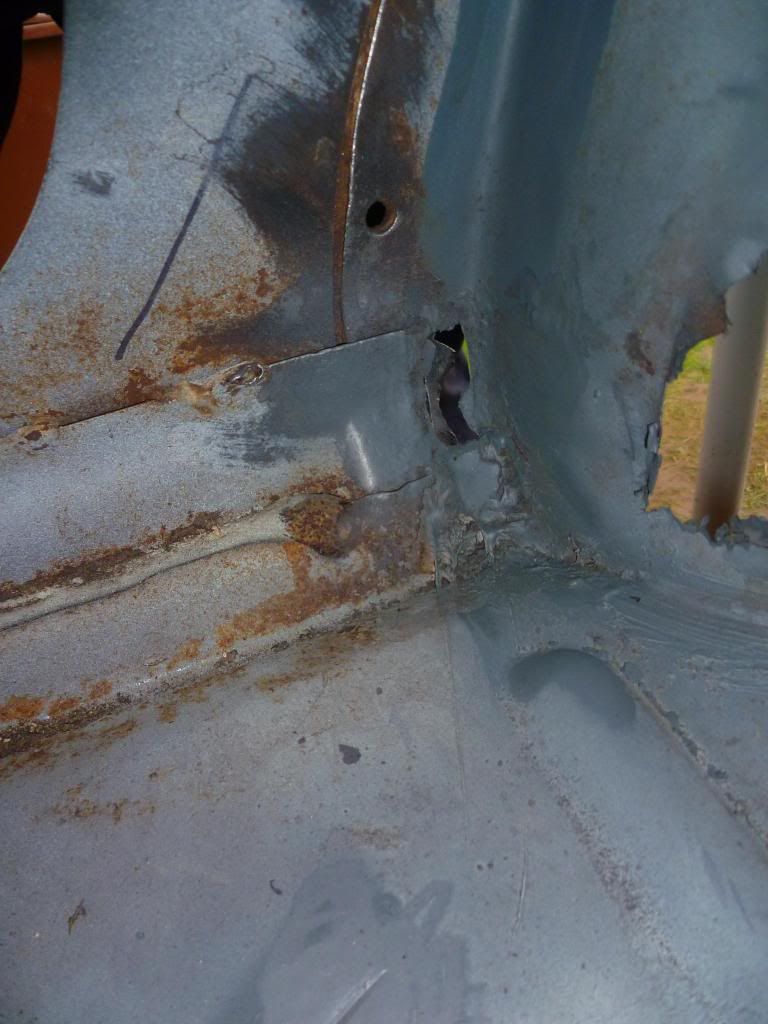 Also took the chance to see what was behind the bubbling on the shock mount strengthening plate. Nice! 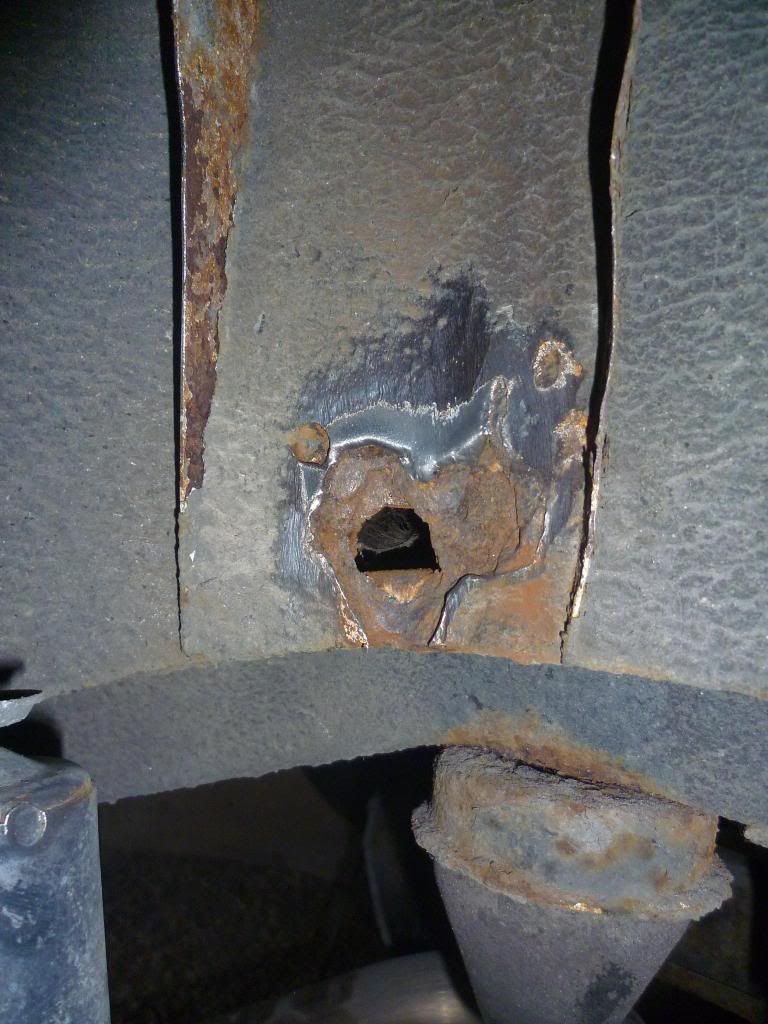 Looked up and saw this hiding on the bottom of the door (It's very crusty) 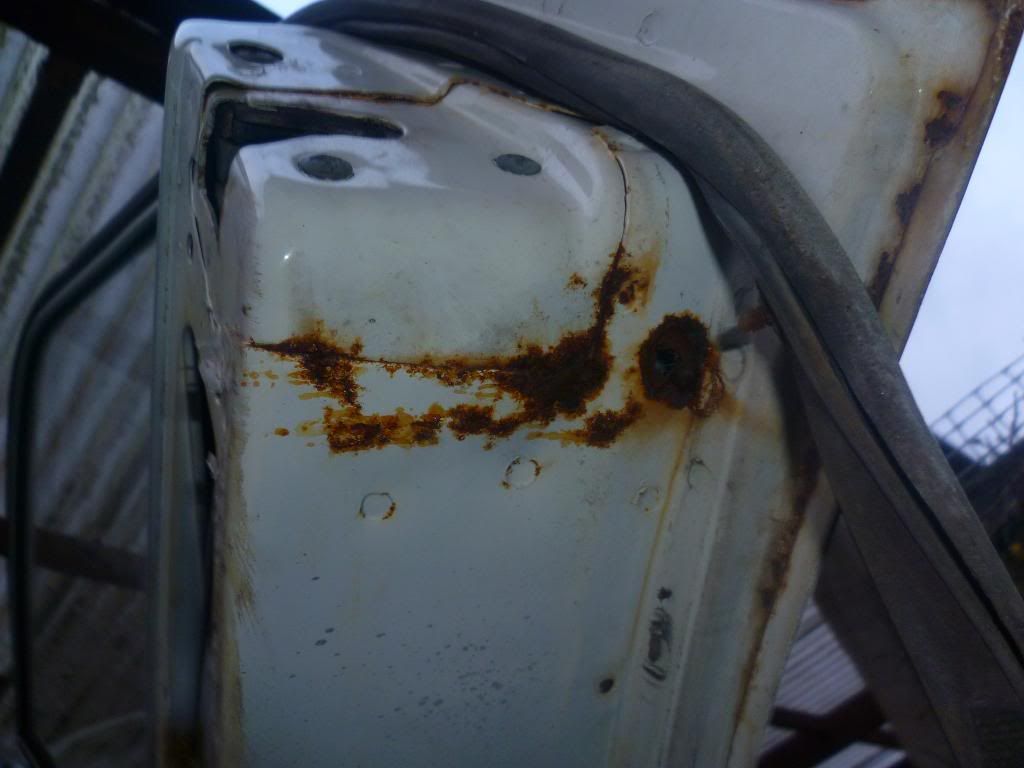 And with light failing decided to strip the sill back a bit more to make sure the rest was solid 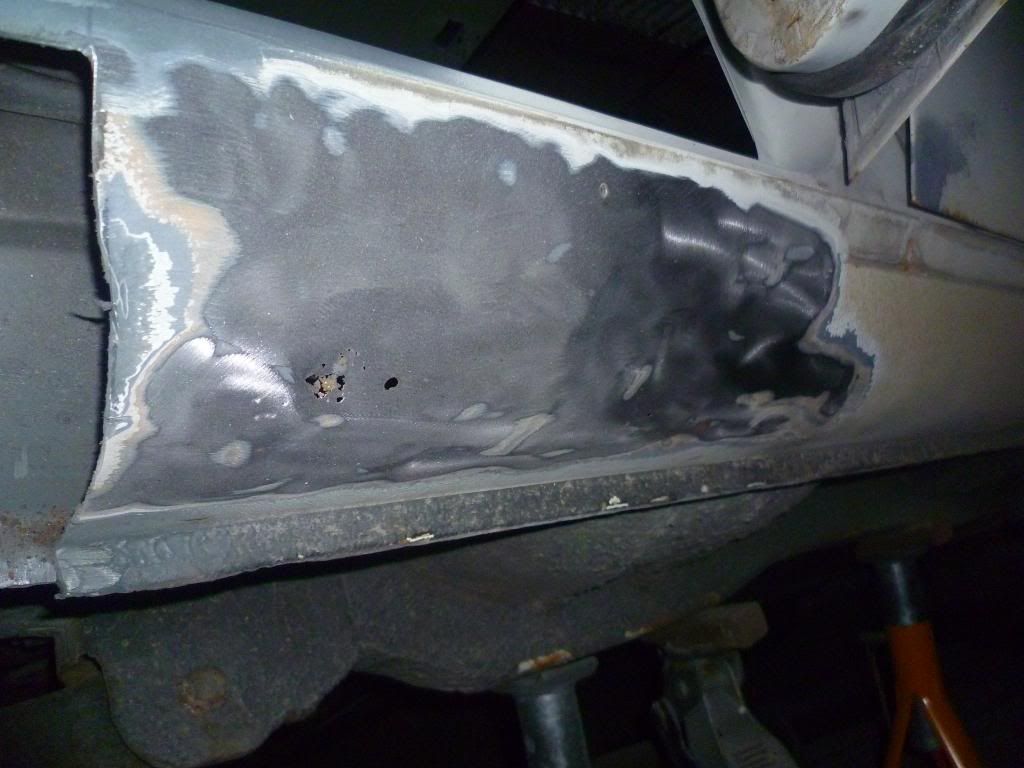 It's not. So, my thought's were I could keep cutting out and welding in new patches for every hole, but then I don't know what the inside is really like and it would be pointless spending ££££ and getting a fresh paint job for the rust to bubble through in a year or two. So should I replace the entire sill so I know it's all good clean metal and I can properly inspect the inside? In which case genuine or pattern sill? Or should I chop the bottom half out as much as I need to and weld the bottom half of a pattern sill on? I tried asking my dad for advice but it was fruitless. Basically "why make more work than you need to, just patch over the holes"...errr, no. So end of day whatever it is, 400 odd by now since it came off the road, and this is what I have 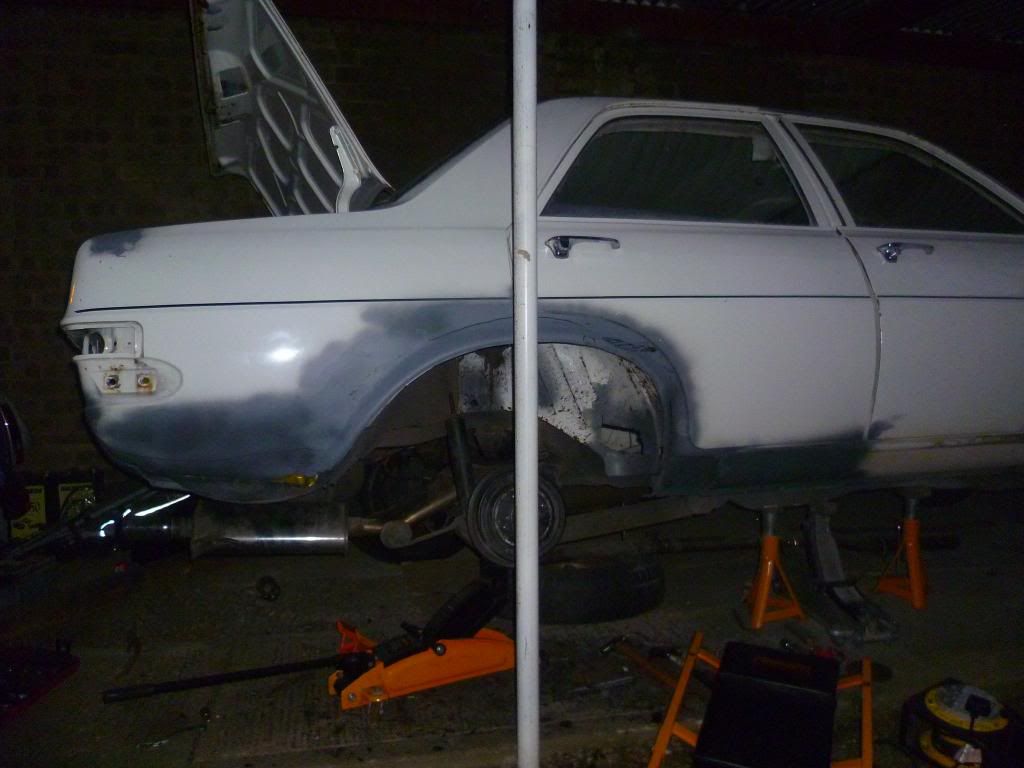 |
| |
Last Edit: Feb 22, 2013 23:41:34 GMT by oli8925
Project Diary1975 Viva / 1988 T25 Camper / 1989 Mini / 1991 MX5 / 1992 Mini / 1994 Saab 9000 / 1997 Saab 9000 / 2008 Saab 9-5
|
|
MonzaPhil
Posted a lot
Think like a man of action, act like a man of thought
Posts: 2,454
|
|
Feb 23, 2013 11:27:04 GMT
|
|
Problem with fitting sills would be finding good quality panels that don't take forever to get to fit properly. I thought about doing it that way but have patched instead. Just make sure you fill the sill with rust killer/ waxoyl etc.
I think, unless you do a complete strip, blast, galvanising and rebuild, some sort of naughty rusty bit will appear in the future somewhere.
|
| |
This is now a clicky linky! |
|
|
|
|
Feb 23, 2013 13:38:59 GMT
|
As it happens the only sills I can find on ebay are genuine ones, so hopefully they'll fit pretty well. Only drawback is they're £230. I'll finish stripping teh sills and see what the front turns out like and go from there. If it needs new sills, it needs new sills |
| |
Project Diary1975 Viva / 1988 T25 Camper / 1989 Mini / 1991 MX5 / 1992 Mini / 1994 Saab 9000 / 1997 Saab 9000 / 2008 Saab 9-5
|
|
|
|
taurus
Posted a lot
Posts: 1,084
|
|
Feb 23, 2013 13:49:50 GMT
|
|
Talk to Fred on VVOC - I think he's got some sills - at least when I was down at his last week he asked me if I needed any.
|
| |
|
|
|
|
|
Feb 23, 2013 21:59:18 GMT
|
|
Ooh thanks for the heads up, I will do. Incidentally pattern sills reappeared on Ebay today at £60 a pair. I'll take back both sills completely tomorrow and make my decision.
|
| |
Project Diary1975 Viva / 1988 T25 Camper / 1989 Mini / 1991 MX5 / 1992 Mini / 1994 Saab 9000 / 1997 Saab 9000 / 2008 Saab 9-5
|
|
|
|
|
|
|
|
Glad to see you are still persevering. You'll be an 'ace old rusty car fixer upperer' by the time you finish this and look at other rusty cars and think 'pffff.. That's not rust'
keep chipping away at it. As long as its strong then the neatness doesnt matter till you get to the last welds. And wax will be your friend when it comes to keeping it solid.
|
| |
|
|
|
|
|
Feb 25, 2013 10:33:32 GMT
|
|
Excellent stuff, although this does put the fear of god into me about what I've got waiting for me with the Chevette!
|
| |
Sierra - here we go again! He has an illness, it's not his fault.
|
|
ShaunOfCalder
Part of things
Yes - I should know better....
Posts: 120
|
|
Feb 25, 2013 10:54:30 GMT
|
|
Not sure how I've missed this thread, yours was/is one of the better HC's around here, but the recent pics have made me feel better about the work STILL pending on my 'donkey' estate, keep it up, and you're giving further inspiration to others out here with similar projects!
|
| |
Another bloody Mx5
The wifes' Suzuki Grand Vitara
Mercedes Sprinter Ambwilans (Rescue Unit)
|
|
|
|
|
Feb 26, 2013 14:25:01 GMT
|
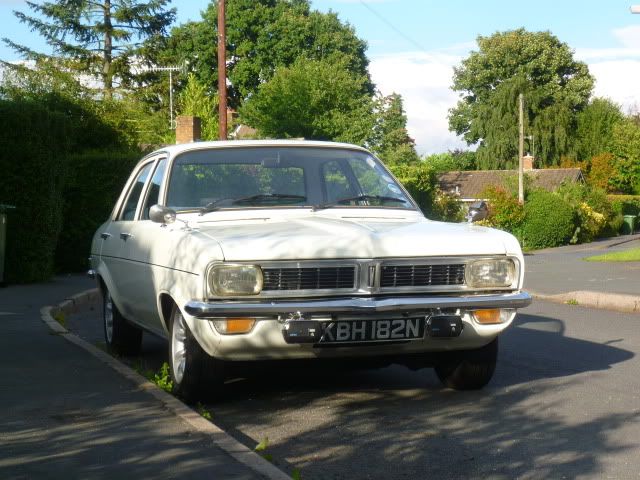
Nice car even though it has some rust not nearly as bad as most viva's! Good idea to learn to weld will save a fortune in the long run. With all the viva's on this site its giving me ideas that or a shove-it anyway but need to finish a few projects and clear some space! Keep up the good work. |
| |
|
|
|
|
|
May 18, 2013 11:11:55 GMT
|
|
liking what you have done to the viva oli. been reading through to see what lowered springs you have in. do you recall what brand/part numbers they are? I have a hb I am trying to get lower but can't seem to get it as low as I want yet.
|
| |
|
|
|
|
|
|
|
Thanks for the kind words guys. Had another long break from doing any work to it, every time I looked at the rusty bits and thought about how to fix it I was filled with self-pity to be honest. Thoughts of "I'm never going to be able to fix this". Then I grew some balls and just started buying bits to do some panel beating and forming, and some massive old manuals to teach me how to restore body work. Over the past few days I chopped out the rusty sections of the panels bit by bit in the corner I'm focusing on. 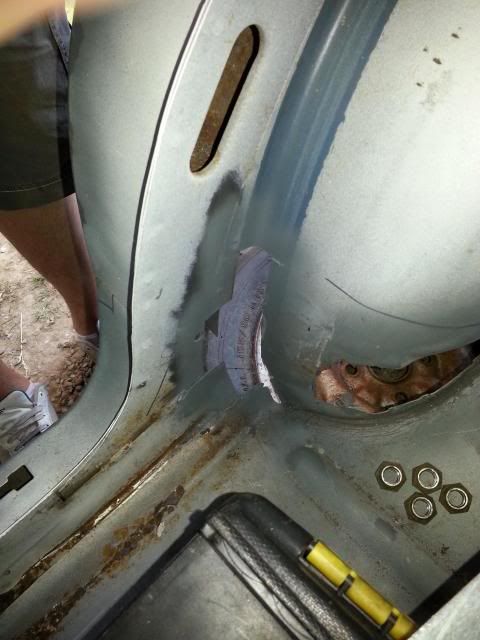  I've made the inner arch section but am struggling to work out how to make the inner skin of the outer arch out of sheet metal. I unintentionally remade the piece out of card which is useful as there wasn't much left of the metal work but I can't work out how I'm going to get that much 3 dimensional curvature into a flat piece of metal. 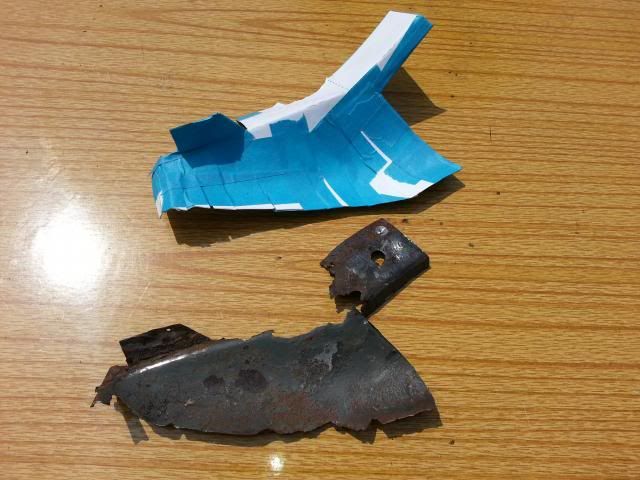 Dagsy, I got my springs from a guy called tony at Springs 2000/South Yorkshire Springs in Rotherham. He seems to know the original length and spring rates so you just need to tell him how much lower than standard you want to go. I wouldn't recommend 2" though, it's too compromised and not enough suspension travel. Was a bit of a dog to live with on Britain's roads. For more ideas for an HB talk to Graeme with the Retro-Cars featured green HB, if you haven't already. Before mine goes back on the road I'd like to customise the suspension to accept coilovers and possibly alter the chassis, chassis/subframe mountings and/or suspension to keep a decent amount of suspension travel while remaining roughly 1.5" lower than standard. Still a long way to go until then though. |
| |
Project Diary1975 Viva / 1988 T25 Camper / 1989 Mini / 1991 MX5 / 1992 Mini / 1994 Saab 9000 / 1997 Saab 9000 / 2008 Saab 9-5
|
|
|
|
|
|
|
|
Keep hacking away at it Oli. As for compound curves you could hammer the sheet into submission into a carved out block of wood. remember it only needs to be solid and close enough- then skim over with decent filler.
Or can you find someone local with an english wheel?
|
| |
|
|
|
|
|
|
|
|
Complex curves are hard. There are some good videos on youtube, but they mostly show people doing it with proper tools. If you cant get the bends right then you could make it in two pieces, then weld them and clean them up off the car. Then take it back to the car for final trimming and weld it in.
If you can afford it i would go for the original sills. It will help you align your rear wheel arch an you will have more confidence in it being in the right place.
Good work so far though!
|
| |
|
|
|
|


 l know how that feels, even if you kinda expected it to be there its still a pain!