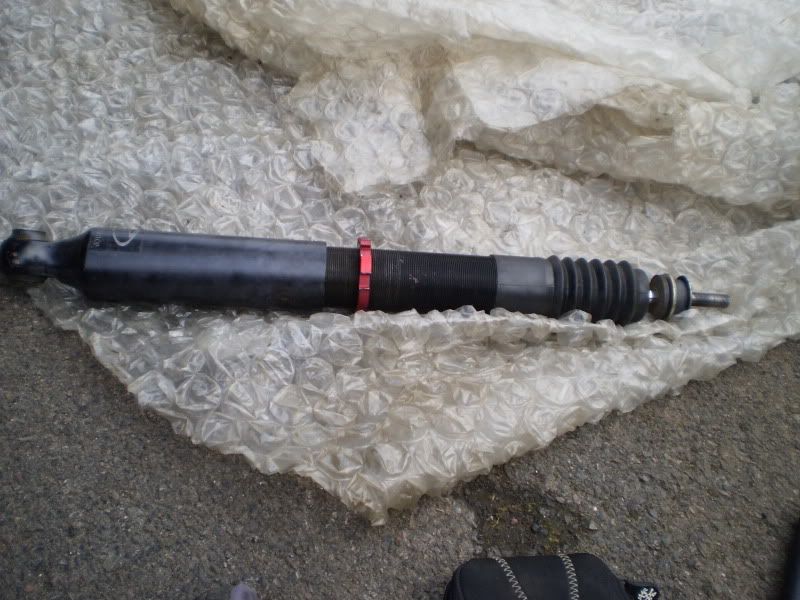
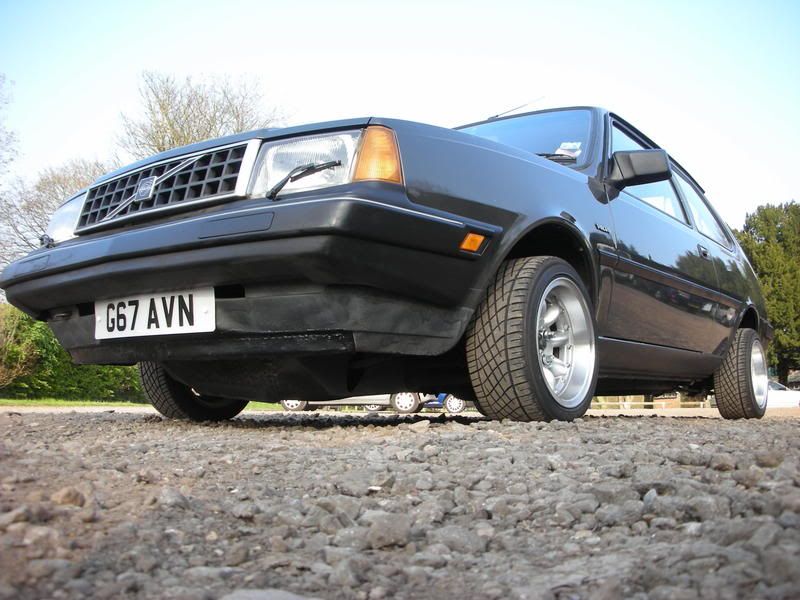
I've not updated in ages so I have just pasted up some of the highlights since My last post on RR...
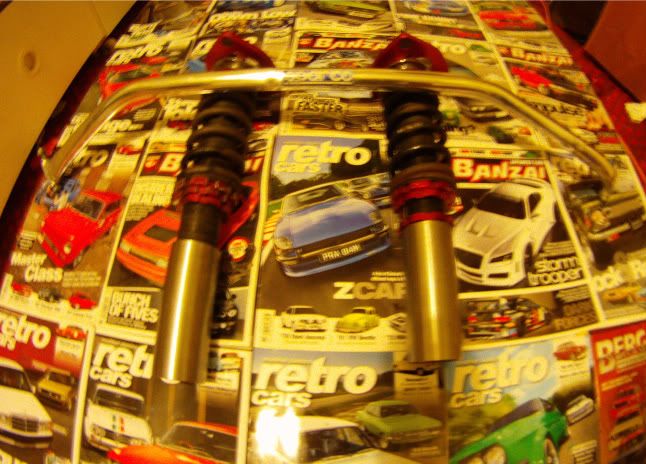
Driftworks got them in for me. 347 of my English pounds,
Bloody aussies, they put the sticker upside down

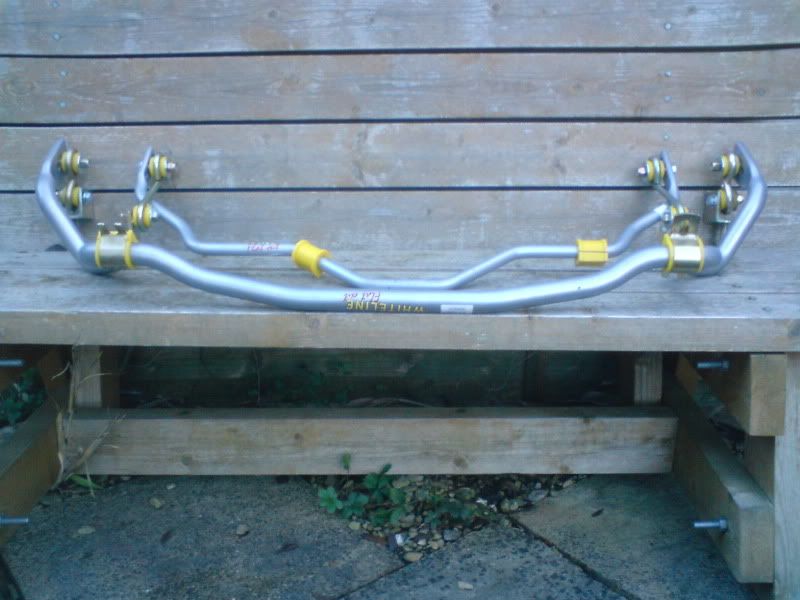
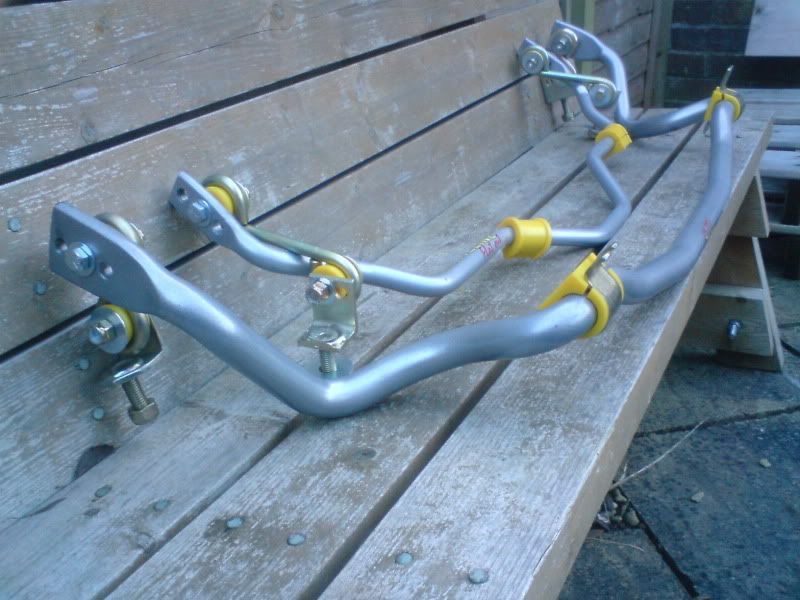
Hopefully get them fitted at the weekend. I had a set of eibach anti roll bars on my bmw 328 before, and they are definitely the best things to buy for getting a car to handle without needing to go for silly hard springs to prop the car up. Good on a track, but wibblepoo on the road, which is where the car gets used.
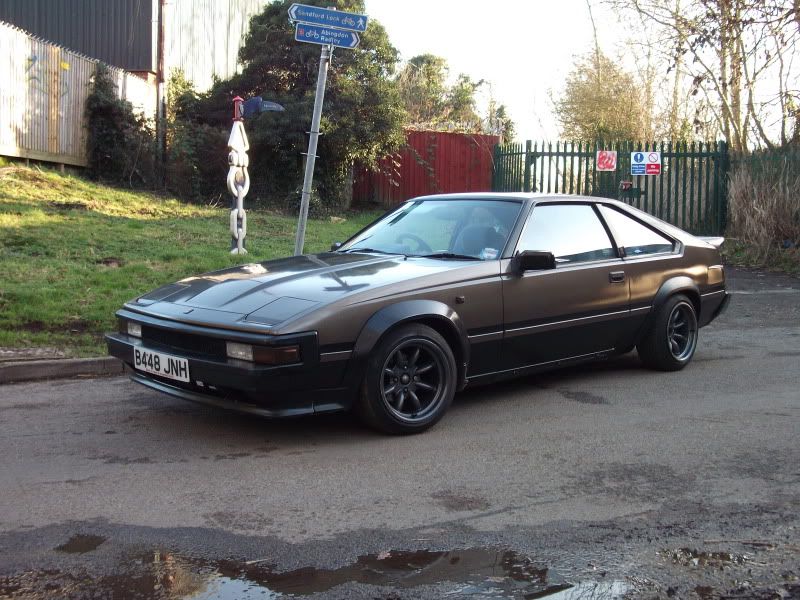
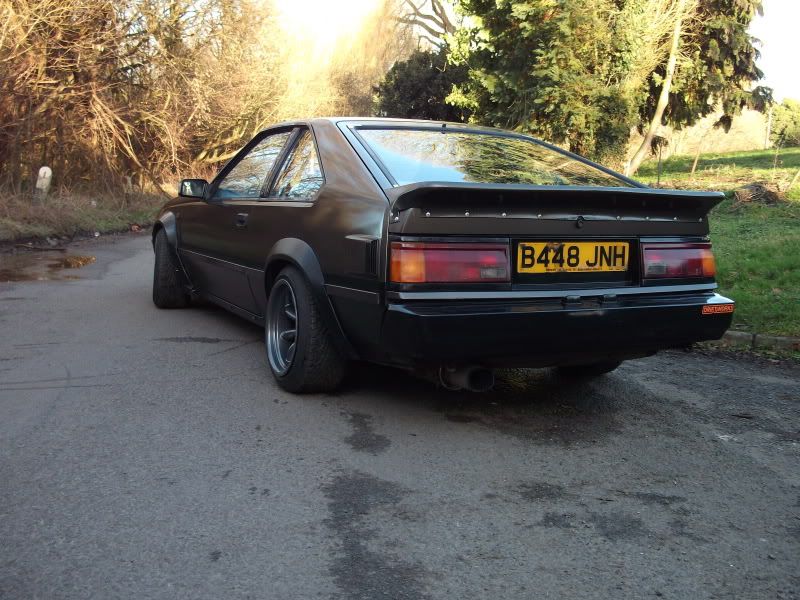
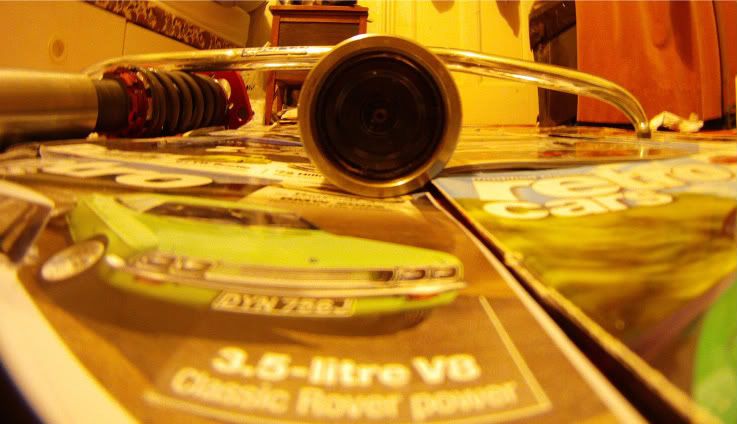
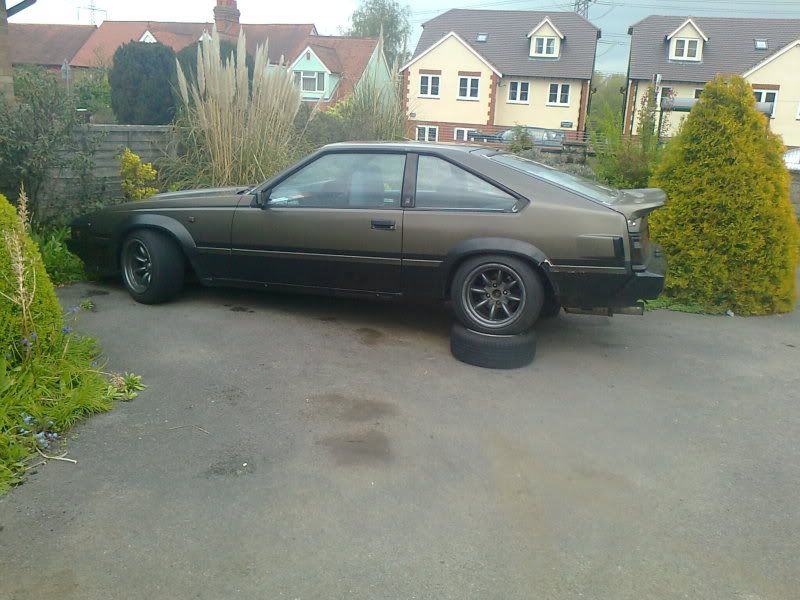
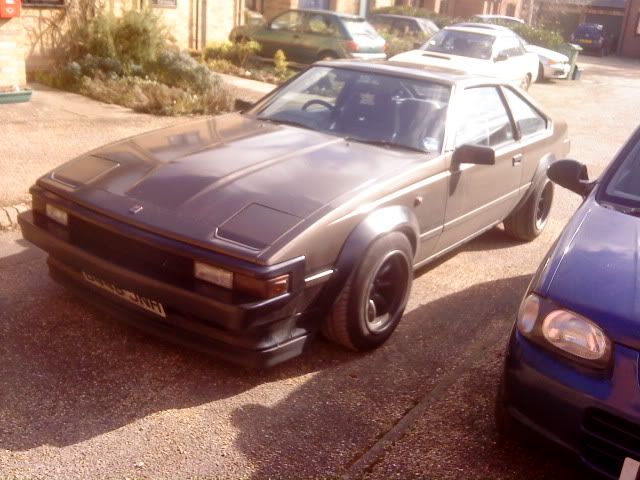
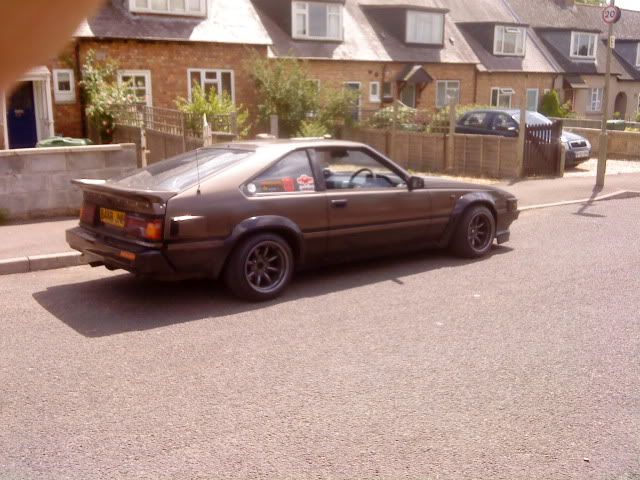
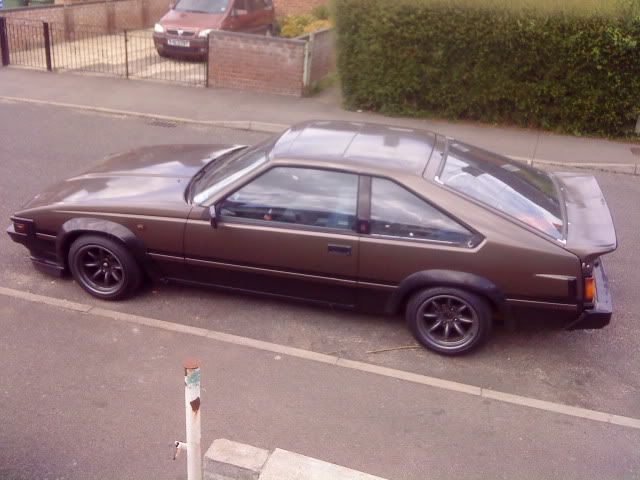
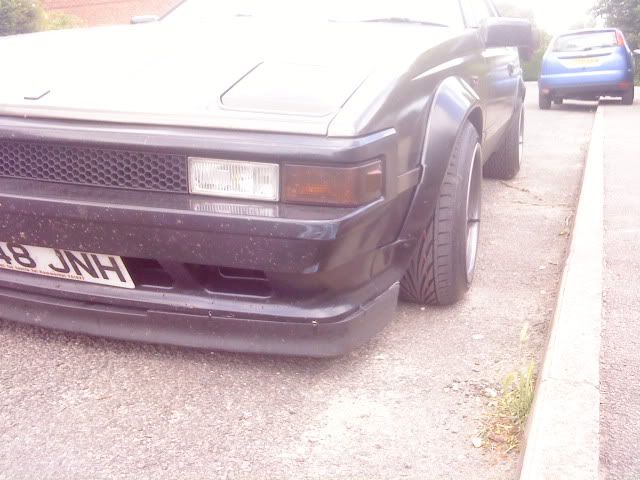
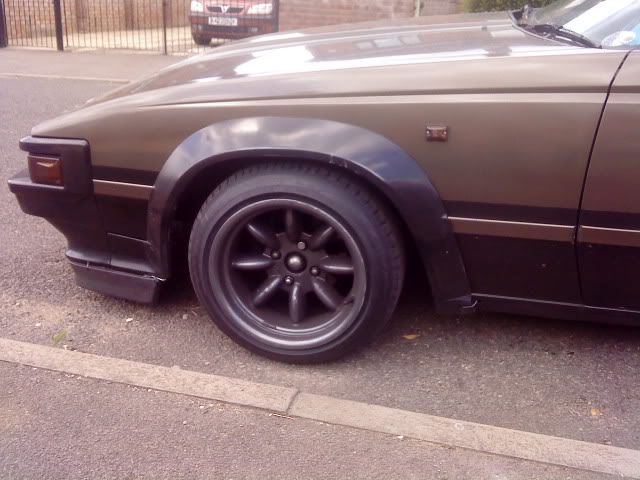
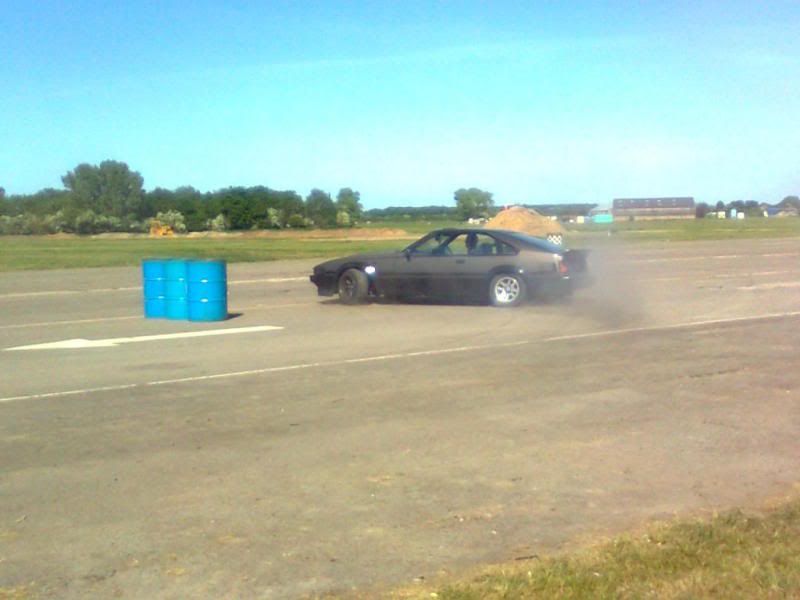
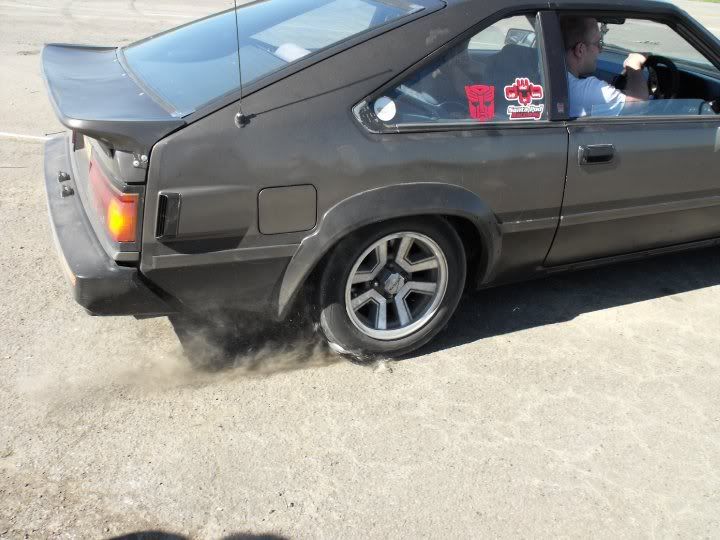
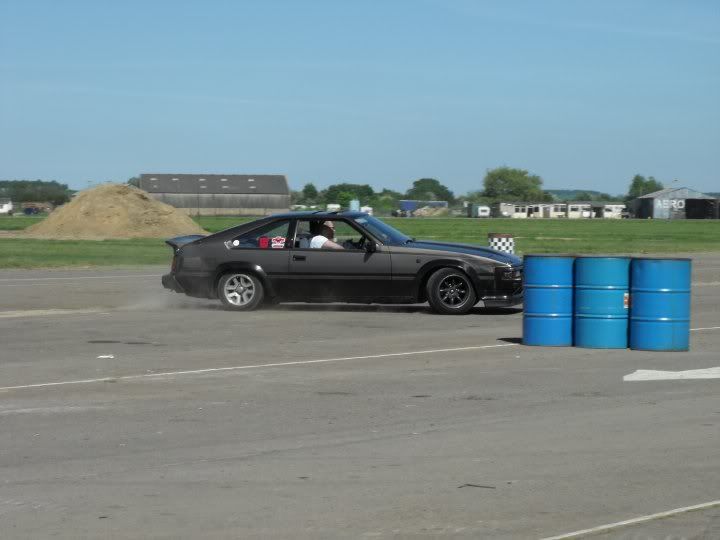
Few more photos I took the other day.
So, onto the write up and a bit of a fitting guide if you guy's are thinking of going down the same route..
Ok, first thing to take into account is that you will have to get your hand dirty, It's not a direct fit so some basic tool's are needed

* A Trolley jack / flat surface and axle stands/ wheel chocks
* A decent Bench Vice
* Hacksaw with a new blade.
* Copper Hammer (nice weight one)
* C spanners (make sure you get them with the coilovers)
* A round/ flat metal file/ and some Emery cloth.
* Copper grease / anti seize compound
(I will supply you with a 70g tube like pictured with front kit)
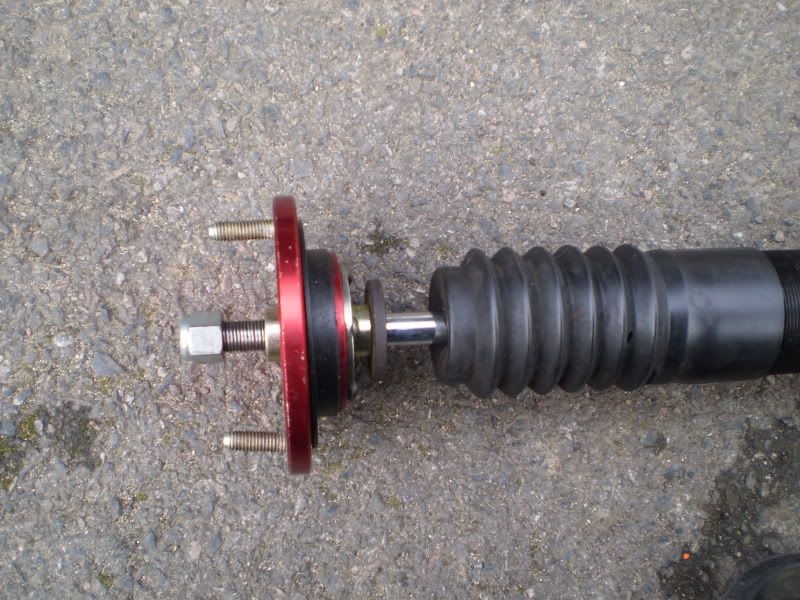
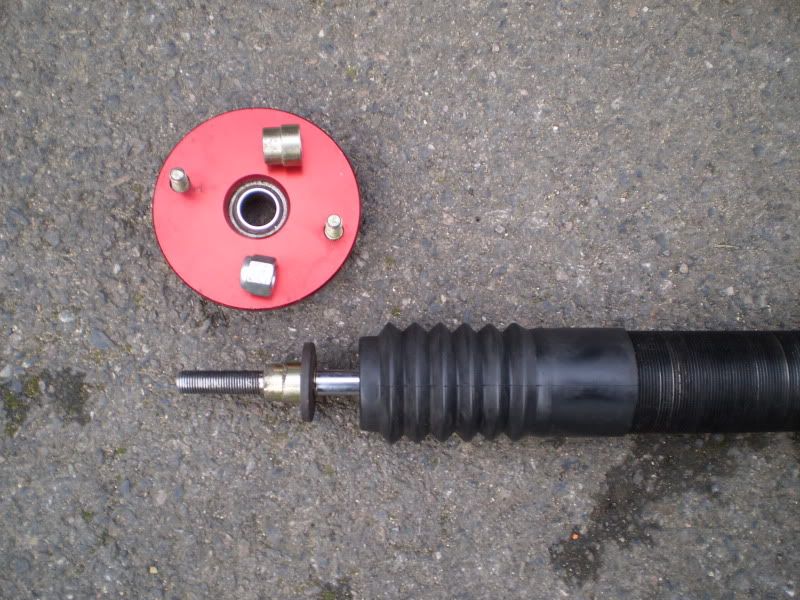
Loosen the nyloc nut at the top of your new coilover and slide off the S13 Pillowball top mounts, along with the top and bottom spacer hats.
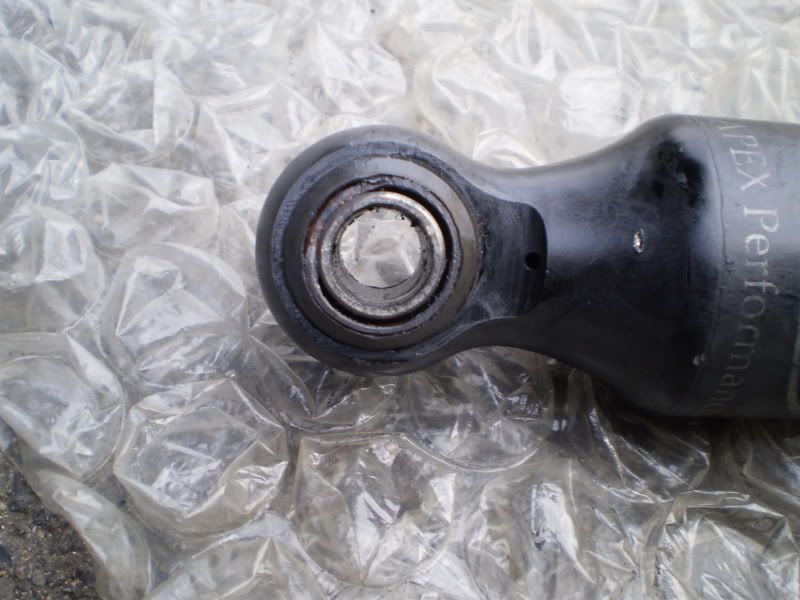
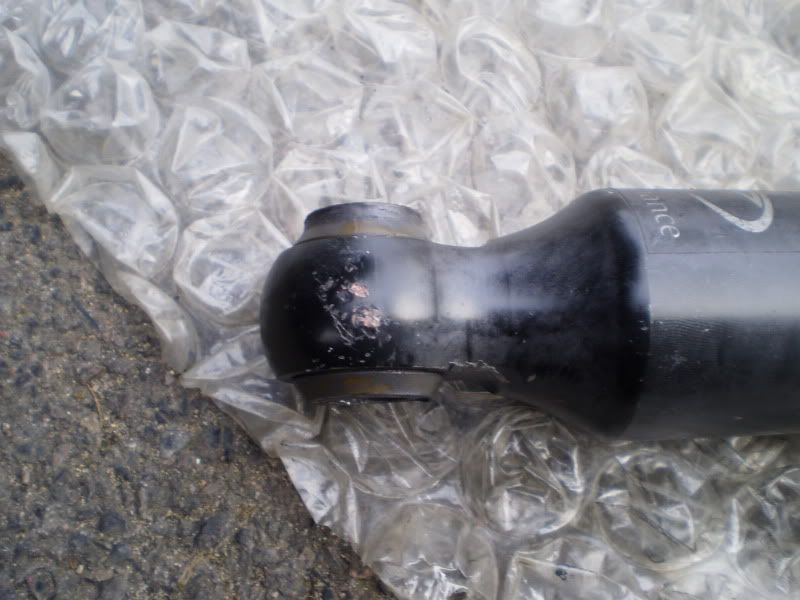
Next, Dig out the standard Rubber bushes from your old MA61 dampers (If they are perished, buy some Superpro poly replacments, No point putting any old curse word back on.
My rubber ones were like new, so I will get some later on.
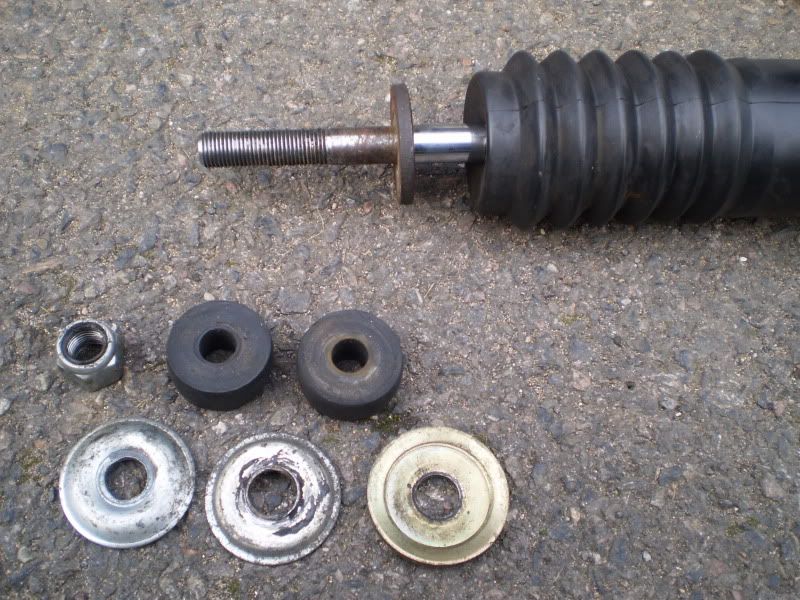
And arrange them like pictured.
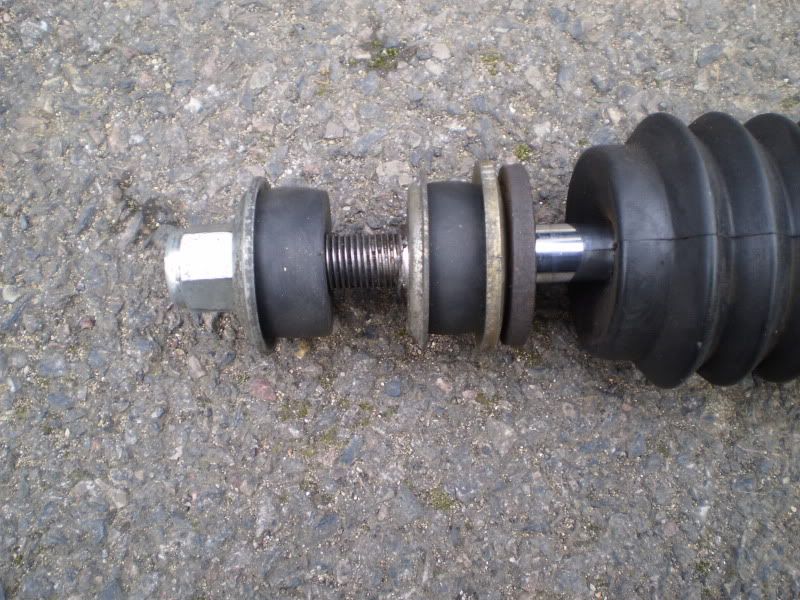
the curved washers on the top and bottom bush SHOULD cup the bushes, so make sure you put them how I pictured.
the middle washer is a centre locator to guide the damper strut in straight. The washers may not fit, so a bit of filing will be involved. Not a lot though!
Next step is the bottom mount,
before you go any further, and if your using second hand Coilovers Make sure all the threads are free to turn, so spend some serious time cleaning everything till they're like new .
Notice i've already pressed in the spacer tubes.
Also, this is the bit if your using New dampers your warranty will go out the window, as this next bit requires some cutting..

(But you DO want decent/ cheap suspension don't you?! )
My advice, don't be a Pussy and get it done.

As you can see in the picture ^ I have removed one of the lips on the bottom mount. (Reason will become apparent in next pic)
As you can see, the damper sleeve is longer than the lug, but its not so bad, the s13 dampers had some little lips which makes for awesome cutting guides..
I only removed one lip as I had some 16mm OD washers to make up the difference. If I were you, and had more time i'd trim them both so you use less washers .
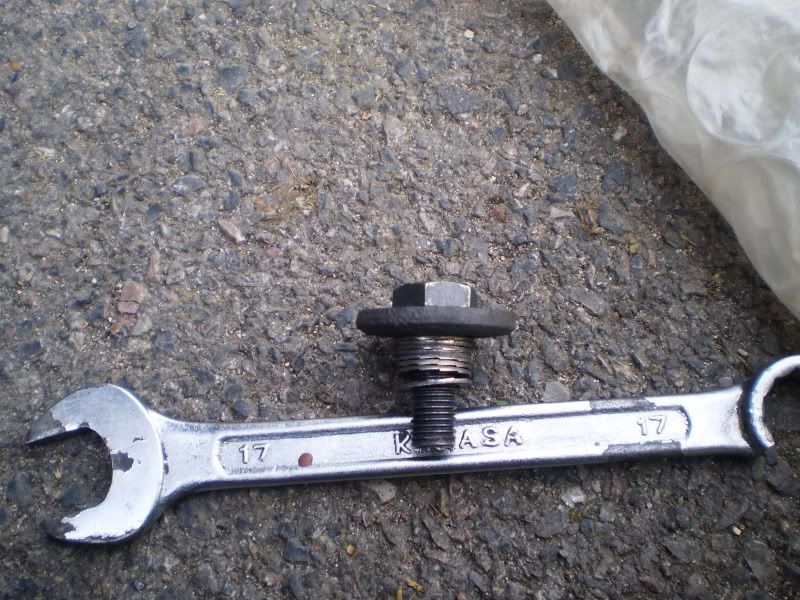
Bolt's need to be 30mm long, but try finding them
I just chopped them down as left the ones I did have to supply at work
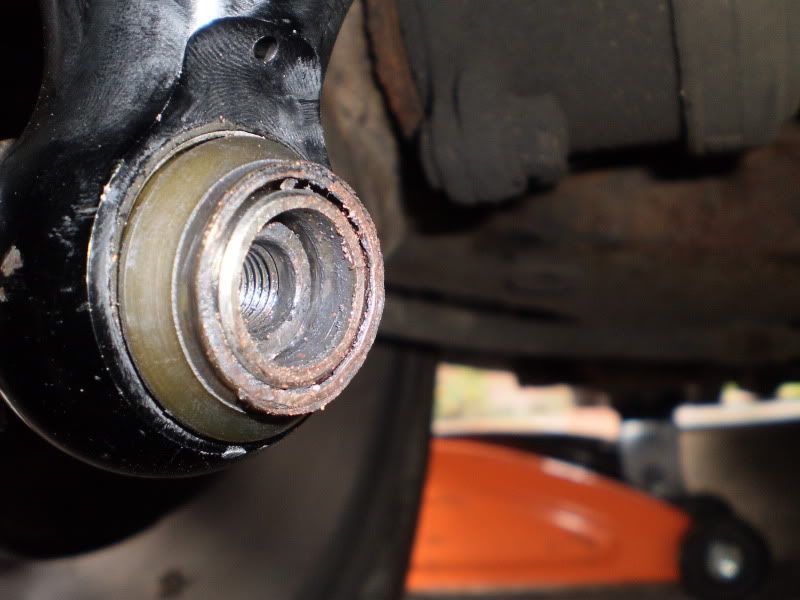
This is the next fun bit. Clean up your bottom lugs! (not pictured)
The tolerences for the lugs were awful, Are designed to support rubber bushes, plus 20 odd years of wear means they are not usually dead on 16mm, So spend a bit of time with some emery cloth/ glass paper till the bottom Damper tubes (with my sleeves) slide on nicely without lateral movement. So DON'T go mental with a dremmel

It's hardly any material, so go SLOW!
Your nearly there, so don't lose faith yet man!
Next you want to take apart the damper sleeves and Grease the absolute curse word out the female bottom damper tubes. And I mean/ don't scrimp on the grease, really go to town on it!
Reassemble, then jack up the car, (always support) & remove a wheel, then position the top of the damper through the holes
Making sure all bushes and washers are in the correct order.
Lightly wind on the nut a couple of turns.
DON'T fully tighten as this gives the dampers some much needed movement.
Put the wheel back on, and nip up the wheel nuts, you WILL need to take it off again, so just do them up to hold the wheel.
Drop the car so the wheel/ arch gaps about 1- 2" off being fully supported by the springs, This will give the dampers a bit of compliance. Do the same for the threaded bottom tubes. ie, allow the holes to line up about 1" BELOW the bottom lugs. It's much kinder on the damper units to have a bit of droop as the wheel sometimes wants to drop slightly when going over a crest/ speed hump ect.
If you've ever experienced a knocking sound, this is usually the Root cause, hence why lots of posh coilovers now come with preload helper springs below the main ones.
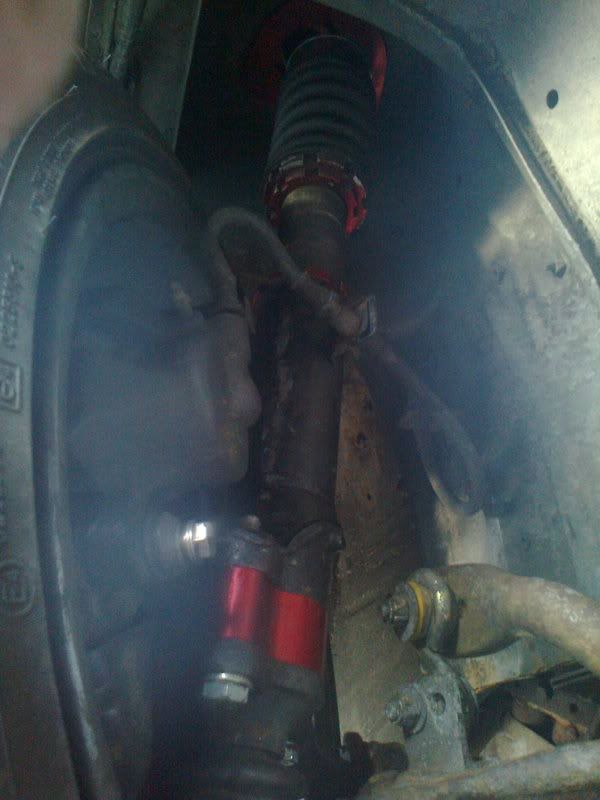
Ok, so Now everything is lined up, cleaned and lubricated
the home stretch in sight!

Slide the bottom mounts over the lugs, ( Don't forget to grease) observe the gap and space the remainder with some washers like i've done, hell, you could even use the sleeves you took off the Nissan top mounts if they're the same size but a few washers wont hurt to space out the remainder
(Less are needed if you take off both lips)
Thread in the new 30mm bottom bolt (Grease!) and fit spring washer between the bolt head and the original cup washer.
Fully tighten the tops (good idea to replace the nuts if Nylocs)
Jack up the car again and remove the wheel (last time!
)
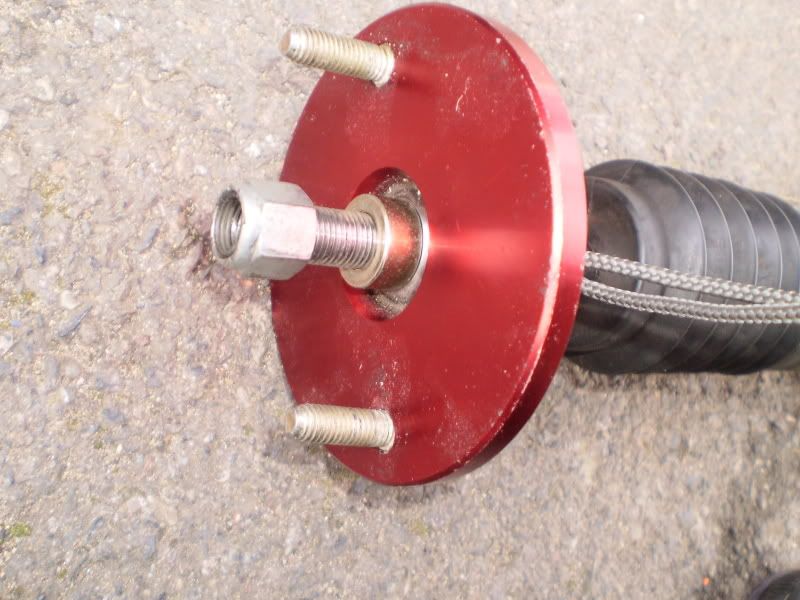
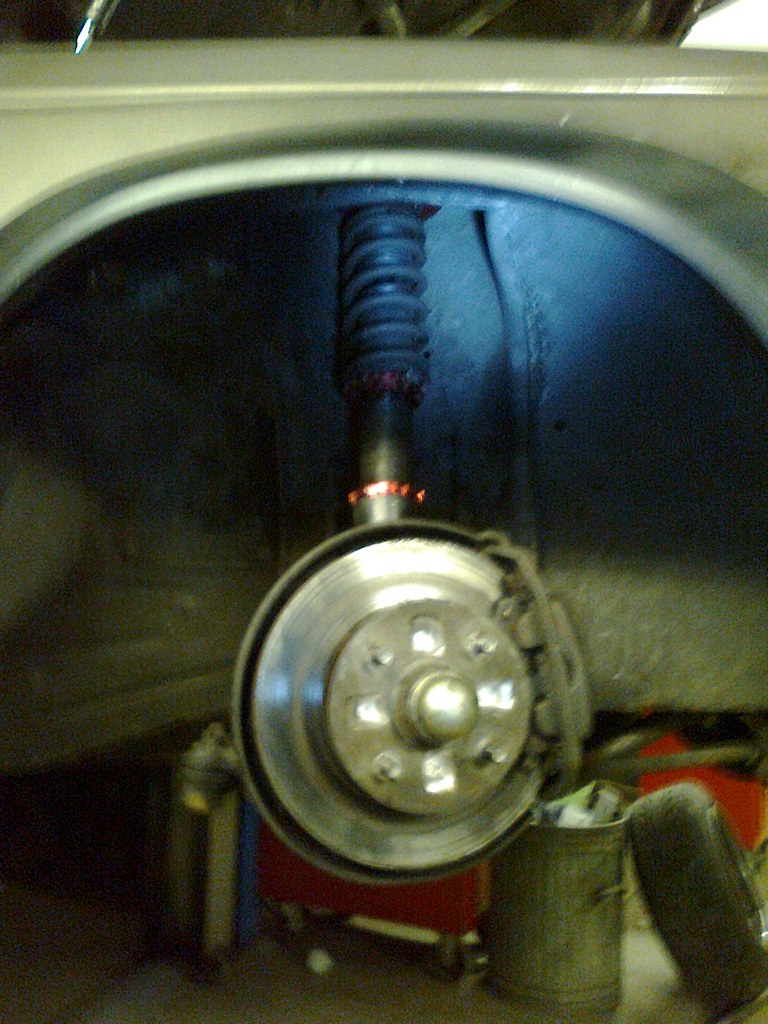
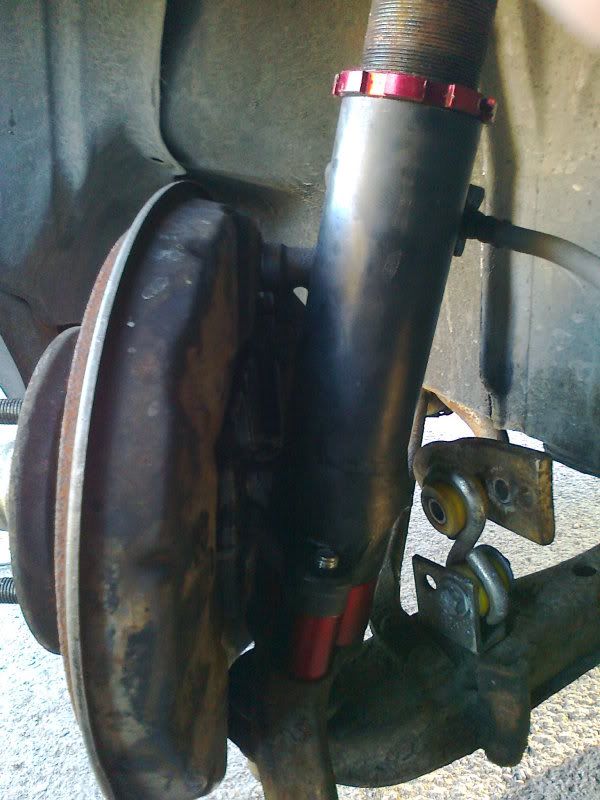
you should be looking at something very similar to this..
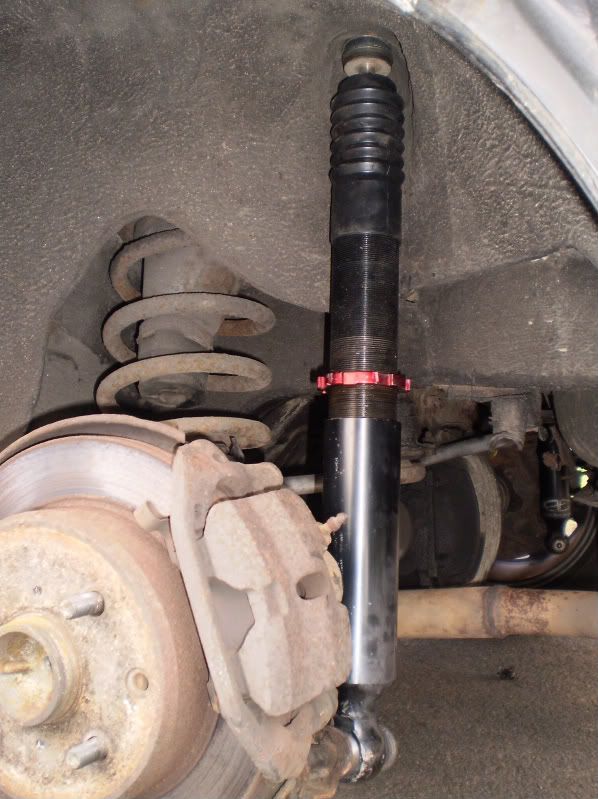
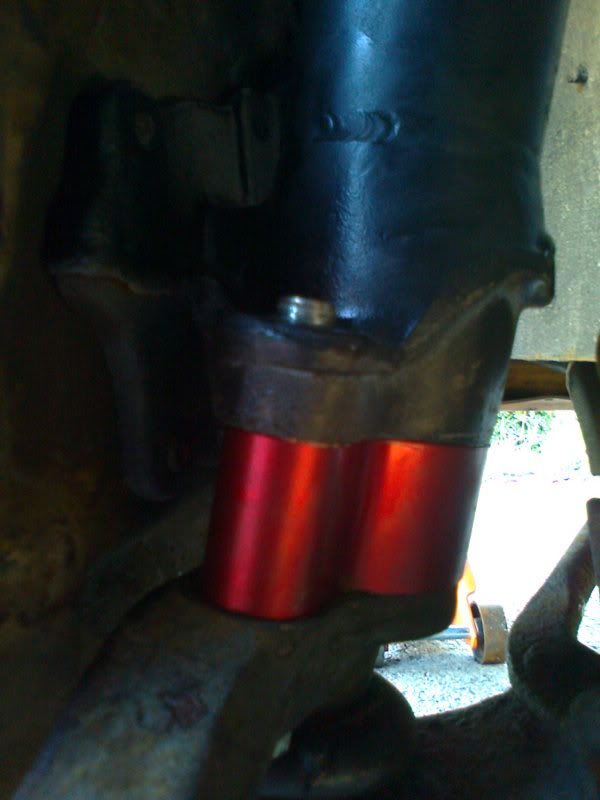
You then will need to tighten up the locking collars , so, once again everyone! "GREASE" Haha ;D Yeah, wipe a bit of grease between the end of the threads , then wind the collar down over the grease till it nips up against the top of the bottom tube.
Grab you c spanner and tighten them up till your happy.
(A few taps with the copper hammer against the spanner is my technique)
Refit wheel, drop car and repeat for the other side, then chill! you've done well, so, before you take it out for a drive remember to set your dampers to an equal level, (i set mine to 16/32 clicks)
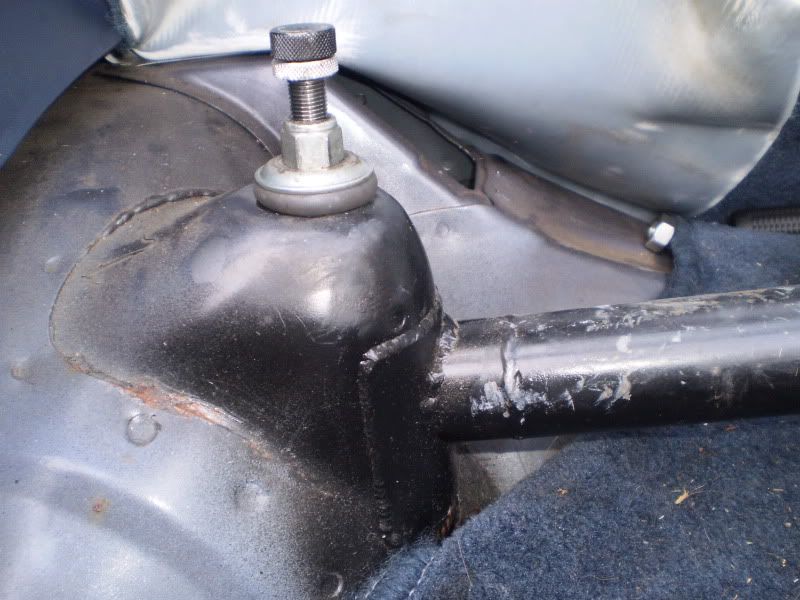
Oh, and to anyone who want's to know about running the springs the same as the S13, check pic below...
Picture ^ shows the amount of clearance between the damper unit and the body of the car. The Nissan S13 2.5" dia springs
would def. foul against the body. there's about 20mm between them at the bottom, and gets tighter as you go up!
I have Whiteline Anti Roll bars on my car, so the spring rate doesn't have to be really hard to support the weight of the car.
I just have shortened originals, but I will post up some details on part codes for some Eibach replacement springs and spring cup adjusters v. soon!
Hope this has been useful to you guys anyhow!
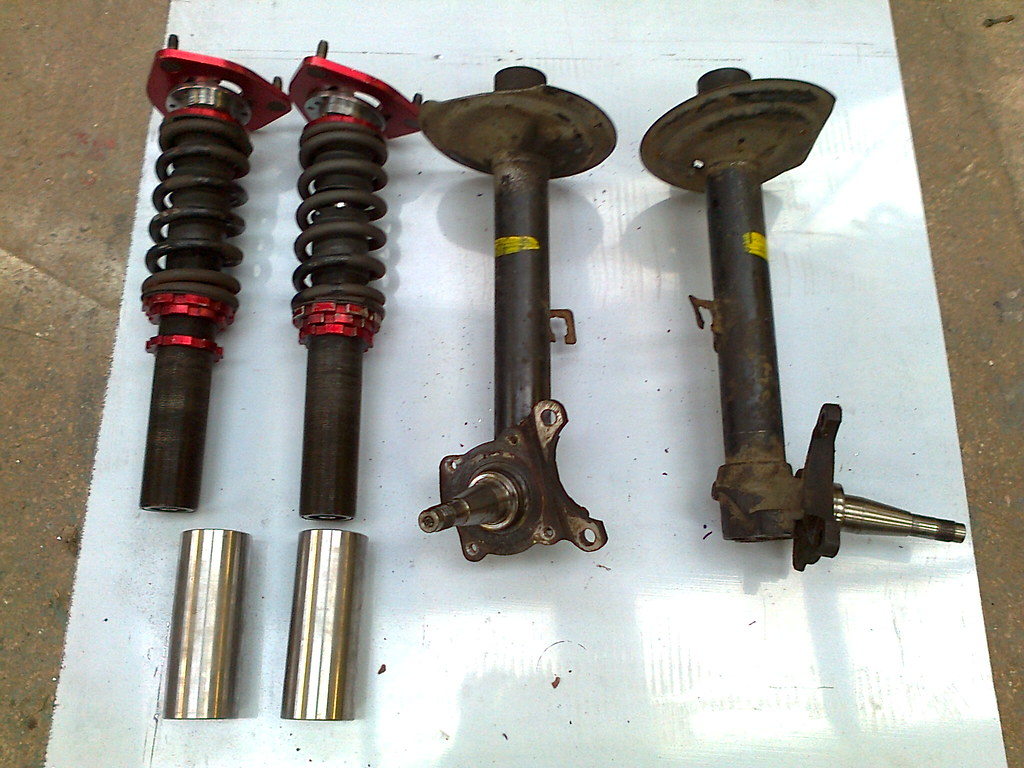
Front struts have been swapped back to original length ones with my mate Erny, so he's happy.
In return he gave me a Fully balanced and lightened 5MGE flywheel
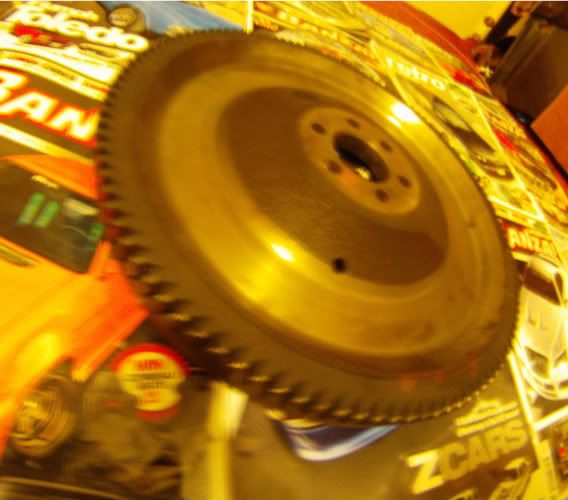
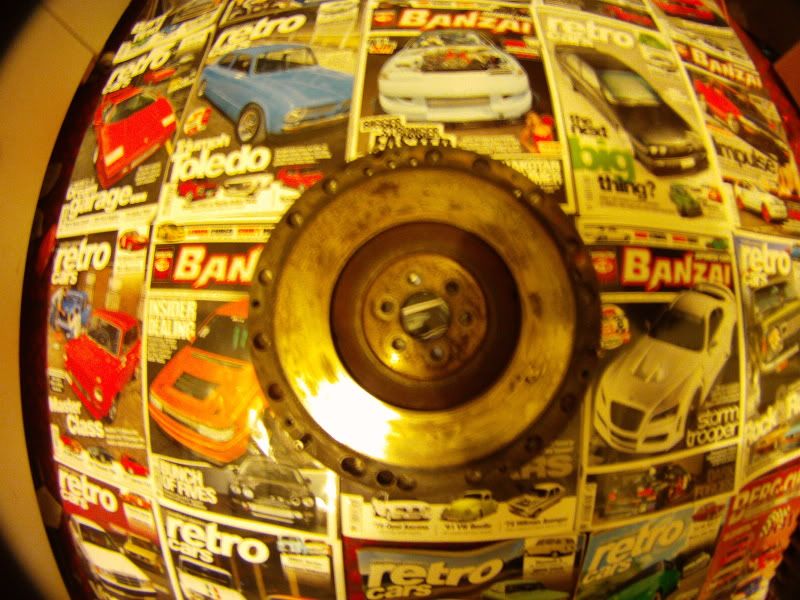
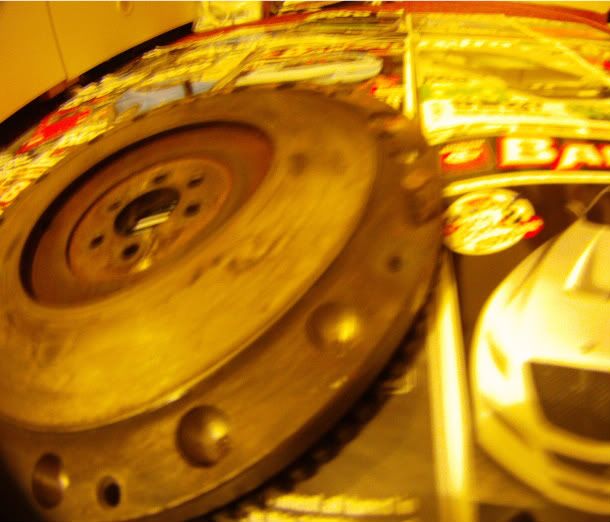
Balanced^
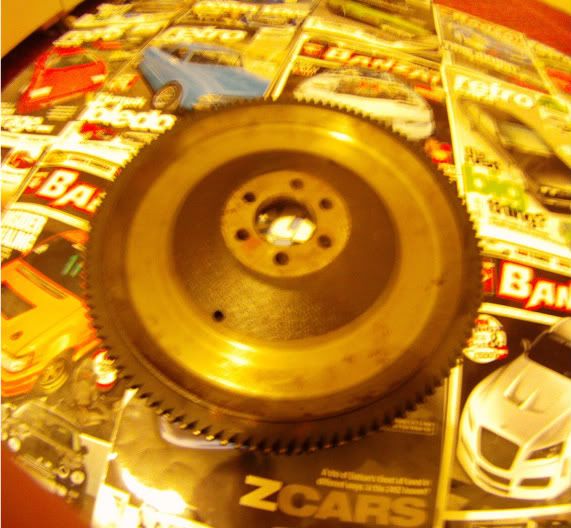
Lightened^
and a non specified sparco brace which I will make fit the front somehow!
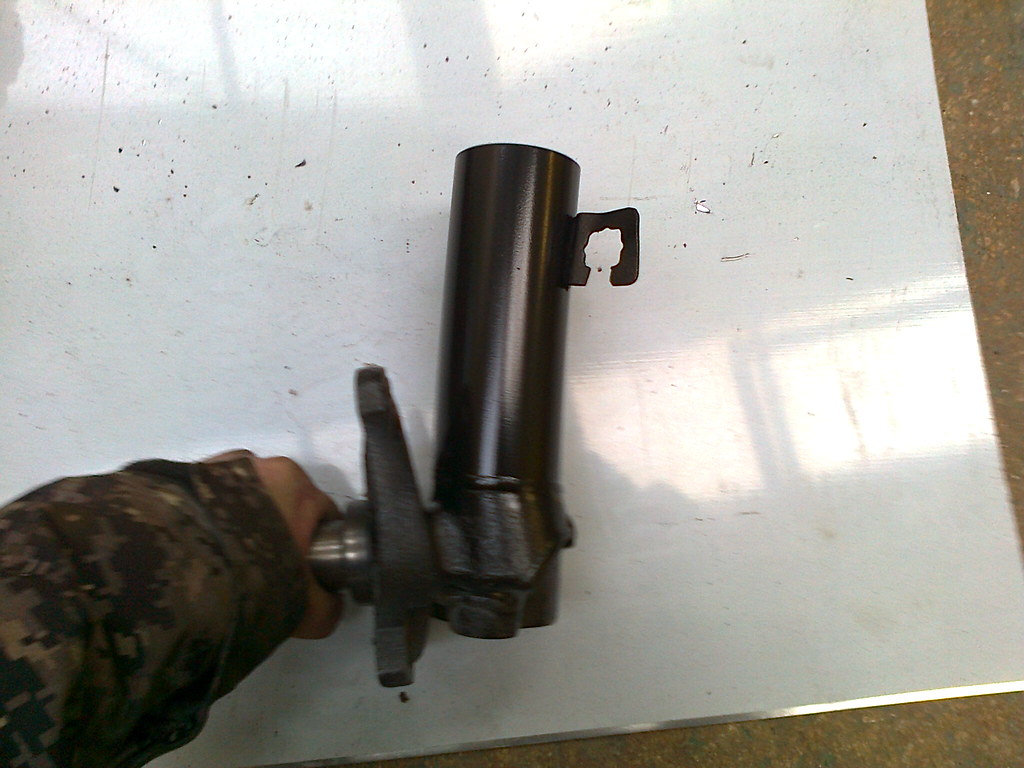
Front Coilover sleeves are Tig welded on
We got the front coilovers fitted today using my new strut tubes and damn, i'm good ;D
The fit was perfect, and they are tbh bloody amazing, a complete night and day difference to how the car drives now. I've done a write up on this, and the photo's will b used for the instructions sheet available with the Driftoy strut tubes, but your best bet if your not confident with welding is to send them to us and we'll convert them in under a week if i haven't sourced enough sets to do an exchange
Anyway, onto the write up...

After you have stripped the struts of the springs and dampers you will have your S13 coilovers and Driftoy strut tubes.
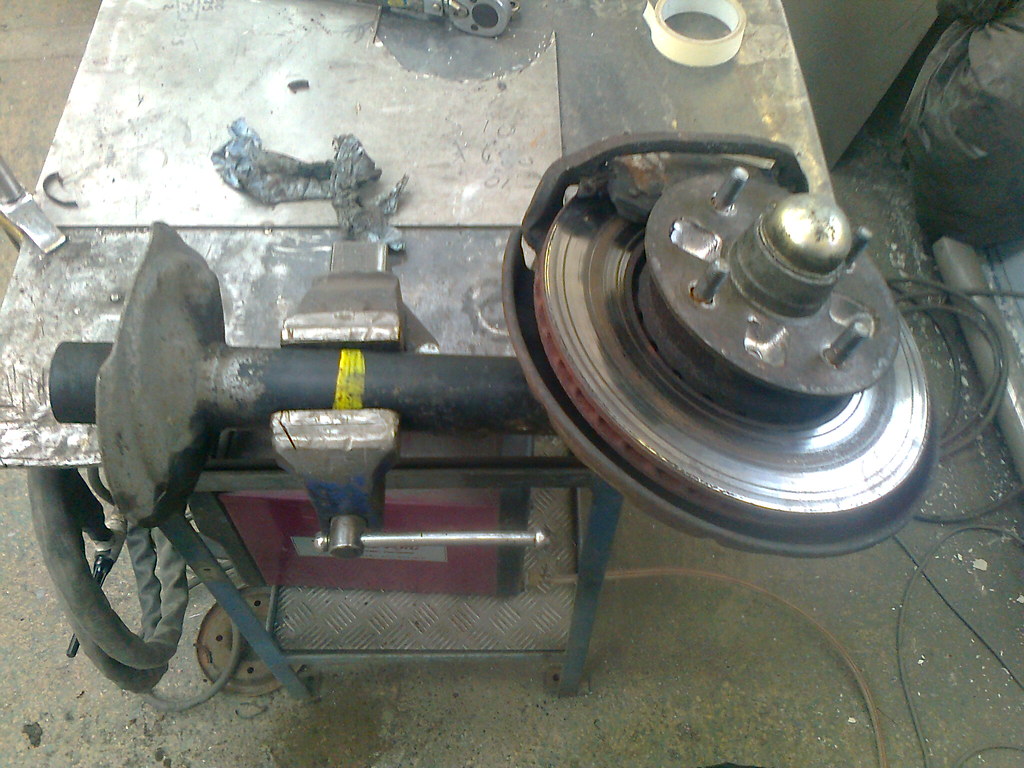
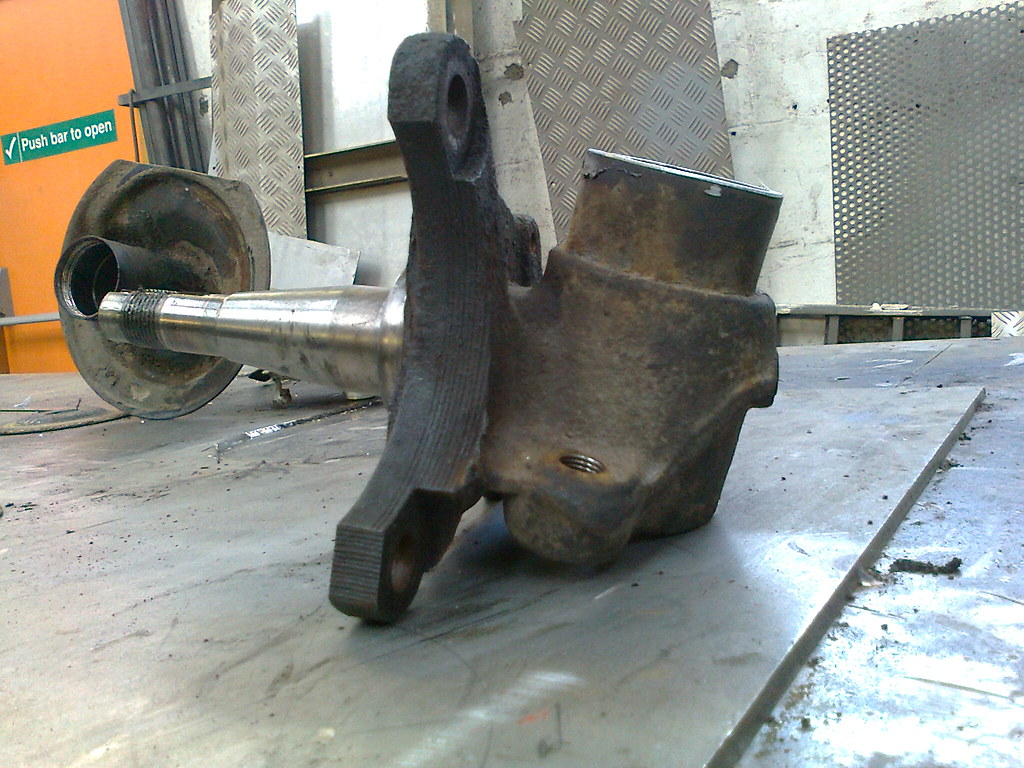
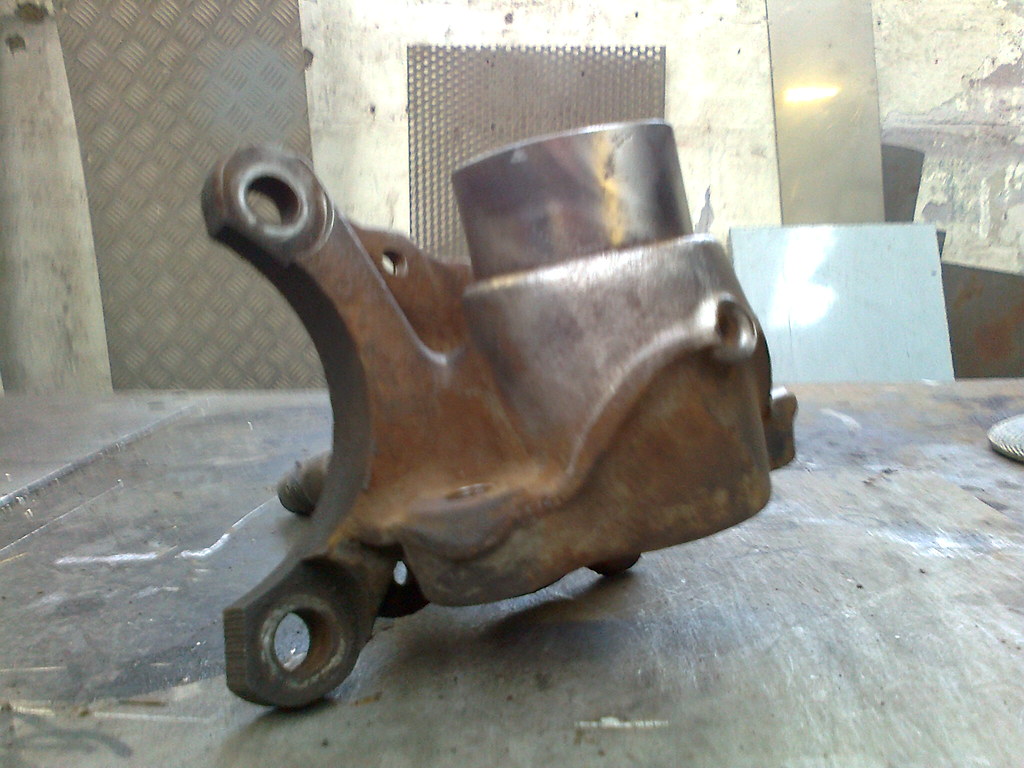
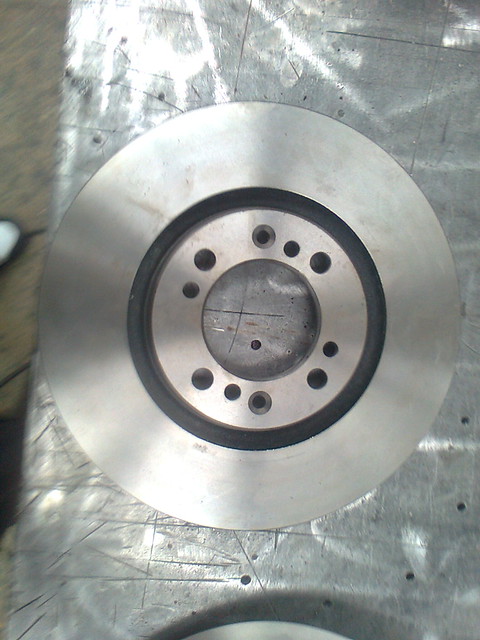
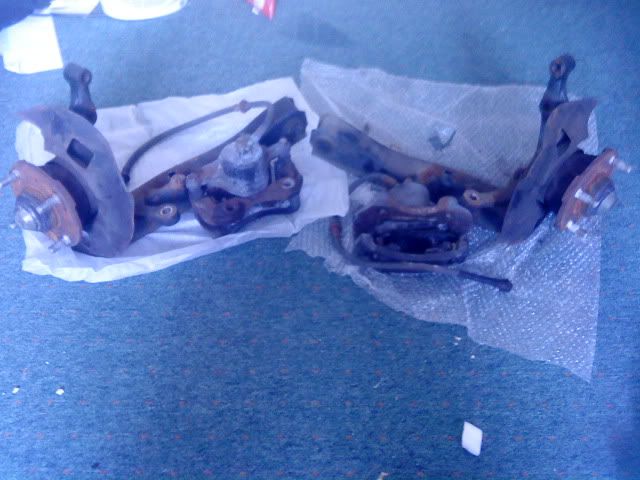
Next thing is to remove the brake brackets, hub/ discs and disc shield, A vice is a must, air tools and penetrating fluid are also reccomended!

After stripping you should be left with this.

With everything off.
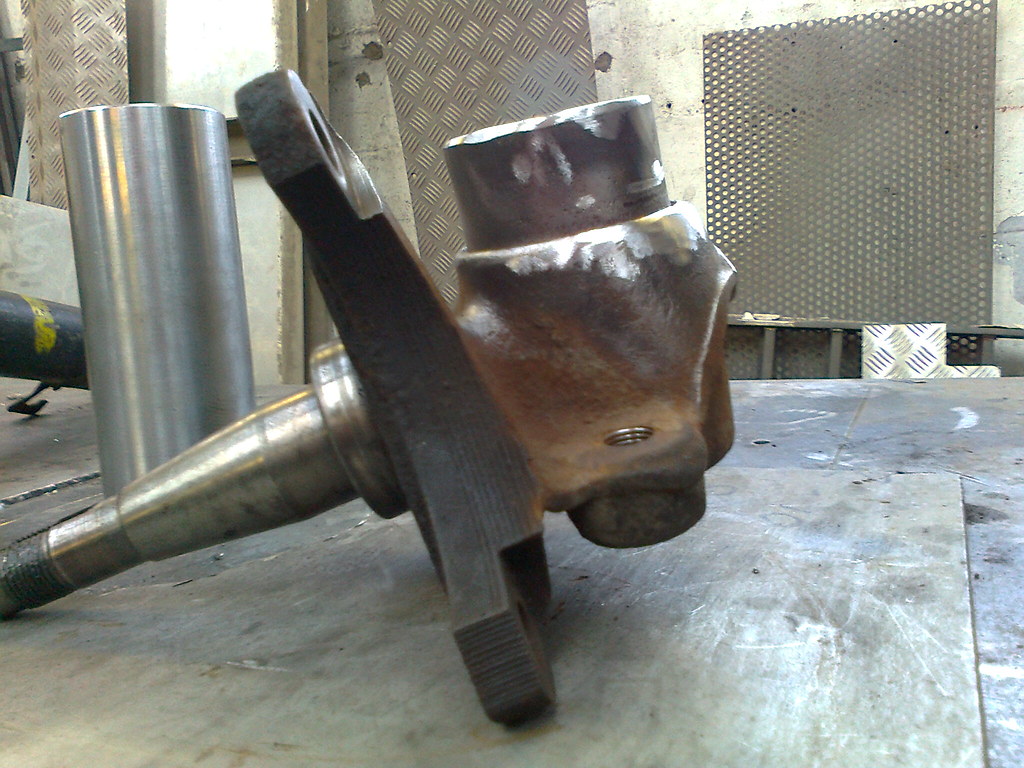
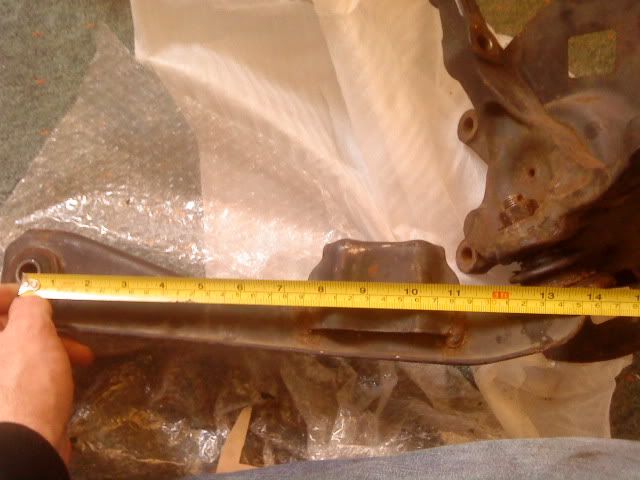
While it's in the vice its a good time to Mark with a scribe 1" from the bottom all the way round.

This is plenty material, and you'll NEVER run a ma61 that low to require any shorter.
Struts all stripped and marked up for cutting.

I have a Mark, which is about the best fabrication asset you can have, If you don't have a mark to hand Send me your struts for conversion.

Mark thrives on Tea and banter, so i keep him topped up regularly with both to ensure he performs to full operational capability.
Once their chopped they look like this.

Next job is to clean them up with a wire wheel.
How clean

This clean.
Also, put a radius around the edge you just removed.
Driftoy sleeves are a press fit, so Bottle jack/ fly press is needed.
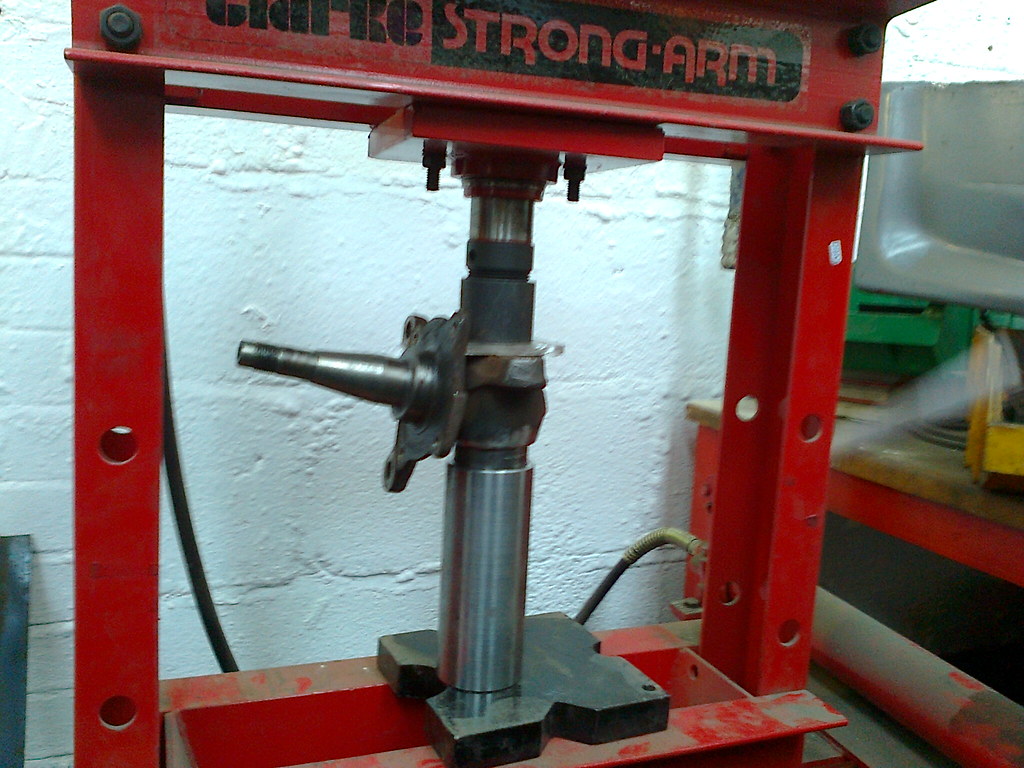

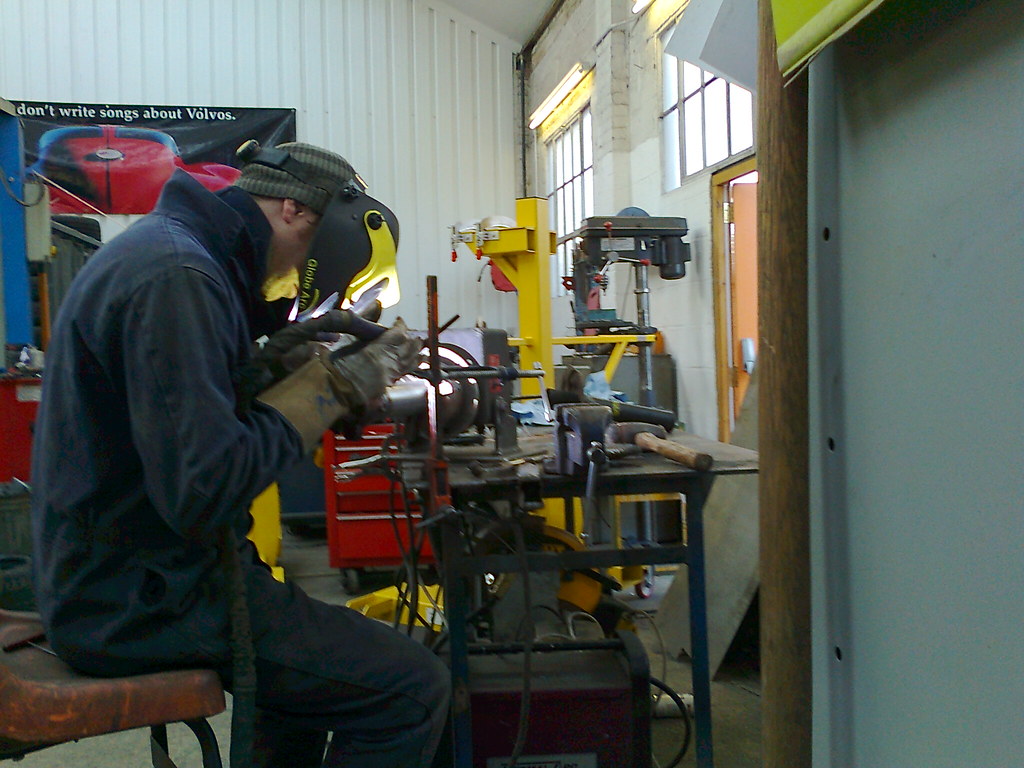
On to welding.
Mark first tack welded the sleeves in 4 spots.
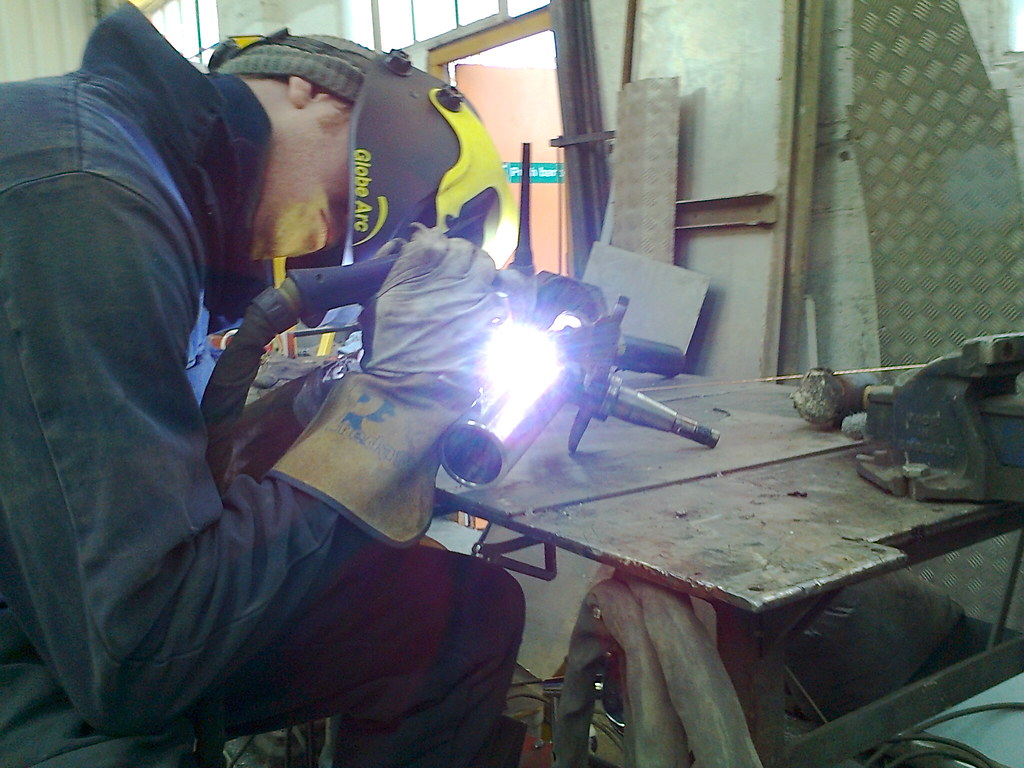
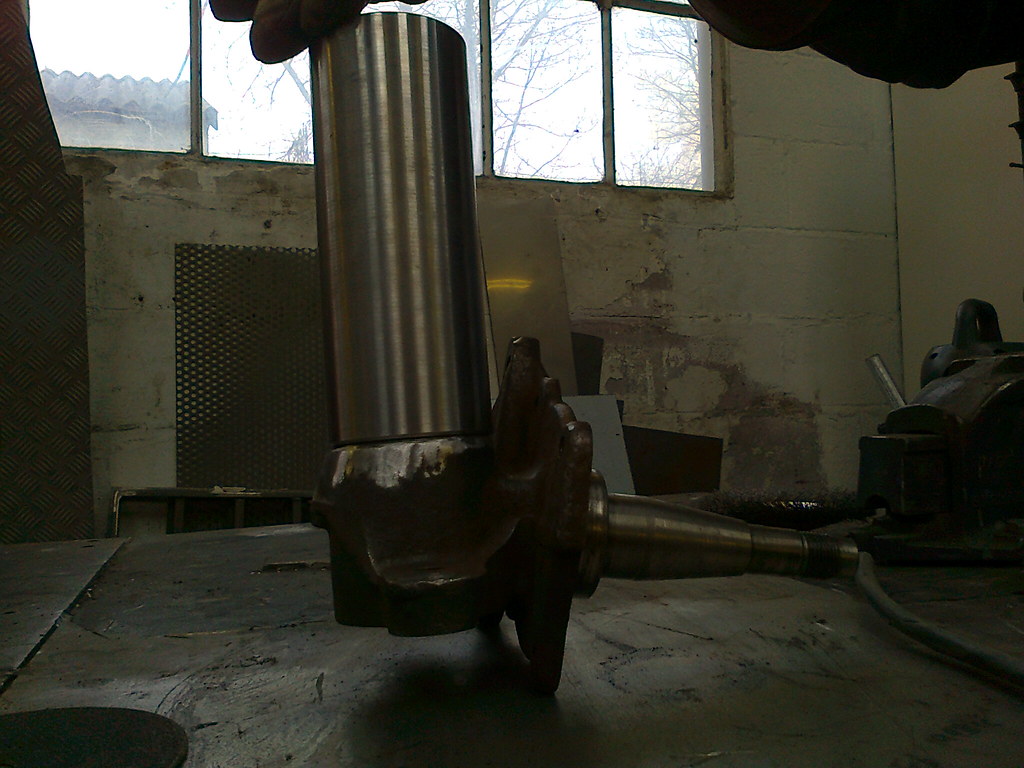
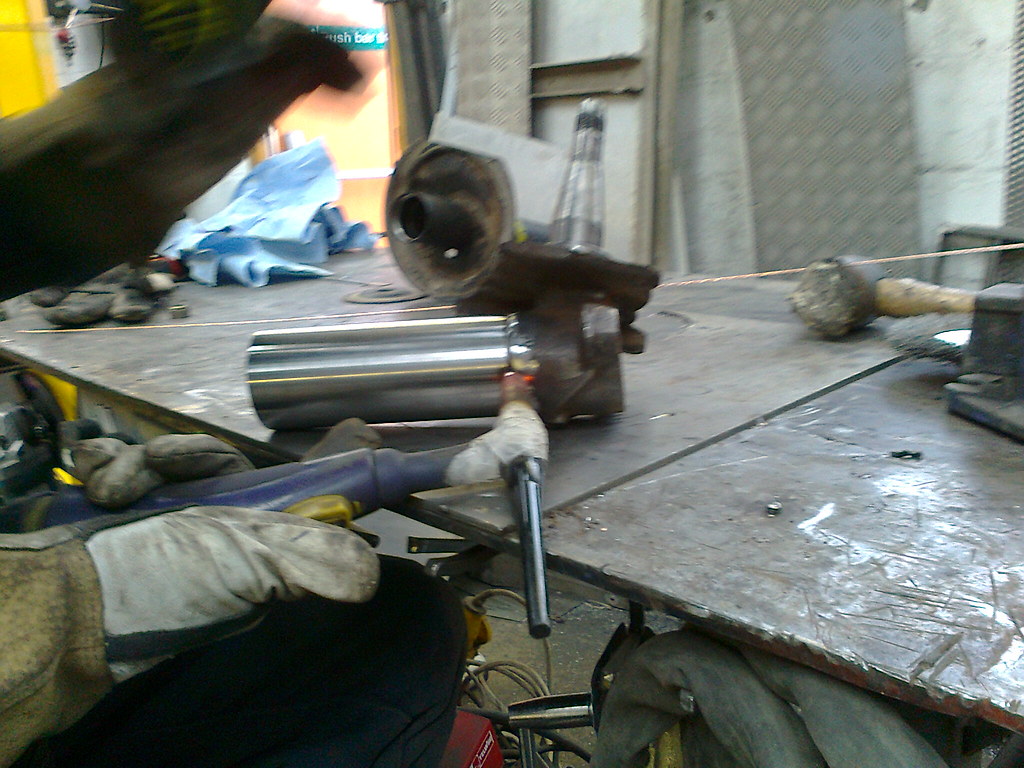
Then fusion welded the first run. ( Fusion welding is without rods)
He did 3 runs in total. 2 with rods were done on a turn table.

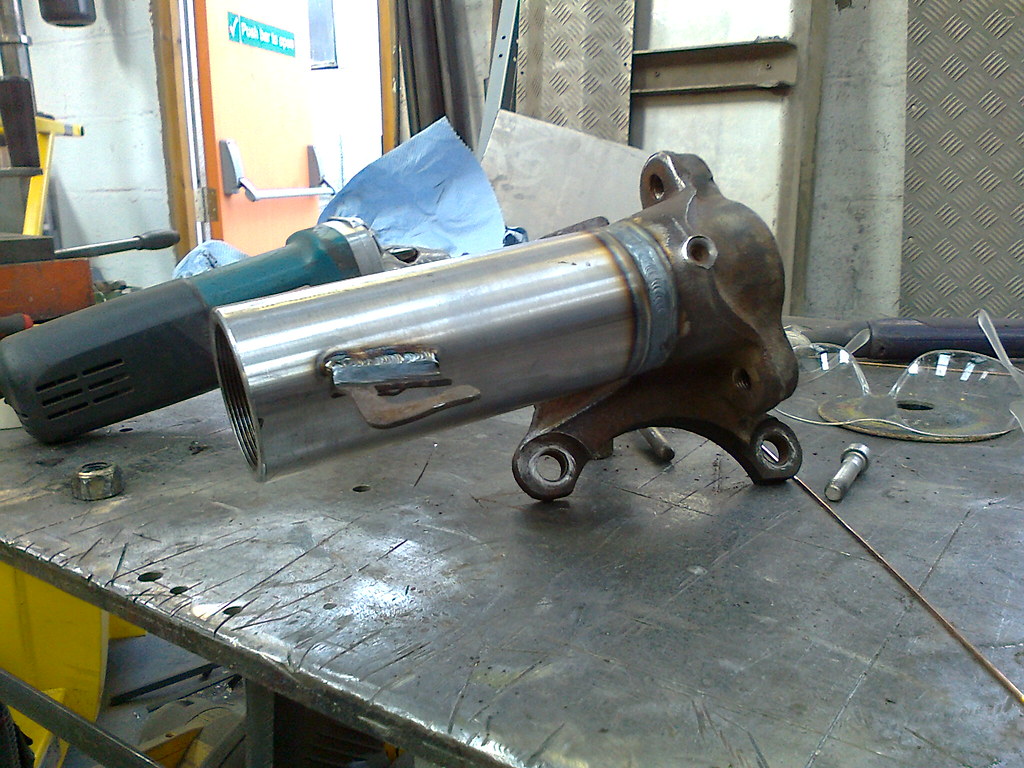
First one done, and Brake pipe brackets slotted and welded on.
When cleaned up they looked like this, That's proper welding!

So, Now they need paint,
A zinc based primer is prob the best one to use as the base coat, then choose whatever colour you like, Personally satin black is the only can i need!
Refit everything how it came off the car. (sorry about blurry pics)

Front sleeves are £90 + p&p Rear conversion sleeves are £20 or £100 for the Set (+ p&p)
Welding service is £30 + couriers fee's.
And then it's on to bushes and allignment
will probably go see Polo for that as he's quite close to me, and last I heard he was getting a fancy bit of kit?!
So many plans for this car...

got some RCA's from techno toy tuning this week to sort out my bump steer issue's I was going to make my own, but decided to concentrate on making some for cars not already catered for.
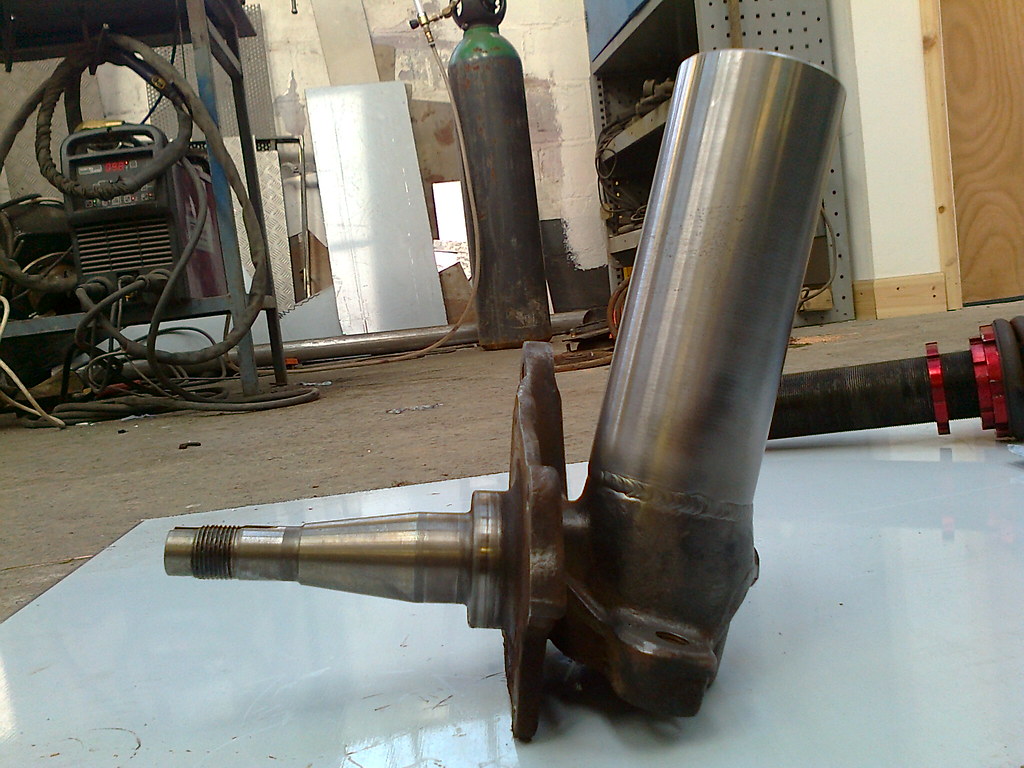
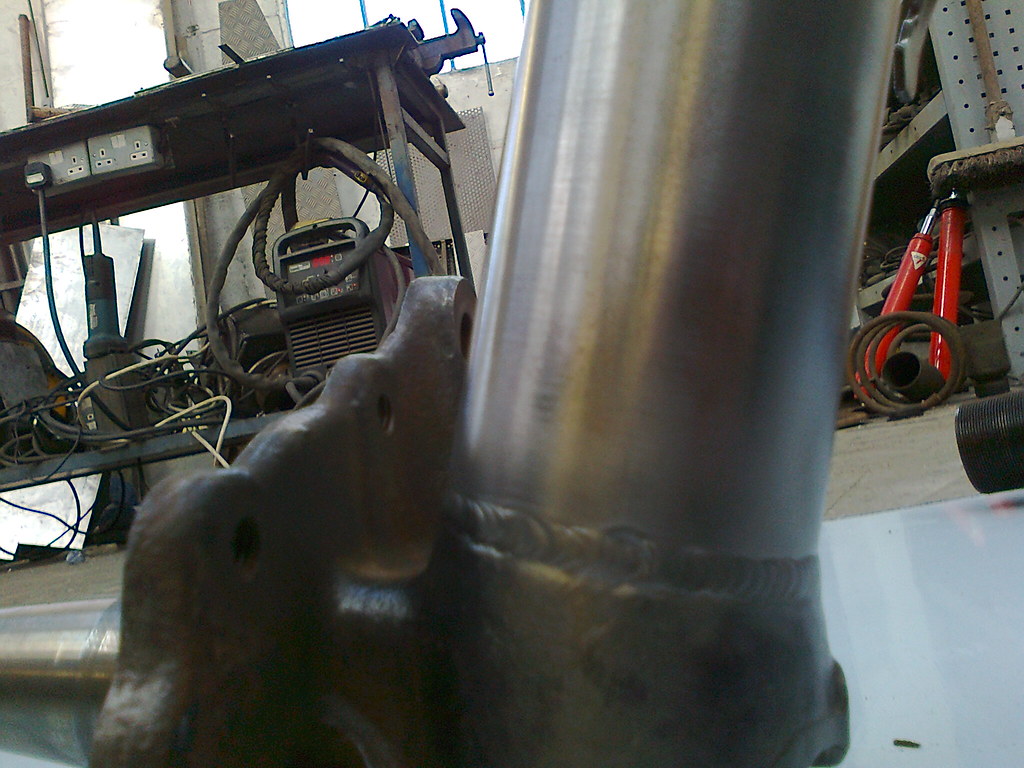
It also gave me an opportunity to take some decent pictures of the Driftoy sleeves as the ones above are pretty terrible
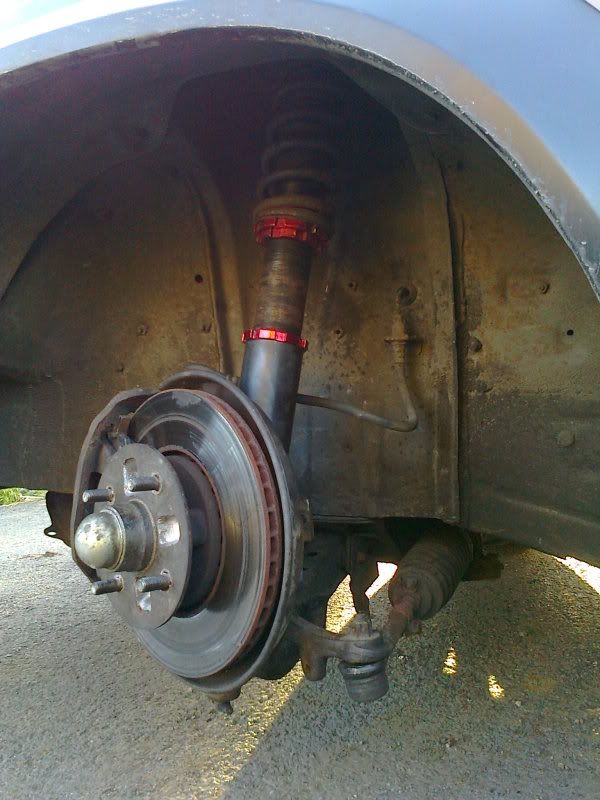
T3 RCA'S fitted. See the Quality of welding with the Driftoy sleeves
Sleeves Still available direct from me £90 + p&p
I can make pretty much any coilover fit any strut for older cars.
For example i'm Working on Kits for E21 and E28 Bmws, Mitsubishi starions and Mk 1/2 escorts.
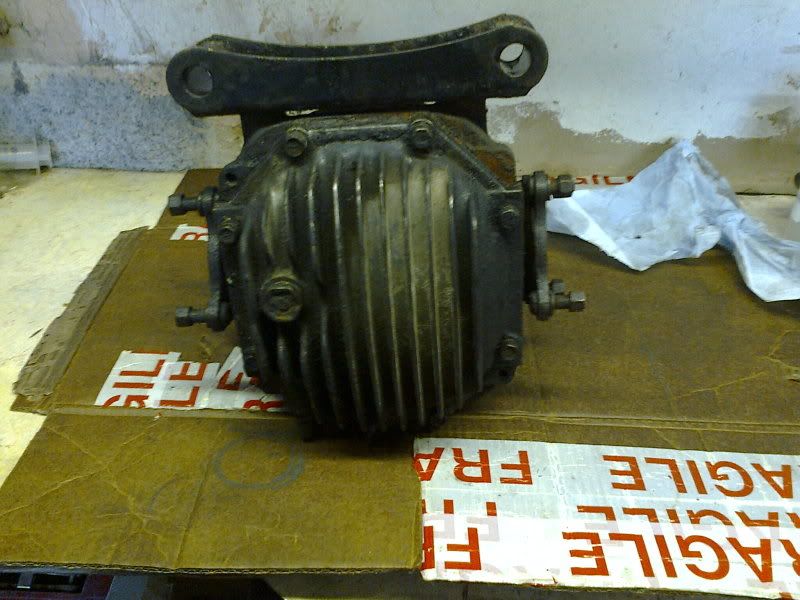
So, Diff curse word itself at pod and I was car less for a while after it make some god awful noises a few days after the big clunk
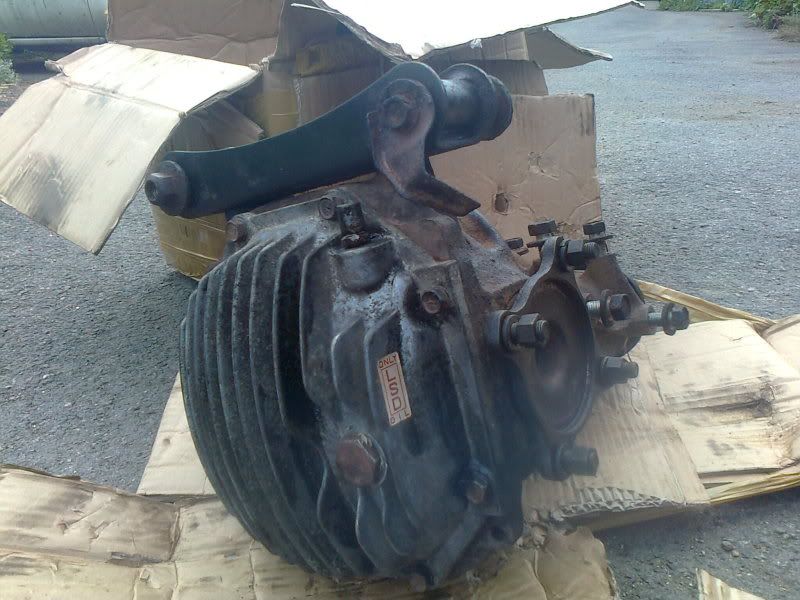
Rather than pulling out the diff for a 50/50 rebuild I decided to just find another diff. Trouble is that all the Lotus eclat excel guys had been robbing the 7.5 lsds so I was chasing around for a while to find a manual I settled for an auto lsd which came in at a whopping £114 all in. Tcb autoparts in cornwall are the nuts for sporty toyota stuff.:nod:
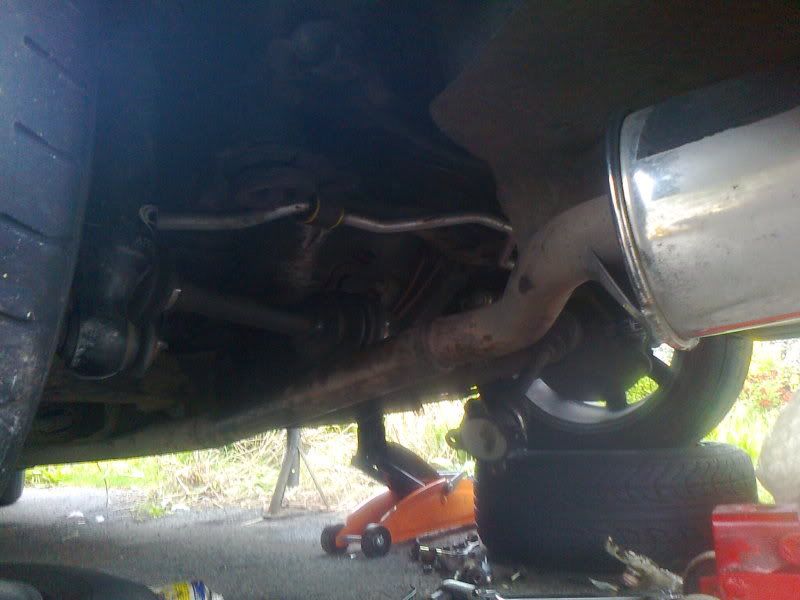
Pulled out the manual one
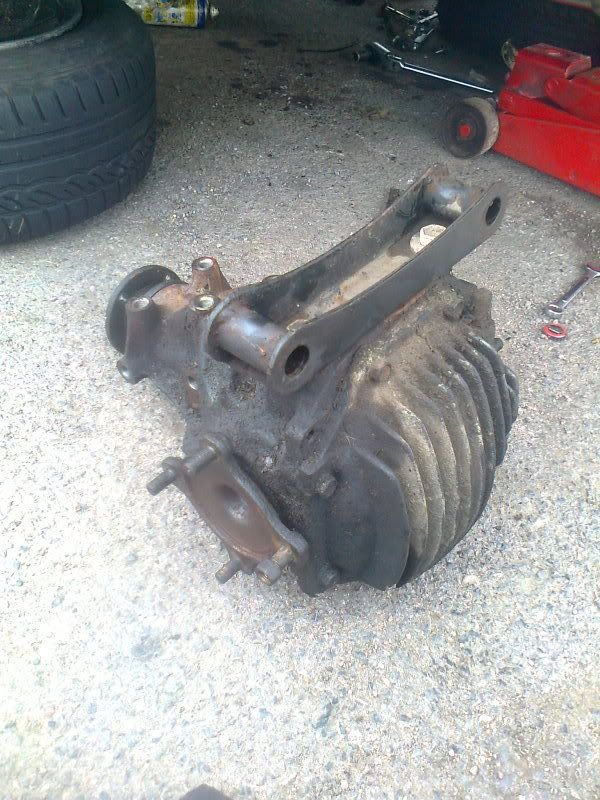
Auto feels nice and tight as they don't really get abused thanks to the kickdown.
I fitted it yesterday,And took it out for the test drive and all seems well, Not sure what ratio I got with it, but the final drive ratio is so close to the manual I can't really tell much difference apart from maybe being a slight bit quicker off the line.
After this diffs fitted I will put the manual one apart properly
for its rebuild with weir parts :nod:
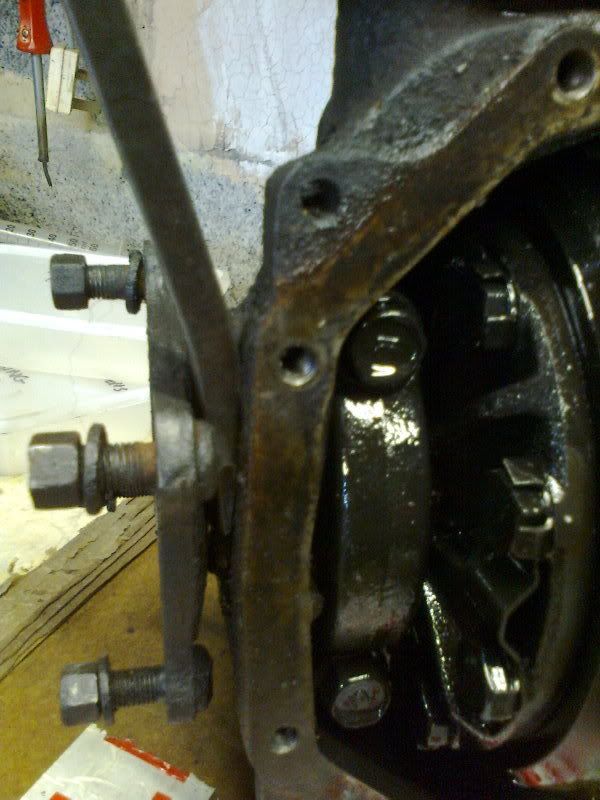
I took the Backplate off, and apart from some horrid coloured oil everything looks undamaged and reusable. Lots of play in the clutch plates between the diff body which indicates a well worn lsd, but from the ammount of curse word i've gave it in 4 years of ownership that's more than to be expected ;D
I had a bit of time to pull the old 2 way lsd apart today and examine the causes of the failure. Poor maintainance by Me was the likely culprit

But it never does any harm to dig a bit further!
I was quite surprised to see nothing was ripped to shreads but the next series of photo's will hopefully show you whats lurking inside that diff case.
So call this a "How to dismantle your 7.5"lsd diff guide"
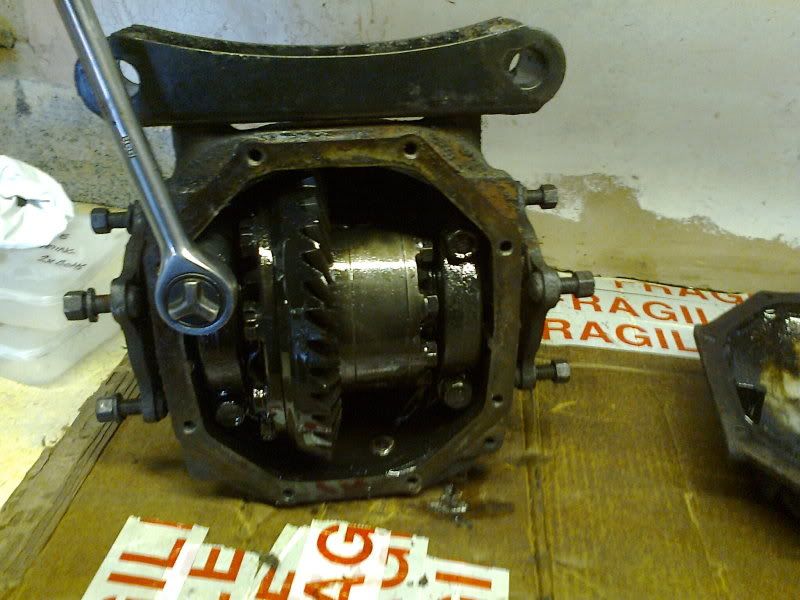
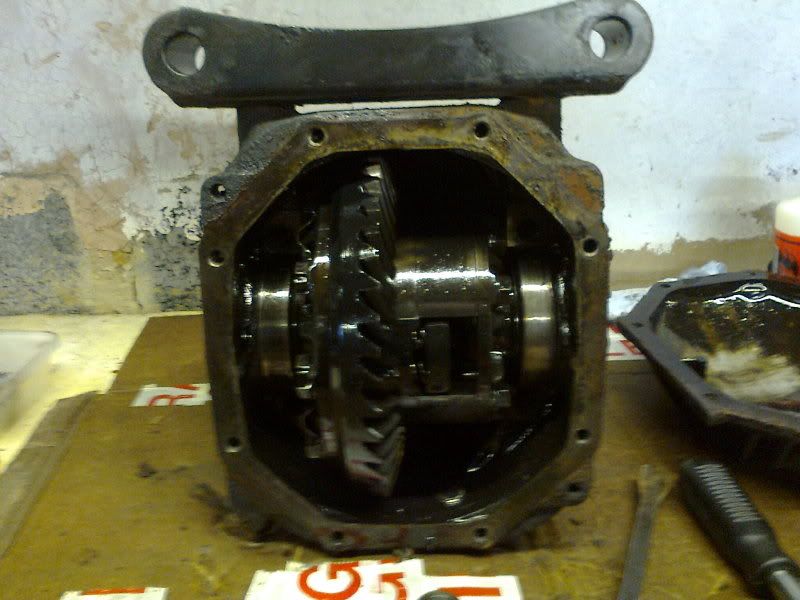
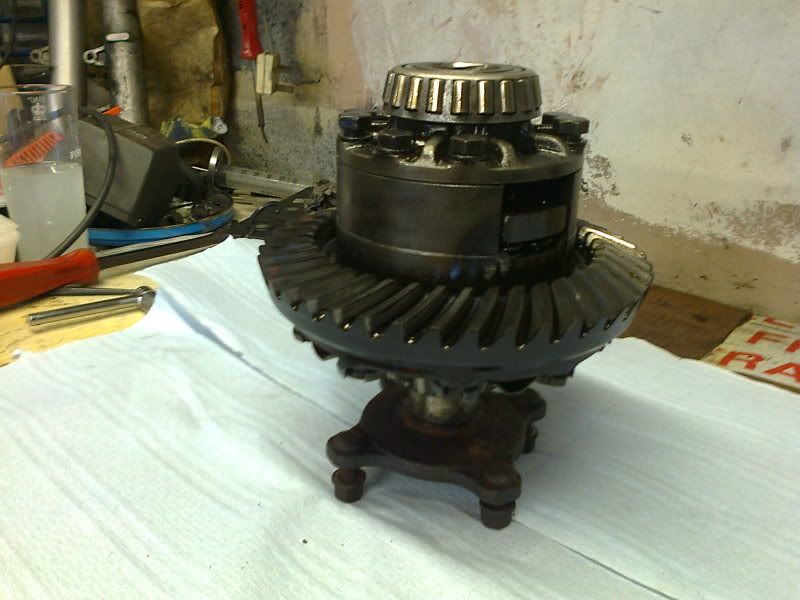
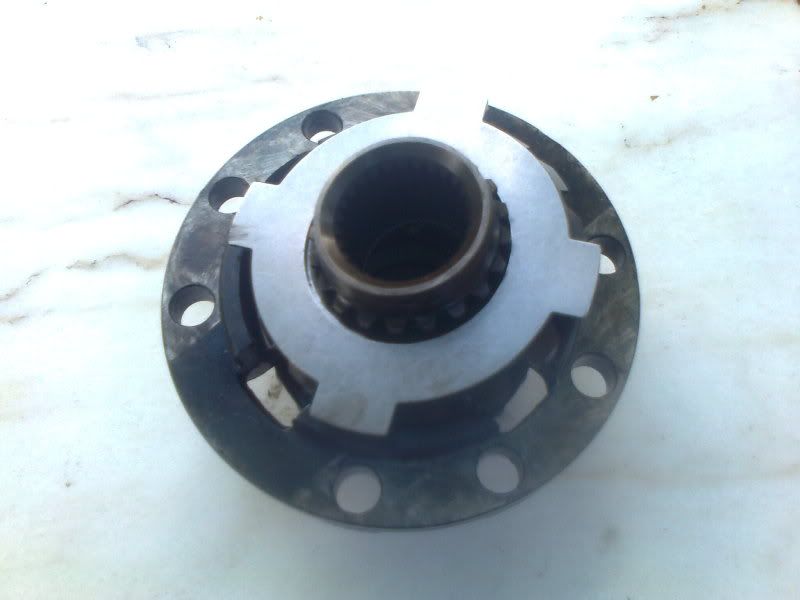
Nice clean bench to start with. Drained diff oil and loosened diff
back plate.
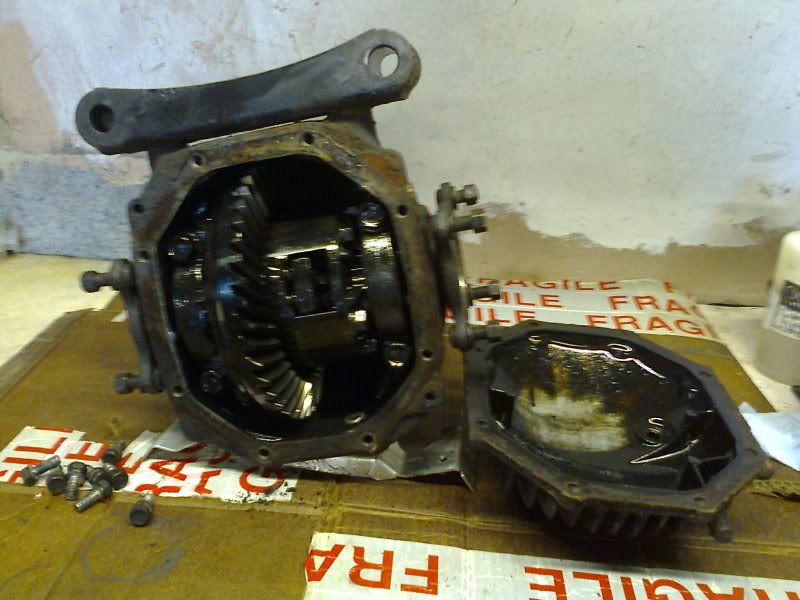
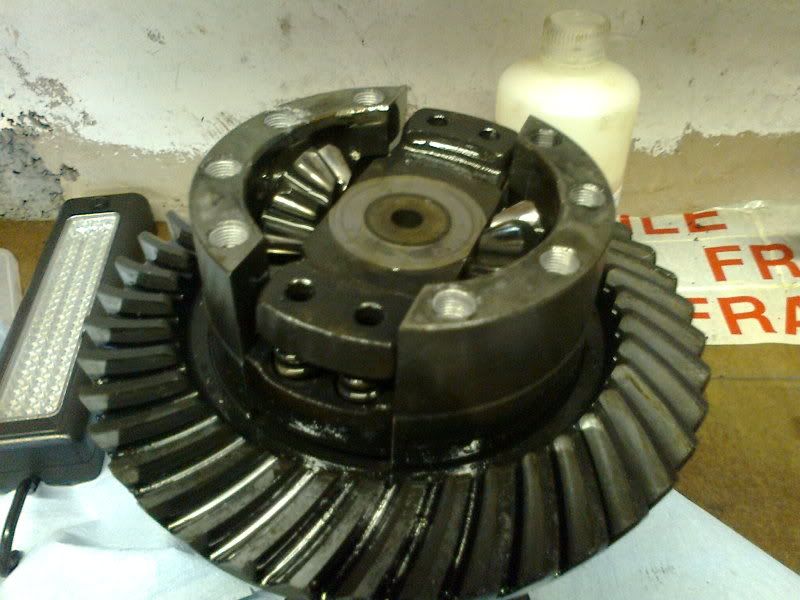
Now you can see the sprung plates in the Diff body.
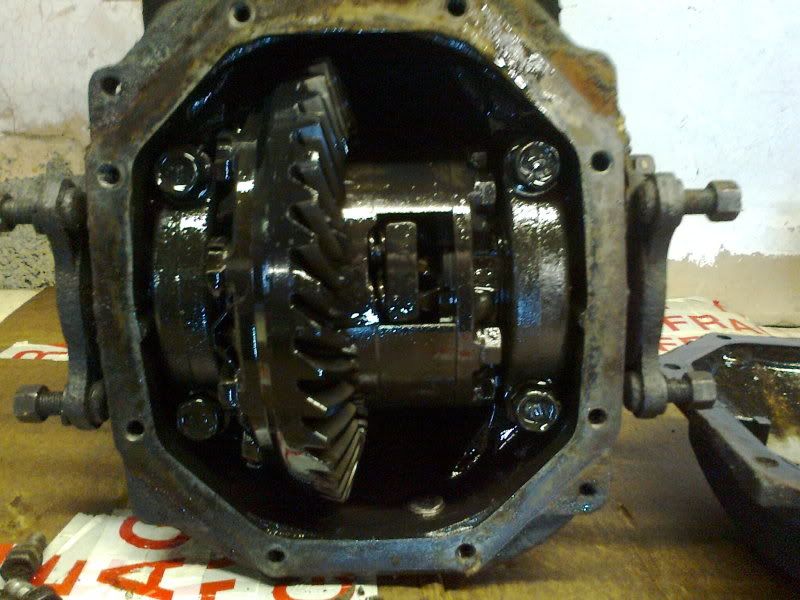
A bit more closely...
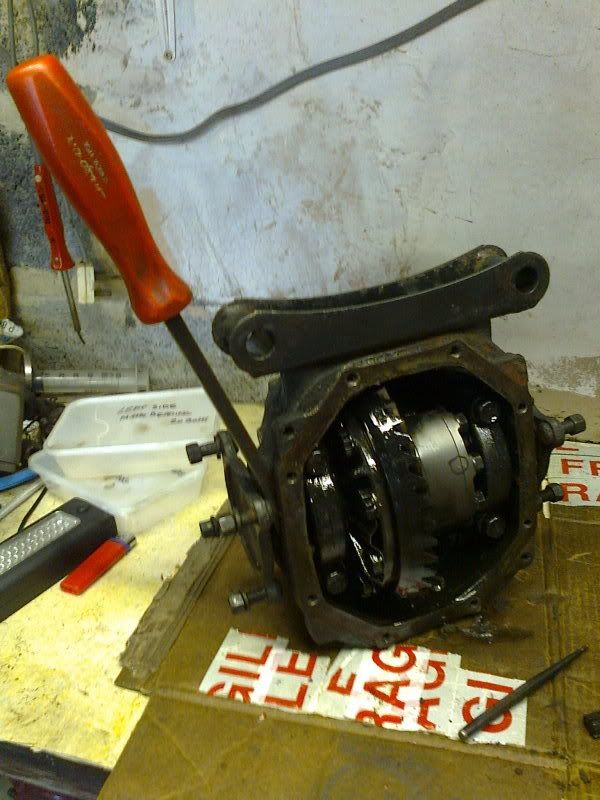
Time to loosen the rear bearing carriers with a 14mm socket.
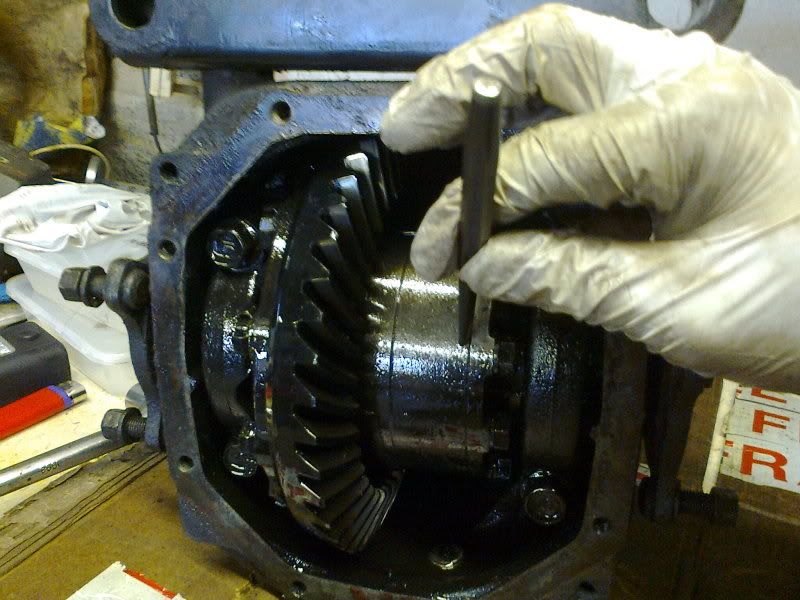
And now is a good time to punch match marks on the casing
before it all comes apart.
I did the same to line the casing with the CROWN wheel too.
To pop out the half shafts I just used a short pry bar between the back of the 14mm drive stud and casing.
The shafts are held in with sprung C clips so don't need a crank puller.
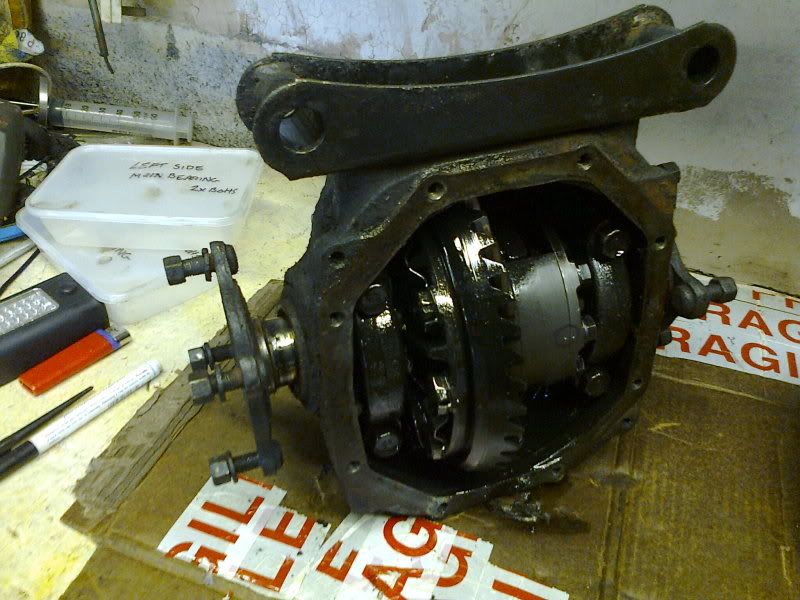
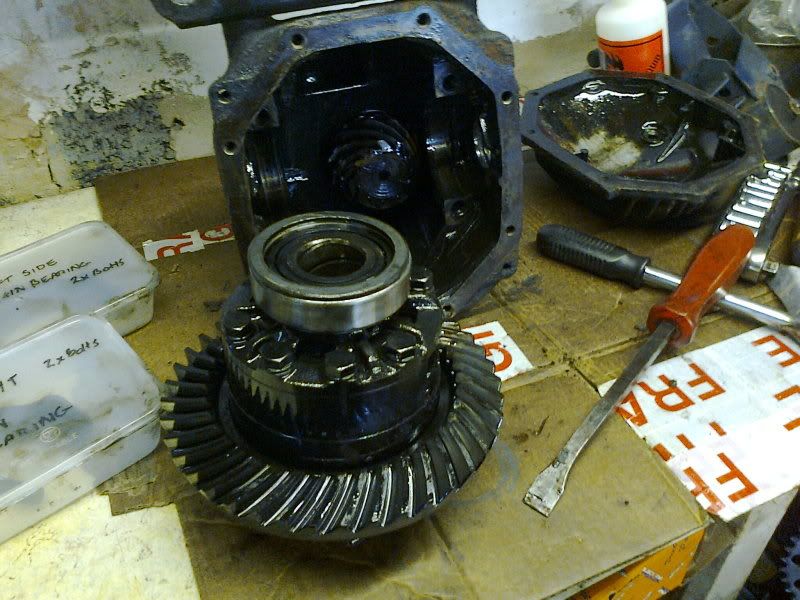
Once they pop out.
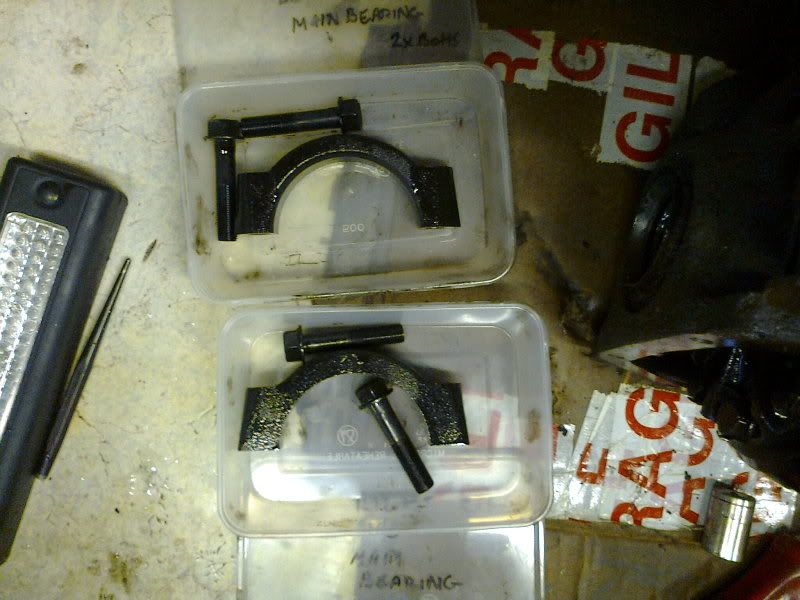
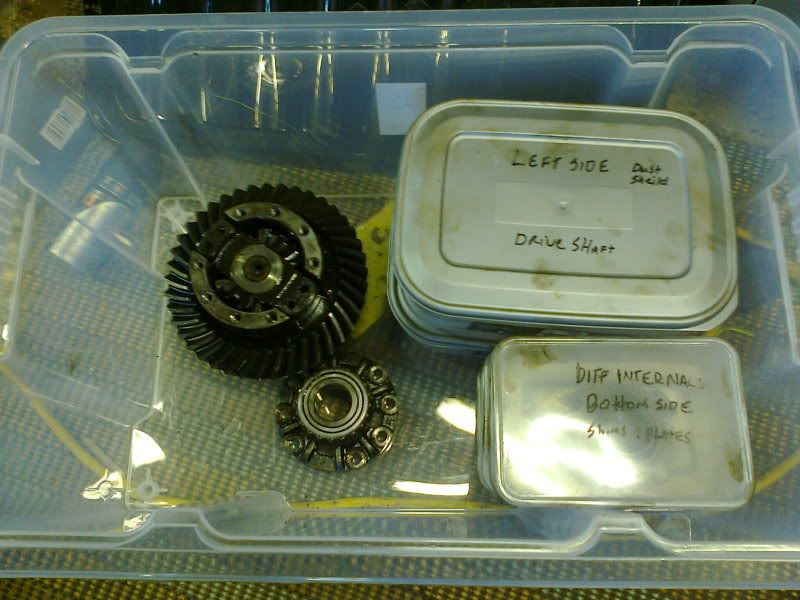
You can remove the bearing cradles and bolts. If you eat as much Chinese Takeaway as I do, the plastic food containers are awesome for keeping the Left /Right side separate.
LABEL EVERYTHING!!! THIS IS VERY IMPORTANT!!!
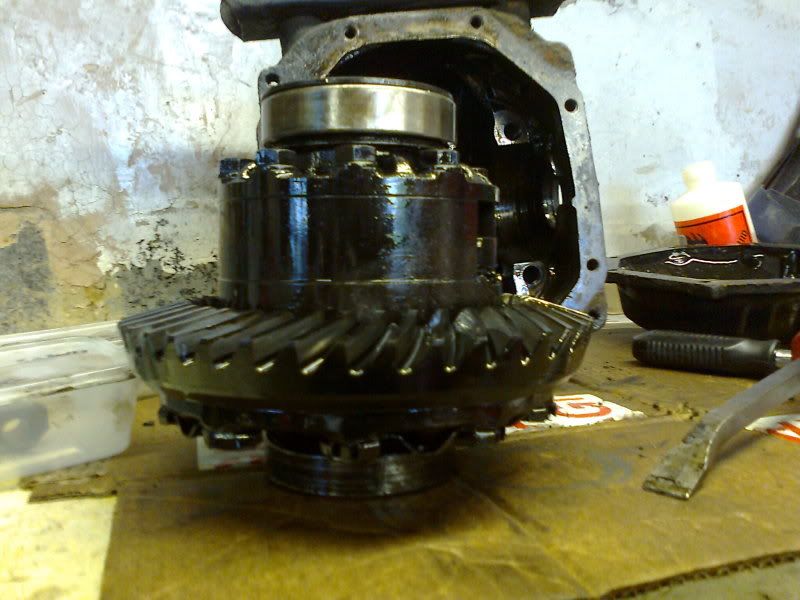
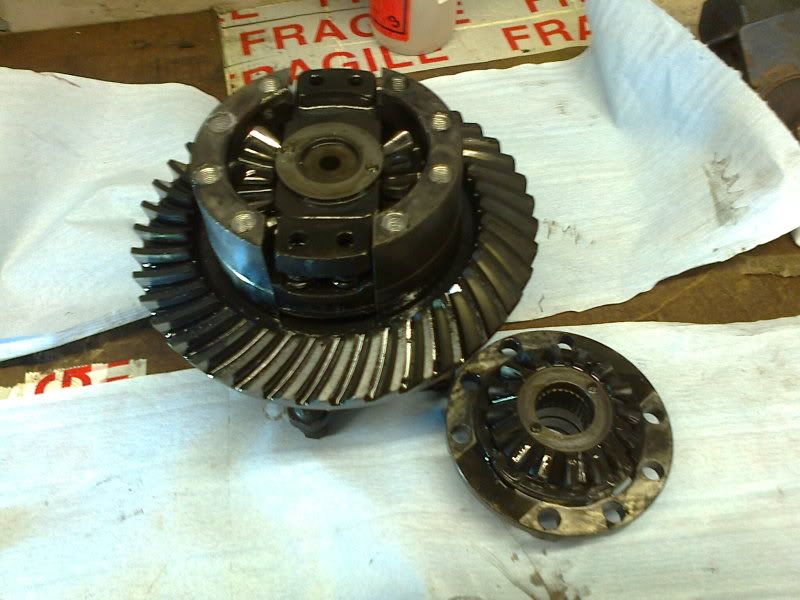
Your now ready to pull the diff from the casing. Needs to be wiggled a bit but comes out ok.
Clean up around the bench and put everything else to one side.
...Not like this curse word Nest I got going on!
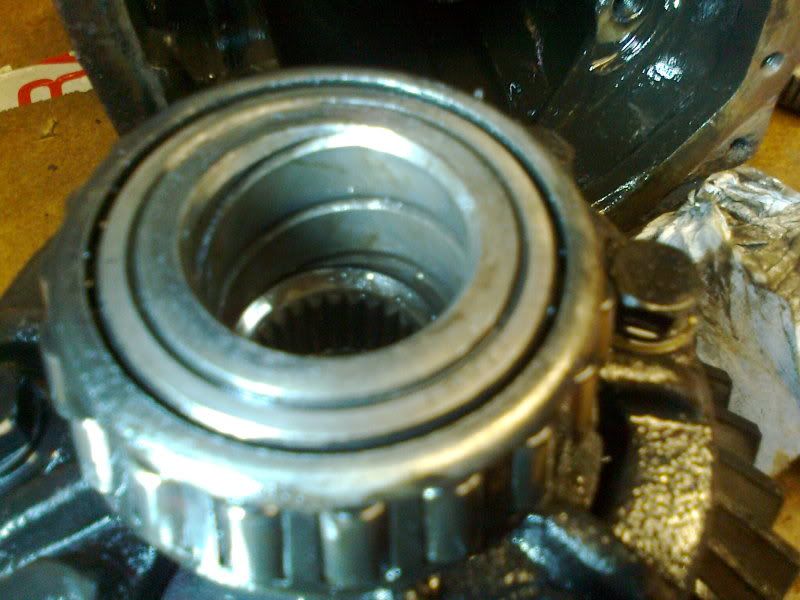
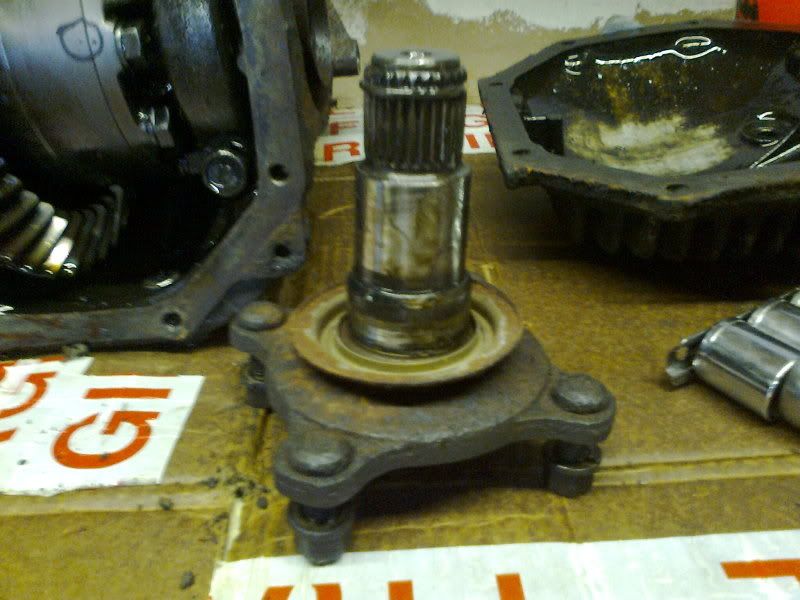
Spiral grooves inside the inner race of the bearing are a nice touch. If you have a 3 leg bearing puller to hand at this point, use it. doubt your gunna be stupid enough to re use the old ones?!
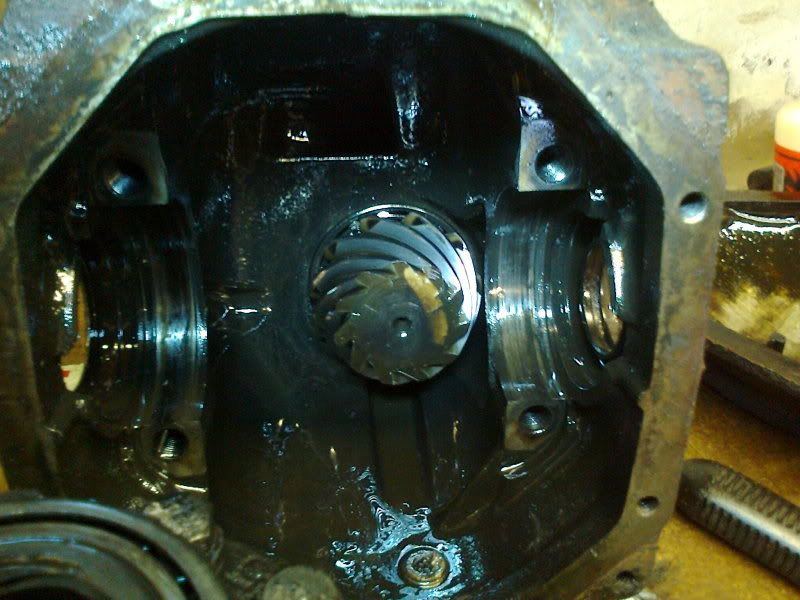
Photo of the inside of the casing with pinion wheel at the back.
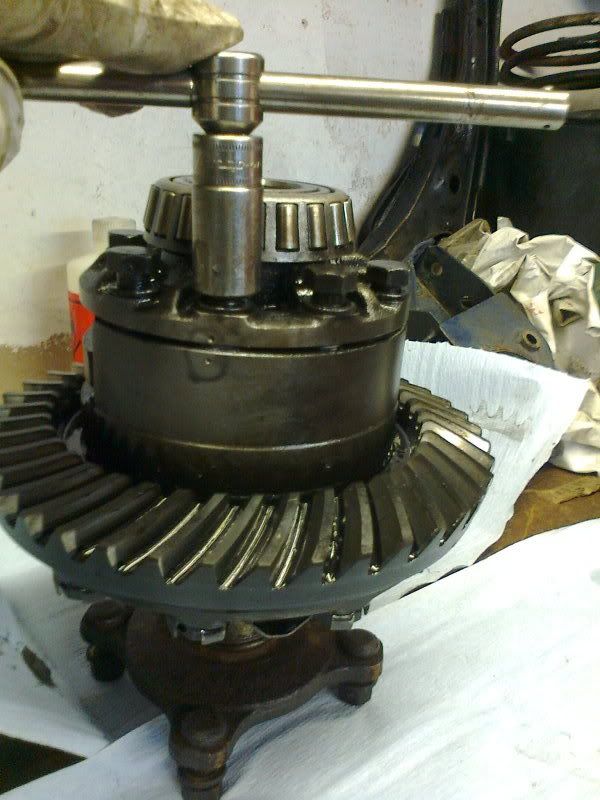
Now, Vice time
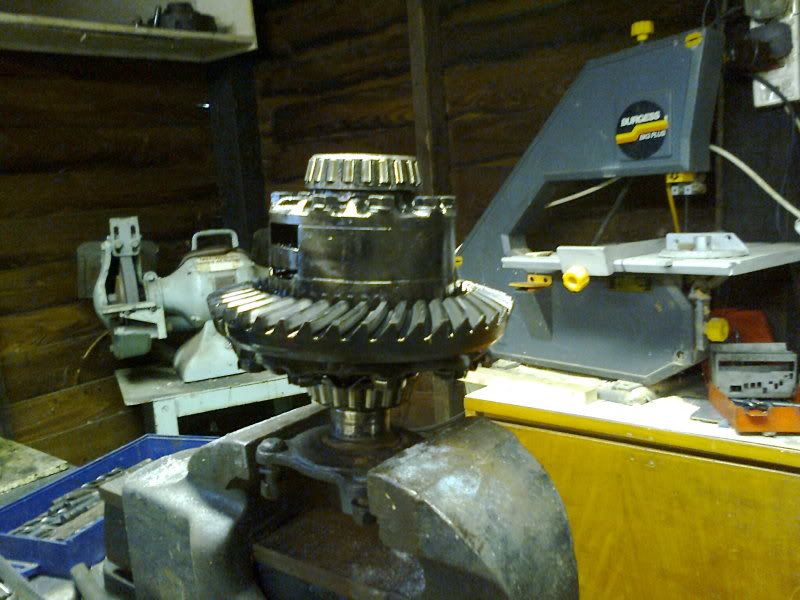
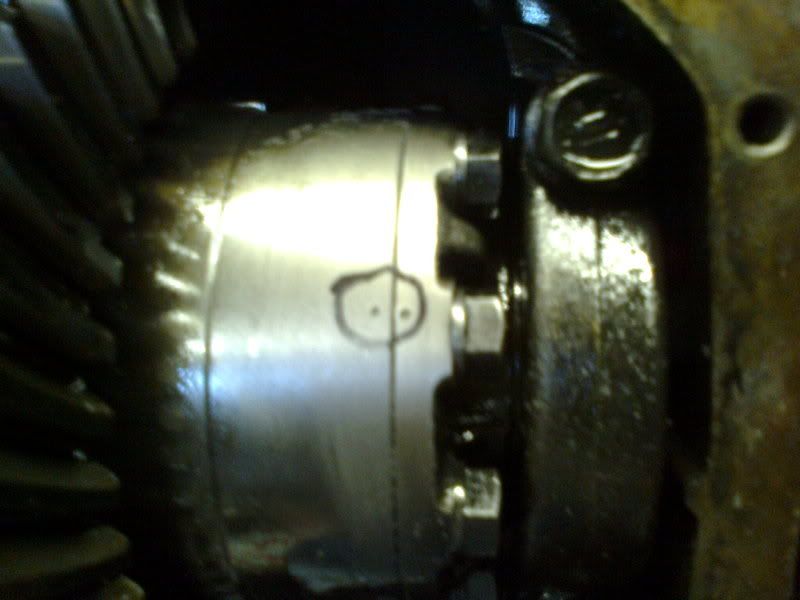
Take the C clip off the half shaft and use it to stand the diff up in the vice. Break the tension of all 8 14mm bolts with a windy gun.
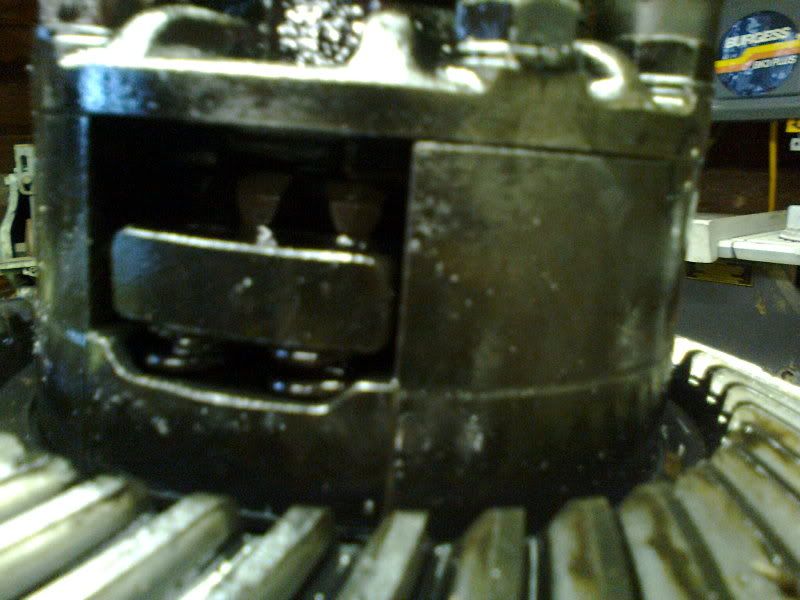
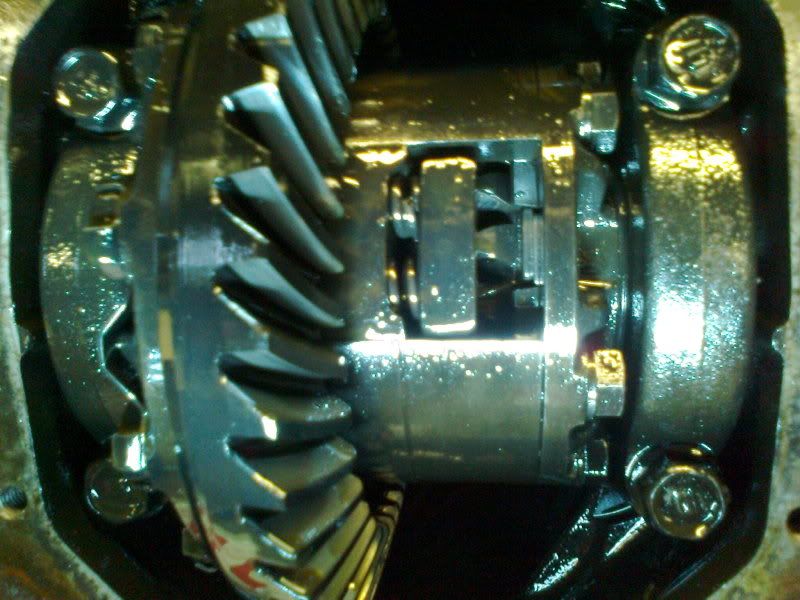
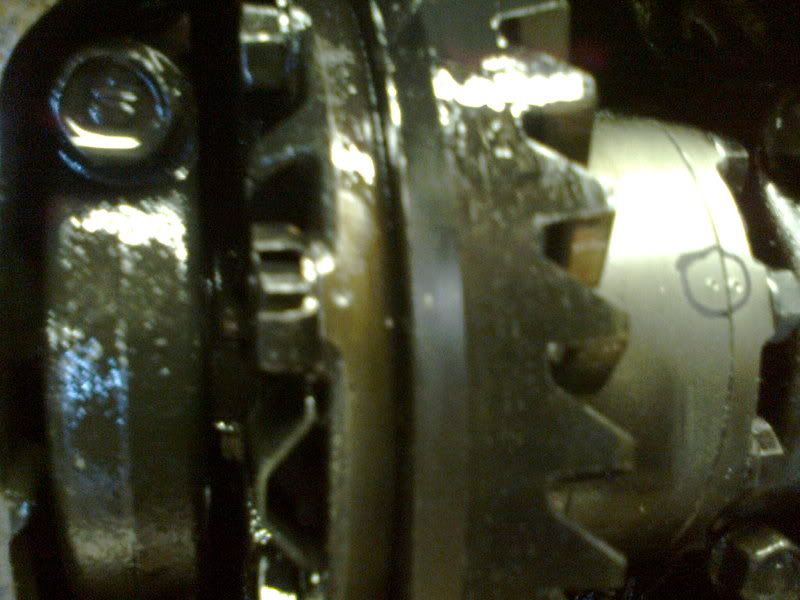
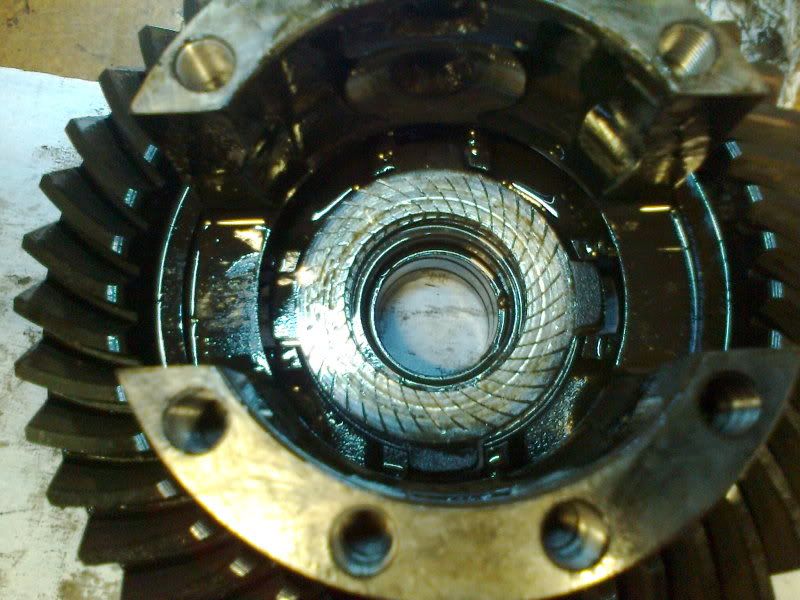
In the above shots I have rotated the Diff Casing against the resistance of the shaft clockwise. You can see the big top plate
above the springs hit the right side of the slotted casing.
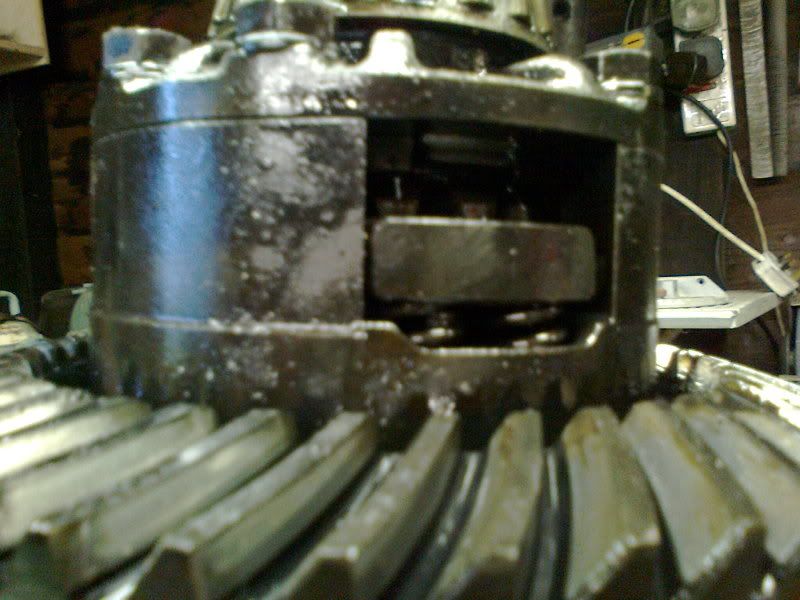
Now, when I rotate it counter clockwise it hits the left side of the slotted casing. This is not good, there should be more resistance.
Once the Top cover bolts have been freed off put the diff back on the bench.
The top cover is under tension from the springs so all bolts need backing off.
Once undone you can remove the top cover.
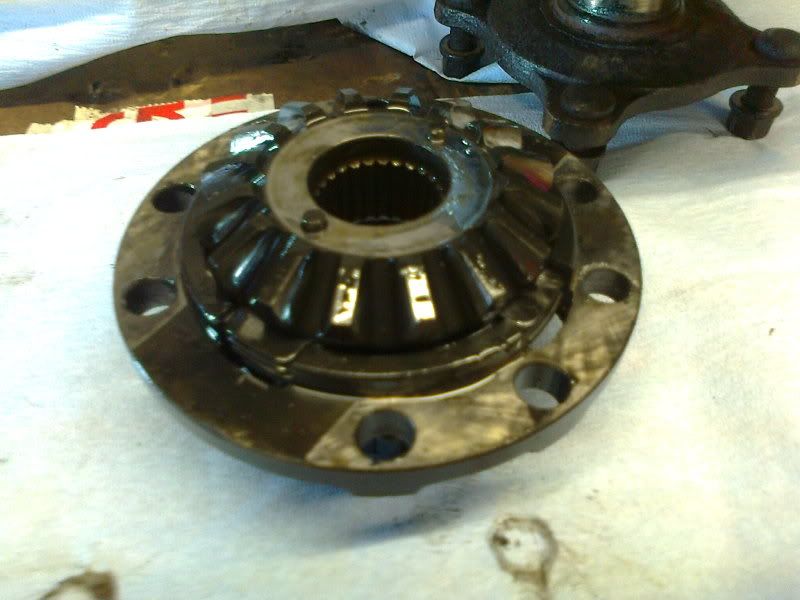
This is the bit you need to label up and NOT Mismatch
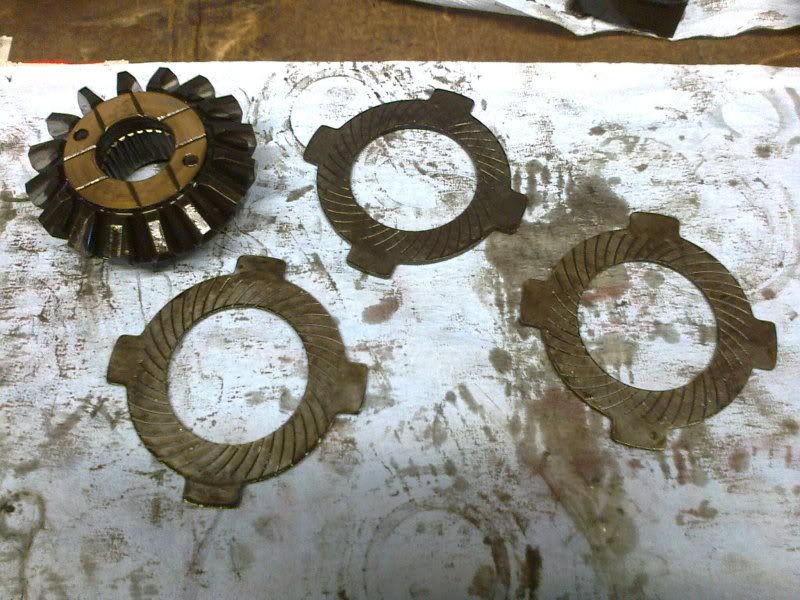
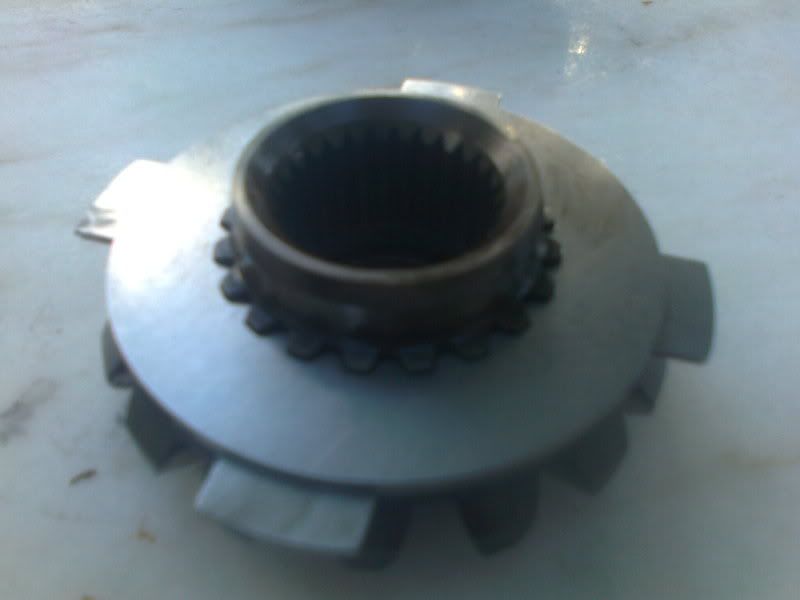
Three clutch pressure plates, one of which was worn to curse word!
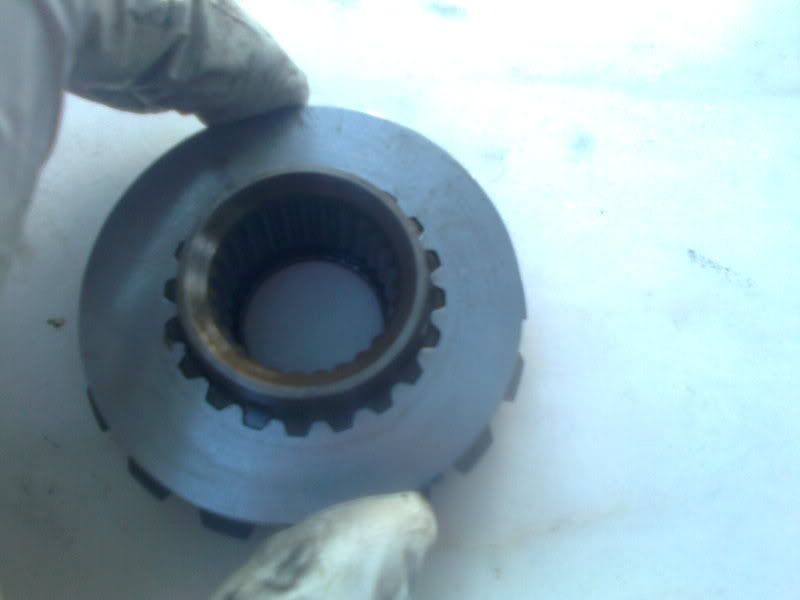
Also notice there is an unused spline on the gear shaft.
These diffs had no clutch discs from the factory, The only thing locking the diff is the friction between the plates and the back face of the gear!!!
ie Toyota pussied out on giving this car a proper locking diff in the final design stages.
But the weir kit will make use of those splines ;D
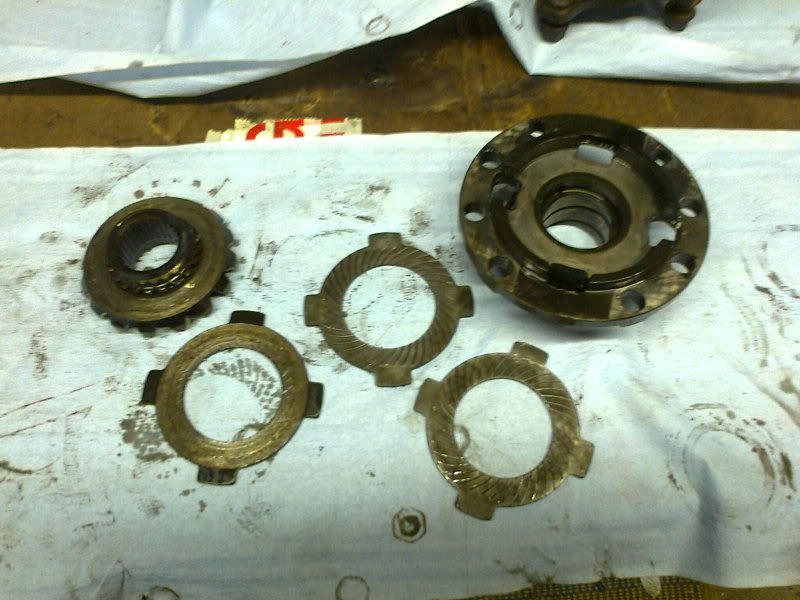
Put those to one side for now.
Now to remove the Internals.
With brass thrust washers on top.
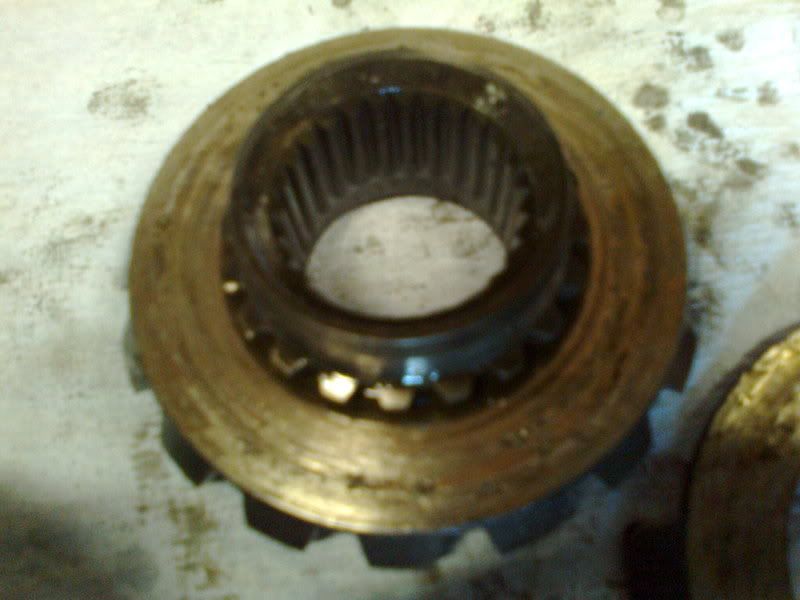
why my diff failed?!
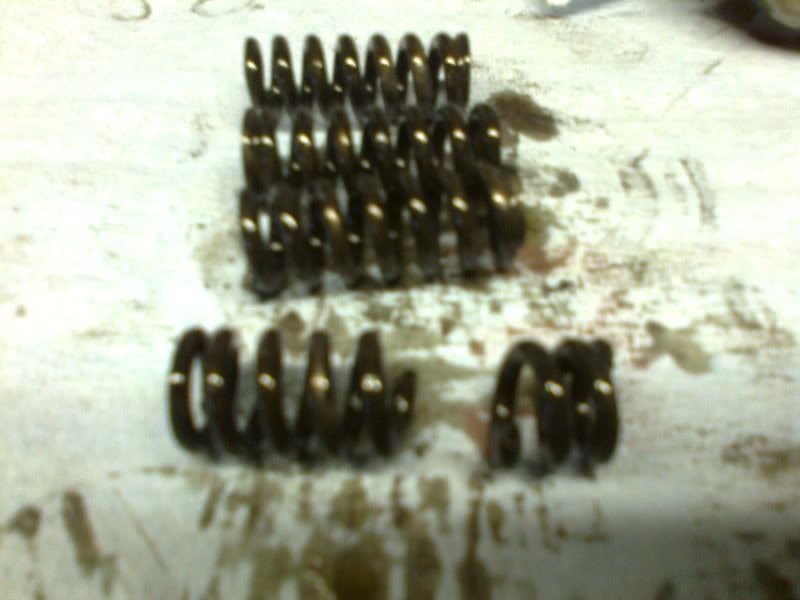
Snapped spring would account for the noise and curse word lock up!

Bottom gear with Brass thrust washer left on top. See the grooves for Lubrication.
Three bottom clutch friction plates left.
I need to stack these up and replicate the thickness to my new weir kit so need to keep these safe.
So, that's how you take one apart. Now time to order a solid crush sleeve from weir to make sure nothing is a weak link to fail again..
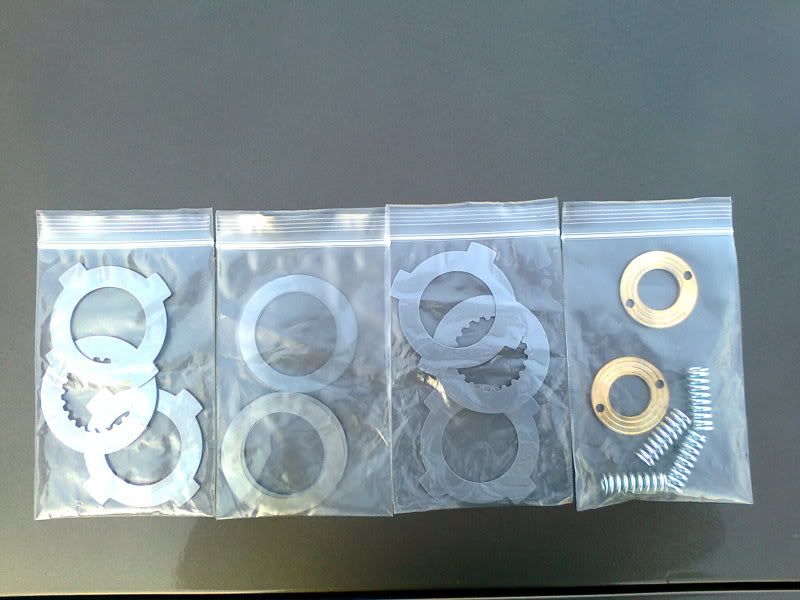
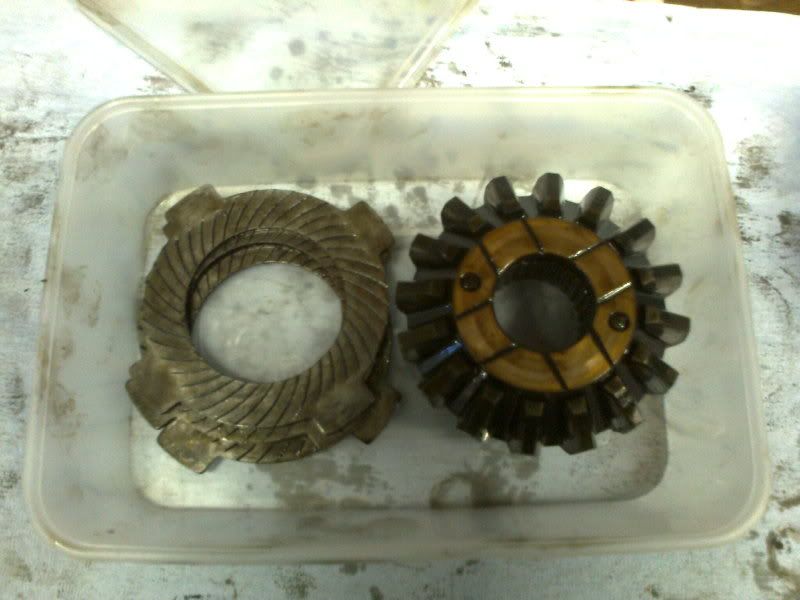
As you can see the Weir maxgrip kits I already have contains 2 new Splined clutch discs and 4 new friction plates instead of the weak standard 6 friction plates, So will essentially make these Diff's lock up properly as they are pretty naff once the friction plates have worn.
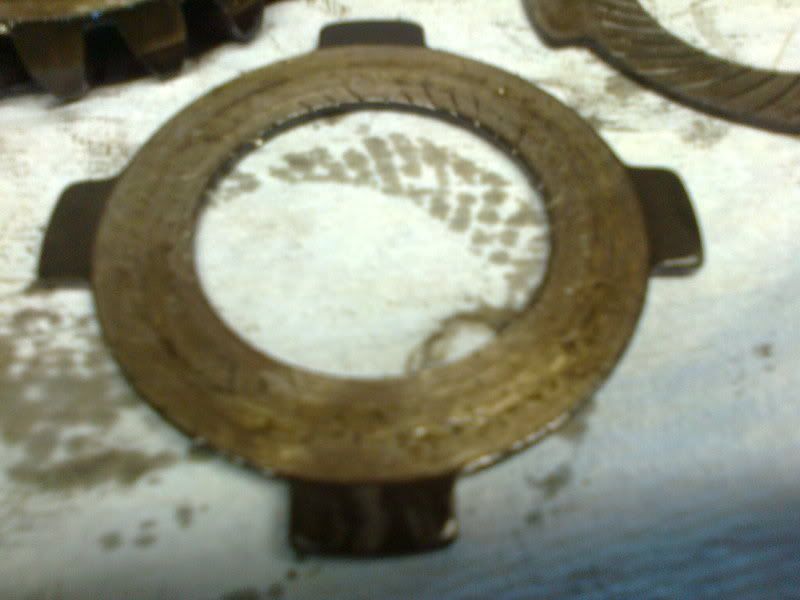
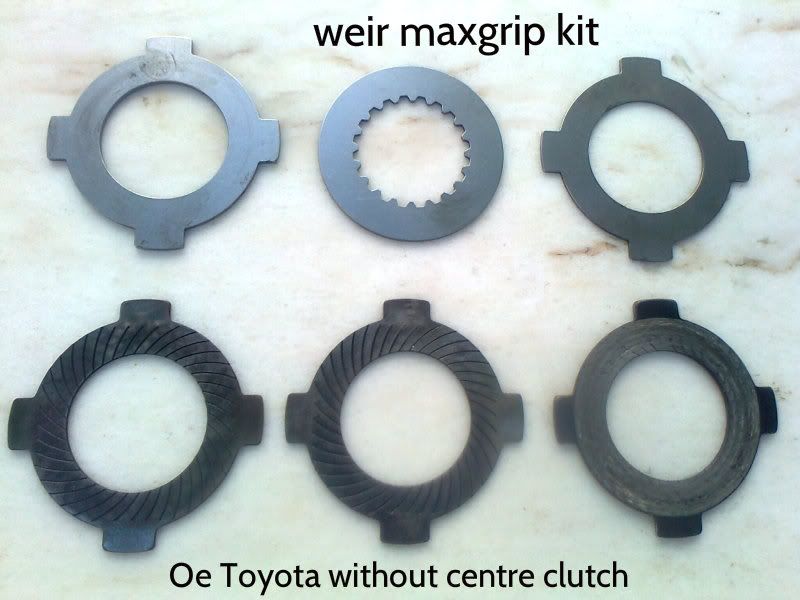
I thought it may be useful to take a few comparison photo's between the Weir maxgrip kit and the standard Toyota clutch plates
to help you understand a bit more why this is such an important upgrade.
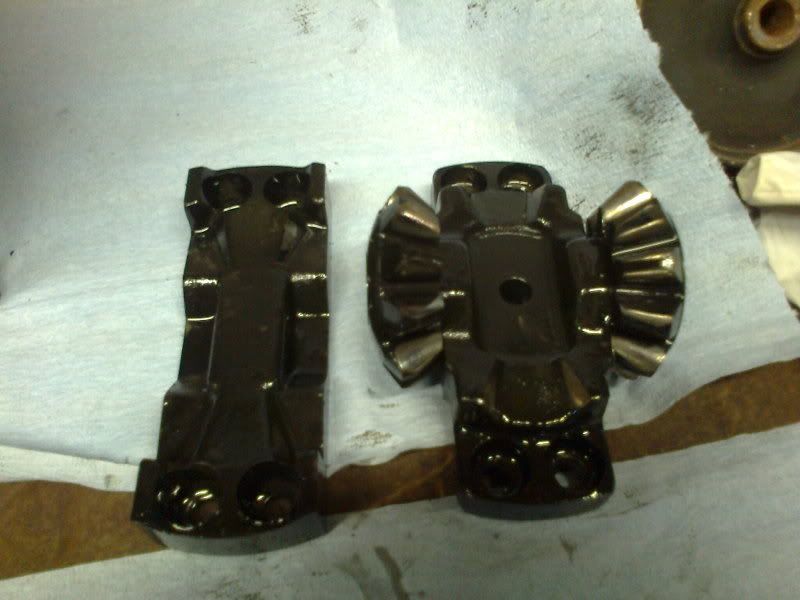
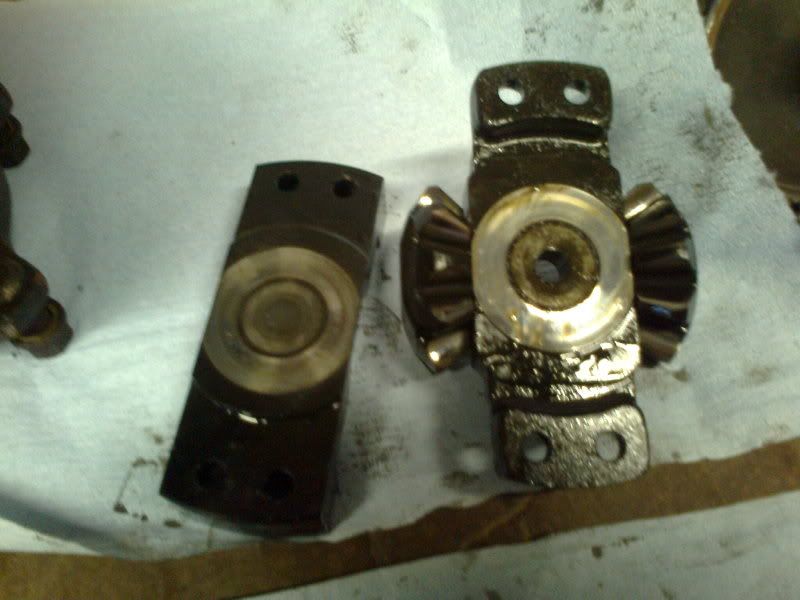
This is a better photo of the damage caused by the stock Toyota set up. See the pitting against the back Face of the Gear.

This is the most important part of the kit, The New splined clutch plates. The Diff WAS Designed them, but were Never available ...until now!
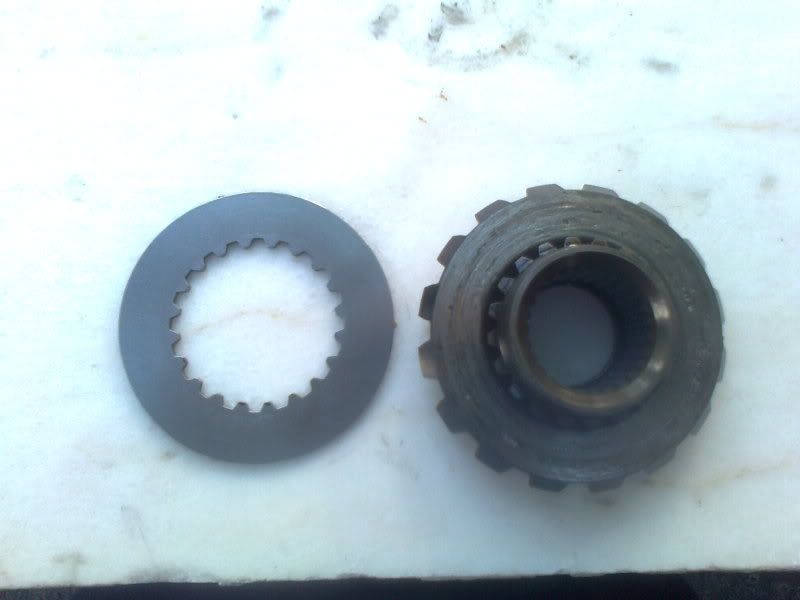
Which fit over the previously unused drive spline.
So, once assembled on the gear shaft in this order.
Friction plate.
New clutch disc
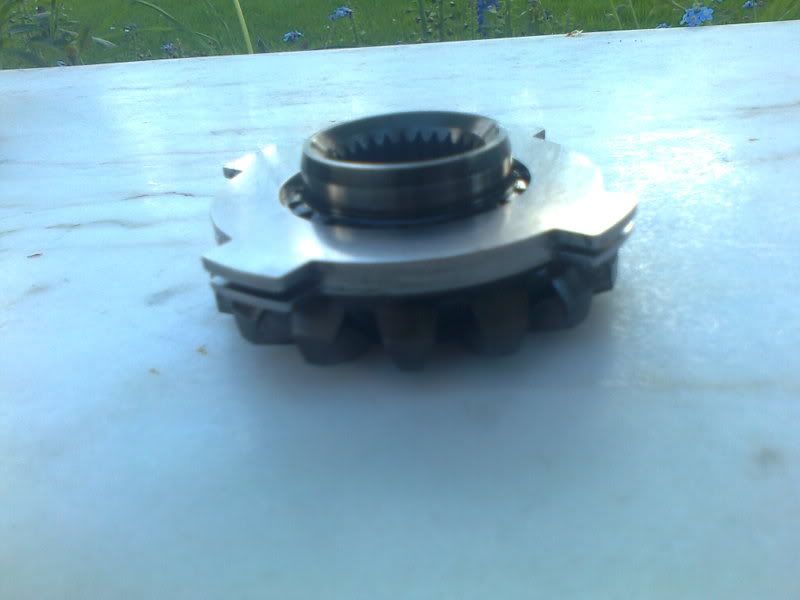
Top friction plate.
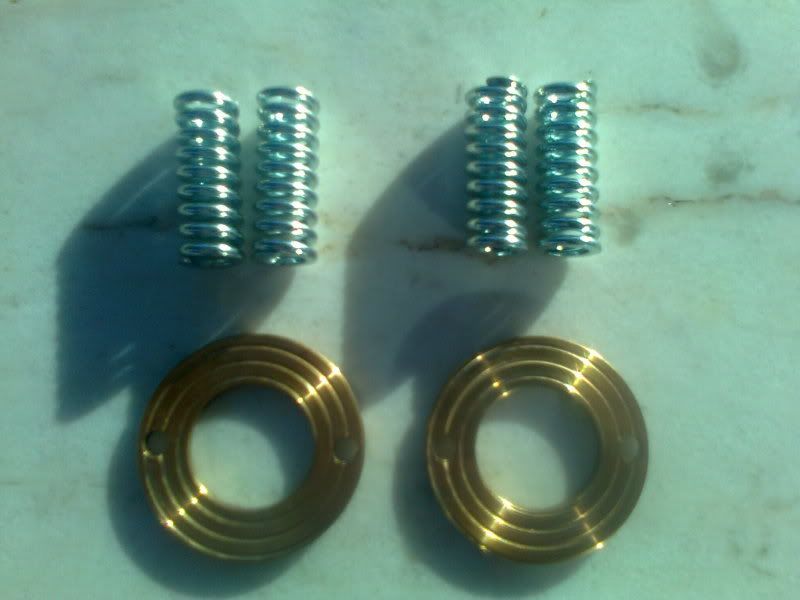
The kit also comes with loads of thin shim to tighten the Diff and quicken the rate at which it locks up both wheels.
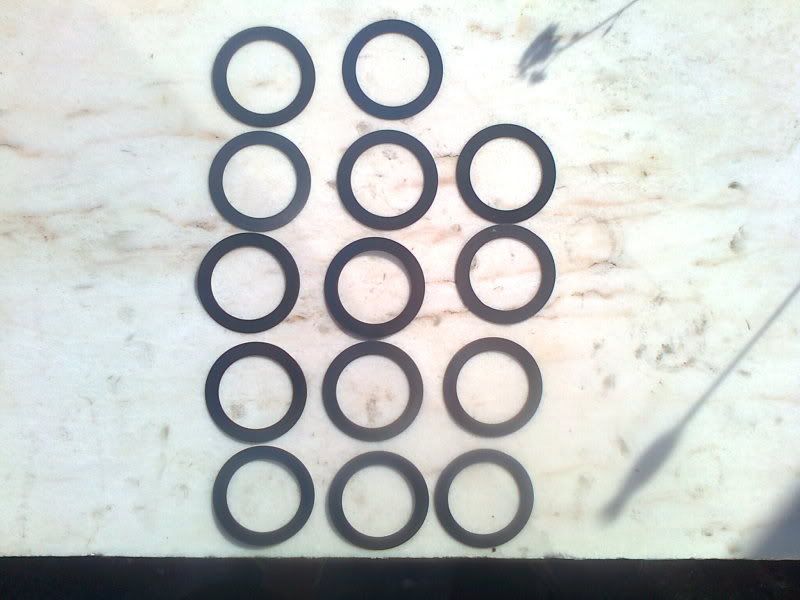
And new Brass Thrust washers, which are spiral grooved on both sides for better oil flow. And New, Higher Rate springs.
All in all, a worthwhile bit of kit. I'm going to get the pitted gear faces reground so there's less chance of future damage.
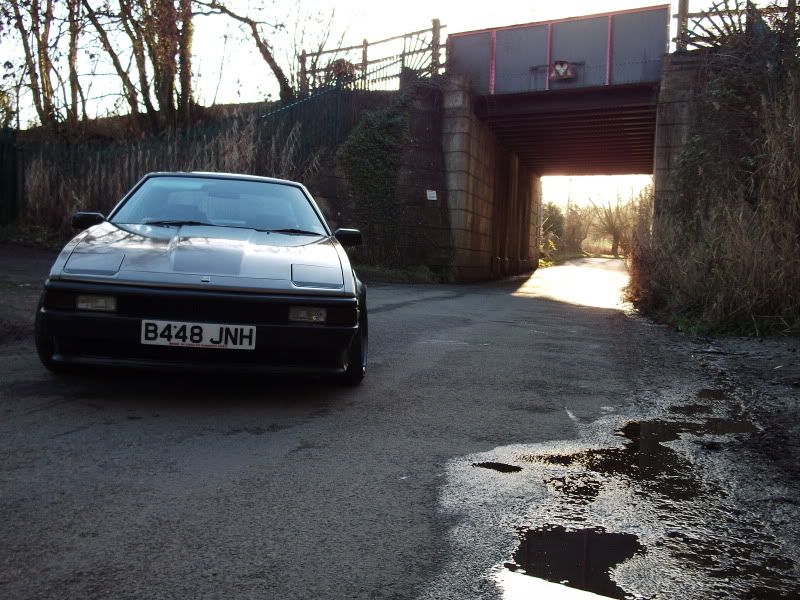
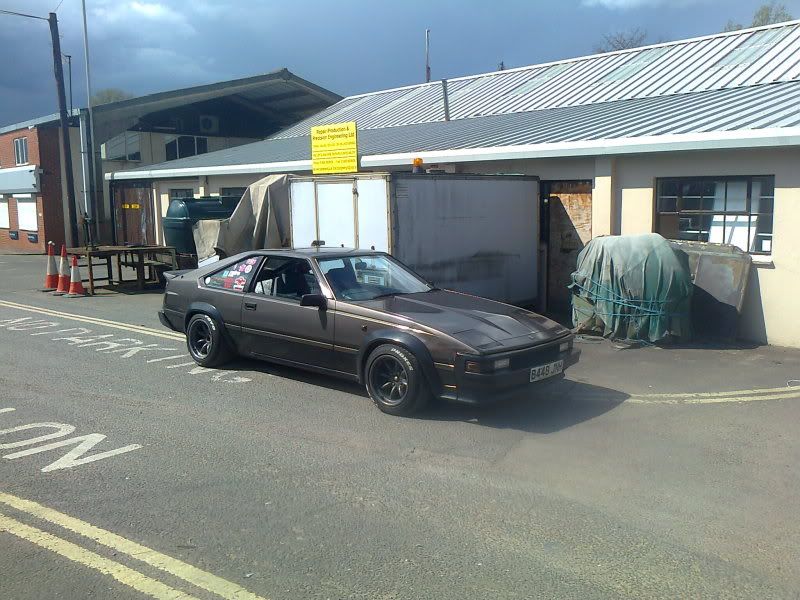
Flying the Ma61 Flag on Speedhunters!

Here's a link to the Meet on speedhunters and Dep-o Magazine for some
nice photos of the other cool cars that were there.
www.speedhunters.com/2012/08/a-casual-affair-rtg-ace-cafe/www.dep-o.co.uk/events/retro-toyotas-at-ace-cafe/Same Angle, different Eye... (wish I lowered the front a bit more, but thought it would rub on the drive up
(it didnt!)

In other news..
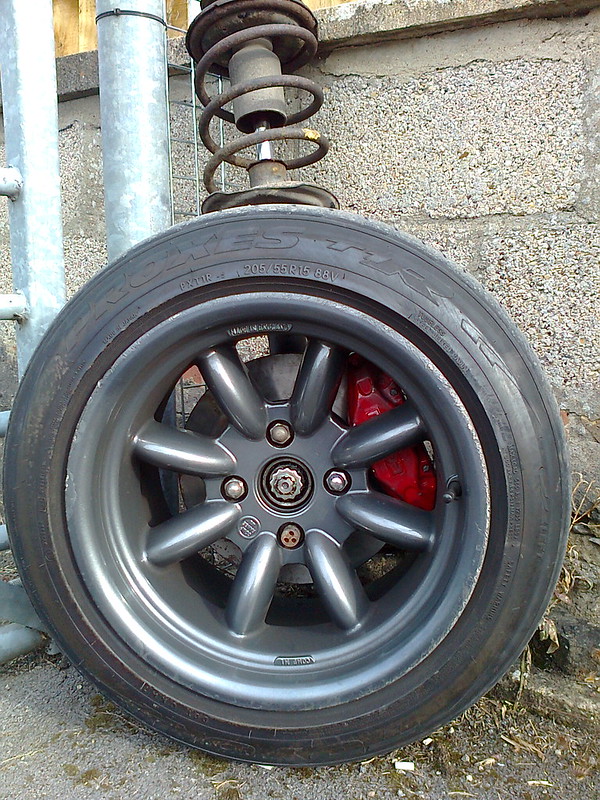
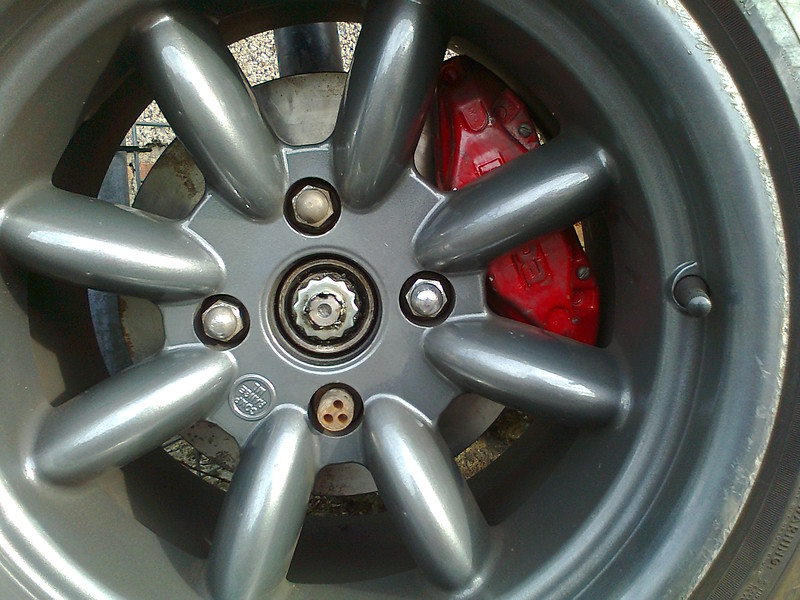
I've been looking into an affordable Brake upgrade kit for those who wish to have a Sharper Braking Performance from their Ma61's.
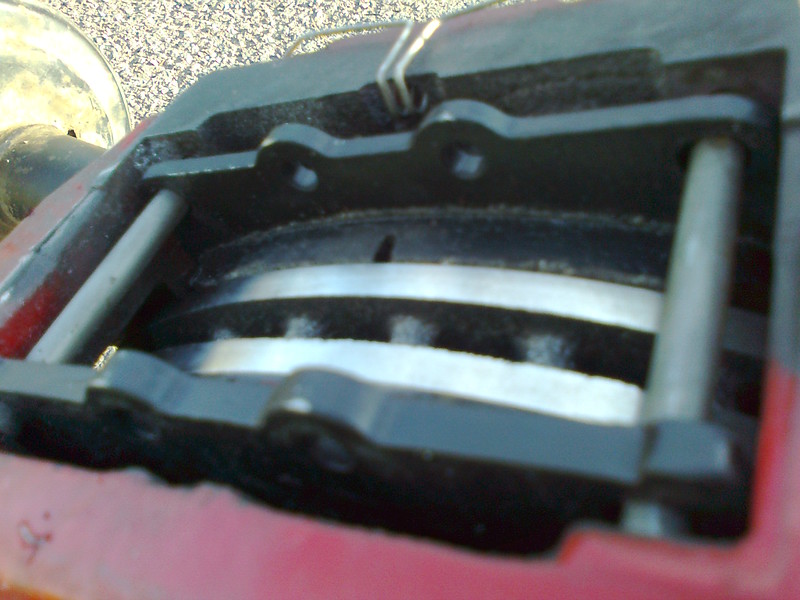
I'll be running some Mazda FD 4 pot front Calipers as they are Light Aluminium Calipers and are well known for their stopping power.
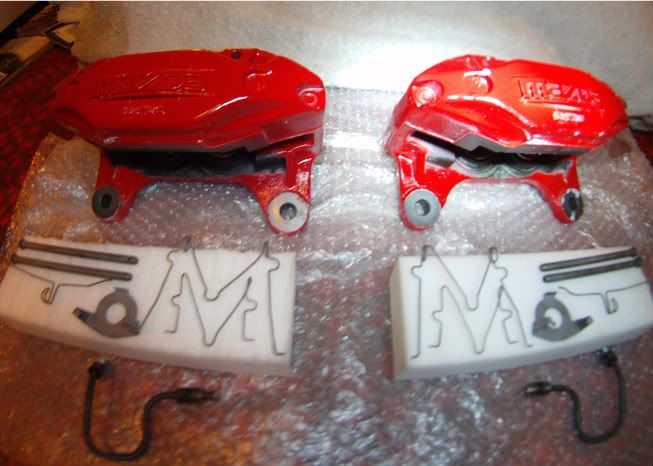
They Accept 22mm wide Brake discs and Regularly can be bought Second hand for around the £100- £120 mark.
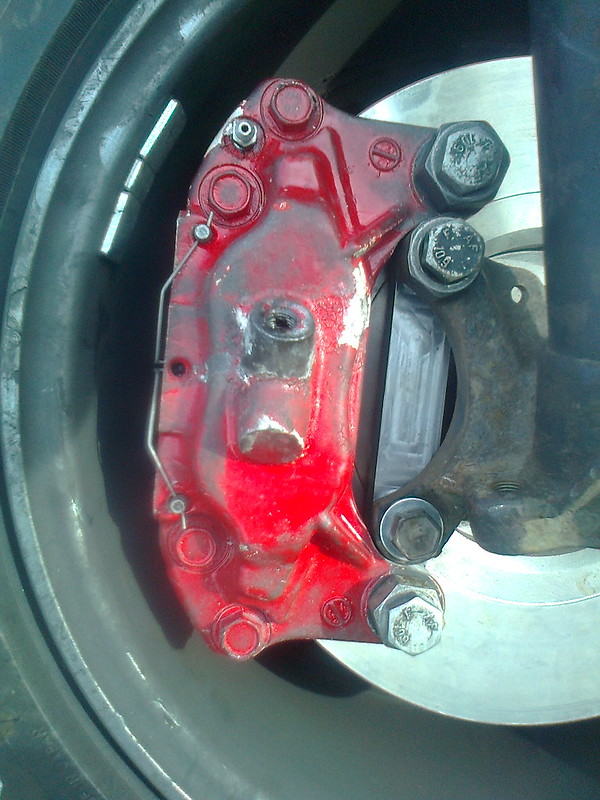
www.ebay.co.uk/sch/i.html?_nkw=mazda+rx7+brake+caliperBrackets will be lazercut from strong EN24T steel plate so no worries of failures.
For discs there a few options, Namely from a Peugeot 306-gti-6
www.dcperformance.co.uk/cheap/136153/peugeot/ebc-standard-front-brake-discs/d612.htmlThe centre bore is 66mm so 10mm smaller than the Ma61's 76mm bore. That's easily fixed with machining on the lathe
and being a 4 x 108mm pcd, The discs can easily be redrilled. to the required 4 x 100mm pcd.
(uses M10 holes/ bolts on the Supra hubs)
The width is the same 22mm for the MAZDA RX7 Calipers and the Disc height is 27mm, so only 1mm off our 26mm high Ma61 supra Discs.That means no Rubbing on the Steering arm/ track rod end whilst still running the brakes inboard.
Less Machining than running an adapted Nissan kit as well as less Unsprung weight. and no need for new wheel studs due to to no change in track width.
You would need to run At least 15" wheels to run this set up though.
 Photo0284
 by
shiredrifter, on Flickr
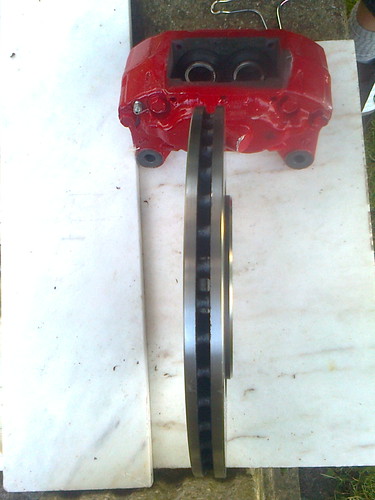 Photo0283
 by
shiredrifter, on Flickr
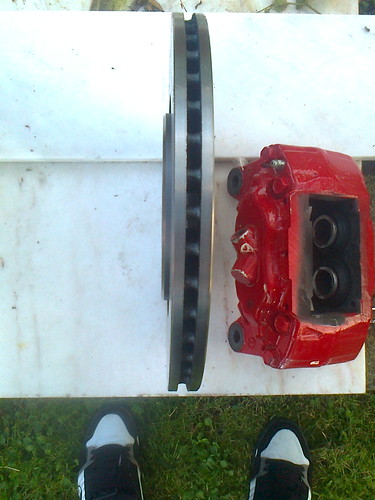 Photo0282
 by
shiredrifter, on Flickr
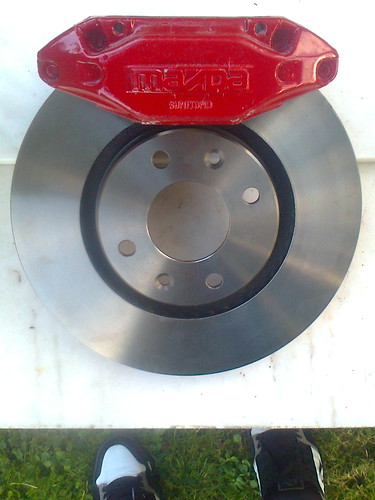 Photo0281
 by
shiredrifter, on Flickr
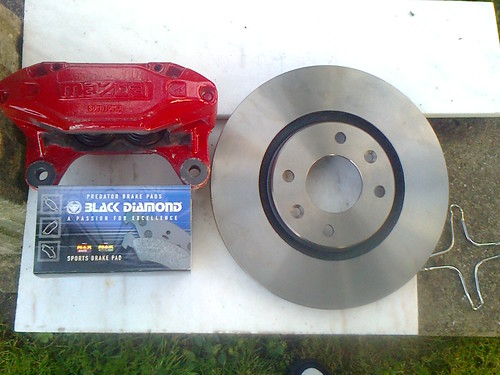 Photo0286
 by
shiredrifter, on Flickr
Hopefully have them mocked up on the car Early Next week.
The Discs only cost £47.50 a pair, so not really breaking the Bank
Although i'd recommend upgrading to the larger Mk3 Brake booster/ master cylinder for sharper braking response
as well as braided hoses and dot 4 fluid.
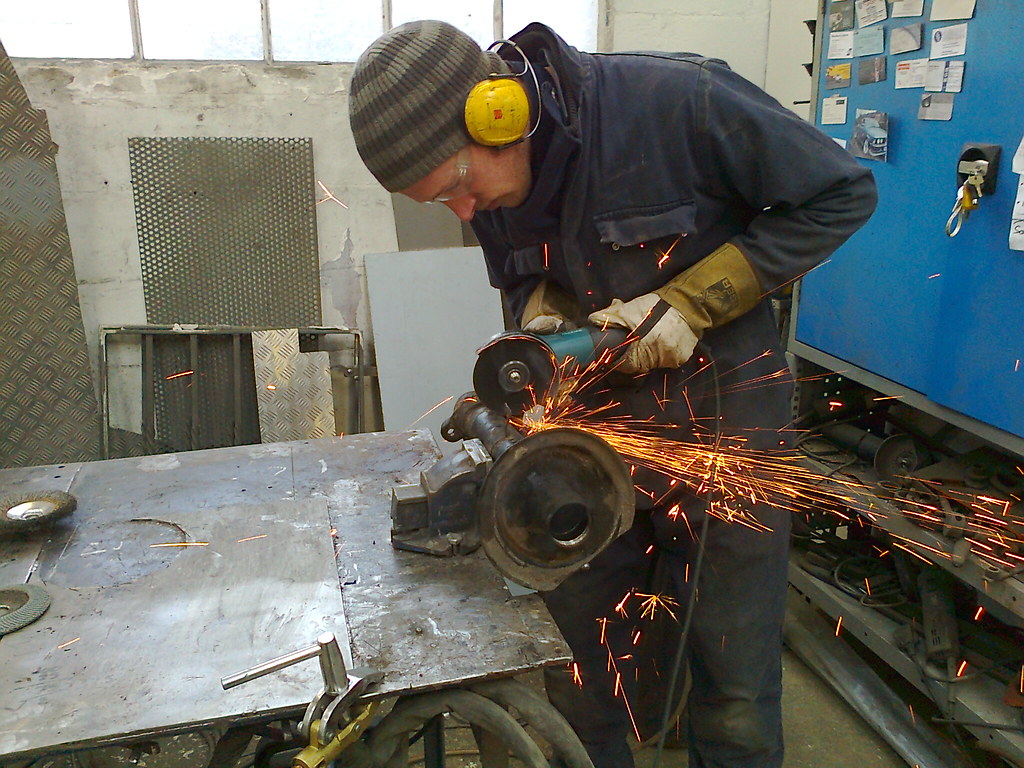
I had a bit of a slow one at my Day job today, so decided to book the afternoon off to concentrate on the Brake kit.
I had a set of Hubs with discs kicking about at my Fabricators shop, so went up to the Estate and took some proper measurements as well as speak to the Machinist Next Door.
He was just running CNC batches so had a bit of time to Adjust the discs on the spot! (literally about 20mins from start to finish!
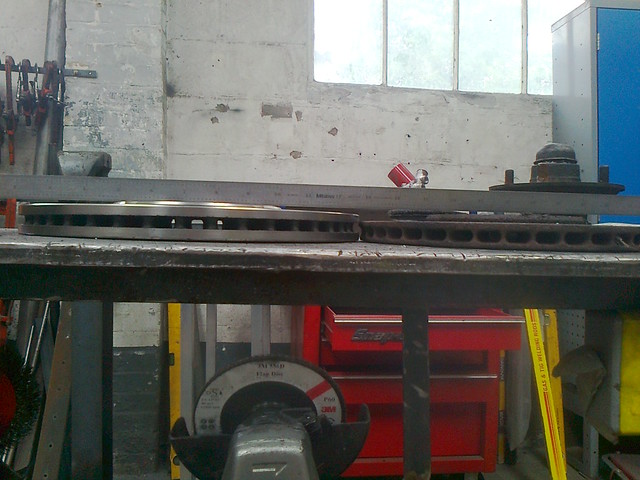 ma61 height v's 306 gti-6 disc.
 by
shiredrifter, on Flickr
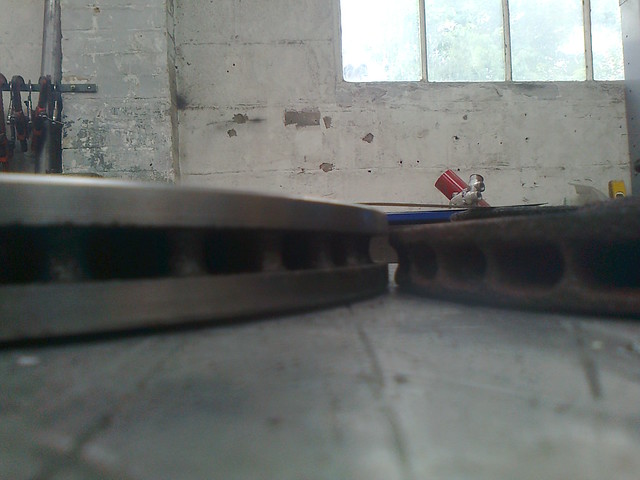 Photo0290
 by
shiredrifter, on Flickr
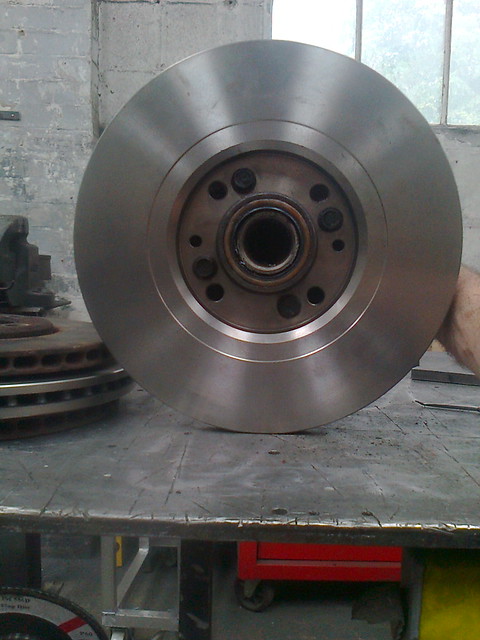
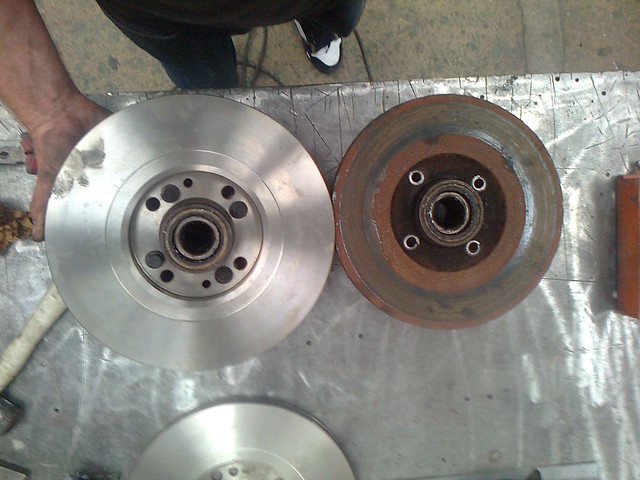
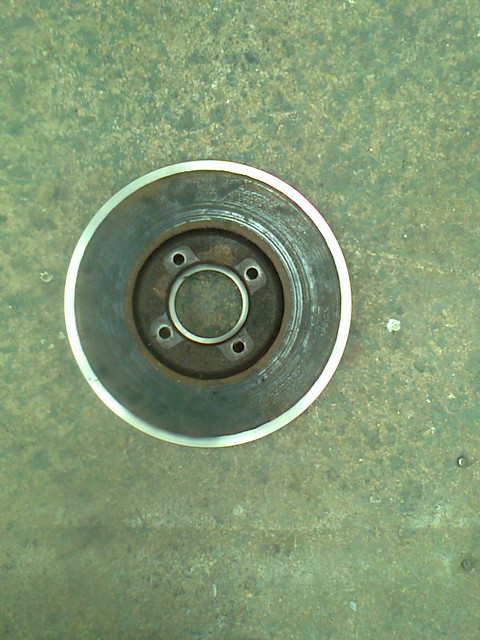 Comparison shot.
 by
shiredrifter, on Flickr
 258mm dia ma61 Disc vs 283mm dia 306 GTI-6 Disc
 by
shiredrifter, on Flickr
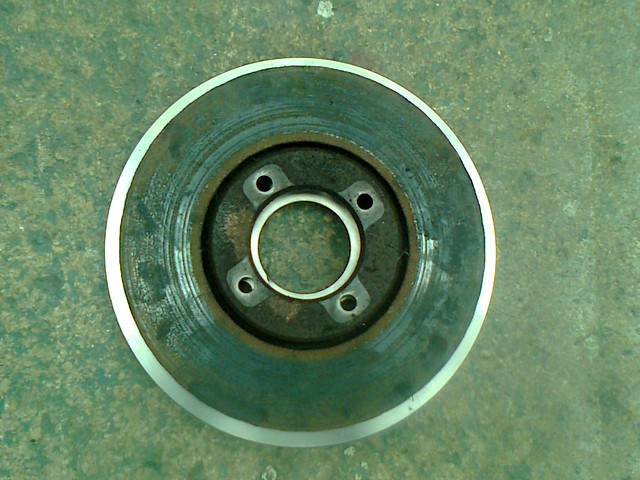
 New disc Centre bore Enlarged to 76mm & new M10 holes drilled for 4 x100mm Toyota Hubs.
 by
shiredrifter, on Flickr
 New disc Centre bore Enlarged to 76mm & new M10 holes drilled for 4 x100mm Toyota Hubs (Close up)
 by
shiredrifter, on Flickr
 Bolted up to Hub.
 by
shiredrifter, on Flickr
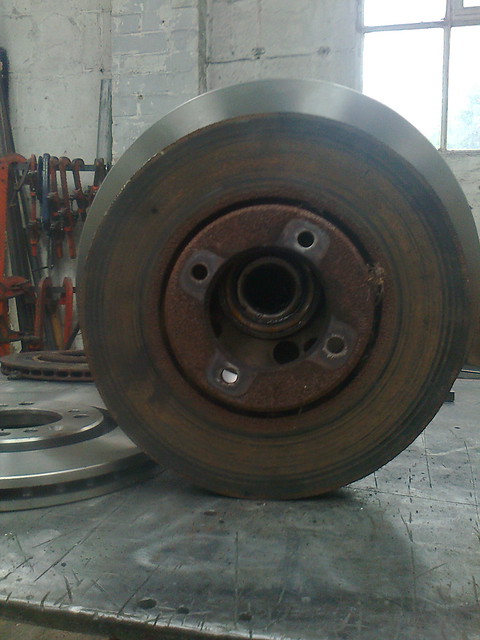 25mm larger Discs!
 by
shiredrifter, on Flickr
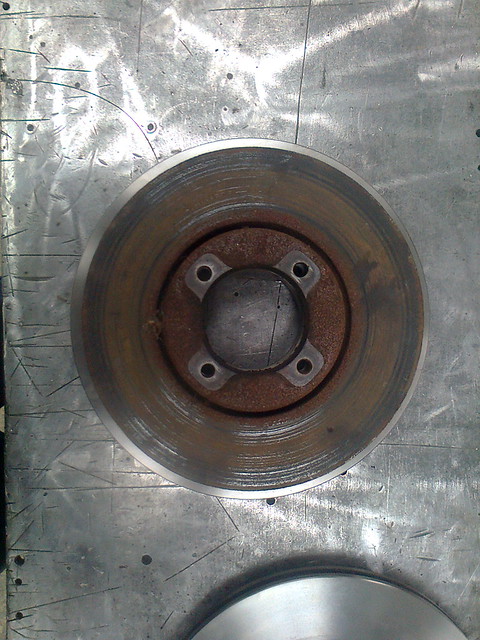
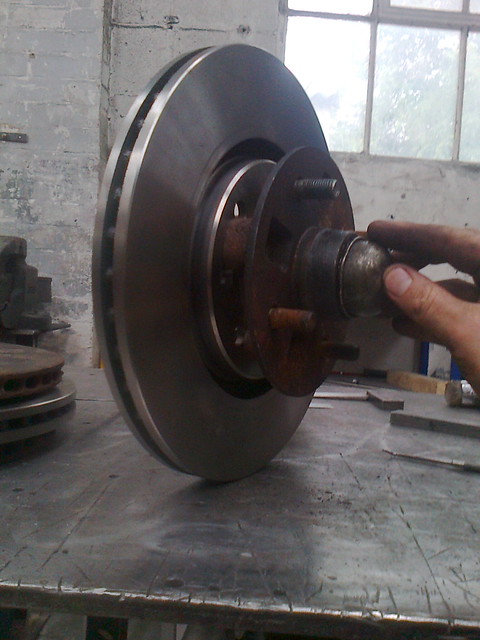 Side shot fitted to Hub.
 by
shiredrifter, on Flickr
 Height Difference of 25mm & 2mm thicker over stock Ma61 discs.
 by
shiredrifter, on Flickr
 soon to be fitted to car, Stay tuned for further updates.
 by
shiredrifter, on Flickr
n other news, I Bought an Eaton M90 Supercharger from a jaguar X300.
www.ebay.co.uk/itm/JAGUAR-XJR-X-300-SUPERCHARGER-/251130666389?roken=WvuCPh It's a short Snout model Off a 4.0 litre straight six, and bolts on same side as where the Aircon compressor goes. I want to make it switchable (like mad max haha) or like on a Toyota sc14 charger via using the now obsolete Aircon Button, But i'm going to have to make the pulley the right size so the ratios arn't mental
and it blows up. Aiming for only Around 8-10 psi, but have to fit a thicker head gasket as my 1984 model is 9.2.1 compression ratio.
It's early days, but am picking up a free 70k Engine from a well looked after Auto car so will use that as the Mock up so I don't keep having to take the car apart to make things. still gotta Get some bigger injectors
but already got a Dastek Unichip Piggyback Ecu and a Walbro 255Lp/h Fuel pump from My old Nissan s13
(Same part No.) So might have to go from MAF to Map Sensor? Dunno, will cross that bridge when I come to it!
And you may say, "why the hell do you want to supercharge it when turbo's are easier to do, and are more efficient you mad bastar, WTF are you doing?!
My answer to that is, No Lag from idle up to redline, Waay less heat, which in a drift car is paramount to reliability, and General Driveability with the option to switch it on and off (which you can't do with a turbo)
since i'm using an M90 charger off a straight six engine i'm hoping, so long as I move the MAF over to the other side , and move a few things around a bit the Weight shouldnt be too bad. Wrestling with Intercooler V's Charge cooler At the moment, But Probably go with an air to air intercooler for less to worry about if I hit something whilst drifting.
As i'm not going to be running the M90 charger anywhere near flat out, the air should be quite a low temp
so the Cooling side isn't as vitally important as it would be on a turbo'd engine.
Well, thats the Theory anyhow, see me in about 6 months when I have Cut hands and lost the will to live after worrying about Pipework routing day and night...:duh:
Well, supercharger Arrived today.
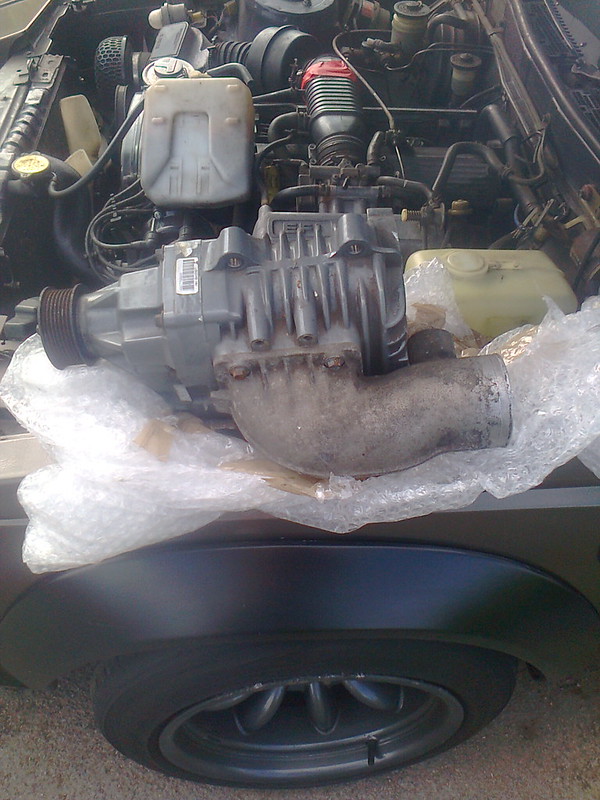 Photo0299
 by
shiredrifter, on Flickr
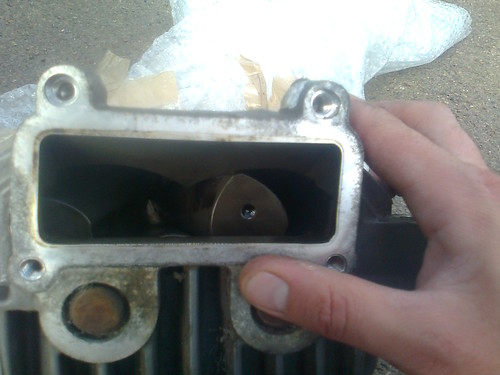 Photo0302
 by
shiredrifter, on Flickr
Needs a rebuild, so will be buying a kit from the States no doubt.
Best be safer than sorry really
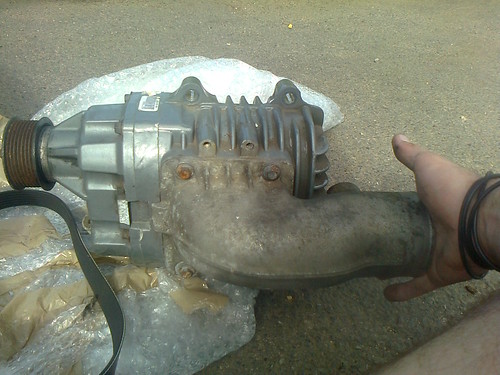 Photo0303
 by
shiredrifter, on Flickr
I had a spare Ma61 Alternator belt that I need to fit, Just out of curiosity,
I wanted to see if it fit the Jag pulley on the Charger ?
Result = Spot on
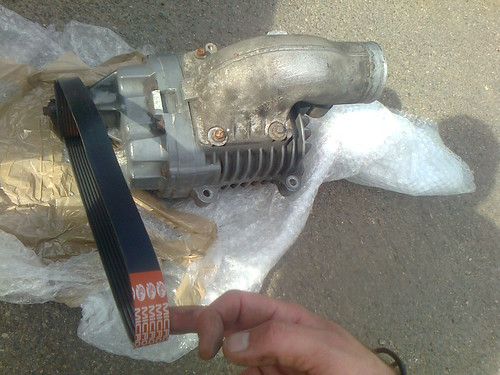 Photo0300
 by
shiredrifter, on Flickr
I Mean perfect! ( who Knew!!)
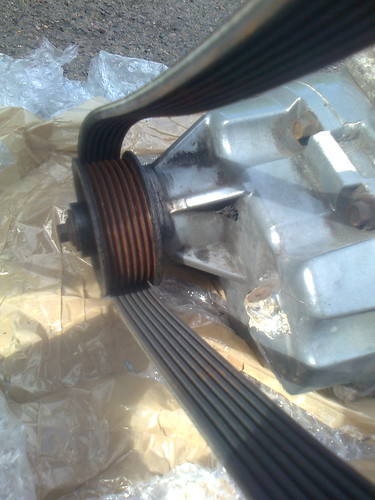 Photo0301
 by
shiredrifter, on Flickr
Now, that gives me the option to either find a longer Toyota Belt that fits, or have a look at the Jag x300 Belt length, either way, thats the Pulley's sorted. ;D
Next I moved the battery out the way, and spinning the pipe round 180 deg to see what clearance is like.
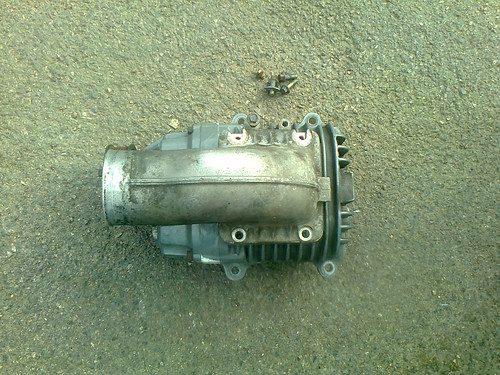 Photo0307
 by
shiredrifter, on Flickr
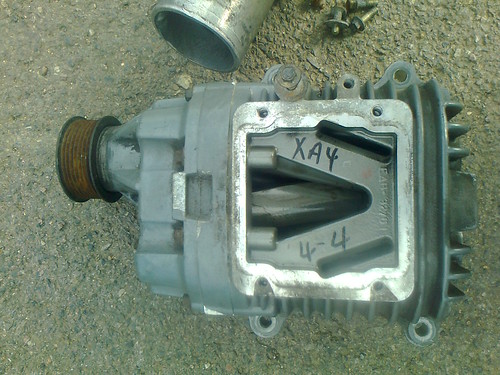 Photo0306
 by
shiredrifter, on Flickr
 Photo0304
 by
shiredrifter, on Flickr
The Cavern! Need to move the rad though, so save mock up for another day..
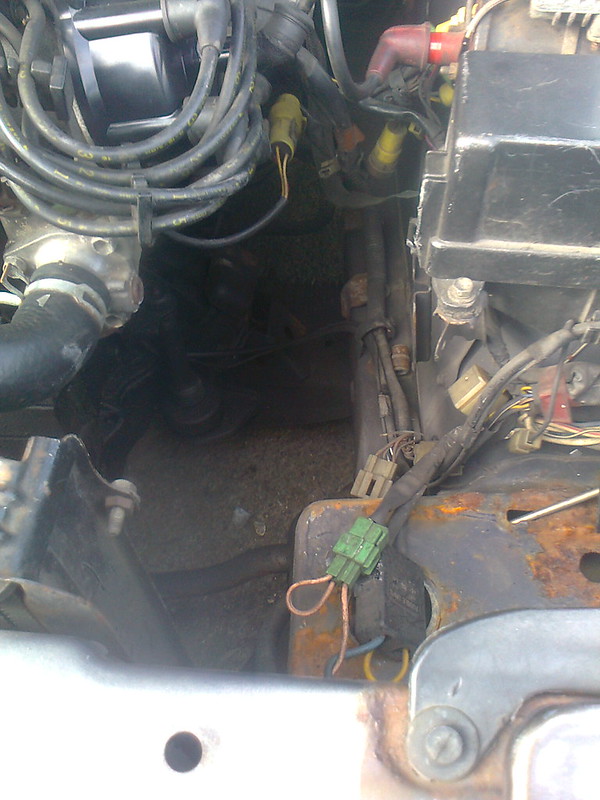 Photo0305
 by
shiredrifter, on Flickr
then look at back plate design, fabbing up some brackets to suit, as well as a belt tensioner, but I can do all that on the spare engine i'm getting soon.
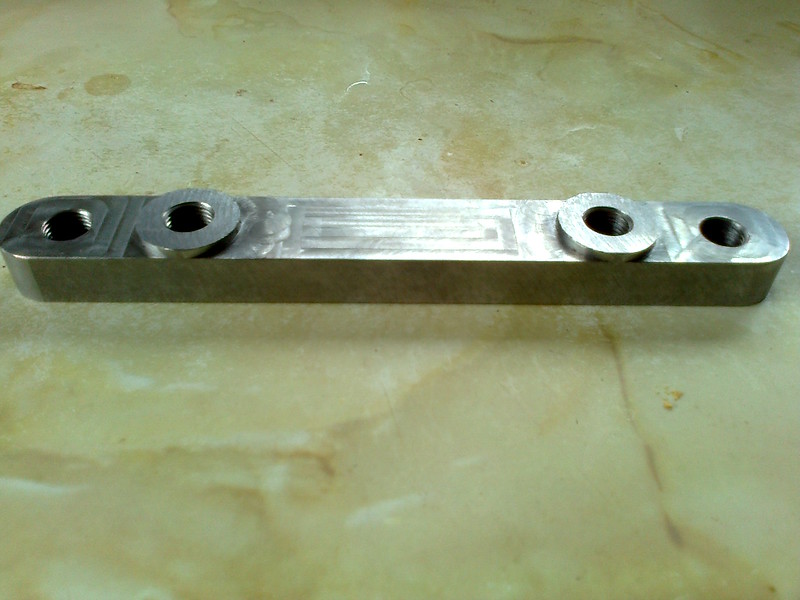
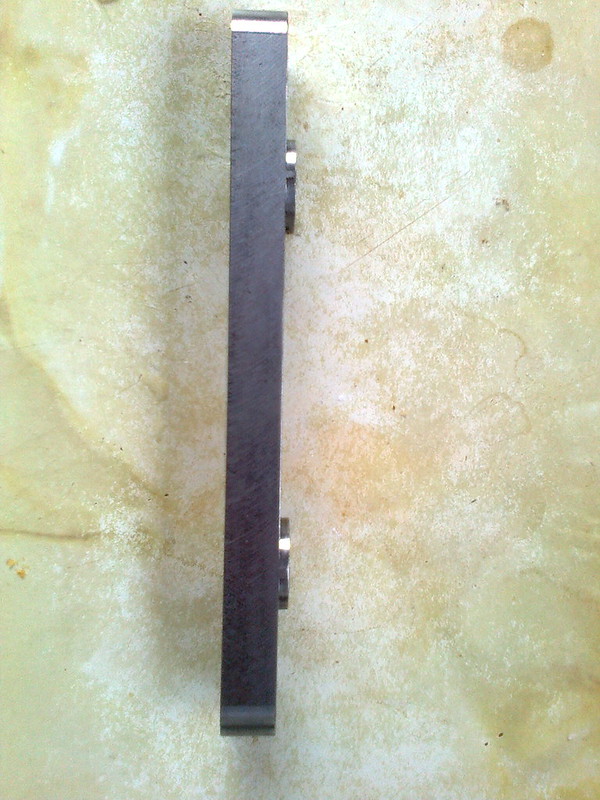
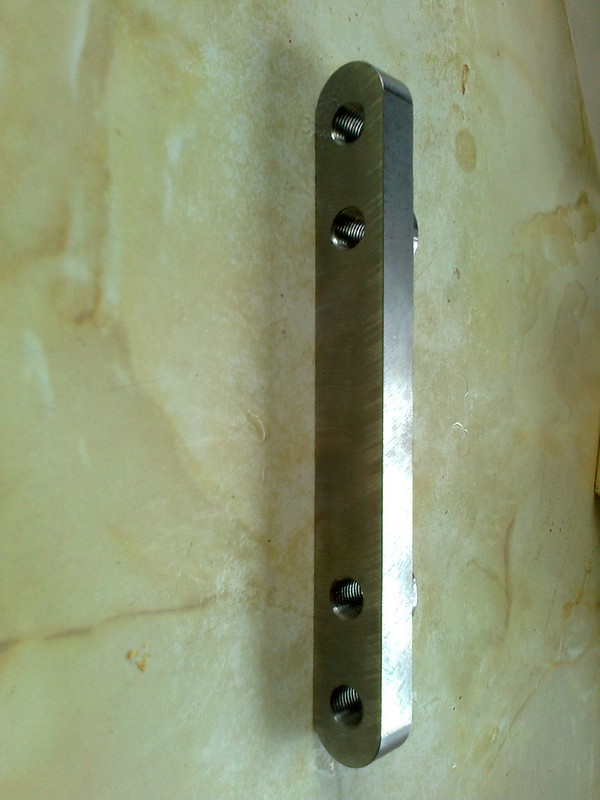
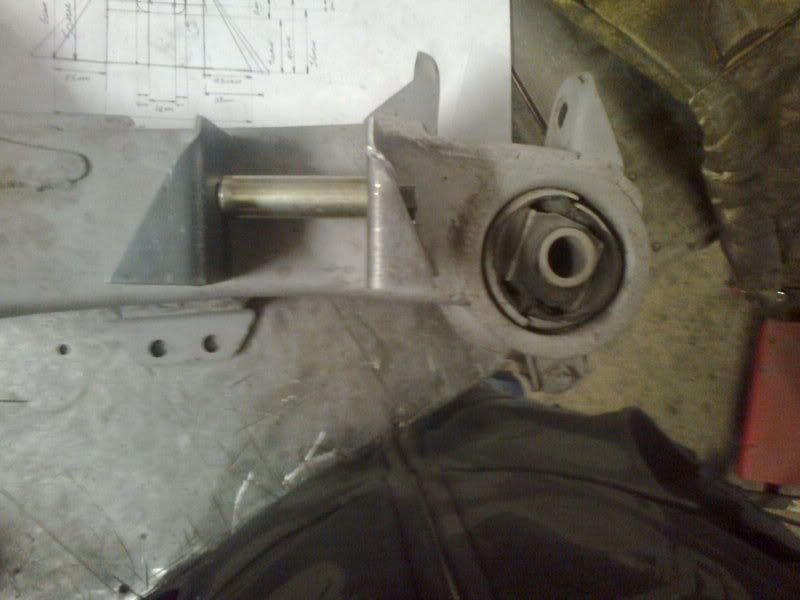
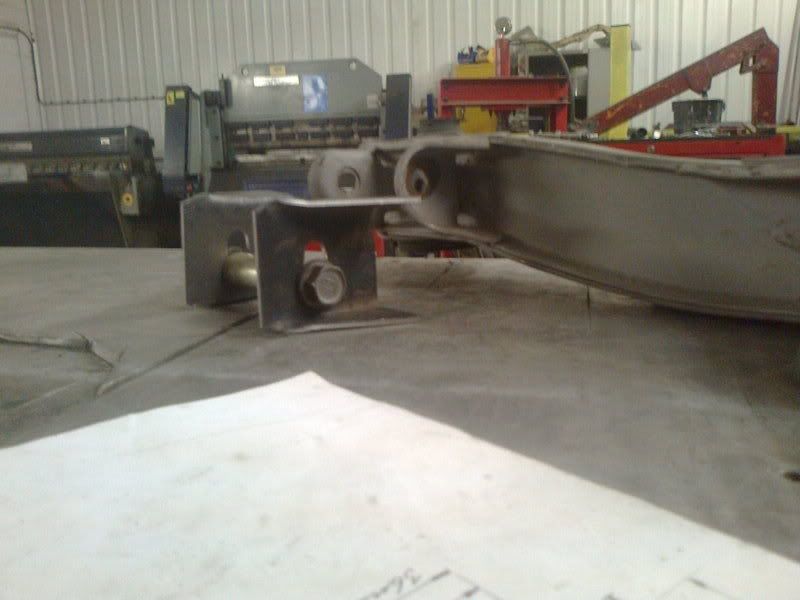
have been working on some Weld on Rear camber correction Brackets for the Celica Supra to try and eradicate some of the Dirty excess Rear camber angle which piles on after you lower the car.
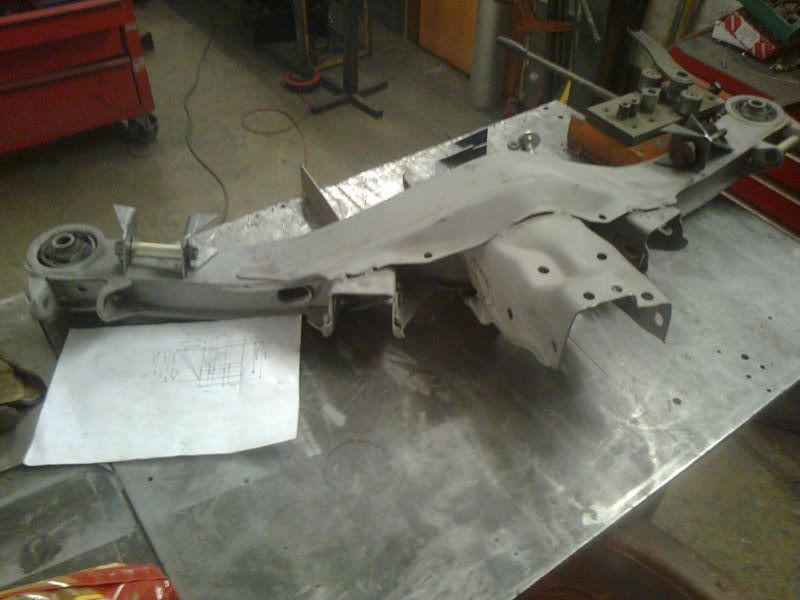
New M12 bolts and camber washers will be supplied so will fit all Aftermarket poly bushes rather than having to drill out the inner sleeves to accept the Oe Toyota Eccentric Bolts Used already for the Toe adjusment on the inner arms.
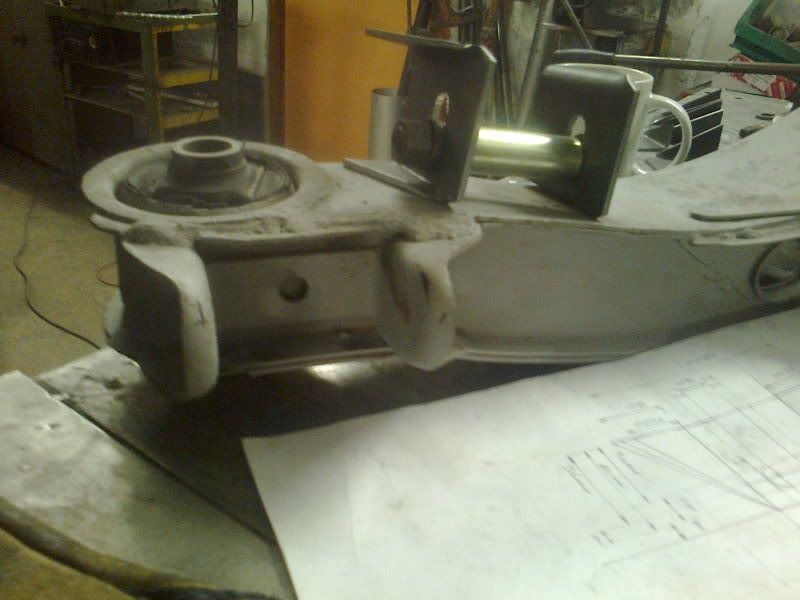
]I will be doing the Subframe modification on an exchange Basis as well as selling the brackets and hardware individually so those who are confident welders can do the mod at home.
Exchanged subframes will be Blasted back to allow stitch welding and repair, then Powder coated in a choice of colours.
I am also thinking of knocking out some Poly bushes to supply with the Subframe, so it's super easy to refit.
Prices to follow after ive tested everything to be of superior standard
And also manages to Get a free Aluminum Diff Oil cooler and pump From a Nissan 200SX.
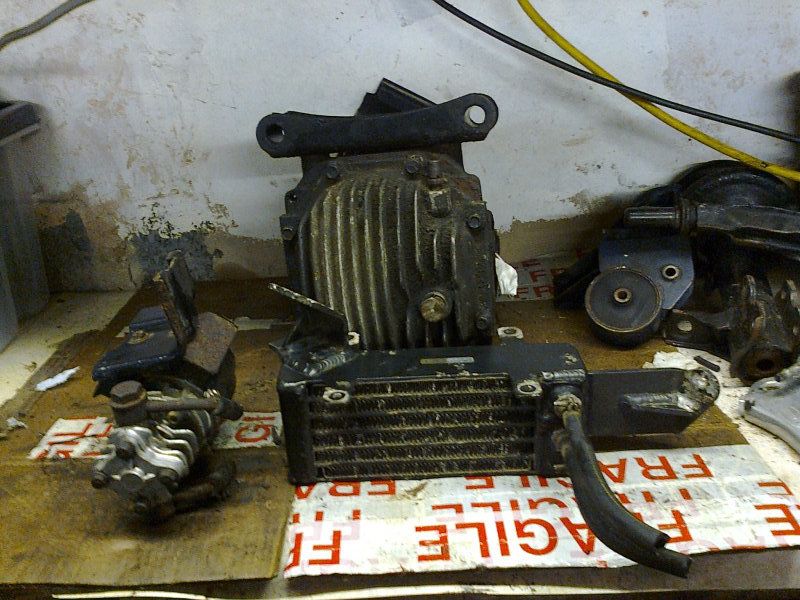
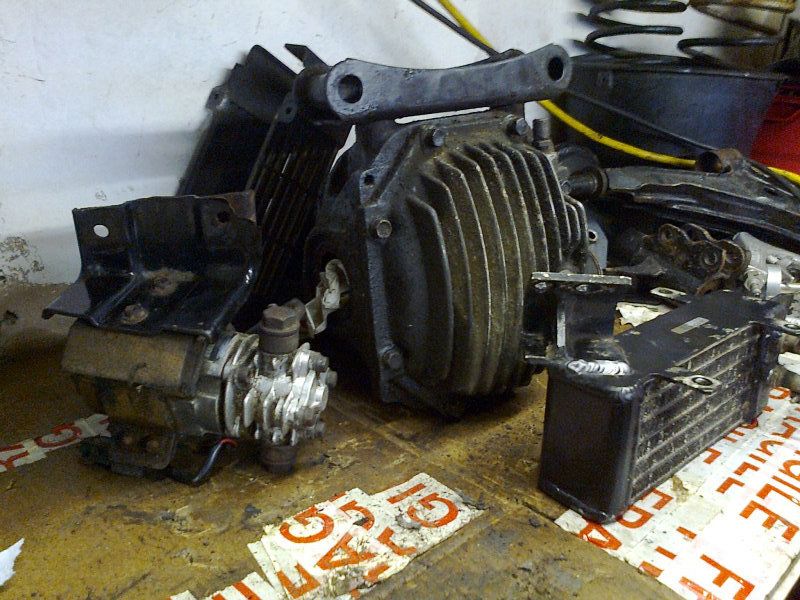
It's much needed as these diff's get really hot and have quite a low oil level in them,so no good for prolonged drifting. I'll link up the Pump to the old Aircon Switch, so I can run it on whilst i'm giving it angry death on the track.
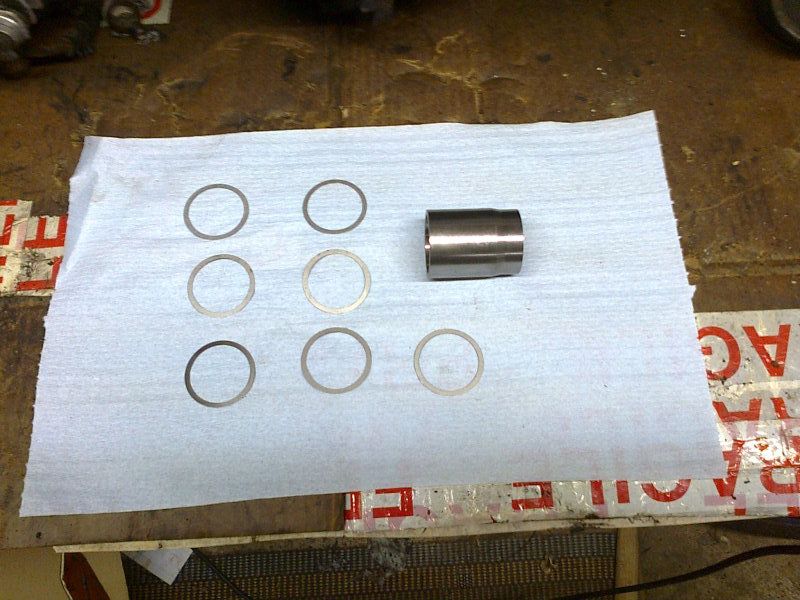
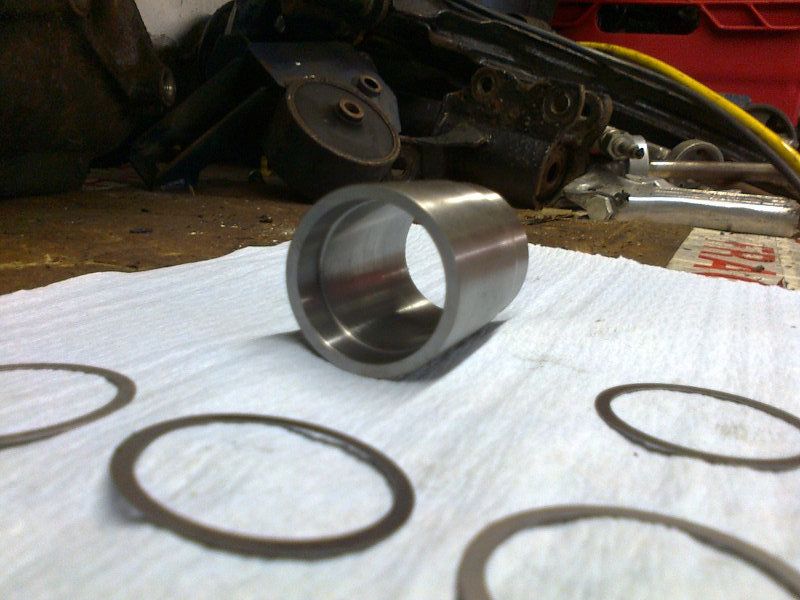
Forgot to take pictures of the solid Pinion Crush sleeve from Weir Performance, so here are a couple to show you with the shims for matching to original spec.


 i'm another one with big love for these and want one someday before they all dissappear.

 )
)


 Yeah, i've been meaning to update this thread for ages, so finally had 2 minutes to sit down and type it up.


 It's hardly any material, so go SLOW!
 This clean.
 But it never does any harm to dig a bit further!