foxy99
Posted a lot

Posts: 1,391
Member is Online
|
|
|
|
|
Hi. I've noticed your Polo problems before and shyed away from throwing my tuppence in because there are so many others able to help but have now read the story in detail and feel I have to add something in.
Yours is a standard 1043cc GL? (engine, not trim). I have had three (Y reg, A reg & B reg).
I also encountered 'unfixable' idling problems, oil in air cleaner and a couple of blown heads and some overheating.
I once dismantled one of the radiators and examined all the waterways and they were clean as a whistle so I don't think a blocked rad is the problem.
Your water pump & thermostat are fine so god knows what is causing the overheating!
Regarding the idling, it is vital that the dwell angle (points gap) is spot on on these. You won't believe the difference it can make to the idling. Its a pain in the ass to set as you have to take the distributor cap, rotor arm, plastic shield off adjust it, put it all back, make sure your dwell meter is connected, check it, re-adjust again and again till its right. Also you need to keep your eye on the timing marks and the bottom distributor bolt is hard to reach and turning the dustributor can affect the points gap again slightly but if its not a freezing day its more fun.
There is also lots of talk about blocked jets and passageways in the carb but I have also stripped and took out the lead plugs on a carb to check for blockages and again - nothing, clean as a whistle.
Have a look at your manual and check the numbers on the brass air/idle jets on the outside of the carb (under air cleaner) are correct. On one of my cars someone had changed the jets to ones which blocked the holes completely.
Apologies if I haven't read back far enough about the work on the head but that seems to be the root of your problems. Its vital when the head is put back on that it is torqued down correctly and new gaskets fitted all round (head, manifold etc). If the exhaust or inlet manifolds have any leaks it will mess up the carburation completely.
Lastly. I have a full engine for one of these (from the B reg) that will be getting thrown out one day and I'd be happy to send you the head for nothing. Just pay the P&P. You could then get one reconditioned.....new valves, guides etc
|
| |
Last Edit: May 3, 2012 1:10:48 GMT by foxy99
1974 Daimler Double-Six VDP
1965/67 Hillman Imp pick-up
1984 VW Polo breadvan
1970s Yamaha Twins (4)
1976 Honda SS50ZK1
|
|
|
|
|
|
|
|
|
foxy: Well, that lines up exactly with what's going on with mine, which is reassuring. It is the GL code 1043cc engine, just as it came from the factory bar a bit of a head skim. I have checked the points, but I will check them again. When I replaced and gapped the new points it did make a massive difference and improved the car dramatically for a time. I have to reset the timing/dwell angle after having removed the water pump so that will get done properly when it's all put back together. I shall check the brass jets as suggested. I'm confident these haven't been touched since VW installed them, but I'll check anyway. Please do let me know before getting rid of that spare engine, I could definitely make use of a spare head as a just in case if mine is still good, or a replacement if it's shot. I've not had much luck finding a replacement GL engine, people seem to be less than keen on them and throw them away in favour of bigger lumps. I find it's suitable for my needs and can be a peppy little lump around town, if not on the motorway.
|
| |
|
|
|
|
|
|
|
|
The jets should have been removed when your friend stripped and checked the carb buddy :-) I would check again as you intend. all you need is a Good thick flat blade screwdriver, they just unscrew, easy peasy :-)
then a good blast with some carb cleaner will clean them out nicely. Also check that the filter that is inside the inlet pipe <it hides and can't be seen, get a wood screw, screw in to the inlet pipe carefully and then pull, it should pop out with the filter on it. blast as per, and refit :-) >
glad you have you polo love back!
|
| |
|
|
|
|
|
|
|
|
in that case, they probably have been removed since he did do a full strip and rebuild and run the whole thing though the parts washer. He doesn't particularly like doing rebuilds on carburettors, but he does at least do a very good job of these things. Still, things could have got messed up again since running the car so I'll check anyway, just to be sure, can't do any harm if I'm careful.
I still have this horrible feeling that there's nothing really wrong with the engine and that I'm missing something really simple and really obvious and that I could have been running around enjoying the car for the past few months instead of him being bundled up in the garage.
|
| |
|
|
foxy99
Posted a lot
Posts: 1,391
Member is Online
|
|
|
|
I only ever had the 1043cc GL engine (3 of them lol) and, apart from the idling issues, thought it was great. My first one was the worst idler but the fastest. It had done over 100k but went great. I put a vacuum guage on it once and the needle snapped back and forward brilliantly when you blipped the throttle. A good sign. I have two left (will maybe start thread after I finish the Daimler). The one in my car has had full bottom end rebuild and head - apart from still looking for a new cam - and I also found a brand new carb of exact right spec so I'm sure one day I'll have the perfect OEM engine  Will keep you posted re the other engine which is lying at back of lock-up |
| |
Last Edit: May 4, 2012 1:51:43 GMT by foxy99
1974 Daimler Double-Six VDP
1965/67 Hillman Imp pick-up
1984 VW Polo breadvan
1970s Yamaha Twins (4)
1976 Honda SS50ZK1
|
|
|
|
|
|
|
|
This one has done, if memory serves (can't be arsed to wade back through the thread and find out) 118k and it did used to idle perfectly fine once I'd done the new maintenance stuff last year. Everything changed when the car was laid up for a month or so in the garage, shortly after the head was done. I can't help but think that's related, I just can't think how. All the while I was lugging furniture during the house move and doing my hops around town or treks to and from Sheffield I never had a temperature issue or anything, but laying the car up and not using him for a month causes me enormous headaches... cars are odd.
|
| |
|
|
Lawsy
Posted a lot
Posts: 2,615
|
|
|
|
but laying the car up and not using him for a month causes me enormous headaches... cars are odd. I've often found the more eyou use an odl car the better it becomes i had a B3 passat was dog rough when i got it, used loads of fuel, eratic tickover etc, so i set it towk, within a week things had started to improve, quick service and carried on, after about 2 months of daily abuse it was running sweet - i think they get upset when you don't drive them |
| |
|
|
|
|
|
|
|
but laying the car up and not using him for a month causes me enormous headaches... cars are odd. I've often found the more eyou use an odl car the better it becomes I had a B3 passat was dog rough when I got it, used loads of fuel, eratic tickover etc, so I set it towk, within a week things had started to improve, quick service and carried on, after about 2 months of daily abuse it was running sweet - I think they get upset when you don't drive them I agree. Especially if the fuel system dries out as you end up with sediment breaking off and all the gaskets and rubber components drying out and changing shape. Once all that clears out and the gaskets have expanded, the little gaps where it may have had a slight leak fill with dirt or carbon or oil and seal properly, and it all works nicely. The Renault is running better now it has a few hours on the engine. I can see it changing behavior once I get it going on the road properly. -Phil |
| |
|
|
|
|
|
May 10, 2012 20:40:24 GMT
|
Update time, though not a huge one. This is more outlining my plans for the work I want to do over the next couple of days. After all the despondency about not being able to sort the Polo out and money and blabla my brain seems to have clicked into productive mode. Today I pulled the rear seat out of the car, and my new split seat I got from a breaker recently They're a similar basic design, so I'm hoping I can remove the cover I made for the non-split seat, modify it a bit, and reattach it to the new 50/50 split seats. In theory, it shouldn't be too difficult but we shall see what happens in practice.   The other thing I liberated from the garage were the new headlamp mounts. One of these still needs trimming, then both need stripping down and the backing plates painting up, probably just in black so they're less visible when fitted. After that, I just need to use suitable screws or bolts to fix them to the modified original light brackets and I'll be good to go once I have some more sealed beam units to slot in there.  I've got everything I need to put the front end back together and I think if I focus on getting the Polo looking like a car again and out of the garage, I'll be more inclined to work on him. Sometimes, I forget the car is tucked away in the garage and I'm sure that's prolonging the rebuild more than it needs to. I even took one of the front wings out of the garage and put it in the house so I'm encouraged to actually get the flatting back and minor repairs to the paint finished. I think this build has been suffering from rather too much procrastination of late, and it's high time I got stuff done, the engine running and an MoT booked! |
| |
|
|
|
|
|
May 29, 2012 21:16:35 GMT
|
Today, I moved the Polo. I did not, however, move him under his own power because I am full of fail and the garage is an oven. My theory is that if the Polo is visible, I'm more likely to work on him than if he's in the garage. I was going to bolt the various bits in and get him running with the petrol I have, but because the garage was roasting hot, I decided to push him out on to the newly cleared bit of drive, a foolish thing to attempt on my own, but I was (over)confident in my own abilities. Because of the daft shape of the drive I got this far.  I tried very hard to move the car more but a combination of shoes with no tread and just being plain knackered meant I got no further. Just for now I've put the bonnet and the cover on. Tomorrow I plan to give him a wash for the first time in forever and put the engine back together to see if I can get him running as well as some other bits and bobs to keep myself motivated. The Princess has been taking all my enthusiasm lately, no necessarily because of being a new toy, but I think because the jobs are easier to diagnose and resolve and, on the whole, she just needs a little bit of tidying as opposed to the Polo's seemingly major fixing. So for now, Wilhelm has his space blanket on until I can get out there tomorrow and really get to work a bit harder. I miss driving the Polo more and more, especially in this weather. Biggest hurdle at the moment is most definitely money. I've had three weeks off work (one by choice, two not) and being self employed that means I earn nothing so I've got to catch that up and pay the surprise bills that we've been getting this year that have been driving me to distraction. Until tomorrow, Herr Polo.  |
| |
|
|
|
|
|
|
|
May 30, 2012 21:35:22 GMT
|
After pushing the Polo out of the garage yesterday and getting him into view so I'm encouraged/shamed into working on him I actually did today. I'm really very pleased with myself because today I managed to do some spannering from experience rather than having to consult a book every five minutes, something of a milestone for me. I knew I had to reinstate the water pump and the timing belt in order to get the Polo running, but a look around the engine bay also highlighted that the coil needed to be reconnected and of course water needed putting back in the system. I had my doubts in my abilities because I'm nothing if not under-confident when it comes to mechanical things, but I worked through methodically and got everything connected, checked the labels we'd put on the wiring and was sure I'd got everything as it ought to be. When I removed the water pump I had made sure (or thought I had) that the static timing was where it should be so I didn't think to check that. This is something I will have to go back and do, but I'm getting ahead of myself... I've never done a timing belt before, but I knew what should happen and that tension was very important. First of all I bolted the water pump and back plate in place and then found I couldn't get the belt to go on the cam sprocket at all.  I quick search of the old memory bank made me remember that the water pump assembly appears to have an eccentric rotation, or rather that the rotation point is not central on the whole pump assembly, which made me realise that must be for adjusting it, especially when combined with the long curving slots the bolts go through. That was how to sort out the tension on the belt. So I slackened off the stupidly awkward bolts and rotated the back half of the water pump in situ with the bolts loosely in the holes.  This gave me enough slack in the belt to get it located correctly both on the pump...  ... and on the sprocket.  Eventually everything lines up neatly, and the belt can go from this...  ...to this.  My camera has eaten the pictures, but on the water pump housing there's a notch that you can use to push it around to tension the belt, once you've pushed it as far as you can, tighten up the bolts and the job is done. Next thing was to put Mister Bunny in his run because he was in the firing line of the exhaust and I didn't want him getting poorly. Then I filled up the water and burped the system, I think I did this a total of 5 times until the water level didn't drop and I got no air bubbling up and then did everything up. A few last checks to ensure everything was where it ought to be and nothing could fall into belts and fans and whatnot and I connected the battery. I had no idea if there would be any life in the battery as I hadn't thought to put it on charge the night before, but happily there was. This clicky video is the engine running. I managed to mechanic something!  The good news is that there the water now circulates, the temperature on the hoses is as it ought to be and the cap on the expansion bottle pressurises properly, all things that weren't happening before. Diagnosis: really bad airlock, now resolved. The bad news is that I think I've cocked up the static timing, the engine now hunts badly and won't run without some choke applied. My current thinking is that I need to reset the static timing properly and fiddle with the mixture setting on the carb as it's probably running too lean so that's something to look into. However, I am happy that the car no longer overheats, even under load, and the system is working as it ought. I've ruled out head gasket failure completely now, there's simply none of the signs I'd look for apparent for that. After some tinkering that confirmed rotating the distributor did nothing to alleviate the hunting, the house reeked of exhaust fumes as it had got sucked in through the kitchen window (just as well Mister Bunny was out of harms way). Since the car was running, I thought it would be sensible to turn him around under his own power, which went swimmingly until I got stuck.  As I came off the bottom of the drive, the corner of it that had begun to break up collapsed under the weight of the Polo, leaving one wheel stuck in a hole and the other on slippery mud. I tried very, very hard to free the car, chocking the wheels, putting stuff with better traction under the wheels (which mostly just gripped the tyre and slid on the mud, scooting out across the lane), using smooth and even revs without too much power... but all the theory failed me in practice and I had to admit defeat and call my Dad.  He and my brother have rescued stuck cars before, so they knew what to do. A bit of weight over the passenger side wheel got the much needed traction on the rough concrete slab I'd been using to try and get better traction than the mud, and the car was driven up onto the drive by my brother. When he came to a stop, he put the handbrake on and the cable decided that was the perfect time to snap, adding itself to the list of things I need to buy or fix.  If it's not one thing it's another! I'll add it to the list. Still, the car did make it up the drive under his own power, allbeit hunting and running a bit rich because of the choke, and we chocked the wheels before putting him to bed for the night.  I had better update the plans for the car now on what needs doing I suppose. > MoT > Road Tax > New backbox > New handbrake cable (unless existing one can be repaired) > Finish trimming and fitting new headlight brackets > 3 Sealed beam headlights (got one already) > Fit new sidelights > 2 good tyres (at least) > Finish grille > Retrim new back seat > Finish off the paint > Lots of cleaning in the engine bay. Not a huge list, but a lot of work to get it all done. I'm just happy my little car is sorted, and it *does* feel little after tooling around for a while in the Princess. Most of what needs to be done won't cost any money, thankfully, as I don't have any money at the moment. |
| |
|
|
dw1603
Part of things
Posts: 591
|
|
May 30, 2012 23:01:30 GMT
|
|
Well done! You really seem to be getting the hang of this mechanicing business now, you must have been so pleased when it burst into life. Hope thats the end of the cooling system woes.
|
| |
|
|
cianha
Part of things
aka VDubbin
Posts: 923
|
|
May 31, 2012 13:32:47 GMT
|
|
Sorting stuff out on your own is a great mojo boost, and it's great to hear the engine running again!
Why the sealed beam units? Are they a necessity or a choice? It seems odd to use them when everyone else is getting rid of them in favour of more modern projector units and halogens? That said, there's probably a few MX5 owners here who could still have old units lying about?
|
| |
|
|
|
|
|
May 31, 2012 16:25:35 GMT
|
|
dw: I was elated, felt like a bit of a milestone in my learning.
vdubbin: Personal choice, really. The original Polo lights are rubbish, I don't really rate them. Twin sealed beams up front will give me a quality and colour of light I prefer and aesthetically, the lights themselves will look that bit better to me. Everyone seems to want super-bright lights these days and I get a bit fed up of being dazzled by them, that and I don't think many of the new lights look that appealing.
|
| |
|
|
|
|
|
May 31, 2012 20:21:18 GMT
|
|
On the subject of sealed beams- note that with quad lights it's wise to find the proper single-filament high beams for the main beam (usually inner) lamps, coupled with the twin filament dip/high lamps.
On high beam the single filament ones make night-time driving quite bearable.
It's also worth trying because you amn't allowed two headlights to be lit on each side anyhow. Two sides, yes, two mains yes, but not two dips.
Oh, and if you are after the sealed beam look but want something with a bit more oomph, try the old trick of calling up someone like CSE in Oxford and ordering some landing lights. Quite a lot of small aircraft use similar/same size lights and have 12v systems. Old trick.
--Phil
|
| |
|
|
|
|
|
May 31, 2012 21:18:10 GMT
|
|
That's a very sneaky trick, I would never have thought of that. In the meantime, I'll just go with the standard bulbs, and the Princess has taught me the difference in dip and main lights. I've got to find the best location for the Austin 'torpedo' sidelights, I think they're from an A35, got them cheap from eBay and they just need new bulbs and wires to be fully operational.
It wasn't until I got the quad lights and Dad asked me where my sidelights were that I realised I had to buy some! Thankfully, the Austin torpedoes came up cheaply enough that I didn't have to go with my brother's suggestion of using some plastic caravan sidelights.
Soon as I can find the angry grinder and can get on with finishing the front end. I want the Polo to be road legal by my birthday in November, so that's the target I've set for myself, which is completely unreasonable given the current financial situation, heh.
|
| |
|
|
bortaf
Posted a lot
Posts: 4,549
|
|
May 31, 2012 23:38:58 GMT
|
Not sure what size yours are but on an old cortina i ran capri twins and used KC daylighters as the main beam, great for B roads but had no beam pattern for the MOT  |
| |
R.I.P photobucket
|
|
|
|
|
May 31, 2012 23:55:00 GMT
|
|
Most twin filament sealed beam lamps there have a little window at the bottom of the silvering for a sidelight to shine through.
-Phil
|
| |
|
|
|
|
|
Jun 12, 2012 22:14:02 GMT
|
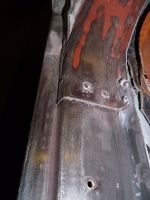
Here we go, update time. After some fears that I was going to throw in the towel for no reason that's readily apparent, I've been convinced to stick at it and set some goals and actually make some proper lists of what needs doing. I think I've been suffering from a lack of direction with the Polo, probably due to my life as a whole having a lack of direction of late. Buying the Princess kept me on the road, but probably exacerbated my issues with the Polo and he's therefore been neglected. Today, after determining initially to make up a Want and a Need list, I actually did something productive again, the first time I have since sorting out the air lock in the system. Once I'd bolted one front wing on and made the car look more like a car I realised that maybe it was foolish to give up, it started to remind me of why I was building what I'm building. Sounds a bit daft really, but it really is less disheartening to see the Polo looking more car shaped and less abandoned. After I'd done this I started to get to grips with resetting the timing that was out and causing the lumpy running. As if by magic, Dad appeared to have a natter and ended up helping me understand how to set the timing best since the Haynes Book of Lies was of little significant help in the matter. To set the timing, we first needed to find out where the timing marks are, as follows. I had a wheel brace in the toolbox that was the same size as the pulley nut, how handy.   This demonstrates how far off the timing was, fat lot of good the HBOL was helping me to set that up.   Then, it was a case of getting the bottom timing mark to line up properly, slacking off the water pump bolts and removing the timing belt so we could rotate the cam pulley to get the timing mark there to line up too. Once that was done we found it was indeed one tooth out as had been suggested previously, so all was rebuilt and tightened up, the water topped up to replace what was lost and the key turned. With a bit of choke the engine fired up and ran almost evenly, certainly a lot better than it had before. A few adjustments were made including tightening up the throttle and choke cables a bit, which helped further, but we couldn't get the engine to idle without a smidge of revs or choke. More headscratching was done and the carb fiddled with a bit. Eventually, the mixture was made a lot richer and that replaced what the choke was effectively doing. The car will now run at idle, but it's set up badly and the timing is still out. We investigated the timing again and now the timing belt appears to be half a tooth out, but I'm not sure how that can be or how to rectify it, or if that's the cause of the problem. Before this running problem everything worked fine and hadn't been fiddled with, it's like the running problem has just appeared. The prime suspect at the moment is the carburettor, a known problem on these engines. The rubber gasket under the carb is brand new so I don't think it's sucking air in from that even though it's behaving a little like it did when it was. The head gasket is not, as previously suspected, blown and the system is pressurising and temperature regulating as it should. I'm out of my depth again with this one, I really can't figure out what's causing the problem. Here's a clicky video of the engine running, that loud squeaking is most likely the water pump that, apart from the noise, is doing the job it should do.  Once we'd got the engine to the above state, where if I had to I could drive it, I gave him a wash. Looks a bit more like a car, I don't feel as meh about him as a project now I have a short term goal and am not worrying about the long term and just maybe I can get to the bottom of this problem and get things moving again.   The goal is to have him ready for an MoT by my birthday at the start of November, but not to necessarily have to put him through said MoT. Here's my lists, I'll go around the car again tomorrow to see what I've missed and maybe tick some things off. NEED (to get the car on the road) > Refit passenger side wing. > Refit driver's side wing.> Refit bonnet> Replace fuse borrowed for Princess > Sort windscreen leak > Fit headlights > Fit new grille > Paint bulkhead repair so that I can: > Refit dashboard > Fit horn > Refit air box & filter > Refit back seat > New backbox > Fix/replace handbrake cable > Fit sidelights & bulbs inc. new wiring. > Fit mirrors. > repair back valance (gaffer tape if need be) WANT (to get the car where I want) > Finish paint > Fit pop-out rear windows > Fit Bruce wheels > Fit chrome trim bits > Acquire and fit exterior sunvisor > Whitewalls > Smooth boot properly > Acquire and fit spats > Rear light mod > Retrim new back seat > Construct and trim new door cards > Clean, trim and fit Lexus carpet > Construct and fit new headlining > Retrim boot area > Acquire/fabricate and fit interior sun visors. It feels a bit more directional now, as though I know where I'm going rather than just flailing at picking at the seeming mountain of jobs. Dividing stuff up into Want and Need has really helped me gain some perspective because most of the stuff I though I 'needed' to do is actually on the want list which gave an inflated sense of what's left to achieve. |
| |
|
|
|
|
|
Jun 12, 2012 22:28:53 GMT
|
Once I'd bolted one front wing on and made the car look more like a car I realised that maybe it was foolish to give up, it started to remind me of why I was building what I'm building.
Lots of other awesome stuff...;D ;D ;D This update makes me very happy. ;D ;D ;D |
| |
|
|
|
|


 [*]
[*] [*]
[*]

