|
|
|
Sept 13, 2010 21:01:13 GMT
|
|
I'm always amazed at how easy you make these jobs look, especially since they're finished to such a high standard.
|
| |
|
|
|
|
|
|
|
Sept 13, 2010 22:04:09 GMT
|
|
l love ur car my dad has one very mint no rust in green.He bought it 1984 l beliv its a 80 or 81 model not sure.He lives in SouthAfrica and l want to bring it here,will try to post pictures when l go there.
|
| |
|
|
|
|
|
Sept 13, 2010 22:50:58 GMT
|
|
I didn't think repairs to such a high standard were possible untill I saw your Victor thread, truly mind blowing stuff.
|
| |
|
|
|
|
|
Sept 14, 2010 18:17:55 GMT
|
Carsie - Crispy notes are a good starting point  volksangel volksangel - Its mainly down to practice, and a couple of good techniques, its nothing that anyone can't learn Lenhard - Look forward to seeing your pics, the E12's continued on in South Africa for about 4 years after the UK, and there are still some good cars out there Schrickvr6 - I firmly believe that anything is possible if you take your time and put your mind to it
|
| |
|
|
|
|
|
Sept 14, 2010 19:24:39 GMT
|
|
Amazing skills you got there, cant wait to see how the e12 will look in the end Top work!!
|
| |
Sig pic too big!
83 MK1 Golf 1.3 Driver-sold
83 Mk1 Golf GTI Pirelli-sold
95 BMW 520i Individual-sold
94 BMW 525i Sport-R.I.P
04 Audi A4 1.9TDI 130-55mpg:)
|
|
david
Part of things

Posts: 55
|
|
Sept 15, 2010 11:34:35 GMT
|
I'll need to work on my patience then  your welds turn up very flat! I've been experimenting with copper backing as heat sink but then I have to set my MIG to a much higher amp to get proper penetration. But I guess the copper actually reduces cool-down shrinkage? In any case I've got a way to go untill I can produce welds like yours David You are dead right re the copper acting as a heat sink, I would only use that where you were trying to fill a hole or a large gap, otherwise as you say you will have to turn your welder up and then you end up with more distortion, what you can do though is clamp the copper adjacent to the weld, that way it will work as a heat sink to minimise distortion, without actually affecting the weld hmm. thats a good tip. your comment got me thinking about how metal moves when welding and got me to a better understanding of it Shrinking is caused by rapid heating and cooling. and how much shrinking there is, is affected by how much the surrounding metal expands when the weldpool is liquid en solidifies. Hence, reducing heat in surrounding metal decreases the amount of shrink because it expanded less when the pool was molten! Does that sound about right? |
| |
|
|
|
|
|
Sept 15, 2010 18:05:41 GMT
|
|
David
Almost right, you are really getting the hang of this now,
It is really the weld itself that shrinks more than the surrounding metal, hence if you try to keep the weld as cool as possible by welding in short bursts to start with, then again the distortion, or shrinkage as you rightly point out is reduced.
If your weld was laid down huge and hot then it contracts at a greater rate, this causing more distortion
That is also why if you gas weld a joint, you can hammer it after to remove the distortion, as you reffered to in an earlier post, as this has the effect of stretching the weld area back to where it was before it shrank, it is often wrongly assumed that welding distortion is the metal expanding, but it is actually the metal shrinking, hence why most distortion in panels has a BOING affect when you push on them, the way to get rid of it is to stretch the panel.
This is not to be confused with distortion from impact or crash damage, as that is the metal stretching and it then needs to be shrunk to get it back to shape
It has been said, but I have never personally tried it as I don't have gas welding gear, that part of the problem is the differing metals between the panel and the welding wire contracting at different rates this increases the distortion, and that if you can fuse the 2 parts together without the use of any welding wire, then distortion will be greatly reduced. But to do this you need to be very good at welding and make sure your repairs are very tight and edge to edge before you start to weld them
As an example of this when I used to work on the shop floor, if we had a gap in a joint of box section or something like that, we would tack it first, and then systematically heat each tack up, and each time it cooled it would pull the joint closer together, until eventually it was tight and then we would fully weld it, also if you had a spar that was slightly out of square you could square it up by laying the weld down in a specific direction, what would happen is that as you welded along the joint the weld got hotter and hotter, and therefore the point that you finished the weld would be hotter than the point where you started the weld, and the hotter point would shrink more and the spar would be pulled that way, obviously if you welded it the wrong way then the spar would be pulled the wrong way and it would be more out of square, for this to work effectively though you must only have small tacks, as a large tack can hold the joint and prevent it from moving.
I am sure I have said it before, but once you understand how metal works, it becomes much easier to manipulate it
Hope this helps and I have not made it too complicated
Tony
|
| |
|
|
|
|
|
Sept 15, 2010 18:40:58 GMT
|
|
|
| |
|
|
|
|
|
Sept 15, 2010 20:17:41 GMT
|
|
You are right,they did carry on for a few years in SouthAfrica.You can pick up E12s with the E28 dash board,interior and engines.There are a handful of custom made E12 with the E23 745i turbo don't know if you ever heard or seen them.They where all done in the 80s.
|
| |
|
|
|
|
|
Sept 15, 2010 20:25:12 GMT
|
|
Good work!!!
|
| |
|
|
|
|
|
|
|
Sept 15, 2010 20:58:11 GMT
|
oh yeah! awesome |
| |
|
|
Carsie
Part of things
Posts: 127
|
|
Sept 15, 2010 21:19:55 GMT
|
Lol ! Yeh- nice to see your work Tony Very good ....very, very good indeed No surprise the painter didn't match your standard. The photo's were pre- painting, at mask up stage yes? Great to see how it turned out. How you getting on with your's? |
| |
Last Edit: Sept 15, 2010 21:24:14 GMT by Carsie
|
|
Davenger
Club Retro Rides Member
It's only metal
Posts: 7,272
Club RR Member Number: 140
|
1981 BMW E12 M535i - GoldDavenger
@dminifreak
Club Retro Rides Member 140
|
Sept 15, 2010 21:25:55 GMT
|
|
I love E12s
Top job dude
|
| |
|
|
|
|
|
Sept 15, 2010 21:57:54 GMT
|
|
The photos above were actually after the second paint, what you cant see in the photos is the repair marks in the basecoat, so once I pointed these out to him, he painted it again, and to be fair the base coat has been well applied this time, its just the lacquer that has imperfections, but I can deal with those later.
Unfortunately all this work on other peoples cars, means that mine are being ignored for the moment
|
| |
|
|
david
Part of things
Posts: 55
|
|
Sept 15, 2010 22:16:22 GMT
|
David Almost right, you are really getting the hang of this now, It is really the weld itself that shrinks more than the surrounding metal, hence if you try to keep the weld as cool as possible by welding in short bursts to start with, then again the distortion, or shrinkage as you rightly point out is reduced. If your weld was laid down huge and hot then it contracts at a greater rate, this causing more distortion I am sure I have said it before, but once you understand how metal works, it becomes much easier to manipulate it Hope this helps and I have not made it too complicated Tony Your explanation confirmed what i had in my head but i failed to explain it properly in my last post. From what i understand, the shrinking effect goes as follows. 1. Heat enters the metal which makes it expand (temporarily) and puts the panel under tension 2. Heat makes a weld pool. This metal loses its structural strength. 3. The surrounding metal that has expanded by the heat, releases its tension, which moves the metal into/closer to the weld pool. 4. Weld pool cools and solidifies, regaining structural integrity 5. Welded area cools and contracts 6. surrounding metal contracts to its original dimensions. Weld pool contracts as well, pulling surrounding metal in. creating warpage. Thats why i said that reducing heat in the surrounding metal -> reduces the expansion of it -> reduces the amound that is sucked into the weld pool -> reduces warping This is all much easier with a proper drawing but making it on a computer is a pain. I've seen a professional use play-dough or something similar as a heat dam to prevent large scale expansion of surrounding metal. ( saw it in a youtube movie about rust repair featuring a guy with long hair but cant find it now) does this make any sense? |
| |
|
|
|
|
|
Sept 15, 2010 22:33:49 GMT
|
|
David
Yes that about sums it up, but I am not convinced that the putty will prevent distortion, probably only help to reduce it, as it will only have an affect on the surrounding metal and not the weld itself, although I guess if the surrounding metal stays cool then the weld itself will stay cooler
|
| |
|
|
david
Part of things
Posts: 55
|
|
Sept 15, 2010 22:45:57 GMT
|
sorry, used wrong words again (English isn't my mother tongue) completely preventing shrinkage is pretty much impossible. reducing it certainly is (up to a point) now i just need to practice more... i'm too often a thinker and not a doer thanks for the insights |
| |
|
|
|
|
|
Sept 16, 2010 17:58:33 GMT
|
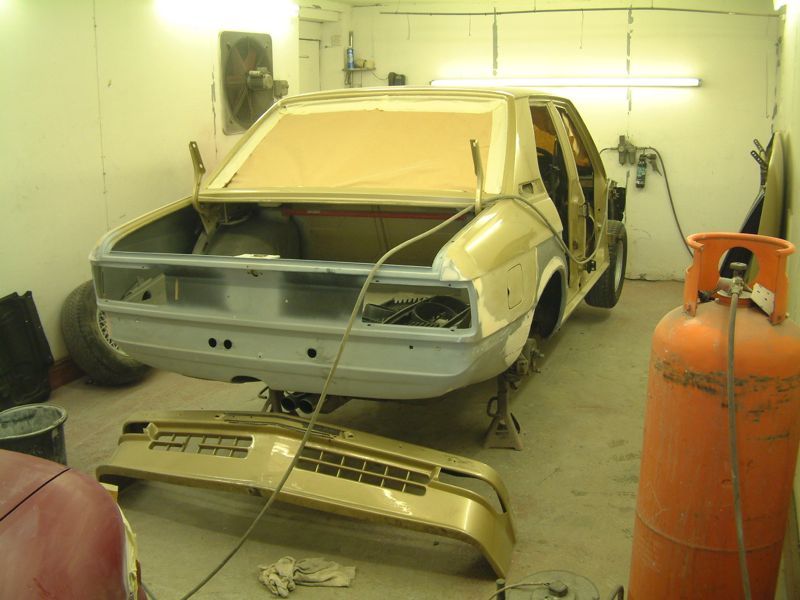
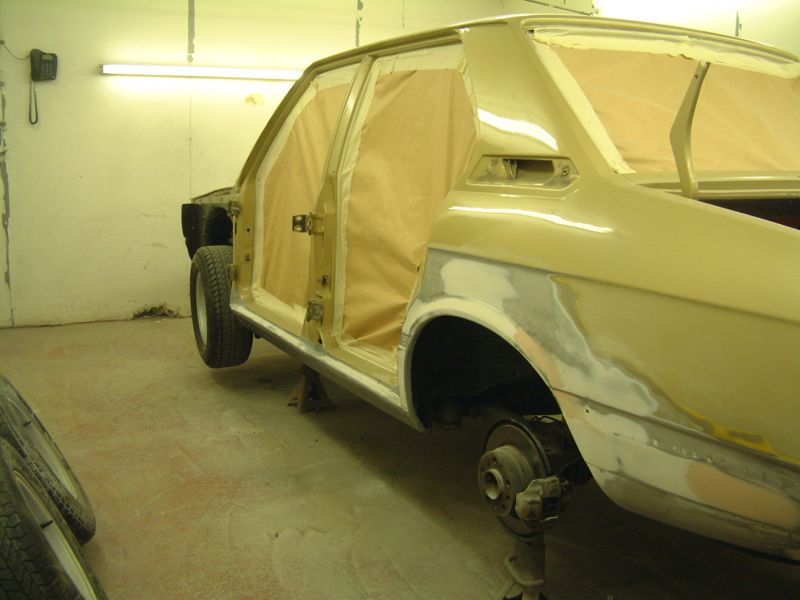
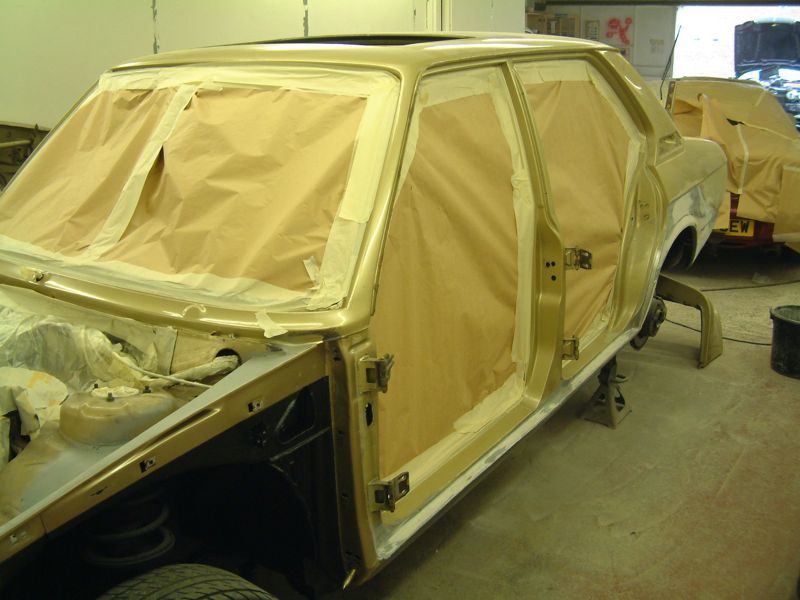
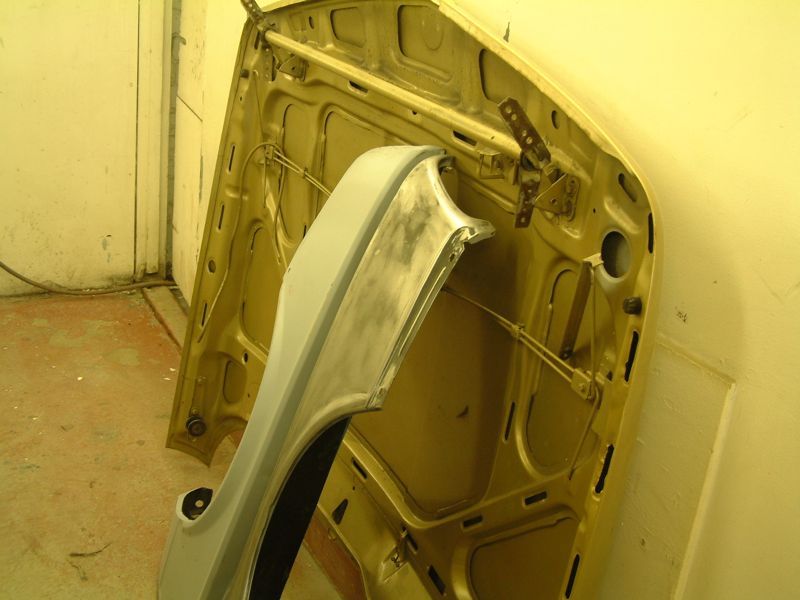
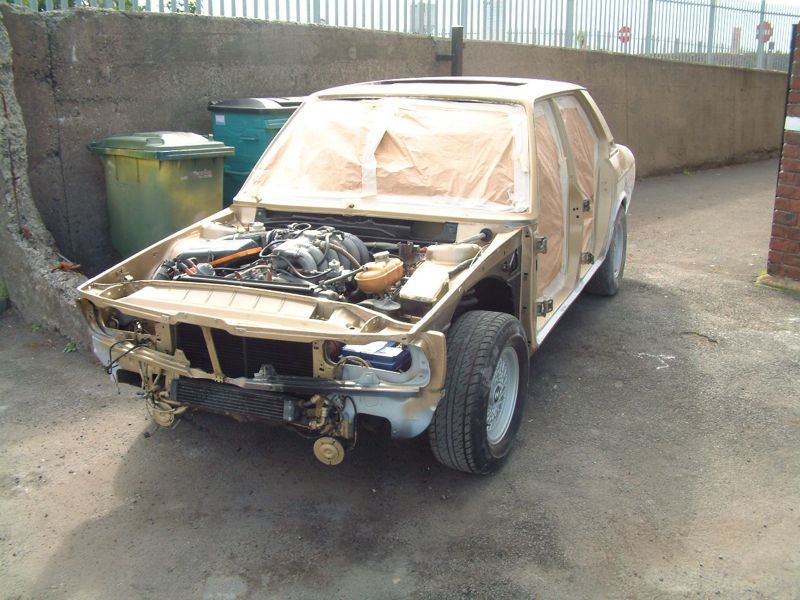
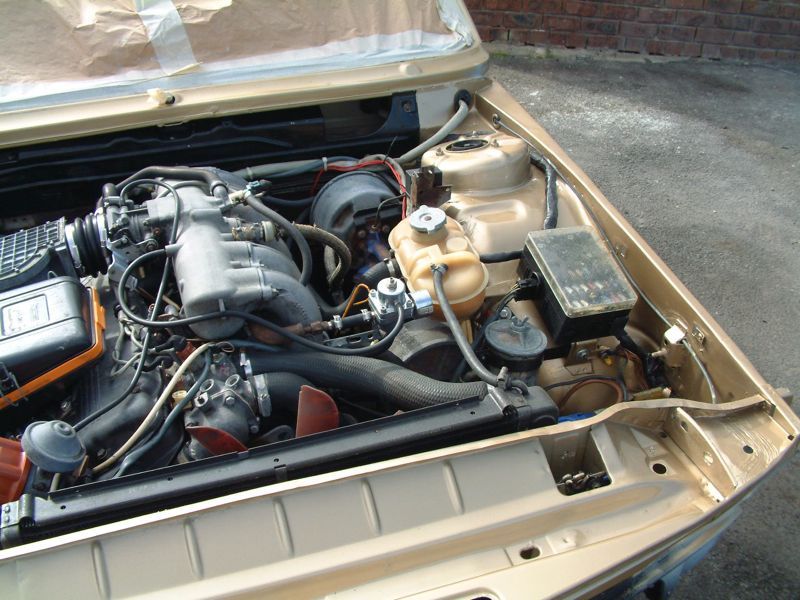
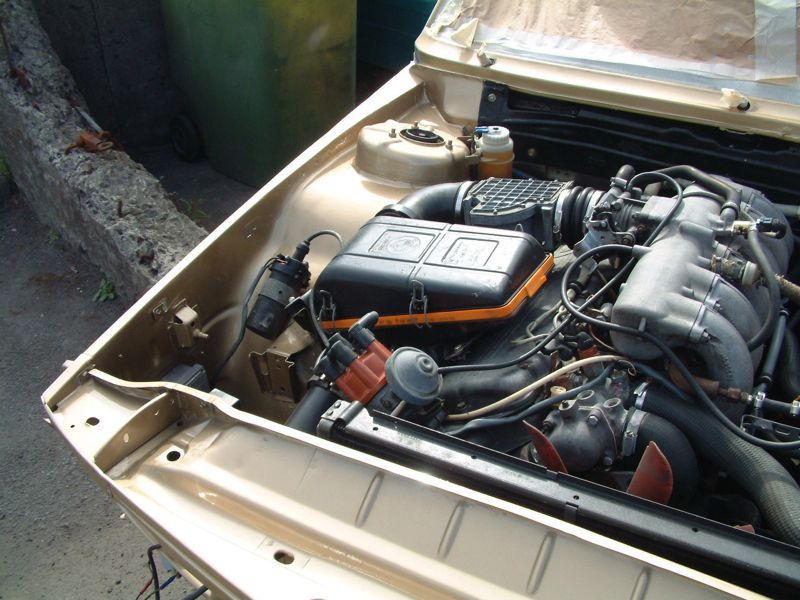
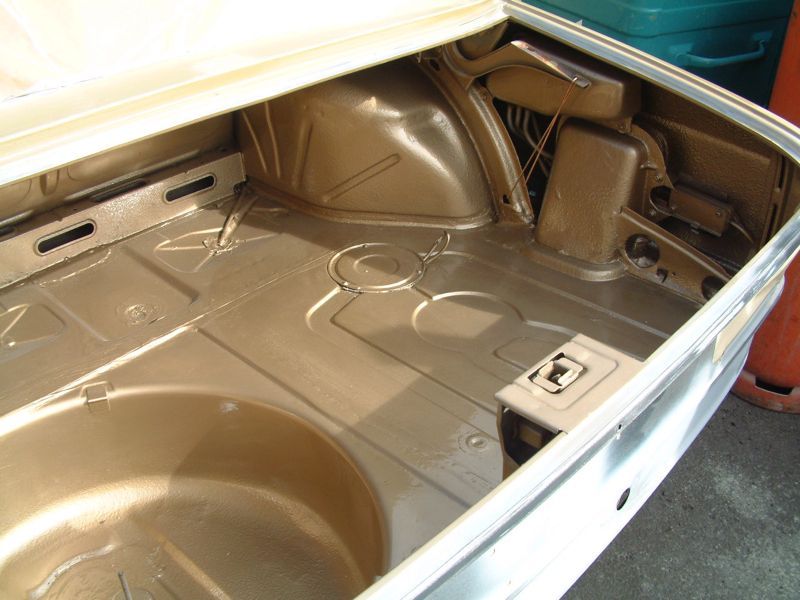
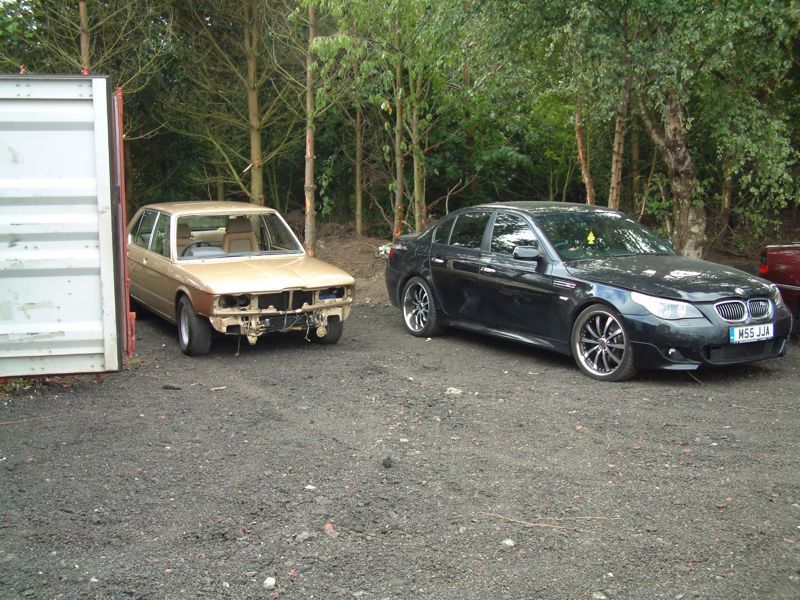
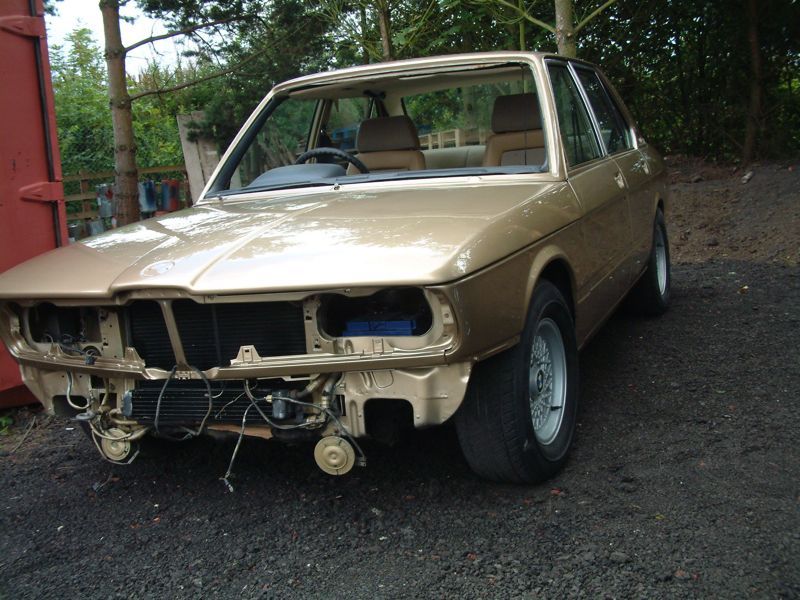
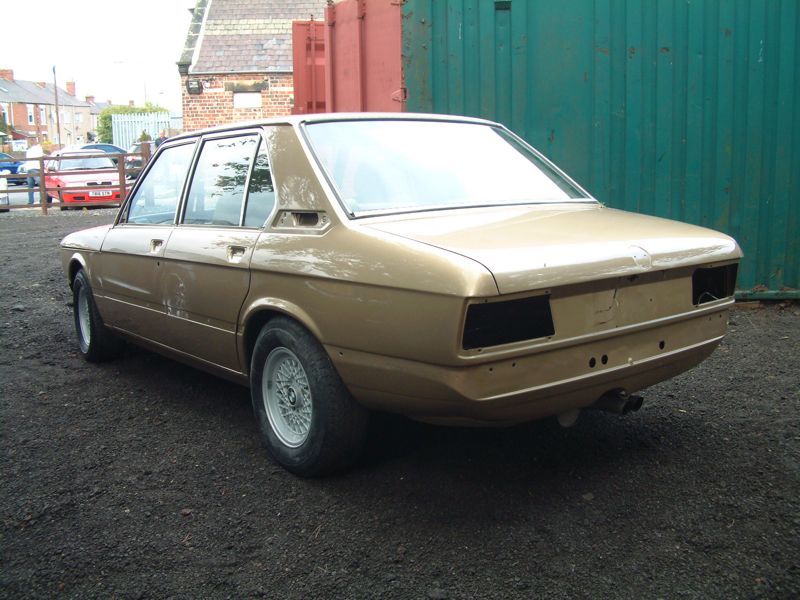
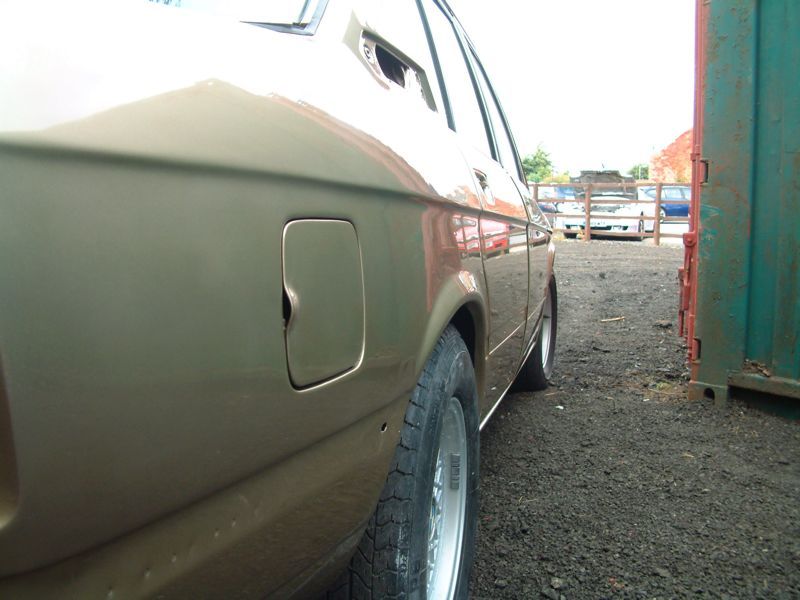
So got the car home 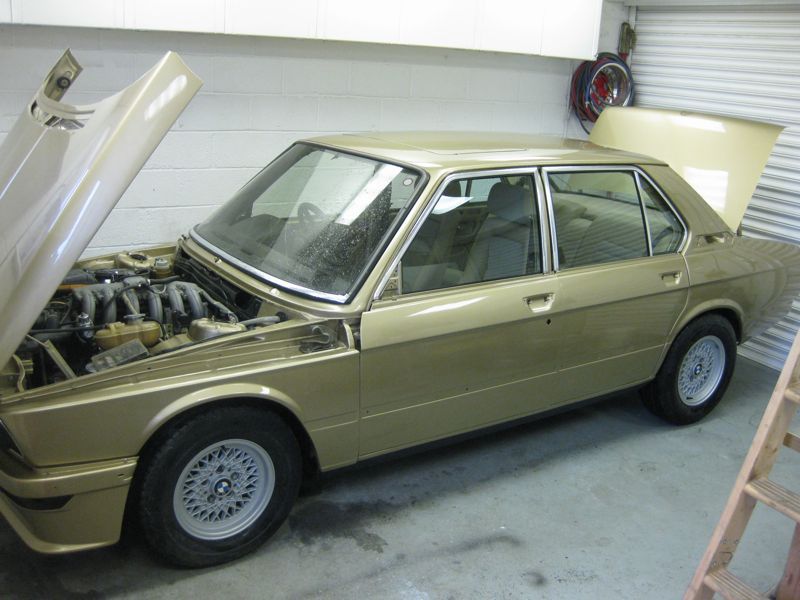 First job was to flatten and polish the sides to remove the imperfections in the lacquer, ignore the terrible panel gaps and door alignment, the painter also did not understand how to adjust the doors properly, 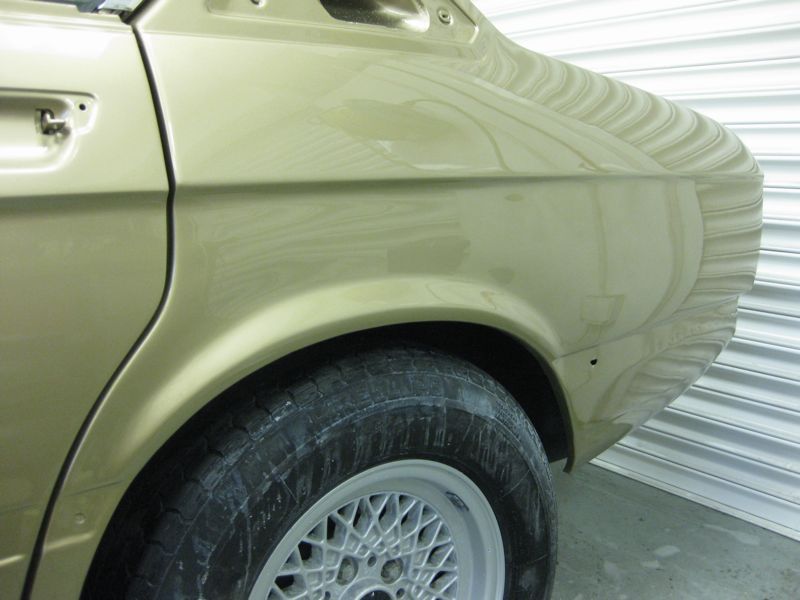 Doors aligned and polished, starting to refit the trims 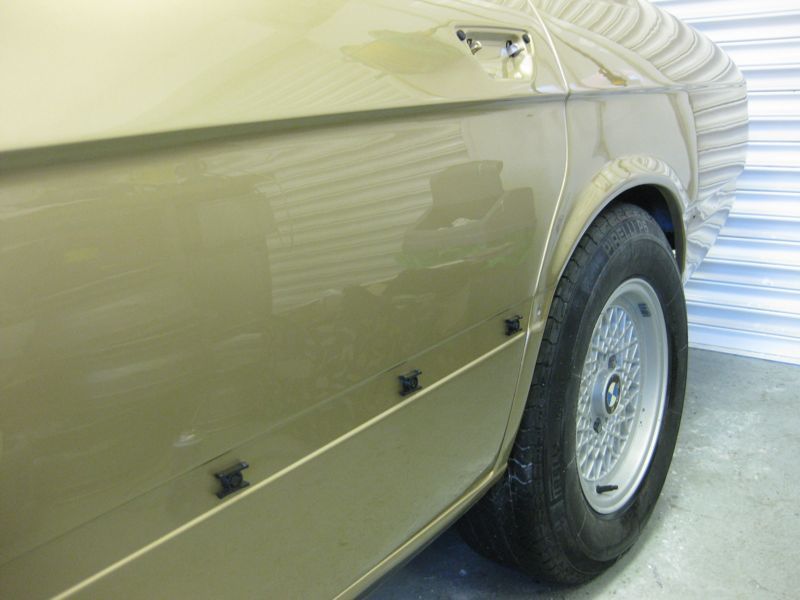 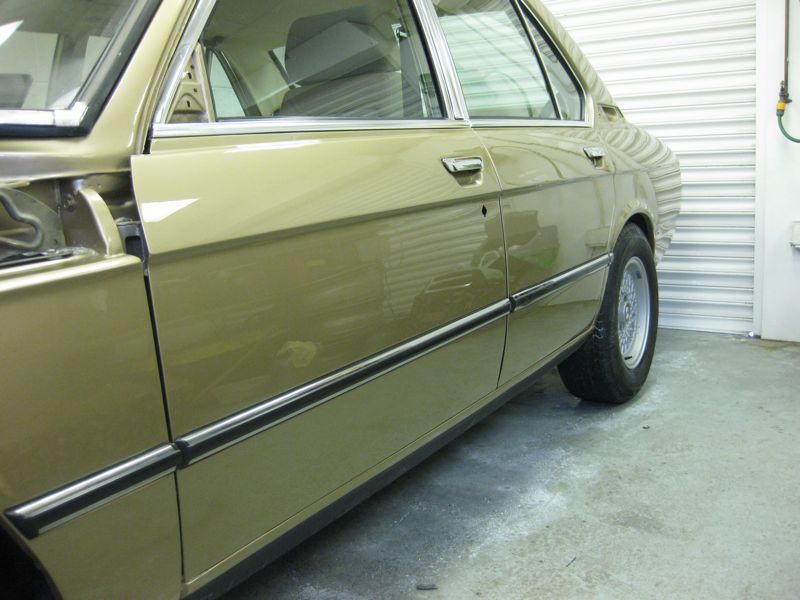 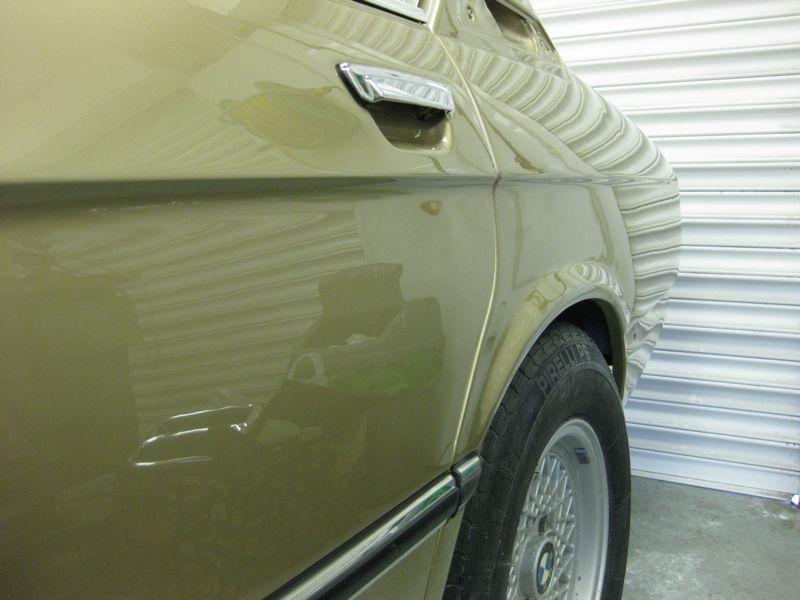 looking much more complete now 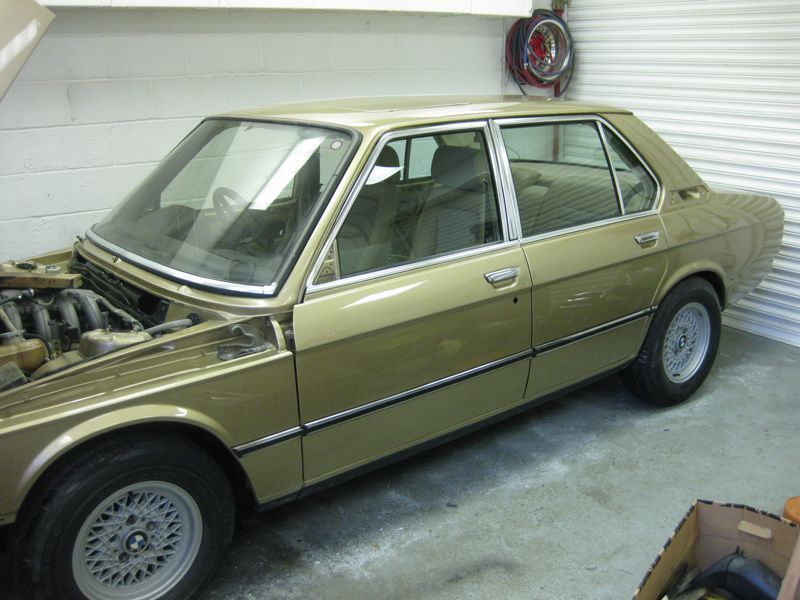 then turn around and repeat on the other side 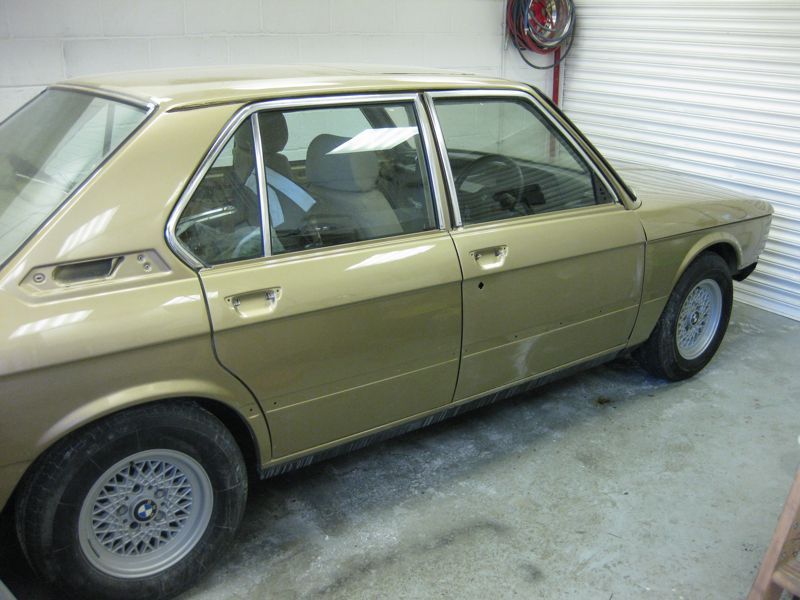 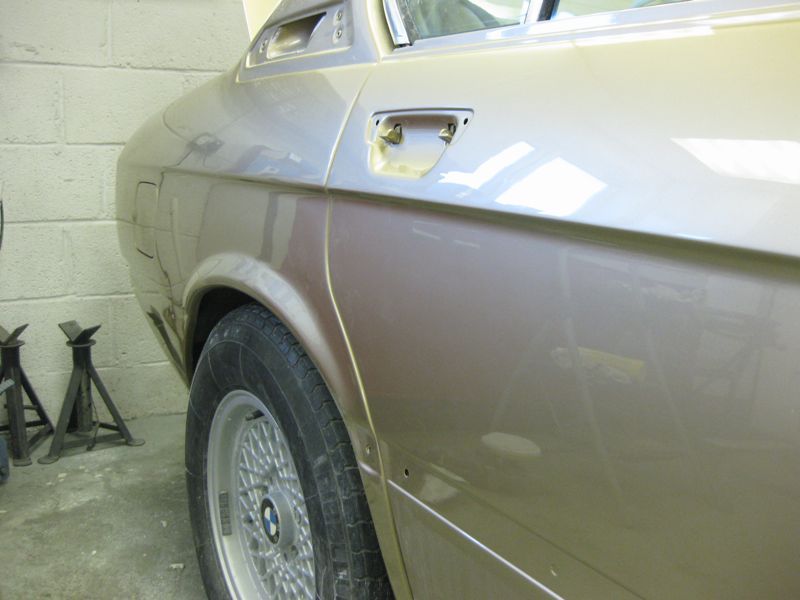 front spoiler gets built up 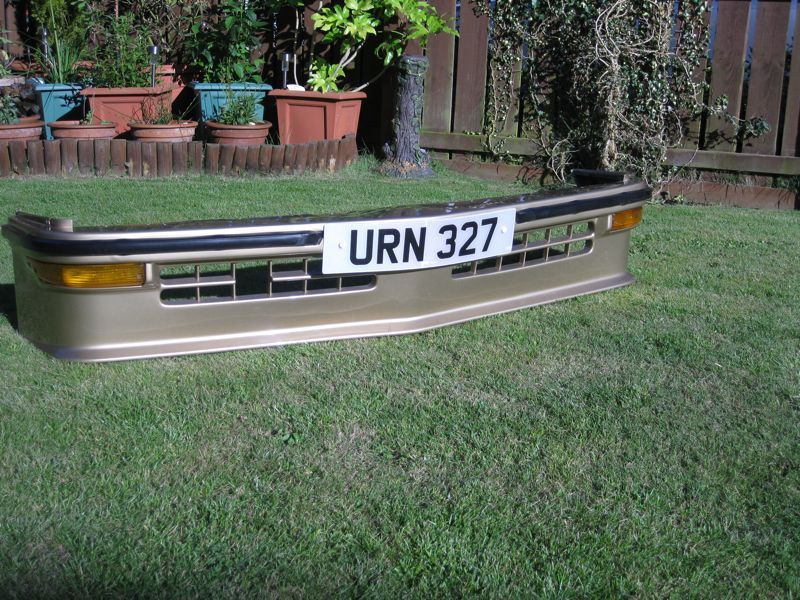 and grills start to get refurbed 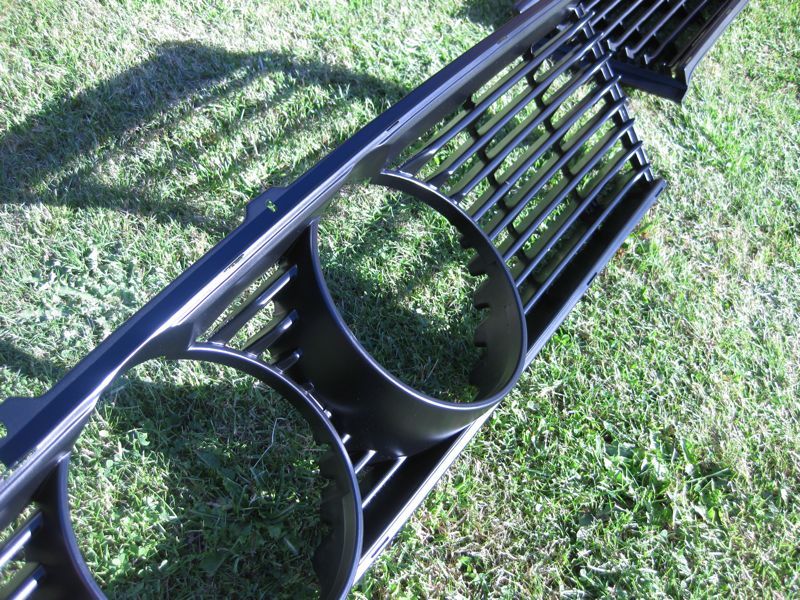 I could not get the rear bumper to sit right, I had tried it on when I fitted the back panel , but had made the mistake of not tightening it up, as when I was doing that now, it was being pulled out of line, after much head scratching I discovered that the rear bumper brackets were twisted, I suppose that makes sense as to why the rear panel was full of filler Fortunately I had some good ones to compare with bent bracket on the left, good on the right  |
| |
|
|
|
|
|
Sept 16, 2010 18:01:59 GMT
|
This really is fantastic all over again Tony, I almost feel guilty asking if you fancy sorting out the pans on my E28  |
| |
|
|
mirafioriman
Posted a lot
My next project.......
Posts: 1,361
|
|
Sept 16, 2010 21:39:12 GMT
|
|
Always liked the E12 and this one looks lovely. Work has stalled on my Fiat 130 for various reasons but I hope to get it done in the near future.
|
| |
|
|
|
|


 your welds turn up very flat!