bstardchild
Club Retro Rides Member
Posts: 14,886
Club RR Member Number: 71
|
|
|
|
|
^ WHS
Thats just lovely - never been a fan of Daf's but it's great to see one saved and some real effort put into it
Well done
|
| |
|
|
|
|
|
|
|
|
|
|
Yo super Joe you finished this one yet?
Having followed the DAF club thread intently Joe is putting some major work into it, but having tested my 44 against a 33 those extra horses help. Especially when a 32 is not quite as powerfull as a 33 anyway. Hopefully both Gladys and Sophie will join you at Henblas and I can see Matilda in the flesh
|
| |
|
|
Sinky
Posted a lot
 Run Baby Run......Please!
Posts: 1,395
|
|
|
|
|
WOW!!
Nice find and great that your bringing it back to its former glory.
Well done.
|
| |
2001 Volvo XC70 wagon
2003 Piaggio X9 Evo
|
|
|
|
|
Mar 18, 2011 19:57:41 GMT
|
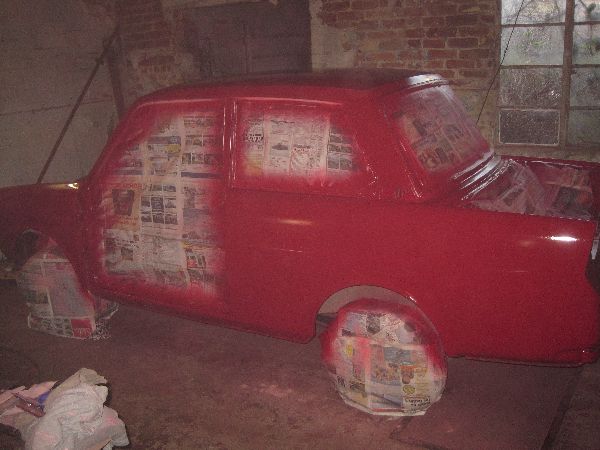
Well, there's more to report from Anglesey Daf (there are now unofficial Daf centres in Derbyshire, Essex, South Wales and Anglesey - at this rate the club will have more outlets than the old dealer network ;D ) The brake plumbing got held up a bit by a problem with the bulkhead-mounted vacuum valve leaking air:  This valve uses brake line pressure to divert engine vacuum to the transmission to force a down-change when the brakes are applied. It has a piston with a cup seal which was sealing fine under pressure from the brakes but leaking air back into the brake system as the pressure relaxed. It's a 10mm piston and couldn't find a seal anywhere, so a bit of rethinking was needed. Adding an O ring in a groove behind the existing seal seemed worth trying: 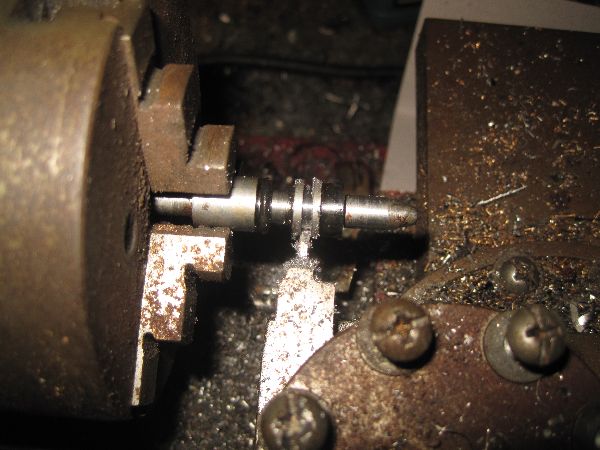 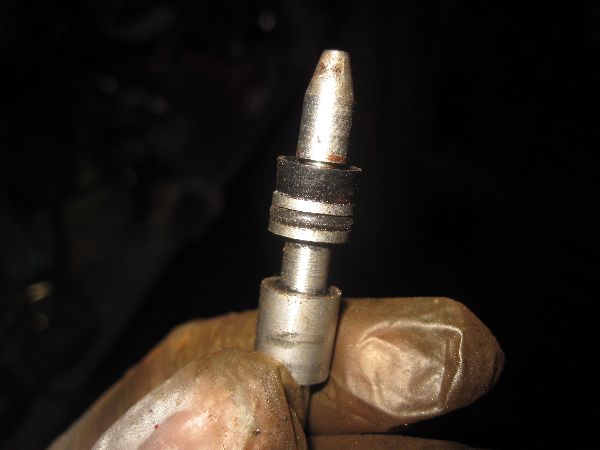 And she now has fully working, successfully bled, brakes  That let me finish assembling stuff round the engine bay to give her steering (with a rebuilt rack) and front suspension. She's also sitting back on her wheels with a nice new set of tyres: 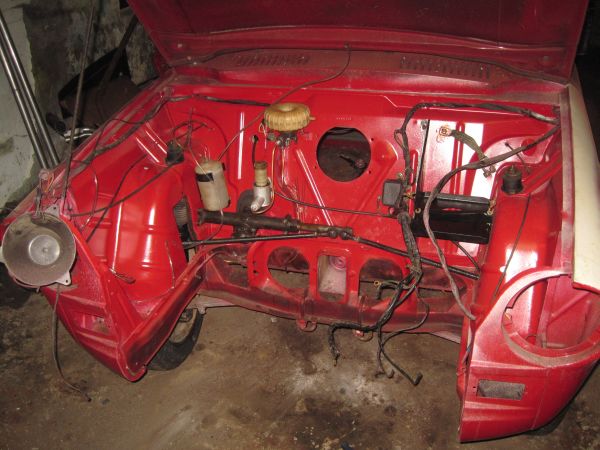 So yesterday bodywork started with a little light digging at the various bubbles on the bonnet with a flap wheel: 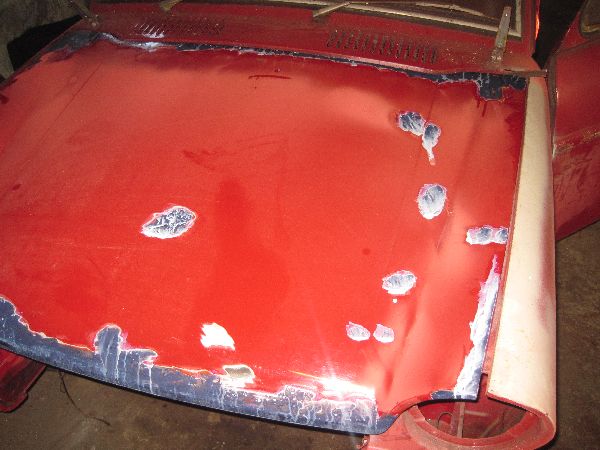 And removing the rear side windows: 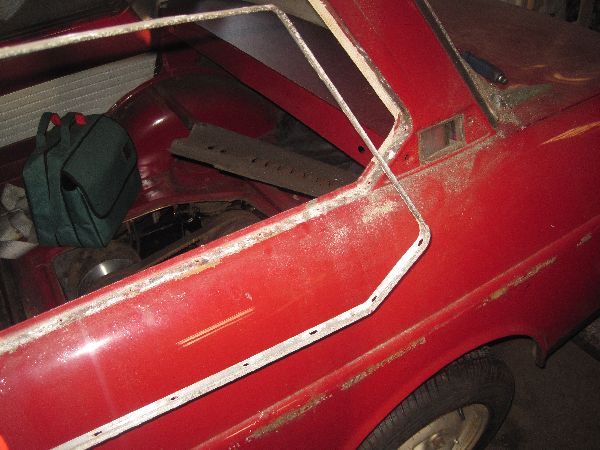 Today was helped by our workshop's landlord fishing into a corner and bringing out a DA sander. I've always been just a little sniffy about these as just a lazy way to "save some effort" but I'm now 100% convinced because of the time saving! Started off by going over the bits of the bonnet I'd de-rusted in order to feather the paint edges. That took about 10 minutes: 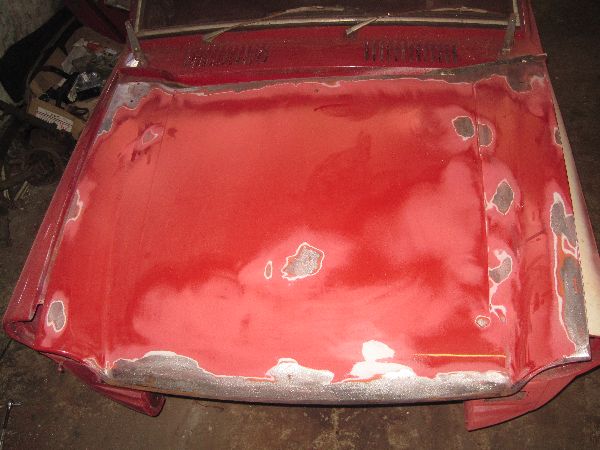 So then I spent another 10 feathering the n/s wing that I'd rust treated before Christmas. There was another side to that which I'd been looking forward to finding out - just how well had the etch primer protected the metal over 3 wet months? The answer was - very well indeed! 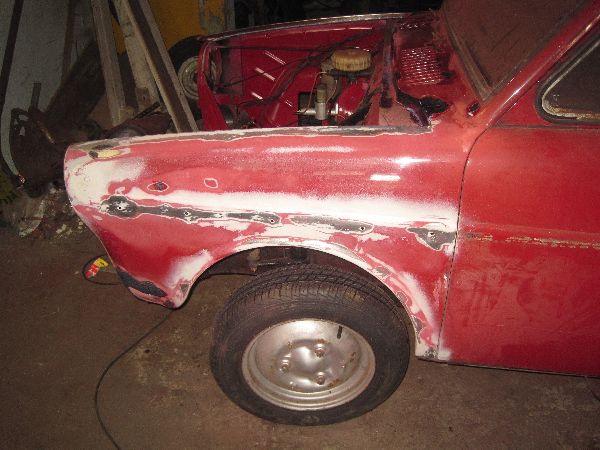 I also found a couple of spots I'd missed so ground them back and rust treated while getting on with the next bit - grinding out any bubbles from the scuttle: 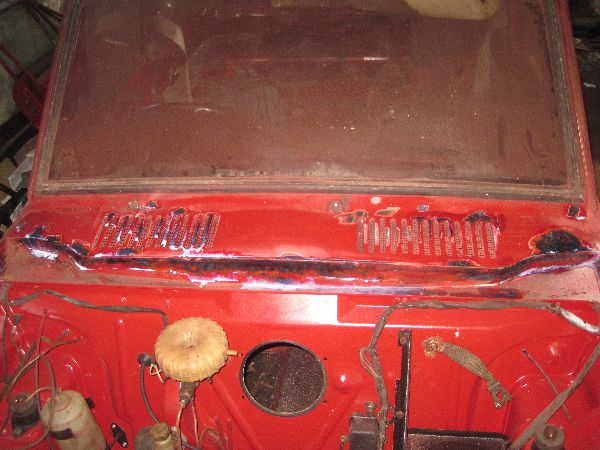 Obviously, that carried on round to the o/s wing which also got ground out and a healthy dose of Kurust:  At this point I decided that I couldn't really do the scuttle justice while the screen was in place, so peeled out the (solid aluminium!) seal trim: 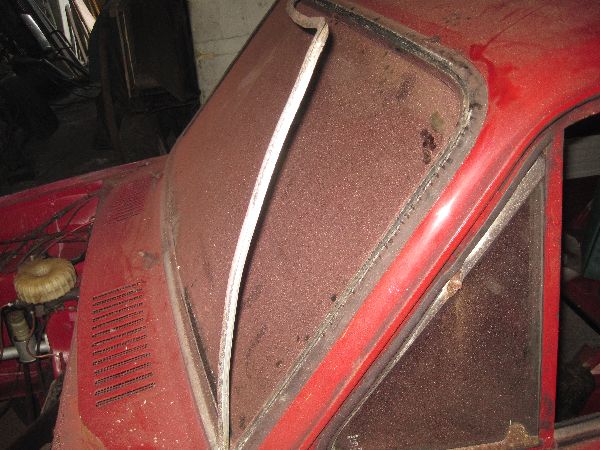 Breath was then firmly held while the screen itself came out: 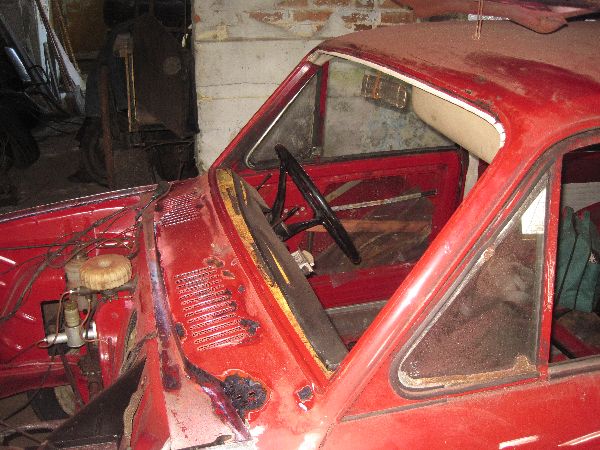 Which allowed me to remove the fairly sorry looking dash top. Not quite sure what the plan of attack is on this but I'm sure I'll think of something before the screen goes back ;D 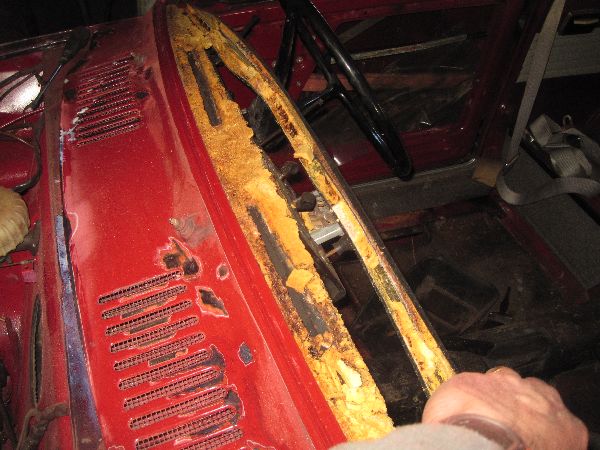 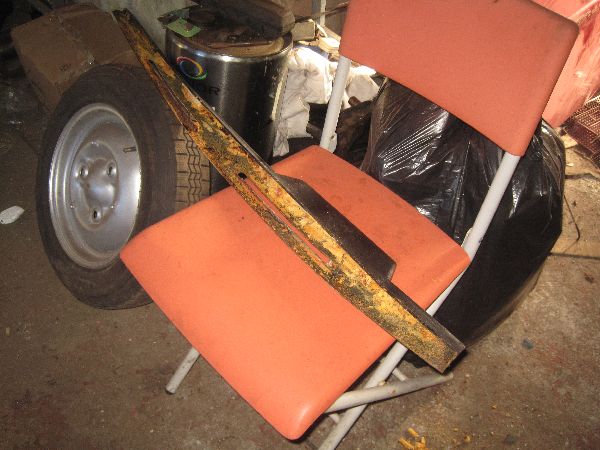 There was also the problem of the rear edges of the wings, which you can't really get to with the doors on. So: 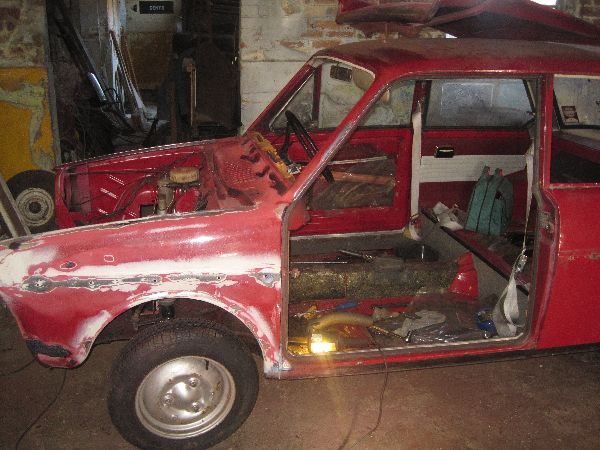 which allowed me to get in to do this: 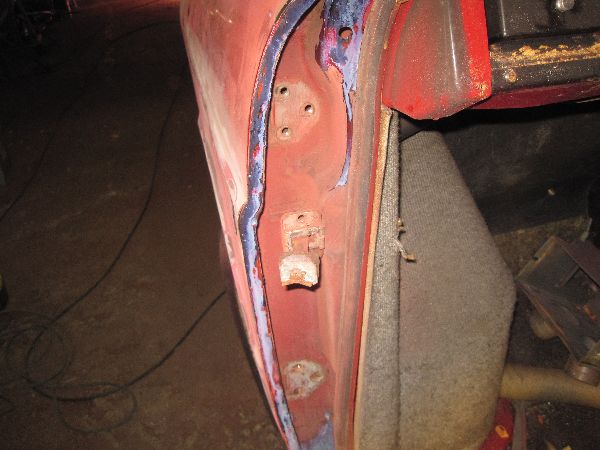 More door removal and DA action followed on the o/s and around the screen surround: 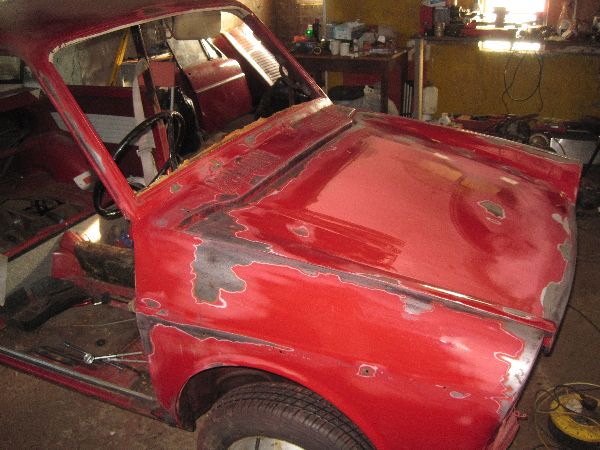 And a skim fill was applied to the areas of the bonnet that needed it: 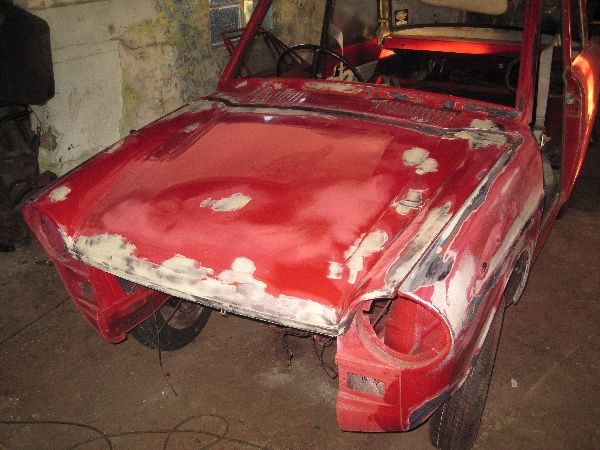 That was all for today, with the filler hardening overnight, but I don't think it's bad progress for about 3 hours. Hopefully by tomorrow she'll be primed as far as the bulkhead - about 1/3 of her done in 2 days if I'm successful |
| |
|
|
|
|
|
Mar 18, 2011 21:38:32 GMT
|
|
This is exactly how my car ended up in bits on a council garage some years ago, a case of "I'll just take this off to do that bit". Worth it though, you get to fix lots of things nice and early.
|
| |
|
|
|
|
|
Mar 23, 2011 22:55:06 GMT
|
Five days later and she's starting to actually look like she's moving in the right direction. Is it just me, or does that initial stage of grinding big holes in "looks good at a distance" paint always feel like you're going backwards even though you know it's a step forwards??? Anyway, she now looks like this, with all the rusty bits I could find ground back, rust treated, then ground back again after the converter had a chance to work overnight and etch primed: 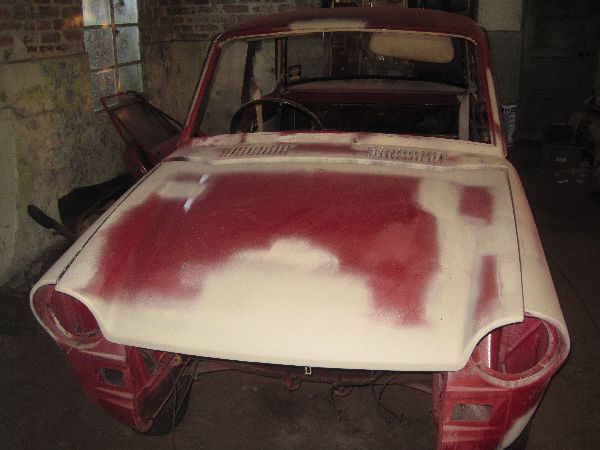 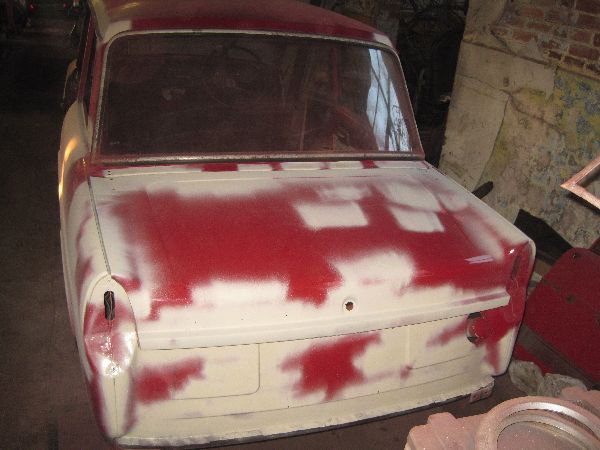 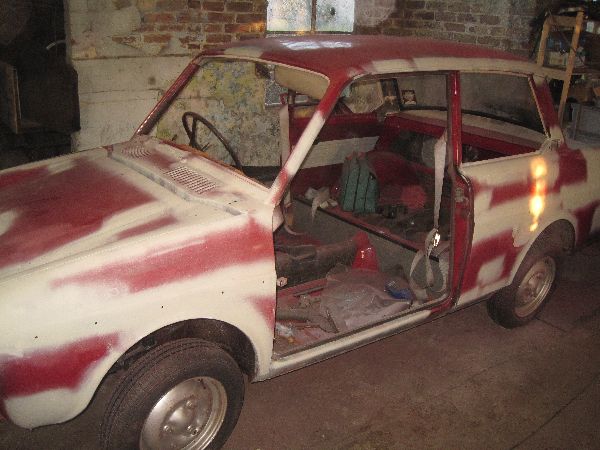 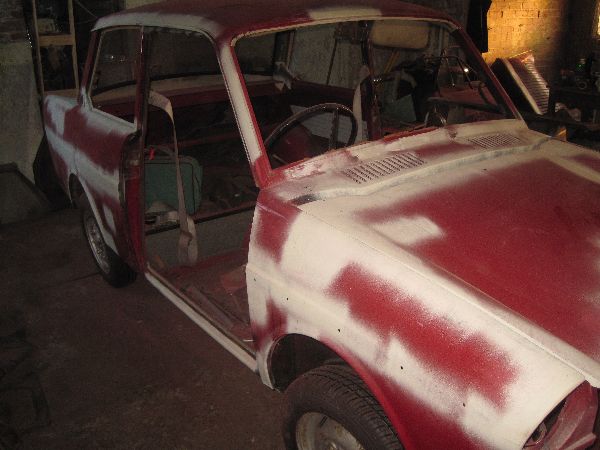 I'm also most of the way through repairing the driver's door, which had rusted to detachment at the bottom edge: (spare door, also rotted at the bottom): 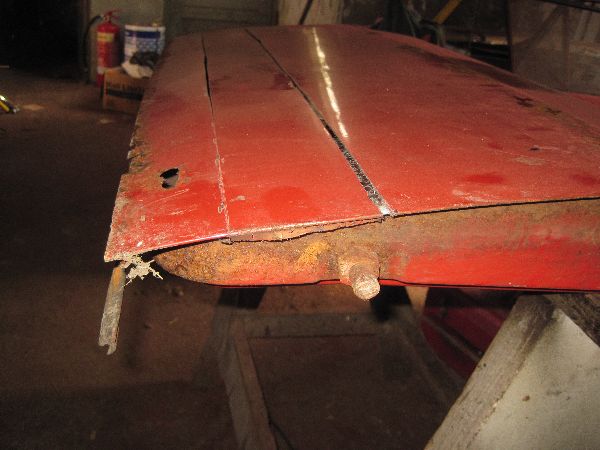 Mark out door to be saved: 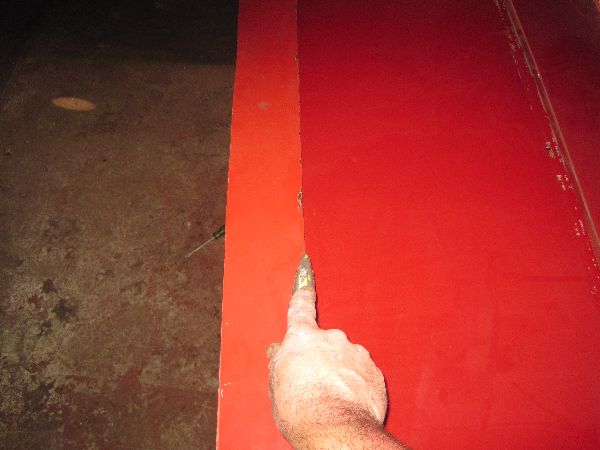 Spot replacement metal in place: 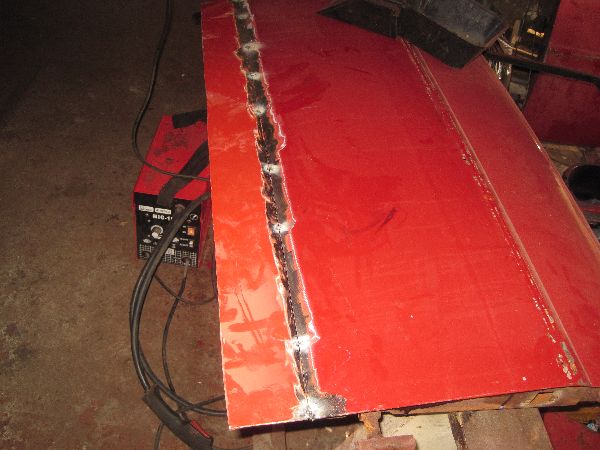 Form bottom fold: 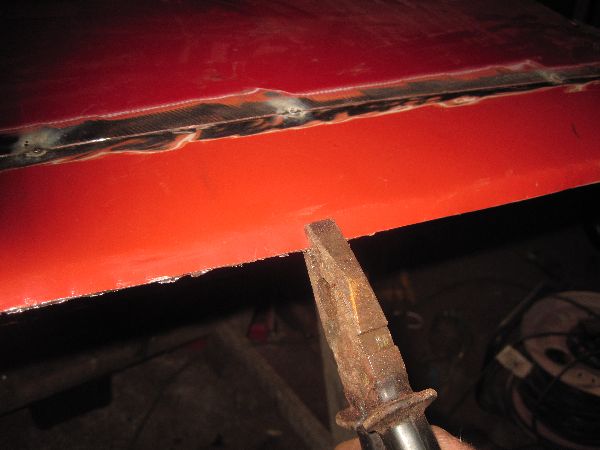 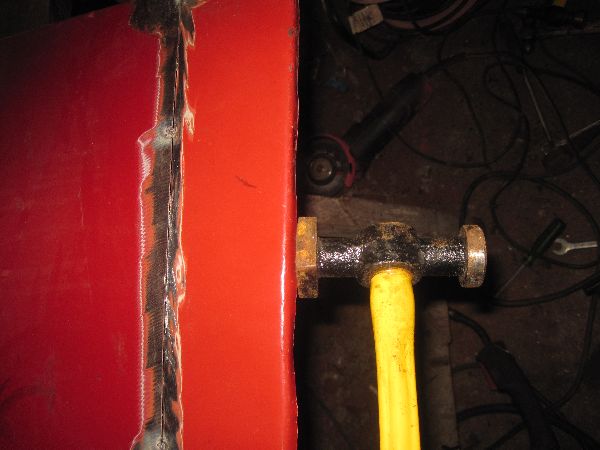 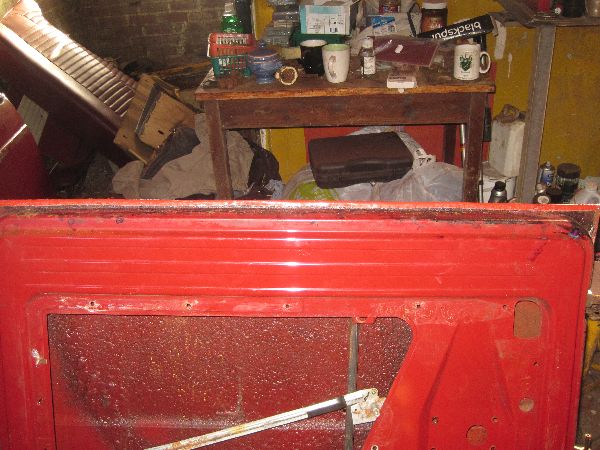 More spots to firm it all up: 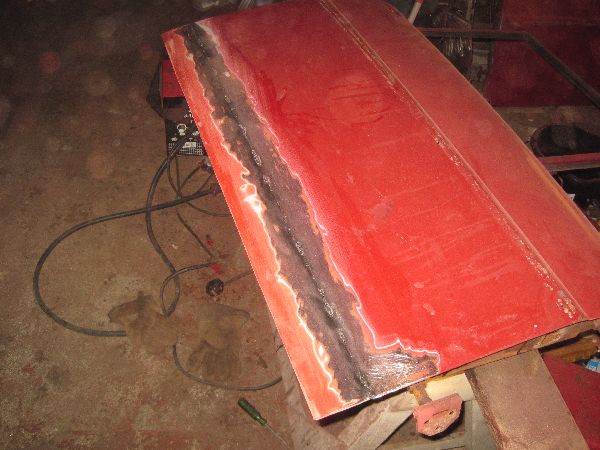 and a little filler: 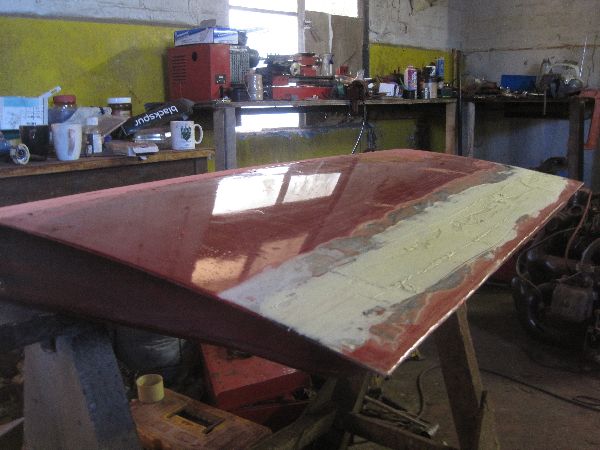  A final skim on the door, de-rust and etch prime both doors and final check for defects, then she should be getting normal primer on Friday ready for hand flatting (hopefully) on Saturday. Oh, and the DVLA have reactivated her "void" record so she now show up on an online status check. Hopefully that means a V5 should be here soon Just for the record, we now know that her last tax ran out on 30th April 1978 so her hibernation has been all but 33 years. It's kind of nice to think that I was a 10 year-old with no when she was last road legal edited to add: Just did a quick search online, and I know this is dated '76 but I'm in there (somewhere) and it gives an idea of how long it's been ;D  Edited again to add: Just for the record, this was me after crawling out from cleaning the floor-pan. Yes, it really has been that long  ;D  |
| |
|
|
robbo86
Part of things
Current Ride: 2018 Volvo V90 D4 , 1983 Rover SD1 Vitesse
Posts: 168
|
|
Mar 24, 2011 11:14:28 GMT
|
|
Epic... What a find and for free to! I read an article about these little DAFs in practical classics a few years ago. They always had me interested since then!
Bookmarked
|
| |
|
|
|
|
|
Mar 24, 2011 14:30:48 GMT
|
Epic... What a find and for free to! I read an article about these little DAFs in practical classics a few years ago. They always had me interested since then! Bookmarked Hmm just thinking was it a 66 buying guide featuring this car? Or a small european car test using this one?  Joe here is an absolute wizard with a welder and you are wise to bookmark it. I follow the main thread of the DAF forum and the speed and quality of the work going on this car is incredible. Having seen his other halves car "Betty" arrive after driving from Anglesey to Colchester with a welded together half shaft under its own power, and then seeing him patch a big rust hole in my silencer with a 3 phase arc welder that hadn't been used for 20 years, which Joe had never used before with no new metal. I tell you this man is a wizard  , oh and a thourighly generous and kind hearted chap as well  Keep up the good work Joe |
| |
Last Edit: Mar 24, 2011 14:34:44 GMT by automatic
|
|
|
|
|
Mar 26, 2011 23:45:17 GMT
|
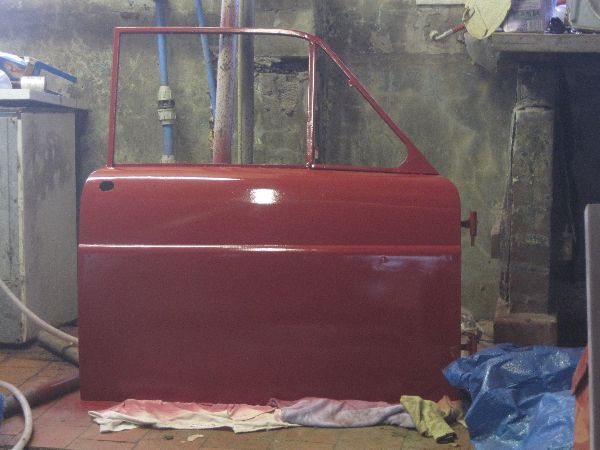
Nearly there (well, nearly to paint anyway). Finished off the rectification over the past couple of days and got her into primer today. The only thing is, she'd been resprayed in the past and the colour was slightly light. Cutting back through the paint it turns out that the original was sprayed over red primer but the respray was done over white. I only had white primer available but wanted closer to the original colour, so have tried a little improvisation courtesy of the guy who makes poly bushes next door. "Borrowed" some red pigment and started stirring: 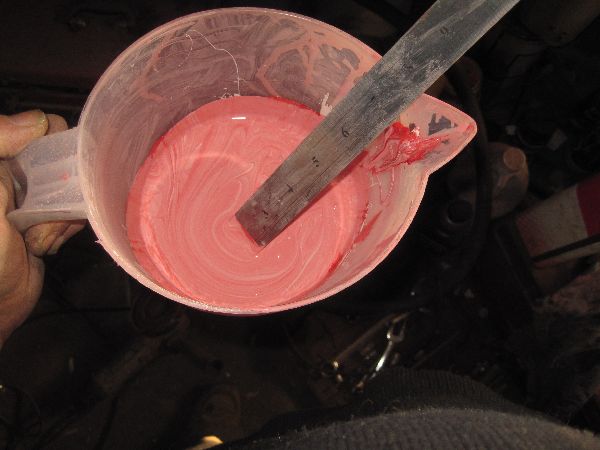 and sprayed that on the passenger door as a test panel last night. There was still some slight rectification to do along the bottom edge, so sanding it all off again if it didn't work wasn't a real problem: 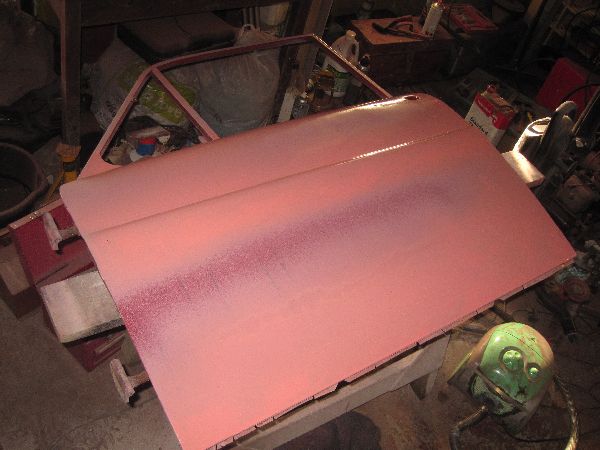 Went down today and it had hardened properly and seemed to sand well, so the car is now pretty in pink waiting for flatting tomorrow and (hopefully) topcoat on Monday. Pretty pleased with the door repair on the driver's side, just hope it looks as good when it's shiny  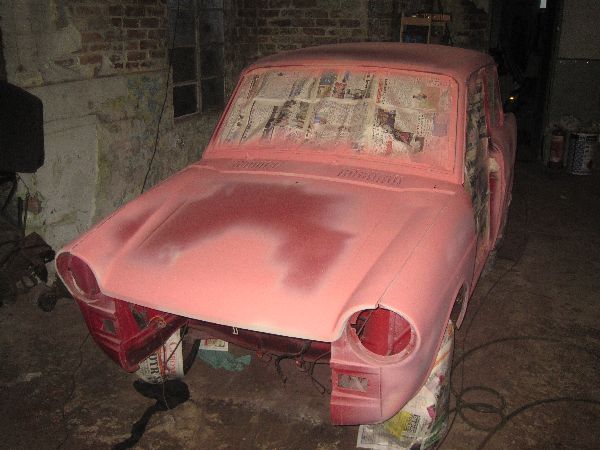 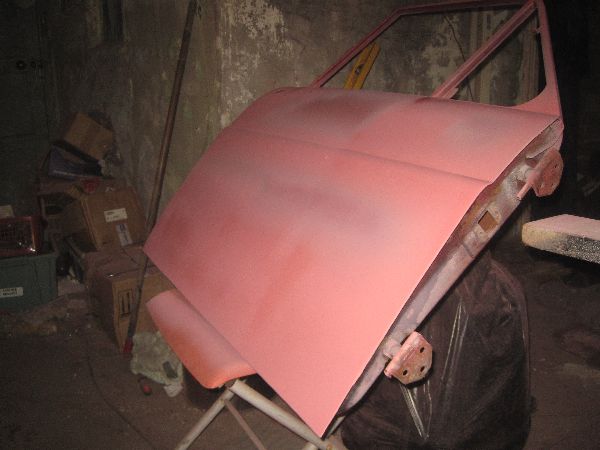 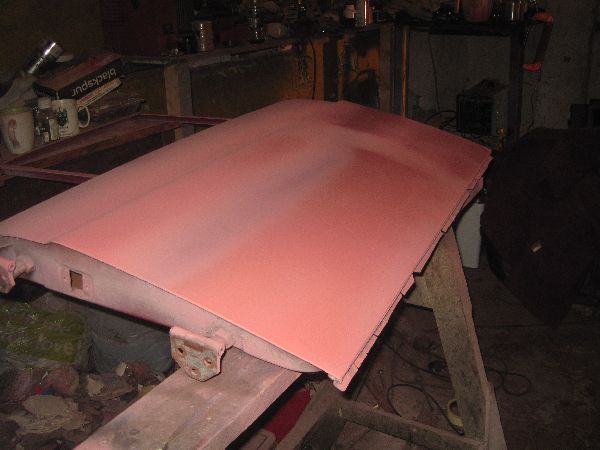 Don't think I'll make my self-imposed deadline for completed and driving by 1st April but it shouldn't be far off...... |
| |
|
|
|
|
|
Mar 27, 2011 11:16:50 GMT
|
|
Top work Joe, glad to see this one coming together.
|
| |
|
|
|
|
|
|
|
Mar 27, 2011 20:22:31 GMT
|
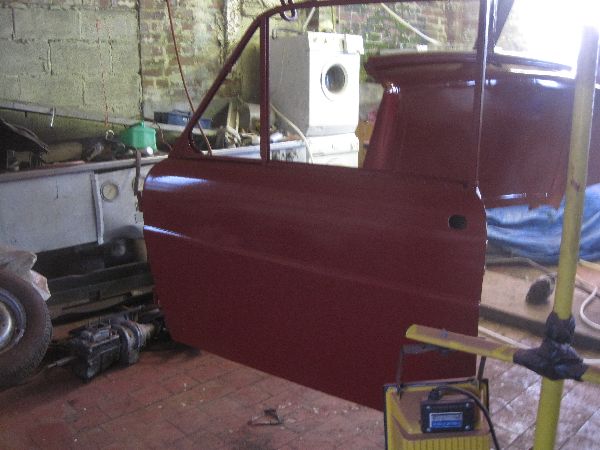
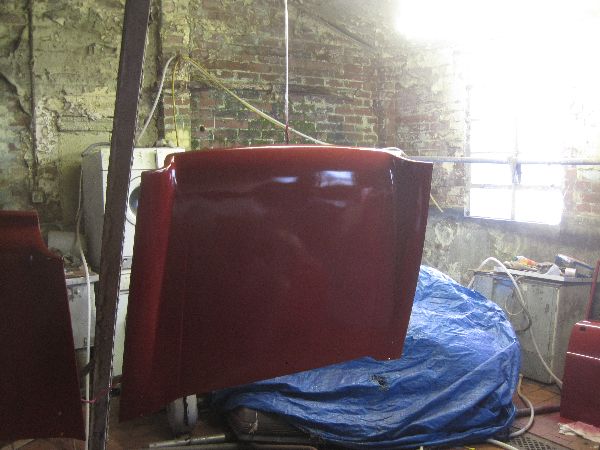
Thanks Elmo Had a bit of a problem today when I found some (quite a lot) of the primer had gone over unkeyed topcoat so the flatting was a bit more aggressive and a bit longer than I'd expected. But I cheered myself up by taking one of the doors and doing this to it: 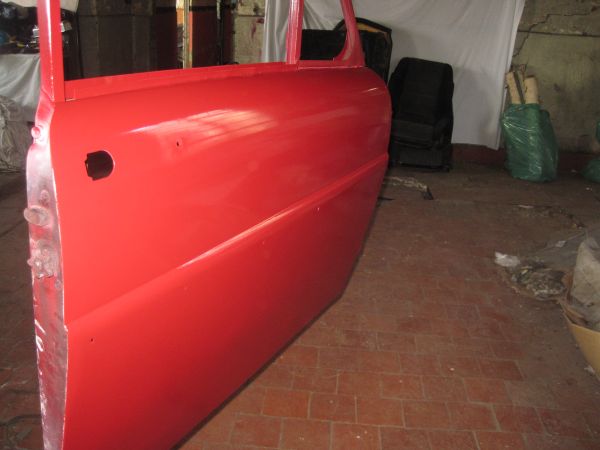 It's not perfect (slight peel and a light bloom) but it'll polish up fine and I'm happy seeing as it's the first time I've driven a proper spray gun in about 19 years! Finally got to see the true colour as well - it wasn't easy to get the camera to register it right but this one (without flash) is pretty close: 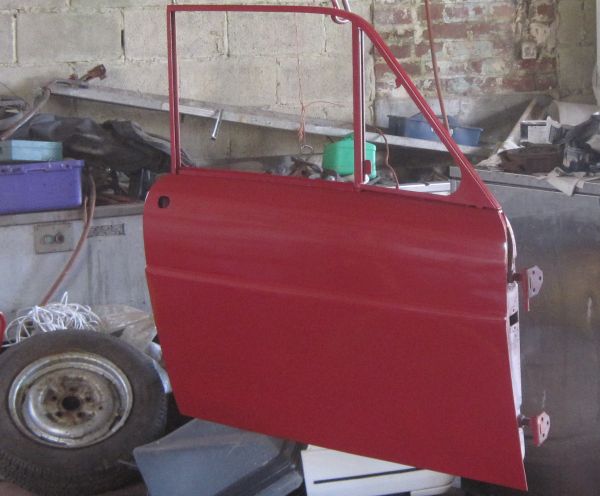 Which looks very close indeed to the original un-faded stuff from under the back seats, which is good |
| |
|
|
|
|
|
Mar 28, 2011 21:50:52 GMT
|
|
|
| |
|
|
|
|
|
|
|
|
Looks good in the red, you're storming along with this one. I quite liked the pink too, would've been nice in that with a rose white roof and whitewalls.
|
| |
|
|
|
|
|
|
|
|
Nicely done! I've been ignorant of the existence of any DAF models beyond the 66 till now, but this is truly cool.
Thanks for sharing.
|
| |
|
|
|
|
|
Mar 30, 2011 15:31:39 GMT
|
Nicely done! I've been ignorant of the existence of any DAF models beyond the 66 till now, but this is truly cool. Thanks for sharing. But the 66 is not a real DAF Its a renault 5 automatic later badged as a volvo ;D This and mine on the other hand are all DAF through and through with a bulletproof aircooled twin |
| |
|
|
|
|
|
|
|
Productive day today I'd had a problem with the front engine mounting bar not lining up when I went to fit the engine late yesterday, so left it overnight to see if it made more sense today. In the clear light of day the mounting bar problem was solved quickly enough - having taken it off and compared to a spare one, the problem was pretty obvious. This is the o/s ends lined up: 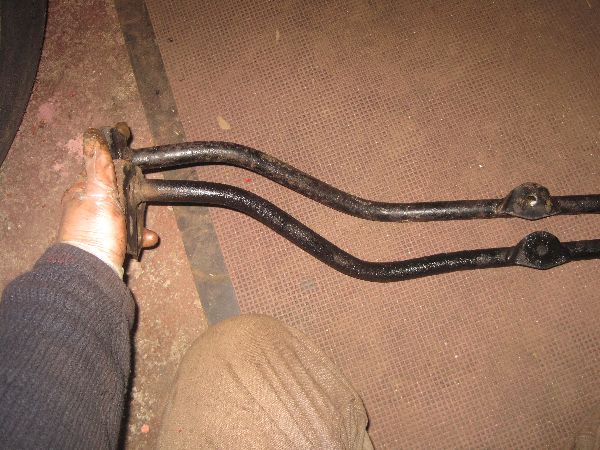 And this is the n/s without moving them: 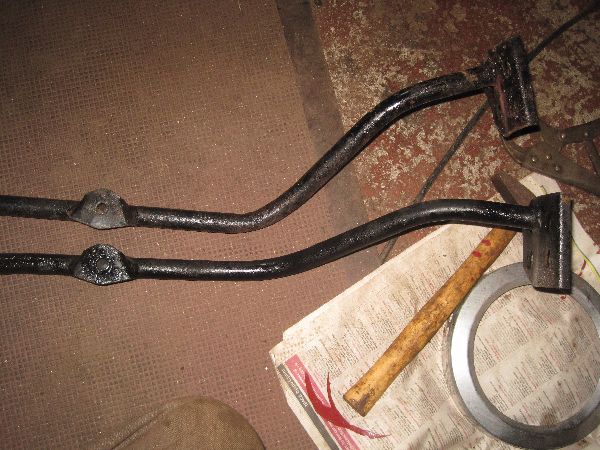 There was a huge bend in the bar! Considering it was like that while it was on the car (there's no way I've subjected it to that sort of force in the workshop!) it's a bit of a mystery how it happened but a quick paint and fit of the other bar got it sorted easily enough, resulting in this ;D 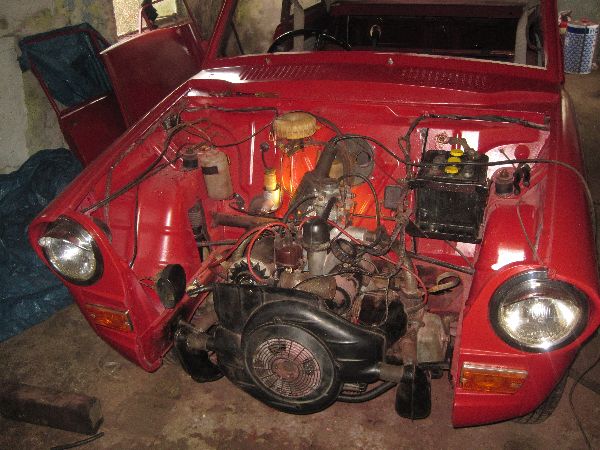 Fully connected, except for the heater cables because the end fell off one as I went to connect it so have to get a couple of bike cables as replacements. Tried cranking her over (no petrol in the tank) and the oil light goes out reassuringly after about 4 or 5 seconds at cranking speed, which must be good! Now a view of the back - can y'tell what's new yet? 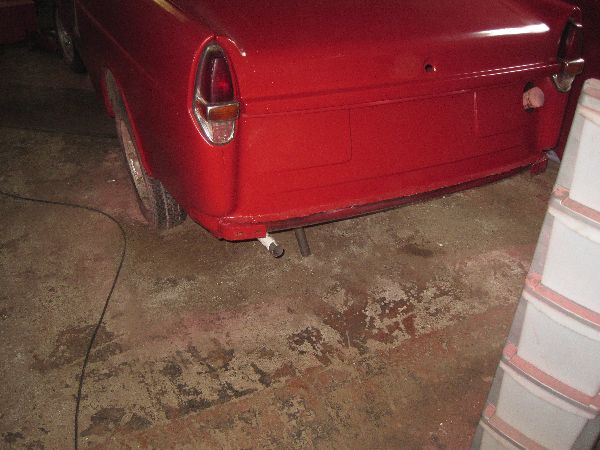 Yes, all that pipe I bought a few weeks back has been melted together like this: 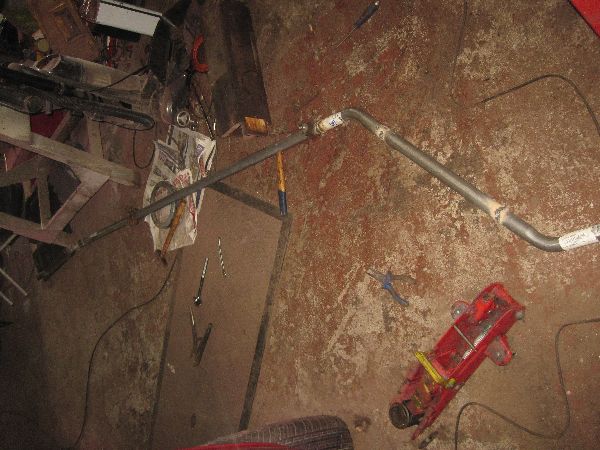 and fits nicely under her like this: 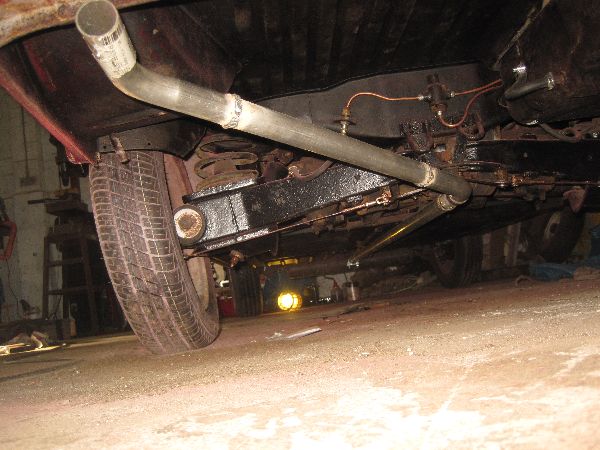 It's currently missing one rubber loop from the centre mount and I have to make up a rear mount because the original clamped to the tiny original tailpipe and won't fit on this. The original tail was about 3/4 inch diameter where it came out of the rear resonator - that's one restriction that just had to go! Having got that fitted up, there was only one thing to do - steal some fuel from one of the semi-dead cars down there (with the owner's assistance so it wasn't really stealing) and see what happens. We managed to collect about 1 1/2 litres so put most in the tank and a little dribble in the carb. The battery's taken a bit of a hammering over the past week or so but, on a worryingly slow cranking speed, she fired! She then moved. In my enthusiasm I'd forgotten to check she was in neutral and she jumped backwards about 6 inches! Luckily, the engine died almost as fast as it fired cos I don't think I would have reacted fast enough to avoid driving her backwards into a wall from my perch on the floor. Which would have been awfully embarrassing to have to report..... Trying again with her in neutral, there seems to be a fairly heavy vibration which might be prop balance or exhaust or (possibly) the little nylon bushes that the primary slides on at the front end. One of these has disintegrated as I was adjusting the belts, which drops the input shaft for the transmission slightly and might cause alignment problems seeing as the prop has no UJs. Something else to add to the endless list  Anyway, to sum up the day, Matilda has her engine in, her exhaust fitted and has (accidentally) moved under her own power for the first time since 1978 ;D |
| |
|
|
|
|
|
|
|
Ok, not very far and certainly not very fast, but she's moved under her own power for the first time since the 70s ;D She's also leaking oil, hence the several missing bits round the front end |
| |
|
|
|
|
|
|
|
We have progress! First things first, her V5 turned up today so I'm officially hers now Low mileage, only 2 previous owners, with the last change happening when she came off road on 1st May 1978. Could make a good selling point not that we're going to Next up is, the engine came out again today - I wasn't completely happy about the vibration at certain revs and also noticed while crawling around sorting oil leaks that the o/s engine mount was starting to separate. They'd looked ok out of the car but, with the engine weight on them, it was obviously not all that happy. So it had to come out. For the vibration, it seems that someone had hammered it in the past, probably trying to get it on because the rear splines are a bit tight. This might have had something to do with it: 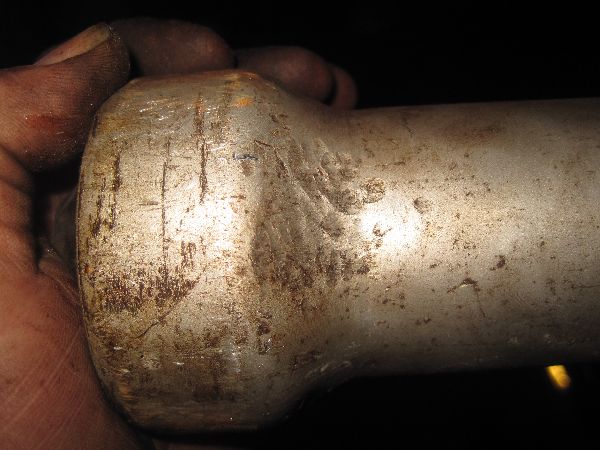 It didn't look all that bad in itself bu a fairly small dent there can distort the rubber: 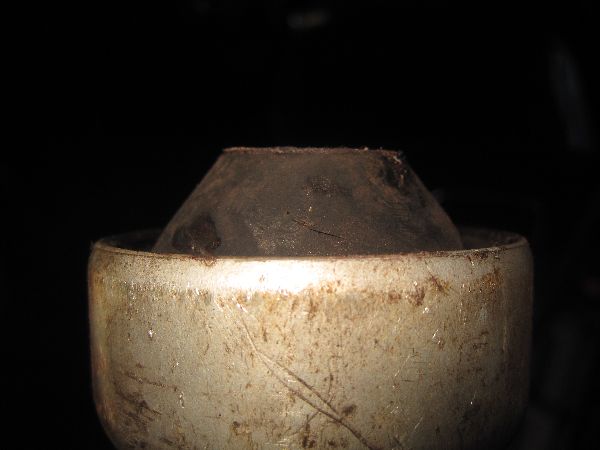 So the spline at that end wasn't in line with the prop tube - pretty well guaranteed to cause vibration! The replacement got checked very carefully before fitting because if there was any doubt I was prepared to pull a known good one out of our spares car but the only problem I could see was one rivet missing on a balance weight, which was a lot easier to sort than pulling another engine to get at a prop: 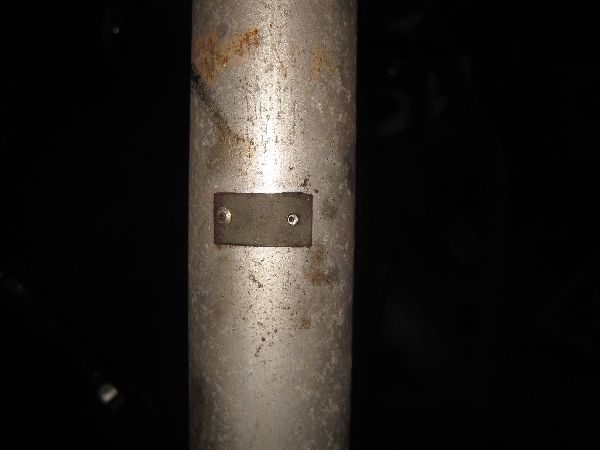 Much reassembly later and..... no, no, no no vibrations [cut to Beach Boys] Happy with that, I had a look at her lack of charging. The dynamo was producing power with the output and field connected so that suggested a control box fault. Sure enough, the voltage regulator contacts were a little corroded, so the dynamo was effectively turned off all the time. A quick bit of wet & dry action has the light going out as it's meant to. Spurred on by these successes I rounded up the evening by refitting her grille. This was the one bit I forgot to clean up and paint, so it's had to go back on as is for now. There are some rust bubble on it, but nothing too obvious, and the paint match is pretty well spot on! 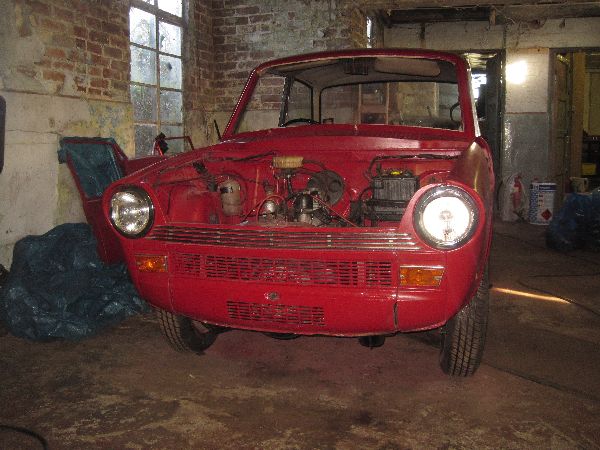 The plan now is to blitz the rest of the reassembly over the weekend and try to get her in for MOT middle of the week. It's my birthday on Thursday and driving in for a shiny new tax disc would make a nice present to myself |
| |
|
|
|
|
|
|
|
Almost there! Insurance is paid up and I hope to get her in for MOT later this week: 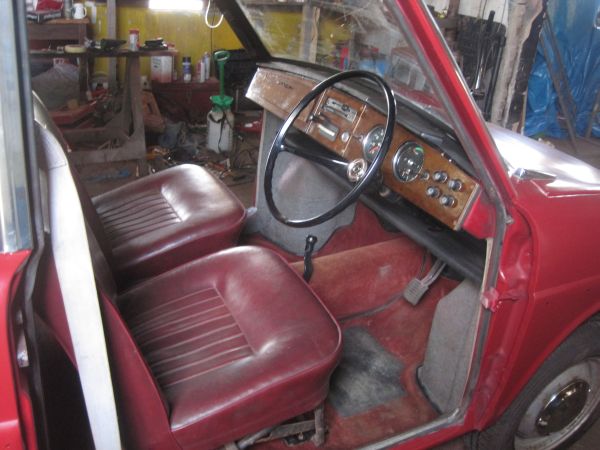 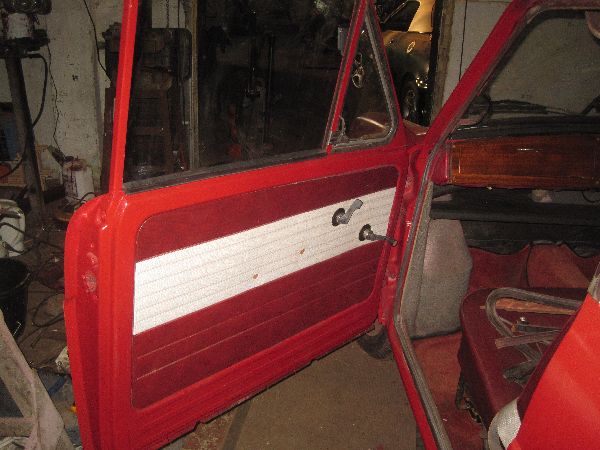  ;D |
| |
|
|
|
|
|
Apr 11, 2011 21:10:28 GMT
|
And there's more..... 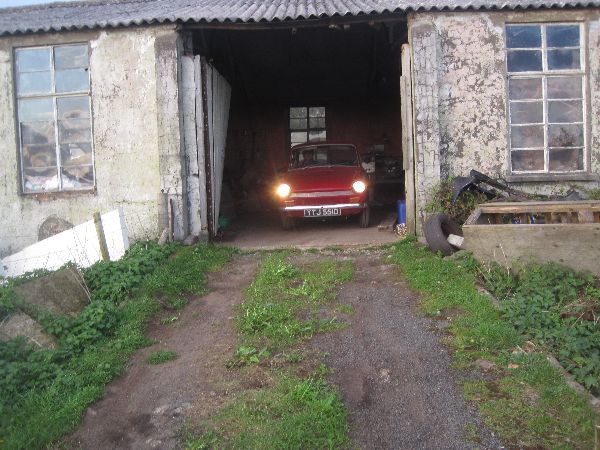 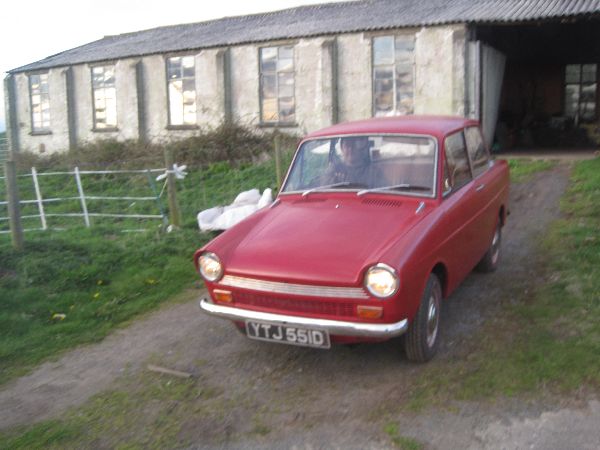  At this point there was a small problem of a stall (she's running weak so needs choke) followed by a flat battery (I'd forgotten the interior light while working on her today ) but a quick jump start off Betty got her going again easily enough. I then made the mistake of turning my back for a minute..... 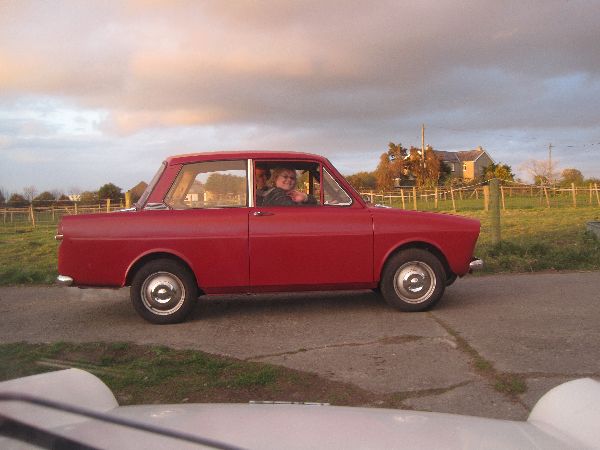 Yes, that's Sian stealing her! Obviously I jumped into Betty and gave chase, finally catching them so that Tilly and Betty could meet: 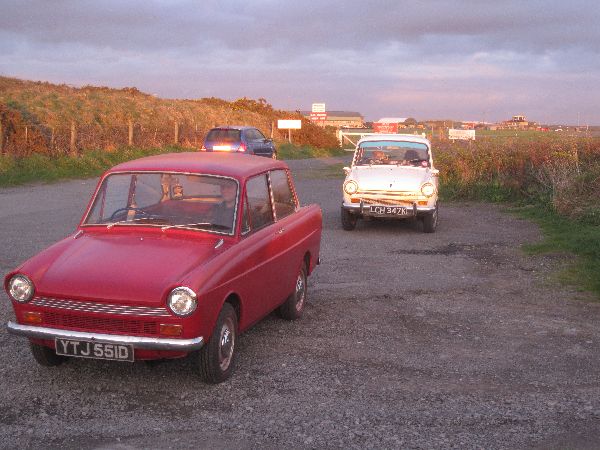 This did give a chance to take a nice photo of her out in the sunshine - I just wish Alex from the workshop hadn't stayed sat in her, but he was hard to get out (apparently she's dead comfy like) 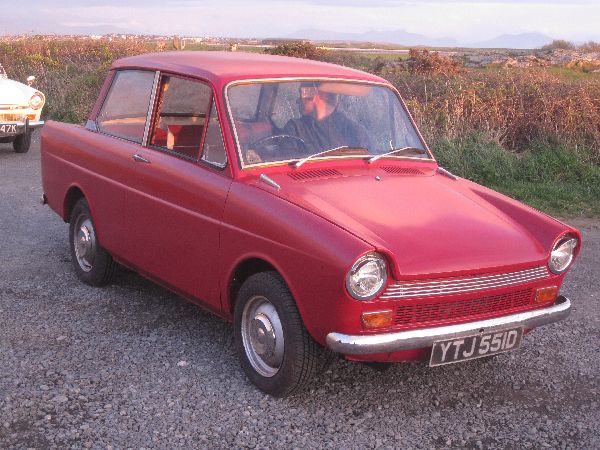 Her battery is now on charge, and I need to check the brakes (they work fine but not sure if they're up to full efficiency) and check the headlamp alignment. Oh, and get her warm and set that mixture properly! Then she's booked in for MOT at 1pm on Thursday. If she passes it'll be the bestest birthday present ever ;D |
| |
|
|
|
|


 That let me finish assembling stuff round the engine bay to give her steering (with a rebuilt rack) and front suspension. She's also sitting back on her wheels with a nice new set of tyres:
 ;D
;D
 , oh and a thourighly generous and kind hearted chap as well
  Keep up the good work Joe
 ?
?