|
|
|
Dec 22, 2010 16:47:37 GMT
|
I'm keeping an eye on this, my MX5 might end up with one of these chargers if I get round to it! That "Supercharger" damper you post is actually an engine steady - they come on a lot of minis and brace the engine to stop it tilting back. It's got supercharger in the name because it's got longer ears on the bracket to space it out past the pulleys  |
| |
Last Edit: Dec 22, 2010 16:48:54 GMT by cobblers
|
|
|
|
nofrills
Posted a lot
 my wings are made of Steeeeeeeel!!!
Posts: 1,243
|
|
Dec 22, 2010 17:05:27 GMT
|
|
Nice install, i have been looking at doing the very same thing using the same charger on my fiat marea 2.0 20v, claymore did the conversion on his one too, think it will make good power once set up
|
| |
|
|
Fungus
Part of things
Posts: 960
|
|
Dec 22, 2010 17:09:41 GMT
|
|
In what way is the supercharger actually modified?
|
| |
|
|
|
|
|
Dec 22, 2010 18:29:20 GMT
|
In what way is the supercharger actually modified? on the inlet there is a lip as a rubber pipe usually fits onto it with a jubilee i think. I had to have this milled flat so i could drill and tap the 4 M5 holes for the carb pipe flange. Also had to cut out some of the bottom of the supercharger as the flat part on the bottom used to cover half of the inlet manifold pipe up that would have flowed really well! not.(pictures to follow on that later this evening) Also has to cut out the inlet a little as the round pipe from the carb didnt quite match the profile of the oval inlet so needed the top and bottom opening up. Its probably all wasted work as i think i managed to get some swarf down the charger. Cleaned it thoroughly though so i really hope it hasnt done any damage. I'm keeping an eye on this, my MX5 might end up with one of these chargers if I get round to it! That "Supercharger" damper you post is actually an engine steady - they come on a lot of minis and brace the engine to stop it tilting back. It's got supercharger in the name because it's got longer ears on the bracket to space it out past the pulleys Ah really! i didnt know that i assumed it bolted to the back of the charger somewhere and was more of a charger steady than an engine steady. Thanks for clearing that up! |
| |
|
|
|
|
|
Dec 22, 2010 19:07:40 GMT
|
|
looking really good!
I'm thinking of supercharging my mk1 turbo....lol
|
| |
|
|
|
|
|
Dec 22, 2010 19:41:45 GMT
|
Righty well todays progress then. The header tank was so filthy i could never see where the coolant was etc not to mention how crappy it looks(i know the rest of the engine bay looks like curse word at the moment but once ive got everything figured out and modified to fit round the charger etc I'm going to look into cleaning it up and hiding things as i really want to show it next year) This is how it started out:   Soaked it in bleach and boiling water inside and out. Not looking too bad now but going to leave over night 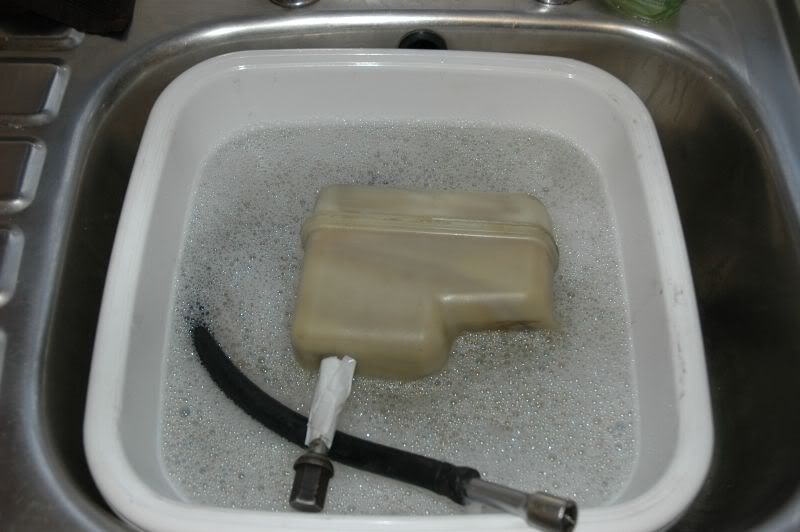 Right thats enough of the washing up in the warm... Out into the cold we go  Decided today i would have a crack at my heater box modification and it couldnt have gone better... Apart from slapping myself in the face somehow with the soldering iron when i was plastic welding and burned my face hurts pretty bad. Finished product    As you can see gives me loads more clearence for the charger, absolutely loads of room inside still and its perfectly sealed. Best bit is when the charger is in and you just look in the bay you wouldnt even know its been done which is what i was hoping for. Noticed that the outlet at the bottom of the charger covered half of the inlet manifold well... inlet. Which would have been absolutely curse word for flow. So using the suplied gasket i marked it out and cut it all out with my die grinder and carbide cutter. Looks a little rough in the phtotos but its smooth to the touch and should flow nicely. Also opened up the charger inlet a little as i mentioned before 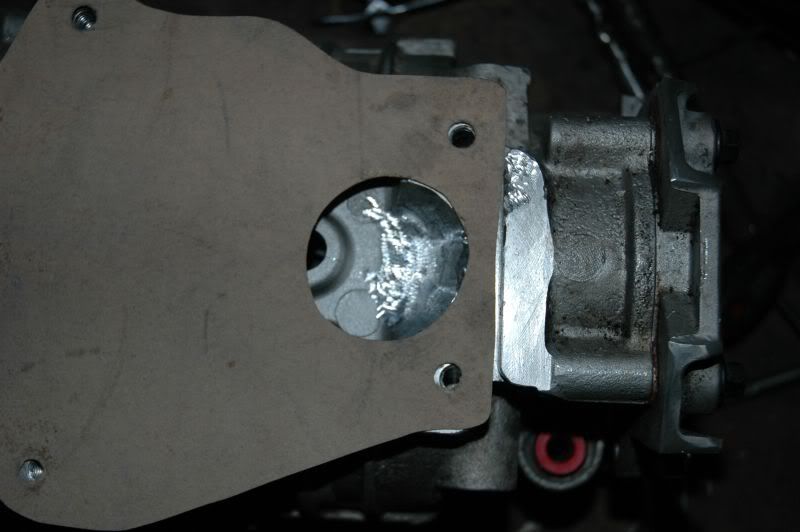   Then I bolted the crank pulley on to 80ftlbs/108nm and knocked over the lock tab washer(i put a cheeky dab of thread lock on the threads too, to make sure) and tried the belt back on with the tensioner on and belt under tension. Ignore the huge bolt its all i had laying around i will get some new bolts. Looks like the bottom water hose wont fit between the belt like i was hoping for and it wont fit behind it normally  So i need to extend it backwards and lengthen the metal bottom rad hose. shouldn't be too much work but it will put the hose in a much safer place rather than inbetween the belt 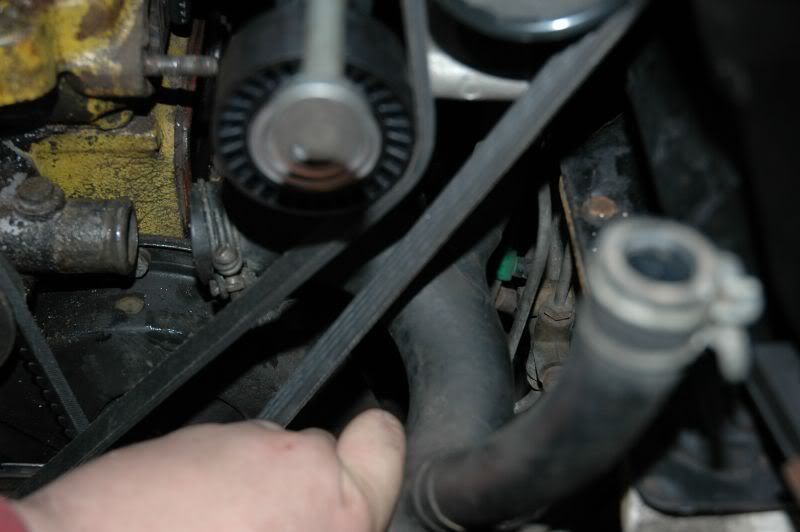 Next up with the tensioner on i notice the breather didnt fit 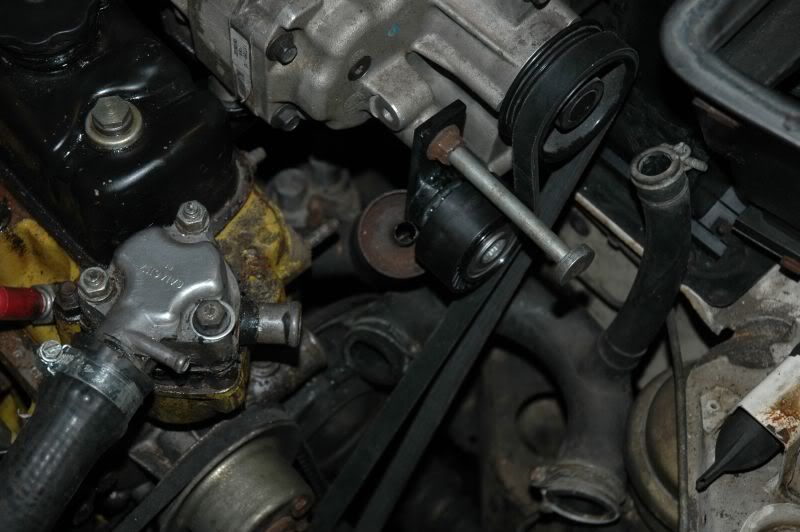  As you can see it fouls on the tensioner bracket I think i can cut and shorten the pipe between the canister and the tapet cover to tuck it in a bit tighter so it clears the tensioner bracket. Going to make the hose fit right first and get the exhaust manifold on so i can make sure the final position clears everything before i get too excited. Otherwise has anybody got any better ideas for a breather? Something in the rocker cover maybe? But one in the rocker cover wouldnt be enough would it? Ideally i need this block one and put one in the rocker cover for a forced induction setup shouldnt i really? Or will the one over the tappet cover be fine? |
| |
|
|
|
|
|
|
|
|
just cut and shorten it,make sure you have a decent size hole in the rocker cover instead for a breather,
What are you doing with regard to getting the comp ratio down?
|
| |
|
|
|
|
|
Dec 23, 2010 10:00:00 GMT
|
|
Header tank in the dishwasher works absolute wonders!
|
| |
|
|
|
|
|
Dec 24, 2010 19:51:46 GMT
|
Well..... IT RUNS!! ive had a quick drive, it definately needs some fettling but it runs and drives! Bit of a combined update from today and yesterday as i spent most of yesterday buzzing around collecting bits and bobs to finish it off and get it going. First i needed a new bottle of gas for the welder. I used to just do a bottle exchange at a local place but BOC are really tightening up on this and are going to start chipping bottles soon. So i thought what the hell i will look into getting a BOC account and doing it all legit. Turned out its only £9 a month and £49 for a full size bottle of gas(holds 3 times as much as my little Y sized bottle). Bare in mind the Y size costs £7 a month and £45 for a bottle it didnt make much sense to go for that. So now I'm all legal and can easily go get gas whenever i want only £49 for a bottle every time. I really recommend it to anybody who is worried about getting gas as it was so easy and so cheap. Pic for comparison:  Once I could do some welding again i welded up the inlet pipe(sorry no pirctures) and modified the breather to work the opposite side of the engine so it would clear the charger  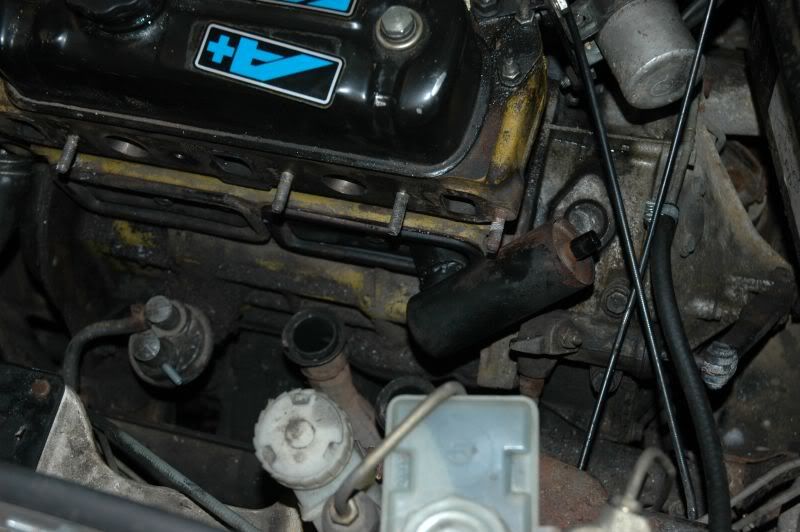  Then my minispares ordered turned up with inlet manifold gaskets so i could start putting it together. GREAT! New thicker and wider washers to spread the load and get a better clamping force(note the frost on the exhaust manifold!) 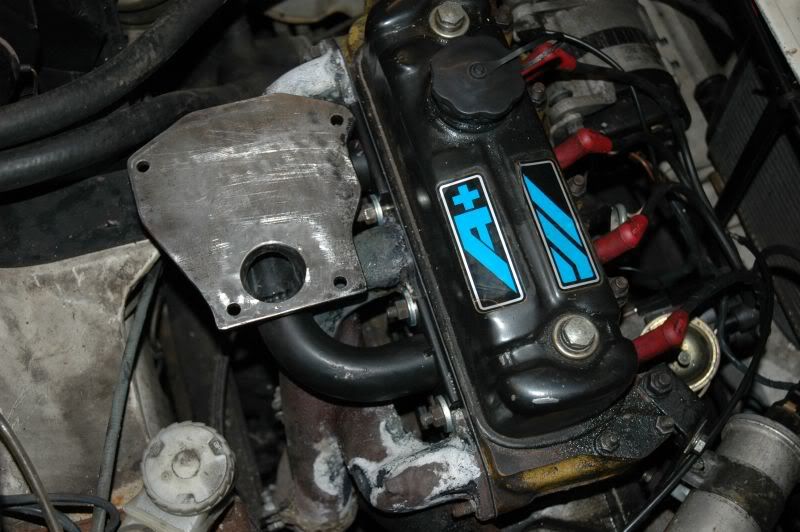   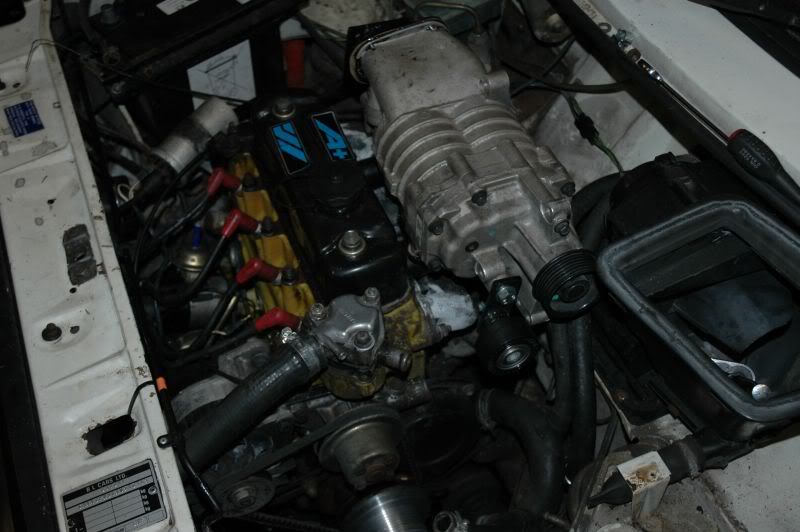 Then decided i needed a breather in the rocker cover too really so i cut down an old oil pickup pipe i had laying around which made a nice breather boss. Put it between 2 pushrods at the read of the cover so it cant really be seen, its a bit tight against the charger but works fine.  Carb on(you can see the pipe from the breather here too. Decided I'm going to get a nice polished catch tank off ebay and put it in the top left hand corner of the engine bay, nice area there to bolt it down and pipe the breathers up to. 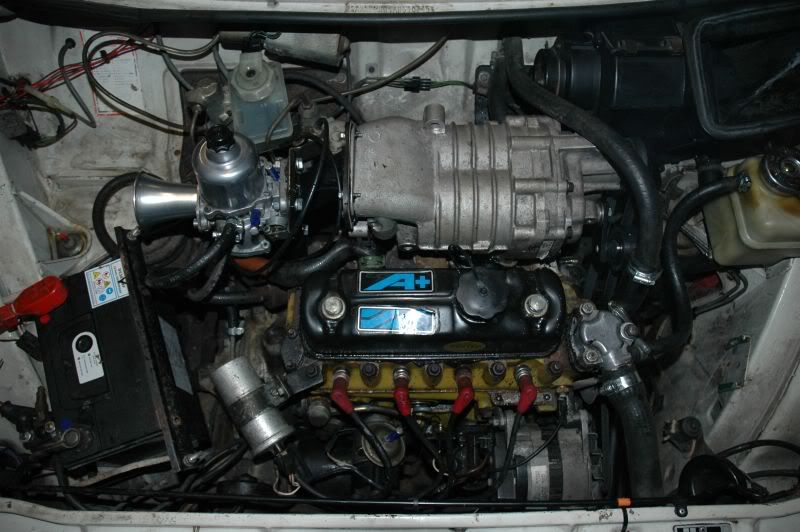 Sorry I just like this picture 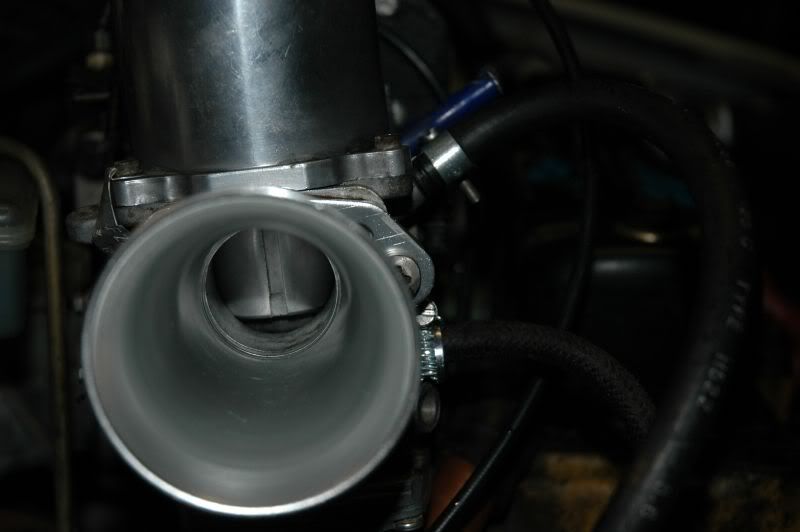 I bought a 1025 belt which turned out to be too short so i had to return it and get a 1050 belt. This was just right, needed a little bit of persuasion to get it on but was pretty much spot on. Once i got the belt on I made the water pipes. Sorry i didnt get any pictures of these as i was too excited to get it running! But i basically extended the metal water pipe and the joiner onto the water pump to push the U shaped pipe behind the belt up against the bulkhead so it had no chance of rubbing on the belt. So yeah VIDEO TIME! Sorry for the wibblepoo quality it was shot on my curse word blackberry but you get the idea(apart from the dark drive you just get some sound in that). Its running super super rich i think the needle i ordered was a bit OTT so I'm going to put the ADP back in and reprofile that to work with the setup. Start Up Dad Driving it, wanted him to give it more so i could hear the charger whine but he didnt haha And a drive in the dark(i do have my lights on haha just doesnt look it in the video because the camera is curse word) |
| |
|
|
|
|
|
Dec 24, 2010 20:28:36 GMT
|
|
I sooooo need to Supercharge my Metro... ;D
|
| |
1950 Ferguson TE A20
1971 VW Beetle 1300
1972 VW Beetle 1302S
1977 Leyland Mini 850
1983 Austin Metro 1.0 HLE
1984 Honda Acty TN 550
1989 Rover Mini 30
1990 Rover Mini City E
1990 Mazda MX5
|
|
|
|
|
|
|
Dec 24, 2010 20:54:34 GMT
|
|
You should! I'm still grinning ear to ear! Thats a good enough christmas present for me!
|
| |
|
|
|
|
|
Dec 24, 2010 22:13:15 GMT
|
I sooooo need to Supercharge my Metro... ;D ditto - I so need to supercharge my '62 Mini 848!!! |
| |
Ian Campbell
'64 Morris Cooper S Traveller
'65 Morris Mini Pickup
'83 Austin City E
'84 Sinclair C5
'87 Austin "Seven S" 1000 (Retro Rally / Autotester)
'04 MG ZR
'07 Vauxhall Astra GTE
|
|
|
|
|
Dec 25, 2010 10:40:07 GMT
|
|
that is awesome ... well done
|
| |
its not a rust hole its air conditioning
|
|
|
|
|
Dec 25, 2010 14:58:23 GMT
|
Bloody awesome job you've done on his old car! Lol, actually sent him a text last night to see if he still had the old beast, as a mate of mine wants one now! Kinda freaky to see it on here... If in the future, you want to strip the engine down and clean it up a bit - try to get your hands on a 1275 transfer case, as they have the breather hole machined into them. The fuel pump cover plate (just under the pully-side tappet cover.. the one that originally had the breather) can be made into a handy breather too. The more the merrier! And for a steady, why not make up a simple one, that uses the rocker cover bolts, to hold it onto the bolts, on the pully-side of the 'charger? (as I'm guessing, that's where most of the weight, and strain is) and if you've done ANY form of metalwork on the body of the charger, strip it down and clean it. Not too difficult a job, and makes sure that it won't get damaged. Also, look up "porting" a supercharger.. lots of gains to be made, as long as you don't mind the extra noise and Lastly.. I'd deffo say those parts were Jonspeed... The total lack of quality speaks for itself! A simple bit of extra fabrication on the intake would give you a LOT of extra flow. Look at giving the transition between the supercharger bottom plate, and the intake pipe, a curve of SOME description - having a 90 degree sharp edge is NOT good for power, economy, or intake temps!(it has to push more, which raises the intake temps) That part alone, could eaily be robbing you of about 3-5Bhp of free power! |
| |

You're like a crazy backyard genius! |
|
|
|
|
Dec 27, 2010 14:35:34 GMT
|
whats it like to drive now? I'm trying to decide whether turbo or supercharger would be better for my 998 mini. It sounds great in the vid  Chairchild really knows what he's on about too |
| |
|
|
Colonelk
Posted a lot
Posts: 3,740
Club RR Member Number: 83
|
|
Dec 27, 2010 15:21:31 GMT
|
|
hmmmm one of these chargers would go nice on my 1256 viva haha
|
| |
|
|
|
|
|
Dec 27, 2010 16:44:46 GMT
|
|
glad u got it runnin, sounds ace! just 1 question, wats the best way 2 cut open the heater box? thinkin of doin that myself. u goin 2 the next pride of longbridge meet or sumthin? would luv a look at that beast!
|
| |
|
|
|
|
|
Dec 27, 2010 17:19:30 GMT
|
Been having a play with it and found out i had a big leak on the inlet manifold sealing to the head... theres a suprise with the crappy inlet manifold! so it all came off and i got the file out. Filed it all flat, big of instant gasket on the mating faces to make sure and it runs LOADS better not but i cant stop the poxy manifold and downpipes blowing apart those clamps are curse word! so its all coming back off to fit an LCB manifold when i order one as it sounds terrible at the moment so thats a bit of a set back gtajohn. I marked it all out and cut it with a really thin cutting disc on the grinder, flipped it all over and plastic welded it back together with a normal soldering iron. I'm really pleased with how it turned out. Looking into the bay now you wouldnt even know it had been done and it works great still loads of air out of the vents. |
| |
|
|
|
|
|
Dec 27, 2010 18:11:13 GMT
|
I made 2 plates to raise the boonet and it looked terrible and the bonnet was really unstable due to the weak and thin hinges austin blessed them with. So i decided to cut a hole in the bonnet and edge it with carbon fibre. I quite like it for some reason but thinking of replacing it with some sort of fibreglass bonnet bulge or reversed scoop to stop meddling fingers undoing the dashpot plunger... You know how people are. 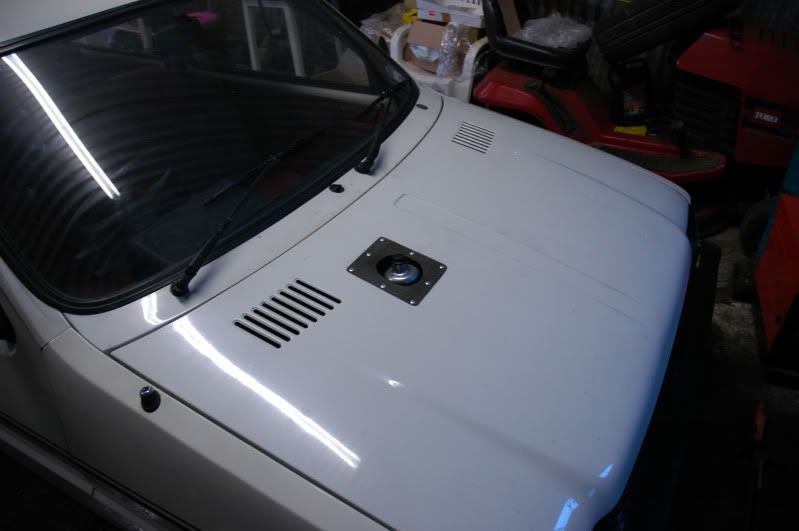 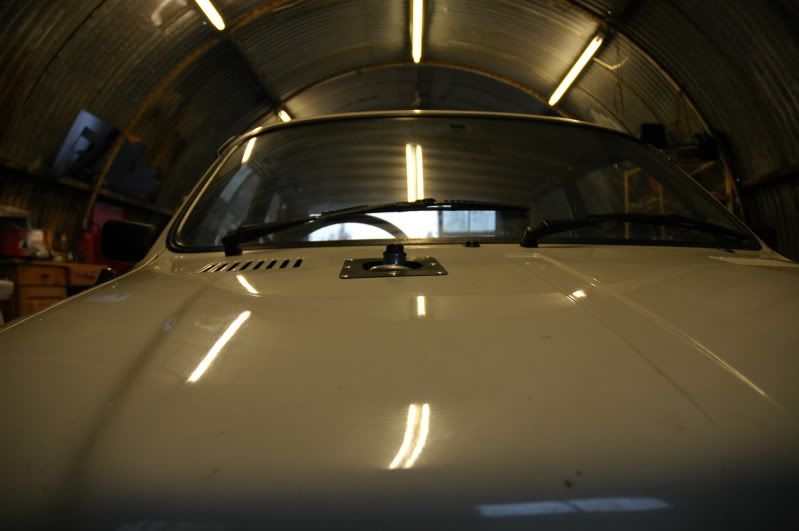 |
| |
|
|
|
|
|
Dec 27, 2010 18:39:04 GMT
|
A cheeky mk2/rover metro bonnet vent would just about cover that  Good work mate! What kind of boost is it making? |
| |
|
|
|
|


 Decided today i would have a crack at my heater box modification and it couldnt have gone better... Apart from slapping myself in the face somehow with the soldering iron when i was plastic welding and burned my face