Kai
Part of things

Posts: 276
|
|
Feb 15, 2011 20:52:32 GMT
|
Thanks to a friend of mine - things like welding will become far easier once i get round to it, why though? Because he works for Toyota, and can get all the really stupidly rare manuals that are out of print! Apparrently Toyota archives all its old manuals in PDF format now, so if you take a 1974 Corolla into a dealership, they still have everything they need, info wise, to deal with it  For anyone that wants a copy, i uploaded it here: kai.robinson.free.fr/dropbox/Supra/A70%20Chassis%20Collision%20Repair%20Manual.pdf |
| |
|
|
|
|
Kai
Part of things
Posts: 276
|
|
Feb 19, 2011 13:32:14 GMT
|
Well, i've been outside today - first time in months that i've done something productive with the damn thing! Thank the weather for getting warmer (10+ degrees outside!), and the dry day  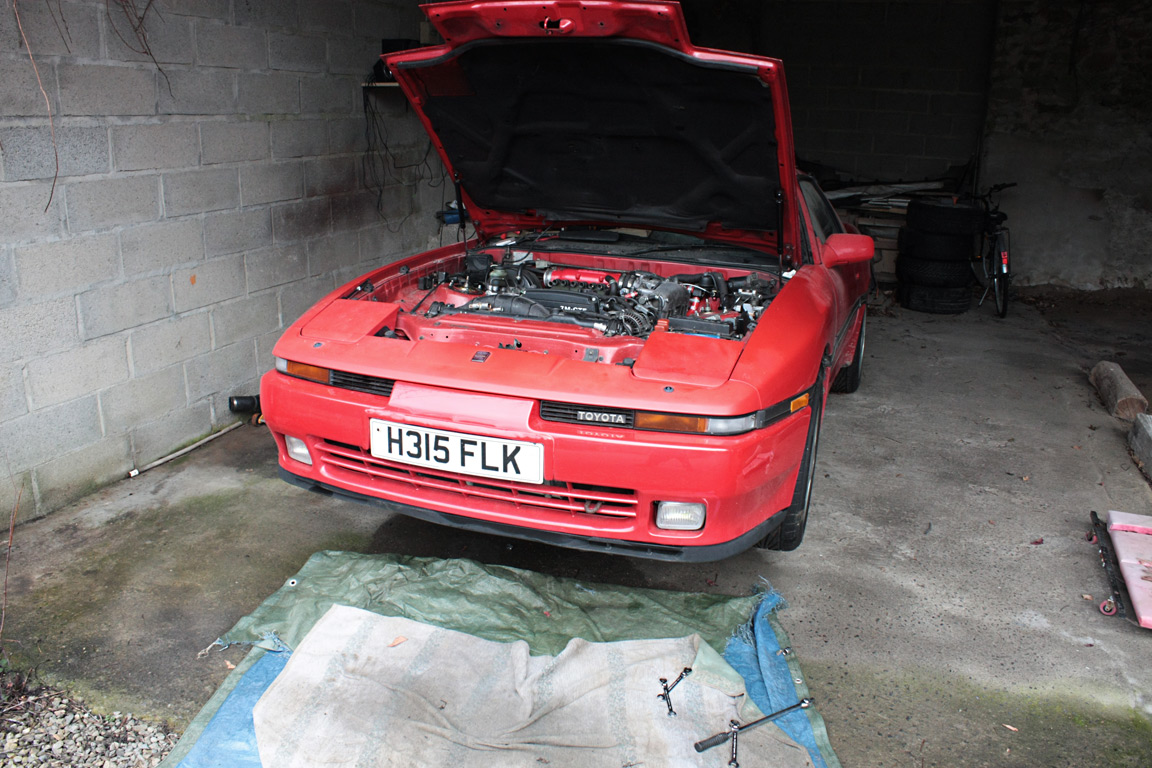 Originally, all I was going to do - was install the alternator, but on finding out that the alternator bracket wasn't installed, I needed to get under the car, and unbolt the aircon compressor (fiddly job) as the lower alternator bracket goes between the compressor bracket, and the block - doh! 20 minutes and it was all done - i'm starting to know these cars far too well  Alternator was bolted up, and moved into a 'belt install position', then I decided for good measure to bolt the throttle cable bracket up, and the main intake pipe, which meant I finally had to bolt down the cam covers (30mm torx bolts with spring washer and flat washer to stop them from vibrating loose, like the stock screws do!). After that - I was going to bolt the coil pack down...unfortunately - some total IDIOT that had been housesitting for me over christmas had thrown it into a bucket in an attempt to be helpful and tidy. What else was in the bucket? Brake fluid....UGH! The first two coils were fine - just grimy, the third was half sunk into the brake fluid, although thankfully not the important end with all the electrical connectors. So I had to spend a good half an hour unbolting the coils from the brake fluid soaked bracket, and cleaning them with a toothbrush and dish soap. Dried them on the radiator for another half an hour with the bracket, and then rebuilt it and stuck it on the cam covers. I was going to install the PCV system but again - said housesitting IDIOT had swept all my parts into a pile with leaves and old parts that have since been replaced, and one of the hard-to-get-hold-of PCV hoses has disappeared. GAH! As I was ordering a load of small sundry items (turbo oil & water feed gaskets, rad cap etc), I stuck it on the list to get from Toyota. The other issue is, because the PCV steel pipes were stuck in the damp pile of leaves and curse word - they've gone all rusty again - so another hour cleaning each one again  Still - all that remains, is to bolt up the turbo oil & water feed, the power steering reservoir, radiator hoses, thermoviscous fan, intercooler pipework and then finally, the dashboard! Everything else is DONE. I can do the rest in a day - sooooo close I can almost taste it! Anyway - here's how it looks now 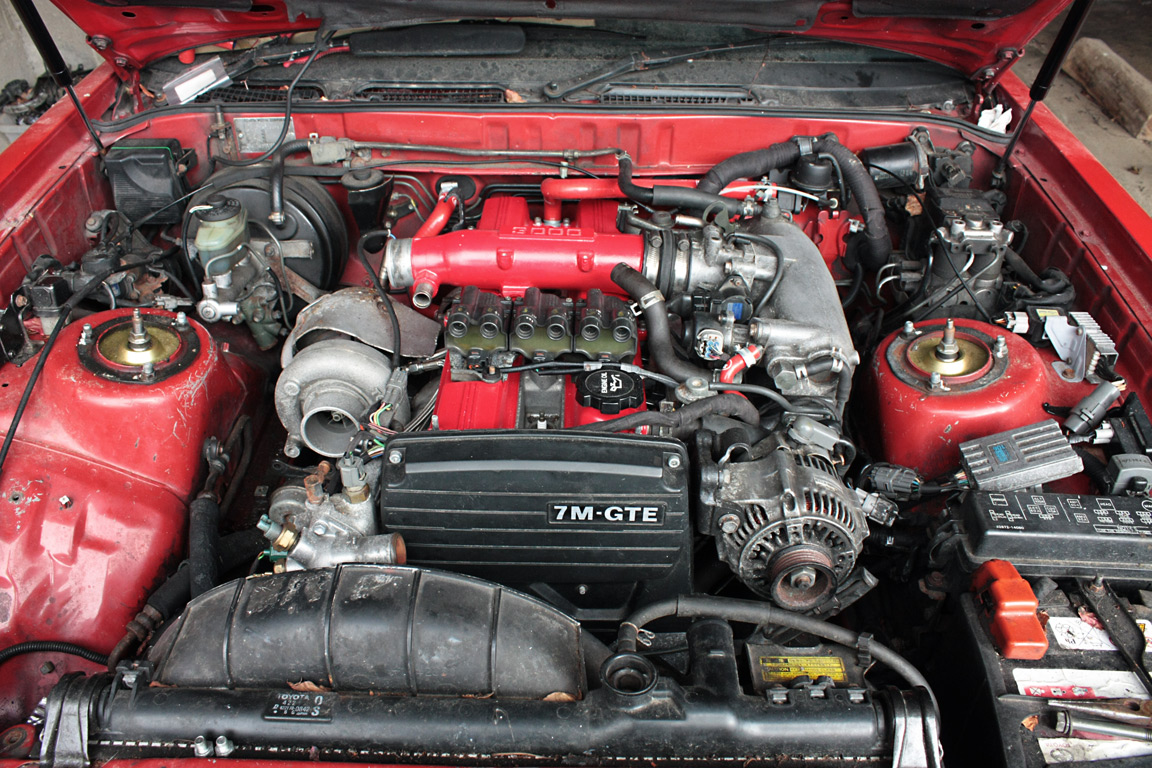 |
| |
Last Edit: Jul 23, 2011 23:28:58 GMT by Kai
|
|
Kai
Part of things
Posts: 276
|
|
Feb 20, 2011 17:34:10 GMT
|
More fiddling today - this time - refitting the dashboard! Unfortunately, despite fitting it - i'm going to have to take it back out soon - as there are two bulbs that have gone pop Still - its not massively important, as I can still see the speedo  I need to spend an hour or so fiddling around with the glove box, get the ECU back in place, bolt the knock sensor ground wire to the chassis somewhere, and put it all back together for the final phase. The only engine bay thing that's been done today was installing the spark plug leads (a fiddly and annoying job) and the first section of PCV piping was cleaned up with some steel wool, and bolted into position. I'm going to have to remove the turbo...AGAIN - the water lines just won't do, and I might as well go back to the standard oil feed & drain while it's off - its a shame really - they're good quality -4 and -8an lines, just the adapter plates on the turbo are totally curse word It worked with the stock one before, so I guess it's nothing major - just annoying really. Why people sell these line kits without checking if they work for the stated application - I honestly don't know 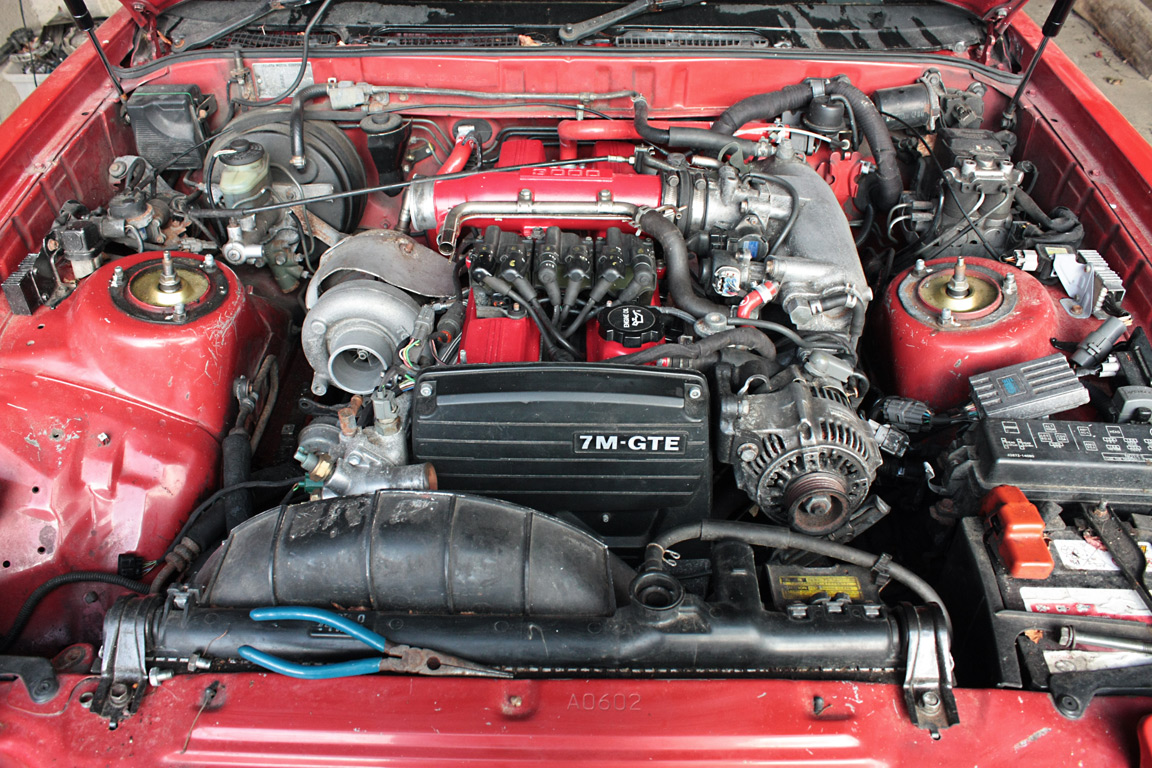 Until the turbo is done - I cant do the oil cooler line, or the power steering fluid reservoir - and that also means I can't put the belts on, or the fan - so annoying! >_< Still, I have high hopes that it'll be starting before the end of march |
| |
Last Edit: Jul 23, 2011 23:29:44 GMT by Kai
|
|
|
|
|
Feb 26, 2011 10:07:16 GMT
|
|
nice to see you on here fella
|
| |
Going MAFless
Need a Field Harness
Fitted list:
Walbro, Bilsteins, RSR springs, Blitz Nur Spec R, Boost Temp Gauge, ApexI TT, Mkiv wheels, HKS super mega flow, ARC IC, more to come
|
|
Kai
Part of things
Posts: 276
|
|
|
|
Yo Ollie, Ditto! Hows yours coming along? |
| |
|
|
Speedle
Posted a lot
Need a Country Rock band in the Hampshire Area? https://www.facebook.com/DirtRoadDiaryUK
Posts: 2,221
|
|
|
|
awesome read dude! your attention to detail is inspiring! I would love to get my hands on one of these so nice to see people taking the time to keep these great cars on the road |
| |
|
|
Kai
Part of things
Posts: 276
|
|
|
|
There's attention to detail, and theres what i do, which is more anally retentive I don't like fitting non-Toyota parts, and i don't like the idea of 'going cheap' and spending 50p less on a gasket from a motor factors, when i'd rather have the Toyota warranted one! For me, more than anything, time isn't the issue, it's simply money - a lot of the big stuff for the rebuild, i already had (whole engine gasket set), but it's always the small stuff that makes the bills higher, like bolts, nuts, studs, o-rings etc - one trip to Toyota cost me £96 for about a dozen parts that'd fit in a bag of walkers crisps! |
| |
|
|
Kai
Part of things
Posts: 276
|
|
|
|
So, i've been waiting since February for parts...then of course the Japanese Earthquake & Tsunami happened, leading to difficulty in obtaining parts. Well, 3 months later and whaddaya know? I got a call from Toyota, telling me my parts were ready. So yesterday, I went down there, and picked up a very, very small bag of stuff, and was actually SHOCKED by the price of it all... came to €92.18!! That's £80.74 or $132.14, in case you were wondering. So, I must have got some big, expensive, rare parts, right? Nope! 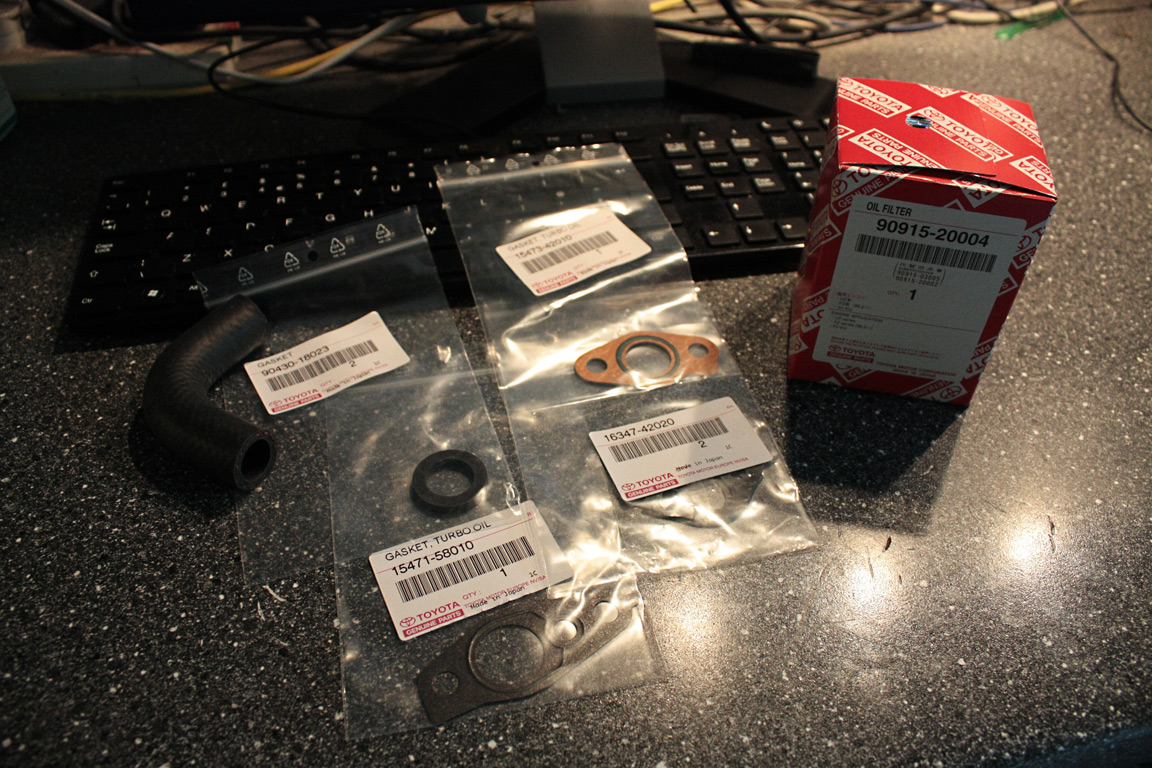 The only thing not pictured, are 4 spring clips, two stubby PCV hoses, and the Radiator Cap. Bill breaks down like this: Turbo Oil Drain to Block Gasket €3.90 Turbo Oil Drain & Feed Gasket €3.58 Turbo Water Feed & Return Gasket €7.16 Water Bypass Hose €17.75 Lexus LS400 Oil Filter €16.80 Oil Drain Plug Gasket €2.20 Radiator Cap €26.89 4 x Spring Clips €5.16 2 x PCV hoses €8.74 You don't get much for your money these days! Still, with all this lot, I should be able to crack on with the final bits of work, and plumb everything back in, ready to start! |
| |
Last Edit: Jul 23, 2011 23:36:32 GMT by Kai
|
|
Kai
Part of things
Posts: 276
|
|
|
|
Okay - time for a brief update i think... I had to take the dashboard out to refit the illumination bulbs, and check for a short circuit, as the dimmer rheostat seemed to be doing nothing. All the grounds check out, so i took the liberty of replacing the standard green bulbs, with some 5 watt 5000k Xenon White wedge bulbs (bright, super white), not LED's, but proper BULBS! There's also the matter of the oil pressure gauge lighting being typically annoying, and requiring that i get a totally different bulb to the others, for the illumination. So, i found a bloke on eBay selling 2 watt mini-wedge bulbs (standard are 1.2 watt), so....i now have 9 bulbs left over Once back together, i cleaned up the PCB plug traces with some white vinegar on a J-cloth (works brilliantly!), and proceeded to polish the clear dashboard face. Little trick i learned that some of you may already know; Brasso is king, as a plastic surface polish. It's a very, very fine abrasive, easily applied - do so in a circular motion, and try not to add too much at once. Let it dry for a minute or two, then use a piece of kitchen towel to clean it off, again, using circular motions. You'll need another piece of kitchen towel to buff it up. Result? You can now see your face in the plastic, like a mirror finish! I got so carried away, i ended up cleaning the backplate and screen on my phone, my entire iPod Touch, and figured out a very clever way of getting light scratches out of glass - fine valve grinding paste, tiny smear, rub in circular motion over any piece of scratched glass. Wipe off, and then three to four coats of brasso as described above to get the glass fantastically shiny and scratch free! I would be out doing more mechanical work to the car, but i seem to have lost my mojo at the moment - which is a right sod, because the weather is perfect for working on Cars. Having MS is a pain sometimes - you just get so fatigued you really can't be bothered to do much of anything, and end up nodding off in your chair I'm hoping after the long weekend i have planned on Guernsey will sort me out, energy wise - as i really should get on with it! |
| |
|
|
Ian
Part of things
Posts: 977
|
|
|
|
|
I found that out about brasso as well.
I was working in a bar cleaning the pumps and started using the brasso on the glass face of my watch. It wasn't a busy shift and 2 hrs later it was like new! Havnt tried it On plastic yet good plan.
Like the progress though so far
|
| |
|
|
|
|
Kai
Part of things
Posts: 276
|
|
|
|
So my work on this has so far been hampered by poor weather, and a distinct lack of Mojo. However, on Tuesday, when the sun came out, i thought 'enough is enough!' and went outside for a few hours, determined to swap out the water feed & return on the turbo, as the softline kit i have is just totally wrong. Simple 10 minute job, right? Noooooo! See, on the CT26, one bolt holding down the feed/drain is easy to get at - a simple 12mm nut. The other 12mm nut? Located right where you can't get any kind of socket or spanner, requiring the removal of the whole turbo... So turbo came off. Water feed swapped out for the original one. Bolted back up. got under the car to connect the oil drain line and....bloody line is too long, and creates a u-bend. Removed the turbo again, removed the softline adaptor and went back to the stock formed metal pipework. Put the turbo back on. Just as i finish tightening the last nut...i see i've left the one heatshield off the manifold, thats impossible to install with the turbo in place. Remove the turbo AGAIN. *queue string of expletives and sudden urge to hit something with a large hammer* Okay then, heatshield installed, now comes the tricky part - bolting up the oil feed banjo. It's a relatively tight space, and you have to perch the turbo on the manifold studs in such a way that any movement will get the banjo fitting out of alignment. TWO HOURS LATER and it still wasn't in! Bloody thing is like, 1mm out, i need to be able to get a second hand in there to hold the pipe in place with the other crush washer, unfortunately the turbo is then in the way. How the f*** do they install these?! Of course, at the tail end of the two hours, i'm just about to get the banjo bolt in place when *PING*....the circlip holding the wastegate to the actuator arm disintegrates, rendering my entire day utterly and totally pointless until i can source another one from the UK... I swear, this car is testing my bloody patience! |
| |
|
|
Kai
Part of things
Posts: 276
|
|
Jul 10, 2011 15:47:23 GMT
|
Right - update time! A friend of mine from the UK sent me over the wastegate circlip, so I could start putting things back together again - Toyota are damn cheeky, asking for £2 + VAT for a SMALL METAL CLIP THE SIZE OF MY SMALL FINGERNAIL. Grr. Sometimes I wonder if I shouldn't just get a kit of stuff like that, and fit a generic one... Finally, I managed, after several hours of swearing, threatening to beat things with a hammer and telling the supra I was about THIS close so setting it on fire....i got the banjo bolt in 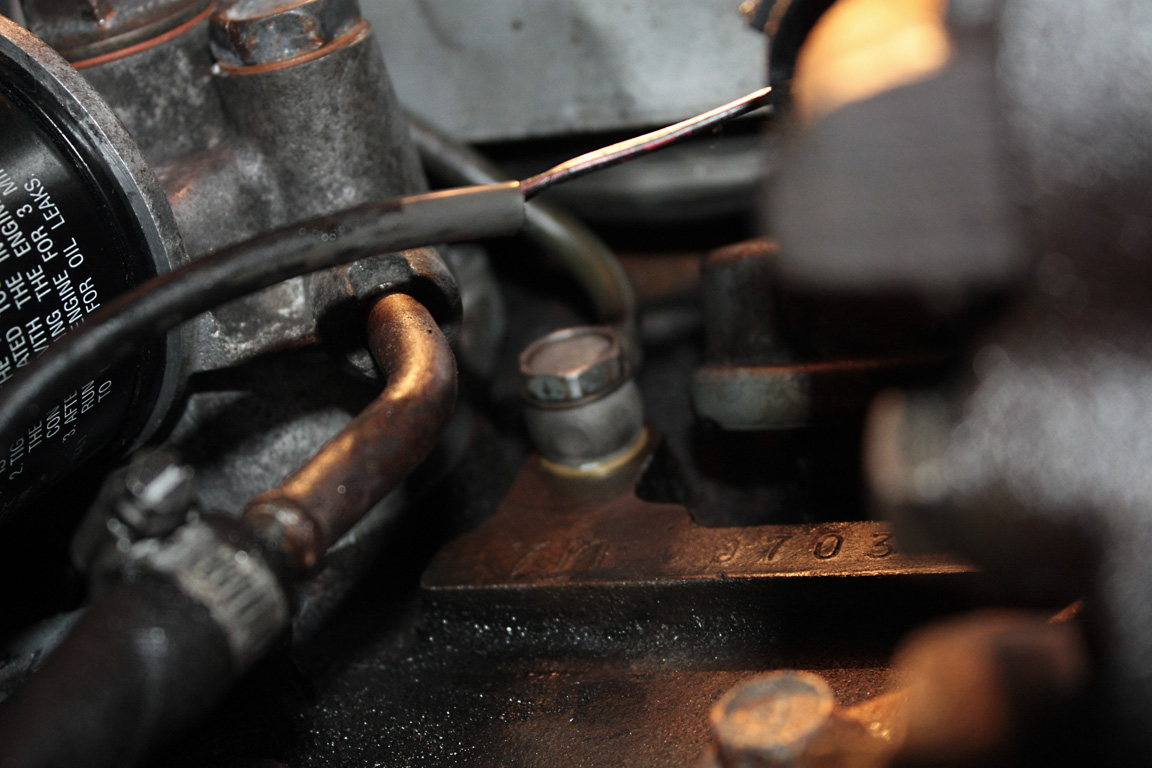 See? SEE THAT? I HATE YOU, BANJO FITTING! I really should have saved up and sprung for the ARZ Softline kit that driftmotion sells - let this be a warning - don't CHEAP OUT! Anyway, with that done, I could finally get moving on everything else...turbo to intercooler plumbing? Check, installed and tightened. Oil Cooler line? Check, installed and tightened as well. Turbo water lines? Check, replaced with samco ones, new clips installed. Wastegate was finally bolted back into place, vacuum piping on that side is DONE. Installed the '¬' shaped vacuum line from the fuel rail mounting point to the PCV pipework, new clips installed there, too. Bottom Rad hose swapped out for a samco one, new jubilee clips, and tightened up, rad drain plug re-installed. New Gates power steering belt, and new Dayco alternator belt installed, and I just re-installed the old A/C compressor belt, as I couldn't really be arsed to replace that, there's nothing wrong with it, and the A/C is empty anyway. I've not installed the PS reservoir - debating on whether to use the N/A one, or try and re-situate the Turbo one, in either case, its only two small hoses and their respective clips. This is how things sit as of right now: 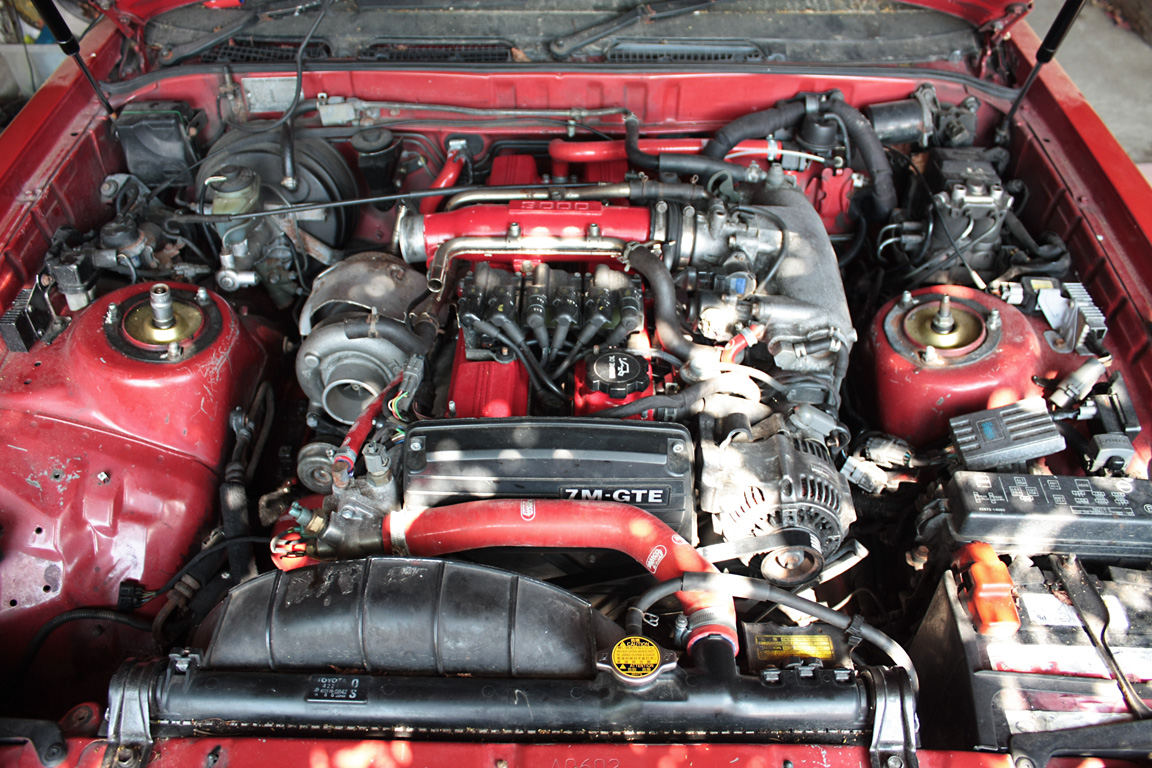 Once the oil gets drained off tomorrow, and re-filled with fresh stuff for the break in (it's 10w40, going to last about 30 mins before its switched out for some fresher stuff), it can *FINALLY* come of the axle stands, the rest of the turbo plumbing can go on, and the dashboard and fascia can go back in AGAIN, once i've checked all the connections twice over. The dashboard has new bulbs installed throughout, proper xenon bulbs, not LED's, of the blue-white variety, instead of the standard 'yellow' white bulbs - they all check out, so hopefully, the dash dimming will work properly. So....verdict? Reckon it'll start, or explode on me? |
| |
Last Edit: Jul 23, 2011 23:37:25 GMT by Kai
|
|
grayb
Part of things
Posts: 86
|
|
Jul 11, 2011 12:14:03 GMT
|
|
Course it will start - think positive ;D
let us know how you get on
|
| |
1984 Celica Supra
|
|
Kai
Part of things
Posts: 276
|
|
Jul 11, 2011 17:50:05 GMT
|
So today I thought 'i'm finishing this!' and went outside to plumb the rest of the turbo intake pipes up, and the power steering fluid reservoir. For the sake of faffing around, I put the NA reservoir on, which I thoroughly cleaned yesterday. Unlike the turbo reservoir, its see through, so you can actually SEE the fluid level in the reservoir. It also means I can now get to the CPS easier. The reservoir will need a bracket. It would mount on the wing, but annoyingly, the intercooler return pipe gets in its way. So next to the airfilter it is...well, i'm going to have to ditch the stock airbox and go for a cone filter, but that's okay - both the stock airfilters and boxes I have are naff. Once all the under-car stuff was done, it was time for it to get off the axle stands...coilovers make jacking the car up interesting, thats for sure - constantly worrying the whole car is going to tilt over on top of you. Still, once it was on the ground, for the first time since March 2009, the only issue was getting the jack out from underneath on the passenger side, as the tyre had gone flat. 5 minutes and a 12 tyre pump later, and voila, it looks like this: 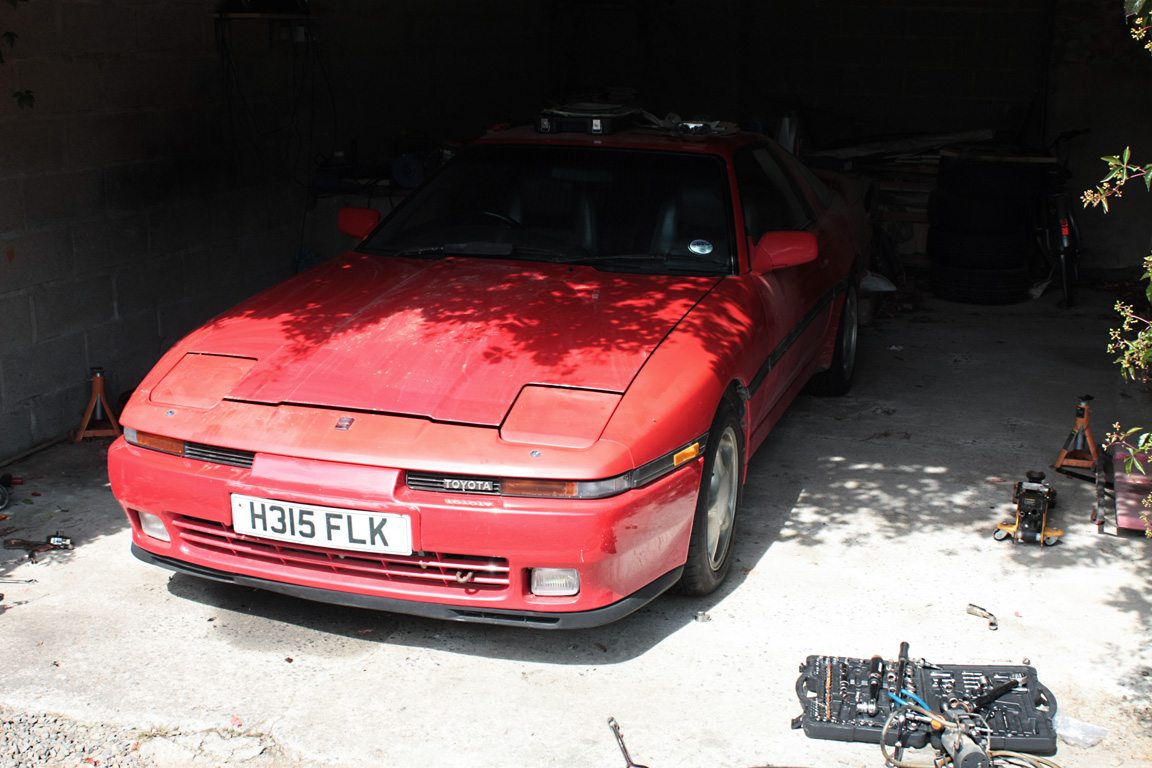 Yes, it looks sun-faded...but thats okay - for the moment, it's not my primary concern. Under the bonnet, things look like this now: 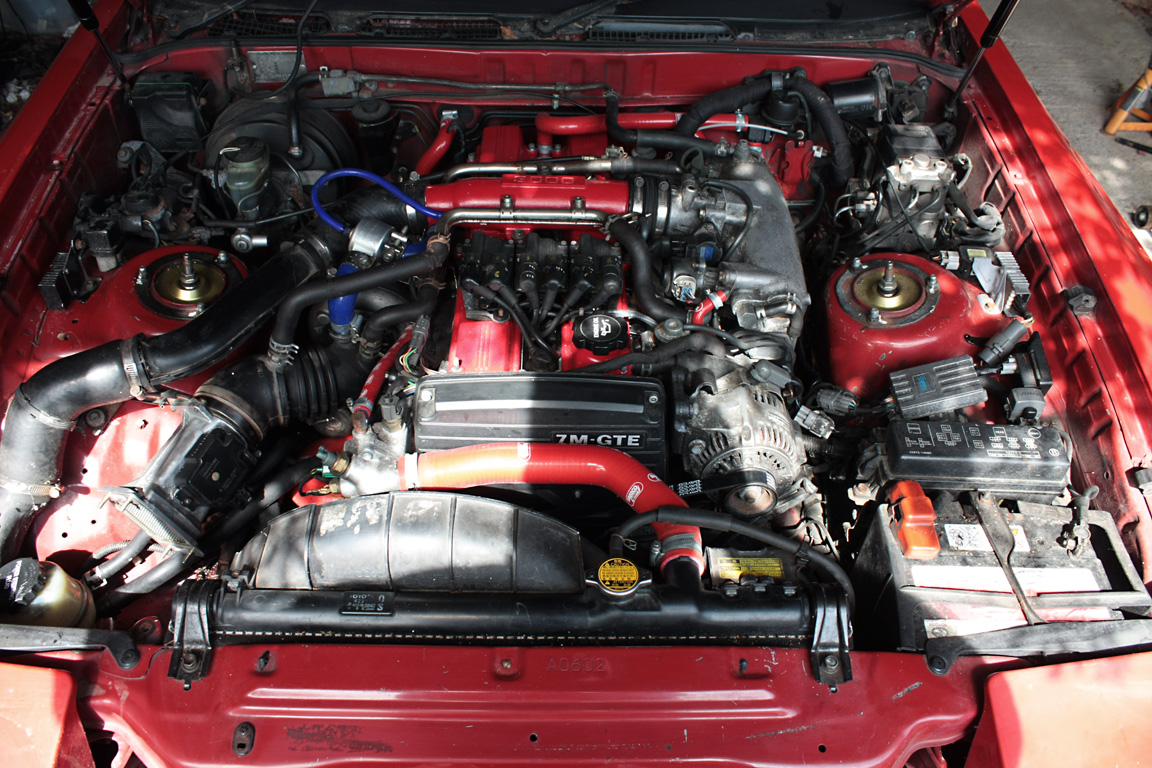 It's dry of all fluids right now, the battery is on charge. First thing in the morning, the oil is going in. I'm kind of nervous to see if the thing goes *BOOM* or fires at all. Kind of paranoid, if i'm honest, I don't want to have spent all this time, effort and money to have the thing not work |
| |
Last Edit: Jul 23, 2011 23:38:38 GMT by Kai
|
|
Kai
Part of things
Posts: 276
|
|
Jul 12, 2011 16:37:39 GMT
|
|
Okay....today is totally the wrong weather - it's been slamming it down with rain all day - not a letup until about 2 hours ago. Turned the key and....nothing. Not a sausage. Oh the gauges and dashboard works fine - but the starter wasn't doing anything, and i couldn't hear the fuel pump...then i looked into the engine bay and saw the positive lead to the starter has become unplugged. UGH! Going to have to jack the car back up in order to get at it - its a sod to get to, although having removed the EGR makes things a little easier, access wise.
However, jacking up the car will have to wait for a day or two, as i have an urgent need to do some gardening before paying guests turn up on thursday! :/
|
| |
|
|
|
|
|
Jul 12, 2011 20:53:34 GMT
|
|
i love reading your updates! Best of luck- i know the nervousness your feeling. And surely the excitement too. Yep- that engine bay sure looks well crammed!
|
| |
|
|
Kai
Part of things
Posts: 276
|
|
Jul 12, 2011 21:10:30 GMT
|
Yep - the GTE was always a bit of an afterthought...you look at the 7M-GE and think 'hmm, simple, elegant, everything in a sane place'. Then you look at the GTE and think 'ohhhhh curse word.' |
| |
|
|
Kai
Part of things
Posts: 276
|
|
Jul 15, 2011 17:56:43 GMT
|
So today, after getting back from the store, I decided that enough was enough, and it was going to run...TODAY. No if's, no buts, no arsing around, just jacked it up, plugged in the starter motor (after much huffing and puffing with the jack), and it kicked over. So, EFI fuse was removed, some cheap 10w40 flushing oil was put in (it's getting drained out tomorrow, and fresh stuff is going in, along with a new filter), fresh, luminous green coolant and distilled water. Cranked it for 30 seconds+ to build oil pressure, and voila, pressure! GOOD pressure, too! EFI fuse was plugged back in and....it started. Ish. After initially getting concerned there may be a wider issue, it turns out that the CPS was merely installed a few teeth out. Thanks to shaeff's excellent guide here: www.supramania.com/forums/showthread.php?38775-How-To-basic-timing-instructions-CPS-alignment, I was able to plug the CPS in the right way, set perfectly to 0* TDC. Upon putting everything back together....ladies and gentlemen - IT LIVES AGAIN! I am SUPREMELY happy! Of course, I still need to sort out the timing properly, with a timing light, and tighten the turbo elbow. but for today, I think that's enough - i'll do that all tomorrow when I do the ps fluid reservoir fill, oil and filter change, and I have to get some more distilled water to top up the rad, I don't think 6 1/2 litres is enough! Just need to sort out the valve clearances, and an air filter adapter so I can chuck on a cone filter |
| |
Last Edit: Jul 15, 2011 17:57:13 GMT by Kai
|
|
Kai
Part of things
Posts: 276
|
|
Jul 16, 2011 19:23:52 GMT
|
Small update - got the thing up to temperature again, and set the static timing to 10' BTDC. Unfortunately, the idle is jumping around from 750 to 950rpm, which is a little annoying, although I *think* most of it is due to there being a missing vacuum line from the power steering pump to the pipe running from the AFM to the turbo. I might have the original line around here somewhere, else I may have to order another one...sigh :/ The coolant temperature sensor is giving me cause for concern too, as it doesn't seem to want to show anything. Could just be a bad connection though, i'll try it again tomorrow. I want a dry day again, its soaking wet under the car, and I want to swap out the run-up oil for some 10w40 break in oil. Thanks also to my lovely fiancee, who told me she's going to order me 4 of the 9 valve shims I need - toyota charges £10 a pop for them, but as she lives on guernsey, where there's no VAT, they're £7.50 each instead The top end really *IS* clattery - here, have a look at the valve clearances I had to put it together with: 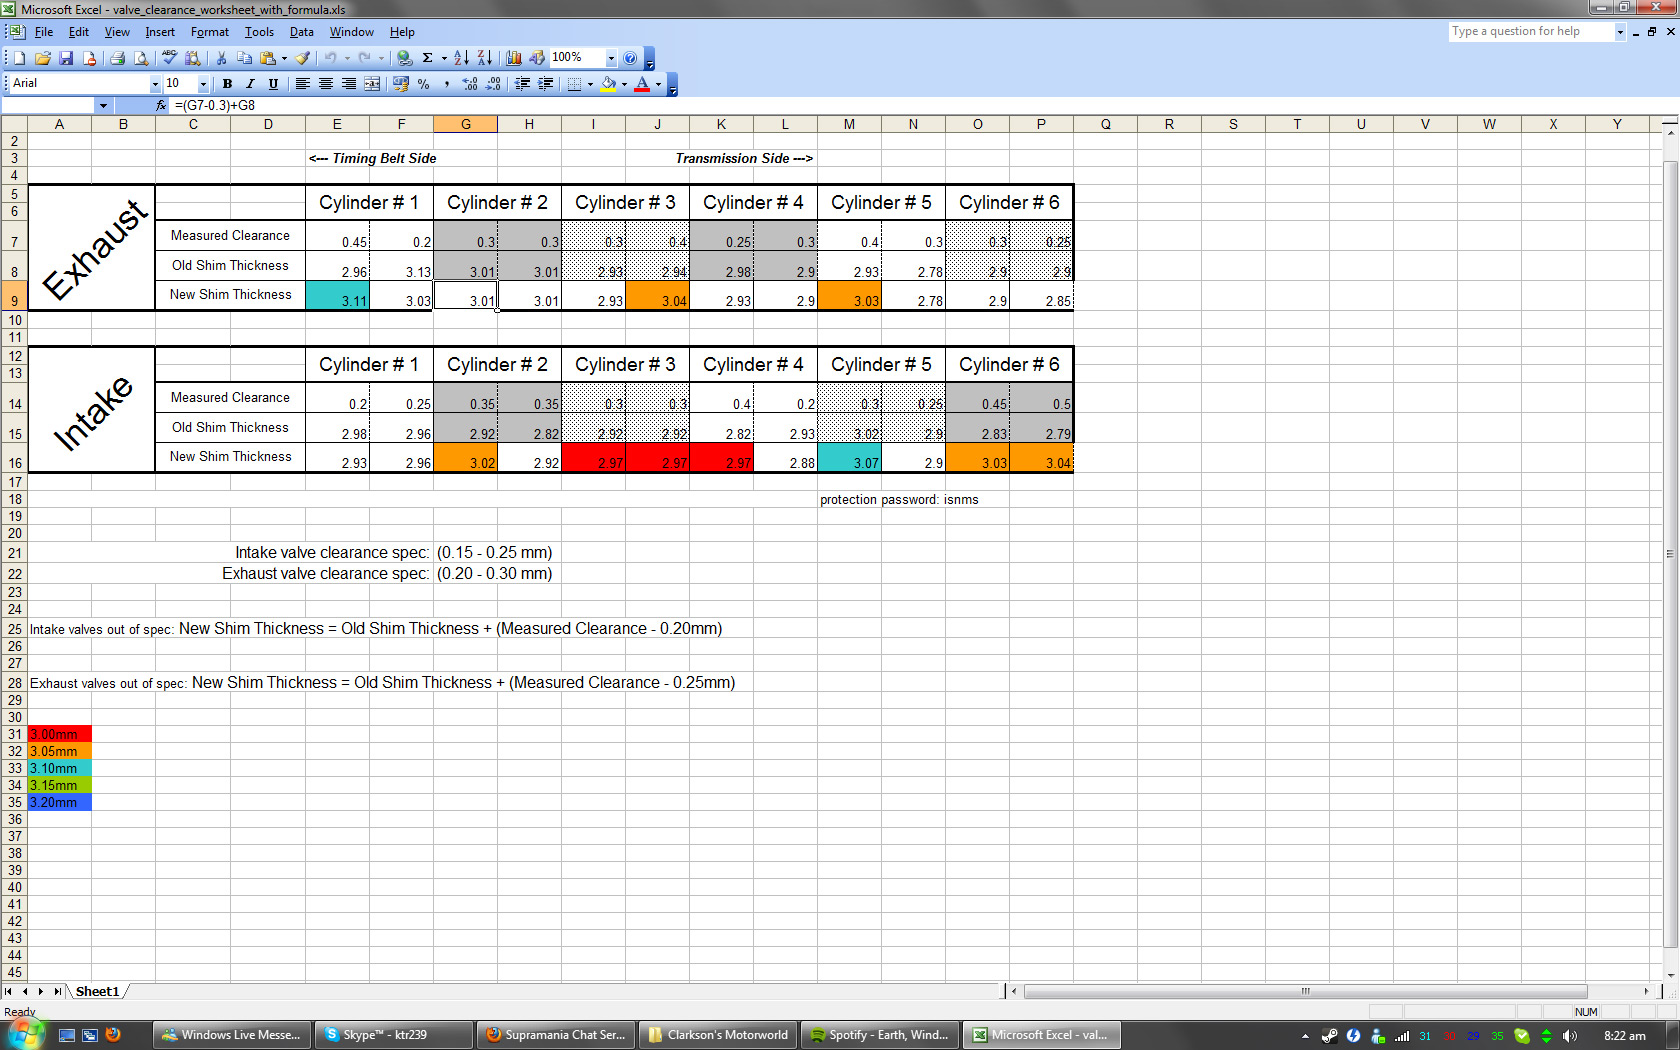 Cylinder #6 on the intake side is the worst! |
| |
Last Edit: Jul 23, 2011 23:40:13 GMT by Kai
|
|
|
|
|
Jul 16, 2011 20:33:11 GMT
|
|
wow- thats a posh looking piece of scruffy oily paper with the valve clearances scribbled on it.
Congrats on it starting. Sleep easy now!
|
| |
|
|
|
|