bstardchild
Club Retro Rides Member
Posts: 14,892
Club RR Member Number: 71
|
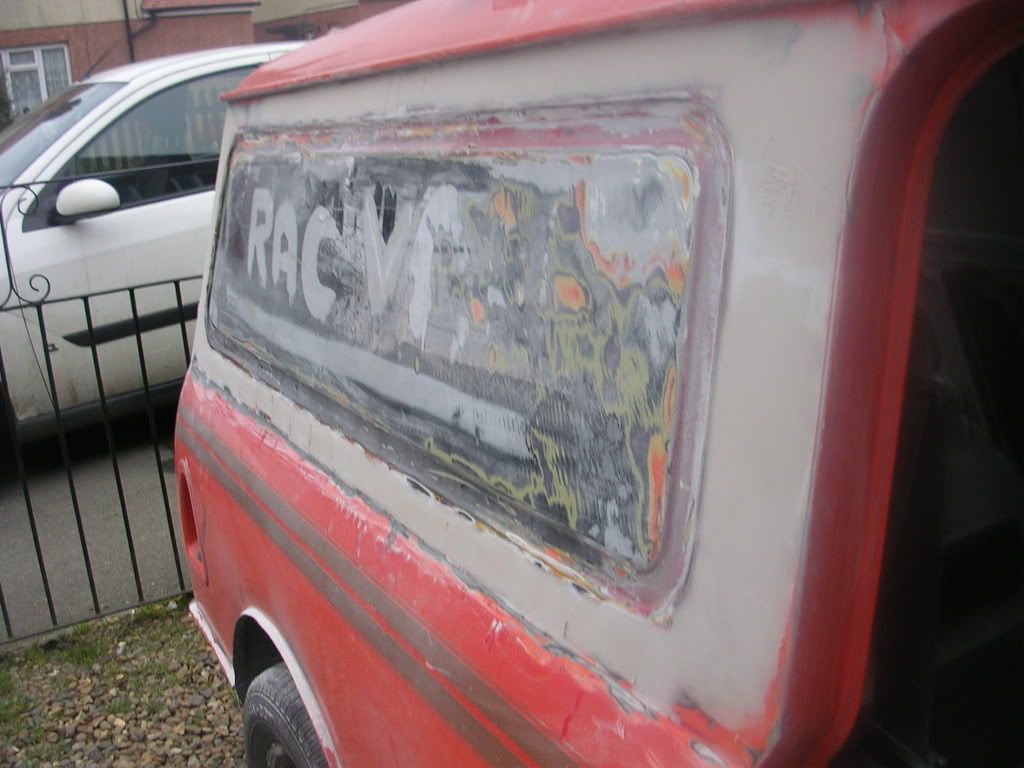
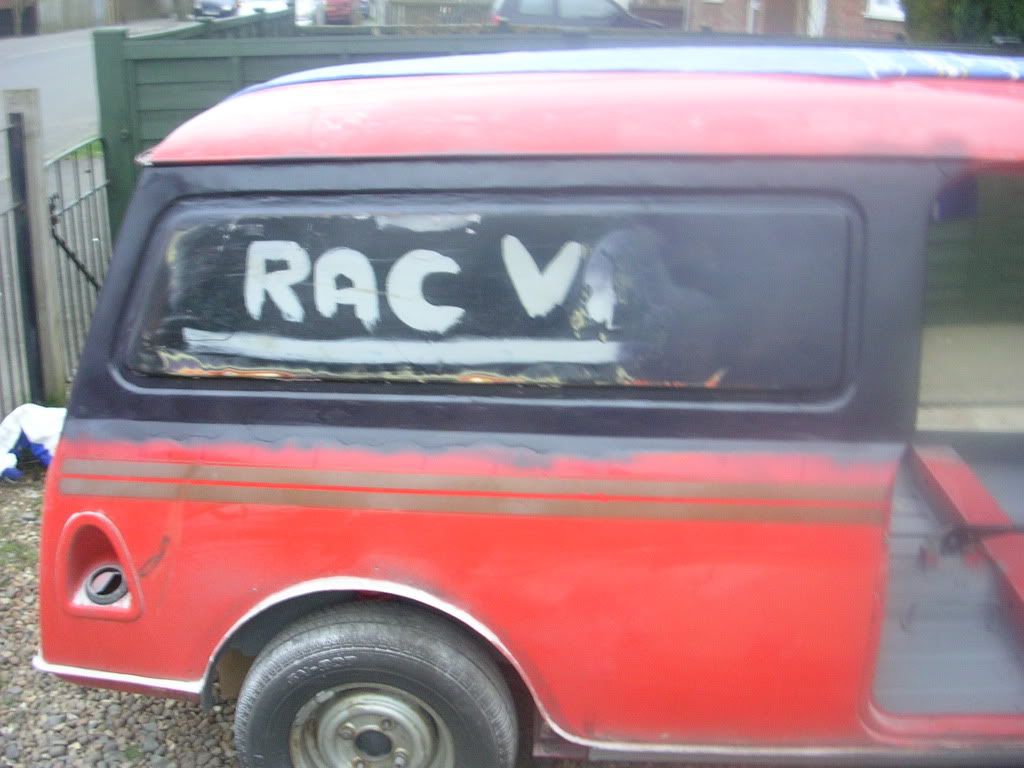
1979 Mini ClubVAN estatebstardchild
@bstardchild
Club Retro Rides Member 71
|
|
|
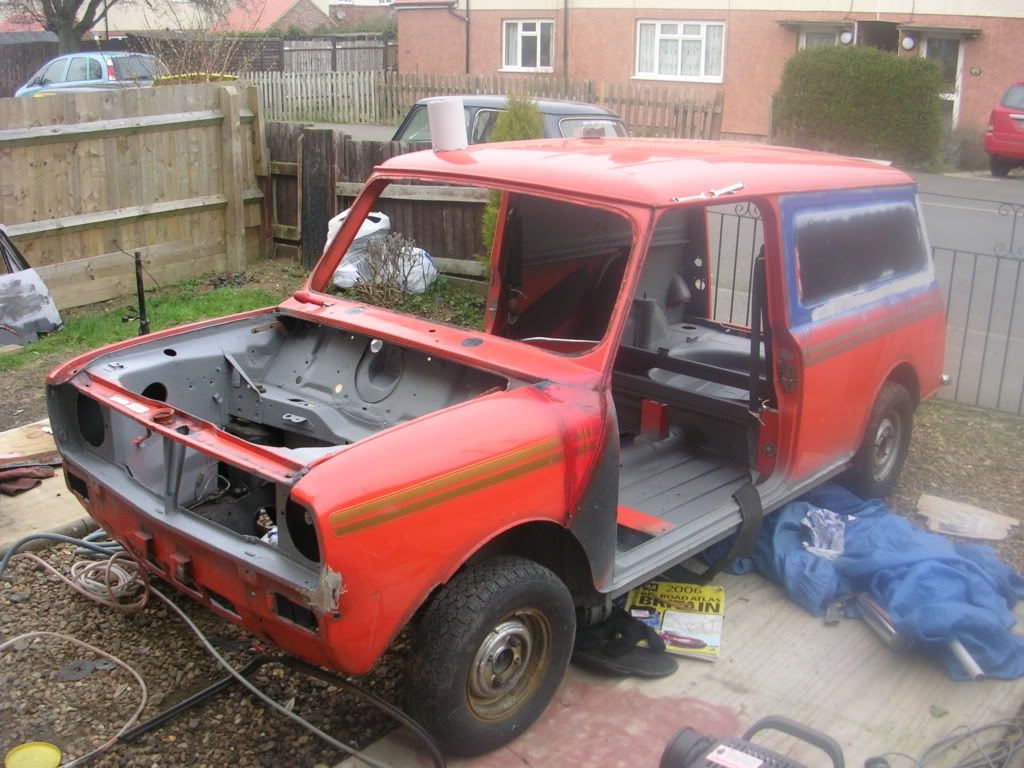
I got a tight deadline for the build, as I'm planning on doing london to brighton in may! lol I sold the load bed from the van the day after I cut it up (and for more than I paid for the whole shell!) to a bloke who also needed one for his pick up project, but I do still have some parts like the roof and bulkhead, although the bulk head is from a clubman?! so was obviously a cut and shut as there would be no doors in the world that would have fitted without drastic surgery. needs a roof so I'm sure he'll be interested Also needs Cab floor and front wings  |
| |
|
|
|
|
|
|
|
|
|
snap, i always wanted a van, but in the last few years ive been priced out of owning one unless i get a bank loan lol so i went for the next best thing and got a clubby estate, which is a bonus as i have a 2 year old to cart around and the missus, so needed the extra space, but now its a van/estate, its so much more to what i wanted in the 1st place i doubt ill ever get rid, and it cost a fraction of the price of a genuine van  happy days |
| |
|
|
|
|
|
|
|
needs a roof so I'm sure he'll be interested Also needs Cab floor and front wings like i said, i got a complete roof panel, and i also have 2 full length floor pans for estates/van/pick-up, complete with sills, but they were cut from the van shell so could do with tidying up, if your interested, ill get some pics for ya of the parts i have |
| |
|
|
bstardchild
Club Retro Rides Member
Posts: 14,892
Club RR Member Number: 71
|
1979 Mini ClubVAN estatebstardchild
@bstardchild
Club Retro Rides Member 71
|
|
|
needs a roof so I'm sure he'll be interested Also needs Cab floor and front wings like I said, I got a complete roof panel, and I also have 2 full length floor pans for estates/van/pick-up, complete with sills, but they were cut from the van shell so could do with tidying up, if your interested, ill get some pics for ya of the parts I have Please do that and I'll pass them on to my nephew |
| |
|
|
|
|
|
|
|
got more done today, i love having time off work to do my cars  finished the passenger side completely now, and made a start to finish the drivers side, here are a few pics! repaired the front wing, was abit holey but made a plate up, once its had a skim of filler you'd never know 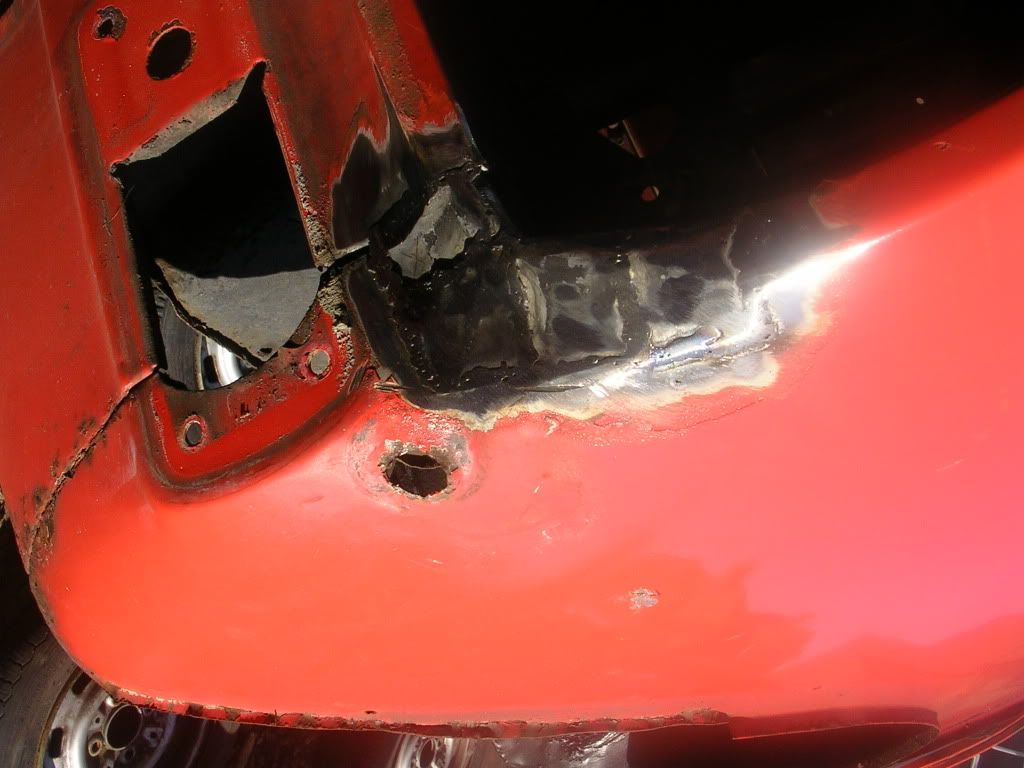 finished all the welding underneath, seam sealed, painted in rubberised paint and then stone chipped 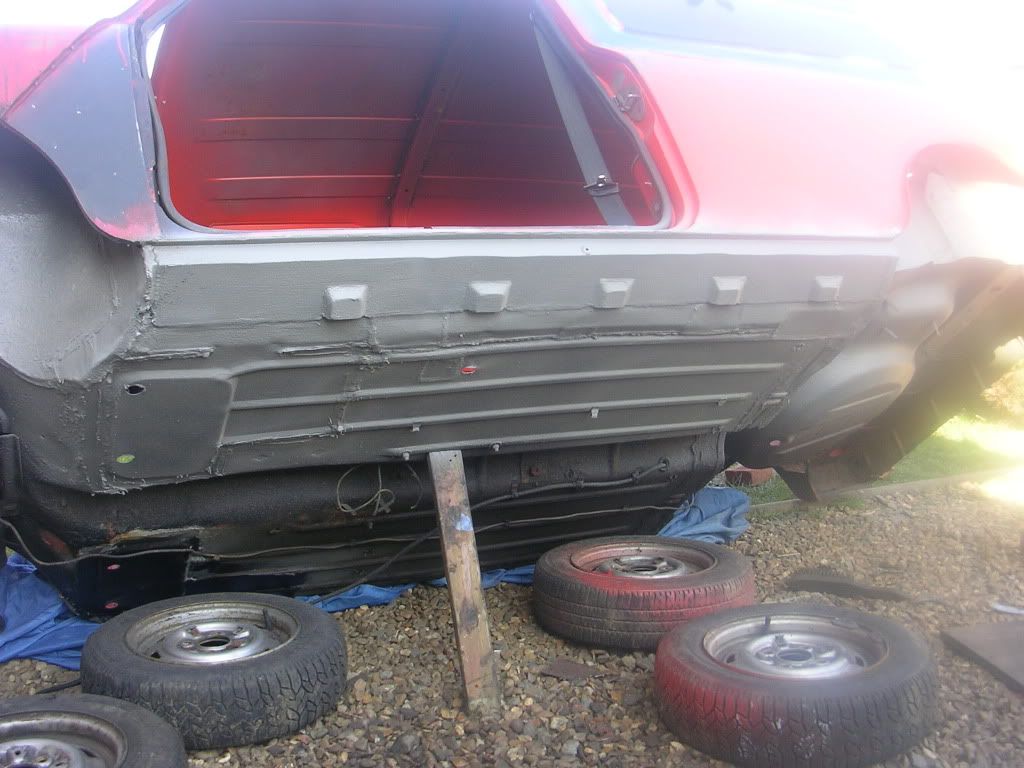 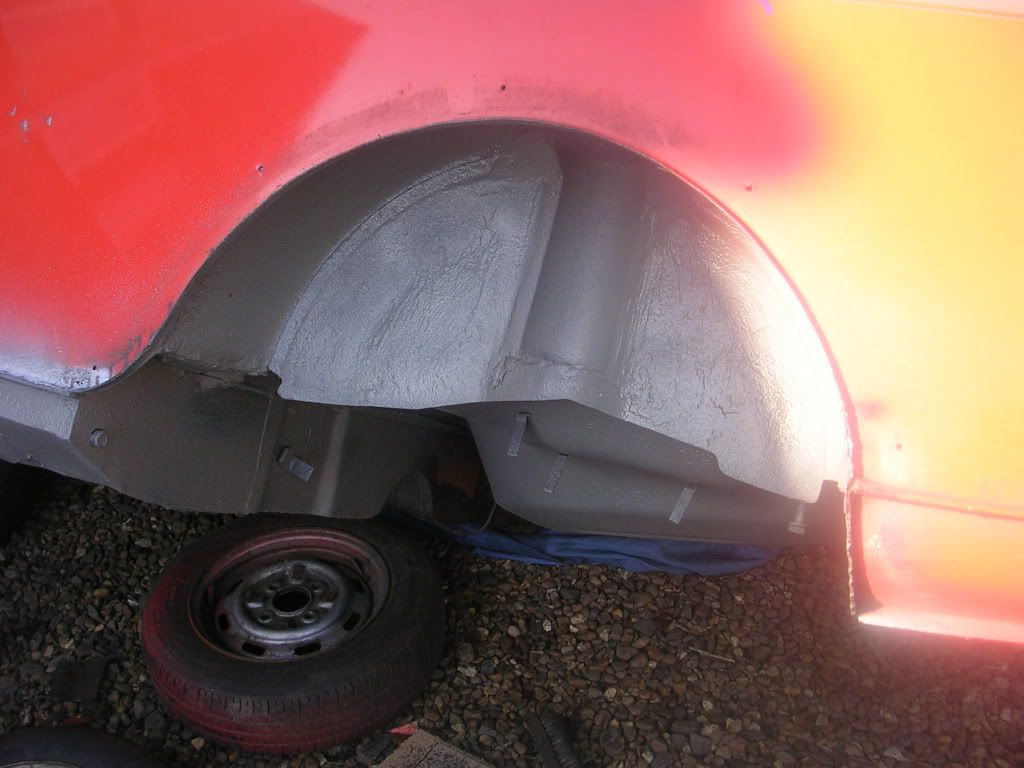 i then spun the shell round once the stone chip had dried, and made a start on the drivers inner and outter sill, not as bad as the passenger side 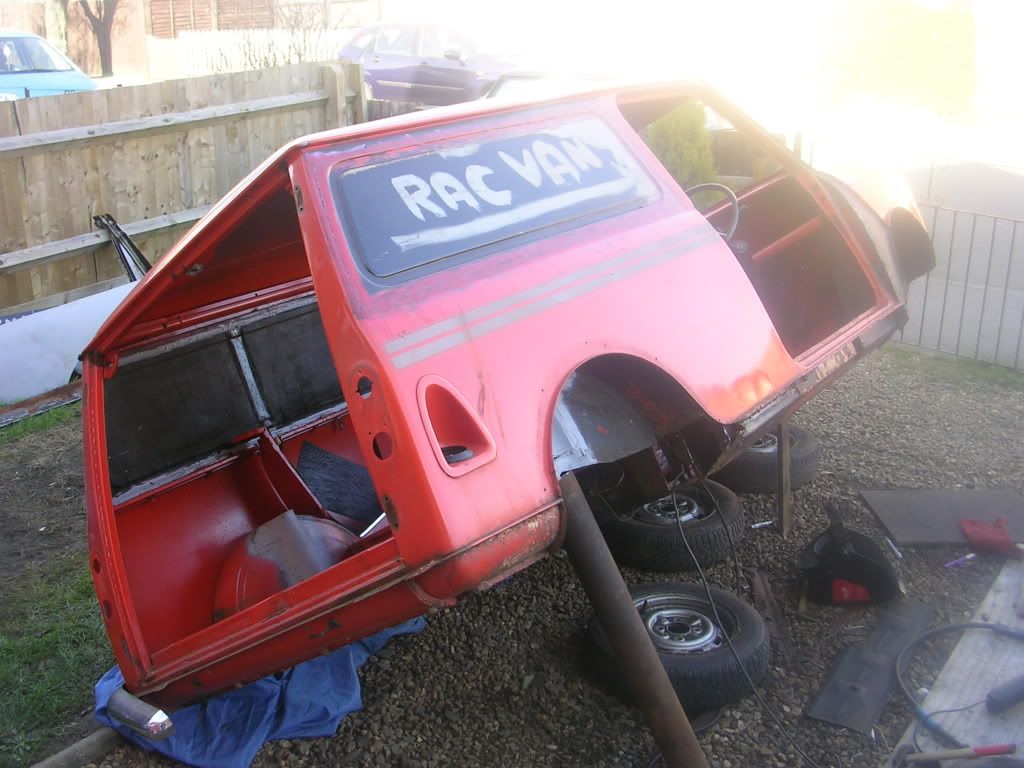 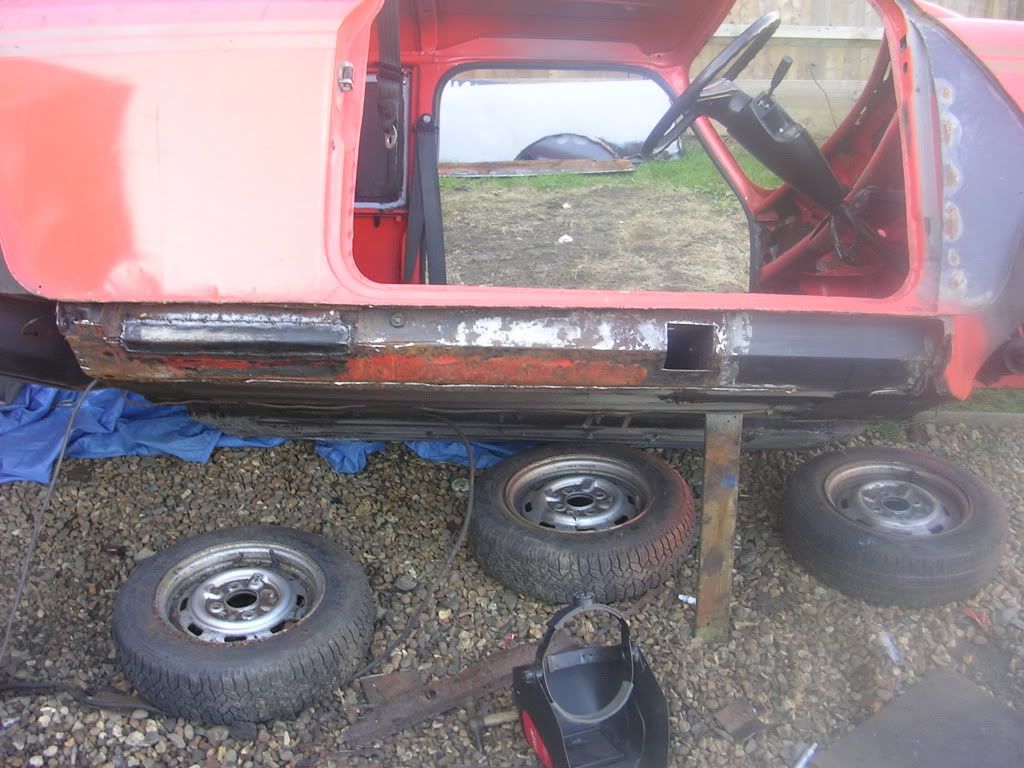  thats all for today! I'm pooped lol |
| |
|
|
|
|
|
|
|
blagged a sick day off work  so i could get the welding completely finished, finished the drivers sill this morning, painted and stone chipped same as passengerside, then once dry ive test fitted the rear beam and coilovers... i have to admit, it looks rather good! it sits just right too, not to high, and not to low! here are some pics floor and sill after painting with rubberised paint 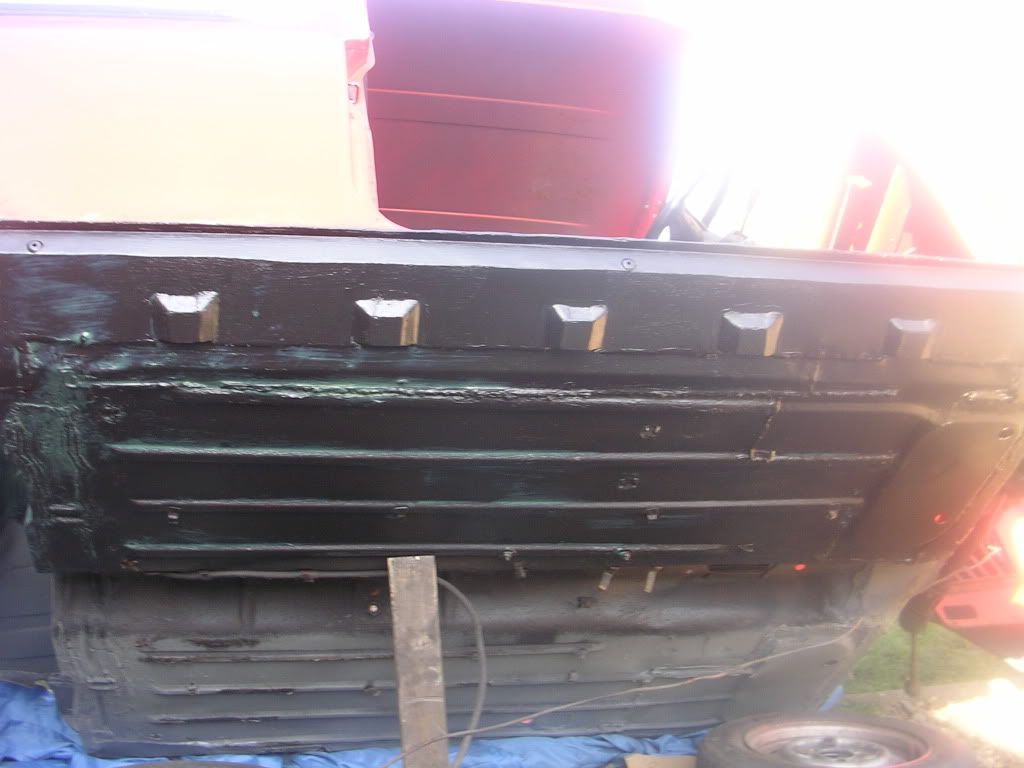 stone chipped and trial fitting rear beam 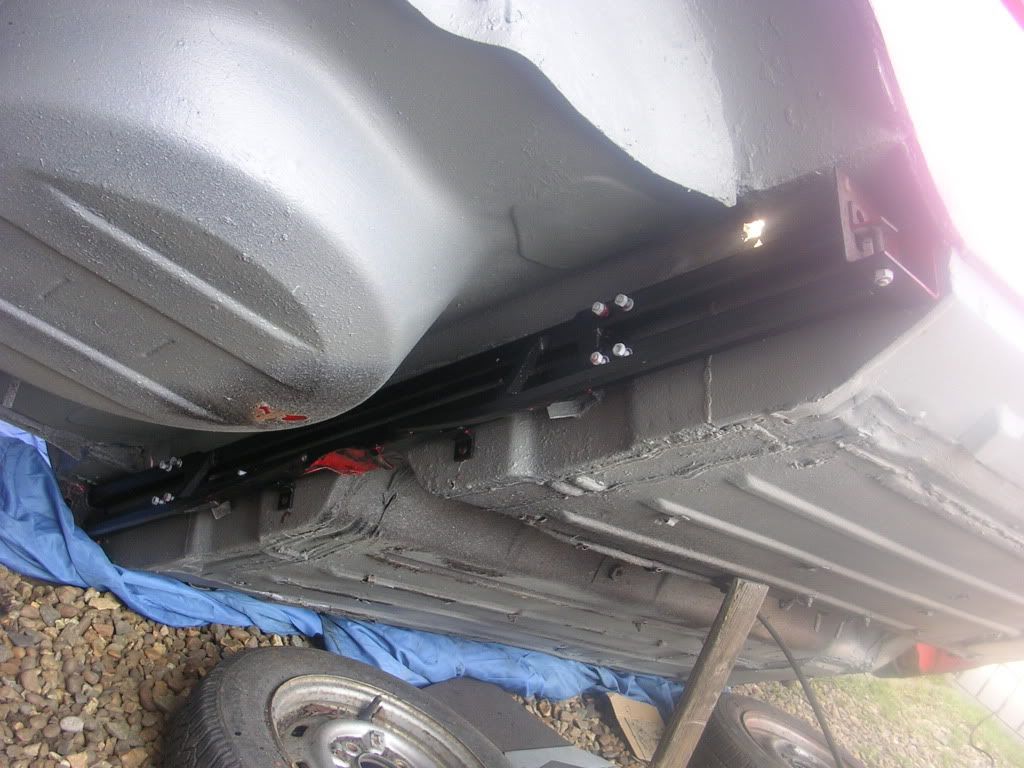 radius arms and coilovers bolted up 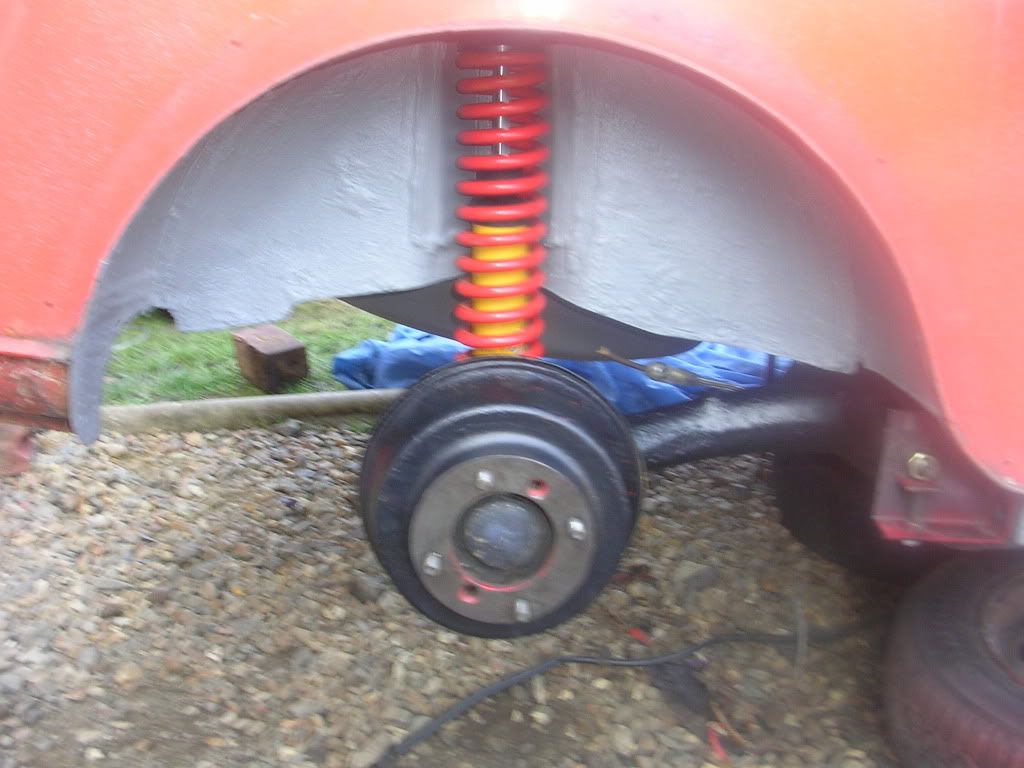 underneath view  finally on some 10" steelies 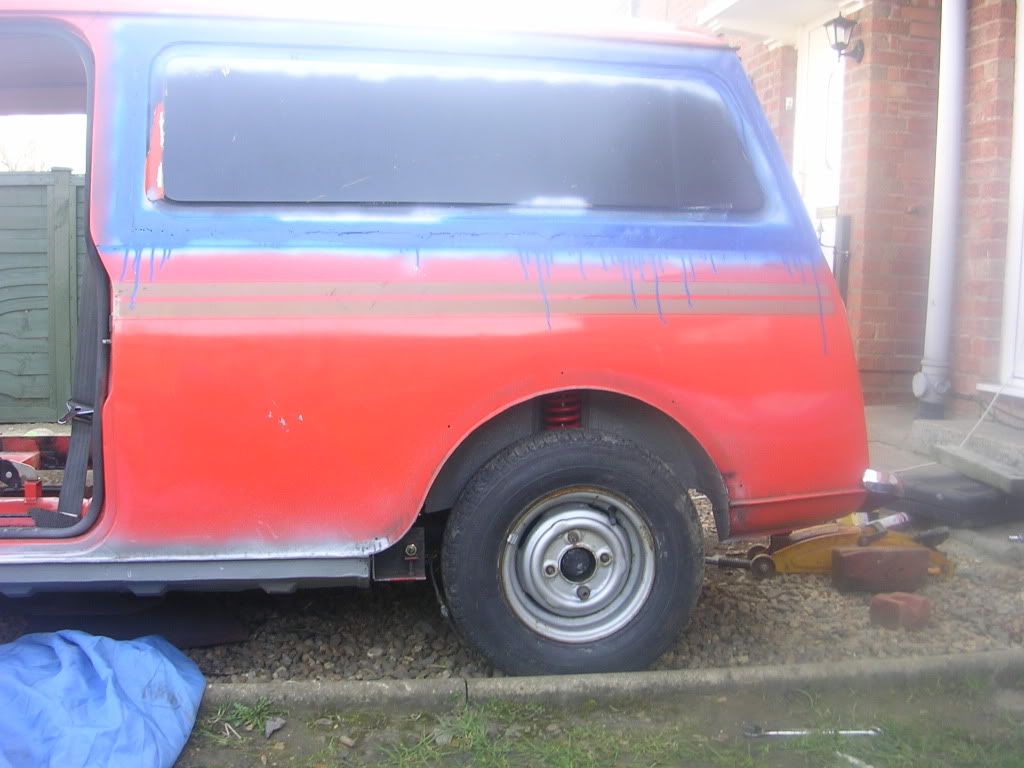 there are still some small patching to do on the inside where the rear seat bolts to, but this is easily done with the beam fitted, and its on my list of little bits to finish off beofre paint! |
| |
|
|
|
|
|
Mar 10, 2011 19:30:13 GMT
|
another small update, i cleaned, rust treated, primed and stone chipped the engine bay when i got home from work, and behind where the grill sits, as this wont be seen once the trim is all fitted up! think it looks pretty cool, and i quite like the textured finish it gives (and stone chip can be sanded slightly once dry if its a little too rough!) 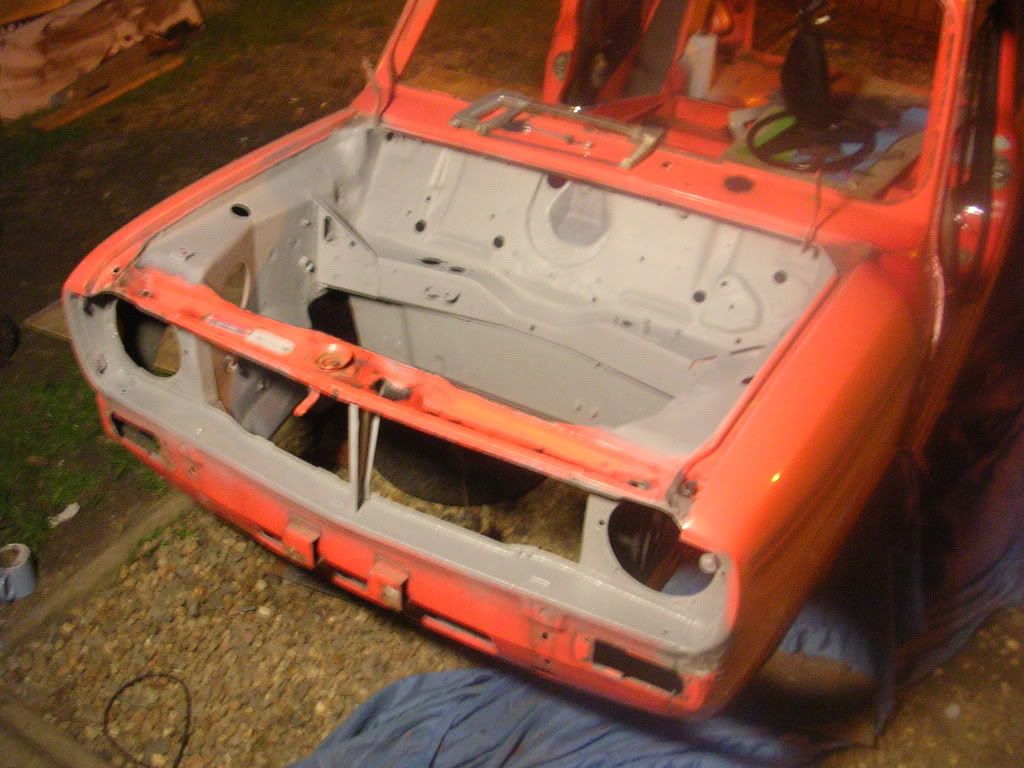 |
| |
|
|
luckygti
Posted a lot
 I need to try harder!
Posts: 4,912
|
|
Mar 10, 2011 19:58:34 GMT
|
|
Looking amazing, and you are really cracking on with it for sure. I'm not really up on Mini's but what's the sketch with changing to ciolovers? How does the original suspension work at the back?
|
| |
|
|
|
|
|
|
|
Its getting there! hope to have most of the body prep done this weekend, then its off for paint! The original rear suspension is very basic in design, using a rubber "donut" and and alloy cone in a subframe, when travelling along and you go over bumps and pot holes, the suspension "donut" is compressed, this is the suspension, you can get harder or softer "donuts" but i fancied something different, and havn't seen coilovers and a beam axle used on a clubby estate before, so thought why the hell not! lol they work pretty well too with me standing on the back and bouncing it lol i really hope to get it painted within 2weeks so i can start building it up ready for summer |
| |
|
|
|
|
|
|
|
Really liking this. Great work, bookmarked  |
| |
|
|
|
|
|
|
|
Mar 12, 2011 19:47:00 GMT
|
|
|
| |
|
|
|
|
|
Mar 13, 2011 18:47:17 GMT
|
with this morning being wet, i didnt get much done so went out with the missus and our daughter, this afternoon dried up so i thought id get some more done on the car, my daughter wanted to help too, shes nearly 3 but already has the mini bug!  she wants to learn to weld too, bless her 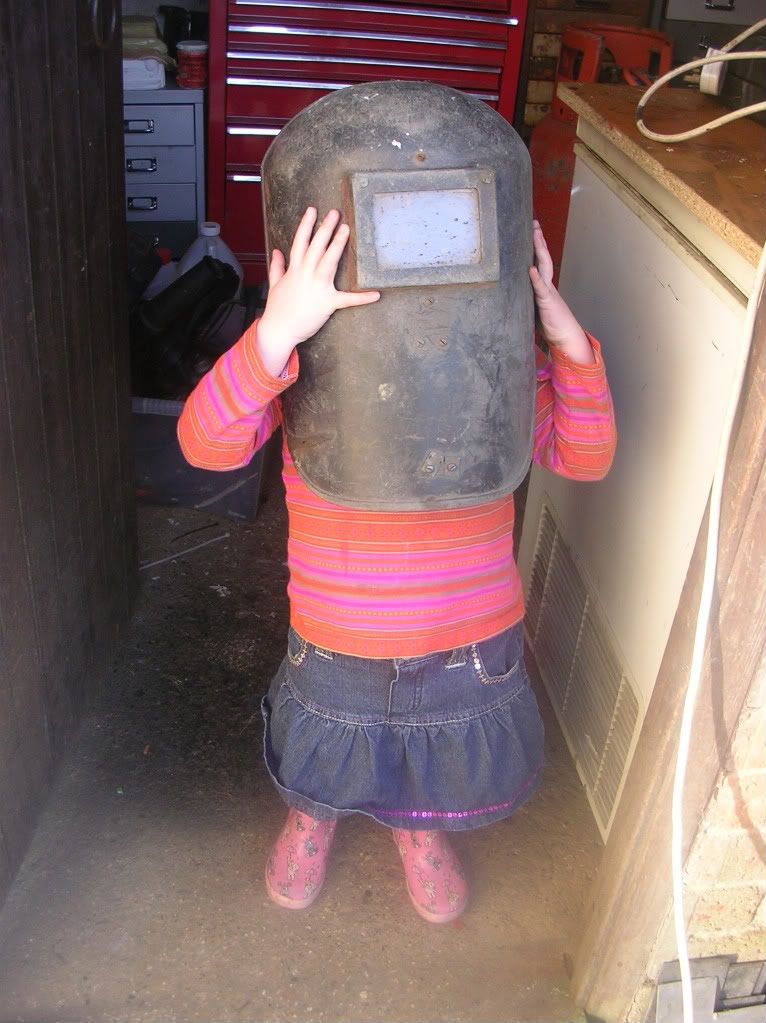 then having thought about it, having a beam instead of a full subframe i had no where to hang my exhaust from at the back, so did this... 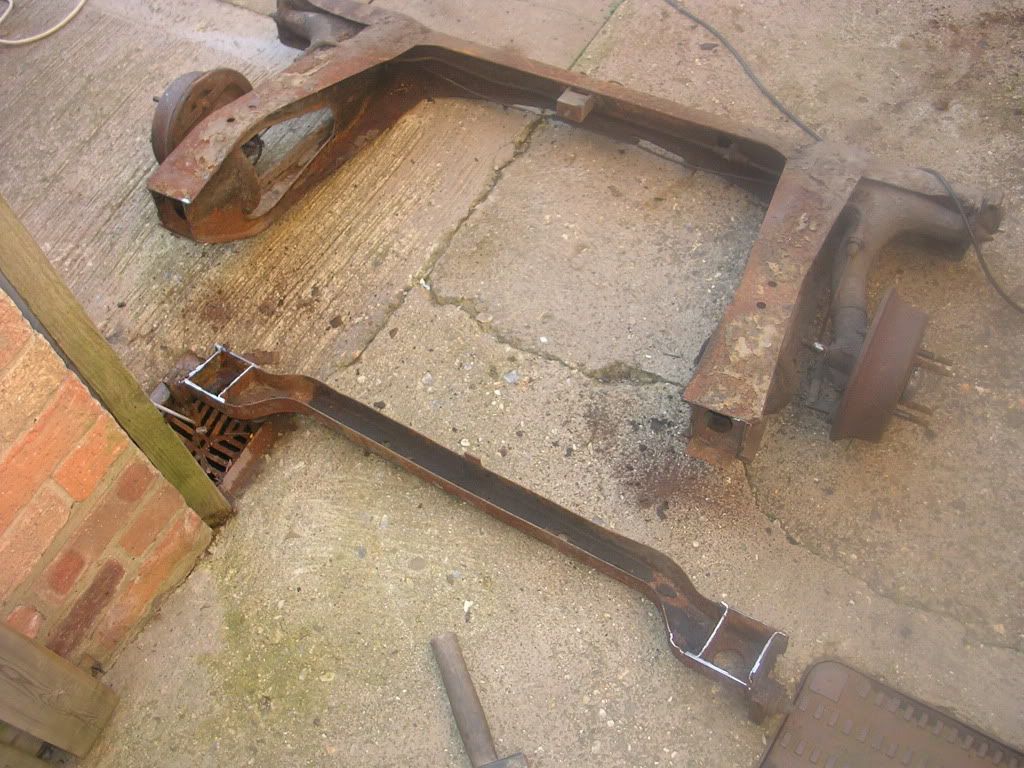 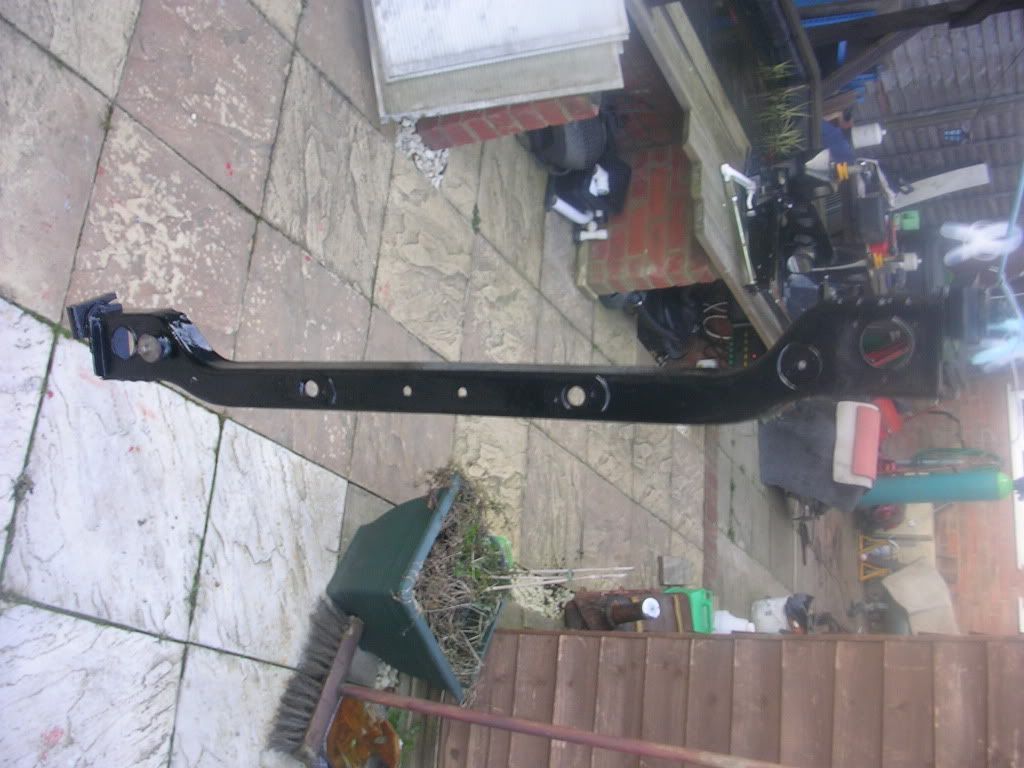 once bolted up ill have somewhere to hang my exhaust from! i also did some more prep work on the shell, but wont bore you with endless pics of sanding lol |
| |
|
|
|
|
|
Mar 13, 2011 22:32:41 GMT
|
|
Looks good as usual lewis, just a thaught though, with you replacing the rear subbie for beam axle, youve lost all the rear end strength in the case of a crash havent you? so now you have that rear part, maybe it could be an idea to link the 2? use some small diameter tubing and make like another subframe (i know its kinda killing the idea of a beam axle) but it would give u alittle bit more strength in the case of being rear ended.
|
| |
Nobody dies a virgin, because lifes curse word us ALL
|
|
|
|
|
|
|
|
yeah i was thinking something similar, just to give a little extra protection incase of a rear end shunt, and that way, i can kinda get away with saying it still has a rear subframe fitted lol
|
| |
|
|
|
|
|
Mar 18, 2011 19:23:05 GMT
|
|
been repairing the rear doors this evening, battery was dead on the camera so didnt get any pics unfortunaly, will try get some tomorrow when i finish them off!
|
| |
|
|
|
|
|
Mar 19, 2011 13:44:08 GMT
|
been doing some more work on the clubVAN again today while the weather is perfect! repaired and fitted all the doors, drilled the holes for the wing mirrors, trial fitted my carbon fibre bonnet and generally standing back with a cup of tea admiring my work (good job its outside, my big head wouldnt fit in a garage lol) anyway heres some pics... rear doors repaired and fitted, nice fit too, the drivers one i repaired myself, the passenger one was already half repaired by the guy i got them off, and i finished it off, but the fit along the bottom isnt as good in my opinion  wing mirrors fitted, took me half hour to decide where i wanted them and to fit them, i think i got them just right 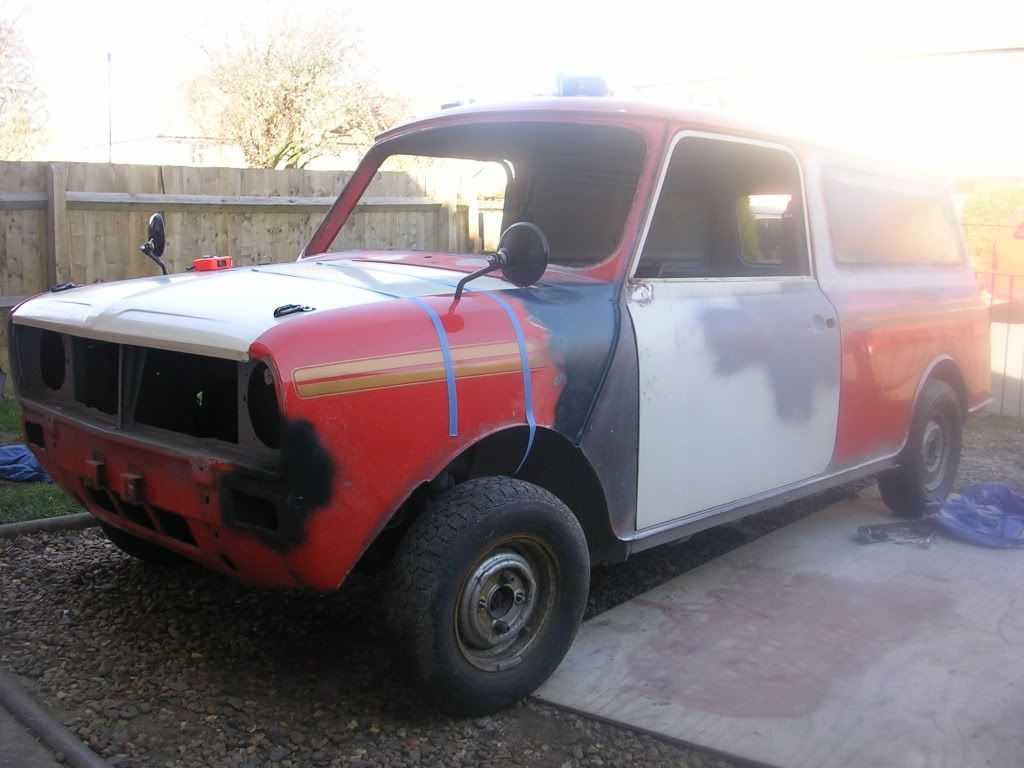 the blue electrical tape was used to mark out where i want the black line to cross the bonnet and wings 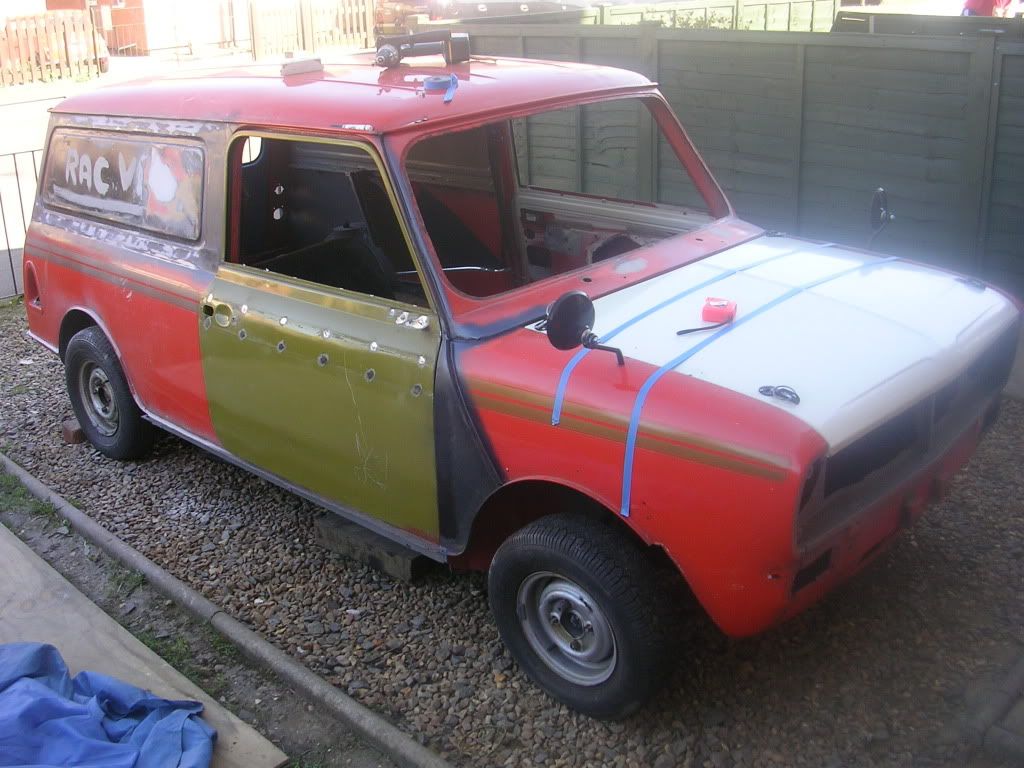 got my paint guy coming round later to give it a once over, and to give me a price and hopefully get it up the unit to slap on its new coat |
| |
|
|
|
|
|
|
|
shes now sat at the paint shop waiting her turn for a new coat next week i should have her back all shiney and new looking! |
| |
|
|
|
|
|
|
|
the engine looked like this when i bought it...  so tday i have spent a few hours degreasing it, pressure washing it, painting and detailing it... think it turned out pretty well! just need my orange ht leads, and orange rad hoses and its ready to drop in! what do you think? 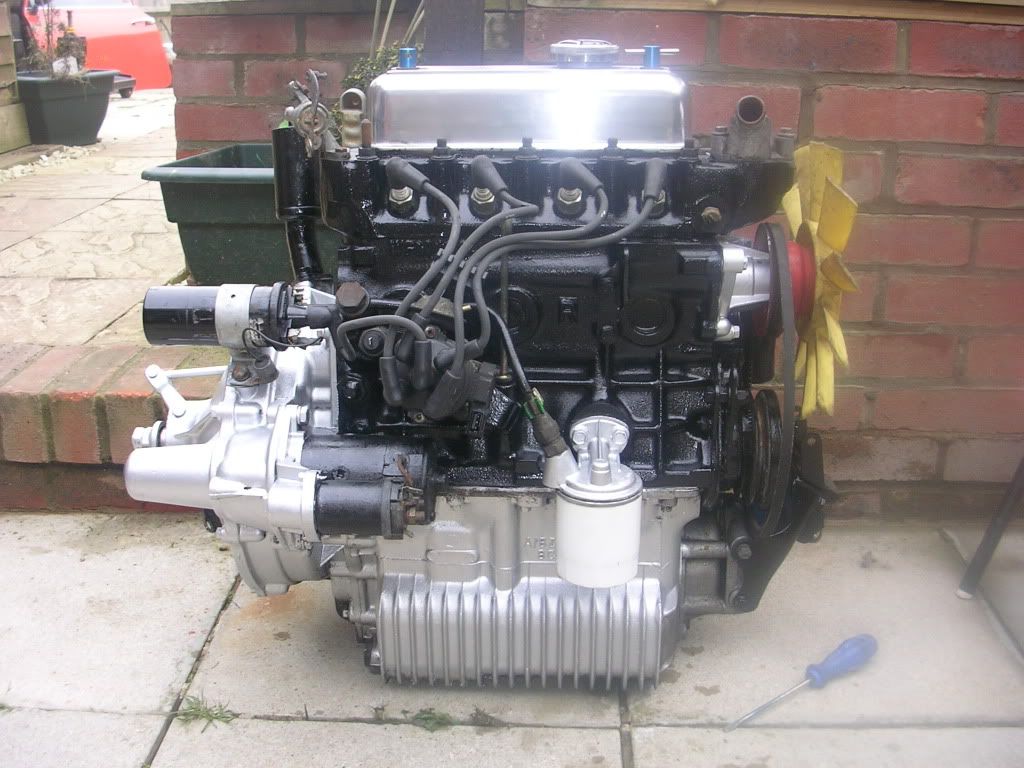 |
| |
|
|
bstardchild
Club Retro Rides Member
Posts: 14,892
Club RR Member Number: 71
|
1979 Mini ClubVAN estatebstardchild
@bstardchild
Club Retro Rides Member 71
|
Mar 29, 2011 21:01:09 GMT
|
like I said, I got a complete roof panel, and I also have 2 full length floor pans for estates/van/pick-up, complete with sills, but they were cut from the van shell so could do with tidying up, if your interested, ill get some pics for ya of the parts I have Please do that and I'll pass them on to my nephew bump cos he's nagging me ;D |
| |
|
|
hamps
Posted a lot
www.medwayrscentre.co.uk
Posts: 2,077
|
|
Mar 29, 2011 22:10:23 GMT
|
i like this build |
| |
|
|
|
|


 happy days
 finished the passenger side completely now, and made a start to finish the drivers side, here are a few pics!
 so i could get the welding completely finished, finished the drivers sill this morning, painted and stone chipped same as passengerside, then once dry ive test fitted the rear beam and coilovers... i have to admit, it looks rather good! it sits just right too, not to high, and not to low!