LowStandards
Club Retro Rides Member
Bigging Up The Sum Sum Man Since '99
Posts: 2,650 
|
|
|
|
I'm not sure them vents will be up to much cop to be honest  I'm sure with the seat raised allowing heat to escape and the pull start venting to outside so it's pulling in fresh air it will be fine. I think leaving it to drag already hot air in will be it's downfall. Just means making up some sort of vent and tubing in an already tight space You can already buy these plates for go karts that remove the pull starter and have a hole in for an external starter, so venting from that hole should be easy enough  |
| |
|
|
|
|
LowStandards
Club Retro Rides Member
Bigging Up The Sum Sum Man Since '99
Posts: 2,650
|
|
|
|
How you gonna cool the thing? Surely it’ll get red hot in there Not wanting to speak for Ian, but hey, I'm going to The whole bottom of the kart is open These engines run stationary, so movement will help We've discussed raising the seat base up say 10mm and cutting out the area above the engine - this by far should make the biggest difference The pull starter is no longer needed, they're designed to pull air in through the holes in the pull start casing. We could rejig this to make an external vent that the fan pulls through I think all these together should be fine... maybe |
| |
|
|
LowStandards
Club Retro Rides Member
Bigging Up The Sum Sum Man Since '99
Posts: 2,650
|
|
Mar 24, 2023 14:28:59 GMT
|
I ordered some keysteel of eBay, it arrived, I cut it, I now have a completed rear axle. No pics of that, you've already seen the axle. I should really get on with the steering, but it's complicated so I don't wanna I would like to start it though. Best look at the exhaust I hacked up the quad one, these pretty much follow the lines I wanted to go with, up and over the engine for ground clearence. I adjusted it a bit to get it really tight to the engine  This pipe exits here, which is the only little bit of space left up the back. 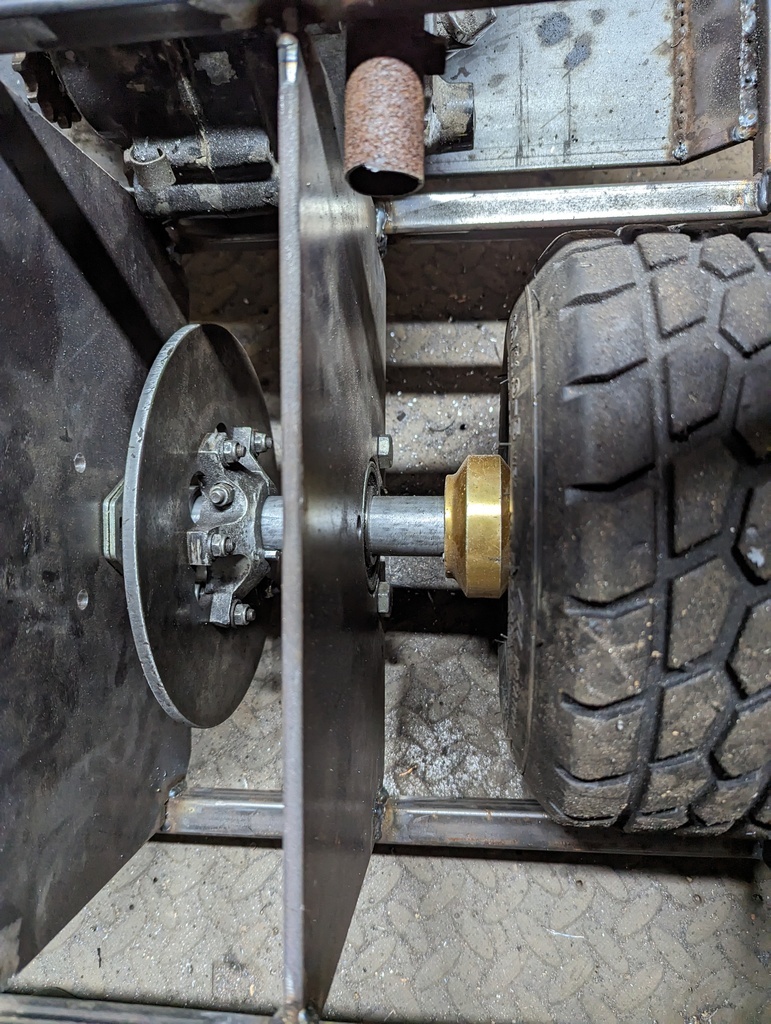 The stock quad silencer doesn't fit here, nor does it do much silencing. After knocking about at RRG last year i've very much come to the conclusion that a quiet Toilet Transport means a happy campsite and allows more use early morning and later on. I doubt i'll find anything stock that will fit, so I'll make one. Some 80x40 tube was cut to length and it fits nice 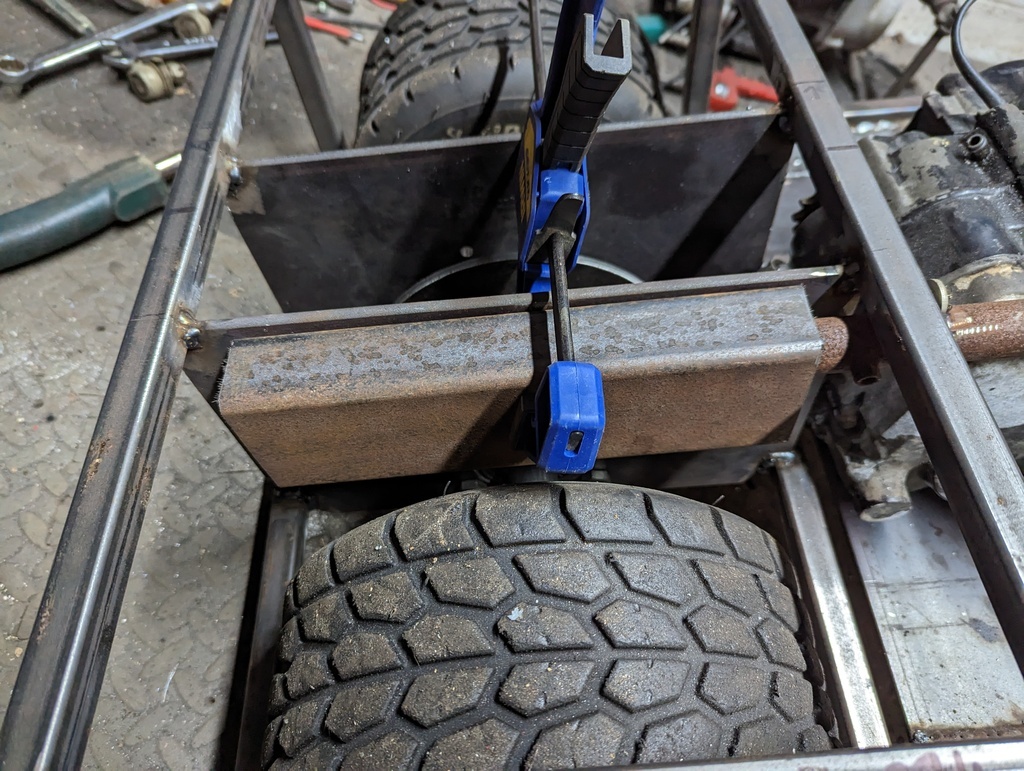  I cut up an old exhaust from a 2Stroke I had, only using the baffle tube. This has bends and notches and holes to do things and stuff with gasses. The notches corresponded to baffle plates in the old exhaust, so I made some up. 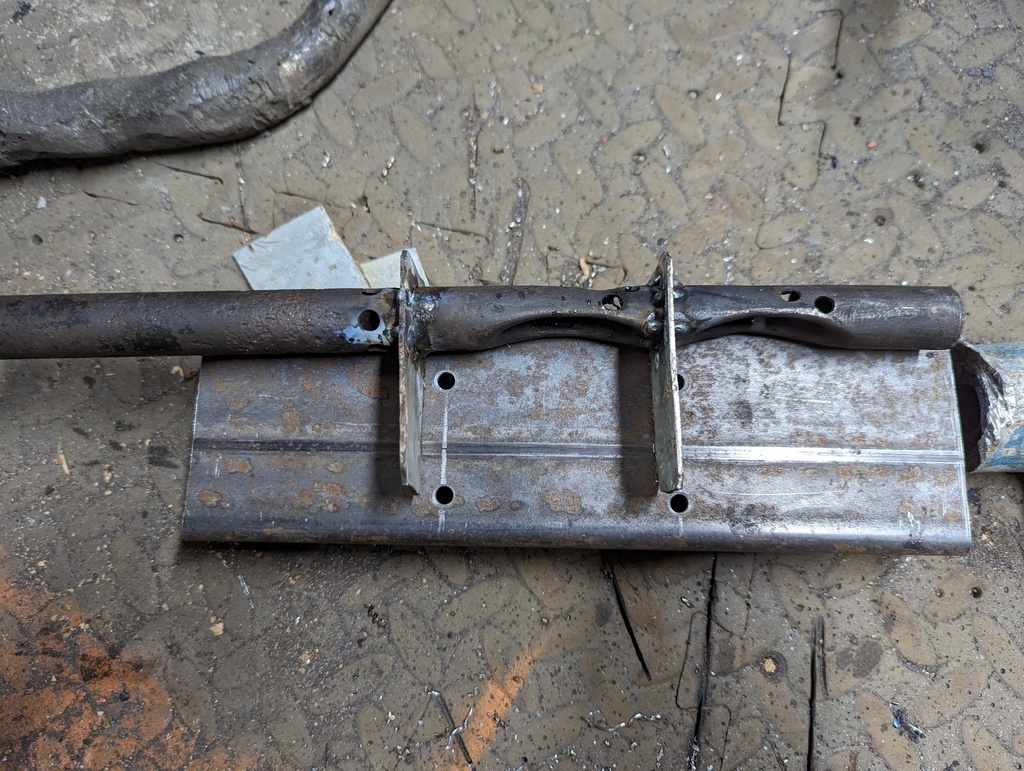 I've loosely filled the gaps with wire wool and just need to weld the end caps on, then I can test to see if it's actually quite, else I'll have to revisit it |
| |
|
|
LowStandards
Club Retro Rides Member
Bigging Up The Sum Sum Man Since '99
Posts: 2,650
|
|
|
|
|
The beam extenders do normally incorporate a drop
|
| |
|
|
LowStandards
Club Retro Rides Member
Bigging Up The Sum Sum Man Since '99
Posts: 2,650
|
|
Mar 18, 2023 18:18:17 GMT
|
I milled a thing 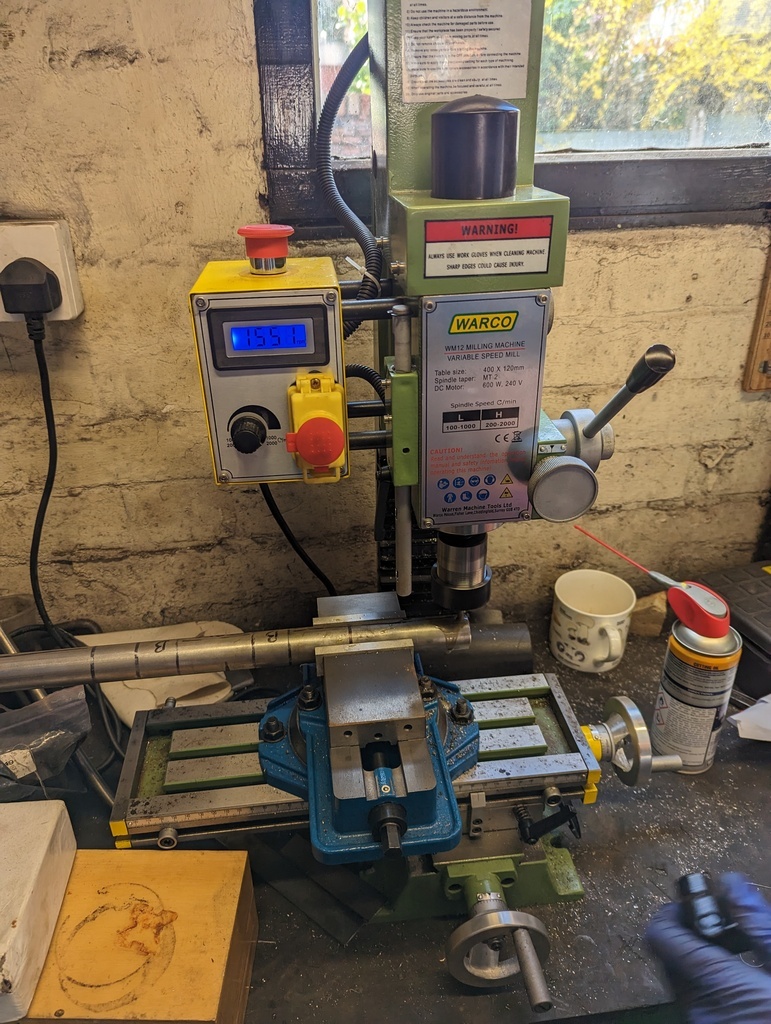 What a great but of kit, I want one 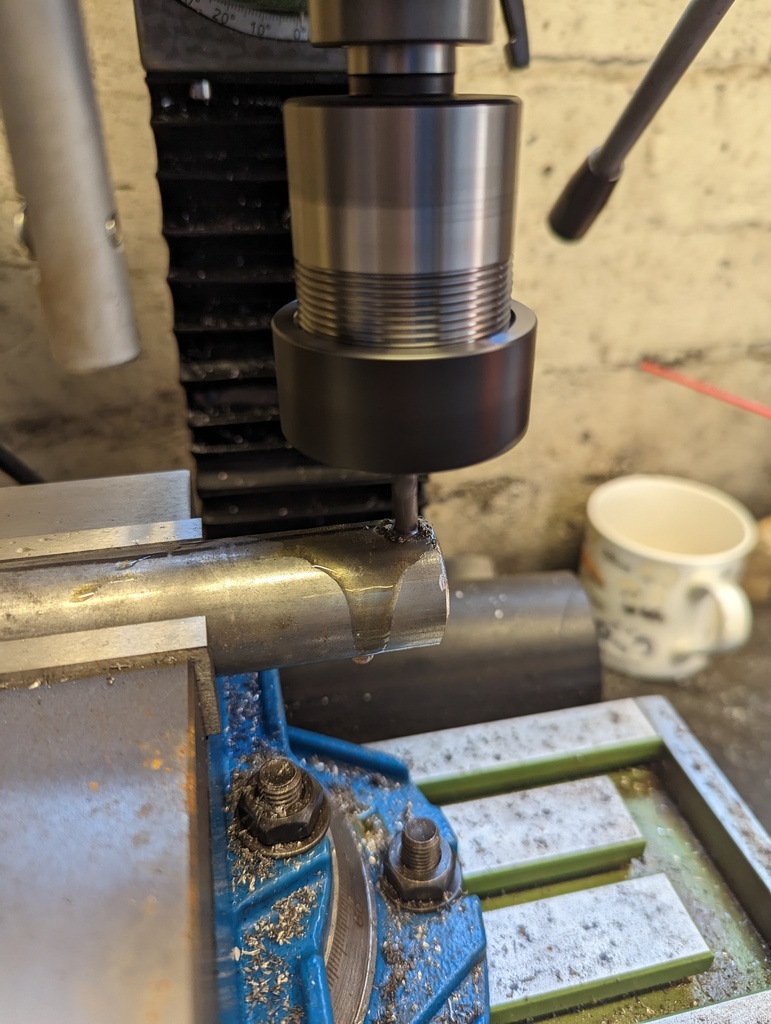 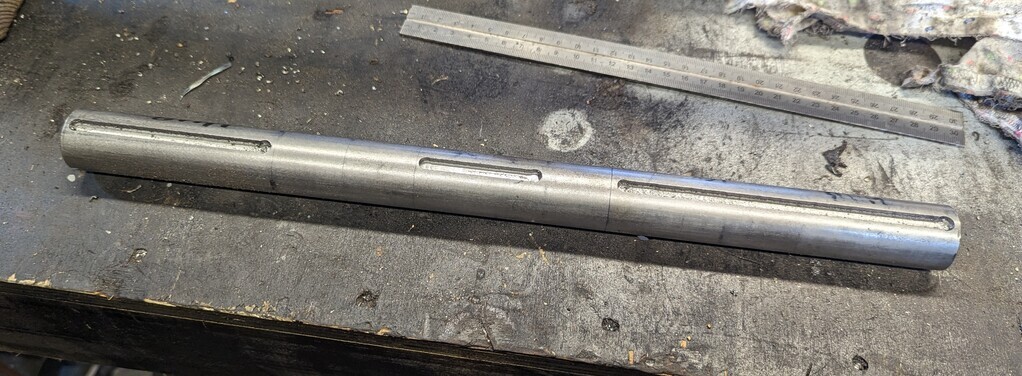 |
| |
|
|
LowStandards
Club Retro Rides Member
Bigging Up The Sum Sum Man Since '99
Posts: 2,650
|
|
|
|
|
Where are you?
What are you looking to swap it for?
|
| |
|
|
LowStandards
Club Retro Rides Member
Bigging Up The Sum Sum Man Since '99
Posts: 2,650
|
|
Mar 16, 2023 11:12:12 GMT
|
|
Couple of bits of tube, some laser cut plates and you're golden
The one on mine was really nothing more than that
|
| |
|
|
LowStandards
Club Retro Rides Member
Bigging Up The Sum Sum Man Since '99
Posts: 2,650
|
|
|
|
Smol update Finished the floor. Yes, yes, yes, it's more 6mm plate. I was going to use some 3mm I had but there just wasn't enough. Still, my feet will be nice and protected from them pebbles. I really REALLY need to buy a new welding helmet, it does'nt darken straight away anymore and it goes almost pitch black (excuses over) 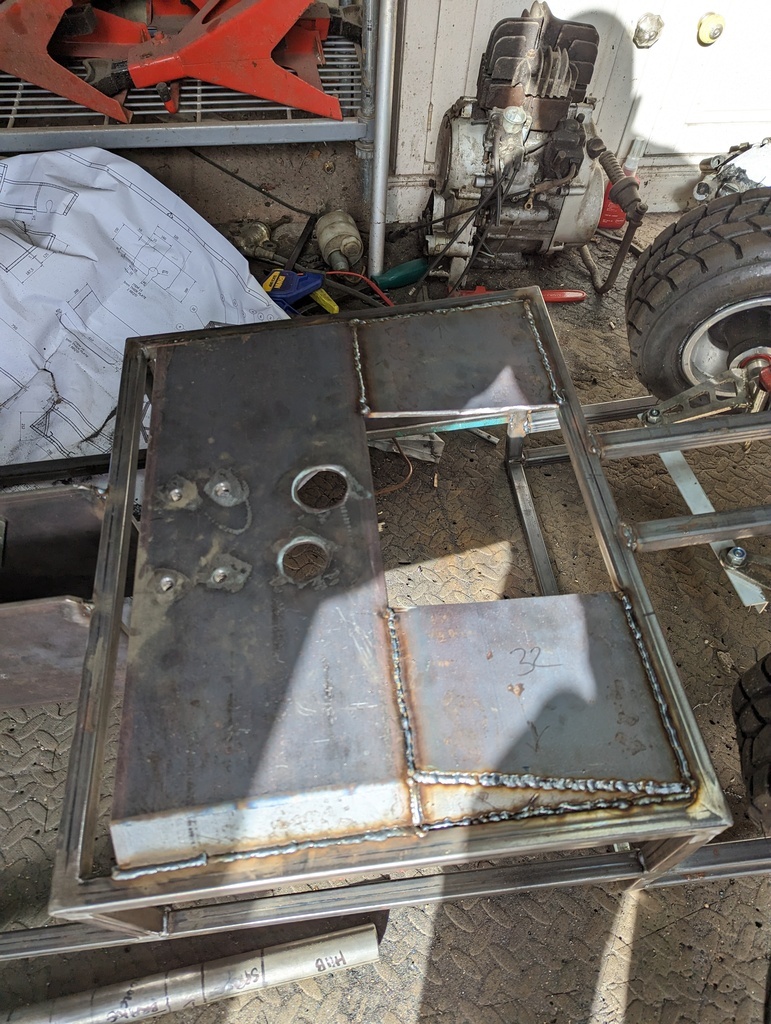 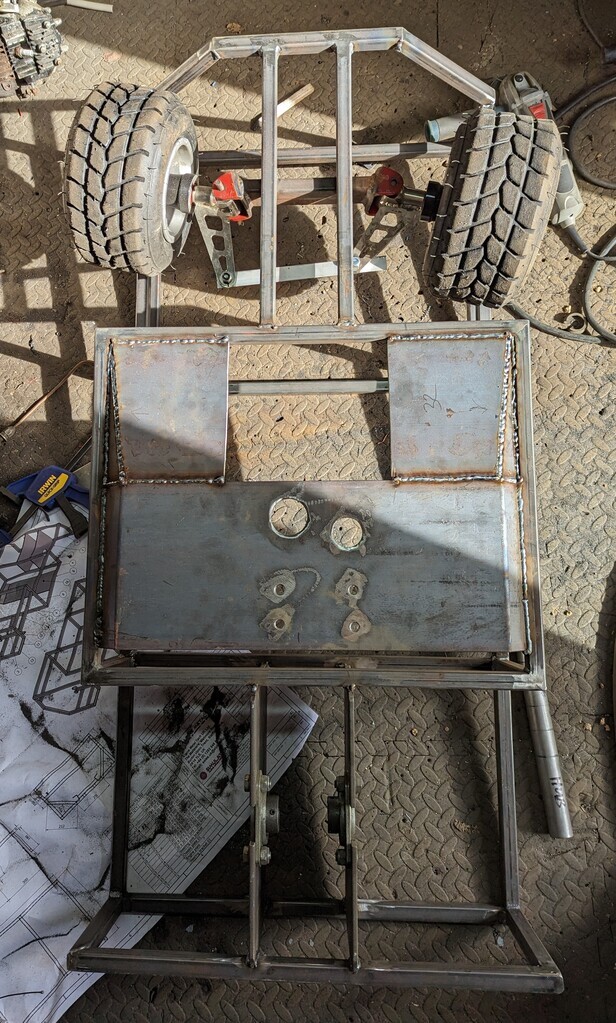 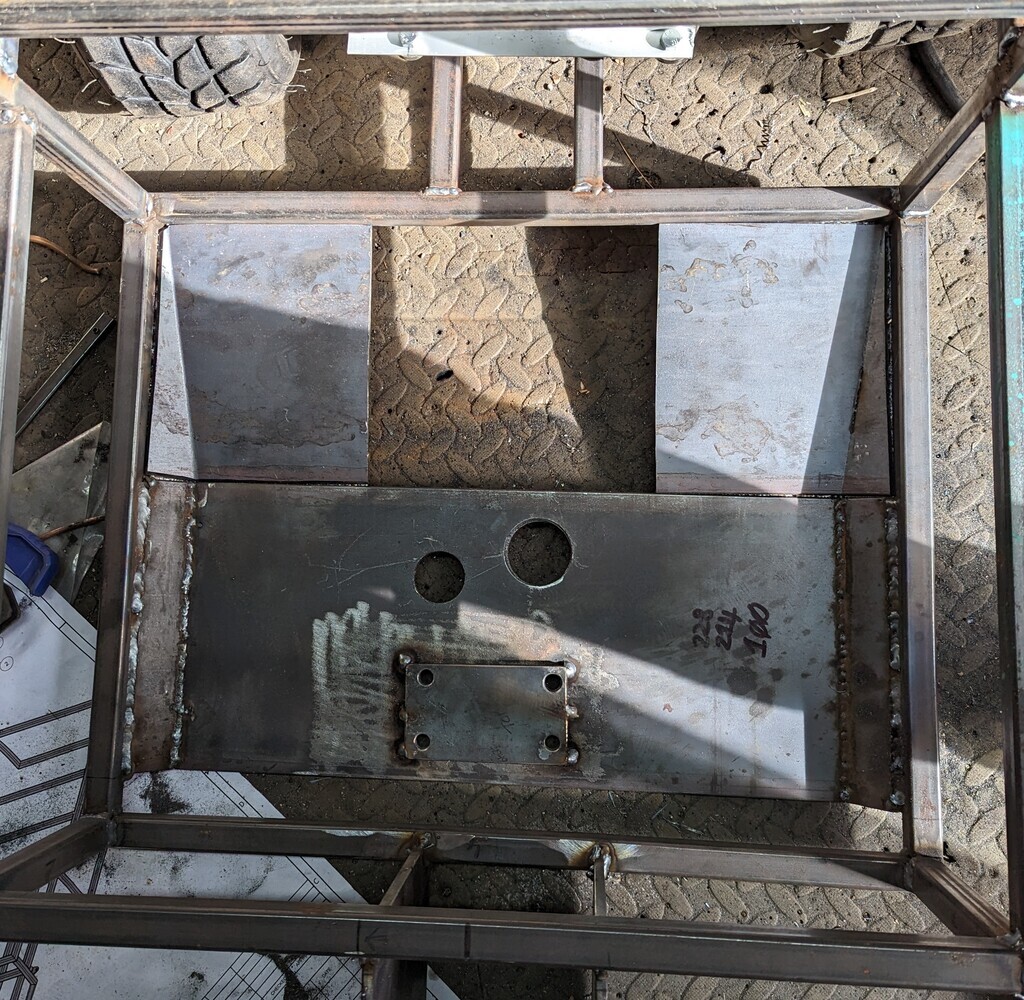 I'll weld inside when my new helmet arrives. |
| |
|
|
LowStandards
Club Retro Rides Member
Bigging Up The Sum Sum Man Since '99
Posts: 2,650
|
|
Mar 12, 2023 20:43:35 GMT
|
|
Love it
It's even better/tighter in the flesh.
Show us a render (preferably one that isn't skewed by the software 😜 )
|
| |
|
|
LowStandards
Club Retro Rides Member
Bigging Up The Sum Sum Man Since '99
Posts: 2,650
|
|
Mar 12, 2023 19:27:38 GMT
|
|
I have no idea why we don't have an update on this little slice of awesomeness
|
| |
|
|
|
|
LowStandards
Club Retro Rides Member
Bigging Up The Sum Sum Man Since '99
Posts: 2,650
|
|
|
|
|
I'd be keeping the hand controls, why re-invent it, part of it's charm.
I don't think you'd get it as PLG either, have to look down the light/heavy quaricycle route in my eyes
|
| |
|
|
LowStandards
Club Retro Rides Member
Bigging Up The Sum Sum Man Since '99
Posts: 2,650
|
|
Feb 28, 2023 14:37:32 GMT
|
Lets mount this engine These pitbike lumps have 2 bolt through mounts, 1 on the back and 1 on the top. That's how Honda mounted them and that's how they're mounted in pitbikes. On the quad it was mounted through the footpeg mounts. So i'll do the same, and no doubt use at least the back bolt through mount. Here's what I'm faced with. I've had to drill out and re-tap these as the bolts all snapped.  You can't really tell from that photo, but they're not flush with the bottom of the engine. I could use washers, but why do that when I can ruin Jonny69 's day and use some 8mm thick heavy plate.  First a template of the bolt holes, nothing fancy, just a dirty finger rub  Standard stuff, mark it up, hole punch, drill  I've not got a picture of the next step and i'm not going to unbolt the engine just for you lot.Oh go on then, it's dull, but in the pursuit of completenessI decided the easiest way, saving any marking up, would be to super glue this plate to the engine in the right place. I then got the engine where I wanted it to be and tacked the plate to the big plate on the MMS. The engine was pulled away - super glue has nothing on these guns - which left me with an 8mm thick 'washer' in the right place and a perfect way of marking the holes for me to drill. 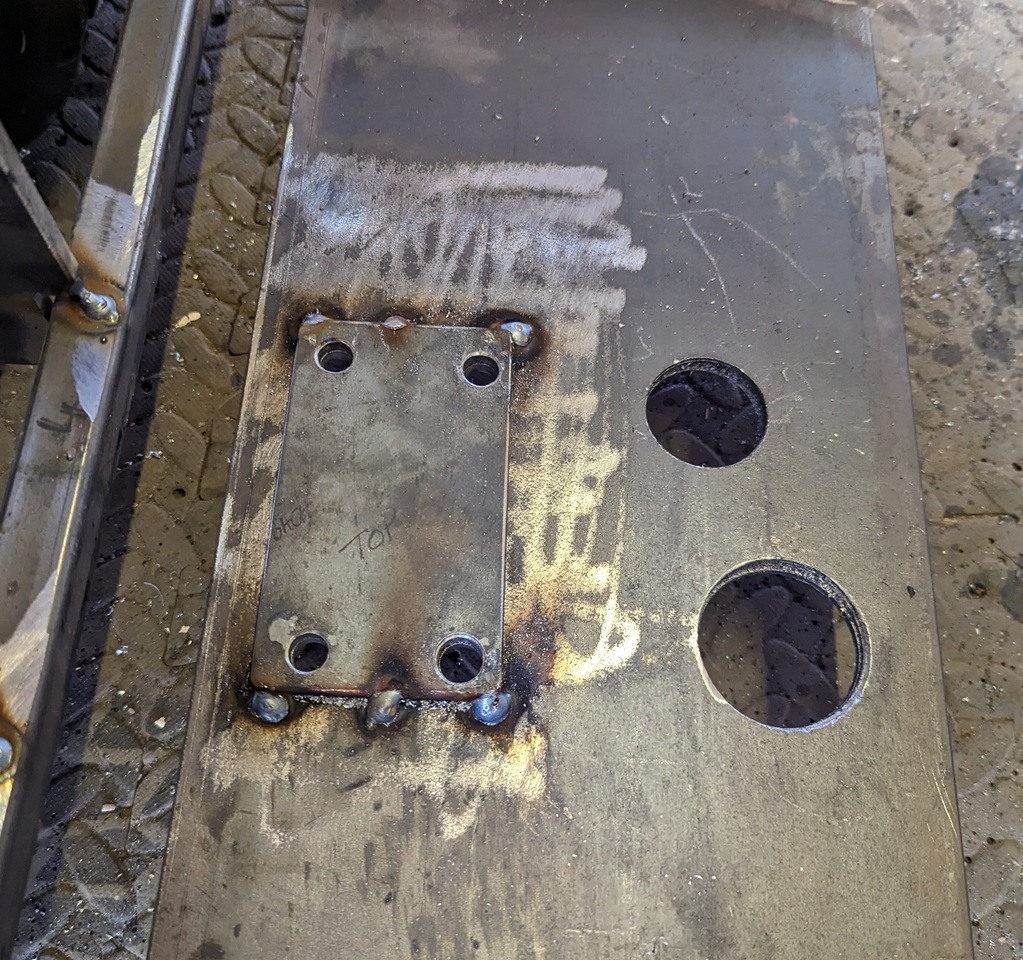 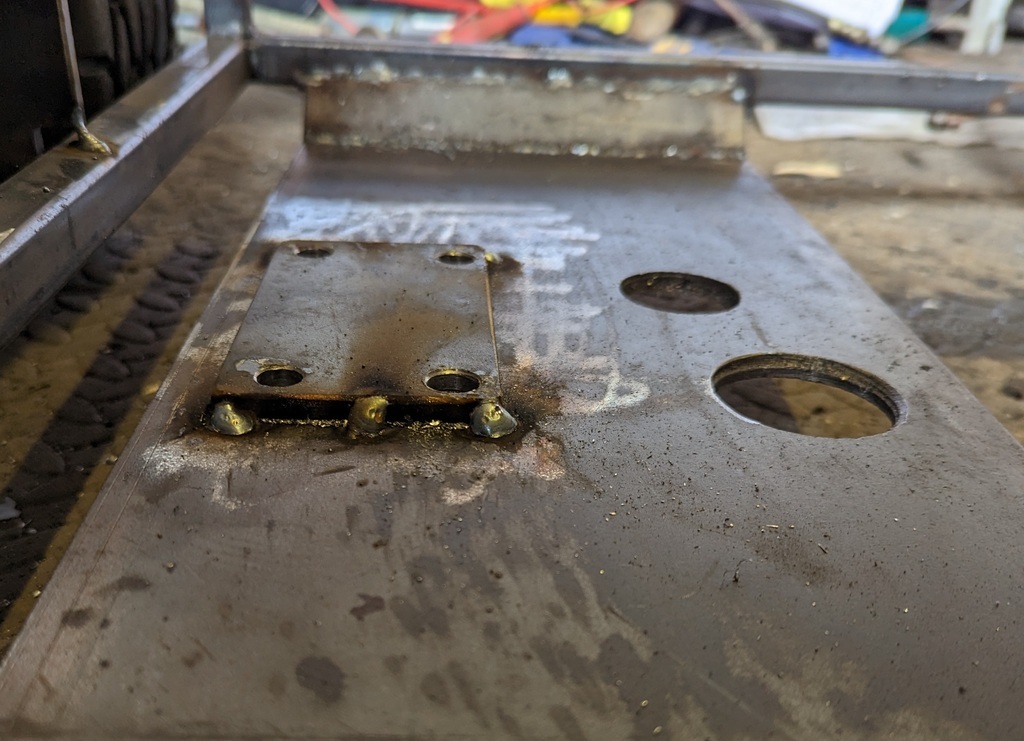 Which I did 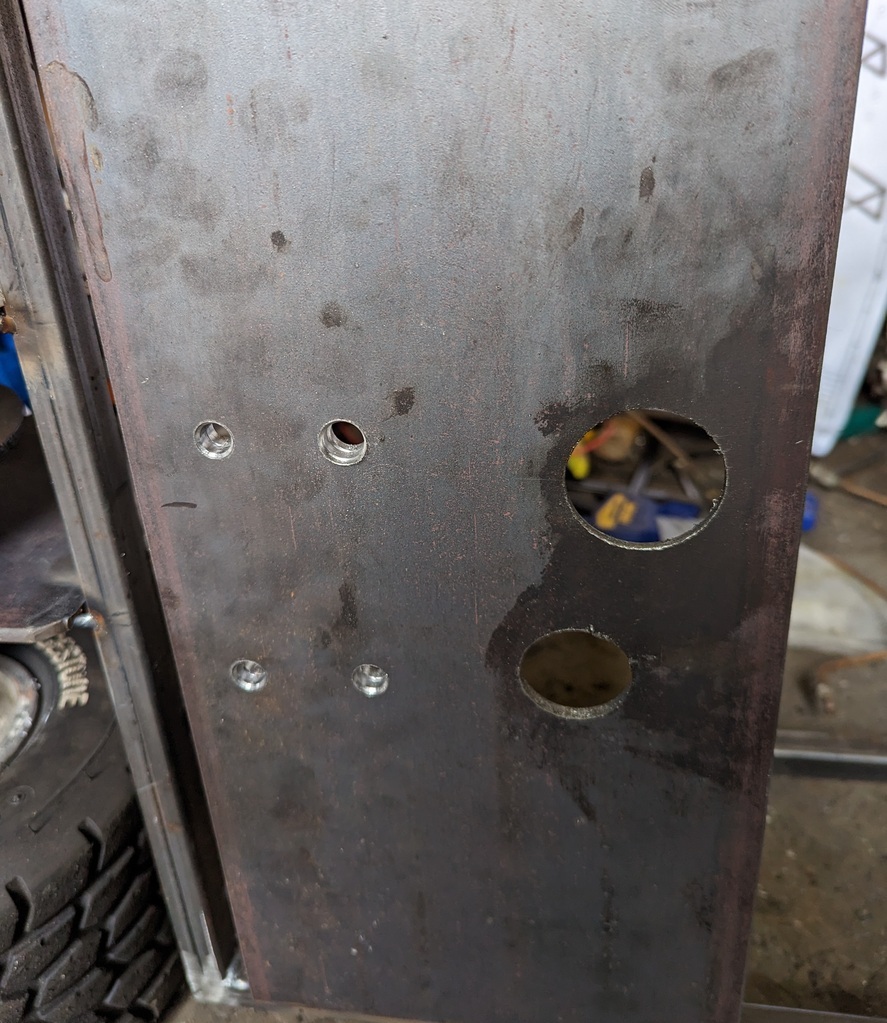 Which allowed this 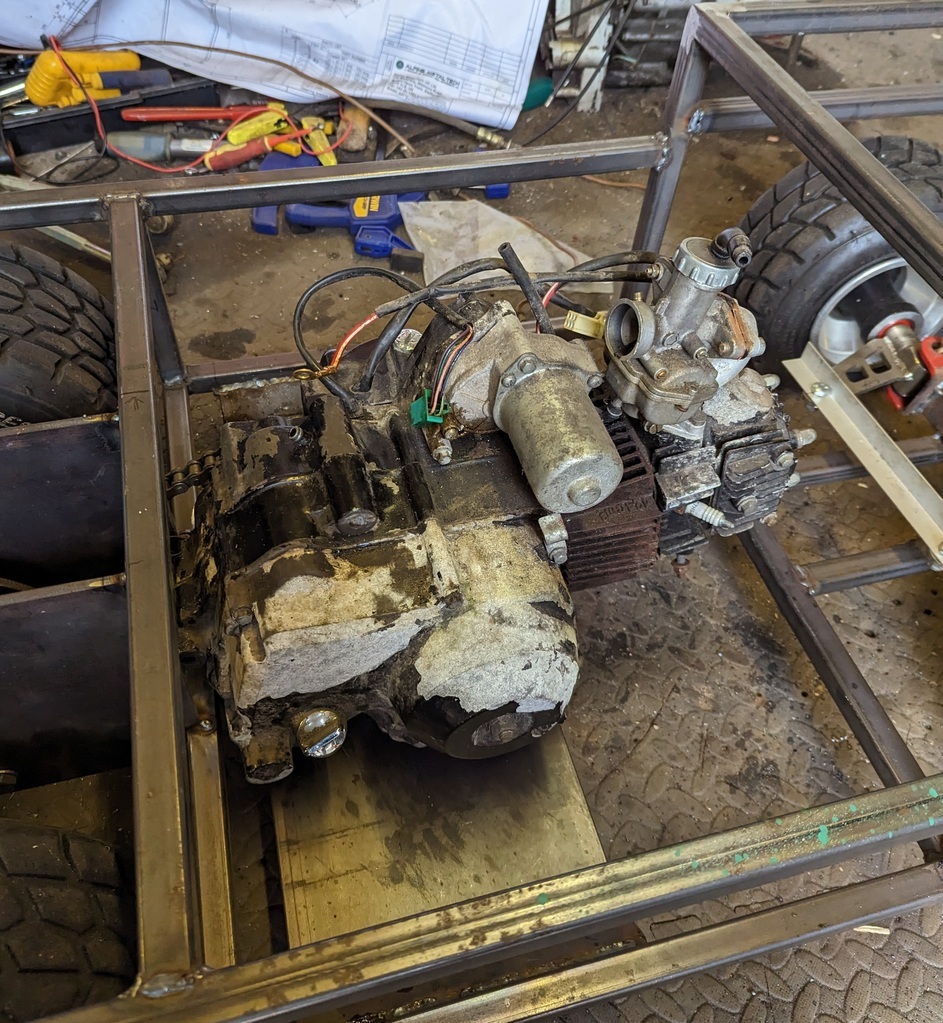 A few days ago my split sprocket arrived, so all this, now also allowed this 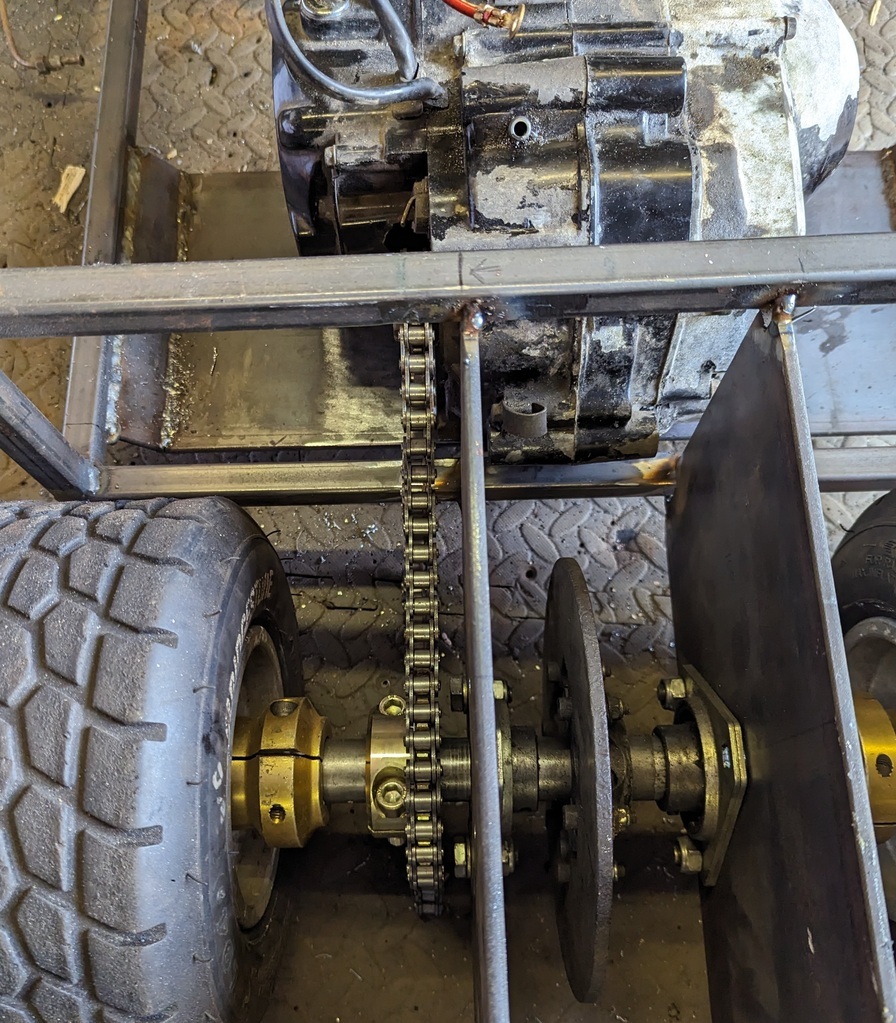 So there's that, an engine mounted in the right place nice and solid. As mentioned, I will pick up the rear mounting as the re-tapping of the holes was a little suspect |
| |
|
|
LowStandards
Club Retro Rides Member
Bigging Up The Sum Sum Man Since '99
Posts: 2,650
|
|
Feb 27, 2023 14:54:25 GMT
|
|
I can offer you this from my ownership
Filmed on a potato by the looks of it
I'm still trying to sell a kidney, so I can be reunited
|
| |
|
|
LowStandards
Club Retro Rides Member
Bigging Up The Sum Sum Man Since '99
Posts: 2,650
|
|
Feb 24, 2023 11:18:22 GMT
|
|
Well, I want this back
|
| |
|
|
LowStandards
Club Retro Rides Member
Bigging Up The Sum Sum Man Since '99
Posts: 2,650
|
|
Feb 23, 2023 13:42:10 GMT
|
The Mini Scamp is currently in more bits than the Mini Mini Scamp, so the latter would prove really difficult |
| |
|
|
LowStandards
Club Retro Rides Member
Bigging Up The Sum Sum Man Since '99
Posts: 2,650
|
|
Feb 22, 2023 15:19:38 GMT
|
Looking forward to seeing this at the show very much  It's currently geared for 42mph I'm going to make a 'walking pace' throttle restrictor, you know, because beer... I'm also really REALLY hoping we can do the full track at Goodwood ;P |
| |
|
|
LowStandards
Club Retro Rides Member
Bigging Up The Sum Sum Man Since '99
Posts: 2,650
|
|
Feb 22, 2023 14:18:58 GMT
|
I'm getting near to a point where it would be wrong to bolt the engine in and check out how it drives To do that, I need the engine mounting plate. The engine sits lower then the main chassis, so I had the joy of bending the 6mm plate. But it's bent and welded in now - she's getting HEAVY (the hole is for the sump plug) 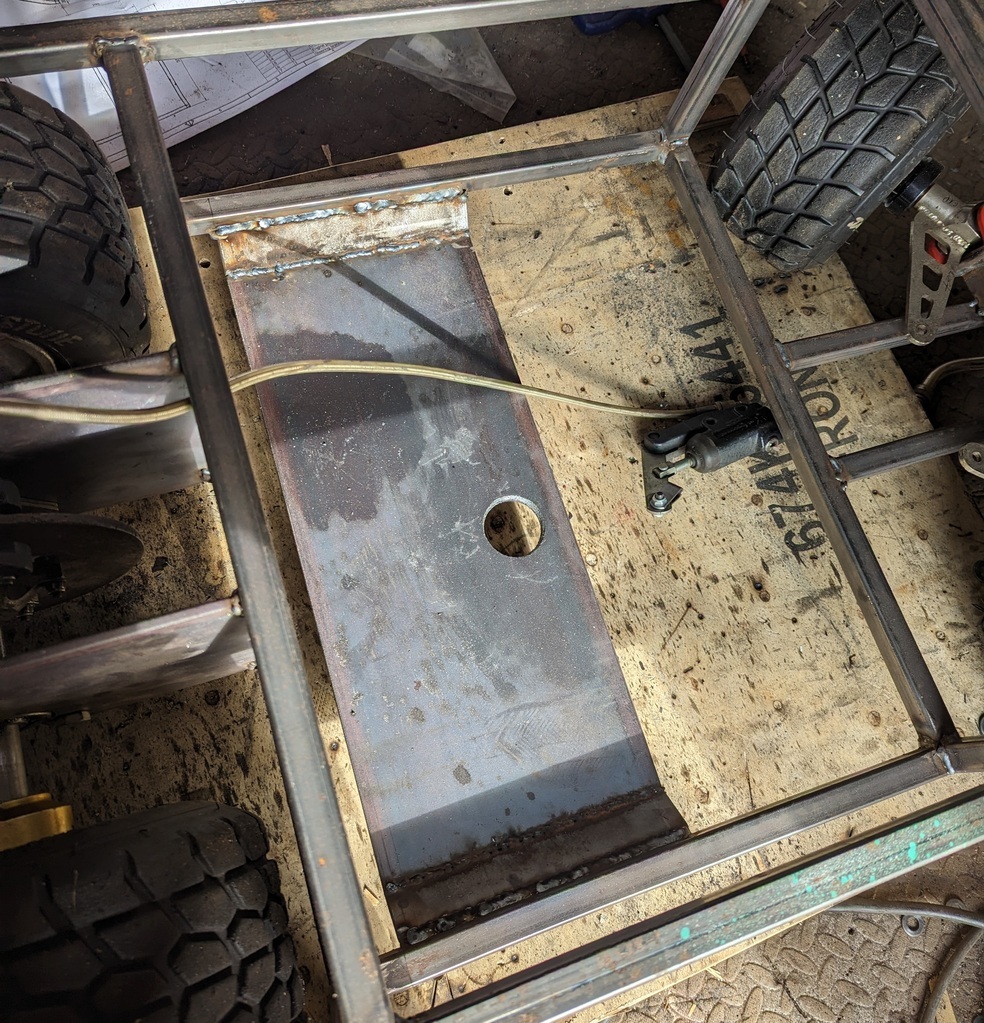 Now every test drive should be concluded with the safe stoppage of the vehicle; so brakes. I got me a proper racing kart brake, clever little caliper really, adjustable width, pads bolt in, nice flat side for mounting. 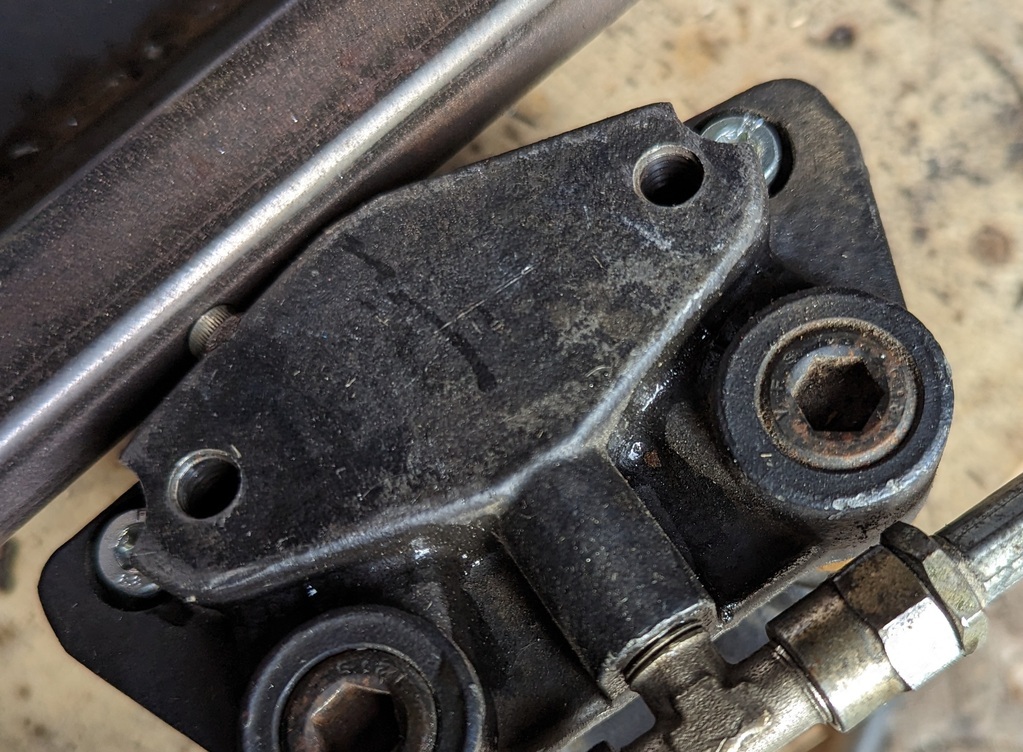 She sits in the middle of the axle between the 2 bearing plates, which is an ideal place to mount the caliper, can't see it moving anywhere. I can't drill from the side of the caliper, so I made up a lil template so I could transfer the markings to the side I can actually get a drill into 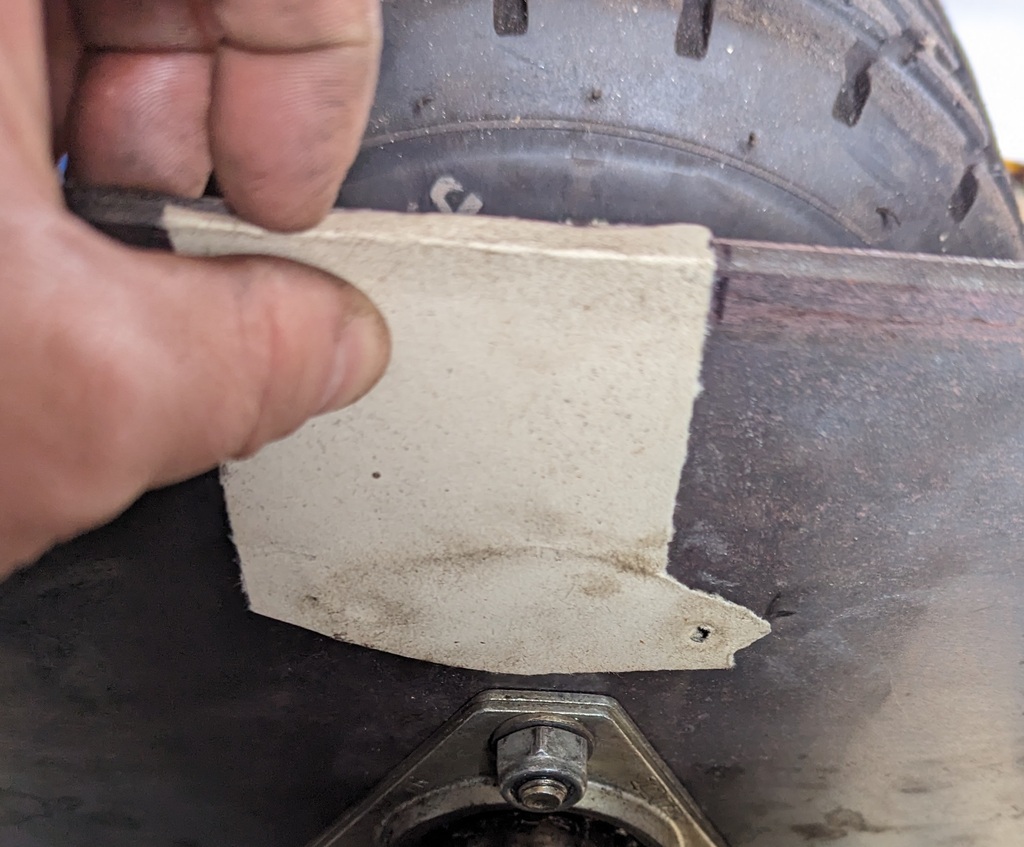 A few moments later and I could mount the caliper, look at that, perfect 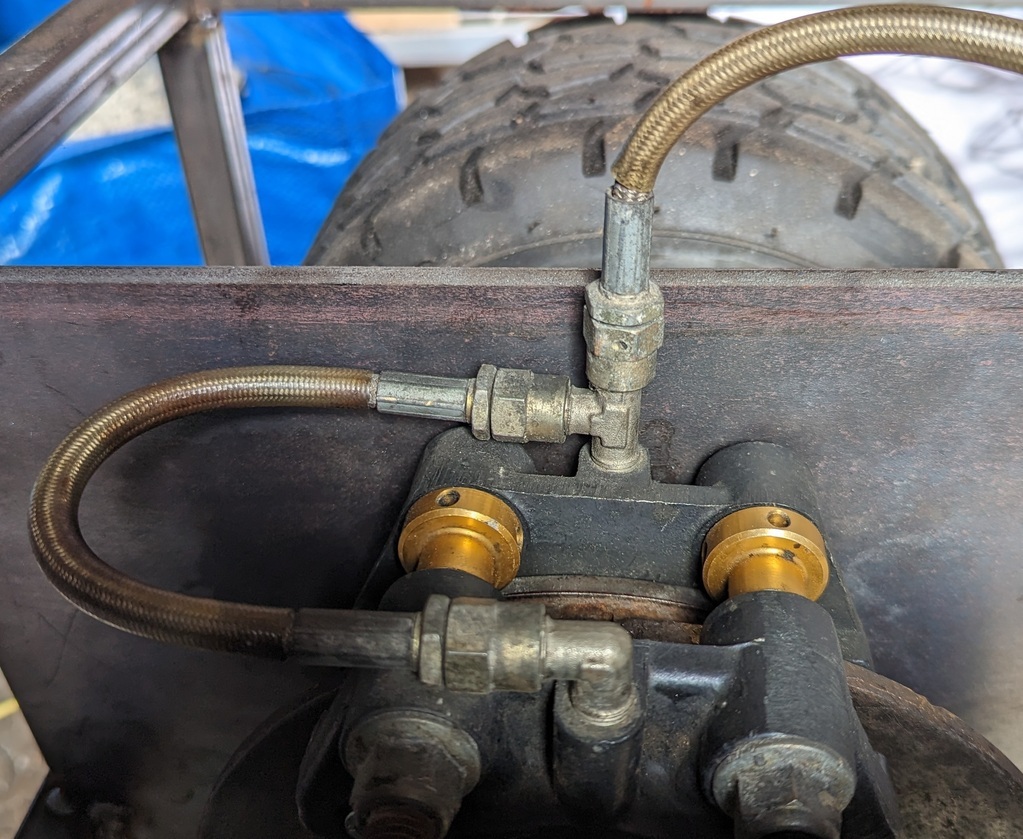 Well, no. As much as I like sitting on small pointy objects, I best turn that hydraulic stuff around. 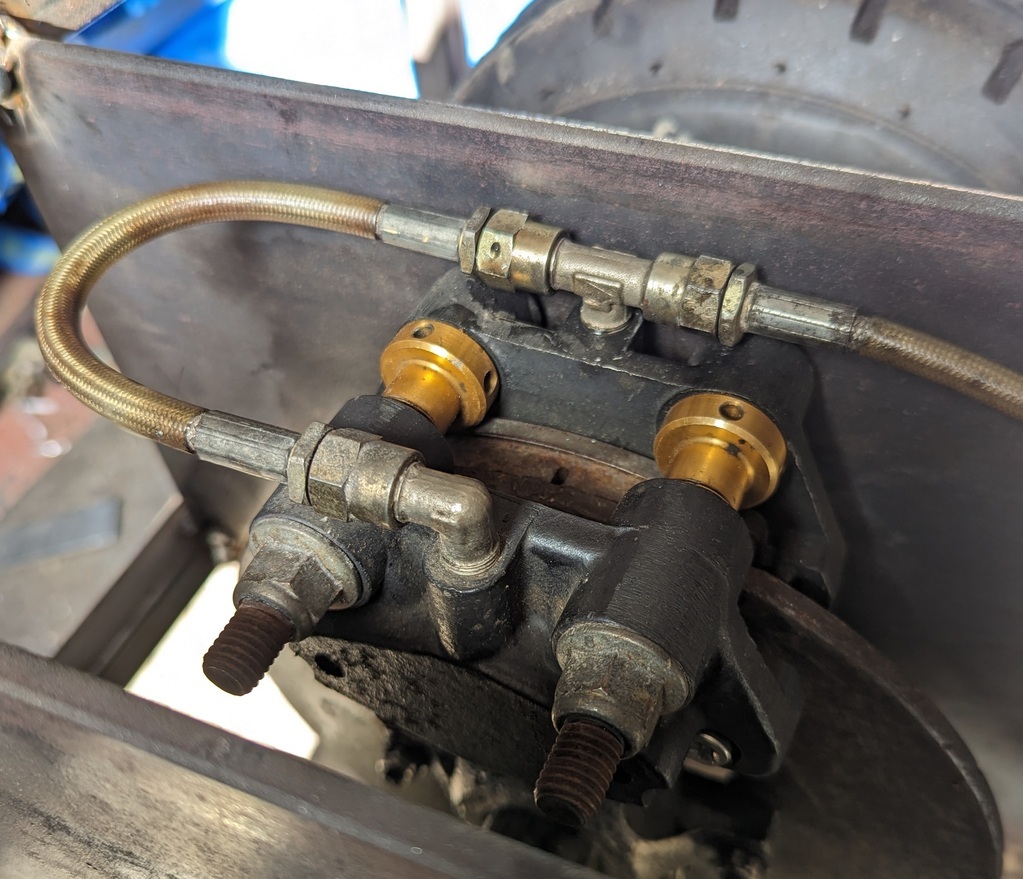 There - Perfect! Stay tuned for the next exciting installment which should involve mounting the engine and doing something steering related so I don't just stuff it into a random car |
| |
|
|
LowStandards
Club Retro Rides Member
Bigging Up The Sum Sum Man Since '99
Posts: 2,650
|
|
Feb 14, 2023 10:58:54 GMT
|
|
I expect it's restricted for rpm, it will make it's power low down anyways
Give it a service?
Make sure you're in the appropriate gear?
I've used an 8hp tractor to pull a disabled van about the yard, they have a hell of a lot of ooooomph
|
| |
|
|
LowStandards
Club Retro Rides Member
Bigging Up The Sum Sum Man Since '99
Posts: 2,650
|
|
|
|
|
It's gonna be an IVA whichever way you look at it
|
| |
|
|
LowStandards
Club Retro Rides Member
Bigging Up The Sum Sum Man Since '99
Posts: 2,650
|
|
Jan 21, 2023 10:05:30 GMT
|
Excellent work, looks smaller than I was picturing it. Are you copying usual cart steering geometry that lifts the outside rear wheel to aid turning? I’ve copied the geo from the Gillard chassis I had Think the angles are pretty subtle. The steering arms have mad angles built in to them as you can see, no idea why, must aid in something 😂 |
| |
|
|
|
|