jayvoa
Part of things

Posts: 229
|
|
|
|
I don't think the vacuum pipes are suitable for the dizzy vac advance. They will give you too much advance at everything except what. They would be great for a maf signal for an ecu though. The vac advance signal usual comes from the carb butterfly area. Great Capri btw! Glad you like it! Just wondering why you think it'll give too much advance? Most Pinto bike carb set-ups I've seen have a vacuum takeoff from each runner, usually about halfway down the runner. This is actually how my current manifold is set up. The vacuum takeoffs on the rubbers will sit about 20mm from the end of the carb, so probably about 40mm from the butterfly. Do you think the inner diameter is too large on these takeoffs, which would lead to too much advance, or is it just their position that you think isn't right? Not trying to dismiss your advice, don't worry, just trying to make sure I'm clear on why! Any advice is always appreciated! Carl, I'll definitely need to head over soon for a brew and a chat! I'll send you a text and try to sort something out this week if you're free. In other news, I've been in touch with Castrol about the use of their lead replacement additive with an O2 sensor. I'm still keen on having a wideband gauge to set up the carbs right, and I know that leaded petrol kills the sensors pretty rapidly, but I was hoping that lead replacement additives would be ok. After a brief email discussion we came to the conclusion their Valvemaster additive would likely kill the O2 sensor. Still waiting on a reply from Wynn's, as their Lead Substitute additive states it's ok to use with catalytic converters, so I'm hoping it's also ok with O2 sensors. If I can't use any additives I'll just have to hurry up and rebuild the unleaded head that's sat in my shed! Also, I had a look at reviews of various wideband gauges, and it looks like the Innovate MTX-L isn't very reliable, so I've got my eye on this little AEM one. Fingers crossed there's some lead substitute out there that's safe to use! |
| |
|
|
|
|
Kieran
Posted a lot
Posts: 1,092
|
|
|
|
|
It's the difference between ported and full manifold vacuum.
To run full vacuum (as you intend to), you need a much stronger advance unit spring.
The advance from say a down draught Weber is ported and a lot lighter vacuum than full ported.
I doubt t would cause a problem, you will just be running a lot more vac advance at nearly all throttle openings (except idle and wide open throttle).
|
| |
Last Edit: Feb 10, 2015 22:03:19 GMT by Kieran
The Ashby Jackson fleet:-
1979 Mini Clubman 1.8 K series
1978 Skoda 110r Project 130RS K-oupe
1978 Austin Allegro 1500 SDL Estate
1984 BMW K100 Sidecar outfit
1999 Yamaha FZS 1000 Fazer
1991 Kawasaki ZXR400 race bike
2002 Kawasaki ZX9r race bike
|
|
jayvoa
Part of things
Posts: 229
|
|
|
|
|
Out of all the discussions on Pintos with bike carbs I've never seen anyone actually explain that (and I've trawled through a whole lot of kitcar/locost/robin hood forums) but it makes perfect sense. Thanks for clearing it up! If the vac advance proves troublesome I can easily remove the pipe to the distributor and blank the ends off, re-set my static advance to something suitable and roll with that. Might affect the mpg but hey, we don't drive these things for their economy!
|
| |
|
|
jayvoa
Part of things
Posts: 229
|
|
Feb 25, 2015 22:56:09 GMT
|
We have progress! Over the past two weekends I locked myself in the shed and cracked on with the new bike carb manifold, doing everything I could to make it better than the last shoddy one. Bike carbs, when on a bike, have two throttle cables, one for opening and one for closing. Cars don't have this, clearly, so an extra throttle return spring can be used to make sure the butterflies snap shut quickly. I'm actually using two springs like this on my current setup, but it was an afterthought, so cable ties were utilised. I didn't want to use cable ties this time, so I drilled an extra hole in the carb mounting flange which a spring could hook on to. Wow, that was a lot of text just to say "I drilled a hole". Anyway, onwards. 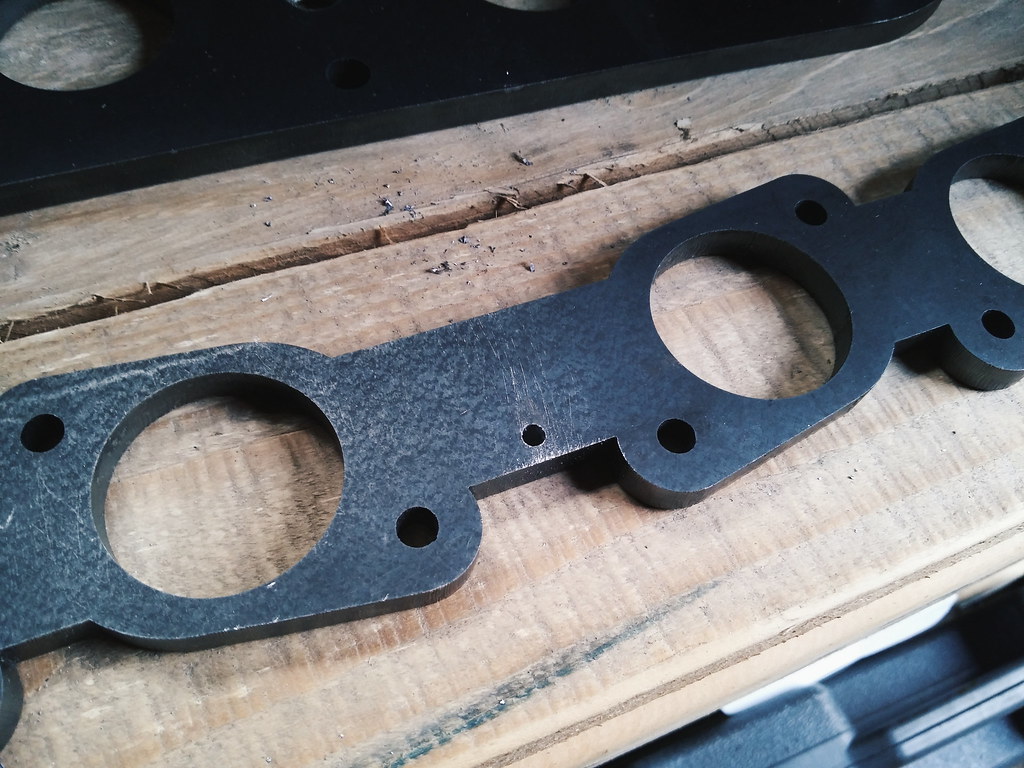 I then started the seemingly endless task of getting all the angles right, making sure the carbs sat at 30º so the floats sit level. I made the job easier by going for long, straight runners. No dog-leg bends this time.  Once I was happy with the angles I welded it all up and lightly smoothed all the joins over with chemical metal, just to be sure there were no stray pin holes, then painted it with some matt black VHT paint. 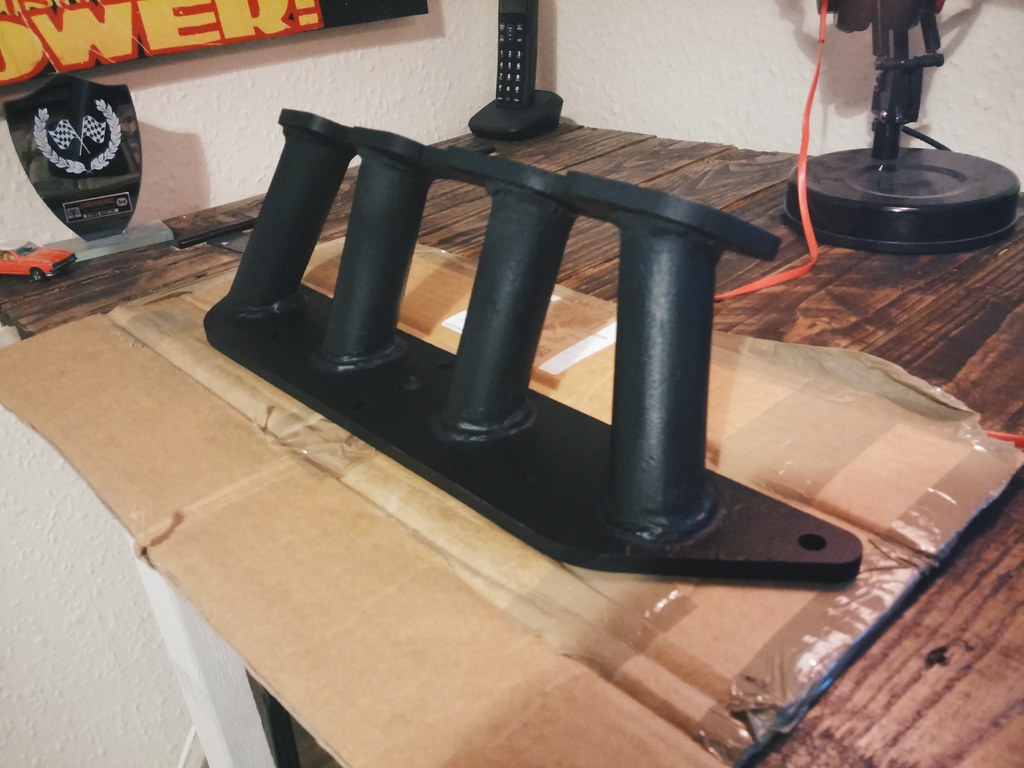 With the rubbers in place, it's a pretty long manifold. I wanted to try narrower and longer runners, as I've read that longer runners would favour usable torque throughout the range, as opposed to more power at the top end. The reason for them being narrower is because I'm always reading that the inlet ports on a Pinto are already too big as standard, so why go for even bigger runners? The carb rubbers also taper down to the same diameter as the runners, so they match up pretty well. However, the manifold is a tad longer than I had planned... But the Capri luckily has a lot of room in that engine bay, and I measured things before... once... It'll be fine. 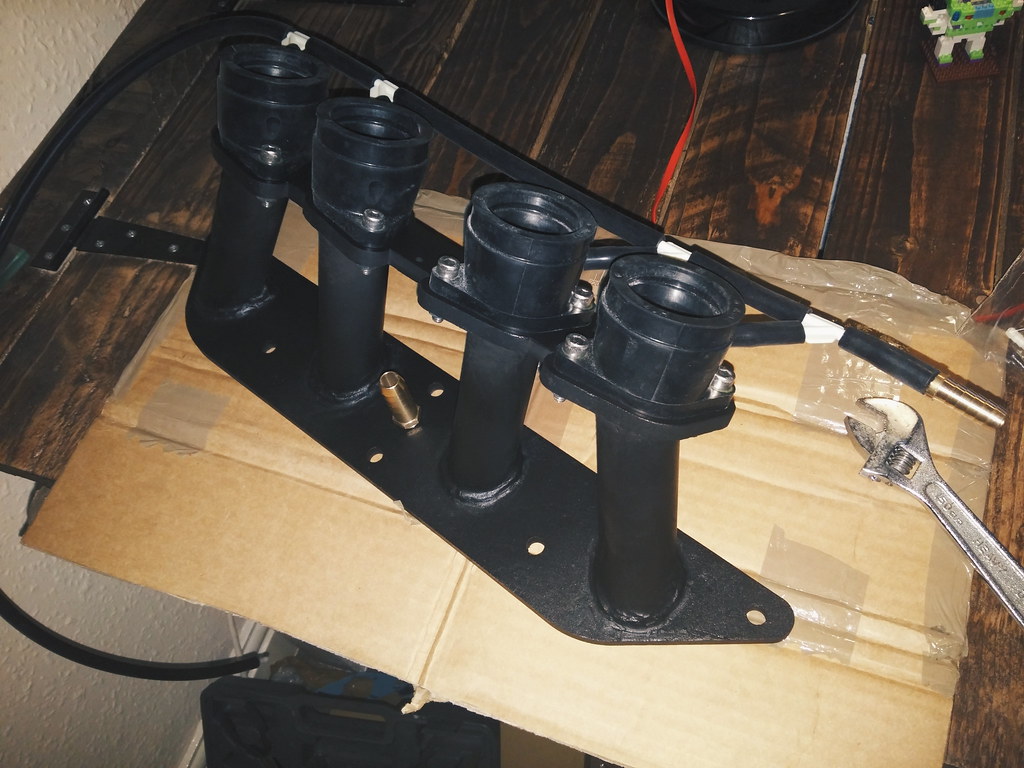 I got a bit fed up with syncing the carbs using just a feeler gauge and wishes. Never seemed to be right... So I got some carb sync gauges to make life easier. 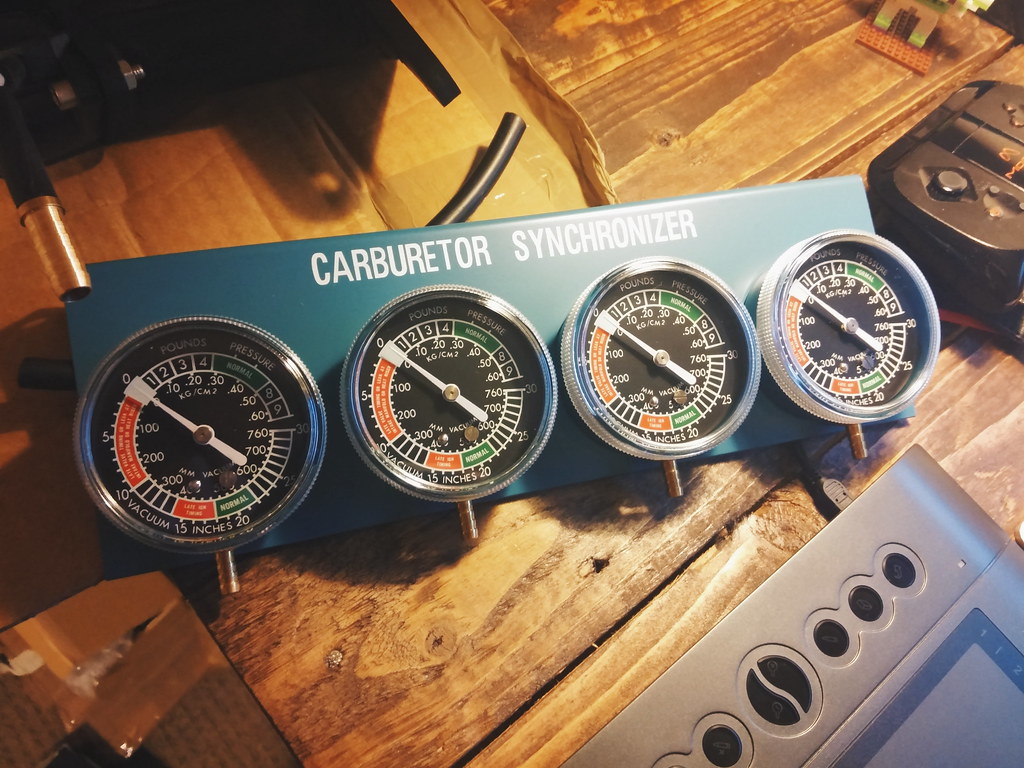 Can't wait to replace my rubbish old manifold with the new one. The weekend can't come soon enough. Back to the wideband gauge/O2 sensor/lead additive issue. I spoke to Wynns, who got in touch with their boffins in Belgium, who then confirmed that their lead substitute additive is safe for use with O2 sensors. So this means I can get that AEM wideband gauge to help with tuning the carbs before I get around to rebuilding and fitting the unleaded head. Win! |
| |
Last Edit: Feb 25, 2015 22:57:44 GMT by jayvoa
|
|
Kieran
Posted a lot
Posts: 1,092
|
|
|
|
|
Did you get the little valves to go with the vac gauges?
Usually you get little plastic needle valves for each gauge so you can dampen the dramatic pulses on the gauges!
|
| |
The Ashby Jackson fleet:-
1979 Mini Clubman 1.8 K series
1978 Skoda 110r Project 130RS K-oupe
1978 Austin Allegro 1500 SDL Estate
1984 BMW K100 Sidecar outfit
1999 Yamaha FZS 1000 Fazer
1991 Kawasaki ZXR400 race bike
2002 Kawasaki ZX9r race bike
|
|
jayvoa
Part of things
Posts: 229
|
|
|
|
|
Yeah, 4 little plastic valves. I'm wondering, once I've used the gauges I could maybe use the valves to dampen the vac feed to the distributor... hmmm...
|
| |
|
|
|
|
|
Feb 26, 2015 17:52:08 GMT
|
Great build, great stories, great arches and great OCD-style checklist for fitting the carbs  |
| |

Out for a drive on a sunny spring day reminds me why I got this car  |
|
Kieran
Posted a lot
Posts: 1,092
|
|
Feb 26, 2015 18:46:18 GMT
|
|
No, the valves won't regulate or restrict the vacuum, they just dampen the pulses.
I've used them to dampen down the vac signal to a map sensor, but if you use them for the dizzy, it will just make it lazy in operation.
|
| |
The Ashby Jackson fleet:-
1979 Mini Clubman 1.8 K series
1978 Skoda 110r Project 130RS K-oupe
1978 Austin Allegro 1500 SDL Estate
1984 BMW K100 Sidecar outfit
1999 Yamaha FZS 1000 Fazer
1991 Kawasaki ZXR400 race bike
2002 Kawasaki ZX9r race bike
|
|
|
|
|
Feb 27, 2015 20:54:15 GMT
|
Cracking job on the new manifold petal, looks ace : . Be good to see the Capri Rollin round again.... Brew time soon  |
| |
I'm not curse word, i just fell off my shoes
|
|
jayvoa
Part of things
Posts: 229
|
|
Mar 23, 2015 19:59:01 GMT
|
More progress! After finishing the new carb manifold and gathering all the required bits I set about fitting it. I started by removing the disgusting old manifold I made before. I honestly don't know how the car ran with this on. It's fair to say I did a pretty rubbish job on it! You can see on the left runner that I tried to stop it leaking with silicone sealant whilst I was making my new manifold. It still leaked, from there and every other available spot. 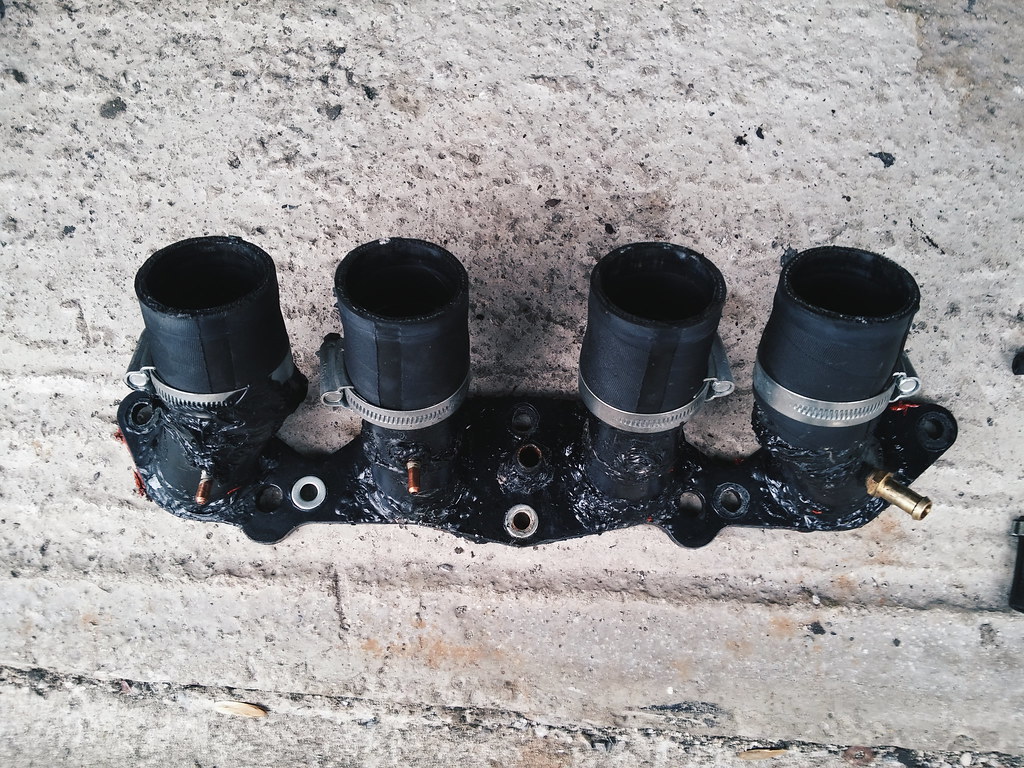 With that manky thing removed, I threw on the new one, bolted everything up and turned the key. Surprisingly it worked, everything lined up nicely, no measurements were completely out, and nothing leaked! I took some shoddy photos in the dark to prove it. 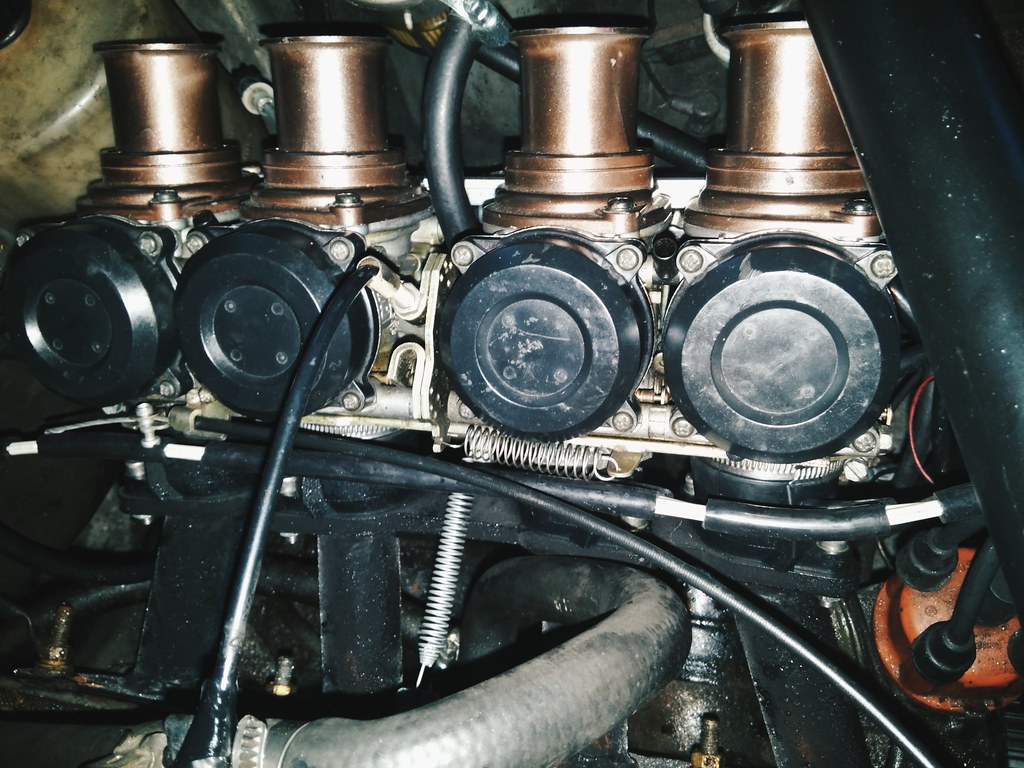 It was a little lumpy on idle, so I used the carb synchroniser to balance the carbs up and got it running smoothly. The only thing that did need tweaking as I was working on it was the return spring setup. The one that went from the carbs to the manifold didn't have enough tension, so I used a little aluminium bracket to attach a second spring which had plenty of tension on it. This stops the revs from hanging and allows the car to idle properly. If anyone out there is trying to fit bike carbs and finds that that the revs are hanging like crazy, and you're sure there's no air leaks to be found, fit a nice strong return spring! The one on the carbs isn't likely to be strong enough alone, hence why on a motorbike there's actually a cable to shut the throttle as well as open it. 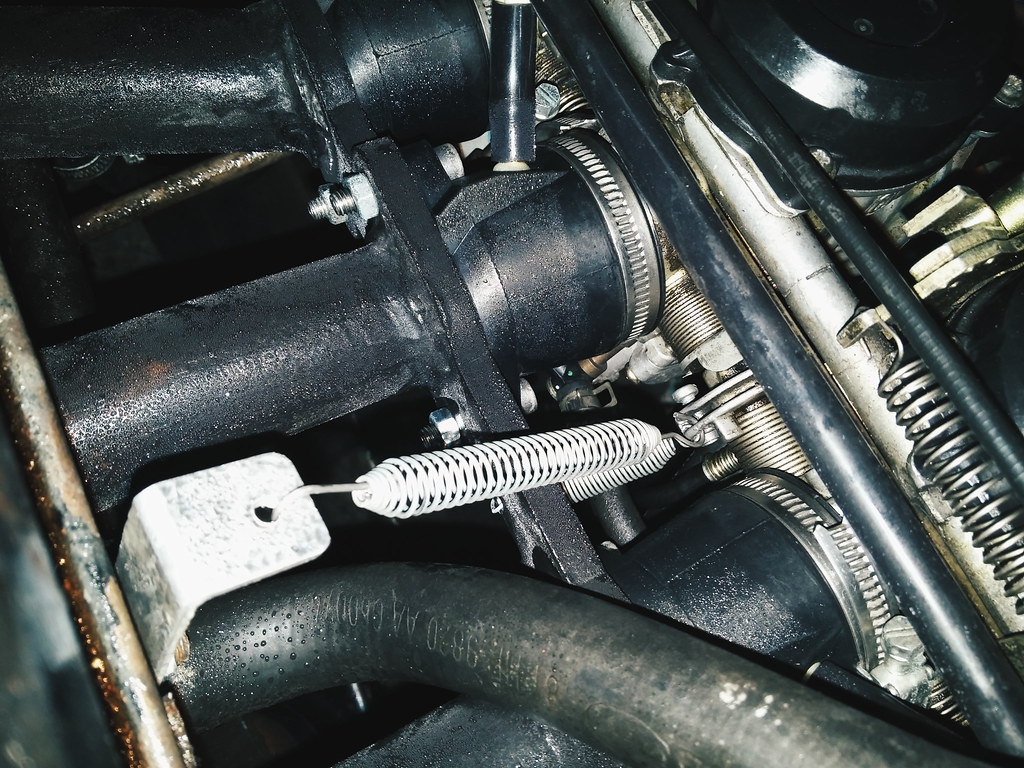 Don't worry, the water droplets all over the engine are from the test drive. Drove through puddles. No leaky manifold. Soon after, something special arrived on my desk at work. A box which contained a magical device with pretty flashy lights on it! 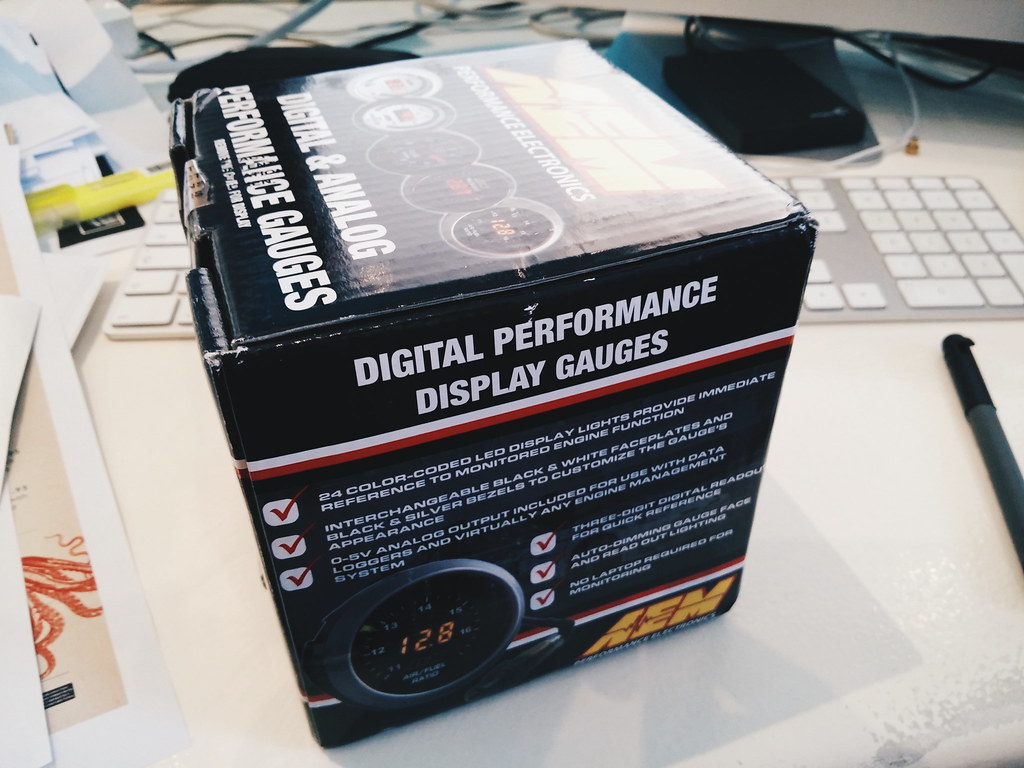 I whipped my exhaust manifold off and set about fitting the O2 bung for the AEM Wideband gauge, using a spark plug to make sure the bung didn't warp. 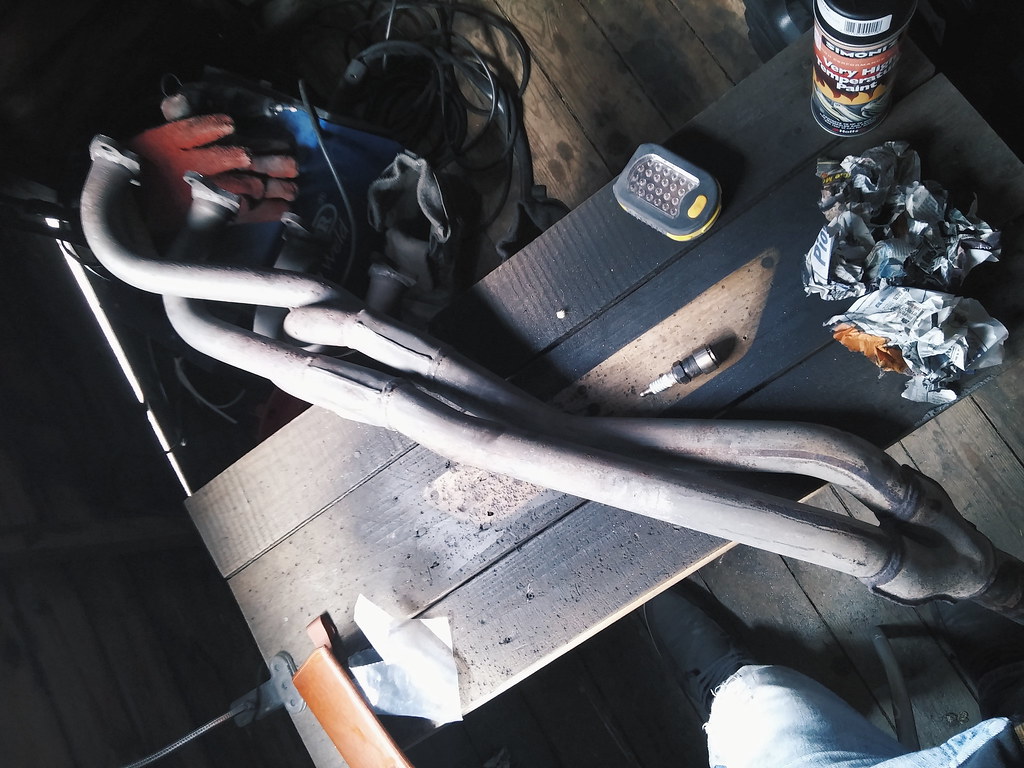  My welder is gasless, and not very good, plus my welding skills are worse than amateur, but I was fairly pleased with the result. I made doubly sure there were no holes, as that would render the O2 sensor a bit pointless. 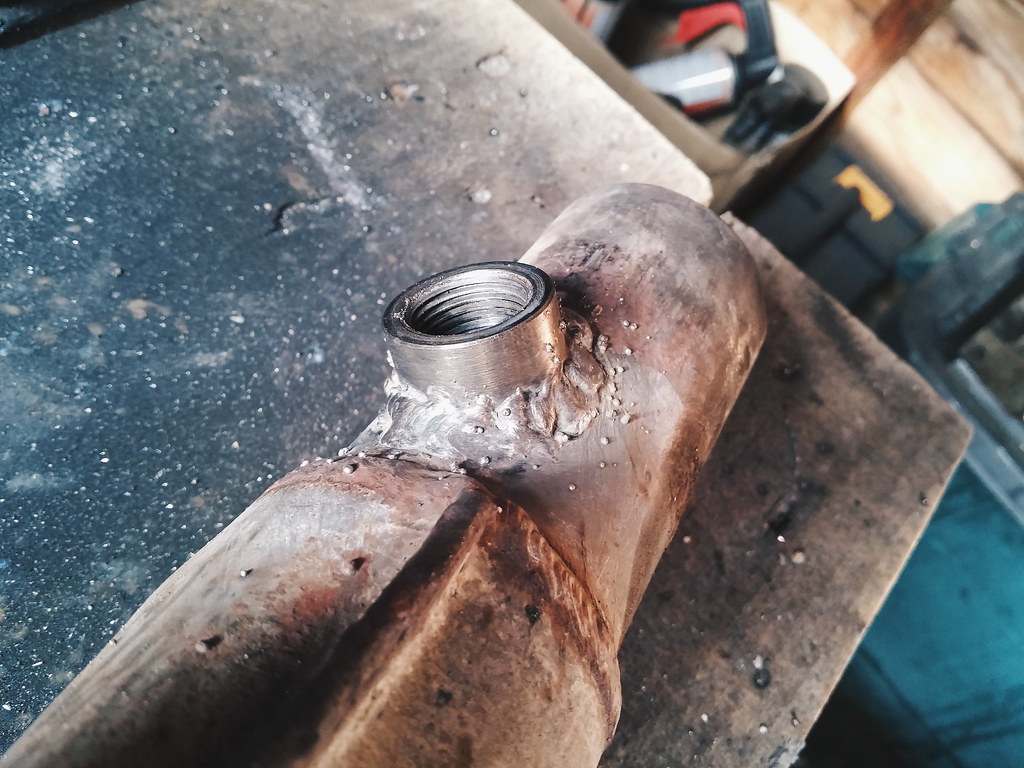 After the success of welding the bung in and refitting the manifold I moved on to the wiring. I hate wiring. Even though this thing only required an ignition switched live and earth I was still worried. I studied Capri wiring diagrams to make sure I wasn't going to make a massive mistake, and discovered an unused spade connector on the fuse box that happens to be a 12v ignition switched feed. I connected that to the red wire, and earthed the black wire, plugged the gauge and sensor together, then routed the wires through a grommet and behind the dash. I fitted the gauge in an unobtrusive spot, but nicely angled upwards towards me so I can easily read it whilst driving. 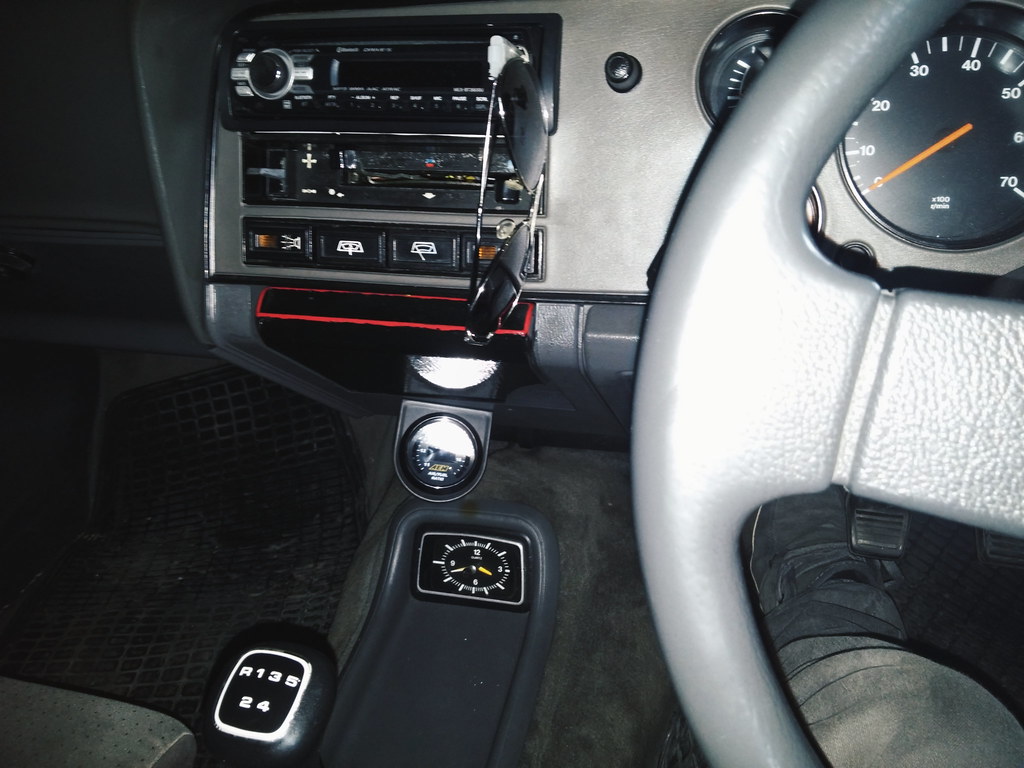 After fitting, I turned the key, some lights flashed, the word "POO" came up on the LED display (seriously) and it worked! And I was running stupidly lean at idle! Everybody says to have the idle screws on bike carbs set to about 2-2.5 turns out. Turns out it needed to be 3.5-4 turns. This gave me a decent AFR reading, with the gauge bouncing happily around the 14.8 mark. Perfect!  After a good drive it looked like I was running way too rich at mid-throttle, so I dropped the needles down by removing the washers I'd put in there. At what I was hitting about 12-13, which is just about right I think, so I don't have to change the original 155 main jets! Score! (note: this is with the corrector jets blocked off) A few days later I was cruising along at 60mph, feeling smug with all my successful work, when suddenly the car started juddering violently, and I mean bloody violently! The whole car was shaking, the steering was shaking so much I could barely hold it and I honestly thought it was going to shake itself to pieces. I put my hazards on and slowed right down until it stopped. Not a good move on a busy carriageway but it was that or attempt to mount a grass verge. When I got to where I was going I noticed the centre of the front wheels were hot. After this incident, whenever I hit between 30-40mph, the car would start shaking again, and not the usual "it's an old Ford, it's supposed to shake" kind of shaking. I got the car home and double checked the front end, making sure everything was tight enough and where it's meant to be. Seemed to me that my thirty year old calipers were starting to give up, so I did the sensible thing and bought brand new bright orange ones. And lots of other stuff whilst I was at it. 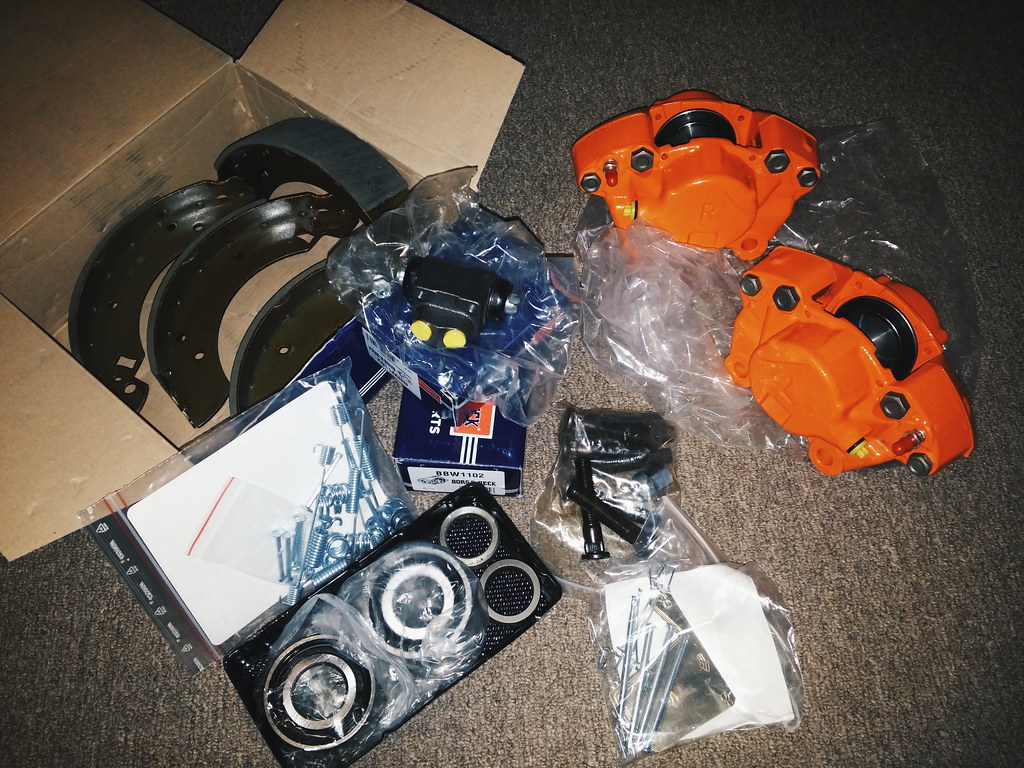 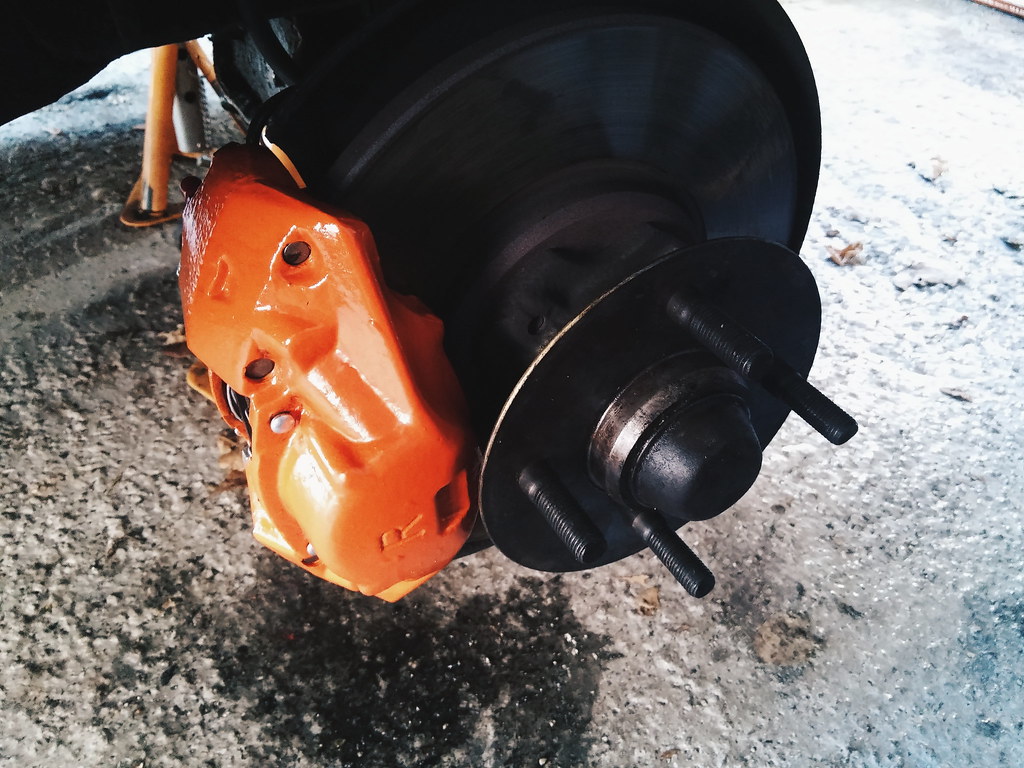 New calipers fitted easily, and made a big difference to the stopping. More importantly the car didn't wobble, judder or shake anymore. You might notice a couple of images up that I bought new bearings for the rear, again. I'm fed up with the brand new leaky ones I have, so I spent some time tracking down some bearings that are actually correct, with a different shaped seal on either side, which only fit one way, as Ford intended. I'm going to put these on my old half shafts that I luckily held on to, then swap them for the ones I've got in now. Before that though, I'm gonna tackle the rear brakes. Progress feels good! Long post over! |
| |
|
|
|
|
|
|
|
Mar 23, 2015 22:15:27 GMT
|
All good stuff matey .... For me seriously thinking about the sensor doodah now to after your little demo drive. Big difference! Added to my to do list |
| |
I'm not curse word, i just fell off my shoes
|
|
jayvoa
Part of things
Posts: 229
|
|
|
|
Drum brakes are the work of Satan. Deceivingly easy to dismantle and near impossible to reassemble. Got the buggers done though! Feels good to be making progress most weekends. Not even man flu can kill my mojo right now. Seeing as I'd fitted silly bright orange calipers on the front I thought it would be rude not to paint the rear drums in silly bright orange too. I bought a cheap little pot of brake paint on eBay and hoped the colour would match. Turned out pretty close! 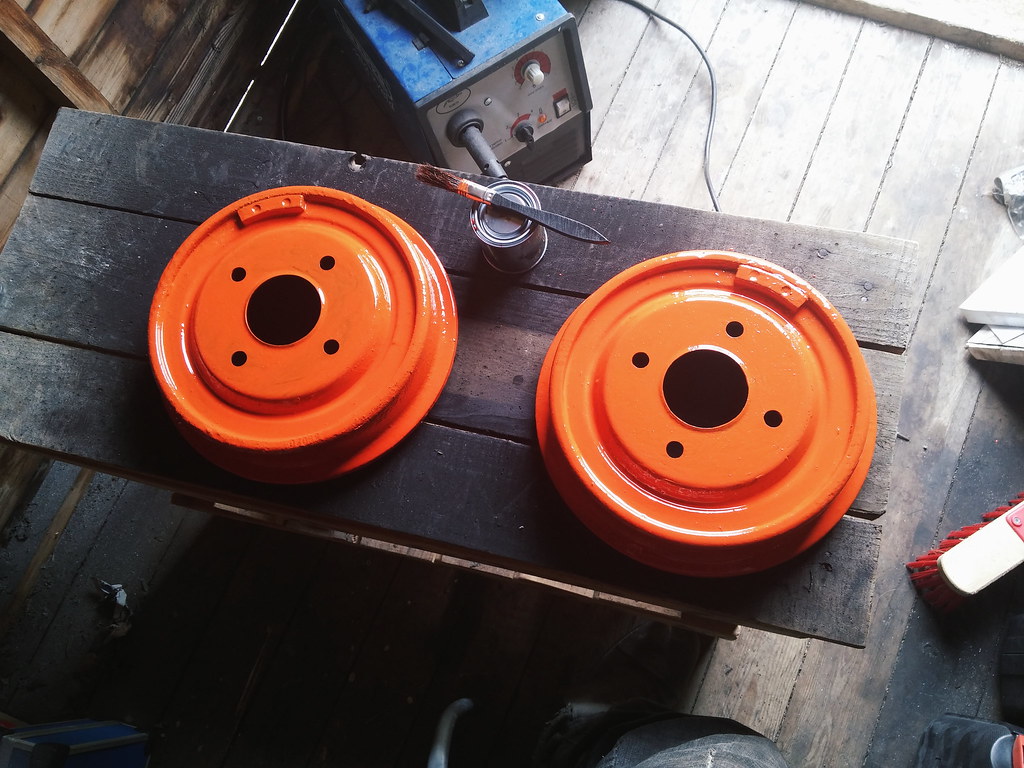 After a few coats of that I left it to dry and set about taking the dirty old brakes apart. I replaced the cylinders, springs and shoes, during which I swore a lot and accidentally punched myself in the face when trying to fit the stubborn little springs. 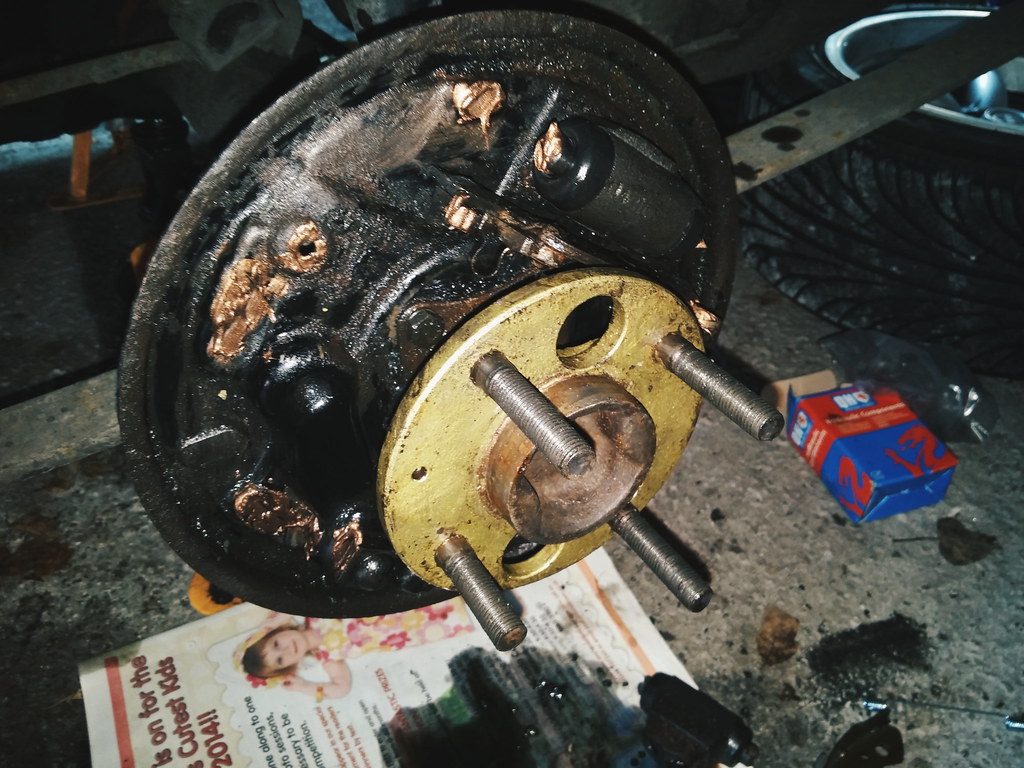  After a bit of fun jumping in and out of the car to check my £3 "one man brake bleeding kit" the brakes were successfully bled and I could refit the wheels. 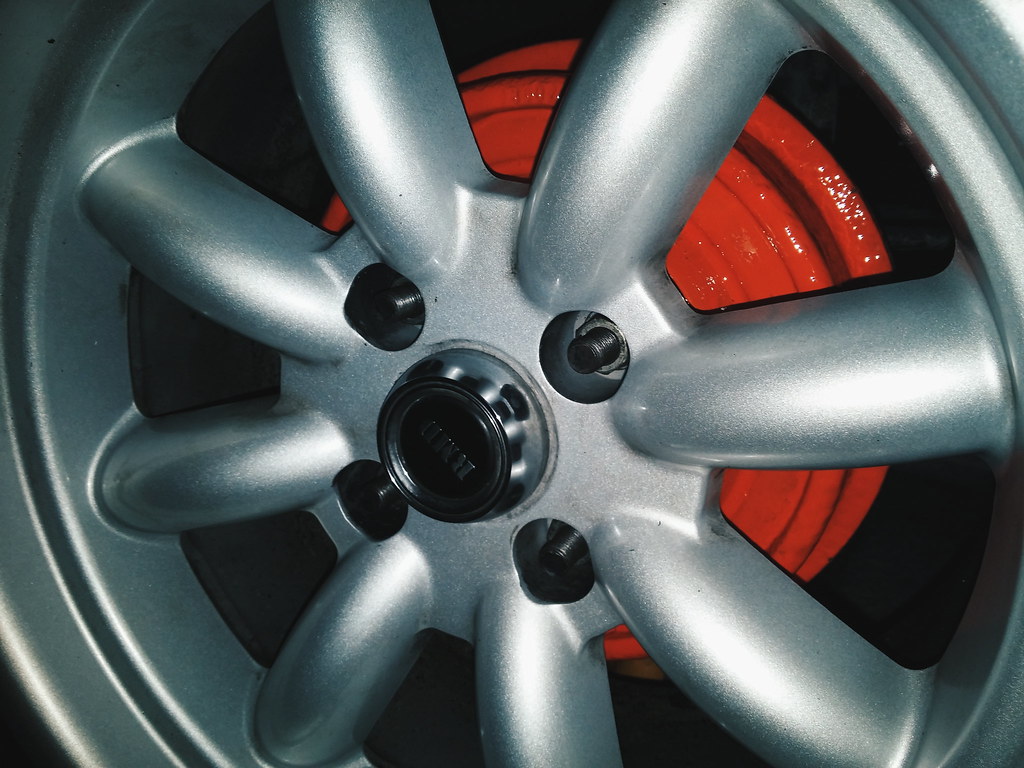 Not test driven, but no leaks at least! Yet... |
| |
|
|
jayvoa
Part of things
Posts: 229
|
|
|
|
Mini-update time. The brakes work, and they work well! I feel a lot more confident with them now, so no more brown trouser moments with the spongy, weak old brakes. Not 100% sure on the bright orange after seeing it on the car, but it looks better than grotty rust and oil. Might repaint them all gold at some point. I do love gold. It's worth reporting that the AEM Wideband gauge is still performing brilliantly, and the Wynn's Lead Substitute hasn't cocked up the sensor, so it seems like their boffins were telling the truth! If anyone out there is running a leaded head and wants a wideband gauge without fitting hardened valve seats, Wynn's is the way to go! It doesn't boost octane at all though, so keep this in mind. In preparation for my next job, fitting yet another pair of refurbished halfshafts, I bought a great big slide hammer. In the past I've struggled with a small slide hammer, trying to remove the halfshafts with a hooked attachment, and after using some RTV sealant around the bearings the shafts are a little more stubborn to remove. I didn't want to have any problems like this again, so I ordered the mother of slide hammers from Germany. It arrived at work today, and it's a bit of a beast. A thing as heavy and destructive as this should have a name like "Dominator" or "The Mighty Slidehammer of Destruction". 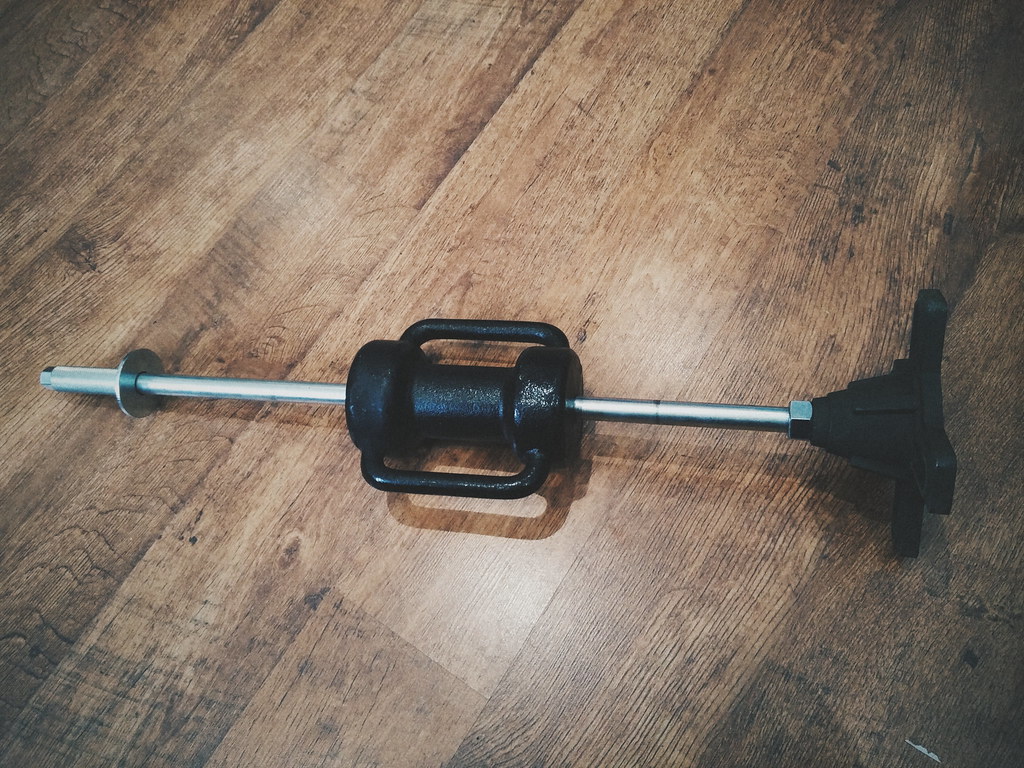 I actually wasn't expecting it to arrive so quickly, so I haven't finished working on the spare halfshafts yet. It'll be done soon, but first, a Bank Holiday weekend of joyful driving around the Welsh valleys is calling! |
| |
|
|
PhoenixCapri
West Midlands
Posts: 2,683
Club RR Member Number: 91
|
|
|
|
|
Looking really good, need to get myself one of those wideband gauges
|
| |
|
|
jayvoa
Part of things
Posts: 229
|
|
|
|
No more diff oil leaking through the rear bearings! YES! Managed to fit some new rear bearings myself, and it seems these new bearings are doing their job and keeping the diff oil in the axle, instead of inside my rear drums and wheels. The bearings came off my old half shafts without much fuss. First I cut through the retaining ring with a Dremel, until the ring cracked under its own tension. Once it had split through I could gently tap it off with a hammer and cold chisel. 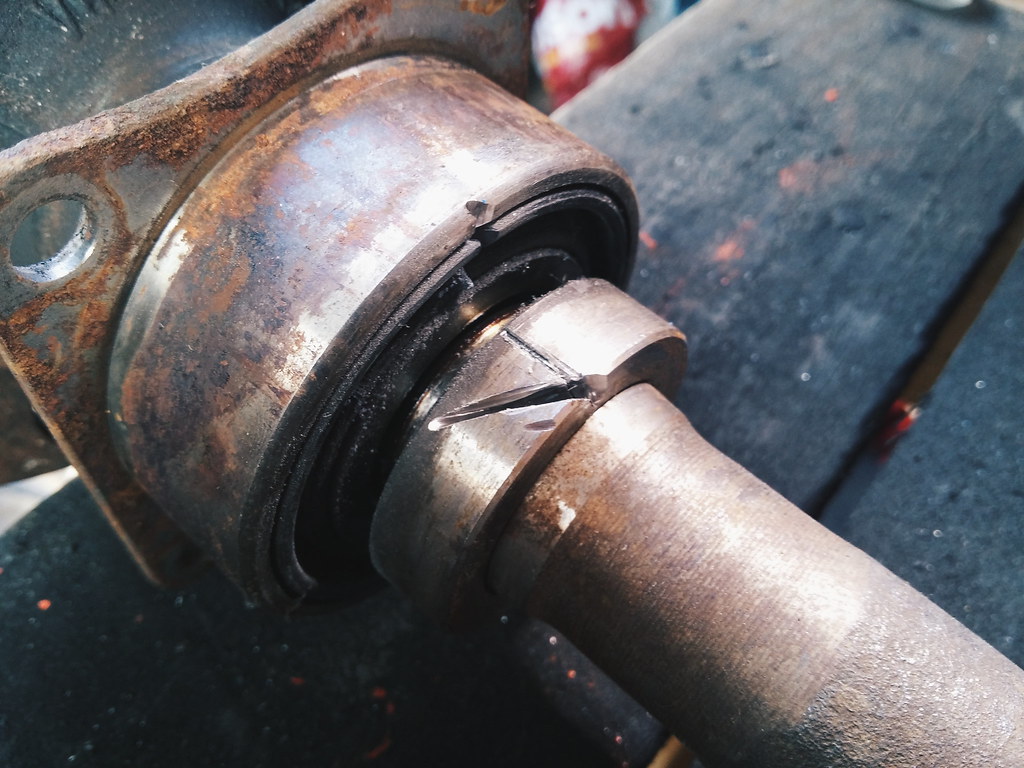 Then I cut off the outer race and removed all the innards... 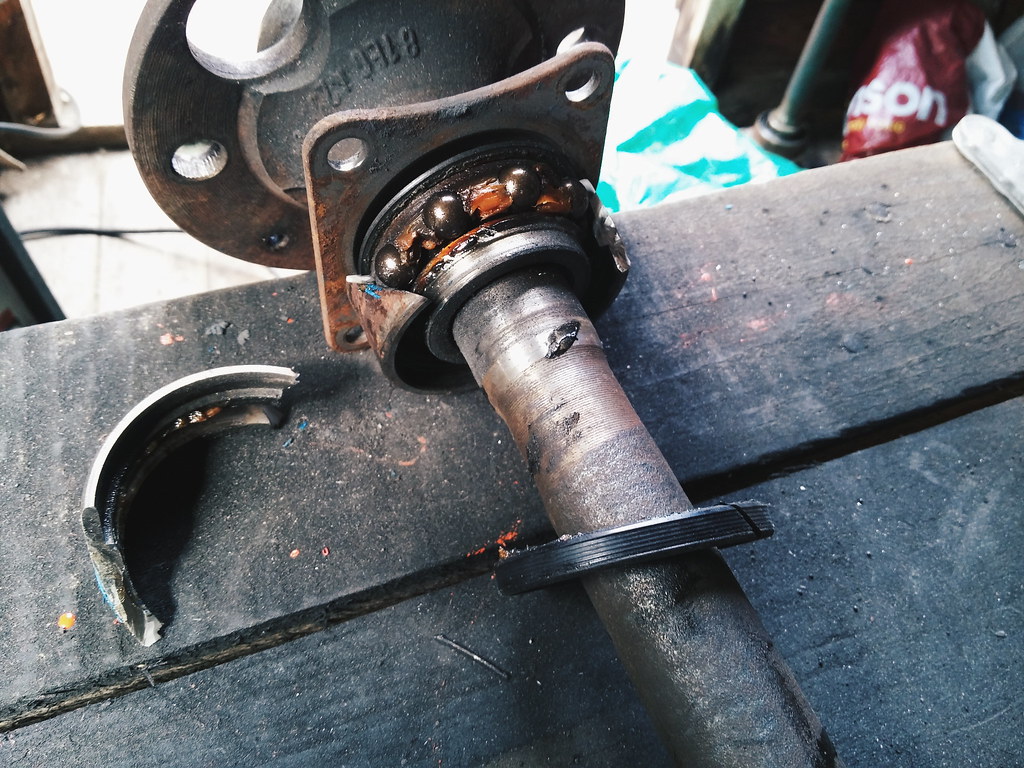 ...so I could get at the inner race and cut through until it cracked like the retaining ring. 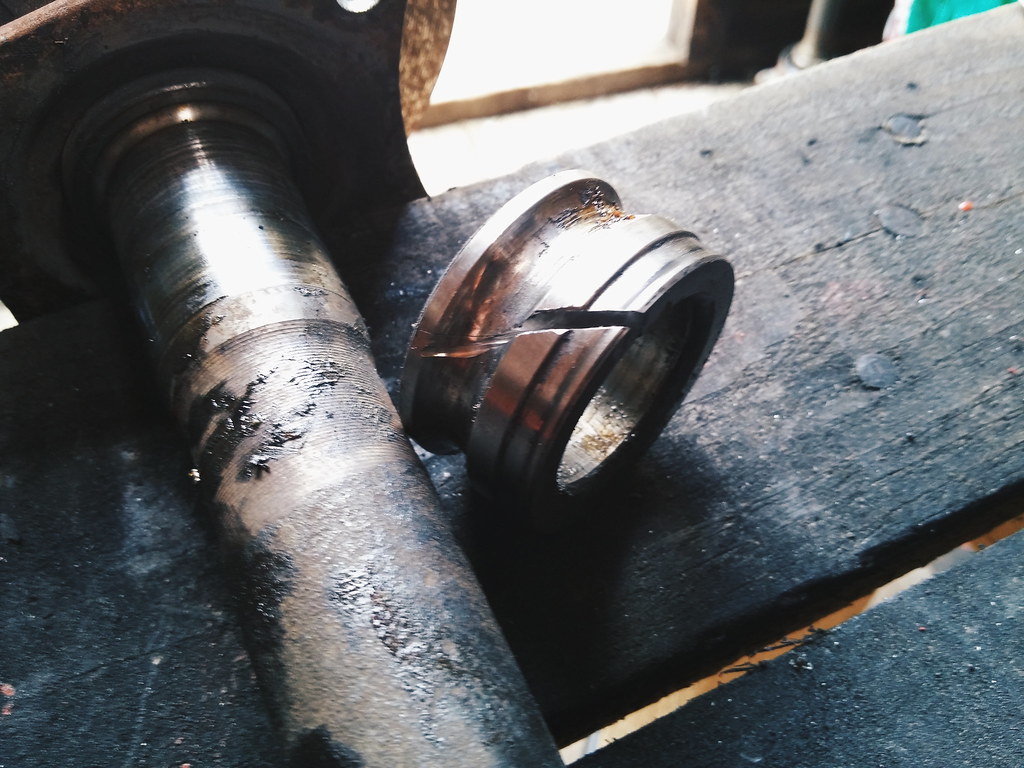 I repeated the process for the second half shaft, then cleaned them up and treated them to a coat of gold Hammerite. Once they were ready for the new bearings I thought about various ways I could fit the bearings myself, without a press. I settled on this elegant solution. 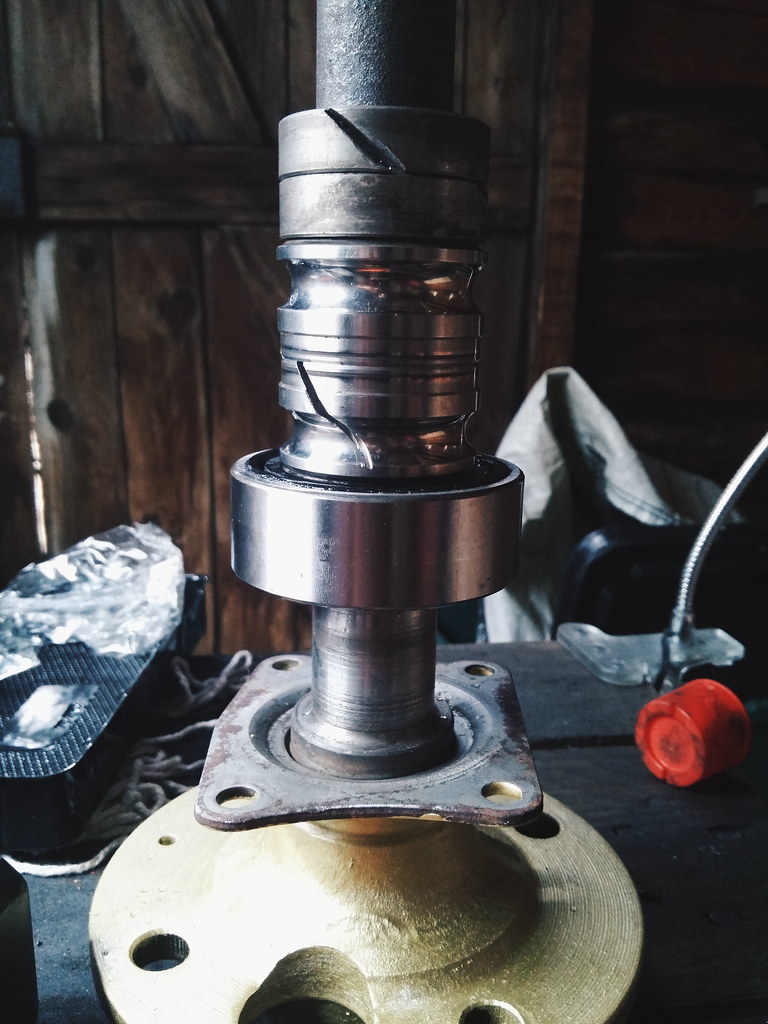 I stacked the old inner races and retaining rings on top of the bearing, sliding them down the shaft with a fair bit of force, striking the bearing until it was seated nice and flush. With this technique it took me about 10 minutes to get each bearing and retaining ring on. 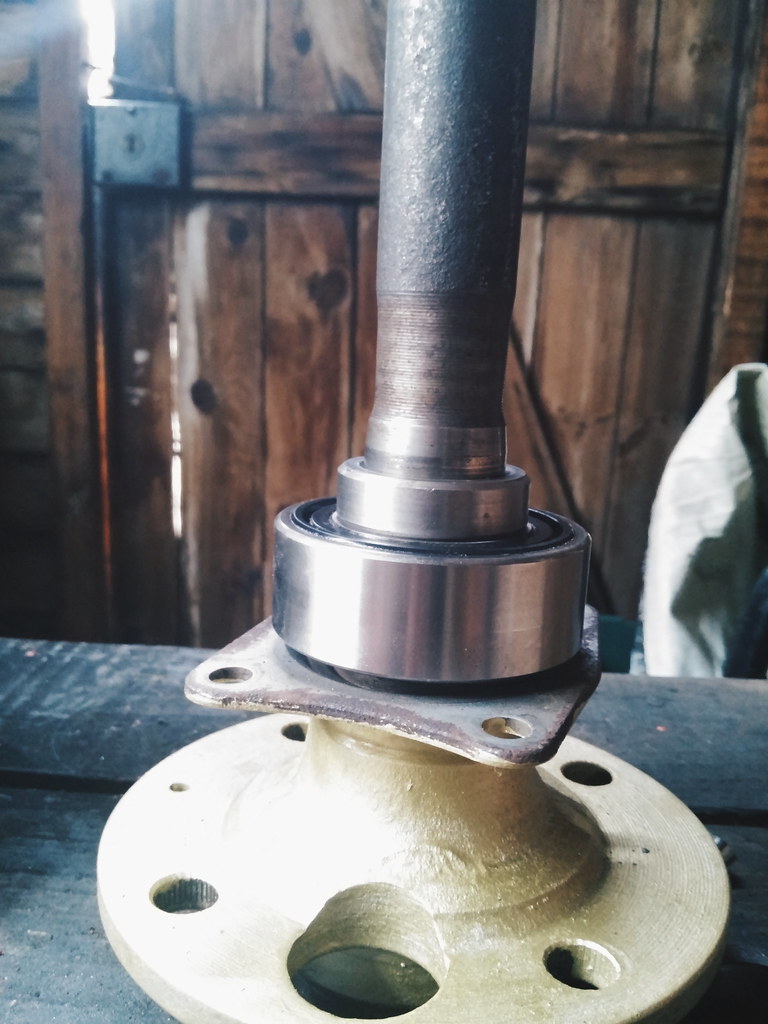 After getting the bearings on to the shafts I had the small matter of my birthday to deal with, so I had to ignore the car for one weekend and start working my way through these gifts...  The next weekend it was nice and sunny, so I broke out the mother of all slide hammers and got the half shafts swapped out. 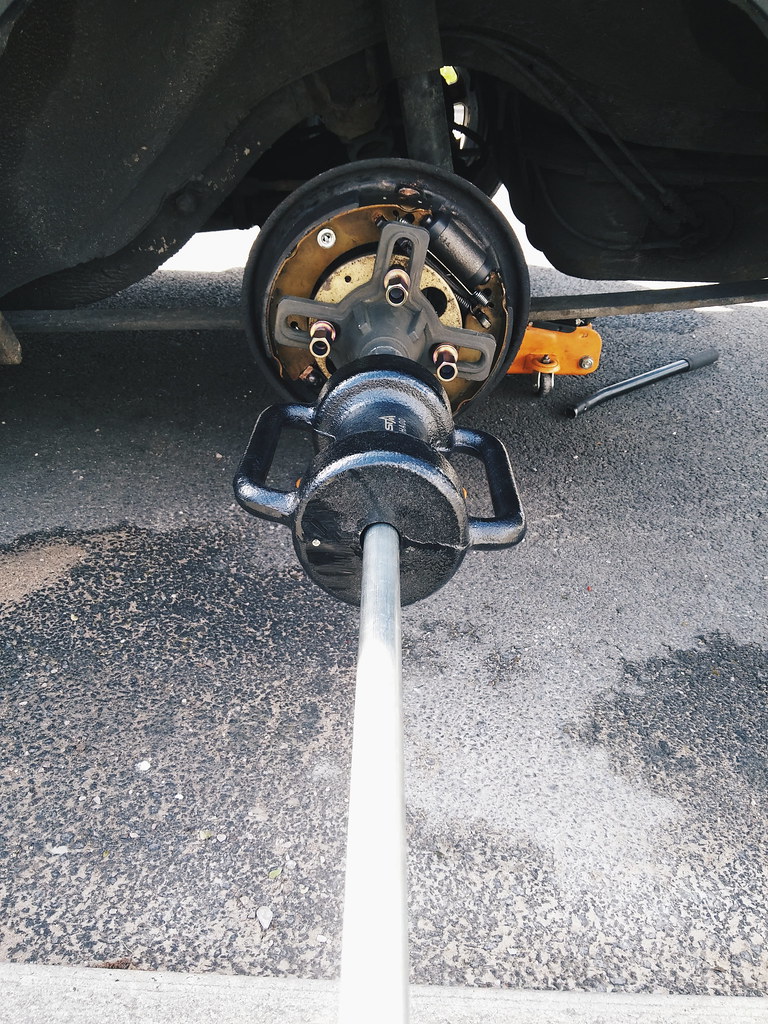 The "new" half shafts went in nice and smooth, only needing a little tap from a rubber mallet to get seated properly. 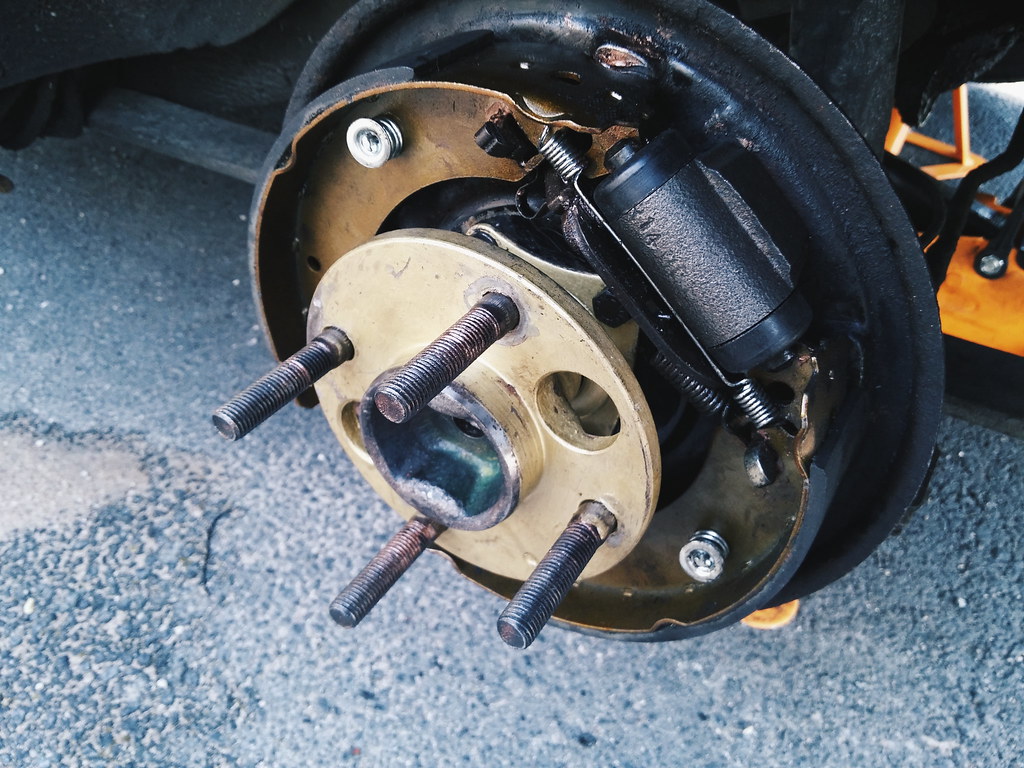 I've been driving with these new bearings for a week and I haven't seen a drop of diff oil leaking into my rear wheels, so it looks like the job was a success! I can't explain how good it feels to see the inside of my rear wheels all clean and dry. My next job is to stop ignoring the rust and start replacing it with fresh metal, so I've bought a couple of replacement panels (seen here next to retro Iron Man's crotch) for the lower rear quarters as a start. Should be simple enough to weld these in, I hope. 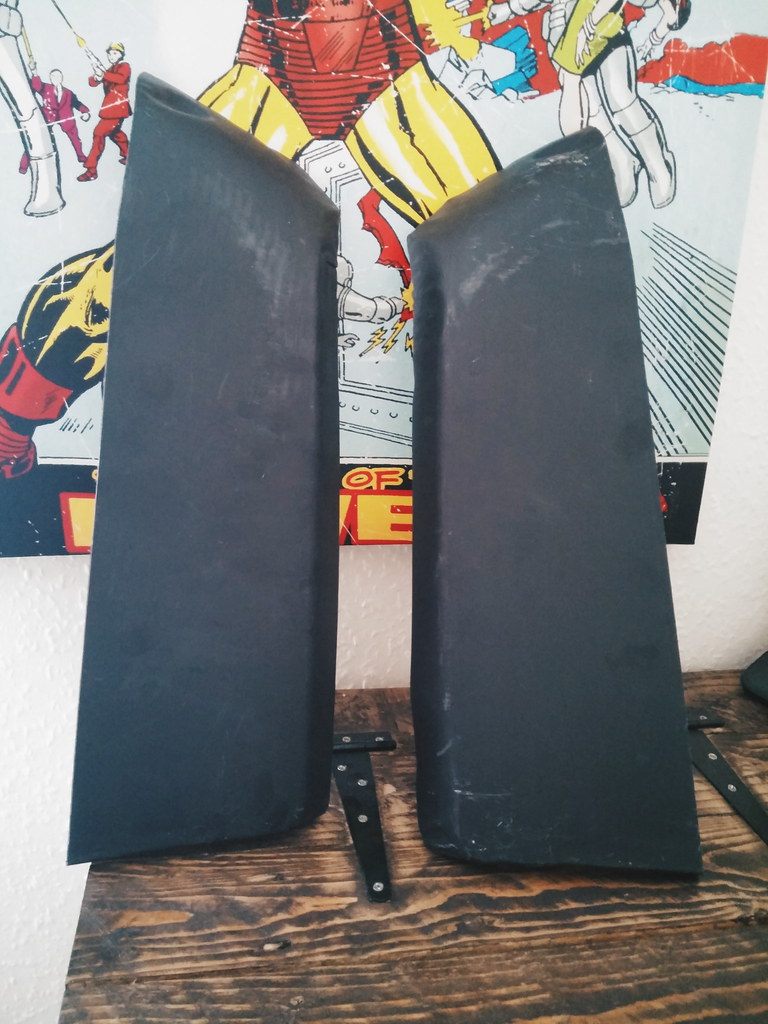 Also got a cheap hammer and dolly set to try and get rid of some dents and form some of my own simple panels. I'm hoping that for the more simple shaped bits I'll be able to make the panels myself, and eventually move on to more complex panels if/when my skills progress enough.  |
| |
|
|
jayvoa
Part of things
Posts: 229
|
|
|
|
Just when I booked time off to get stuck into the bodywork, I'm forced to get stuck into the bloody old Pinto. 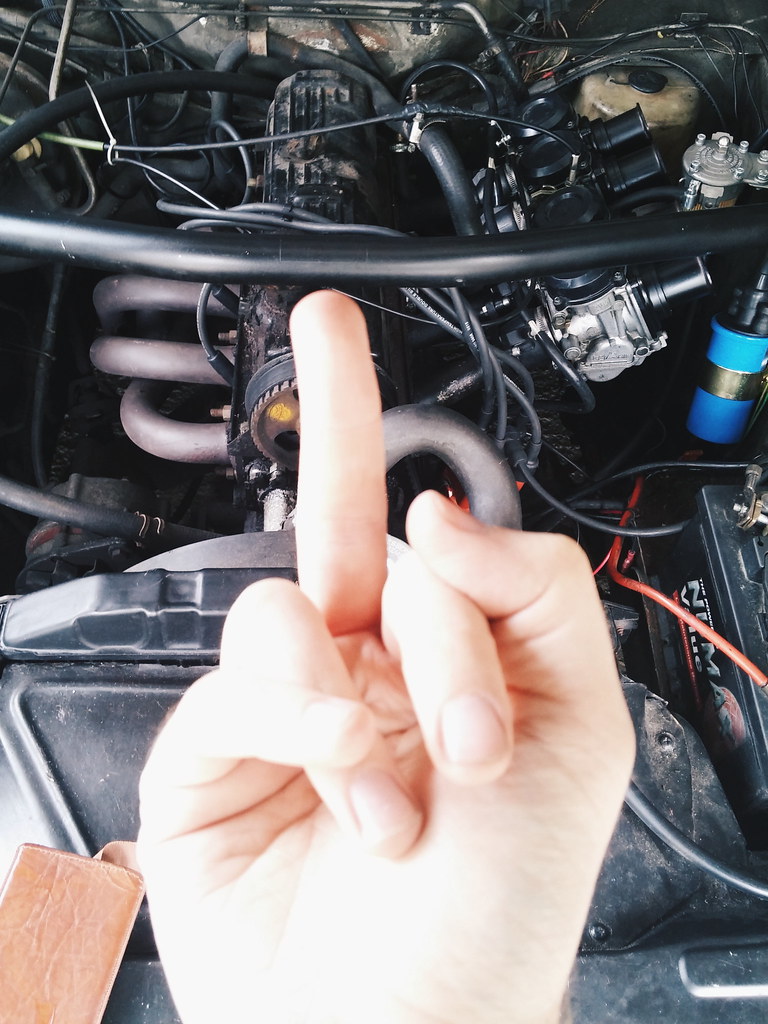 It had recently started idling really roughly, and over a few days had gotten worse, until it wouldn't idle properly at all. It would idle for a little bit, but the revs would gradually drop until the engine would splutter and stall. First thing I thought was the spark plugs were due a change, so I went ahead and bought some new ones, went to remove the ignition leads, at which point the leads tore apart with ease. Balls.  I thought that the deteriorated leads must have been the issue, so I fitted brand new leads with the new plugs, but it still ran like poo. At this point I thought I should refresh the ignition system anyway, so I fitted a spare distributor cap and rotor and bought a new coil and electronic ignition unit from AccuSpark. I already had one of their units fitted, but having a spare in the car might one day come in handy. Still the same. I checked that there was a spark at each of the plugs, and all was fine, so it didn't seem to be an ignition problem. I then thought if it wasn't an ignition issue it may be a fuelling issue, so I whipped the carbs off and rebuilt them. I'm also still running on the mechanical fuel pump, so I tried out a low pressure electric one. The carb rebuild made no difference, neither did the new fuel pump (although I kind of knew the pump wasn't at fault). I fitted a pressure gauge to double check and the Malpassi regulator was around 1.5-2psi, so no problem there. I couldn't find an ignition or fuelling problem, so I started checking the mechanicals. Valve clearances were checked and all were fine. Static timing was bang on, so the belt hadn't slipped. Timing was set to the standard 8º BTDC as it was at about 12º, but this didn't change anything. The only thing that would keep the car running is higher revs, so I was able to keep it running with the choke, allowing me to check the carbs and get them balanced. I then figured that if I adjusted the idle speed control on the carbs high enough, I could get it to run without using the choke, but it would stick at 2000rpm and get really hot really fast. After balancing the carbs and turning the engine off I got a massive bang from the exhaust, which I'm guessing was unburnt fuel igniting in the hot exhaust. So my next step is to dig deeper and take a proper look at the cylinder head. And I've had a spare unleaded head sat in my shed for a while so the logical next step is... Car parts! 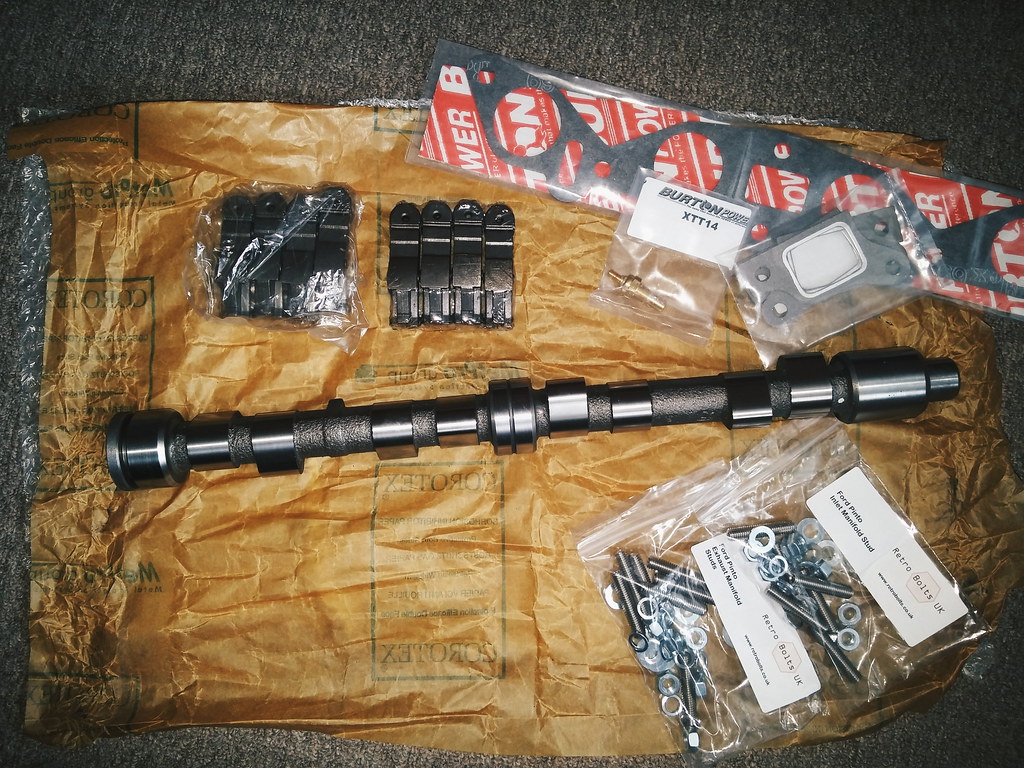 I ended up buying the Newman camshaft I've been wanting for ages, along with lots of other bits to turn the poor filthy old head into a loud shiny one! I thought, if I'm taking the head off, I may as well fit a better one in it's place when I'm putting it all back together. Right? Speaking of the filthy old head... 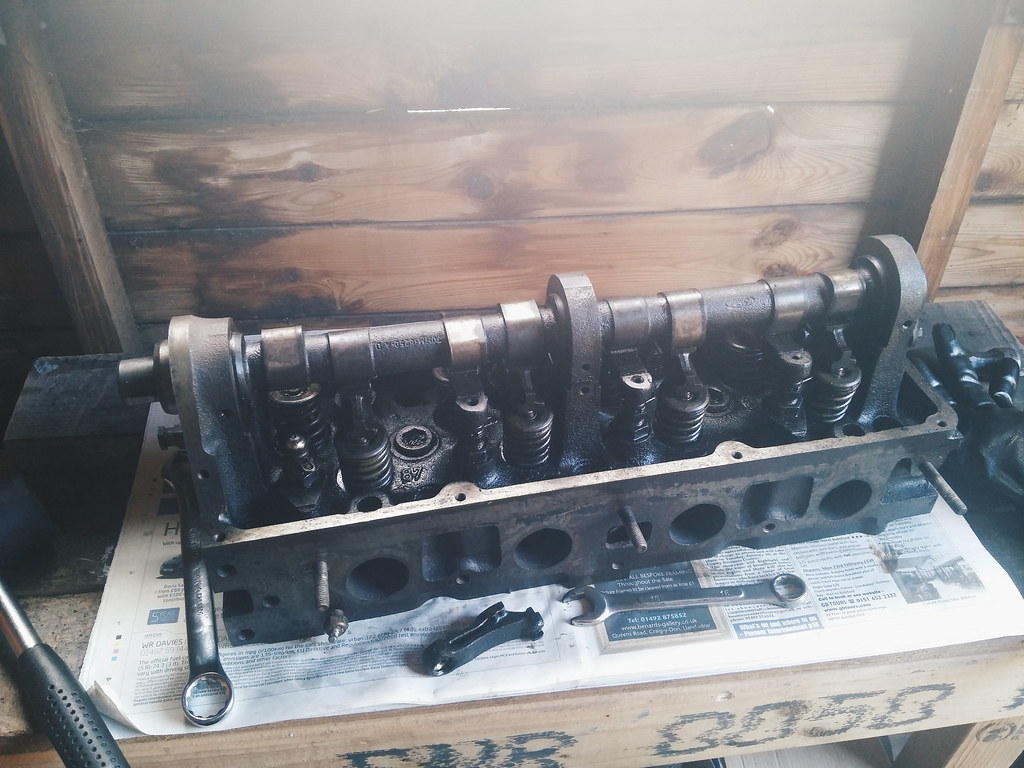 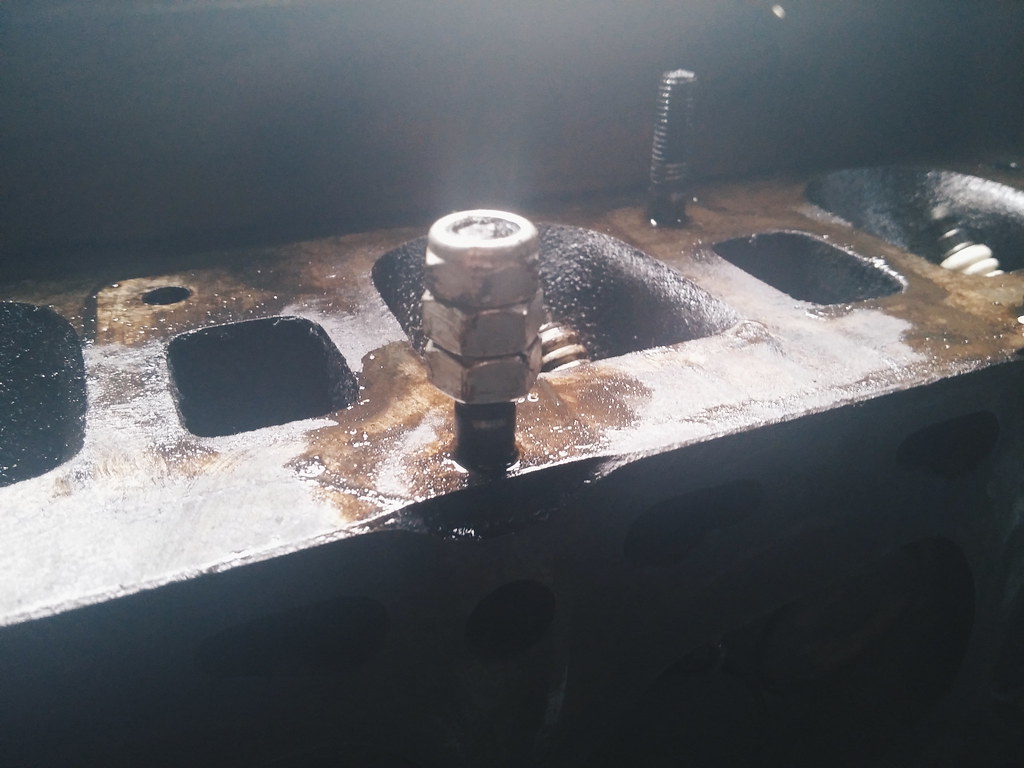 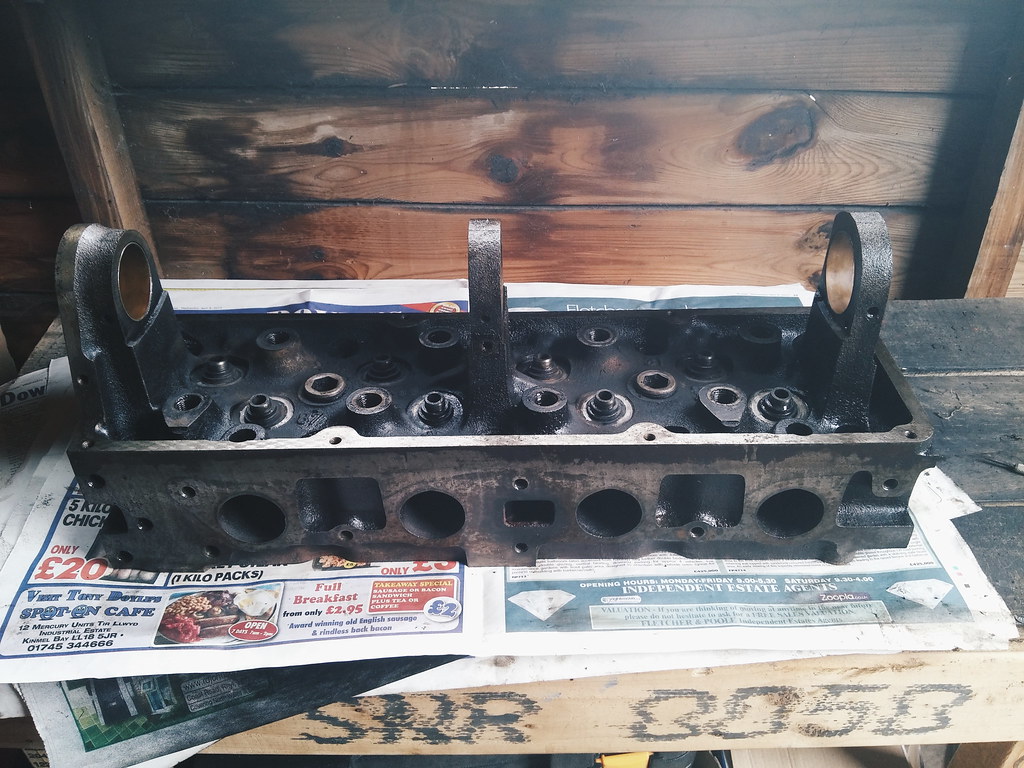 It's now all dismantled and ready for a good scrub, all apart from the one snapped exhaust stud which broke off when the head was posted to me a while back. I might try drilling it out gradually, and if I can't I've always got an M8 sized Helicoil kit to use. I've also been reading the David Vizard book on the Pinto, which is tempting me into a bit of mild porting... So I've decided to improve the sharp short turn on the ports, just before the valves, as well as removing as much of the valve guide boss as I can without reducing it's height and ruining the guide's life-span. Might go with the "knife edge" shaped boss. This is my thinking...  Bet you a tenner it still doesn't work after! |
| |
|
|
|
|
|
Jul 28, 2015 11:21:38 GMT
|
Hi. Just signed up to say I've spent the morning at work reading through your entire thread and have really enjoyed it. I've recently started looking at getting a Capri again because it's been a a few years since I sold my Mk1, and the pains and torment of owning a classic are all very well documented here. I miss it for some reason. Ahhhh, nostalgia. I've been through it all myself having owned a few Capris and can confidently claim to be able to rebuild the entire suspension and running gear with my eyes closed. You're doing a good job; all the little bits and pieces you're doing now will result in a car that runs well for many more years. Glad to see you keeping up with it all and managing to keep the blog updated too. Looking forward to more updates! Matt. |
| |
Last Edit: Jul 28, 2015 11:22:06 GMT by MattMe
|
|
|
|
|
Jul 28, 2015 16:10:27 GMT
|
Hi. Just signed up to say I've spent the morning at work reading through your entire thread and have really enjoyed it. I've recently started looking at getting a Capri again because it's been a a few years since I sold my Mk1, and the pains and torment of owning a classic are all very well documented here. I miss it for some reason. Ahhhh, nostalgia. I've been through it all myself having owned a few Capris and can confidently claim to be able to rebuild the entire suspension and running gear with my eyes closed. You're doing a good job; all the little bits and pieces you're doing now will result in a car that runs well for many more years. Glad to see you keeping up with it all and managing to keep the blog updated too. Looking forward to more updates! Matt. have you got any pictures of that red mk1, would love to see that? =) |
| |
Only dogs go for new cars, real cars have rust!
Ford capri laser 1.6 -http://retrorides.proboards.com/thread/181032/1986-ford-capri-laser-updates
|
|
|
|
|
Jul 29, 2015 16:15:37 GMT
|
have you got any pictures of that red mk1, would love to see that? =) Not handy, unfortunately. It hurts too much to look at it! I sold it about 6 or 7 years ago for around £2.5k. It came up for sale last year for £10k. I felt sick. Was pretty close to abandoning everything (including buying a house) to get my hands on it again. But common sense prevailed (was bound to happen at some point in my life) and alas, I am still Crapi-less. I'll see what I can dig out and upload a few. |
| |
|
|
|
|
|
Jul 29, 2015 18:49:12 GMT
|
Not handy, unfortunately. It hurts too much to look at it! I sold it about 6 or 7 years ago for around £2.5k. It came up for sale last year for £10k. I felt sick. Was pretty close to abandoning everything (including buying a house) to get my hands on it again. But common sense prevailed (was bound to happen at some point in my life) and alas, I am still Crapi-less. I'll see what I can dig out and upload a few. that's a shame mate, looks rad. my dad did the same with an R1 mini, sold it for 7.5k and it went up for sale a few years later for 15k. also cheers mate =) |
| |
Only dogs go for new cars, real cars have rust!
Ford capri laser 1.6 -http://retrorides.proboards.com/thread/181032/1986-ford-capri-laser-updates
|
|
|
|


