Confused
Part of things
  Building: Anglia 105E with 6A13TT
Posts: 136
|
|
Feb 23, 2012 21:55:46 GMT
|
Hi all, Hoping to become a little more active around these parts - I've already started posting my up main project, my 1967 Ford Anglia 105E in the Readers Rides section, and this is my other current little project, so thought why not post this up here too! First, a little background (all good stories have a start, and it's a way to add a few photos to give you something to look at!) About 18 months ago, I got given by a work colleague an old full tower case, because I'd moved my main PC components & watercooling setup out of an HTPC (Home Theatre PC) case, and left the HTPC to HTPC duties. It was beige, oh so very beige!  Even in 2010 when I got this, beige was bad! But - I had been given it for free, and I needed to then just do my best with it, and get my PC up and running again. Armed with not much more than a drill, a hacksaw and a file, I went to work, and begun by marking and cutting out a hole for my XSPC RS360 radiator. 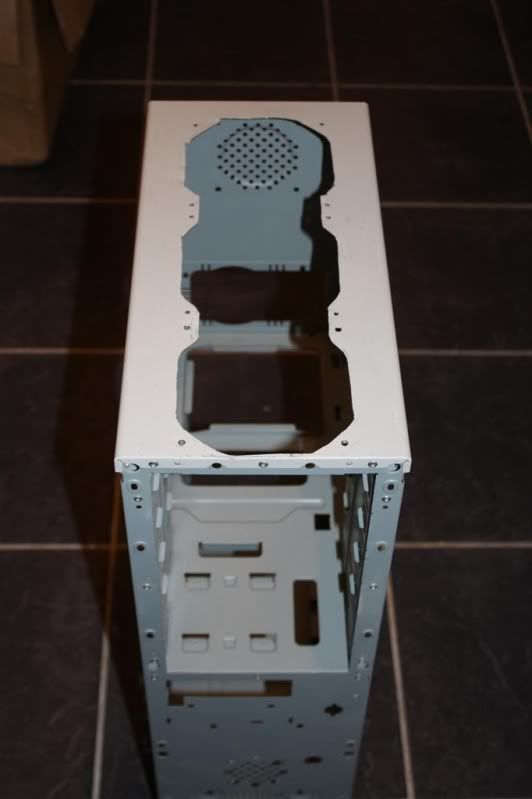 And with only a single fan, the radiator went in, as did the rest of the components - at the time an Abit IP35, Q6600, 8800GT. 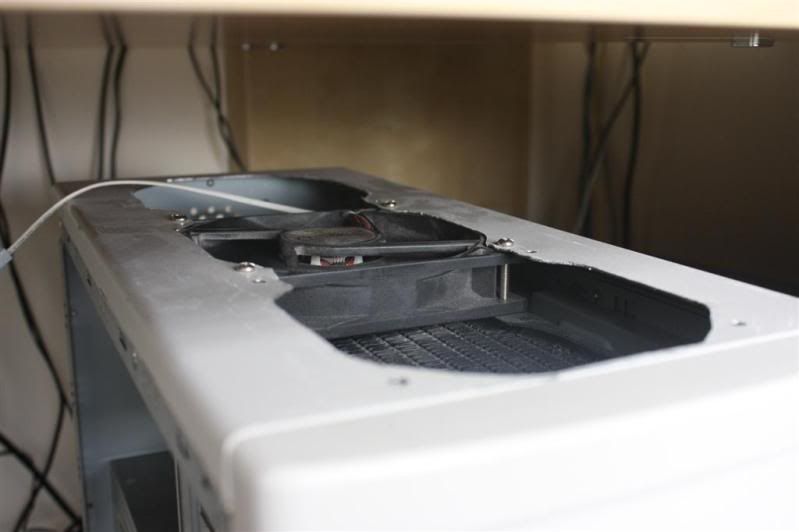 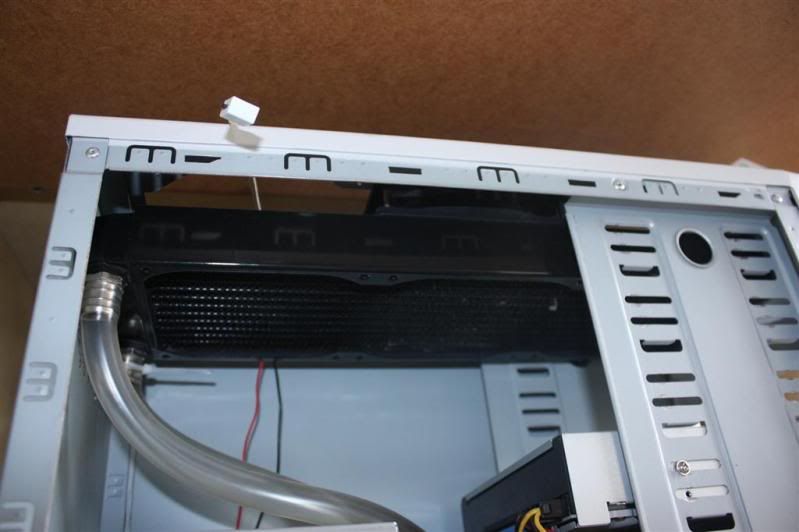 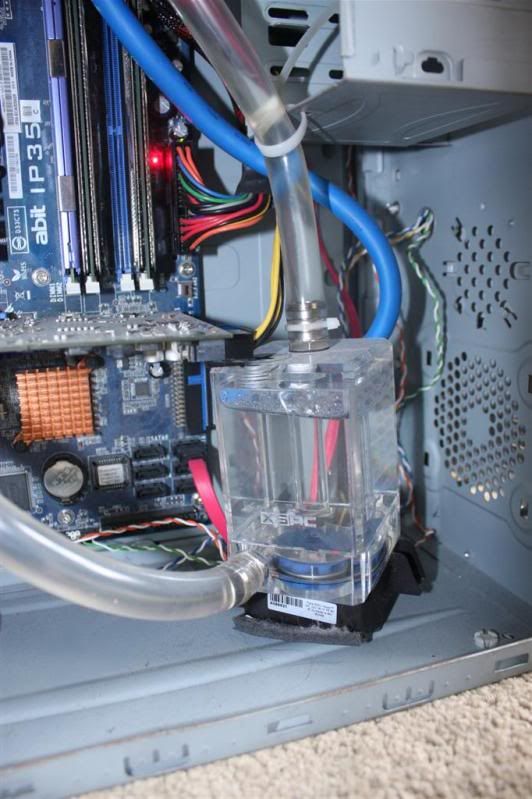 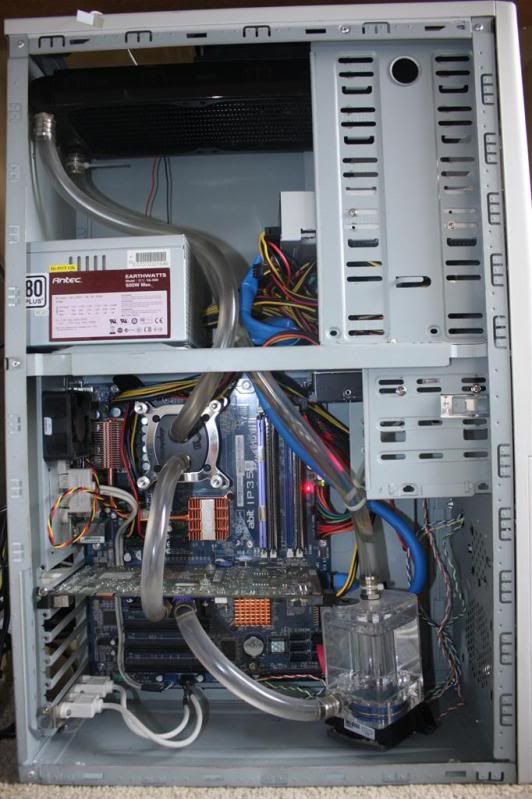 And that's how it stayed for a year or so, until one day I got annoyed with the beige, and wanted it black, instead. So, out came all of the components, and armed with a tin of black paint, I got to work again. 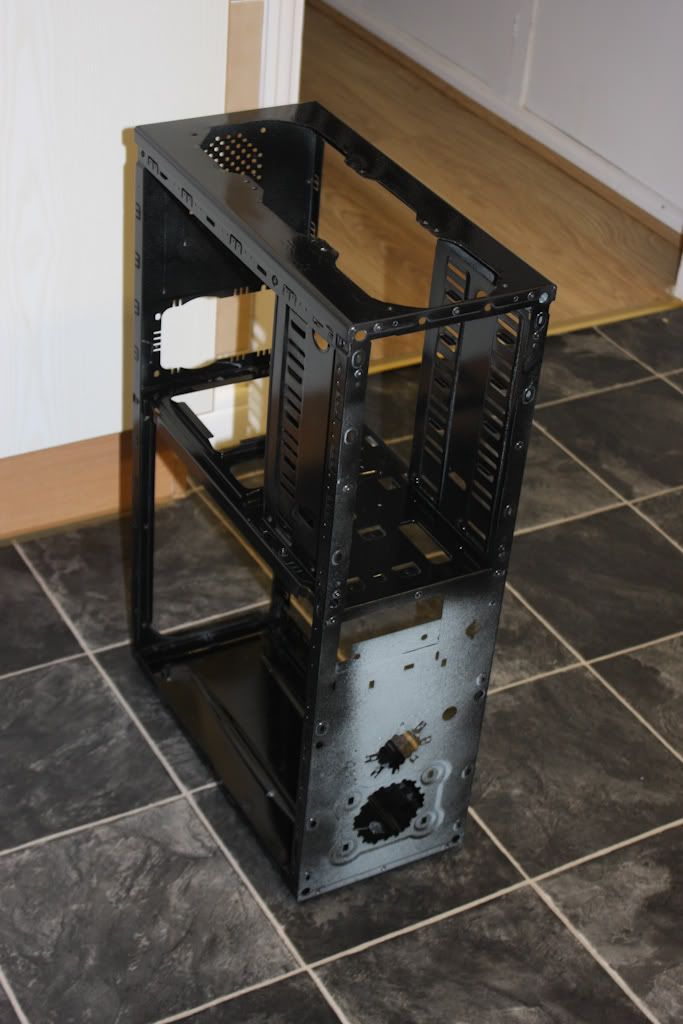  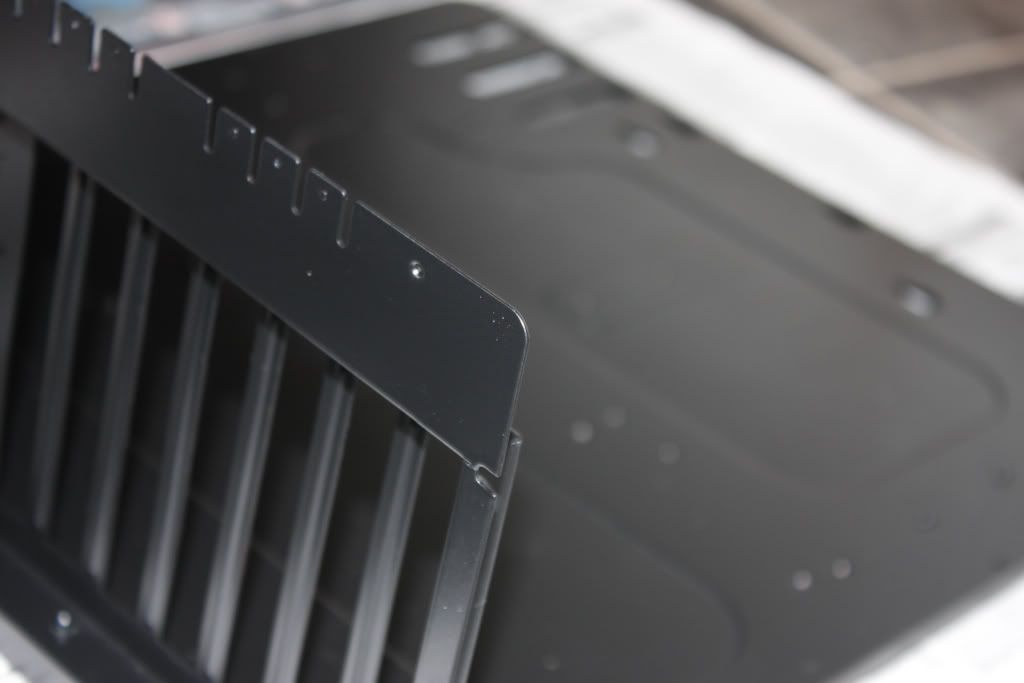 I also purchased some nice new fans - Sharkoon Silent Eagle 1000, and with those, and my other new bits - Asus P8P67, i5-2500k, HD6850, I began to reassemble. 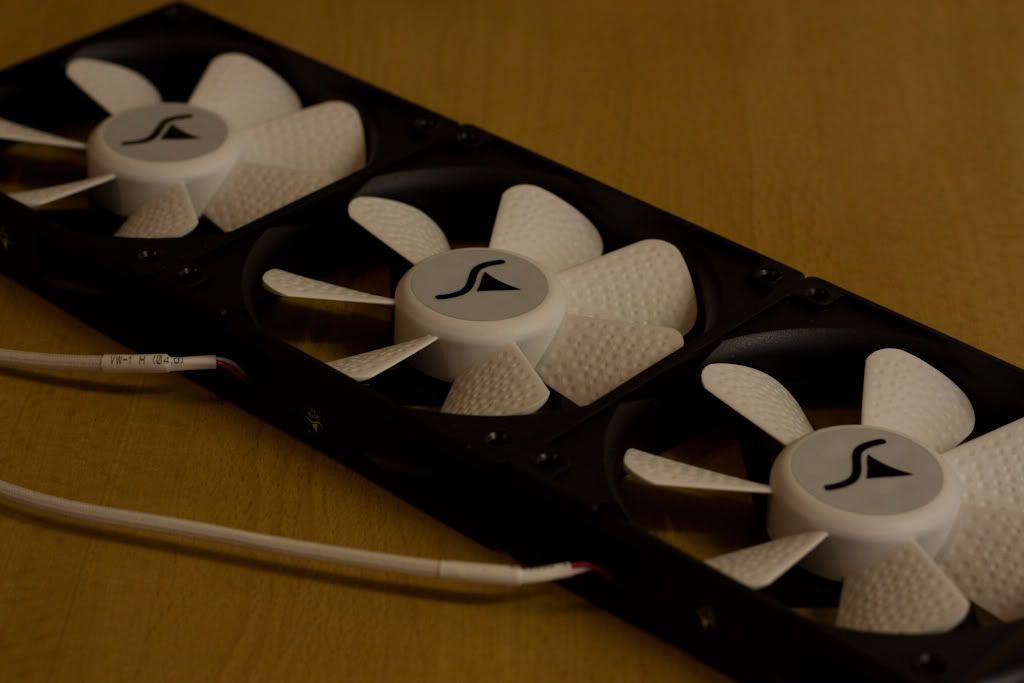 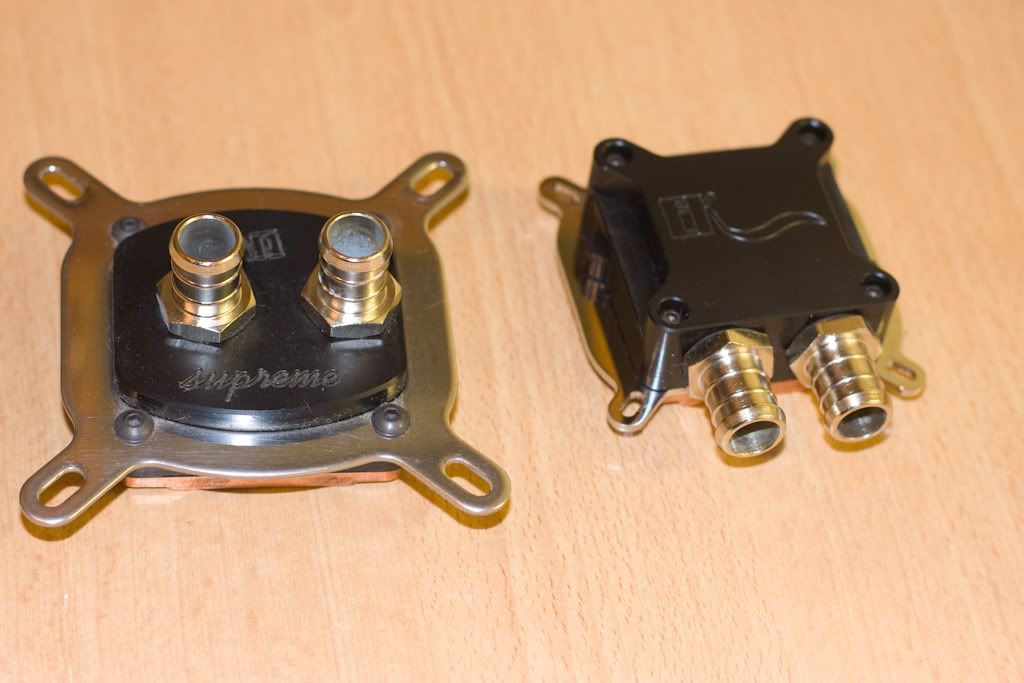  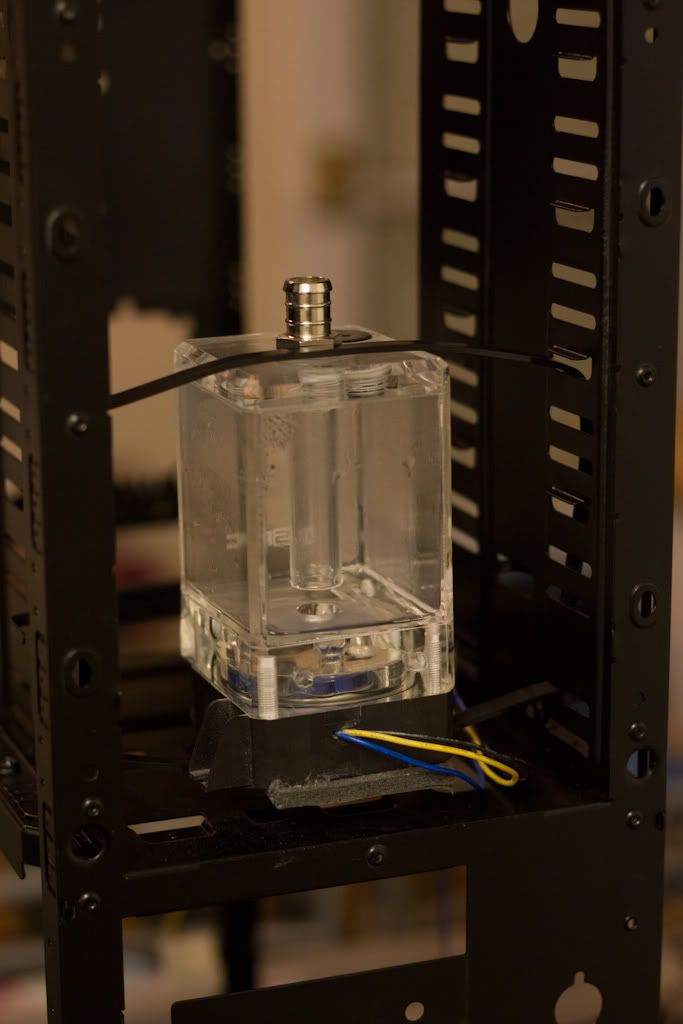  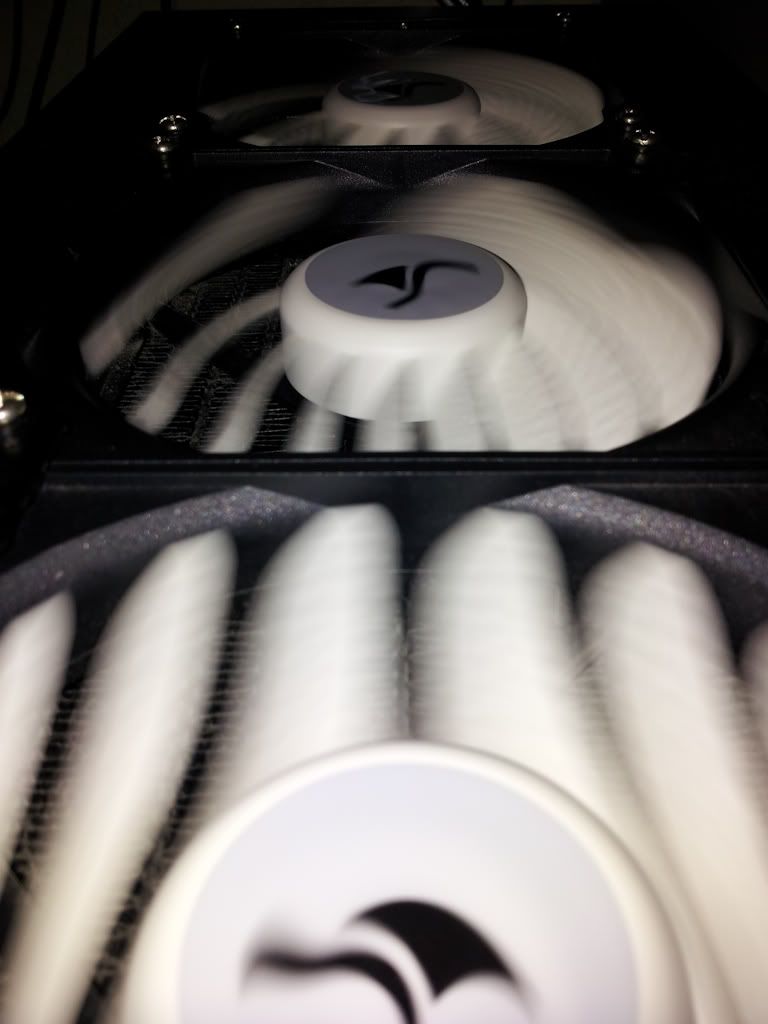 A little while later, I added another fan to the front, to blow over the hard drives and the memory on the graphics card - having a chip-only block and not a full-cover block, meant that I needed airflow over the GPU memory. 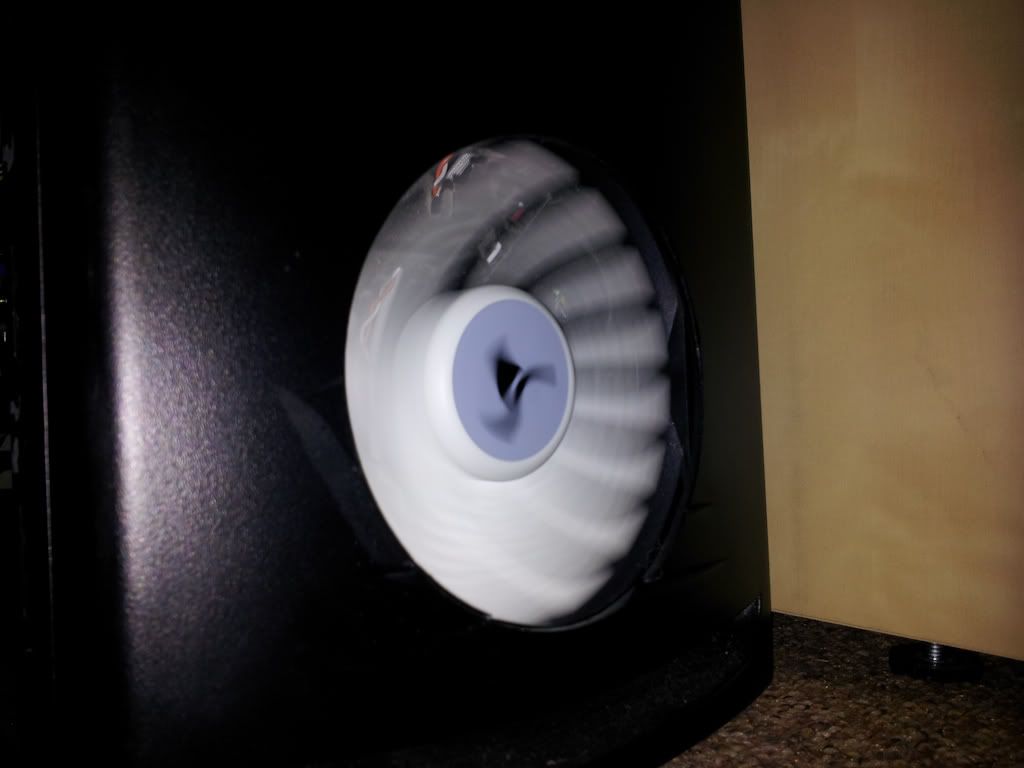 |
| |
|
|
|
|
Confused
Part of things
  Building: Anglia 105E with 6A13TT
Posts: 136
|
|
Feb 23, 2012 21:56:56 GMT
|
However, I've now decided that I want to change things around a bit. I've yet to see any cases that really grab my attention, and due to the desk that I've got (Ikea Expedit bookcase with the desk extension) and the orientation, there's few cases that will both fit in the gap I've got, and allow me to view the watercooling stuff. Therefore, I've decided to design and make something that will fit the space, and show off my PC. So - I introduce to you, my desk design, modelling courtesy of Google SketchUp - the 3D warehouse is great and you can find almost anything!!   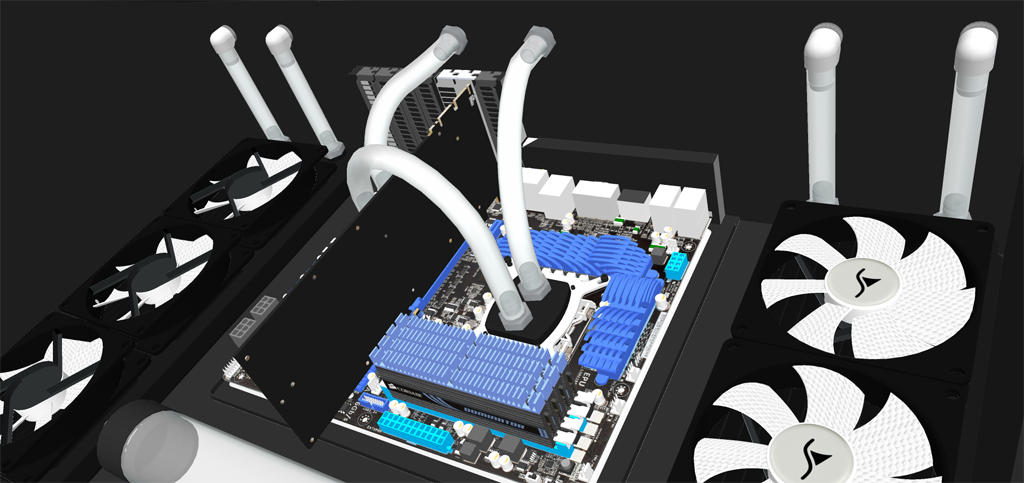 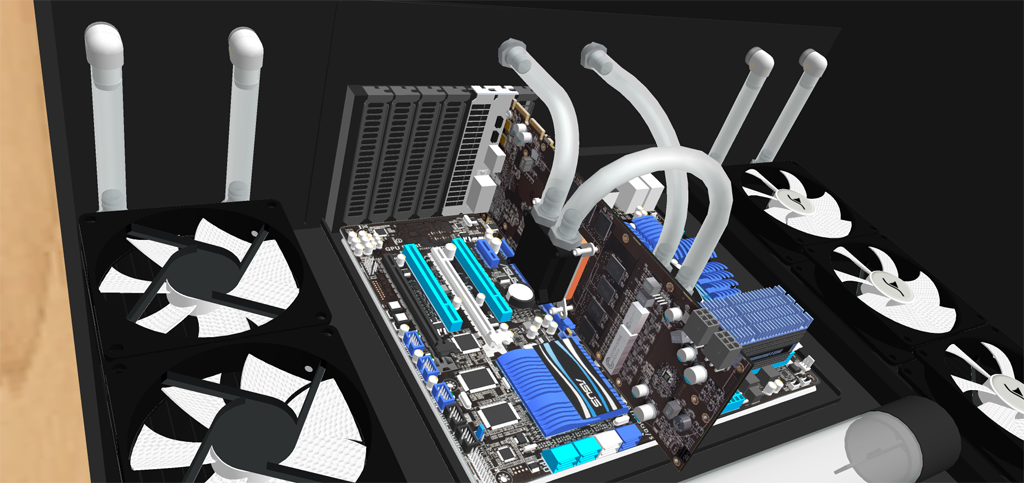 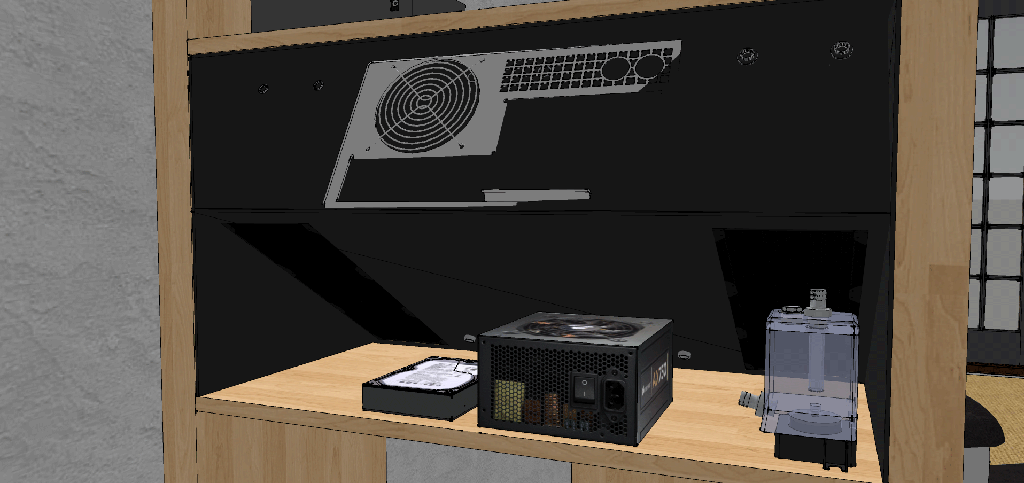 I have a home server sat on the bottom shelf, which runs mostly headless. My plan is to have a nice sheet of either clear or tinted perspex on the front, and have the back part mostly open for the mess of cables - it won't be seen given the placement of my desk. I may use something like the Bitfenix braided extension cables for the connectors - my theme ideas at the moment is black/white (it would have been a pain to model those - you can probably get the idea!) I've modelled 2 radiators for symmetry - the second may not come just yet, but the 6 fans will definitely be there, so that there's a nice flow of air going over the motherboard and other components |
| |
|
|
Nathan
Club Retro Rides Member
Posts: 5,650
Club RR Member Number: 1
|
My desk/computer projectNathan
@bgtmidget7476
Club Retro Rides Member 1
|
Feb 24, 2012 10:44:54 GMT
|
|
I like your thinking, few years ago I played around with watercooling for my server (use it to render and compile), then ditched it and went for an Oil bath.
Always like to see stuff like this, and keep saying to myself I must make a new setup again. Trouble is working in IT when I get home the last thing I want to look at is a bloody PC lol.
|
| |
|
|
beejay
Part of things
 
Posts: 207
|
|
Feb 24, 2012 23:39:37 GMT
|
Me likey  I take it the reservoir with the tube bit inside helps stop water escaping when filling the system up? I used to run mine (same pump but different res) with the pump in a similar position but as it's not at the highest point the water had a tendency to escape if the pump was turned off when filling  Moved it up to the top of the case now which makes it a bit easier. I'm thinking rackmount for my next case with a bit more thought to leak and splash protection as I've had a few close calls in that department. I like your thinking, few years ago I played around with watercooling for my server (use it to render and compile), then ditched it and went for an Oil bath. I remember hearing of people experimenting with oil cooling a few years ago and wouldn't mind looking into it at some point. What kind of oil are you using? Is it the whole system thats submerged? |
| |
|
|
|
|
|
Feb 24, 2012 23:50:08 GMT
|
|
Heh, I have the exact same motherboard/CPU and GPU set up as you for my main 'work' PC. Mine's only aircooled though, on the stock fan that came with the processor. And it's in a beige box. One day the hum will annoy me enough to do something about it.
Nice radiator setup. Will be watching with interest.
|
| |
|
|
Confused
Part of things
  Building: Anglia 105E with 6A13TT
Posts: 136
|
|
Feb 25, 2012 13:02:27 GMT
|
I managed to pick up some old advertising boards from work, which are some ~3mm thick white plastic, which should be quite easy to work with - at the very least they'll be good enough to mock it up in something real, in case I decide I need some other material. I started off by grabbing a piece, then measuring out for the angled base by using one of the original shelves from the shelving unit.  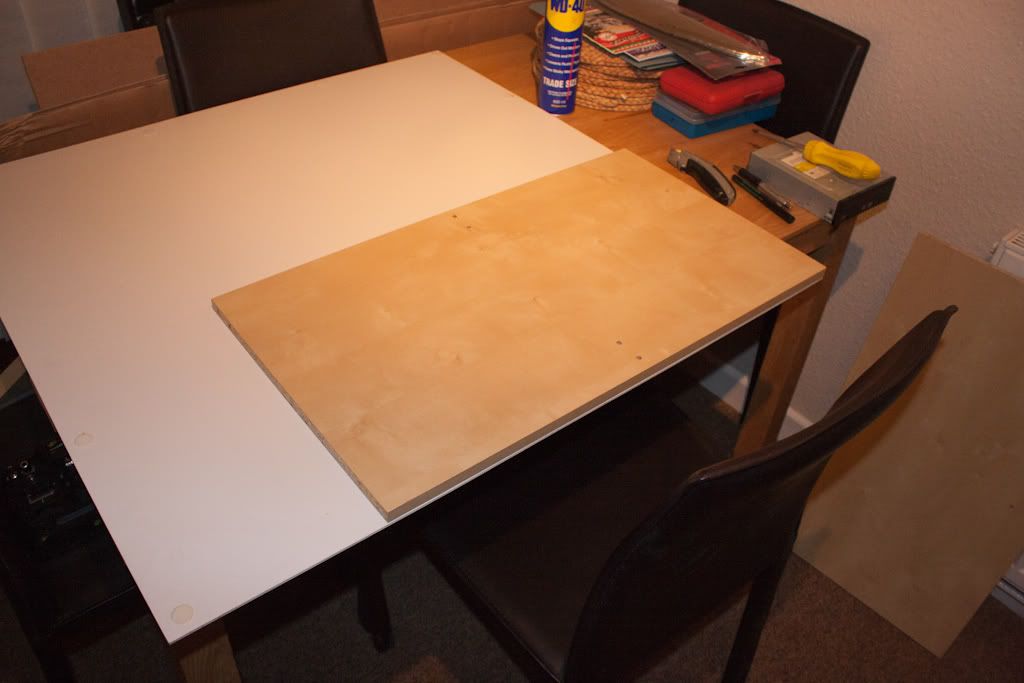 This stuff is really easy to chop up - something large and straight, such as a spirit level, and a sharp Stanley knife, and it goes through like a hot knife through butter!  A quick calculation using an online calculator, and a left-over bit was chopped into a pair of triangles with one 30 degree corner to give some basic support at the right angle for the base part.   (I've not actually put them in the right positions yet, but the general idea is there!) I think I'll be needing to get some right-angled brackets to start to secure some of this together - some careful planning and I should be able to get any screws that need to go through anything out of sight enough and behind other stuff, like the motherboard tray. |
| |
|
|
|
|
|
Feb 25, 2012 13:07:45 GMT
|
I like that idea, i like to be able to see computer parts, instead of being hidden away in a case anyway... And just as i like to show my computer off at every chance i can, heres a video of my build  |
| |
|
|
Confused
Part of things
  Building: Anglia 105E with 6A13TT
Posts: 136
|
|
Feb 25, 2012 13:53:07 GMT
|
I think I've figured out what your favourite colours are!  Nice build - not my personal choice of colours though!  |
| |
|
|
|
|
|
Feb 25, 2012 14:23:49 GMT
|
thanks  yeah i love green and black together haha |
| |
|
|
Confused
Part of things
  Building: Anglia 105E with 6A13TT
Posts: 136
|
|
Feb 26, 2012 18:21:52 GMT
|
First off I grabbed some power tools to begin some assembly of some bits. And of course - you can't work without a cup of tea, either!  When I built the shelving unit, I was left over with 2 large shelves, and 4 of the dividers which sit upright. My plan is to use the 2 large shelves and 2 of the dividers to make a box frame which will be mostly solid and won't move (much) - but will still allow me to slide the whole unit out should I need to do any maintenance on the computer. The dividers, however, wouldn't have given me enough space with them the "correct" way round, so I've now rotated them by 90 degrees, to give a little more height. Also, because I want the insides black (for now!), I've cut out a piece of the plastic sheet to sit over the face of it, and one of the triangle pieces to give a guide for the angled "base" bit to be supported on.  I've used the right-angled brackets as spacers so that the upright bits aren't tight against the inside faces of the shelving unit, just to give myself a little bit of "wriggle room" when sliding it in and out. I then cut out another 2 of these triangles, so that I can have one either side, and two more further in-board to provide plenty of support to stop the angled "base" from flexing and getting out of shape.  Mirroring to the other side, I placed the angled base on for a trial fit. 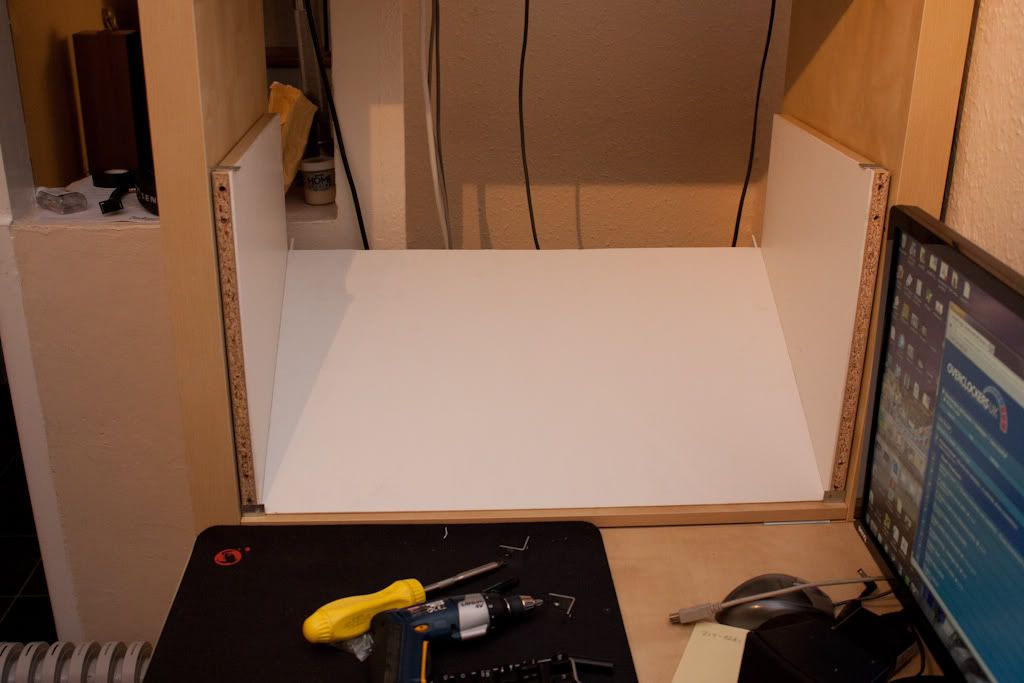 I then decided to see how it would look using a couple of the extra Sharkoon Silent Eagle fans I'd purchased from the MM, positioning them so that they'll sit in roughly the right place once the depth of the radiator is taken into account, it seems as though I'm a little short on the depth of the bits I've cut out so far! 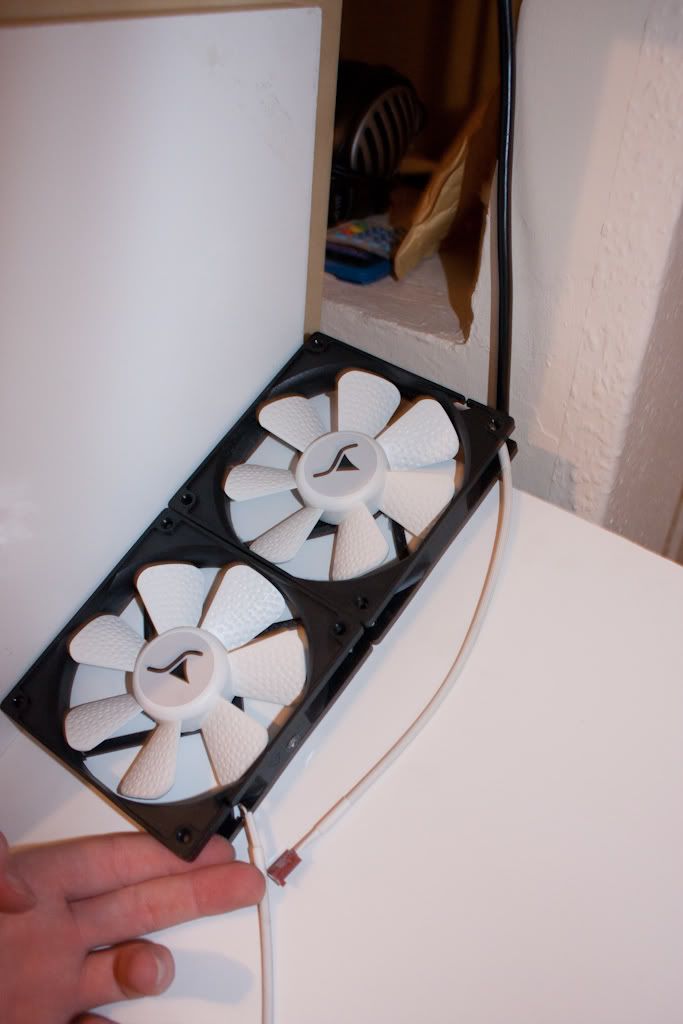 And that doesn't take into account the space needed for the end tank on that end of the radiator which has the barbs in! However - this isn't a huge problem - the bit that's currently at an angle will be just the right size for the roof now, and it seems as though the triangles are long enough, and I'll need to re-do the side bits - despite my best efforts at modelling it accurately in SketchUp - there's no substitution for making it for real and seeing whether it works! (And I've got plenty of those white plastic boards to mess with!) |
| |
|
|
|
|
Confused
Part of things
  Building: Anglia 105E with 6A13TT
Posts: 136
|
|
Feb 27, 2012 12:45:09 GMT
|
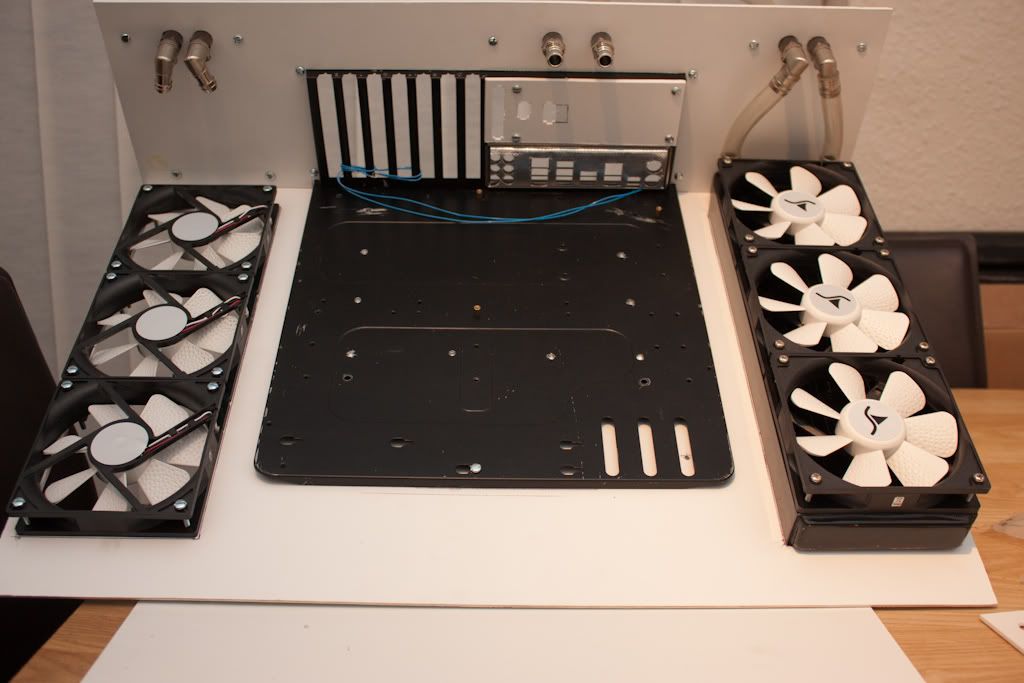
The next task after my last update was to re-measure the angled base, and add the extra on so that the radiator and fans would actually fit! Once I'd done that, I attached the two additional 30 degree triangles to the underneath of the base, and had a trial fitment. 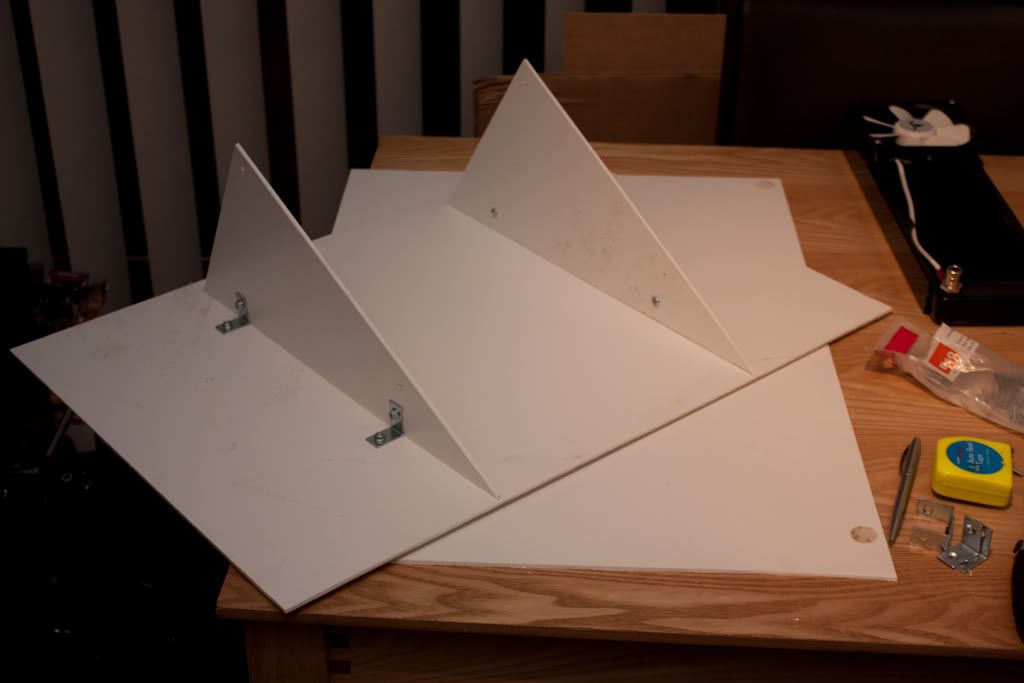  Before I could move onto the next step, I needed to strip my current case down, and remove the motherboard tray. Therefore, I needed to re-home my PC temporarily, so I borrowed an old case from a friend, and transplanted my stuff - and as fitting the standard cooler back to my 6850 would have been more hassle, I have thrown in a 7300GT to give me some form of graphics!  With the motherboard tray free, I could see how much space I'd have (as we've seen before, even measuring everything in SketchUp it wasn't quite right!)  Looks like I'm going to be good there for putting the roof piece on  I then began to make up the piece to go at the back. I decided to make it the same shape as the original case would have been, so that I can attach the motherboard tray using the same mounting holes as on the original case.  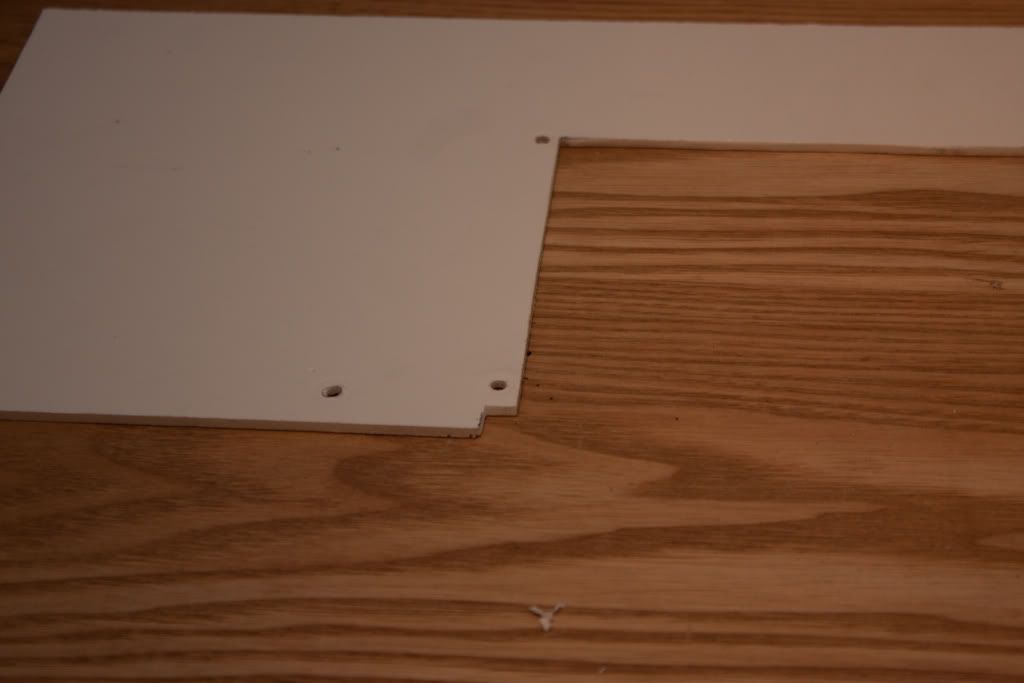 And then affixed the motherboard tray to it.  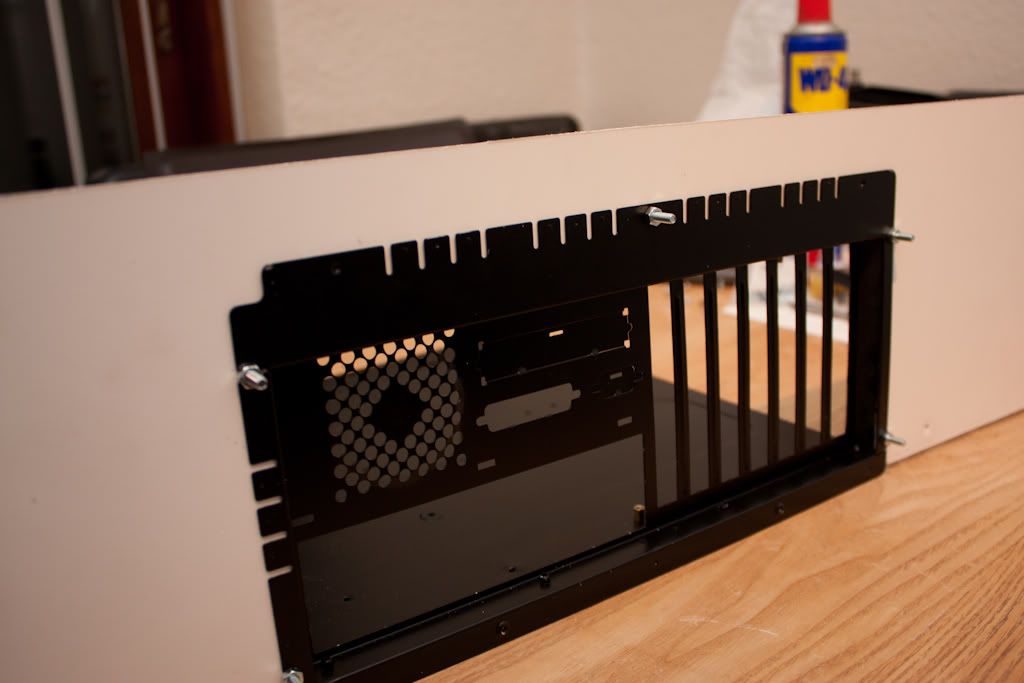 Next, using a template I found on the internet for marking up a 360 radiator, I marked, and cut/drilled in the appropriate places. 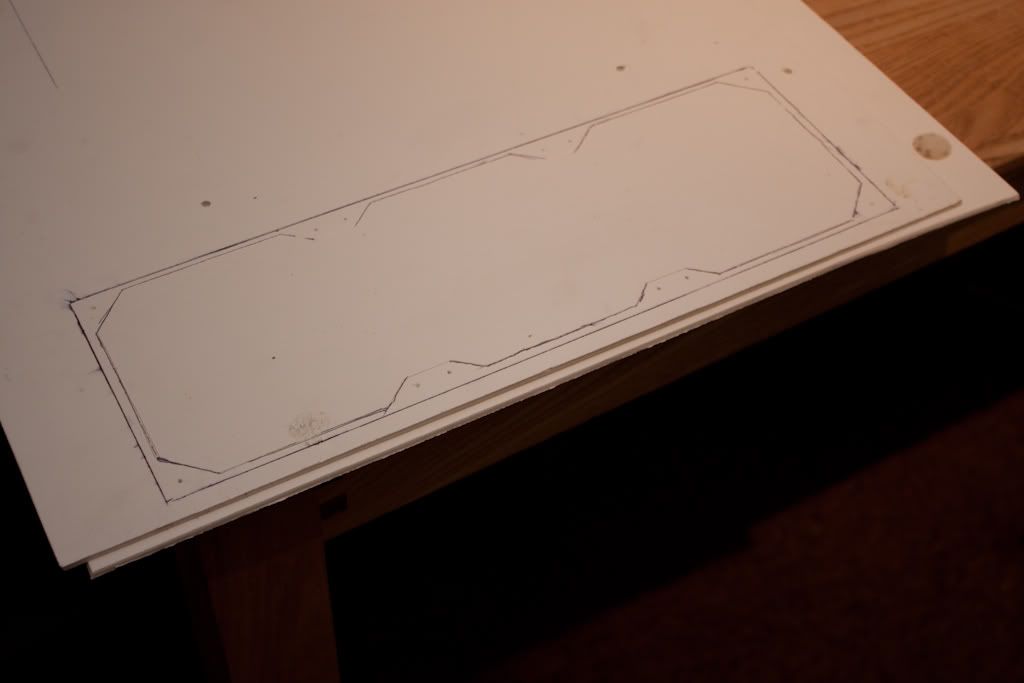  Repeated on the other side, I then put these bits together. 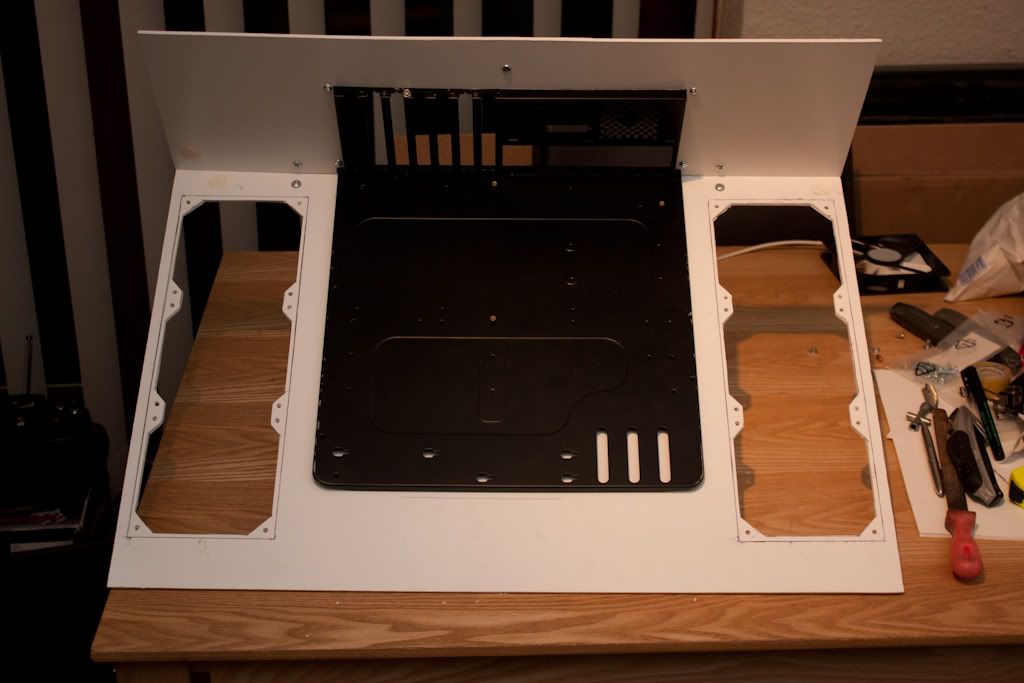   And, of course, tested it in-situ. 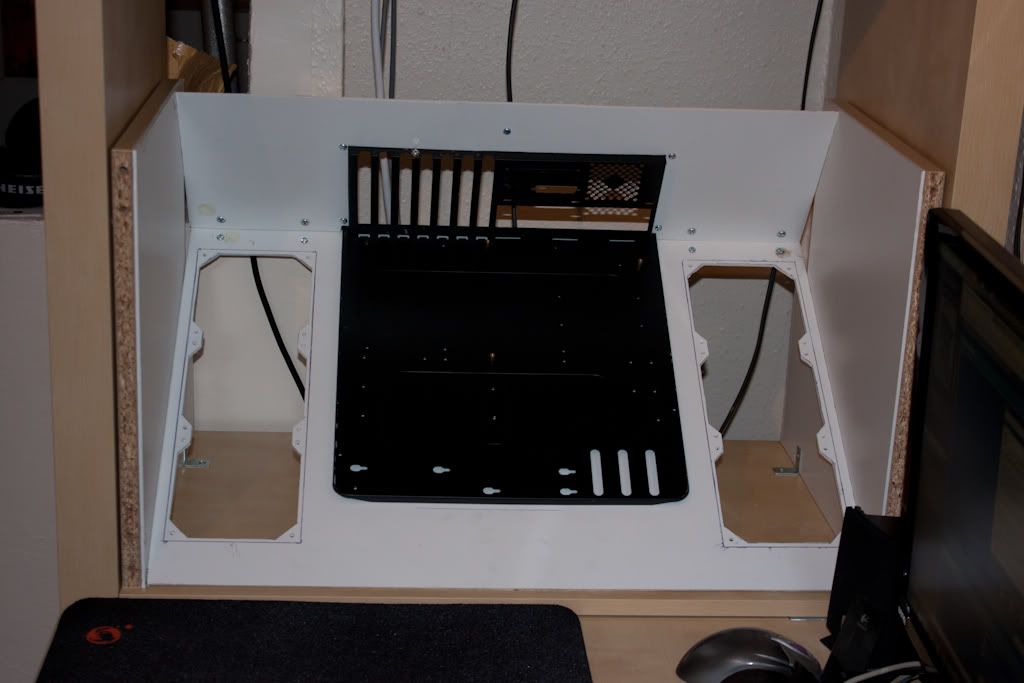  Next on the list is to re-do those side bits to fill in those little gaps in the corners - that's for another night though! |
| |
|
|
cavman
Part of things
  feeling inspired :)
Posts: 233
|
|
Feb 27, 2012 12:56:51 GMT
|
This is brilliant, I'm definitely the kind of guy who only uses computers as a tool for getting things done. But to see one modded like this is really inspiring, and I can definitely appreciate the skills and talent required to do it this way. Top drawer stuff Confused  bookmarked! James |
| |
'78 Mk1 Cavalier Coupe - I wish I had a pound for every time someone told me "my dad used to have one of those"!!
|
|
Confused
Part of things
  Building: Anglia 105E with 6A13TT
Posts: 136
|
|
Feb 28, 2012 11:46:42 GMT
|
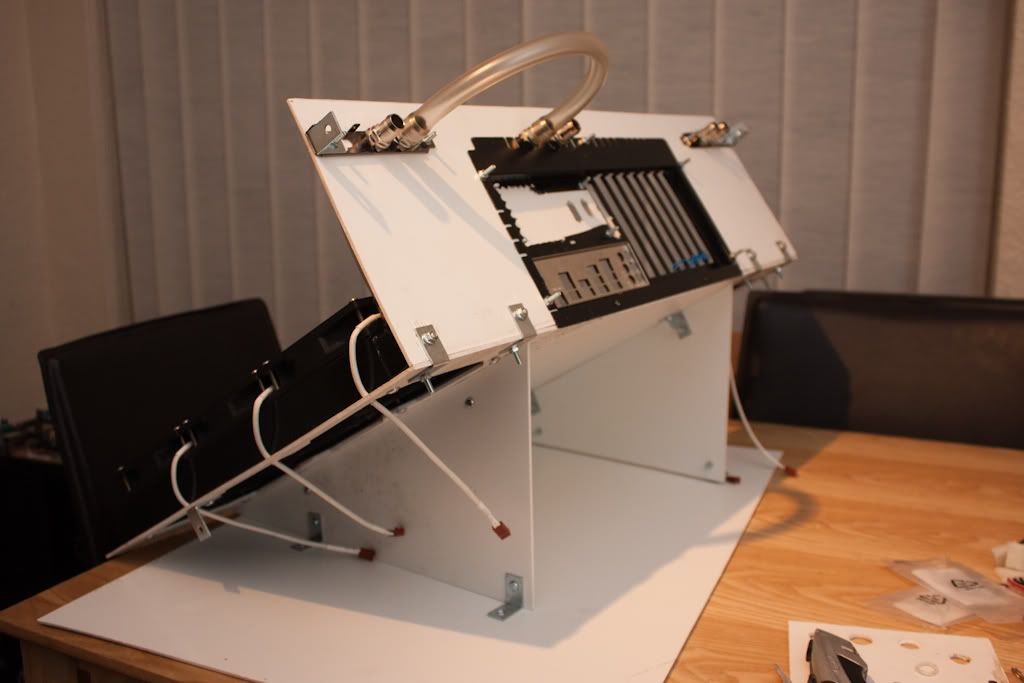
As mentioned last time, the first thing to do is to remake the side pieces so that they're big enough to fill the corner from where I didn't quite measure it all up properly in the first place!  I also chopped a small section out from the triangular bits to take another of the 90 degree brackets, which will secure the angled floor piece, utilising one of the holes for mounting the radiator. 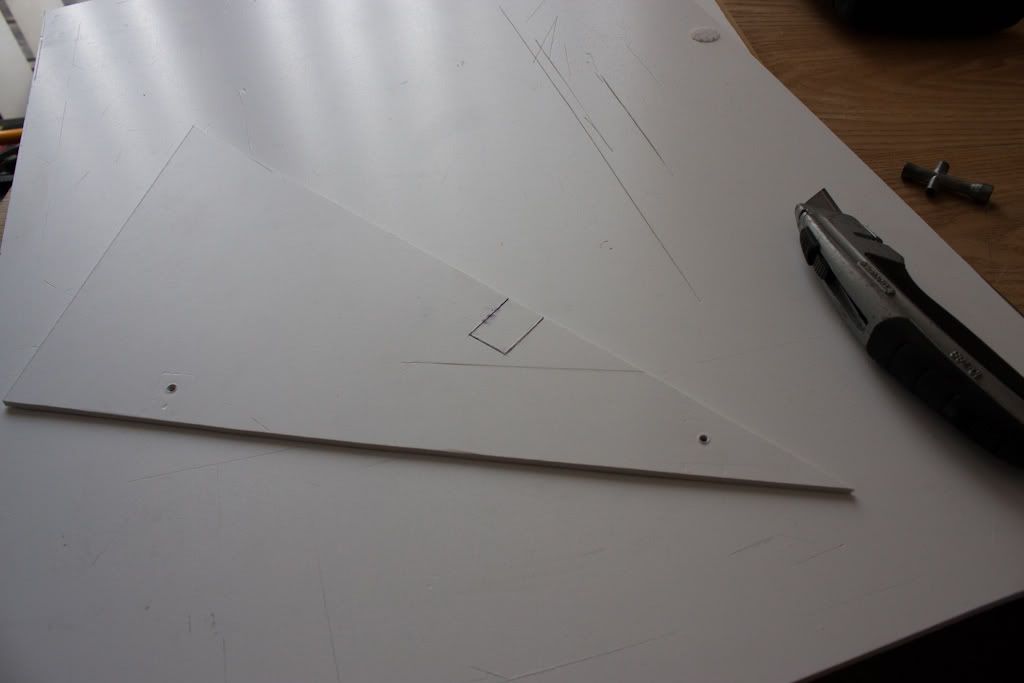 I was browsing on OcUK a couple of weeks back when designing this, and what made me decide to route the pipework as I have is because I was able to pick up a couple of PCI covers with through-bulkhead fittings with G1/4" threads. So a minor modification to cut off a right-angle that turned the wrong way...  And with a further two going through the top of the motherboard tray...  A small change to the design, by having them closer together, rather than apart, but I think it looked a little too "clinical" with the straight runs of pipe, there's a couple more on it now. That, and it made securing them much easier, because the PCI blanking plate is a lot thinner than the plastic - trying to clamp it to the plastic would have meant it wouldn't have sealed properly.  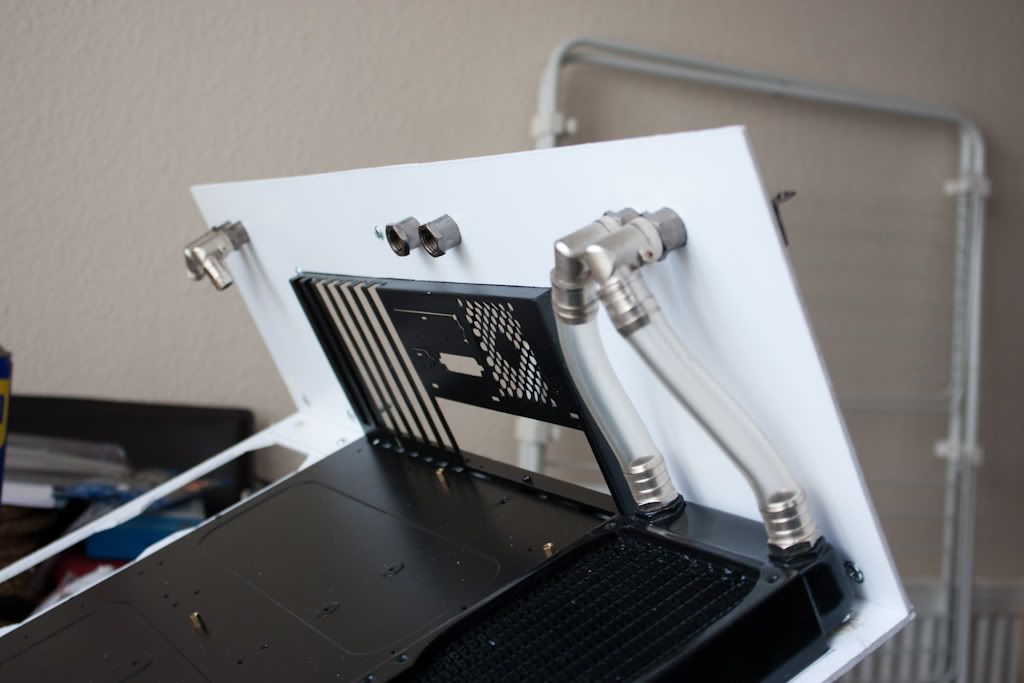    I've decided to offset the central to one side so that I can put another pair of bulkhead fittings offset to the other side at a later date - will assist if I decide to go for dual-loop (or even decide in the next couple of days to feed the graphics card from that second pair of bulkhead fittings!) |
| |
|
|
Confused
Part of things
  Building: Anglia 105E with 6A13TT
Posts: 136
|
|
Feb 28, 2012 22:14:39 GMT
|
I ordered some extra barbs, some cheap ones for the rear that won't be seen, and a couple of EK ones for the visible bits which match the barbs I've got everywhere else already. So, I wrapped a little bit of PTFE tape around the threads to aid the seal, and affixed as necessary.    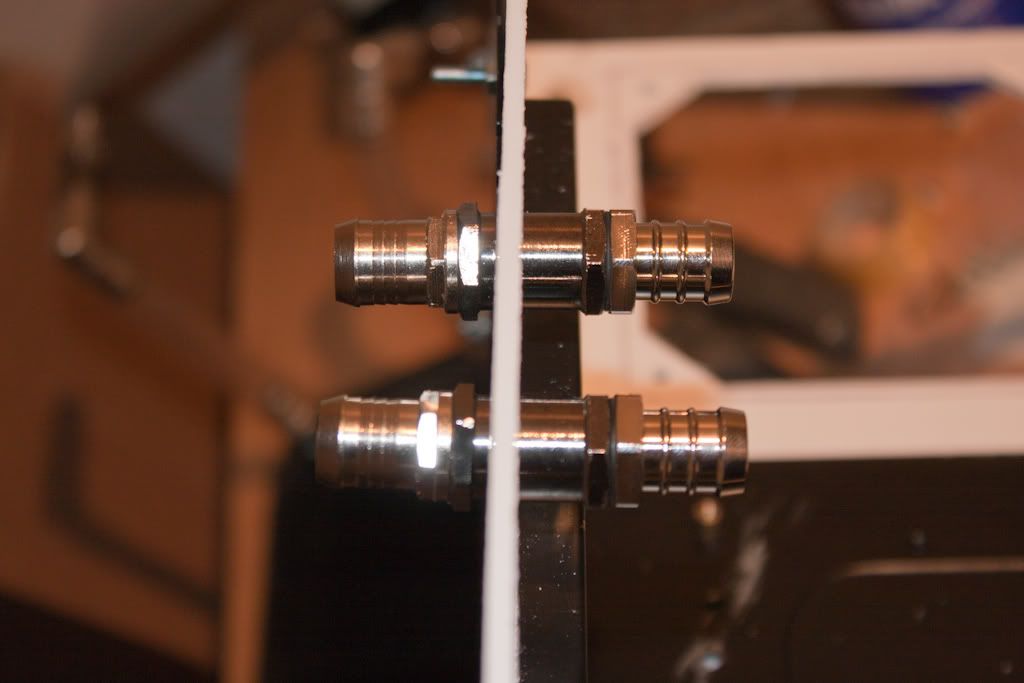 OcUK cheapies on left, EK on right. |
| |
|
|
MiataMark
Club Retro Rides Member
Posts: 2,971
Club RR Member Number: 29
|
My desk/computer projectMiataMark
@garra
Club Retro Rides Member 29
|
|
|
|
Interesting, and impressive, project.
I know it's done by loads of people and by big companies but the thought of miuxing water and a computer still makes me wince...
The first computer I saw (not worked on) glowed in the dark because of valves not UV.
Mark (ex computer field engineer)
|
| |
1990 Mazda MX-52012 BMW 118i (170bhp) - white appliance 2011 Land Rover Freelander 2 TD4 2003 Land Rover Discovery II TD52007 Alfa Romeo 159 Sportwagon JTDm
|
|
Confused
Part of things
  Building: Anglia 105E with 6A13TT
Posts: 136
|
|
|
|
|
I first looked into watercooling about 10 years ago, and there wasn't anywhere near the selection available as there is now. There were a couple of companies who made water blocks for the processors of the time, but getting hold of them was fun.
I had an Eheim pond pump, some tubing, and an old car heater matrix as the radiator, a real Heath Robinson affair!
I've had a tube pop off once - I'd just put the current graphics card in and re-done the tubing, but hadn't clamped down around the barb. I wrigged it slightly as I put it in, and the hose popped off when I switched it on. I just let it dry out for 24 hours, and it's been absolutely fine since!
|
| |
|
|
bigrod
Posted a lot
  
Posts: 1,654
|
|
|
|
|
Back in the day when I fixed home computers and regularly got wound up at how unserviceable, cumbersome and 'in the way' some chassis were, I had the idea of building clone PCs into furniture, particularly desks where the gubbins would be housed in suitably capacious cavities and/or drawers with the relevant connectors easily accessible.
I drew up some fag packet plans and started pricing them up, but due to not having two ha'pennies to rub together at the time, (something to do with blowing my wages on stupid cars and associated motorobilia!), didn't have anything to invest so the plan fell before it got to the first hurdle.
Shame as I think I was on to something.
|
| |
If I have to explain, you won't understand.
Maximum signature image height = 80 pixels
|
|
Confused
Part of things
  Building: Anglia 105E with 6A13TT
Posts: 136
|
|
|
|
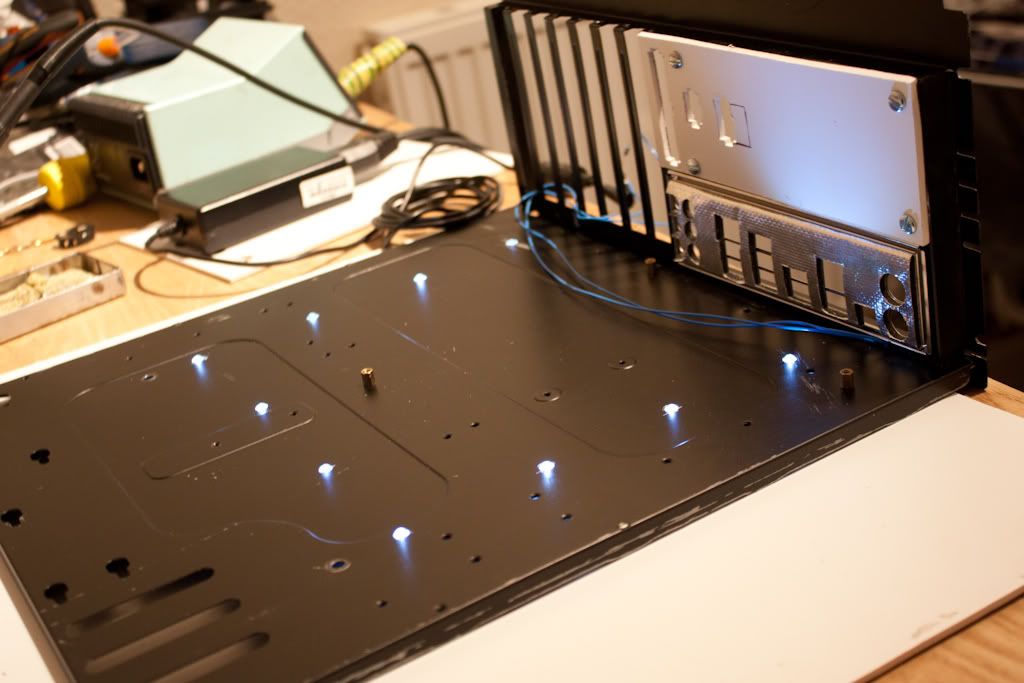
I needed a neat way to bring the power cables from the power supply, which will be underneath the motherboard, up to the various components. Without having anything useful like rubber grommets like many of the cases you can get nowadays, I had to think of something else... so, I decided to bring the cables in through the back using some NZXT extension cables... 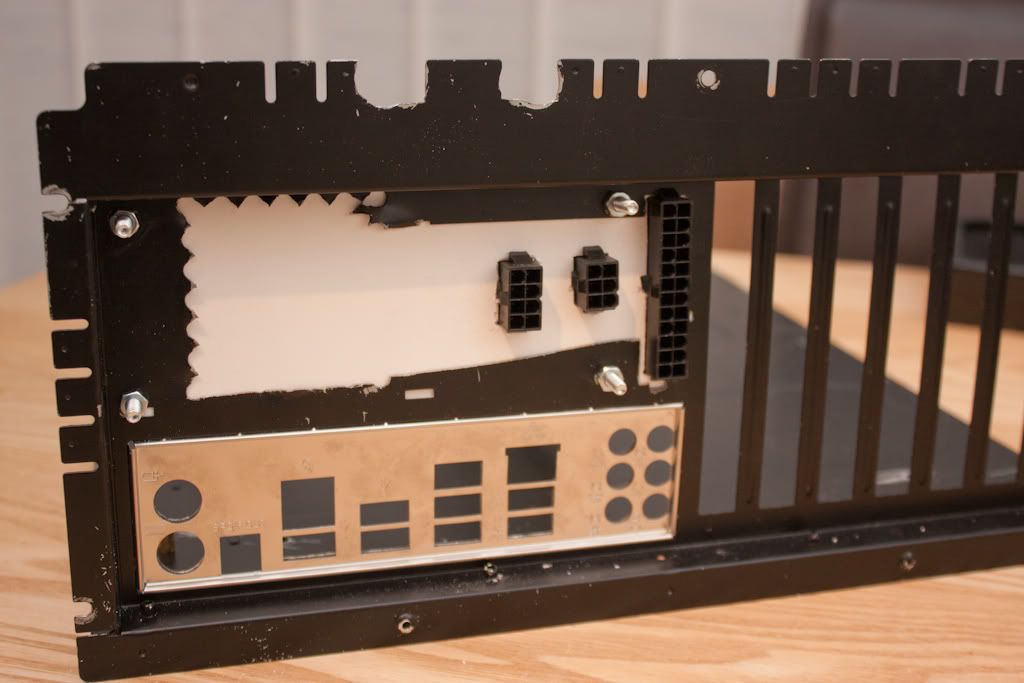 The cutting out of the metal panel is a little rough around the edges at the moment, but I only have a hacksaw available - I'll eventually get a file in there to tidy it up a bit and remove those sharp edges!  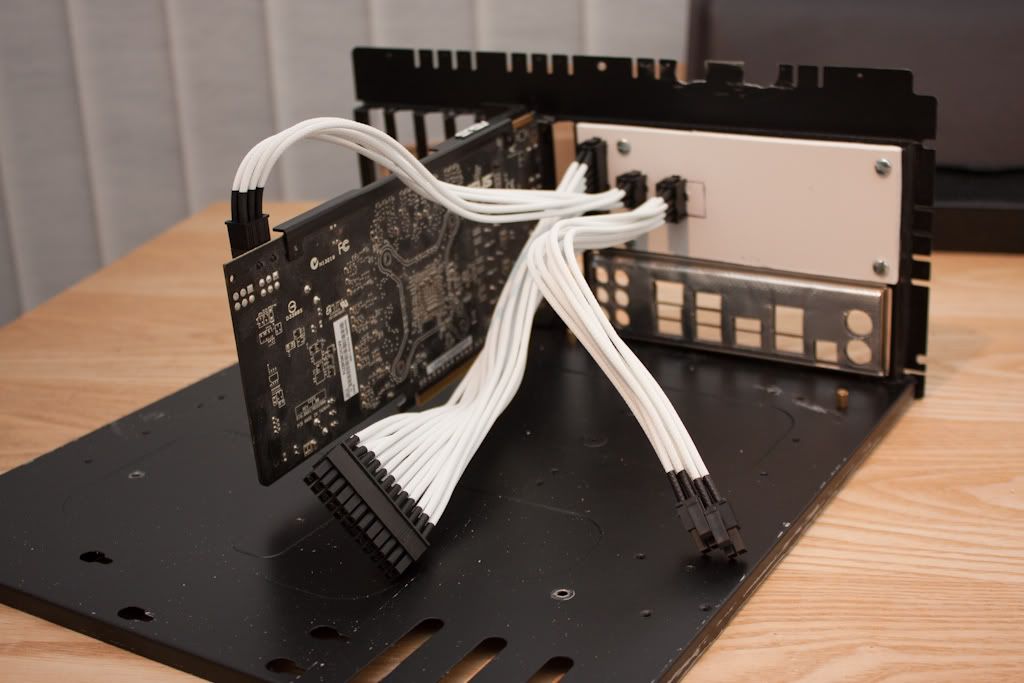 Not that the edges will be seen from the front, though... I saw on here someone had set up a load of LEDs under their motherboard which provided some lighting, which I liked, so I decided to copy the idea, utilising some of the Superflux LEDs left over from when I did my Prelude headlights and taillights back in 2007. LEDs laid out in place  Now glued in position and soldered up. 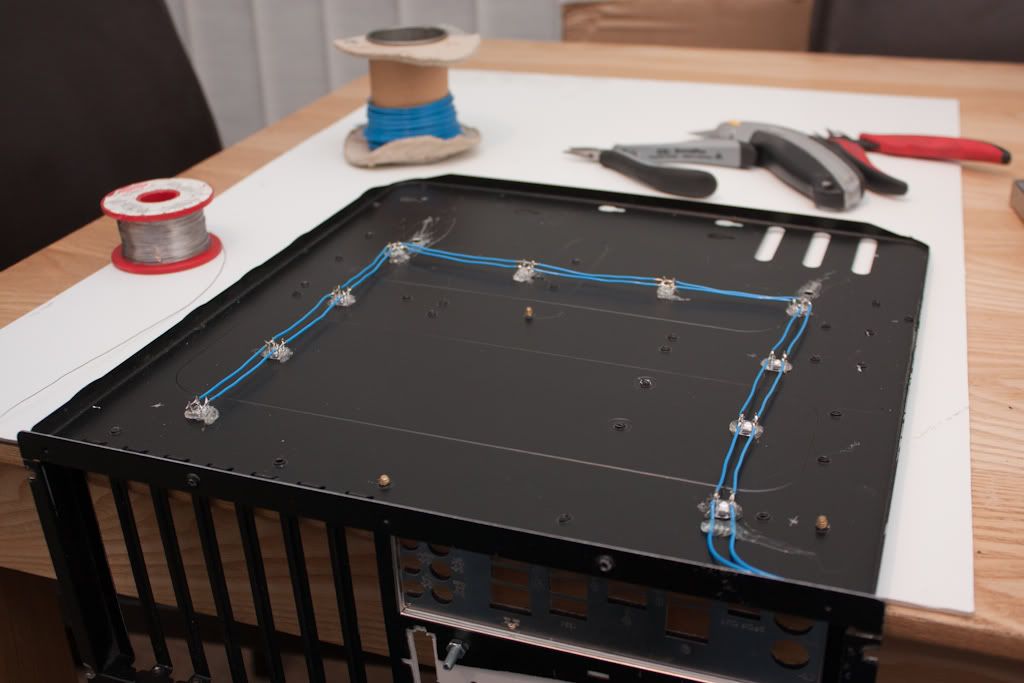 |
| |
|
|
Confused
Part of things
  Building: Anglia 105E with 6A13TT
Posts: 136
|
|
|
|
|
|
| |
|
|
meltedcheese
Part of things
  Please, Don't Sqeeze the Volvo!
Posts: 403
|
|
|
|
|
This is a great idea, like the tidiness of the concept!
|
| |
|
|
|
|


 I take it the reservoir with the tube bit inside helps stop water escaping when filling the system up? I used to run mine (same pump but different res) with the pump in a similar position but as it's not at the highest point the water had a tendency to escape if the pump was turned off when filling


