adam73bgt
Club Retro Rides Member
Posts: 4,991
Club RR Member Number: 58
|
|
Aug 11, 2019 22:13:01 GMT
|
Hmmm thats an interesting site sonus thank you! Continued on with the front suspension parts today, soon became clear that the kingpin dust tubes come out easily with the steering arm removed 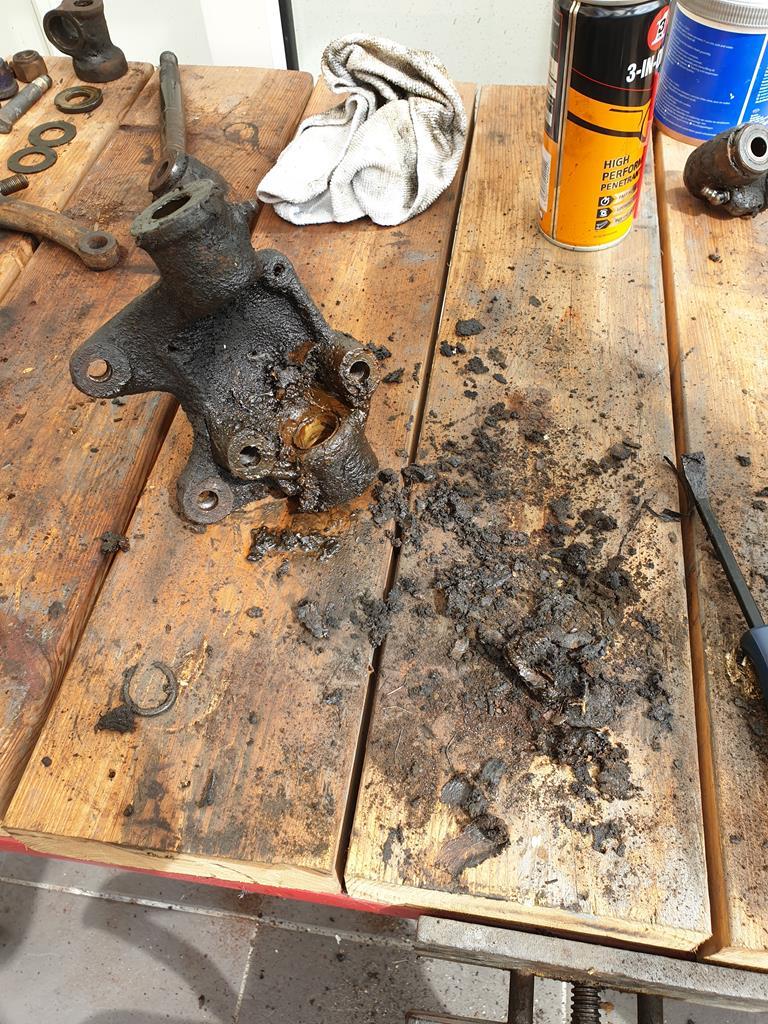 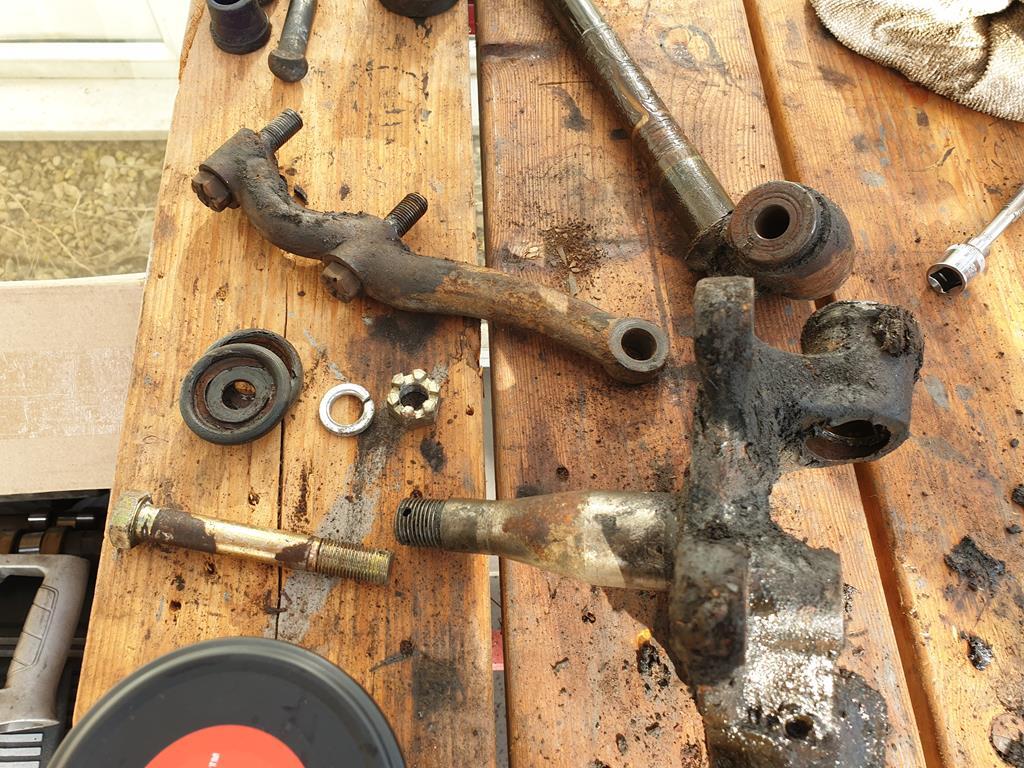 One side in particular was really thickly caked in old grease, I think its fair to say the seals had failed! I put the dust tubes, springs and grease nipples in some white spirit to clean them up 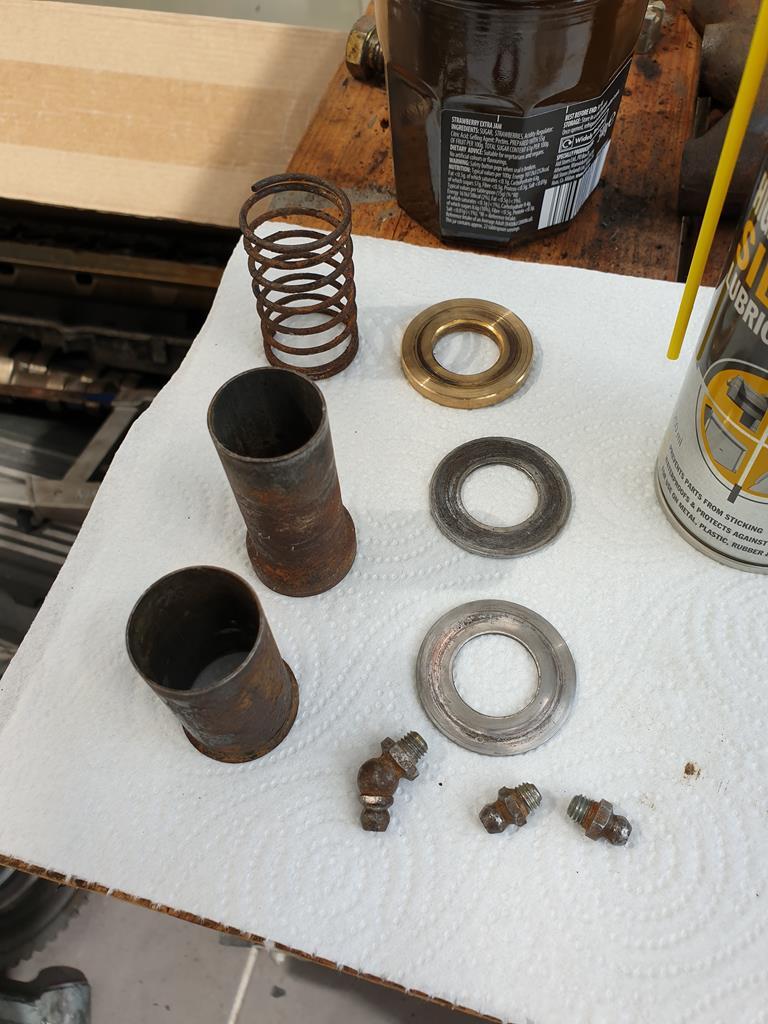 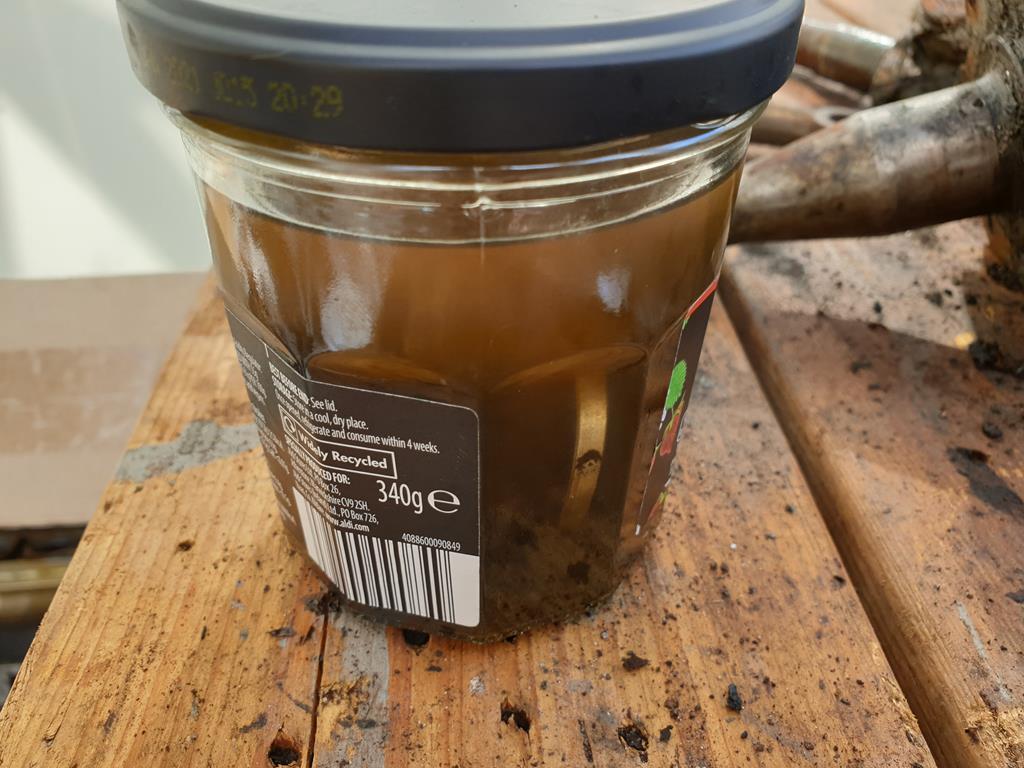 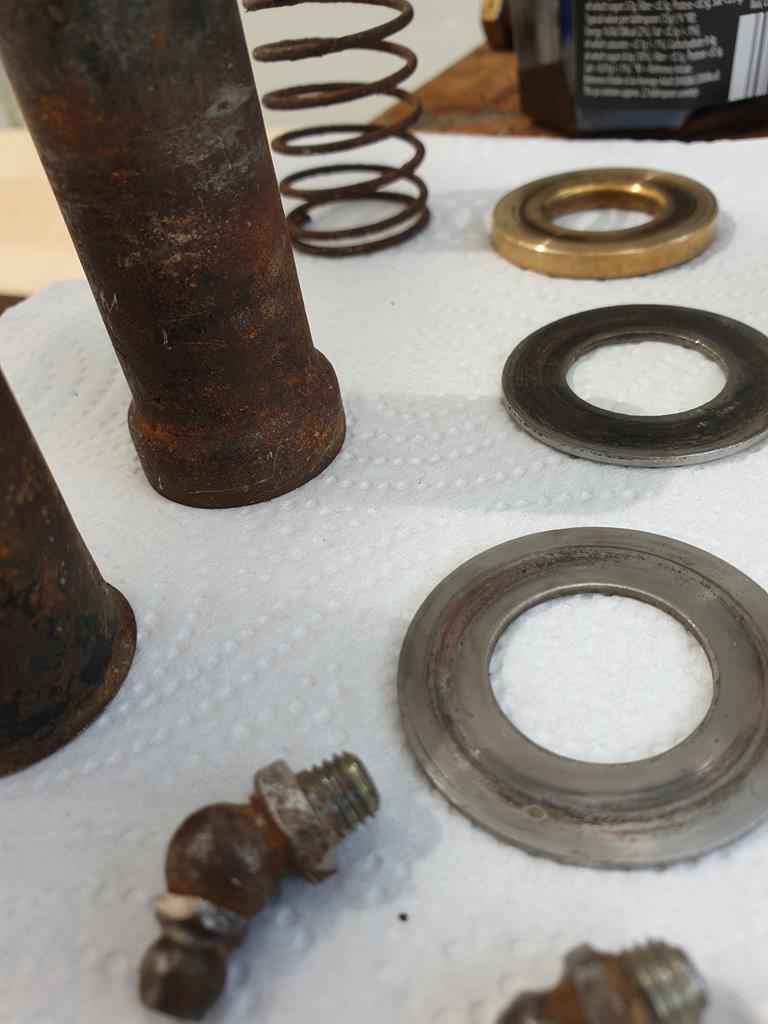 There is some pitting on the shims and the dust tubes are quite corroded so I guess I could just replace with new. This is part of the problem with a car like the MGB, with everything available its very easy to get carried away and buy new replacements for every single part, which just feels a bit wasteful to me.. but equally its a nice problem to have! These would be the least of my issues though.. Cleaned up the stub axles and kingpins, the pins look quite pitted although the bushes in the stub axles aren't too worn, just have quite a lot of dirt in 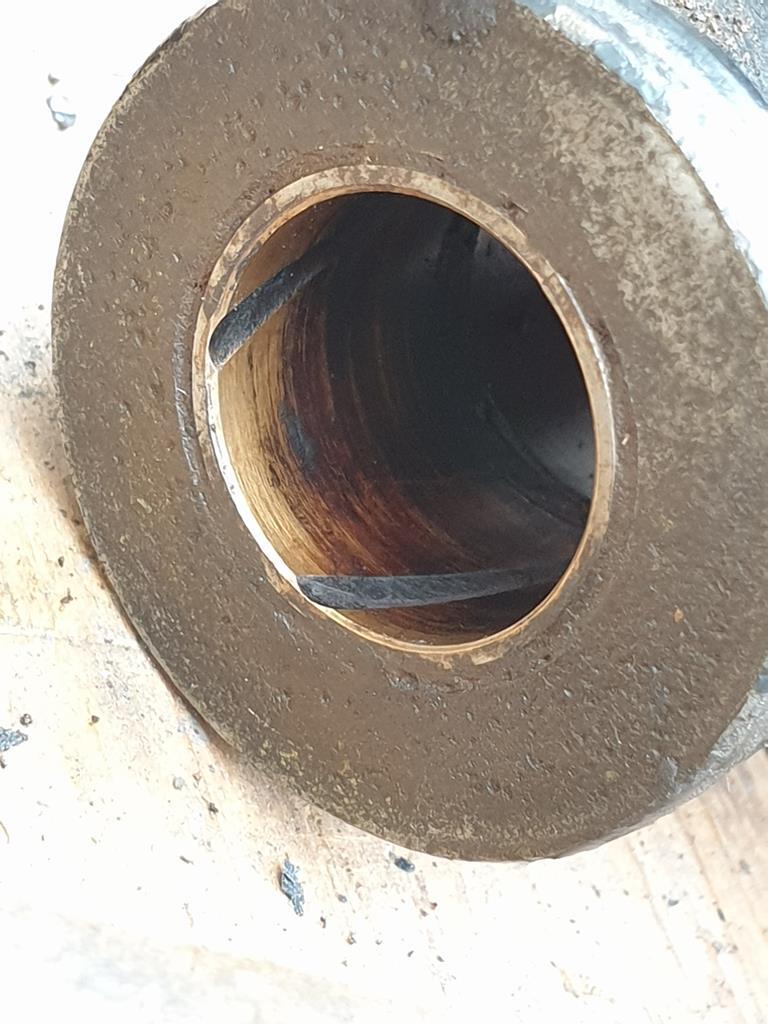 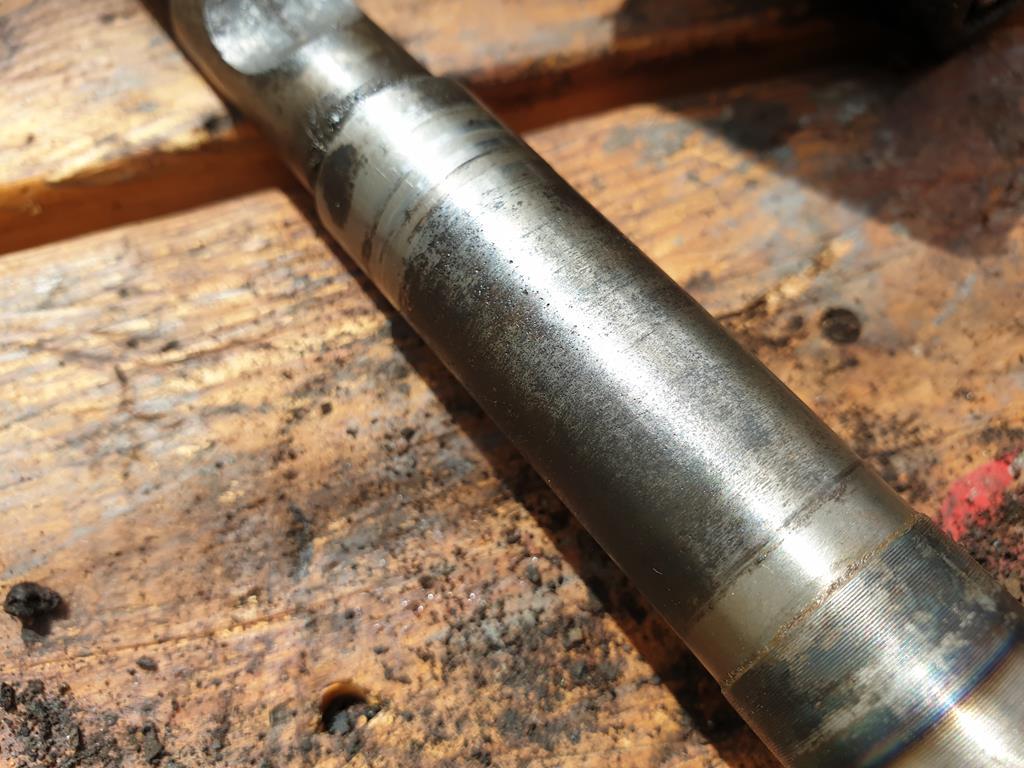 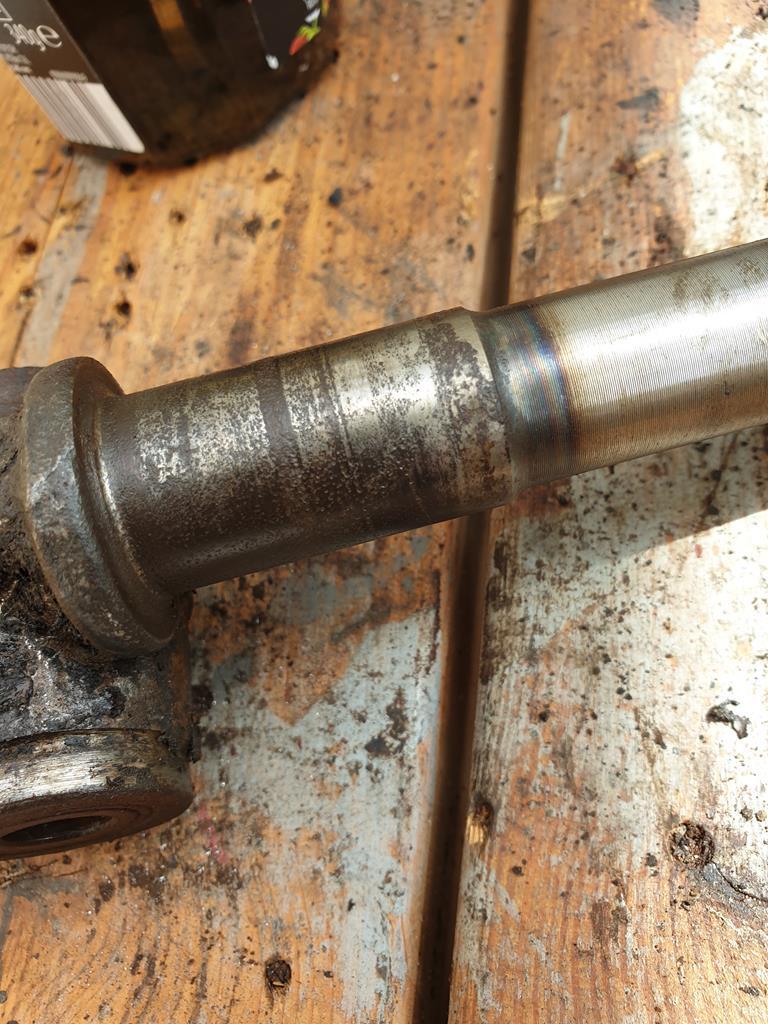 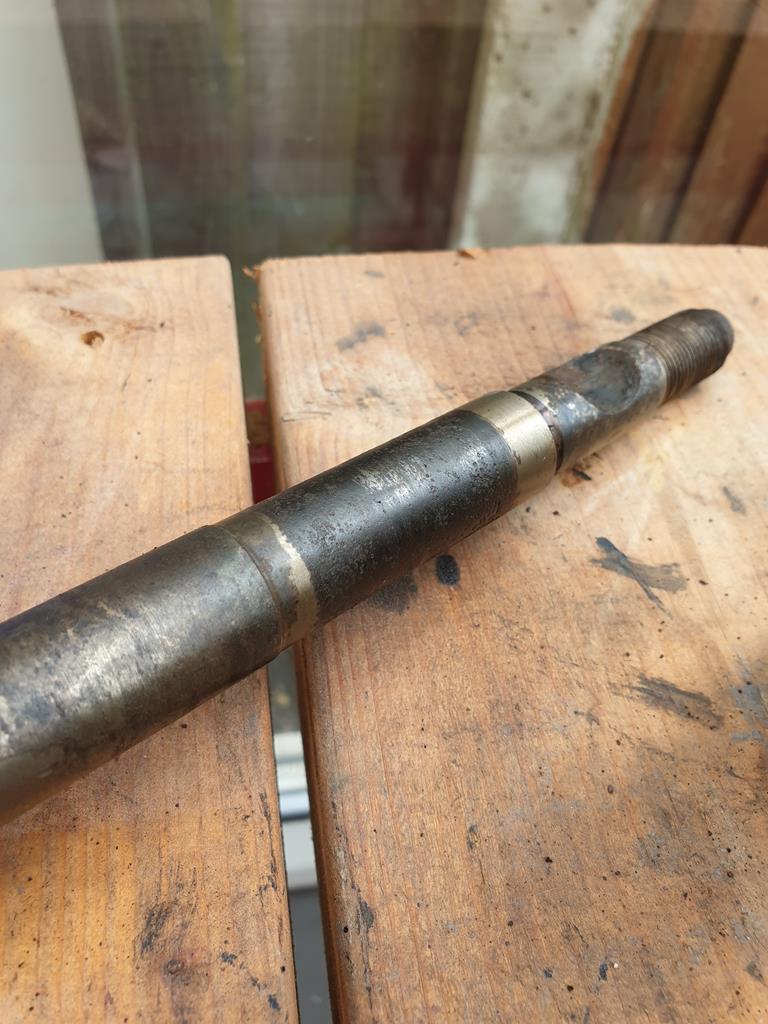 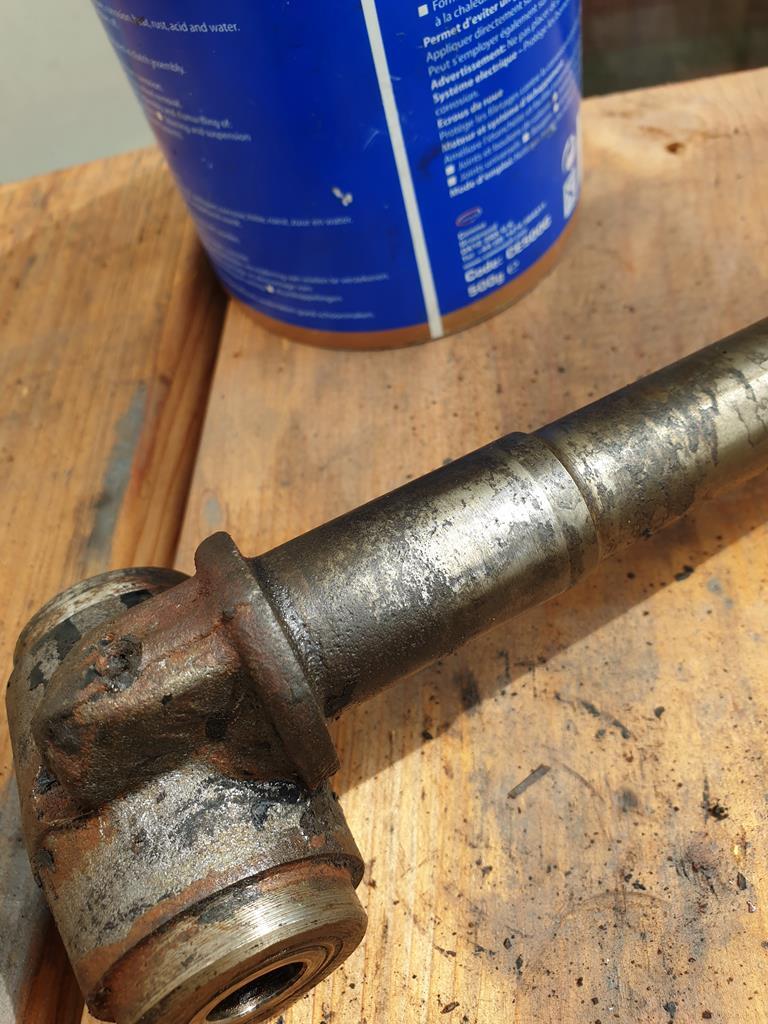 I'm pretty certain I'm going to get dropped spindles to improve the geometry and I think I'm going to have to get some new kingpins and bushes while I'm at it, so thats a bit of extra expense I could have done without but its worth doing properly at this point. In more positive news though, I changed my mind on the dampers. They haven't leaked in my ownership so decided to trust them. Started off by taking off the rear plate which revealed both dampers had good levels of fluid in there 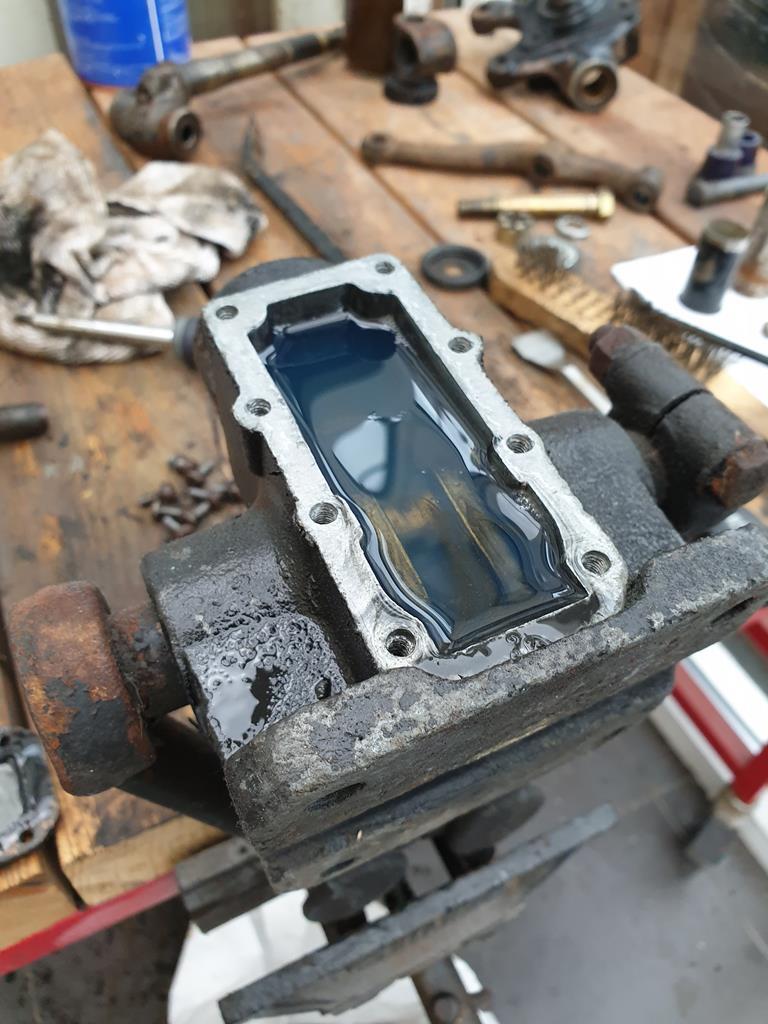 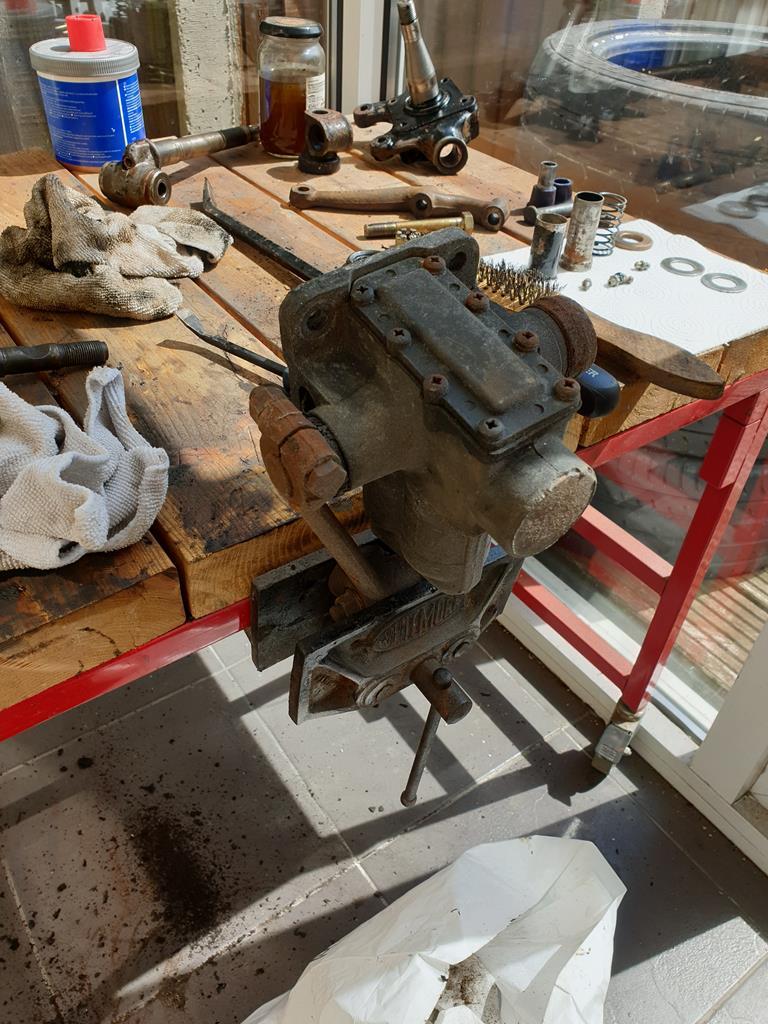 Dumped that out and took out the valves, then flushed the dampers through with engine oil as per the guide I was following, which was keen to mention that solvents should be avoided! 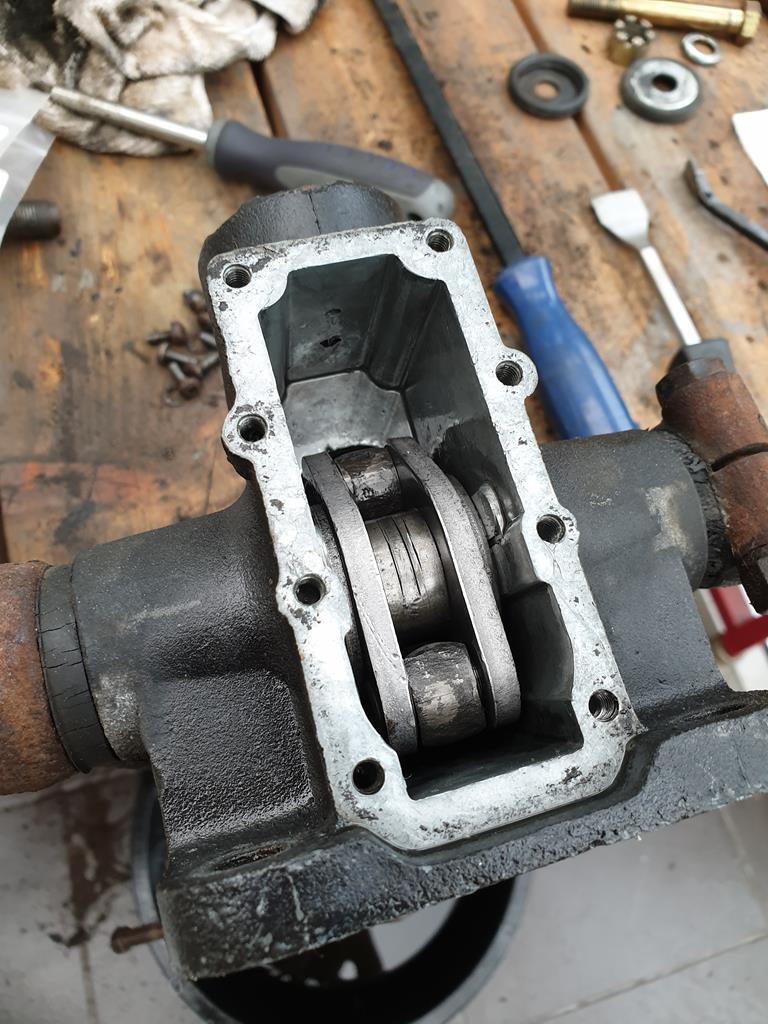 Comparing the new and old valves, the new ones are uprated so have slightly thicker springs and extra shims under the spring to stiffen up the dampers 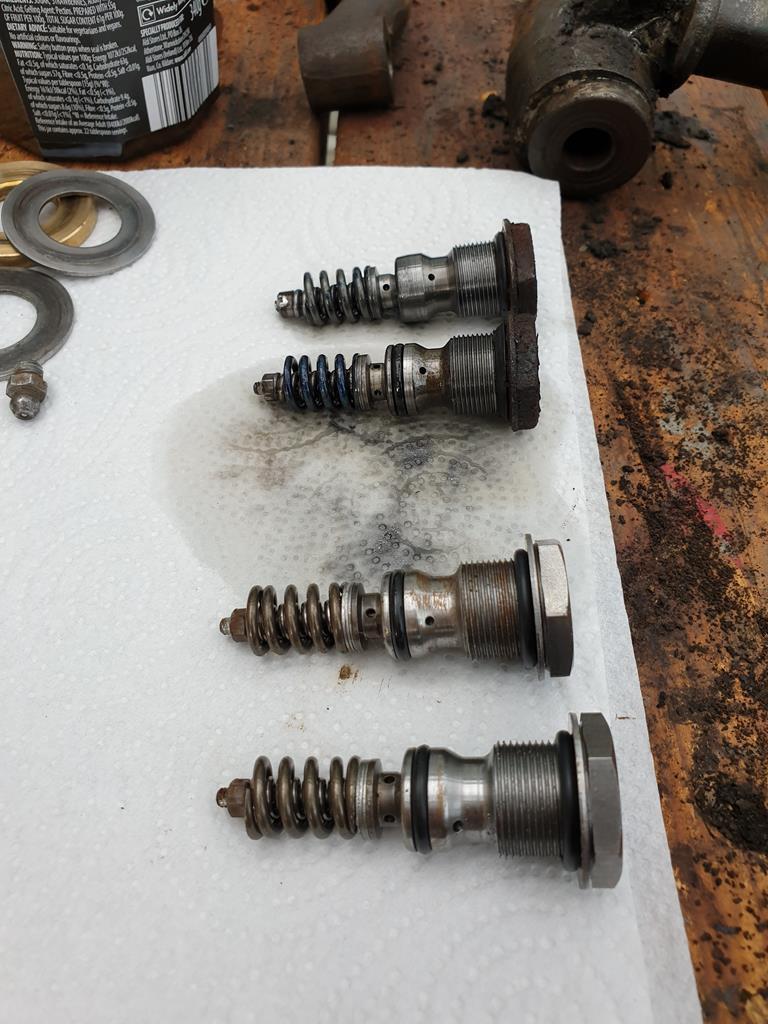 Then came reassembly which got a bit messy so light on photos! First I filled the dampers with 20w fork oil through the rear plate before putting the plate back on, then turned the damper over so the port for the valve was upright. This port was filled up and the damper slowly actuated through its range of motion, while being sure to keep the oil level topped up so that the air could be bled out. Once there were no more bubbles, I put the valve in and that was job done. 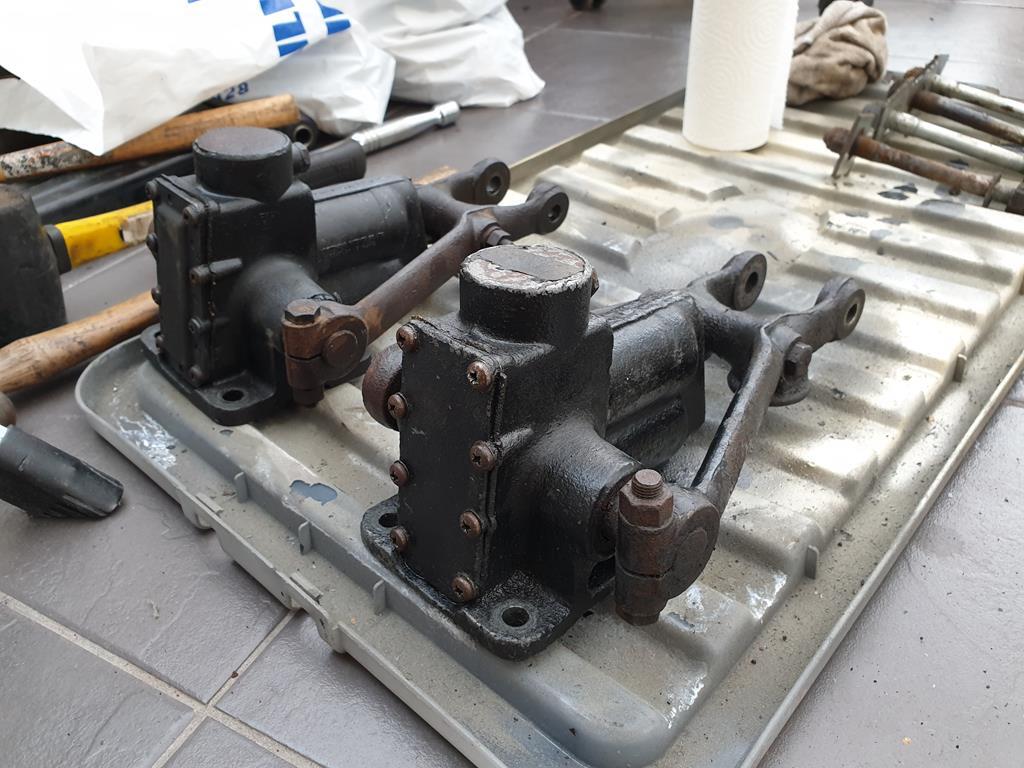 I'll give them a clean and a quick lick of paint in the week. In other good news, I managed to find the crossmember mounting bolts in the car, these will get a clean up before being paired with the polybushes that I also dug out of my pile of spares 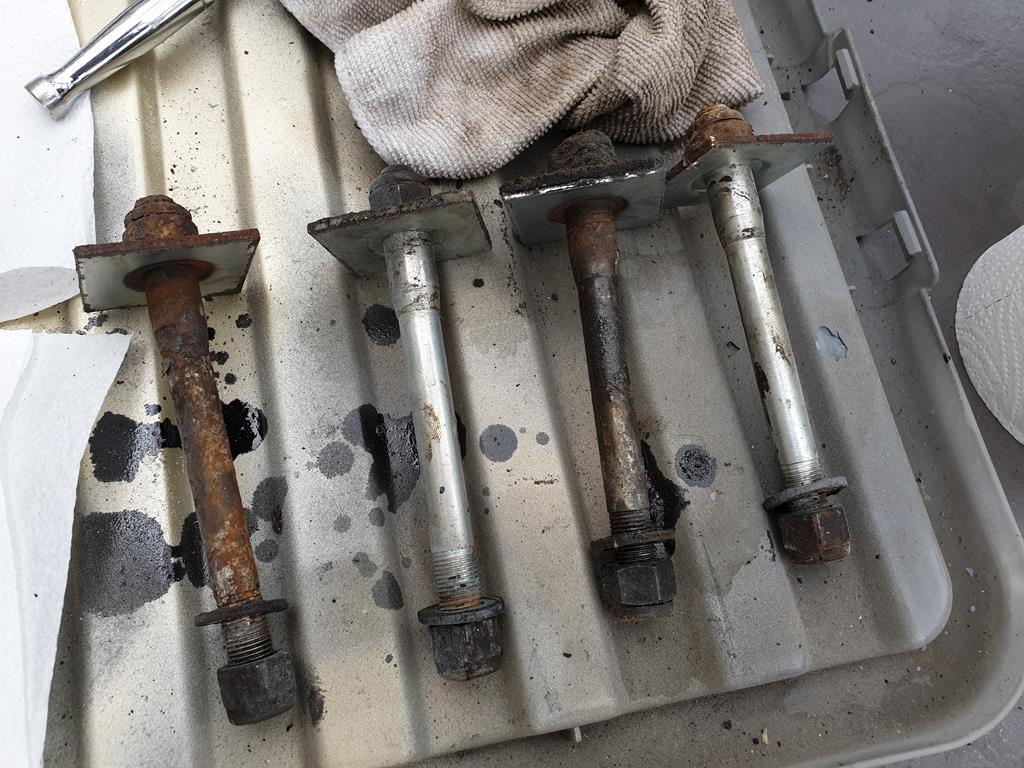 Also put the lower arm pivots on the crossmember, very nice to be bolting clean parts together  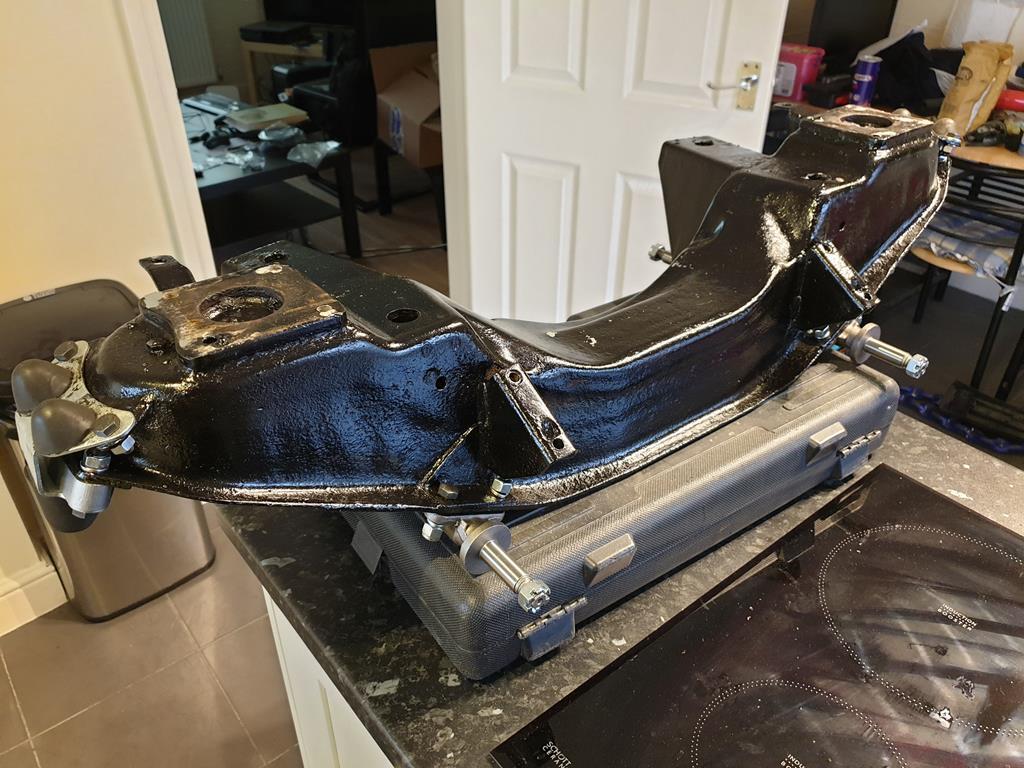 |
| |
|
|
|
|
|
|
|
|
|
|
Good progress! When i restored my MGB i sometimes got caried away and bought a lot of new parts but then you end up with a small bag of new parts and paying over Euro 100,- And then when you fit the new parts there is often a small difference which leads to rework so soon i cleaned up all bolts, washers, nuts and studs and got these zinc coated and tried to restore most of the parts. It is good that new parts are available but the quality is not always good. I spent a day with modifying a new grill to make it fit properly
Peter
|
| |
|
|
samta22
Club Retro Rides Member
Stuck in once more...
Posts: 1,276  Club RR Member Number: 32
|
|
|
|
Might be worth looking into Classic Conversion Engineering suspension parts from the US. They might be a bit cheaper than the Frontline and Hoyle parts for when you find out the BMW engine is a it much for the MGB suspension 😁👍 www.classicconversionseng.comThat's a very dangerous site indeed... Adam do you want to organise the container from the US or shall I?  |
| |
'37 Austin 7 '56 Austin A35 '58 Austin A35 '65 Triumph Herald 12/50 '69 MGB GT '74 MGB GT V8'73 TA22 Toyota Celica restoration'95 Mercedes SL320 '04 MGTF 135 'Cool Blue' (Mrs' Baby) '05 Land Rover Discovery 3 V8 '67 Abarth 595 (Mrs' runabout) '18 Disco V |
|
|
|
|
|
|
|
The Special Tuning Competition valve assemblies are :-
Front AHH7217
Rear AHH7218
Not sure if they are marked anywhere.
|
| |
Last Edit: Aug 12, 2019 8:43:05 GMT by westbay
|
|
sonus
Europe
Posts: 1,392
|
|
|
|
Might be worth looking into Classic Conversion Engineering suspension parts from the US. They might be a bit cheaper than the Frontline and Hoyle parts for when you find out the BMW engine is a it much for the MGB suspension 😁👍 www.classicconversionseng.comThat's a very dangerous site indeed... Adam do you want to organise the container from the US or shall I?  Adam New on the Upgrades4MGs-facebook page might be able to give some feedback on their K-link rear suspension set up. He bought the left overs from my kit after a few of the parts were stolen from my lock up. I think he is still using it in his Caterham R500 (Duratec) powered MGB GT. |
| |
Current
1968 TVR VIXEN S1 V8 Prototype
2004 TVR T350C
2017 BMW 340i
Previous
BMW 325d E91LCI - sold
Alfa Romeo GTV - sold
Citroen AX GT - at the breakers
Ford Puma 1.7 - sold
Volvo V50 2.0d - sold
MGB GT - wrecked by fire
MG ZT 1.8T - sold
VW E-golf Electric - sold
Mini Countryman 1.6D -sold
Land Rover Discovery TD5 - sold
|
|
adam73bgt
Club Retro Rides Member
Posts: 4,991
Club RR Member Number: 58
|
|
Aug 12, 2019 18:21:50 GMT
|
samta22 Hey if they'll do us some discount on a combined order/shipping.... yep definitely a dangerous site  westbay westbay I don't recall seeing any markings on the valves themselves but I found them in my pile of bits still in their bags from MOSS, rather embarassingly this also showed that I bought them in 2016... sonus thank you for that, I remember using that site for a lot of info back when I had my MG on the road, didn't realise they had a FB group so I've joined up there too 
|
| |
|
|
adam73bgt
Club Retro Rides Member
Posts: 4,991
Club RR Member Number: 58
|
|
|
|
Not made a huge amount of progress on this, have mostly been sorting out my stored parts which has been a bit of an eye opener! (Some of the wiring I did for my auxiliary gauges and spotlights at uni is a bit cringeworthy, looking back  ) On the subject of stored parts, wiring and spotlights, I fairly recently bought a second Lucas spotlight to go with one I bought.... some time ago. 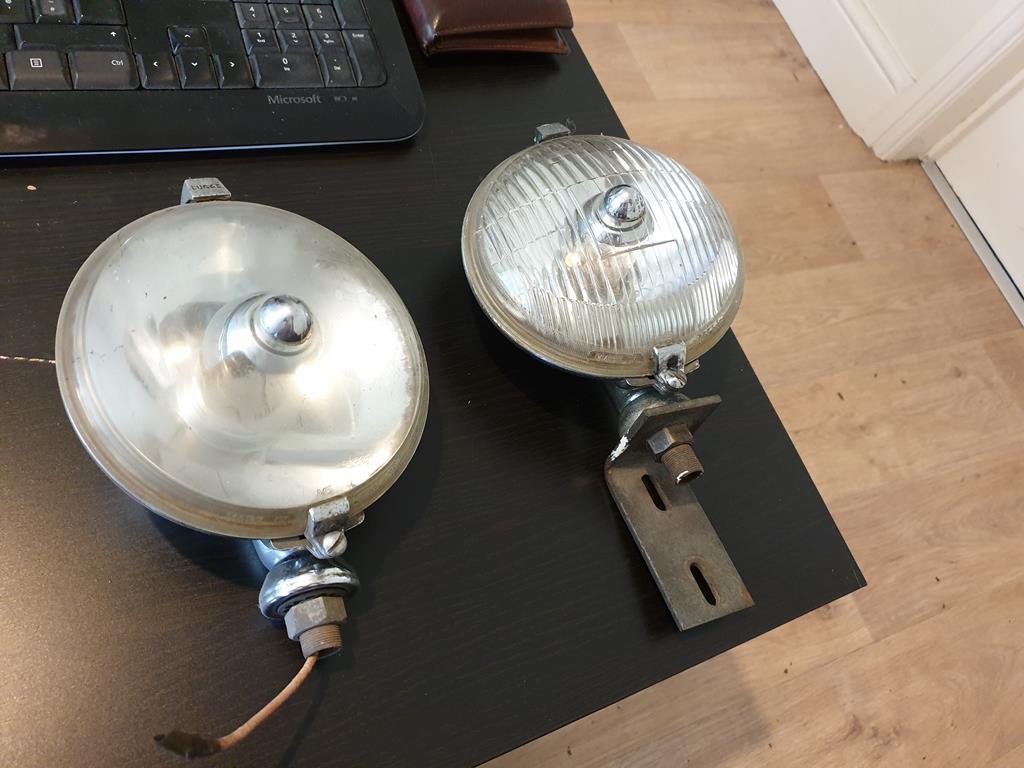 I ran a single yellow SLR576 on the car back in 2013 or so until it got broken by a careless parallel parker. After that I ran two smaller, modern spotlights behind the grille, this gave a better light output but I like the style of the big, old Lucas lights. Of the two I have, one is another SLR576 and I believe the other is an SFT576. They're not in perfect condition, but then I didn't pay much for them 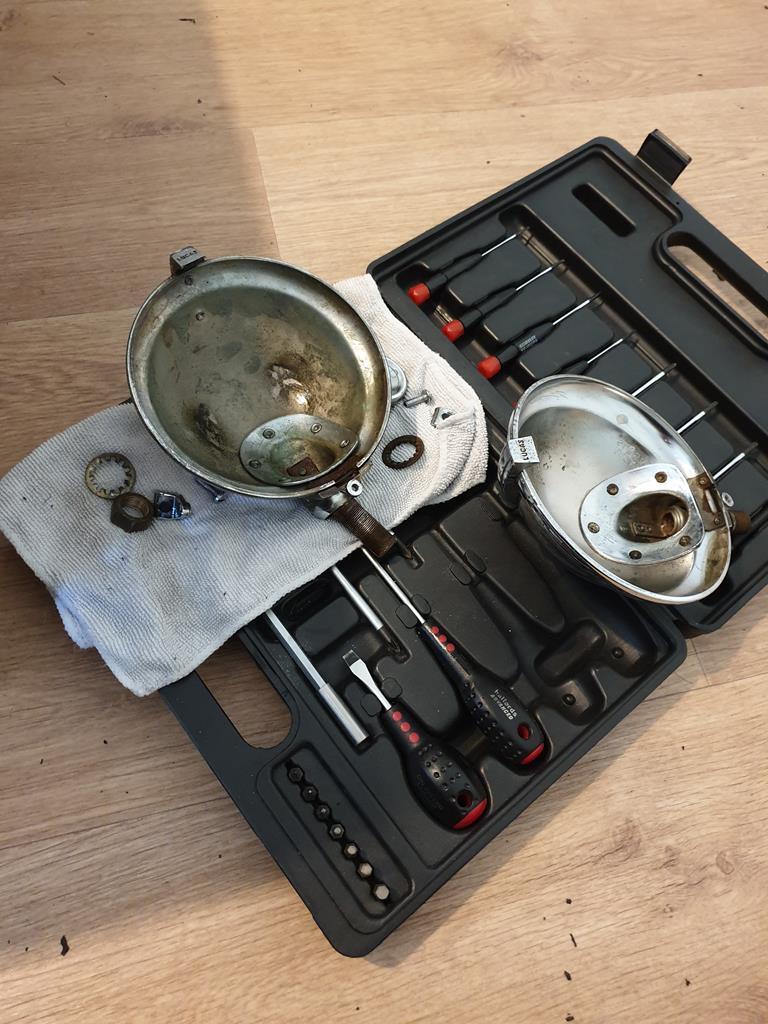 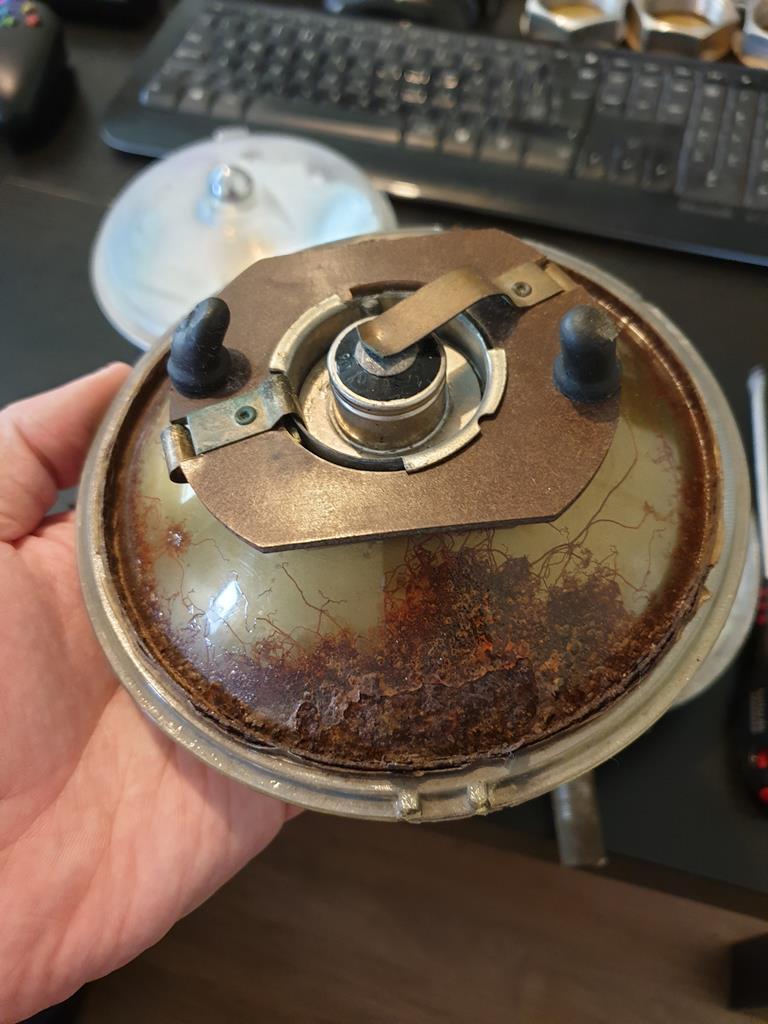 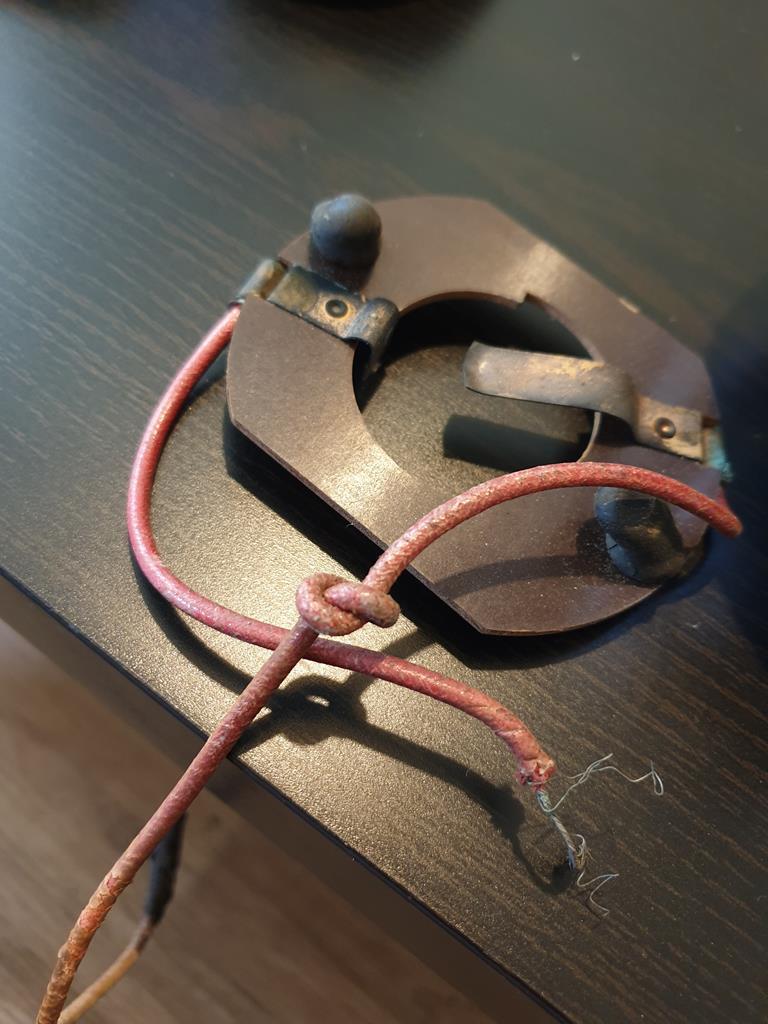 I'm renewing the wiring and the fibreboard bulb holders as the ones in both lights had seen better days. The rest has been given a little clean up and polish and that'll do. Currently just awaiting me doing the wiring and putting them back together and they can go back into the storage pile. The other thing I've been working on is the front suspension. Last time I was left pondering what to do with my front spindles/kingpins, I think I've worked out a plan for those but I'll reveal more when it starts coming to fruition. One of the last elements of the front suspension/crossmember that I needed to pay some attention to was the steering rack. 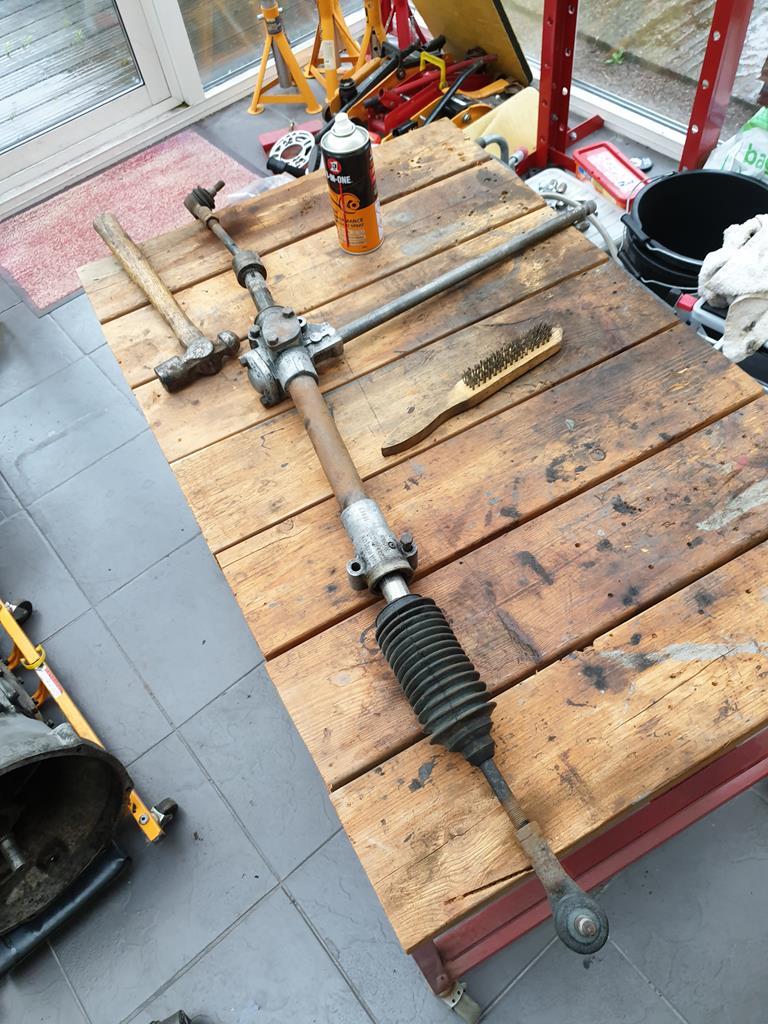 I've had it kicking around for a bit since I initially cleaned all the muck off it when I removed it from the car. It wasn't in too bad condition really, but I'd bought a service kit off here a few years back so figured I might as well use it! The track rod end boots did have some damage from where my old wheels had been fouling them when I first fitted them and got my offsets a bit wrong.. It was my first time fitting different wheels to a car, back in 2013 or 2014 I think 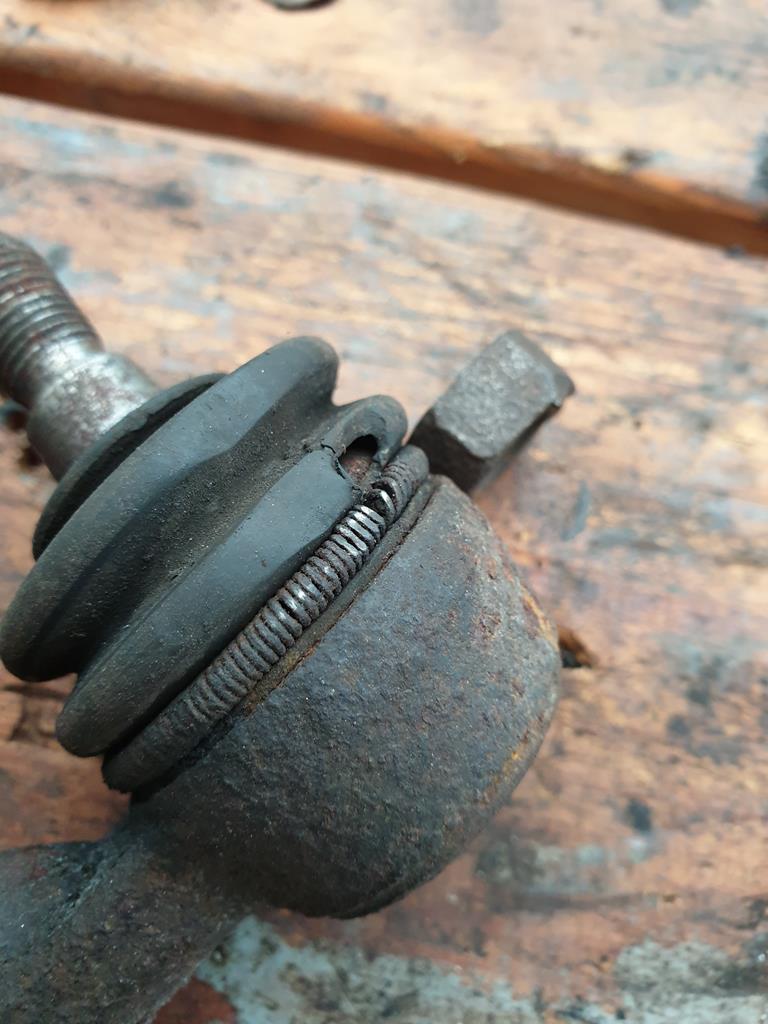 The inner end of the track rods have this odd circular nut and lock nut arrangement going on (on the right side of the pic below) 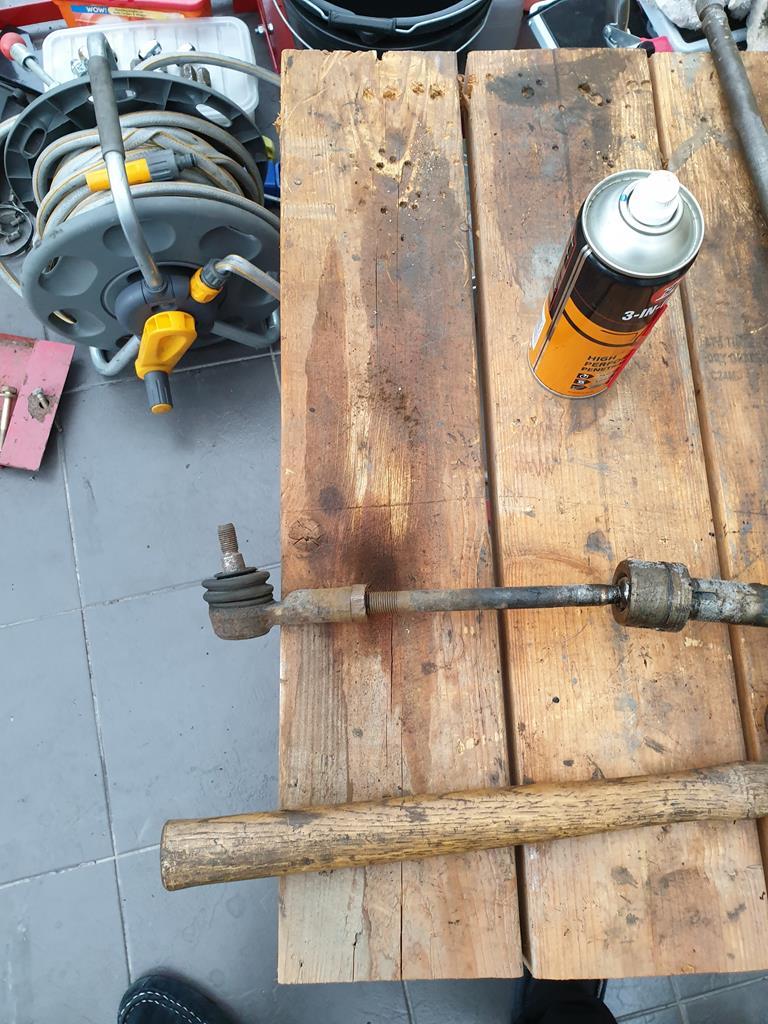 I went out and got some pipe wrenches to get them off, but they weren't too bad in the end. Just had to knock out the locking tab then get a good grip on them 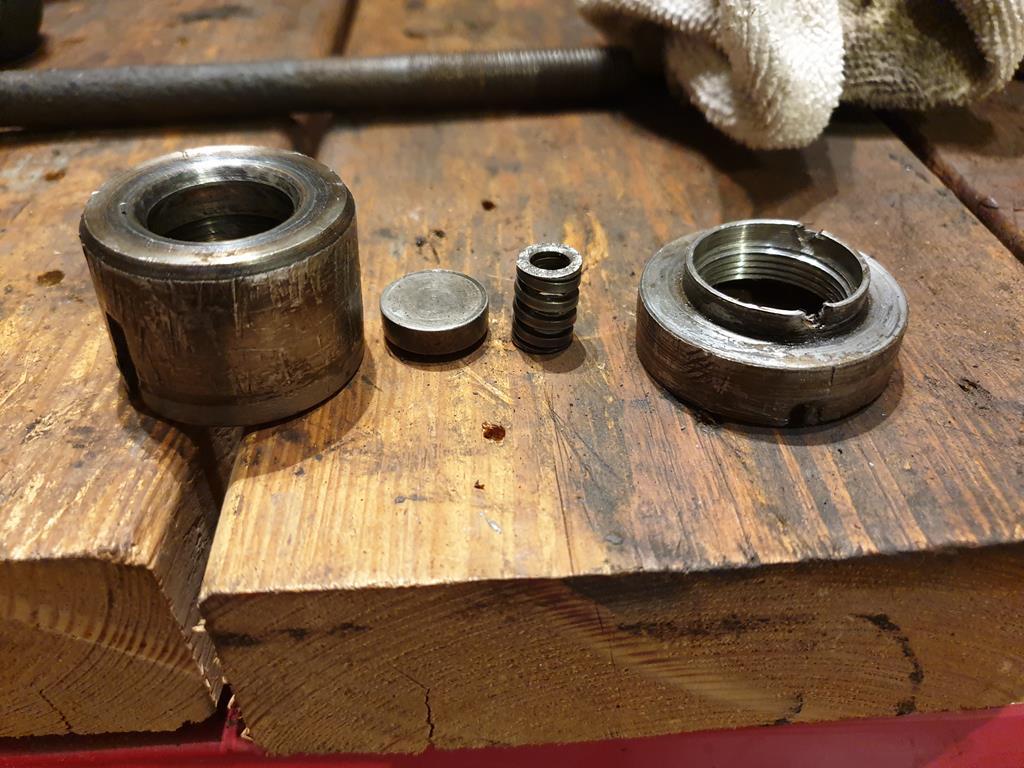 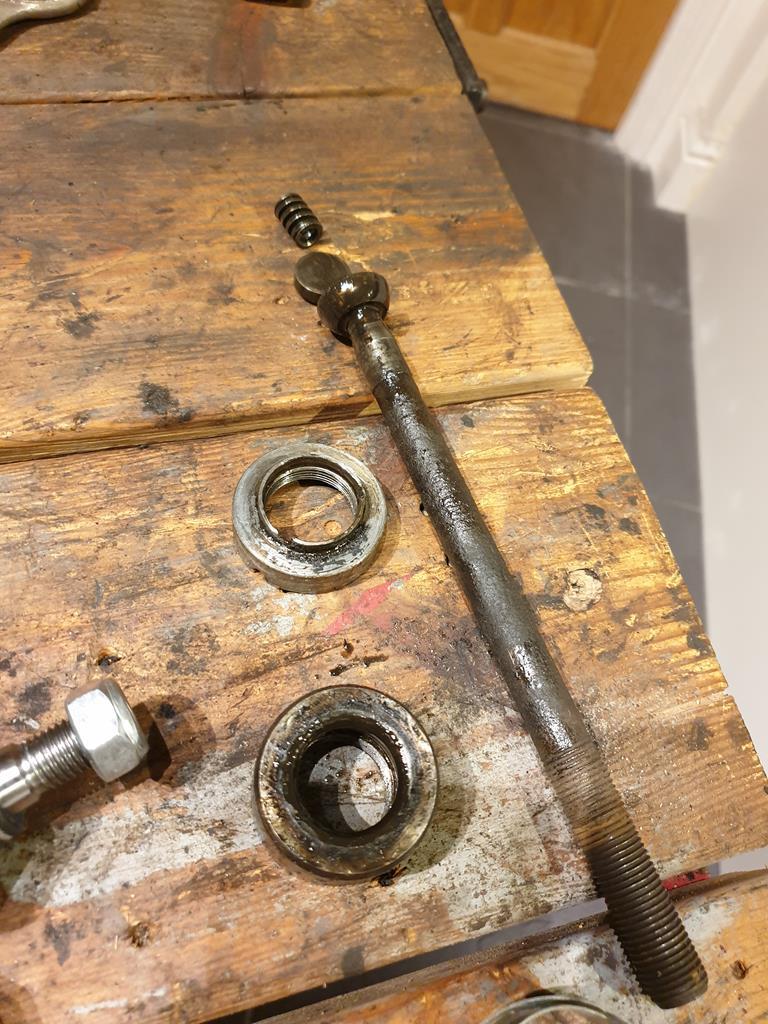 These are the bits that come out. Now I was led to believe that there should be some shims in there also to adjust the "tension" (for want of a better word) on the track rods, but neither side had any shims! They both seemed to be OK though so perhaps they weren't needed on this rack after all... 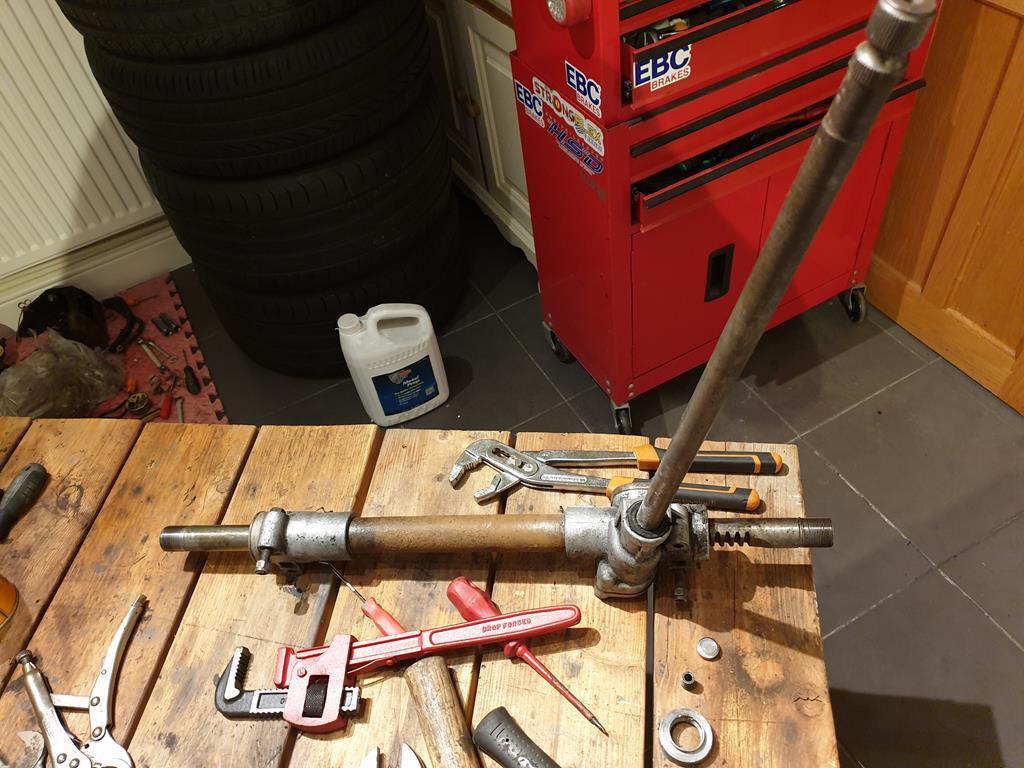 Then it was a case of taking off the plate opposite the bottom of the column and withdrawing the column with a bit of wiggling, then the other plate can be taken off and the rack withdrawn also 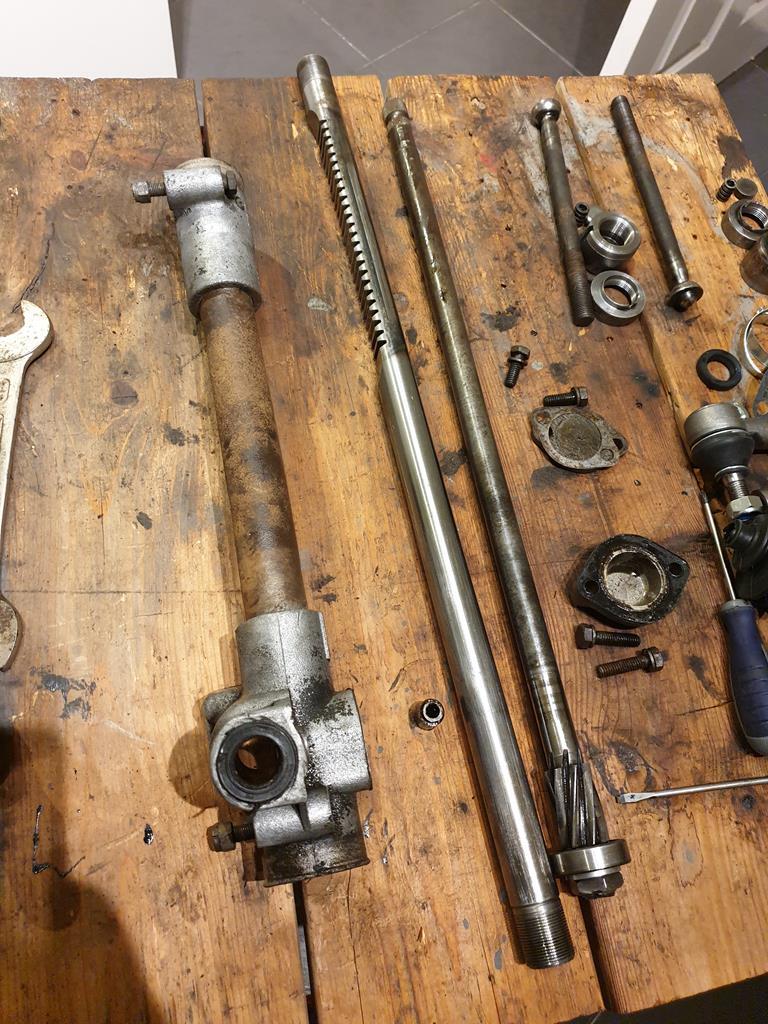 I've got some degreaser coming tomorrow as I ran out, so all of this will get a good clean, I'll paint the rusty part of the rack casing tube thing, got a seal and a gasket to replace and it'll all get put back together with plenty of grease  Then it should be just the spindles and I can make it a roller again. I'll also get some new wheel bearings and do those while I'm at it |
| |
|
|
adam73bgt
Club Retro Rides Member
Posts: 4,991
Club RR Member Number: 58
|
|
|
|
Been slacking on the car really but did get some stuff done. Finished up rewiring the spotlights 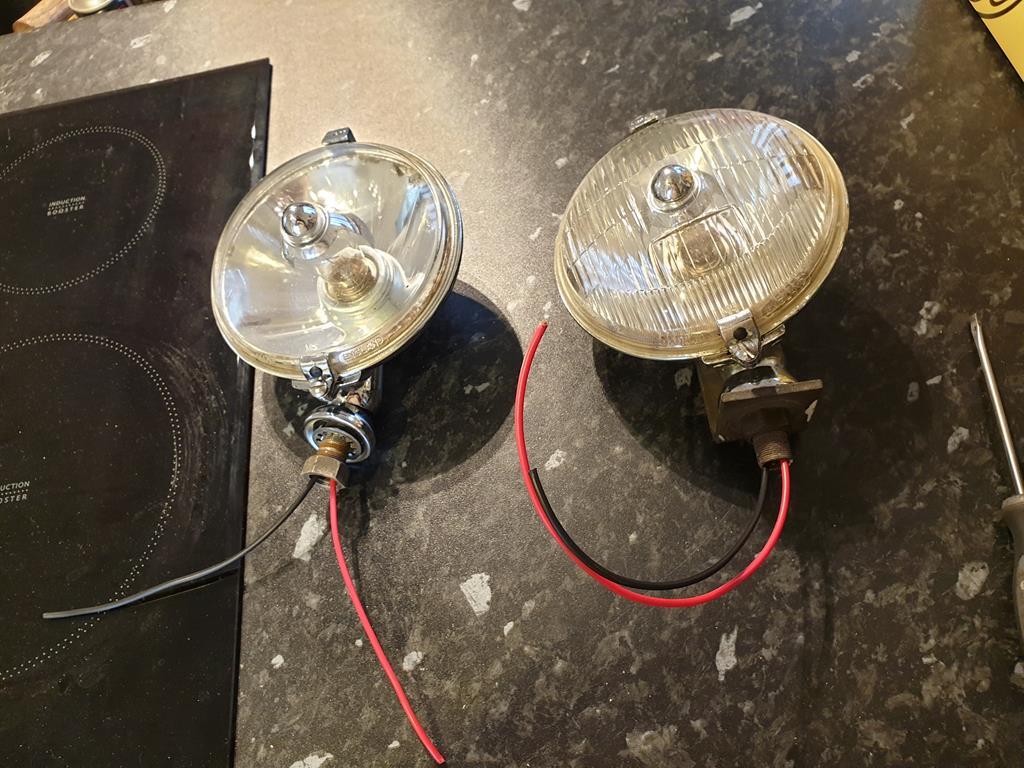 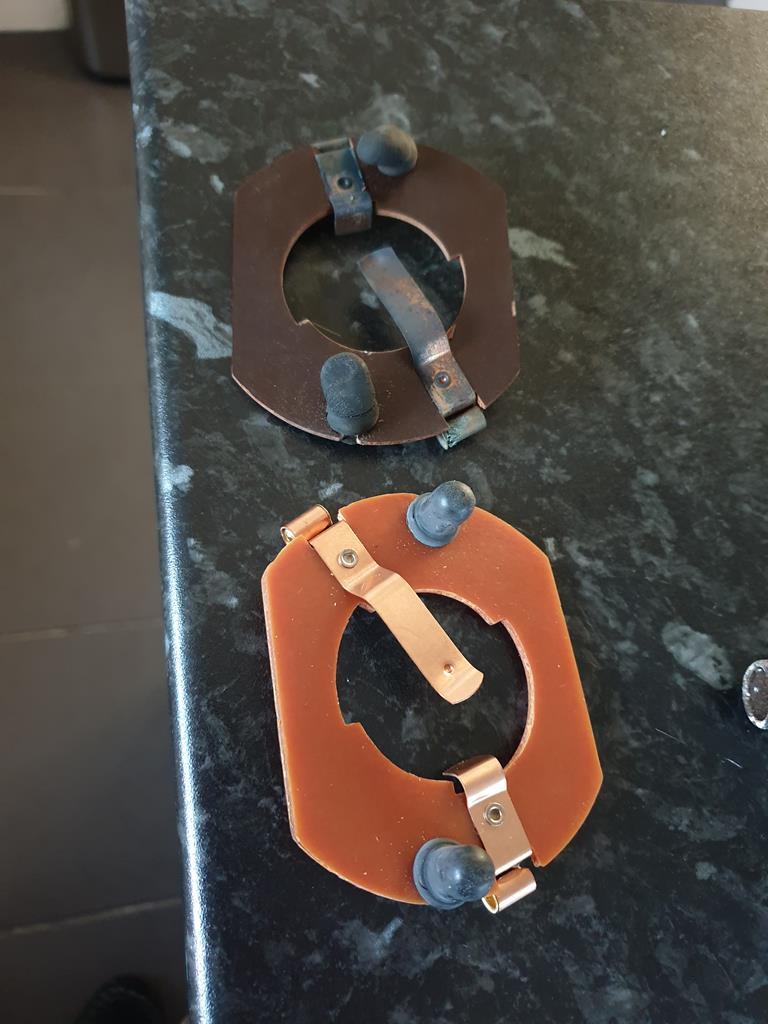 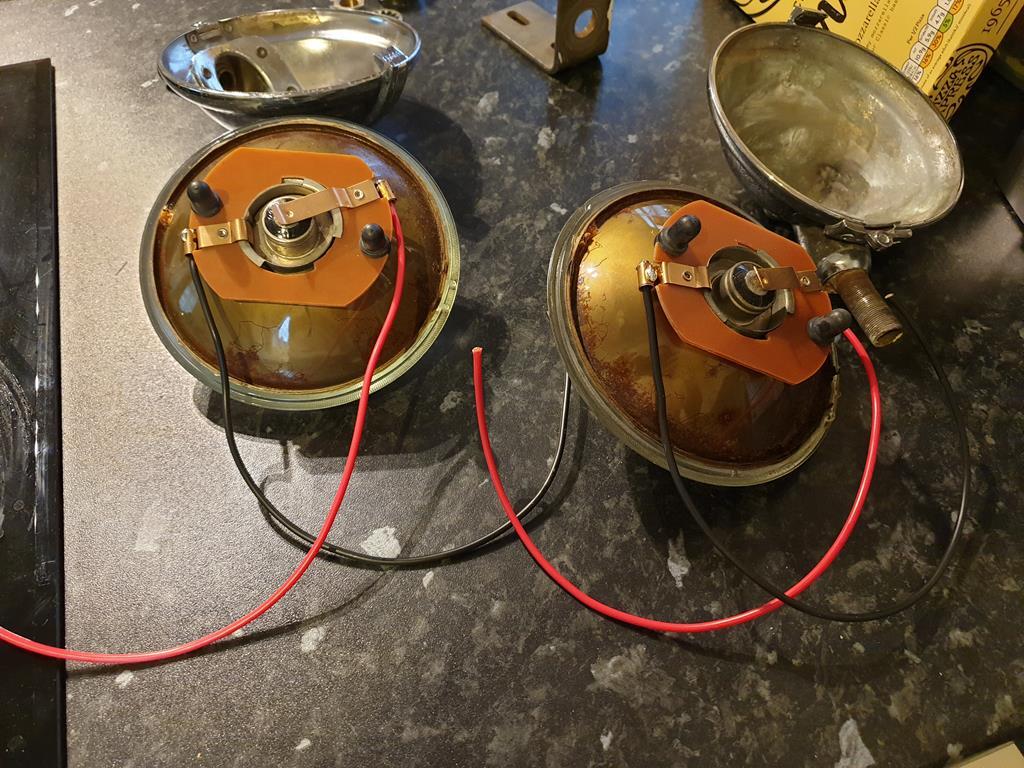 Put them back in the big pile of parts. Turned my attention to the steering parts the other week as I realised there was a part that hadn't come out of the rack casing, there's a "plunger" which I had to lever out with a pry bar.. Below you can see it halfway and fully removed 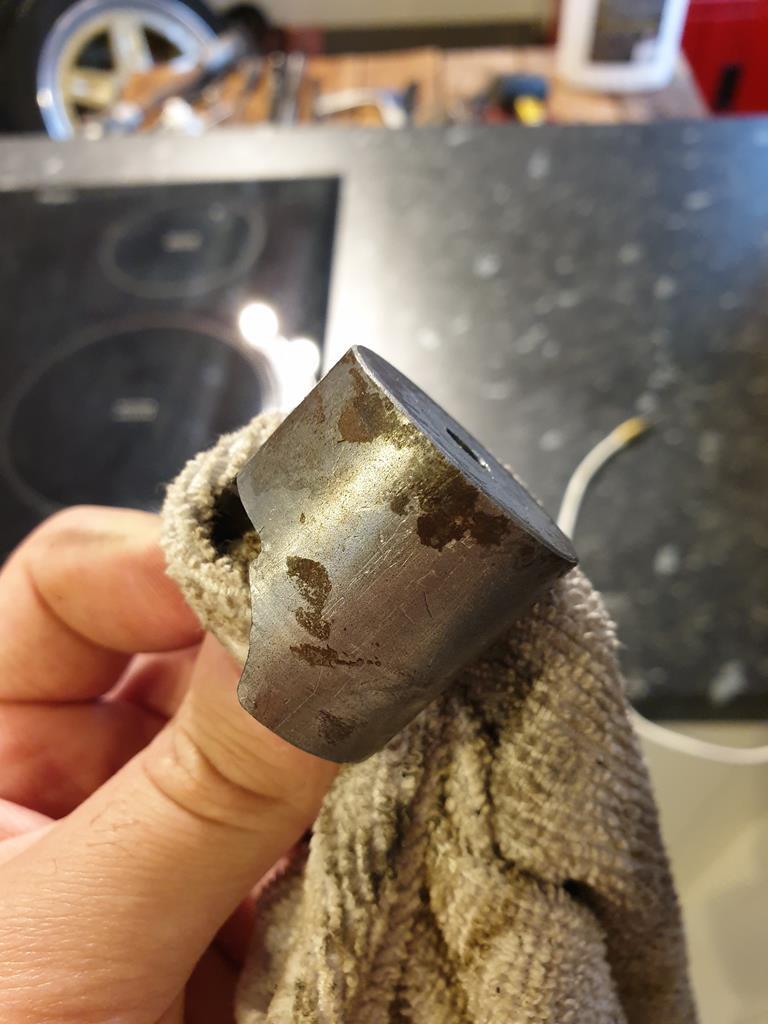 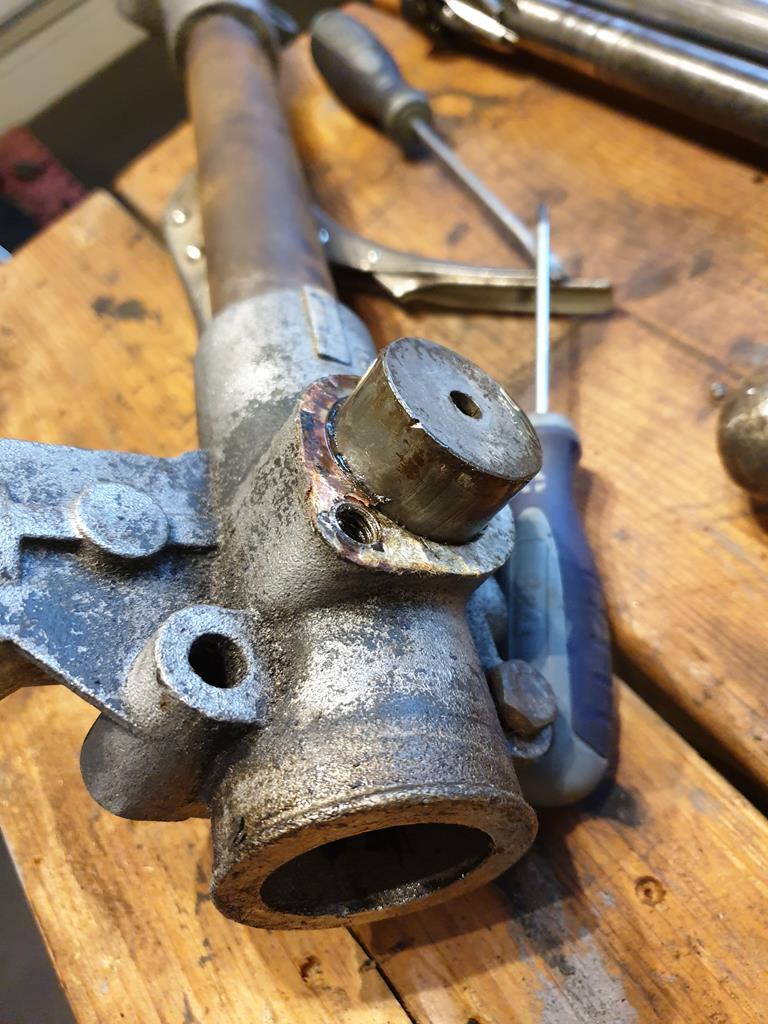 Will need a bit of polishing up but hopefully reusable. I've not got round to cleaning up the steering parts just yet. Today, saw there was a bit of a break in the rain so time for a bit of work in the garage. Started off by trying out some new tools I'd bought to get the shell a bit more mobile, namely some wheel dollies or skates 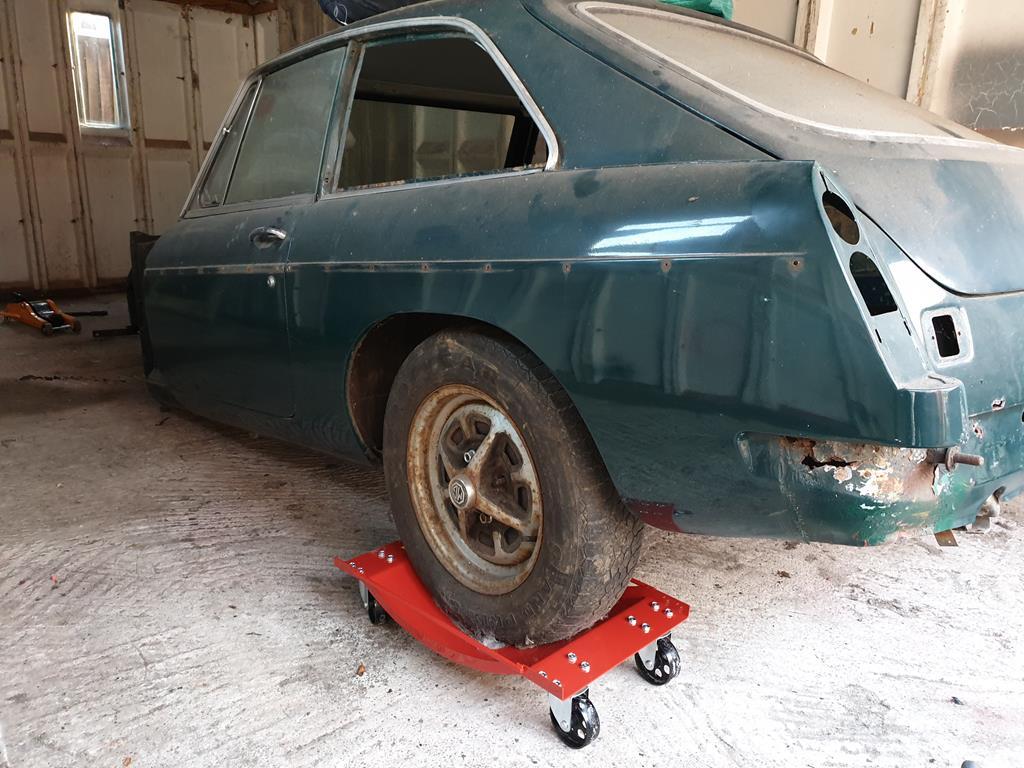 Had some partial success there, the garage floor is actually quite rough but was able to move it about a bit. Randomly, I turned my attenion to the B series engine short block which has been sat in the garage for ages now. Engine choice is somehing I've been deliberating over for years on this car, and while I'm semi-decided on the BMW M50, size concerns do mean that I've been thinking of other options still. Anywho, I had thought the B series was seized as I was unable to get it turning and had left it with the head off in a damp garage... So I figured I might as well try and get the sump off and get the pistons/rods out and see what was going on. 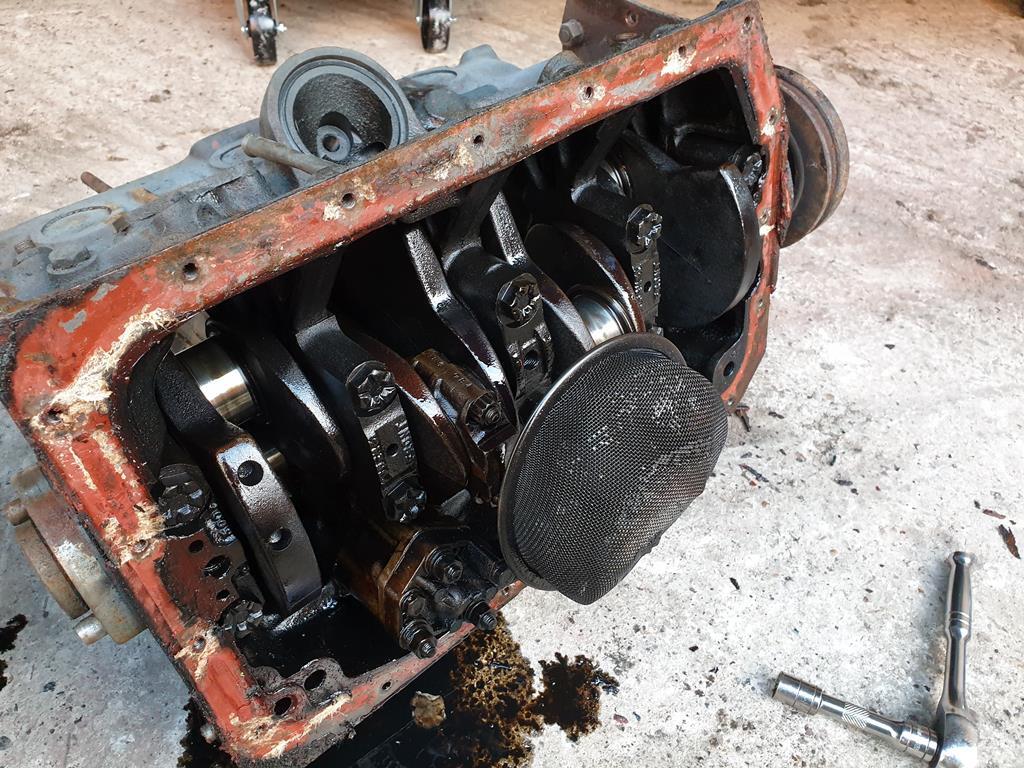 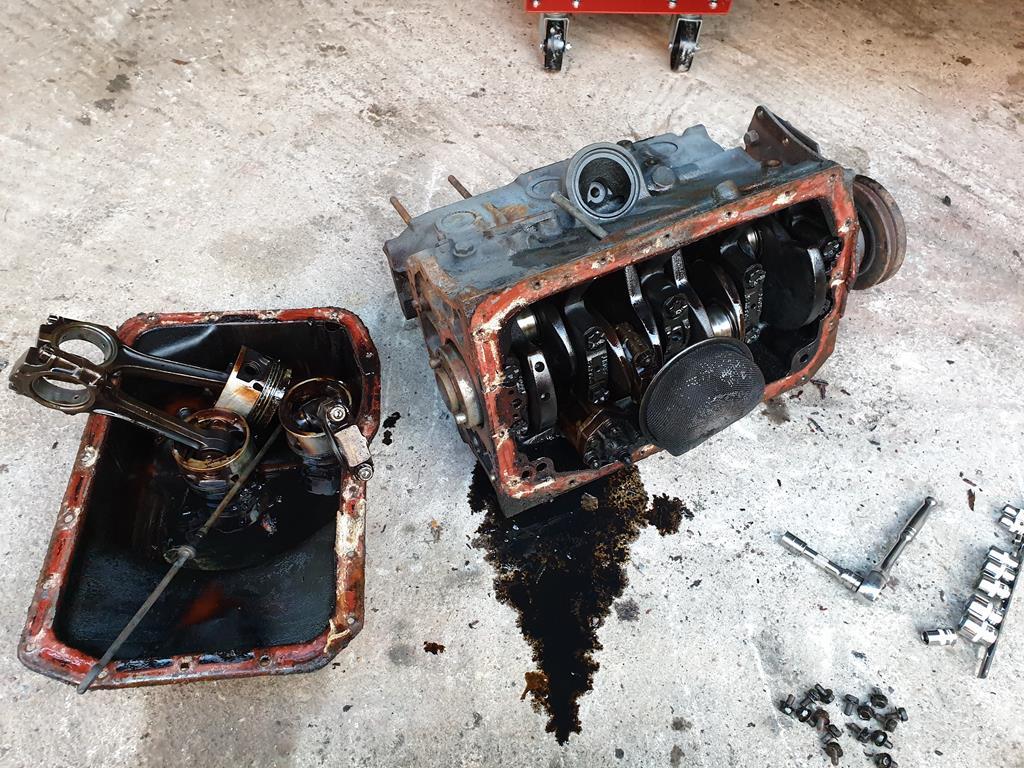 Made a bit of a mess, but turned out the engine wasn't seized! Just when I first took the head off, the only stuff I had to chuck down the bores to stop rust was some spray grease, and it was very sticky  The pistons and rods all came out pretty easily, and the bearings all looked in decent condition and appear to be marked as being for a 20 thou undersize crank if I'm reading correctly 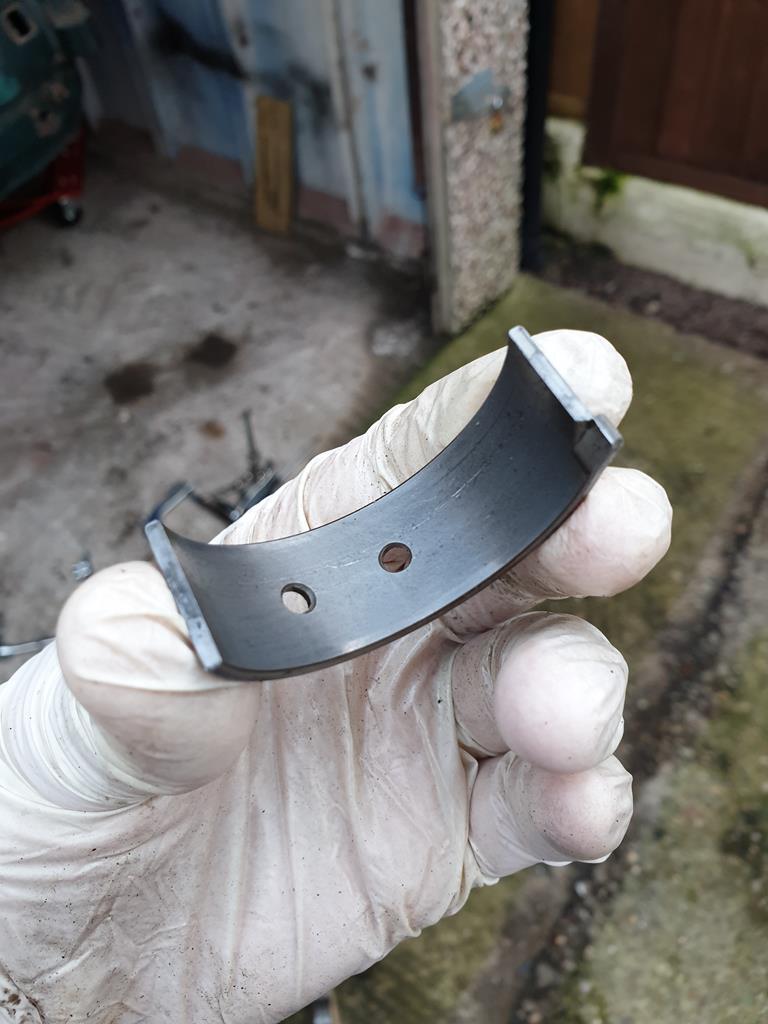 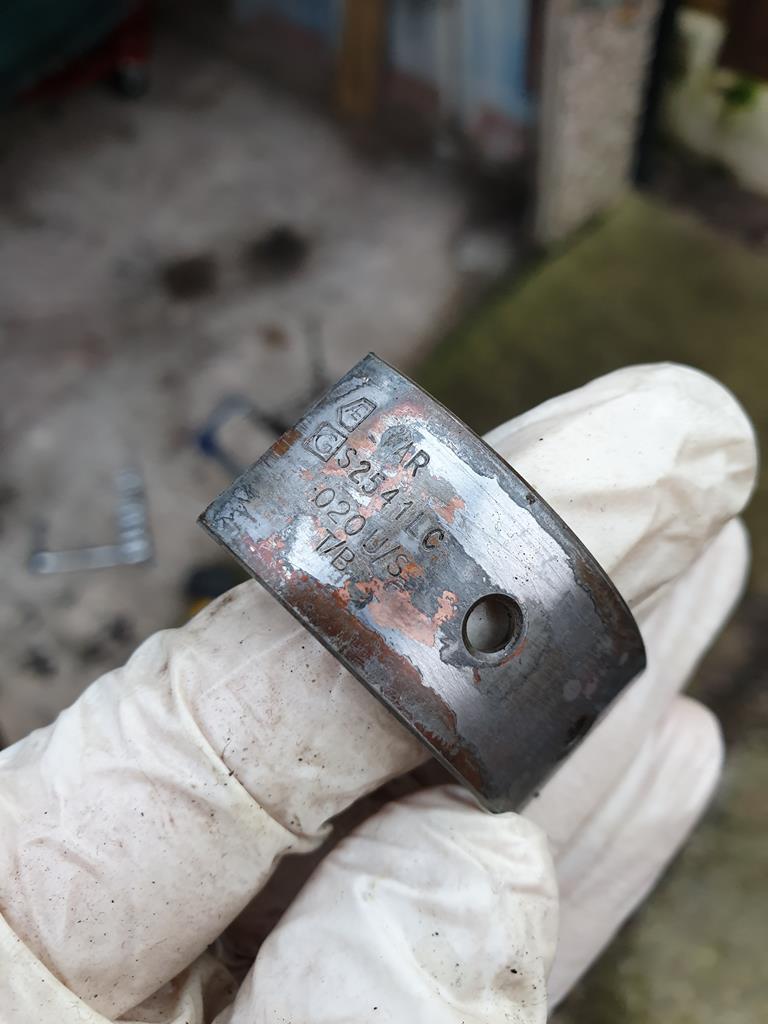 Some of the journals have some wear but I don't know when the engine was last rebuilt 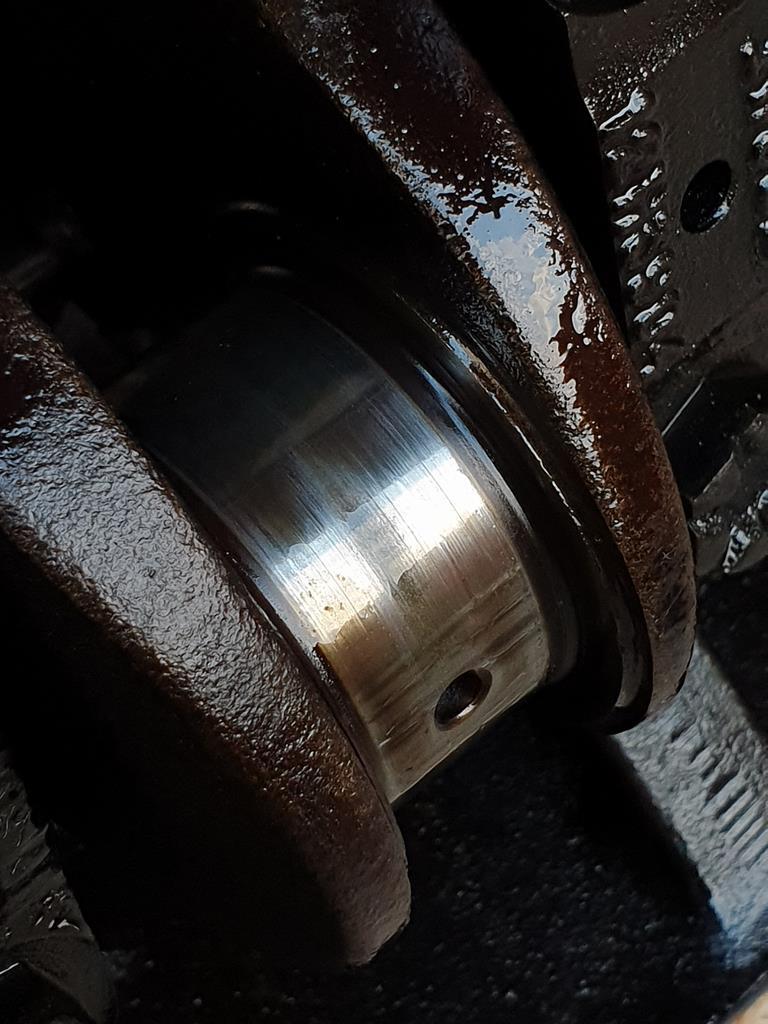 Not really sure what I'm going to do with this engine (or its corresponding gearbox), but knowing the condition of it, makes it easier to sell should that be what I do. Alternatively I might use it for some rebuilding practice. But for now, I will force myself to finish off the steering rack job before I get too distracted  |
| |
|
|
adam73bgt
Club Retro Rides Member
Posts: 4,991
Club RR Member Number: 58
|
|
|
|
So as promised, an update on the steering rack. I'd basically got it to the point where it was apart but needed a good clean, so I got myself a 5L bottle of GUNK and a bucket and brush and got to work. Before long I had a load of clean rack parts everywhere 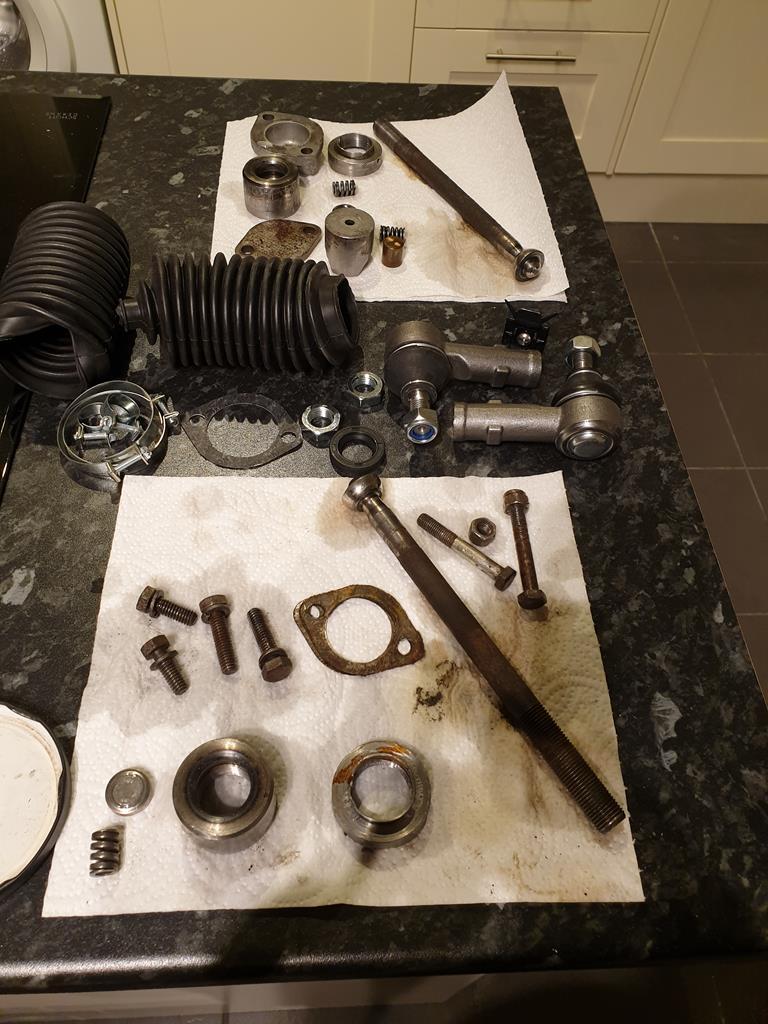 In the middle of the bottom bit of kitchen towel in that pic, are the shims which go under the plate which covers the plunger/piston type thing I had to pry out before. That assembly was the main focus of my attention with everything apart. The piston was very stuck in the housing so I spent some time cleaning/polishing up the piston and the bore it works in, I also took a couple burrs off the edge of the bore with a file. 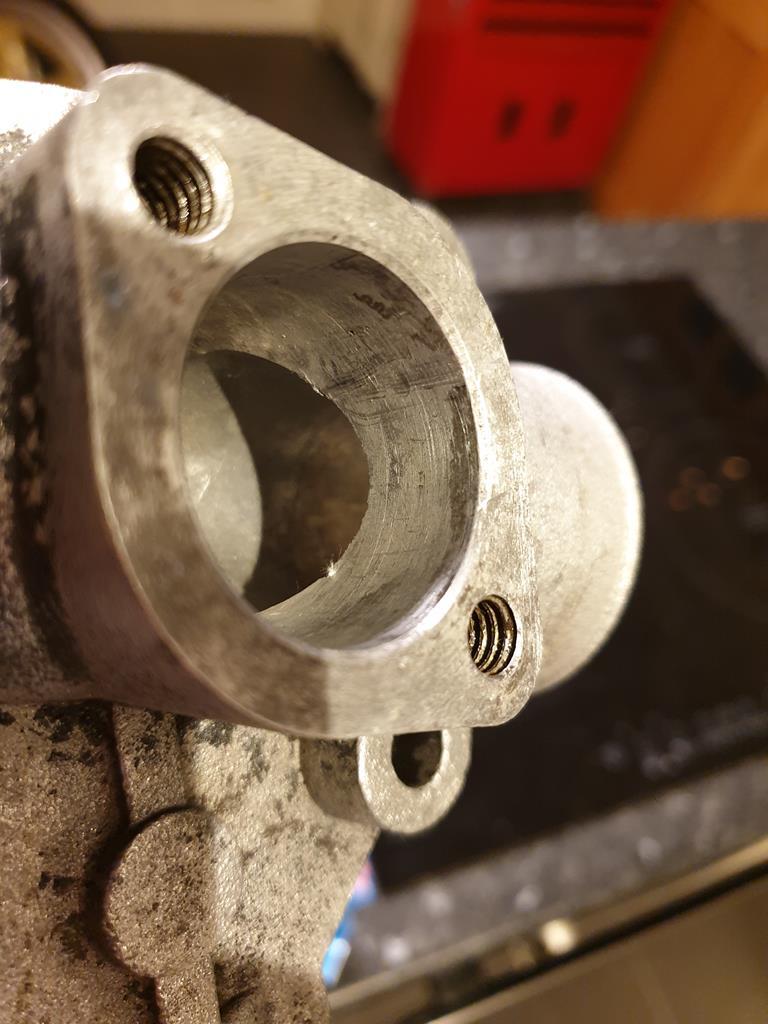 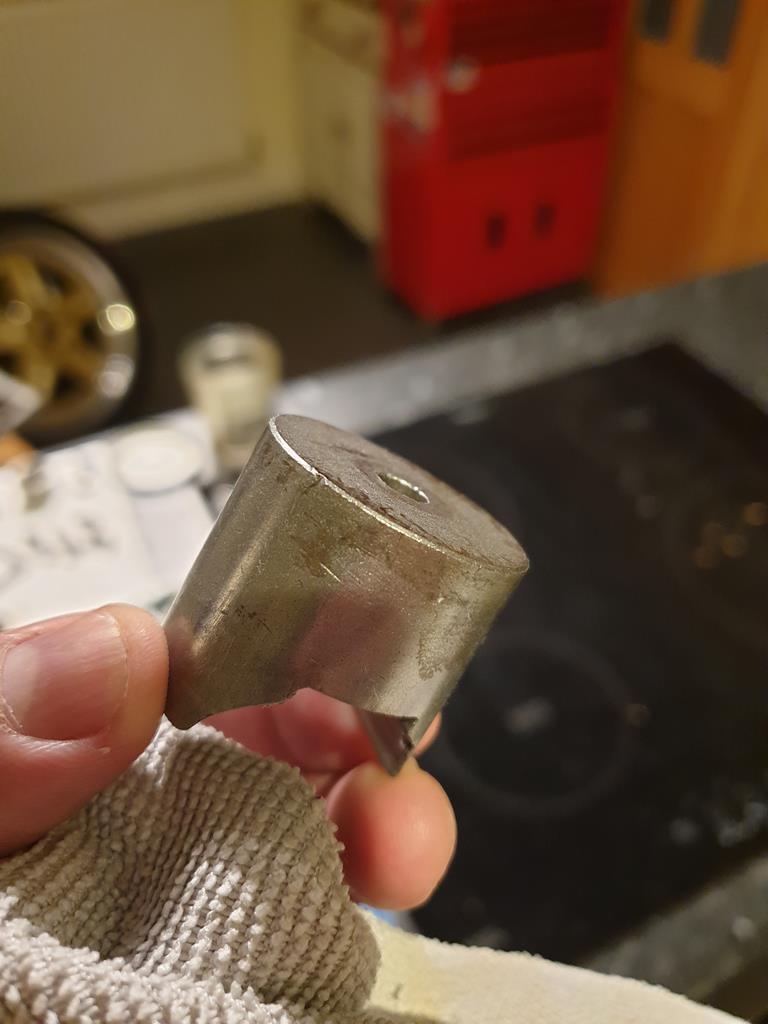 You can just see a bit of fluff catching on a slight burr in the bore of the housing, I'm not sure how the damage got in there but there were some marks on the underside of the piston also 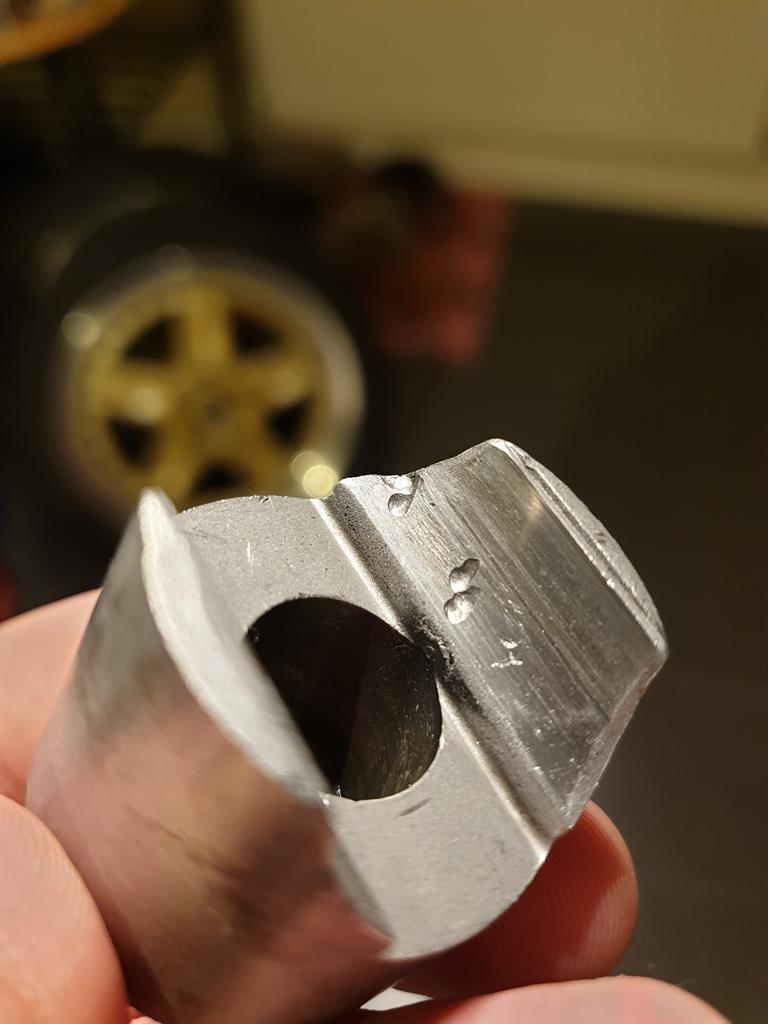 With the filing, cleaning and polishing, the two parts were moving freely again. The next bit is the small bronze "damper pad" that goes inside the piston with a spring to keep it loaded against the rack. 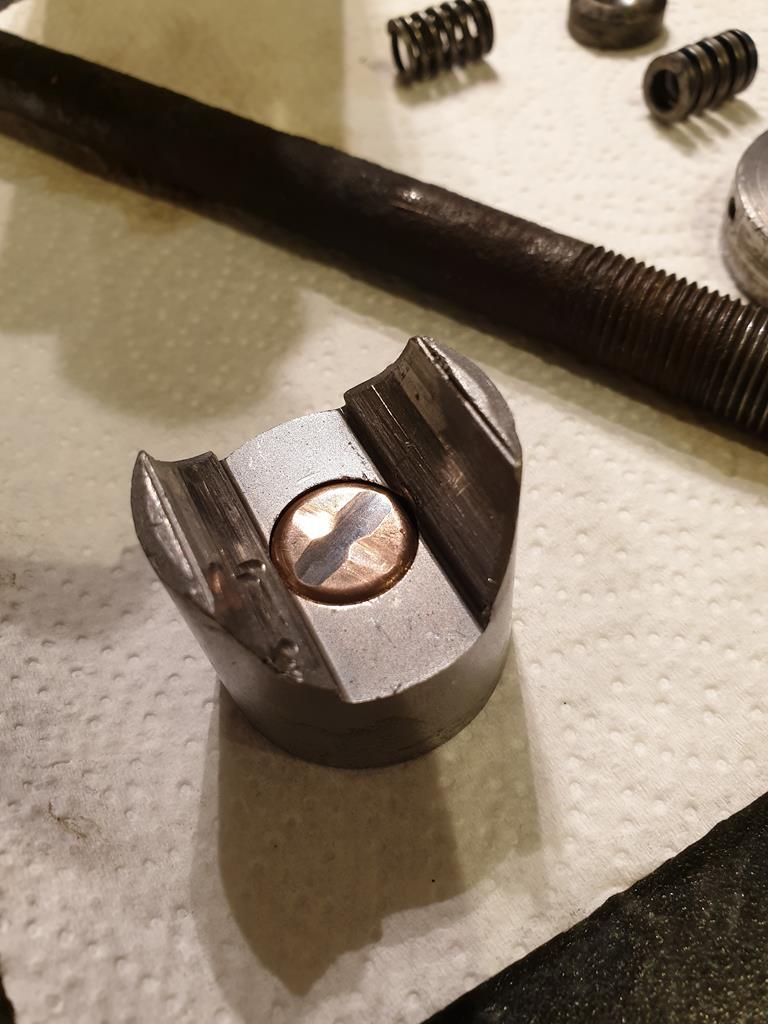 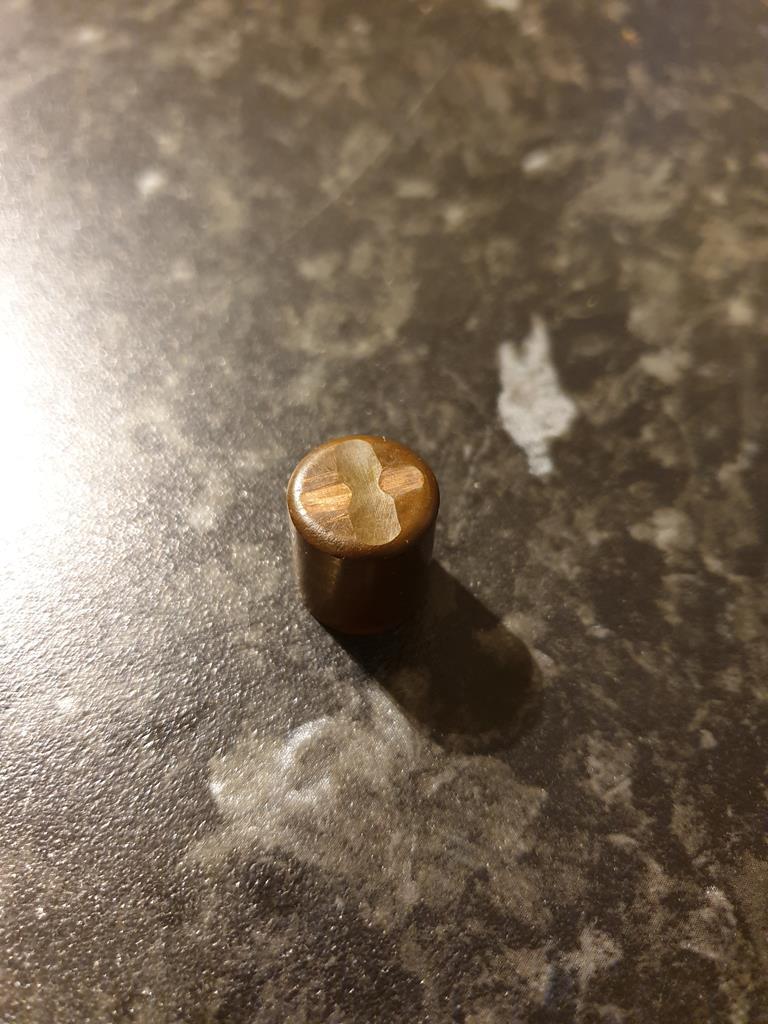 This didn't have the same sticking issues as the piston, but I thought it was interesting to note the wear pattern on the end of the pad. the rack slides along the pad so a linear wear mark is expected. These pads are no longer available though, so if it becomes too worn in one direction, it can be taken out and reinstalled at 90 degrees to wear on fresh material. Judging by the cross on this pad, someone has had this rack apart in the past which could also explain some of the marks on the other components possibly. New racks for MGB's seem to do away with this arrangement and the shims under the cover, instead having a plastic version of the piston to act on the rack and having the cover drilled for a stud for tension adjustment. Anyway, with that out the way, I masked up some of the parts ready for some paint 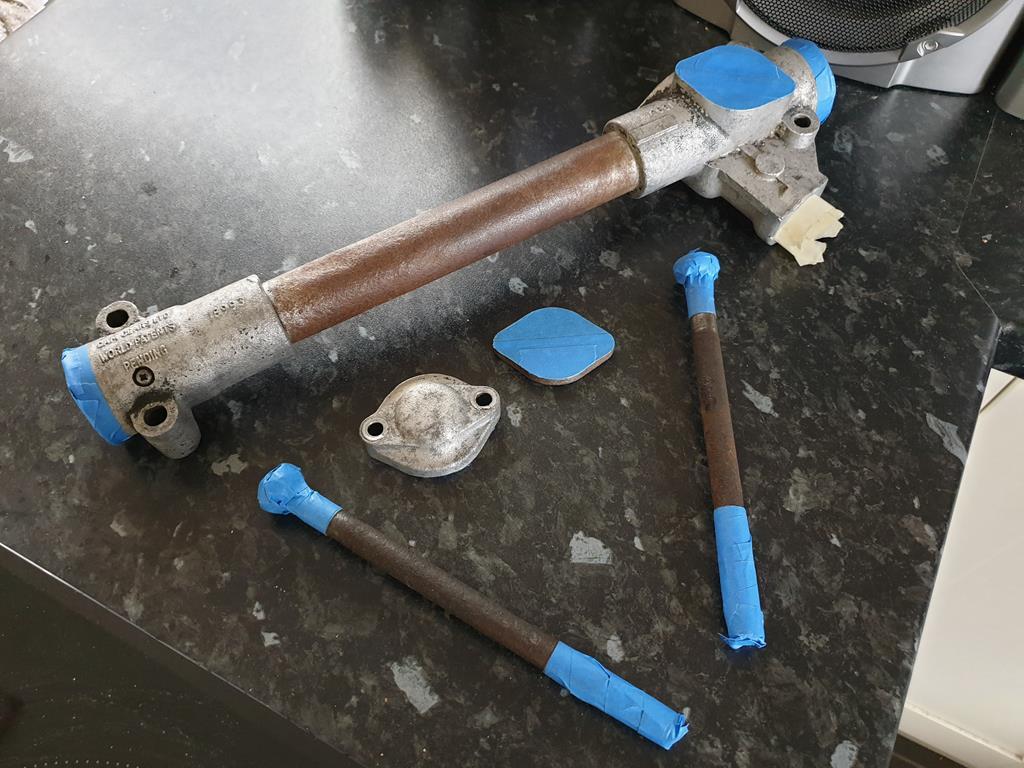 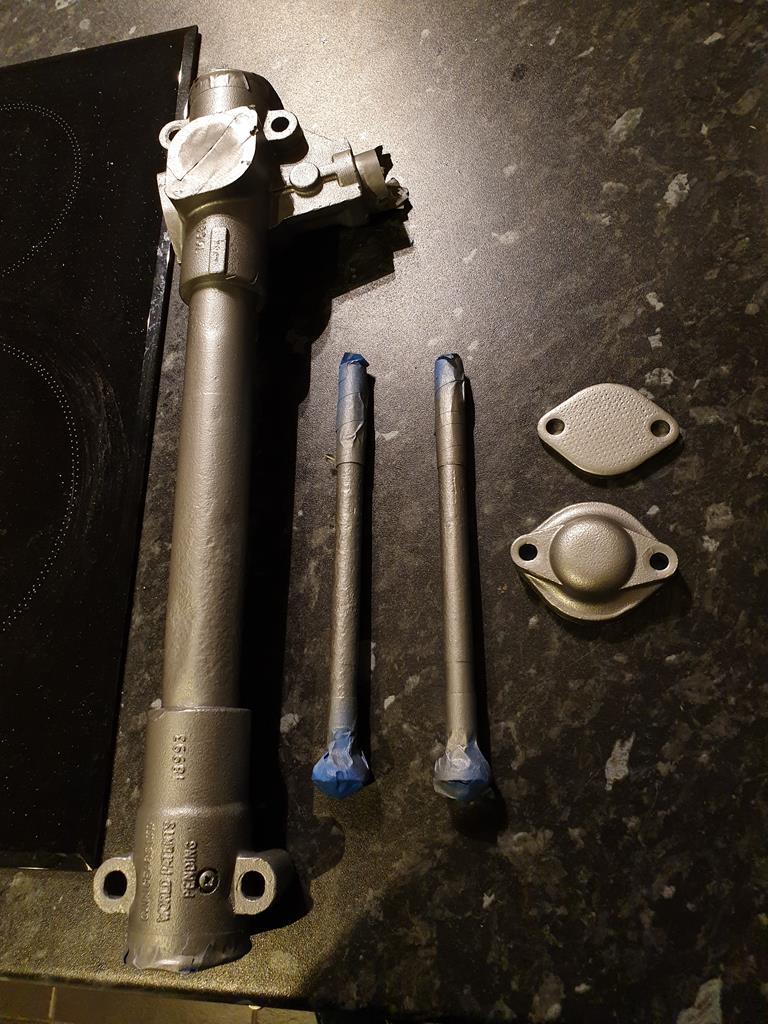 Then reassembly, this is a bit pic-light as grease and phones don't mix as you can imagine  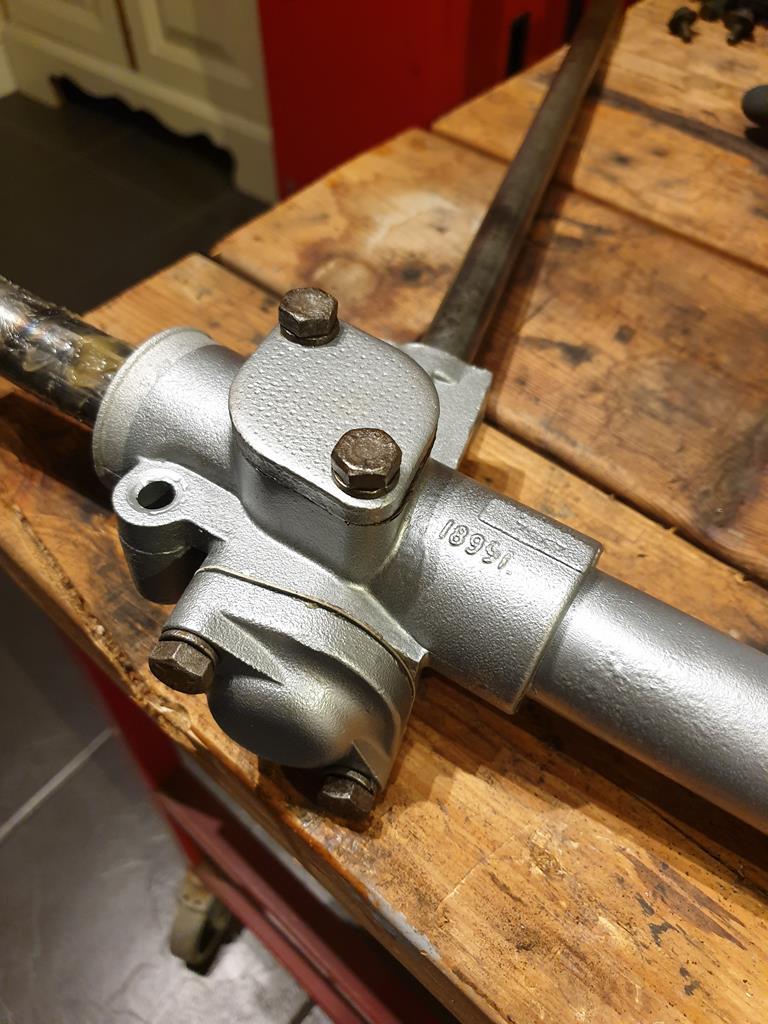 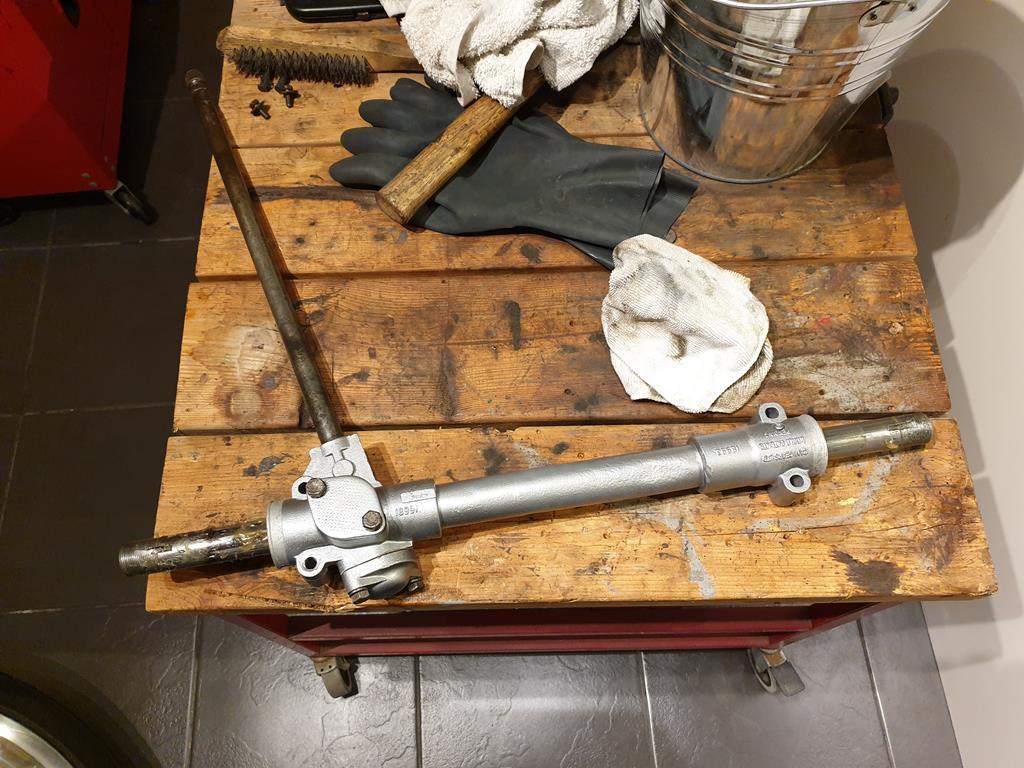 To get to this point, I put a load of grease up inside the rack housing, wiped the rack down with grease and put it in. I positioned it roughly where it was when I took it apart, and then while holding it in place, pushed the pinion through from the bottom of the rack housing. There is a ball bearing at the base of the pinion which I packed with grease before putting it in. With the pinion in place, I put some more grease in the "dome" of the cap that goes over the end of it and loosely bolted it in place with the new gasket I had for it. Then I put the spring and pad into the piston with plenty of grease and then put that into the housing, put the shims on and bolted the cap down for that also. Checked the rack moved happily either way then tightened down the caps. Last job I've done on it so far is to attach the tie rods to the rack, a small spring goes in the end of the rack first 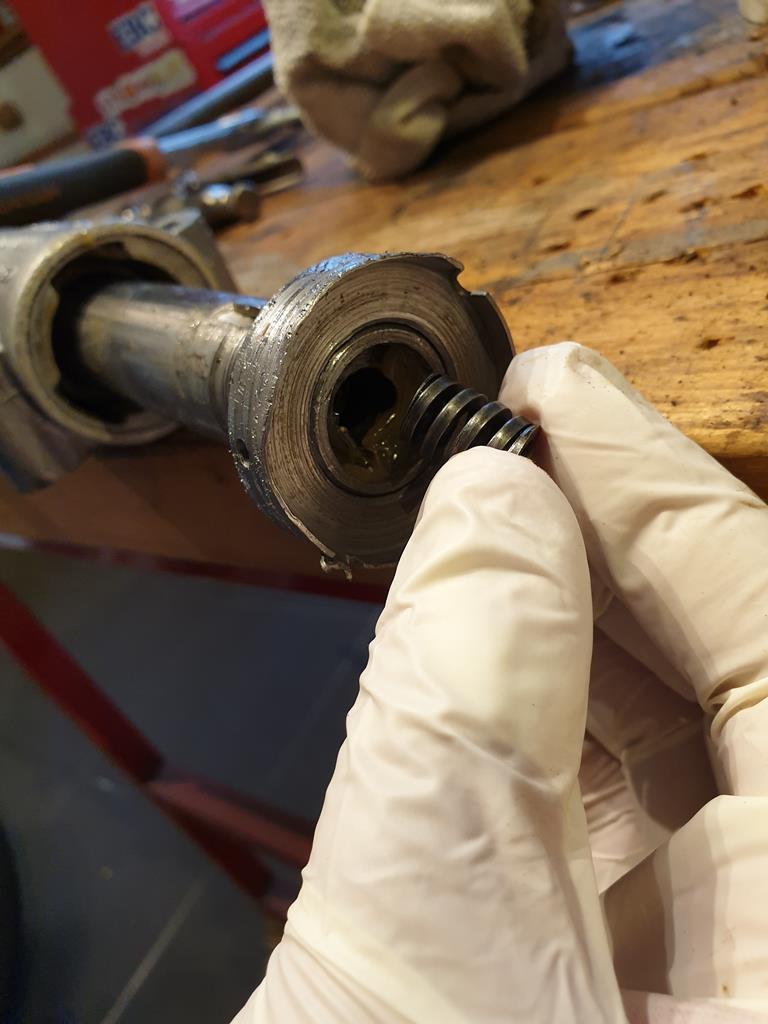 That outer locking nut got wound further on, then the tie rod assembly could be screwed on. This is the rod which has a little socket above it that the spring acts on. 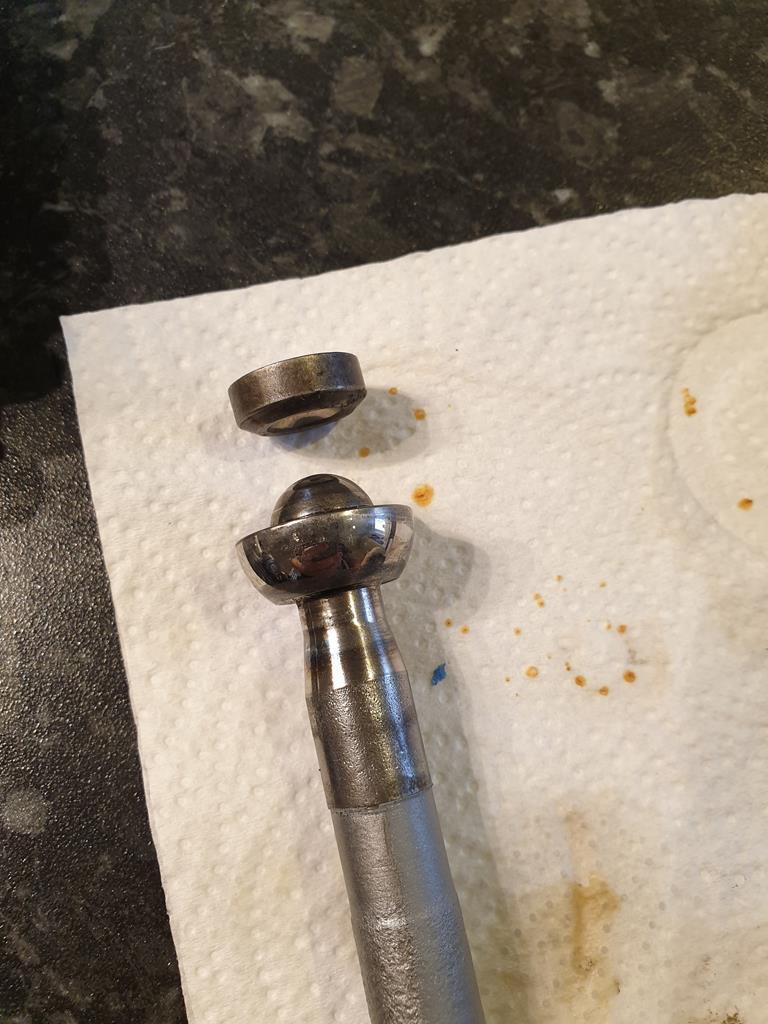 Chucked a load of grease all over it, then attached them to the rack using the large round nuts which are then locked in place by the round locking nut. I set the tension of the tie rods by tightening them until there was enough resistance such that you can move them about and they don't drop down under gravity, but not so tight that they lock in place 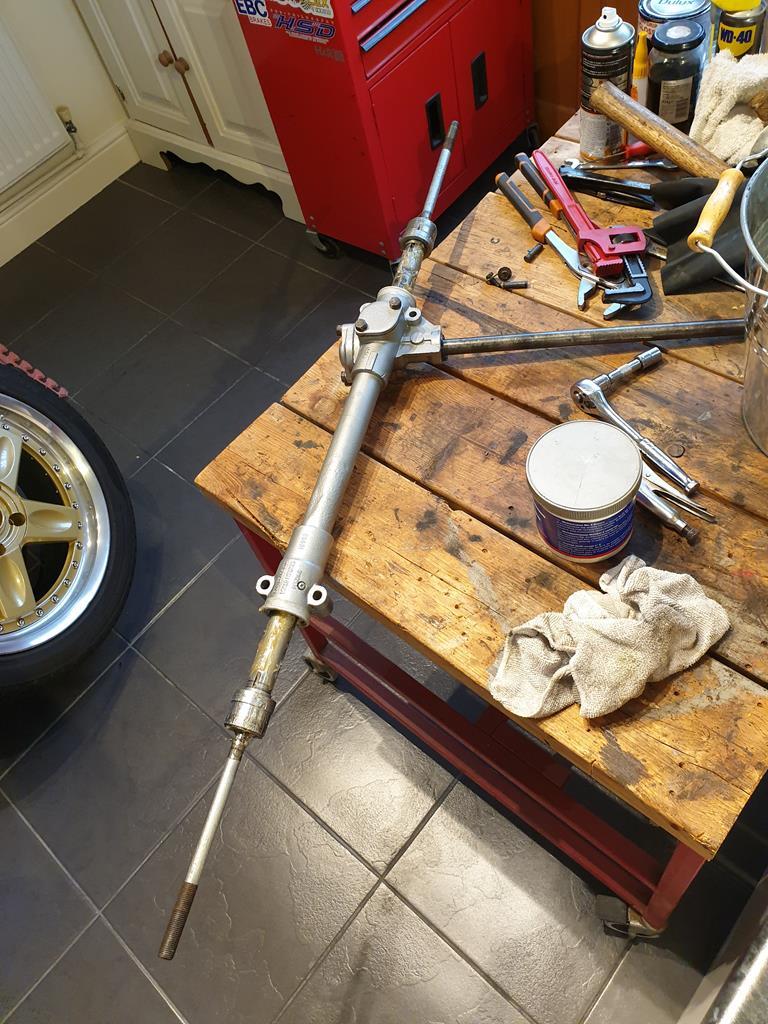 I'm just waiting for some punches to arrive so I can lock the locking nuts in place, then I'll put the boots and track rod ends on and its job done. I also bought myself a 1 5/16" socket to undo the crank pulley bolt so I can continue taking the engine apart, so might have a crack at that tomorrow  |
| |
|
|
adam73bgt
Club Retro Rides Member
Posts: 4,991
Club RR Member Number: 58
|
|
Nov 14, 2019 22:15:58 GMT
|
To finish off the rack, I put a new seal at the top of the housing where the column goes in 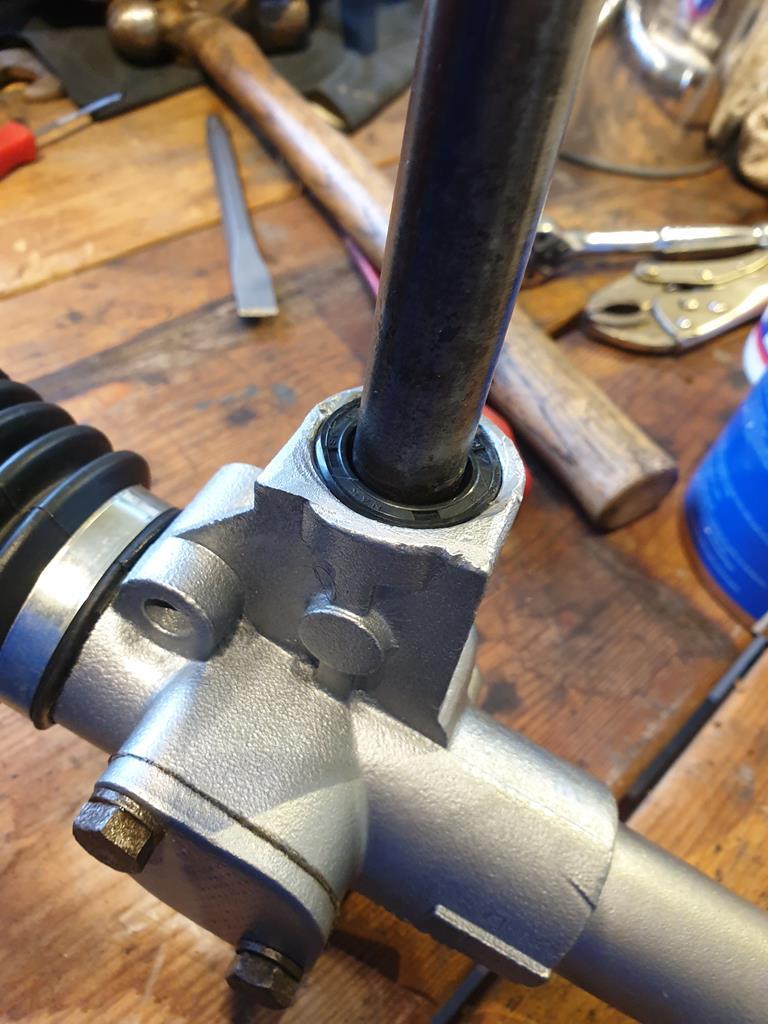 Then was a case of putting on boots and track rod ends and job done 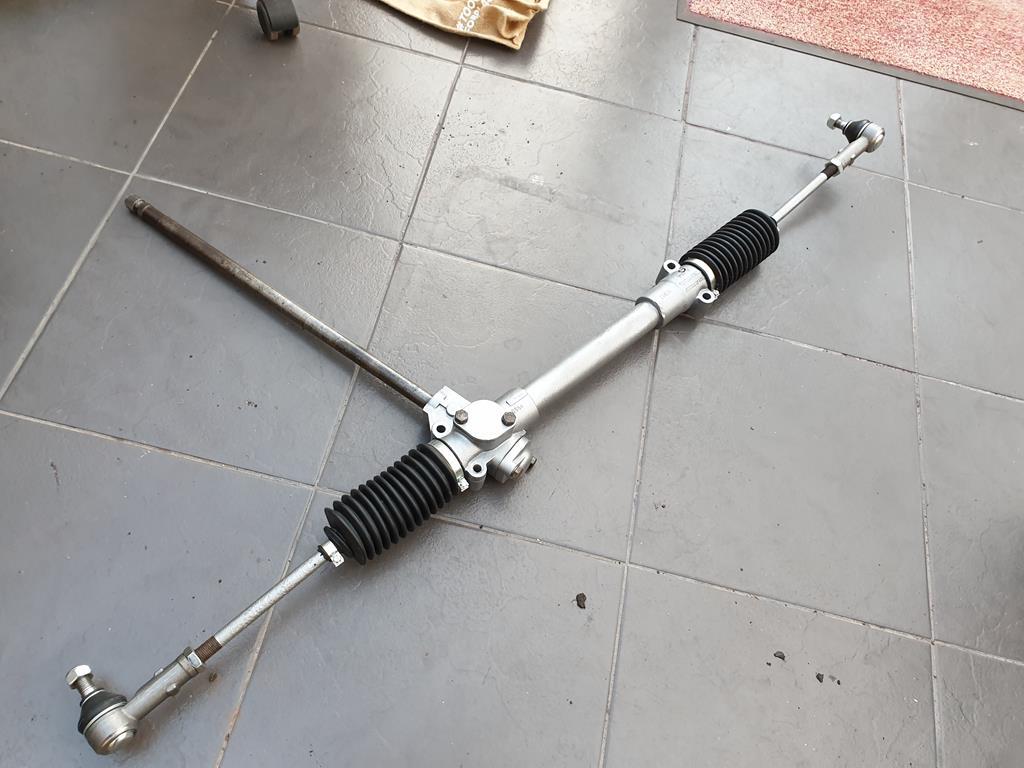 For my next job,(conveniently ignoring the partially disassembled engine in the garage for a sec) I decided to take a look at a gearbox 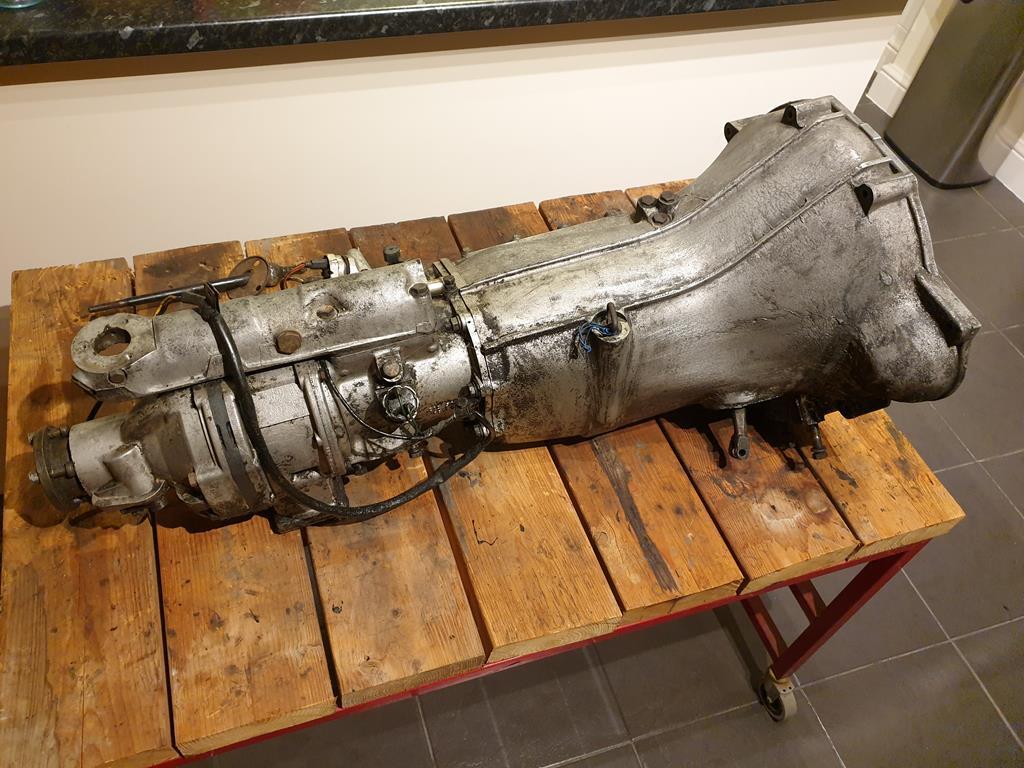 Specifically the 4 synchro with overdrive gearbox from the MG. These are pretty stout units and I don't recall this giving me any issues while I had it on the road. It was however coated in oil sludge and muck (the above pic was after a fair bit of cleaning already) so I had bought a load of gaskets and seals in preparation for cleaning it up and rsealing it all. I also wanted to learn a bit more about how it all works out of curiosity really. Taking off the side cover showed that the internals all looked in good condition 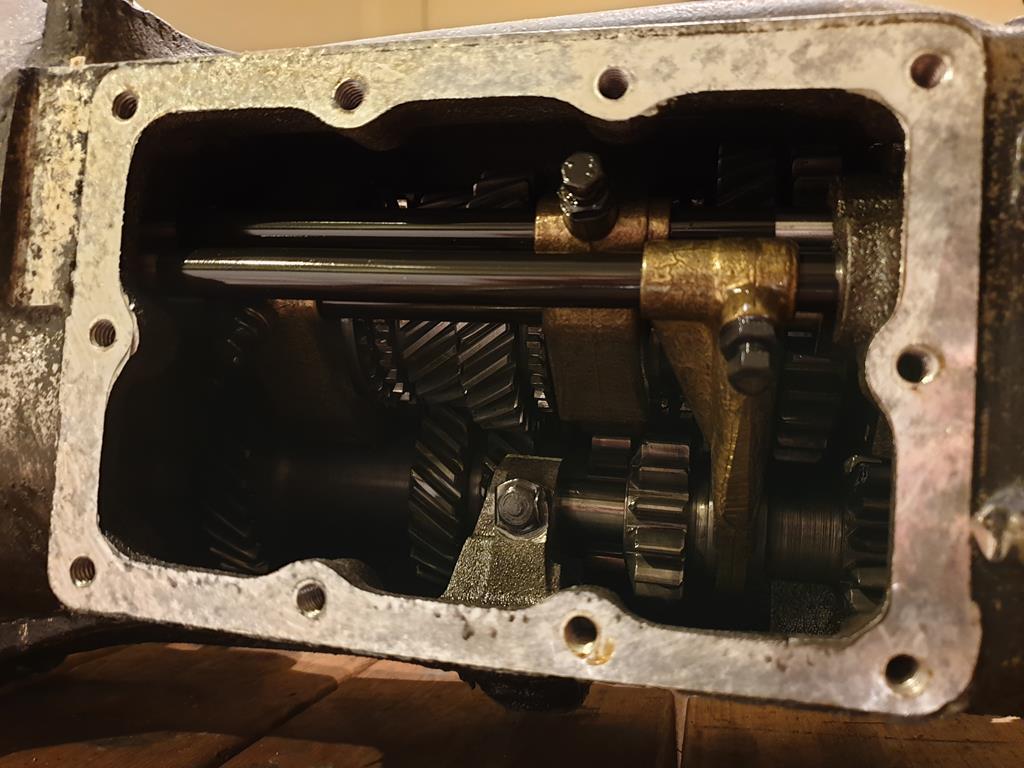 Then 6 bolts out the top and the remote housing comes off, did take a bit of tapping with a rubber mallet to get it off the dowels. 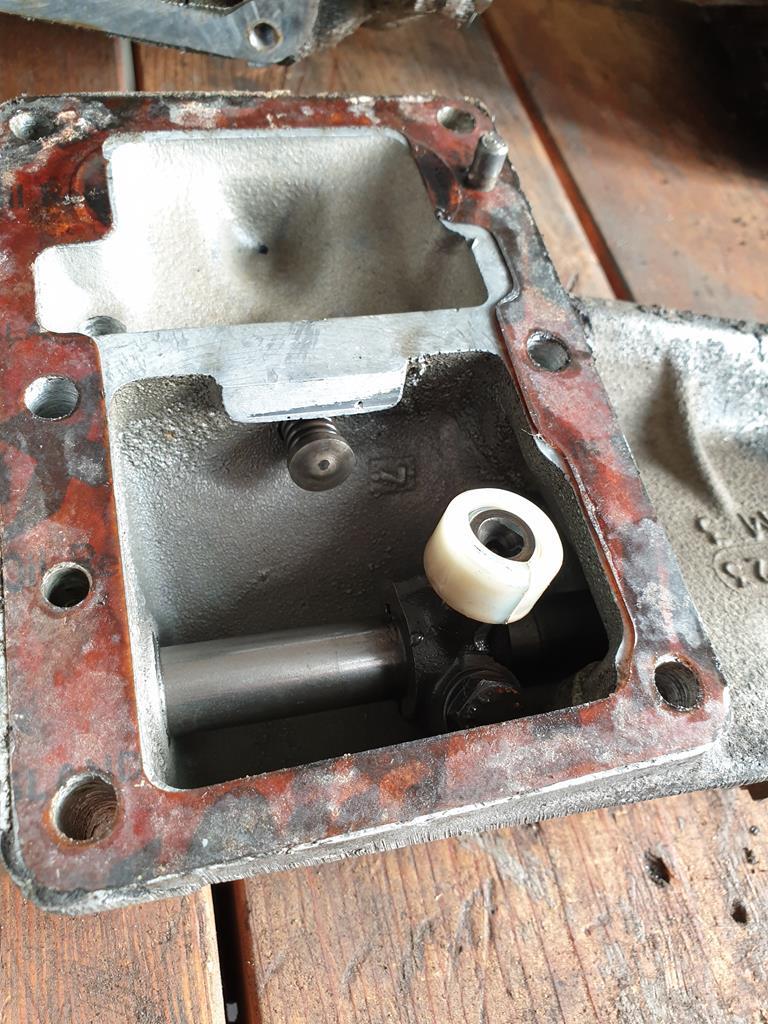 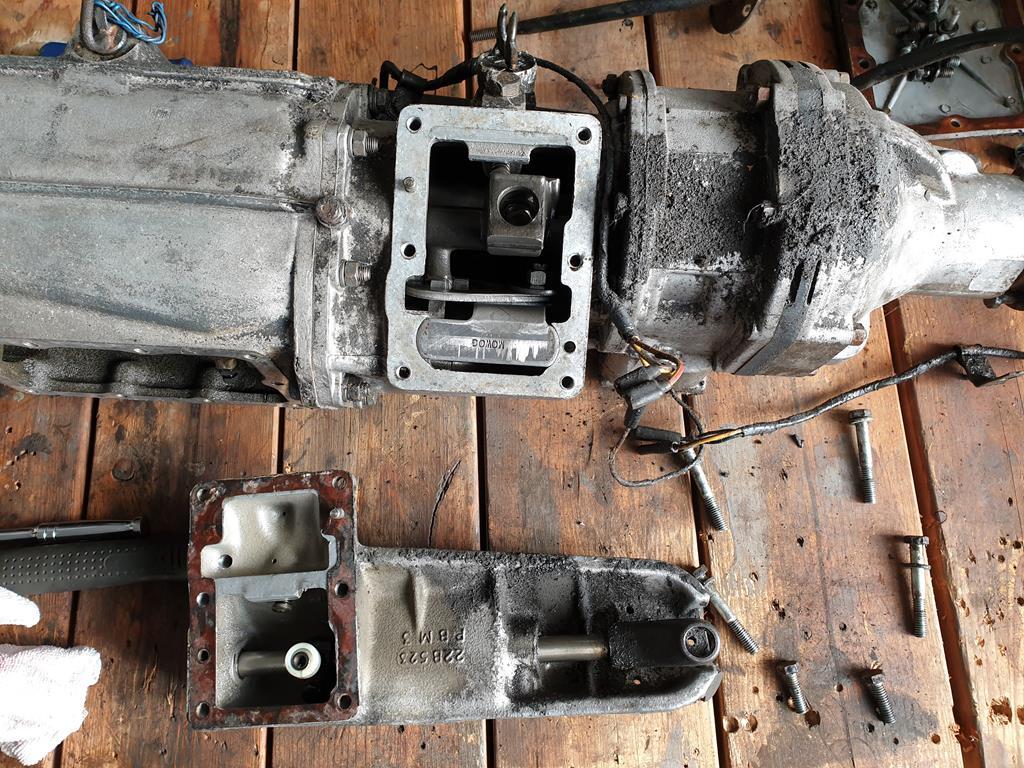 I don't know if this box has been apart before, but nice to see that the little plastic bush in there was in good condition. One thing I did always like about this box was the directness of the gearshift. The rather embarassing thing I'm finding with finally getting on with these MG jobs is how long ago I gathered some of the parts. For instance, back when I was still dailying this (2014 or earlier) the reverse lights stopped working, I sussed this out to be an issue with the switch and bought one, but due to the awkward access it never got changed! So at least I can do that now  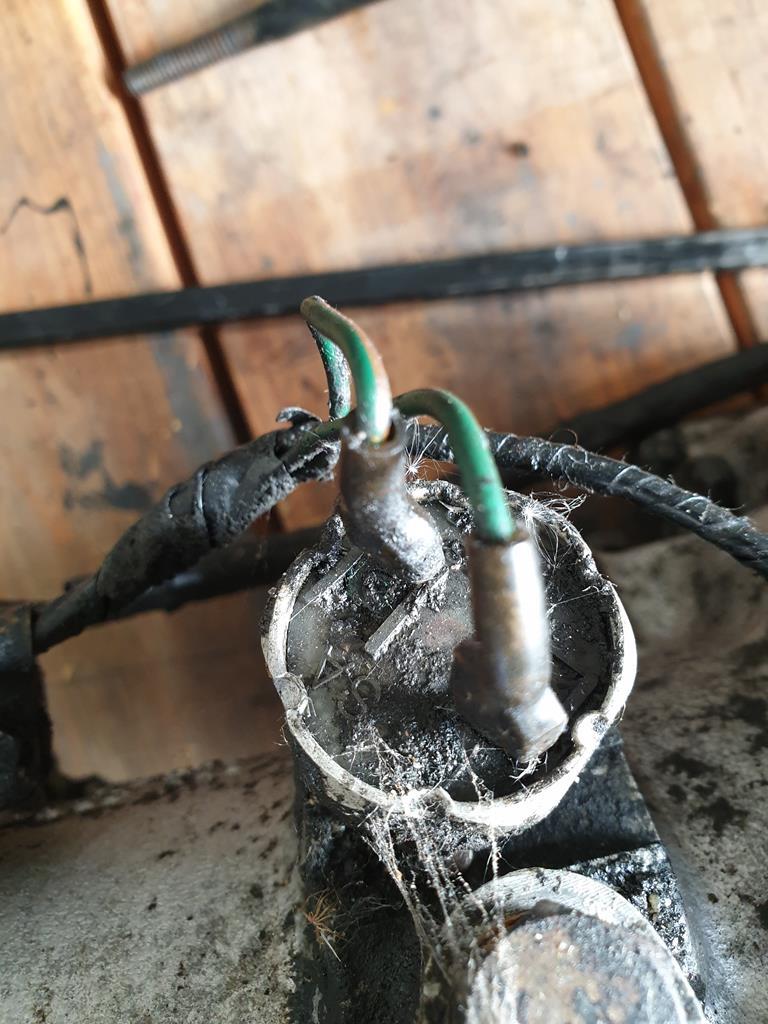 Then I got a bit carried away and decided to split the overdrive from the back of the gearbox. 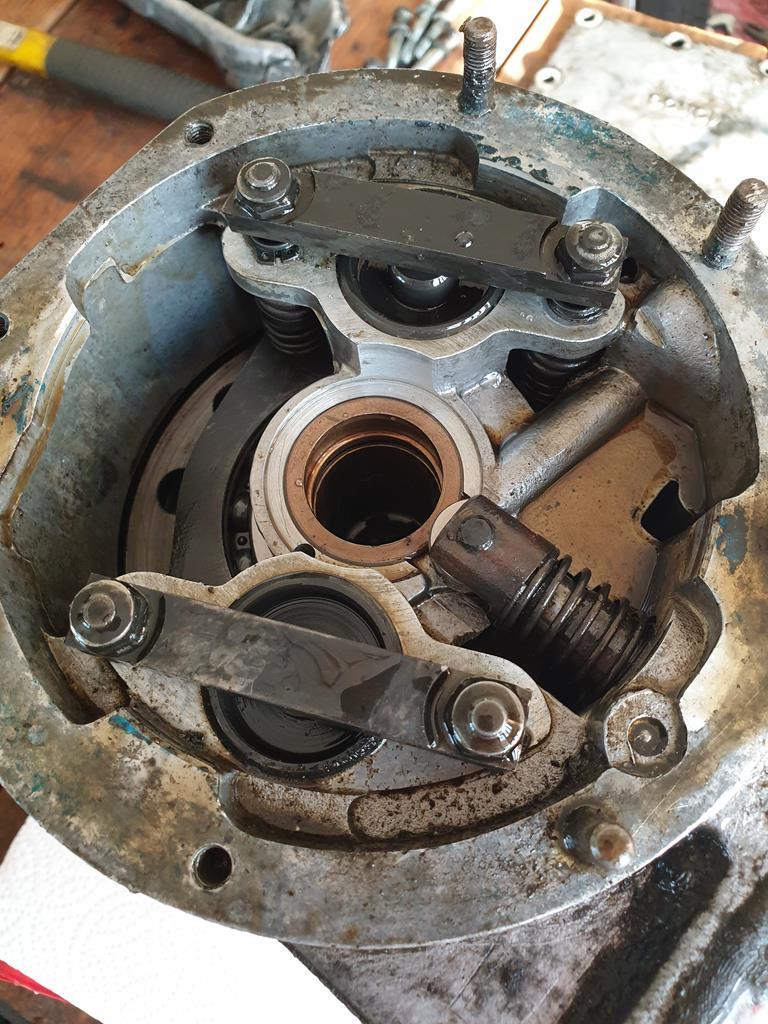 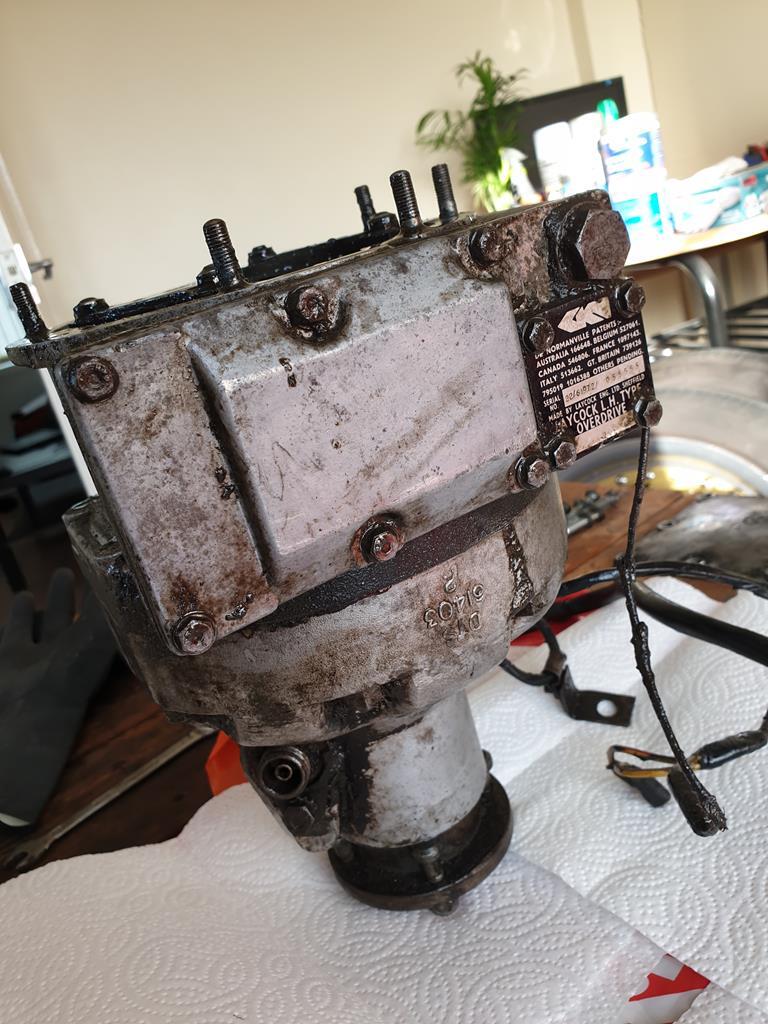 Pretty simple to do, a series of bolts and nuts and then pull the two apart, while trying to catch the remnants of oil that were hiding in the overdrive.. It initially looked quite clean inside the overdrive but spraying a bit of brake cleaner in there soon showed that there was quite a lot of grey-ish substance on bits, maybe zinc deposits or something? Seems to come off easily though so I'll give it all a good clean out 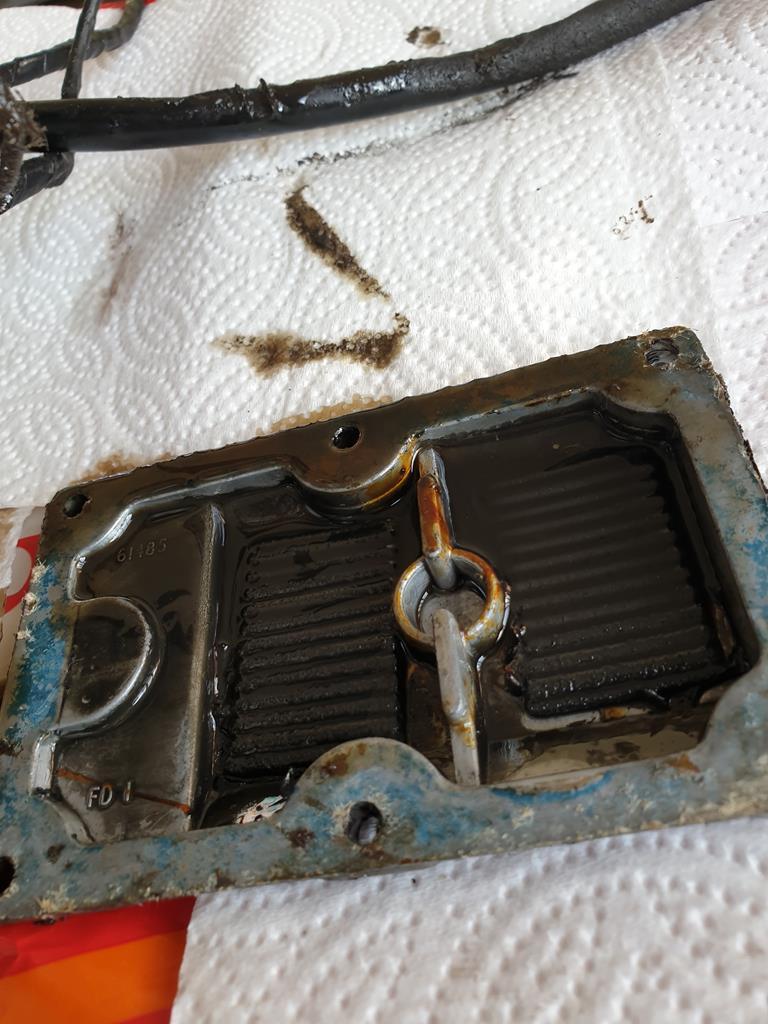 The sump of the overdrive has two magnets in it which were quite covered in material so I don't think this has been off in some time.. That will get fully cleaned out. Of some more concern were some bigger particles in the filter that sits above the sump. 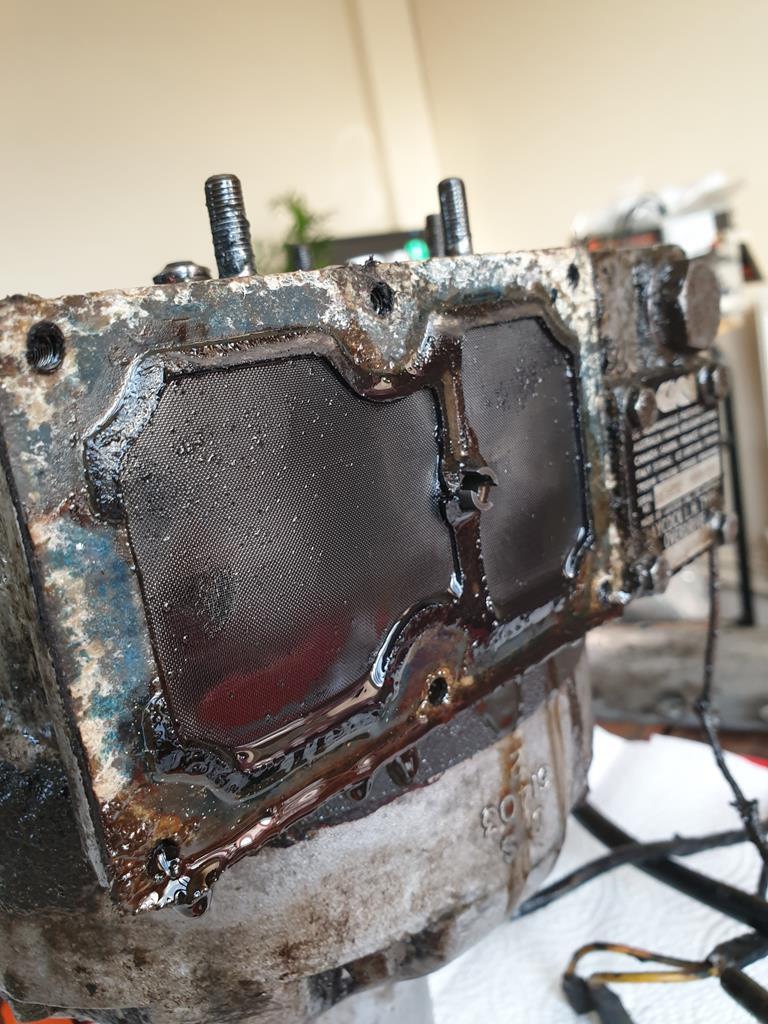 I've got a new filter but I'm not sure where those bits will have come from, a bit more poking in the overdrive netted me these bits as well.. 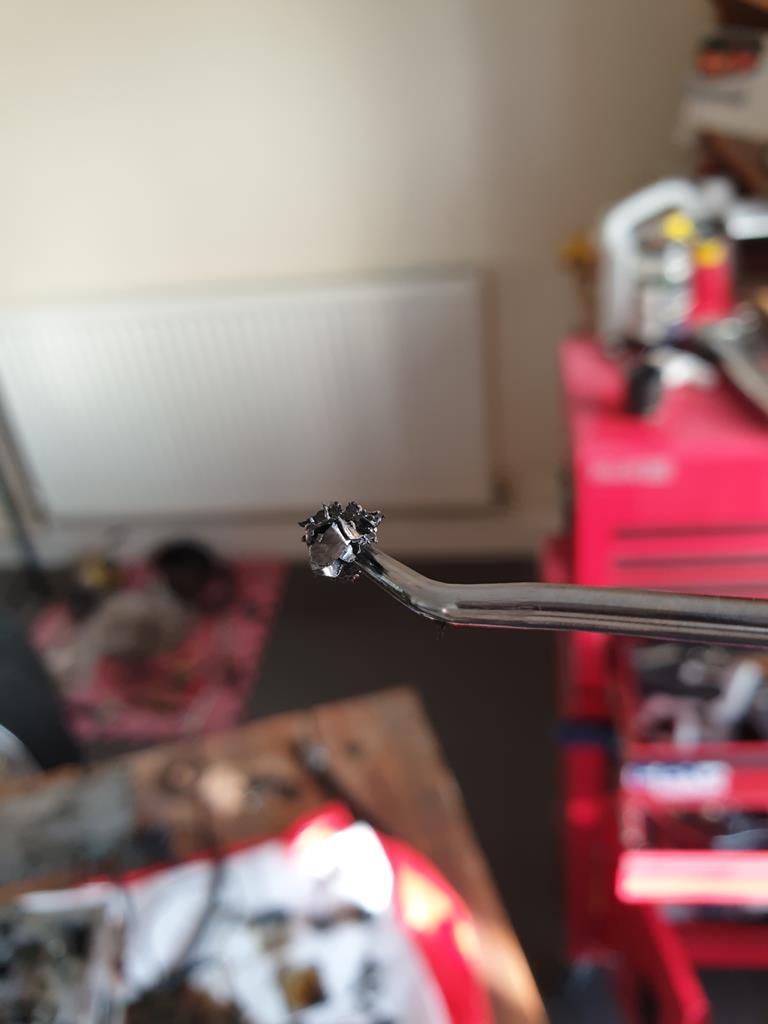 I think the overdrive was still working fine when I last used it, but I'll look into stripping it down and investigating further. |
| |
|
|
|
|
samta22
Club Retro Rides Member
Stuck in once more...
Posts: 1,276  Club RR Member Number: 32
|
|
|
|
|
Steering rack came out really nicely. Will be following your lead as am about to do mine.
Gearbox looks in good condition as you say. I'd be very wary of attacking the overdrive though, damn complicated things, so fair play for giving it a go.
Might be worth another watch of the Mark Evans series where he rebuilds his... Or rather gets someone else to! 😉😂
|
| |
'37 Austin 7 '56 Austin A35 '58 Austin A35 '65 Triumph Herald 12/50 '69 MGB GT '74 MGB GT V8'73 TA22 Toyota Celica restoration'95 Mercedes SL320 '04 MGTF 135 'Cool Blue' (Mrs' Baby) '05 Land Rover Discovery 3 V8 '67 Abarth 595 (Mrs' runabout) '18 Disco V |
|
adam73bgt
Club Retro Rides Member
Posts: 4,991
Club RR Member Number: 58
|
|
|
|
Steering rack came out really nicely. Will be following your lead as am about to do mine. Gearbox looks in good condition as you say. I'd be very wary of attacking the overdrive though, damn complicated things, so fair play for giving it a go. Might be worth another watch of the Mark Evans series where he rebuilds his... Or rather gets someone else to! 😉😂 Thanks  took me long enough to get round to it but happy with how it turned out Haha yeahh I did a bit more reading about taking the overdrives apart, seems the general wisdom is to not do it 😅 funnily enough though, the Haynes manual I've got suggests just getting stuck in and taking it all apart haha I'll probably just stick with giving it a really good clean out with carb cleaner and then putting it back together with my new o rings etc. I did accidentally put a pick tool through one of the little mesh screens that wasn't in my kit though so I'll need to get one of those from somewhere... |
| |
|
|
adam73bgt
Club Retro Rides Member
Posts: 4,991
Club RR Member Number: 58
|
|
Nov 22, 2019 22:09:05 GMT
|
Been meaning to do an update on this, not a great amount of progress but there has been lots of cleaning going on! Bit of before and after on the body of the overdrive itself 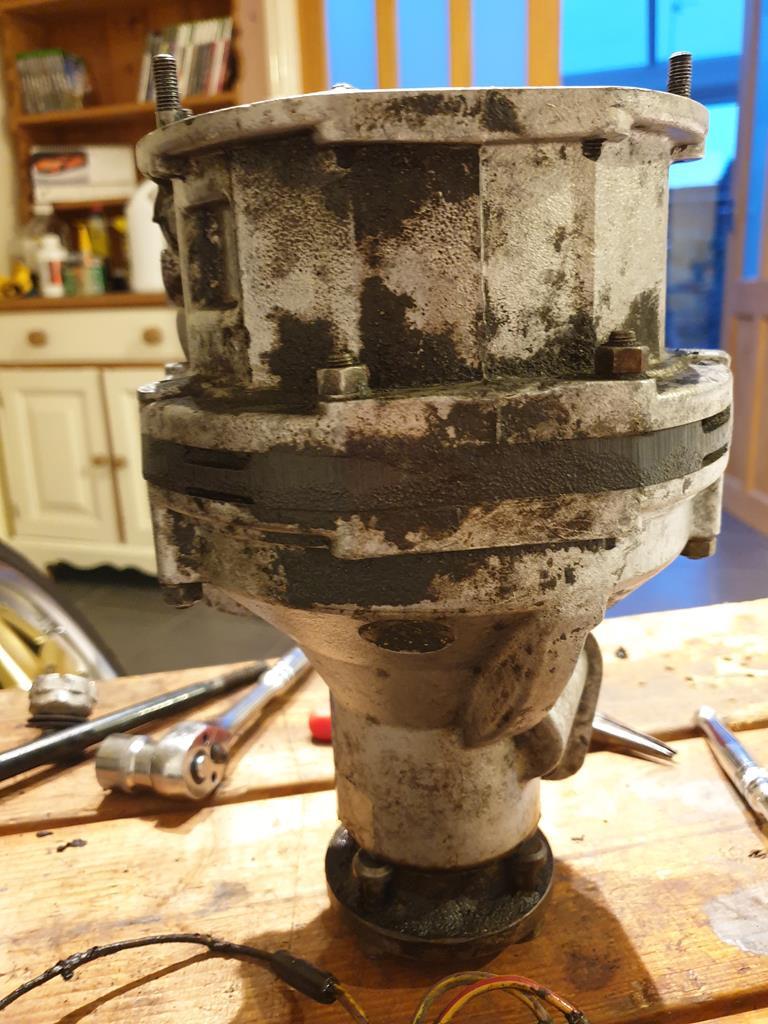 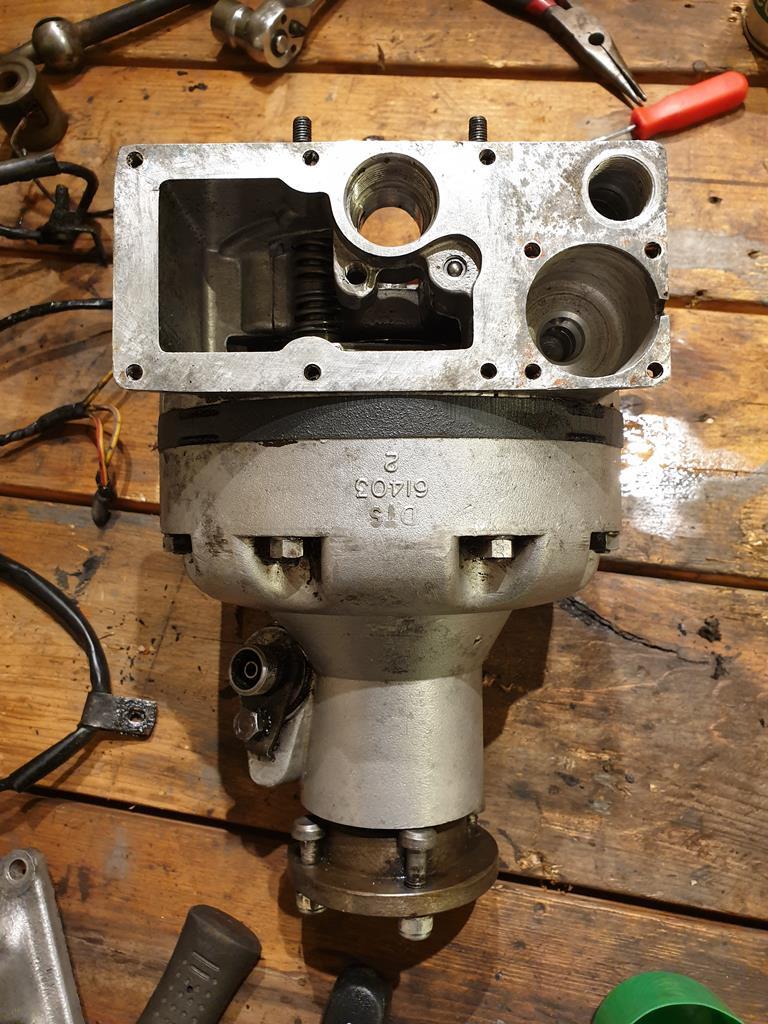 The remote housing came up nicely as well with a bit of wire brush action 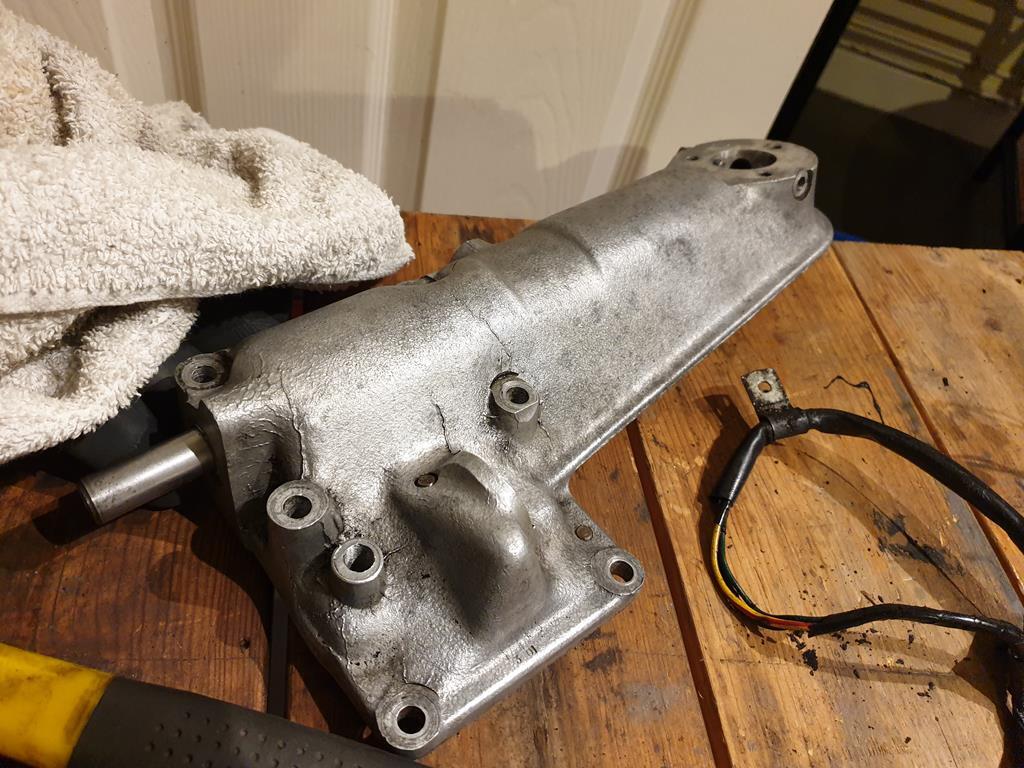 I then spent ages cleaning up every last bit that I'd taken off so that everything was reasonably clean of muck and grime 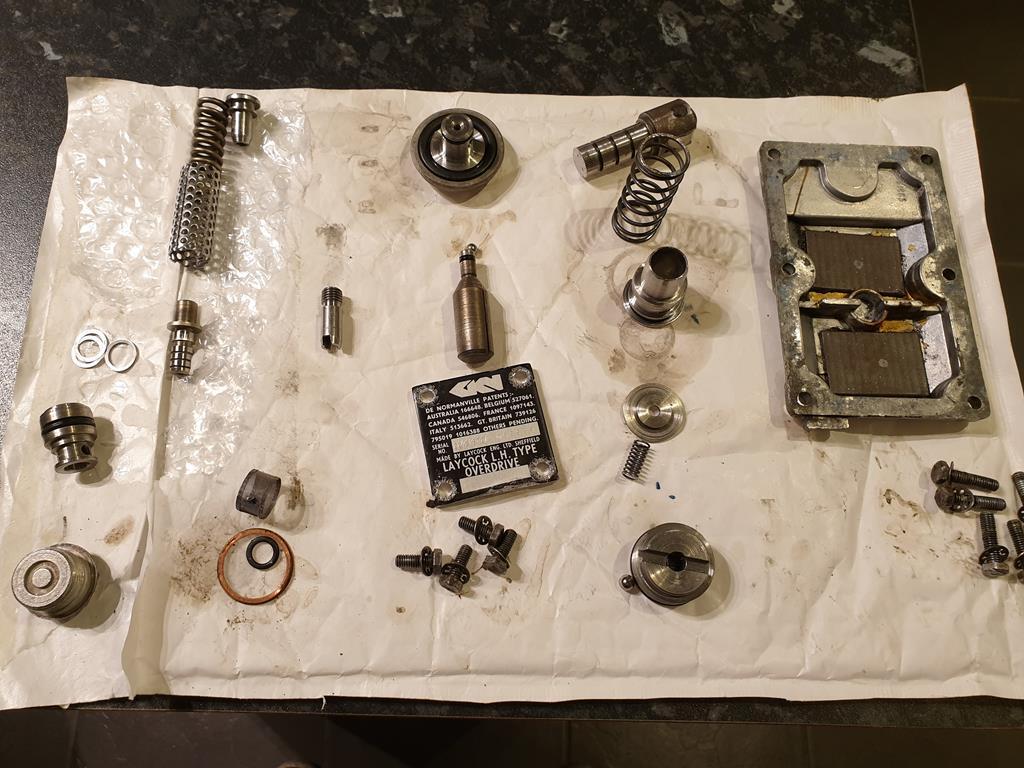 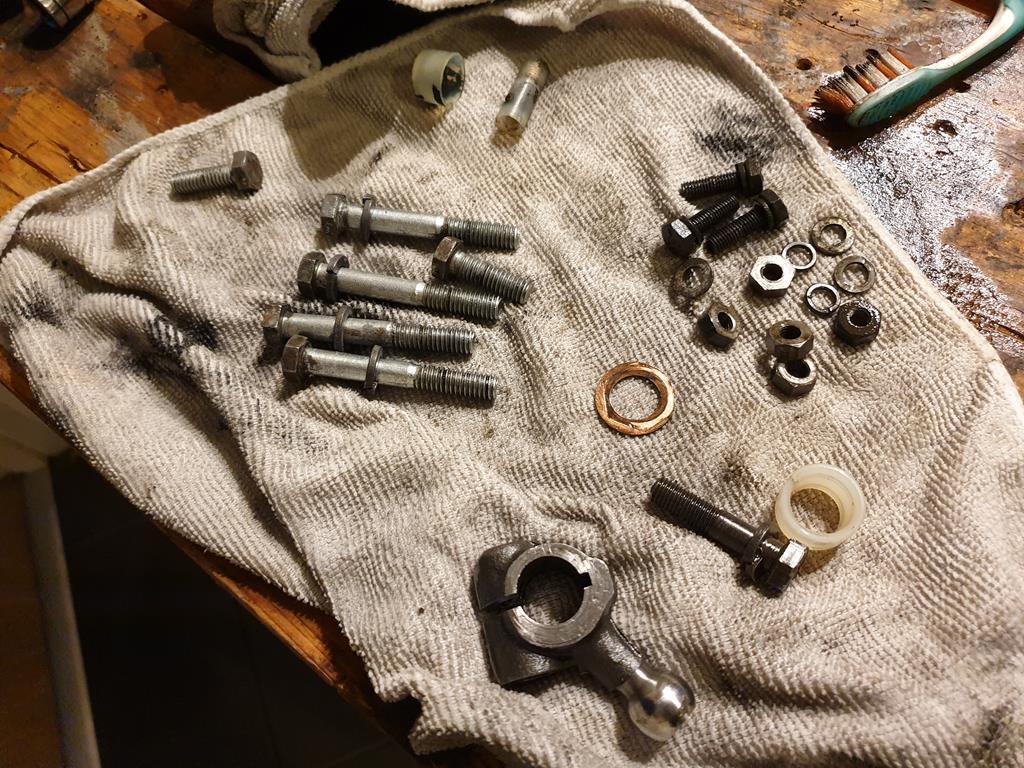 Bit hard to see with all the overdrive internals laid out, but there were essentially three main sub-assemblies that I removed, the Relief Valve (bits on the left), the Solenoid Valve (bits in line with the black cover, without the solenoid itself) and the Oil Pump (parts laid out next to the sump) I had bought an overdrive "seal/flter" kit some years ago, turns out the O rings in this kit just covered the ones that are part of the Solenoid Valve 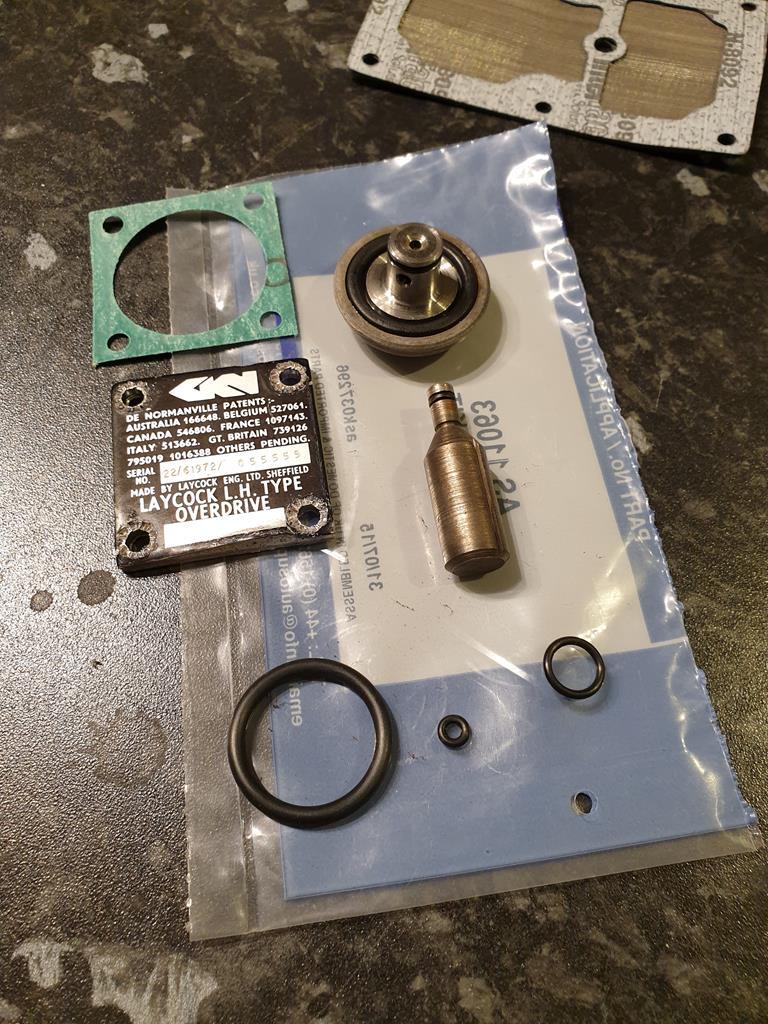 This was well worth doing as some of the O rings had gone a bit flat and hard over time so were overdue a change. This did mean I had to get onto ordering new O rings for the other bits as well 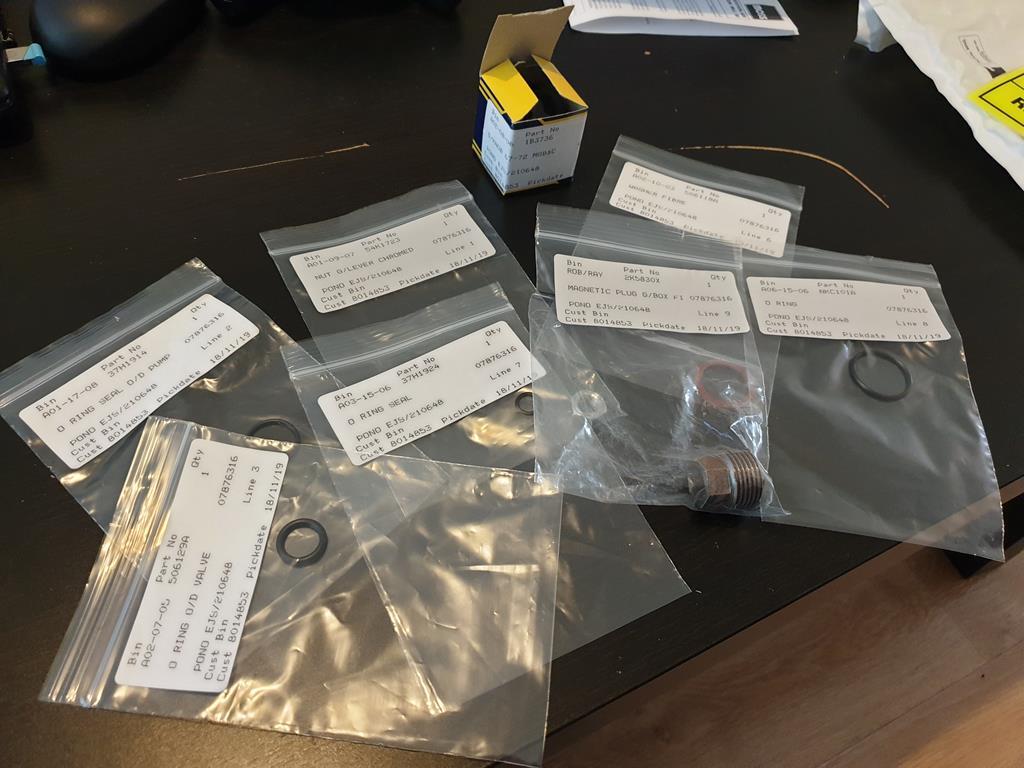 I think I've said it previously, but while they're not the cheapest, Moss really are probably the most handy place to get MG spares when you just need odd little bits here and there. This lot netted me the O rings needed for the Oil pump and Relief valve along with some other bits. These are the component parts of the oil pump, going from the plug on the right, up to the piston that rides on a cam thats on the mainshaft going through the gearbox/overdrive 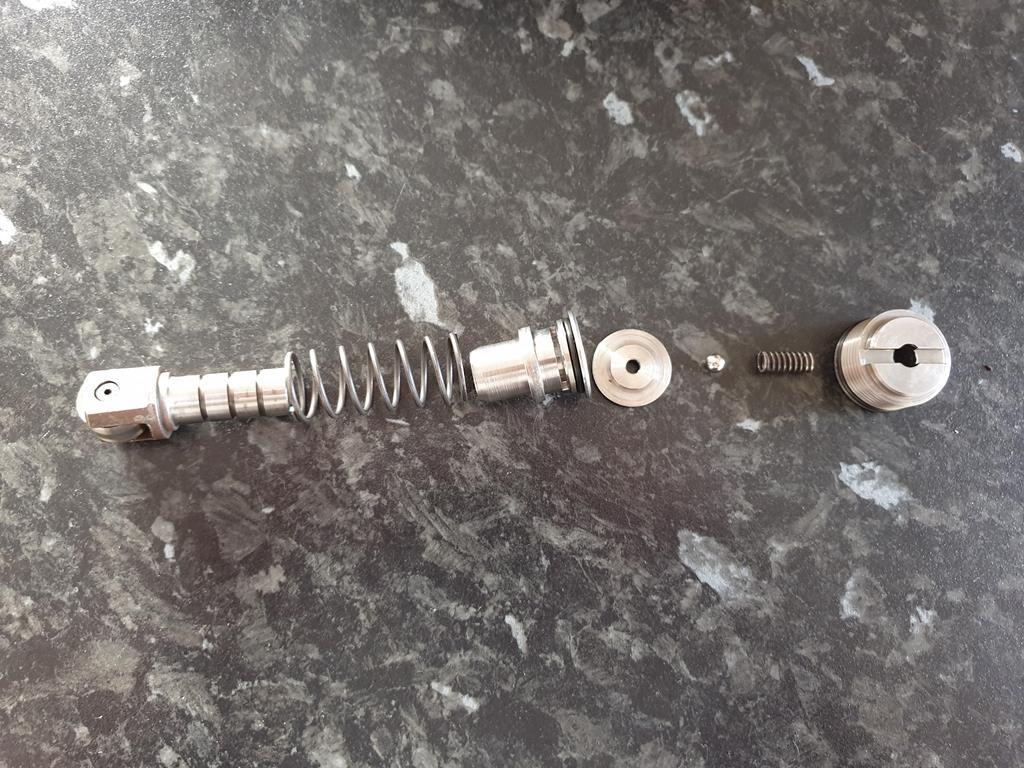 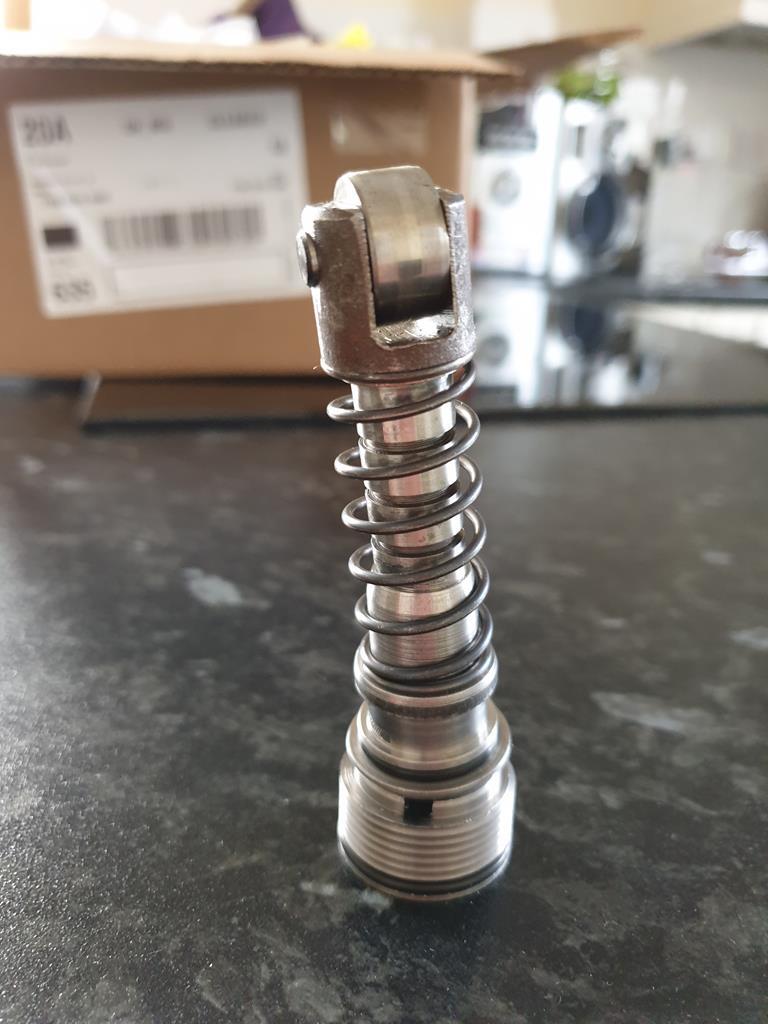 The piston was given a clean and polish up to ensure that it moved really freely in the pump body. The O rings on both the pump body and the sealing plug were replaced 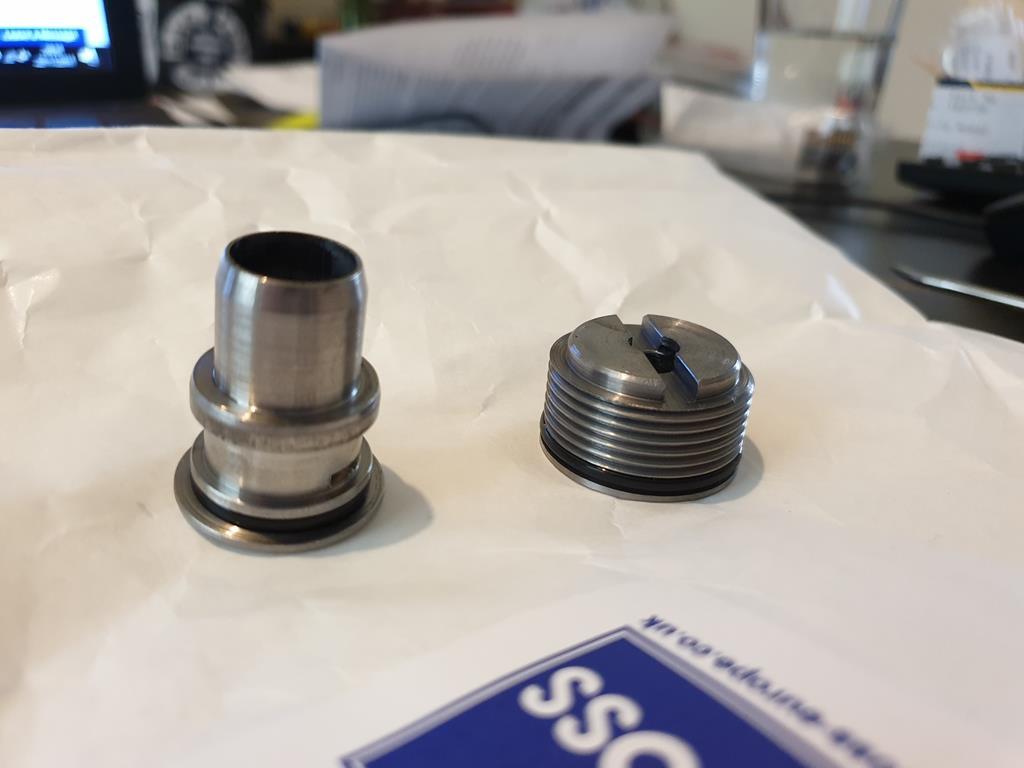 That assembly has been set aside for the moment as I think it's going to be easier to refit these after the gearbox and overdrive have been reunited as its quite crucial to get the piston lined up properly on the cam to ensure that the oil pump works. Next up was the relief valve 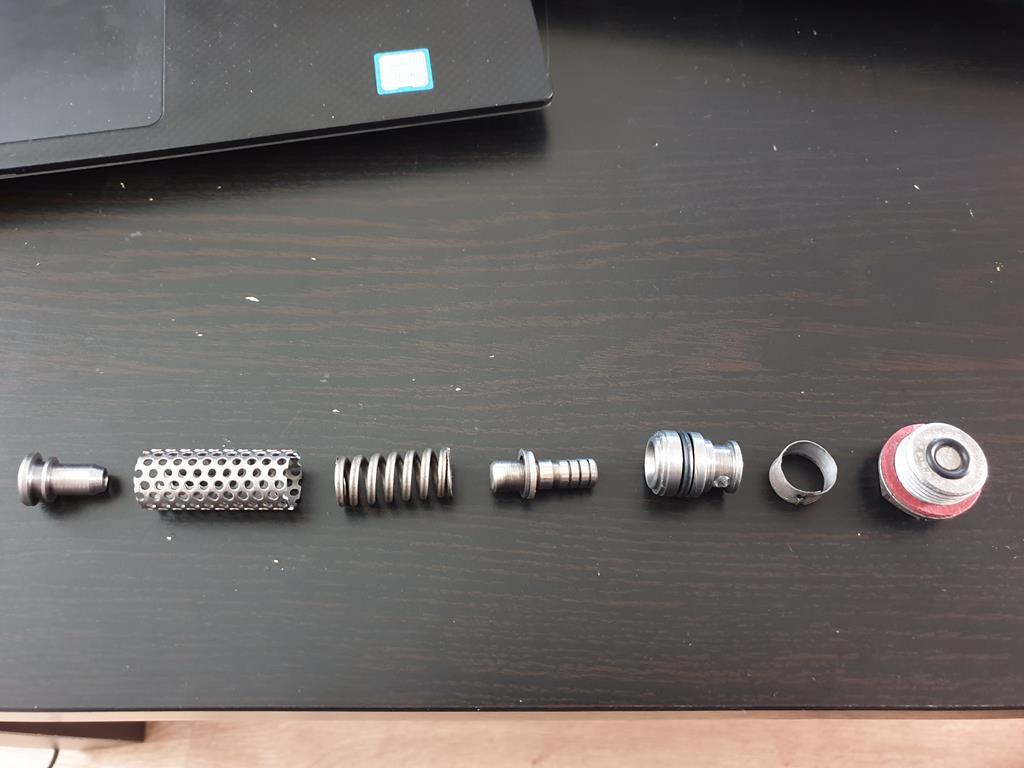 As with the Oil pump, I had to do a bit of work to the 4th and 5th parts in the above photo to ensure they moved smoothly in relation to each other, the 4th bit (can't remember/don't know the proper name) also has a washer and two thin shims on the upper side which I was very careful to keep track of 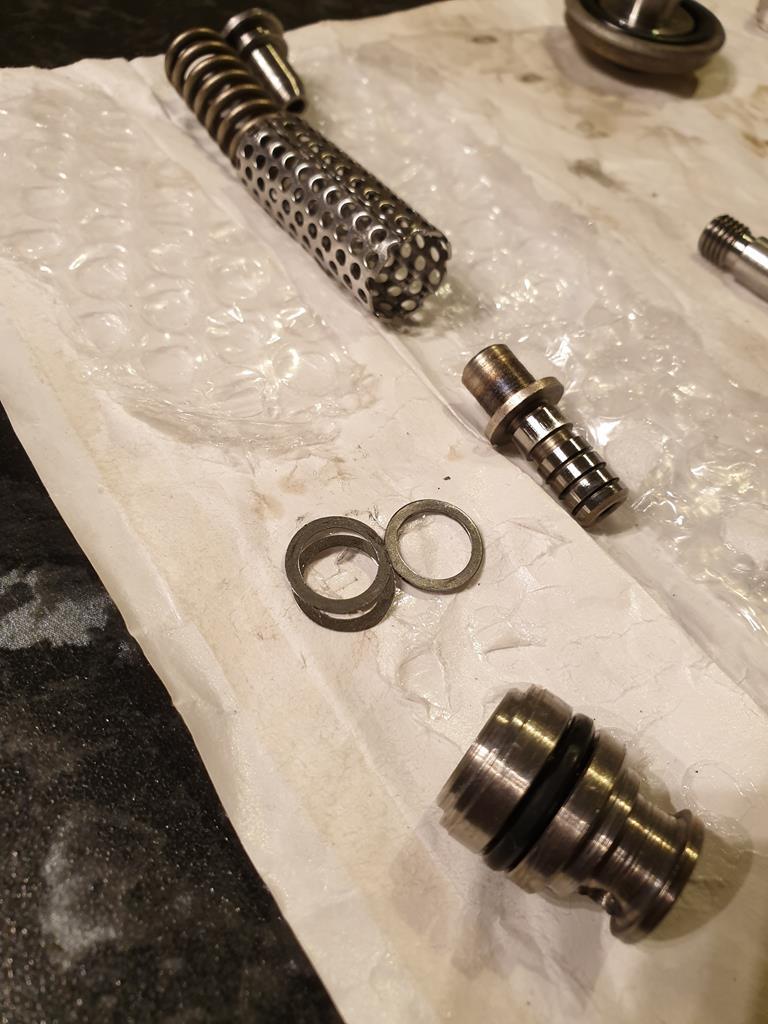 The O Rings were pretty straightforward to swap out, and a new fibre sealing washer was put on the plug. Oddly it was a copper washer that I took off, but I trust it will do the job. 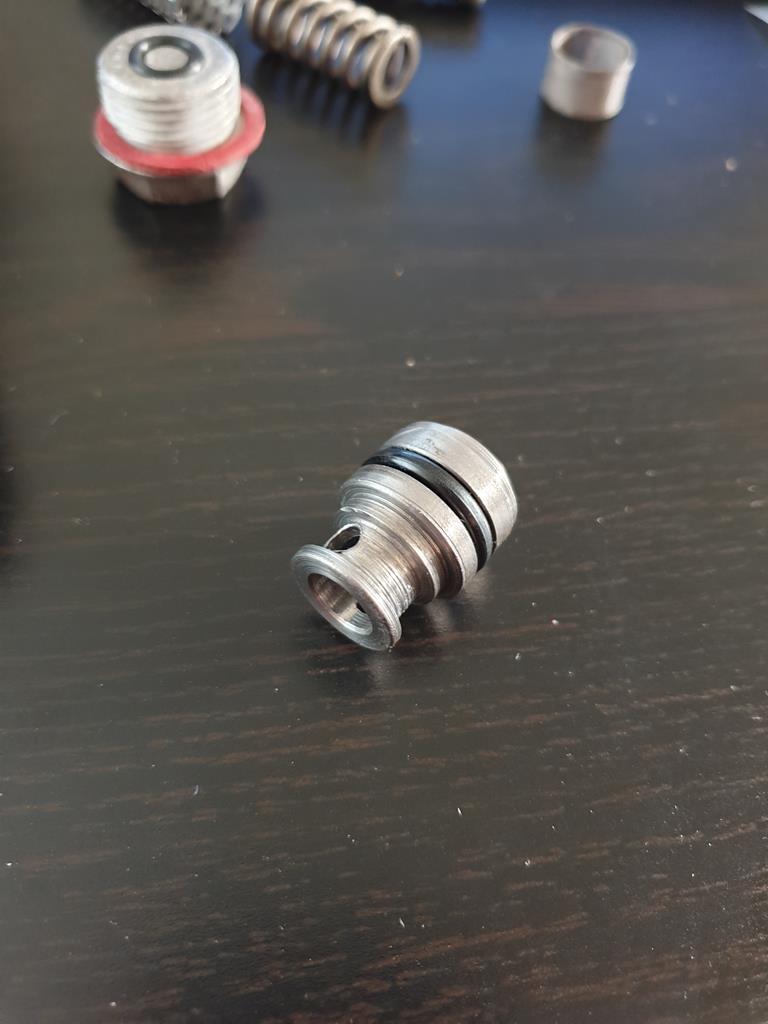 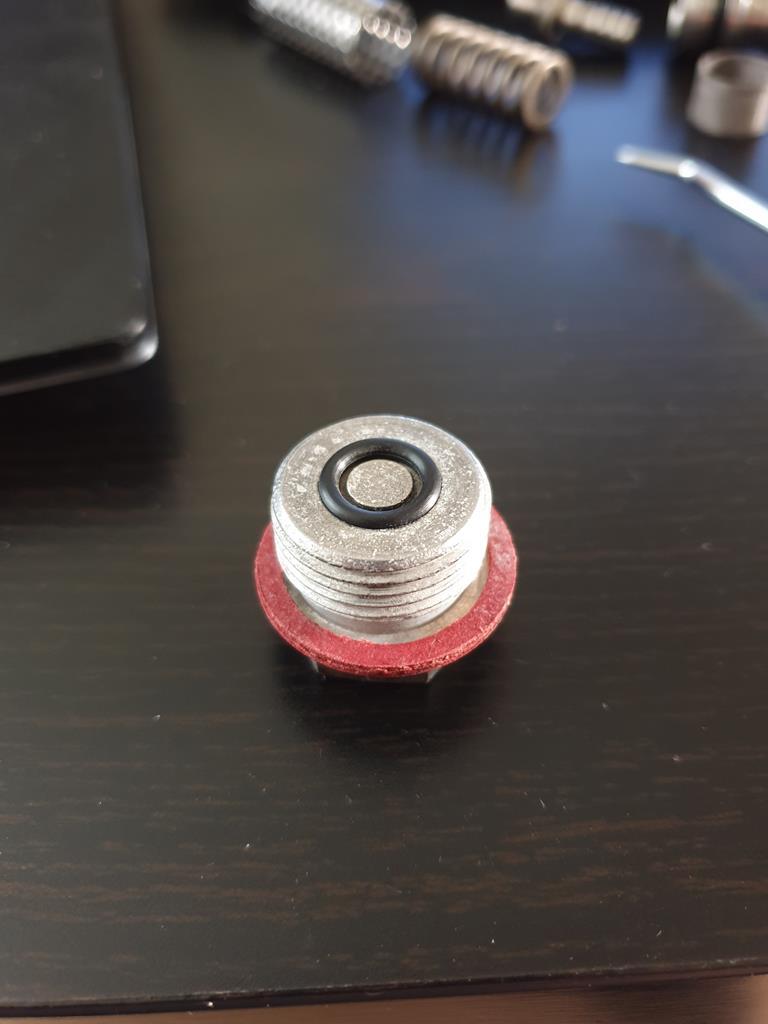 I was going to change the mesh but on closer inspection its fine really, so I just assembled it all together and have installed it back into the overdrive body, using some oil to give it a bit of a pre-lube. 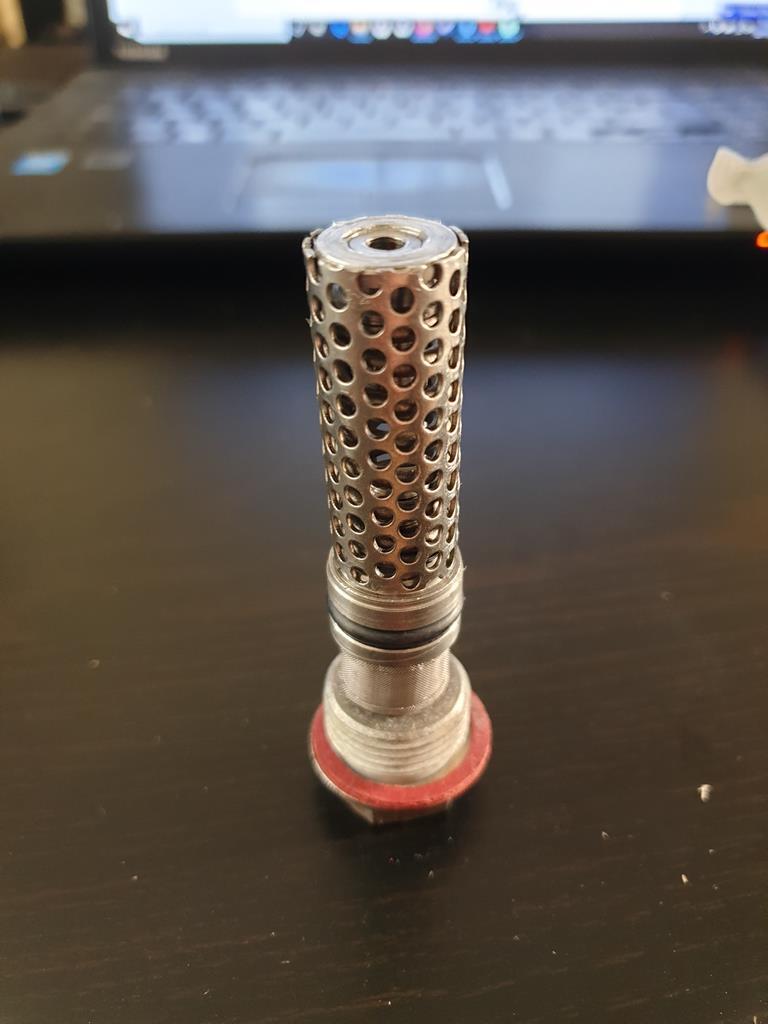 Last thing I've looked at is the solenoid itself and unfortunately it's looking like its seen better days 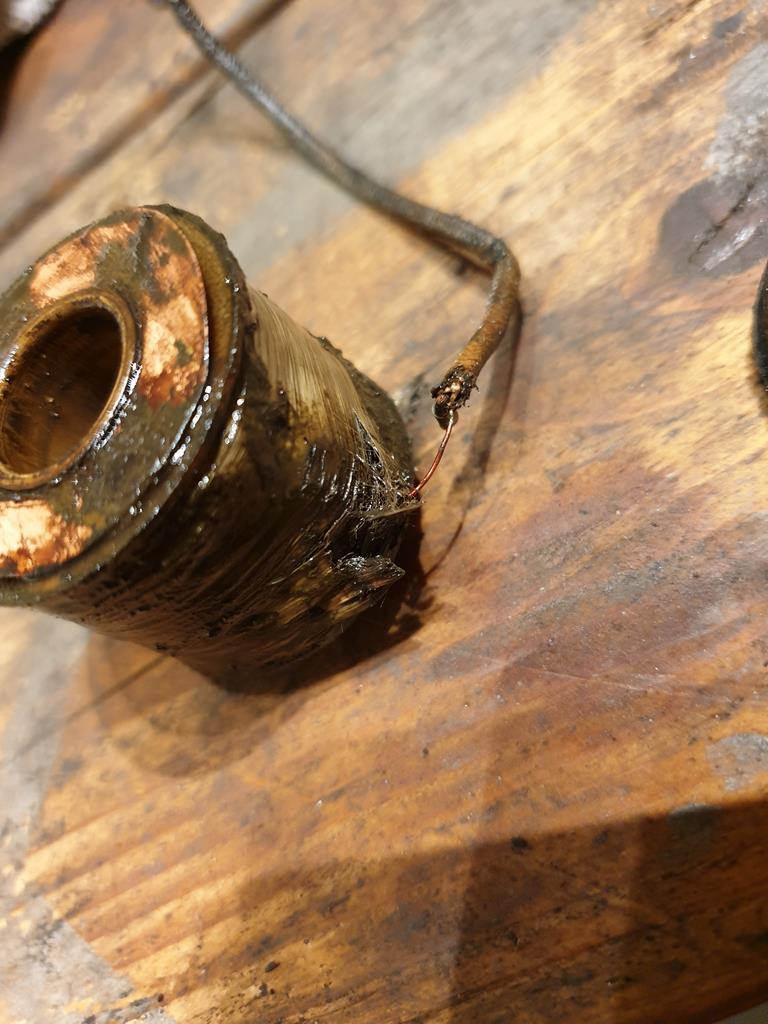 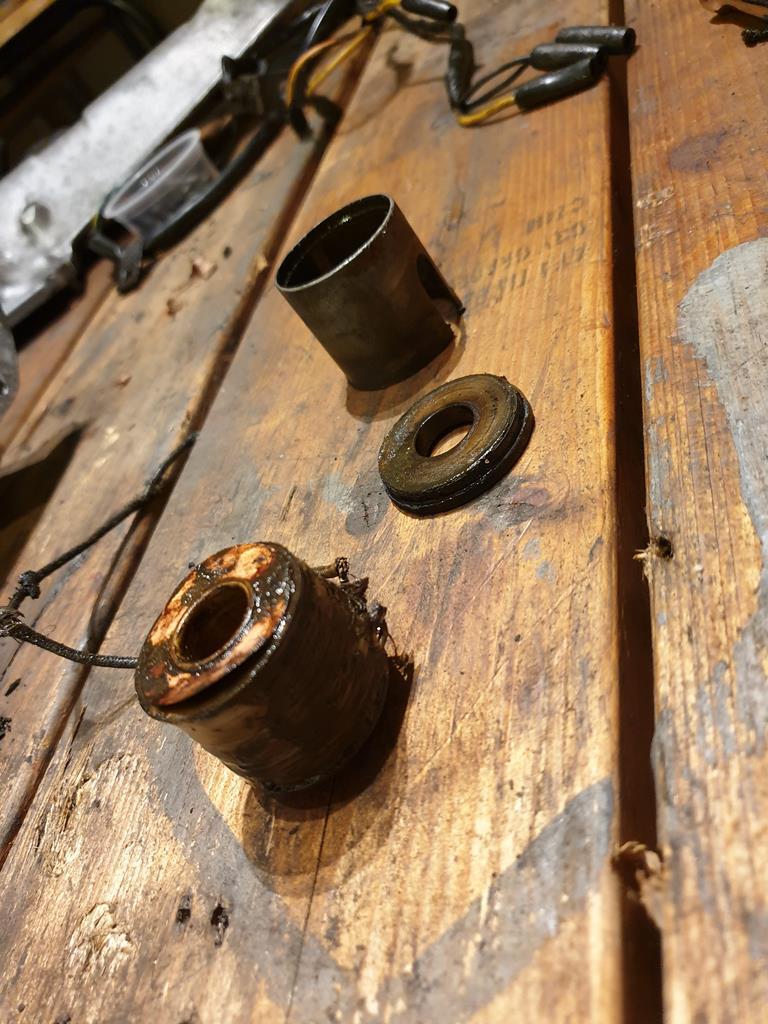 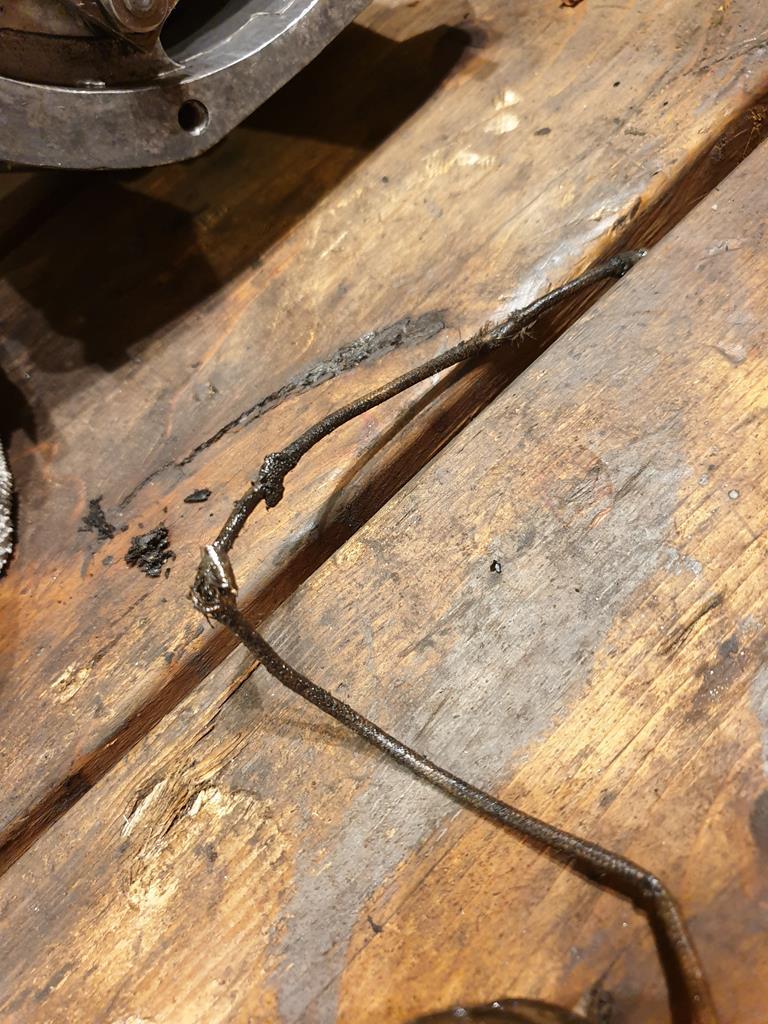 To ensure I'm only doing this job once and to ensure future reliability, I think I'll replace the solenoid altogether. I'm also going to get a new wiring harness for the gearbox/overdrive also, so it should tie up nicely. Next job should be to split the gearbox from the intermediate housing and to clean the rest of it all up as its still pretty greasy and horrible! |
| |
|
|
|
|
|
Nov 22, 2019 23:15:59 GMT
|
|
Nice work and thanks for the clear pictures and detailed explanations.....Well Done!
|
| |
|
|
CaptainSlog
Part of things
 
Posts: 510
Club RR Member Number: 180
|
|
|
|
|
Love the engineering on these parts. All that is required is to clean them and replace the o rings.
|
| |
|
|
adam73bgt
Club Retro Rides Member
Posts: 4,991
Club RR Member Number: 58
|
|
Nov 23, 2019 13:26:56 GMT
|
Thanks flyingphil  To be honest they mostly help me remember how to put it all back together! CaptainSlog yeah I agree, I like how it all comes apart nicely and seems to go back together well also. I just hope it still works in the end  |
| |
|
|
adam73bgt
Club Retro Rides Member
Posts: 4,991
Club RR Member Number: 58
|
|
Nov 28, 2019 23:30:33 GMT
|
Still been chipping away, gave the gearstick and retaining plate a bit of a tart up and fitted new gear knob 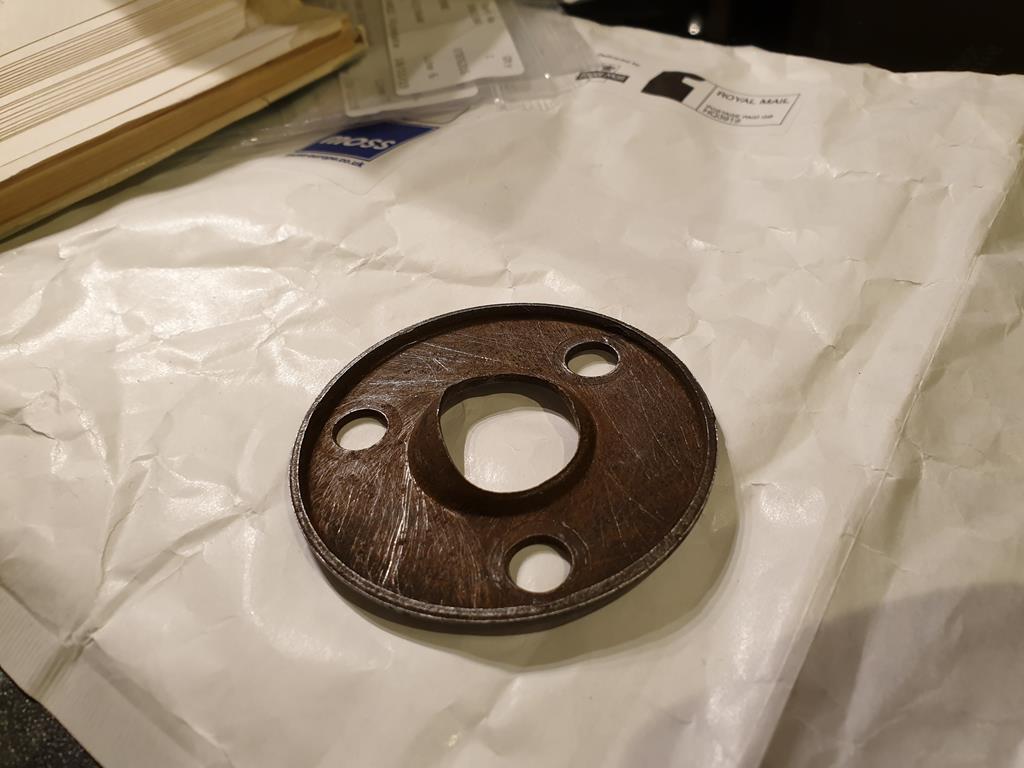 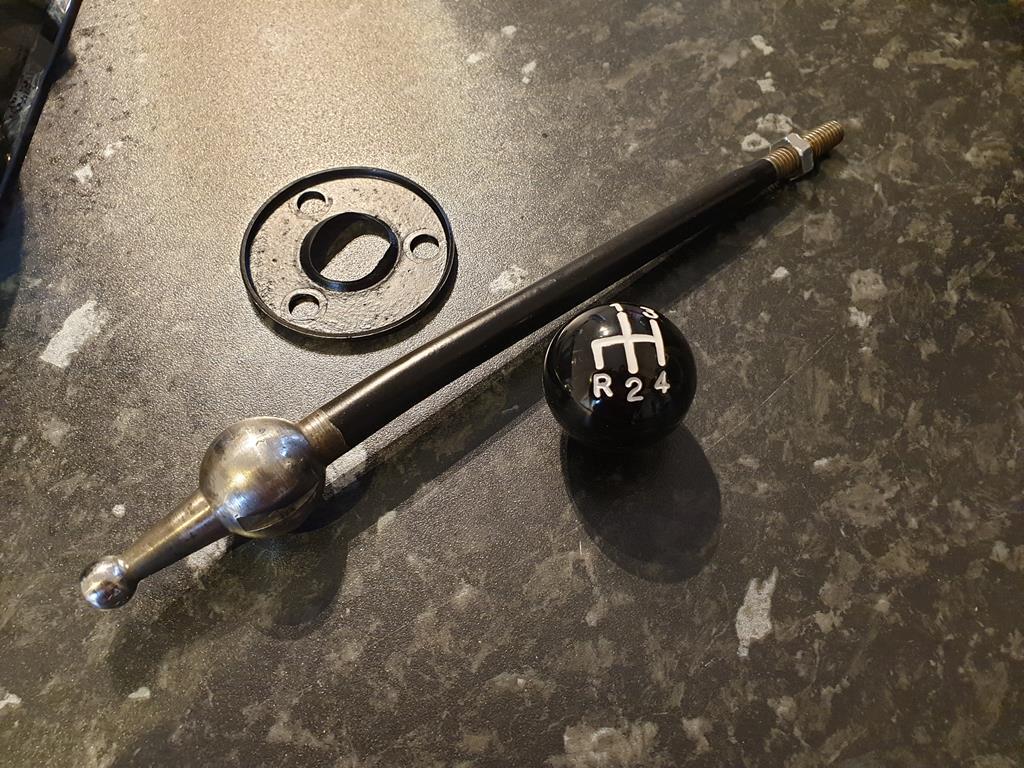 I'd bought one of these gearknobs way back when I had the car on the road but promptly ruined it by screwing it down too far  the nut on the gearstick should help prevent this happening again! My new solenoid for the overdrive arrived from Moss 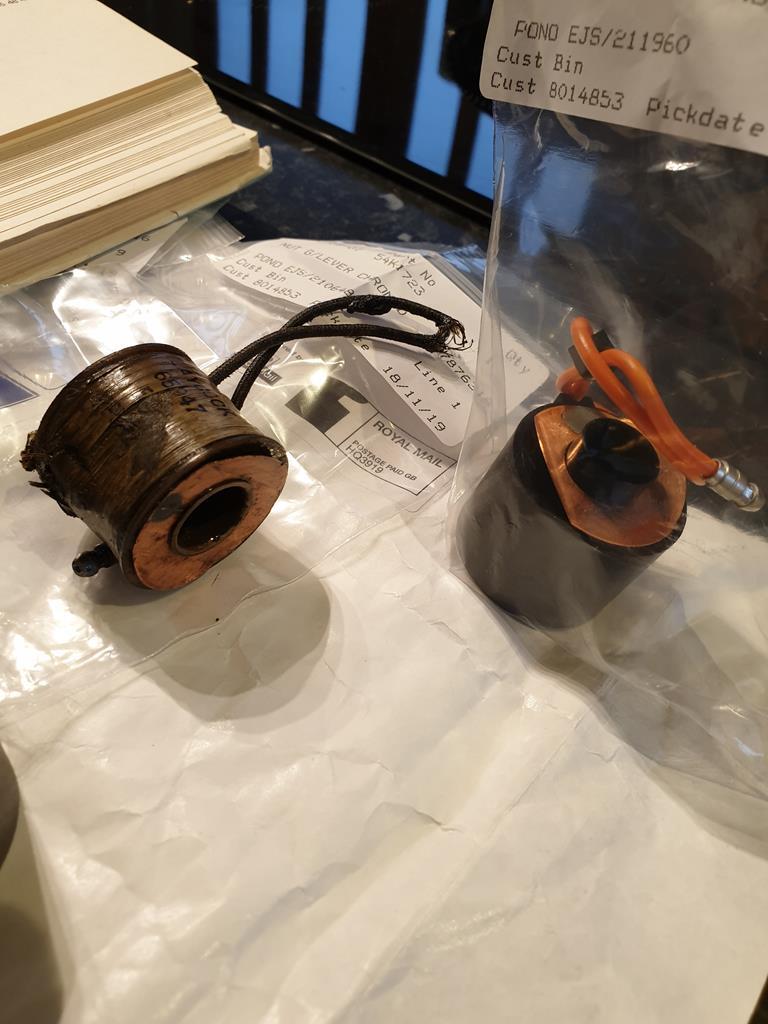 There is a subtle difference between them, there is a copper spring which acts as an ground for the solenoid, on the original one its on the top of the solenoid, but on the new one its on the bottom. 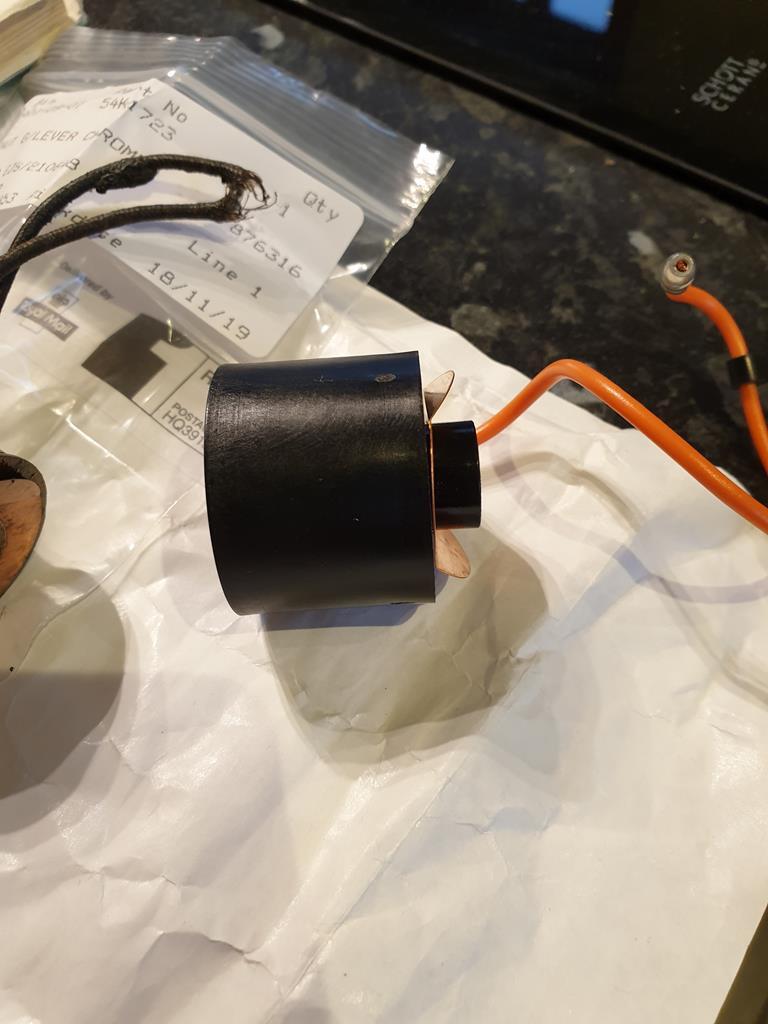 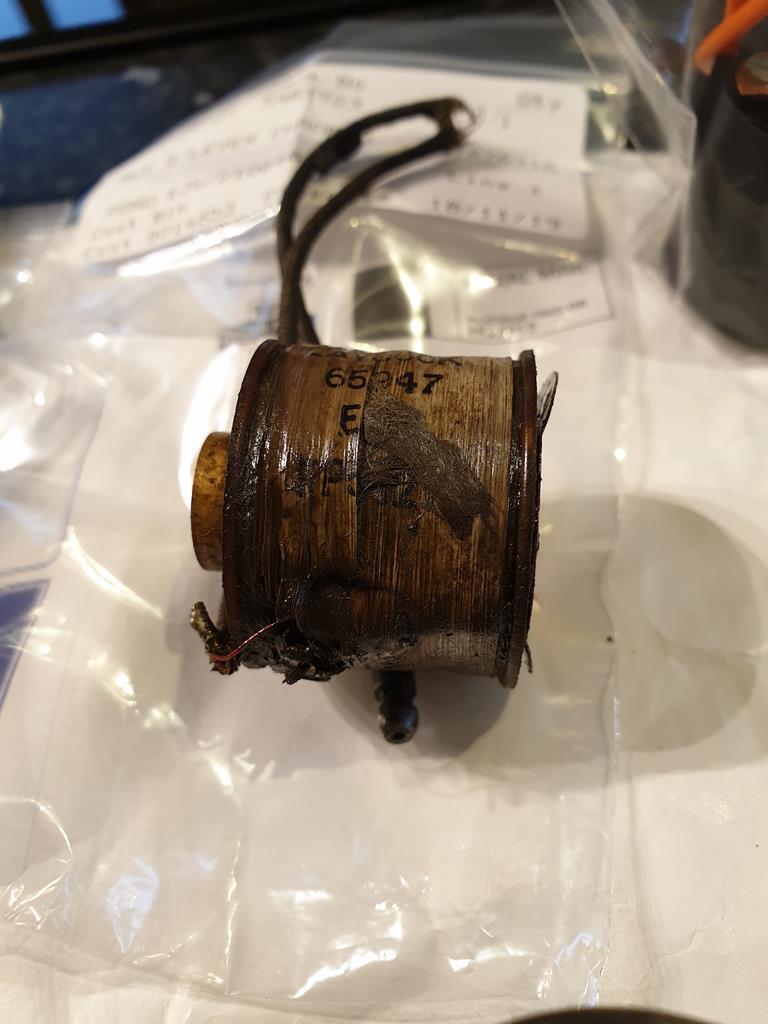 The new one is more "springy" anyway so thats good. These are the components of the solenoid assembly 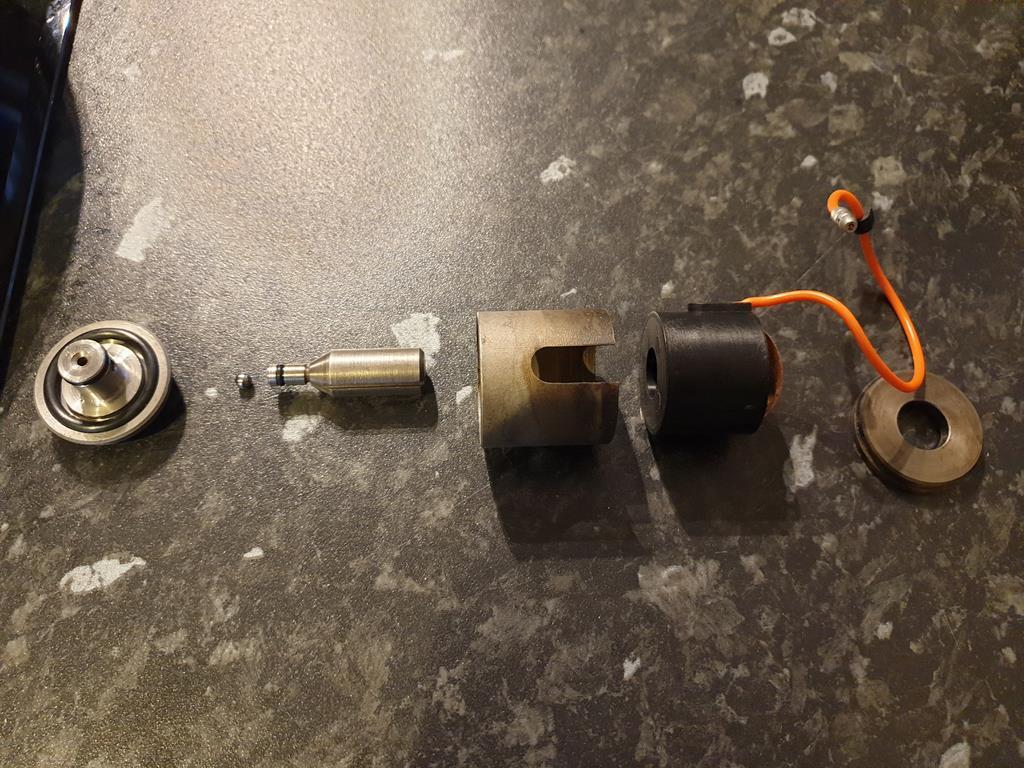 From the top on the left to the bottom on the right. The ball bearing goes in the underside of the top cap on the right like so 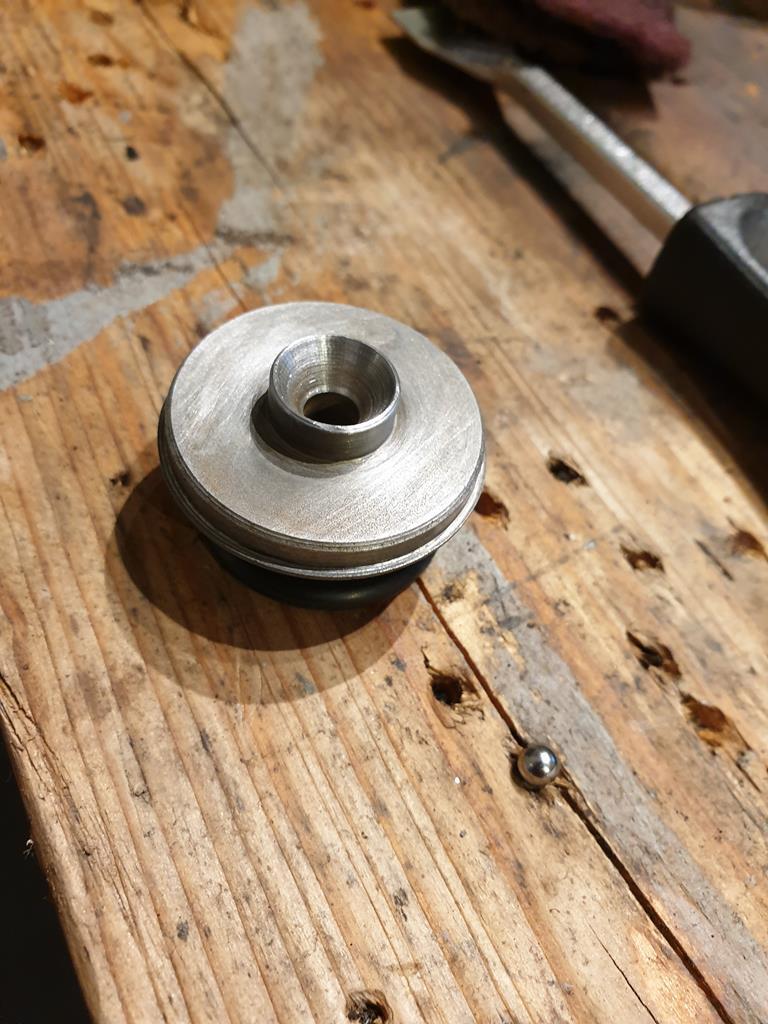 The plunger (I think its called) then goes up underneath and holds the ball bearing in 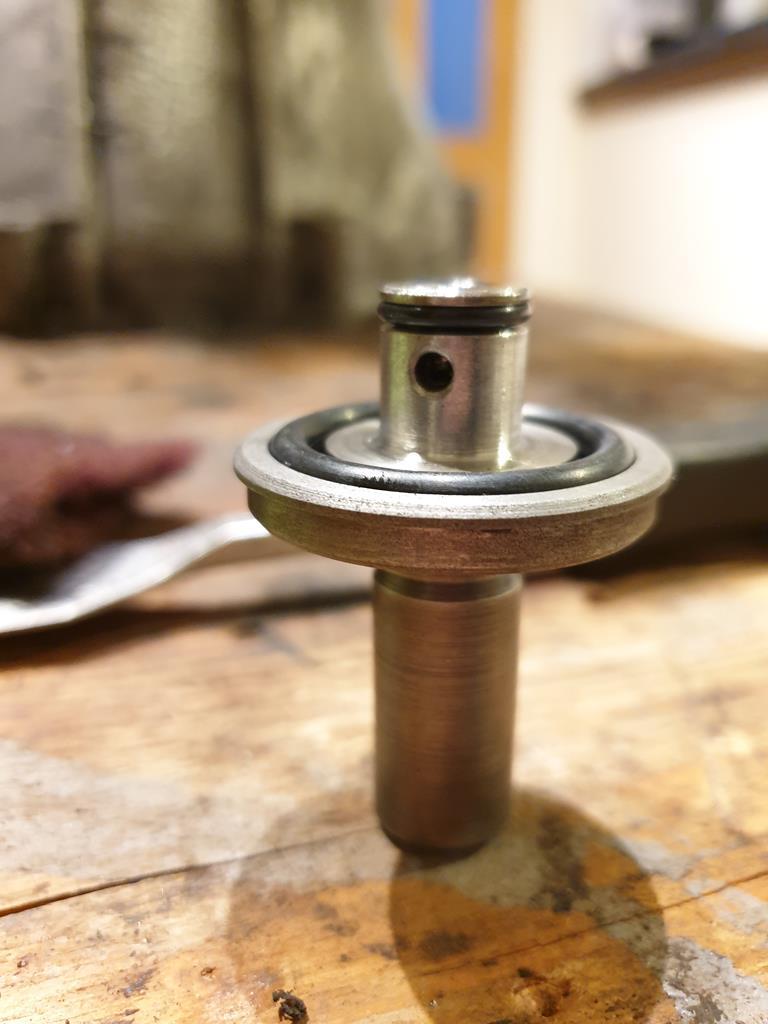 To get it in the overdrive unit itself, I found it easiest to put the unit the right way up with the hole for the solenoid assembly on the bottom and then push the top cap/ball bearing/plunger assy up into it. Once its in, I could then turn the unit over 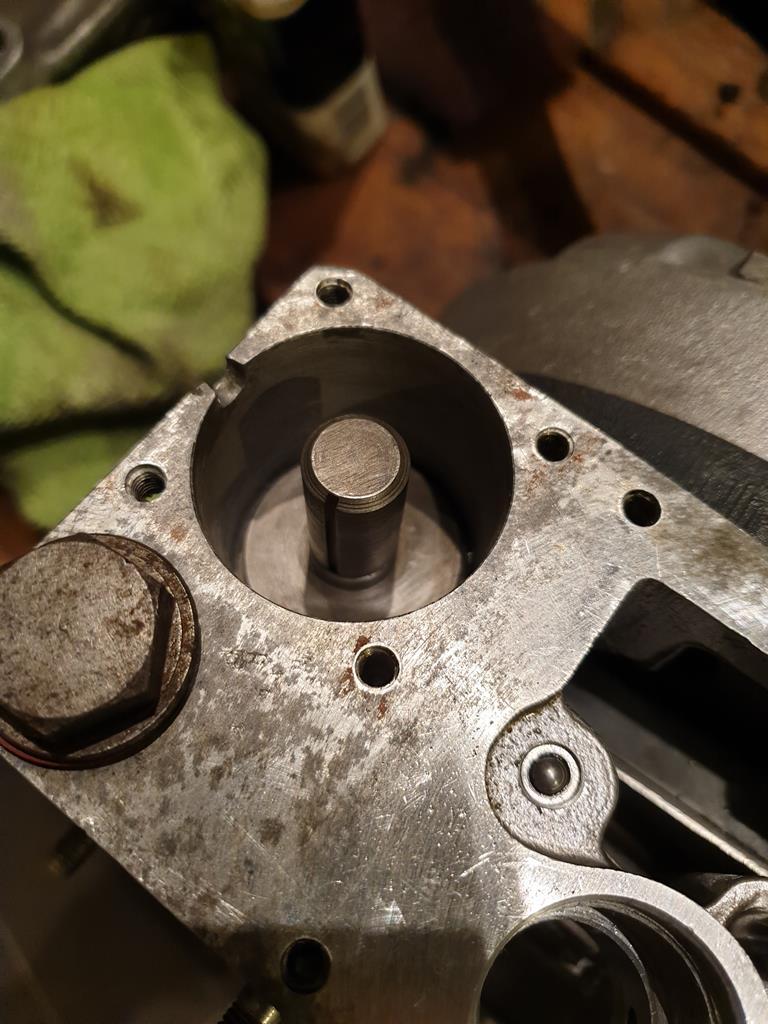 The casing slides over the solenoid and the bottom cap fits in place then I slid these both over the plunger into the unit 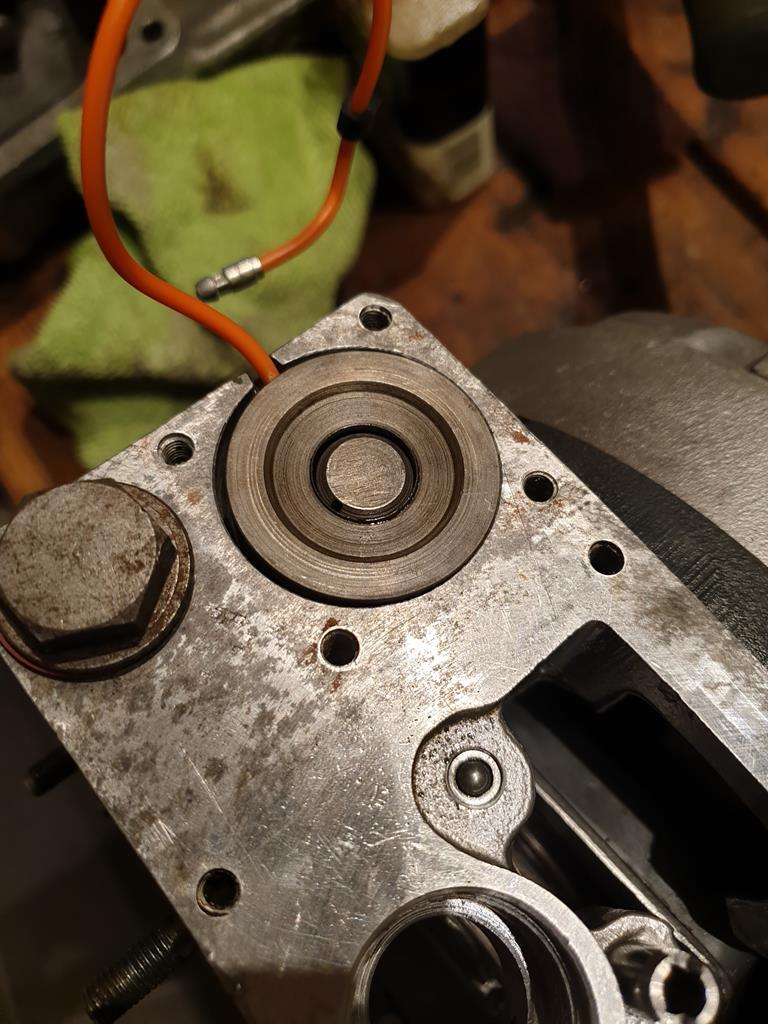 Finish off with the gasket and cover, I appear to have mislaid two of the screws... 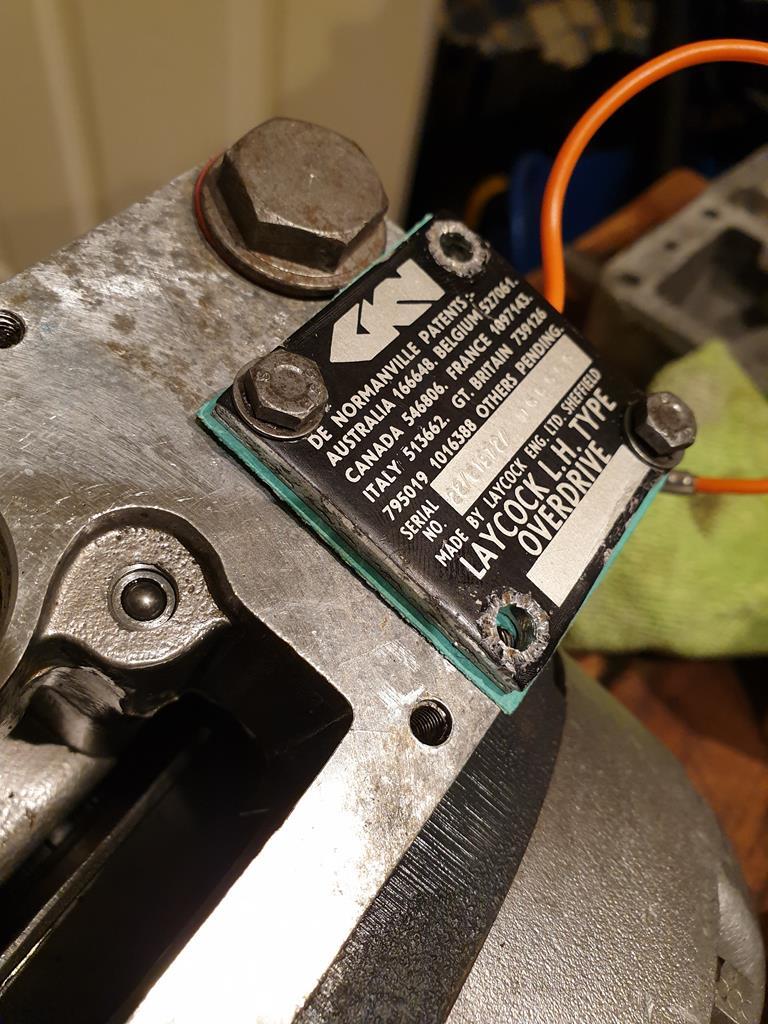 That kind of concludes my work on the overdrive for the time being. Next I turned my attention to splitting the gearbox from the intermediate section where the remote housing bolted on. The bit on the left with MOWOG on it needs to be removed. Not sure of the name but its related to the selectors, takes a bit of wobbling to get out but will come eventually. I found putting the box into 3rd made it easier to get out 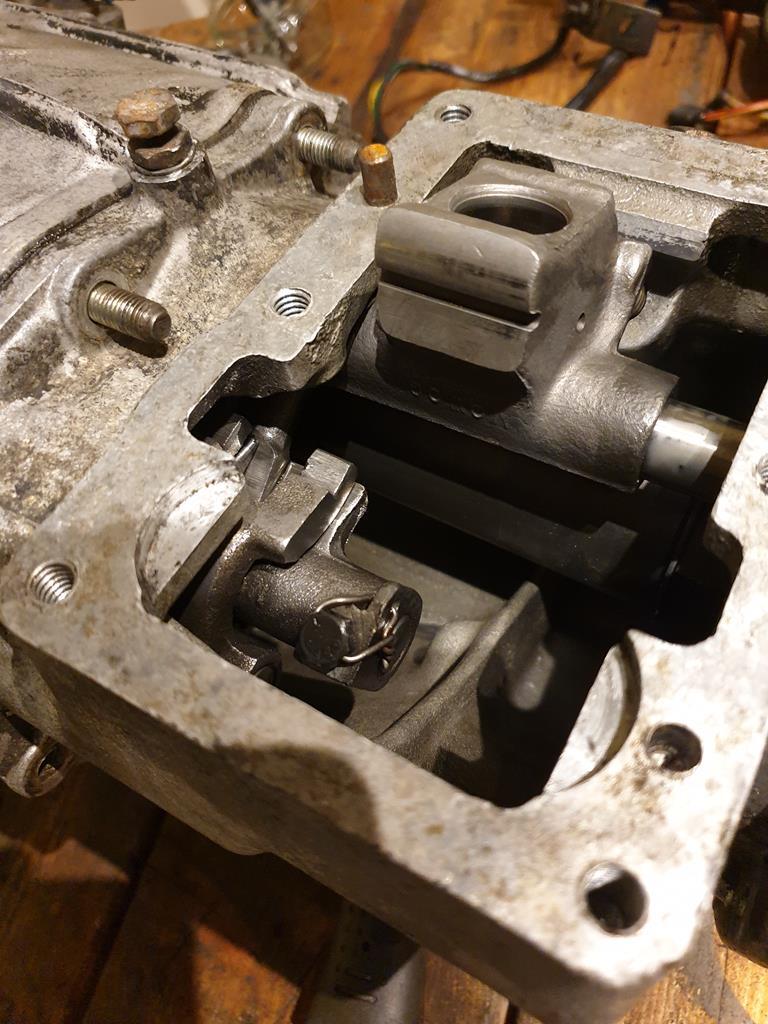 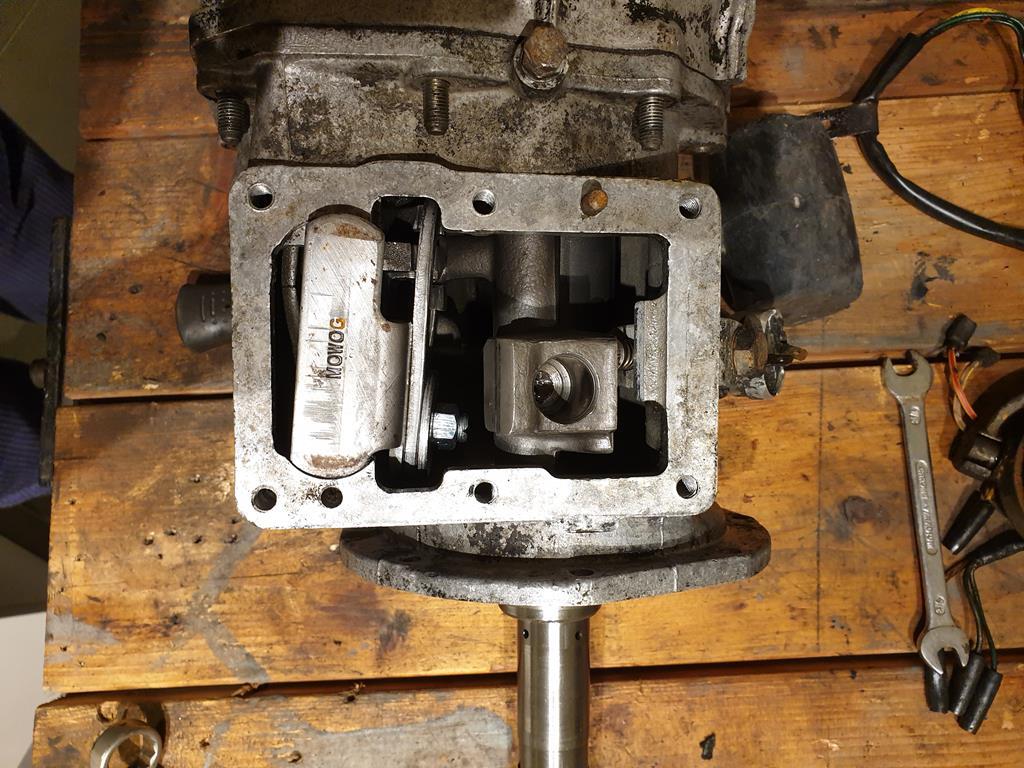 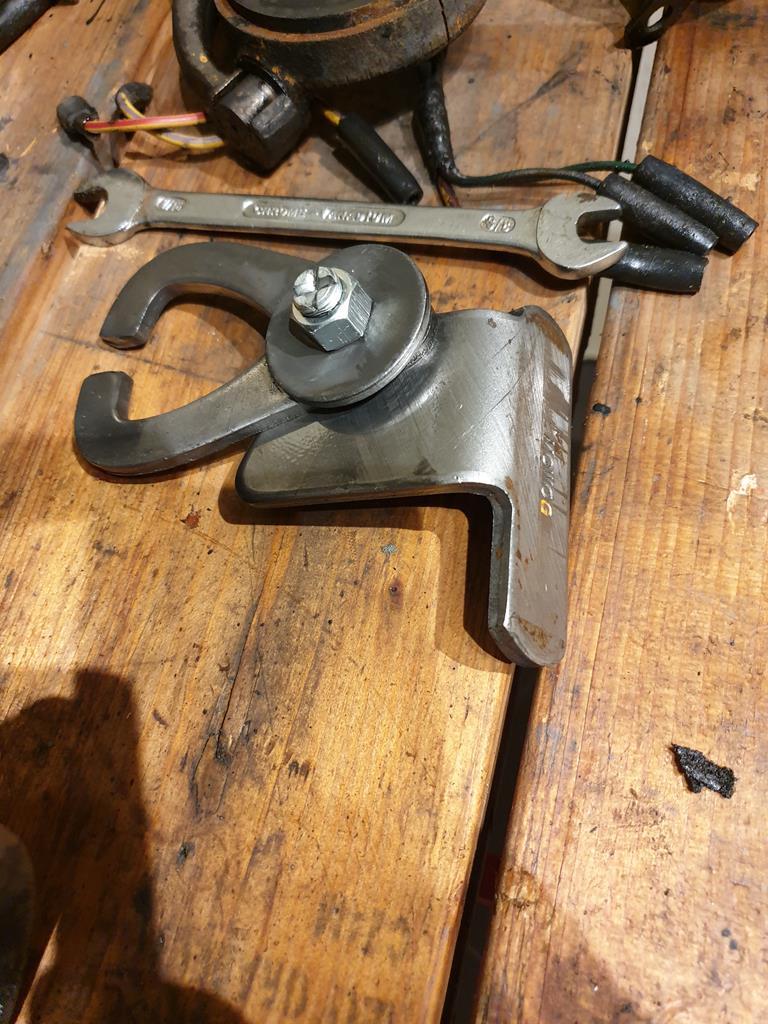 With that out and the nuts and bolts holding the two cases together (which I'd taken off previously...) the two parts separate 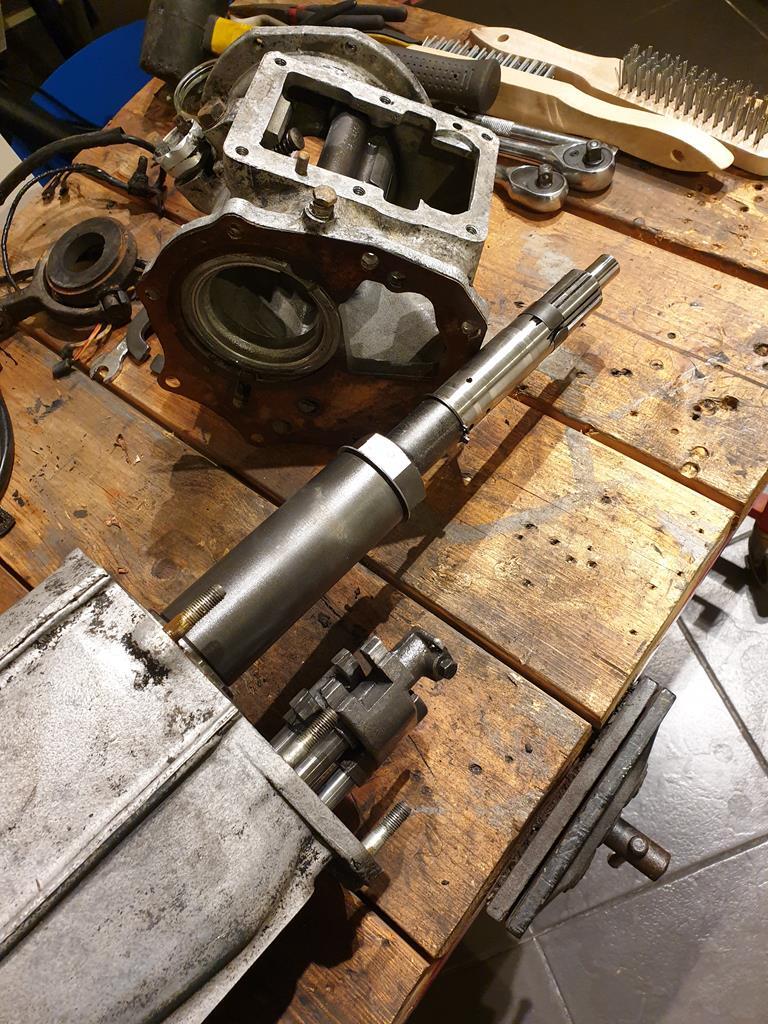 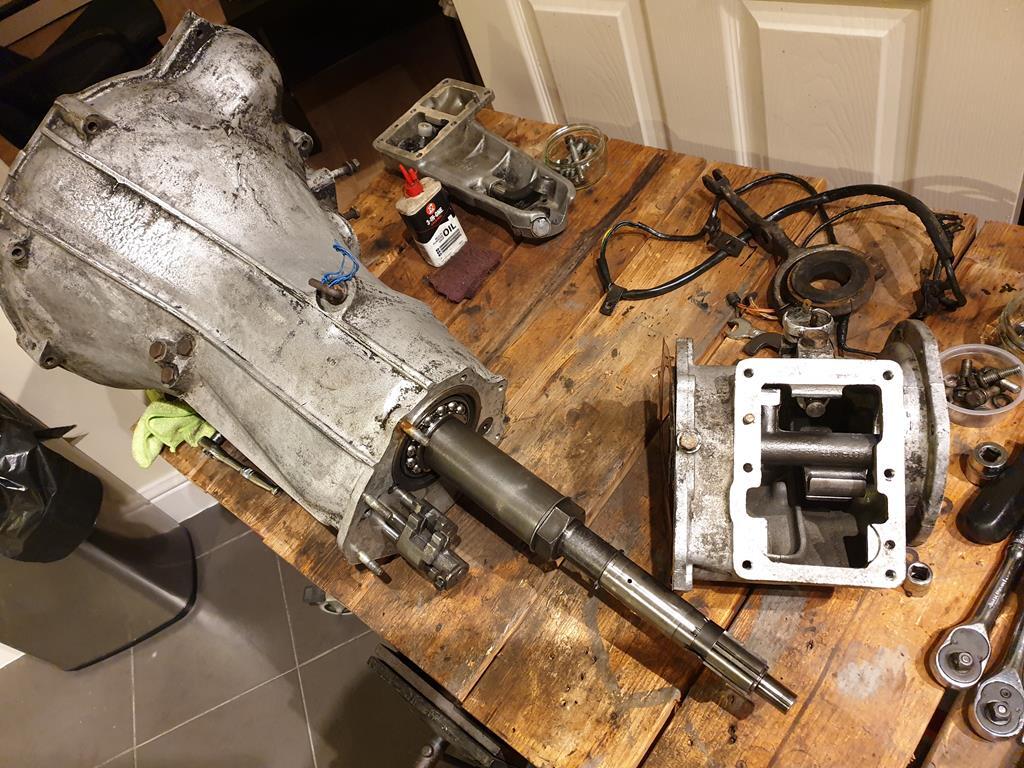 Naturally there'll be much cleaning and re-gasketing to come  Lastly, going back to the front of the gearbox after getting most of the gunk out of the bellhousing, I got the clutch fork out 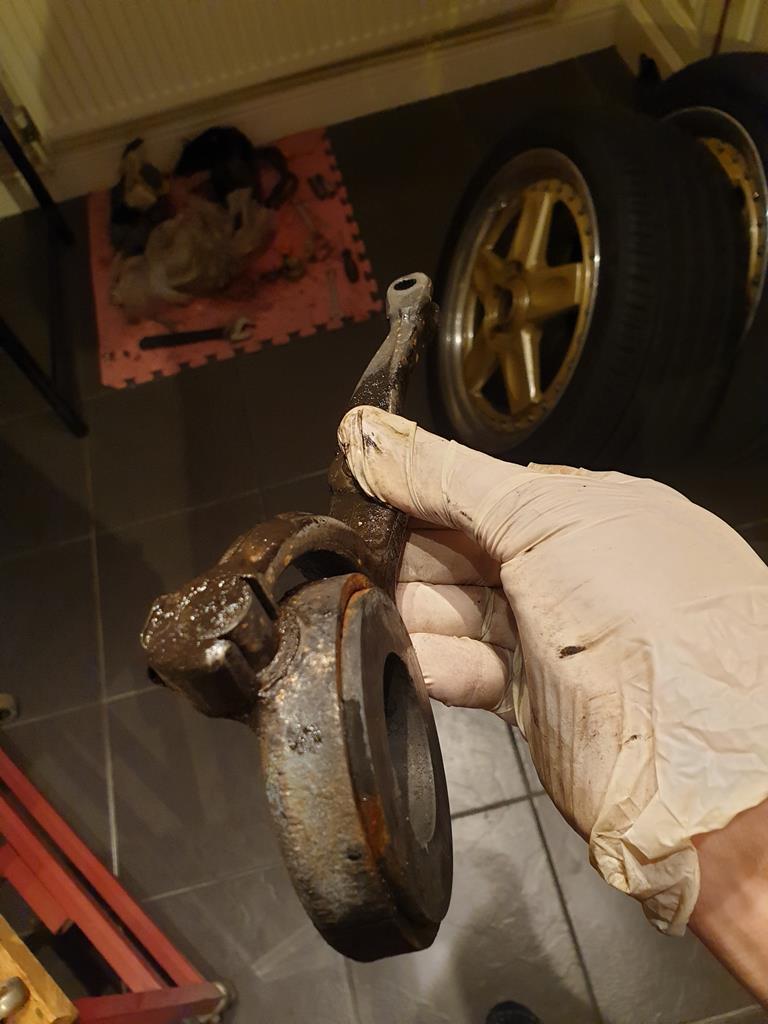 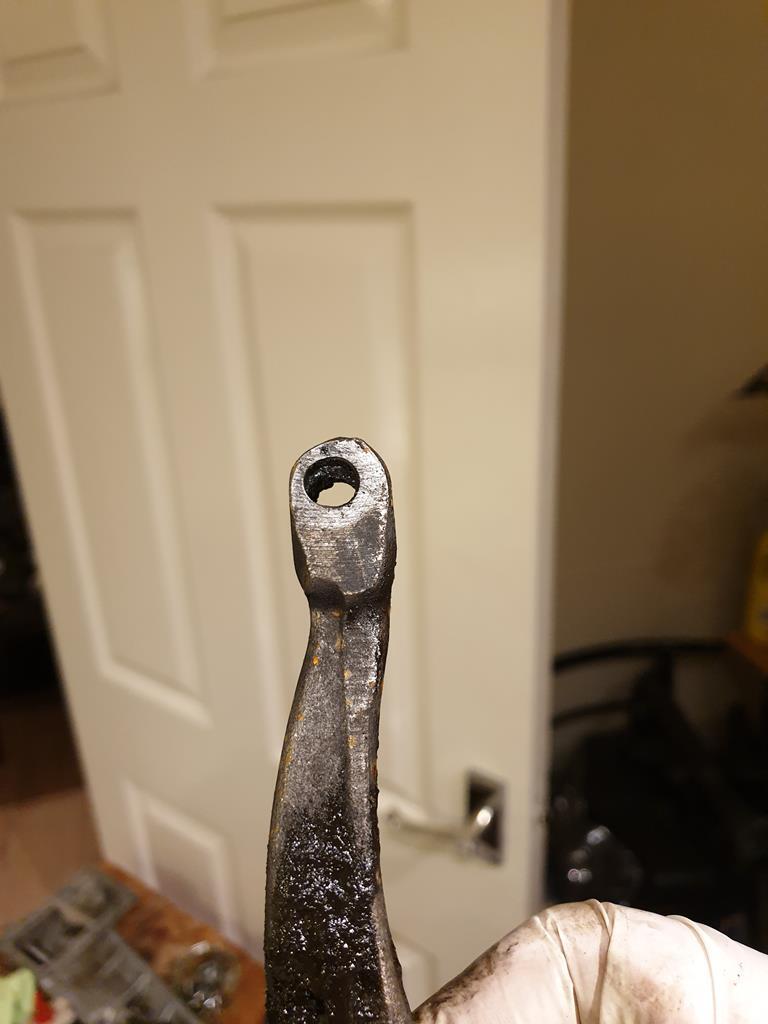 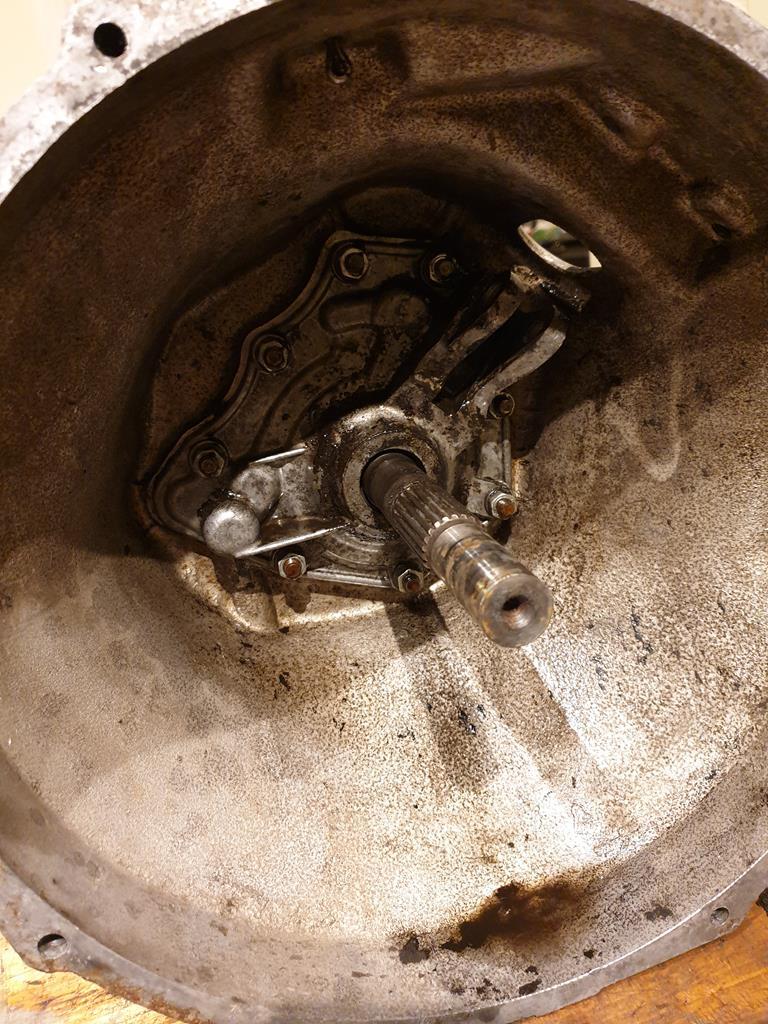 It doesn't really show in the photos but I thought the hole in the end looked a bit ovaled, I'll check it again after cleaning it up a bit. I also got the front cover removed as there is a gasket and oil seal in here to change which will hopefully help keep the bellhousing cleaner in future! 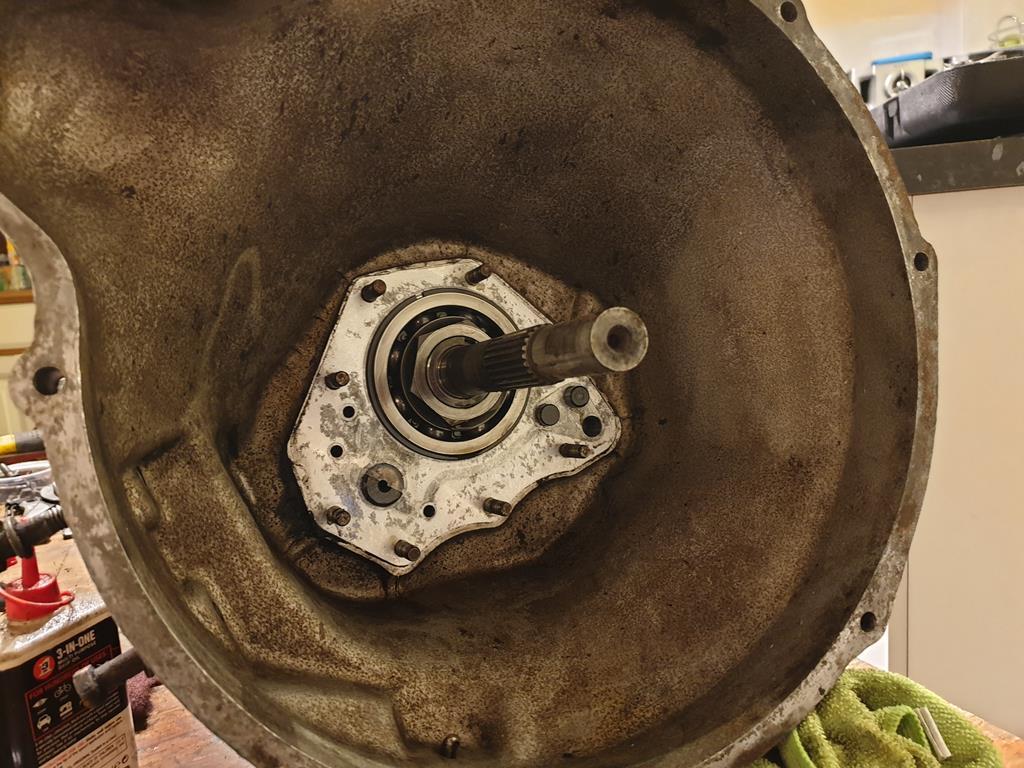 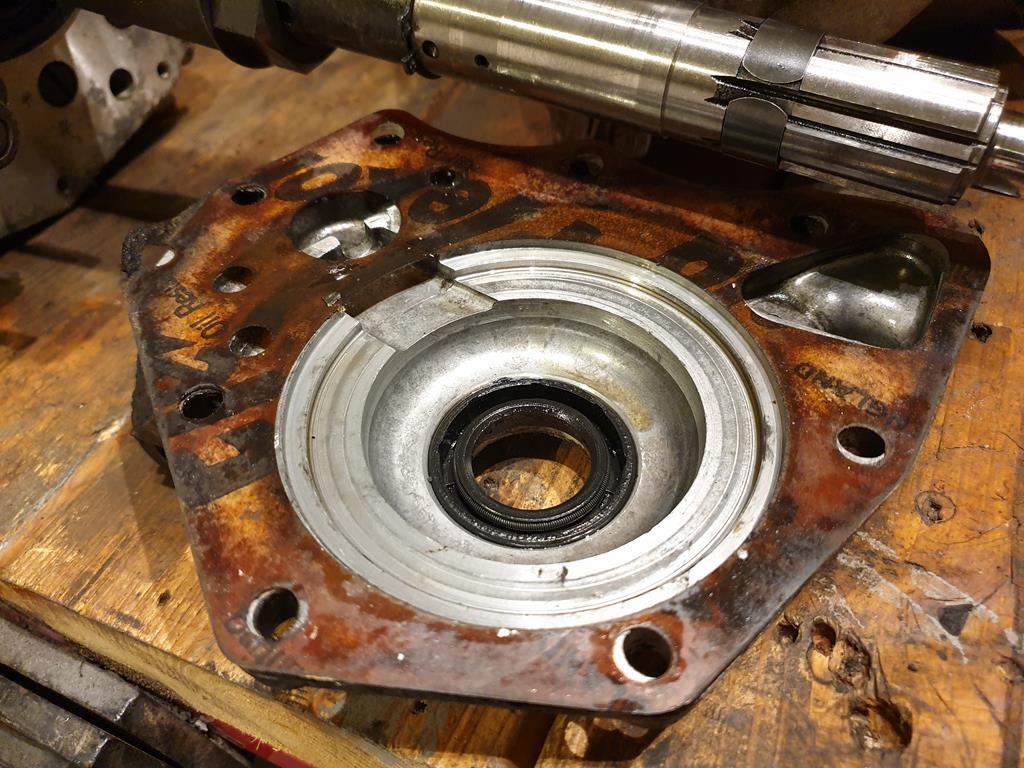 Removing this did yield an odd/worrying find 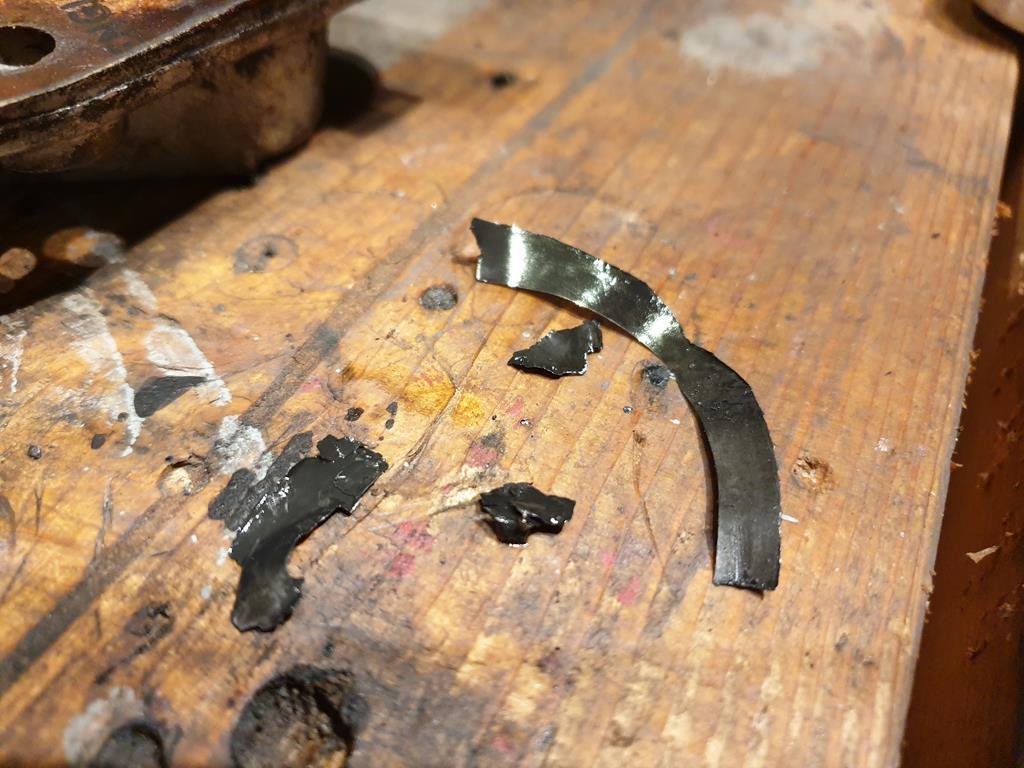 This material was caught under the front cover, it looks like part of a really chewed up shim, but it isn't clear where its come from. Some investigation is required |
| |
|
|
|
|
|
|
|
|
Good progress Adam, that shim looks as though it bears against the outer section of the input shaft ball bearing race, the circlip stops it going into the box and the shim stops it working out to the front cover....?
|
| |
|
|
adam73bgt
Club Retro Rides Member
Posts: 4,991
Club RR Member Number: 58
|
|
Nov 29, 2019 12:06:08 GMT
|
Having read up on it a bit today, I believe you're right. No idea how it managed to get so chewed up though as with the cover on, there shouldn't have been much room for the shim to move around.. Also I'm not sure where the rest of it has gone! I'll see where I can get a new shim/s from as it seems to be a part that Moss don't sell Edit: scratch that, they do sell them  just need to measure the remnants of mine to see what thickness I need, they come in either 2 or 5 thou thicknesses |
| |
Last Edit: Nov 29, 2019 12:12:56 GMT by adam73bgt
|
|
|
|
|
Nov 29, 2019 12:15:25 GMT
|
|
That shim possibly got rotated by the bearing then got chewed as it went into that slot - I would check that the outer bearing housing is not too loose in the gearbox casing and then use a sort of "locktite" when putting the bearing back next time.
|
| |
|
|
|
|


