bstardchild
Club Retro Rides Member
Posts: 14,965
Club RR Member Number: 71
|
|
|
|
Going back to the carb quickly, I got my thackery washers and was still having issues getting the carb to seal to the manifold with the gasket, worked out why.. 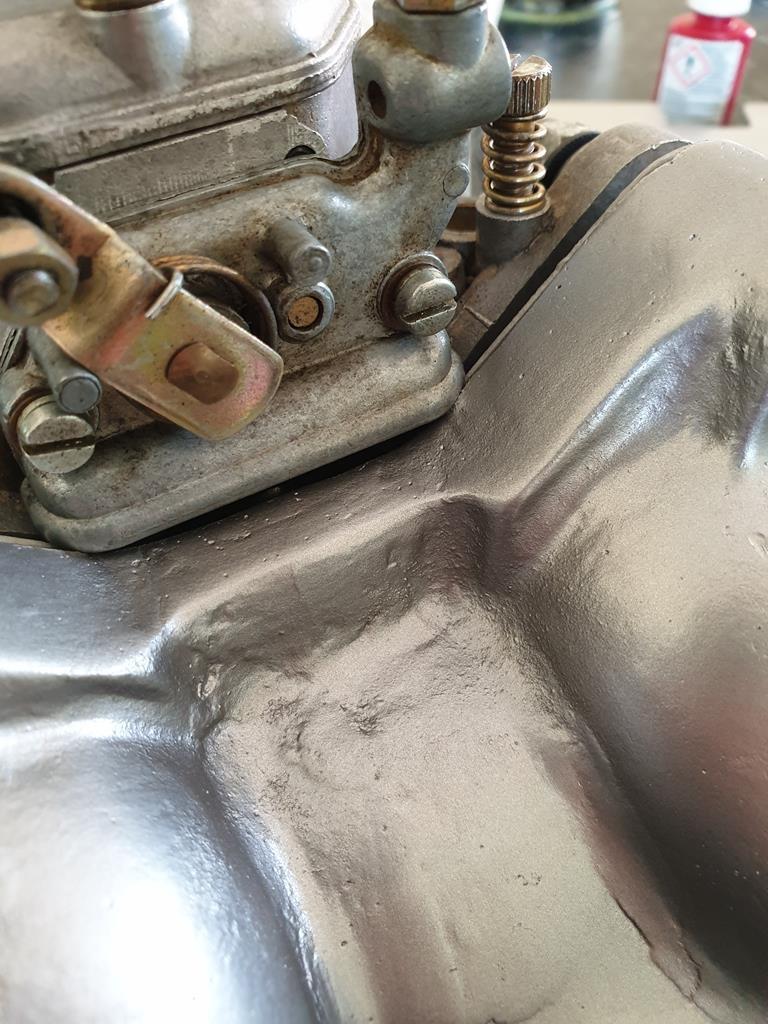 The choke mechanism is hitting the manifold. I did have some spacers that came with one of the carbs but I threw them out as I assumed the rubber O rings were all compressed and old etc... So some more parts to get there. I'd just dremel/grind the required clearance on the manifold - doesn't look like it needs much and there is plenty of meat in the manifold |
| |
|
|
|
|
adam73bgt
Club Retro Rides Member
Posts: 4,991
Club RR Member Number: 58
|
|
|
|
You are absolutely right, but I'm also lazy and couldn't be bothered to re paint that bit after grinding it out  |
| |
|
|
adam73bgt
Club Retro Rides Member
Posts: 4,991
Club RR Member Number: 58
|
|
Apr 17, 2020 22:04:52 GMT
|
Well it's been a couple weeks, have been trying to sort a few jobs on the daily instead so MG stuff has just been little bits here and there. Spacers turned up for the carb so thats all fitted to the manifold and tucked away 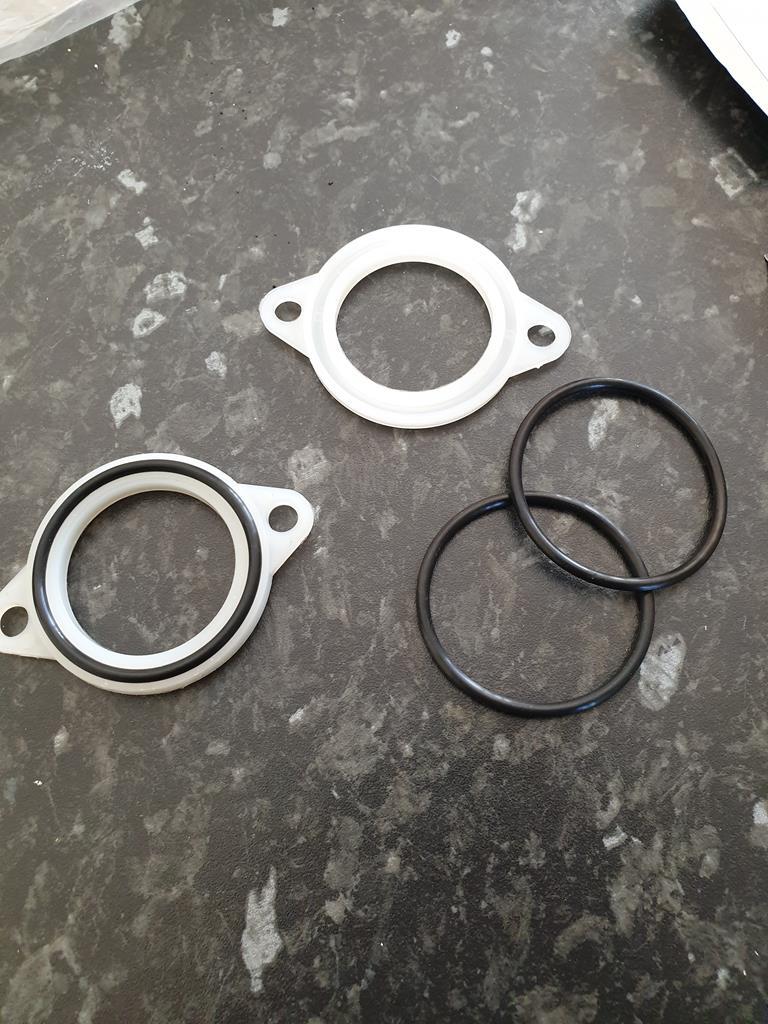 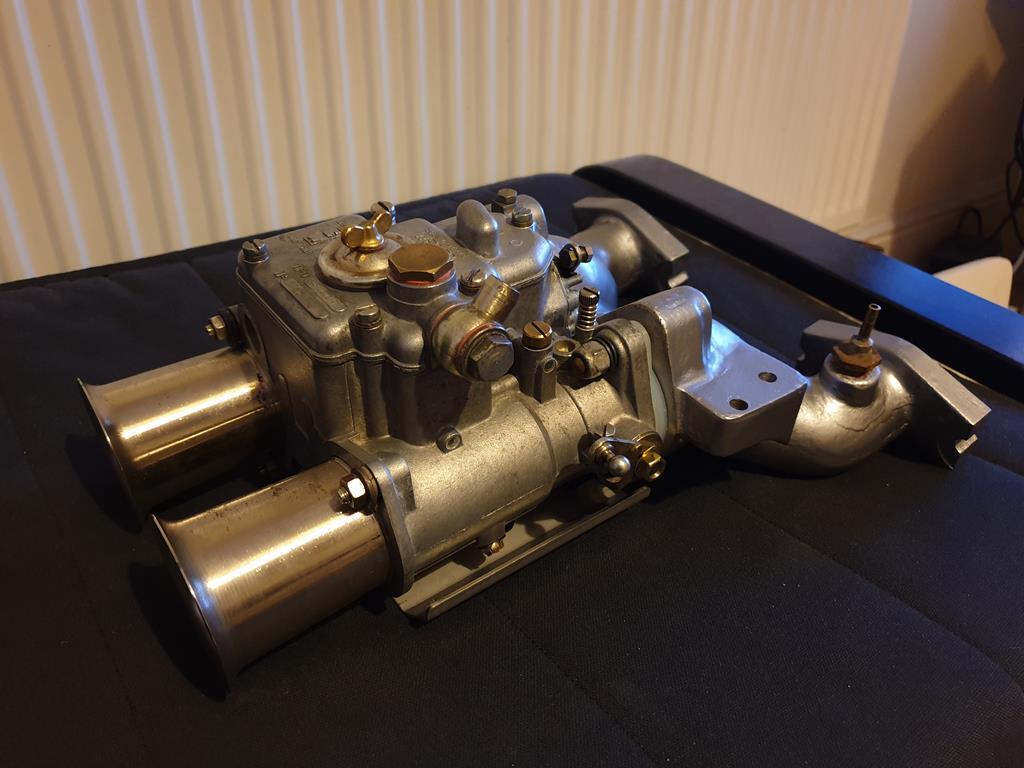 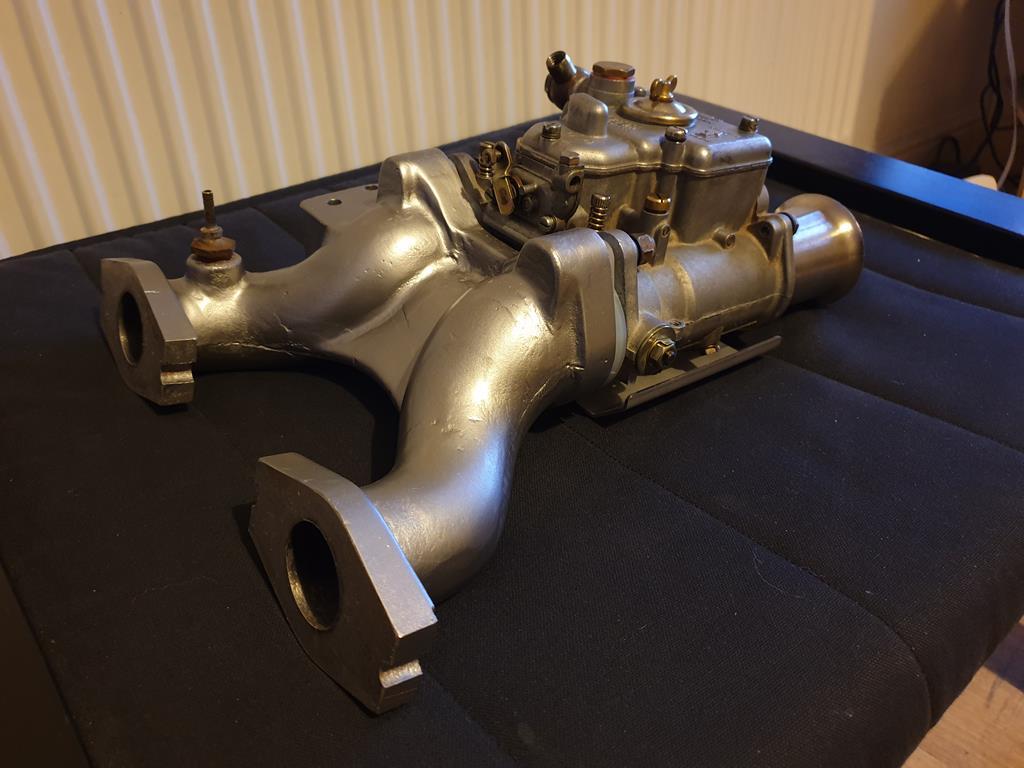 Did a bit of uninteresting stuff, sorting out some of the many bags of rusty, oily fixings and brackets I'd kept from when I'd stripped the car down, cleaning up some bits. Also dug out my front crossmember polybushes and found that I had two sets for some reason! 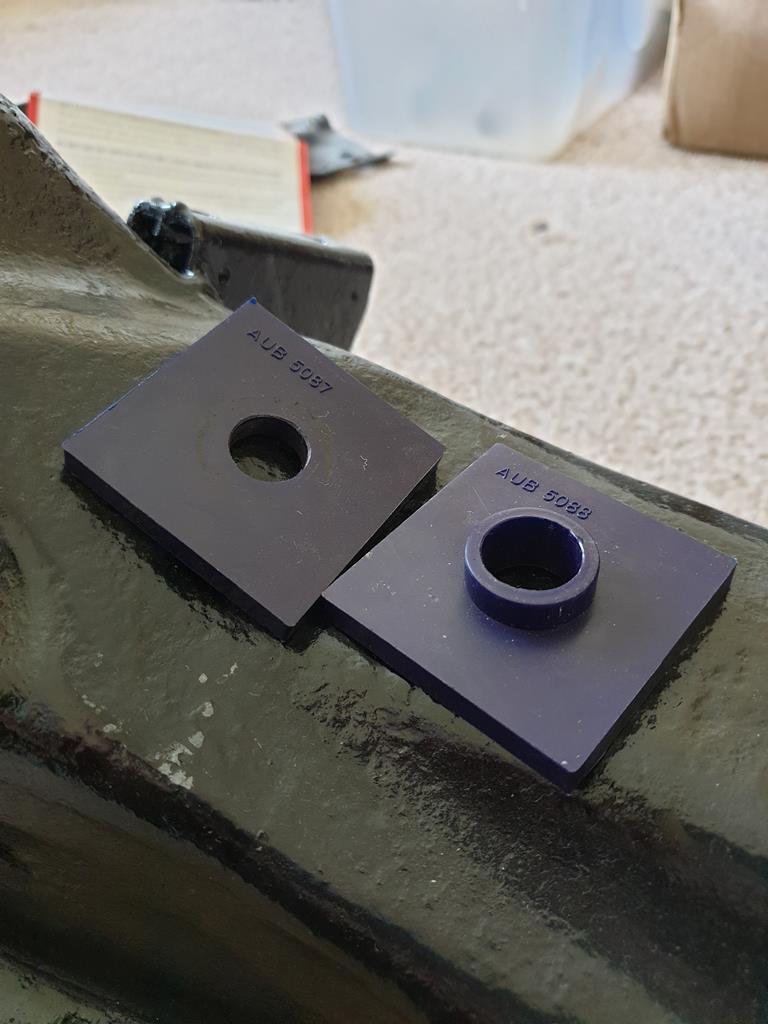 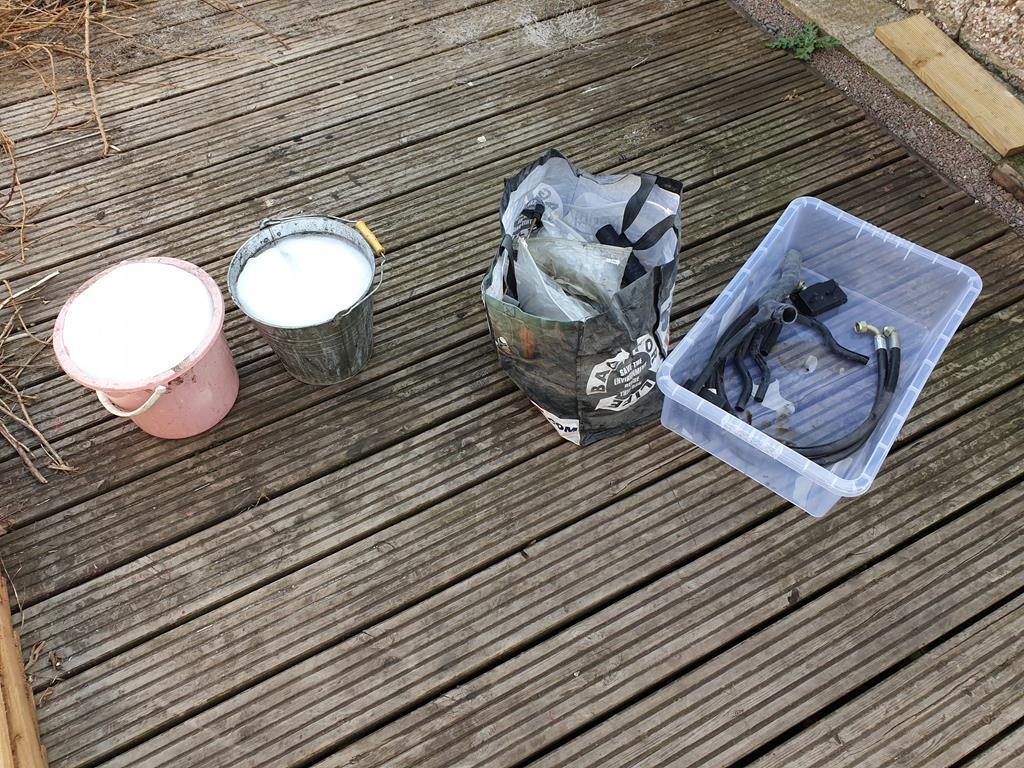 The lipped polybush is the upper bush for any B owners who may be wondering, took me a while of searching on the internet to find the right answer! While looking through old parts I found these old Maserati air horns 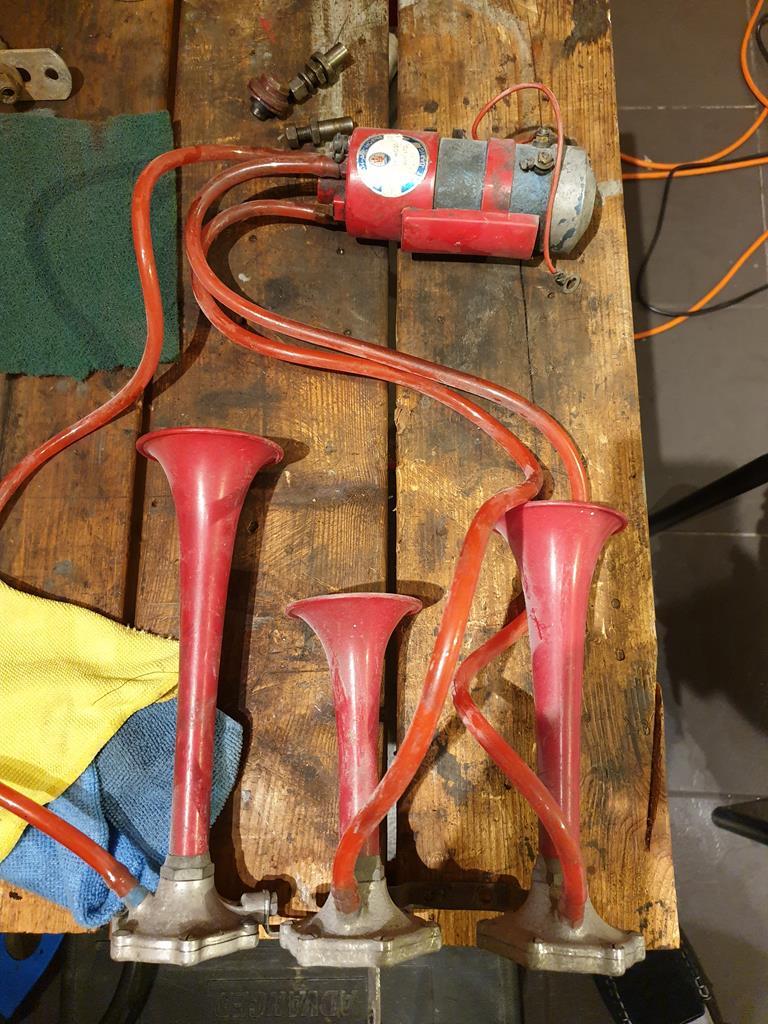 I did a quick search in this thread and I apparently bought these in late 2014! but haven't done anything with them since. Looked like an ideal thing to tinker with in these long lockdown evenings. My main focus has been on the compressor to begin with, I've never had them working in the time I've had them so thought a stripdown, investigate and clean was on the cards 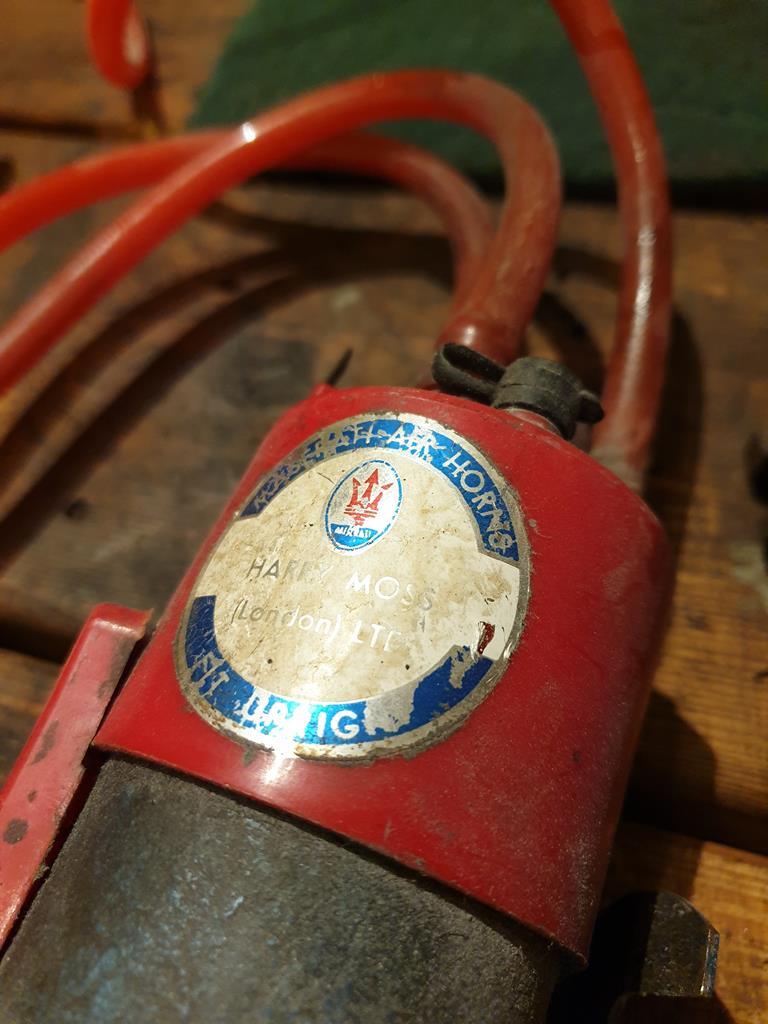 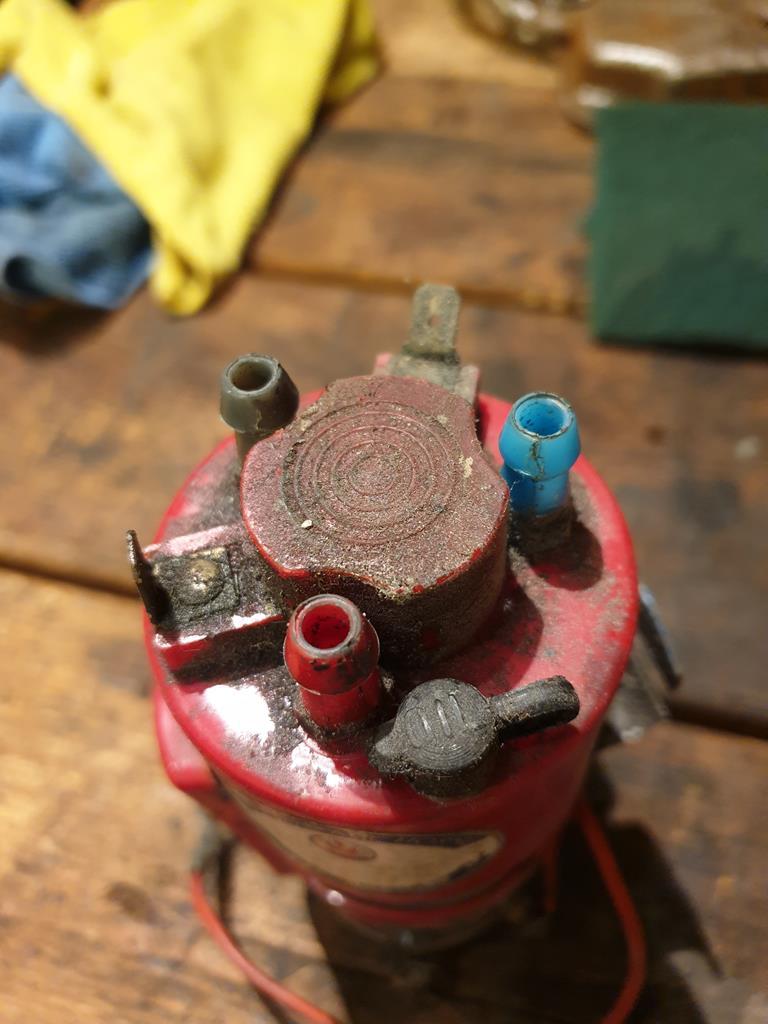 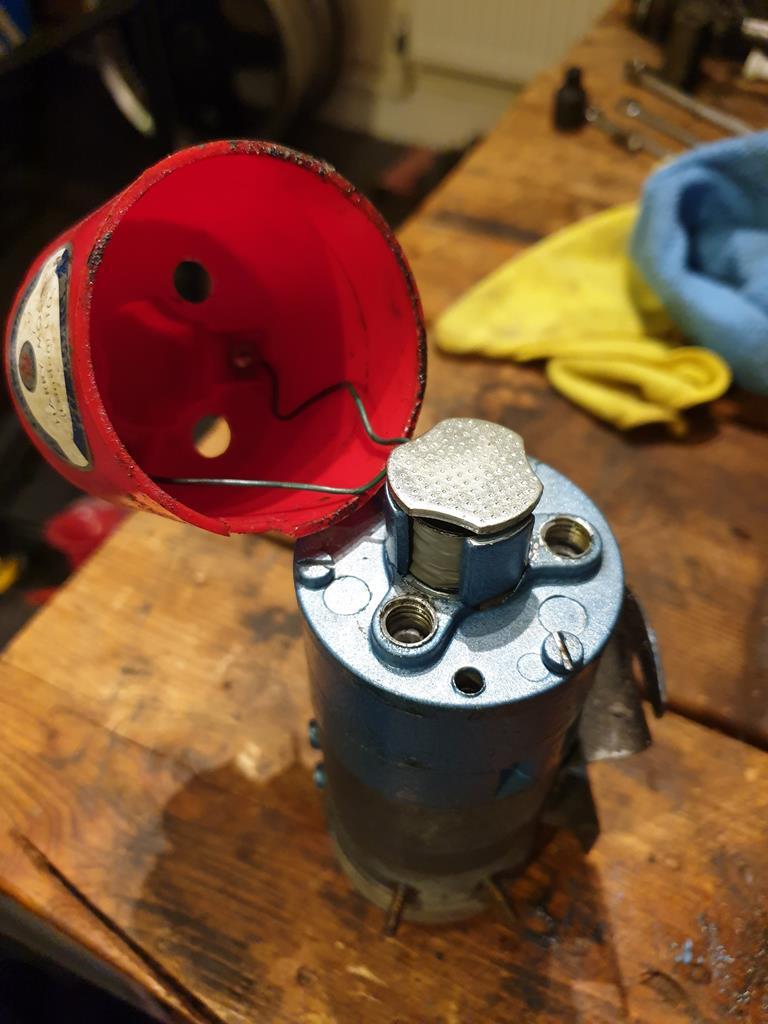 With the trumpets and hoses removed, unscrewing the ports from the top of the compressor and removing the oil filler port, allowed me to unclip the top cover and reveal a little metal plate on top of what looks like a solenoid. The wires go to the two spade connectors on the cap which I believe controls whether the horns sound simultaneously or in a triplet. 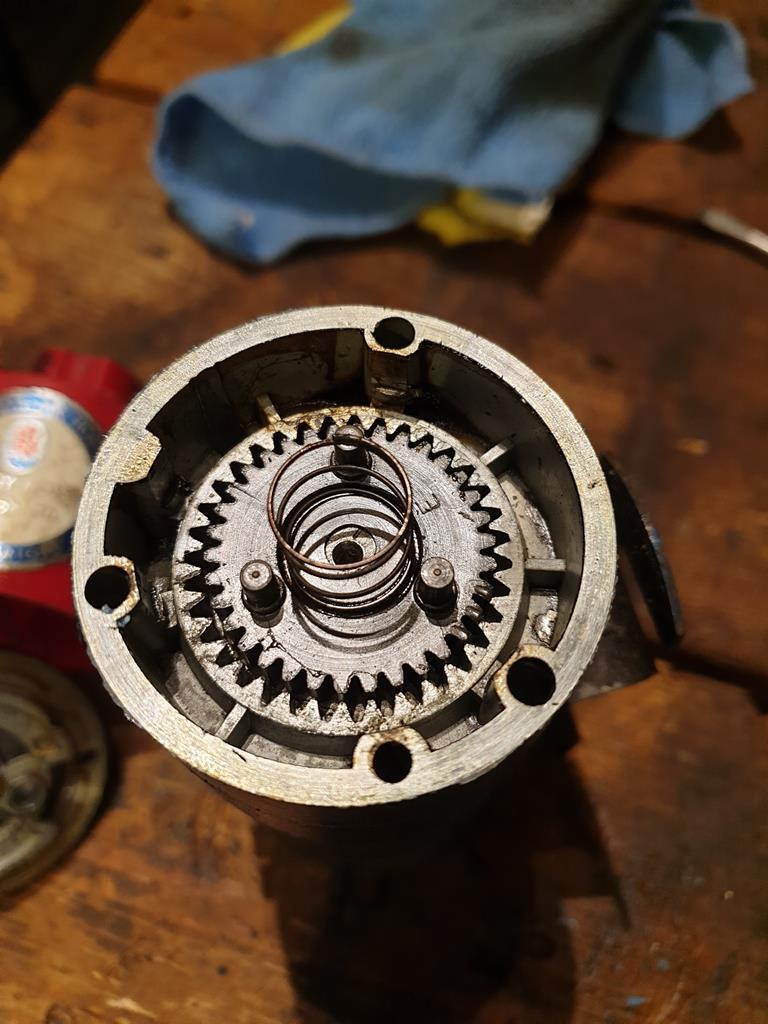 Going down to the next level of the compressor shows the gear that the solenoid controls, the gear wheel itself is plastic and looked in OK condition. Going down past this level reveals the compressor element of the compressor... 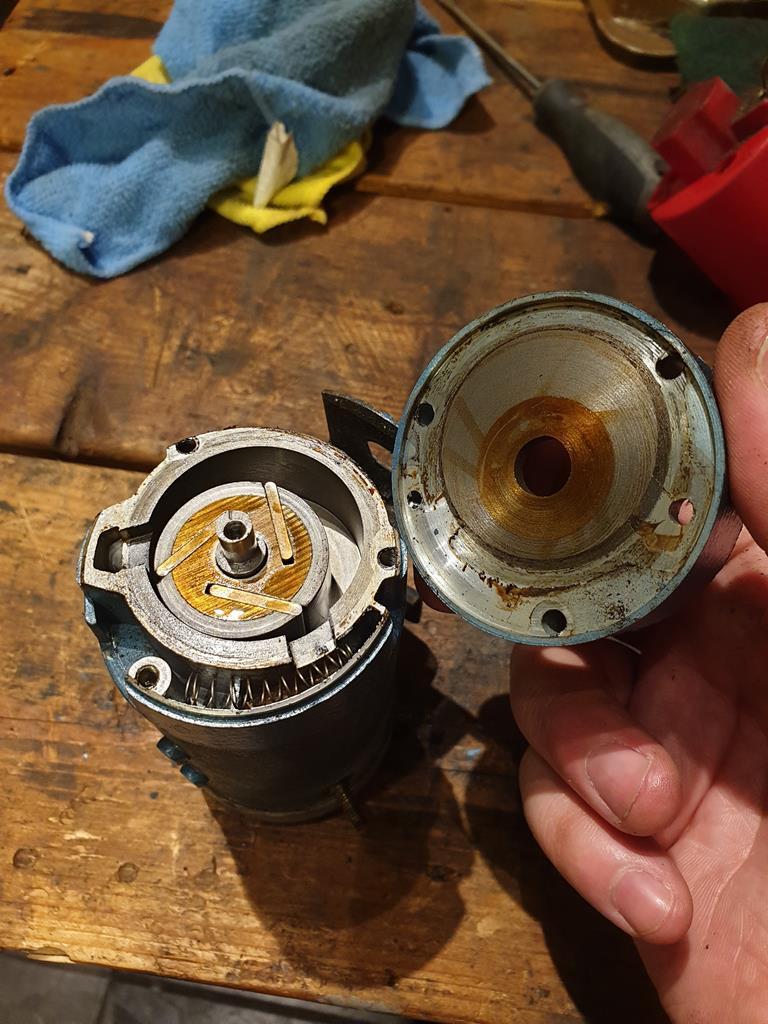 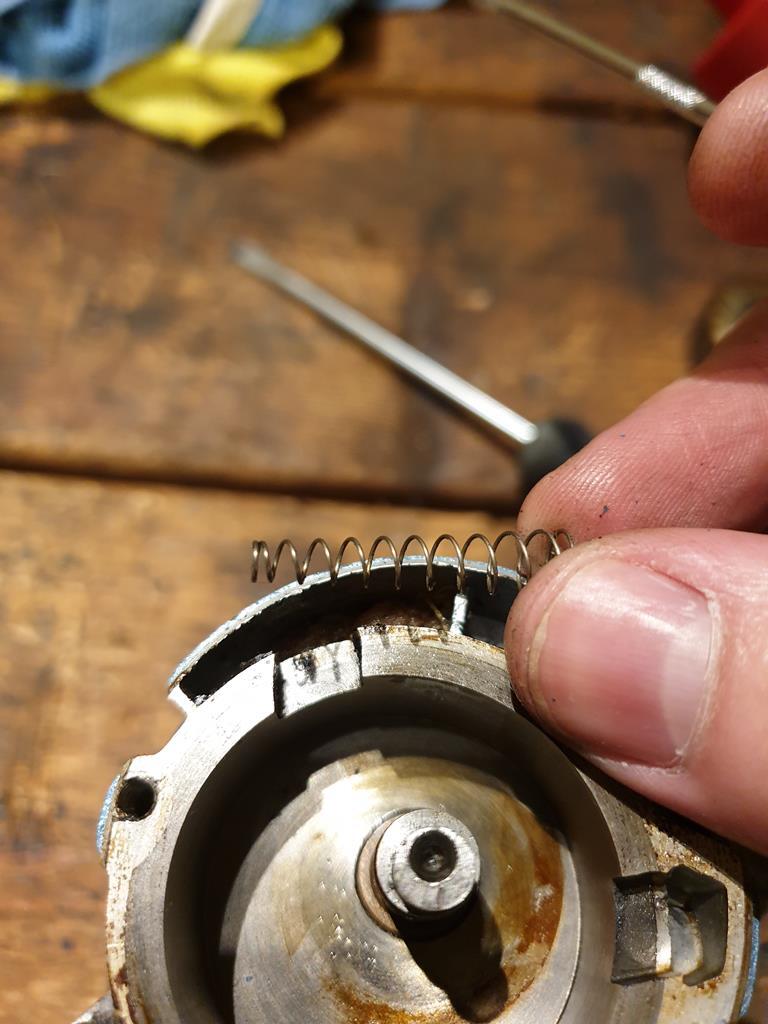 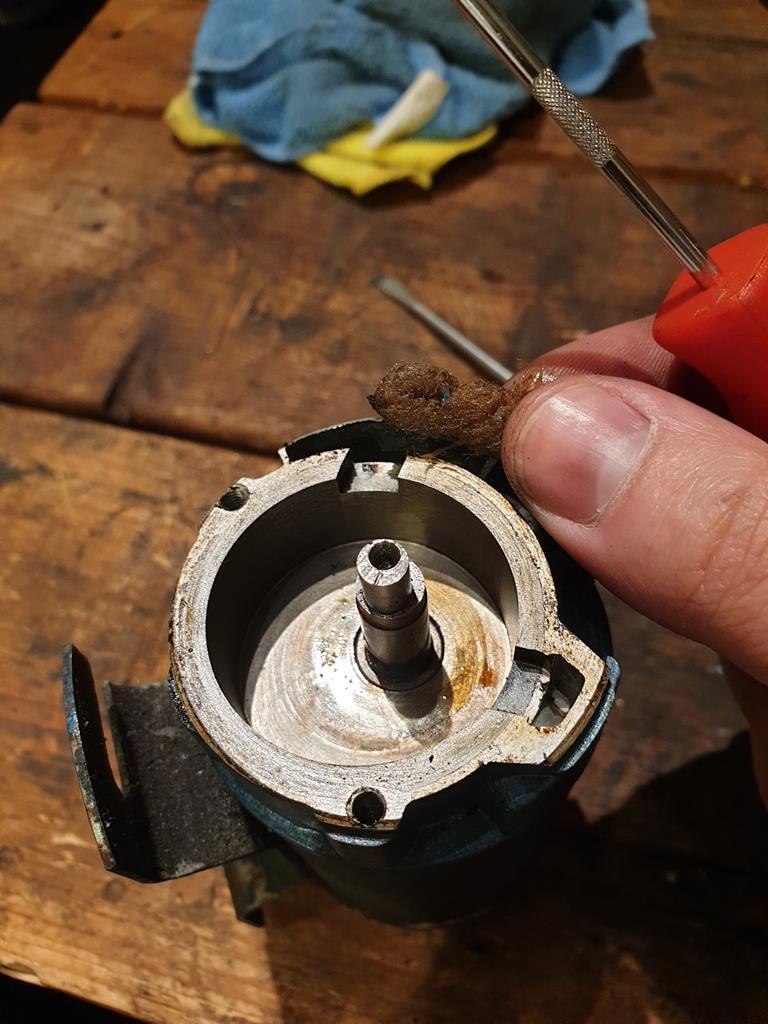 To me it looks a bit like a miniature rotary engine, theres an eccentric shaft, a (circular) rotor with sliding sections that act like apex seals and inlet and exhaust ports for the air. On removing the rotor, the sliding seals were stuck in the place with old oil, so a bit of cleaning with brake cleaner was required, they now slide freely in the rotor. The spring and odd bit of material in the section to the side of the rotor housing are I think in the "intake" for the compressor, and the material is there to soak up the oil that is fed in from the top, some oil can then be drawn in with the intake air. I'm still not quite sure how you determine it has been filled up with enough oil though.. 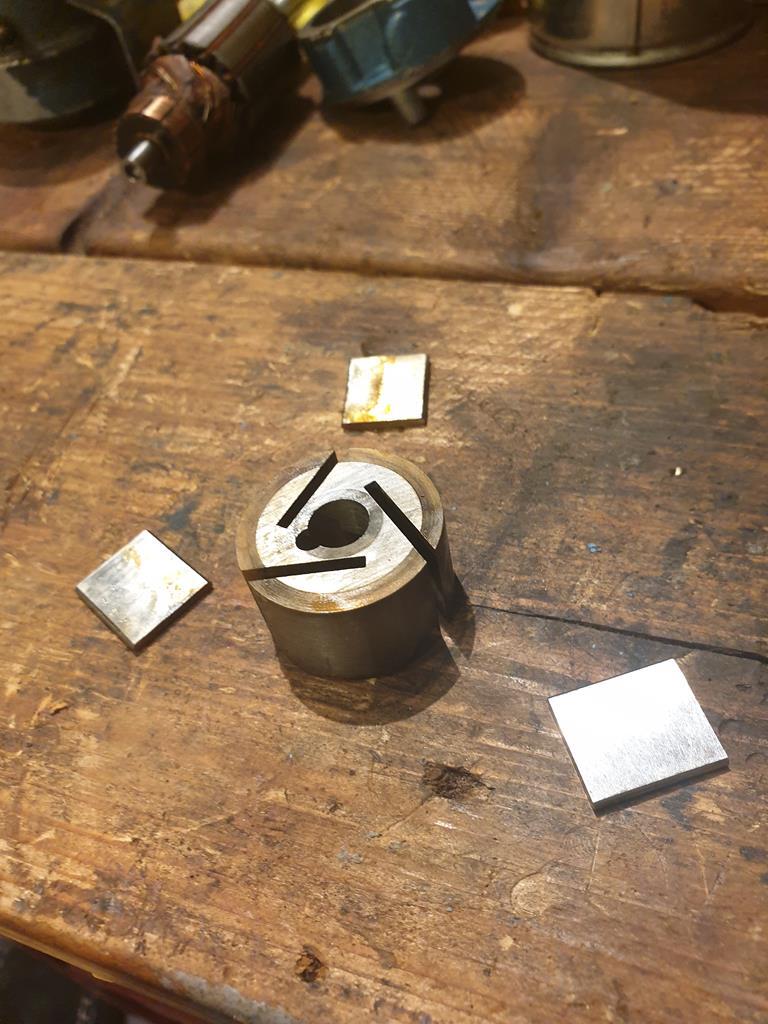 Going down another level from the rotor housing required the removal of two long screws from the bottom of the compressor body, which then revealed the electric motor that powers the compressor. 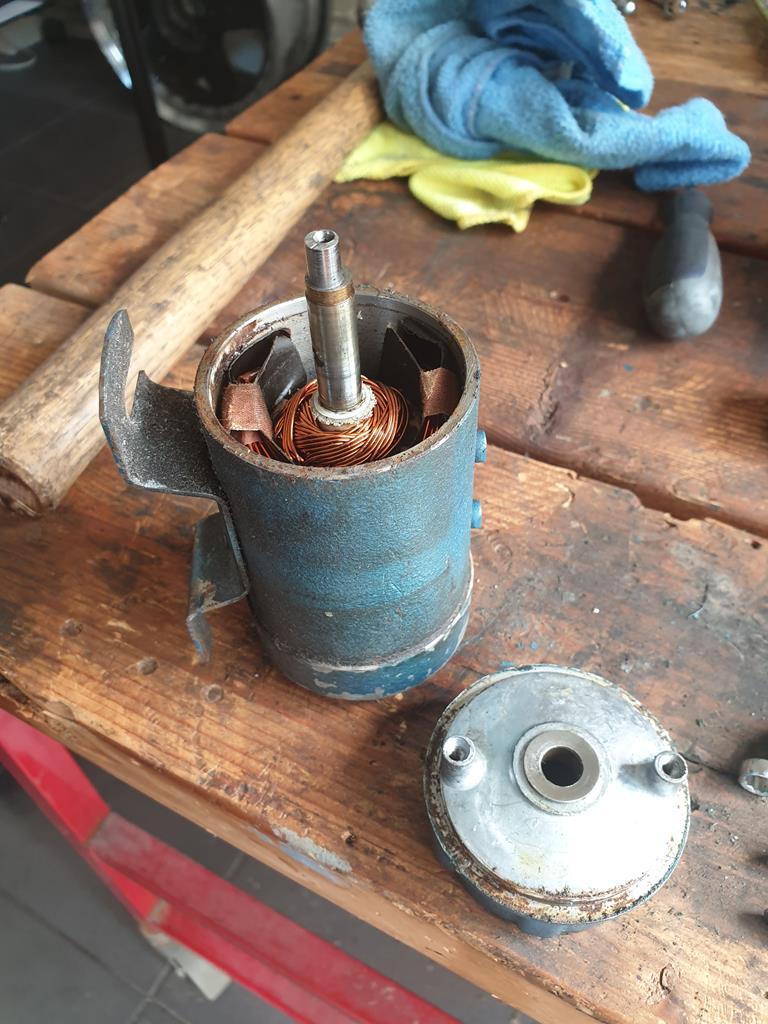 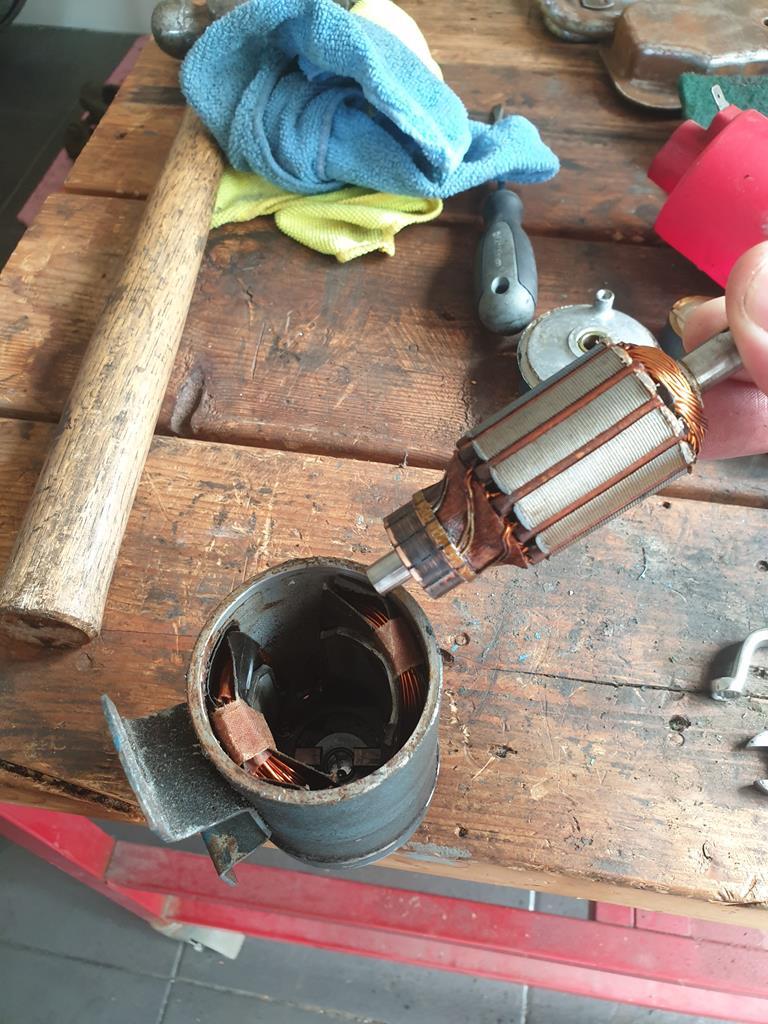 The commutator needed a bit of a clean 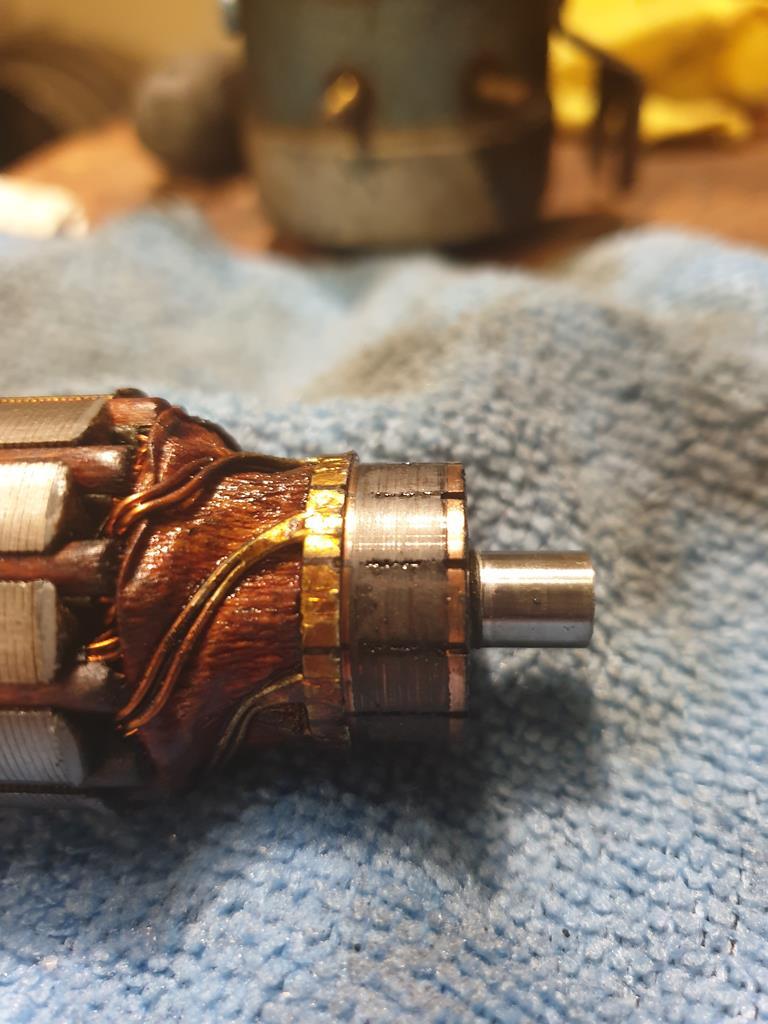 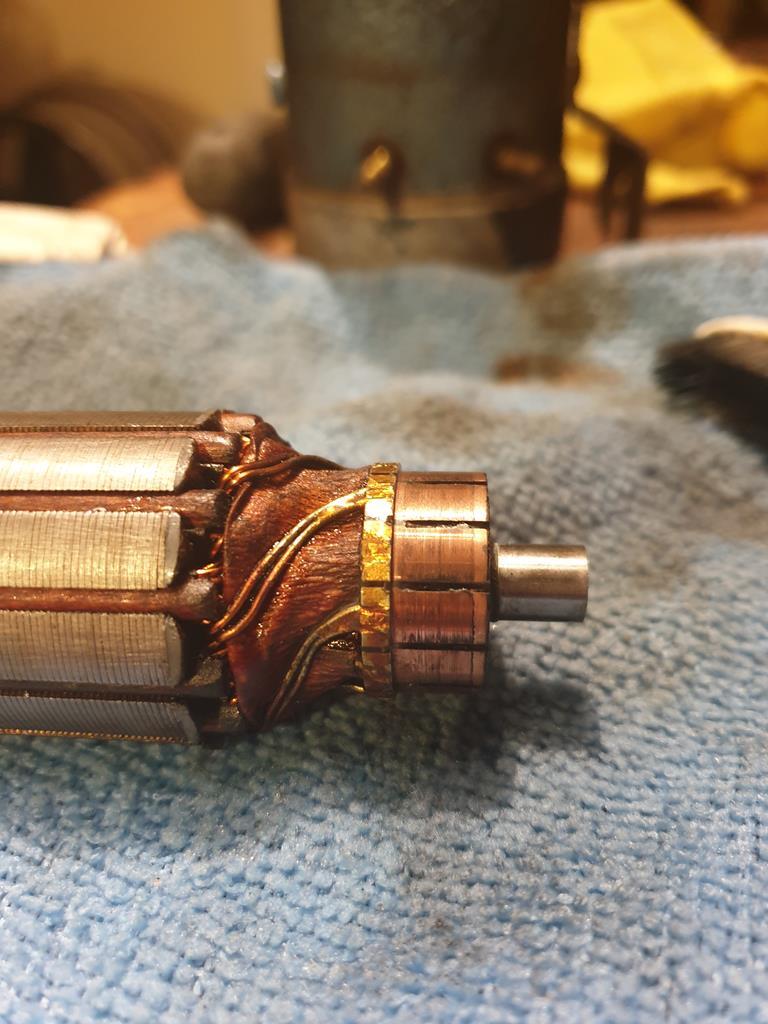 Tapping off the bottom cover of the compressor highlighted the fact that the brushes were stuck in place, a bit of a clean later and they now move in and out freely 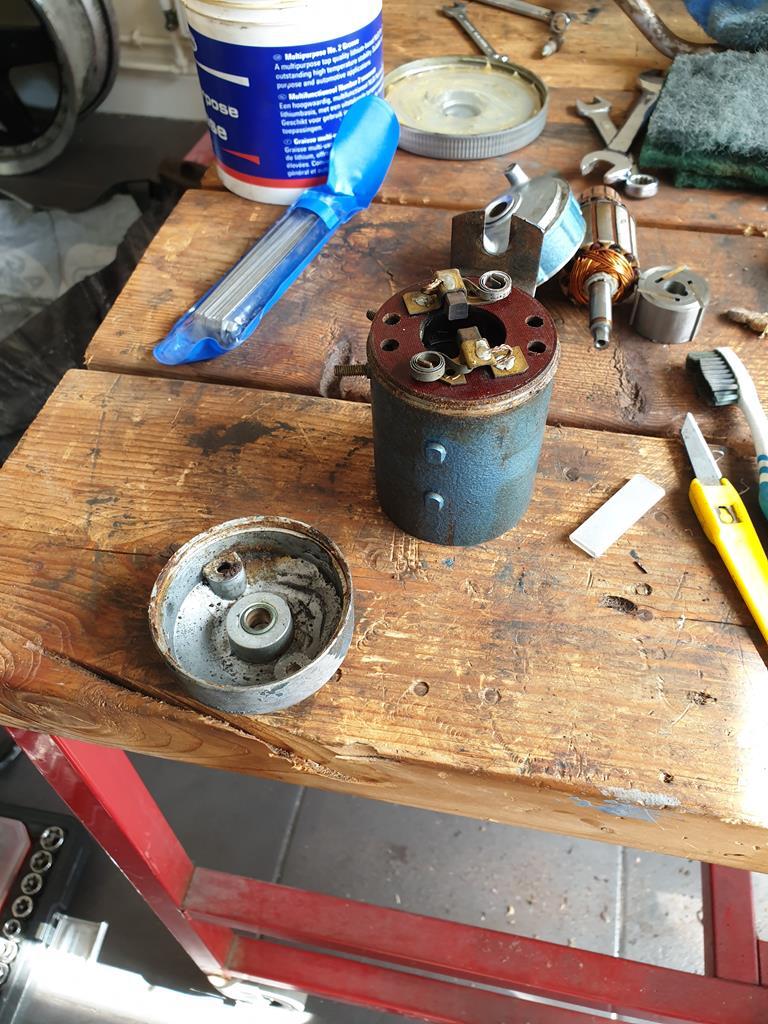 I had originally planned to leave the exterior as it was, as I think the blue hammerite type finish was largely original. However from looking at the bottom cap where the paint had been chipping off, it seemed like it wasn't particularly well adhered, so wasn't too much of a task to scrape/sand the paint off (apart from on the steel main body of the motor housing) and get the bits primed ready for a freshen up 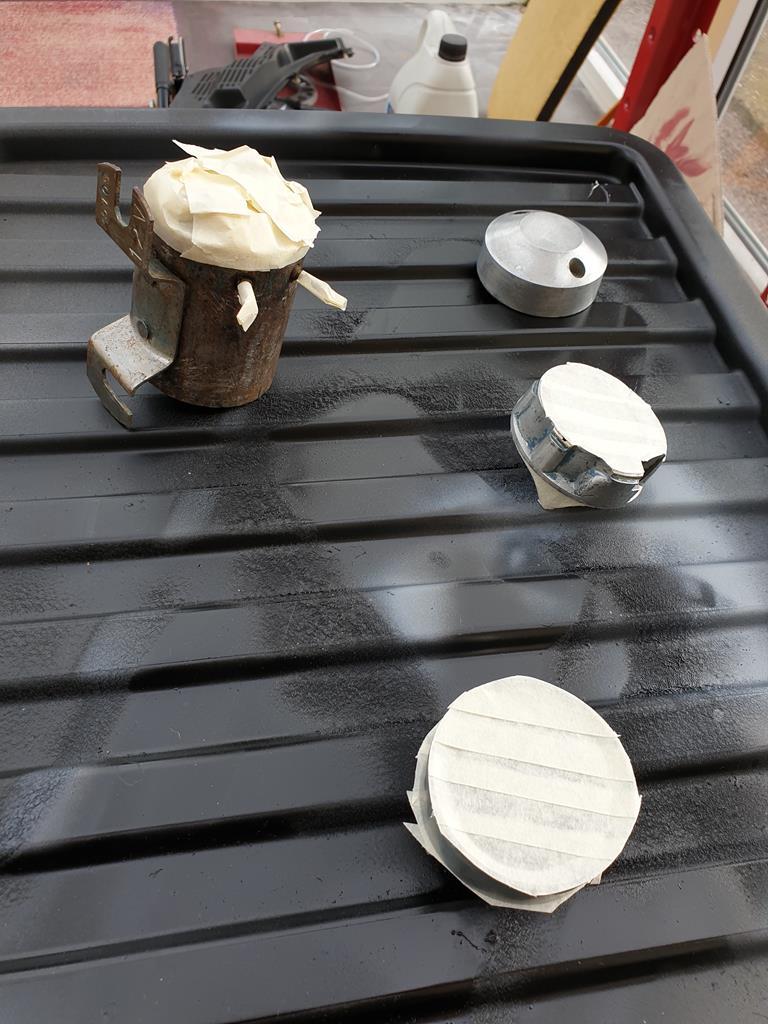 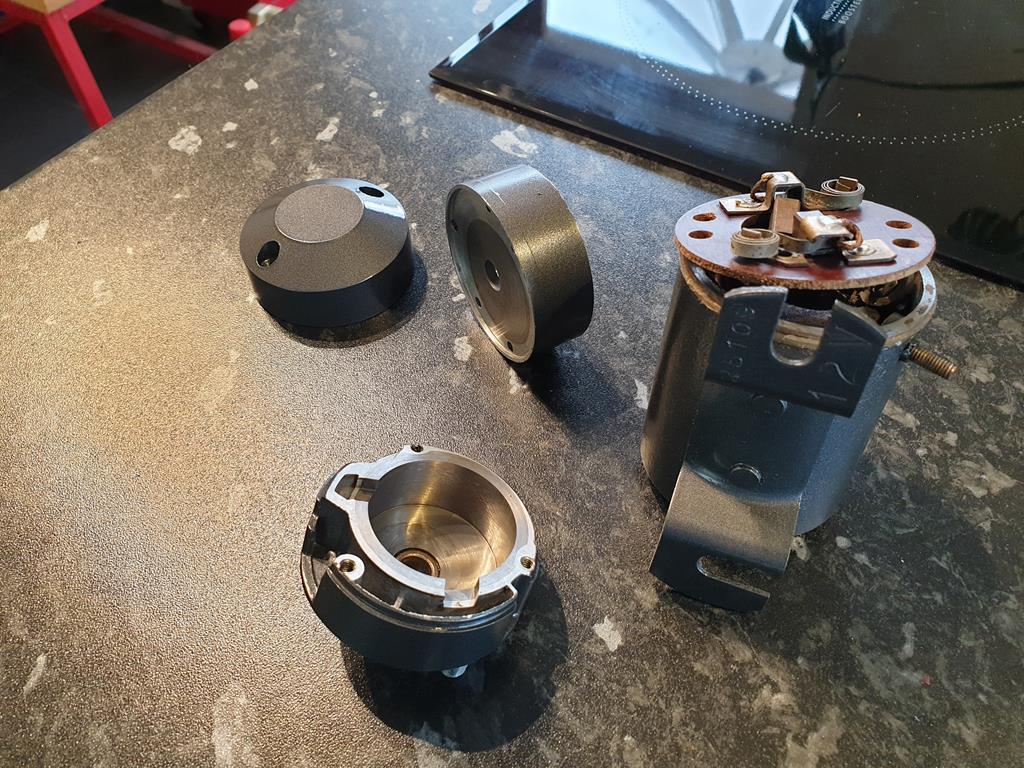 After perusing my extensive aerosol paint collection, I settled on a can of grey that I had left over from when I painted some side skirts for my Toyota Corolla T Sport, tidies them up nicely. I had hoped today would just be a case of putting all the bits back together but I hit a snag in that the wire had come away from one of the power terminals on the motor housing. 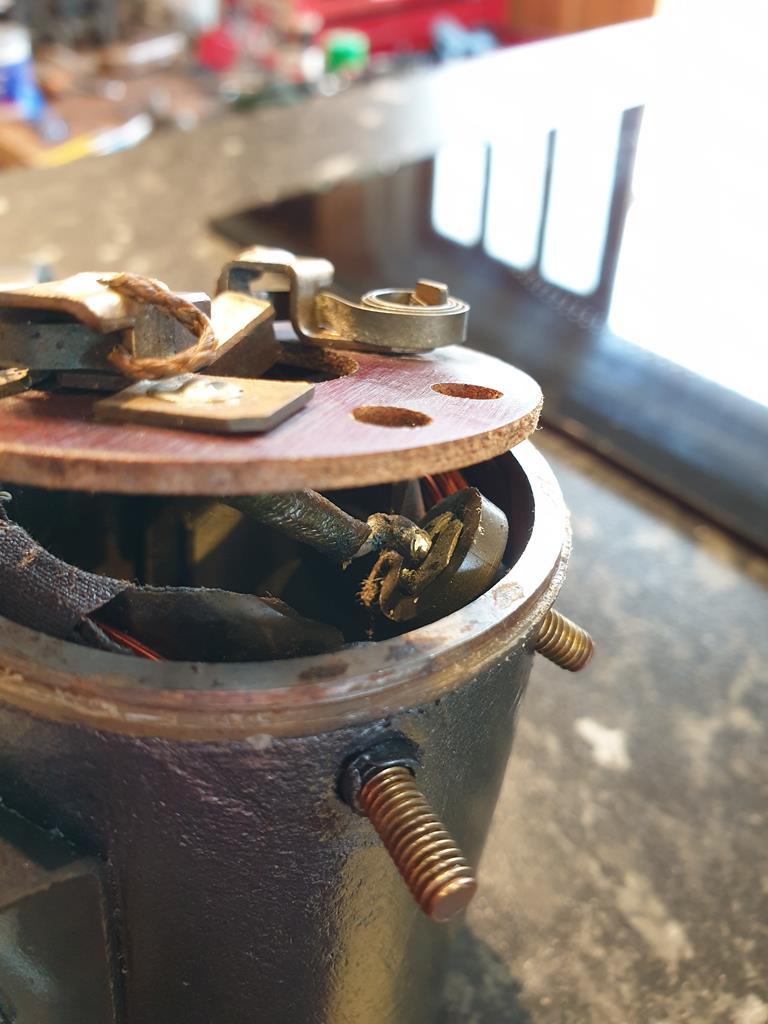 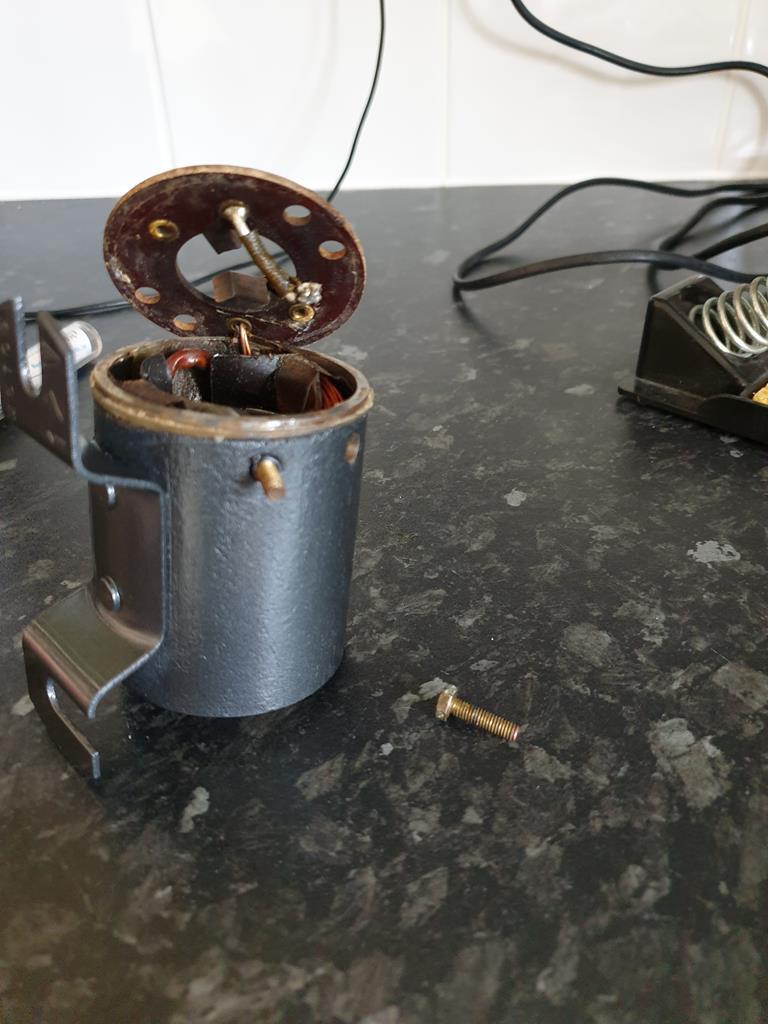 Been trying to solder it back together, not sure if my soldering iron is a bit weak or it's something about the particular metals here but it wasn't having it! So a bit of head scratching to be done there |
| |
|
|
eternaloptimist
Posted a lot
   Too many projects, not enough time or space...
Posts: 2,578
|
|
|
|
|
Nice job on that compressor. How big is your soldering iron?
|
| |
XC70, VW split screen crew cab, Standard Ten
|
|
adam73bgt
Club Retro Rides Member
Posts: 4,991
Club RR Member Number: 58
|
|
|
|
|
It's just a little electric 25W hobby type one, I suspect the issue is that it isn't man enough to get the heat into the terminal bolt to get it to take the solder
|
| |
|
|
eternaloptimist
Posted a lot
   Too many projects, not enough time or space...
Posts: 2,578
|
|
Apr 18, 2020 14:35:00 GMT
|
I think you’re right. You could preheat the screw in the oven then try soldering it, but tbh I think you’re going to struggle without a much bigger iron. Alternatively, find a terminal like this, bend the tab up and solder the wire to that. The terminal could fit under the screw head sandwiched between the screw head and the insulating washer. 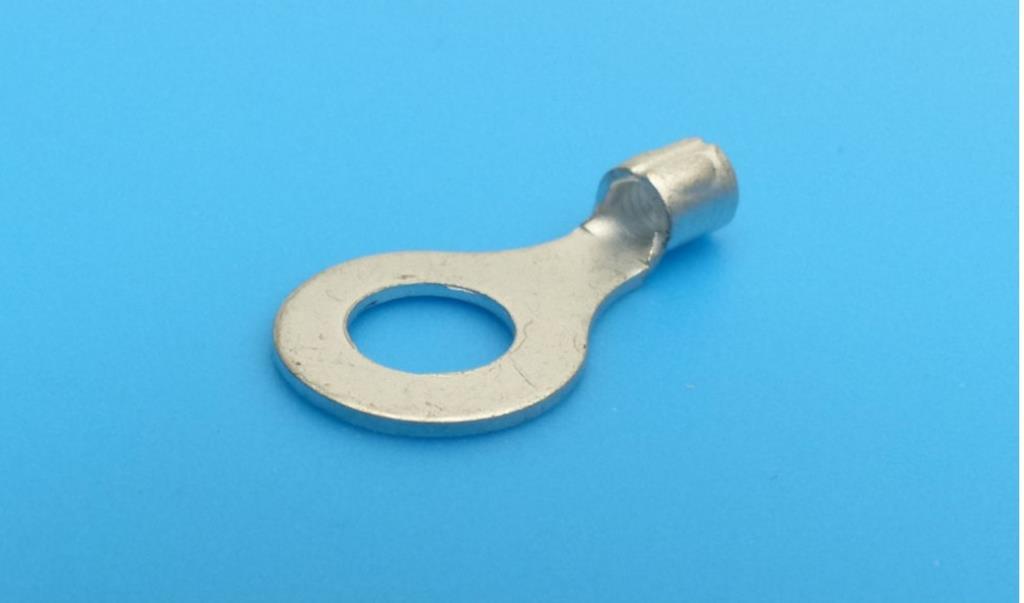 |
| |
XC70, VW split screen crew cab, Standard Ten
|
|
Darkspeed
Club Retro Rides Member
Posts: 4,874
Club RR Member Number: 39
|
|
Apr 18, 2020 20:32:10 GMT
|
|
With those sort of jobs I find one of those micro blow torches to be very good
|
| |
|
|
|
|
|
|
|
With those sort of jobs I find one of those micro blow torches to be very good +1 definitely. |
| |
|
|
adam73bgt
Club Retro Rides Member
Posts: 4,991
Club RR Member Number: 58
|
|
Apr 20, 2020 22:47:38 GMT
|
Thats a good idea eternaloptimist ! I've had a go at doing that which has been semi successful. Managed to get the ring terminal soldered onto the existing wire and got it to go over the terminal as well, only issue currently is that the wire routing has changed a bit so that it goes exactly where the long screws that hold the end cap on, want to go... I think part of the issue is that that wire appears to be solid which is making it tricky to bend where I want it to, I'm fairly tempted to remove it and replace it with a more flexible bit of wire. In any case, I have ordered a gas powered soldering iron as well with some various attachments as whatever I do on this, I'll need a bit more oomph than my current iron has! Thanks for the recommendations guys  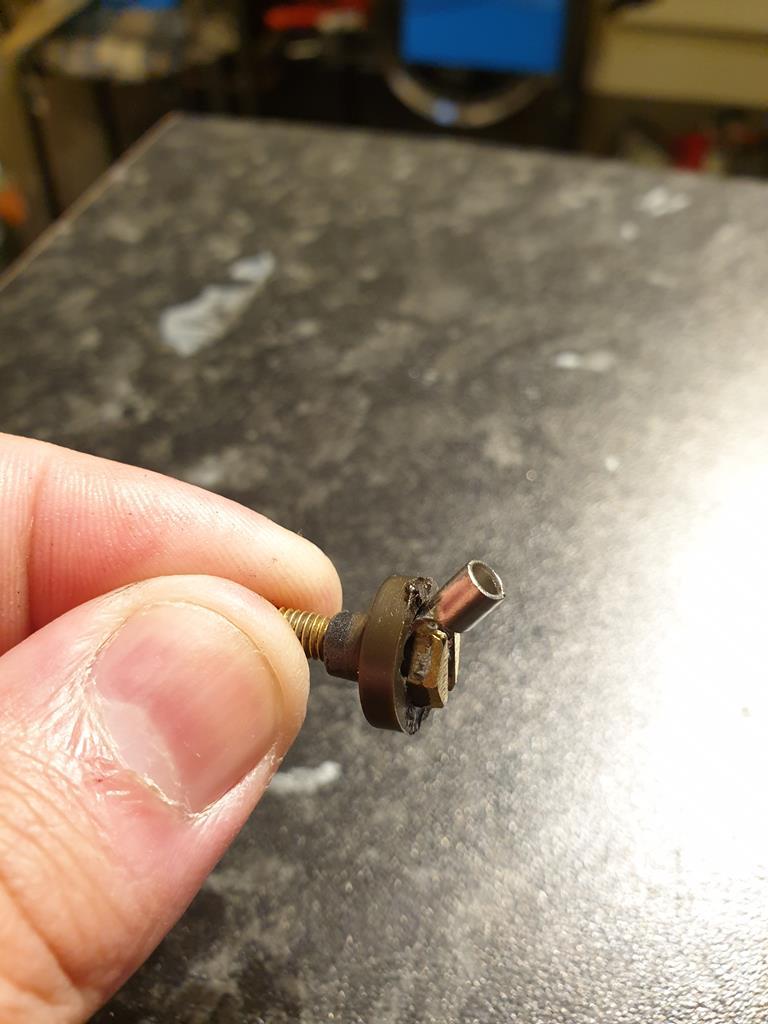 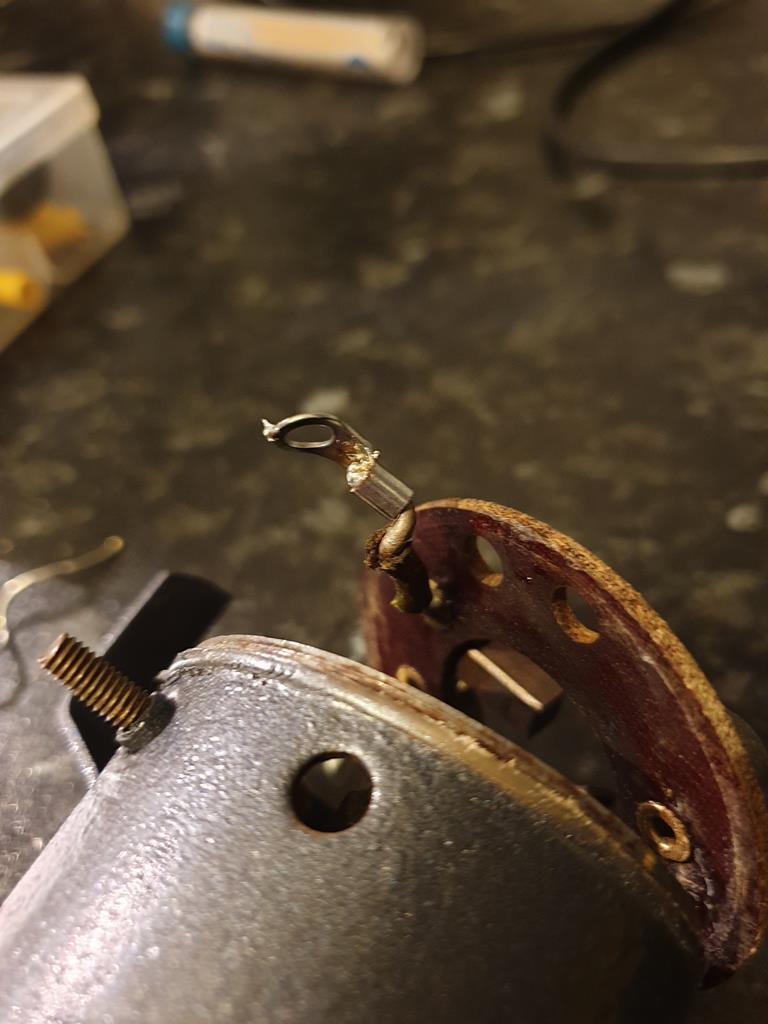 While I wait for that to turn up though, found some more bits for the cleaning and painting treatment. 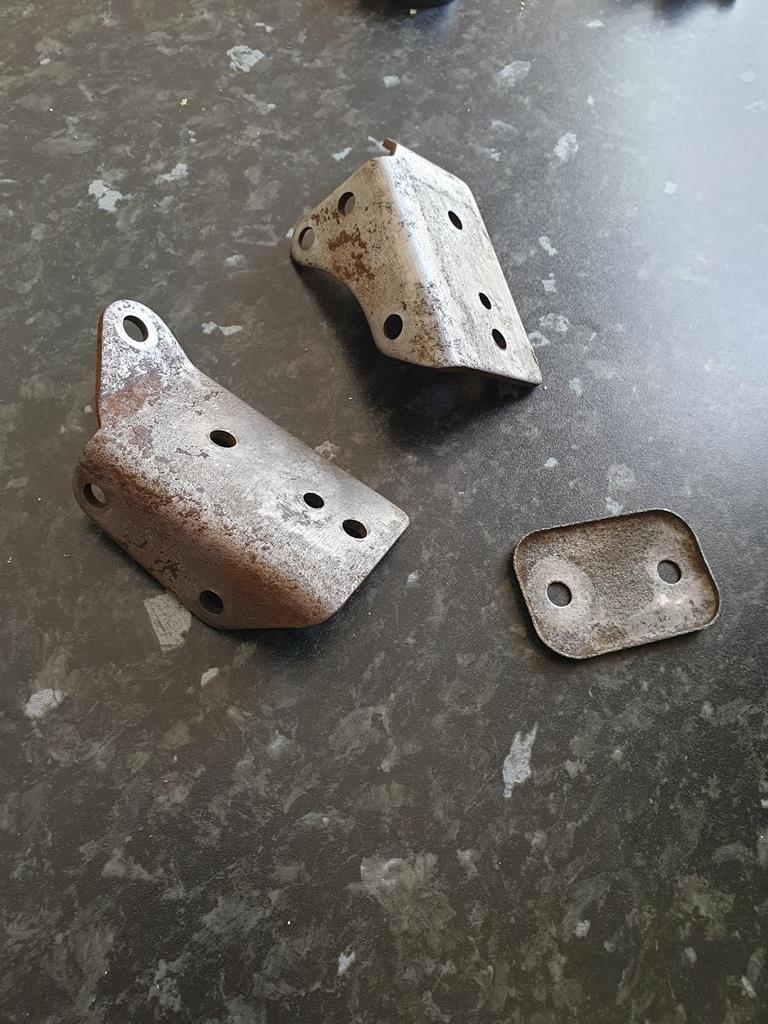 Couple of engine mount brackets which I've now finished off in satin black and the smaller blanking plate came from the bulkhead I believe so I've painted that with some Mallard Green aerosol which I've had kicking about for years. Also this evening I did manage to uncover the gearbox mounting brackets which look delightful... so they're next on the list! I'm also going to get my head around the gearbox crossmember and mounting. Many B owners seem to curse it as being one of the harder jobs on these cars but I'm going to see if I can find an easier way to do it... |
| |
|
|
|
|
|
Apr 20, 2020 23:11:47 GMT
|
|
Huh. Thanks for the lesson on what the inside of those air horns looks like.
Hope those hoses are ok still!
|
| |
|
|
|
|
trimtechniques
Part of things
  Porsche 928 4.7 ltrs of German grunt. Mazda MX-5 MK1 Dakar. VW T4 camper
Posts: 158
|
|
Apr 20, 2020 23:39:04 GMT
|
|
Great effort.its coming along really well. It will be a good looking car when it's done!
|
| |
|
|
adam73bgt
Club Retro Rides Member
Posts: 4,991
Club RR Member Number: 58
|
|
Apr 22, 2020 19:45:37 GMT
|
Huh. Thanks for the lesson on what the inside of those air horns looks like. Hope those hoses are ok still! I get the feeling the hoses aren't original, not really basing that on anything but they just don't feel as old as the other bits appear but I could be wrong of course. In any case, they seem to be pretty usable still, if I can get this compressor back together I'll give the horns and hoses a good going over! Great effort.its coming along really well. It will be a good looking car when it's done! Thank you  I certainly hope so haha Well according to facebook, today marks 8 years of ownership for me with the MG  sadly its probably only been on the road for about half that time haha My gas soldering iron has turned up but didn't come with any gas so I'll need to go out and get some before I can continue on that. However I have been taking advantage of the good weather by getting lots of little odds and sods painted Painted up those engine mount brackets and did the tappet covers in VHT 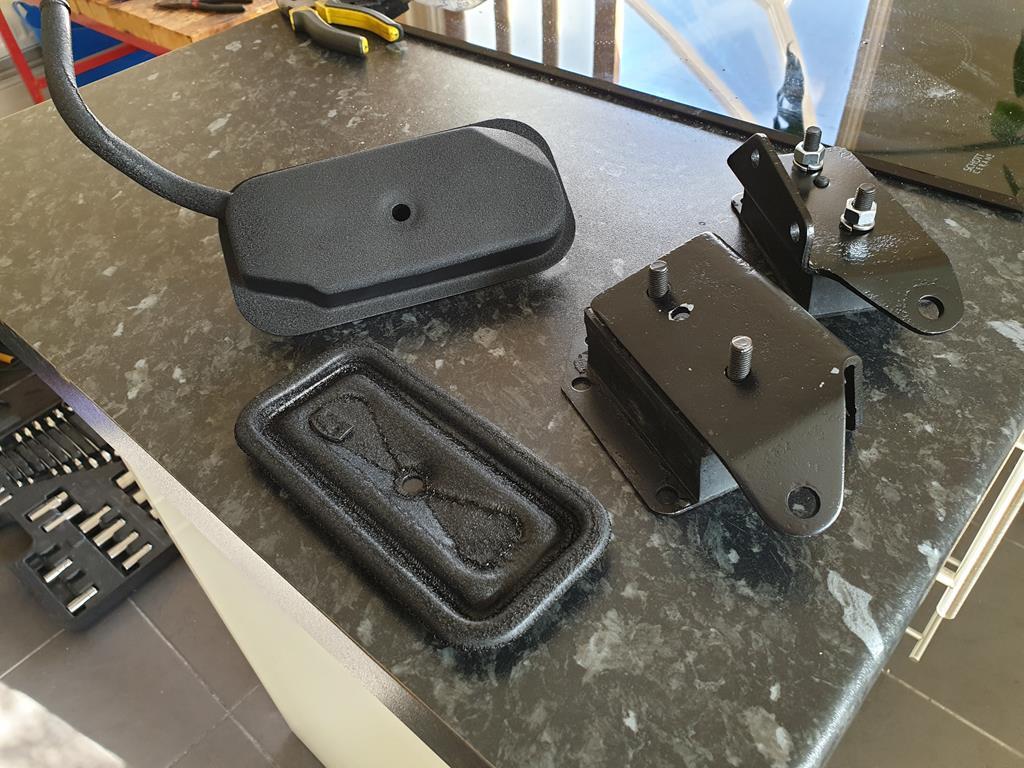 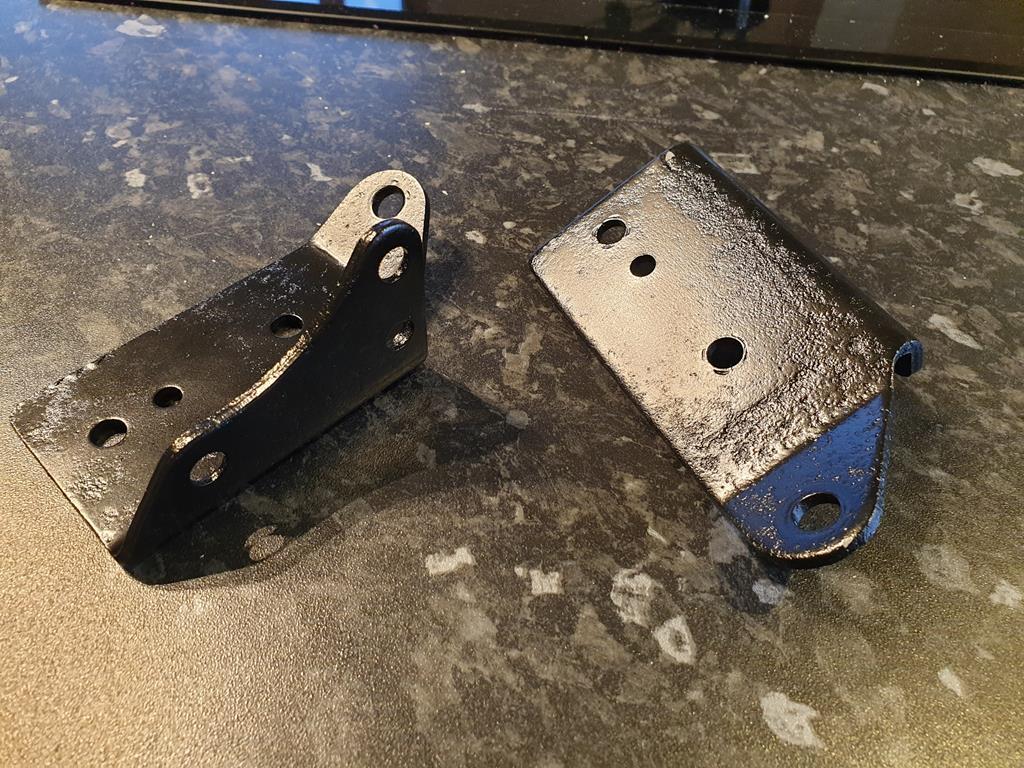 Then did these bits, support brackets for the front grille, bonnet striker cup thing and a bracket from the alternator 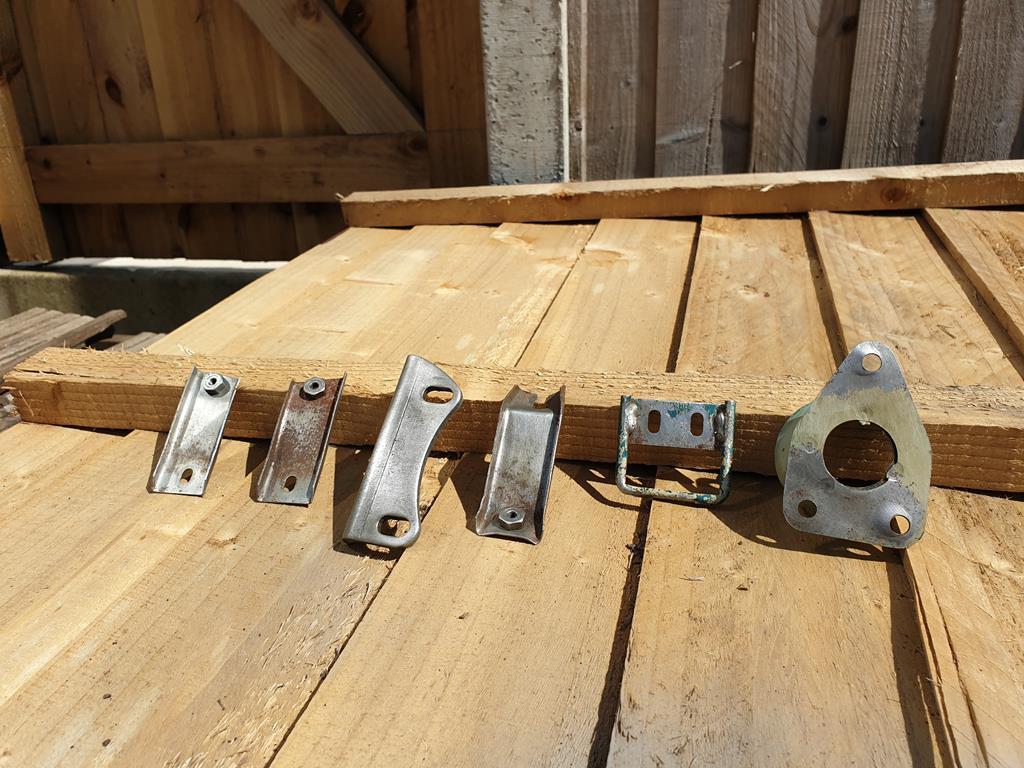 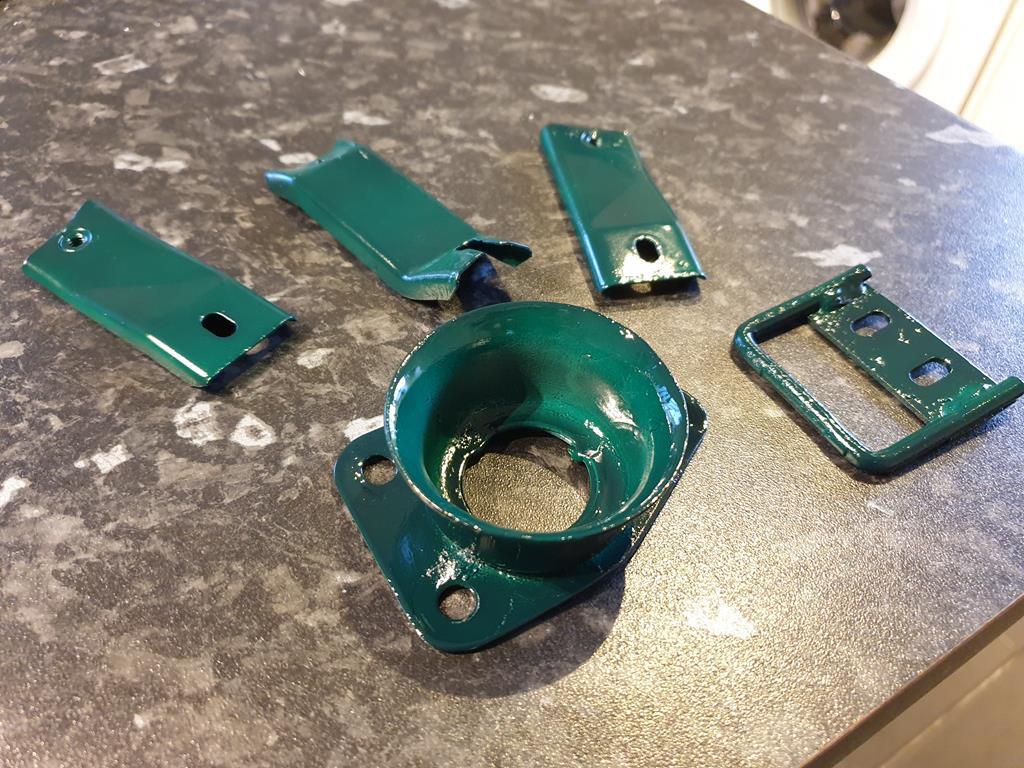 The photos really don't show how much effort that took  all those parts had some pretty ingrained grease and dirt on them so took a fair bit of cleaning, wire brushing and de-rust dipping before I could get some paint on them. The bonnet latch was even worse and is just in the de-rusting dip ahead of me painting it tomorrow. Dug out this gearbox mounting bracket, it amused me because it perfectly sums up how most parts on this car are, either covered in caked on oil and grime like the top part, or quite rusty and with dried on dirt like the bottom part  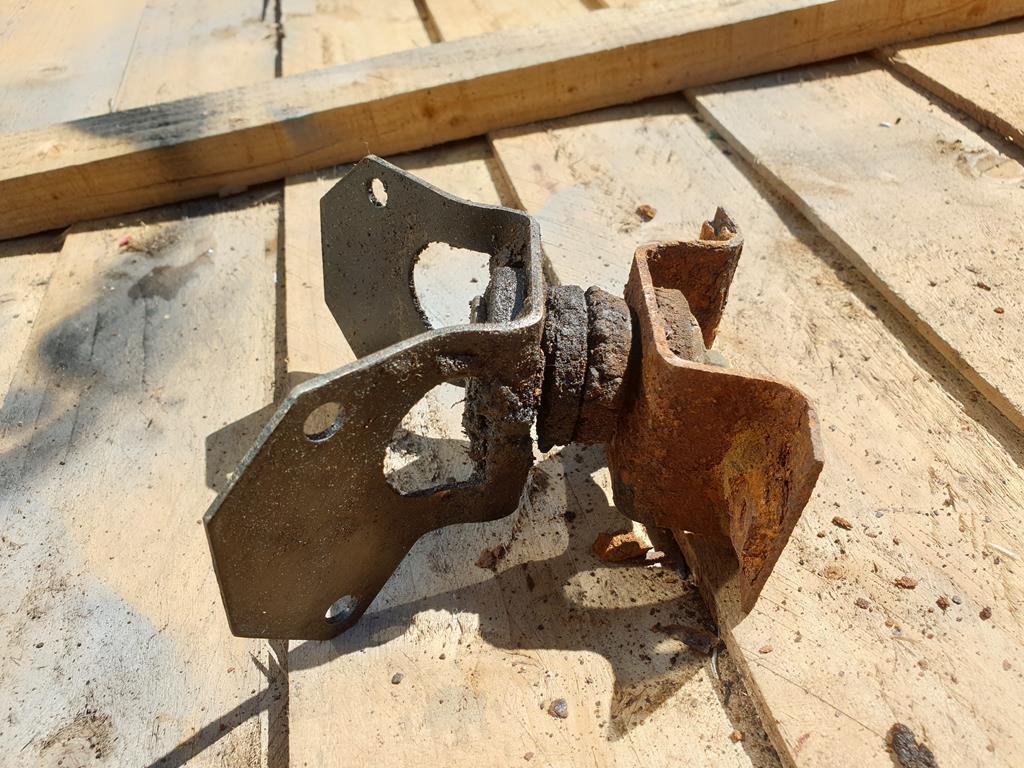 The inadvertent oil bath did mean that the top bit cleaned up pretty easily at least and is now painted and ready for a new rubber bush to be fitted as the old one practically fell apart in my hands. I will be replacing that pin that connected the two parts though as it has seen better days and they're quite cheap. The bottom half of the mount has had one de-rust bath already and is getting there but I'm giving it another dip overnight to get it as best I can. 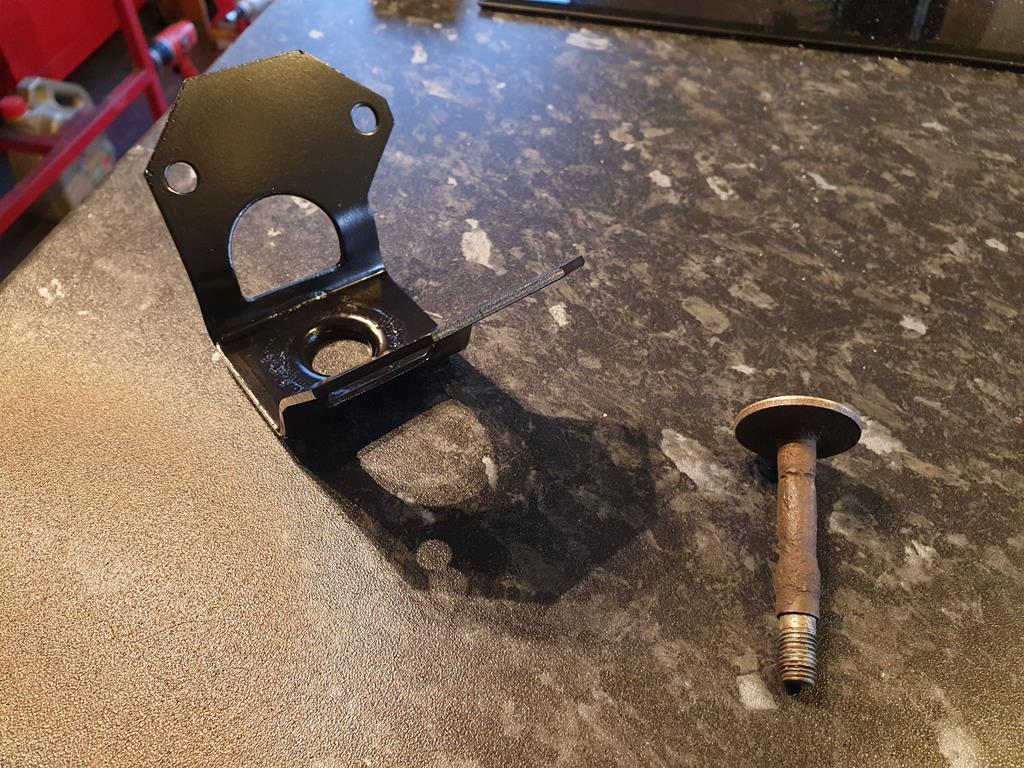 Now speaking of the rubber bushes. There are two bobbin type bushes which go on the top and bottom halves of the mount respectively. 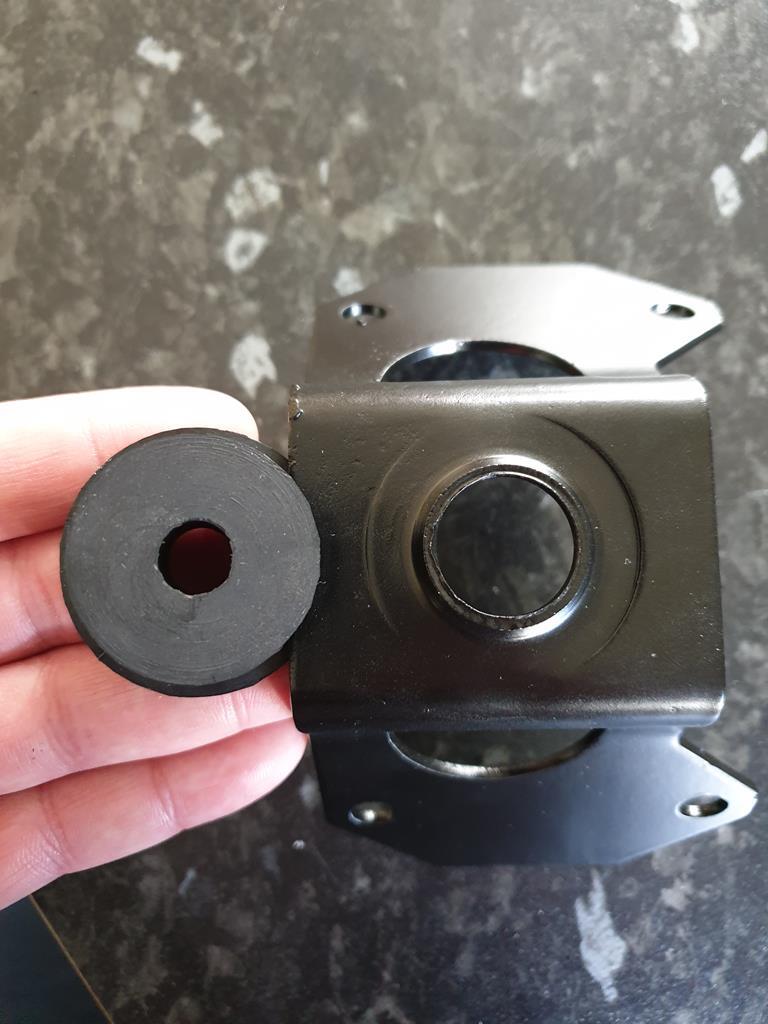 That is quite a difference in diameter so they're not the easiest things to fit. I've given up on it for the time being and will attack it again later or tomorrow I think! |
| |
|
|
|
|
|
Apr 22, 2020 23:14:12 GMT
|
Might need a bit of vaseline on that one! Or a ring compressor  |
| |
|
|
samta22
Club Retro Rides Member
Stuck in once more...
Posts: 1,276  Club RR Member Number: 32
|
|
Apr 23, 2020 10:31:18 GMT
|
Soak in hot water, apply vaseline and watch it fly everywhere but where you want it to go, however you occasionally get lucky and will seat as intended and you'll wonder what the fuss was about  |
| |
'37 Austin 7 '56 Austin A35 '58 Austin A35 '65 Triumph Herald 12/50 '69 MGB GT '74 MGB GT V8'73 TA22 Toyota Celica restoration'95 Mercedes SL320 '04 MGTF 135 'Cool Blue' (Mrs' Baby) '05 Land Rover Discovery 3 V8 '67 Abarth 595 (Mrs' runabout) '18 Disco V |
|
bstardchild
Club Retro Rides Member
Posts: 14,965
Club RR Member Number: 71
|
|
Apr 23, 2020 11:59:14 GMT
|
Soak in hot water, apply vaseline and watch it fly everywhere but where you want it to go, however you occasionally get lucky and will seat as intended and you'll wonder what the fuss was about  We are talking about bushes right? being serious I prefer red rubber grease on rubber bits and tend to use copperslip on poly parts |
| |
|
|
samta22
Club Retro Rides Member
Stuck in once more...
Posts: 1,276  Club RR Member Number: 32
|
|
Apr 23, 2020 12:05:07 GMT
|
Soak in hot water, apply vaseline and watch it fly everywhere but where you want it to go, however you occasionally get lucky and will seat as intended and you'll wonder what the fuss was about  We are talking about bushes right? being serious I prefer red rubber grease on rubber bits and tend to use copperslip on poly parts Possibly not, but that's more of an insight as to how your mind works  good point on the grease vs. copperslip, for some reason I always seem to have a tube of grease left over from fitting SuperPro polybushes so will often use that for these kind of jobs as well. |
| |
'37 Austin 7 '56 Austin A35 '58 Austin A35 '65 Triumph Herald 12/50 '69 MGB GT '74 MGB GT V8'73 TA22 Toyota Celica restoration'95 Mercedes SL320 '04 MGTF 135 'Cool Blue' (Mrs' Baby) '05 Land Rover Discovery 3 V8 '67 Abarth 595 (Mrs' runabout) '18 Disco V |
|
adam73bgt
Club Retro Rides Member
Posts: 4,991
Club RR Member Number: 58
|
|
Apr 25, 2020 17:57:32 GMT
|
Haha I was thinking this would be prime for innuendo  Well I did get the bushes in but that isn't a fun job at all.. I ended up putting the bushes in boiling hot water (I did let it get a bit cooler before I fished them out though!) then used some washing up liquid as lube ( I can't vouch for its efficacy outside of installing bushes..) and managed to pull/push the bushed through using a bit of string wrapped around the bush and brute force. I only had some twine type string which wasn't strong enough really, but it worked well enough, once you get the lip through the hole (...) you can poke the rest through using a screwdriver fairly easily 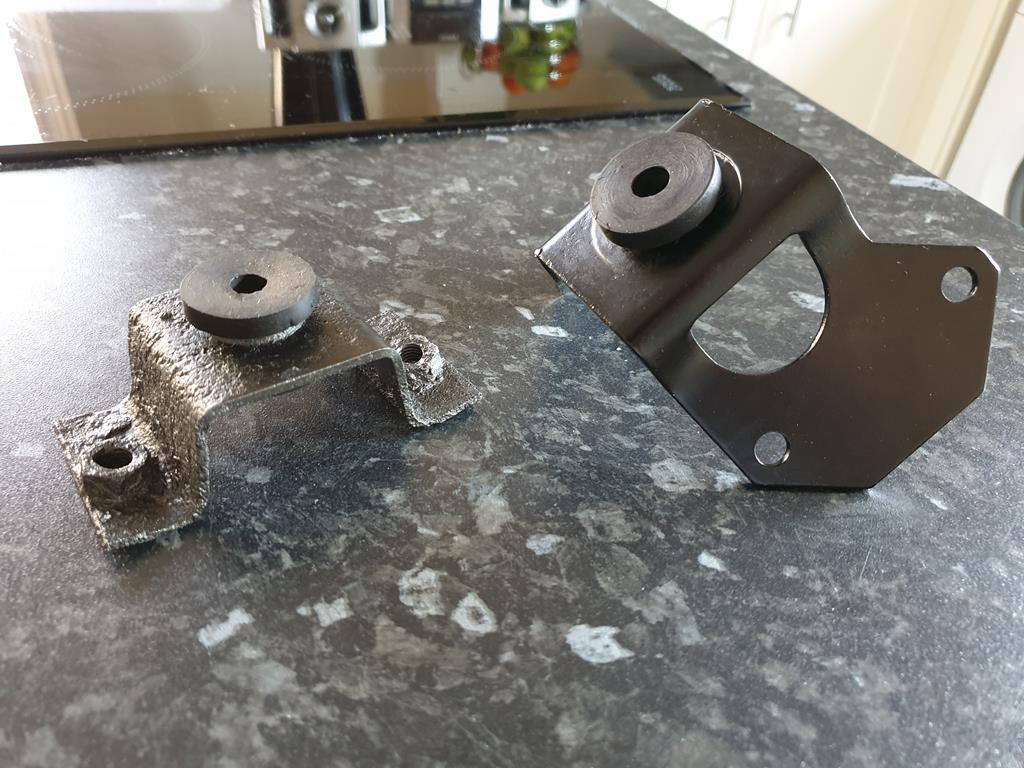 Just waiting for the new pin to arrive then I'll loosely mock it up on the gearbox/crossmember. It'll probably have to come off again when fitting to the car but it keeps it out of the way for now, and I'd prefer the 'box to be sat on the crossmember than the bottom of the o/d unit. I'll tackle the air horn compressor again next, I'm almost beginning to run out of jobs to do.. I know there is bodywork to sort in terms of rust and in fitting the Sebring kit but I've been putting that off. Whenever lockdown ends I can look to get some machining work sorted on the engine, but for the moment I'm being kept busy trying to repair the daily driver |
| |
|
|
|
|
|
Apr 27, 2020 16:29:45 GMT
|
Wow - I’ve just spent the last few days reading all 46 pages and I’ve gone from cringing at some of your early “repair” efforts to being absolutely astounded by your tackling of gearboxes, overdrives etc. Thanks so much for sharing this journey (especially keeping all the images alive), it’s been a highly enjoyable way of whiling away a few lockdown days. Can’t wait to see this finished  |
| |
|
|
adam73bgt
Club Retro Rides Member
Posts: 4,991
Club RR Member Number: 58
|
|
Apr 27, 2020 17:16:19 GMT
|
Well you deserve a medal for that  but thank you very much. I too occasionally look back at my earlier efforts and cringe but hey it's all part of the learning curve haha (though I will say, the Dulux rollered on roof paint has held up well over the past 8 years!) I'm certainly looking forward to being able to drive it again |
| |
|
|
|
|
|
Apr 27, 2020 17:57:37 GMT
|
the Dulux rollered on roof paint has held up well over the past 8 years!) Haha brilliant  |
| |
|
|
|
|


 sadly its probably only been on the road for about half that time haha


