gess
Part of things
 
Posts: 220 
|
|
Jun 22, 2016 10:36:35 GMT
|
|
Good to see that there is some progress and mojo boosting!
Mk3 Mondeo from 2001 to 2007 has also got a remote fuel flap opening system. A simple lever connected to a wire running from the left side of the drivers seat to the fuel flap. Maybe you could source one, and keep it Ford :-) I once had a Daewoo Nexia with an electric fuel flap opener, a small button on the dash and an electric solenoid in the boot. A more modern touch, and it was equipped with an emergency relaease wire in the boot. The Mondeo didn't have one of those :-(
|
| |
|
|
|
|
eurogranada
Europe
To tinker or not to tinker, that is the question...
Posts: 2,556
|
|
|
|
Good to see that there is some progress and mojo boosting! Mk3 Mondeo from 2001 to 2007 has also got a remote fuel flap opening system. A simple lever connected to a wire running from the left side of the drivers seat to the fuel flap. Maybe you could source one, and keep it Ford :-) I once had a Daewoo Nexia with an electric fuel flap opener, a small button on the dash and an electric solenoid in the boot. A more modern touch, and it was equipped with an emergency relaease wire in the boot. The Mondeo didn't have one of those :-( Thanks for that! Yes mojo is still there, but of course, this week access to the car (as in time to go) is a problem. I did some small things like send of the seat belts for a reweb and repaint the modified trims. I hope to be at the barn tonight and tomorrow afternoon, but it's a crazy week. I'd really like the wiring/interior trim to be behind me. So I can turn my attention to the dash area and call it ready for MOT. Haha, if I can keep it all ford, I'll certainly try. See if I can source something. But this can be one of those "when it's up and running" projects. |
| |
|
|
eurogranada
Europe
To tinker or not to tinker, that is the question...
Posts: 2,556
|
|
|
|
|
Just a very short update for today...
I just wanted to say that despite it being a rotten job, I have finally managed to decently put my inner sill trims back in the car. I hear you thinking, why is that such a rotten job? Just 6 screws to put through a plate right? Well....
I guess I made it a little harder for myself by gluing carpet to the inner sills as I couldn't use my old carpet due to floor modifications. Add to that the many many thick wires for audio components in the boot that for various reasons need to run back to front and the fact that the granada has absolutely NO provisions for any of that (even my 66 mustang had a nice channel in the sills). Add to that speaker pods on the kick panels that in hindsight I should have positioned a cm or 2 higher from the lower edge. This meant trimming down and repainting the trim pieces. And finally add to that the fact that I had sourced a better set of these trims as mine were corroded and brittle in the front. This meant the mounting holes didn't line up either.
Anyway after fighting this job a little for a couple of sessions now, they are in. I didn't have enough of the correct screws, so I'll have to replace some of them in the near future after sourcing them (the typical head shape makes that harder).
So mojo has still not taken a hit and today I should be able to wrap up the audio and neatly tying down the wiring to the parcel shelf etc. After that I'll build the circuit for my power seat adjustment and mount the seats permanently. If I get that far I'll be happy!
Oh I also looked into my widscreen washer pump wiring again. I was told the blue wire from the footpump switch was the one that powers up the wipers for three swipes when pushed. So I hooked up my electric washer pump to that. It works as expected with one side effect: when the regular wipers are now switched on, each time park is reached, the washers fire as well. I was advised that maybe I had the wrong wire, but I don't seem to. The only other wires carry 12v constant on ignition on. So I have to find a fix for that.
Anyway, back to the regular sheduled programm....
|
| |
|
|
gess
Part of things
 
Posts: 220 
|
|
Jun 24, 2016 12:44:16 GMT
|
|
Wouldn't it have been possible to put some of the cables between the seats? In my car the power for the amplifier runs on the passenger side, audio cables to the amplifier on the transmission tunnel and I used to have some audio cables running along the drivers side sill. I also found it almost impossible to get the sill trims back in place with all the cables tucked in. It is a bit easier when the large RCA cable for the amplifier is located between the seats.
|
| |
|
|
eurogranada
Europe
To tinker or not to tinker, that is the question...
Posts: 2,556
|
|
Jun 24, 2016 15:29:51 GMT
|
Wouldn't it have been possible to put some of the cables between the seats? In my car the power for the amplifier runs on the passenger side, audio cables to the amplifier on the transmission tunnel and I used to have some audio cables running along the drivers side sill. I also found it almost impossible to get the sill trims back in place with all the cables tucked in. It is a bit easier when the large RCA cable for the amplifier is located between the seats. I had considered that as an alternative. I also considered routing them underneath in the trans tunnel. Between the seats though, I Jan even less room as my custom interior has wide base seats that just go between the tunnel and the sill. Running them underneath I found to troublesome. Creating plugged entry and exit points, protecting the cables from external influences etc. In the end it got done as is... Just a little more effort.... |
| |
|
|
eurogranada
Europe
To tinker or not to tinker, that is the question...
Posts: 2,556
|
|
Jun 27, 2016 11:37:18 GMT
|
Another week another couple of sessions on the car... I started my sessions by finishing what I had started... First was a test of the washer pump after having received some more info. Problem I have now is that using the wire that triggers the 3-time wipe of the windshield wipers to also fire of the washer pump means that when the regular wipers are switched on, the washers also fire upon each park... The info did not provide an answer. I was hoping to use a well placed diode or something to get it to work as I'd like. Still waiting on that. If that fails current thinking would be to brake the connection to the wipers from the footswitch. FAr simpler then adding another switch. Side effect would be having to manually switch on the wipers after spraying. Next I turned my attention to finishing mounting the inner sill trims over the many wires. Took zome effort but I'm happy with how it got done. I then went on to binding up all the remaining audio wiring mainly in the boot and testing the bluetooth. The quality was not super and I feared that the sound was out of fase. Testing that however turned out I had it all right and the sound just isn't any better. It's not horrible, but ist not as nice as I'm accustomed to. This binding of the wires took quite some time, but now everything is nice and out of harms way in the possibly hazardous environment that is the car boot. The seats were next on the list. Mounting them permanently for one and an wiring them up second. Mounting them was not very hard. During the floor modifications I had already taken into account the new way of mounting the seat and adjusted the different mounts to match. I had also created two simple thick brackets to crete the final mount. One point of the seat tracks extends quite a bit beyond the structural braces in the car. So I had made a mounting lug in the braces where the brackets could be attached that allowed the seat thracks to be mounted to them and be secure. Really no more difficult than screwing in 5 bolts. The wiring of the seats was a bit more complex and at this stage is not complete but functional. The design was to be able to adjust the seats with ignition on (so while driving), but also with no keys present and just the door ajar. This to aid the kids getting in the car without having to actually hand over the keys and having them turn the ignition on or possibly the engine with all possible consequences. I saw it as a convenience and a safety feature. Now this means two circuits join, one of which is switched opposit to the other... So this meant a relay and diodes to get it all safe and correct. As the diodes were missing I for now just hooked up the seats to the door ajar circuit and that works fine. Adding the door step trims I was so kindly donated by spot and refitting the under carpet and carpets finished the day off. Upon installing the door step trims, I drilled and protected the holes before riveting them in place. They didn't seem to be screwed originally looking at the holes in them. Also I didn't think they'd need to be coming off any time soon. I may not have the Original end pieces that supposedly exist, but I'll finish the installation with a small bead of black caulking. All of this cleaned up the interior real nice. Doing some under dash work to fit the car kit and some other stuff means the interior is now almost finished. And it by now has come together quite nicely!! I might add. Two final jobs that I'm having done: the side bolster adjustments and covering the speaker pods. For myself just little things like sun visors (still need to source), front cabin light (refurbed), rear cavin lights/third brake light (custom unit and mount) and the hand grips on the roofline. So the interior is pretty much there. One exception to that is the inlays on the console. I need to get to work on those. But they are not MOT required so are a bit on the back burner. It's also a grat thing to do with fibre glass, but it's such a messy process that I'm scared to do it. Although I have a spare console that could be used as it's also in dire need of fibre glass. In summary it doesn't feel like much, but it makes a huge difference in how the car looks and feels. And therefore to my Mojo. Still now looking at the interior I'm quite happy. It looks the business! The new seats also provide a great seating position with height and tilt, forward/backward, seat back angle and even 4 way adjustable lumbar support. I don't think I'll be sitting lower than Original, but if one is longer I think I added room for that. The head rests function, but when extended to max, hit the roof lining, lol. The seats are also nicely close to the console sides (definitely NO room for wiring!). The seat belt locks moving along with the seat in that respect look even better now. Somewhere in between I also fitted the final bit of bodywork: the fuel filler flap! So after this weekend I sort of feel like I'm ready to tackle the final things: Dash, seat belts and washer... and potentially an engine issue. The blinking light on the O/D switch indicates a shifter problem with a solenoid. The fact that it showed up the second I did the dash gauges gives me hope that it will be solved by undoing those. But if that does not change how the engine itself runs, I'll need to investigate further. I may have bitten myself in the but not changing over my known good harness to the new engine. But it ran well on its own loom and I was afraid that by changing the loom I'd possibly introduce problems. And in the beginning the new engine ran beatifully.Anyway, if needed I'll run compression, leak, spark and fuel (pressure) tests. Also I'll hook up my code reader and see if it says anything. But I recall it didn't. So it looks like MOT and alignment may be coming closer now pretty rapidly... We'll have to see I guess. In the meantime, have some pics! 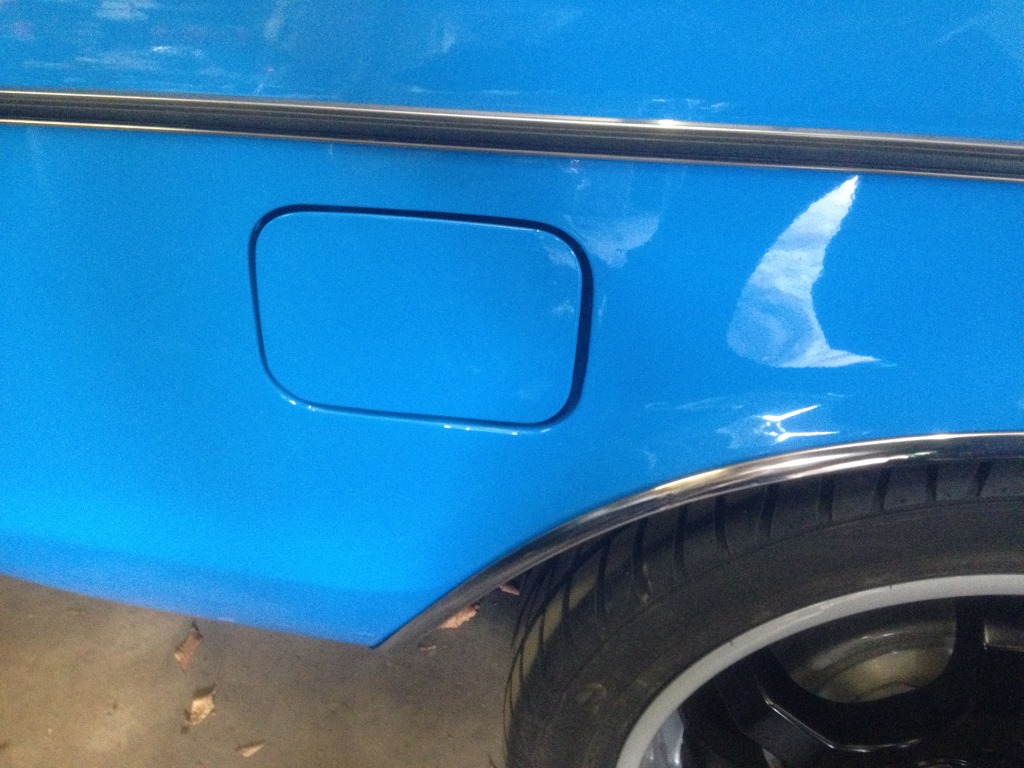 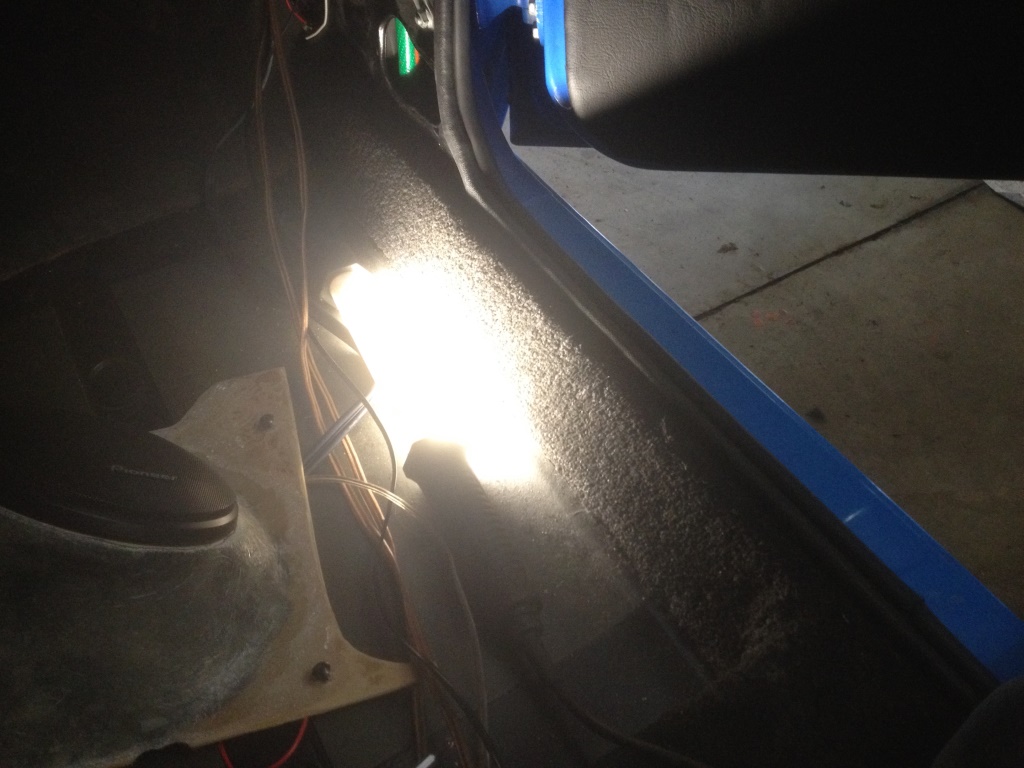 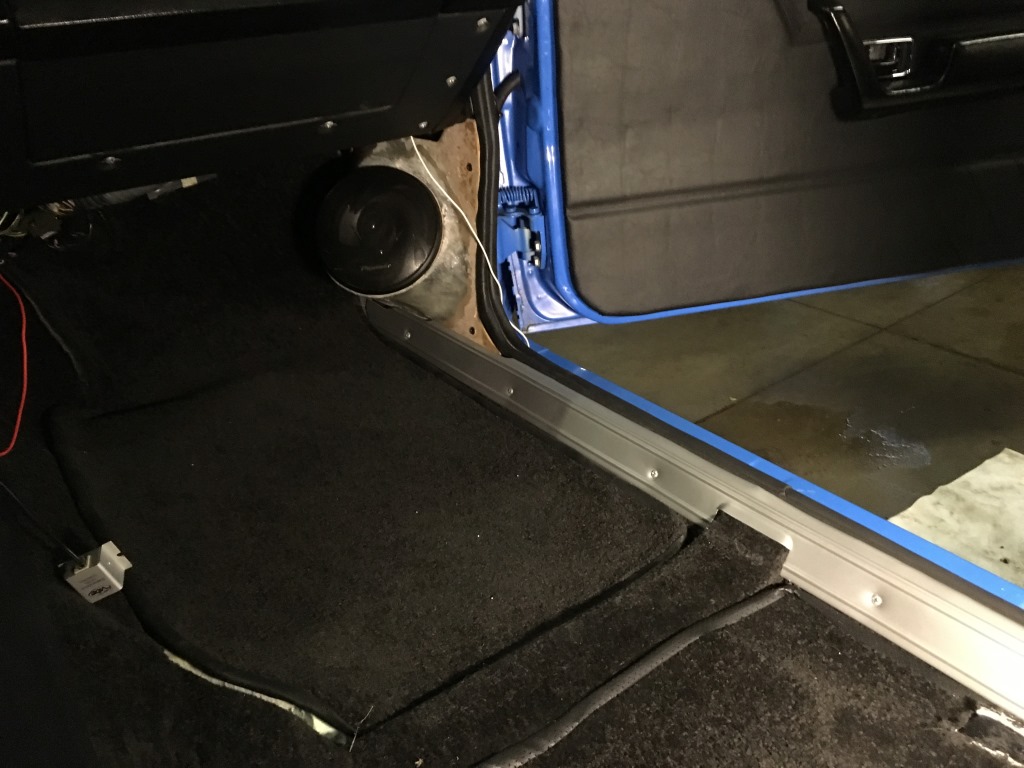 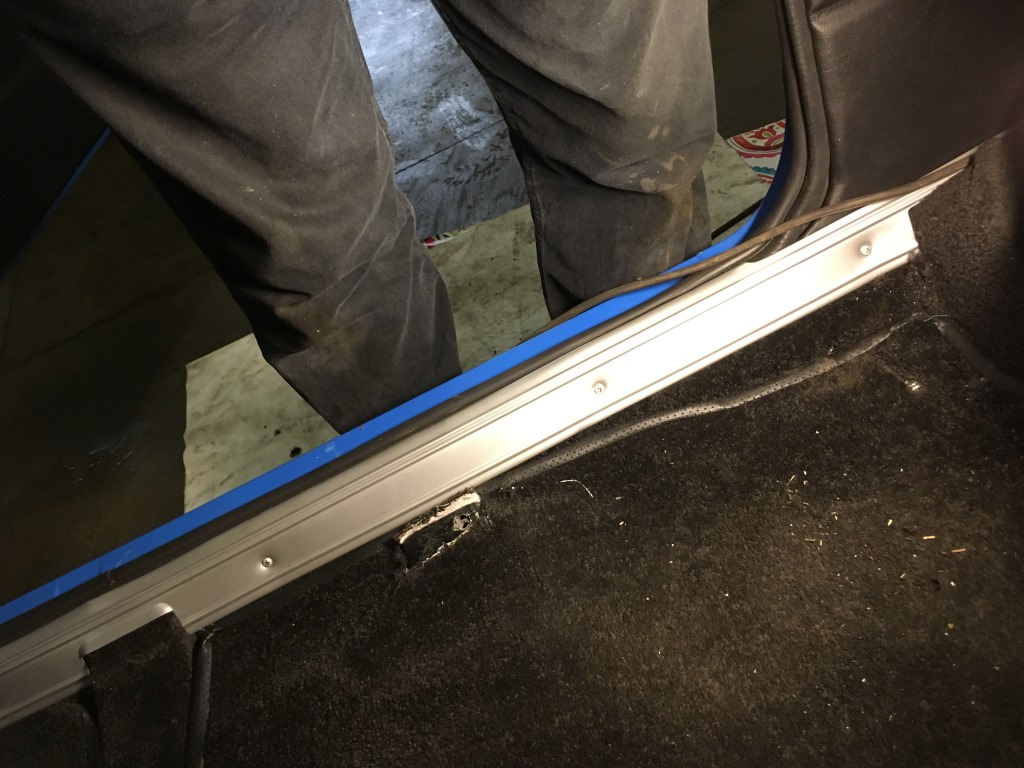 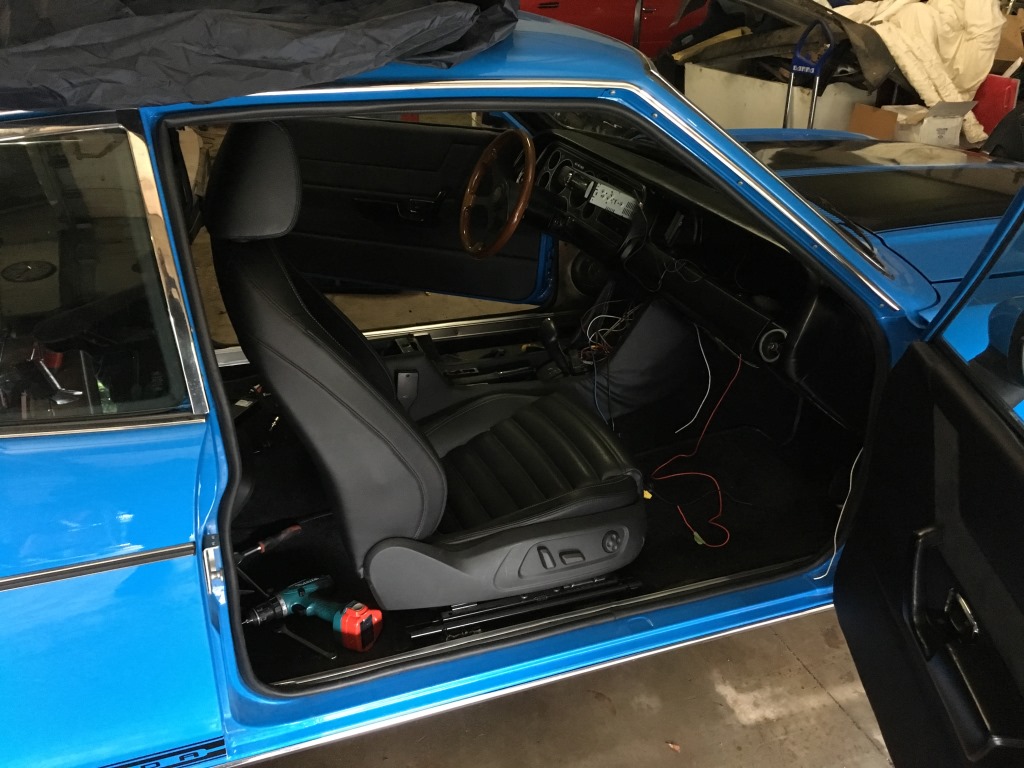 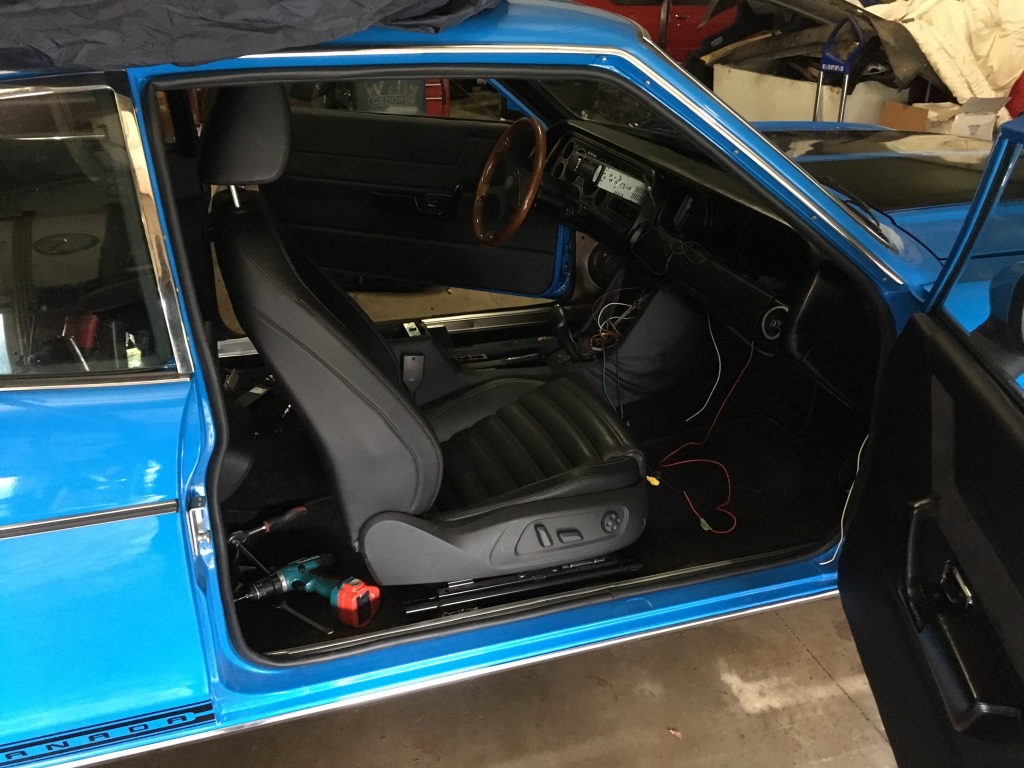 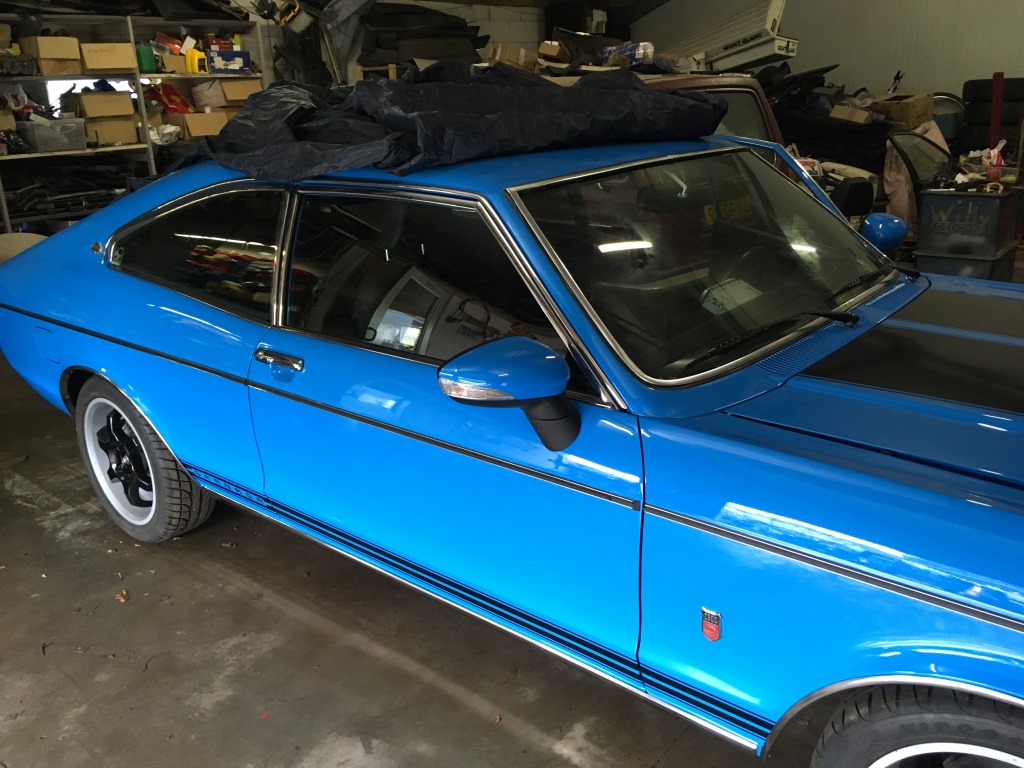 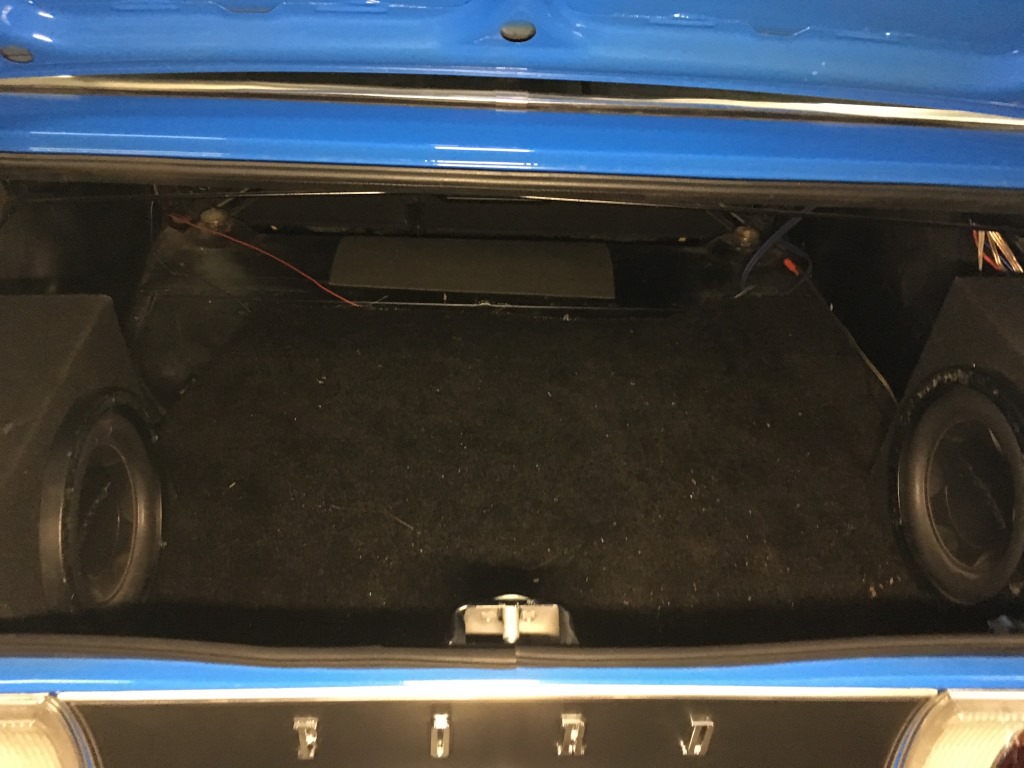 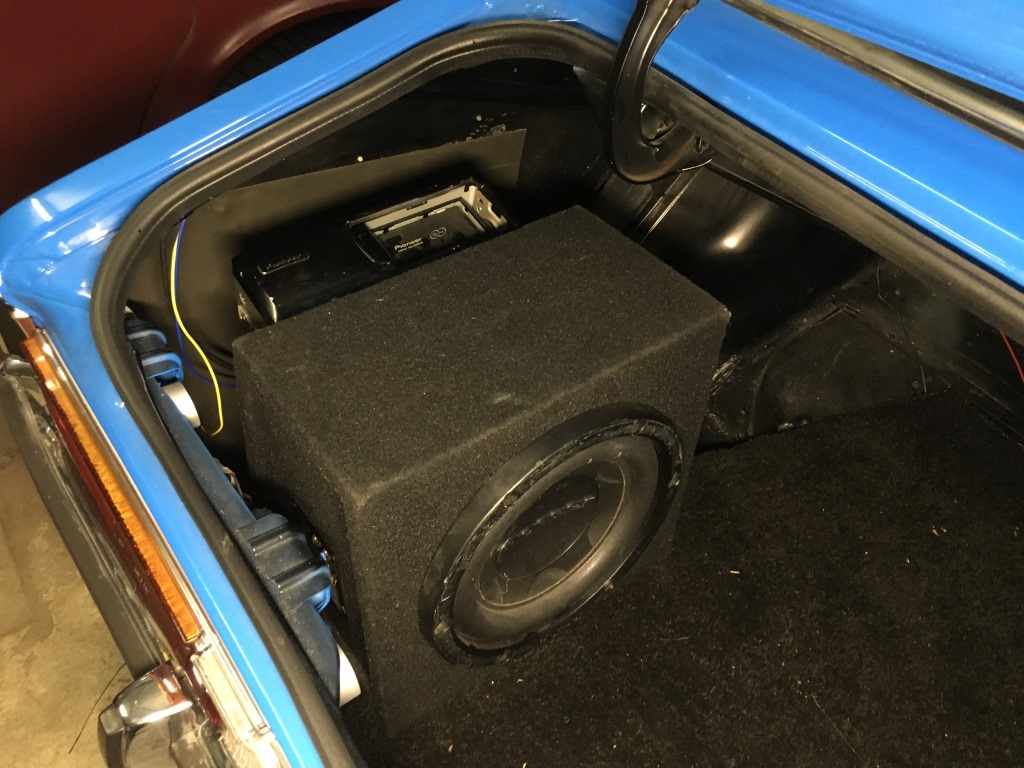 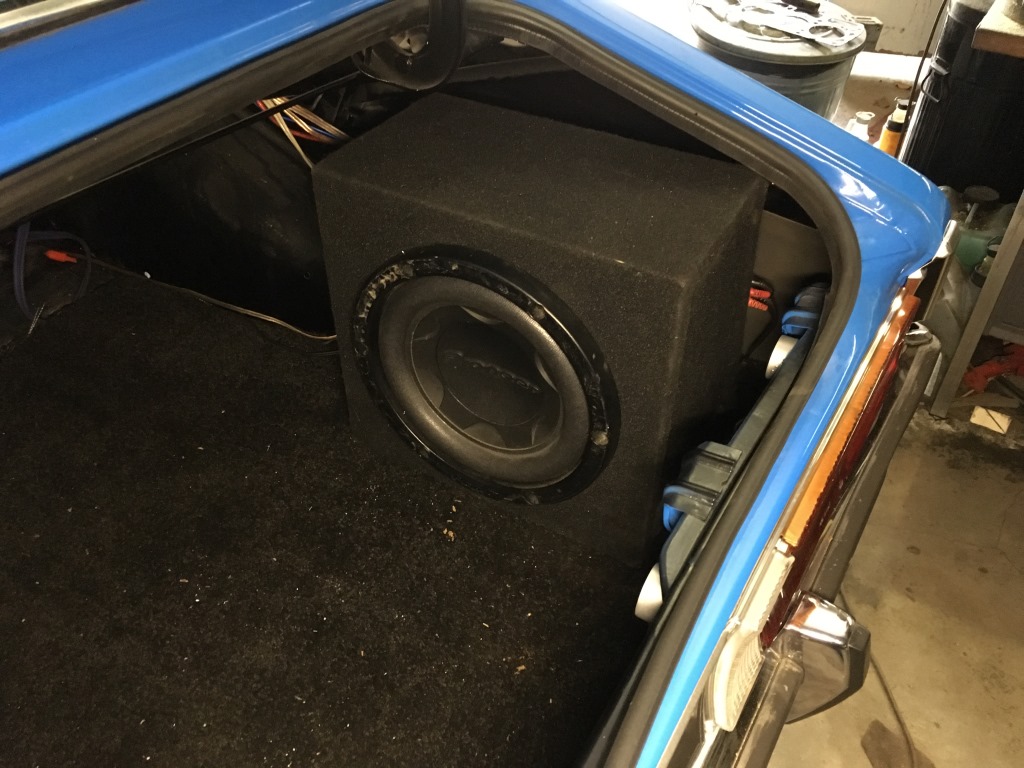 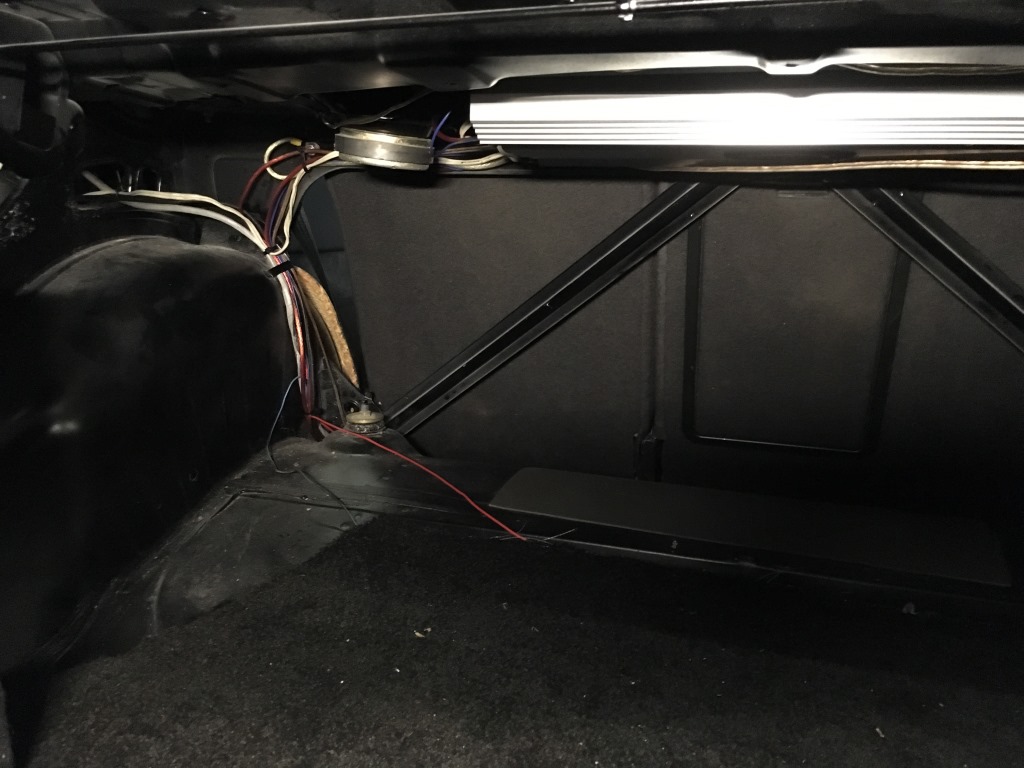 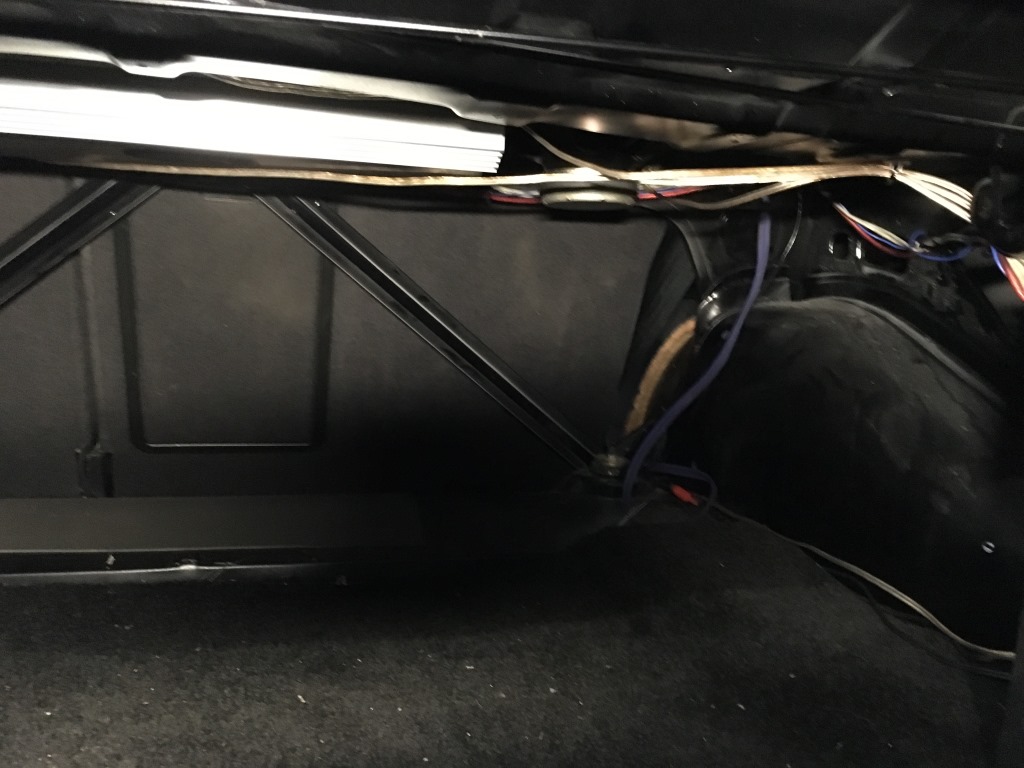 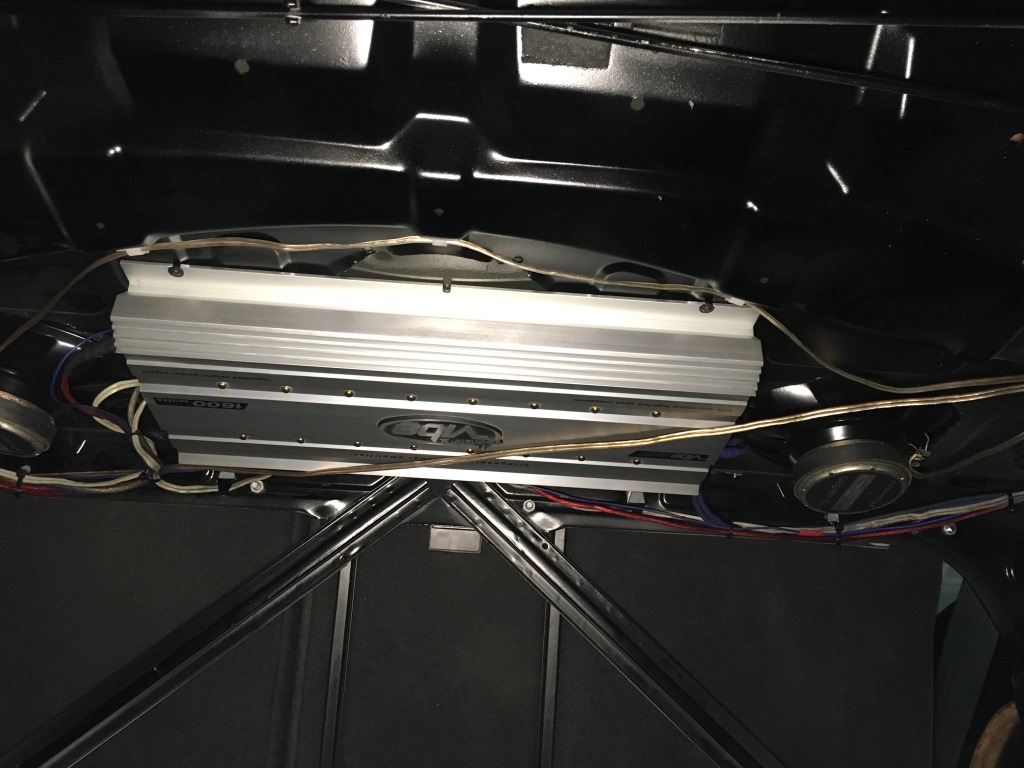 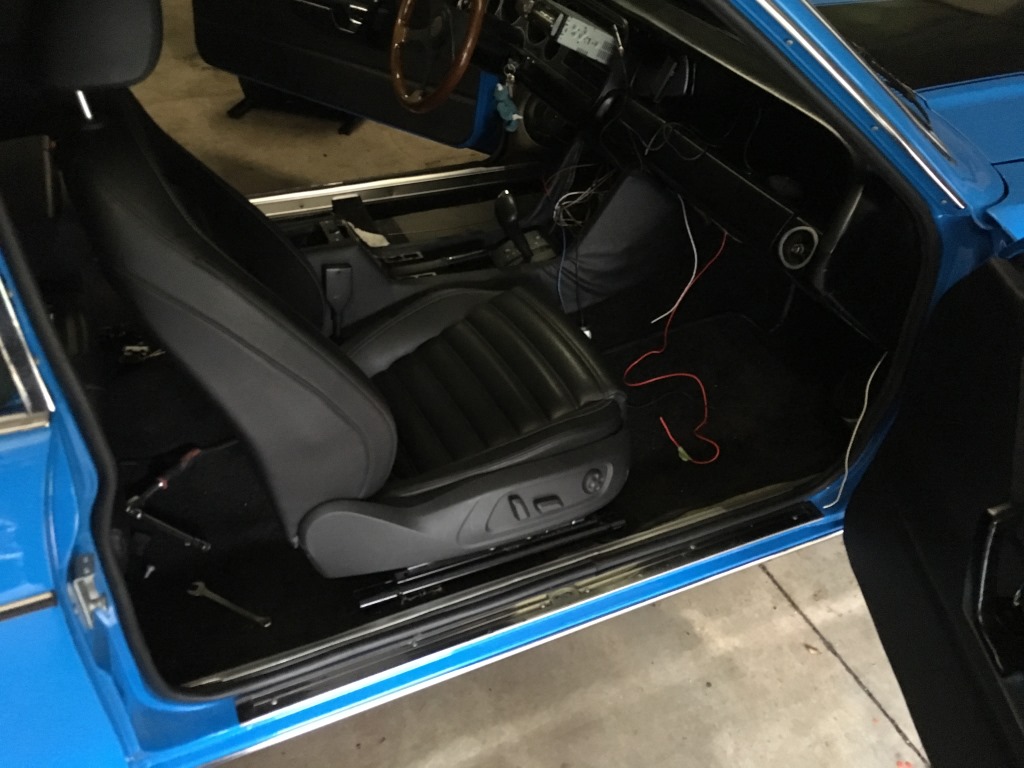 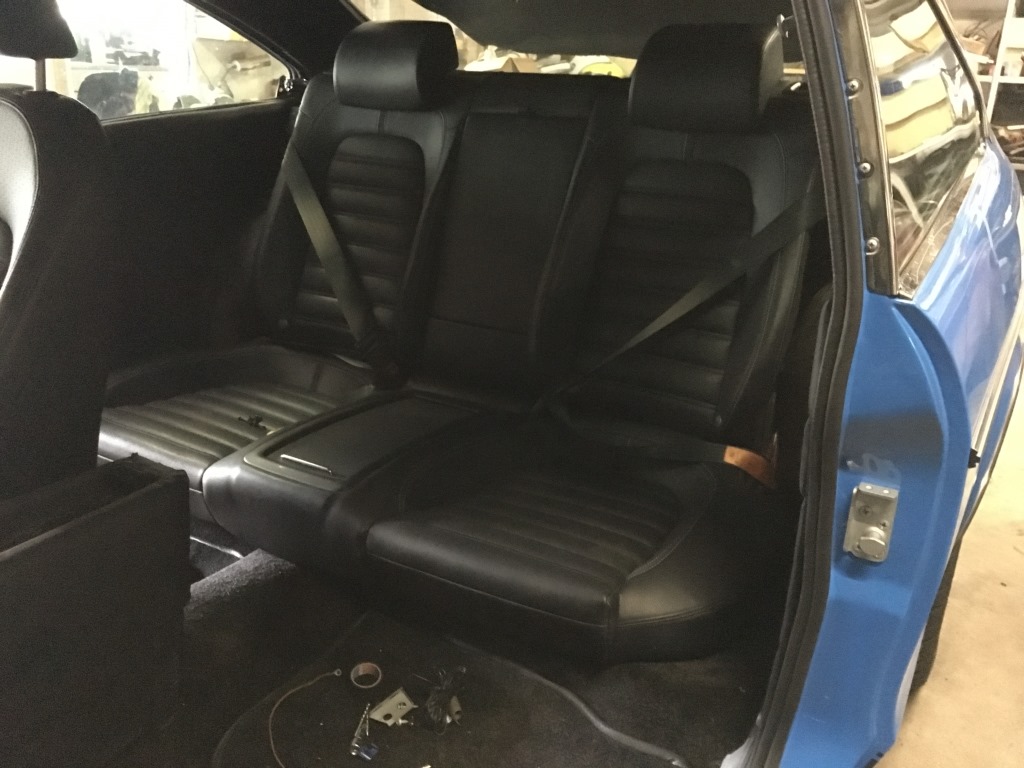 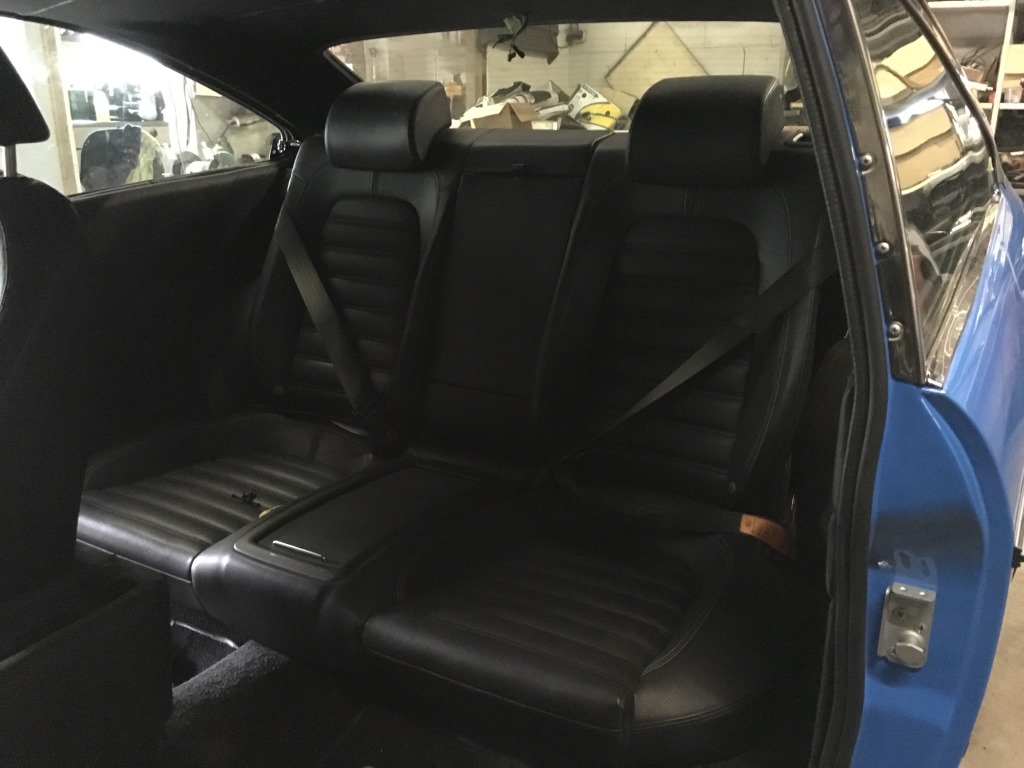 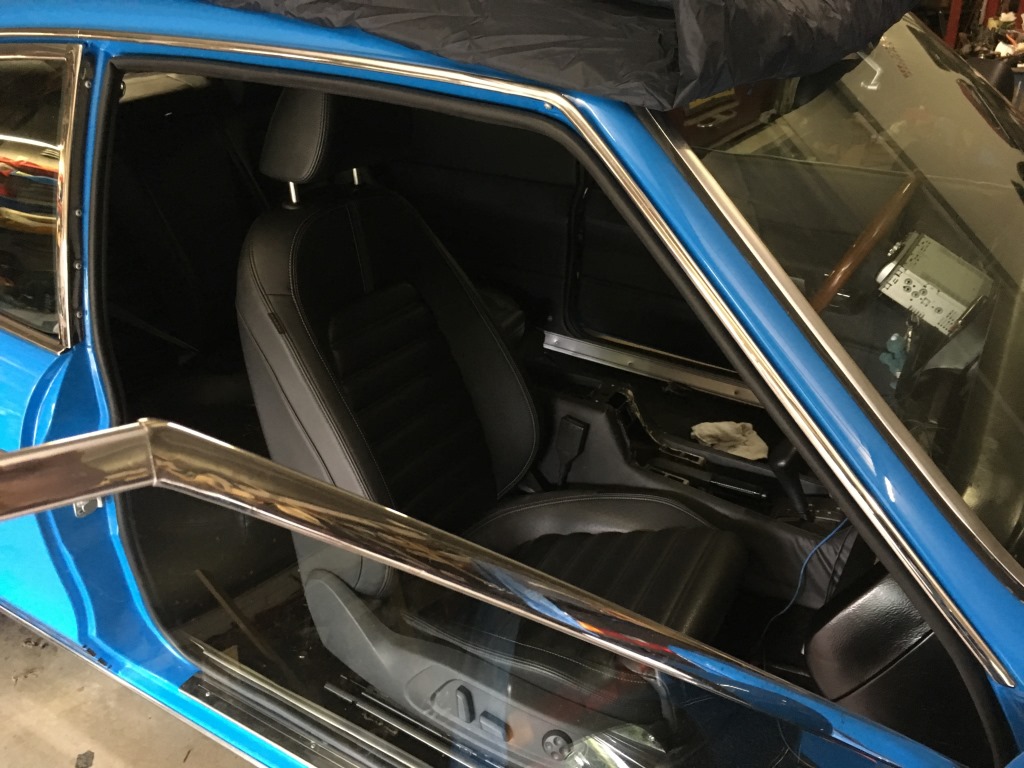 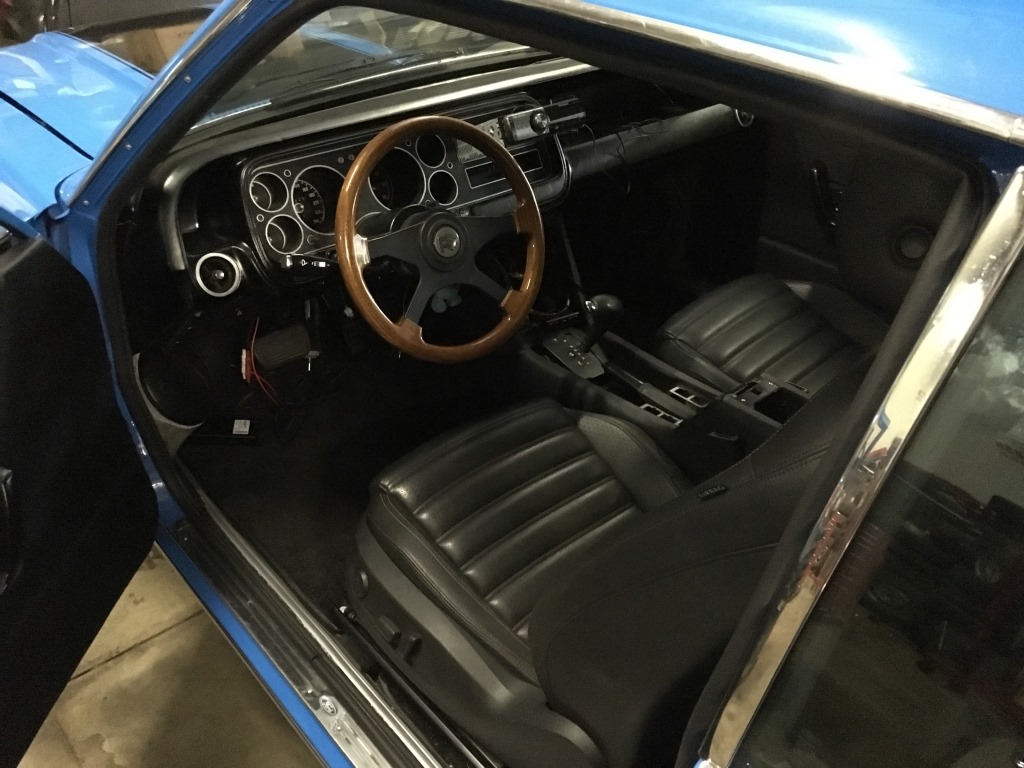 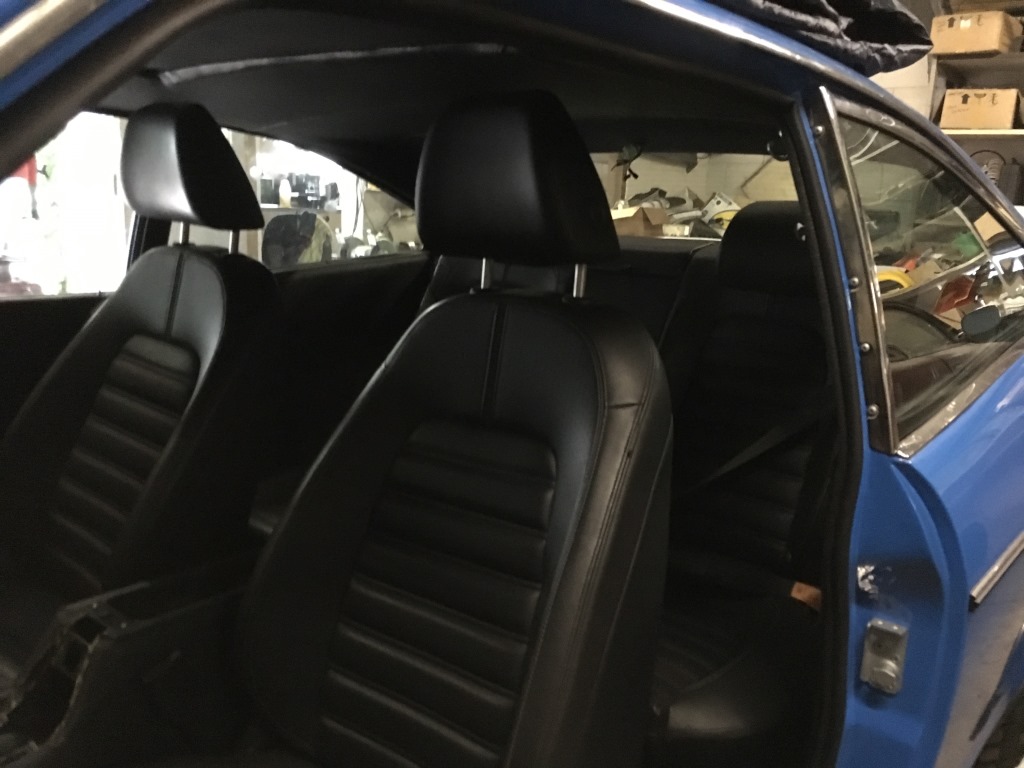 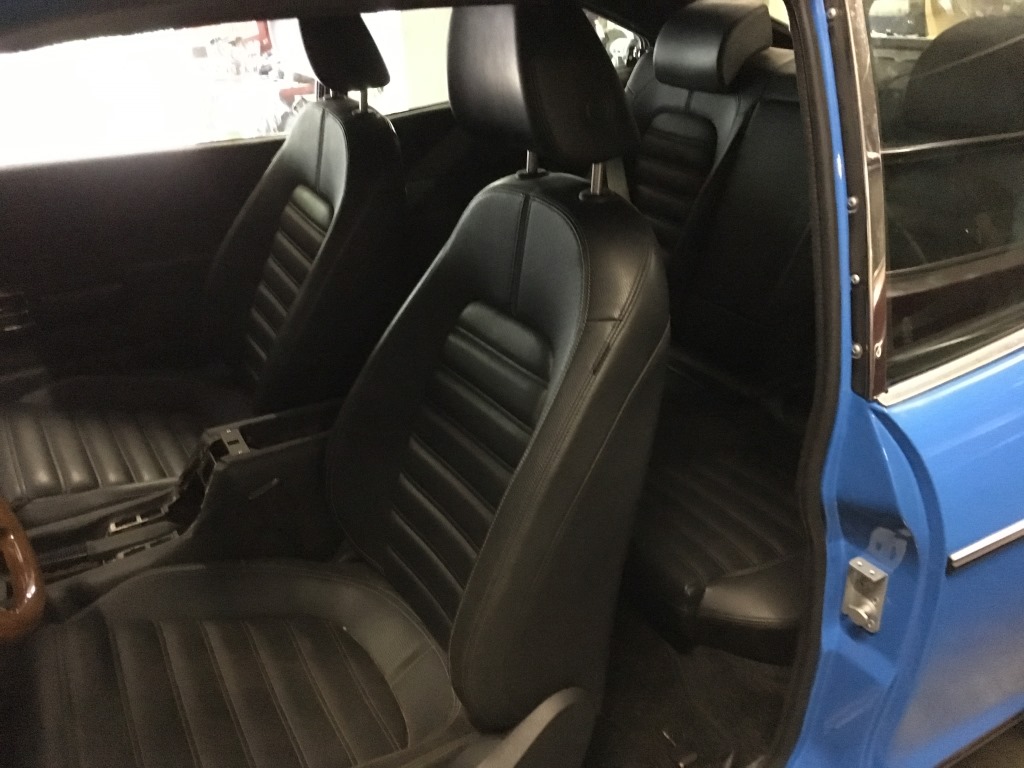 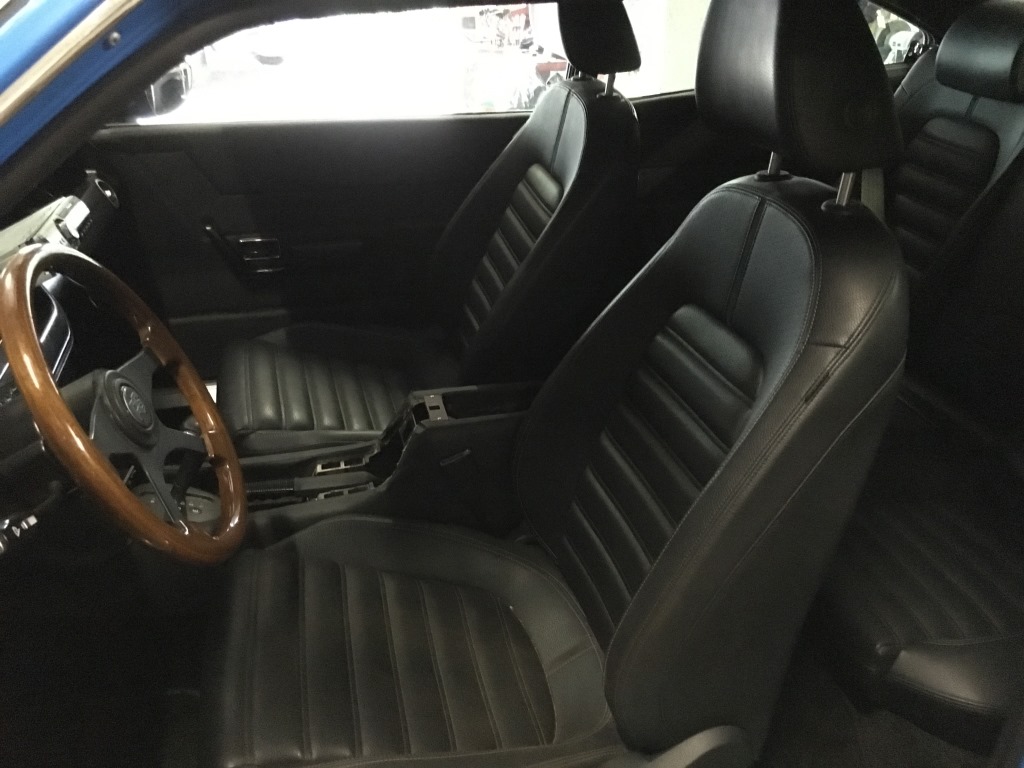 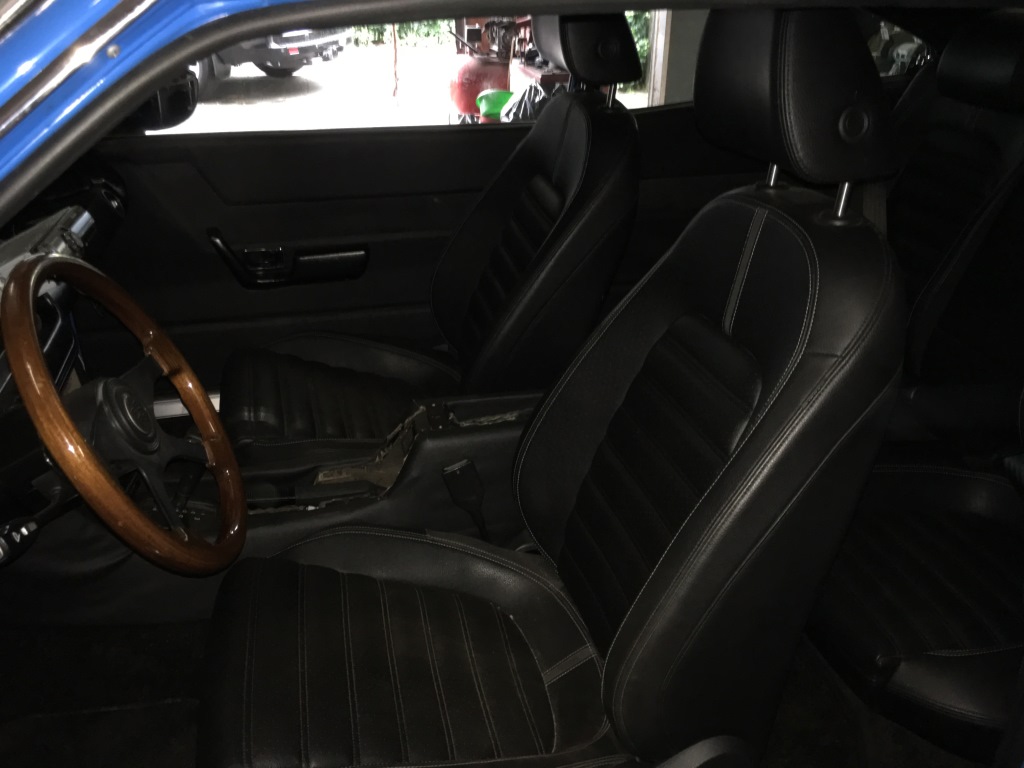 That's it for now I guess... |
| |
|
|
|
|
|
Jun 27, 2016 12:32:29 GMT
|
|
I honestly think, when this is finished, you could sneak it onto the Ford stand at the NEC Motor Show and say it is the new "retro" inspired concept car for Ford and everyone would believe you.
The standard is jaw-dropping and everything looks like Ford made it that way in the factory it matches and works so well. I can't see how anyone could better this.
|
| |
The Millenium Volcon"Get yourself a Volvo if that's what you really want, you might be dead next year. In the meantime, you could be going sideways in a gigantic land barge."
|
|
eurogranada
Europe
To tinker or not to tinker, that is the question...
Posts: 2,556
|
|
Jun 27, 2016 13:22:31 GMT
|
I honestly think, when this is finished, you could sneak it onto the Ford stand at the NEC Motor Show and say it is the new "retro" inspired concept car for Ford and everyone would believe you. The standard is jaw-dropping and everything looks like Ford made it that way in the factory it matches and works so well. I can't see how anyone could better this. Thank you so much for these very kind words! I'm not very good at taking compliments I guess, as your words make me feel very humble and even a little sheepishly uncomfortable for some reason... Your words struck a nerve I guess, in a good way! I still think I'm just doing my thing. In some ways my standards are very high, in others not so much. I refurbed an original interior light for instance by scotching off the "chrome" that was left on it and painting it wheelspray silver... (it does match the dash gauge surrounds thought). It's often a funds thing... What also plays a part is that things you call high standard to me aren't even finished as well as I'd like, lol... I also see so many Granada's pass by on my facebook, mainly from the UK that seem so much nicer than mine in some ways... They seem sooo clean! I guess mine could really do with a good clean specifically under hood... That sometimes dented my own beliefs. What my car does have on those cars is customisation. Apart from a very clean v8 conversion most of what I see are just great looking originals. I went full custom on the inside and partially custom on the outside and full custom under bonnet (although admittedly not particularly inventive as Cossies have been done, apart from running original management). Also apart from paint prep and paint, I did most of it all myself. I cut the metal (although not handling the hot glue stick), I made and sewed my own door panels, carpets and even headlining etc. And what matters most or possibly solely: I love my car and the result I achieved! Thanks again for this huge compliment. |
| |
|
|
|
|
|
|
|
|
Looks great (again)!
Ever since a friend of mine built a keyless entry and keyless go system on his old Volvo, I have been wanting to do the same to one of my classics. My daily Kuga has that system and I quickly get used to it.
Now there are kits to do it, so it should be easier. I thought about that when you mentioned the seat adjustment power - a keyless system would be great for that. It could power up certain things with the key just being close to the car.
Regards
Gustaf
|
| |
|
|
eurogranada
Europe
To tinker or not to tinker, that is the question...
Posts: 2,556
|
|
|
|
Looks great (again)! Ever since a friend of mine built a keyless entry and keyless go system on his old Volvo, I have been wanting to do the same to one of my classics. My daily Kuga has that system and I quickly get used to it. Now there are kits to do it, so it should be easier. I thought about that when you mentioned the seat adjustment power - a keyless system would be great for that. It could power up certain things with the key just being close to the car. Regards Gustaf Thanks! Keyless entry is something I'll probably be putting in with an alarm system. But haven't decided yet on what. I have a great feature packed two way communicating alarm system with remote start, programmed start, auto close windows and what not. But it's from the toy category and not really (SCM) certified. One of the reasons it's not yet in the car is that toyish feel, the other is that my car will be in a garage away from home. There's a mile or less between my house and it, but it does mean I won't be around to hear false alarms due to rodents or anything hetting in the garage through its vents etc. I don't want the neighbouring flats to suffer from my car alarm. Still I want my car to be safe. I may make the alarm horn switchable. That would prevent false alarms from being heard, but the real deal as well... Ok, PATS key is needed to get the car running, but we all know there are otherways of taking a car. So that is the question I'm still pondering... |
| |
|
|
gess
Part of things
 
Posts: 220 
|
|
|
|
|
Nice to see some pictures of the interior again. Those seats really look at home in there. I think you have done a great job to incorporate the rear sets, it is as if they were ment for this car!
You have really made your own Granada, as you wanted it to be, with the interior, mirrors and engine of your choice. That's gotta give some street cred! I believe you could have saved yourself some trouble with an easier engine swap, the 2.9 12V or the 2.9 BOA engine, but your engine does look better! Cleaning up the engine bay can be done at a later time. The important thing is to get the car ready to be used, and enjoy it during this summer.
|
| |
|
|
spot
Part of things
 
Posts: 105
|
|
Jun 30, 2016 12:38:00 GMT
|
|
Hey Alex,
By the looks of it you must not have received the matches I sent over: or if you did, you had a change of heart. I'm glad to see real progress, and not a just a smoldering pile with a weeping man* stood beside it! LOL
(*Weeping as I did when I asked if we were going to exchange gifts for our first aniversary and you called me names /sniff)
Heres hoping you can finally get to the bottom of those last few niggles before you and the family can really get out and enjoy the car at last.
Best wishes
|
| |
|
|
eurogranada
Europe
To tinker or not to tinker, that is the question...
Posts: 2,556
|
|
|
|
A short intermediate update... Though I'm supposed to be on the home stretch with my build, I've hit a couple of mojo killing snags...coupled to a list of honey do's to try and give my wife a slightly more interesting birthday this year...this means progress is slow. So what's been going on.... well, earlier this week the steeringcolomn in my new Transit van decided to dislodge itself from its mounts. This meant that steering al of the sudden became vague and extremely notchy as the shafts and u-joints were very much out of alignement. Thankfully I was going slow after a short and simple trip to stuff some things in my garage close to home. But the fact that this happened and the realisation that had I not used the car for this short trip in a built-up area, this would have happened the next morning in rush hour traffic on the motorway... Somehow this is sticking with me for a bit... The dutch tripple A (ANWB) came out via Ford Assistance to check out the problem and was horrified that this in his opinion clearly had never been installed correctly from the factory. Turns out that the tabs just weren't under the screws in most places. 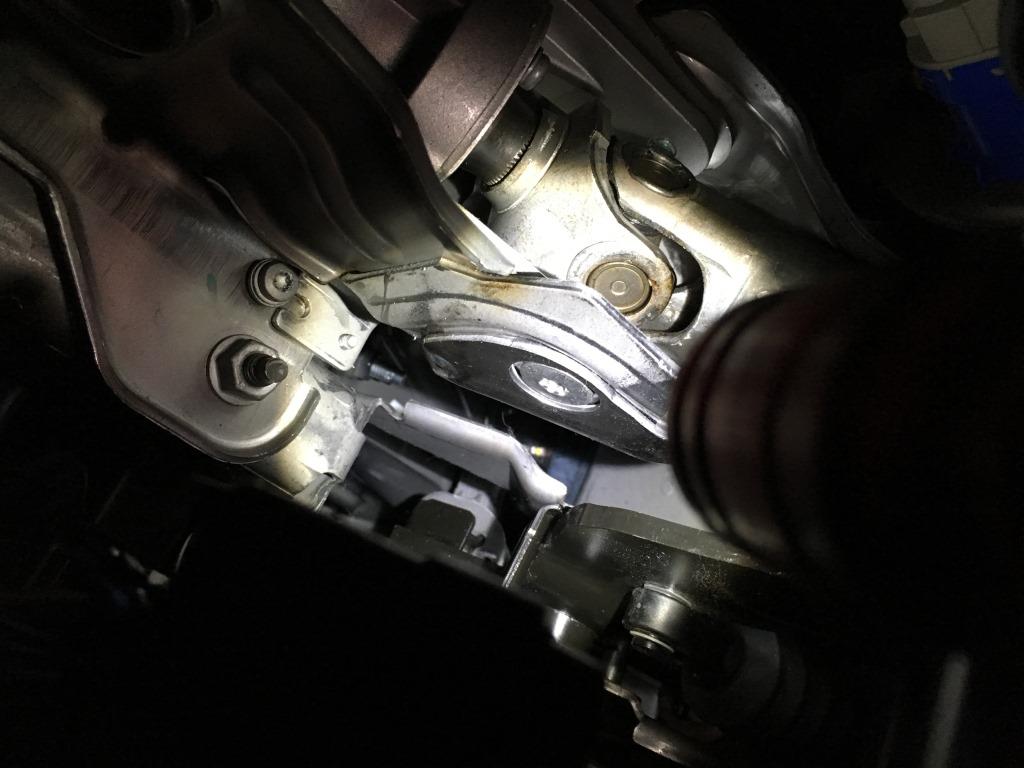 Anyway I now need to arrange for Ford to remove and refit the whole thing under warrenty. Something to dread in itself. Dealers have not shown very helpful since owning this car not having bought it at a Ford dealership. So this feels as an added burden. Next and granada related, I finally got my front seat belts sent off for rewebbing and at the same time changing over the clasps to the ones used on my seat. Only to get a call early the next morning saying that these were the second set of belts that they had seen in many years that they were not able to reweb. The spindle apparently needs to come out and on this model of reel the spring pak is integral. Meaning the legislation regarding this type of work means they can't tear it apart. Options: - cut off the very heavily welded "locks" from the seats and reweld some to be aquired others - buy universal belts of the right orientation and have them swap over the clasps. - and my friend here came up with this one: cut a slit in the clasp, slide over existing belt (which is serviceable) and reweld the slit. But that is hard to do with a plastig cover on the clasp, you cant restore that...so the repair would show and possibly be frowned upon. Another issue is that in trying to finalize wiring under hood and other small stuff, the electric bonnet popper has gotten stuck so the bonnet won't close anymore, requiring grille removal again to fix. Also still battling with the washer circuitry. To recall: by using the signal wire from the foot switch to operate the electric pump the pump pumps and swithces on the wipers when pumping. Drawback is that now when the wipers reach park under normal operation, the pump also fires... Funny as hell, but not MOT spec. All these admittedly mostly little things mean I have a hard time to get her done.... And finally time has been very limited. My wife's birthday is coming up and as I can rarely give her anything special like a dinner or a gift or the like, I wanted to to right by her and grant her a long standing wish: remoddeling the garden (a 5x5m square) to make it more attractive. So I've built flower beds, switched our campsite lounge set for the home foldable chairs, bought and put together a fire pit (or rather bowl), cleaned out part of the shed to allow for the extra cushions coming home and had a cearing in the garden (getting rid of extra wheels, hubcaps, and other stuff so the garden is now clutter free.... The good thing is my wife is very touched and happy, as are the kids who suddenly like to hang out on the loungeset a lot more! But it all has taken any and all weekend and evening hours I usually can spend on the granada. Anyway, as work got in the way of my self claimed 8-7 MOT date anyway, I guess I'll just plod on next week...when I can... I'd hoped to be out of the barn by 16-7 but I don't think that is realistic now. All those little jobs take so much time. Yet I'm soooo close as well. That too is frustrating my mojo. Well, there you have it, the reason for no real progress! Well I did make a bracket for my air cleaner to be held in place... |
| |
|
|
mk2cossie
Club Retro Rides Member
Posts: 3,059  Club RR Member Number: 77
|
|
|
|
nice little progress update, and the garden upgrade sounds good as well  As for the seat belts, I take it the reels are standard Granada coupe affair? If so, could you not just bolt the seat belt stalks for the Granada on to the Passat seats? Or even use mk2 stalks, as they are bolted on to the back section of the seat frame itself  |
| |
|
|
eurogranada
Europe
To tinker or not to tinker, that is the question...
Posts: 2,556
|
|
|
|
|
The issue with the seat belt is this:
I had granada ones with pointy ends on the clasps. They turned out not to be coupe ones and this meant the belts always hung mid door opening when trying to get in the back. I welded those matching stalks/locks to my seats as I wasn't yet aware of this at the time. I then got a set of real coupe seat belts that have a swing arm to prevent just this. Only, they have clasps with a square shape and hole.
As the stalks now don't match and I don't have matching ones anyway and also because they are welded very well, I thought the best solution was rewebbing and changing over the clasps. Now this turns out impossible (or at least when the rules are abided, cause I may have a go myself at stripping them, not webbing them).
So I need to either source and cut and reweld new stalks and be left with belts that have seen better days (I wasn't very carefull with the webbing when stripping for repaint etc. as I knew the webbing would be replaced) or be able to strip the reels myself or find universal ones that can be resewn with the right clasps on them. I'd really hate to weld to the seat again as damage is easily done. Welding/cutting generates enormous heat and sparks as well...
So it is not as simple as you make it seem...or I'm missing something.
|
| |
|
|
mk2cossie
Club Retro Rides Member
Posts: 3,059  Club RR Member Number: 77
|
|
|
|
|
Hmm, are the stalks that are now welded in with a metal tab or just the wire rope type?
If they are a strap type, would it be at all possible to drill a hole to bolt the mk2 Granada type stalks to?
|
| |
|
|
eurogranada
Europe
To tinker or not to tinker, that is the question...
Posts: 2,556
|
|
Jul 11, 2016 12:50:29 GMT
|
|
As this weekend I found myself rather crippled by pain in the shoulder and neck region not being able to move my head much if any, I didn't get anything done really. This grew into more frustration...
The seat belts had been returned at no charge as they couldn't help me but I was not simply going to take that as an answer. So I did do one thing while the meds had kicked in: strip the reels to the guts. Off course, after stripping, I found that stripping was in no way shape or form necessary. The seat belt webbing was easily released by simply pulling out a white plastic centre pin. Only issue was gently persuading this past the tab that holds the spring pack in place. A seat belt is a clever yet simply built device I found.
So I have sent off a request to just recreate the webbing so that I can assemble the belts myself, hopefully saving some cost as well. They have answered positively I may have my belts arranged before or shorty after the weekend!
That would help out with the mojo a bit.
At the moment I'm still in anguish so although working I have no clue if I'll be able to do something to the Granada in the next two days.
|
| |
|
|
eurogranada
Europe
To tinker or not to tinker, that is the question...
Posts: 2,556
|
|
|
|
So another week has come and gone... After a little break from the car due to muscle aches, doing nothing for it than sending off the seat belts once more for rewebbing), I decided to make the best of my saturday free time by going to the car. I still had pain in my shoulder, but nothing like it had been. I reluctantly set to removing the grille for the umpteenth time so I could gain access to the electrical bonnet popper. It took quite a serious tug on the connecting cable to free the piston. And moving it around I could feel the first bit moving freely but when reaching the end of travel I felt it bind again. I put in some penetrating oil and moved the piston around in a twisting motion against it's stop. That seemed to have done the trick. It didn't stick in any of the tests I did. Missing the right connectors to complete wiring the thing up, I left the grille off... At least that was a positive start to the day... After that I decided to tackle the dash. It had gotten somewhat more crowded in the barn with other members arriving so that helped keeping me going. It also provided some interludes between jobs so the pace wasn't as relentless as I can sometimes set for myself. The dash came apart pretty easily. I guess having put it together multiple times helped me there... Test no. 1 was quicly done: remove speedo signal and start engine, wait for the overdrive light to light up or not after about 15 seconds. It didn't anymore, so that confirmed my suspicion that I had used a wrong feed for the speedo. Unfortunately the engine didn't run any better at all. So the wrong connection hadn't caused the rough running of the smooth V6. Next I found the right signal wire for the speedo. It had been marked all along in the loom, I had just routed it away and never seen it again. So with that hooked up test two came: a repeat of test one: start engine and wait to see if the o/d light would come on or not. It didn't so that was a step in the right direction. With no way of driving the car out of the barn I still have no way of knowing if the gauge will work, but I confirmed power, earth and signal are all present, so in theory it should now be capable of working if the gauge is not broken in itself. With at least those results as motivation I tackled the rev counter next. I installed the relay SamJ built me. I verified hooking it up as instructed and tested it. First test showed no reading on the gauge. This promped me to verify power to the relay. It was then I was confronted with how much of a dumba$$ I can sometimes be... Of course I had hooked up the wiring, but to gain access I had unplegged the cluster from its wiring. The speedo of course as an addition is powered separately from that plug so for the previous tests there was no need to hook the cluster back up... So when I realised that I plugged in the cluster and redid my test. Unfortunately it doesn't yet work as it should. It rises some, but sticks below the numer 1 on the gauge and is also not responsive to the revs changing. So this may need some more work/testing. Anyway, feeling I had made some progress and there still was some time, I found myself at a crossroad. I had the choice of delving in to the last of the wiring, soldering in inaccesible places etc. or checking out why the engine ran rough. As I was really reluctant to get into the soldering, the down to earth attitude of one of my fellow tinkerers quickly forced a decision. I went on to check on the engine. It had ran fine after the transplant, but ever since it has only been run for short periods of time. Driving on or off a trailer, in or out of the barn, quiclky up and down the drive for brake tests.... not a serious long drive in there for months. I also had had some starting problems with a pretty much empty tank etc... So I felt like this was the best thing to spend some time on. I quickly checked the oil: all good, good level, no milk, no water... Great start! I had checked the coolant reservoir for bubling or anything and also found nothing. I removed the spar plugs to find ALL of them in less than desirable condition: all were wet from the top (probably from pressure cleaning the engine way back when) with rusty deposits forming and moisture in the plug leads. All were the same sooty black as well. Some were very wet others only a hint of wetness. I cleaned them all up with a soft brush and I cleaned the plug lead ends as well. Plugs went back in and the engine ran a lot nicer if not perfect yet. At least it picked up a lot smoother and better when the throttle was engaged. It still sounded a bit raspy from the exhaust (I think a backfire a few weeks back killed the back box) giving reason to suspect it was still not running on all six but at least not on 3 or 4 either. It also smelled a lot better, before it was really quickly gassing anyone in close proximity even after a short run, now the engine seemed to be running better the smell was much less pronounced. I had trouble with the plug lead for cylinder 5 being hard to get seated so my primary suspect is just that... Need a little time to remove the lead and plug to see what's going on there. At least all this has restored some of the confidence in the car! Which is a good thing... as confidence was running low. So this Saturday some of my Mojo was restored. Doing the work helped, but also the motivation other barn members possibly unknowingly inspire helps. So the list of jobs is getting shorter, although there are still a few serious ones on there: - assemble and fit front seat belts (should be a relative doddle) - check out spark plug no. 5 (let's just wait and see) - check out the fans (still never heard them come on) - check out why dash gauge for water temp is almost at max after only a minutes worth of running (possible mismatch in sender-gauge as it's the scorpio sender not a granada one) - finish wiring and rebuild dash (reworking power supplies and soldering the final connections, not too hard just quite a bit of work to be done) And that should see it ready for alignment and MOT (expecting a fail on the brakes though) and realistically also for vacating my spot at the barn... Feels funny to say that as it will be both a happy moment as the car is proven ready for the road, and a somewhat sad as I'll also miss the barn and its members. Though I don't have to and plan on becoming a stranger... So let's get on with the show, lol! Sorry for the picless updates recently, I've just been doing so much work....I forget the camera... |
| |
|
|
mk2cossie
Club Retro Rides Member
Posts: 3,059  Club RR Member Number: 77
|
|
Jul 18, 2016 12:14:26 GMT
|
Sounds like the light at the end of the tunnel is in reach now  The temp sender will need to be the one for the original engine to work the original gauge, that's what I've done with mine and it reads pretty much bang on from the live reading of the ecu temp sensor value  I must have missed the episode where you installed an electric bonnet release though  I think over here one of those would be a hindrance more than a fancy design feature, with the amount of sticky/seized bonnet catches we see at work  |
| |
|
|
eurogranada
Europe
To tinker or not to tinker, that is the question...
Posts: 2,556
|
|
Jul 18, 2016 12:30:10 GMT
|
Sounds like the light at the end of the tunnel is in reach now  The temp sender will need to be the one for the original engine to work the original gauge, that's what I've done with mine and it reads pretty much bang on from the live reading of the ecu temp sensor value  I must have missed the episode where you installed an electric bonnet release though  I think over here one of those would be a hindrance more than a fancy design feature, with the amount of sticky/seized bonnet catches we see at work  Thanks for that. At first I was afraid my engine was actually getting hot pretty fast so I never ran it for very long, but at that time I also believed there to be a thermostat problem, that once fixed vastly improved the engine tmeps. Still the gauge quikly went to the red, not as fast as before though, so my next thought was a probable mismatch in sensors. Funny thing though, I'm now trying to acquire an oldfashioned 2.6 V6 sender and the adds that come up reference the same one for the 24v lump. If that is correct that would mean my gauge should now read correct and I'm pretty sure it's not. So I hope to find the right sender... The electrical bonnet release is not a new addition. It's something that had been on the car since the first restoration so this time around I may or may not have gone into this specific item. My cable once broke and I thought why not electrify this with a backup pull cable. It worked very well when in use, but lack of use must have meant some crudd accumulation to make it stick. The bonnet spring was not strong enough to release the popper. But the popper is a huge unit pulling a vast amount of power. When closed, a bonnet spring is under pretty great tension so a popper to match was acquired. It sounds like firing a gun when I push the button. The rest of the mechanism is simple, the original (greased) spring and catch, a short cable connection and a relay for the power. Not much to go wrong except for a dead battery, hence the manual override pull cable. I would have even liked the bonnet to rise automatically on either sturdy gas cylinders or an electrical actuator. Only all of these systems would mean eliminating the safety catch or adding a popper to pull that one as well... And you wouldn't want that to happen while driving. The catch is there for a reason... So that never materialised. Although I do have two opel vivaro struts I could try and add to the bonnet for convenient lifting/opening if I so desire. |
| |
|
|


