eurogranada
Europe
To tinker or not to tinker, that is the question...
Posts: 2,556
|
|
Oct 13, 2012 17:39:27 GMT
|
But it's more a case of refinement. And to be honest, both 24v cossies have timing issues. The BOA has a doubled chain, but even crappier guides then the single chained BOB. The BOA ran a duplex chain, one chain around both sets of cams. The BOB runs 2 single chains, it is possible to have 1 chain break and the engine will still run on the other bank! But, yes, they both have chain problems So, which did you choose to use? Care te tell me something about your 24v car? |
| |
|
|
|
|
eurogranada
Europe
To tinker or not to tinker, that is the question...
Posts: 2,556
|
|
Oct 13, 2012 17:48:21 GMT
|
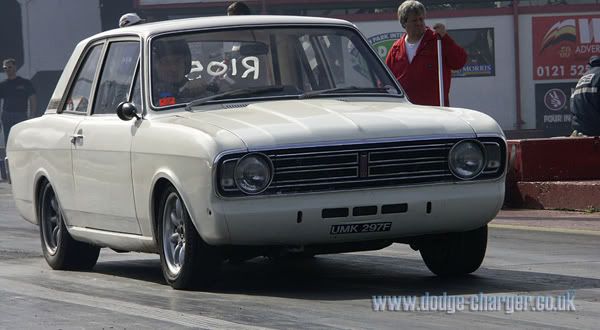
can someone pls post up a pic of both types of coupe - cos I have to say I didnt realise there was more than one type As you wish: Uk model (look at the rear side windows and bodyline). Image from google. 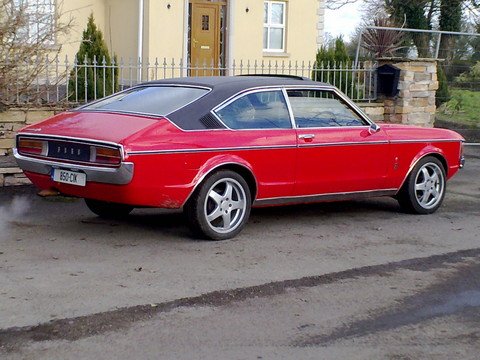 And my car, european mainland model: 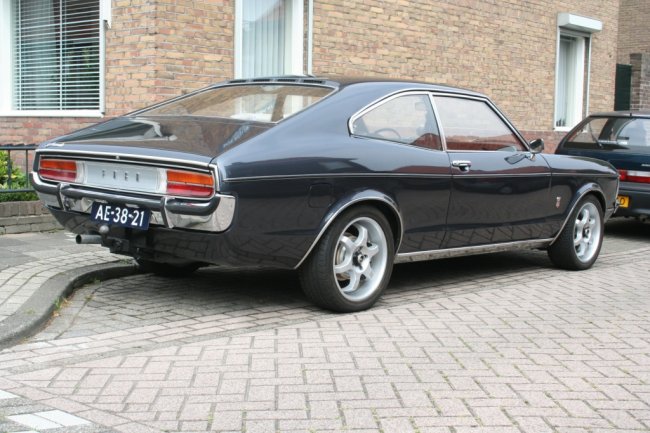 See the difference?? |
| |
|
|
v8ian
Posted a lot
  
Posts: 3,832
|
|
Oct 13, 2012 19:27:29 GMT
|
|
Not only the side glass, there are no C post air vents, on the euro model they are above the rear window, my opinion, I like the euro model more
|
| |
Atmo V8 Power . No slicks , No gas + No bits missing . Doing it in style.
Austin A35van, very different------- but still doing it in style, going to be a funmoble
|
|
|
|
|
Oct 13, 2012 19:49:56 GMT
|
The BOA ran a duplex chain, one chain around both sets of cams. The BOB runs 2 single chains, it is possible to have 1 chain break and the engine will still run on the other bank! But, yes, they both have chain problems So, which did you choose to use? Care te tell me something about your 24v car? In mine, I used the BOA, because the chain is stronger, but I did have to change it, it had stretched, and had a broken tensioner, was very lucky. retrorides.proboards.com/index.cgi?action=display&board=readersrides&thread=43172&page=1This is the small thread on my 24v, no longer have her, she has passed on  |
| |
 1987 24v powered XR4x4 on LPG 1995 Volvo 850 BTCC replica also on LPG, life's a gas! |
|
|
|
|
Oct 13, 2012 22:18:43 GMT
|
I certainly do. subtle, yet obvious once you see them side by side (or picture by picture) both look fab thanks for posting  |
| |
|
|
eurogranada
Europe
To tinker or not to tinker, that is the question...
Posts: 2,556
|
|
|
|
Yesterday was Monday, so that means I should have had another evenings worth of work on the car...and I did! I was late to the workshop due to ill-timed phonecall and the kids craving for attention, but I made it there in time for a couple of hours work. As the focus is on prepping the car for shot blasting, I continued work on the body shell. First thing to do: strip of the last of the inside bitumen from the parcel shelf (is that the correct word for the part behind the rear seat to the window) and the rear seat floorpan. Relatively quick work was made of that with an air chisel. Large chunks came off when attacked at the right angle. Bitumen flying al over the place up to 2 meters around the shell. Almost like a warzone with schrapnell flying around. 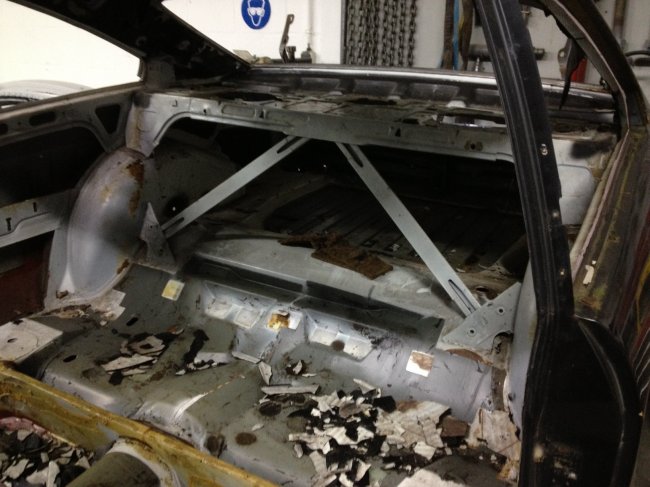 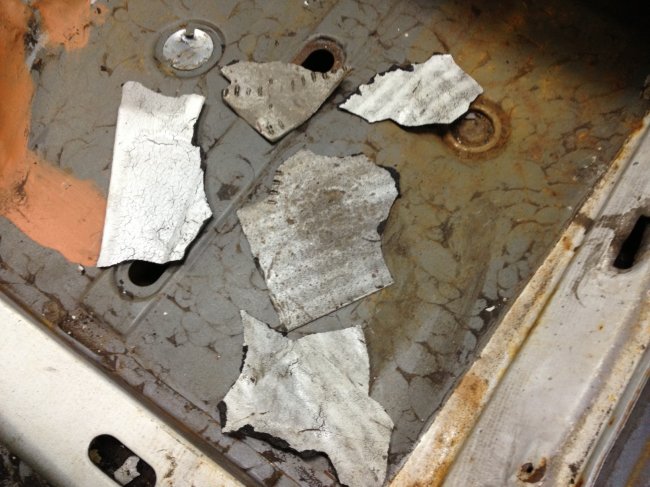 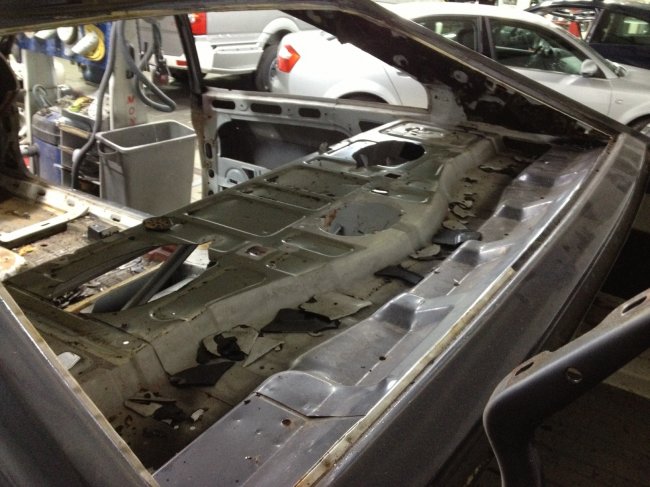 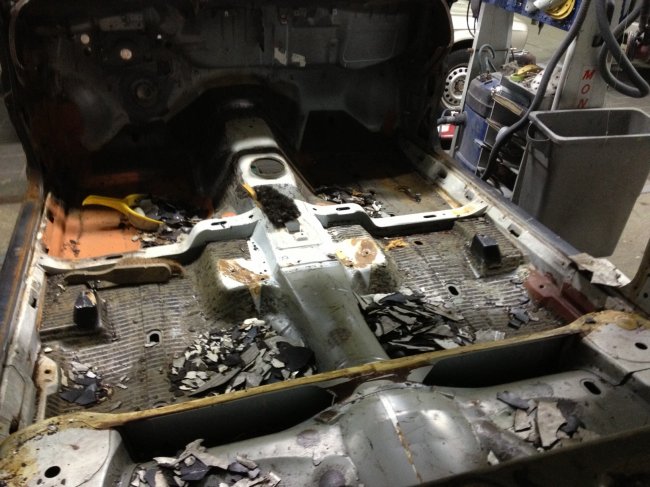 With that done it was time to clear out the mess I'd made and wipe the floor... Left the car looking like this: 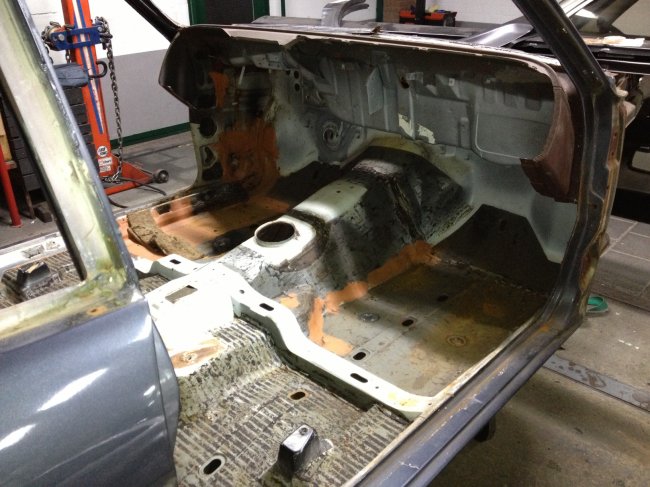 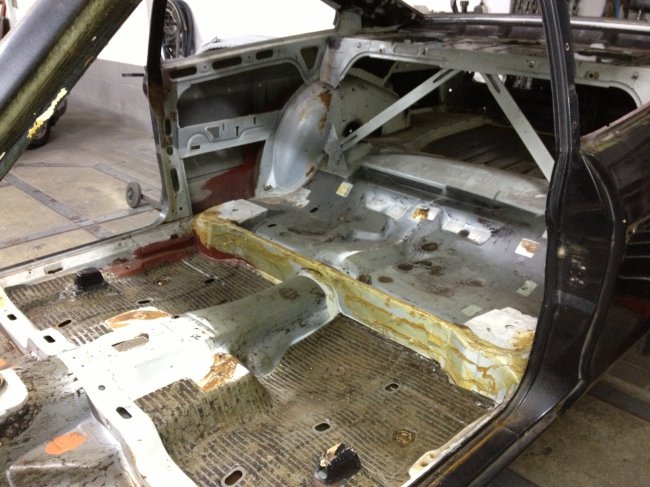 And by the time I left: 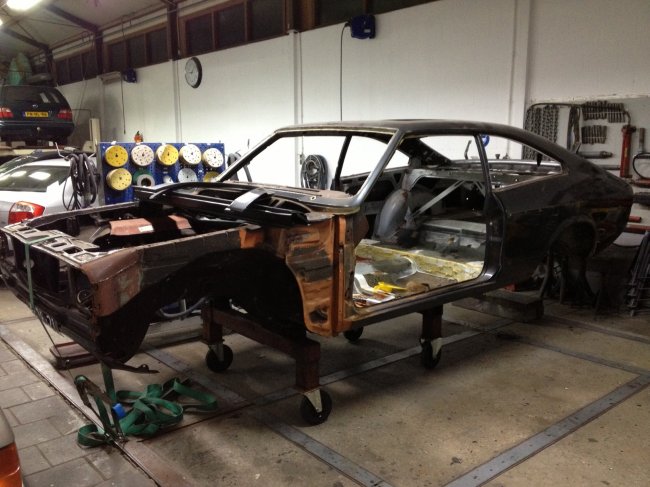 Some time was spent grinding off rusted out trim clips, PO DIY mounted switches with rusted out srews etc. to get the body absolutely cleared of anything before blasting. I also spent a couple of minutes trying to get the front subframe bushes out. But that went as expected. They wouldn't budge yet. So I measured them and will cut some tube to act as a home made puller. It worked wel on the suspension bushes so hopefully it wil work on these as well. Otherwise I will have to chisel them out I guess. After that I lent a hand to the workshop owner ripping a brand new van apart to get the side trims and bumpers painted body colour. That was a nasty job (can't break any of the plastic tabs holding the thing together) and took most of the rest of the evening... But it's nice to be able to give back something to the person being kind enough to let me work in his premises at no charge and mates rates for work done by them. So next session will be friday and will focus on getting those bushes out, wirebrushing some of the underseal from the front wings to an acceptable blasting level and if time permits sanding the roof and rear wings to (almost) bare metal. Can't wait actually.... It's so nice to be working on it again! It also should mean that within the next two weeks the car will be blasted ora t least at the balsters. Along with all bolt on panels. Something interesting about those is the process used to clean those bolt on parts. The panels will first be thermically stripped of paint, bitumen etc, after which they'll only need a light blasting. This prevents warping from heat build up to get the bitumen blasted off. The heating process is a slow process, which means the metal will not be changed in structure and will also not warp because of too high or sudden heat. I've used it before and it works a treat. Nice thing is, it's just as expensive or sometimes even cheaper as it's slightly less labour intensive. I won't have them all fully blasted. The bonnet and possibly the bootlid will probably be blasted in the regular way. They have no bitumen build up, only paint which is easily blasted off. The reason for this is that the bonnet skin is fixed to the trusses with some type of mastic/kit. In the thermal process this will be burned off leaving the skin "loose". Although fixing this is do-able, it's a royal pain to do as well as the factory did it. And that means it saves time when the time comes to fill, sand and smooth out the bodywork. On to Friday... Probably a short update on Saturday... Hope you enjoyed this litte update and will continue to follow my progress! |
| |
|
|
eurogranada
Europe
To tinker or not to tinker, that is the question...
Posts: 2,556
|
|
Oct 21, 2012 13:48:46 GMT
|
Well, another work session has taken place on friday afternoon. Still working on prepping for shot blasting. Wonderous how much work goes in a pretty much bare shell... You keep finding little jobs: removing some rubber gaiters, a lost screw here or there, a left over clip... One of the last things I needed to do was removing the pretty large bushes that mount the front subframe to the car. I was anticipating these to be a right swear word to get out, but armed with my home made removal tool it actually went well. It took an hour and a half to get them all out, but it was a simple and steadily moving process. I put an M12 threaded rod with a huge nut and a selection of fitting washers on the end through the bush. 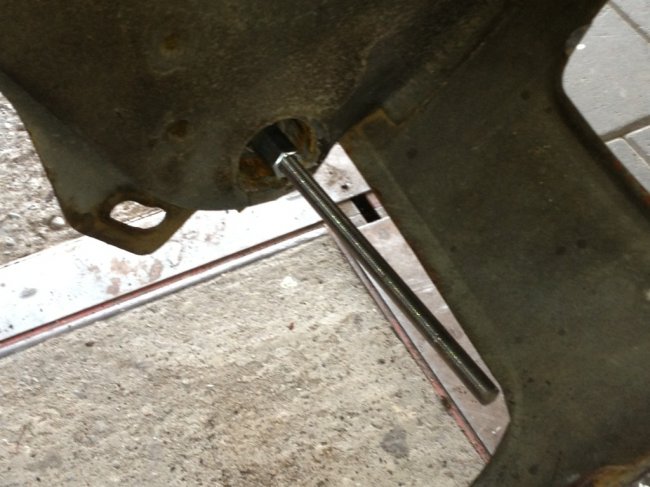 On the other end (the side it should come out of) I put a 90mm inside diameter tube around the bush. Capped that off with a 5mm thick metal plate with a M12 hole in it. Another big nut on the end that is used to tighten and generate pressure on the bush. 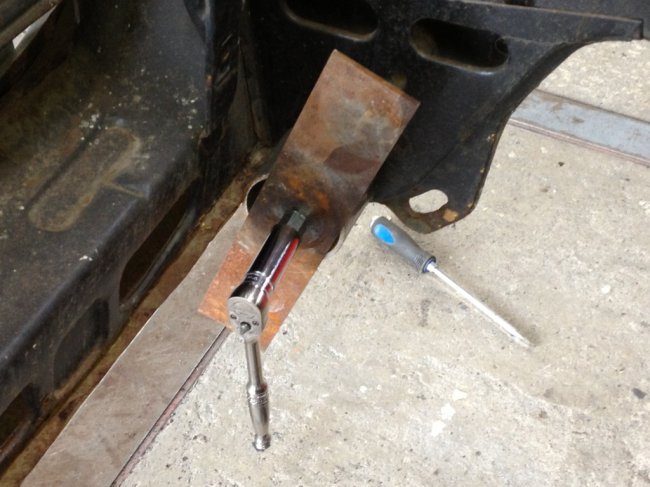 For a while you tighten the nut nothing happens, but then suddenly you usually get a big POP sound and the bush starts to come away from the frame. I aided the process with a BFH (a big hammer). 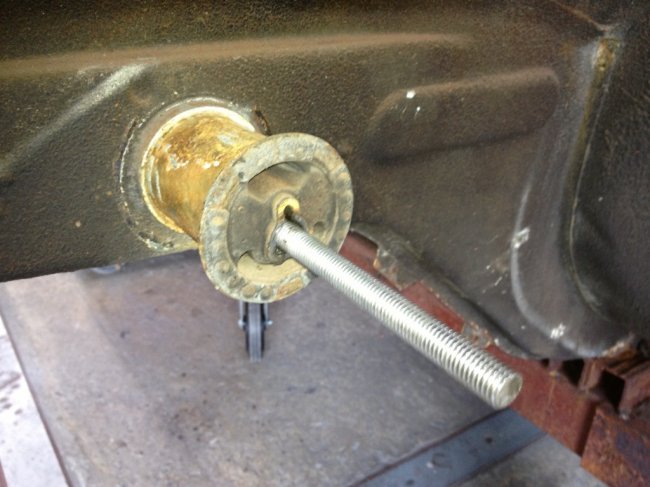 It worked a treat. But doing it four times and given the setup time of the puller tool it wasn't a fast process. With them out, I went on to trial fitting the front seat. I had previeously seen that the rear would be alright with just slight work for making bracketry, but had no idea if the fronts would go in. As the front seats are much wider then the original ones and they have no room for reducing the track width because all the electric motors etc are in between I was kinda dreading the results. Fortunately after loosely putting one in, I could see that they could be made to fit. Again, some work required but they should fit nicely then. Biggest issue is that from the 4 mounting points only 2 are at the same hight. The granada has seat tracks that are designed to level eceryting off, but they wil never fit under these seats or they would be way to high in the car. So some cutting and welding is required, but nothing that can't be done or is really difficult.  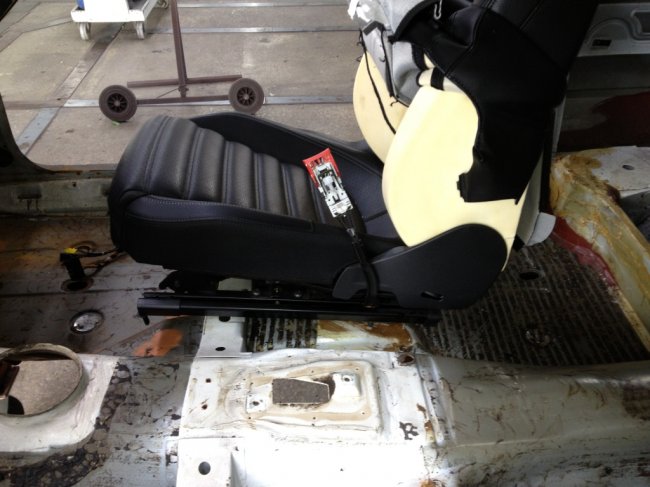 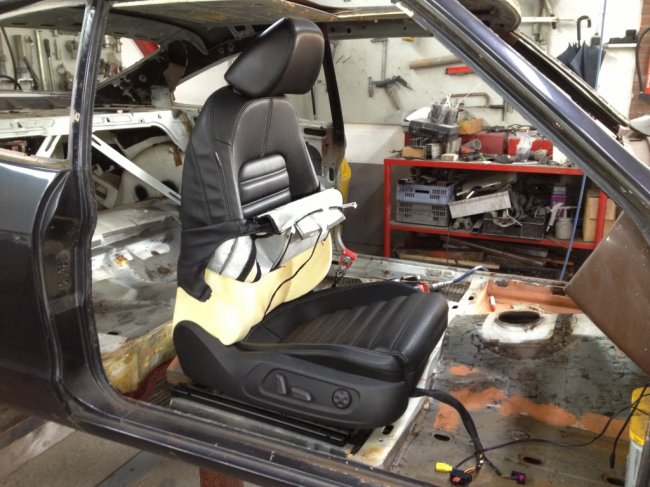 And the best trial ever: 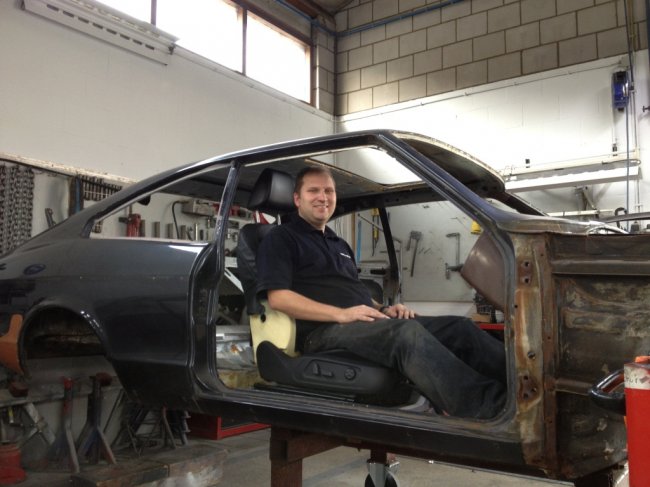 With the great feeling of knowing the seats will all fit and I didn't spend a pretty sum on them for no good reason, I set to my last job of the day: sanding the right outer rear wing almost to the metal. This sanding is the last job before sending the car of to the blasters in about a week from now. Forgot to take a picture'at the time. I carried on the high of finding the seats would fit during the weekend. Knowing they fit, meant it was time to button them up for the final time. The seats originally have airbags which were removed prior to acquisition. This meant the leather seat cover of the backrest was cut loose and never properly refitted. Armed with a charged battery I reclined the seats to gain access. I had borrowed a proper tool to get the hog rings on. But it was still a pain. There was no real access. But after a little investigation and trial and error, I found the best way to do this. And from then on it was a simple yet fiddly job. 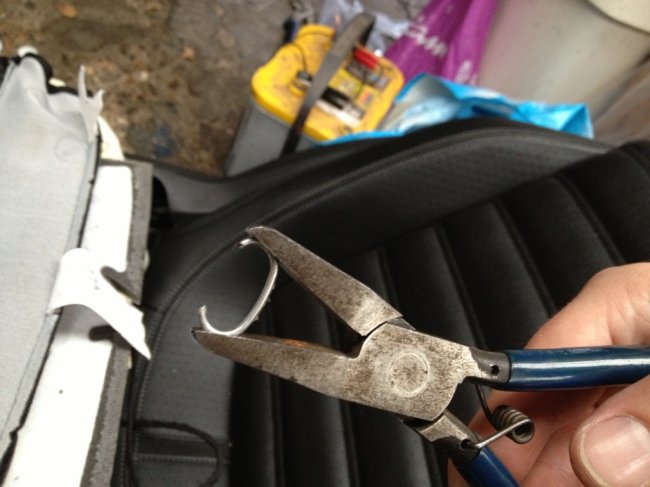 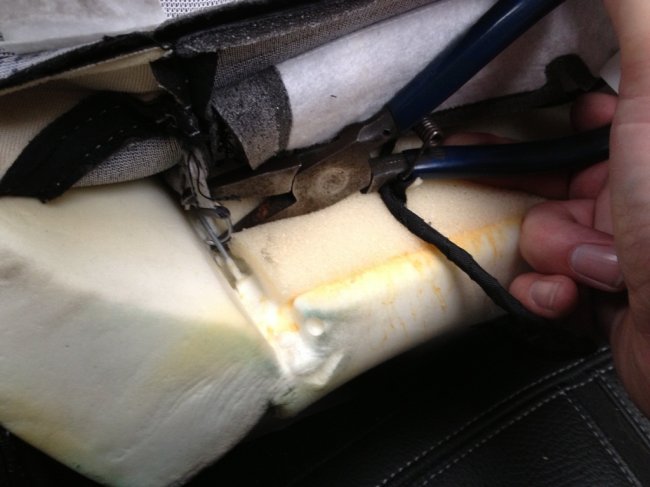 With the seat covers now properly attached, I could button up the back of the seats as well. Another fiddly job requiring quite some tension to get done. But the results are great. The seats look factory new again with the shapes defined as nicely as they should be. 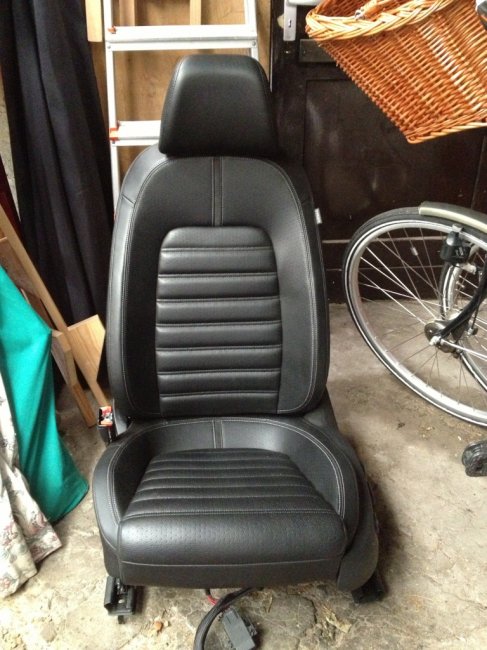 Thanks for staying with me so far. Although with not a single response to my previous update I have to wonder if I'm not just wasting my time documenting this build. |
| |
|
|
maf260
Part of things
 
Posts: 532
|
|
Oct 21, 2012 15:16:38 GMT
|
|
^^^^^^^^^^^^^^^^^^^^^^^
You are definitely not wasting your time with the updates. Please keep them coming. Love the Granada coupes, always wanteds one! Beautiful seats as well - it will take some skill to make it all look like it should be there.
|
| |
|
|
|
|
|
Oct 21, 2012 17:01:06 GMT
|
|
No, please keep them coming . I love this model & thoroughly enjoy your write ups.
|
| |
Todos con Lorca
|
|
eurogranada
Europe
To tinker or not to tinker, that is the question...
Posts: 2,556
|
|
|
|
|
Right then, feels good to know there are people actually reading my thread.
I like sharing what I'm doing and how, but if others weren't interested I'd be using the time it takes to maintain a thread differently. And off course I know this won't be everyone's cup of tea.
Thanks for reading (and responding) guys...it's a powerfull motivator!
|
| |
|
|
|
|
|
|
|
Don't worry about people reading, most will, but don't have anything other than wow, or looks great to say, and that is like stating the obvious, and fill your thread up with pointless comments  |
| |
|
|
eurogranada
Europe
To tinker or not to tinker, that is the question...
Posts: 2,556
|
|
|
|
Don't worry about people reading, most will, but don't have anything other than wow, or looks great to say, and that is like stating the obvious, and fill your thread up with pointless comments  Never thought of it that way, really.... Guess I'm the type that benefits from those simple remarks as well to keep me motivated, not for working on the car, cause that motivation is growing by the day...with a load of brand new parts waiting for something to fit them to... It's the documentation that needs motivation cause it takes quite some time... But I'll keep your comment in mind! Thanks |
| |
|
|
stealthstylz
Club Retro Rides Member
Posts: 14,954
Club RR Member Number: 174
|
|
Oct 22, 2012 11:34:30 GMT
|
|
Looks like a very thorough project, they're a beautiful shape.
|
| |
|
|
|
|
|
Oct 22, 2012 12:26:02 GMT
|
Don't worry about people reading, most will, but don't have anything other than wow, or looks great to say, and that is like stating the obvious, and fill your thread up with pointless comments  at the risk of making a "pointless comment" i just want to say that your spot on. keep an eye on the views - if it continues to rise then thats the best indicator of how popular a thread is. (oh and don't worry if you have less views than other threads - every "great project" comment generates another 50+ views every time they're made, but don't add anything to the thread content |
| |
|
|
|
|
|
Oct 22, 2012 12:30:38 GMT
|
|
seats look great.
an unusual shape to the base, but it looks good.
they have a sort of timeless look to them and as such wont look out of place in the Granada
|
| |
|
|
eurogranada
Europe
To tinker or not to tinker, that is the question...
Posts: 2,556
|
|
Oct 22, 2012 12:53:35 GMT
|
|
To me there are no pointless posts. I appreciate all comments. I like others views, but I'm building this as I want it to be. As I'm the one who is to enjoy driving and creating it. If others share my excitement about it that's bonus!
The seats to me are sporty, slightly modern, yet as you say, they have sort of an old school styling in their design. The base may be a bit weird in that they are quite recessed... But that does give you a lot of lateral support. And they are adjustable in 12 ways...
|
| |
|
|
eurogranada
Europe
To tinker or not to tinker, that is the question...
Posts: 2,556
|
|
Oct 22, 2012 12:55:07 GMT
|
Looks like a very thorough project, they're a beautiful shape. I've done it the cheap/wrong way before, and I'm paying for it now! So this time round it's going to be a thorough job! |
| |
|
|
|
|
|
Oct 22, 2012 13:21:55 GMT
|
Aha, I've always loved MK1 Granada's especially 2 door saloons, I've always disliked, (or not liked enough to chase one) the Coupe, however these are much nicer than the ones we got with that vinyl roof, yours looks more related to the lovely MK3 Cortina 2 door design. Smart, I look forward to seeing this exec coupe get sorted.  |
| |
 it doesn't matter if it's a Morris Marina or a Toyota Celica - it's what you do with it that counts  |
|
eurogranada
Europe
To tinker or not to tinker, that is the question...
Posts: 2,556
|
|
Oct 22, 2012 14:22:10 GMT
|
I agree, body styles are personal... For me it's like this: The MkI granada and Taunus/Cortina are one of the few car models that look great in any of the available body styles. Not many cars pull that off. The reason I went for coupe is that I had had a 66 Mustang coupe v8 before this (had to sell due to family additions) and that was basically a 2 door sedan shape called coupe. I restored that to full factory condition. The fastback was out of reach but the shape has always appealed to me. So when I had serious withdrawl symptoms from not having a tinker car, I decided to chase the coupe style for this once. And I also decided to go restomod on it. Exterior mainly with period accessories, interior fully custom (although on a second custom plan now  ) and engine and suspension at least uprated. Thanks for your comments! I hope my end result will not dissapoint (although like stated before, it's my build, built to my wishes)... |
| |
|
|
|
|
|
Oct 26, 2012 23:27:44 GMT
|
Don't worry about people reading, most will, but don't have anything other than wow, or looks great to say, and that is like stating the obvious, and fill your thread up with pointless comments  +1. I've got this bookmarked. |
| |
|
|




 ) and engine and suspension at least uprated.