|
|
|
Feb 21, 2014 20:24:28 GMT
|
[quote author=" goldnrust" source="/post/1906388/thread" timestamp="139  [/quote] The look of concentration- I know that..... 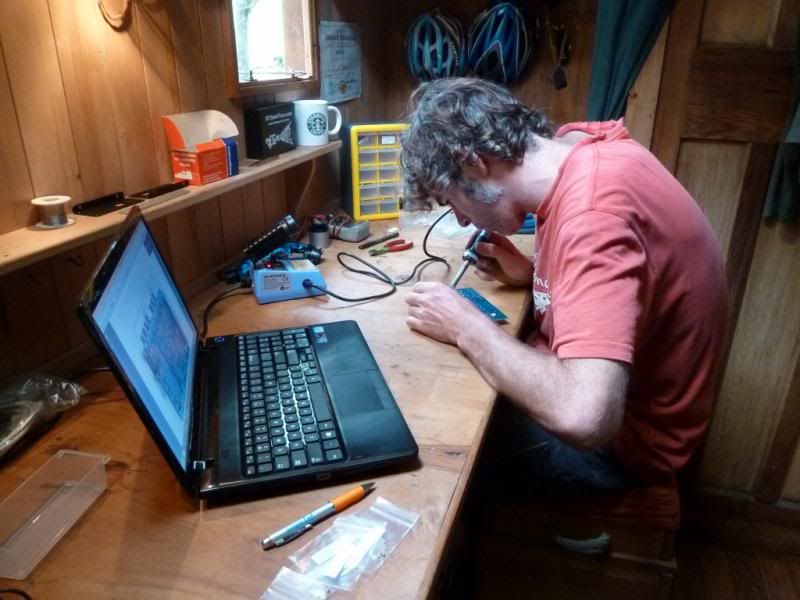 Except it was my first MS build and it shows..you're drinking wine and I was having coffee :-) |
| |
|
|
|
|
goldnrust
West Midlands
Minimalist
Posts: 1,880
|
|
Feb 22, 2014 18:27:37 GMT
|
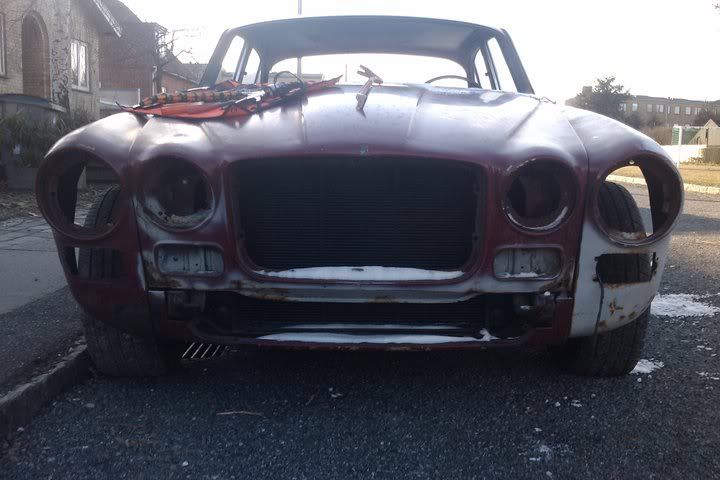
haha yeah, there's a very specific 'hunched over the circuit board' look isn't there  I did only have 1 glass of wine, I don't think building the ECU while drunk would be a good plan! It seems like I've done a million updates recently, and here another one, I guess because I've been able to bring the MS stuff in the house and involve my girlfriend that's opened up more nights to car progress. Normality will resume shortly… Anyway, todays plan was to make a good start on the filler on the last remaining wheel arch, but I didn't get that far. The right rear arch is the one I've still be struggling with tyre scrubbing issues with. In the process of trying to stop the scrubbing I'd pulled the arch quite a long way out of shape. It sort of shows in this photo I took a few weeks back while test fitting the Rays wheels, though the photo flattens it. The wing above the arch has started to flare out, the arch it self is wobble, and not consistently flared.  Now I've got the car in the garage with the rear suspension out I can get a better look up inside it, and the news was not good. I'd made a right mess of the inner arch while trying to starch it out to make room for the tyres. So just when you think the metal work is all over….  …I broke out the grinder and lopped a section of damaged inner arch and arch lip out. It wasn't a complicated section to replace, and in a way in the end it's worked out for the best because I was able to weld in the new inner arch very close to the outer, which should give the tyre a few more mm room. Didn't get any pictures inside the arch after I finished the welding, but there wasn't really much to see. After that I spent a fair while knocking the arch back into a sensible shape, and one that as best I can tell matches the left side.   There is a wiggle visible in the photos on the rear edge of the arch, just below the level of the petrol filler, but since taking the photos and noticing it I went back out with a file a sorted it out, so it's spot on now  It's looking so much better than this morning, I'm actually really happy with it and glad I spent the time getting the metal shape right, rather than fixing it with filler! Through out the day I was feeling a bit grumpy with it and like I'd gone back a few steps to be metal working again, but seeing the results now I feel quite psyched up to get on and get this body work sorted |
| |
|
|
|
|
|
Feb 22, 2014 20:10:13 GMT
|
|
I like the way you have put some effort into bracing the inner arch against a solid brick wall. Sadly I think you will find that having a brick wall attached to your car will be unpractical and you may have to re-think the design.
|
| |
|
|
|
|
|
|
|
I like the way you have put some effort into bracing the inner arch against a solid brick wall. Sadly I think you will find that having a brick wall attached to your car will be unpractical and you may have to re-think the design. Glad it wasn't just me that had to look twice! |
| |
|
|
goldnrust
West Midlands
Minimalist
Posts: 1,880
|
|
|
|
Having decided that the angle brackets bolting the wheel arch to the wall was a bit overkill, and they should be strong enough now properly repaired with new metal, I've been getting on with the filler over the past few evenings.  Progress has been slow but a rough shape is starting to get there, still needs a good few hours before it's as good as the front arch. Most of the time consuming stuff has been in sorting the door shut lines. The previous bodywork had obviously been done without the doors fitted, and the panels all dropped away as they met the door. It was very un-Lancia. Whilst probably not upto factory standards, I'm doing my best to get the lines right. Before I can start properly on the rear quarter behind the arch, I ned to sort the petrol cap hinge which is droopy. Todays plan was to get some serious filler sanding done, but I got kinda sidetracked when a friend came over to fit his new wheels. As ever nothing is simple so it took most of the day with arch rolling and alike...  Was worth it just to have the first day of the year where I worked on a car on the driveway in the sunshine wearing a T shirt Roll on spring! Also this week I've also made some good progress with the bushes. I finally got the right rear shackle bush out of the chassis rail. I had to resort to cutting the bolt to remove it, and because of the location that meant a very slow cut using a hacksaw blade removed from the saw and wrapped in tape to make a handle.  That was the last of the rear bushes to remove. Whilst a couple of the bushes are serviceable, I really want to replace the whole lot and start fresh. Last year I spoke to one of the Lancia specialists about bushes for the front wishbones, and they quoted me £250+ for stock replacements of just 8 bushes, so quite simply curse word that! Really I'd like polyurethane bushes rather than standard rubber bushes for the tightness it gives to the handling. Much googling resulted in a negative on that front. Couldn't find anywhere selling a polybush set for a Fulvia. Then I had a moment of inspiration….  Some of the polybush suppliers will sell you a solid rod of poly that you can put on a lathe and machine up bushes to your own spec, and it didn't take much googling to find a plastic supplier that would sell me polyurethane rods of a suitable hardness for ~£15 per 30cm. Thats more like my kinda pricing! Outside of automotive bush suppliers I could only find shore 95a poly, which is on the harder end of automotive uses. It's spot on for the leaf spring bushes, and is the hardness Superflex recommend, and while it's a bit overkill for the front wishbones, it's still a rubber mounted subframe so I'm not too worried about noise or vibrations. Once I got my head round the specifics of turning the poly I was very happy with the results, to me they look pretty much like bushes I'd buy from a shop. With the concept proven, I've just gotta buy some more poly, find some more time to go and borrow the lathe and get on with making the rest of them!  |
| |
|
|
duncanmartin
Club Retro Rides Member
Out of retro ownership
Posts: 1,320
Club RR Member Number: 70
|
|
|
|
|
Those bushes look the business. I'm always impressed by the amount of progress you cream into the short time between your updates. :-)
|
| |
|
|
smeden
Part of things
 "Full throttle until you see God,then shift to second"
Posts: 356
|
|
|
|
|
Make a batch of the bushes and sell them on flea bay ;-) Good Progress!
|
| |
Jaguar xj6 S1 swb manual
VW Bay Camper
Audi A3 1998 1.8
VW Beach Buggy (sold)
Ford Mondeo mrk I RS Celebration (written off)
Ford Escort Mrk II RS 2000 (rust in peace)
|
|
|
|
|
|
|
Make a batch of the bushes and sell them on flea bay ;-) Good Progress! I'd be in as mine need replacing as well and I was equally shocked at the price. |
| |
1987 Alfa Milano/75
1979 Alfetta Mille Miglia
1976 Alfetta GT race car
1970 Lancia Fulvia 1.3 Rallye S
1968 Fiat 850 spider
|
|
goldnrust
West Midlands
Minimalist
Posts: 1,880
|
|
|
|
cheers guys It's because I have no social life outside of cars Duncan haha. I don't really drink, I'm not much of a computer game fan, I don't watch much telly. If I'm not working or spending time with my girlfriend, then I'm in the garage basically. It's a nice idea Smeden, but unfortunately not one that's not something I can really do, for a couple of reasons. Firstly, I'm a very amateur lathe operator and it's one thing making parts I'm happy with, it's another selling them on as parts made to a standard worth paying for (not to mention the safety/liability aspect with suspension parts). Secondly, I'm only able to go and use this lathe after hours as a sort of perk of my Dads job (he's a director at a small engineering firm), and I'm not sure how well it would be looked apon if I started using this opportunity to try and make money. I can PM you the measurements and where I got the poly from, NMreto, if it's any use? Anyone who can use a lathe should be able to turn them up no problems if I can do it. |
| |
|
|
|
|
|
|
|
|
goldnrust - Had to register just so I could say this has been a great thread to follow. I have a couple of Fulvia and have learnt a lot from your trials & tribulations. I've got a few questions on a couple of the jobs you've done but don't want to sidetrack the thread so could I pm you?
|
| |
unhealthy obsession with italian cars
|
|
goldnrust
West Midlands
Minimalist
Posts: 1,880
|
|
|
|
Hi Blueboxer, I'm glad you've enjoyed reading my ramblings! yeah sure feel free to PM me |
| |
|
|
|
|
|
|
|
I can PM you the measurements and where I got the poly from, NMreto, if it's any use? Anyone who can use a lathe should be able to turn them up no problems if I can do it. Thanks for the offer. Honestly I've just been devoting my time to other projects, I'm sure I can find a supplier over here and I have a lathe. I have Poly in my street Alfa and don't mind/notice the ride so that will probably be the route I go. Thanks for the inspiration. |
| |
1987 Alfa Milano/75
1979 Alfetta Mille Miglia
1976 Alfetta GT race car
1970 Lancia Fulvia 1.3 Rallye S
1968 Fiat 850 spider
|
|
|
|
|
|
|
|
Those poly bushes are a great idea and saved you a packet......
to be spent on some other part on the car lol....
|
| |
|
|
goldnrust
West Midlands
Minimalist
Posts: 1,880
|
|
|
|
I think you're probably right there Rob…. the spending never seems to end! I ordered some more polyurethane earlier in the week and got back on the lathe last night. Thing's didn't go so smoothly though.  The eBay supplier I'd used the first time didn't have any of the right diameter poly in stock, so I ordered from another website, claiming to be exactly the same Polyurethane with the same hardness (90a) but it's definitely a bit softer. That's not a bad thing for the end result, but it made turning them down harder. I struggled to get the finish as good as the first time. I got the rear spring eyes sorted and the pan hard rod before I ran out of time. I've still got the spring shackle to body bush to sort and I need to make the crush tubes for all of the bushes (aside from the front spring eyes which I did last week). I'm going to try and get back sometime next week, so hopefully the car can go back on its wheels before next weekend. I could really do with moving it round in the garage soon to get better access at the left hand panels.  Got some more filler work done over a couple of evenings, the rear quarter is starting to get there and I've got the first pass on the rear panel.  Today I enlisted some help from my friends and we'd planned to spend a day on the body work, the reality is nobody enjoys sanding and we were having too much fun to make any real progress! Still we got the rear quarter pretty close, and got a 2nd pass on the rear panel. Then I chucked a bit of primer on the rear quarter as it helps me see how far off I am.    Rear quarter is very close, the rear panels got a long way to go! Feels nice that it's only really the rear panel and surrounding areas to sort out before the whole car is roughly the right shape, and the proper paint prep can begin. |
| |
Last Edit: Mar 8, 2014 20:54:55 GMT by goldnrust
|
|
|
|
|
|
|
|
Any progress is good progress as they say!
It looks like the boot isn't level? Or is it just the weight of the hammer, etc and the angle of the shot making it look a bit slanty?
|
| |
|
|
goldnrust
West Midlands
Minimalist
Posts: 1,880
|
|
|
|
The boot lid is nowhere near level I've knocked some more fibreglass out of it and it's waiting for some welding to the underside structure, it's touch and go whether it's worth saving it, or whether I bin this boot lid and start with an unmolested example. |
| |
|
|
hairymel
Club Retro Rides Member
avatar by volksangyl
Posts: 1,081
Club RR Member Number: 207
|
|
|
|
..Polyurethane....softer......turning them down harder....struggled to get the finish as good as the first time... possibly a bit late now, and not even sure its true as i am a lathe virgin, but i have read that bunging softer poly material in the freezer beforehand makes it easier to machine  |
| |
whats that burning smell?
oh curse word :-(
|
|
goldnrust
West Midlands
Minimalist
Posts: 1,880
|
|
|
|
I'm very much a beginner lathe operator, all tips are welcome! I shall try putting the poly in the freezer next time I go in and try again. |
| |
|
|
eurogranada
Europe
To tinker or not to tinker, that is the question...
Posts: 2,552
|
|
|
|
|
I love your hands on approach to this restoration!
|
| |
|
|
RobinJI
Posted a lot
"Driven by the irony that only being shackled to the road could ever I be free"
Posts: 2,995
|
|
Mar 10, 2014 20:03:46 GMT
|
|
I'm loving following this. Great car and a great attitude to working on it.
With the bushes, if you did want to go softer then you could try casting them. Polyurethane casting resin's quite easy to use, just a case of improvising a mould.
|
| |
|
|


 I did only have 1 glass of wine, I don't think building the ECU while drunk would be a good plan!


 The eBay supplier I'd used the first time didn't have any of the right diameter poly in stock, so I ordered from another website, claiming to be exactly the same Polyurethane with the same hardness (90a) but it's definitely a bit softer. That's not a bad thing for the end result, but it made turning them down harder. I struggled to get the finish as good as the first time. I got the rear spring eyes sorted and the pan hard rod before I ran out of time. I've still got the spring shackle to body bush to sort and I need to make the crush tubes for all of the bushes (aside from the front spring eyes which I did last week). I'm going to try and get back sometime next week, so hopefully the car can go back on its wheels before next weekend. I could really do with moving it round in the garage soon to get better access at the left hand panels.


