ferny
Club Retro Rides Member
Posts: 981
Club RR Member Number: 13
|
|
May 23, 2014 20:33:12 GMT
|
|
|
| |
Last Edit: May 23, 2014 20:33:55 GMT by ferny
|
|
|
|
|
|
|
May 23, 2014 21:51:20 GMT
|
|
|
| |
Last Edit: May 23, 2014 21:54:08 GMT by timmy201
|
|
jpsmit
Posted a lot

Posts: 1,254
|
|
|
|
|
|
| |
|
|
|
|
|
|
|
|
Nice job.Do you still have the mx5 shell as i wouldnt mind the wings?
Steve
|
| |
Ginetta G15 BMW K1100 conversion Sold
Mk1 Mx5 on ITB'S Sold
TVR Chimaera 400 supercharged
MR2 Red Roadster 2ZZ
Bee*R 324 Skyline
95 Cherokee Jeep
|
|
ferny
Club Retro Rides Member
Posts: 981
Club RR Member Number: 13
|
|
|
|
Cheers for the heater and gauge ideas. I want to use the Mazda ones, well, I have no sound reason as it's not exactly convenient! I reckon I'd have the car running by now if I did things the simple way!  Still got all the MX5 sitting on the driveway.  Hopefully you'll be able to see some photos here - r.ebay.com/fiO1FT |
| |
|
|
ferny
Club Retro Rides Member
Posts: 981
Club RR Member Number: 13
|
|
|
|
|
|
| |
|
|
ferny
Club Retro Rides Member
Posts: 981
Club RR Member Number: 13
|
|
Jun 20, 2014 19:52:32 GMT
|
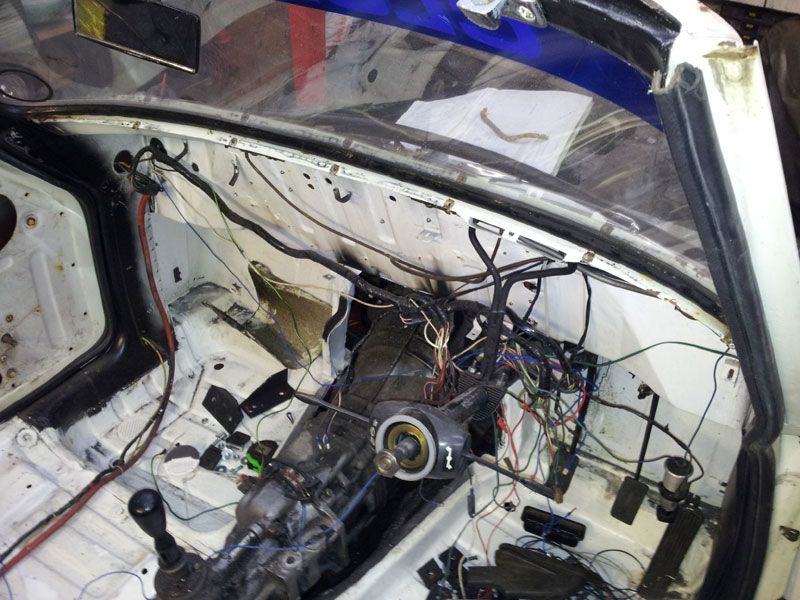
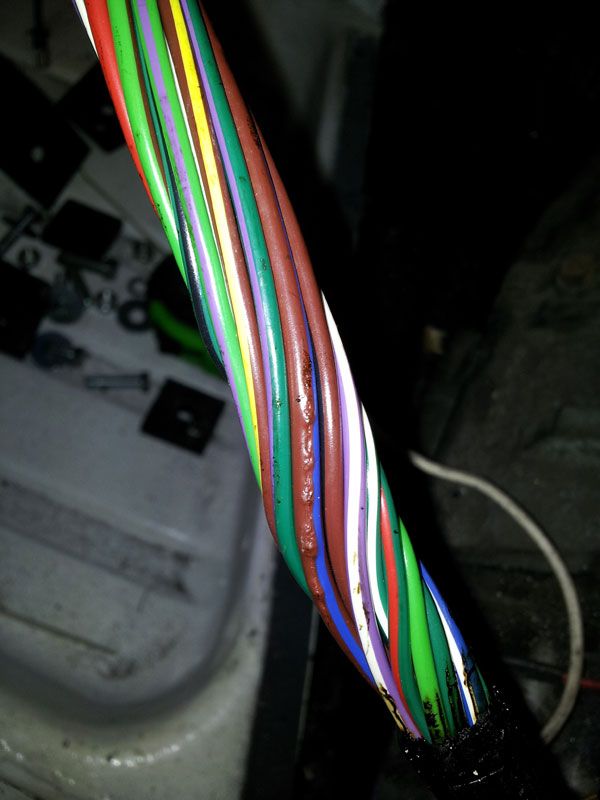
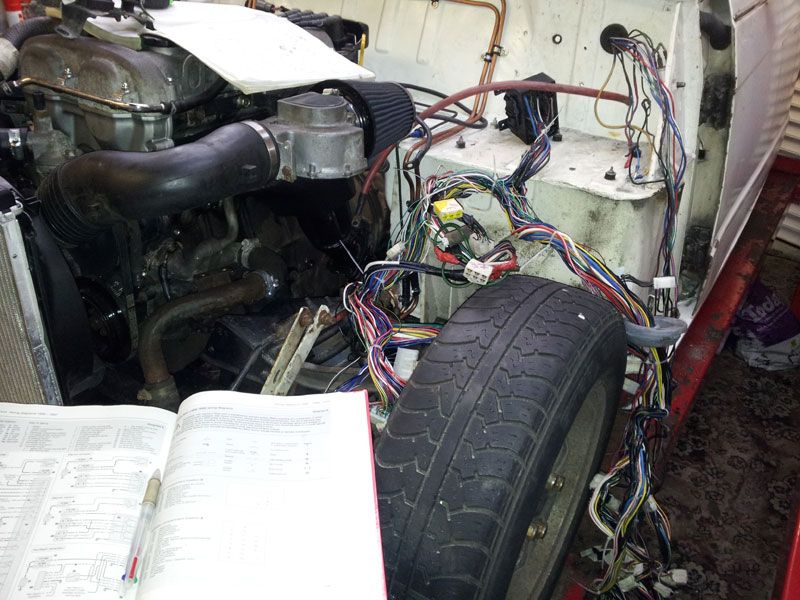
This  I didn't think photo after photo of wires was very interesting. Other things have been going on though but it's mostly been sorting out the explosion in a Skittles spaghetti factory. |
| |
|
|
|
|
|
|
|
|
Phew that's a lot of wires! Good luck!
|
| |
You can't buy happiness but you can buy cars and that's kind of the same thing.
1989 Austin Metro
1994 Harley Davidson hardtail bobber
|
|
ferny
Club Retro Rides Member
Posts: 981
Club RR Member Number: 13
|
|
|
|
|
curse word. Oh well, I'll figure our why and sort it out. Looks like it's from a bleed on the drain.
Oh and, last night...
Then this morning I added some petrol, which made a difference...
|
| |
|
|
|
|
|
Jun 24, 2014 13:50:25 GMT
|
Cool, nice to see it running. Gonna try and run mine tonight on the floor |
| |
You can't buy happiness but you can buy cars and that's kind of the same thing.
1989 Austin Metro
1994 Harley Davidson hardtail bobber
|
|
|
|
ferny
Club Retro Rides Member
Posts: 981
Club RR Member Number: 13
|
|
|
|
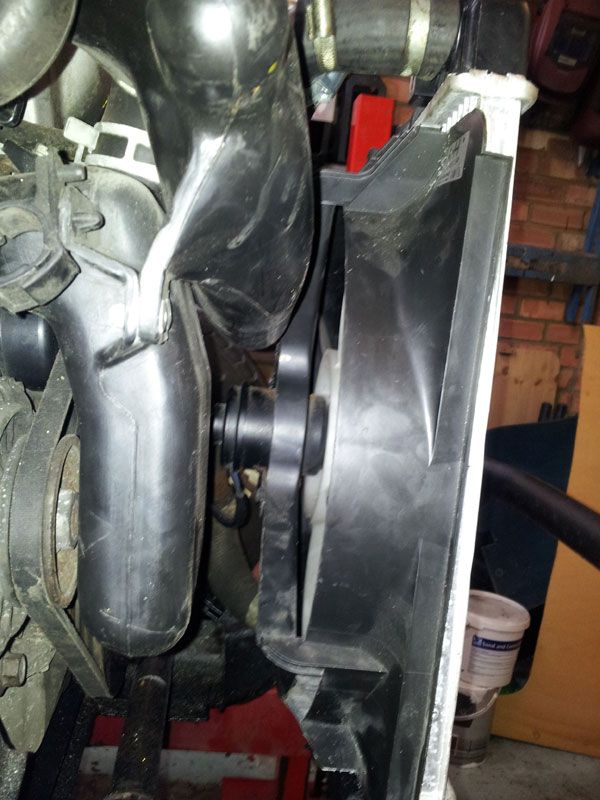
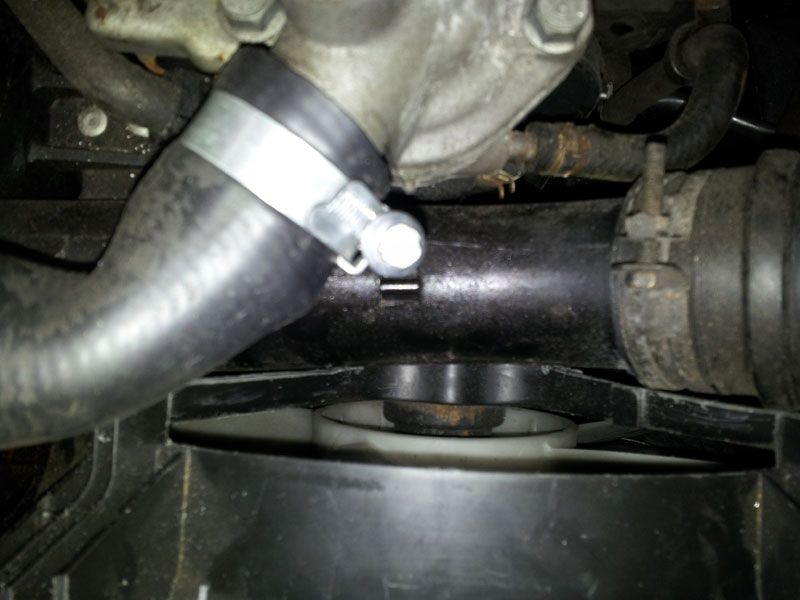
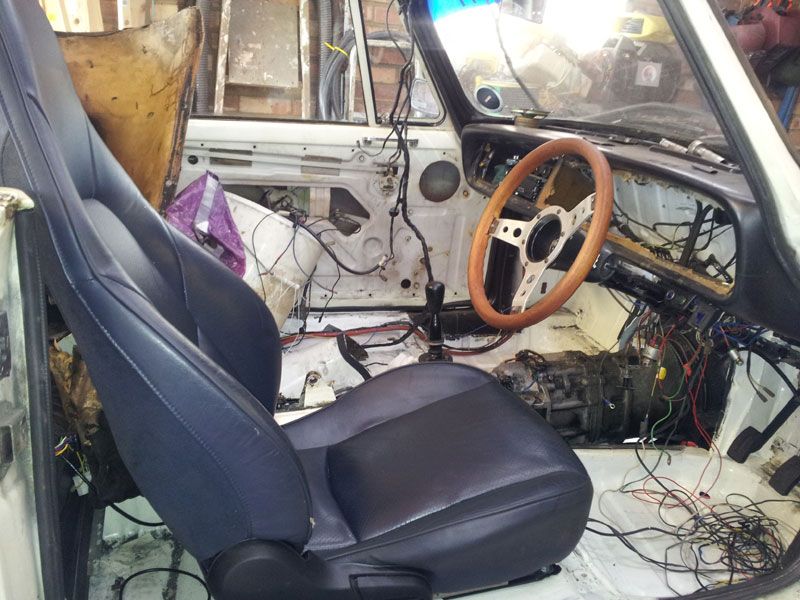
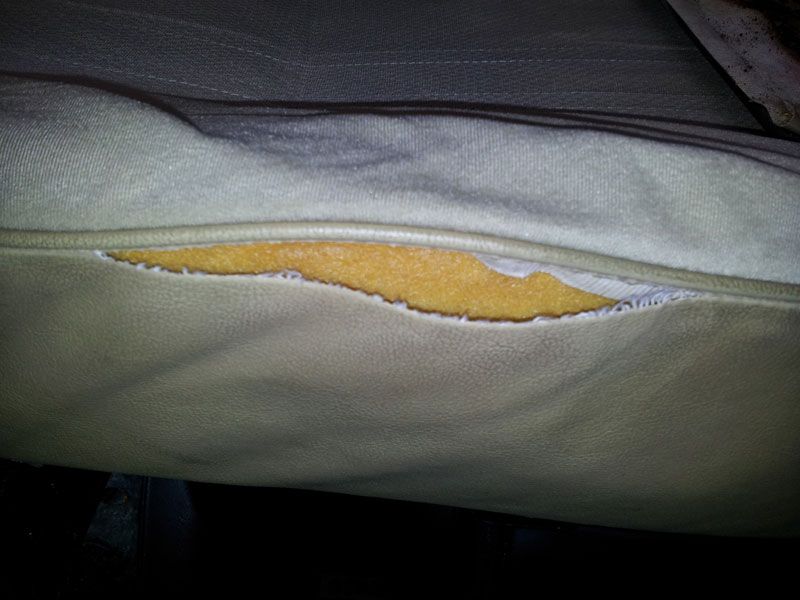
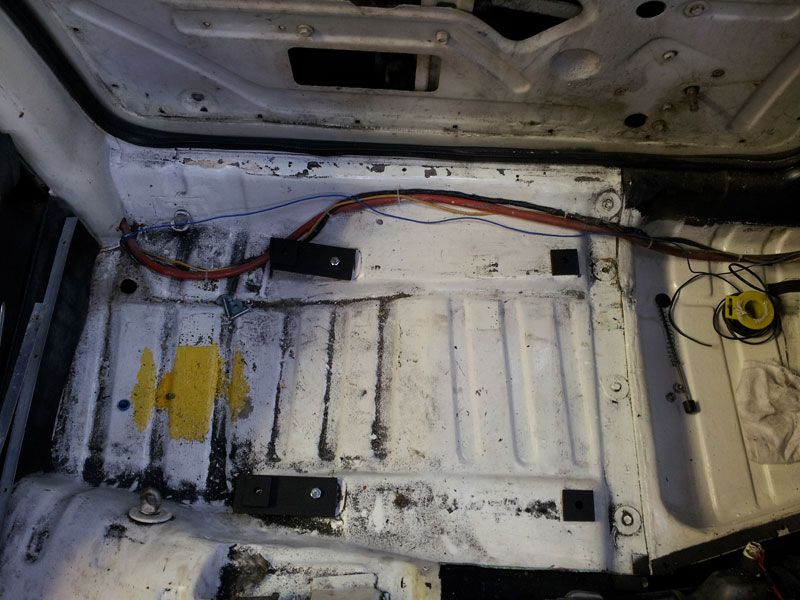
Not really sure what hasn't been updated any more! I guess I'll post about some of the extra little jobs going on. The steering wheel is finished. Months ago I stripped it down to re-varnish it, decided on danish oil then left off the spoke finishers. I've colour coded two of them but left the bottom one as original so you know it's an old wheel and it's got a very hard to read Mountney branding. Some people like it, I'm not sure yet. 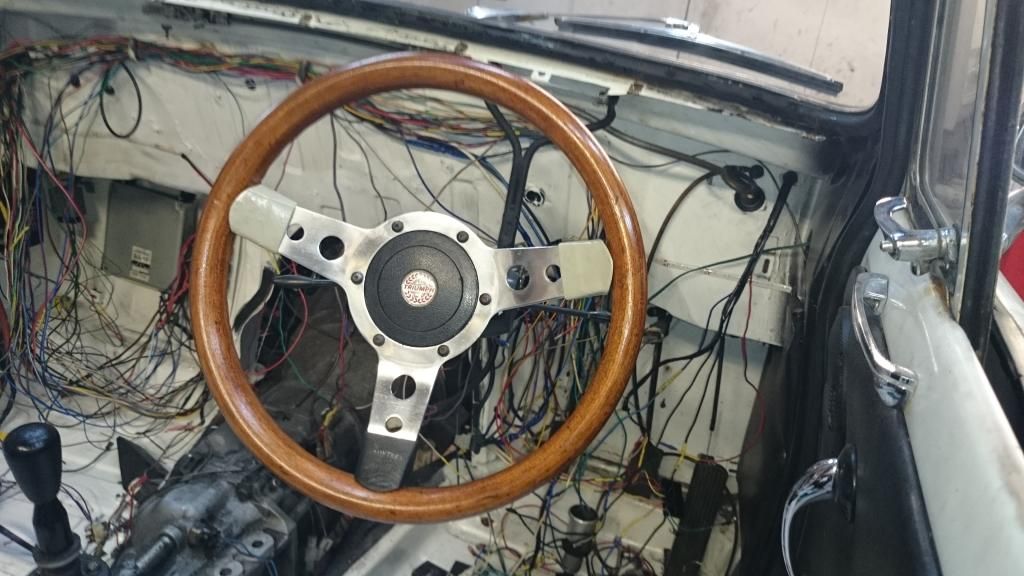 I've also sorted out the heated seats which meant another order of electric bits needed to happen! More wire, more relays... Before that I tested them off the car. It got up to 30°C before dropping to around 23°C then heating back up again. Toasty. At the time I had no real heater plans so it all made sense to fit them. 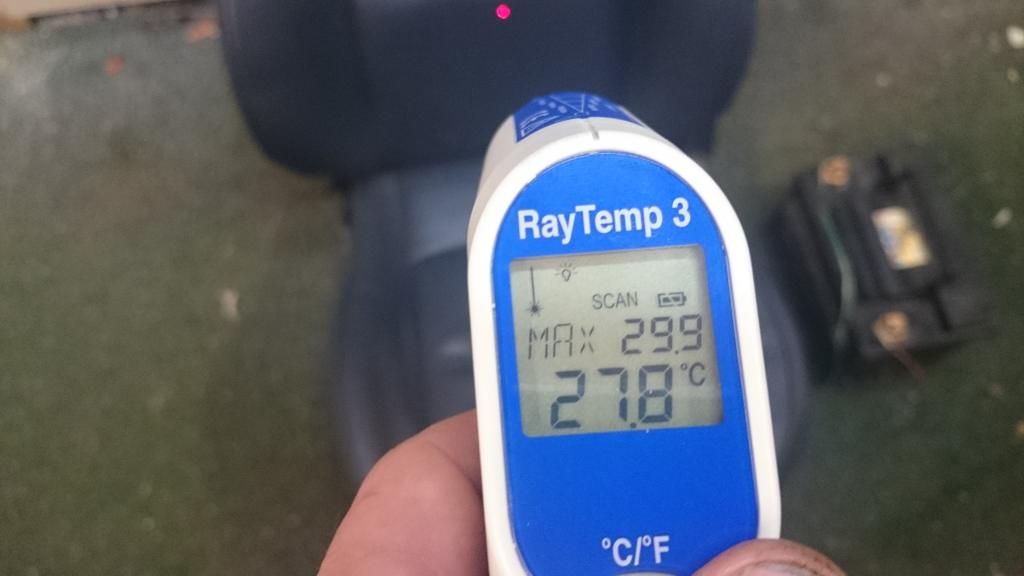 They also need switches so I bought a load from China which arrived within a week. I've set them to glow when you turn the seats on and the seats only work with the ignition so no worries about them staying on all night. 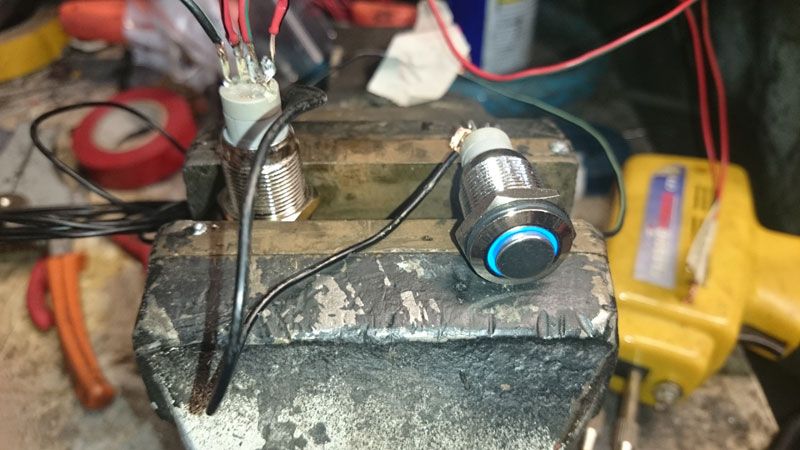 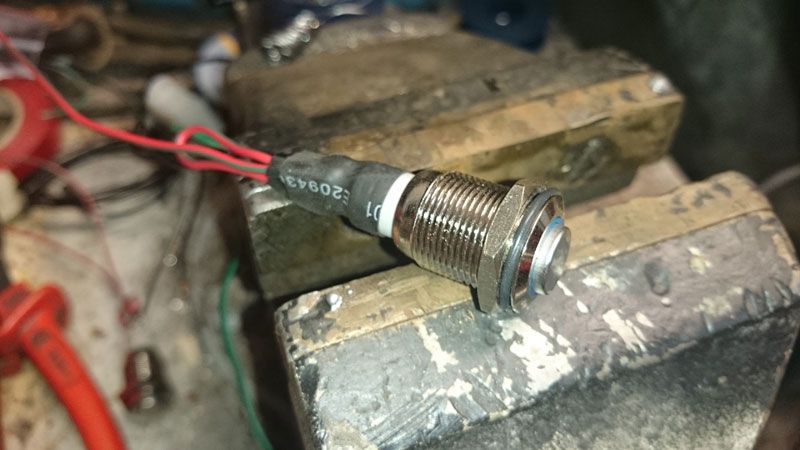 The Mazda radiator fan was hitting on the Hyundai radiator so that needed a bit of a trim! Also, the radiator had a leaking O-ring on its drain tap I had to sort out. Only discovered moments before first fire up! 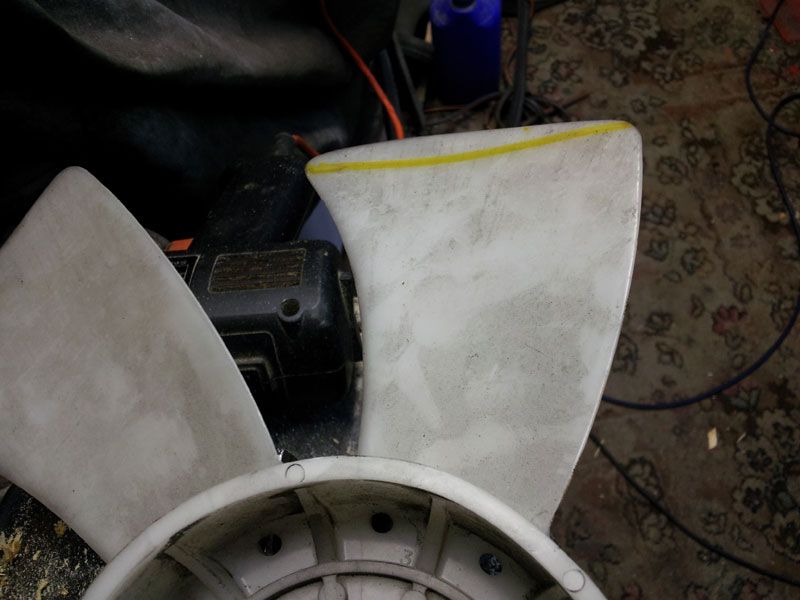 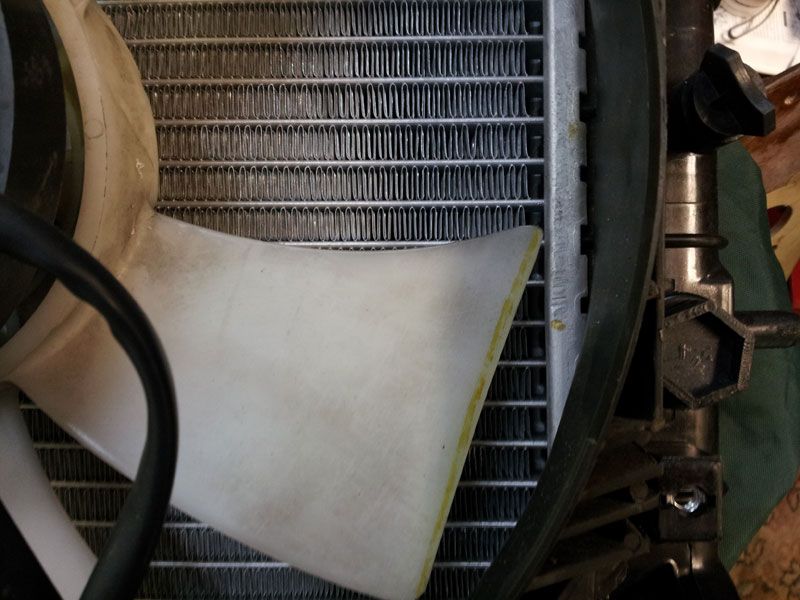 Despite being told it would never be a problem the fuel gauge didn't match the Mazda sender. I've always had problems with incorrect fuel readings so after doing some proper checks on resistances etc. I found that no, the Mazda gauge requires the Mazda sender. Which was too big for the tank... curse word. Nice deep breaths of 20+ year old molten petrol saturated plastics produced...   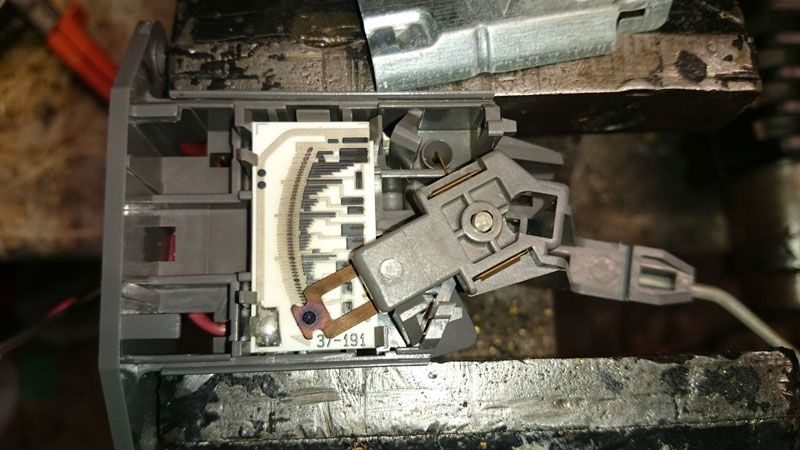 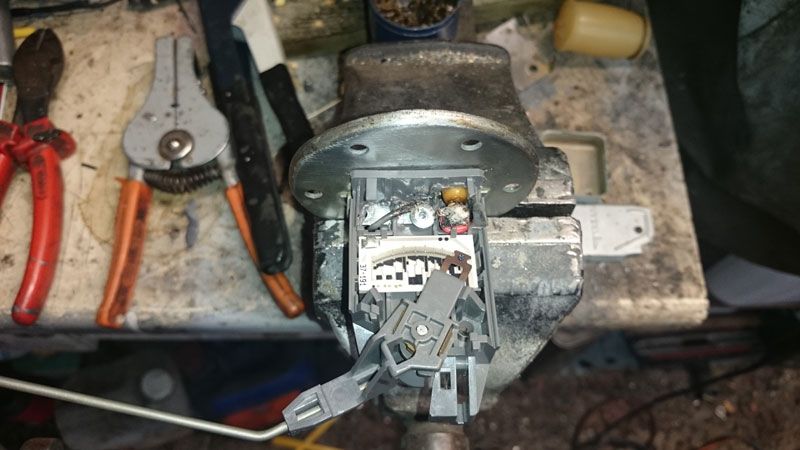 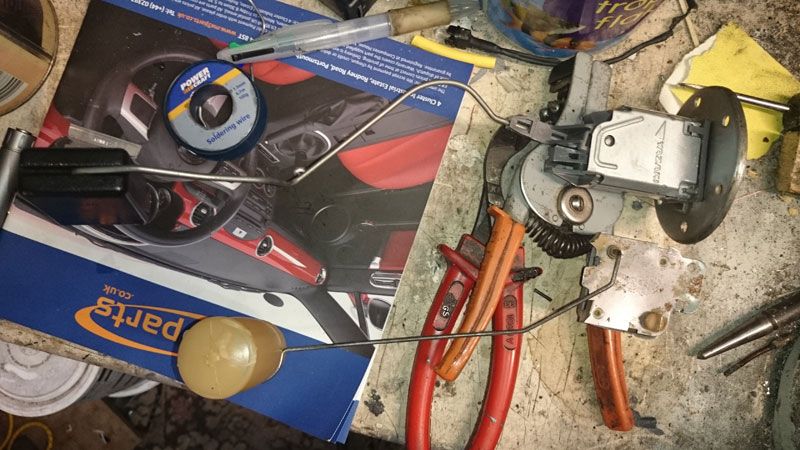 Oh, I also have a switch operated boot light and my reverse light (erm, Jaguar driving lamp) now works when I go backwards instead of having to flip a switch for it. I've got some very bright LED interior lights which will be hidden behind the dashboard so you just get a glow and after some wire tracing the ciggy lighter in my boot works again rather than shorting out. Next, heater. It's a Mk3 Spitfire one which required some work. Not only is it very tatty but its matrix leaked. I've fixed that now. Quick warning, the solder Triumph use has a much lower melting point than modern stuff which makes things fun. I went out after doing the leak test and repaired it when I got back. In between I forgot that I'd reset the compressor so when I repair it I was testing it at 5bar! I think it'll be up to the job. 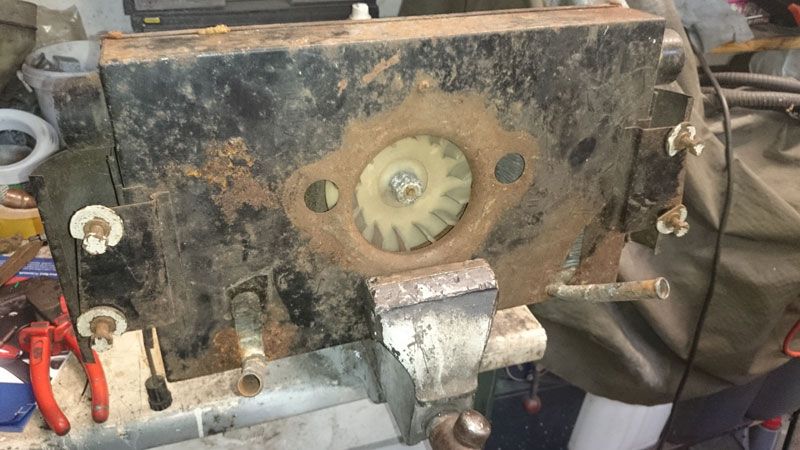 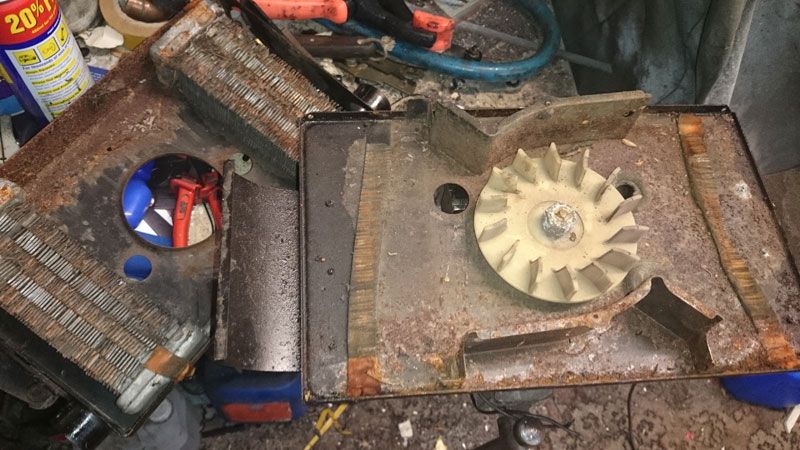 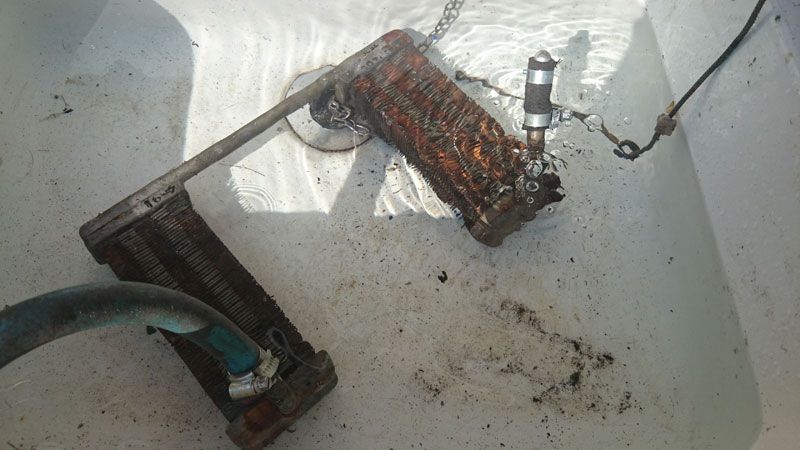 I've played around with the diagnostics light as well. Seeing as I'm not using the Mazda lights I have a warning icon on my rev counter which used to tell you when they were moving doing nothing. The diagnostics is an old system which requires you to short out a couple of terminals then count bulb flashes. Now, the thought of doing that in pitch black in the middle of the night in Switzerland whilst it's curse word down doesn't really fill me with joy. So I'm going to wire it into the fuse box and the old light icon so all I have to do is going out of the car, fit two fuses and then get back in and count how many times my lights aren't going up and down in comfort. I could always fit a hidden switch under the dash to avoid the fuse idea but I don't want random switches everywhere. Of course this involved playing with the light holder. Well, nothing is allowed to be simply and straight forward, is it! 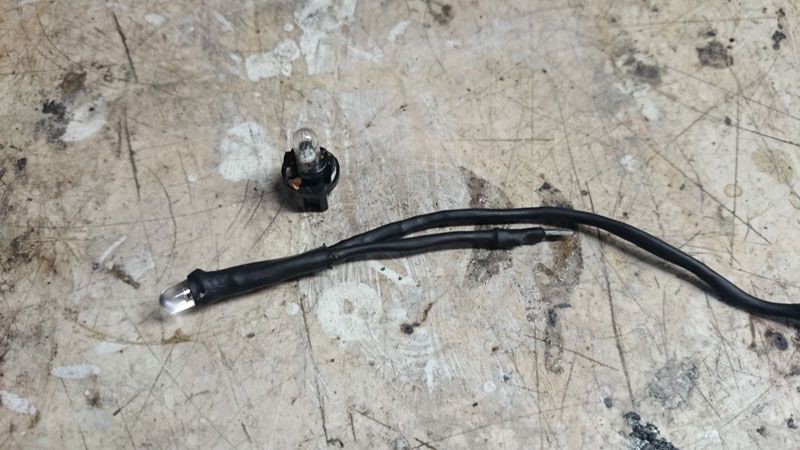 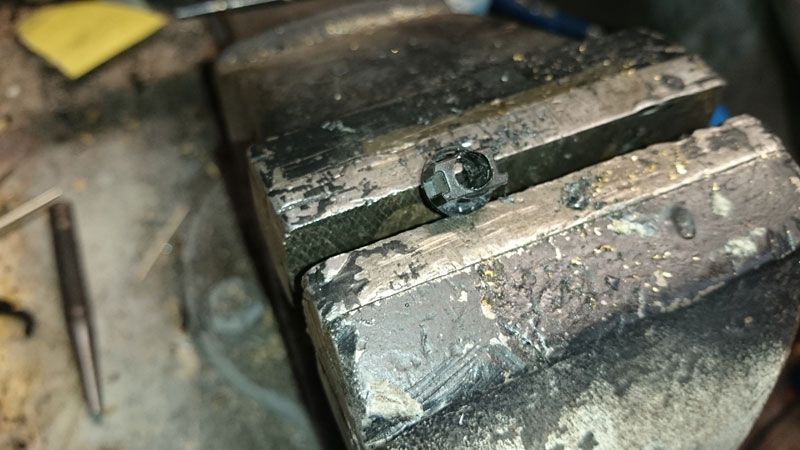  Just fitted a new connector for the bonnet wires. 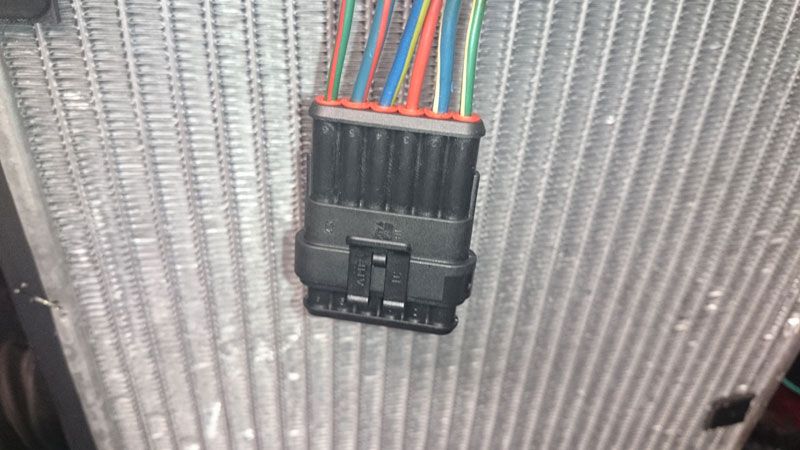 And whilst working in the boot I found I had two small holes in its corners and the rust bubble on the wing by the rear light turned out to be more than a bubble. I really must stop jabbing things with screwdrivers! So I'm hoping to get the car out tomorrow, degrease it, drop the water out of the engine, turn it around and then reverse it into the garage and do a quick job on the rear wheel arches, boot and wing. It'll be far easier for me if I turn it around and the petrol tank needs to come out to allow me to repair the wings and boot so as I've only got a couple of litres left in there it all makes sense to do it now. Shame as it'll add more time onto the, erm, refresh? But then according to someone all I've done is join some wires together so... yeah. |
| |
Last Edit: Jul 3, 2014 6:04:18 GMT by ferny
|
|
ferny
Club Retro Rides Member
Posts: 981
Club RR Member Number: 13
|
|
|
|
|
|
| |
Last Edit: Jul 4, 2014 15:38:03 GMT by ferny
|
|
ferny
Club Retro Rides Member
Posts: 981
Club RR Member Number: 13
|
|
|
|
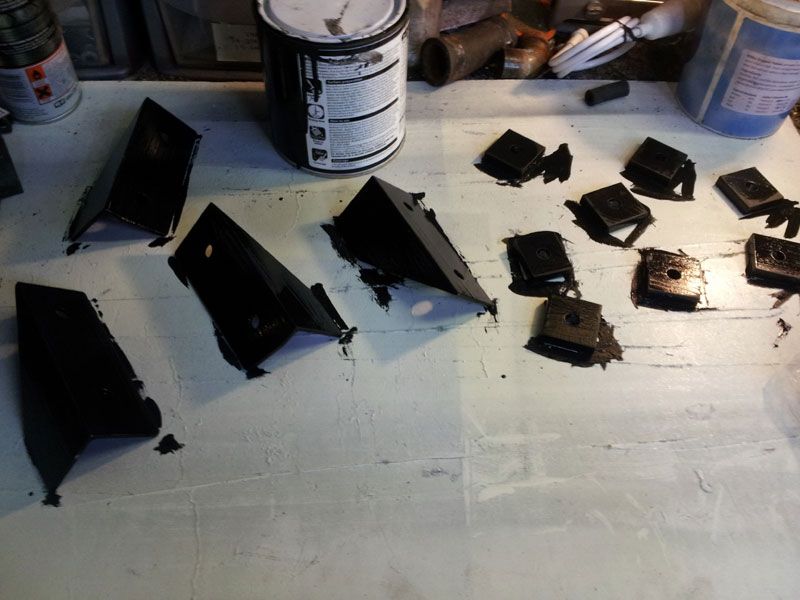
So when installing my boot light and what not I noticed a small rusty patch in the boot and decided to get jabby with a screwdriver. The holes got a touch bigger but nothing which worried me. The petrol tank didn't really need to be removed to fix them but whilst I had the welder out I thought I may as well repair the wheel arches which the tanks does have to come out for as you have to get to bolts to remove the rear valances. This is where it got interesting! The boot floor bolts to the chassis in two places on the floor pan, both of which have strengthening panels. Yep, you guessed it, rotten. It's going to be an interesting repair as the rear body tub needs to come off to do it really but I can't be arsed! It'll have to come off later to replace some chassis bits I've already got but I don't want to do that job just yet. I'm also discovering that everything I'm repairing or replacing has been don't be a previous owner in the past.   Doesn't look too bad, pretty small really. 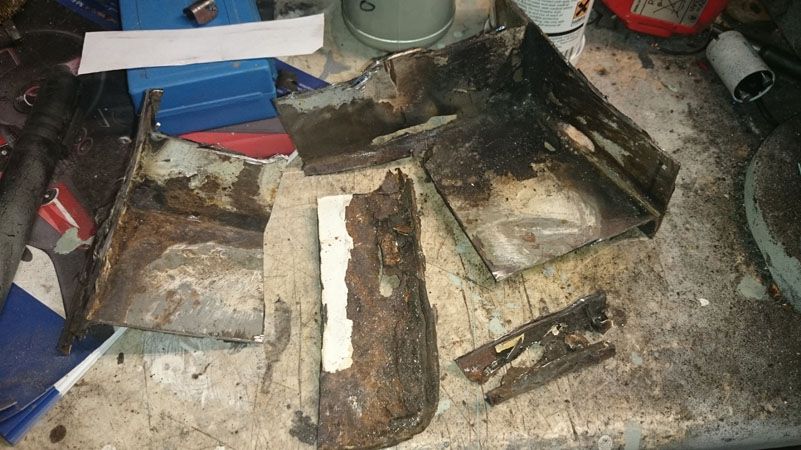 Until I poked some more and decided I needed to remove this lot. That's a small portion of what's been cut out. I even found the inner wheel arch on one side wasn't attached to the body in places so I'm happy I went over the top with the screwdriver. 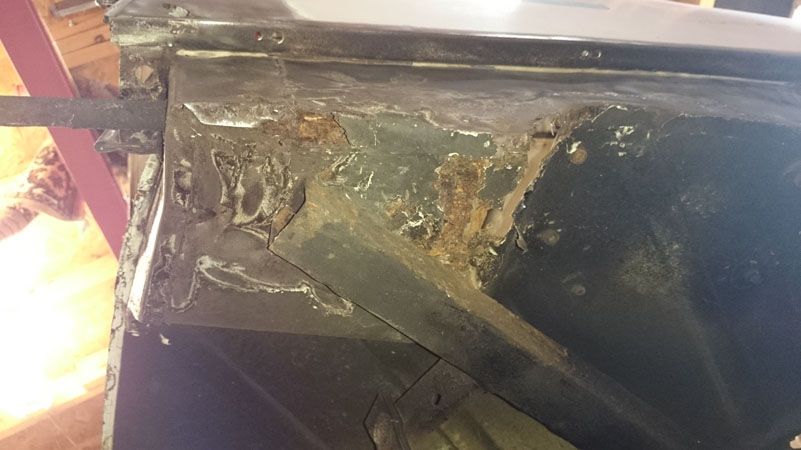  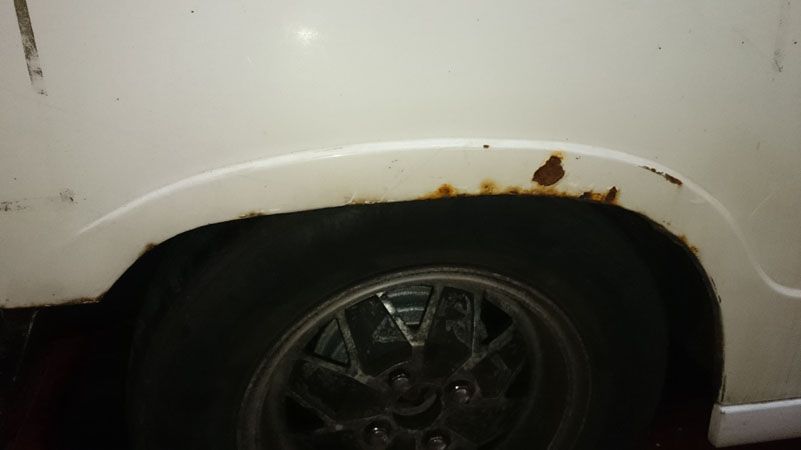   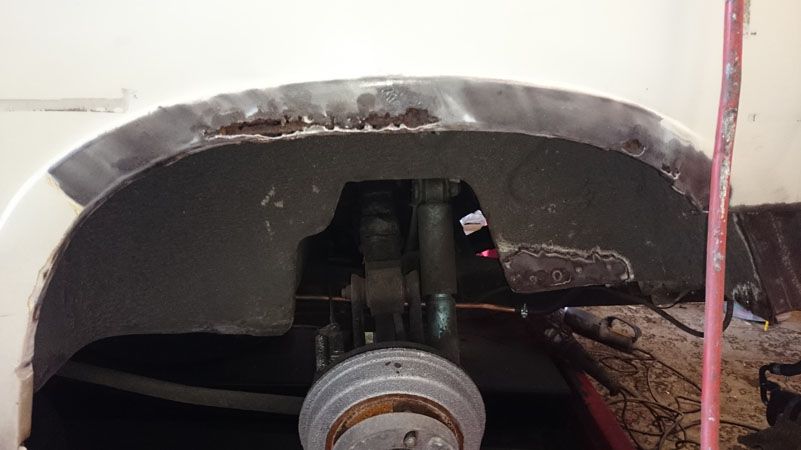 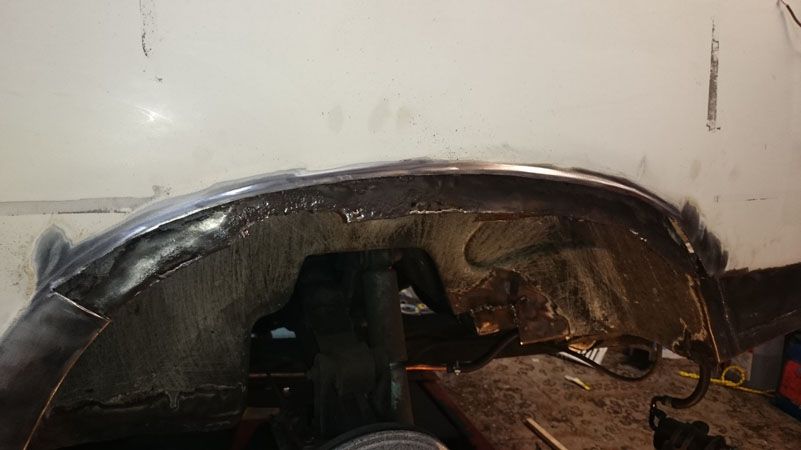 So, you get the gist... Since fitting the Mazda engine I've had a slight smell of petrol from the car and I think I found out why as I was doing all this. It appears that it was leaking at the return to the tank which will be an easy fix. But to make sure it was only that and not a hole in the tank I present to you my method of tank pressure testing!  As this was all going on I thought I'd have some quiet time so took the rocker cover off to paint it, resulting in one sheared thermostat housing bolt. Yes, I've painted that as well. I'm not after a super amazing finish, just something nice. As said, that's the whole point of the car. Nice, usable, fun but deffo not a show car and rough edges are more than fine! This is how it is right now, rattle can finish is good enough for me! Complete with one random dog hair which somehow floated on it when the top coat was wet.   And also had a quick run out with a couple of mates at one point as well.     |
| |
|
|
|
|
|
Jul 13, 2014 15:04:32 GMT
|
I like what you've done with the rocker cover, it looks good! Shame about the rust, good luck with the repairs. Mine is sat in a screwdriver free zone lol, I'm gonna leave the MOT man to decide what needs repairing |
| |
You can't buy happiness but you can buy cars and that's kind of the same thing.
1989 Austin Metro
1994 Harley Davidson hardtail bobber
|
|
ferny
Club Retro Rides Member
Posts: 981
Club RR Member Number: 13
|
|
Jul 21, 2014 17:03:22 GMT
|
I had to fix my speedo earlier and as I was stripping it down my thoughts turned to playing with yet another thing which doesn't need playing with. So I scanned in a couple of faces and had a very quick tinker - so quick you'll notice that none of the colours match. You're looking at £40+ to buy replacement ones so there's no harm in seeing if I can print of some at a high enough quality. Thoughts, opinions? You can see my thinking but I'm obviously no graphics designer so I don't think they'd get any fancier than this, and they're not exactly fancy! I'm liking the plain look which is different enough to not be in your face flashy. 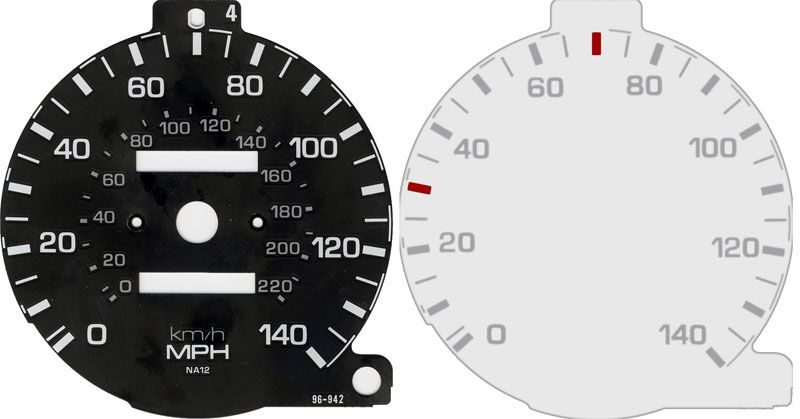 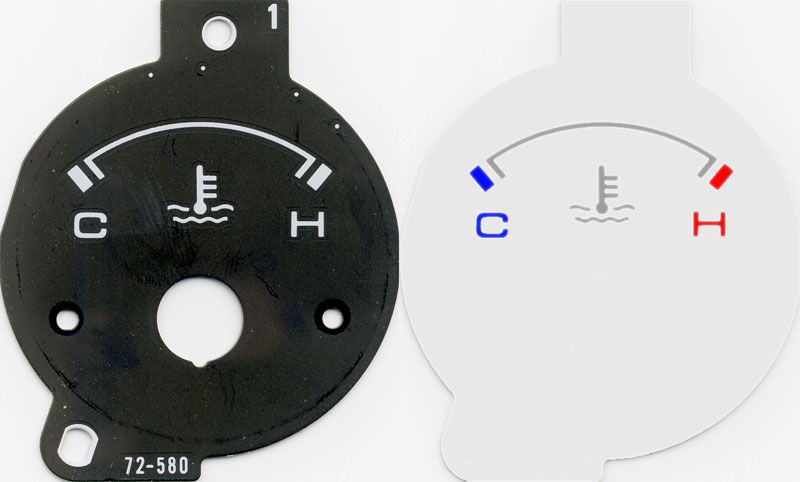 |
| |
|
|
ferny
Club Retro Rides Member
Posts: 981
Club RR Member Number: 13
|
|
Jul 21, 2014 18:11:19 GMT
|
Another thought.  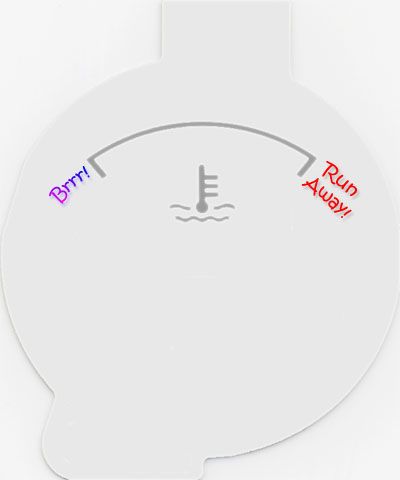 |
| |
|
|
ferny
Club Retro Rides Member
Posts: 981
Club RR Member Number: 13
|
|
Jul 23, 2014 11:46:39 GMT
|
I know it needs to be far more tacky but I thought I'd have a quick test whilst I was waiting for the rice to cook.  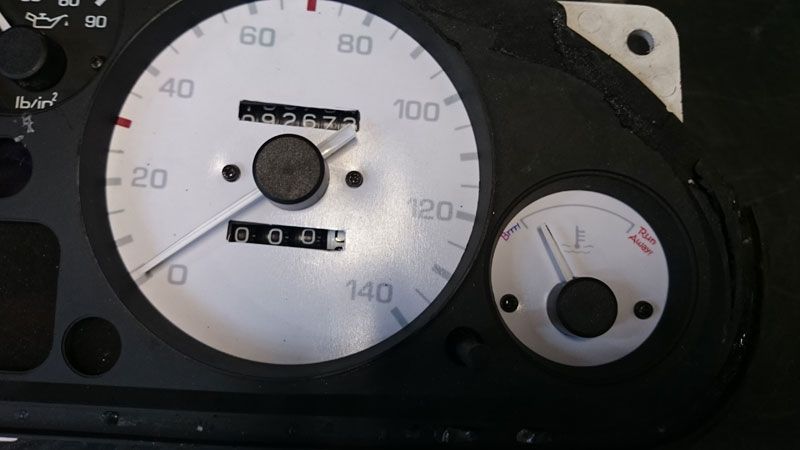 A very quick test I might add! Now I know I can get the scaling correct, or at least that I'm near enough to only need to tweak it, I can see whether or not they let enough light through to be used at night and then think about proper designs. |
| |
|
|
ferny
Club Retro Rides Member
Posts: 981
Club RR Member Number: 13
|
|
|
|
It's 8am as I start to type this. I'm onto coffee number 4 already. Well, it's instant stuff and I'm using two spoons of granules per cup. Does that make eight cups of terrible coffee? I dunno and the wizard behind me is telling me to stop typing rubbish and hurry up with this entry so we can go and ride the magical sand dragon together. I'm getting a bit fed up of it to be honest, he's getting very demanding these days since he bought his new staff with some inheritance. I'm hopefully done with all the welding, woohoo! Although I've said that before, so shhhh. The chassis needs work but it'll last until next year, hopefully longer. I've no reason to look over other bits of the car now either so shouldn't find any more rot. In fact, there's nothing else to check! I think... Other than the boot corners the major rot was where the boot floor bolts to the chassis. It was bad. Very bad. The only option I had was to rip it out and see what happened. So I took some measurements, wrote them on the car over the primer already on there, braced the tub with wood then got cutting. 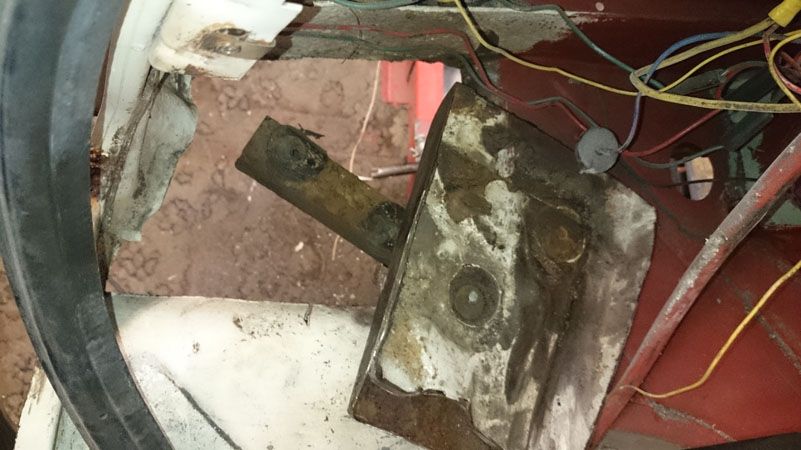  For a bit of fun and curiosity I removed the wooden brace and the boot floor never moved which I'm guessing means I was wise and I've done a good job of getting the other holes filled and solid before doing the boot? You can't buy repair sections for the boot floor so I used the old bonnet to make very simple repairs. It's rough, but it's ready. 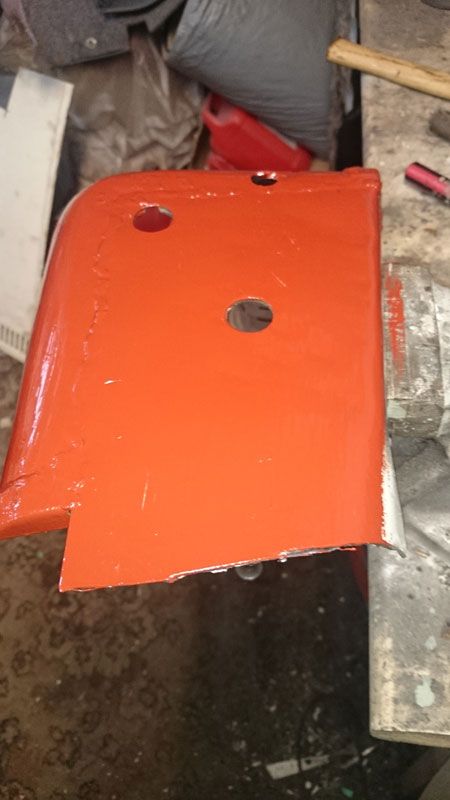 I've just got some paint on it this morning. It's not very pretty, the wise will spot the double skinning has gone from areas I'd repaired and I don't care. No spots welds, it's all seam welded and more importantly it's solid. I'll get some more paint on it later. 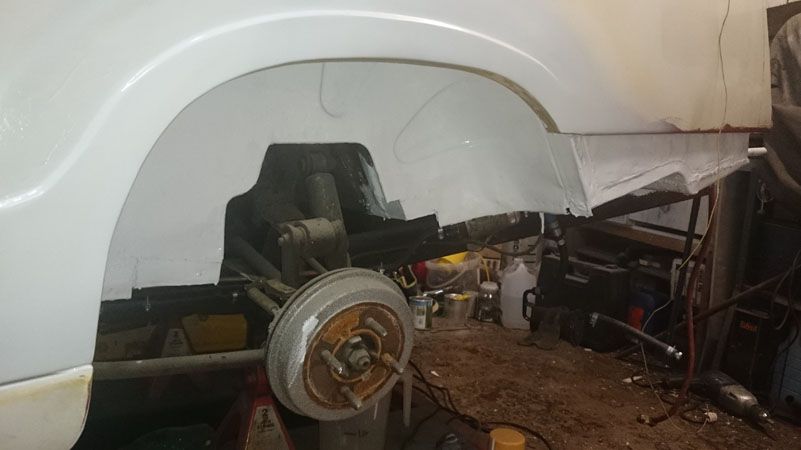 Hopefully it'll last a little while before I can find a new rear tub, the funds for one and the motivation to do it. It's had so many repairs now that there's hardly anything original left! In fact, if you look you can see previous weld repairs from the previous owner - they'll be the pretty ones. Yep, I should have cut them out so I only had one repair line. Nope, I don't care. I didn't have the time to do a "proper" job, it just needed to get done. It's a bit like a car fiddled with by English Heritage now as well, you can see all the previous work. It's a Grade Turd listed car. Also notice the terrible colour match from what was meant to be the correct paint and paint reaction I've got to sort out. Brilliaaaaaaaaaaaaaant! Ok, other stuff. The speedo got damaged and ended up with it's needle pointing straight down so I decided to strip it all. Turns out it wasn't needed as it's an interference fit and just needed moving round but I now know how its internals work which will help further trouble shooting. A bit of knowledge for five minutes work is always ok with me. 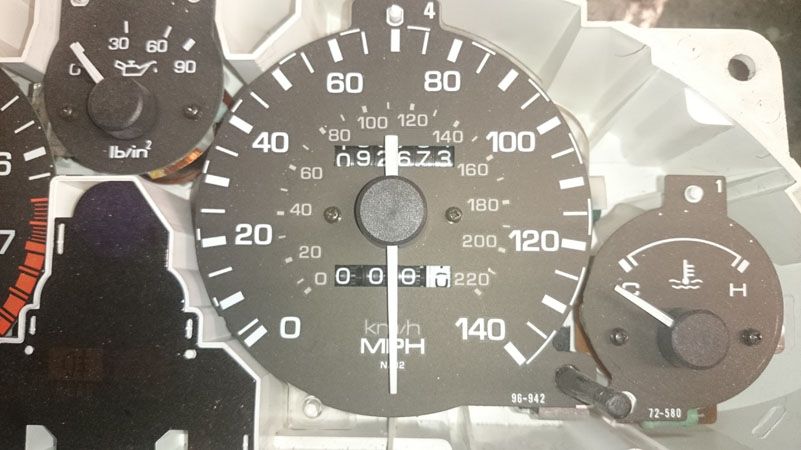 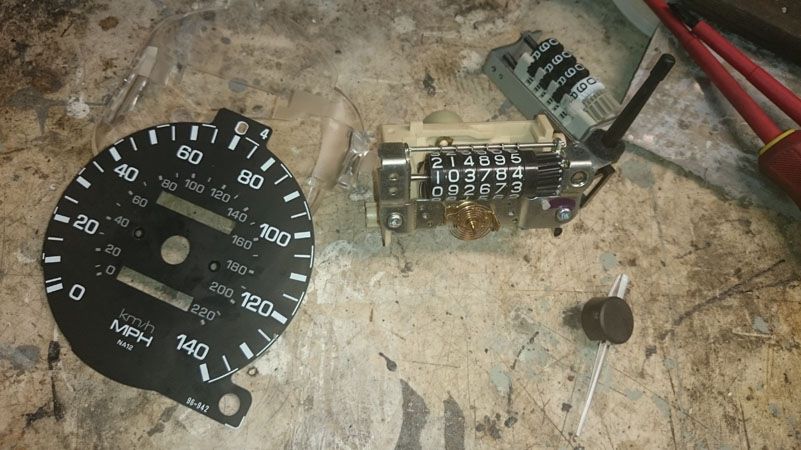 This also got me thinking, can I make my own gauges? So I put some rice onto boil then fired up the scanner. One tasty dinner and a very quick flap with a scalpel later and I had the following. 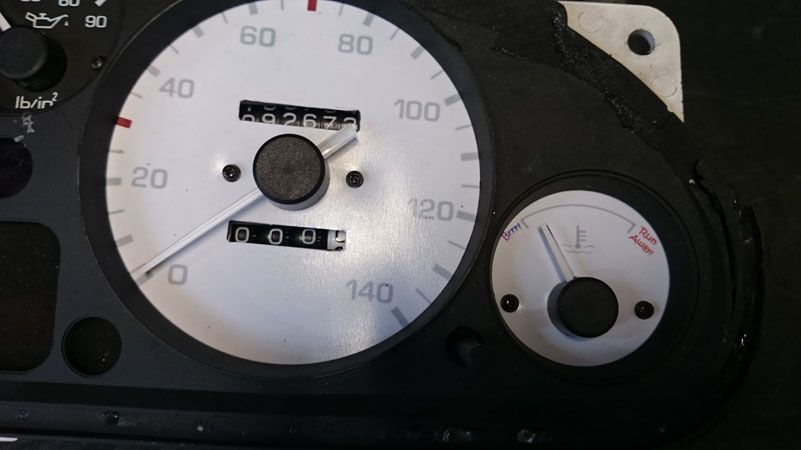 I've decided it's good enough to at least keep tinkering with. Others who have seen it in the flesh like it as well. A job to explore later me thinks so it could get interesting. I also finally finished painting bits in the engine. I've rotated the injectors so the plugs are easy to get to as well and I've learnt more about the engine. Again, it's all knowledge I'm gaining to help me in the future. Plus it looks perdy. I've left the throttle body as a horrible dirty mess as it'd be a curse word to strip down just to paint and I'm lazy. 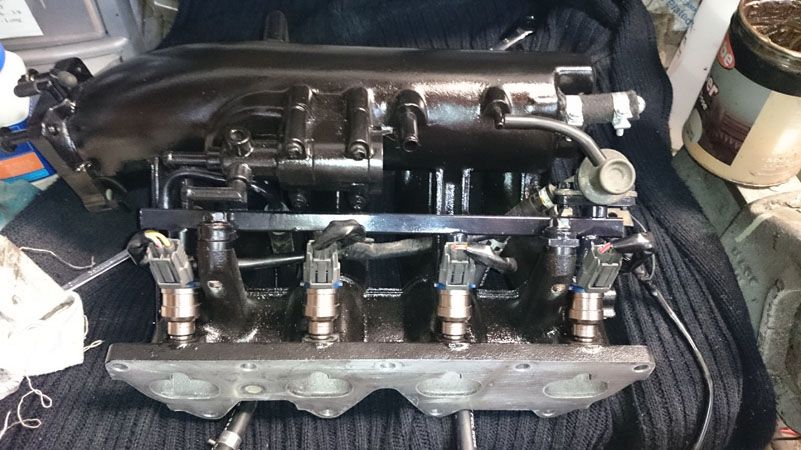 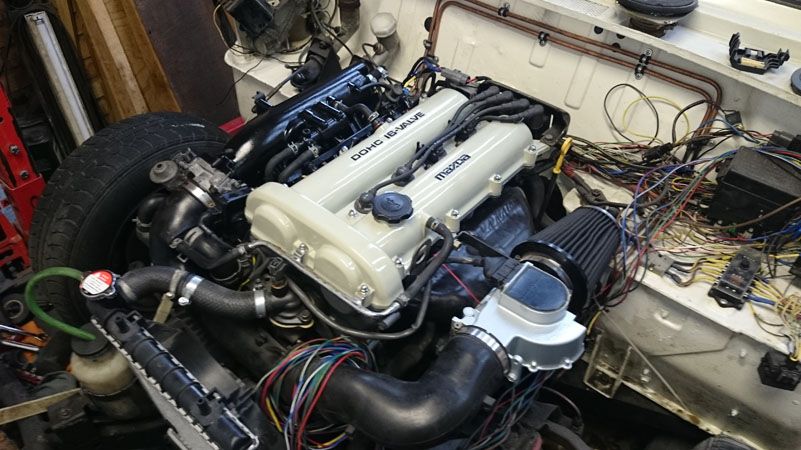 It'll be interesting to see how many air leaks I've created.... |
| |
|
|
ferny
Club Retro Rides Member
Posts: 981
Club RR Member Number: 13
|
|
|
|
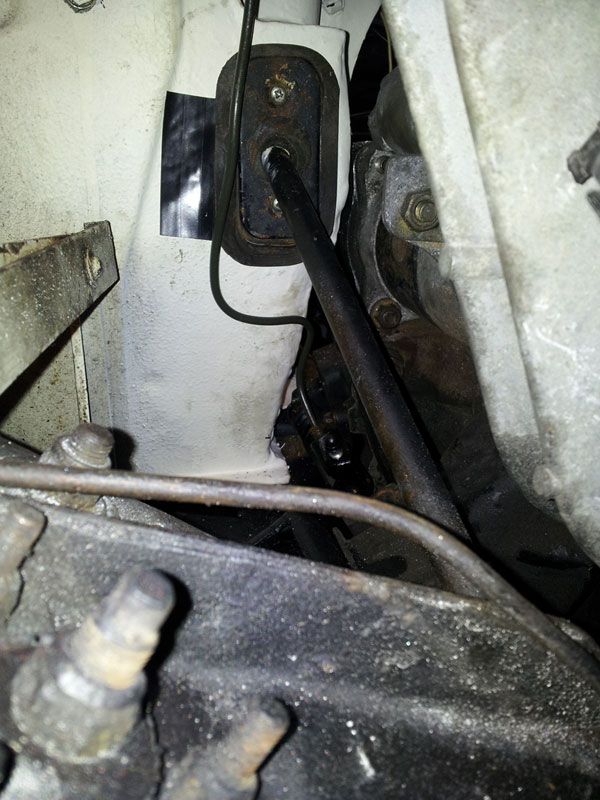
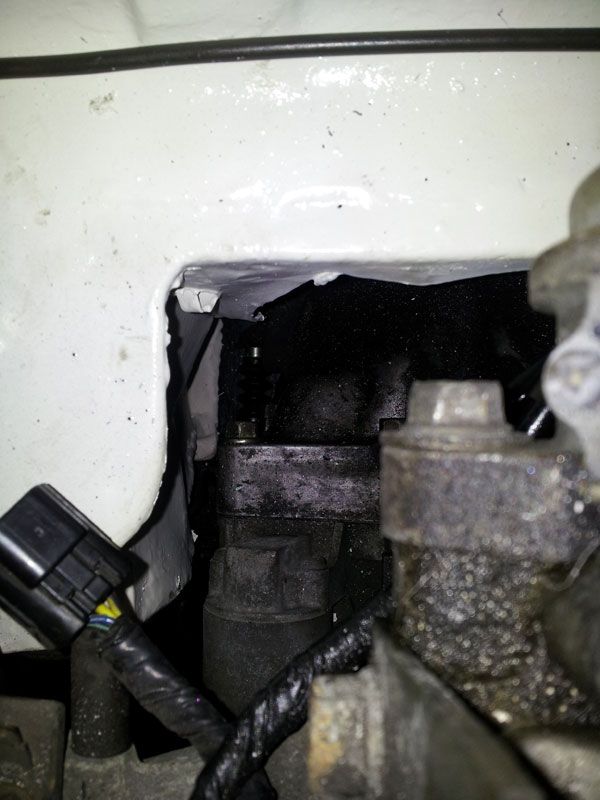
Not been doing too much to the car this last week but small steps forwards were made over the last couple of days. Mostly heater related. Being an ignorant person whilst also wanting to make sure I used as many standard parts as possible to make replacement due to failure easier I was insistent on using the original Herald heater valve. For those not in the know, it sits on the outside of the heater box which lives in the engine bay. It attaches to that by having a rubber olive seal directly onto the pipe of the heater matrix and the unit is bolted to the heater box so it's secure enough to be cable operated. I couldn't use the original any more as the engine is where the heater was, so I've used a mk4/1500 Spitfire heater box inside the car. And I couldn't mount it directly onto the pipes of the heater matrix as one pull on the cable to adjust temperature would bend it all. So, one block of aluminium later there was a solution! 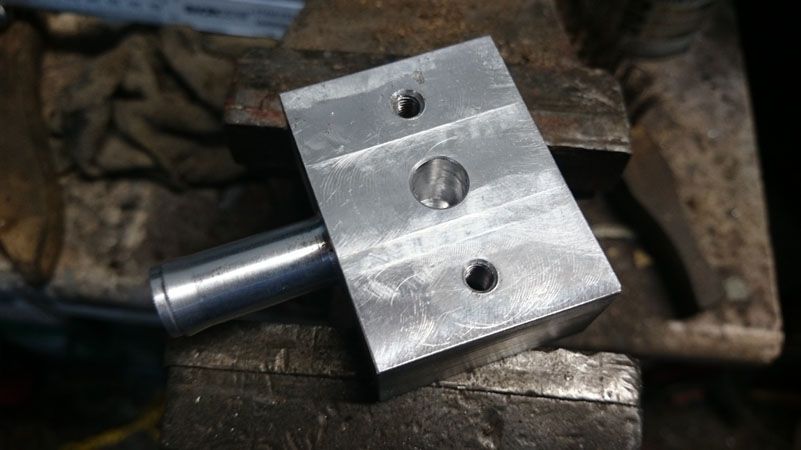 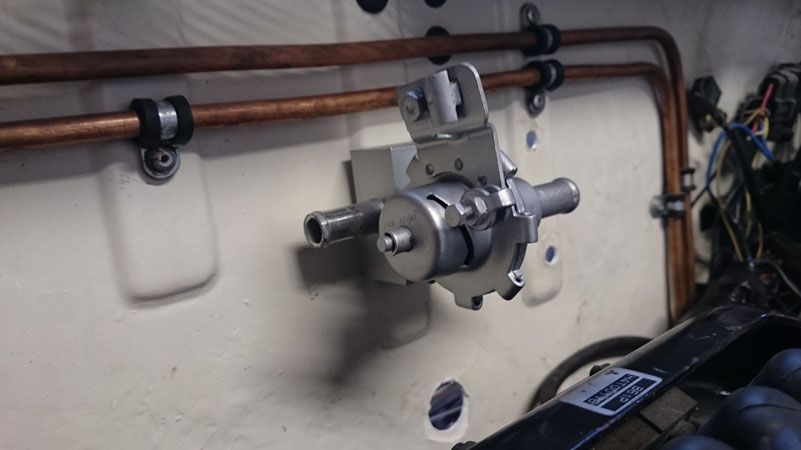 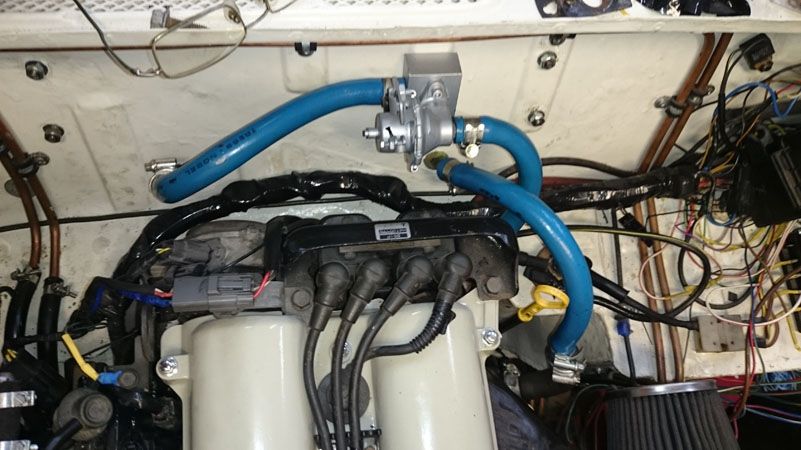 Those with a good memory will remember I was going to use a mk3 heater. I've swapped for a later one as it's slightly faster. I've bypassed the resistor and now it'll run at full speed rather than having two settings. I have no need for a slow fan. If I want less warmth I'll turn it down with the heater valve. I only really want it for screen demisting anyway as I've not had a working heater for some time now and I'm used to it. I've also not cut any extra holes in the bulkhead for its inlet. Instead I've spaced it from the bulkhead so it'll constantly be re-circulating cabin air. This may see the windows getting mistier as it heats moist air, it may not. It'll certainly make bottom burps more potent.  I've also had a problem with a leaking fuel tank which after a bit of faffing was solved. But that lead to me spotting injector number four was leaking. After a bit of research I discovered that Mazda changed the insulator between the injector and inlet manifold early in the MX5 production. What I had fitted to my car was the early (and probably never touched before) one which didn't like to be disturbed which I've obviously had to do to paint the manifold. The new ones were also used on mk2 MX5's and will happily be removed and messed around with numerous times before they begin to leak. Turns out these new insulators aren't very cheap either, well, I consider £20 for four little bits of rubber coated plastic to be expensive! So I bought an injector seal kit for the same price and set to it. Very quick and easy as it turns out, but then that could be in part to me being careful and thinking out a few things last time I reassembled everything with the intention of making strip down quick and easy!  So now it was time to fill the car up with water and discover my cock-up. I'd made my own manifold gasket when I took it apart. This is shaped and not reversible. I guess it's for the engines original turbo configuration that it has a strange water way into the cylinder head at one end underneath cylinders three and four which doesn't go anywhere. I'd made my gasket to fit perfectly, removed it, applied some sealant and then fitted it the wrong way. A fact I only found out when filling the car up with water and hearing it splash onto the floor. Whoops! Wondering if I'd cracked the head from using too much copper slip (still working hard to use up a tin of the horrible stuff) and hydro-locking a bolt hole or from running the engine with no water for a few seconds I slowly removed the manifold. Again, an easy job thanks to a little thought earlier. It was then that I saw the water way and gasket. I must have fitted it as a final job one day when tired. Anyhoo, new gasket is made and it allowed me to get some paint onto the areas which had been stripped from the petrol. 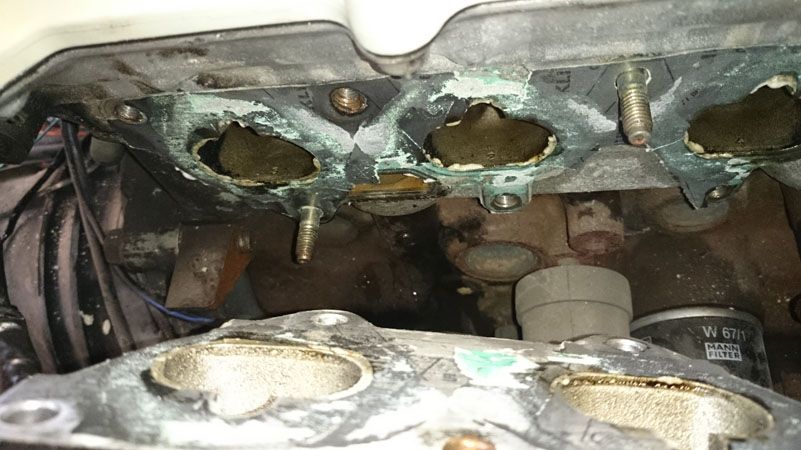 Oh, I also tinkered with the dashboard some more. I tried to use the film I had to coat it with and ended up with a horribly creased mess. So I went out and boat a can of spray paint and have it a quick blast. 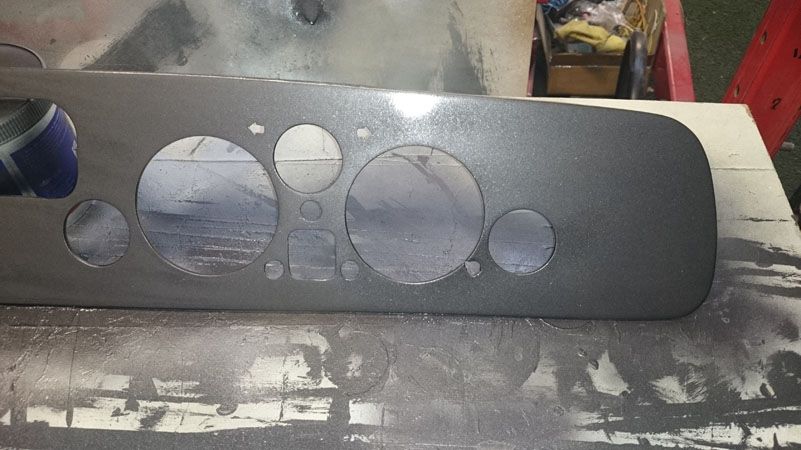 |
| |
|
|
ferny
Club Retro Rides Member
Posts: 981
Club RR Member Number: 13
|
|
|
|
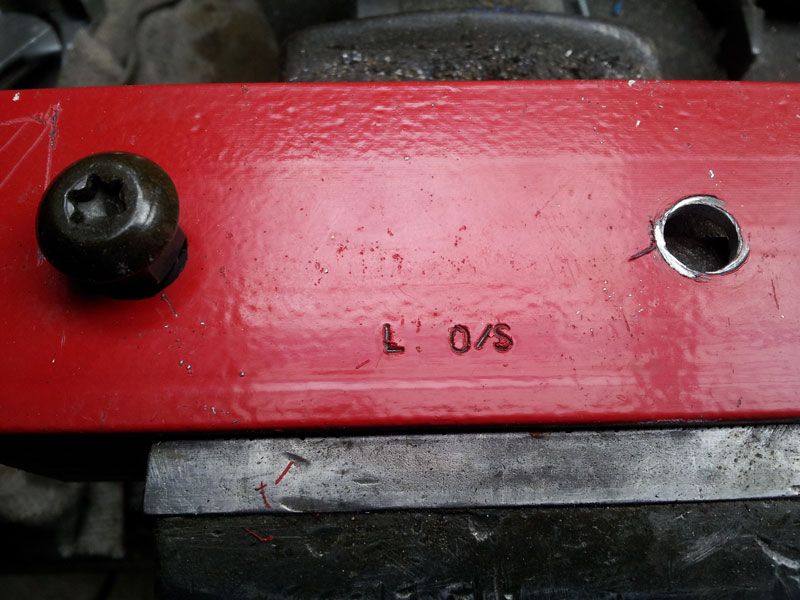
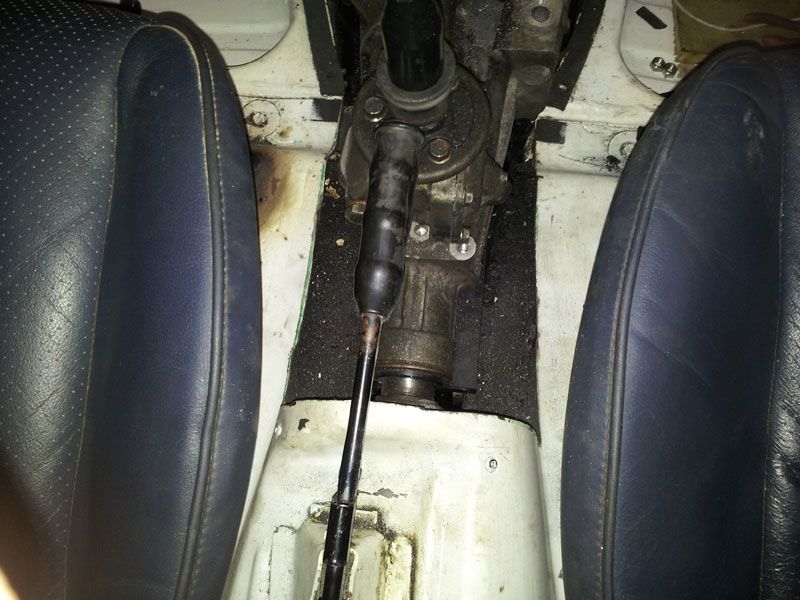
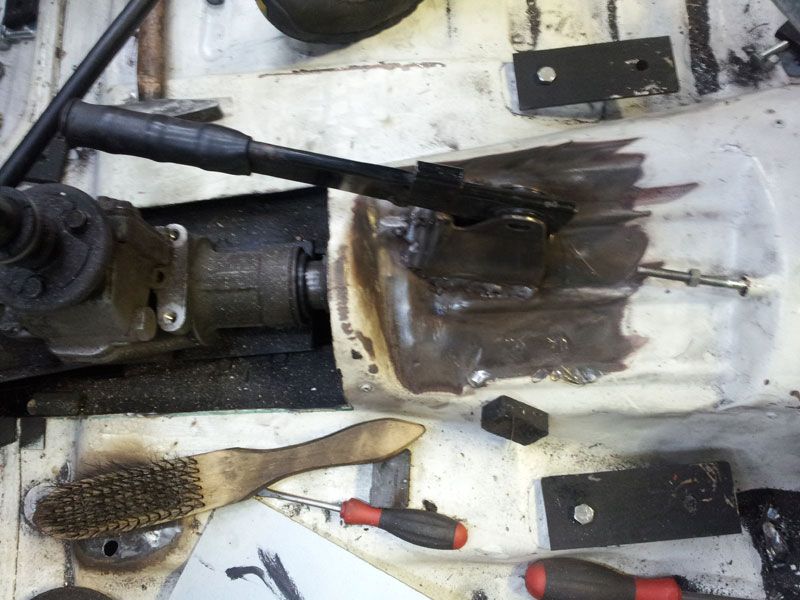
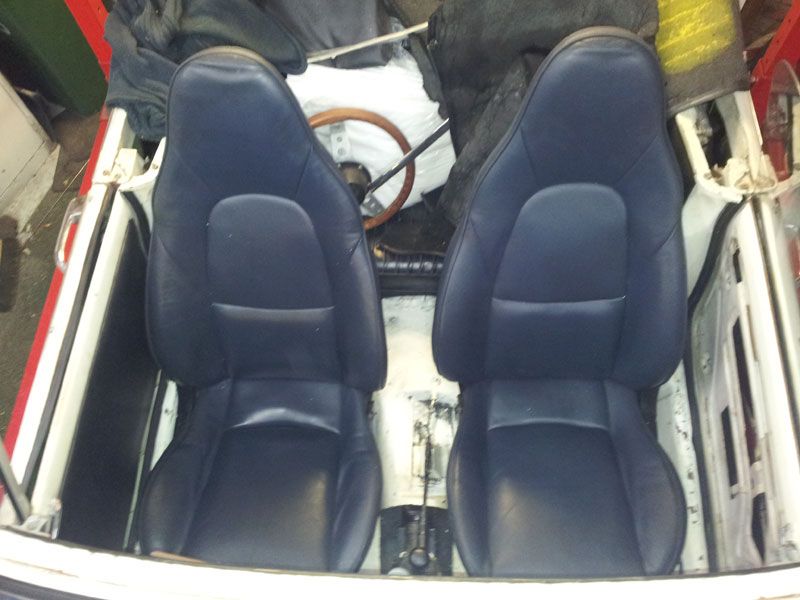
Did some tweaking to the car such as tidying up the wiring under the bonnet and tap out the transmission tunnel where the propshaft UJ was rubbing and then took it out for its first proper test drive. Boy does it shift! The MX5 seats have made a huge difference to the way the car feels too. Everything feels more complete and secure. I think I'm going to enjoy this!  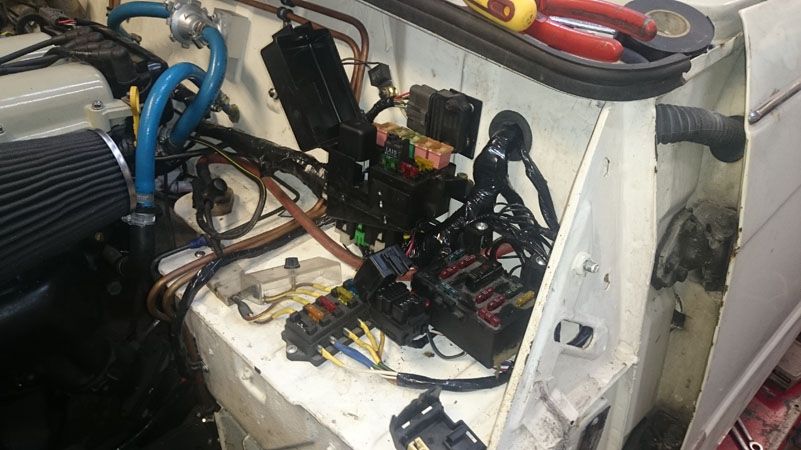 Sadly the test drive threw up some more items for the snagging list. The handbrake needed adjusting, the speedo cable snapped, the brakes needed another bleed and the temperature gauge wasn't working. The gauge was a simple case of the wire being disconnected I hope, I can't test it properly as the car hasn't got any water in it right now. All the sensors have the correct resistances and the fan operates when it should so it's not any major worry. Quick heads up for anyone with the RAC MX5 Mk1 book, ignore its section on the temperature gauge sensor as it's completely wrong and the sensor it refers to is for the engine fan. Checking the speedo cable revealed it had snapped on the section I was worried about - not making a gearbox tunnel yet was a wise idea. The speedo gear housing in the gearbox has now been shortened as has the key on the end of the cable which goes into it. Actually a completely new one was made! Photos later. When it came to bleeding the brakes I noticed the differential sounded a little unhappy. I had concerns over the diff as with the old Cherrybomb on there I couldn't, hear what state it was in. If it was slowly dying a noisey death I'd never know until it fully expired. Almost doubling the power going through it made a little voice in the back of my head louder. I umm'd and err'd for a while then bit to bullet and removed it. When I topped it up with oil three weeks ago it was almost empty and straight away nice clean oil leaks out. This said two things at the time - it had no oil in it and it was very leaky! I already had new shaft seals for it so to make it safe I though it best to whip it out, do an inspection and replace the seals. Less than mouthful of oil came out when it was removed! The video below has the noise in it. On strip down the thrust washers were found to be worn. Another interesting thing thrown up - the ones the manual tells you to measure aren't available in different sizes, they're also made out of copper and not bronze and the ones you can buy in different sizes are all out of stock. Simple, make some then! 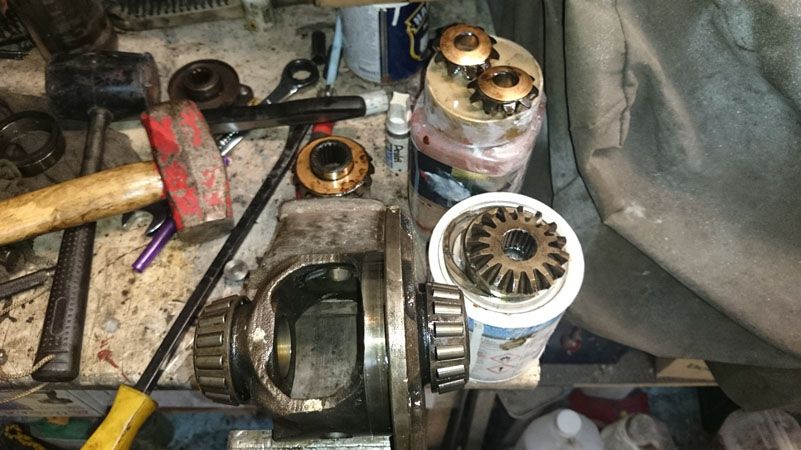 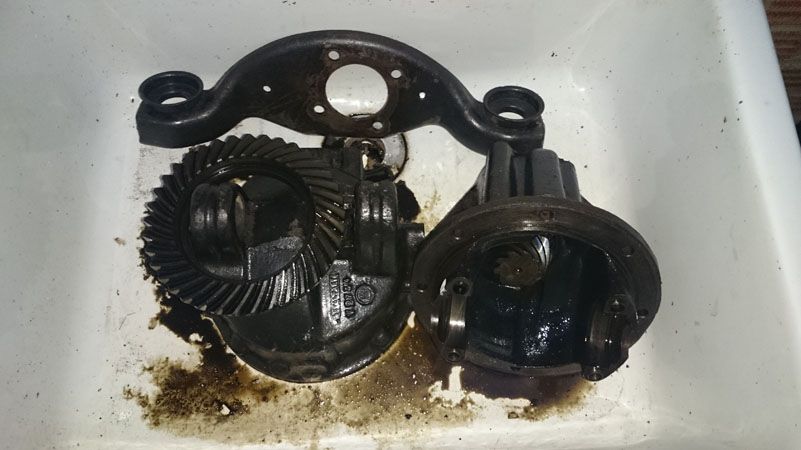 Whilst that was happening a pinion seal, gasket and new Polybushes for the rear were bought and then it was thrown back together after a drain had been tapped and drilled. 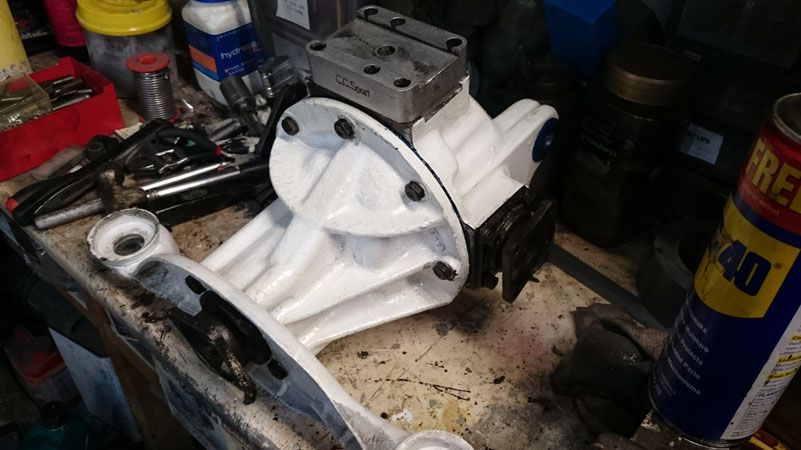 Yes, it's all white. The reasoning for it is that it'll show up leaks far more easily than a black one, I had lots of white paint kicking around and it'll add 15bhp at the wheels. One thing I did notice when putting it all back together was how much of a difference the new bushes have made. Getting the spring back in with a 1" lowering block was a nightmare. Normally I can do it on my own quickly, but this was a right faff as the diff is now sitting at least a 1/4" higher - the old bushes were that badly worn. Also means the car will be that much lower now, which is good. |
| |
Last Edit: Aug 29, 2014 8:22:44 GMT by ferny
|
|
|
|