|
|
|
Nov 18, 2014 22:25:02 GMT
|
|
I also dislike bodges!
I must say, i find it depends on the car, sometimes its warranted on something already ballsed or something worthless but on something excellent thats in acceptable condition, good repairs are a must. I also find mending anything rover built you feel a right judas if you don't do it properly. Rover engineering is great and as such i've been over fastidious with my p6...
I read every update, so keep it coming.
|
| |
|
|
|
|
|
|
|
Nov 18, 2014 22:46:52 GMT
|
|
Those pictures are absolute quality. Keep up the excellent work.
|
| |
|
|
|
|
|
|
|
I also dislike bodges! I must say, i find it depends on the car, sometimes its warranted on something already ballsed or something worthless but on something excellent thats in acceptable condition, good repairs are a must. I also find mending anything rover built you feel a right judas if you don't do it properly. Rover engineering is great and as such i've been over fastidious with my p6... I read every update, so keep it coming. Thanks AtomicRooster, I agree - the P5 and P6 were designed and built incredibly well and deserve to be done right. Same with Triumphs from that era. Your P6 is starting to look really good - the engine bay is lovely. It's strange, I only started to appreciate Rovers after I realised how much I loved the shape of the P5B and saw they weren't crazy money and decided to buy one, even though it didn't make much sense (lack of garage, no time or money, already having several cars etc etc). The P6 is another car I'd like to own - I remember when I was a kid a neighbour had a 3500S with the spare wheel on the bootlid, and I thought it looked amazing. Also the SD1, even though they were more BL than old Rover, for the simple reason I (just about) remember them being launched and thought they looked great. David Bache had a knack for making cars look big, tough and menacing without being ugly or over the top. Growing up in the 70's I have a soft-spot for most BL cars of that era as well (TR7 in particular). |
| |
|
|
|
|
|
|
|
Those pictures are absolute quality. Keep up the excellent work. Thanks georgeb, will do. I'm enjoying reading about your adventures as well - iPad in bed with my favourite RR threads is a good place to be on a cold and damp English night, and "Letters From Manila" are most welcome :-) |
| |
|
|
les509
Part of things
 Compulsive collector
Posts: 526
|
|
|
|
|
Beautiful car, but there again I am biased as I'm currently resurrecting one myself. Going to go for a David Green steering box soon as mine marks its territory wherever it's parked, plus I have a few carb issues too. Love the rear seat belt solution.
|
| |
61 Jaguar Mk 10
67 Austin A60 Countryman
69 Morris 1300GT
77 Triumph 2500S
84 Mk2 Granada Ghia Est
86 BMW 635 CSi
87 BMW 635 CSi
|
|
|
|
|
|
|
Beautiful car, but there again I am biased as I'm currently resurrecting one myself. Going to go for a David Green steering box soon as mine marks its territory wherever it's parked, plus I have a few carb issues too. Love the rear seat belt solution. Ah, you and me both on the steering box issue - MOT is approaching and I'm thinking they might take a dim view of red puddles wherever it's parked. I've heard David Green can supply re-built boxes, and that they're very good. Seems a false economy to put in one that's not re-conditioned, as they seem to be very prone to leaking. |
| |
|
|
smeden
Part of things
"Full throttle until you see God,then shift to second"
Posts: 356
|
|
|
|
|
Such a nice car :-) Love it! And ÿou seem to have the skils to keep it that way!
|
| |
Jaguar xj6 S1 swb manual
VW Bay Camper
Audi A3 1998 1.8
VW Beach Buggy (sold)
Ford Mondeo mrk I RS Celebration (written off)
Ford Escort Mrk II RS 2000 (rust in peace)
|
|
|
|
|
|
|
Thanks georgeb, will do. I'm enjoying reading about your adventures as well - iPad in bed with my favourite RR threads is a good place to be on a cold and damp English night, and "Letters From Manila" are most welcome :-) Not sure whether to be flattered, or worried!  |
| |
Last Edit: Nov 19, 2014 9:34:50 GMT by georgeb
|
|
|
|
|
Nov 19, 2014 18:21:35 GMT
|
Thanks georgeb, will do. I'm enjoying reading about your adventures as well - iPad in bed with my favourite RR threads is a good place to be on a cold and damp English night, and "Letters From Manila" are most welcome :-) Not sure whether to be flattered, or worried! Yeah, maybe I should have re-worded that. |
| |
|
|
les509
Part of things
Compulsive collector
Posts: 526
|
|
Nov 21, 2014 20:13:35 GMT
|
|
The David Green one seems to have some form of pressure relief built in as well so won't blow seals out when it feels like it...
|
| |
61 Jaguar Mk 10
67 Austin A60 Countryman
69 Morris 1300GT
77 Triumph 2500S
84 Mk2 Granada Ghia Est
86 BMW 635 CSi
87 BMW 635 CSi
|
|
|
|
|
|
|
Nov 22, 2014 22:26:06 GMT
|
|
OK, that's good to know. I like how the Instruction manual says not to leave it in full lock for more than 30 secs. From what I understand the pressure builds up quite alarmingly - I guess that would partly explain the leakiness and the pressure relief valve.
|
| |
|
|
|
|
|
Nov 30, 2014 20:18:54 GMT
|
When I bought the car earlier this year the engine ran OK-ish, but not exactly smoothly. Being new to the P5B, I wasn't sure how much of that was down to a 46 year old design, how much was due to wear-and-tear or faults, and how much was due to poor engine setup. The smoothness has gotten worse, firstly after I changed one of the jet pipes and tube, and then over time the car wouldn't idle well, and from the sound of the exhaust I guessed all was not 100%. So, today being a day off work I've spent 6 hours fiddling and tuning. I'm really happy with the results, especially after a test drive and a few small tweaks. The engine idles smoothly now, and accelerates quicker. I'll see over time whether the fuel consumption improves, but I'm guessing there's be small improvement. There are numerous sources of information on the web on how to tune a Rover V8 engine, but not all were detailed, some contradicted each other, and some were downright confusing. There's also the P5B maintenance manual and the SU Carb tuning book, all of which I have. But none were definitive for the P5B. Being new to the Rover and not very experienced wielding a spanner (previous adventures being some time ago with an original VW Beetle, which is a very different and much simpler beast), but being handy at DIY and willing to learn, I undertook to write my own (idiots) tune-up guide for the Rover V8 as preparation for today. I'll publish my guide in the next few days - it includes various sources including the Rover Maintenance Manual. If nothing else, I'll use it myself the next time I do the job, but it be useful to others. Firstly, the matter of tools. I didn't have a dwell meter, timing light nor carb balancer, so these have been bought over the last few weeks. I got the dwell meter on eBay - a cheapish multimeter with Dwell and RPM measurement, which is very useful as the dash tachometer isn't sufficiently accurate. This was the one I bought: www.ebay.co.uk/itm/301314750679After researching timing lights I didn't buy the cheapest, as some are difficult to see in daylight, and the one I bought has a clip-on trigger wire which is convenient. It worked fine, and also has a tachometer: www.ebay.co.uk/itm/111467445562Lastly, the carb balancer. Many people say that it's perfectly possible to do this by just listening to the amount of 'suck' the carb is making, which I don't doubt, but having so little experience I wanted something less subjective. I went with an STE Synchrometer that worked really well and simply: www.amazon.co.uk/gp/product/B00ADITC0I 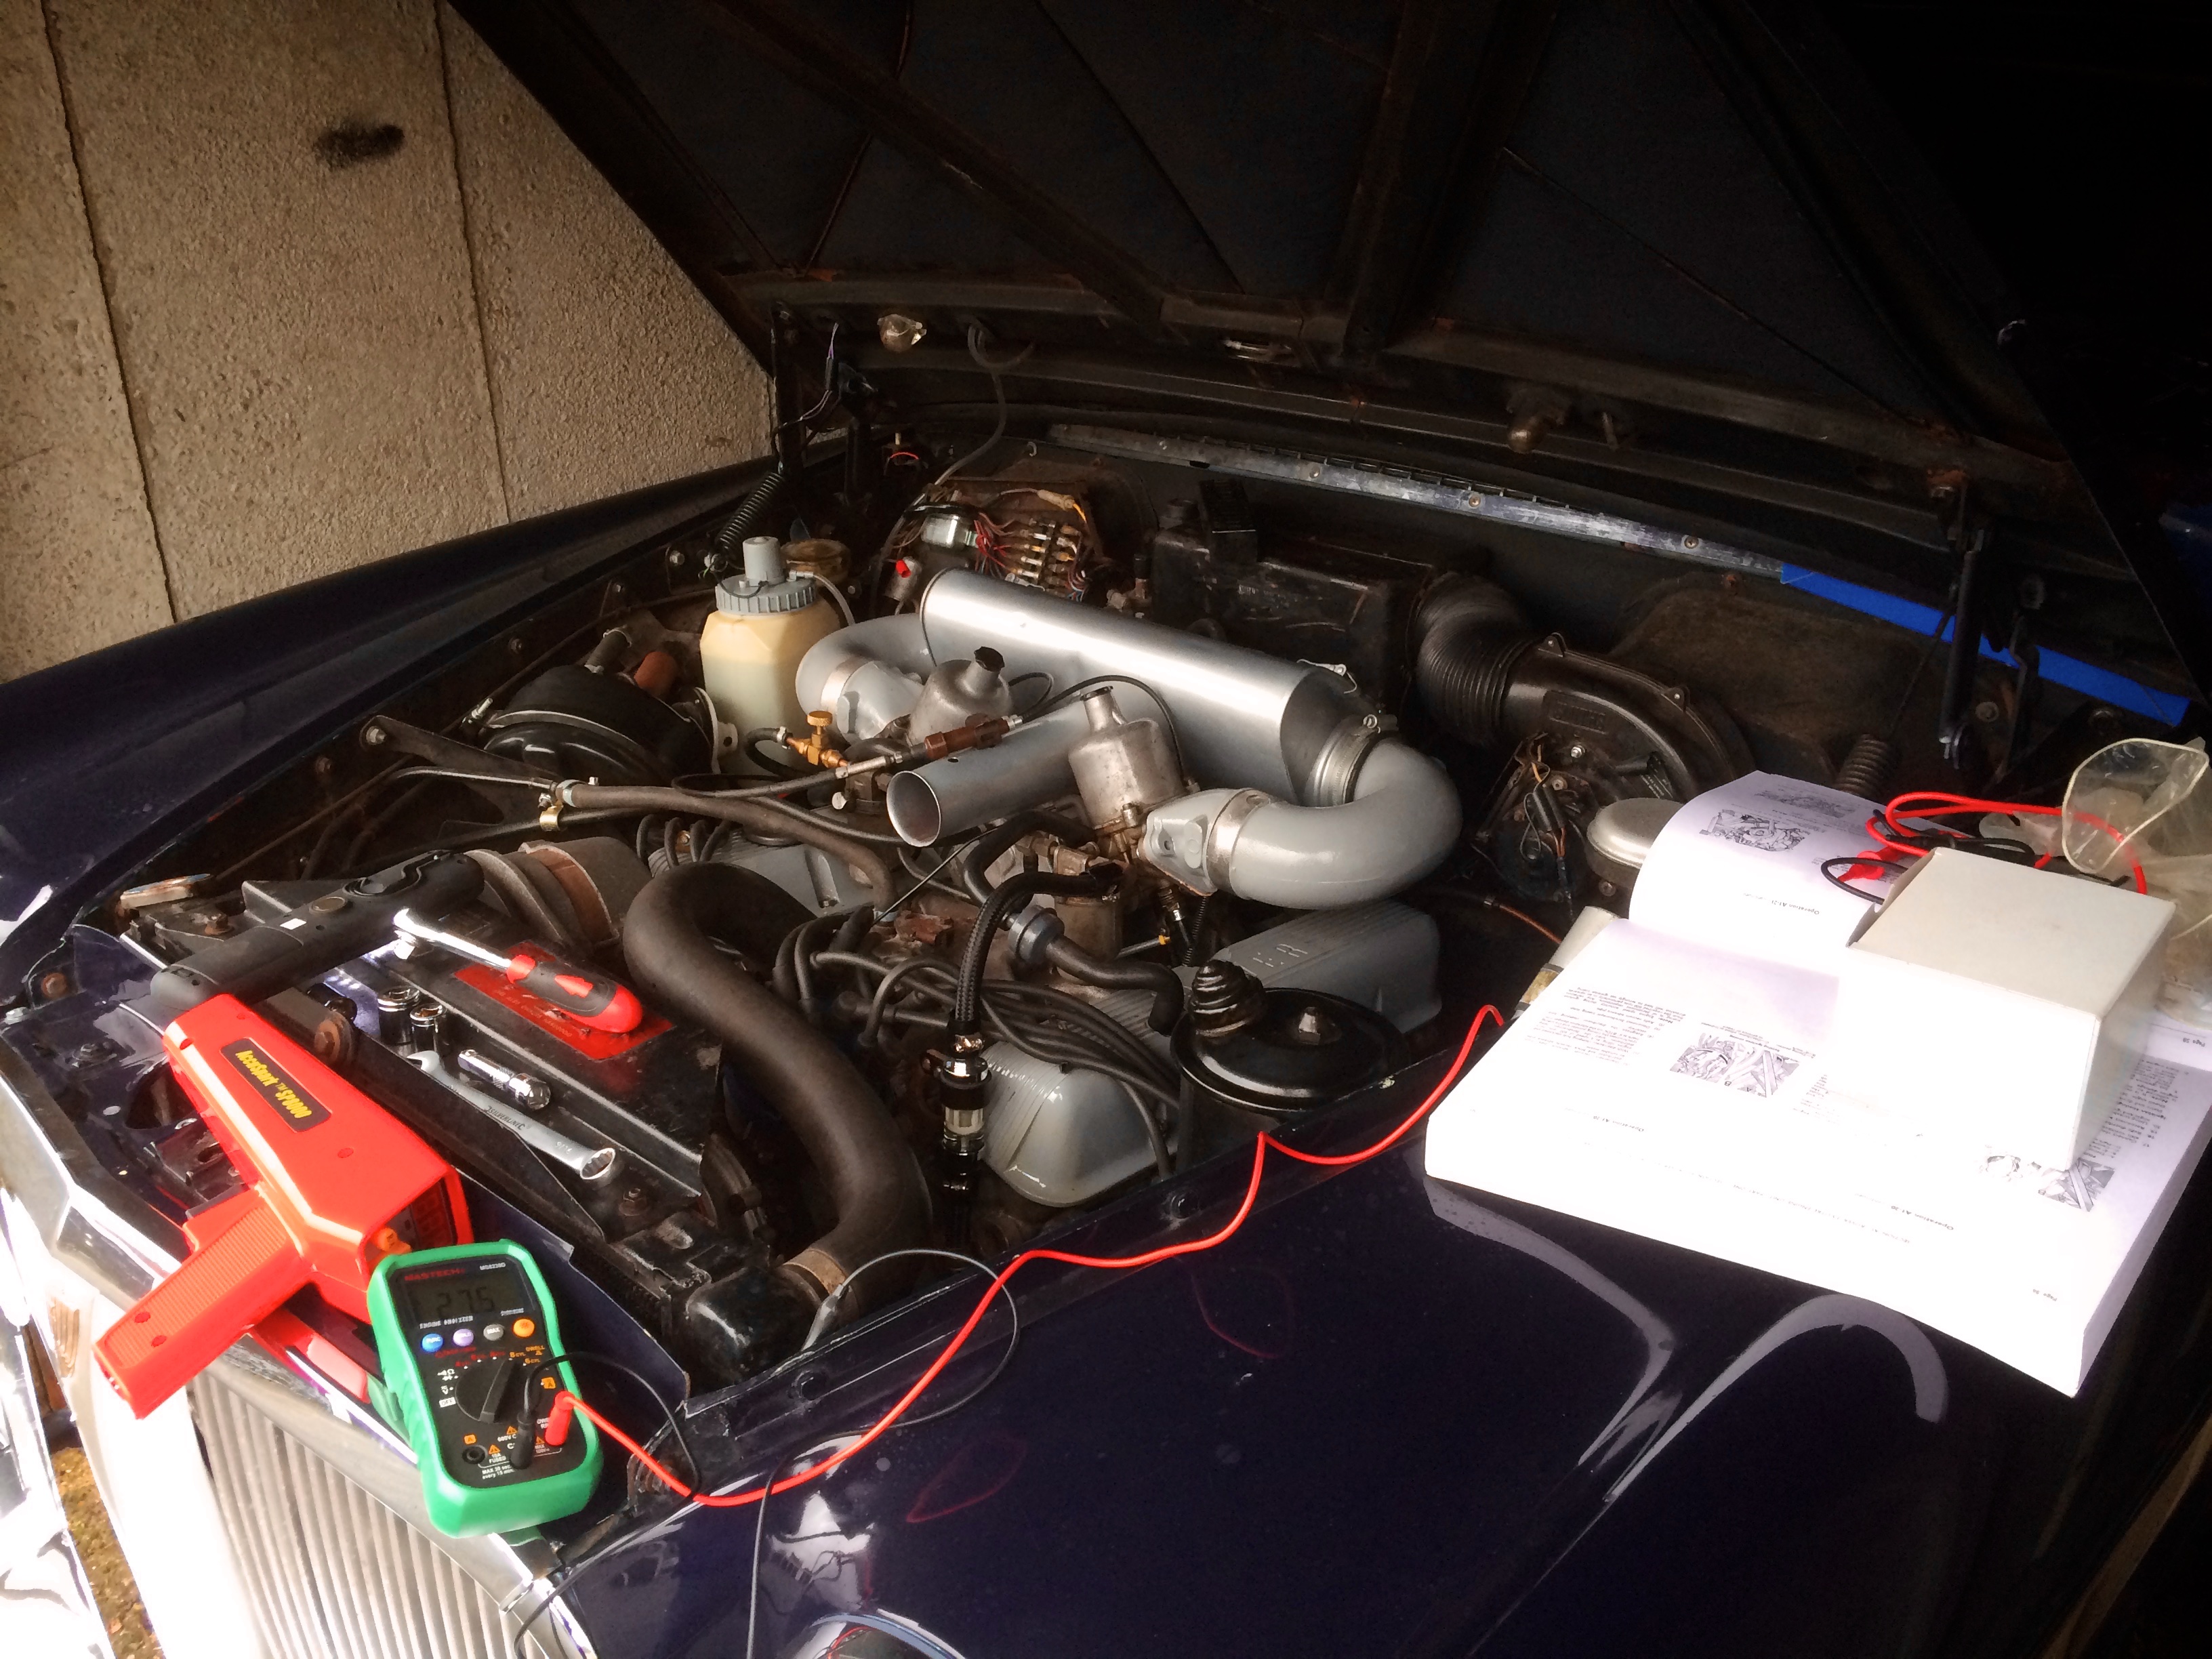 2014-11-28 13-18-42 Rover P5B Engine Tuning, Fuel Filter and Door 2014-11-28 13-18-42 Rover P5B Engine Tuning, Fuel Filter and Door by Rover_P5B_Coupe, on Flickr So, with (new) tools in hand, I worked my way through the tune-up guide. After inspecting the points, which weren't pitted, I measured the dwell angle. This being a more accurate way of measuring the points gap, it removes the errors caused by pitted points and wear and tear. Rover say the V8 should have a 26-28 degree dwell angle. My meter showed 14 degrees. The points are obviously quite new, and I've done about 3,000 miles on them so far. So either my cheap meter was wrong, or my car was badly out of tune. Turned out that it was my car - there's a really easy adjuster on the outside of the distributor, and as I adjusted it towards 27 degrees the engine immediately sounded happier. Result number one. Next I checked the timing. Again, instead of being 6 degrees BTDC, mine was nearer 0 degrees. Advancing the distributor towards 6 degrees again caused a marked Improvement in engine sound and revs. I tend to use Super Unleaded, as the car was designed to run on 5-star leaded, so maybe it was adjusted to avoid pinking, but I'll keep an ear open for pinking under load. Result number two. Next, after a brief test drive that found smoothness much improved, but also a compete unwillingness to rev from tickover unless the choke was pulled out, I embarked on the somewhat daunting task of tuning the SU carbs. Actually, in the end this was much easier than I feared. I started by slackening the carb links and measured the airflow. The lhs carb was saying '6', the rhs carb was off the scale at more than 20. Hmm, quite a difference. Adjusting the idle screw got them about equal and the idle at about 650rpm. Adjusting the fast idle sorted out the choke setting, and then adjusting the jet pipe height by listening to the engine note when raising the jet needle showed that the rhs carb was running much too rich, but the lhs was about right. Adjusting the mixture by adjusting the jet height sorted that out. The result is a much better sounding car. The exhaust is blowing slightly at one of the joints, which needs sorting, but it still sounds and drivers much better. I had to lower the tickover a little after a few miles by adjusting the idle screw, but now it seems all good. Result number three. So, I had a dwell angle that was half what it should be, timing that was 6 degrees out and seriously unbalanced carbs. It's amazing the car ran at all. After that I did a bit of tinkering with a few bad bullet connectors - I bought a crimp tool and brass bullets to do these properly. I also found that what I thought was a leaking steering box is in fact a leaking pipe to the gearbox oil cooler, which is an integral part of the radiator. I thought it seemed odd that the gearbox was taking more topping-up than the steering (which is still leaking, but nowhere near as badly as the gearbox oil cooler pipe) but as they both use red ATF oil, I's assumed it was the steering box which is a notorious leaker on these cars. Anyway, the pipes are £15 from J R Wadhams, so that's a result - will order a couple replace them. I then decided to have a poke around inside one of the doors. Took the wooden capping off and the door panel, and had a look inside. I knew the drivers door wasn't bad as I've replaced the door seal and only found a couple of bits of rust in the channel, and this confirms it isn't too shabby inside: 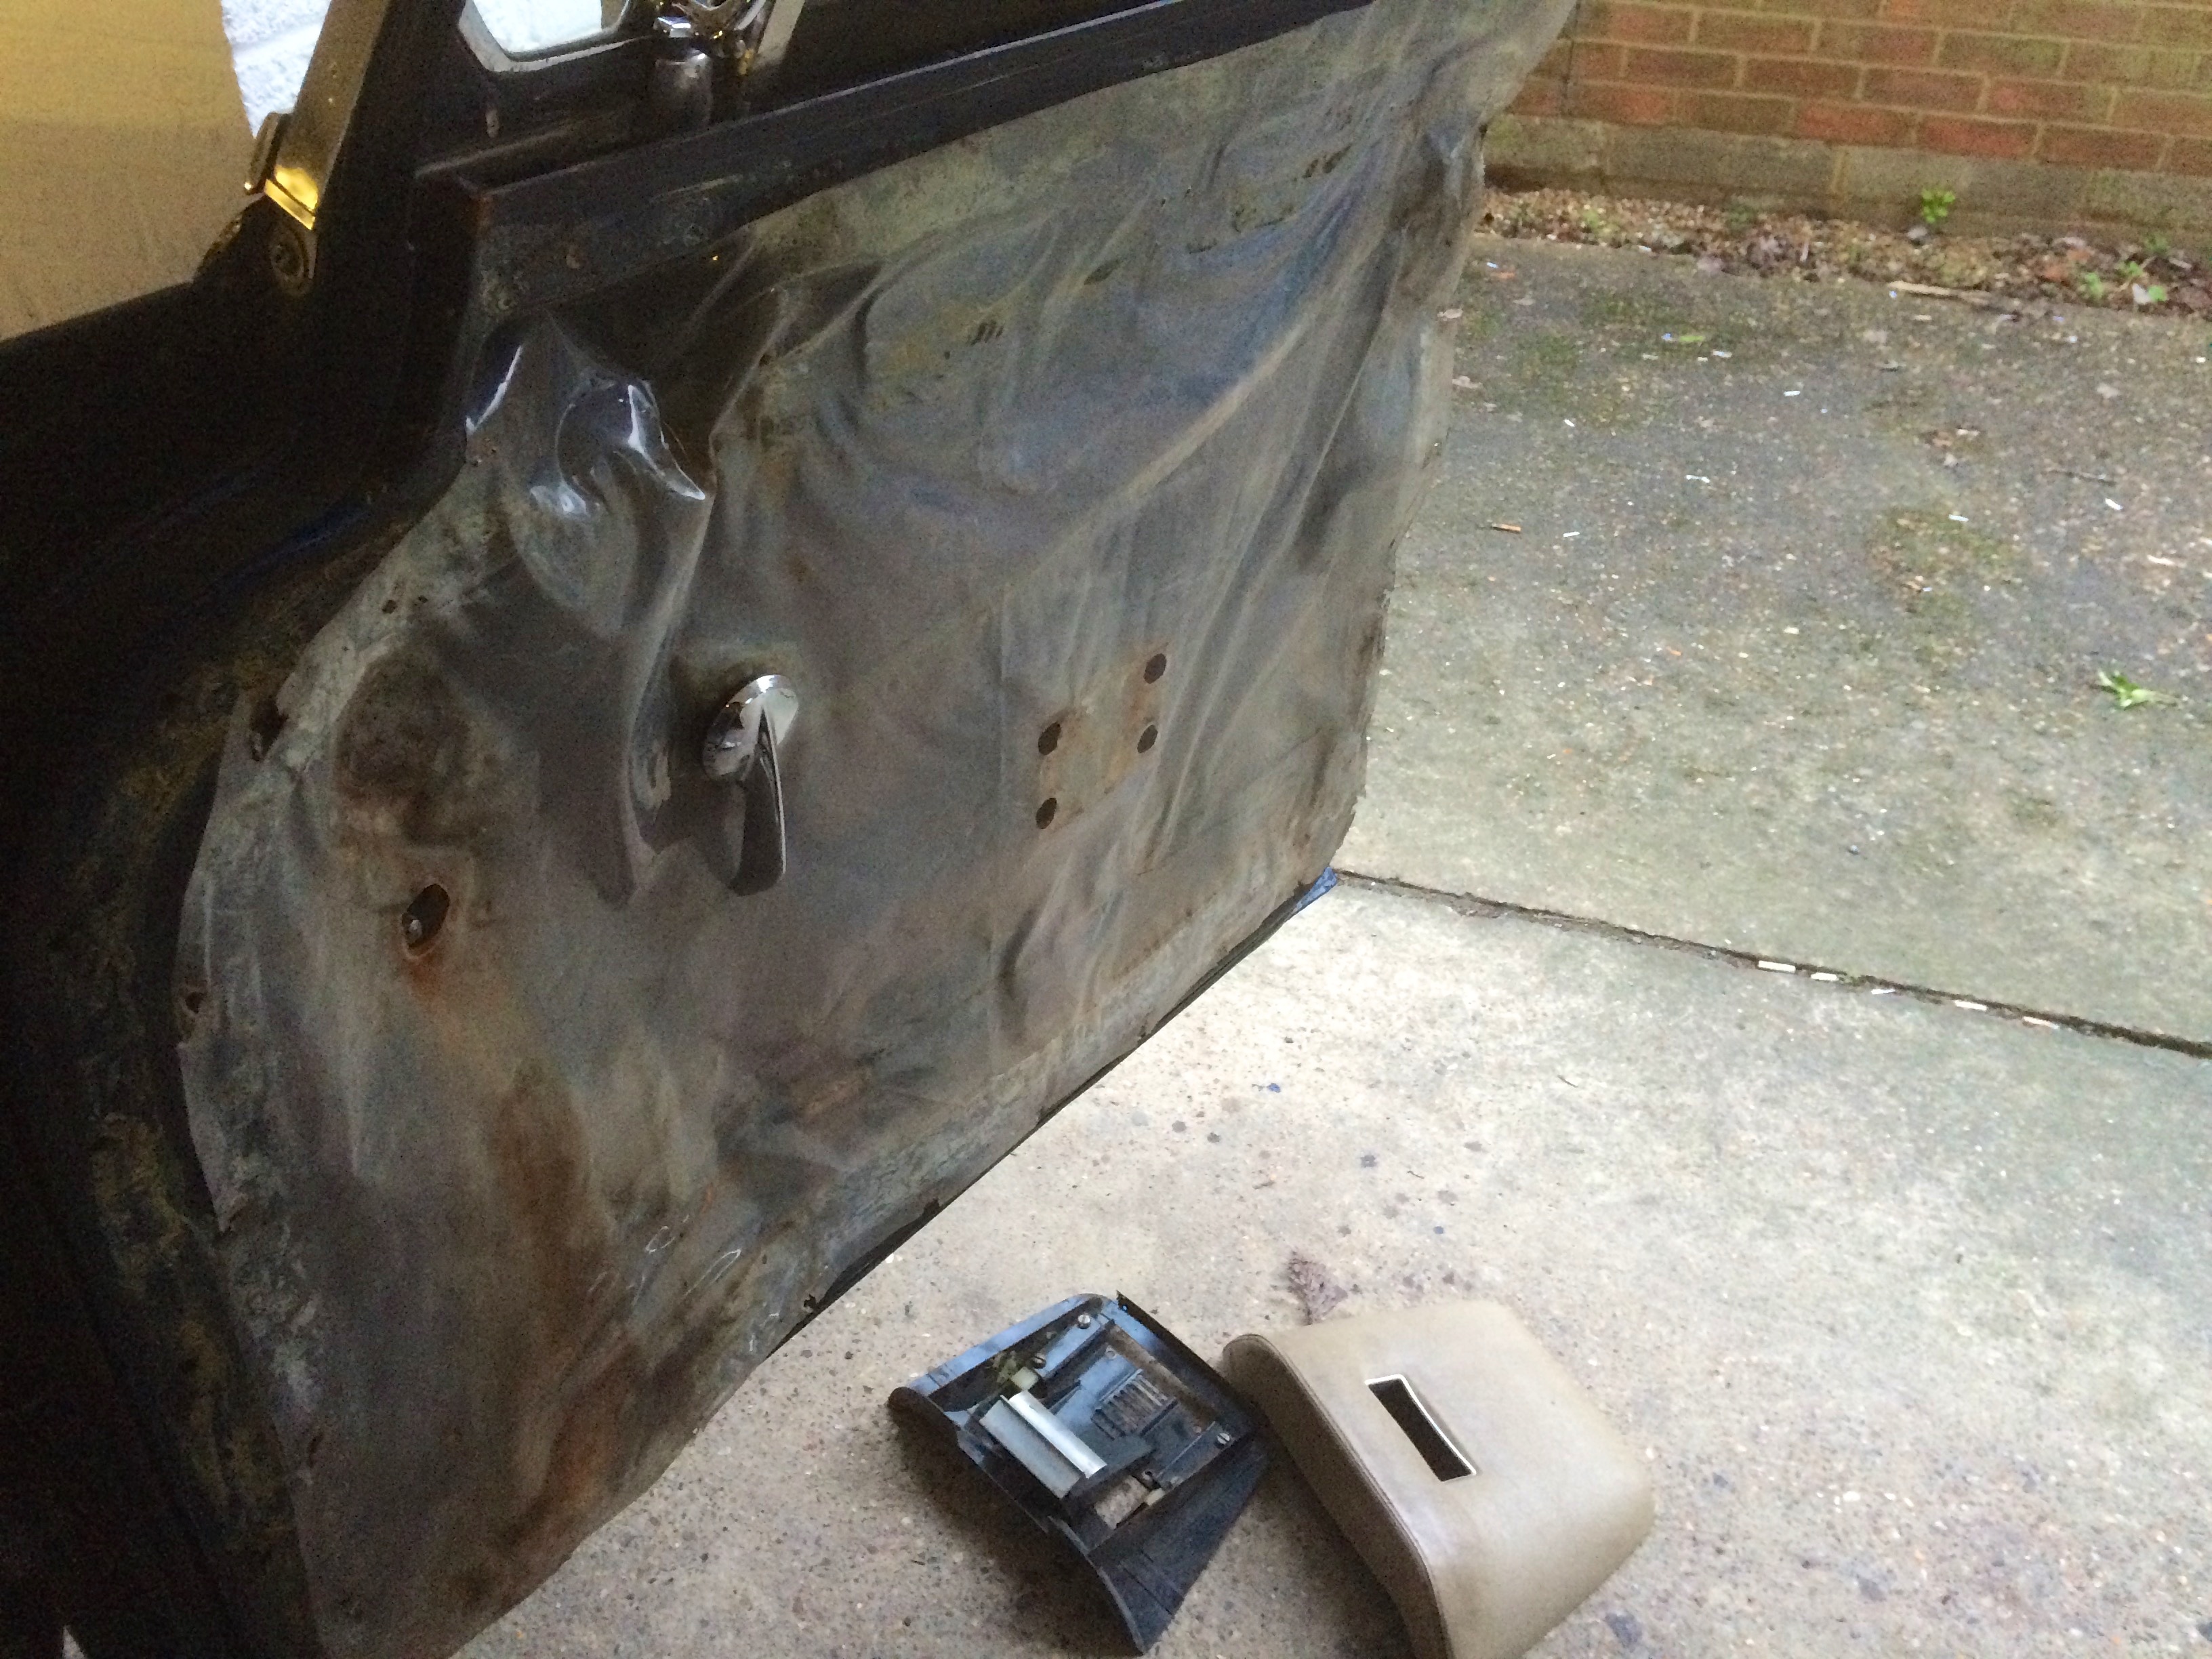 2014-11-16 15-52-57 Rover P5B Engine Tuning, Fuel Filter and Door 2014-11-16 15-52-57 Rover P5B Engine Tuning, Fuel Filter and Door by Rover_P5B_Coupe, on Flickr  2014-11-16 15-53-42 Rover P5B Engine Tuning, Fuel Filter and Door 2014-11-16 15-53-42 Rover P5B Engine Tuning, Fuel Filter and Door by Rover_P5B_Coupe, on Flickr Needs a cleanup, new membrane and rustproofing, but that's fine. Oh, and here's a before and after of the fuel filter that I replaced a few weeks ago, complete with a new bracket I made up: 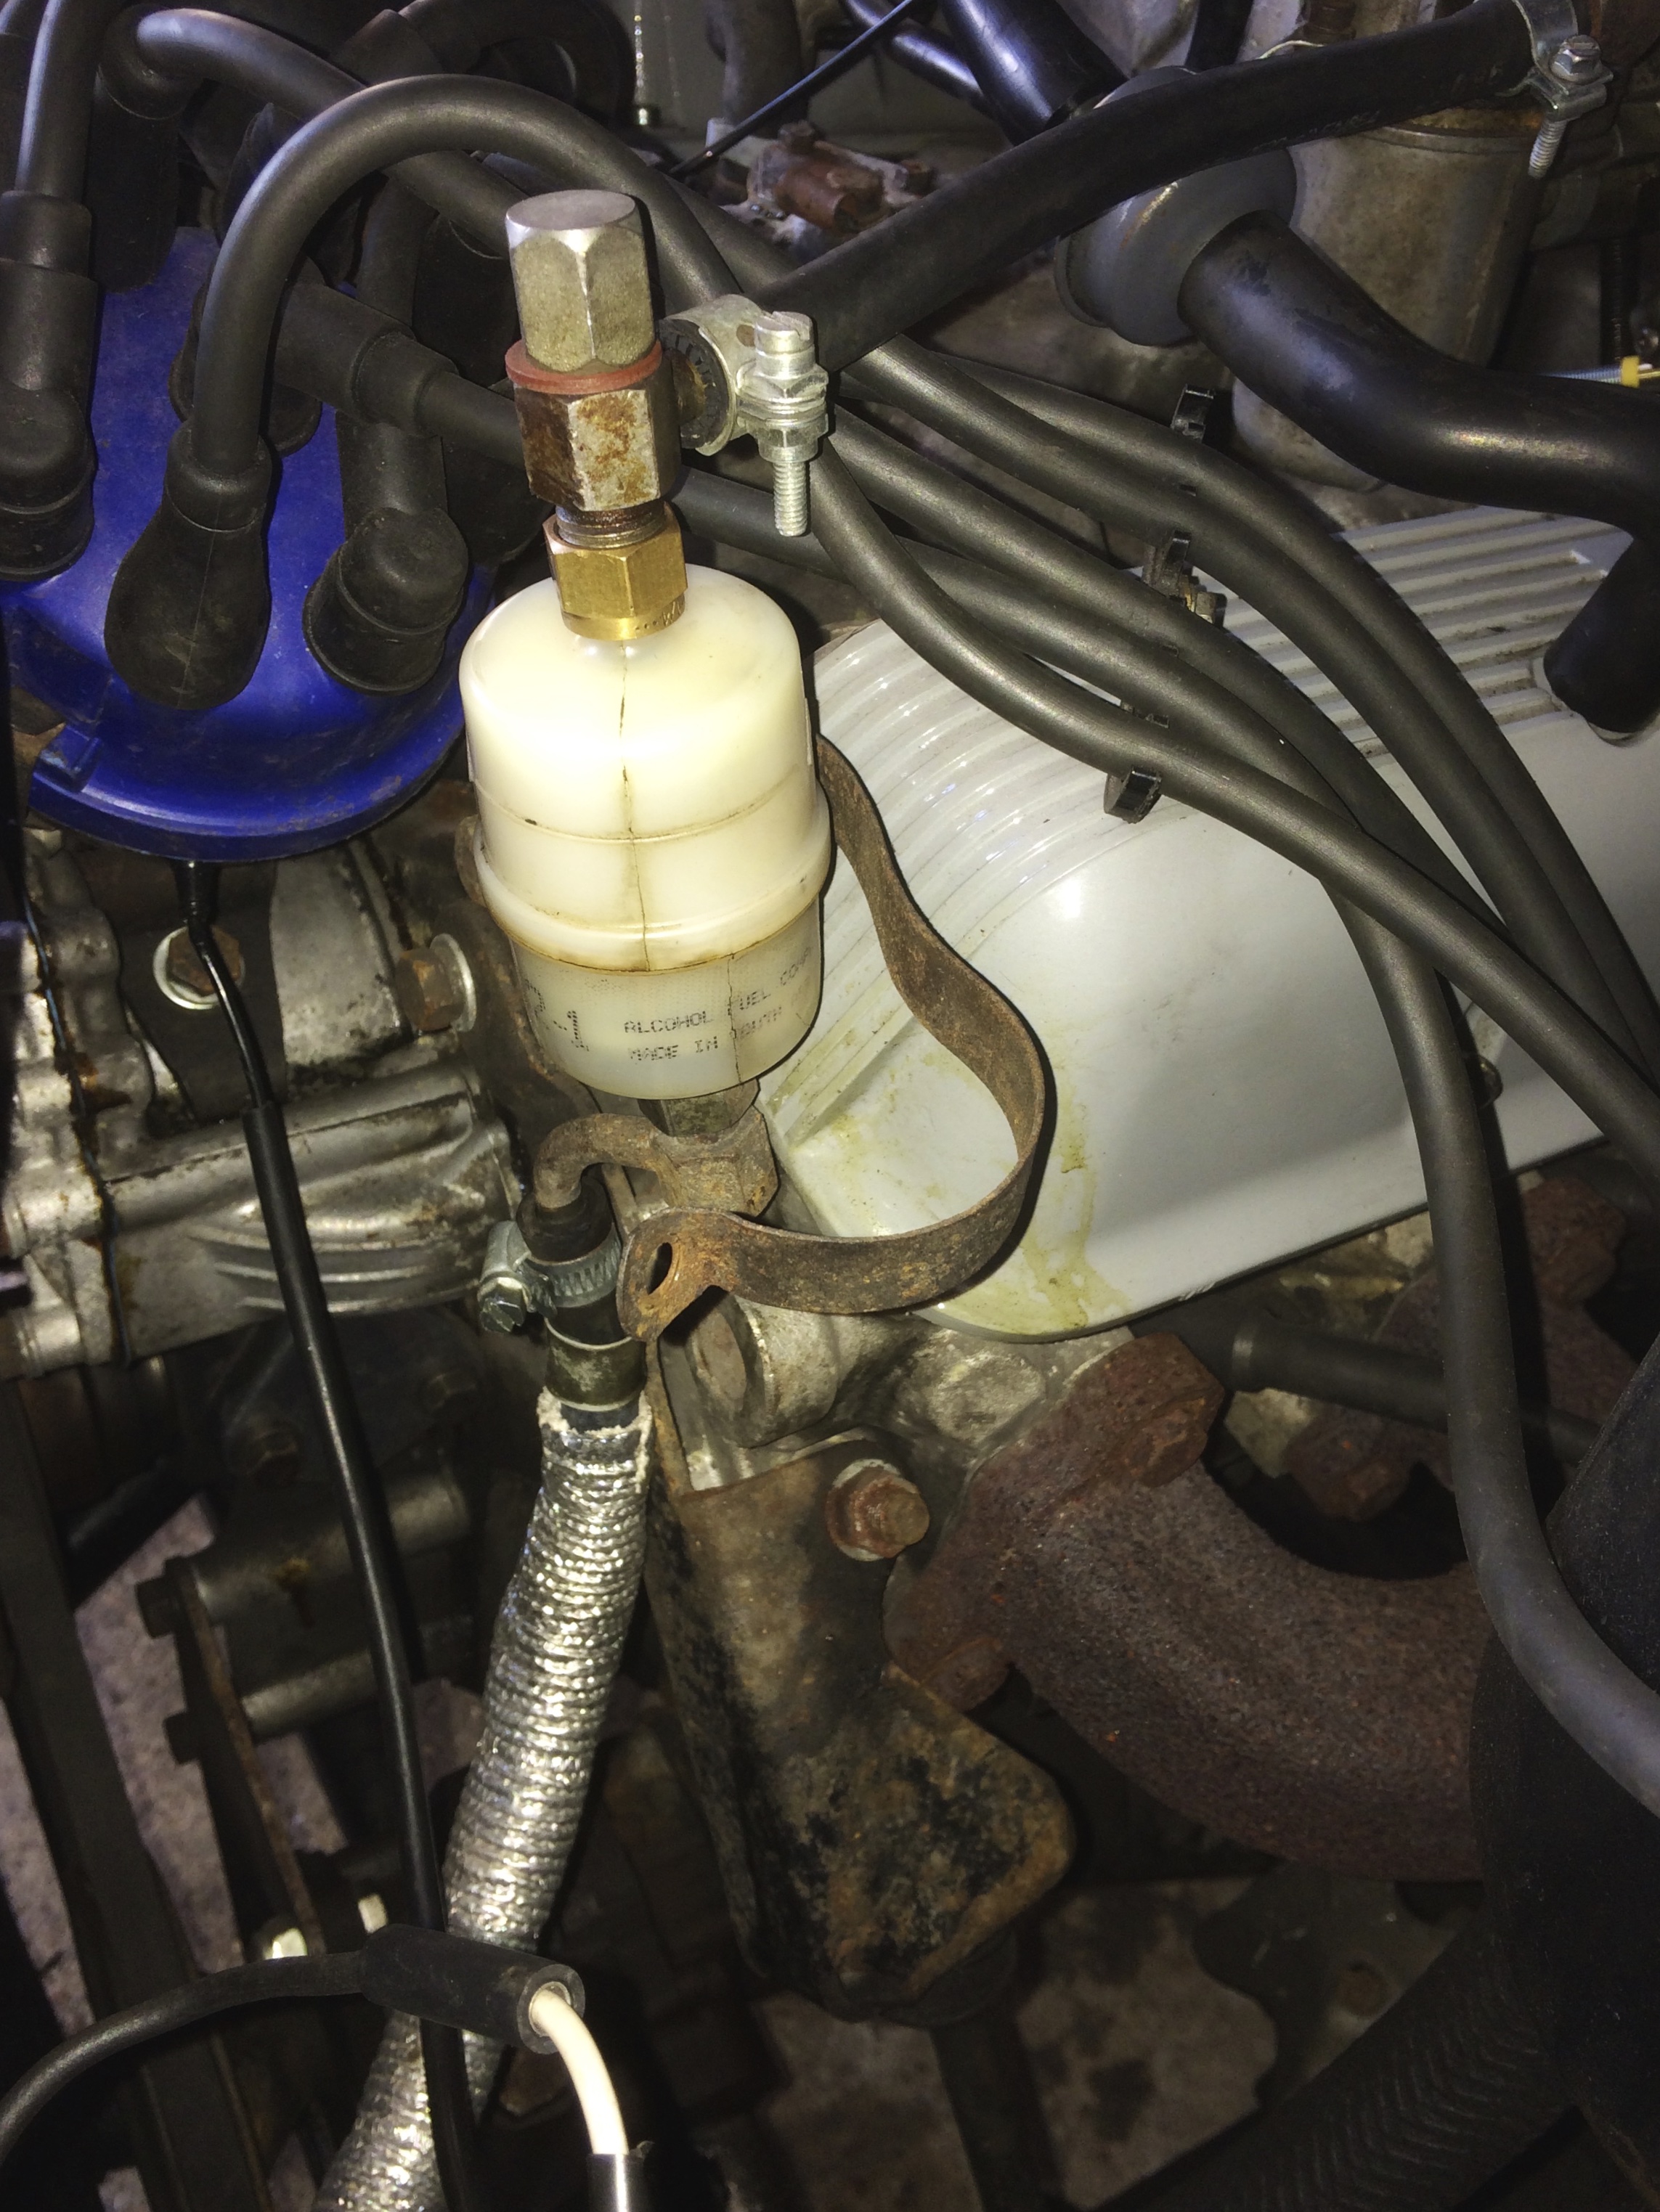 2014-09-27 16-48-48 BGU 122G 2014-09-27 16-48-48 BGU 122G by Rover_P5B_Coupe, on Flickr 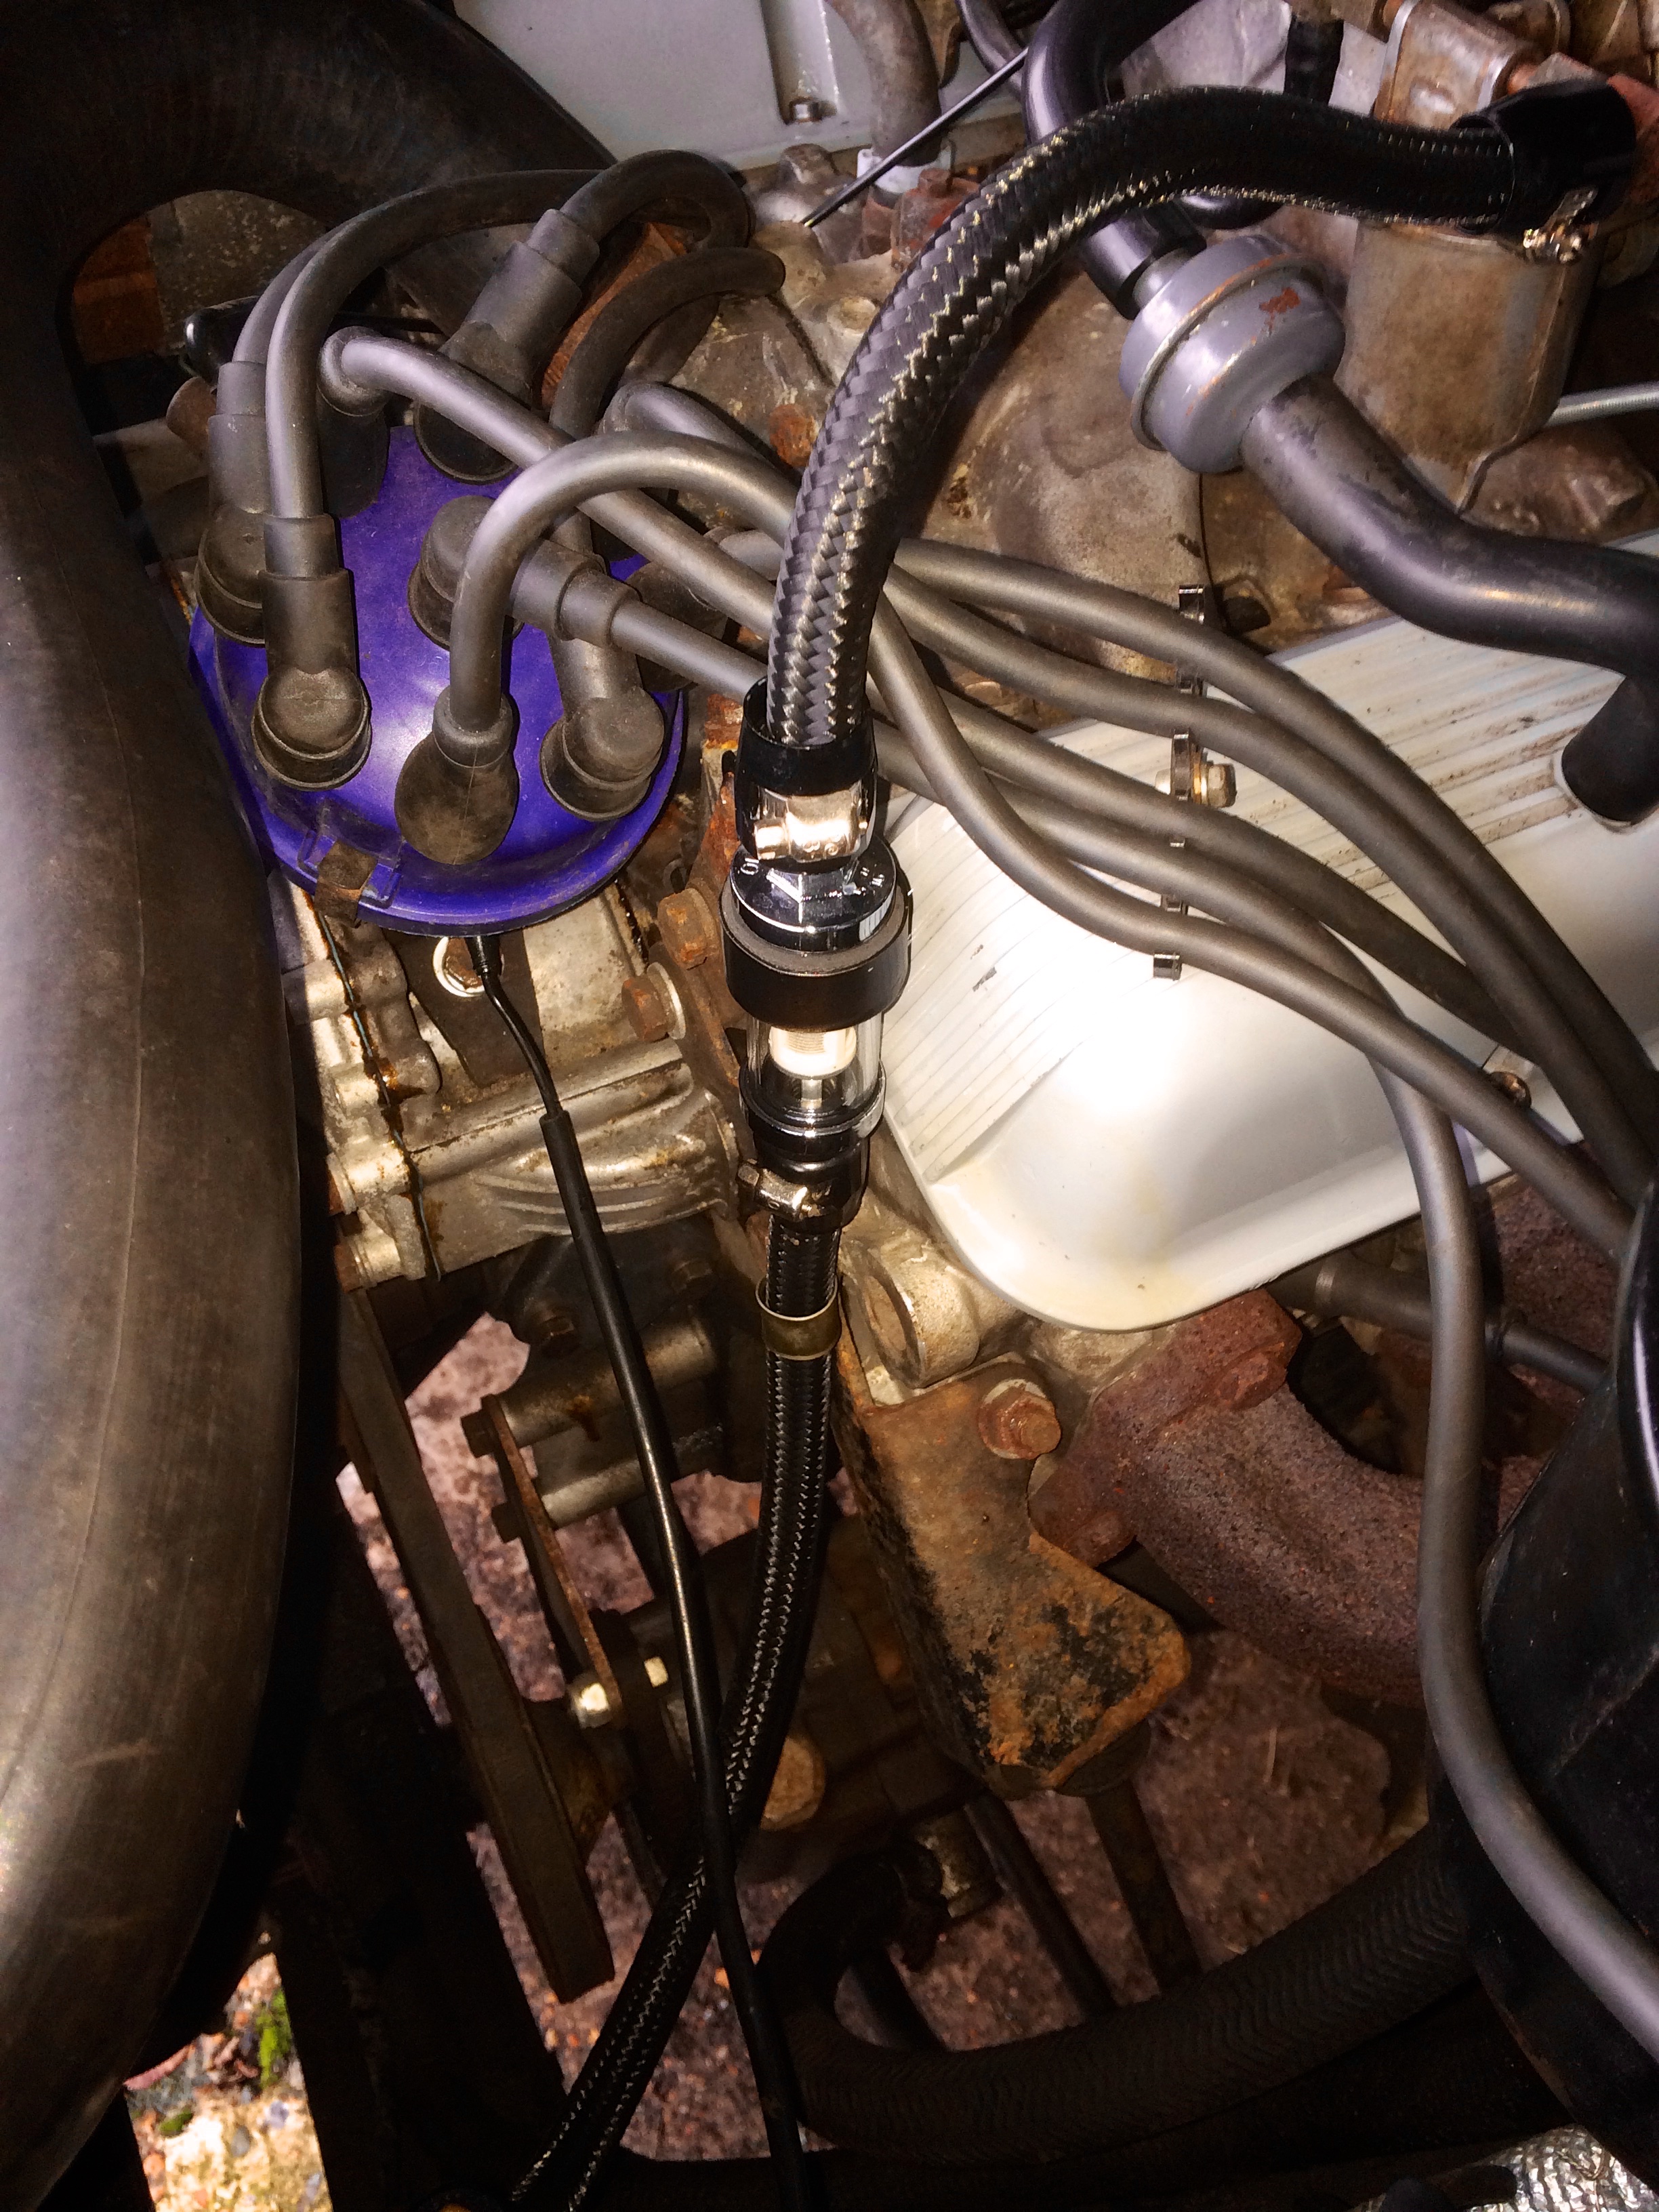 2014-11-28 13-27-40 Rover P5B Engine Tuning, Fuel Filter and Door 2014-11-28 13-27-40 Rover P5B Engine Tuning, Fuel Filter and Door by Rover_P5B_Coupe, on Flickr Thats about it for this week. |
| |
Last Edit: Jan 27, 2015 23:04:30 GMT by lamsdale
|
|
|
|
|
|
|
So, I had a dwell angle that was half what it should be, timing that was 6 degrees out and seriously unbalanced carbs. It's amazing the car ran at all. Excellent result on the tuning. Got to love the old Rover V8 that they'll run any old how. Not well, but they'll run! Goes to show the difference having the proper stuff for the job makes as well. Being later, mine's all electronic, so I bought the Nanocom unit. Again, not cheap, but allows me to see where the fault lies and reset parameters when I've made a change. As a result have a smooth, quiet and powerful motor compared to how I got it. The money you spent on kit has probably just been repaid in savings in garage time having it done. And you have the satisfaction! |
| |
|
|
|
|
|
|
|
So, I had a dwell angle that was half what it should be, timing that was 6 degrees out and seriously unbalanced carbs. It's amazing the car ran at all. Excellent result on the tuning. Got to love the old Rover V8 that they'll run any old how. Not well, but they'll run! Goes to show the difference having the proper stuff for the job makes as well. Being later, mine's all electronic, so I bought the Nanocom unit. Again, not cheap, but allows me to see where the fault lies and reset parameters when I've made a change. As a result have a smooth, quiet and powerful motor compared to how I got it. The money you spent on kit has probably just been repaid in savings in garage time having it done. And you have the satisfaction! Yep, that's how I justified it to myself - £100 on tools has already saved more than that and working on your own car gives you a lot more more confidence in it. The V8 does seem a lazy but lovely and very forgiving old thing - no flat spots or other problems. I'm learning a lot about these cars, and getting the bug to do more. The next house move will have a decent garage. |
| |
|
|
|
|
|
|
|
|
This is a cracking looking machine and must say well done on getting the engine to run more smoothly. It's always a great sense if achievement when you sort something out yourself. Rover P5s have always been a classy machine. Love those photos with the autumn colours . Autumn is definitely the best time for getting atmospheric shots. There's an old movie with Roger Moore in it called The Man Who Haunted Himself. It stars a P5 and a Lamborghini Islero. You should put it on your Christmas list as not actually a bad film.
|
| |
|
|
|
|
|
|
|
[quote author=" lamsdale" source="/post/2014943/thread" timestamp="1417485388The V8 does seem a lazy but lovely and very forgiving old thing - no flat spots or other problems. I'm learning a lot about these cars, and getting the bug to do more. The next house move will have a decent garage.[/quote] Yup, there are lots bigger more efficient V8s out there, but I do have a soft spot for the old Buick! We're in an apartment at the moment, but looking to get a house next year with room to work on motors way above how many bedrooms on the priority list! |
| |
|
|
|
|
|
Jan 27, 2015 22:58:08 GMT
|
Shortly after buying the car the temperature gauge stopped working. Testing the gauge by shorting the cable showed the gauge was OK, and the wire to the transmitter (sender) was fine, so it must be the transmitter itself. The transmitter is screwed into the inlet manifold. Initial careful efforts to remove it failed - it seems to be seized. While the car is garaged over the worst of the winter, I thought I'd have another go before the gauge became more necessary in the warmer weather. Despite repeatedly soaking it in releasing fluid, heating it, hitting it and trying with a large socket drive, all I ended-up with was a mangled transmitter. There was nothing for it but to remove the manifold and try mole grips. I could also fix a few other things at the same time - replace the mangled carb screws, replace several weeping hoses, tidy-up the manifold, try to free the rear heater tap. The manifold came of easily, thankfully. More heat and mole grips failed to move the transmitter. So, the only thing seemed to be to drill it out and repair the thread with a thread insert. Much discussion on the Rover P5 Forum and investigation revealed that transmitter thread is ⅝ inch UNF. Strange, as BSP would seem more obvious for a thread that needs to seal against water, but I'm sure it's UNF. Helicoil don't do that size of thread insert, so a V-Coil kit was ordered, along with the biggest tap holder I've ever seen, and several drills leading up to 16mm. I set about drilling-out the temperature transmitter today, starting with a small drill and worked-up to 16mm, the size required for the ⅝ UNF thread insert. Quite tricky, as the internals of the old transmitter rotated with the drill - there's a brass plug, about 20mm long, a spring, and coiled wire (the thermistor itself, I guess). After a lot of drilling I managed to get all this out and fairly cleanly drill the 16mm hole. The tapping process was fine, with plenty of oil and going in 1 turn then backing-off half a turn. The V-Coil insert also worked fine - went in very easily, and seems to fit well. The new transmitter screws in very easily as well, and hopefully the captive washer will seal it against manifold. Firstly drilling the old transmitter:  2015-01-24 14-50-44 V-Coil'ing The Temperature Transmitter (Temp Sender) 2015-01-24 14-50-44 V-Coil'ing The Temperature Transmitter (Temp Sender) by Rover_P5B_Coupe, on Flickr And some of the old internals that made drilling so tricky: 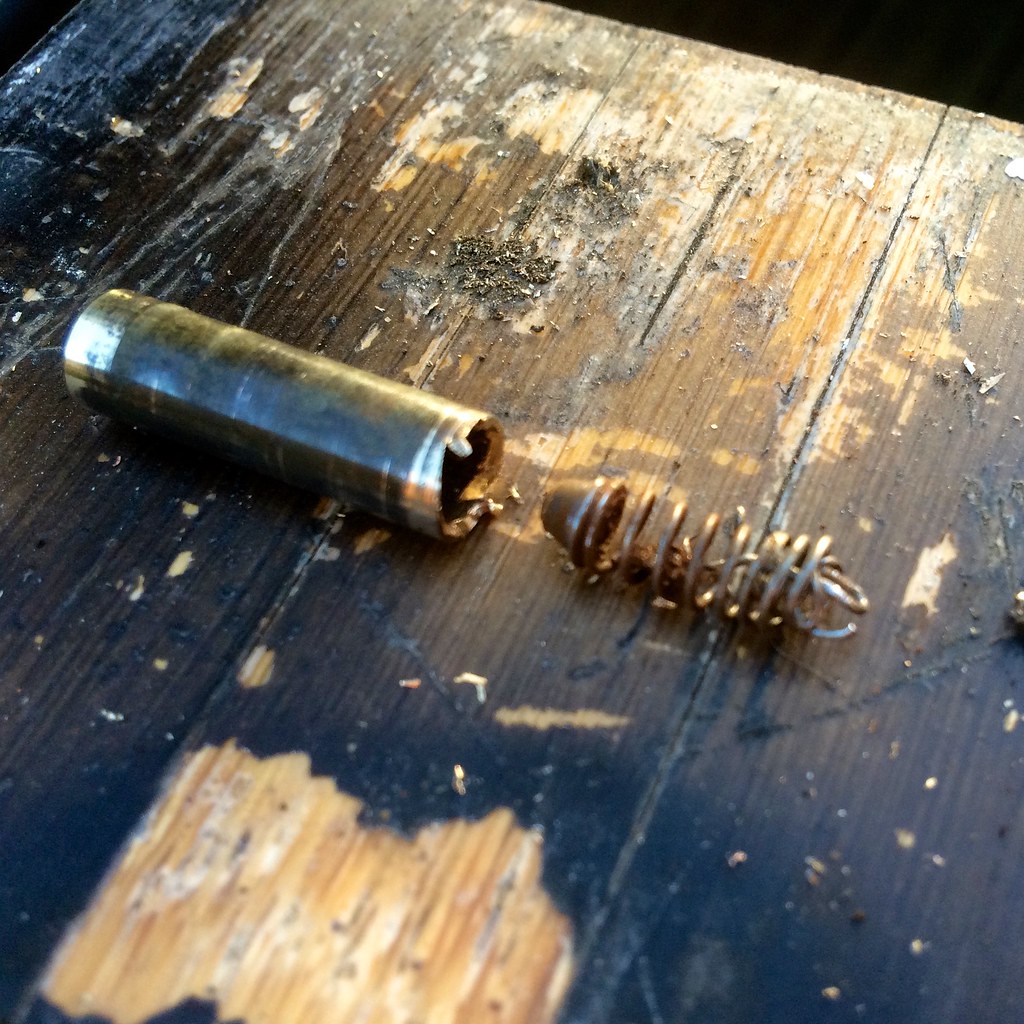 2015-01-24 15-06-01 V-Coil'ing The Temperature Transmitter (Temp Sender) 2015-01-24 15-06-01 V-Coil'ing The Temperature Transmitter (Temp Sender) by Rover_P5B_Coupe, on Flickr Tapping the V-Coil insert thread: 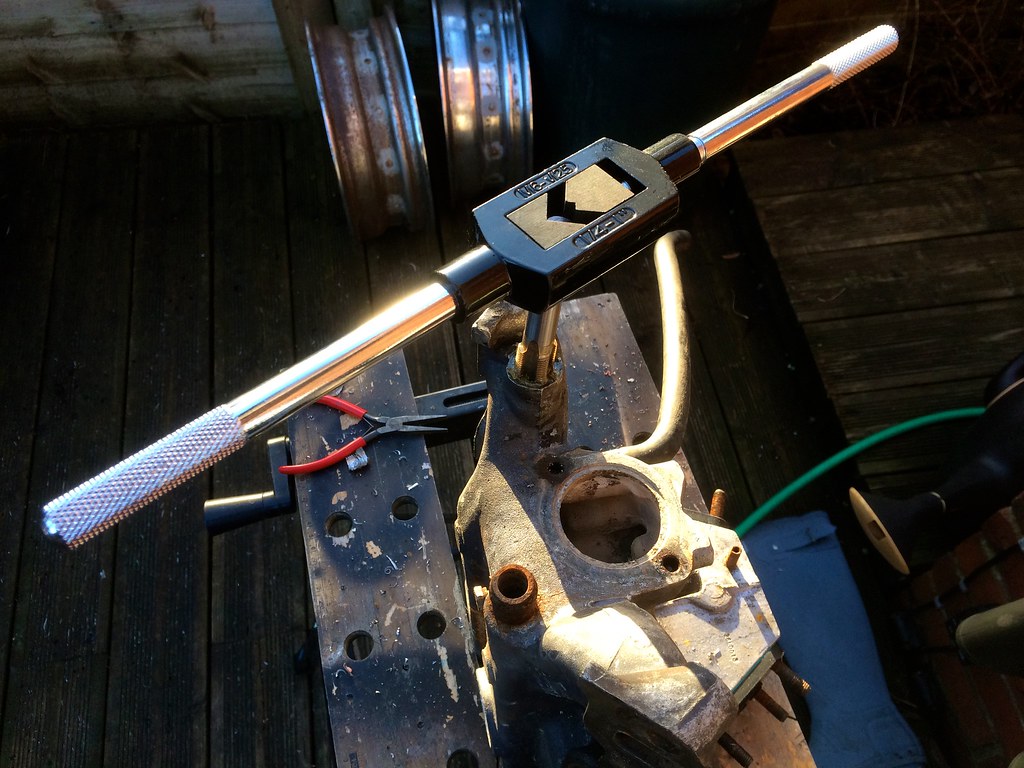 2015-01-24 15-24-02 V-Coil'ing The Temperature Transmitter (Temp Sender) 2015-01-24 15-24-02 V-Coil'ing The Temperature Transmitter (Temp Sender) by Rover_P5B_Coupe, on Flickr The V-Coil inserted:  2015-01-24 15-41-17 V-Coil'ing The Temperature Transmitter (Temp Sender) 2015-01-24 15-41-17 V-Coil'ing The Temperature Transmitter (Temp Sender) by Rover_P5B_Coupe, on Flickr And the new transmitter loosely fitted: 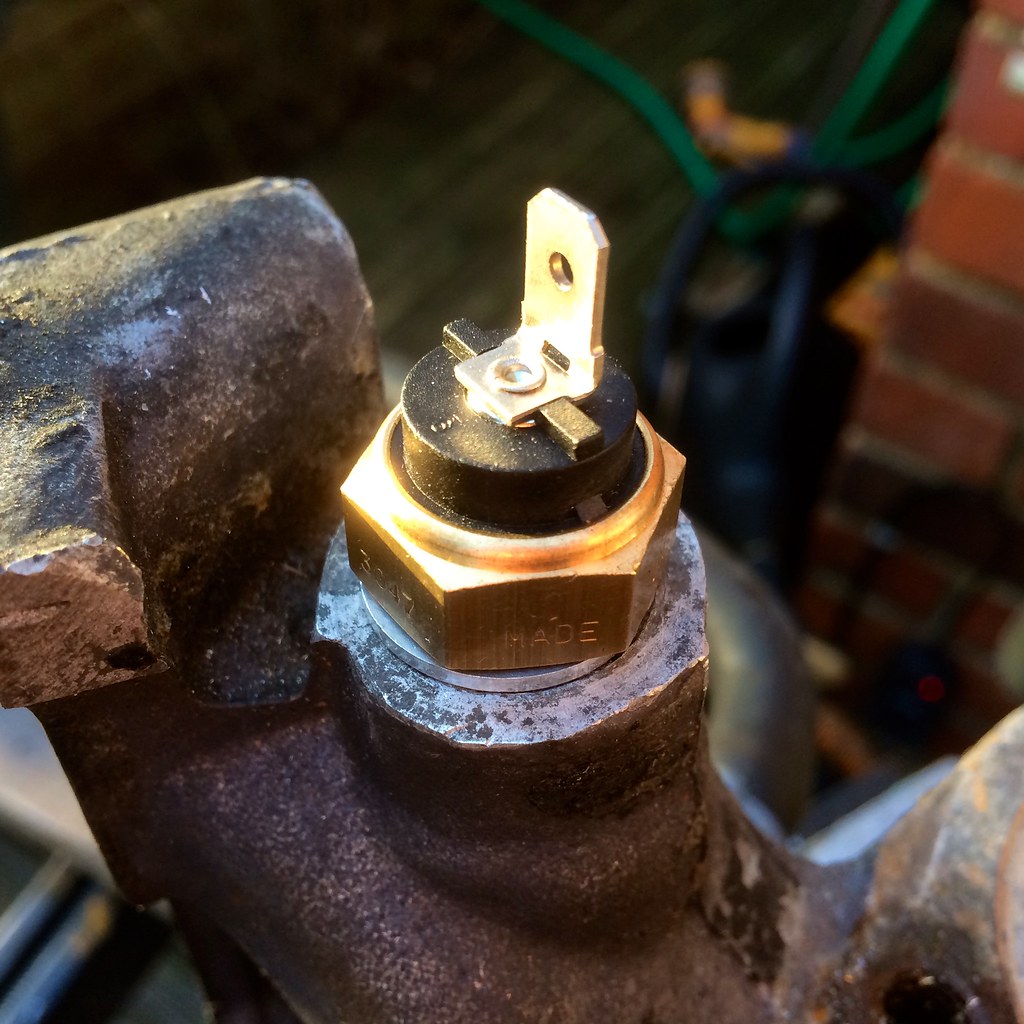 2015-01-24 15-44-44 V-Coil'ing The Temperature Transmitter (Temp Sender) 2015-01-24 15-44-44 V-Coil'ing The Temperature Transmitter (Temp Sender) by Rover_P5B_Coupe, on Flickr Next on the list is to strip and respray the manifold grey, using etch primer, then start putting things back together with new gaskets, hoses and clips. |
| |
|
|
|
|
|
|
|
Jan 28, 2015 11:15:22 GMT
|
|
Helpful guide on fitting a v coil, i'll need to fit a few onto my exhaust manifold studs soon and this is useful information
|
| |
|
|
|
|
|
Jan 28, 2015 11:44:41 GMT
|
Hi, well done, I have to do the same on mine. I have cheated and put another manifold on for the time being, But I will do it because there is no point not. FWIW Correct technique for tapping but should be lubricated with paraffin or light oil.- moodle.sbc.ac.uk/sharedContent/repository/to_be_packaged/Engineering,Technology%20and%20Manufacturing/Manufacturing/Cutting%20Screwthreads%20by%20Taps%20and%20Dies/SC11_RESOURCE_SCREEN_1/SC11_RESOURCE_SCREEN_1.html Colin |
| |
|
|
|
|