kilroy
Part of things
  Suit you sir...
Posts: 251
|
|
Sept 25, 2015 8:48:56 GMT
|
|
Excellent fellow.
Is that not enough to make you want to pick up the challenge.?
You have such experience and knowledge and continue to gather such in your current employ.
I believe you could make such antiquated but ambitious designs bear fruit.!
The potential was always there - but they simply became the object of massive budgets - we with our modest allowances of fiscal enterprise always came up with smarter adaptations of the original concept to suit what we could design - with less money and more animal cunning.
Astound us dear boy - you of all people can do so.
I have absolute faith in you.
And 50% share in the advertising....
|
| |
|
|
|
|
|
|
|
Sept 25, 2015 14:58:18 GMT
|
Oooooooooooooooooooooooooooooohhhhhhhhhhhhhhhhhhhhhhhhhhhhhhhhhhhhhhhhh :-) Wonder if there's any front cuts left?  Or maybe blow your own like Mr Pork of this very parish...  |
| |
Last Edit: Sept 25, 2015 18:10:19 GMT by mdh
Koos
|
|
|
|
|
Sept 27, 2015 19:54:08 GMT
|
The potential was always there - but they simply became the object of massive budgets - we with our modest allowances of fiscal enterprise always came up with smarter adaptations of the original concept to suit what we could design - with less money and more animal cunning. Astound us dear boy - you of all people can do so. I have absolute faith in you. And 50% share in the advertising.... problem is I have a truly tiny budget to play with.. ie pretty much nothing right now. So even a $500 lotus engine is out of my reach. Which is good because I wont have to deal with making an exhaust to fit such a tiny space. If I can get a cheap complete car with the right sort of engine then I have something to play with. Thinking like the mazda eunos I bought for $200 and ended up selling all the bits I didnt need then made money. If I find the ideal donar car with an interesting engine then cool. Otherwise I think my budget might only allow the cobbling of a turbo onto the viva engine for now. See how long it lasts..... BTW- mr Ken.. when are you coming up to visit us on our bushblock?! :-) |
| |
|
|
kilroy
Part of things
  Suit you sir...
Posts: 251
|
|
|
|
Hey Mr Restorer Extraordinaire. Lovin your stuff on here - and I see you are 'accumulating' things of the machine nature on your property..  Oh - and tell Hannah that we see she gets the donkey work... Great work all round. Nelson has eluded us for quite some time. Expect that to be rectified this summer. We are looking for suitable rivers and mountain bike tracks to inflict damage on. Stay tuned. Only several rust issues and several leaking head gaskets to sort first... Sigh.... |
| |
Last Edit: Oct 5, 2015 6:36:32 GMT by kilroy
|
|
stealthstylz
Club Retro Rides Member
Posts: 14,954
Club RR Member Number: 174
|
|
|
|
|
Do you get Vitaras over there? The 1.6 16v motor is great, keep eying the one in mine up to fit in a 60s British car. You can bolt the SJ gearbox on for RWD too.
|
| |
|
|
|
|
|
|
|
Good idea. I'll look them up. Exciting news! Little Viva wagon runs! It sounds quite sweet too. I had a go at getting it to start ages ago but the points and condensor were shot so I gave up. Today I had to move the car from the hoist to make room for an E21 Bimmer that’s in for rust work. With the wagon down on the ground and parked up near the bench I thought I’d get it going and strip out the engine bay while I'm there to make better access for the repairs needed. I had been given another dizzy since the last time so I ripped the points and condenser from that, set it up and got sparks. Set up a fuel can and as soon as the carb had fuel it started. Awesome. It revs nice, idles nice and sounds really good. Time will tell once its running and driving as to how good/knackered/tired/gutless it is. Also today whilst between mucking with the ignition and helping a friend with his Saab I pulled the brake servo off, threw away the single circuit master cylinder, pulled the heater out, bonnet hinges off and some other bits in the search for any more rot. Luckily the usual points behind the hinges were solid as was the heater plenum/channel. I will remove the radiator for a tidy up in front of its mountings. I’ll take off the dynamo and throw that in the bin as planning an alternator upgrade. Pictures from this today.. It was raining to start with so perfect excuse to spend day in shed with Hannah and Rowan and tinker with our respective cars.. 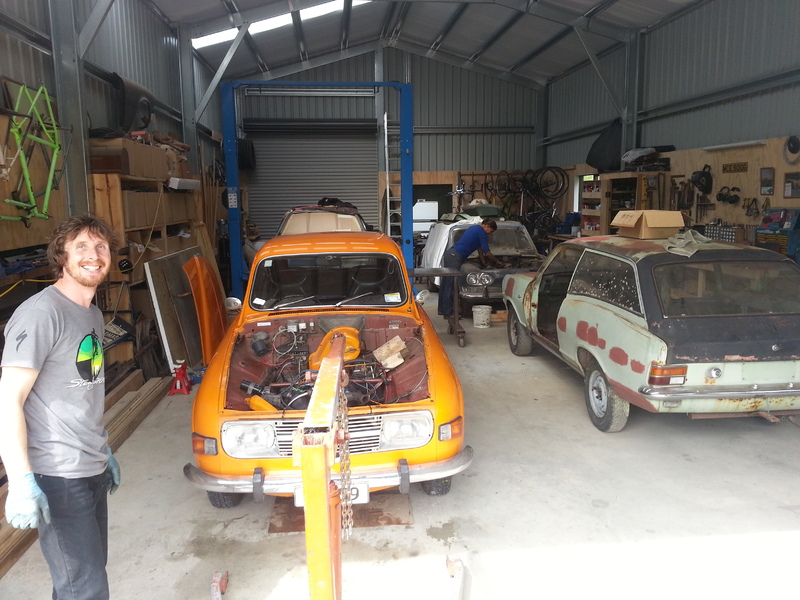 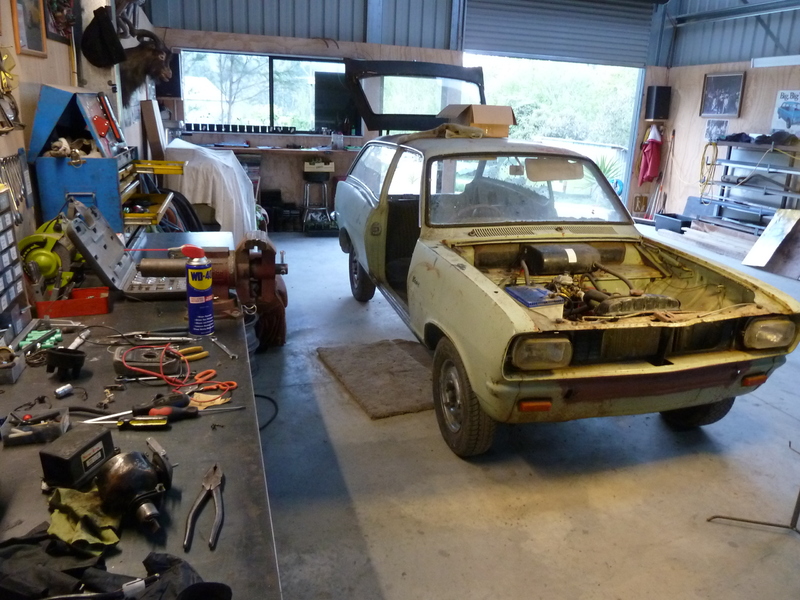 This next one.. look at that for some lovely hose locating bracketary.. 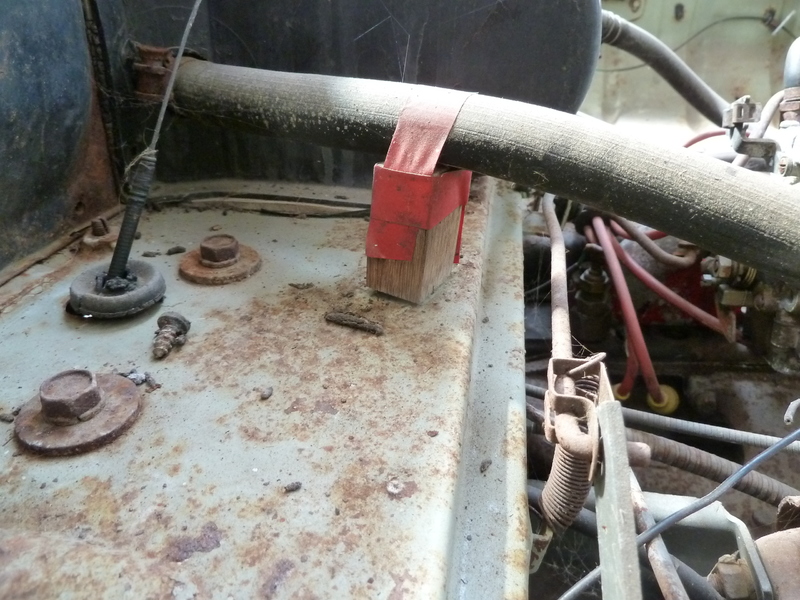 Engine bay cleared out for a looksie.. 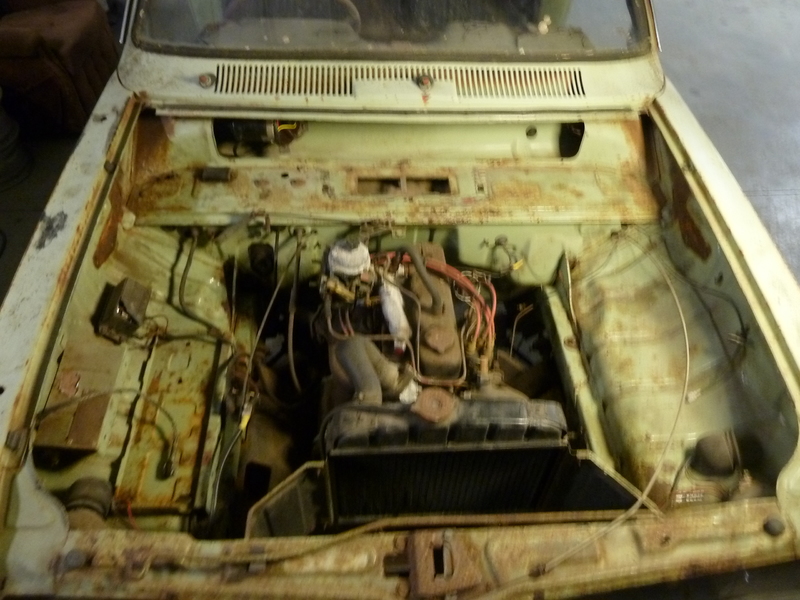 Tidy heater/ventilation plenum thingee.. 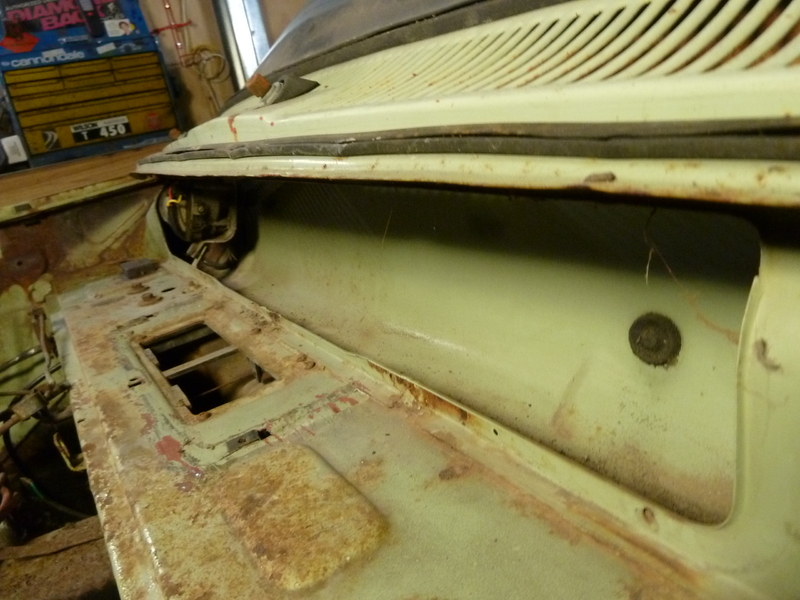 Rust hole.. 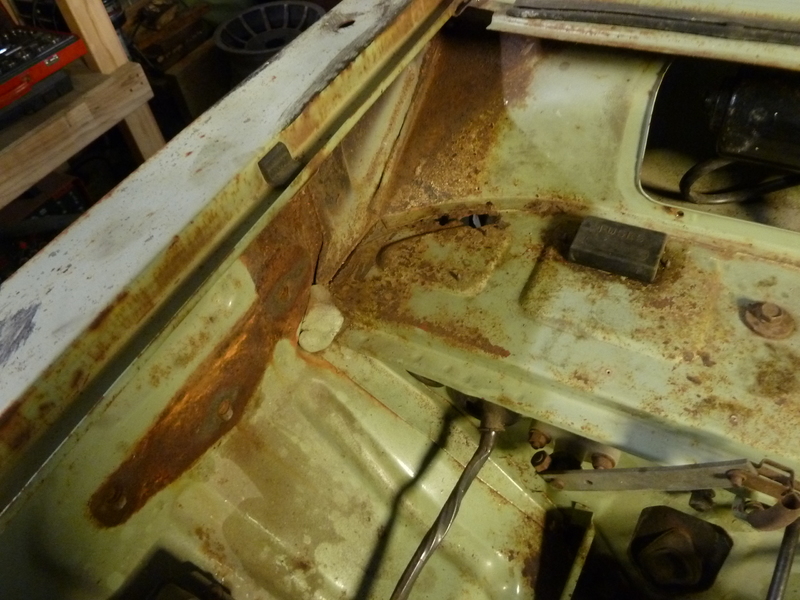 Another hole.. 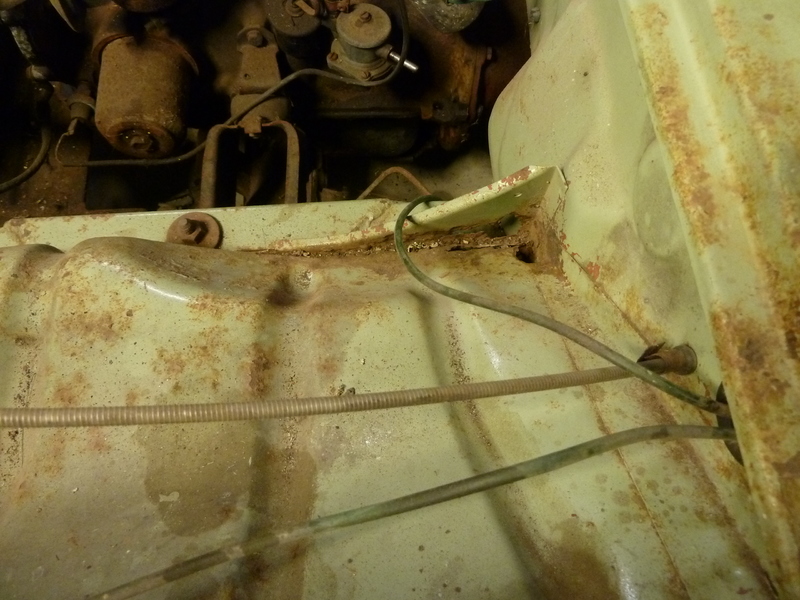 So over the last few weeks, or since the last update, I have been whittling away at a few bits on it while it was up on the hoist. I finished the chassis rail repairs. As suspected the passenger side rail was solid but for a few little holes and around the jacking point/gearbox mount. Its all strong now. Next time its up I’ll clean up and paint it all. Then some decent cavity wax inside. 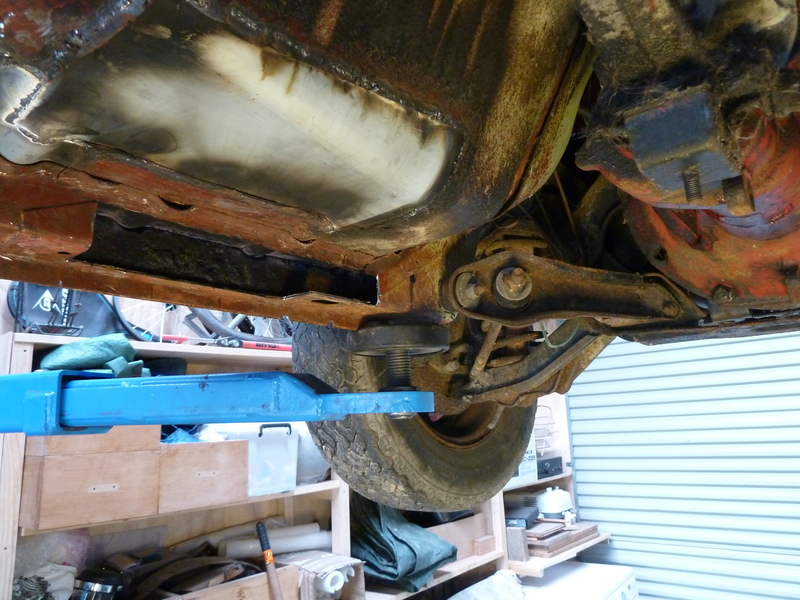 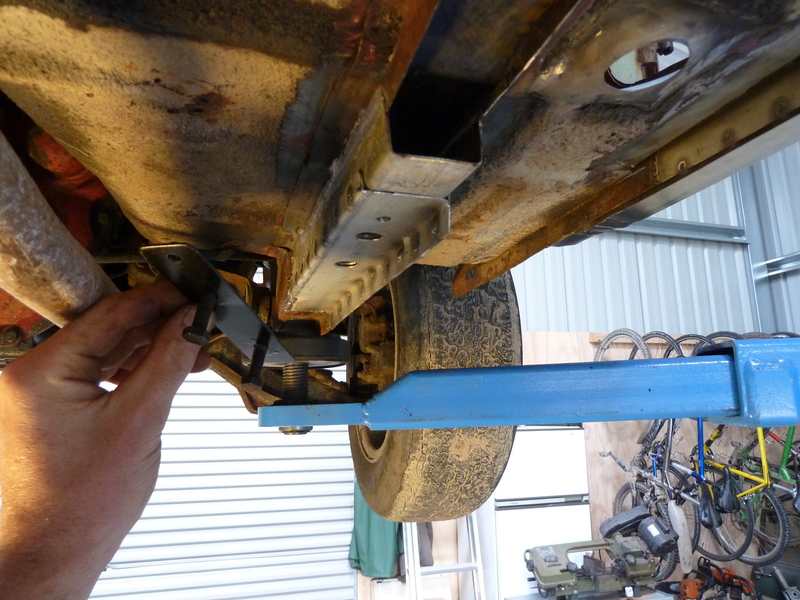 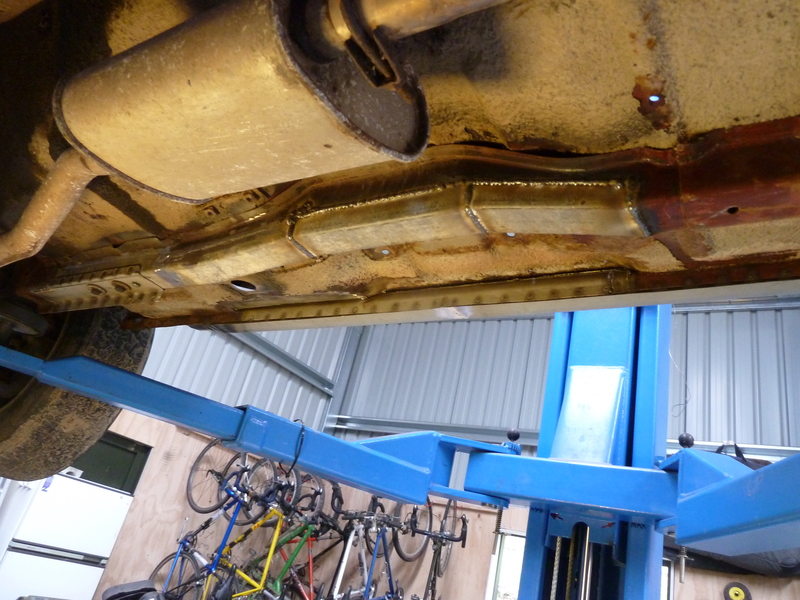 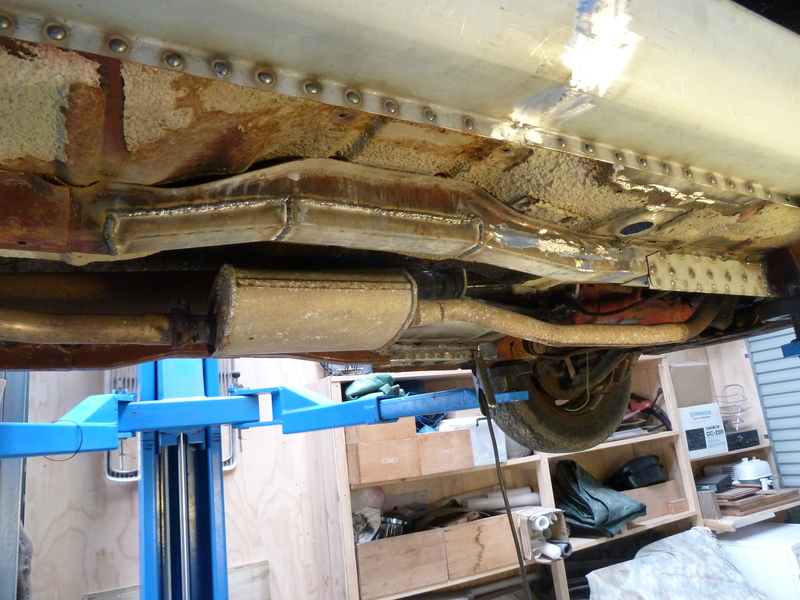 I’ve swapped the alloys over for some old wheels I had kicking about and had the tyres removed so I can weld up/clean up two of the alloys that the have been curbed. It looks horrible on old skinny steels. I look forward to some new tyres and get them Turbos back where they belong! I am planning on getting 175/70 13 so it retains an element of comfort and that slightly older look rather than the more racy 60 series tyres I have on Viva 1. Next rust repairs will be either the engine bay bits whilst its off the hoist or sort the rotten rear valance out when its back up in the air. Luckily for my wallet I have a few jobs coming in. Unluckily for Viva it waits in the queue as its doesn’t pay me money. I'm getting quite excited at the prospect of cruising down to the beach/into town with my ropey looking wagon so I think I see a few evenings spent on it now. Its gonna be perfect for mtb trips too I will have to get a shopping list together now. Things like brake cylinders, seat belts etc. I will be keen on some Chevette front seats too. I hate driving with out headrests plus Chevette seats are really comfy. |
| |
|
|
v8jim
Posted a lot
  
Posts: 1,304
|
|
Oct 18, 2015 21:59:58 GMT
|
I forgot to take a photo till this week but the k11 does have mounting points on the rear(drivers side) of the block  Suzuki Jimny would good 1.3 16v rwd and 2wd as the transfer box is separate Can't wait to see this done it looks so good Are you going to polish the alloys? |
| |
Max sig pic size: 80px
|
|
|
|
|
Oct 18, 2015 22:50:15 GMT
|
|
Oh Cheers. Will look into these suzuki engines too. I wonder if there's a rwd box to fit the old 1.3 swift gti engines?
Probably keep the alloys as is to maintain the 'just dragged out from a field' look. But I am getting itchy engine bay tidy/paint/de loom fingers though. Really don't like messy bays. Already thinking of moving that battery tray.. make a new one to suit smaller battery and mount on passenger side firewall. Get that big open viva bay thing going on. Really like the idea of a teeny tiny twink nestled in there. Even got ideas in my head for super clean efi setup..
|
| |
|
|
v8jim
Posted a lot
  
Posts: 1,304
|
|
Oct 18, 2015 23:22:45 GMT
|
|
I would imagine 1.3 swift engine would go on a jimny or SJ box when I did off roading I had a vitara with a 1.6 16v swift 4x4 carb engine fitted to an SJ box
|
| |
Max sig pic size: 80px
|
|
|
|
|
Oct 20, 2015 11:14:44 GMT
|
your upside down welding looks better than mine with gravity  |
| |
|
|
|
|
|
|
|
Oct 20, 2015 18:21:39 GMT
|
|
Ahhh but remember that we in NZ are upside down so in fact I am welding with gravity there..
|
| |
|
|
|
|
|
Oct 20, 2015 18:47:43 GMT
|
|
Excellent point.....
Nick
|
| |
1967 Triumph Vitesse convertible (old friend)
1996 Audi A6 2.5 TDI Avant (still durability testing)
1972 GT6 Mk3 (Restored after loong rest & getting the hang of being a car again)
|
|
|
|
|
|
|
OK well now that I have some time between paying jobs (which have almost all been other old rusty cars and general rot removal) I have sneaked the Viva up on the hoist and got cracking with its rear end. But first here's a pic of the rust I have removed so far. There will be more.... Now this rear valance panel looks a bit thin on it.. 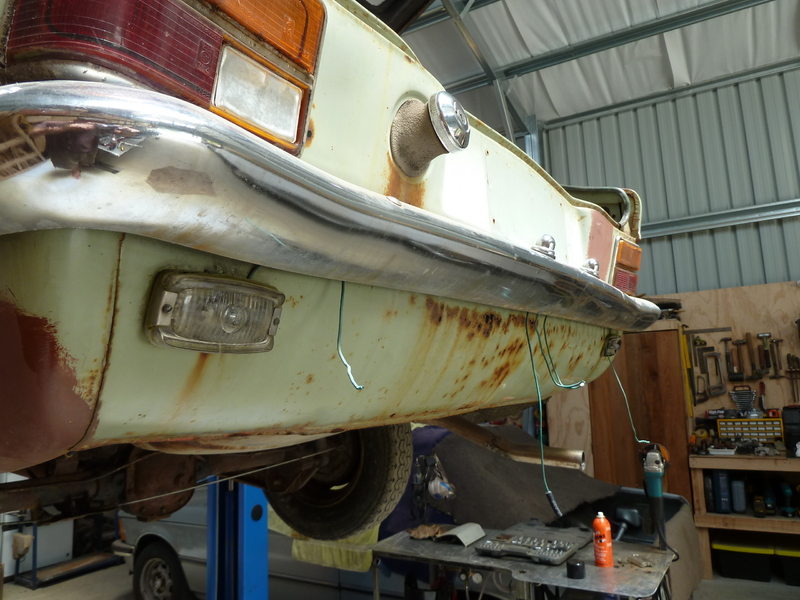 Which it certainly was. 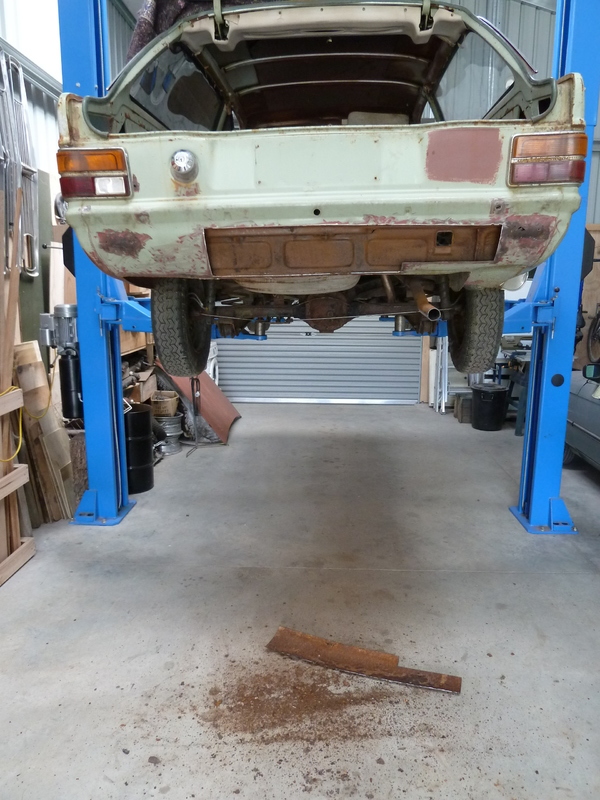 Not quite as bad all the way across as my other Viva when I repaired that one. Again just like the other Viva its weird that only the rear panel rots but the inside shaped vertical panel stays solid?. Not that I'm complaining. Anyway. I cut it open and then cleaned out all the rust flakes, wire brushed it and then neutralised it all. I discovered that the new can of Brunox I had bought happens to accept the extension lance that comes with my cavity wax cans. Sweet- I was able to spray it right into the Lh corner. Then I painted the interior to help the car last another 40 years. 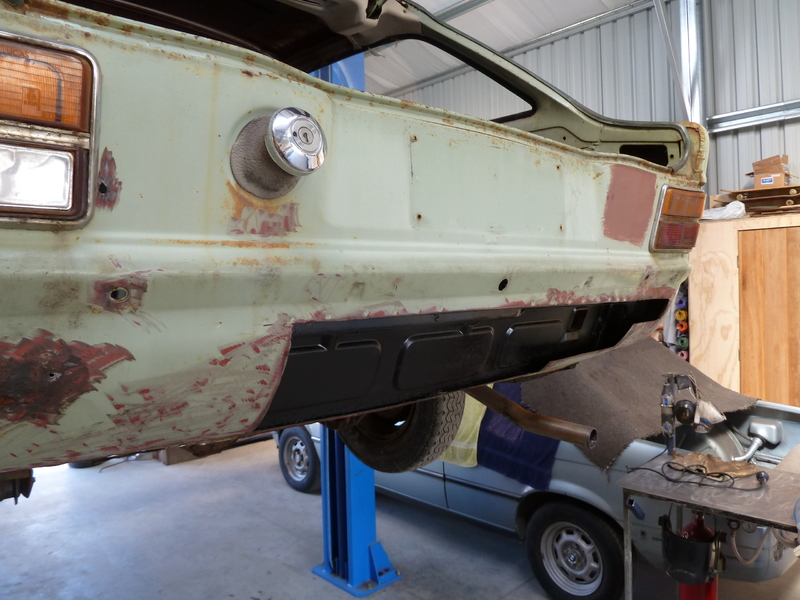 Then a local mate wanted to use my hoist so the Viva came down and I cleaned up the front panel. Its been repaired before and had been done neatly enough but then covered in bog. The corners near the rails were gone again so that will be attended to once back up in the air and Ive finished the rear. 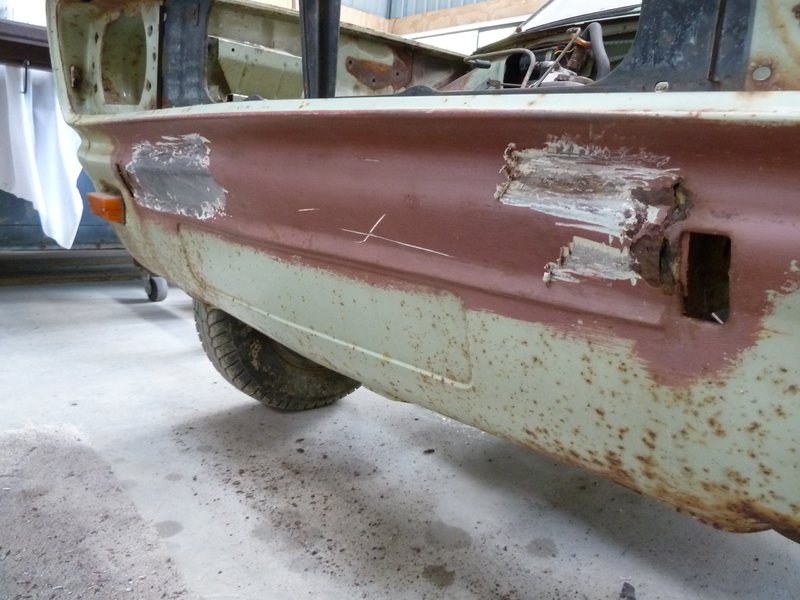 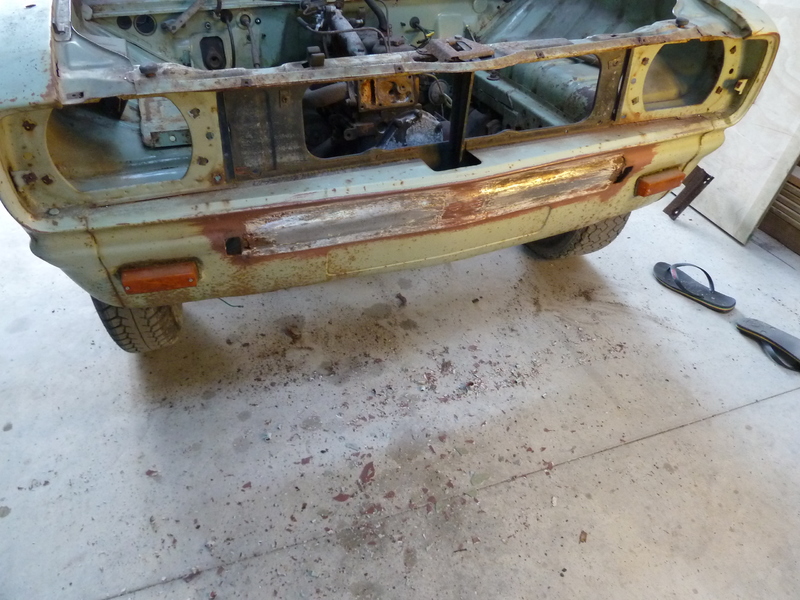 Back to the bum. I carefully cut and shaped new steel to fit in with only butt welds. Vivas have quite a tricky multiple compound curved rear end but I was able to work it out using two pieces of steel and lots of hand shaping after getting the main curve set with the folder. 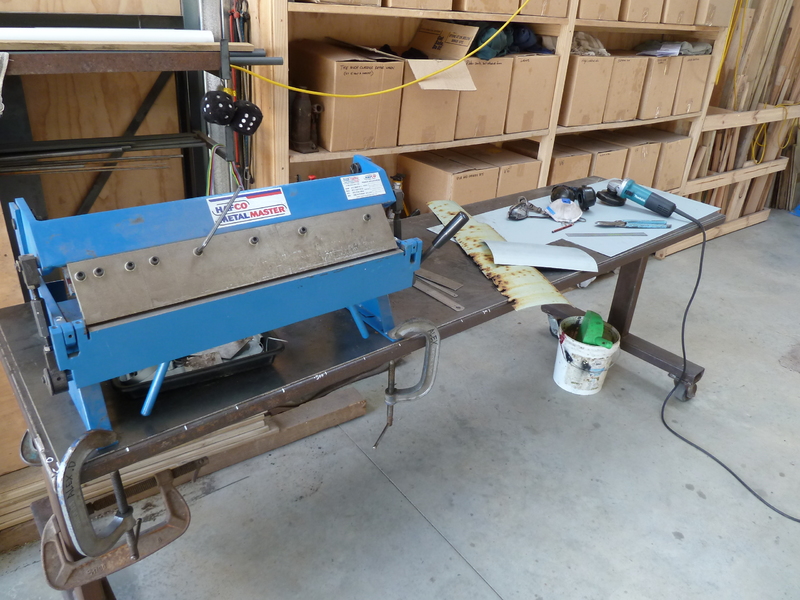 I tidied up the bits that were under the reverse lights, which wont be going back on, then one more vacuum out. For the final fit of butt welded close fit panels it helps to use a butter knife to line the edges up.. 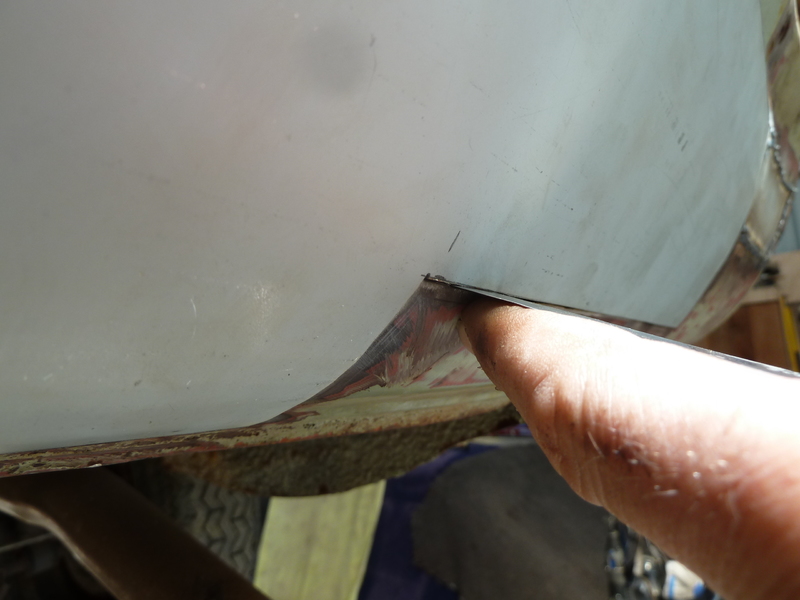 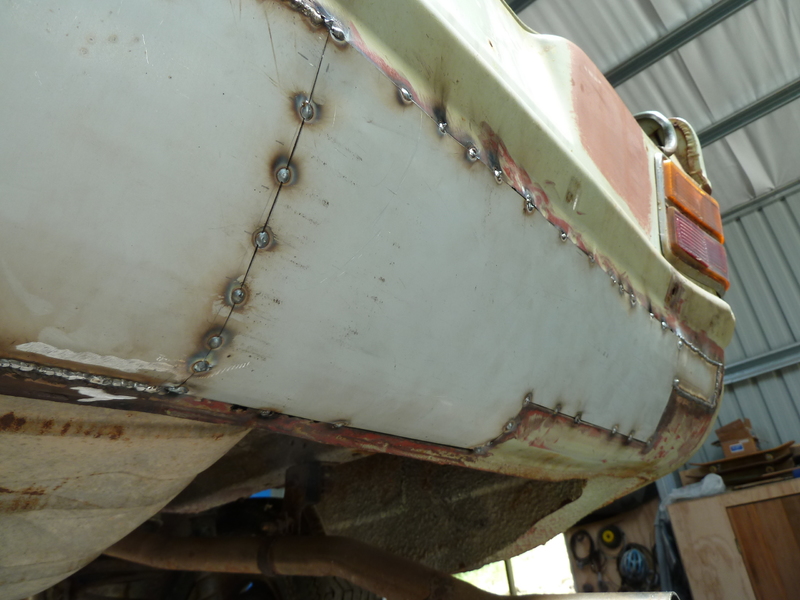 I grind off the lowest weld which could hold road muck but otherwise I will leave all the welds untouched. Grinding welds down sucks. The exposed welds are sort of part of the overall patchwork car I'm after for now... 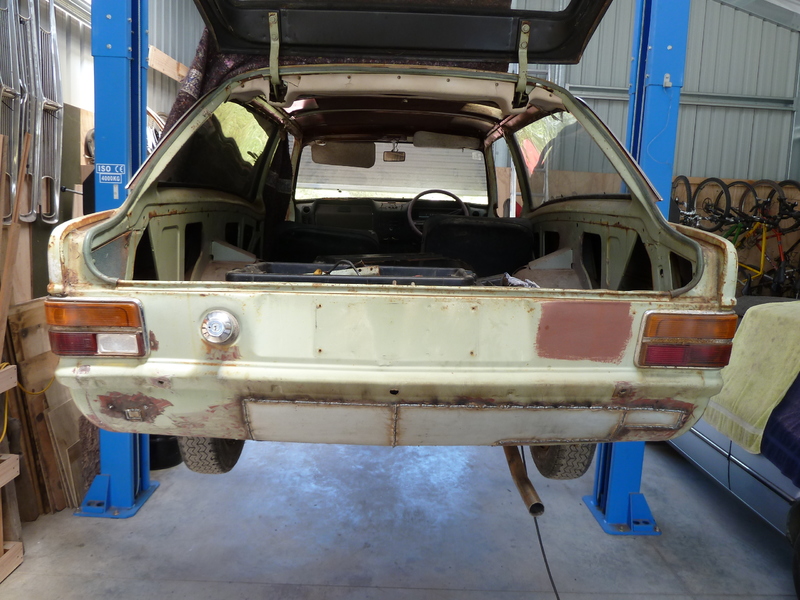 Then I moved round the side and this bit looks a bit dodgy. 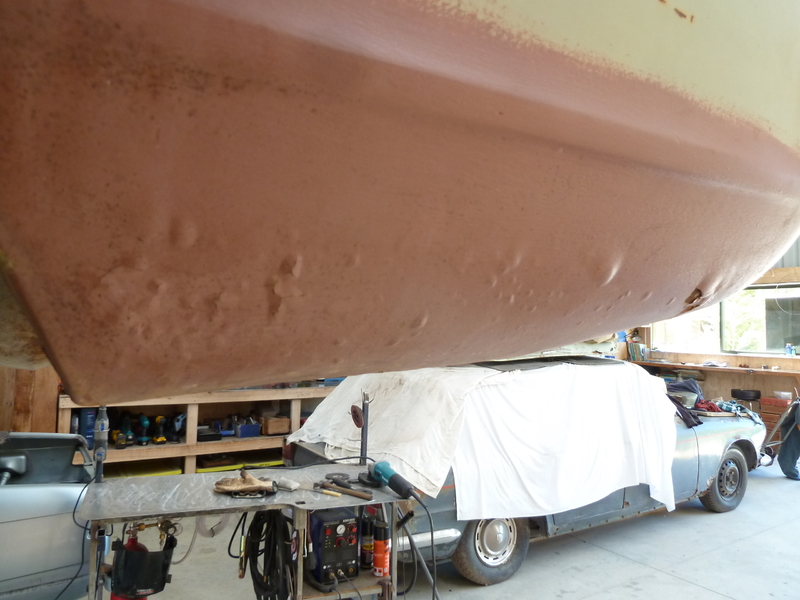 This has had a previous decent enough looking repair but sadly was covered in filler straight onto bare metal- as was the way in the good old days eh. So the bog absorbed moisture and rotted steel. curse word. 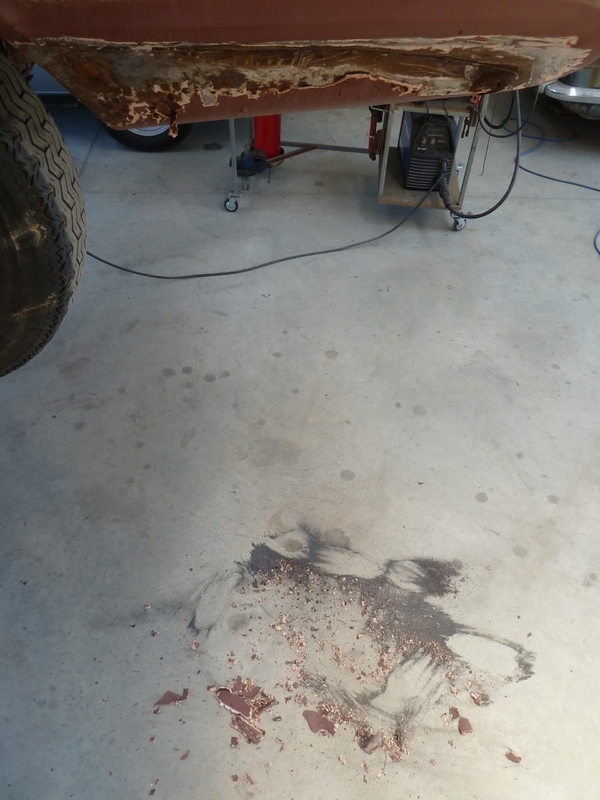 I cut it out and treated the inside with luckily only a few bits that need to be cut out. 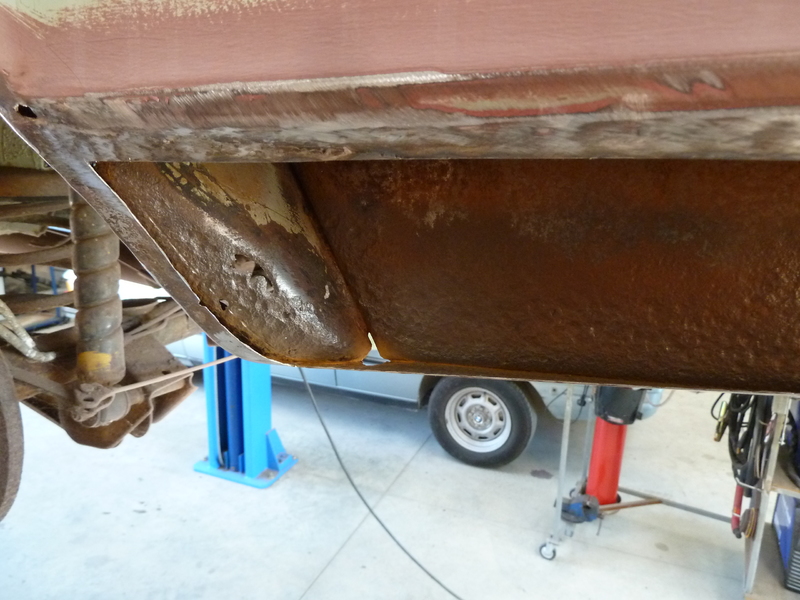 Then while the Brunox epoxy spray was setting I moved over onto the opposite side. This time its the very bottom corner of the arch that looks a touch rotten... 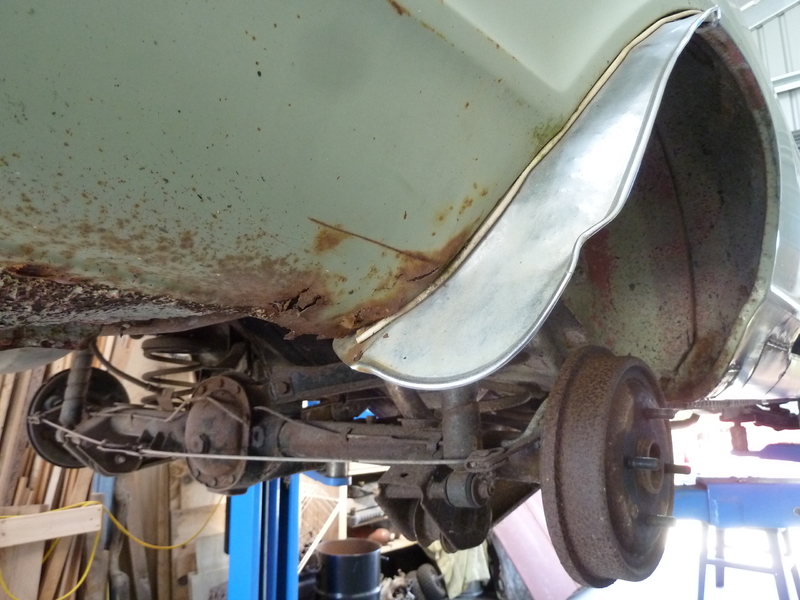 So I cut it out. It was pretty frilly after all.. 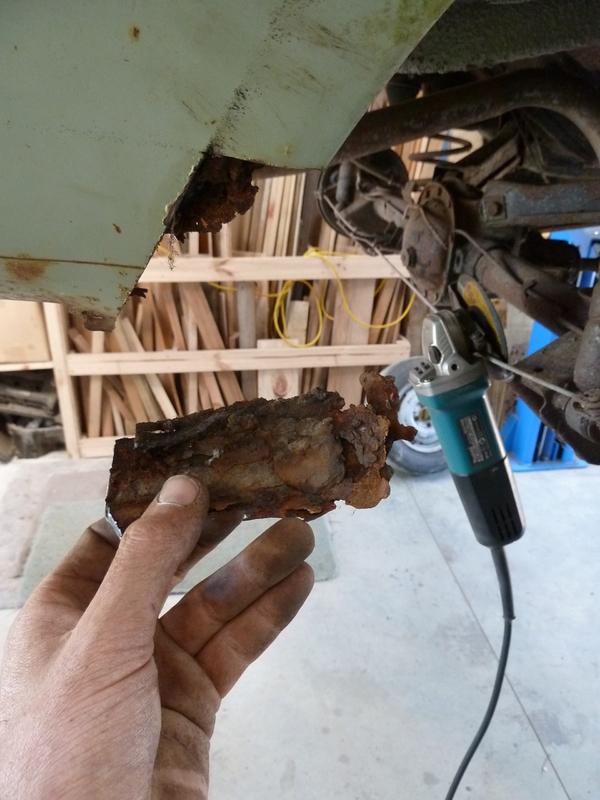 The arch corner in pieces. Note my ever evolving welding table. I recently added the uprights to hang my angle grinder, Dremel machine and other bits that were always getting in the way, falling off or never at hand. 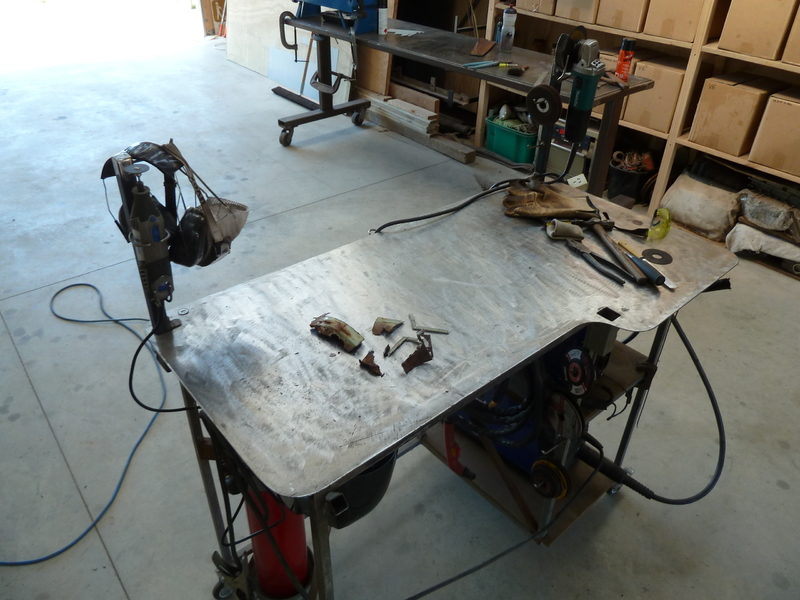 Its then once opened up to day light that I discovered a little seam sealer Jabba the Hut!!! Wow. :-) * 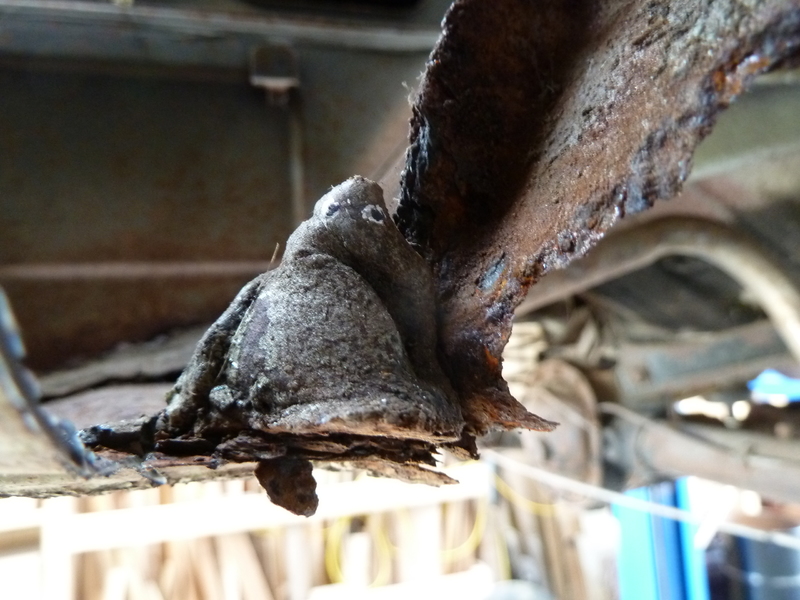 I then had to carefully shape a new corner and arch bottom out of several bits of steel. It was all so rotten I wasn't quite sure what the shape was meant to be like. It didn't really have to be factory original looking, just neat. So I have sort of just made it up as I went along.. 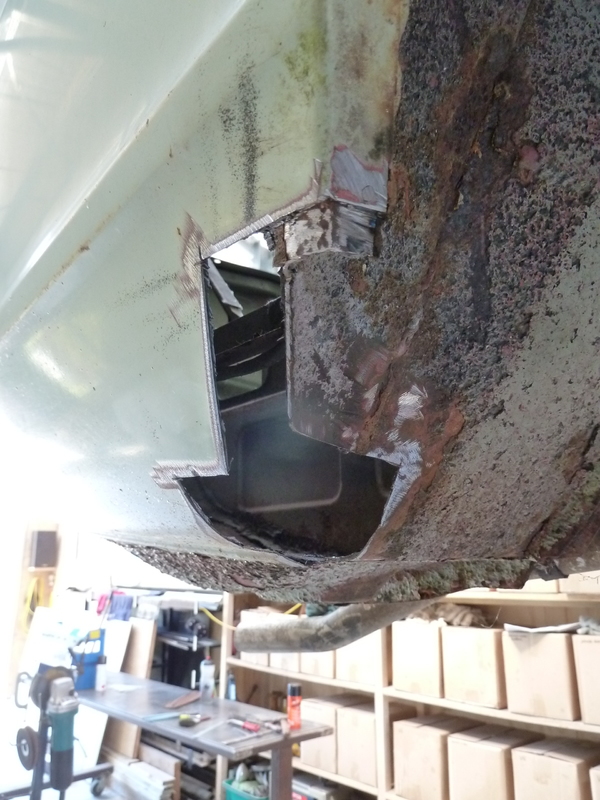 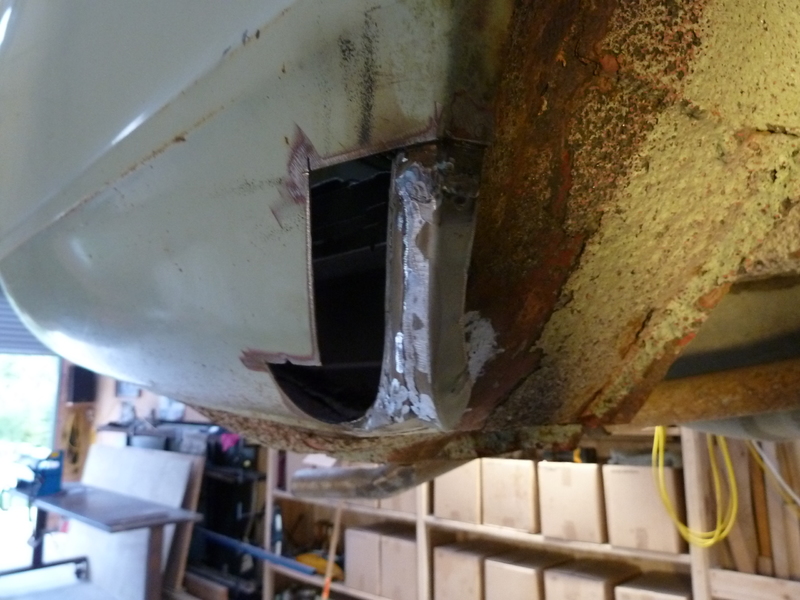 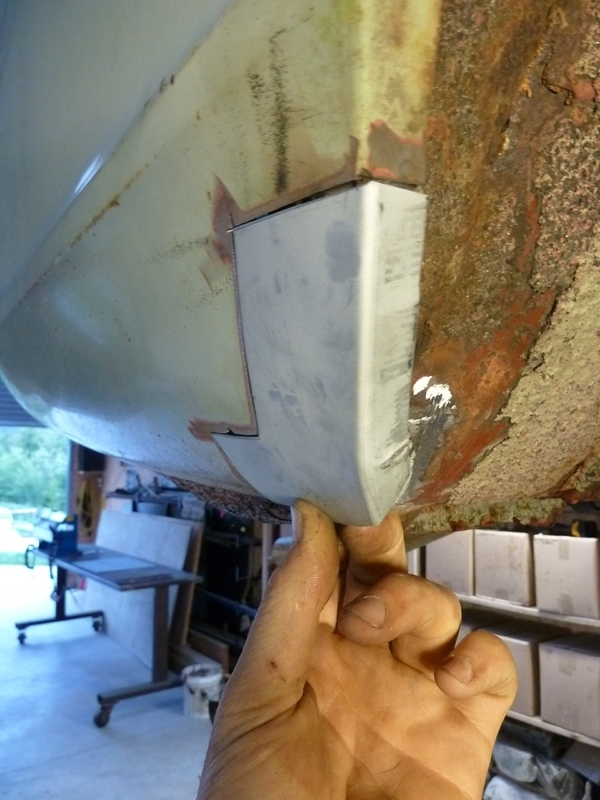 Once this arch repair is done I'll go back to the other side and finish that. Then I will drop the car down and turn it around so I can having it facing the sunny end of the shed. Then I can work through the engine bay rust with nicer light with better access to the coffee machine/biscuits/sunshine/music. * that is actually a lump of factory seam sealer. I might have added the eyes.. |
| |
Last Edit: Dec 16, 2015 6:42:43 GMT by yoeddynz
|
|
|
|
|
Nov 27, 2015 22:38:44 GMT
|
|
Lovely workshop , just out of interest ,what size is it?
|
| |
|
|
|
|
|
|
|
|
cheers. Its 14.5 m long by 7.65 m wide and its 4.5 m high at the knee/sides.
|
| |
|
|
bstardchild
Club Retro Rides Member
Posts: 14,965
Club RR Member Number: 71
|
|
Nov 28, 2015 11:55:12 GMT
|
|
Good to see this one progressing
|
| |
|
|
|
|
|
Nov 28, 2015 20:00:13 GMT
|
|
It can be all yours to drive when you come over to visit Ian. I can run you through the ins and outs of how to handle the raw power that is 1159cc.
|
| |
|
|
bstardchild
Club Retro Rides Member
Posts: 14,965
Club RR Member Number: 71
|
|
|
|
It can be all yours to drive when you come over to visit Ian. I can run you through the ins and outs of how to handle the raw power that is 1159cc. Little cars with minimal power is the way forward - you can use 100% of it 100% of the time and never get into trouble  |
| |
|
|
|
|
|
Nov 29, 2015 17:51:21 GMT
|
|
Top thinking!!!.
|
| |
|
|
|
|
|
|
|
cmon flap disk those welds off! you cant do that good a job and then try and convince us its shabby chic'  |
| |
|
|
|
|


