MrOtter
West Midlands
"Your car is your story, so don't let someone else write the book." - Moog
Posts: 281
|
|
Mar 23, 2016 13:20:05 GMT
|
Only a small update here, but I had the morning off work the other day and decided to have a poke around the Jag for a couple of hours. I quickly hooked up a battery and tried a few things out, and as usual some things worked and some didn't! So I'll have plenty of electrical odds and sods to sort out, but that was to be expected. I decided to try and clean up the interior a bit to stop the spread of mould on the back seat, the worst of which can be seen here (white and green bits, all cleaned off okay with a damp towel thankfully, but still... pretty grim). 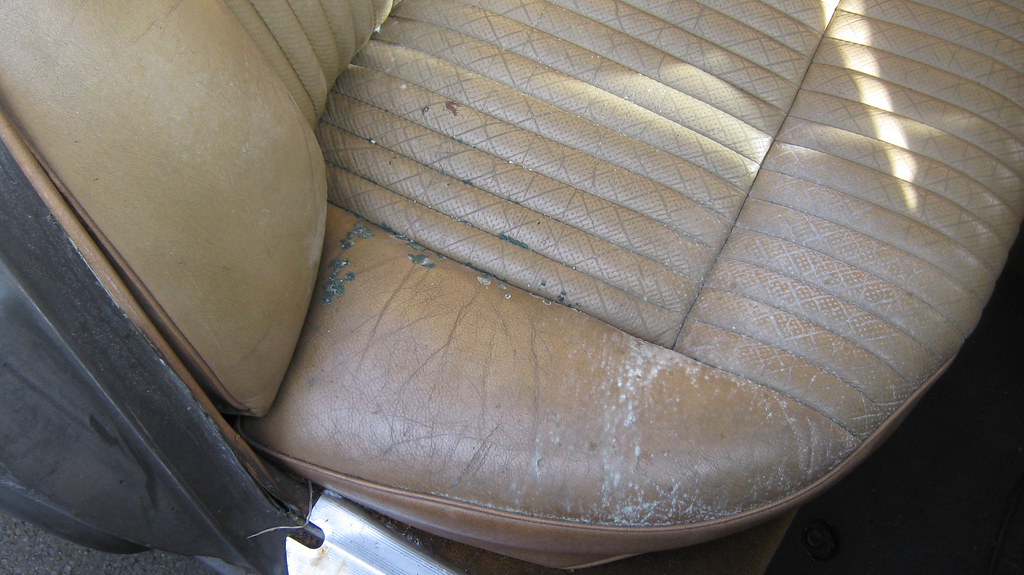 IMG_0273 IMG_0273 by Sven Cumner, on Flickr Whilst ferreting through the usual assortment of screws and bolts and broken clips sitting in the footwells, I found the missing accelerator pedal underneath the drivers seat. The front drivers floor was the only bit of serious rust I knew about, which was made clear by the fact the pedal was still bolted to some of that floor panel. 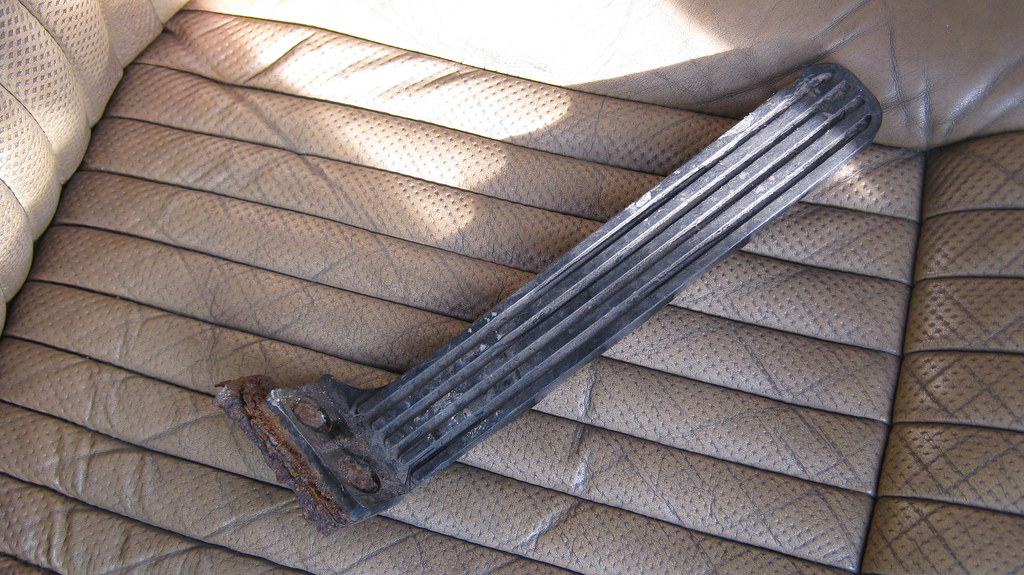 IMG_0274 IMG_0274 by Sven Cumner, on Flickr I'll get back to the pedal later, but for now let's go back to the rear seat. Judging by this quite heavily embossed imprint, I have a feeling there may have been a Goodyear tyre propped up in the back of this car for some time... 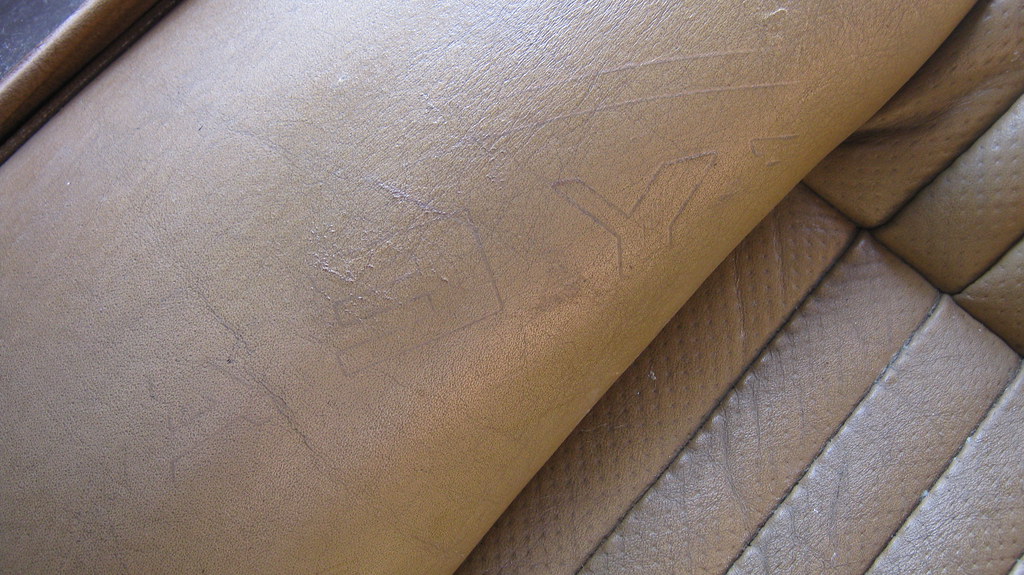 IMG_0275 IMG_0275 by Sven Cumner, on Flickr Whilst I was cleaning the seat and vacuuming out rust flakes from the floor, I noticed the seat wasn't bolted in, so decided to whip it out and give it a better clean outside the car. Now... why did I have to move that seat. Why... 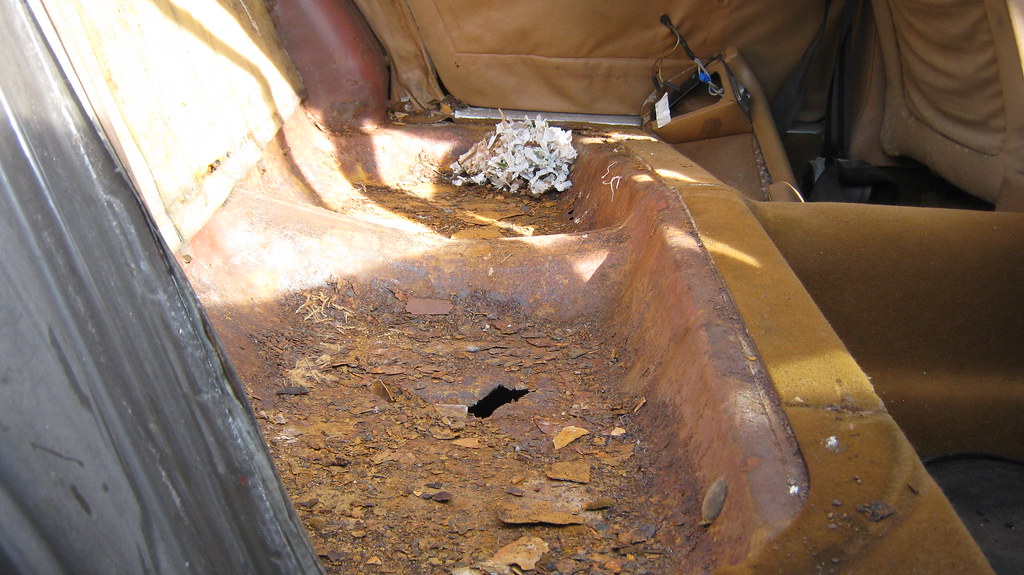 IMG_0276 IMG_0276 by Sven Cumner, on Flickr There's a lovely rodent's nest, and lots of air where there was once car. 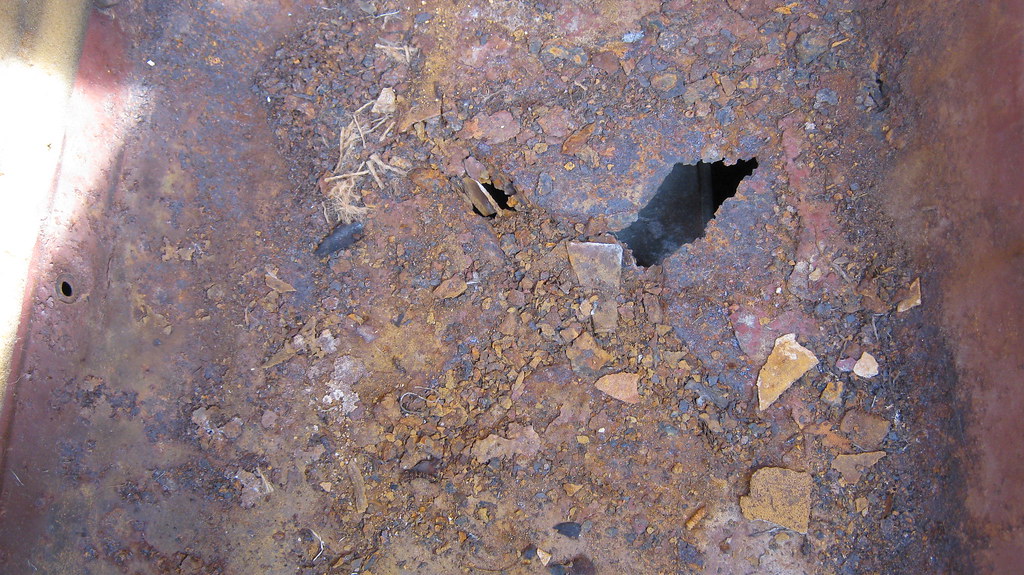 IMG_0277 IMG_0277 by Sven Cumner, on Flickr 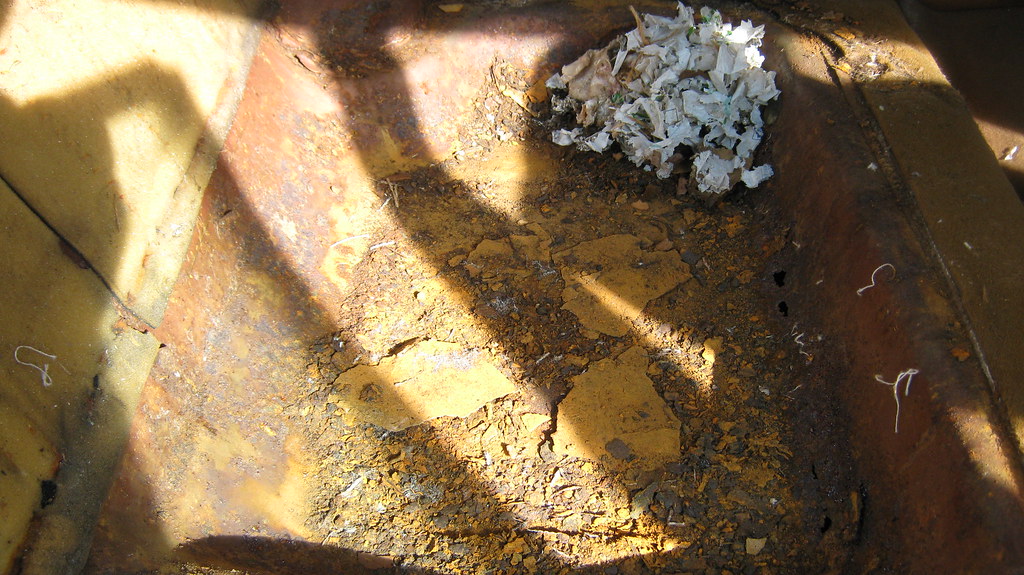 IMG_0278 IMG_0278 by Sven Cumner, on Flickr Whilst I was at it, I thought I'd take off the parcel shelf panel and look at the few rust flakes I saw around the edge. 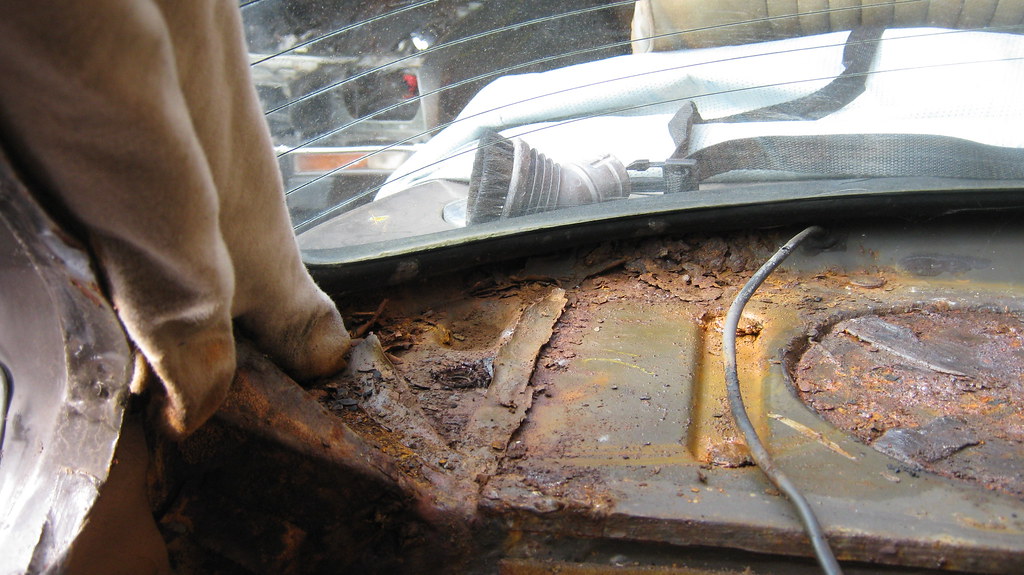 IMG_0279 IMG_0279 by Sven Cumner, on Flickr  IMG_0280 IMG_0280 by Sven Cumner, on Flickr It's easy to get depressed by the rust, but the sills and wheel arches are pretty much fine from what I can see so far, so there's a positive... This car must've been leaking in through the rear window for a long long time, for it to rot out the parcel shelf and the rear seat pan. I poked a few small holes in the parcel shelf, I really don't fancy taking the screen out though so I'm not sure what I'll do with this... maybe just apply some rust converter and leave it as is? I'll have a proper think some other time. So, I didn't get much done in my couple of hours, just poked a load of rust holes and vacuumed up lots of Jaguar. Yesterday evening I removed the accelerator pedal from the chunk of floor it was still attached to. I thought for sure the studs would snap, but the nuts actually came undone quite nicely. Clamped the bit of floor pan in the vice.  IMG_0282 IMG_0282 by Sven Cumner, on Flickr ...and off she came. 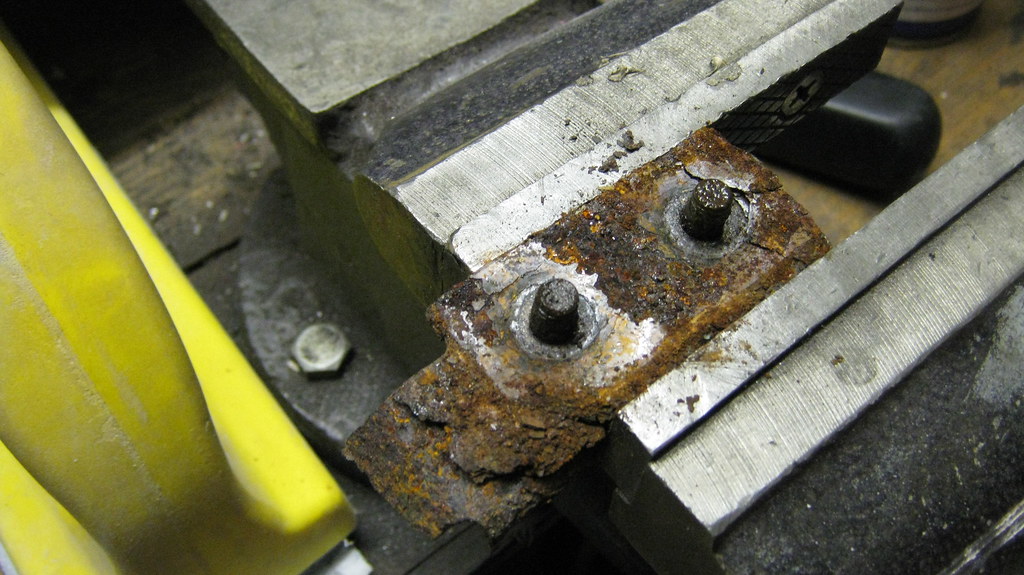 IMG_0283 IMG_0283 by Sven Cumner, on Flickr So I'll have to remember to include a couple of studs in the floor pan repair I do, but that should be a pretty straight forward repair. I'm going to need a lot of steel for that rear seat pan though... Oh and in other news, I sent off all the documents to apply for the V5C, so hopefully I'll get that sent to me in the post in a month or so. I don't feel comfortable spending money on parts for the car until it's registered in my name, and I really do need to crack on with my other projects, so it might be a while before I update this again. I'll definitely make some good progress over the summer though, hopefully I can get it on the road before winter returns this year! |
| |
|
|
|
|
|
|
|
Mar 23, 2016 13:28:45 GMT
|
|
I had a V12 XJs for many years and the engine is fantastic. have a good poke around the trailing arm mounts, what usually happens is the rear window leaks, rots the seat pans out then runs through and rots the trailing arm mounts out.
|
| |
|
|
vanpeebles
Part of things
 I am eastbound in pursuit of a white Lamborghini, this is not a recording.
Posts: 978
|
|
Mar 23, 2016 18:06:20 GMT
|
|
Erk! I'd have brimmed my kecks at the sight of what was(or wasn't) under that rear seat!
|
| |
|
|
retrolegends
Club Retro Rides Member
Winging it.....Since 1971.
Posts: 3,714
Club RR Member Number: 94
|
1972 Jaguar XJ12Lretrolegends
@retrolegends
Club Retro Rides Member 94
|
Mar 23, 2016 20:02:07 GMT
|
|
Good Lord!!! This is awesome pal and it's got to be very rare by now I would have thought.
Distributor the size of a bucket and twin fuel tanks with perfect patina, superb old Jag!
|
| |
1974 Hillman Avenger 1500DL1992 Volvo 240SE1975 Datsun Cherry 100a flying custard1965 Hillman SuperMinx Rock N Roller1974 Austin Allegrat Mk1 1.3SDL1980 Austin Allegro Mk3 1.3L1982 Austin Allegro Mk3 on banded steels2003 Saab 9-3 Convertible 220bhp TurboNutter1966 Morris Minor 1000 (Doris) 2019 Abarth 595C Turismo (not retro but awesome fun) www.facebook.com/DatsunCherry100a |
|
|
|
|
Mar 23, 2016 20:30:51 GMT
|
|
Rear parcel shelf, think you might have to weld that not just rust kill. It may also act as latitudinal bracing to stop flexing of shell.
Lovely beasts really does deserve to be saved and enjoyed, good luck !
|
| |
|
|
Smiler
Posted a lot
I no longer own anything FWD! Or with less than 6 cylinders, or 2.5ltrs! :)
Posts: 2,492
|
|
Mar 23, 2016 21:15:51 GMT
|
|
Watching with keen interest, bookmarked!
|
| |
www.Auto-tat.co.uk'96 Range Rover P38 DSE (daily driver) '71 Reliant Scimitar SE5 GTE 3.0ltr Jag V6 Conversion '79 Reliant Scimitar SE6A 3.0ltr 24valve Omega Conversion '85 Escort Cabrio 2.0 Zetec - Sold '91 BMW 525i - Sold '82 Cortina 2.9i Ghia Cosworth - Sold '72 VW Campervan - Sold '65 LandRover 88" - Sold
|
|
|
|
|
|
|
|
Glad your'e not too disheartened,bit of a downer but to be expected on a 44 yr old Jag i suppose.
At least it looks like your'e the first there and not having to sort out old bodges.
Looks like theres enough good metal to patch the shelf but access will be tricky without removing the glass.
Still a great car and well worth the effort.
|
| |
|
|
MrOtter
West Midlands
"Your car is your story, so don't let someone else write the book." - Moog
Posts: 281
|
|
May 31, 2016 17:33:13 GMT
|
Sorry to disappoint you all, but I still haven't touched this thing yet - been busy finishing up my Mini and now I'm moving on to the Citroen first as I started that before I bought this, so this can wait for now... just wanted to put a post up to say that, after almost 3 months, I finally have the V5C in my name! Yay!  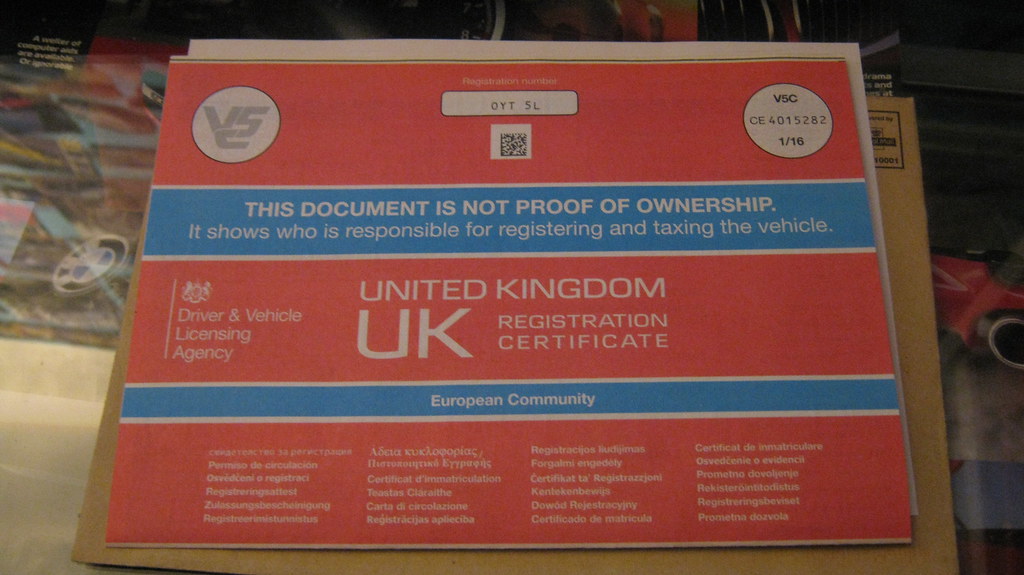 IMG_0384 IMG_0384 by Sven Cumner, on Flickr |
| |
|
|
MrOtter
West Midlands
"Your car is your story, so don't let someone else write the book." - Moog
Posts: 281
|
|
|
|
Update - I cleaned out the boot and tidied a couple of other things at the back of the car! It's not much, but I shall still claim it as progress. Hadn't really touched anything in here since I bought the car, so this is what it looked like before I started. 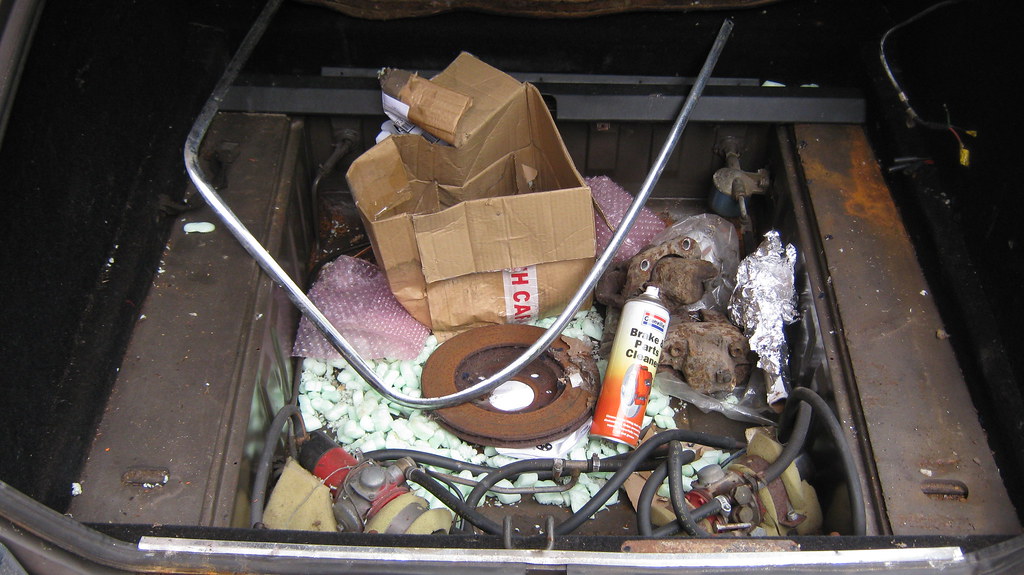 IMG_0398 IMG_0398 by Sven Cumner, on Flickr Pulled everything out to find a surprisingly solid boot floor, I didn't manage to poke any holes! Just lots of surface rust. Oh and as you can see in these pictures, there'd been an explosion of polystyrene peanuts and there were polystyrene bits EVERYWHERE. 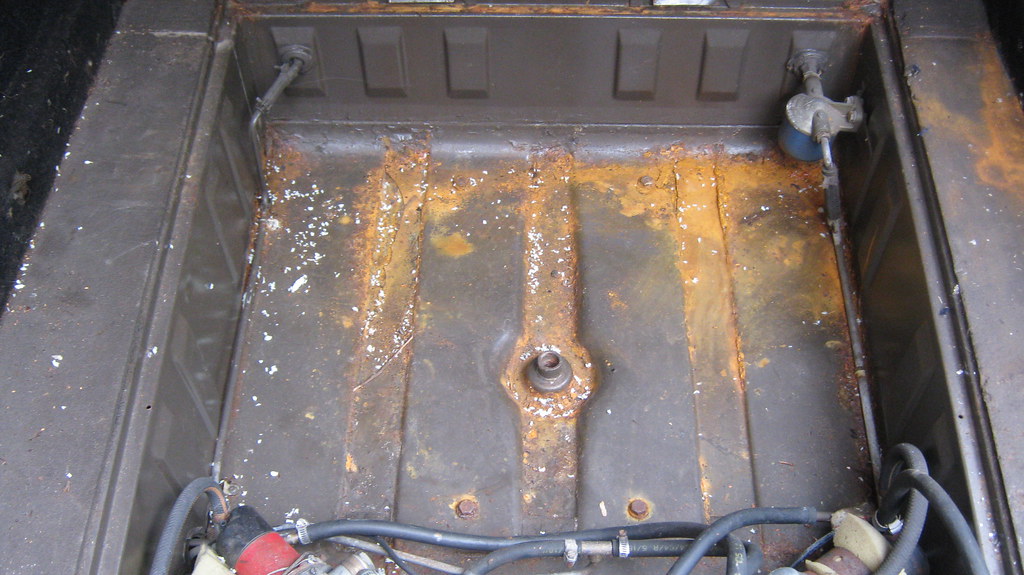 IMG_0399 IMG_0399 by Sven Cumner, on Flickr So, out of all the bits I pulled out, this is what's for the Jag. Half of the front windscreen surround, a trim piece from the boot floor, and what I presume is the original earth cabling for the battery from under the bonnet (there's a bodged in piece of cable there at the moment). 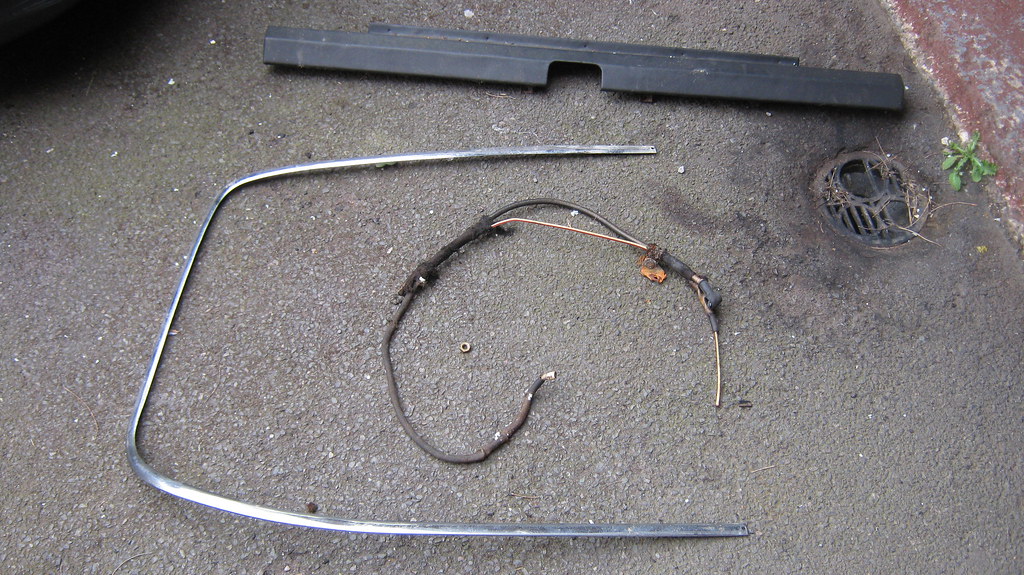 IMG_0400 IMG_0400 by Sven Cumner, on Flickr These calipers/brake disc were clearly not for the Jag, and they were all rusty and nasty so I binned them. I hope they weren't worth lots of money... there was also some orange caliper paint in there, obviously not used on the calipers in the photo. Not sure what I'll ever want it for, but it was still liquid so I kept it. 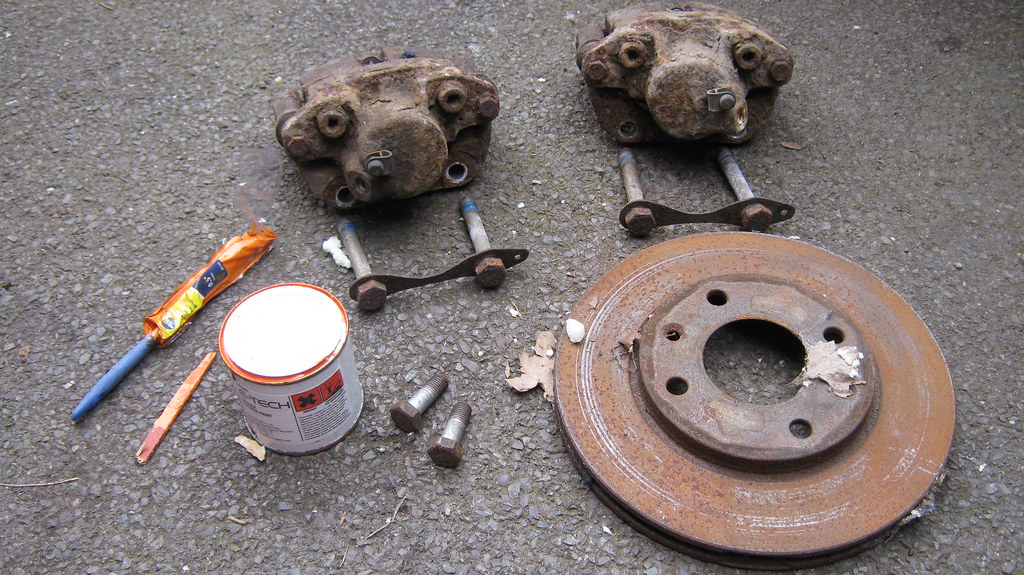 IMG_0401 IMG_0401 by Sven Cumner, on Flickr 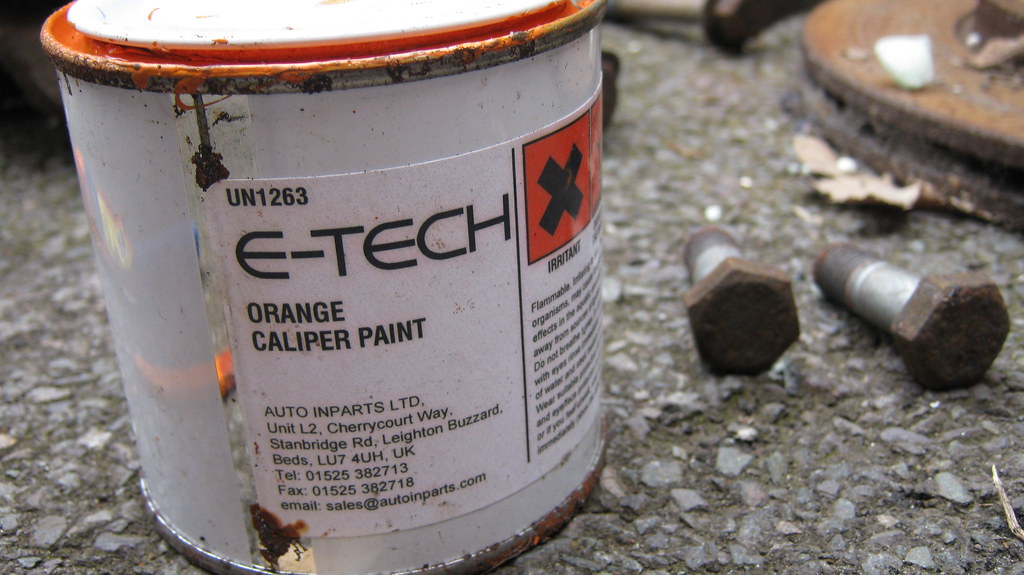 IMG_0402 IMG_0402 by Sven Cumner, on Flickr The final pieces of treasure from the hunt, some tin foil, instructions for a mini grinder, and a nearly full can of brake cleaner. 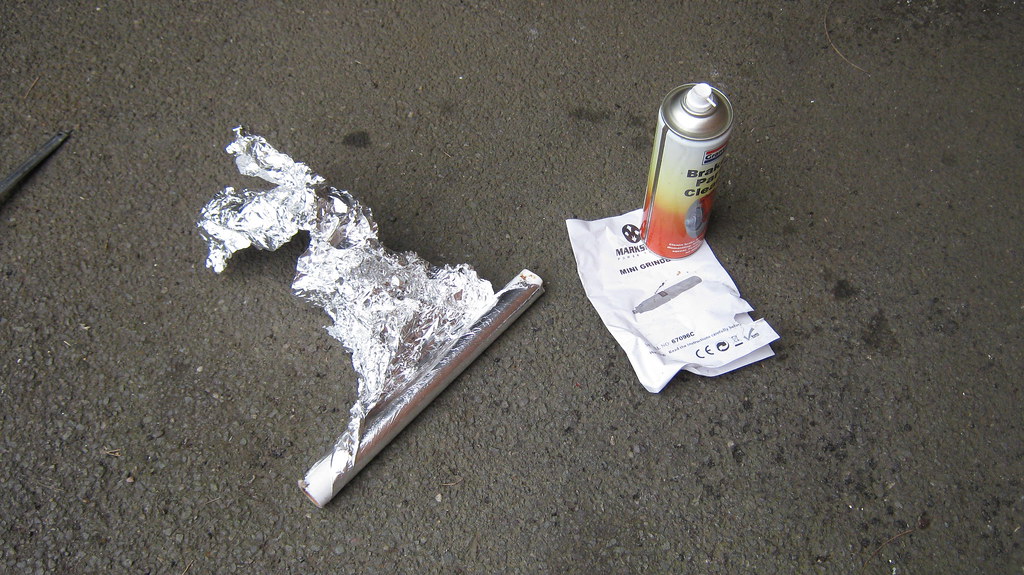 IMG_0403 IMG_0403 by Sven Cumner, on Flickr After I got everything out I vacuumed all the rodent turds out of the carpets and tried to put things back in to place. I did find a dead mouse in there too, which was nice... I took a picture but decided it would be weird to post that to the internet so you'll have to just imagine it... I actually didn't realise what it was at first, I just saw a big blob of something right at the back of the boot in the darkness and just vacuumed it up. Of course the vacuum clogged and I browned my trousers when I turned it round to see a mouse skull staring me in the face from the end of vacuum hose. Anyway... the boot brushed up quite nicely! Shame I'm missing the boot floor board, should be easy to make something up though if I can't find a replacement. 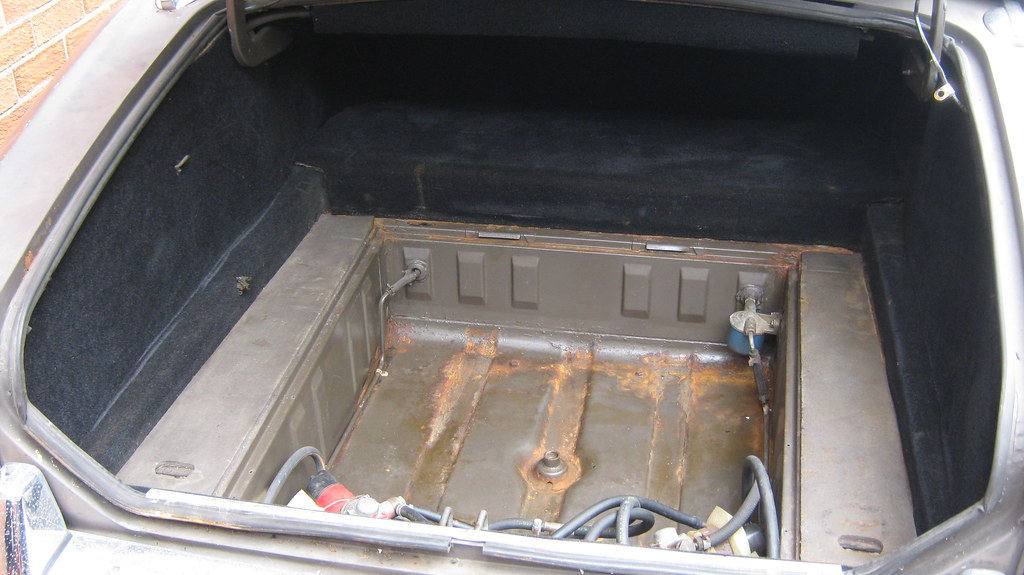 IMG_0405 IMG_0405 by Sven Cumner, on Flickr The missing board would cover the spare wheel and the fuel pumps. Here are said fuel pumps - two of them because it has two completely separate tanks remember! 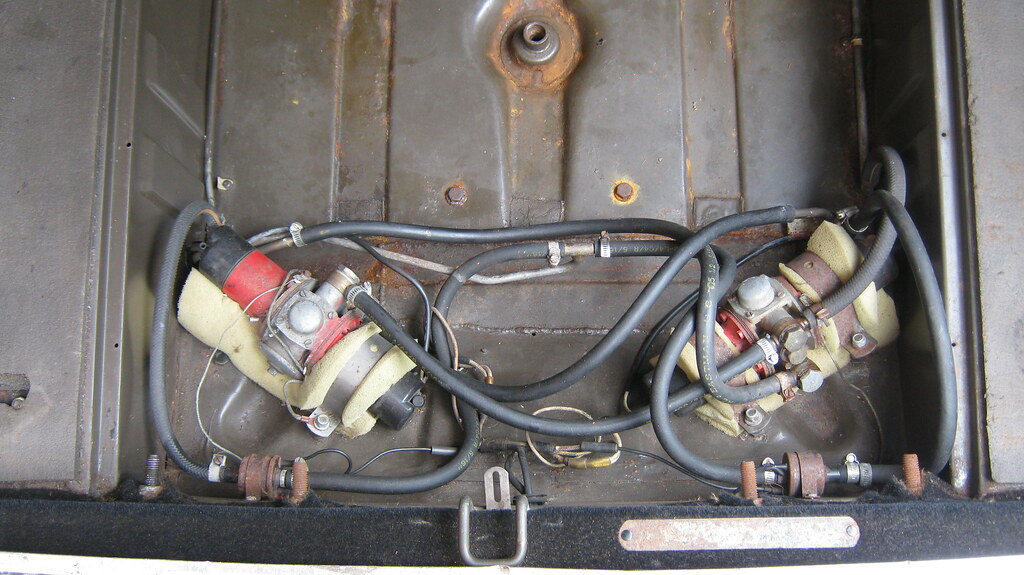 IMG_0406 IMG_0406 by Sven Cumner, on Flickr Found some snipped wires dangling from the boot lid. Was quite easy to connect them back up to the other ends of the wires tucked behind a side panel in the boot - this is just for the reverse lights and the boot illumination light. 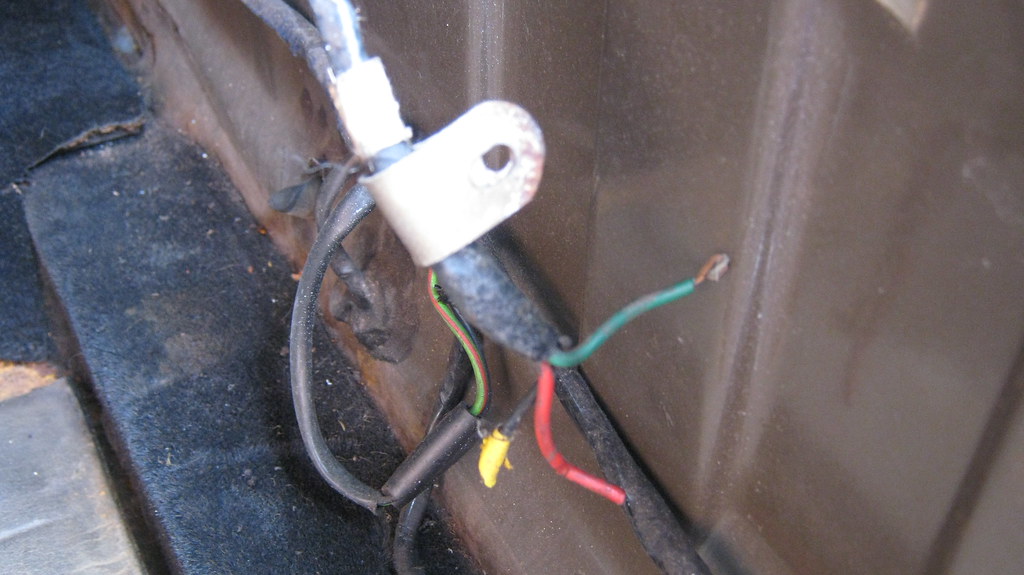 IMG_0407 IMG_0407 by Sven Cumner, on Flickr Under the fuel filler flaps was pretty manky, obviously hadn't been cleaned out in a long time. Tiny bit of rust around here too, just to add to the patina. 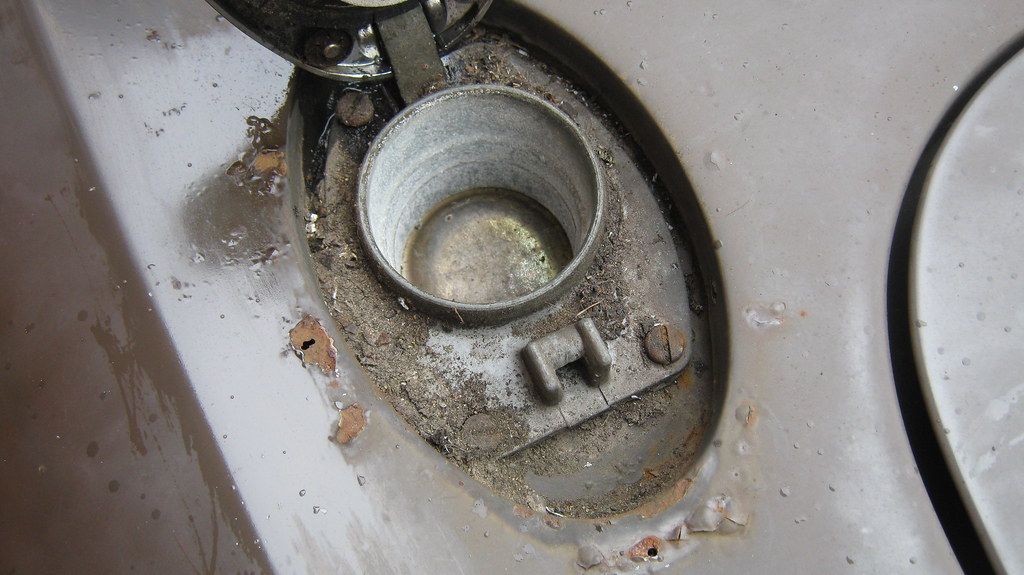 IMG_0408 IMG_0408 by Sven Cumner, on Flickr Clean. 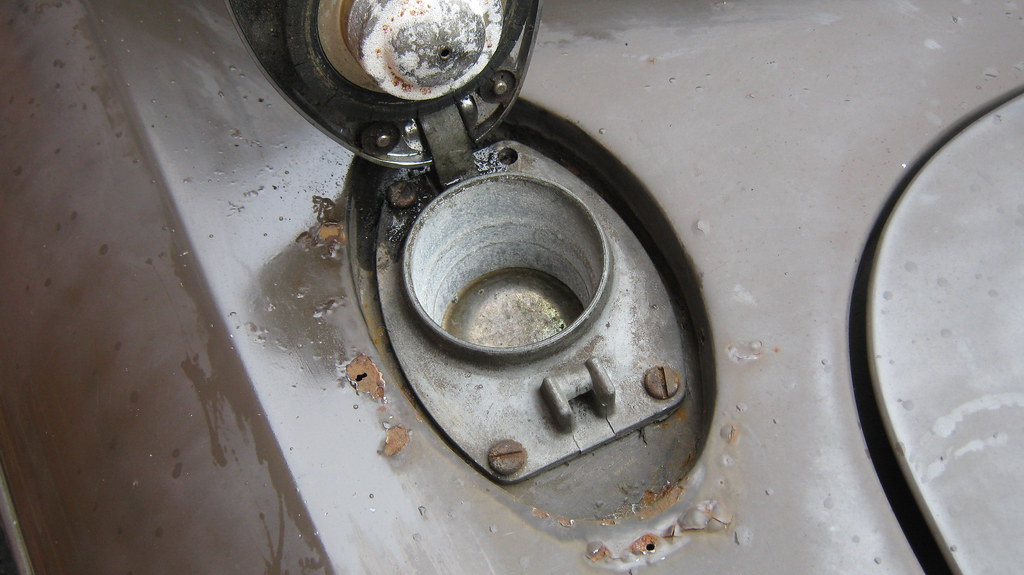 IMG_0409 IMG_0409 by Sven Cumner, on Flickr Also pulled off the rear light lenses to clean them up inside. Found this unit was only held in with 1 out of 3 screws, so good thing I pulled the lens off!  IMG_0410 IMG_0410 by Sven Cumner, on Flicker The driver's side one was pretty clean inside, usual detritus was found in the passenger's one. 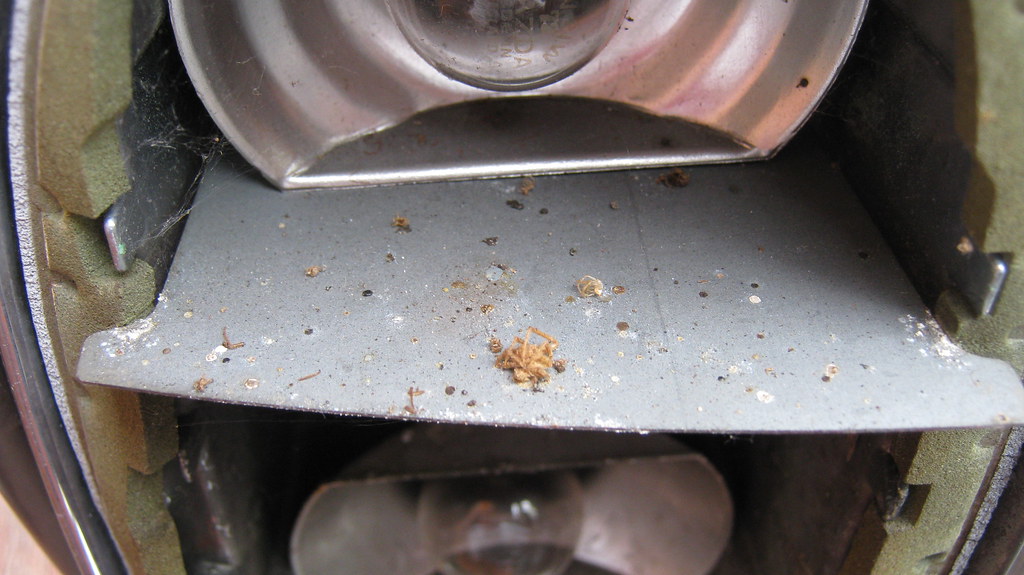 IMG_0411 IMG_0411 by Sven Cumner, on Flickr Hard to see, but one of the bulbs in there is Mazda branded - JDM y0! 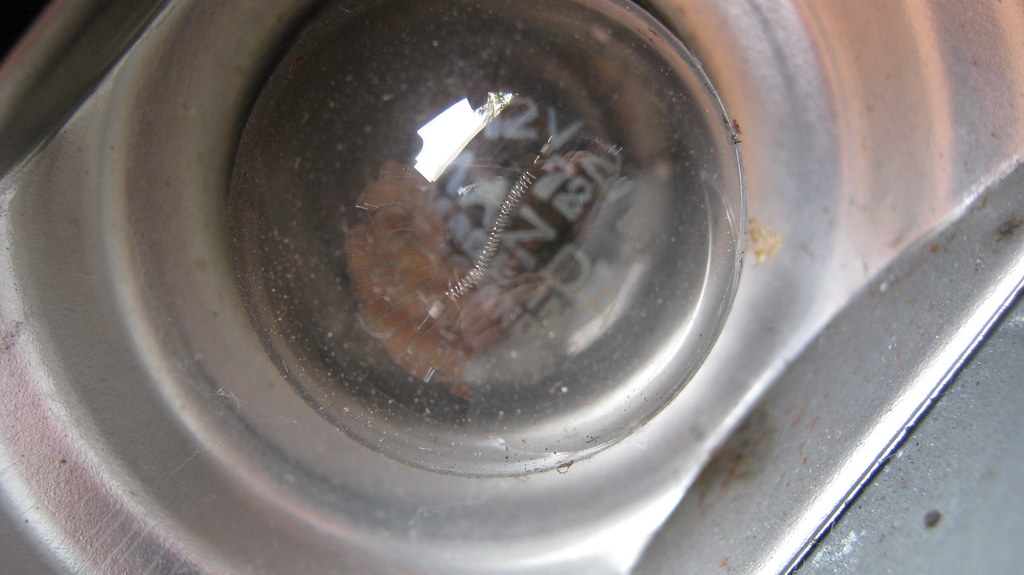 IMG_0412 IMG_0412 by Sven Cumner, on Flickr One of the reversing light lenses had a chunk missing from it. Thankfully I took it apart to find the piece still inside the housing, so I could glue it back in place. 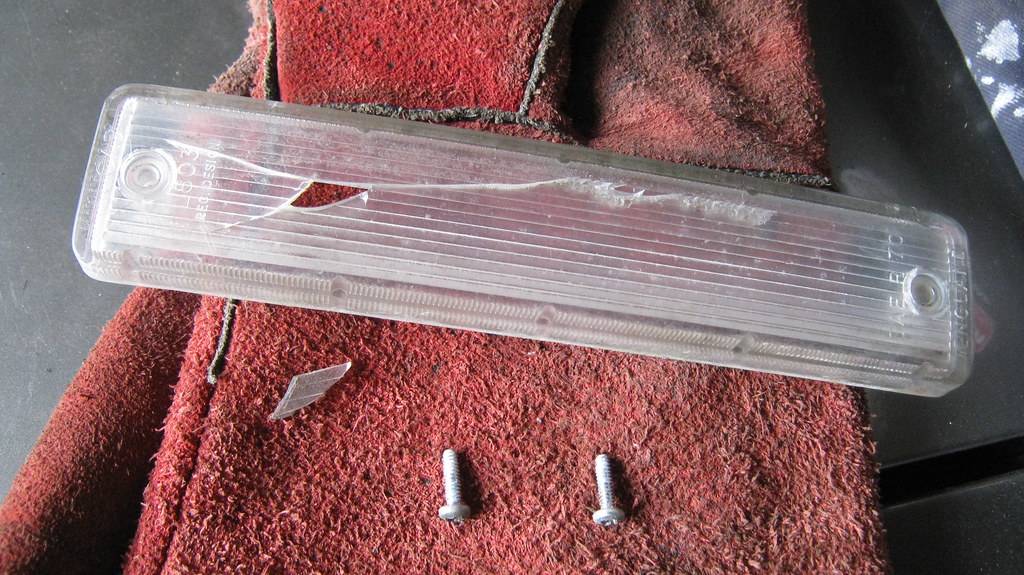 IMG_0413 IMG_0413 by Sven Cumner, on Flickr So there we have it, only little cosmetic jobs but fun nonetheless. Back to bed for a while whilst I crack on with the rusty Citroen... 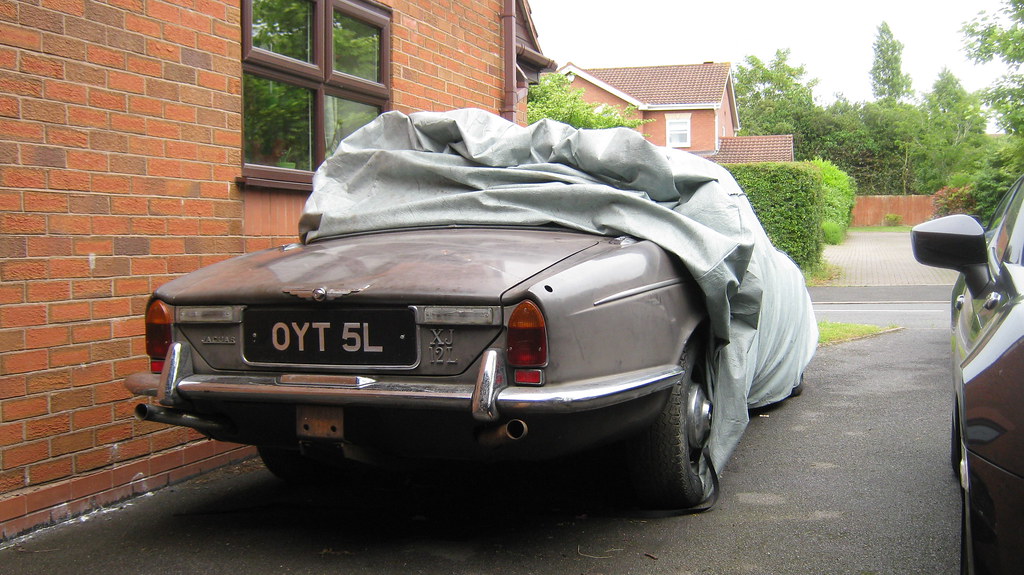 IMG_0414 IMG_0414 by Sven Cumner, on Flickr |
| |
Last Edit: Jul 4, 2016 12:24:46 GMT by MrOtter
|
|
BT
Posted a lot
Posts: 1,772
|
|
|
|
|
I like it! I've followed your mini on various other forums it seems so look forward to watching this.
It's of great interest to me as coincidentally my dear old uncle has located the same model car in a garage in Chigwell, unused for 15 years and in a state of disrepair. I may have to call him and egg him on a bit, this is a model jag I've foolishly never paid much attention to.
|
| |
|
|
|
|
|
|
|
|
|
|
Nice car looks like your going to be busy with the welder and the tin snips
I have a series 3 xj12 lovely car I've had it for ever but it's been in storage for a couple of years now as it was starting to look sorry for it's self and it needs work
One day il bring it home and bring it back to life
|
| |
1992 240 Volvo T8
1955 Cadillac
1994 BMW E34 M5 (now sold )
1999 BMW E36 sport touring x2
1967 Hillman imp Californian "rally spec"
1971 VW bay window (work in progress)
1999 Mazda 323F
1987 Jaguar XJ12
All current
|
|
|
|
|
|
|
|
Always had a soft spot for one of these. Please upload a video once you get it running. Those front brake calipers looking very similar to mini brake calipers to me.
|
| |
|
|
MrOtter
West Midlands
"Your car is your story, so don't let someone else write the book." - Moog
Posts: 281
|
|
Oct 17, 2016 19:32:00 GMT
|
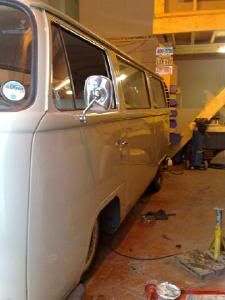
Earlier on, I said this... "I'll definitely make some good progress over the summer though, hopefully I can get it on the road before winter returns this year!" ... which turned out to be a bare-faced lie. As it so happened, my Citroen needed a bit more work than I anticipated, which took up my entire summer of evenings and weekends, and so I still haven't really touched the Jag. Sorry to disappoint you again... The other day I had a bit of a shuffle around of my cars and moved the Jag in to the garage where the Citroen was residing, as it made sense to have the non-working car more out of the way and not sitting on the driveway. I took a few pictures as I thought I could make a tiny update from the afternoons activities. So, moving a car around, how hard can it be? Well, quite hard it if won't roll. I remember it was a bit of a pig to push around when I got it delivered, but I couldn't get it to move at all now after it had sat for around 7 months (how has it been that long already?). Here we are with the cover removed and an interesting pattern of shadows on the side. 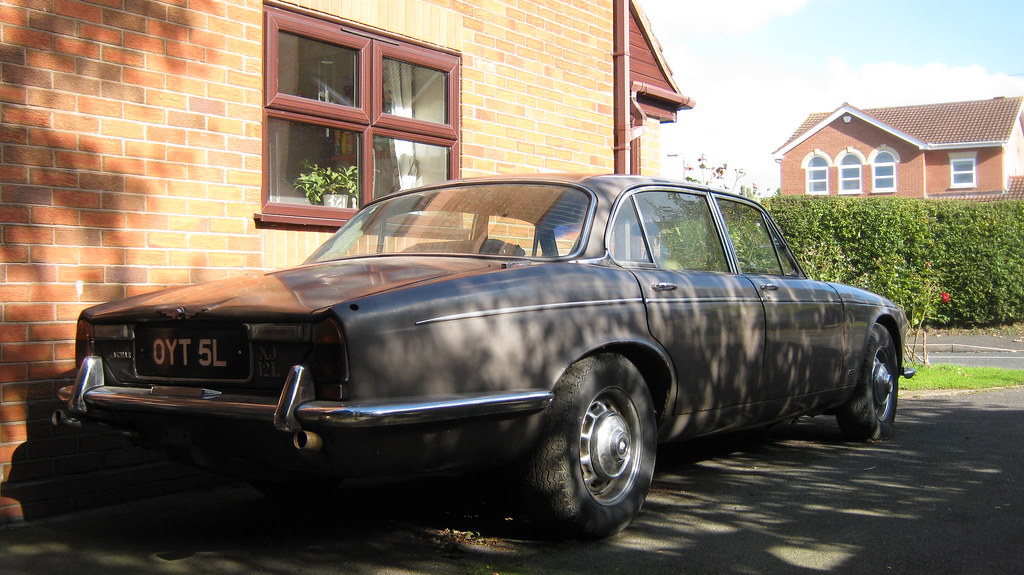 IMG_1014 IMG_1014 by Sven Cumner, on Flickr I thought that if it won't roll, I might as well jack up both ends of the car and try to get the wheels turning one at a time. First I went for the rear as I assumed this was the most likely candidate to seize up, with the handbrake being at this end. I'd left the handbrake off when I got the car in place 7 months ago, it's just been in "park" on the auto trans so it couldn't roll anywhere. So, I jacked up the rear, popped off the hubcap and got a breaker bar on the driveshaft nut. It took a bit to get it moving, it wasn't seized but just very stiff. A bit of wiggling backwards and forwards got it freed up okay, and I could also verify that the LSD was working because the opposite wheel was turning the same way as this wheel! This car would've had an LSD from the factory, I think it was a thing with the XJ12s. 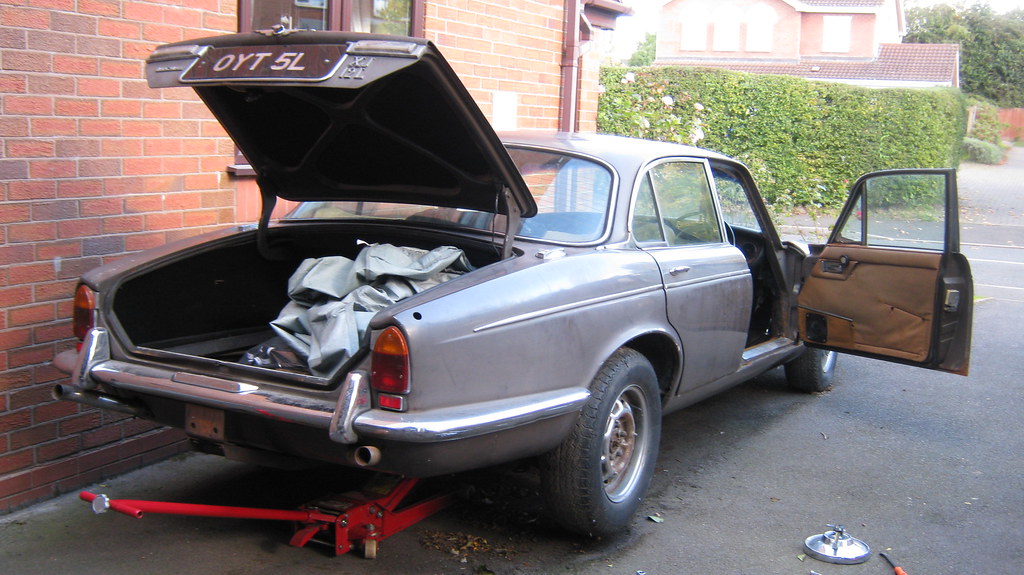 IMG_1015 IMG_1015 by Sven Cumner, on Flickr I put the back end down and then got the front up. The drivers wheel was nice and free and there was a bit of a bind on the passenger side, perhaps rust on the brake disc or maybe it's a bit warped, who knows... nothing to stop the car rolling anyway. 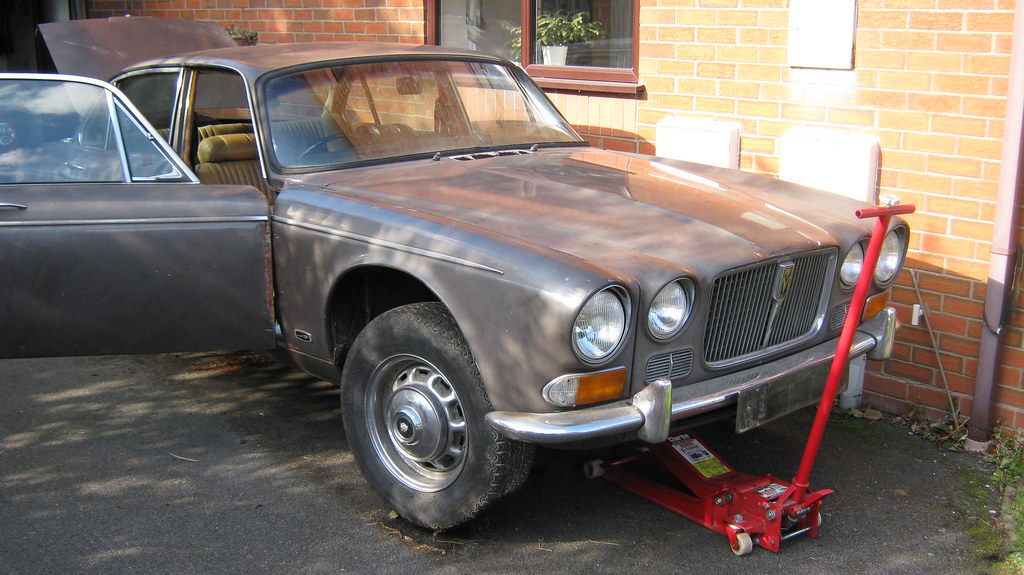 IMG_1016 IMG_1016 by Sven Cumner, on Flickr After that I got it back on the ground and got my old man to help me heave it around the driveway. It took a bit of shuffling but eventually we had it lined up just right to fit in the garage. This car is loooooong. We got it pushed right up against my air compressor workbench at the back, and I had to take the front bumper off to make it fit at the front. 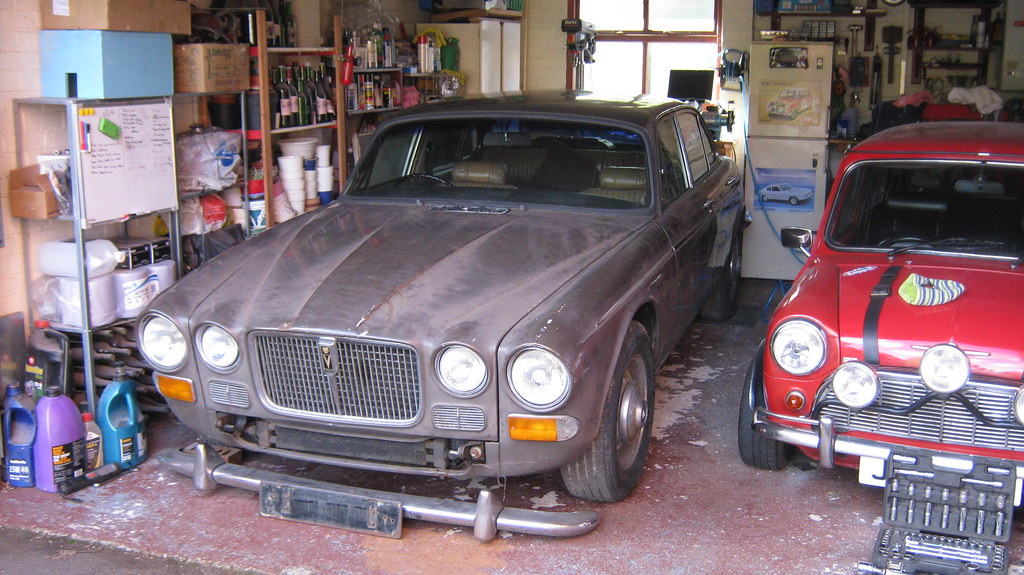 IMG_1017 IMG_1017 by Sven Cumner, on Flickr Rear over-riders jammed in to the bench. 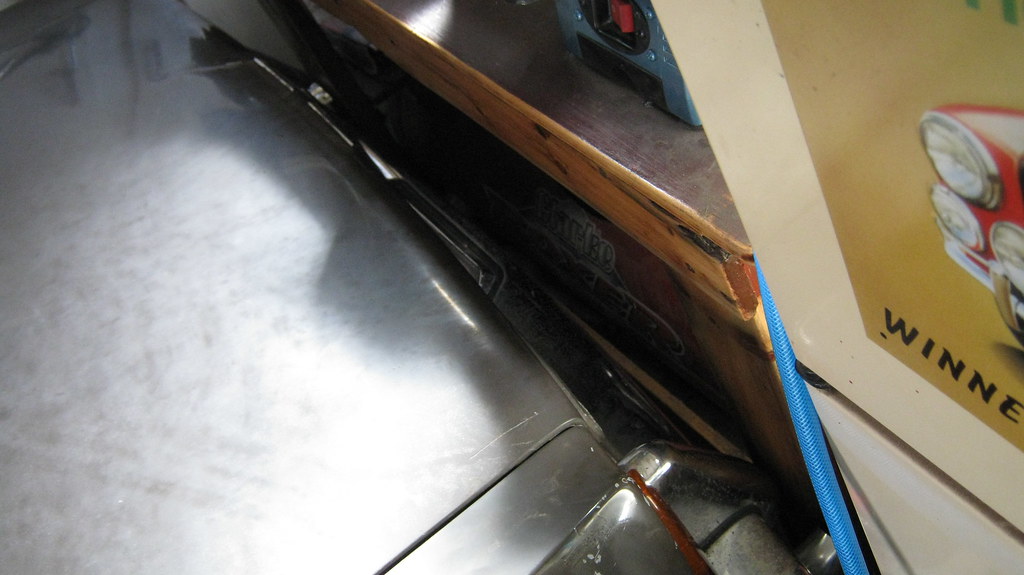 IMG_1018 IMG_1018 by Sven Cumner, on Flickr Bit tight up front, but we made it fit! 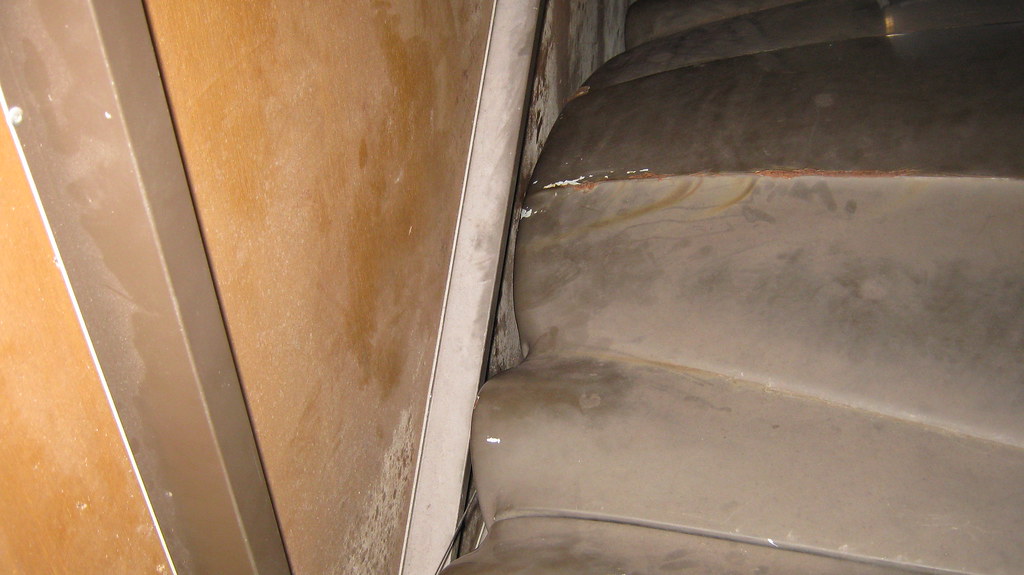 IMG_1019 IMG_1019 by Sven Cumner, on Flickr 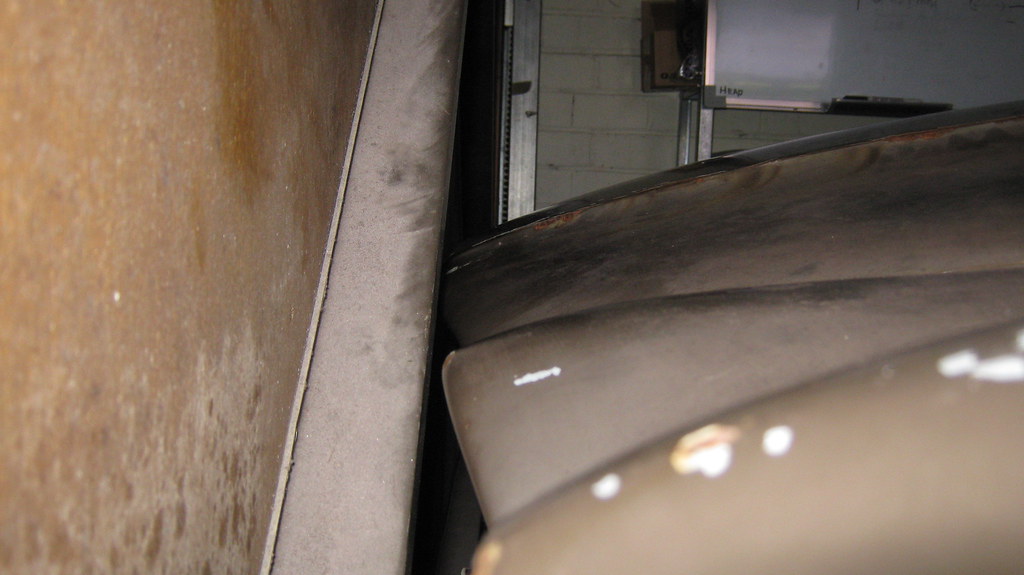 IMG_1020 IMG_1020 by Sven Cumner, on Flickr So, there we go, another update where nothing much has really happened. At least I know now that it's really easy to jack this thing up at both ends, and I know the front bumper nuts aren't rusty - that's something! |
| |
Last Edit: Oct 20, 2016 12:19:11 GMT by MrOtter
|
|
|
|
|
Oct 17, 2016 20:09:58 GMT
|
I love what you're doing - bringing unusual and unloved cars back on to the road. I am guessing that if you can do the Citroen, then this should be relatively straightforward...  Have always loved the Series 1 XJ12s so will be interested to see where this one takes you. Hopefully not to the bankruptcy hearing!  |
| |
|
|
|
|
|
Oct 17, 2016 22:33:54 GMT
|
|
Great find. Good luck with it. I had a '76 xj12 from 86-88. It was my daily , I was finishing my apprenticeship as a hgv mechanic and I ran it every day.I spent half my wages on fuel to go 3 miles to work and back! I had both tanks brimmed only twice in my ownership and ran out of fuel regularly!!
Rotten radius arm mounts finished it but the engine then went into another mint v12 shell and still lives today! (Unfortunately not with me!)
I look forward to progress.
|
| |
|
|
|
|
|
|
|
I'll be keeping an eye on this thread for updates. Love the car and it'll be nice to see this car back on the road soon, as I'm sure it will be.  |
| |
I have a Jaguar XJS - RARRGHH! She is called Lily, and she is my best friend! goo.gl/bT3ASP <-- video of her |
|
jonw
Part of things
Can open a Mouse with a File
Posts: 768
|
|
|
|
|
After the CX, I'm looking forward to this one.
I found it funny that Mazda did lamps, valves etc... but found this is nowt to do with Mazda cars, but a trademark used by GE.
|
| |
Suzuki SV650R The good
Triumph T20 The Bad
BMW G650GS The Ugly
Matchless G12CSR The Smokey
Toyota Hybrid One pint or Two?
Ingredients of this post
Spam
Drunken Rambling of author
Bad spelling
Drunken ramblings of inner voices
Occasional pointless comments
Vile beef trimming they won't even use in stock cubes
|
|
dubscum
Part of things
thats what i do
Posts: 531
|
|
|
|
|
oh my!
|
| |
whip it, into shape ........ go forward
|
|
smeden
Part of things
"Full throttle until you see God,then shift to second"
Posts: 356
|
|
Oct 28, 2016 10:13:40 GMT
|
|
I want it ;-) Nice find! When the time comes to start it then let her suck from a clean can of fuel! Your fuel tanks are bound to be full of dirt and water! The drains around the fuel filler caps get's full of muck. So the water runs into the tanks! Ask me how I know! lovly car! Good luck! Looking forward to following your progress ;-)
|
| |
Jaguar xj6 S1 swb manual
VW Bay Camper
Audi A3 1998 1.8
VW Beach Buggy (sold)
Ford Mondeo mrk I RS Celebration (written off)
Ford Escort Mrk II RS 2000 (rust in peace)
|
|
MrOtter
West Midlands
"Your car is your story, so don't let someone else write the book." - Moog
Posts: 281
|
|
May 27, 2017 15:45:42 GMT
|
Time for another bi-annual update! A couple of months back I decided to take a look at the passenger door that had been jammed in a slightly open position since I bought the car. Pressing the interior or exterior door handle did nothing to open the door so it was stuck in this position. 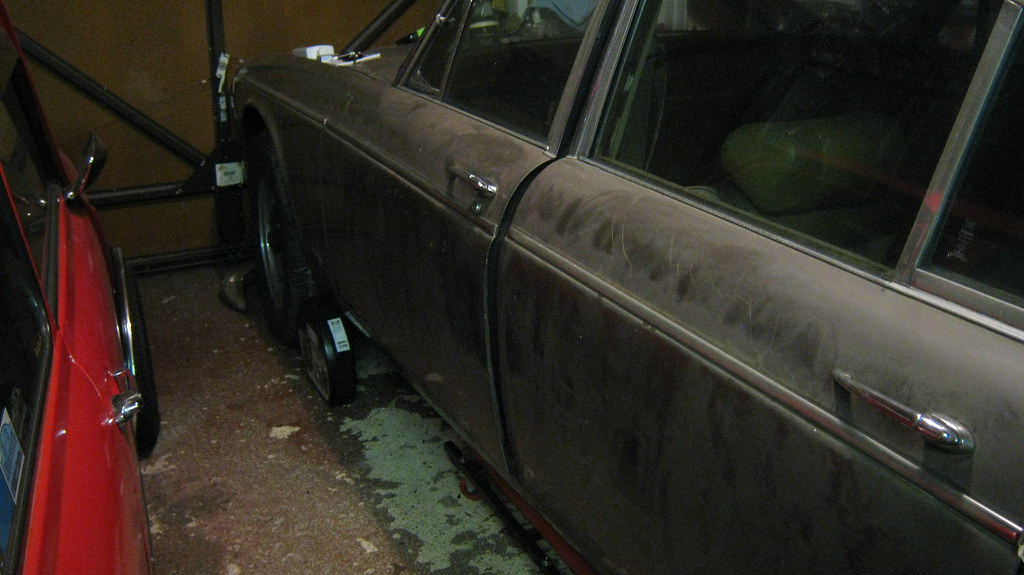 IMG_1077 IMG_1077 by Sven Cumner, on Flickr I found that the door was latched normally, but the latch assembly on the door was missing three of it's four mounting screws, meaning the door was slightly ajar. 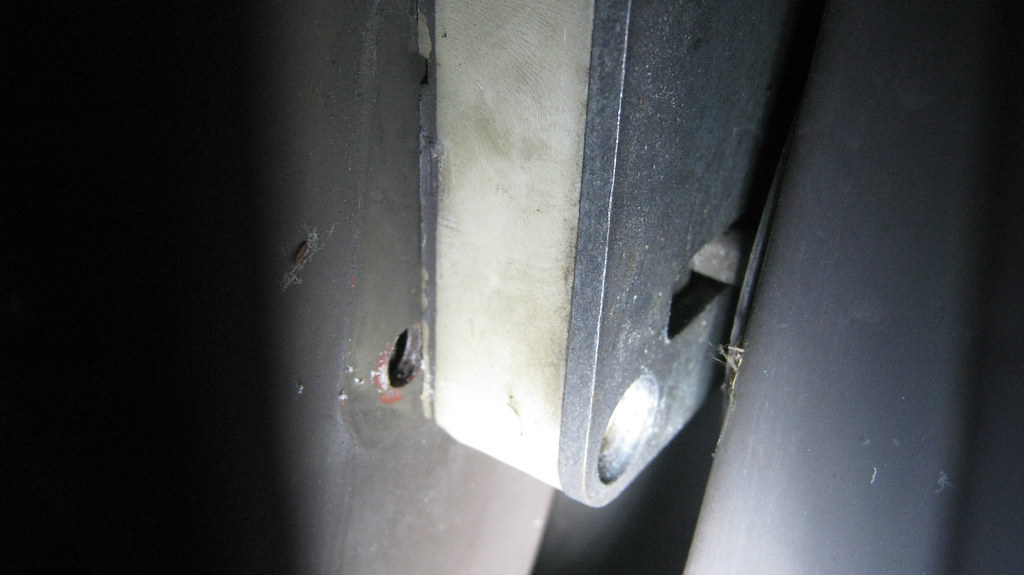 IMG_1079 IMG_1079 by Sven Cumner, on Flickr This was the view I had from the inside, after climbing in through the back. The passenger door card is missing along with the door pull and pocket (I think it's going to be difficult to find these parts when I need them, so if anyone knows of any for sale, let me know!). 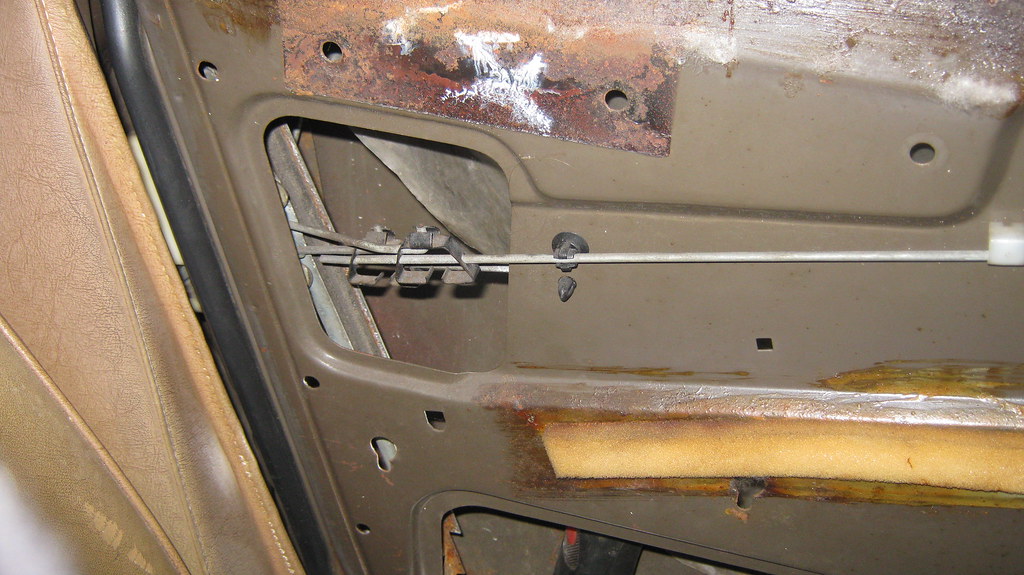 IMG_1080 IMG_1080 by Sven Cumner, on Flickr Here's a look up the inside of the door cavity. I found that the little shiny pin in the middle should have been engaged in to the U shaped lever floating up at the top here. 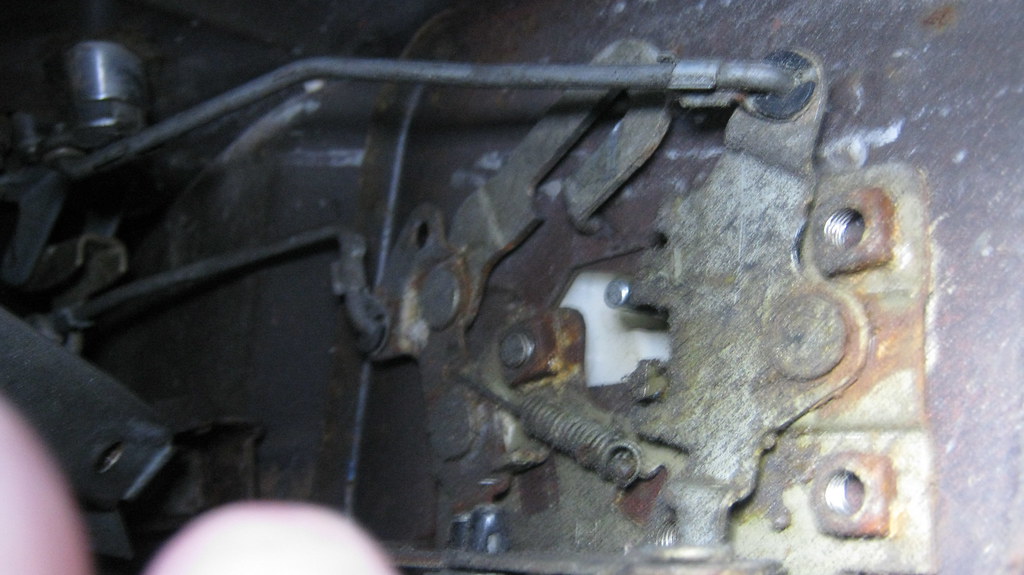 IMG_1082 IMG_1082 by Sven Cumner, on Flickr After popping things back in to place, the door opened straight up! 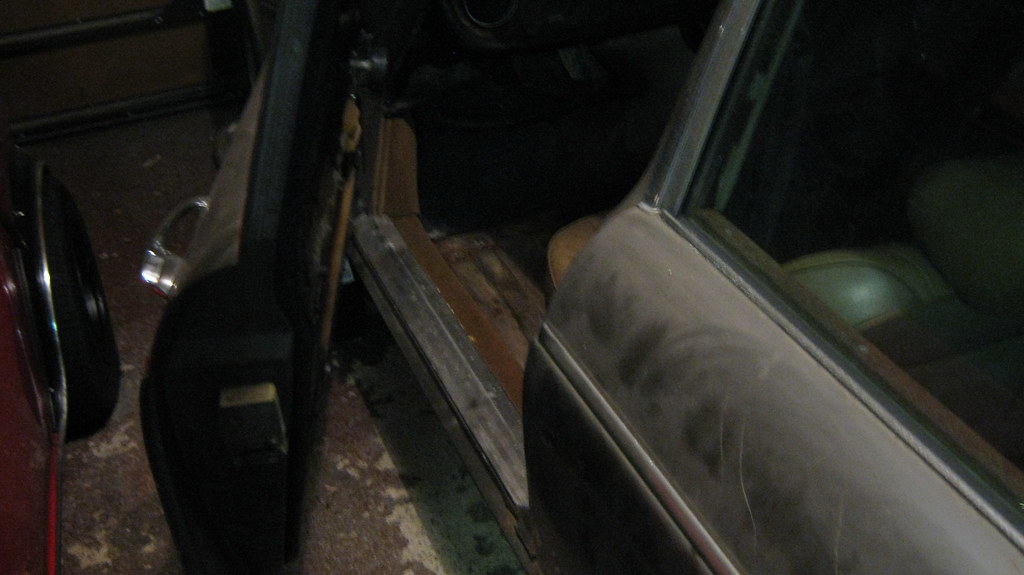 IMG_1085 IMG_1085 by Sven Cumner, on Flickr Then I just had to get some new machine screws to fit the latch assembly to the door. I'd forgotten the charm of working on an old British car - 1/4" UNF by 1 1/2" long countersunk pozi screws needed. I'd been used to M6, M8, etc for the past few years! I also learnt here, the hard way, that countersunk screws are length-measured over the whole screw, not just the threaded part - I initially bought some 1" long screws and found they were too short so had to order some longer ones! Got there in the end though. 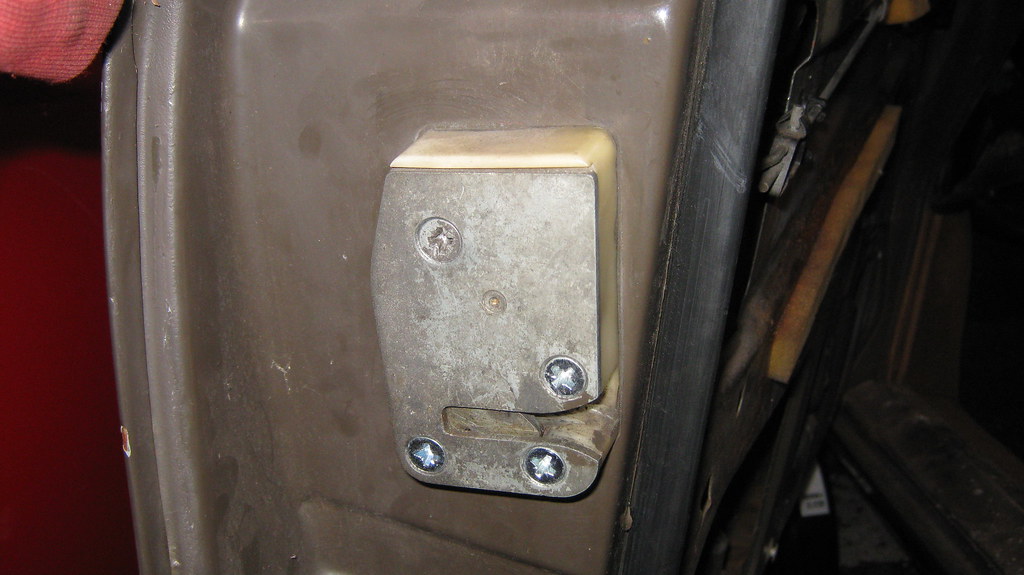 IMG_1087 IMG_1087 by Sven Cumner, on Flickr So now I have a fully functioning passenger door. It actually opens and closes *really* nice, very smooth with no squeaks and a very satisfying clunk. Lovely. 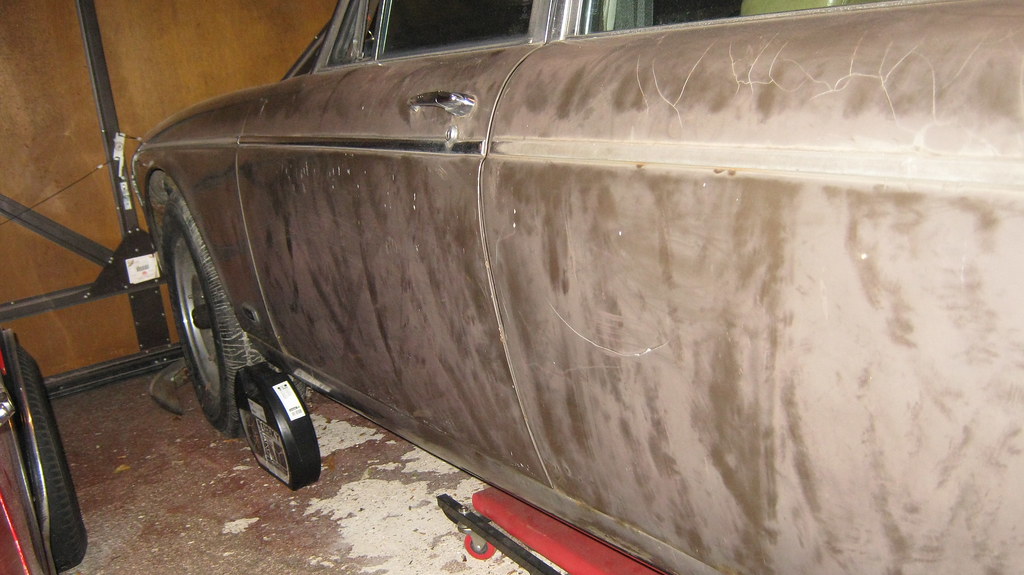 IMG_1088 IMG_1088 by Sven Cumner, on Flickr After the success of fixing the door mechanism, I decided that the first big thing I want to do with this car is get the engine running. To do that, I first need to find out if it'll even turn over (it's been sitting for 30+ years remember!). To do that, I needed to get the spark plugs out and try and get a breaker bar on the crank pulley. So, first things first, get the plugs out and soak the bores in oil. Let's get to it. 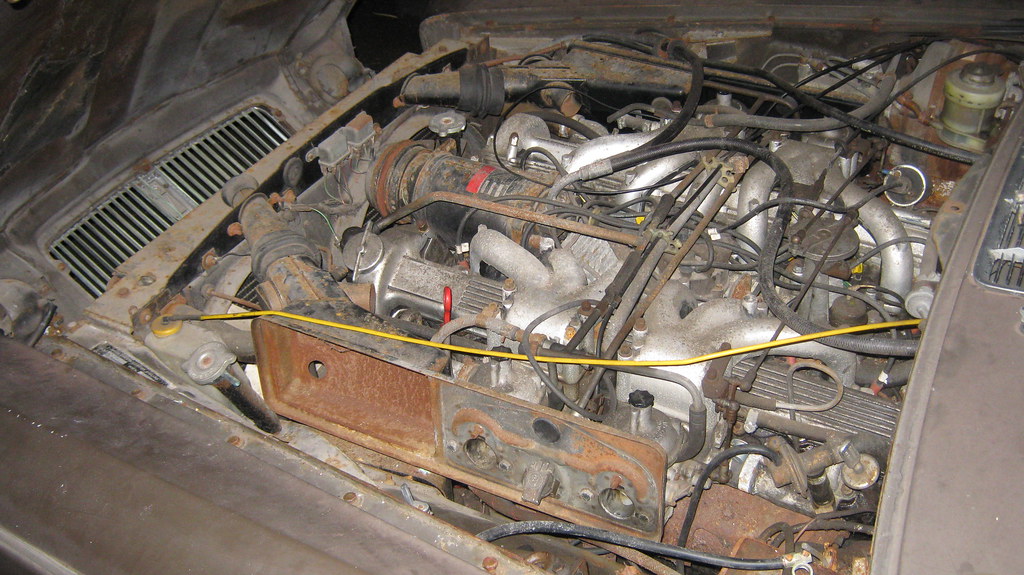 IMG_1090 IMG_1090 by Sven Cumner, on Flickr Right, first step, clean out the "valley" of the engine. There are leaves, snails, dirt, twigs, and all sorts sitting in here that I don't really want falling in to the plug holes and in to the engine. 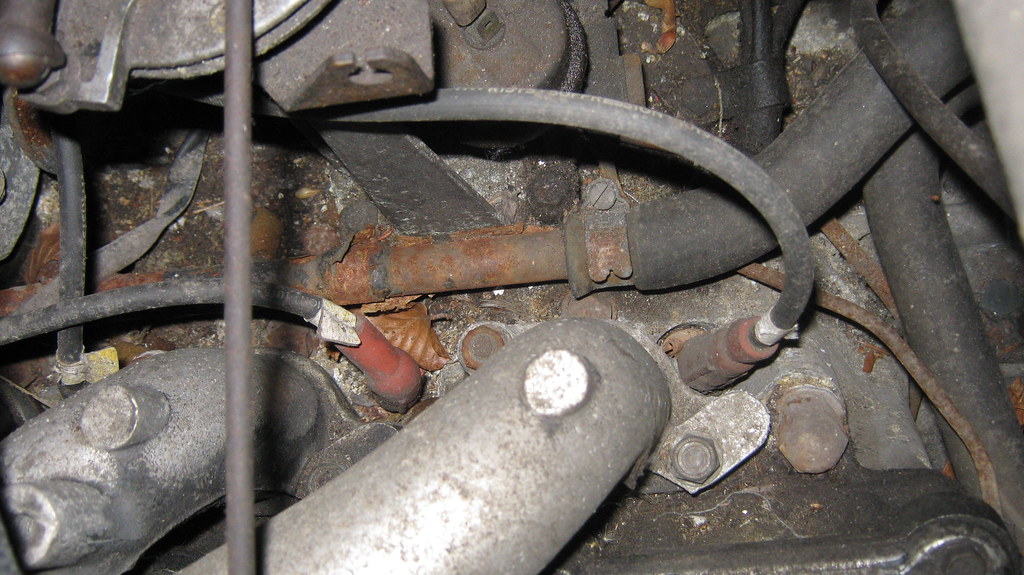 IMG_1091 IMG_1091 by Sven Cumner, on Flickr 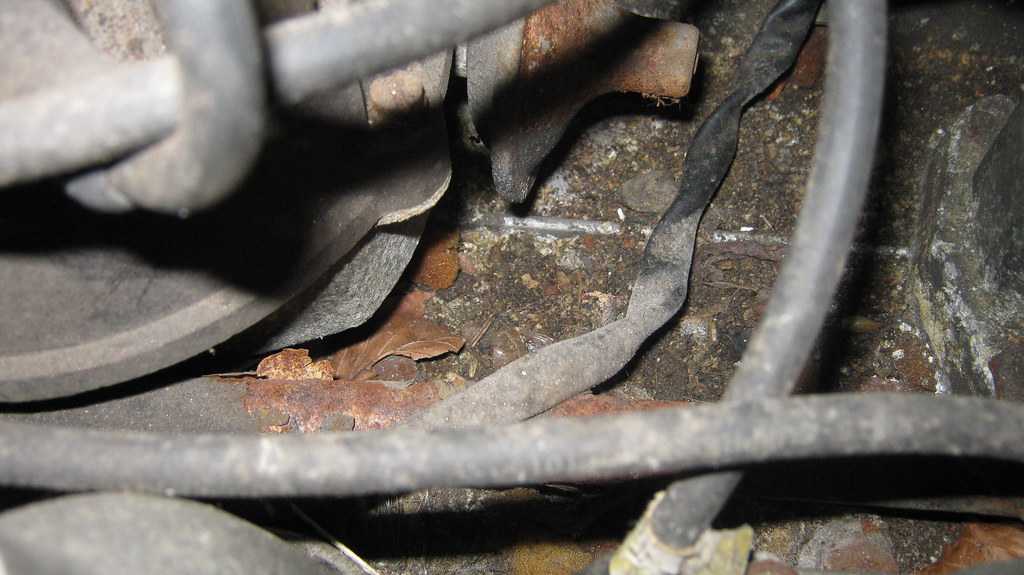 IMG_1092 IMG_1092 by Sven Cumner, on Flickr So I decided to first get the hoover out and suck up as much stuff as possible. Whilst I was there, I decided to clean up the rusty battery tray area. 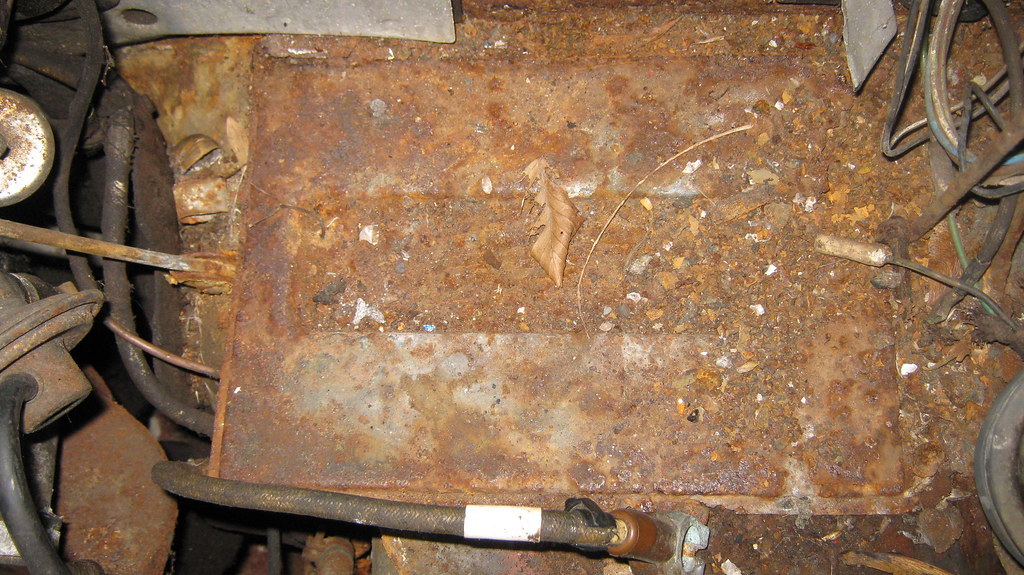 IMG_1093 IMG_1093 by Sven Cumner, on Flickr Then the battery tray fell off. 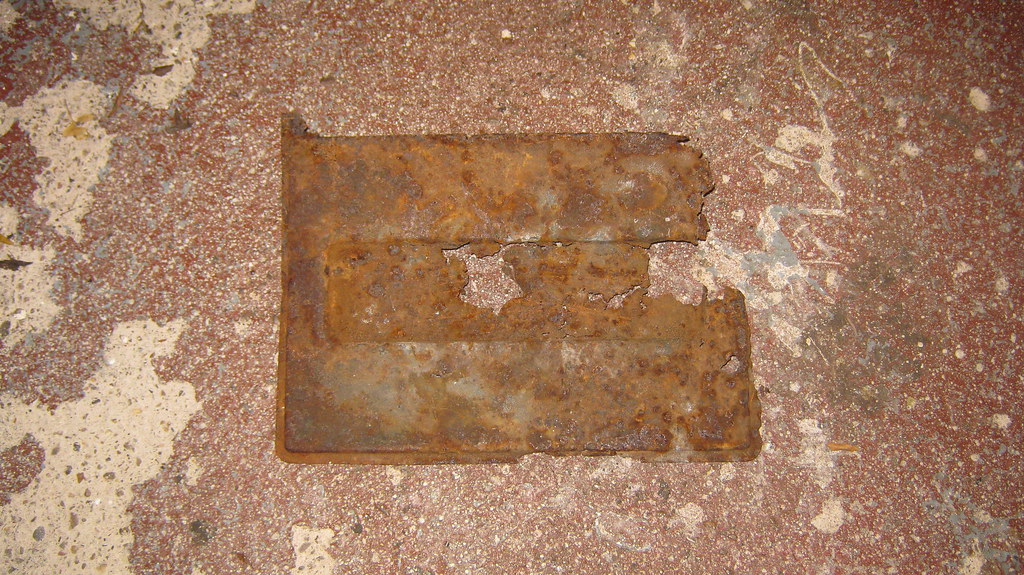 IMG_1094 IMG_1094 by Sven Cumner, on Flickr As did the bit of car beneath it. 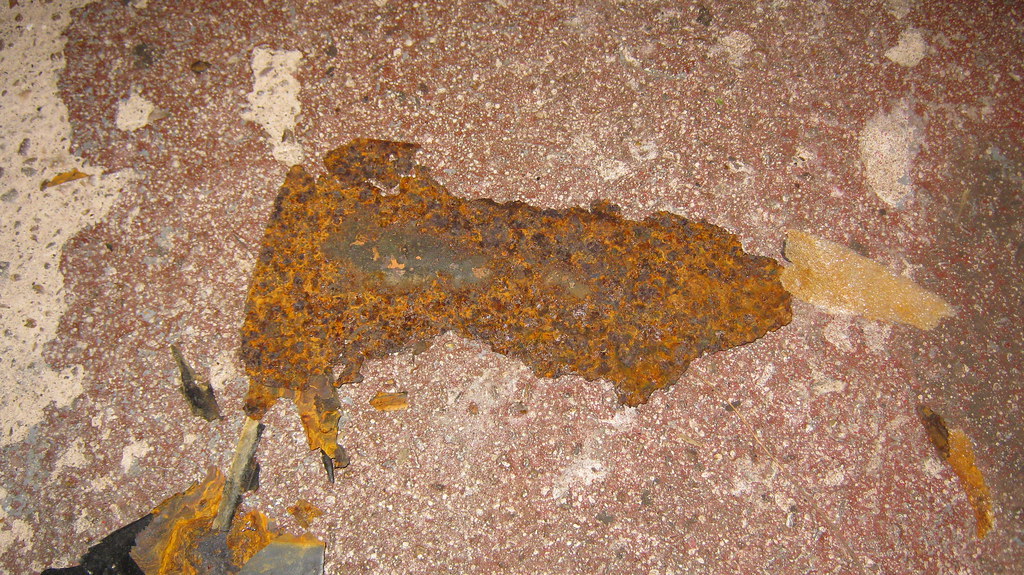 IMG_1095 IMG_1095 by Sven Cumner, on Flickr That's fabric tape stuff on the inside of the footwell. 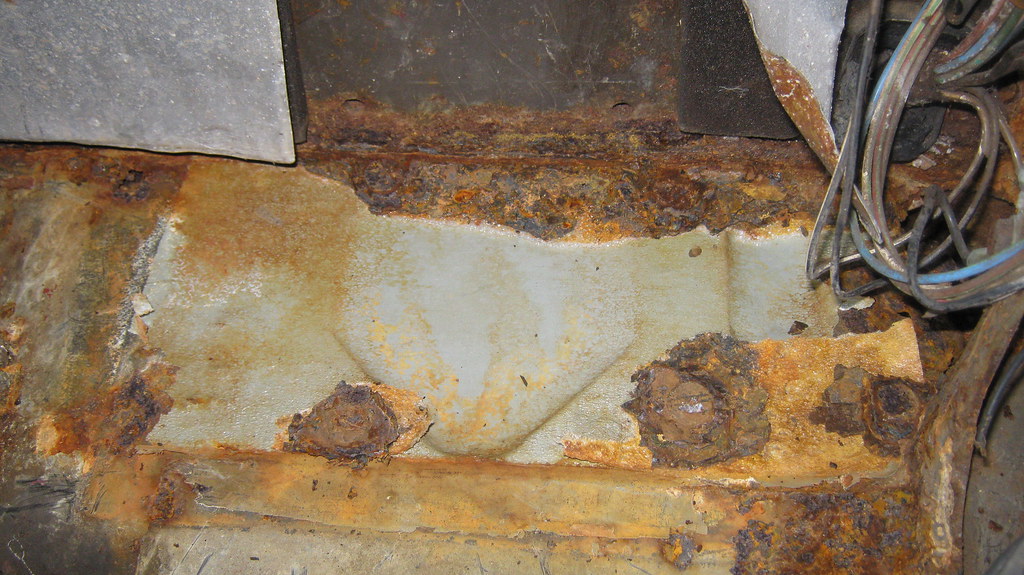 IMG_1096 IMG_1096 by Sven Cumner, on Flickr I then dropped a screwdriver through the inner wing. 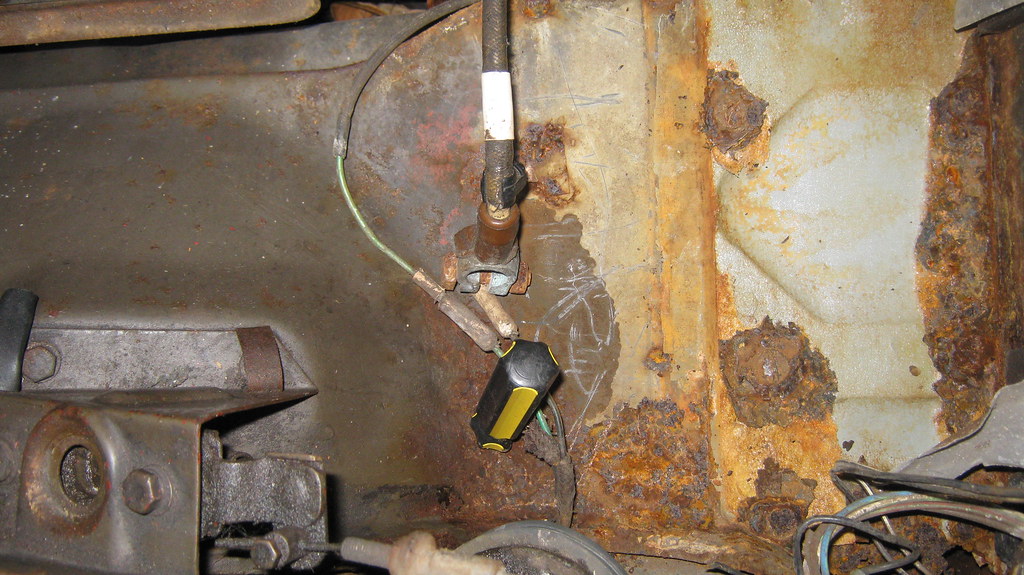 IMG_1098 IMG_1098 by Sven Cumner, on Flickr 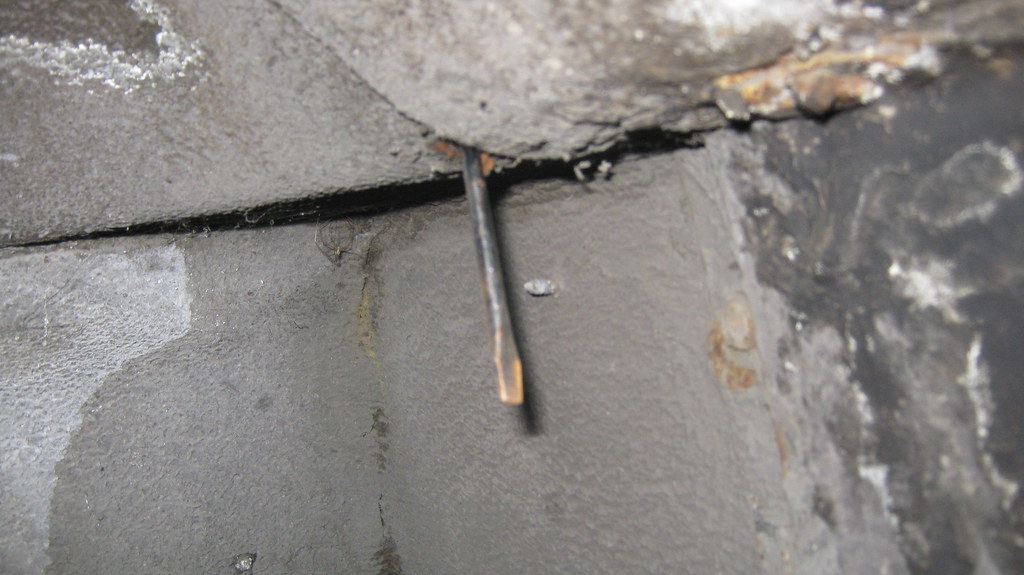 IMG_1099 IMG_1099 by Sven Cumner, on Flickr And found this in the corner. 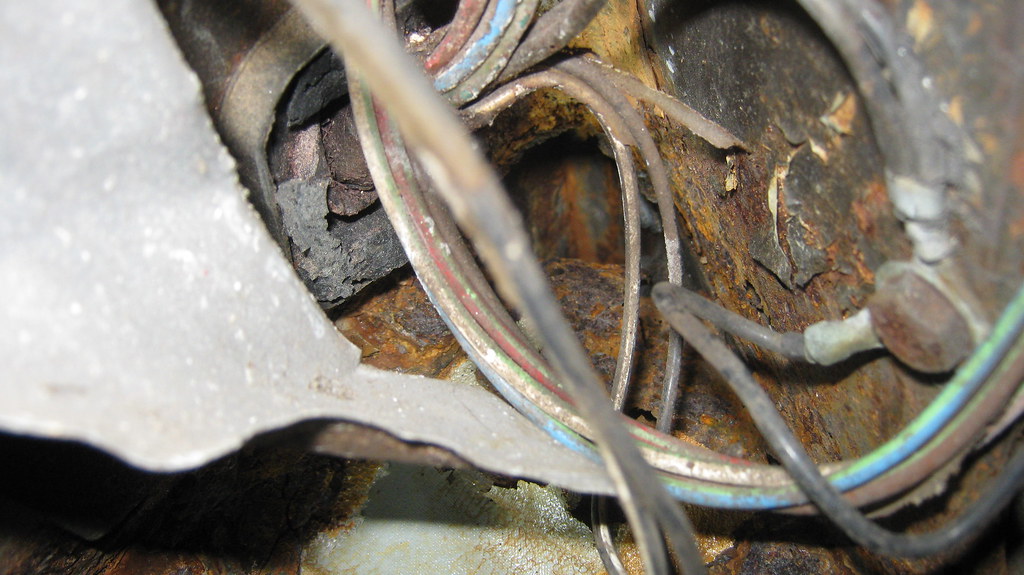 IMG_1097 IMG_1097 by Sven Cumner, on Flickr Okay then, so after poking some rust holes and hoovering up what I could, I pulled off the enormous distributor cap and HT leads.  IMG_1100 IMG_1100 by Sven Cumner, on Flickr 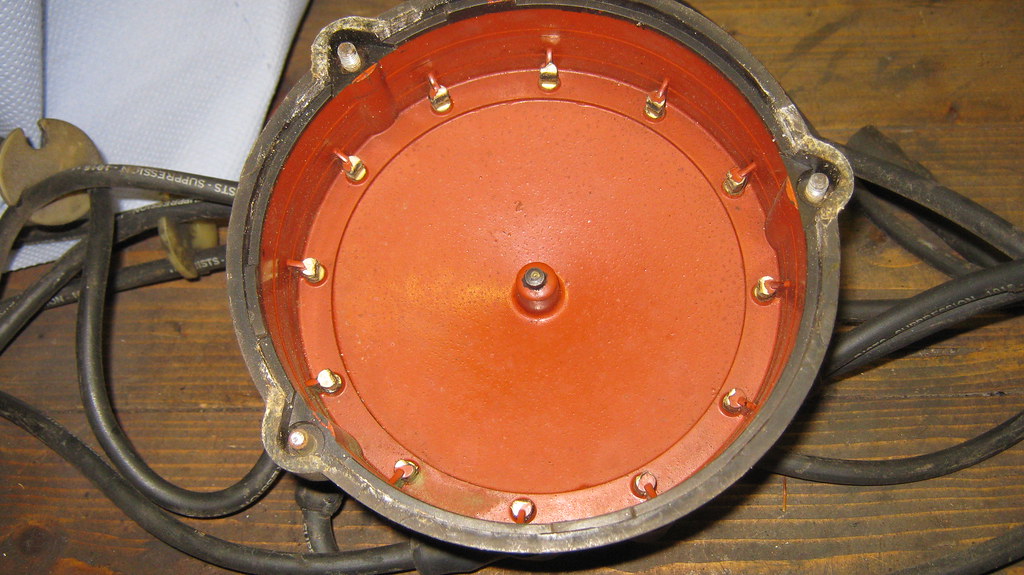 IMG_1101 IMG_1101 by Sven Cumner, on Flickr Think I might try and get a new distributor cap. 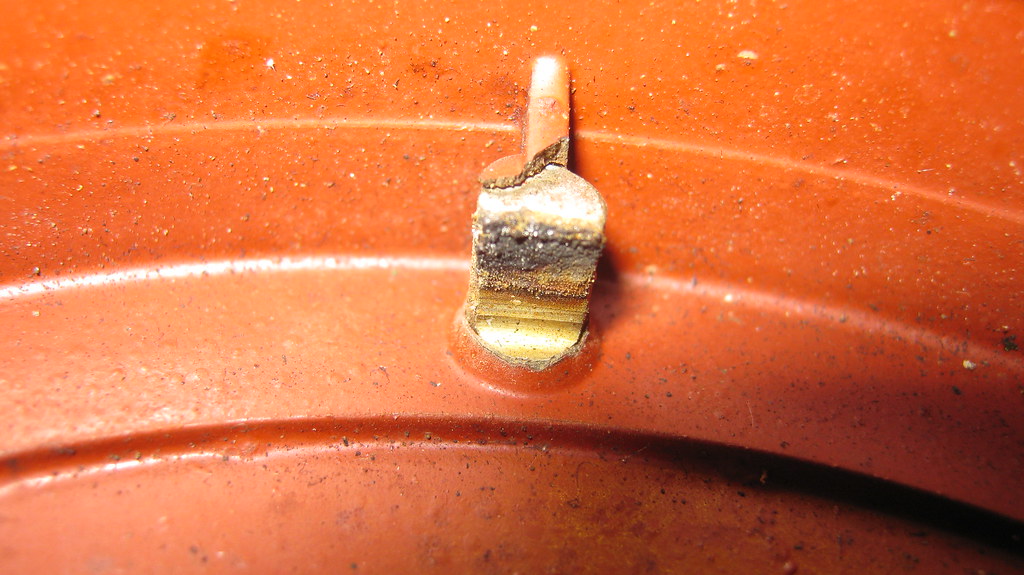 IMG_1102 IMG_1102 by Sven Cumner, on Flickr 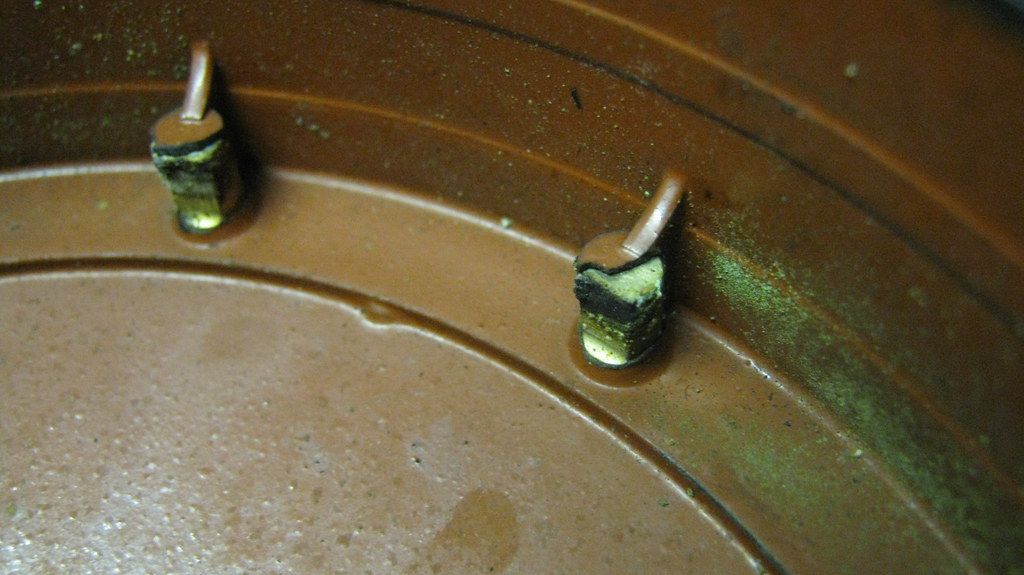 IMG_1105 IMG_1105 by Sven Cumner, on Flickr One of the three bolts holding the cap to the distributor snapped off. That'll be fun to fix later... 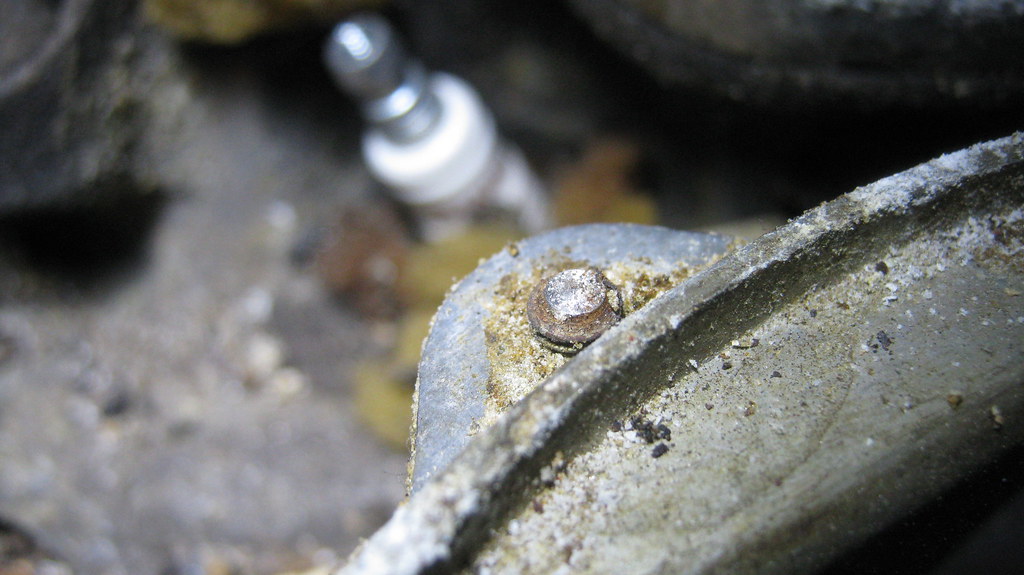 IMG_1106 IMG_1106 by Sven Cumner, on Flickr So, doing some more cleaning, I came across a disturbingly large portion of animal skeleton. 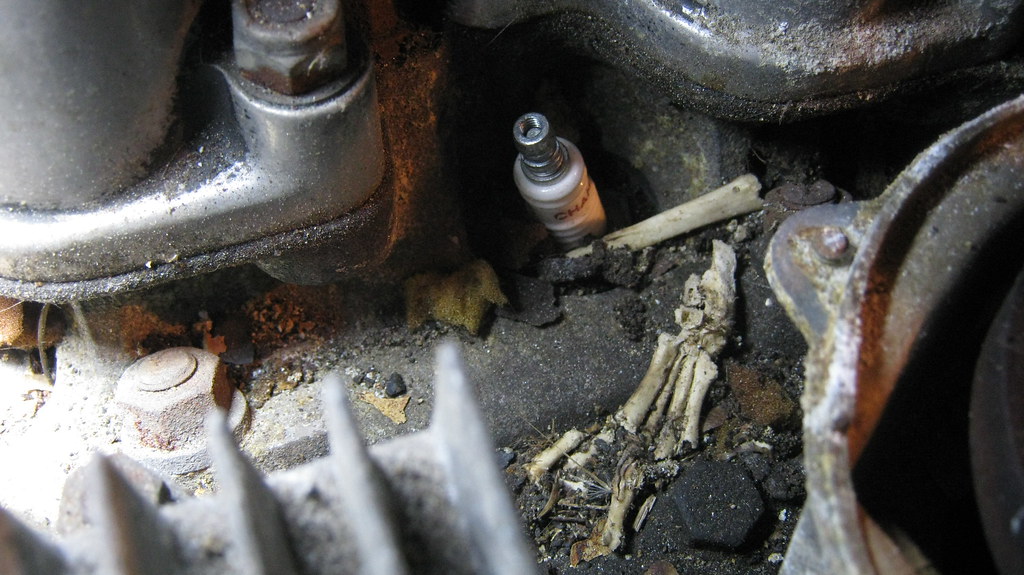 IMG_1107 IMG_1107 by Sven Cumner, on Flickr I have no idea what creature this is from, but I have no idea where the rest of it is! Looks like it could be an enormous rat foot? Your guess is as good as mine! 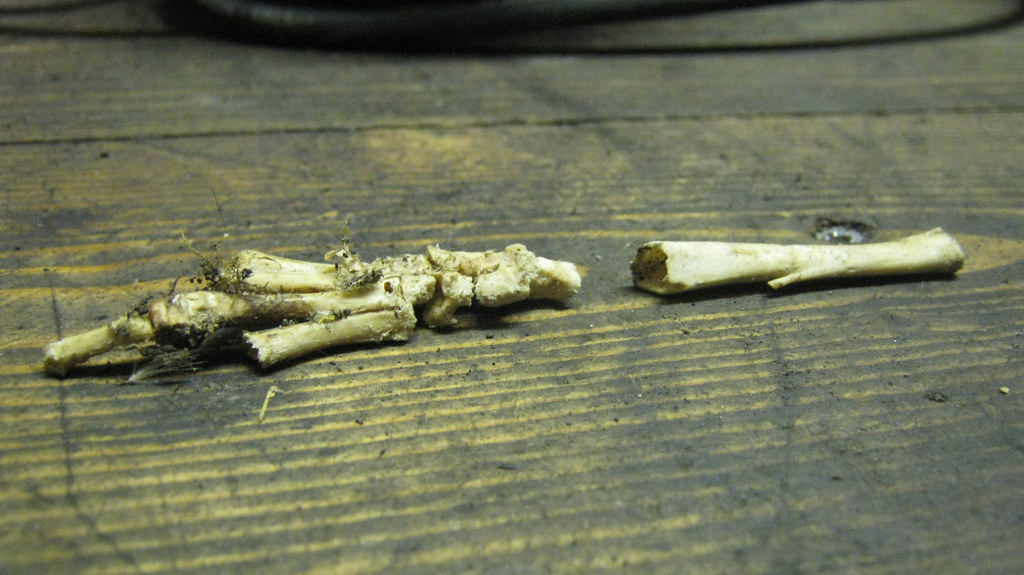 IMG_1108 IMG_1108 by Sven Cumner, on Flickr Back to the engine, this is the sort of detritus I had to clear out to get the plugs removed. Not sure what I would've done without compressed air! 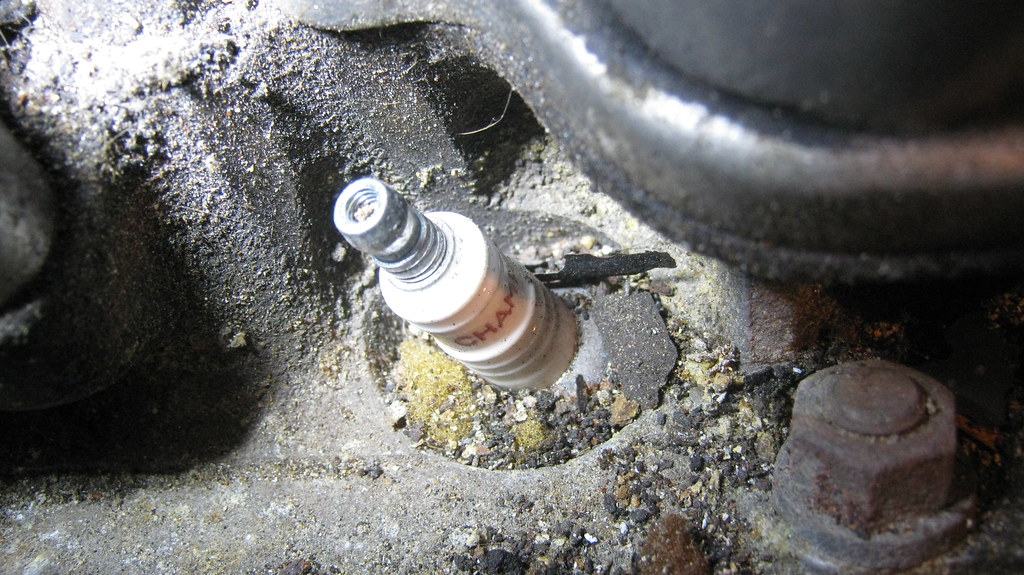 IMG_1110 IMG_1110 by Sven Cumner, on Flickr Aaaaand I'm afraid that's it for now. I did actually get all the plugs out and I poured oil in to all of the bores, but that was probably about 2 months ago now and I haven't touched it since. To get to the crank pulley I need to get the radiator out, and to make life easier I first want to remove the bonnet, so those are the next things on the list. Hopefully I'll get back on to this soon and update again in a few months probably! |
| |
|
|
|
|