logicaluk
Posted a lot
   Every days a school day round here
Posts: 1,373
|
|
Aug 28, 2017 21:30:39 GMT
|
sorry cord i must get arround to taking some pics but i just keep forgetting. std v frank  20170809_121710 20170809_121710 by logicaluk, on Flickr just a quick post to say i have finally, dealt with an issue that has had a black cloud over me for a few years now, i has got frank to run on the microsquirt, ignition only for now but plans are already a foot for some injection niceness, just have to make a new inlet manifold and mod the tank to take a high pressure pump. ill do a proper post on it later. dan |
| |
|
|
|
|
logicaluk
Posted a lot
   Every days a school day round here
Posts: 1,373
|
|
Sept 8, 2017 22:05:17 GMT
|
so the story of the microsquirt, 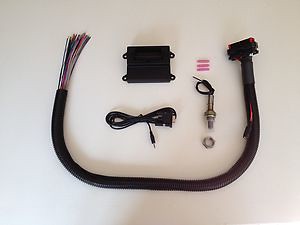 ms2v3_zpsf6bf5b59 ms2v3_zpsf6bf5b59 by logicaluk, on Flickr I bought it in 2013 ish along with an LC1 wideband controller 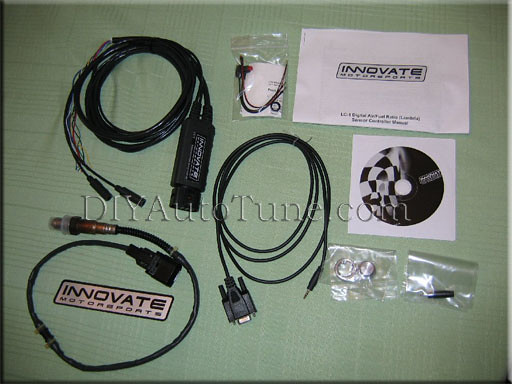 wb-lc1-3769_contents_zpsf3cfb30c wb-lc1-3769_contents_zpsf3cfb30c by logicaluk, on Flickr and a set of Yamaha r6 5sl throttle bodies. 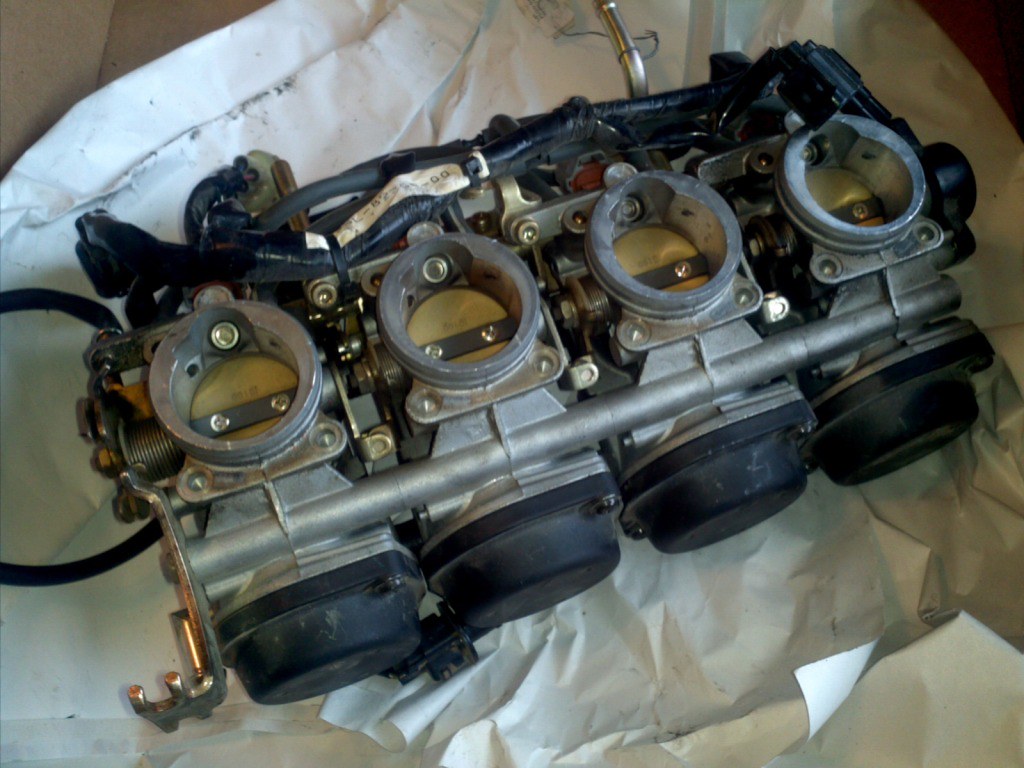 2013-04-17_16-23-29_158_zpsde6209b2 2013-04-17_16-23-29_158_zpsde6209b2 by logicaluk, on Flickr Having read the microsquirt manual many times and scraped around the workshop to see if had owt useful, i found a Saab water temp sensor and a rover manifold air temp sensor, relays, a fuse block, with the easy stuff found that left me with the crank sensor, trigger wheel and coilpack left to find. My biggest problem was the positioning of the crank sensor so that a, it doesn't have to be removed every time the fan belt gets changed and b, had a solid mounting. It seemed that most (almost everyone) people used a ford sensor so I found a second hand one and started playing around with it couldent do anything with it so bought another slightly larger one with different mounting hole and eventually i made a bracket that came off the water pump and timing belt cover. The trigger wheel was easy as it turned out my dad was rather good with cad and a short chat describing what i wanted and the next day an email with a drawing and the correct file to send to the laser cutter down the road at the bargain price of £25 for 2.  DSC_0565_zps6d08ec61 DSC_0565_zps6d08ec61 by logicaluk, on Flickr The coilpack again most people were using the ford coilpacks with ether EDIS or home made igniter circuits i opted for the latter but soon after i picked up a rarther nice GM coil pack, problem was I couldnt find much data on it.  vauxhallCOILPACK_zpsd7836827 vauxhallCOILPACK_zpsd7836827 by logicaluk, on Flickr so i built it with the igniter transistors in the bottom of the fuse box. this is the only pic i can find of the install on ginger with the fusebox located on the bulkhead and the coil temporarily relocated on the inner wing. 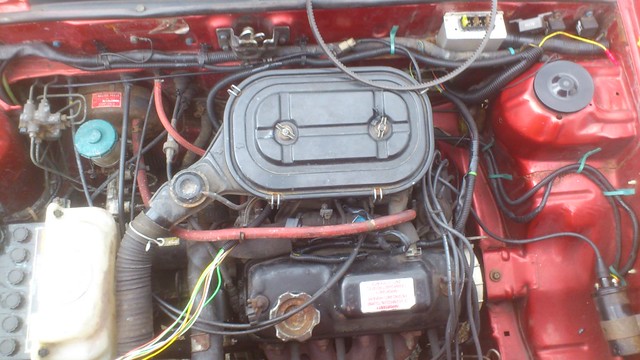 DSC_0555_zps36fb3f9f DSC_0555_zps36fb3f9f by logicaluk, on Flickr I got the microsquirt setup but could never get it to run properly, no steady ignition. then one day it stopped and i couldn't get it to work at all i spoke to the suppler and he suggested a different crank trigger and assured me there was no damage to the ecu its self, but by this stage my mental heath was deteriorating and i was headed for a bought of depression that saw me park up my car for a few years, unfortunately by the time i was ready to look at ginger again the rot was terminal and thats where Frank came in. |
| |
|
|
logicaluk
Posted a lot
   Every days a school day round here
Posts: 1,373
|
|
Sept 9, 2017 20:54:22 GMT
|
then last month I pulled this out of the box of shame and dared it to beat me again. 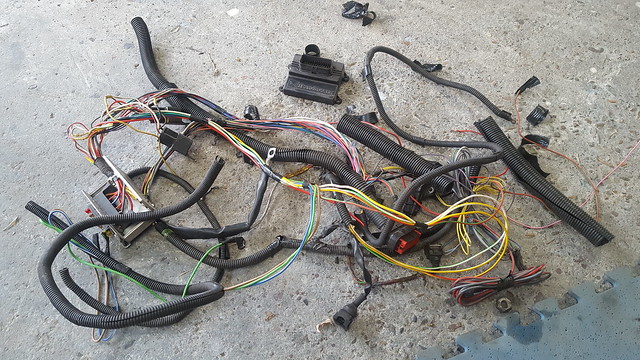 20170819_171050 20170819_171050 by logicaluk, on Flickr first job was to relook at the crank sensor as it was utter pants, lucky this time i had an engine sat on the floor and had spent many hours spent looking at crank sensors on eBay. I had found a Renault Clio sensor that looked good and was really cheap so £3.46 later a suitable bracket was manufactured. 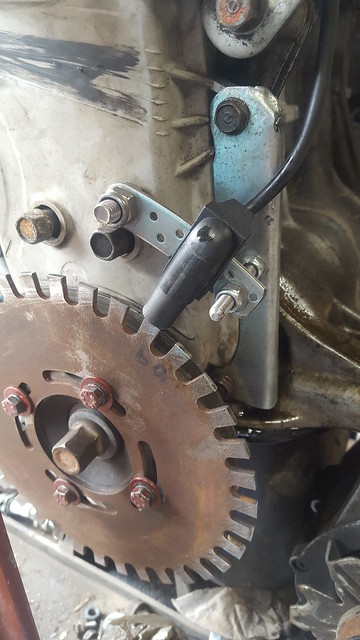 20170822_111151 20170822_111151 by logicaluk, on Flickr and then i had to readjust the tooth length of the trigger wheel which proved remarkably tricky, using the angle grinder whist cranking only served to make 33 off the 35 teeth the same length and 2 shorter, then marked up the teeth and tried on the bench grinder and finally finished off with the file and fitted it to the car. using the air con pipe cut out, i reworked the loom to put the fuses and relays inside the car, found a good place for the coilpack. 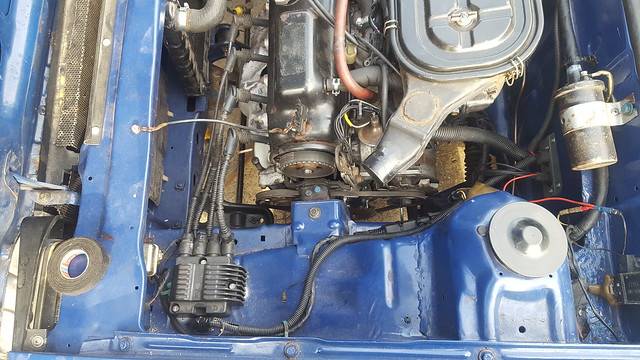 20170822_172830 20170822_172830 by logicaluk, on Flickr I flashed in the firmware and up loaded the settings but they didn't quite make sense but it seemed OK, but i couldn't get it to run properly sounded like a 2stroke bike when it did and then wouldn't, I was bashing my head against it for a while, thought it was the coil pack or the sensor but couldn't prove as the diagnostic and high speed logger was grayed out, so i turned to the support forum and found out i needed the ms2extra firmware to log the trigger, I flashed in the new and suddenly all the setting made sense, and it proved the trigger to be OK but the coilpack was rather hot and it has sh1t its self 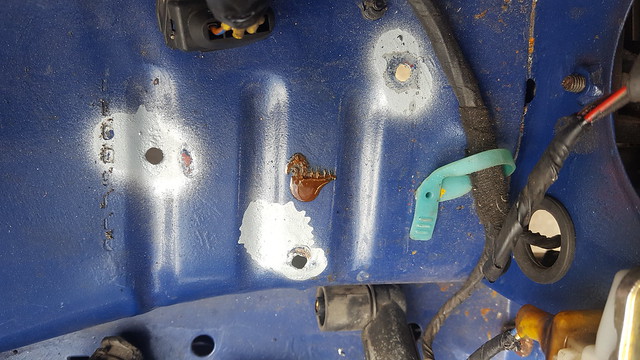 20170825_134640 20170825_134640 by logicaluk, on Flickr so i got frank running on the dizzy again and went to just vauxhall a local breakers and picked up another coilpack and leads for a £10. Frank fired up and idled on all cylinders. |
| |
|
|
logicaluk
Posted a lot
   Every days a school day round here
Posts: 1,373
|
|
Sept 10, 2017 20:39:46 GMT
|
Frank was running, not brilliantly but running. there's 2 ways to build an ignition map, let the MS software do it for you (the map it was running) or the way i had done it 5 years ago, take the dizzy specs and work that in to a table. i uploaded the dizzy map before going out to club triumph monthly meeting, frank drove very nicely, idled as well as any acclaim iv'e ever driven, as the traffic cleared i accelerated and it felt quite nice and pretty quick above 3500rpm very happy. i find the acclaim seats in standard cars very comfortable, but franks suspension is somewhat stiffer and i find my fat wabbling about due to the springiness in the seat base, so i stripped down a spare chair, 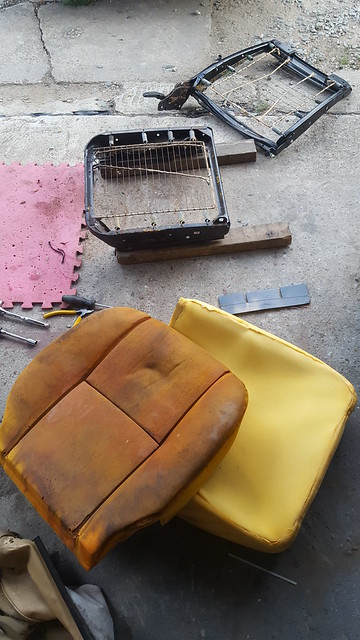 20170827_184617 20170827_184617 by logicaluk, on Flickr removed the sprung base and replaced it with a sheet of ally about 2 inches lower, and cut the foam to fit around the frame.  20170827_194527 20170827_194527 by logicaluk, on Flickr it worked quite well, but was too hard after the squish in the foam had compressed so i ordered the firmest inch thick foam a local upholstery firm had and fitted the seat base frame to franks backrest and original base foam, fitted it only to find its too high under the calf so its got to come back out for a rework. Good news is its much more supportive and my wobbly bits don't seem to as much. next job is to add a water temp sensor to the microsquirt. Dan |
| |
Last Edit: Sept 10, 2017 20:46:57 GMT by logicaluk
|
|
logicaluk
Posted a lot
   Every days a school day round here
Posts: 1,373
|
|
Sept 11, 2017 21:57:24 GMT
|
|
there is only one place to add a water temp sensor on the standard manifold and that's in place of the bleed nipple, not ideal but hey ho.
using the manifold i ported last year, i drilled out and tapped the M12 hole and filled the top flat for a good sealing surface, and completely forgot to take a pic.
I was tired when i reassembled it and it for some reason it frank wouldn't start and their was a coolant leak. so i went to bed and came back the next morning only to find id managed to put both gaskets on one side, so it was an easy fix.
i was looking at the vac take offs there all different sizes 1.35mm 2.3mm and 3.5mm and i know if you get them mixed up the car wont start, so what happens if i blocked them off, the one to the air diverter made no difference, but the biggest one to crankcase breather suddenly made the exhaust quieter and the afr to go off the rich side of the gauge (that's never happenes not even on full choke with extra fueling tweeks) so i put the carbs back to standard now the afr is 14.7 at idle and 12.2 at full throttle. I'm going to try to reintroduce the air leak to bring the ratio leaner.
Dan
|
| |
|
|
79cord
Posted a lot
  
Posts: 2,617
|
|
Sept 12, 2017 13:03:04 GMT
|
|
Really looking forward to the full fuel injection developments.
Glad to hear ignition heartache resolved.
|
| |
|
|
|
|
|
Sept 12, 2017 16:57:50 GMT
|
|
Good work so far Dan! Good work! The EFI and ignition is the right way to go.
|
| |
|
|
jonw
Part of things
  Can open a Mouse with a File
Posts: 768
|
|
Sept 13, 2017 10:45:14 GMT
|
|
IS the exhaust touching the body of the car anywhere? Had this on a mini and it caused the same symptoms (and headache).
|
| |
Suzuki SV650R The good
Triumph T20 The Bad
BMW G650GS The Ugly
Matchless G12CSR The Smokey
Toyota Hybrid One pint or Two?
Ingredients of this post
Spam
Drunken Rambling of author
Bad spelling
Drunken ramblings of inner voices
Occasional pointless comments
Vile beef trimming they won't even use in stock cubes
|
|
logicaluk
Posted a lot
   Every days a school day round here
Posts: 1,373
|
|
Sept 14, 2017 7:08:33 GMT
|
Really looking forward to the full fuel injection developments. Glad to hear ignition heartache resolved. Its a way off as i now have to support offspring at uni in londond. Good work so far Dan! Good work! The EFI and ignition is the right way to go. Makes such a difference, besides sitting in an old car tuning it with a laptop is defiantly the way to go. IS the exhaust touching the body of the car anywhere? Had this on a mini and it caused the same symptoms (and headache). Nope first thing i checked, thanks tho Dan |
| |
|
|
logicaluk
Posted a lot
   Every days a school day round here
Posts: 1,373
|
|
Oct 19, 2017 19:06:16 GMT
|
yes its been a while since i posted but I've been working a lot and driving the wheels off frank, having bags of fun when i wasn't. Also there is another project in the wings, one I've wanted to do for a while but not had the money or parts for but that's all for another thread, when i get around to it. so i pulled out the head i ported last year and found i only cleaned up an inlet and exhaust valve so i could do this. 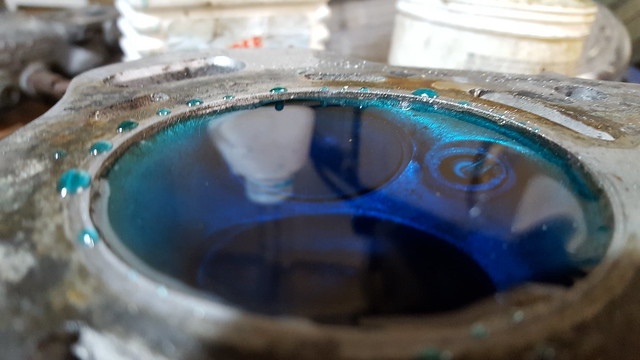 20161215_121526 20161215_121526 by logicaluk, on Flickr the rest of the valves looked like this 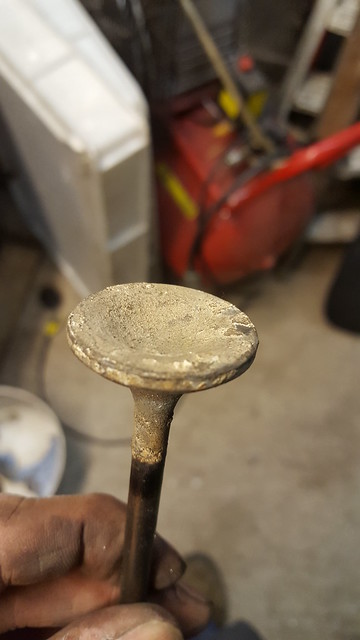 20171003_183511 20171003_183511 by logicaluk, on Flickr after a good going over on the wire wheel i loaded them up along with the head and a fly wheel, then popped down to genesis engines and had a chat with Pete the owner and decided to take a 1mm slice off the head taking the compression ratio from 8.4 up to between 9.5 & 10:1, do 3 angle valves and reduce the fly wheels mass from 7.5kgs to as close to 5.5kg as it was easily done, they managed just over 6kg, all that for less than £150 bargain. also they can cut a new key way in to the cam pulley if i need it to re-time the cam. a totally top company.  20171018_145433 20171018_145433 by logicaluk, on Flickr now do i build up a spare engine or just bolt it all on to frank. but of course there's one more part to add to the mix a re-profiled cam I've just got to find a good one to send off to Newman and save up a few pennys first. I had first refusal on a set of wheels and the looked great.  20171007_174110 20171007_174110 by logicaluk, on Flickr fitted lovely on the front but unfortunately 7Js are just to wide on the back, fouling on the coil-over and spacers would need arch mods so regrettably i had to pass on them. now as far as i know this is a world first, an acclaim with a rear anti roll bar. although there's mountings in the body shell one was never fitted,So after much searching the scrap yard an 18mm rover 45 rear ARB was selected that turned out to be the easy bit. working out the linkage has taken many, many hours of work and turned up a complete and utter blank. So I had to make my own. 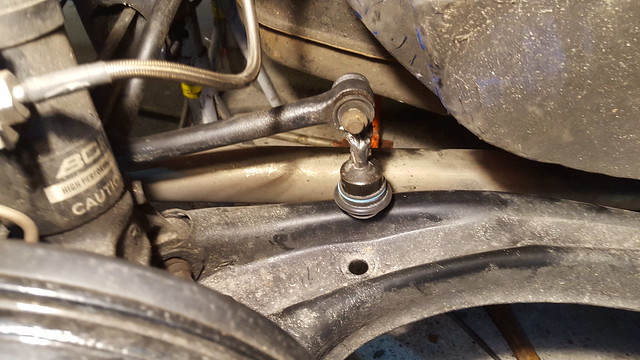 20171015_173300 20171015_173300 by logicaluk, on Flickr i did a quick trip around the block and it felt very different i also adjusted the damper settings. I also tryed to addressed another problem at 60+ the steering feels very light, i had bought a mk1 golf CL front lip ages ago and not done owt with it so that was reworked to fit. I'm not super happy with the way it looks but if it dose the job it will do for now.  20171019_163434 20171019_163434 by logicaluk, on Flickr and that brings us up todate. I look fwd to any comments. Dan |
| |
|
|
|
|
|
|
83 Triumph Acclaim Sprintjohnthesparky
@johnthesparky
Club Retro Rides Member 6
|
Oct 19, 2017 21:06:29 GMT
|
|
Those 5 spokes looked good!
Is it the width or the offset that causes the problems?
Looking good though and good to hear the miles are being done
|
| |
|
|
logicaluk
Posted a lot
   Every days a school day round here
Posts: 1,373
|
|
Oct 19, 2017 21:15:50 GMT
|
|
Thanks john, the 5 spokes were to wide, i could have put streched tyers on but thats not me. I suppose i could have used a shorter spring to move the spring seat out of the way.
Just been out for drive and the ARB has certainly flattened the car out in tbe corners and its improved the turn in. Think theres alot more suspension tweeking left to do yet.
The front spoiler has certainly improved the high speed handling but poping the bonnet works much better so a raised bonnet latch will be on the cards next.
Dan
|
| |
Last Edit: Oct 19, 2017 21:21:51 GMT by logicaluk
|
|
vulgalour
Club Retro Rides Member
Posts: 7,286
Club RR Member Number: 146
|
83 Triumph Acclaim Sprintvulgalour
@vulgalour
Club Retro Rides Member 146
|
|
|
|
Such a shame those five spokes were troublesome at the rear, they looked fantastic on the car. It's like you want staggered wheels the opposite way to usual on this with narrower ones on the back to keep everything clear.
It's great seeing someone actually doing something with an Acclaim, they've forever been looked over in favour of other cars but they've always had the potential to be something fun.
|
| |
|
|
logicaluk
Posted a lot
   Every days a school day round here
Posts: 1,373
|
|
|
|
Such a shame those five spokes were troublesome at the rear, they looked fantastic on the car. It's like you want staggered wheels the opposite way to usual on this with narrower ones on the back to keep everything clear. It's great seeing someone actually doing something with an Acclaim, they've forever been looked over in favour of other cars but they've always had the potential to be something fun. I'll have to refurb my 5 spoke 16" alloys soon. Its definitely fun. Dan |
| |
|
|
79cord
Posted a lot
  
Posts: 2,617
|
|
|
|
|
Congratulations upon the anti-roll bar, sound like you were able to find a perfect fit for the mounting points you found in a rather tightly packaged area, & probably more substantial than that fitted to the contemporary Prelude or Civic hatch, besides Acclaims greater weight bias towards the rear to improve balance.
Surprised how square the Golf air-dam suddenly looks upon the Acclaim. Further shape tweaking possible?
Will be very interesting to see the shock value of the 16"s & their new paint scheme for attracting & polarizing opinions.
|
| |
Last Edit: Oct 20, 2017 9:21:26 GMT by 79cord
|
|
logicaluk
Posted a lot
   Every days a school day round here
Posts: 1,373
|
|
Oct 20, 2017 20:28:44 GMT
|
|
Its definitely tight around there.
Don't know how much difference there is in the weight, the "chassis" extensions are quite obvious under the boot floor. But the tailgate must weigh a lot more than the boot lid and rear screen.
|
| |
|
|
logicaluk
Posted a lot
   Every days a school day round here
Posts: 1,373
|
|
Nov 26, 2017 23:01:48 GMT
|
|
Right then let's give you few who are following this an update
Since I fitted the ARB I've been tweaking rear damper settings, I loned the car out to a mate for a couple of days who set them far softer than I would have done but the car handled much better and now had the best ride comfort I've had since I built the car, but the steering felt dead around the centre and with minor steering inputs, if you turned in it felt nice if a little slow to turn in.
When I had the car originally set up on the laser alignment kit at local garage we had about 21 minutes of toe in on the rear passanger wheel that we couldn't adjust out.i had intended to shim it but there was no room, so I shaved a bit off one of the bushes to correct it but I didn't know how much I had chaned it, so I took it over to my mate Miks place one evening. We found that I taken it from 21" down to 10" so how come the angry grinder and took it down to 0".
Then we checked the front suspension, one of the lock rings on the height adjustment had come undone and gained 12 mm of ride height so after winding it back down and re checking we found 10" of toe out on the front, this was probably from tweeking the ride hight to set the front radius arms level, so we took a quarter of a turn out of each side taking it to zero toe, this made the car much nicer to drive turn turn in was more responsive and losed the dead feeling.
Major win. Next handling mod will be playing with tyer pressures.
Then there is the other issue that has plagued me since I built the car the noise from the exhaust, inside the car it's loud at best and ear bleeding from about 3000 RPM through to 4500 RPM, as I was taking the car out for a drive with some friends at the weekend I decided it needed looking at.
With out pics this may get a bit confusing but here we go.
The motorbike can i have on tbe back has a 3.5 inch opening which is matched by the flange and the pipe opens up to it, i e 2inch pipe flares out to 3.5.
up till now ive tryed a few things to quieten it down, I've had a 2inch baffle plate in there and it made no difference at all. then i tryed a cone that went from 2.5 inch down to 1.5 mounted in the same place this was a little quieter but not much so after removing it i then made a 1.5inch baffle plug to go in the exhaust tip that made it alot quieter but its strangled the top end and my afr has richened. Strange seeing as the same size restriction on the opposite side of the silencer made almost no difference.
Food for thort.
Not sure how I'm going to move forward apart from buying another tin of gun gum.
Dan
|
| |
Last Edit: Nov 26, 2017 23:16:49 GMT by logicaluk
|
|
logicaluk
Posted a lot
   Every days a school day round here
Posts: 1,373
|
|
|
|
|
Wow didnt realise it had been that long since i updated .
So after trying 2 diffrent baffles before the silencer i then made a plug that bought the tail pipe down to 1.5 inch and it was a bit quieter but also made a noticeable diffrence to the performance so it didnt last long, but thanks to this awsome forum i found out a bout a helm holtz resenator (basicly think of blowing across the top of a bottle if you can tune the frequency right it will cancel out the worst of the resonation) and down loaded frequency analyser so i could make the calculations to build one, but the new head was waiting to go on and that might change the frequency so next job change the head, off with its head, PIC. This head gasket was obviously dedicated to its job and had no intention of parting from the block, 3 evenings of scraping and soaking in between with penetrating oil but eventually it all came off. Upon closer inspection the cam was quite worn so this was swaped out for a good one and all went back together as smooth as a gravey sandwich, (well apart from installing the cam gear backwards and losing the woodruff key) it Started as soon as the fuel bowls were full, but i couldn't get it to idle below 1000rpm, checked throttle stop screw wasnt touching, accellerator cable had plenty of slack, so pull the carbs off and sync them on the bench, set the idle air screws to 2 turns off the stop and the idle stop screw 1/2 turn and refitted them, we now have an idle of 750 yay.
The first thing i didn't notice was the exhaust. I plugged the laptop in so i could see the revs and the wideband 02 sensor output, and upload a new ignition map, whilst doing that I noticed the map sensor wasnt reading what i was expected it dropped off very steeply as throttle was applyed, it was atrached to the take off on the bottom of the carb so i moved it over to the manifold take off, revs dropped and the car died, abit more idle speed and upon starting it up it was soo quiet i couldent belive how quiet it was, i ended up with the idle air screws all the way in, now it idles at 500rpm and is so quiet i have to strain to hear it and its more torquy but best of all it will cruse on the motorway and not make my ears bleed.
Dan
|
| |
Last Edit: Feb 7, 2018 21:48:30 GMT by logicaluk
|
|
79cord
Posted a lot
  
Posts: 2,617
|
|
|
|
|
Glad to hear the tuning & fettling of the fuel & ignition systems have transformed it so successfully, with worked over new head for performance too. Exhaust system experiments sound interesting too.
|
| |
Last Edit: Feb 8, 2018 4:57:00 GMT by 79cord
|
|
logicaluk
Posted a lot
   Every days a school day round here
Posts: 1,373
|
|
|
|
ok another long over due update, huge steps forward have been taken but there was alot of ducks getting lined up first. the ball started rolling with a gasket and a visit to campbell engineering in hull who cut me 4 flanges from 12mm stainless steel from the gasket. 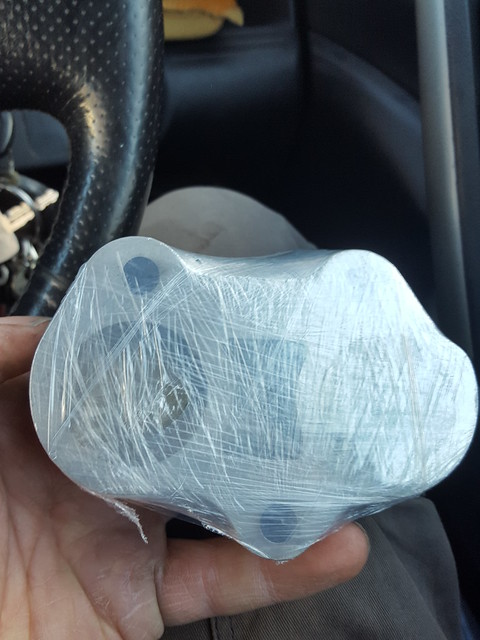 20180131_125046 20180131_125046 by logicaluk, on Flickr I cut and built up the manifold and again got someone who actualy could tig tacked it and then welded it all together for me. 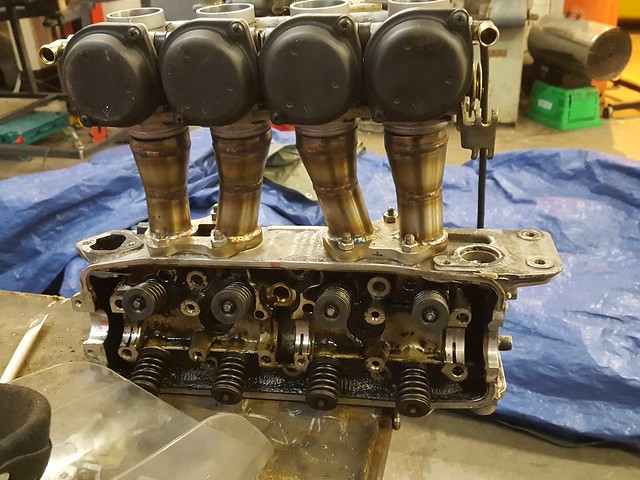 20180212_164838 20180212_164838 by logicaluk, on Flickr 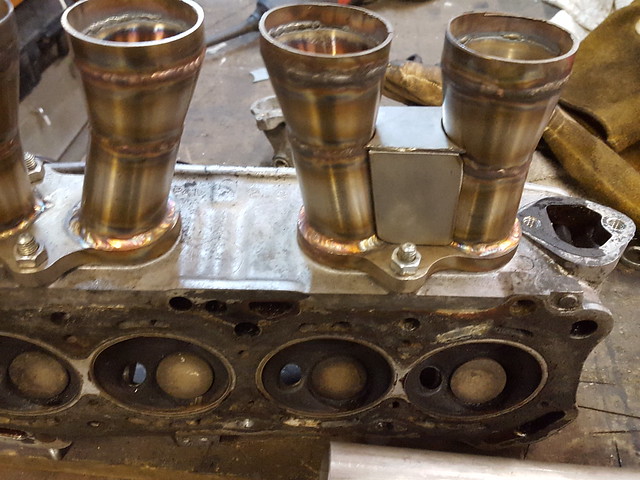 20180213_164658 20180213_164658 by logicaluk, on Flickr 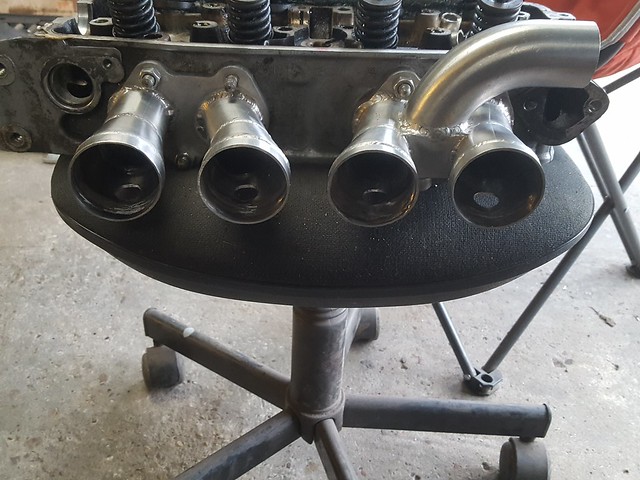 20180321_155957 20180321_155957 by logicaluk, on Flickr if only it had happened as quick as that, as i got my welding done in between real paying jobs it took several weeks to get finished. The air box how ever was entirely in my control, i was planning to get the original Yamaha r6 air box in but there was no way i could get it in, and get air through the original filter so i spend a few evenings doing research on air filer sizes and came out with a modern Fiat 500 panel filter, a trip to the scrappys and i had one with a new filter for 30 quid, but that wont fit on 4 ITBs so we start out with some ally and a bench folder, a hole saw and some screws 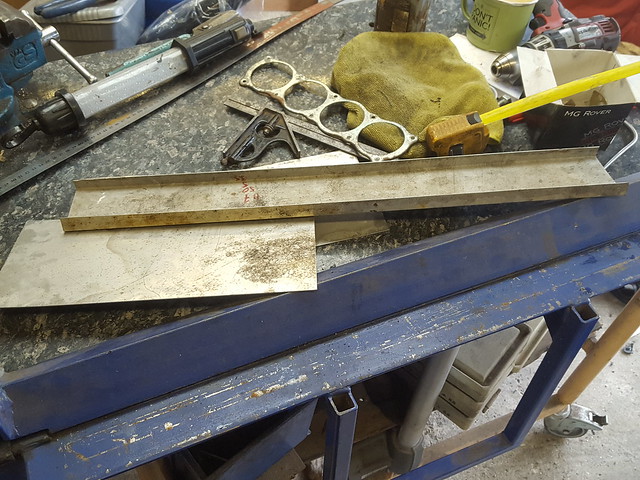 20180322_143342 20180322_143342 by logicaluk, on Flickr then get compleatly carried away and forget to take pics till, this happened 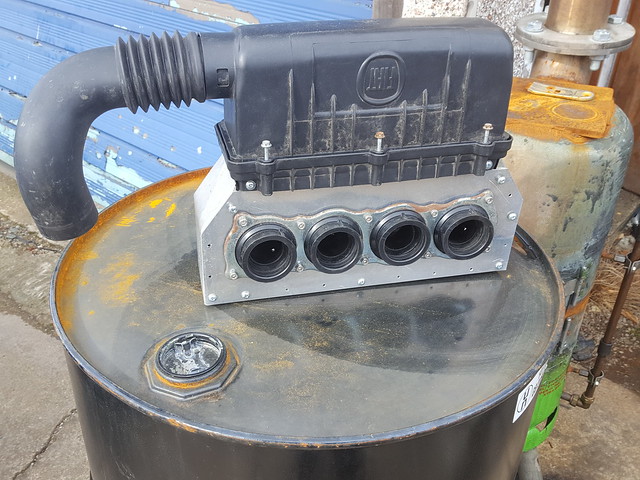 20180323_124632 20180323_124632 by logicaluk, on Flickr 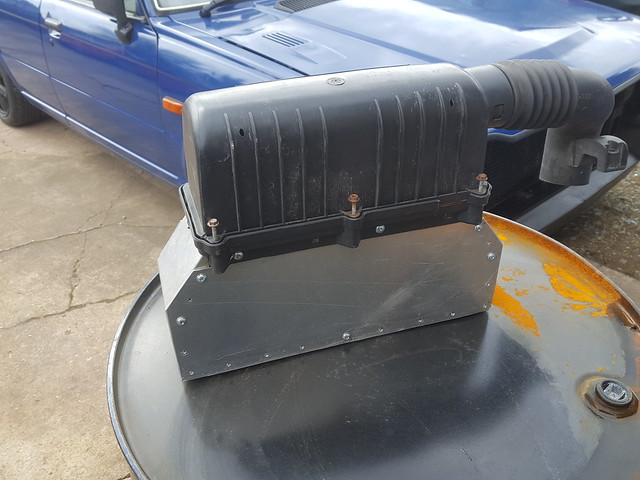 20180323_124646 20180323_124646 by logicaluk, on Flickr As frank had been running the microsquirt for some time and i had planned all along to run the injection, i only had some small mods to to the franks loom, i added a baro sensor (as apparently there are some big hills in other parts of the world and driving around them sounds like quite a laugh.(10cr here i come)) pulled the injection wires through the bulkhead and made them off with my new toy a real proper crimping tool, that dose plugs, sockets and every thing. I also re-terminated the loom that came on the throttle bodies. 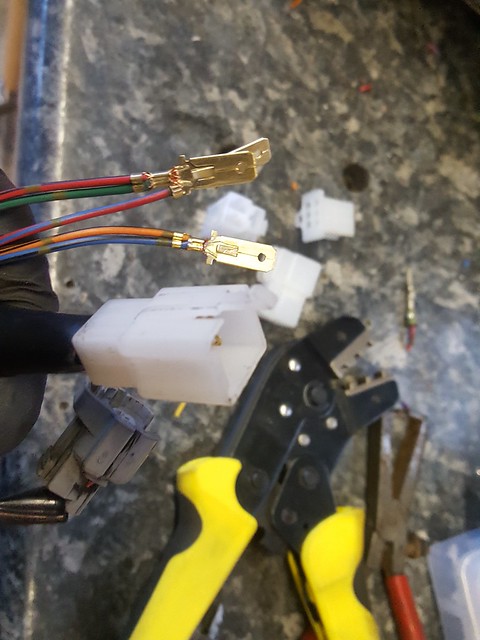 20180405_191548 20180405_191548 by logicaluk, on Flickr 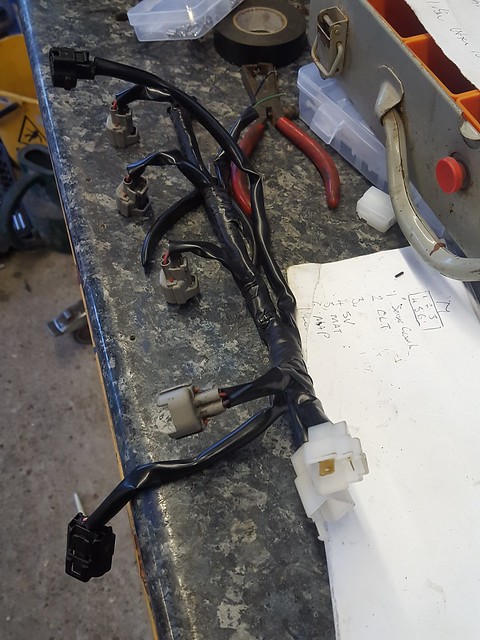 20180405_192315 20180405_192315 by logicaluk, on Flickr next was the fuel pump, i could have done the easy way and gone for a bosch044 pump mounted under the car but i wanted an in tank pump so i could use the old fuel line as a return. Much research lead me to a land rover v8 pump.  20180323_124646 20180323_124646 by logicaluk, on Flickr But that ones to deep to fit in the tank so a bit of shortinifcation made it the right length.  20180307_151509 20180307_151509 by logicaluk, on Flickr after emptying out the tank letting it vent for a week or so then jamming it under a car (just in case it did go bang) I started by cutting a hole out for the pump,using a hole saw in reverse (after braking my tank cutter) 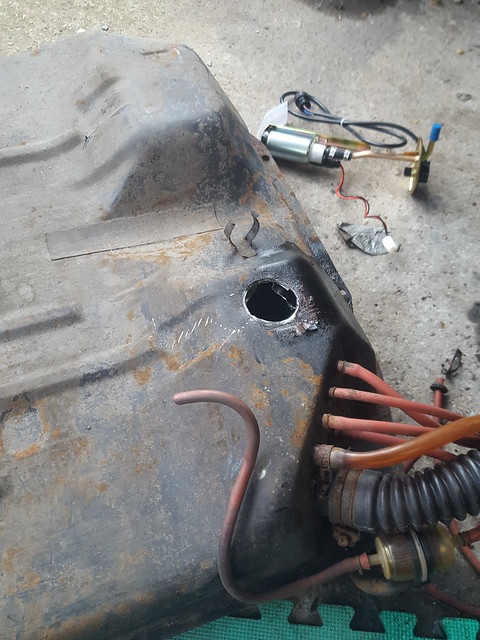 20180307_142442 20180307_142442 by logicaluk, on Flickr I used riv-nuts to secure it but they didn't go in quite the right places, so a plan B was sourced, checked for soundness and the then steam cleaned twice before getting a gold standard test of cleanliness (having a blow torch fired through it) it was passed for welding. A 4mm plate was hole sawed drilled and tapped to accept said fuel pump. 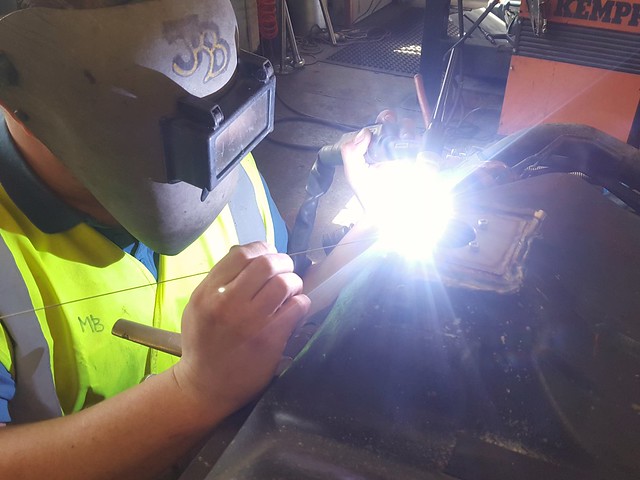 2018-05-05_06-37-31 2018-05-05_06-37-31 by logicaluk, on Flickr 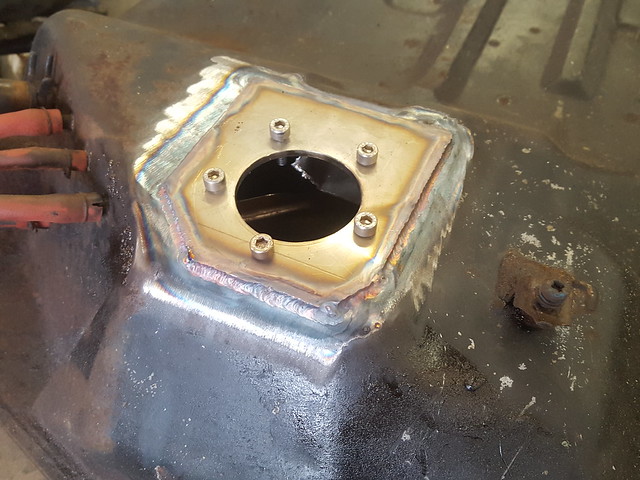 20180419_120348 20180419_120348 by logicaluk, on Flickr then covered in cold galvanising spray and then black and stuffed under the car. 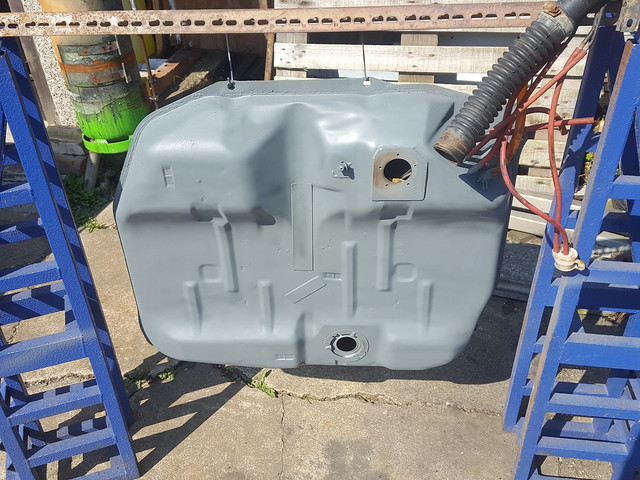 20180419_140352 20180419_140352 by logicaluk, on Flickr next it finally happened, all the ducks were aligned, it all went in and much to my surprise it fitted 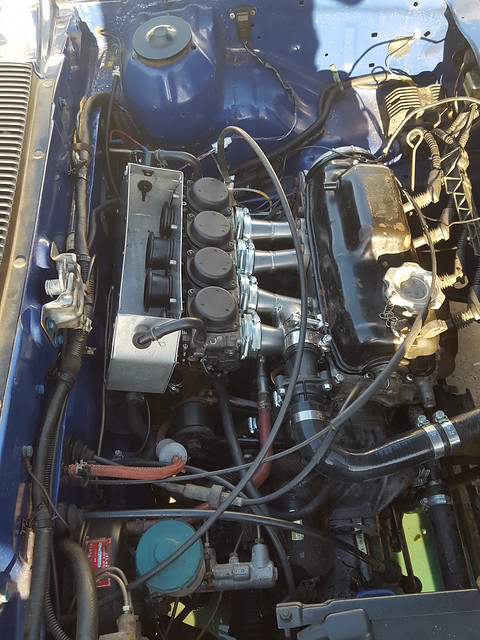 20180420_182220 20180420_182220 by logicaluk, on Flickr Dan |
| |
Last Edit: May 5, 2018 19:27:32 GMT by logicaluk
|
|
|
|
 20170809_121710 by logicaluk, on Flickr
 20170809_121710 by logicaluk, on Flickr


