


Hey guys, thought I'd show you this gem I'm working on at the moment.
I got offered a 1987 Vauxhall Carlton 1.8 8v carb base model from a friend of a friend, i'd been sitting in an old chaps garage since 1995 so this is my first proper barn find as it were.

Its an E-reg 1.8 carb saloon manual! This was the first year of production and i've known for some time that as far as modding goes the E-reg's were best. Basically ONLY the e-reg's had no sunroof which saves a good 25+kgs (and also any chance of leaking) and a better grade of steel was used. But there was also a cool little bonus of this model having no external aerial! Instead is has a heater element-style wire that runs around the windscreen, according to my Carlton expert friend this worked well but was abandoned very early due to the amplifiers being very temperamental.
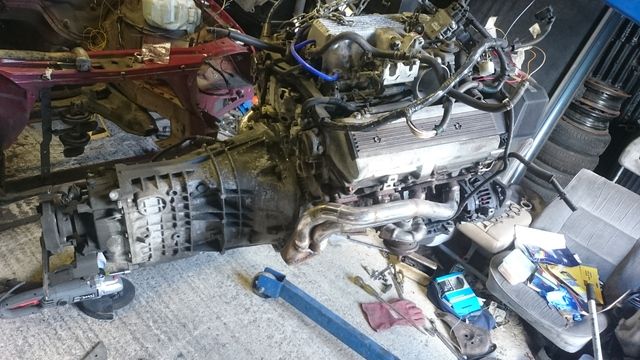
So I had the car but needed a V8, I purchased a whole Lexus LS400 for peanuts due do it being crash damaged. It had already been modified so that saved me some pennies:
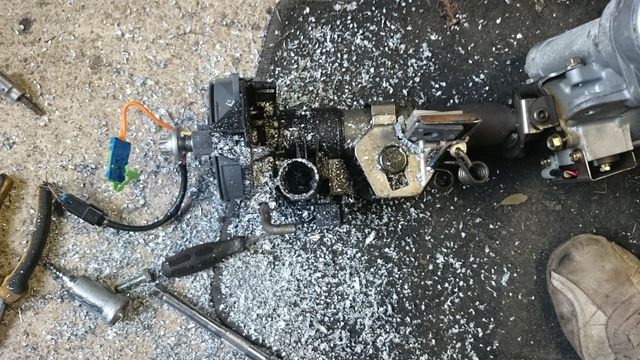
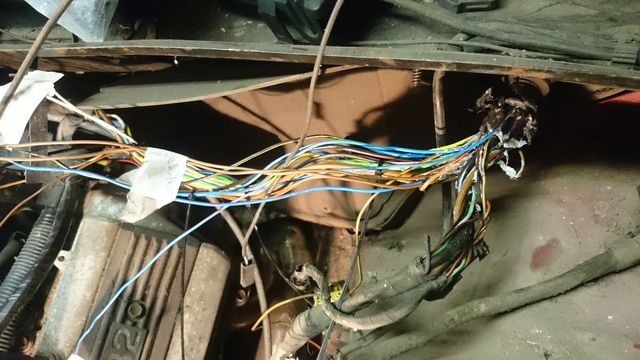
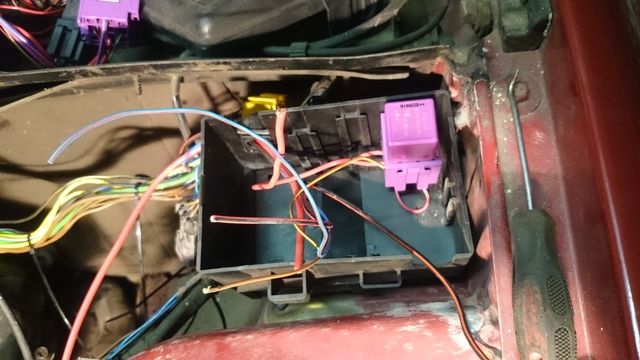
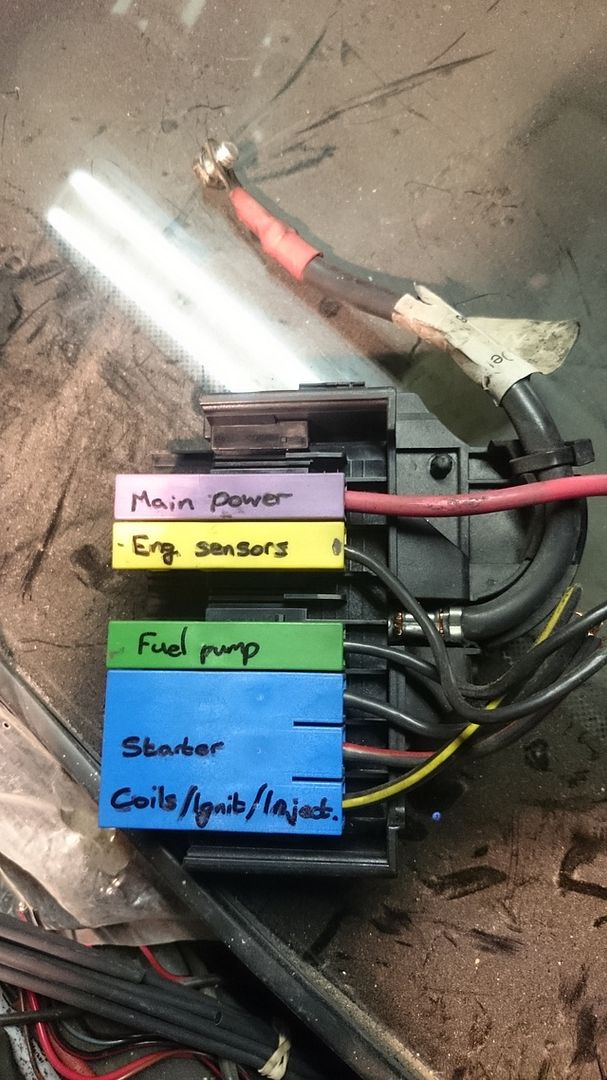
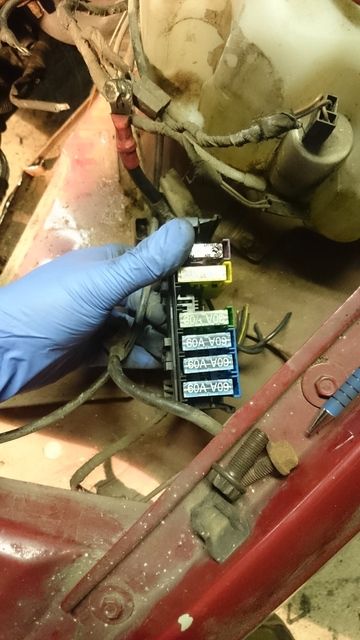
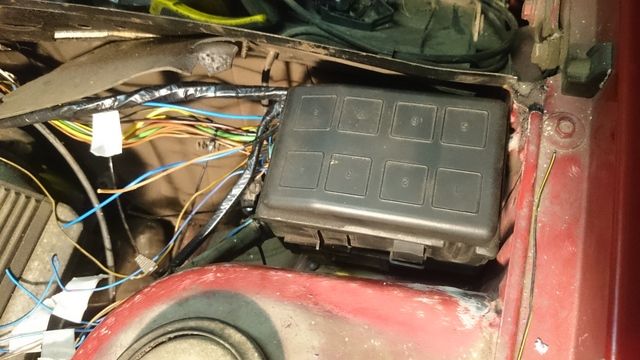
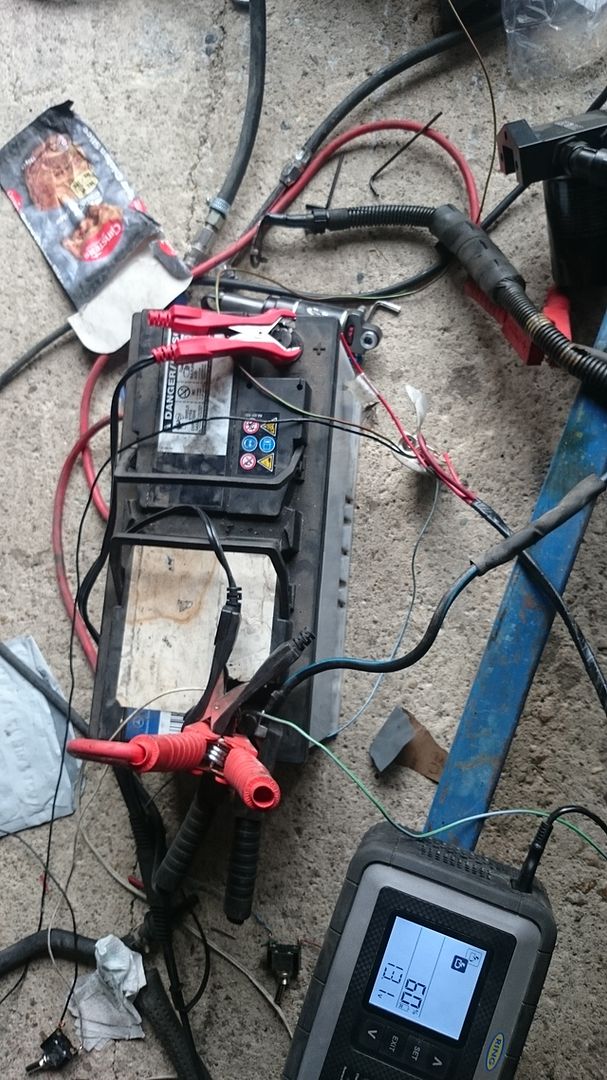
Since having the V8 on the floor I have been looking into wiring it up in the Carlton, its bad... like worse than when I wired up a Z20LET bad. The bad part is all down to the autobox, the engine and autobox wiring is integral which is fine but I cut out the shifter and wiring and assumed that the two plugs that connect the engine harness to the chassis harness would have wires that matched up with the ones out of the shifter.... hmmm well some do but not all and the wiring diagrams mention some sort of control boxes that mean nothing to me.
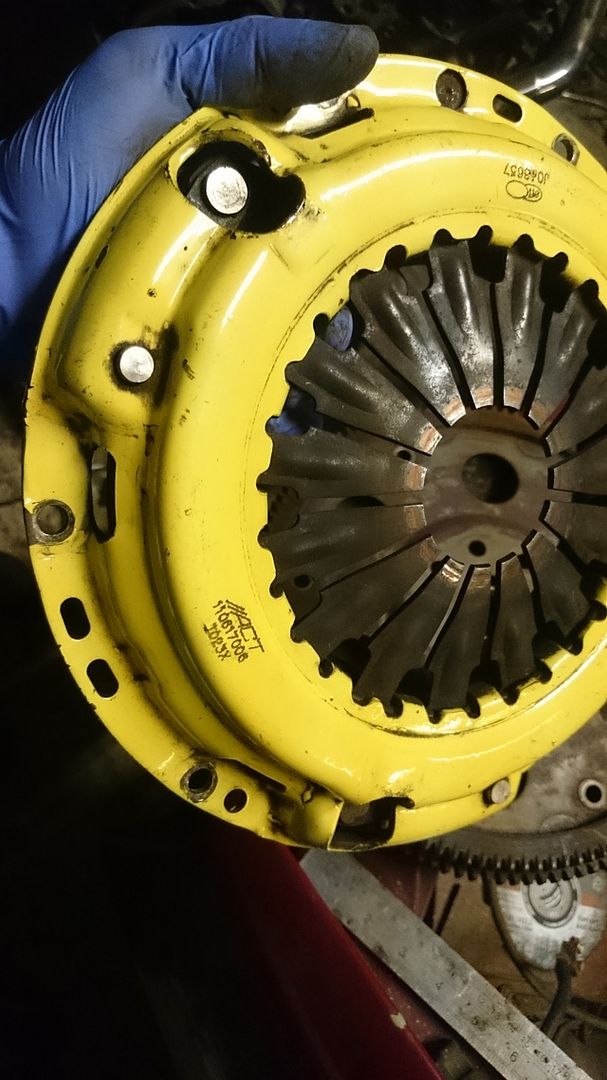
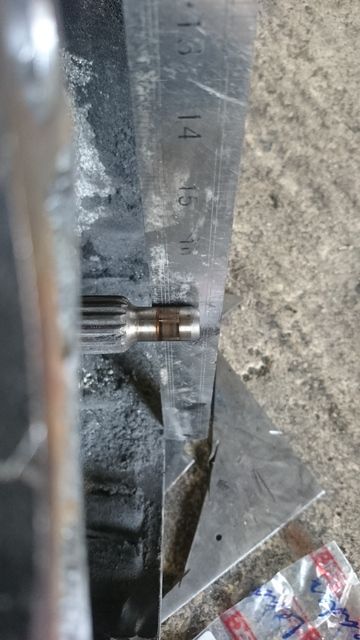
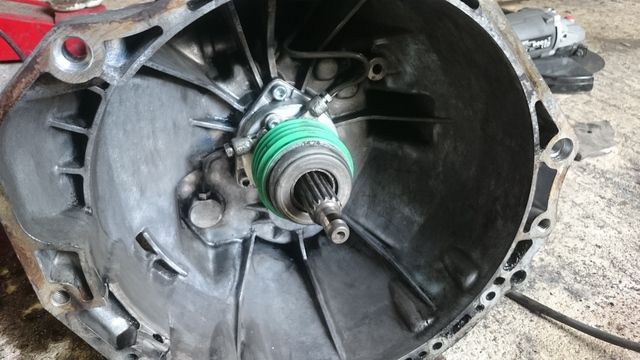
This sparked me to look into cheap ways of converting to a manual box, I picked up an MR2 Turbo flywheel which requires a few tweaks to fit onto the 1UZFE and cost me £25. The clutch is easy, MR2 pressure plate and VX friction. There are two hard bits really: 1) Getting the gearbox to bolt up in the right place and 2) getting the VX needle bearing to sit in the Lexus crank
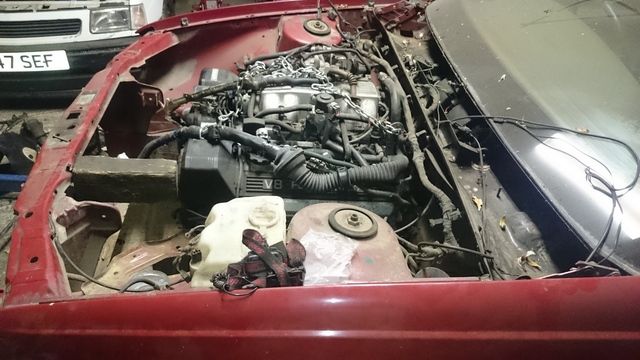
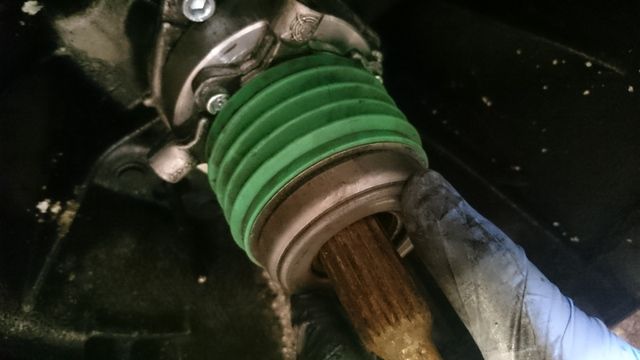
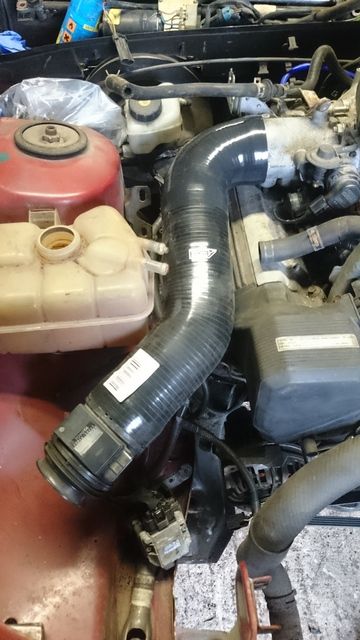
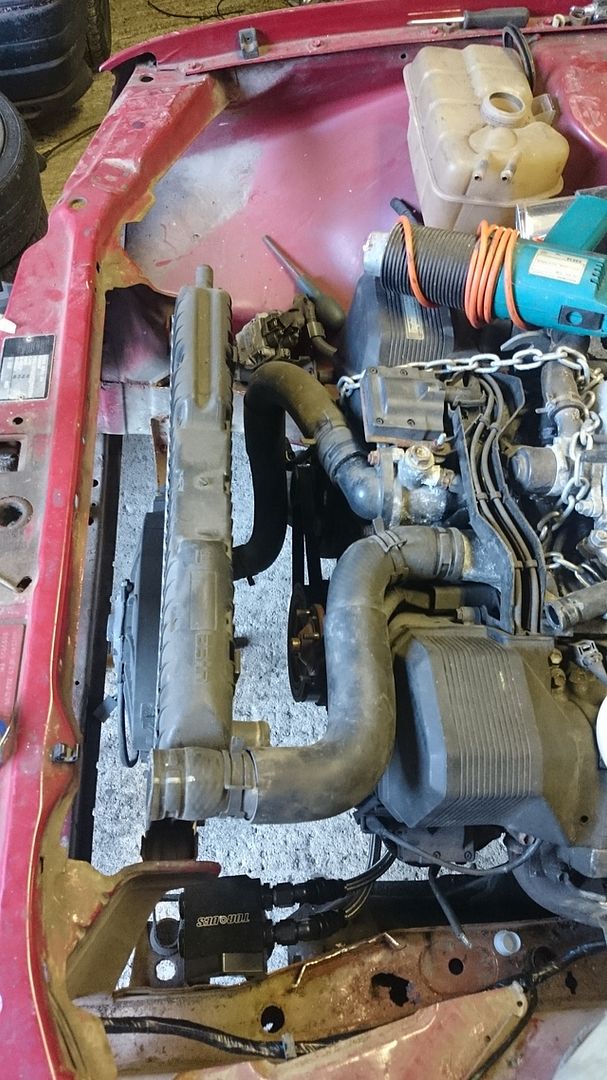
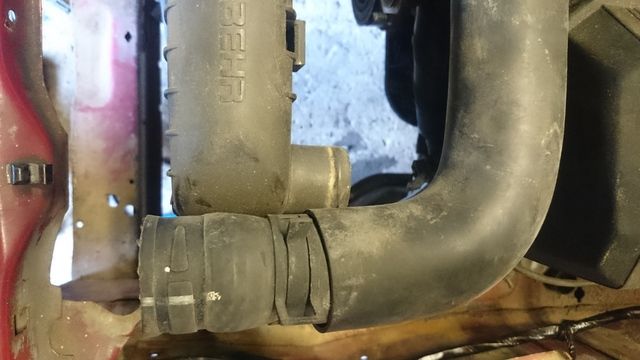
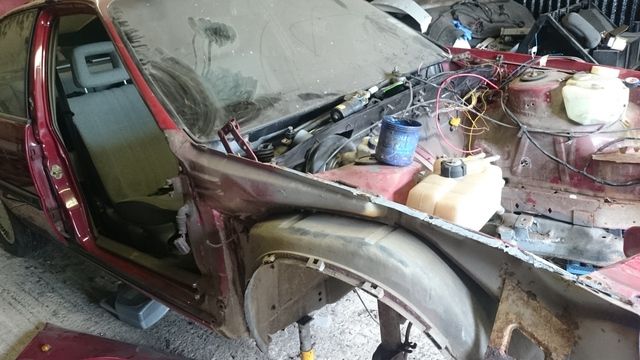
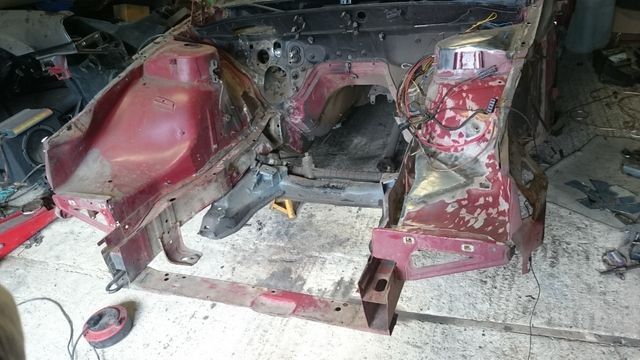
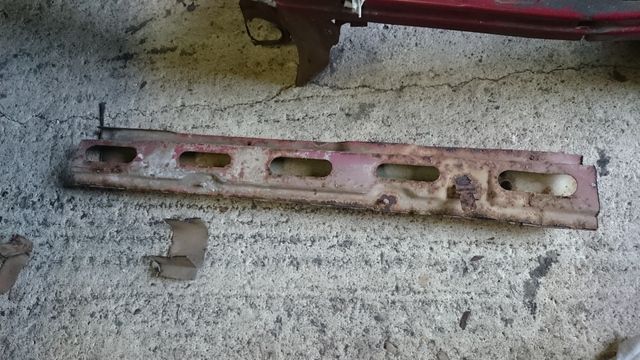
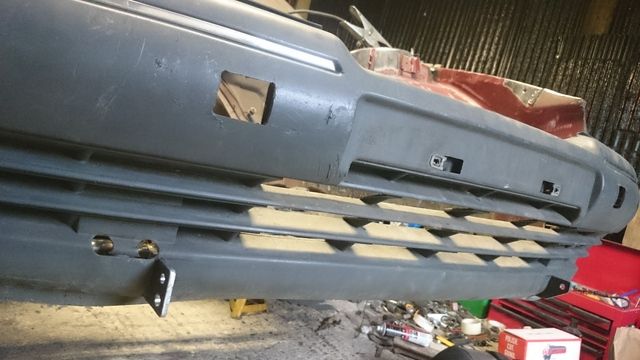
Anyway on Sunday I stripped the carlton of its 1800 8v carb:
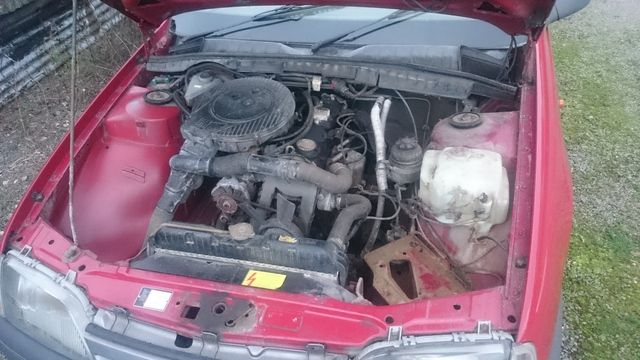
Starting to be stripped:

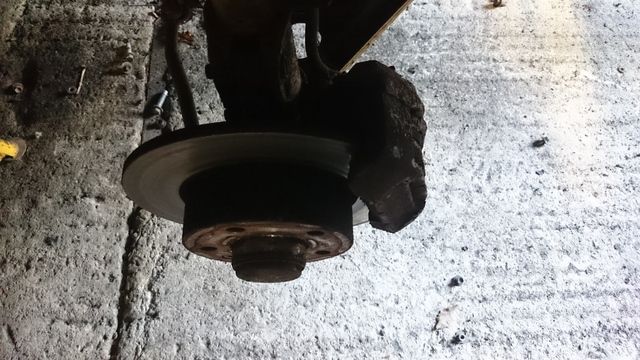
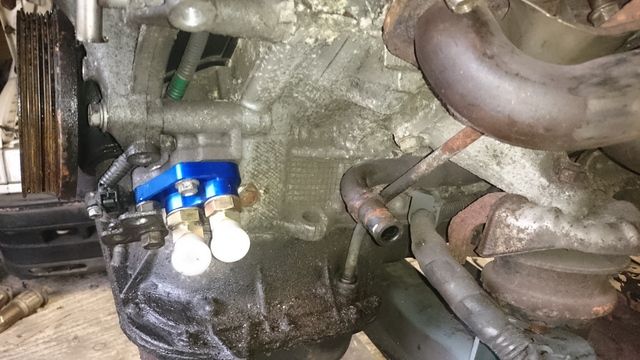
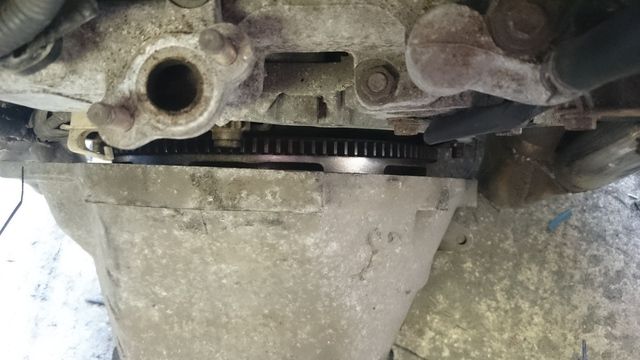
Wait what? Solid front discs on delco calipers? Sick!!!!
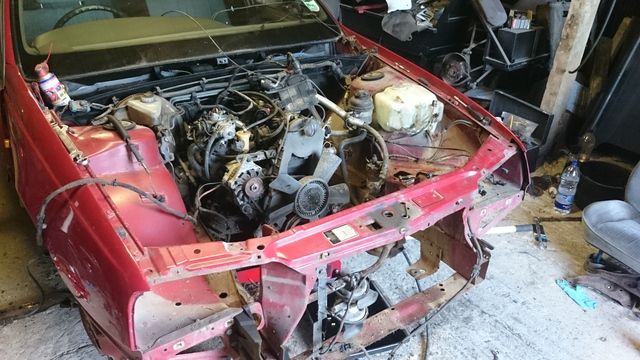
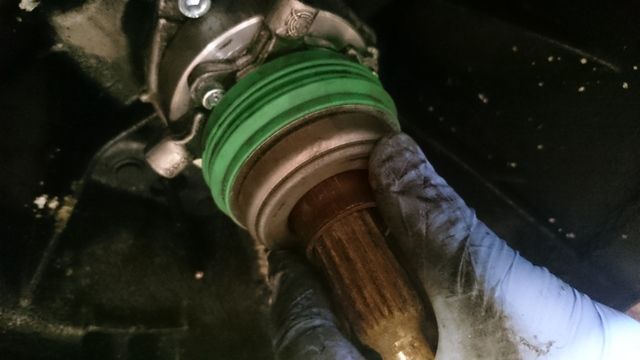
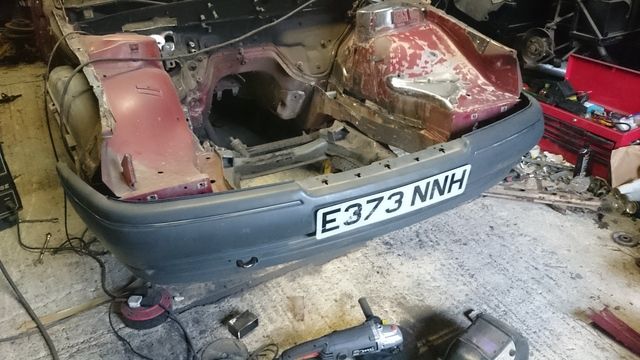
Almost ready to come out:
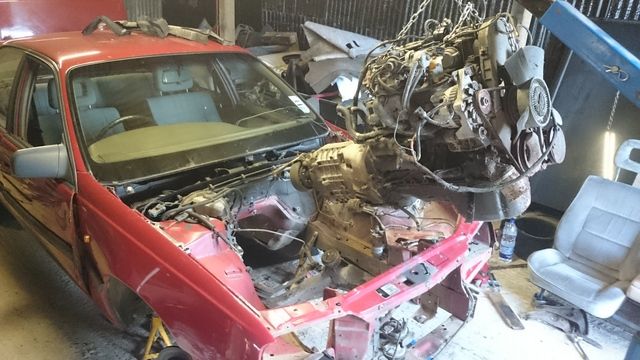
and out!
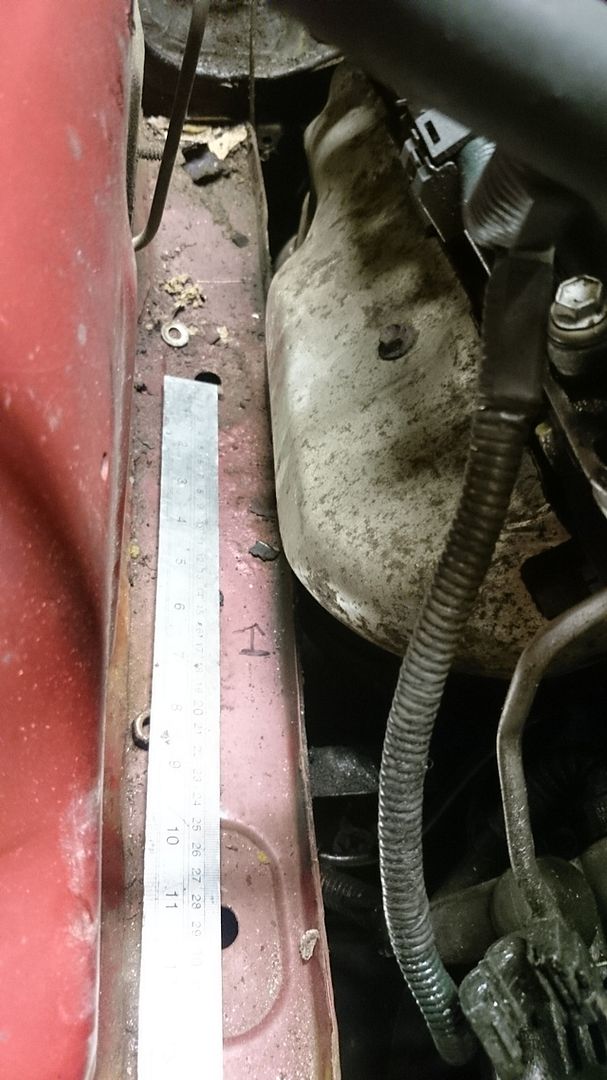
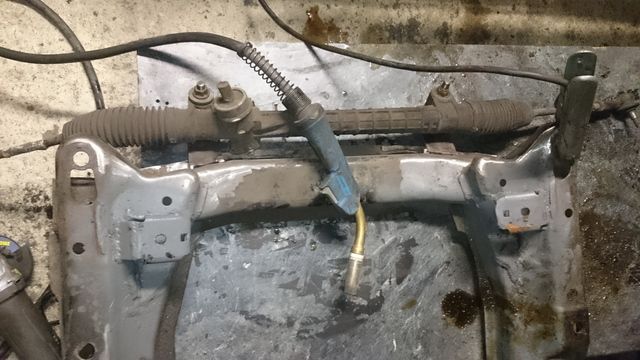
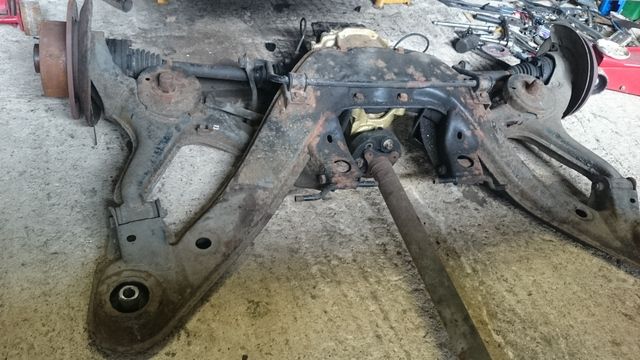
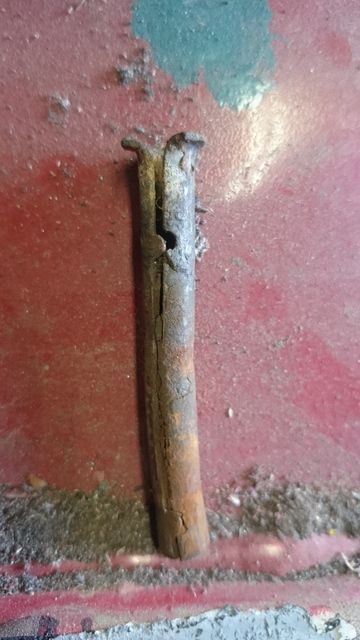
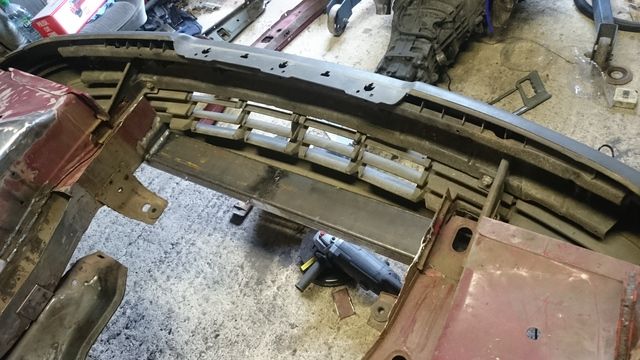
I also removed the steering box, idler arm and joints as the whole lot is being replaced with rack and pinion, the bay is now ready to receive the V8 for a trail fit to see what fouls what (I am expecting a LOT of fouling).
Also the autobox will be removed to see how much work getting an Omega V6 gearbox to fit will be.
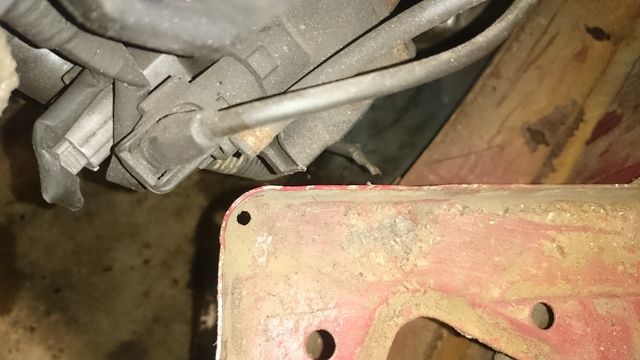
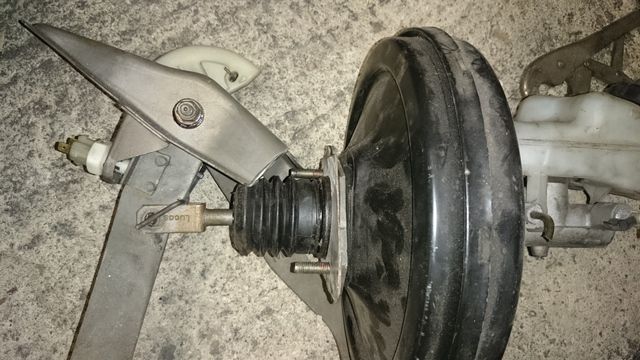
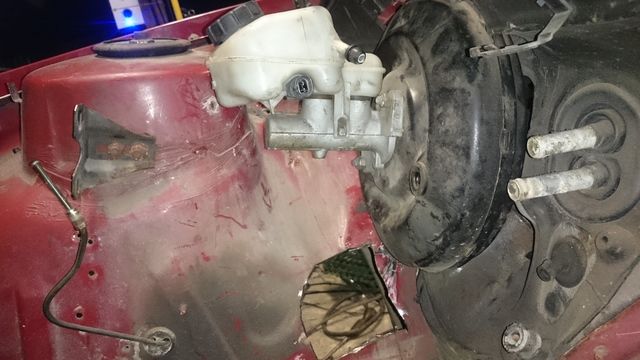
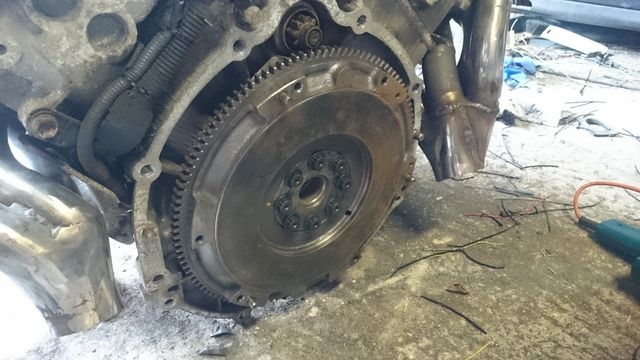
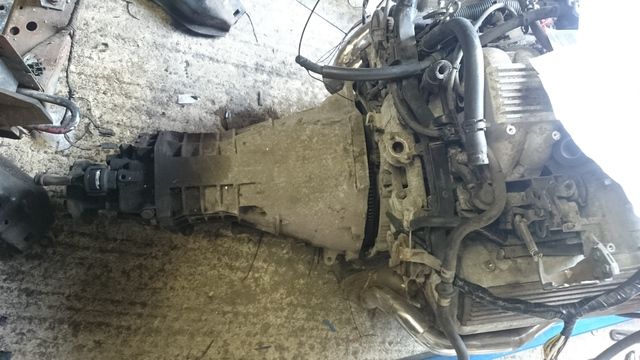
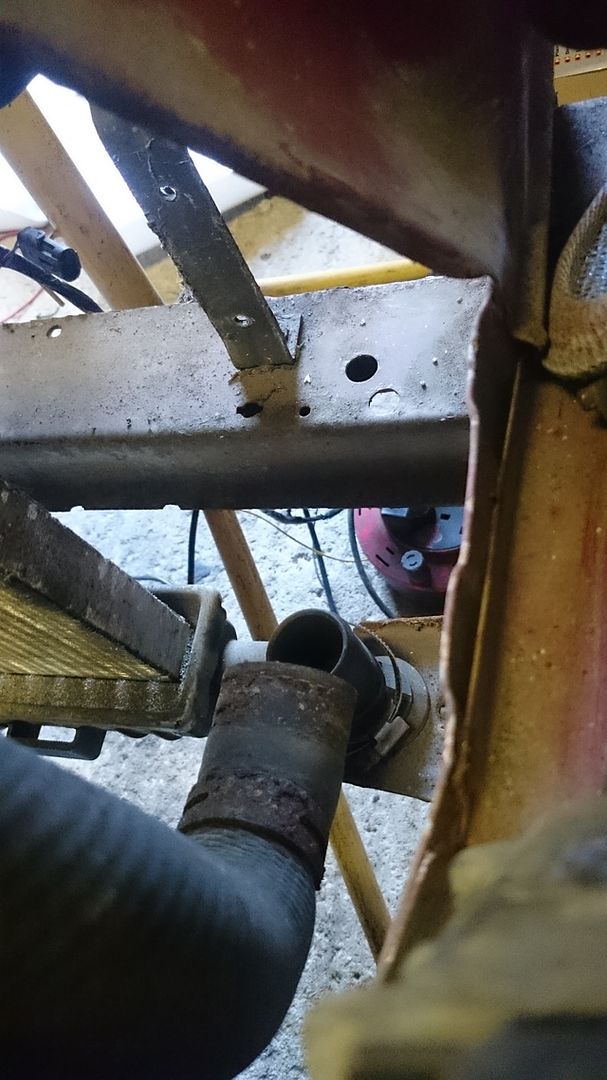
Lot of progress today, I started by removing the autobox, torque converter and flexplate. I was happy to find a totally bone dry engine behind so no need to replace the crank seal, I also ripped out the EGR pipework and chopped out the boss that goes into the O/S downpipe.

Once the back of the engine was ready I moved onto the front, removing the belt, aircon pump, PAS pump, tensioner, idler pulleys and the viscous fan so a fair bit of weight was saved. More removing went on in the engine bay, there is no way in hell the original servo could say to out that came with the master cylinder, all the brake lines (I will fabricate new ones) and finally the subframe. The engine bay is now ready for a trail fit and I can tell you it's TIGHT!!


The majority clears fine but there are issues:
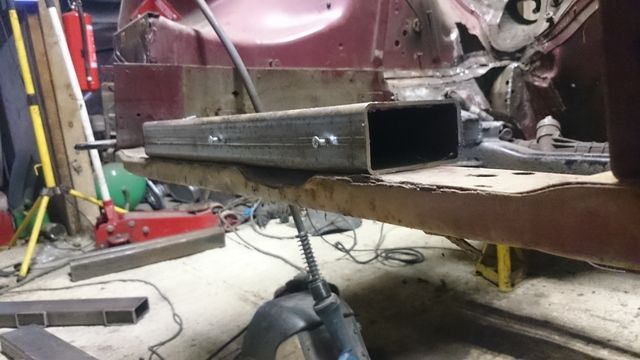
The exhaust manifolds overhang the chassis rails by about 5mm per side, the engine needs dropping about 1 inch so I will need to chop the chassis rails about a bit
The steering rack (Corsa-C) input shaft isn't far enough over to clear the O/S exhaust manifold, this will mean extra chassis rail chopping and some less-than-ideal steering joint angles to clear it
The oil filter hits the N/S chassis rail, it's either going to mean a shorter filter OR a relocation kit
Other than these things it's sitting in there happily at the moment and I am chuffed!!
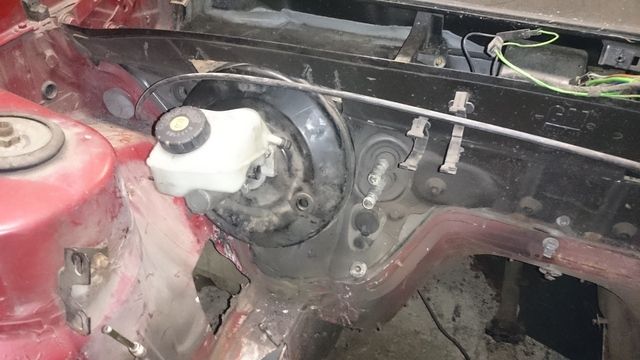
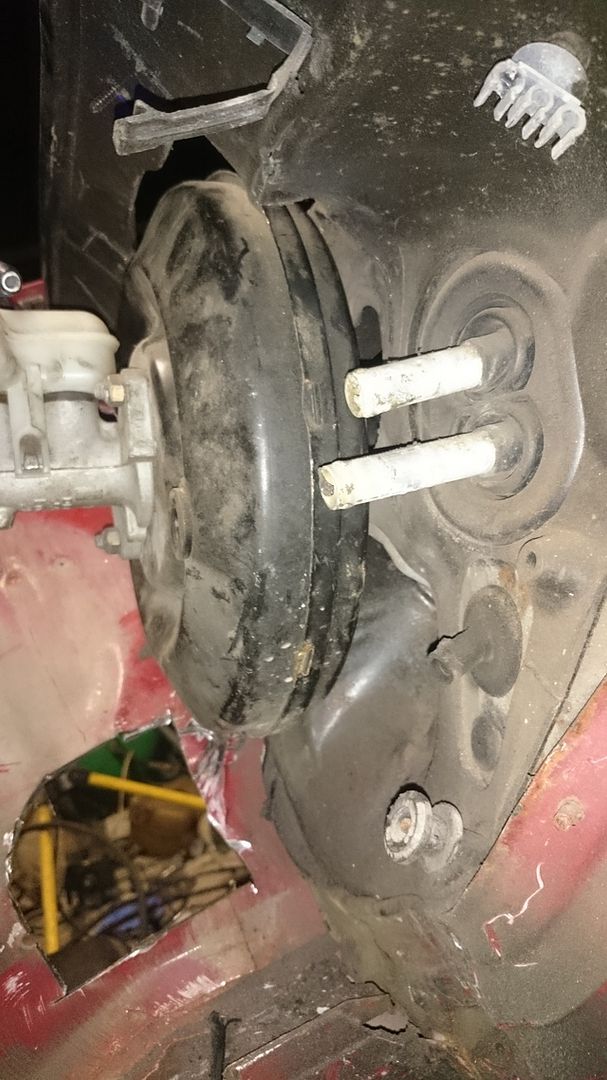
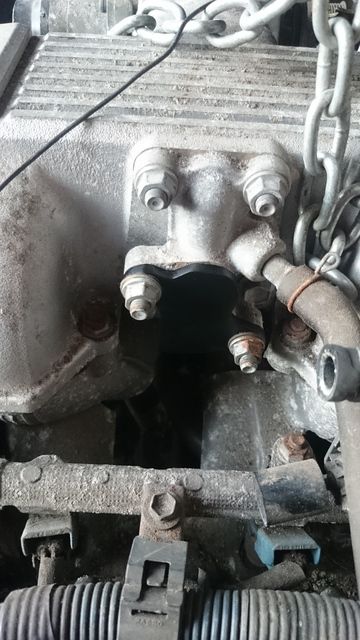
I addressed the servo location issue, my initial idea was to go for a remote servo but one suited to my car is expensive, heavy and a space hog. Instead after some careful measurements I have found that a Astra-G servo mounted directly to the bulkhead will tuck behind the engine, winner!
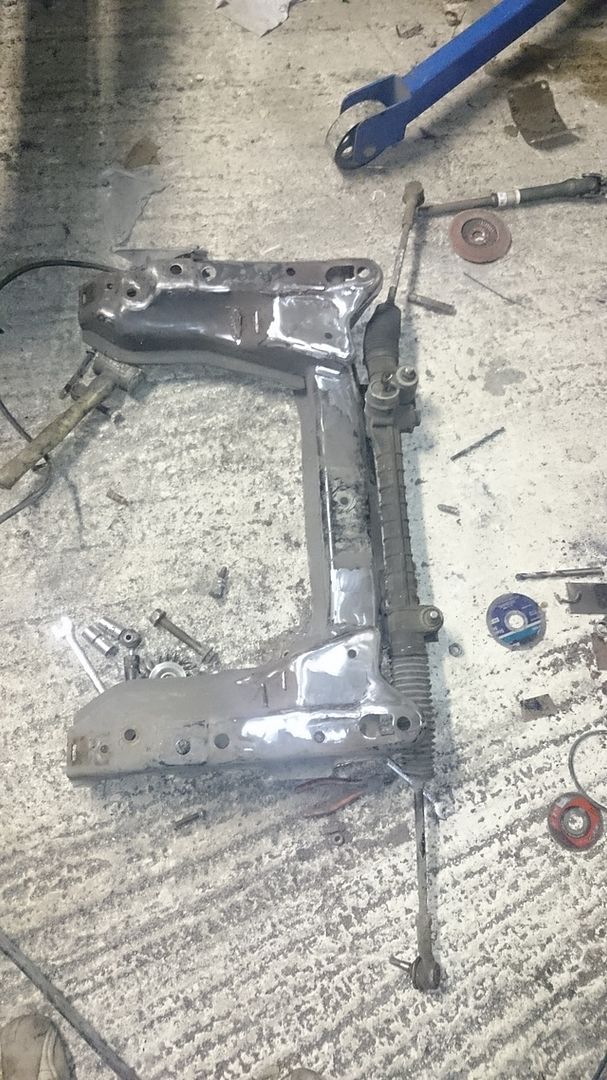
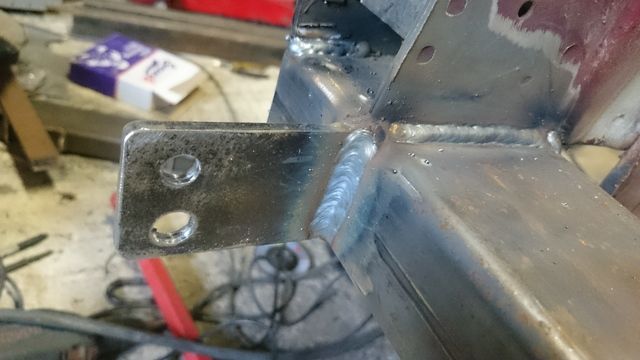
I started work on modding the 24v GSi subframe to accept the Corsa-C steering rack and V8 engine mounts, here is where the rack will sit:

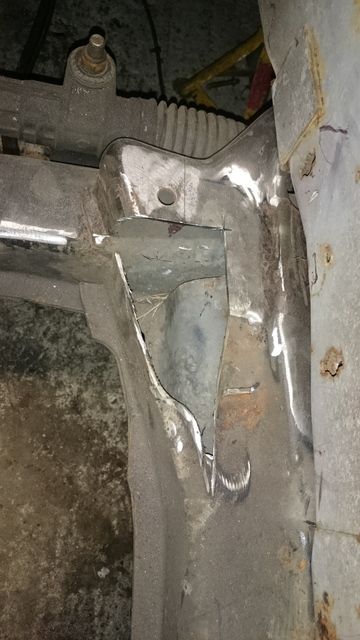
The original engine mount brackets and dampener brackets were lopped off, I cooked some plates up and tacked them onto the subframe:
Then this happened:

Not to worry as I have a spare! I realised the upper platforms on the GSi subframe needed hacking to get the engine sitting right:
Other side all plated up:

With the rack in place I offered the engine up to see about the steering linkage to exhaust manifold interaction, it was pretty severe and no amount of tweeking will resolve it In fact the only way around the issue is to redesign the standard O/S exhaust manifold:
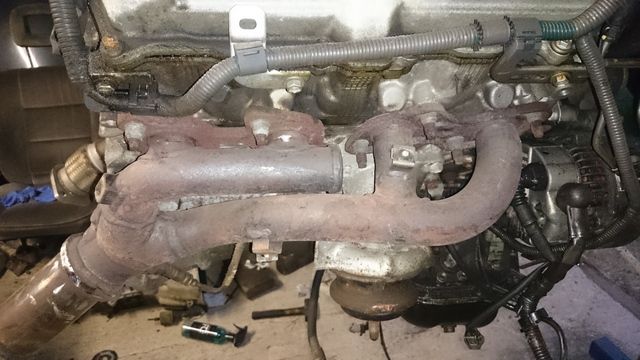
As you can see as standard it's design purely to save money and space with little regard for flow!! So I plan to redesign it for better clearance and flow.
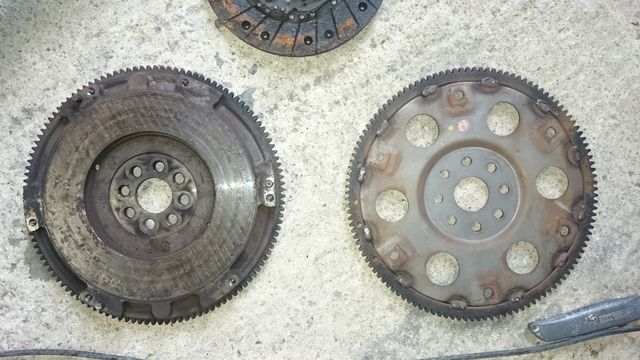
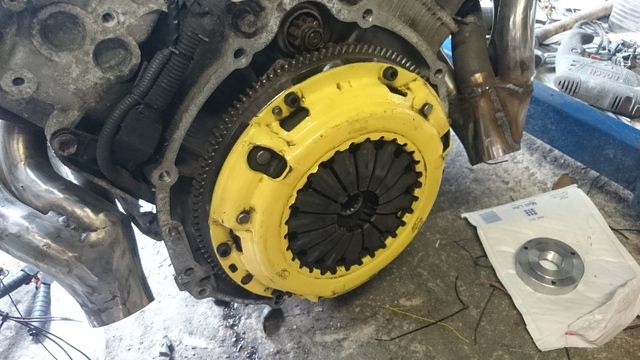
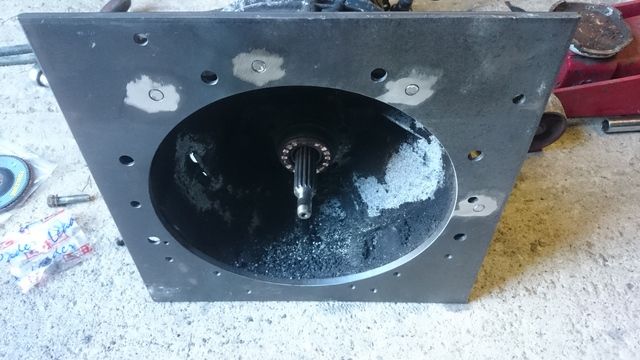
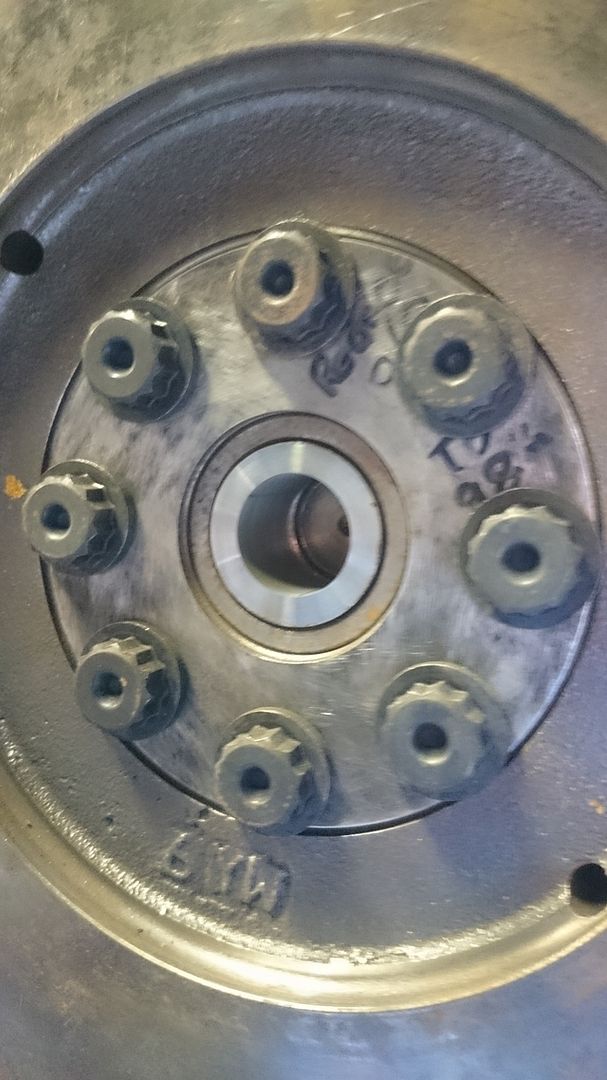
Here is the Toyota MR2 Turbo flywheel to use on the 1UZFE, this is a common flywheel to use as it needs very little to be compatible:
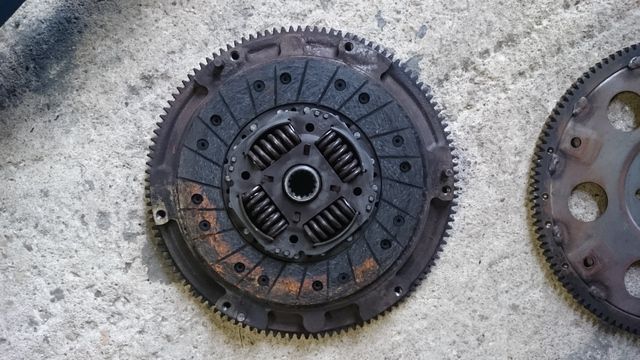
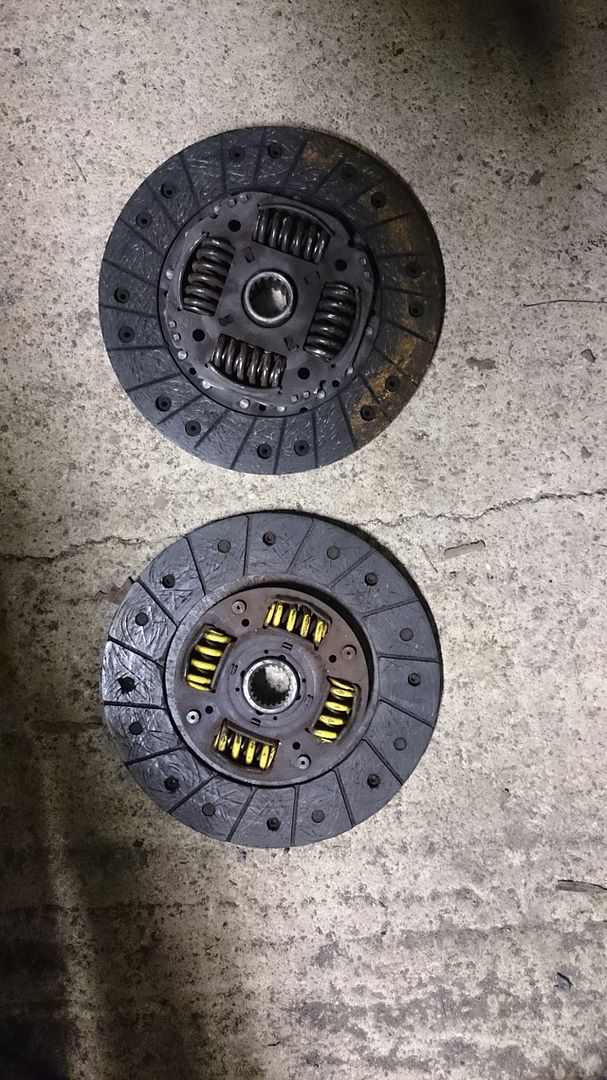
The standard MR2 Turbo clutch friction disc is 225mm in diameter, a Z20LET friction disc (which has the correct splines) is 228mm so is a perfect fit. All I need to do is source a strong MR2 Turbo pressure plate (which is proving to be a bit annoying as I can't find a company that will sell me an uprated one separately):
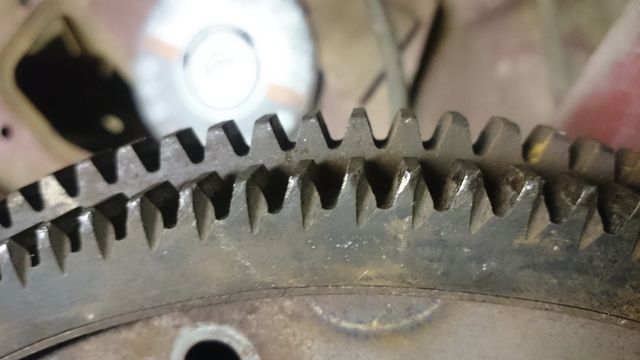
The MR2 Turbo flywheel has exactly the same centre bore so it slides right on, also the ring gear has the same number of teeth and the same diameter:

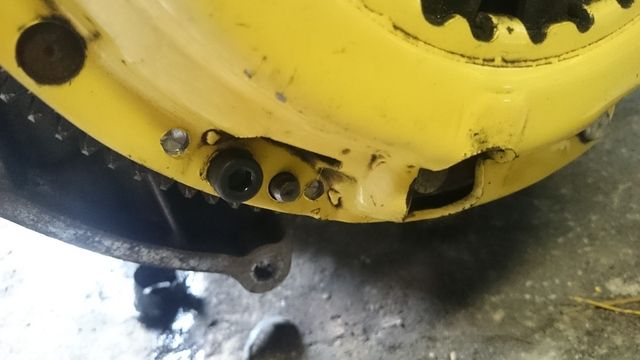
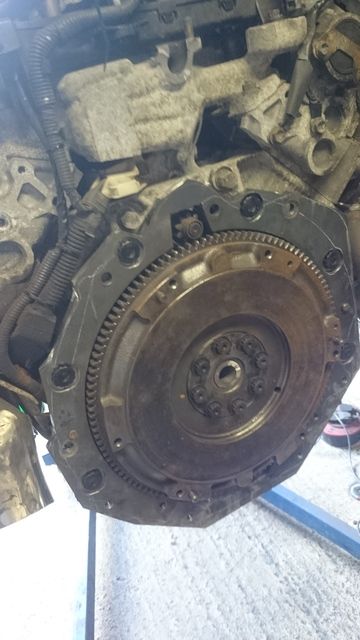
There are two mods needed to make the flywheel work:
1: On the MR2 the starter is on the gearbox facing towards the engine, on the 1UZFE the starter in on the engine facing towards the gearbox. This means the teeth beveling is on the wrong side, only way to sort this out is a grinder with a 1mm cutting disc, a steady hand and a lot of spare time.
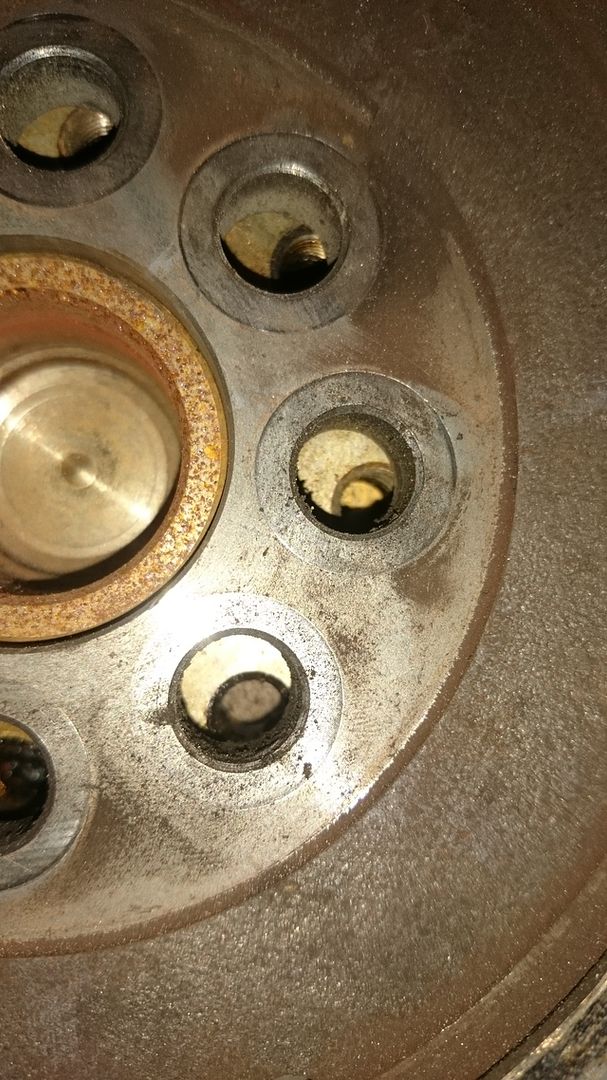
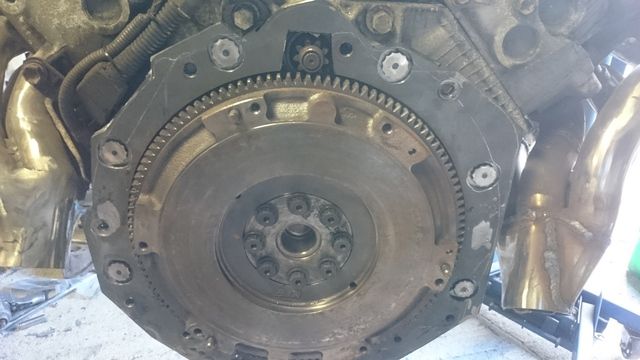
2: The PCD of the bolt holes is different to the crank so they need redrilling:
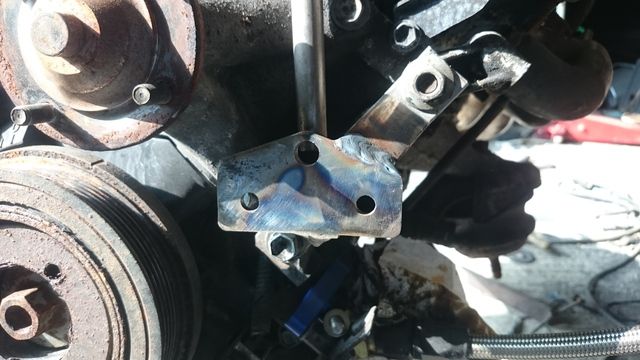
I managed to get the new mounts in the correct place, the engine now sits as close to the bulkhead as I am comfortable with:

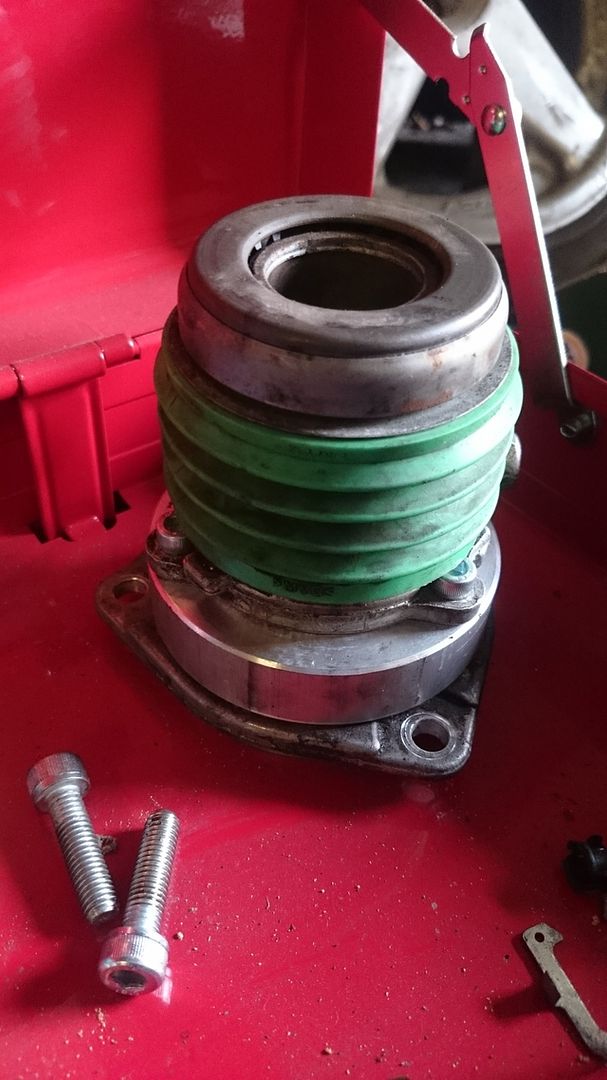
A new toy:
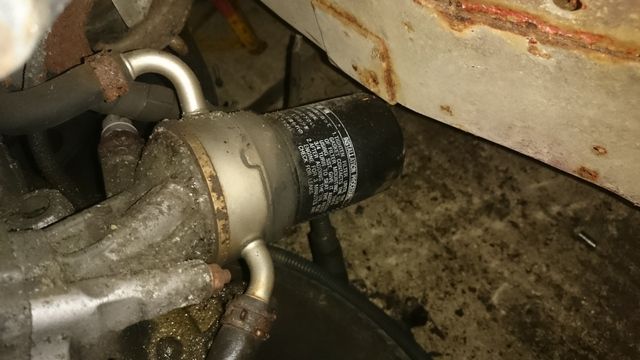
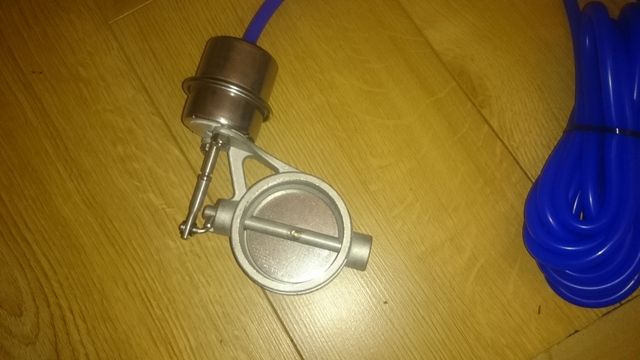
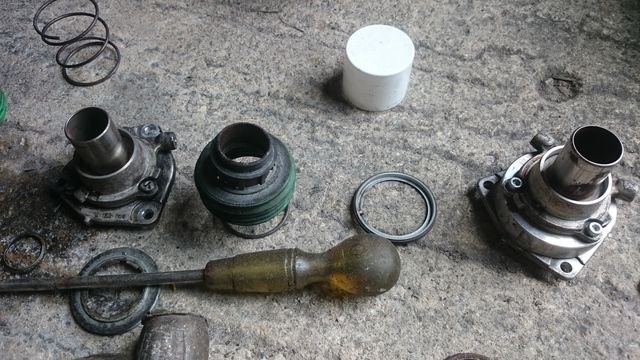
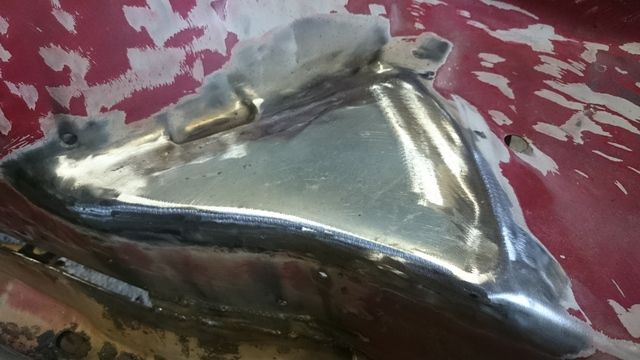
Its an oil filter relocation adaptor, the factory one sticks out a LOT from the block to originally clear the aircon pump. This little thing will allow me to run a remote filter and also a proper oil cooler.
I needed to tackle the steering but this meant making sure the O/S exhaust manifold cleared the steering joint, this in a way is a good thing because the standard manifold is appauling for flow and other tuners have reported massive increases in power by changing them.
In turned out that the whole thing had to be totally and utterly redesigned and took the whole day to do!!
I went from this:
To this:
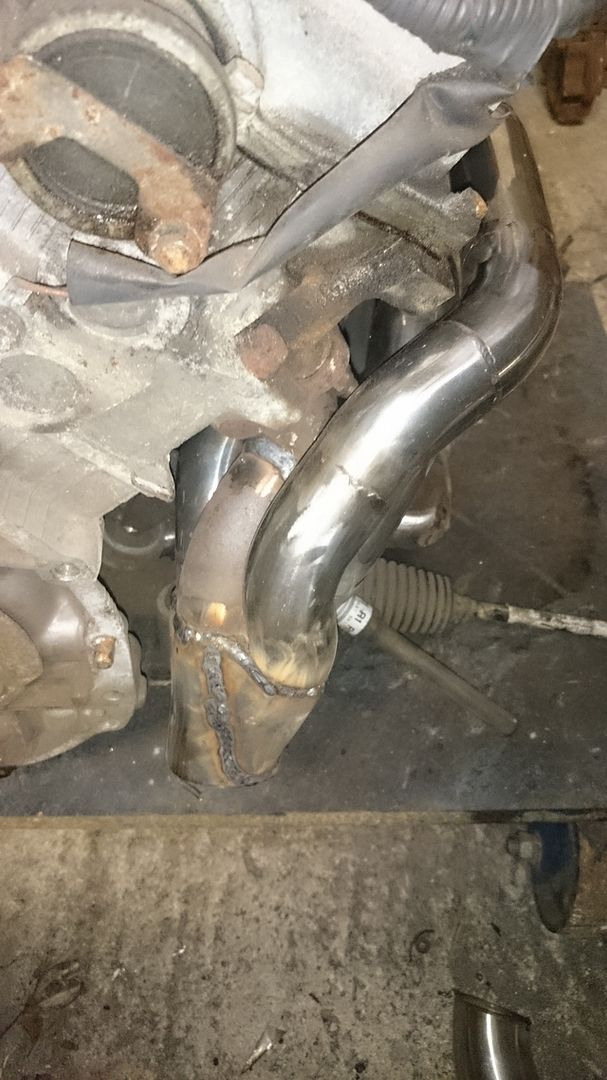
The engine, subframe and steering rack are all attached and I found a block of wood that was the same dimensions as a section of the chassis rail. The steering joint now sits like this:
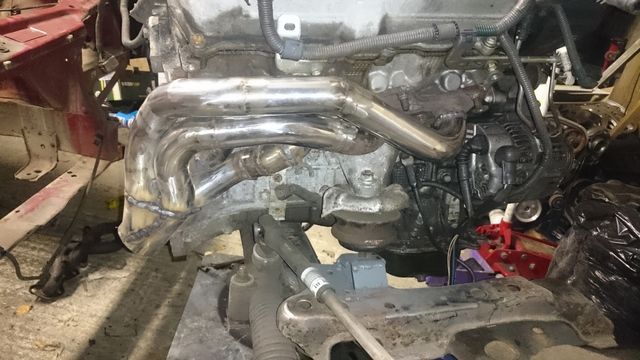
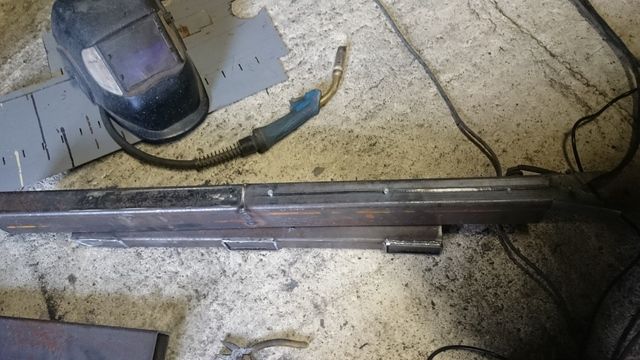
Room is tight down the back of the bulkhead so instead of a normal square 2x2 runner layout I went for a diamond shape and used a 3-runner collector and hacked into it to add a 4th.
The runners are all old bits I cut off an old 200sx turbo manifold (aftermarket with loads of handy tight bends) and an aftermarket M3 manifold/downpipe affair I won on ebay for 99p! Its not the neatest job but its all mandral bends and nice and smooth inside.
I have yet to touch the N/S but because there is no need to route the runners round anything I suspect it will be much simpler.
Time to tackle the N/S manifold, I thought it would be quicker... it wasn't
Original design:

The runners for ports 1 and 2 are fine, but 3 and 4 join them abruptly as they pass by, kinda sucks.
As the runners from 1 and 2 are fine I kept them, the back half of where I will start:

The back half is now done and the front half is bolted on:
Add a bit:

Clean and trim:

Add a bit more:

and repeat until finished:
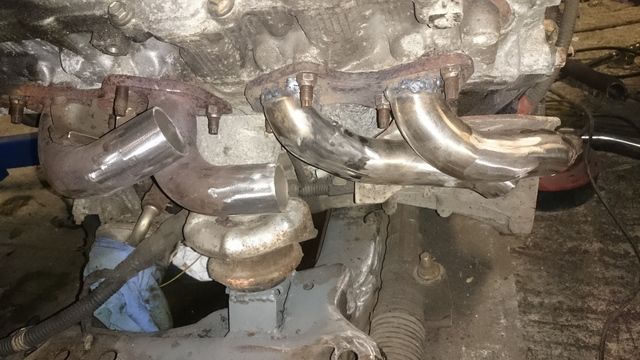
Add a collector:


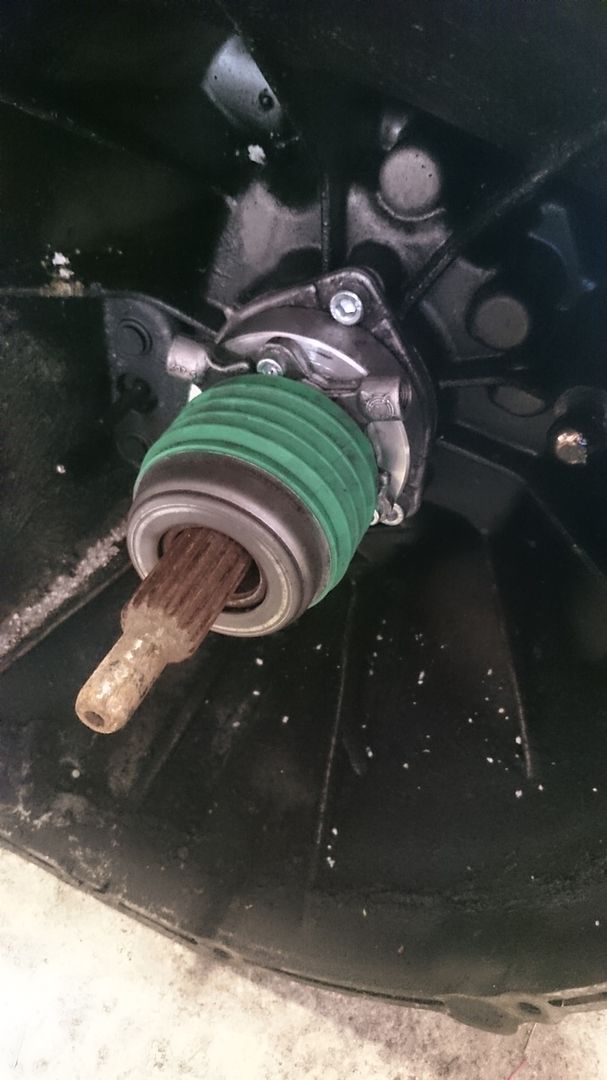
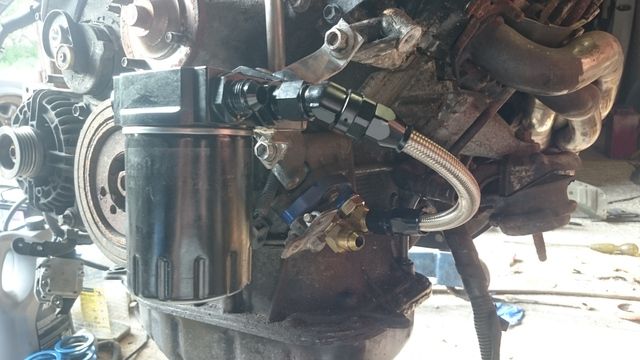
Next up I wanted to see how the manifolds interact with the engine bay, but first it was time to ditch the silly oversized oil filter housing/cooler and replace it with my shiny thing:
I needed to tweek the position of the rack and thought I would be clever and angle it to make the linkage joint smoother... turned out I cocked it up:
Subframe on and engine in correct place, not bad with number 2 cylinder in line with the front axle:

N/S bank coil is too close to battery tray:
The O/S manifold was kissing the bulkhead, so I removed the engine and did what any self-respecting mechanic would do... hit it with a lump hammer:
Although I redesigned the O/S manifold to run as high as possible it wasn't enough to run a simple two joint linkage for the steering so now I will have to run a 3-joint linkage with a bearing!

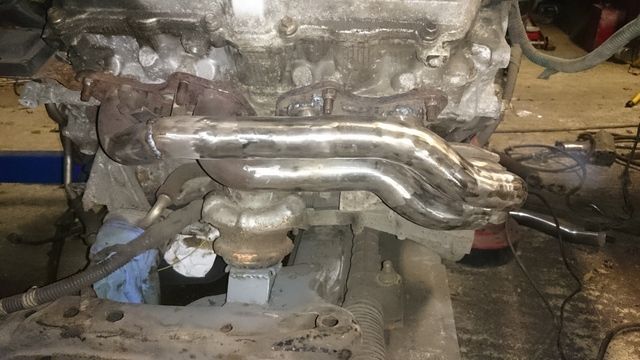
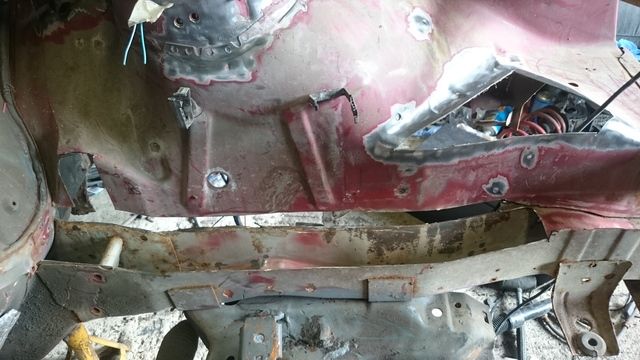
Plenty of room up front which I am happy about:

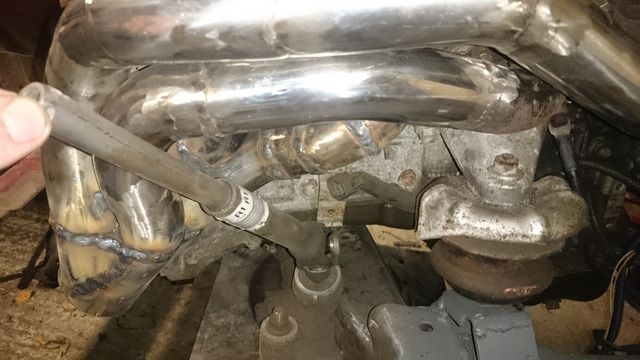
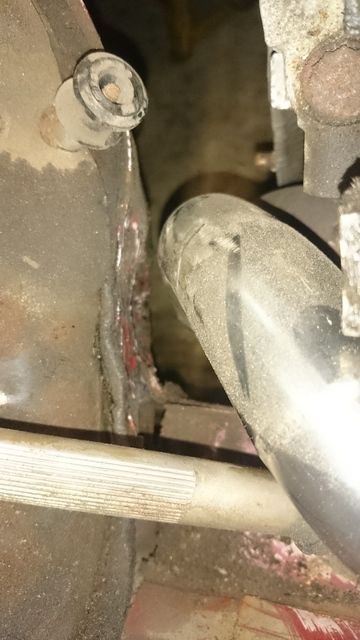
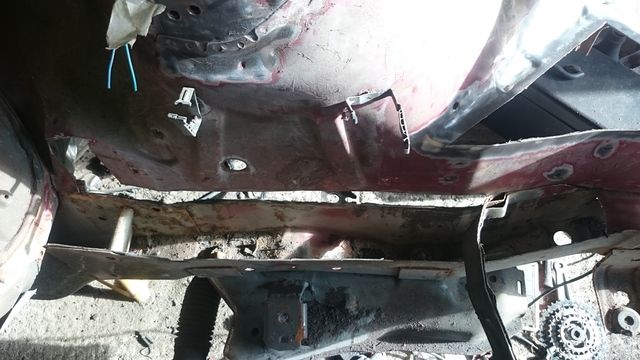
A couple of shots from underneath the car facing upwards on the O/S:
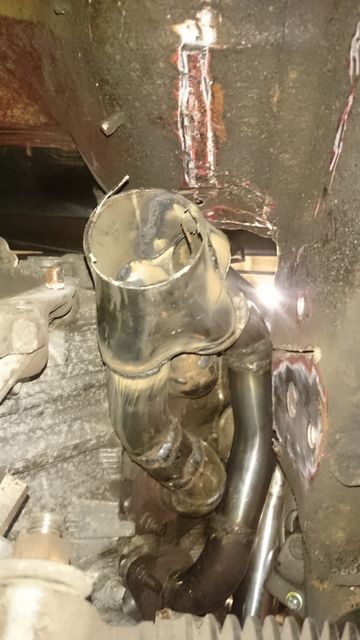


It's pretty tight be clears fine!
I got offered a 1987 Vauxhall Carlton 1.8 8v carb base model from a friend of a friend, i'd been sitting in an old chaps garage since 1995 so this is my first proper barn find as it were.
Its an E-reg 1.8 carb saloon manual! This was the first year of production and i've known for some time that as far as modding goes the E-reg's were best. Basically ONLY the e-reg's had no sunroof which saves a good 25+kgs (and also any chance of leaking) and a better grade of steel was used. But there was also a cool little bonus of this model having no external aerial! Instead is has a heater element-style wire that runs around the windscreen, according to my Carlton expert friend this worked well but was abandoned very early due to the amplifiers being very temperamental.
So I had the car but needed a V8, I purchased a whole Lexus LS400 for peanuts due do it being crash damaged. It had already been modified so that saved me some pennies:
Since having the V8 on the floor I have been looking into wiring it up in the Carlton, its bad... like worse than when I wired up a Z20LET bad. The bad part is all down to the autobox, the engine and autobox wiring is integral which is fine but I cut out the shifter and wiring and assumed that the two plugs that connect the engine harness to the chassis harness would have wires that matched up with the ones out of the shifter.... hmmm well some do but not all and the wiring diagrams mention some sort of control boxes that mean nothing to me.
This sparked me to look into cheap ways of converting to a manual box, I picked up an MR2 Turbo flywheel which requires a few tweaks to fit onto the 1UZFE and cost me £25. The clutch is easy, MR2 pressure plate and VX friction. There are two hard bits really: 1) Getting the gearbox to bolt up in the right place and 2) getting the VX needle bearing to sit in the Lexus crank
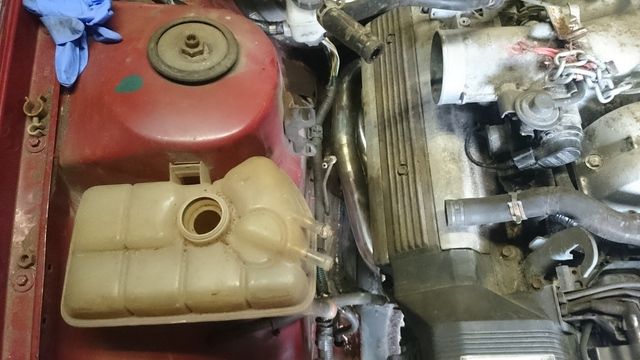
Anyway on Sunday I stripped the carlton of its 1800 8v carb:
Starting to be stripped:
Wait what? Solid front discs on delco calipers? Sick!!!!
Almost ready to come out:
and out!
I also removed the steering box, idler arm and joints as the whole lot is being replaced with rack and pinion, the bay is now ready to receive the V8 for a trail fit to see what fouls what (I am expecting a LOT of fouling).
Also the autobox will be removed to see how much work getting an Omega V6 gearbox to fit will be.
Lot of progress today, I started by removing the autobox, torque converter and flexplate. I was happy to find a totally bone dry engine behind so no need to replace the crank seal, I also ripped out the EGR pipework and chopped out the boss that goes into the O/S downpipe.
Once the back of the engine was ready I moved onto the front, removing the belt, aircon pump, PAS pump, tensioner, idler pulleys and the viscous fan so a fair bit of weight was saved. More removing went on in the engine bay, there is no way in hell the original servo could say to out that came with the master cylinder, all the brake lines (I will fabricate new ones) and finally the subframe. The engine bay is now ready for a trail fit and I can tell you it's TIGHT!!
The majority clears fine but there are issues:
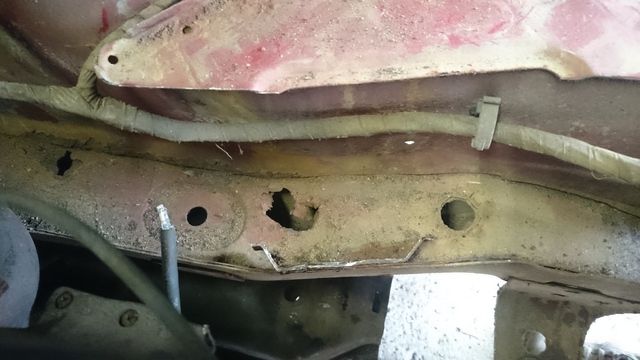
The exhaust manifolds overhang the chassis rails by about 5mm per side, the engine needs dropping about 1 inch so I will need to chop the chassis rails about a bit
The steering rack (Corsa-C) input shaft isn't far enough over to clear the O/S exhaust manifold, this will mean extra chassis rail chopping and some less-than-ideal steering joint angles to clear it
The oil filter hits the N/S chassis rail, it's either going to mean a shorter filter OR a relocation kit
Other than these things it's sitting in there happily at the moment and I am chuffed!!
I addressed the servo location issue, my initial idea was to go for a remote servo but one suited to my car is expensive, heavy and a space hog. Instead after some careful measurements I have found that a Astra-G servo mounted directly to the bulkhead will tuck behind the engine, winner!
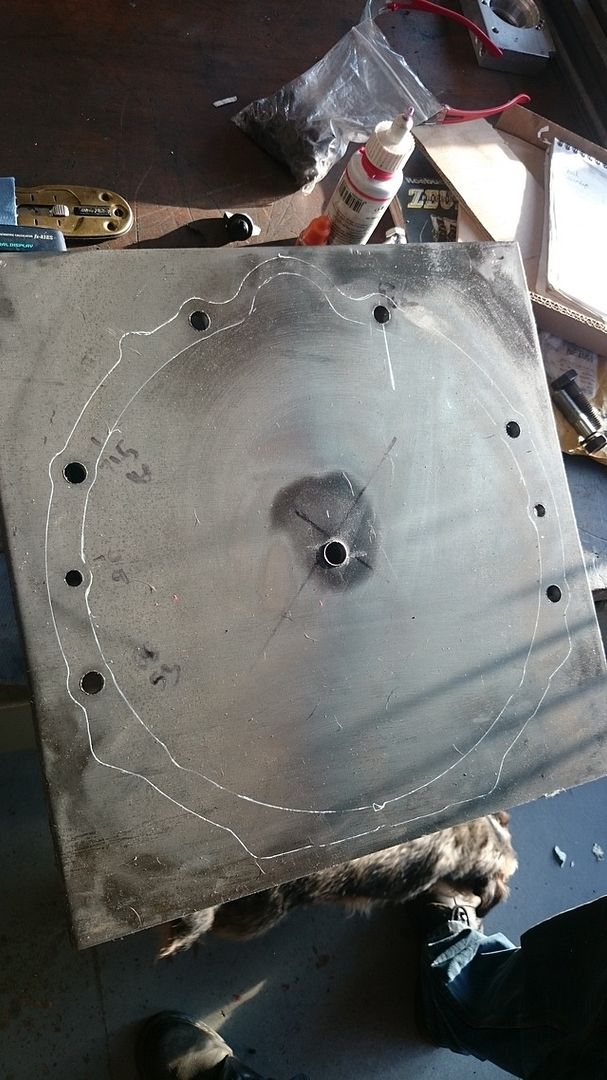
I started work on modding the 24v GSi subframe to accept the Corsa-C steering rack and V8 engine mounts, here is where the rack will sit:
The original engine mount brackets and dampener brackets were lopped off, I cooked some plates up and tacked them onto the subframe:
Then this happened:
Not to worry as I have a spare! I realised the upper platforms on the GSi subframe needed hacking to get the engine sitting right:
Other side all plated up:
With the rack in place I offered the engine up to see about the steering linkage to exhaust manifold interaction, it was pretty severe and no amount of tweeking will resolve it
 In fact the only way around the issue is to redesign the standard O/S exhaust manifold:
As you can see as standard it's design purely to save money and space with little regard for flow!! So I plan to redesign it for better clearance and flow.
Here is the Toyota MR2 Turbo flywheel to use on the 1UZFE, this is a common flywheel to use as it needs very little to be compatible:
The standard MR2 Turbo clutch friction disc is 225mm in diameter, a Z20LET friction disc (which has the correct splines) is 228mm so is a perfect fit. All I need to do is source a strong MR2 Turbo pressure plate (which is proving to be a bit annoying as I can't find a company that will sell me an uprated one separately):
The MR2 Turbo flywheel has exactly the same centre bore so it slides right on, also the ring gear has the same number of teeth and the same diameter:
There are two mods needed to make the flywheel work:
1: On the MR2 the starter is on the gearbox facing towards the engine, on the 1UZFE the starter in on the engine facing towards the gearbox. This means the teeth beveling is on the wrong side, only way to sort this out is a grinder with a 1mm cutting disc, a steady hand and a lot of spare time.
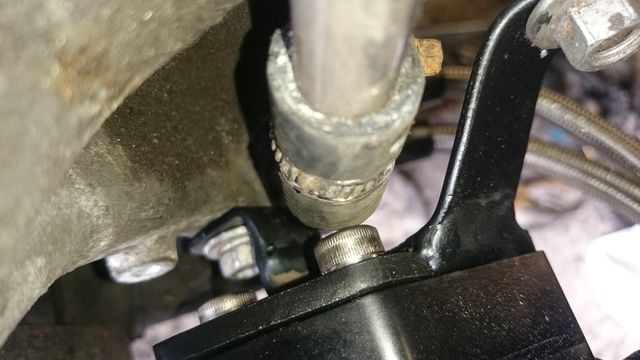
2: The PCD of the bolt holes is different to the crank so they need redrilling:
I managed to get the new mounts in the correct place, the engine now sits as close to the bulkhead as I am comfortable with:
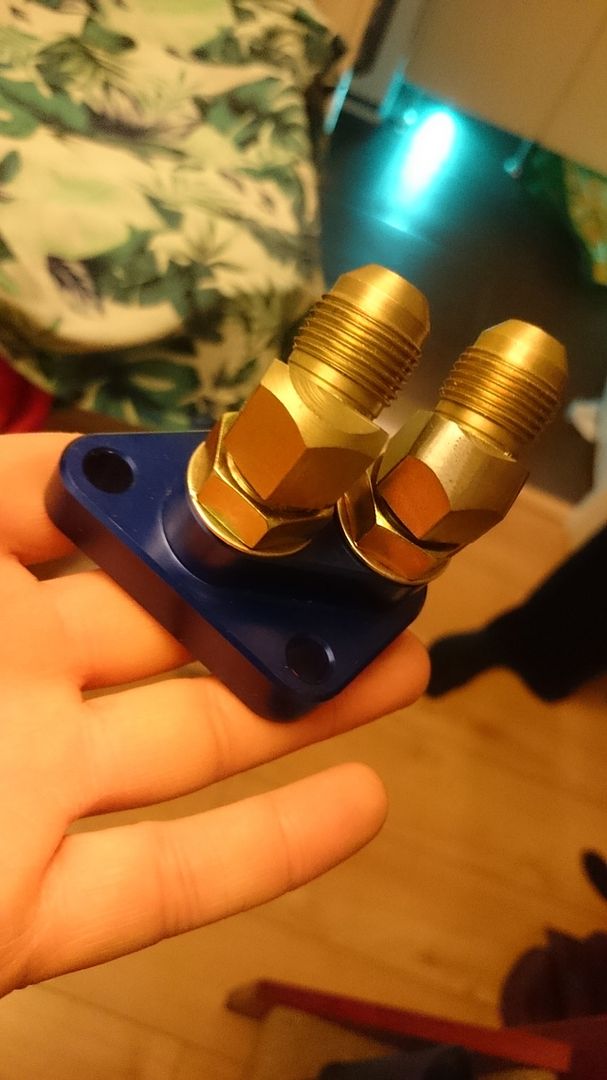
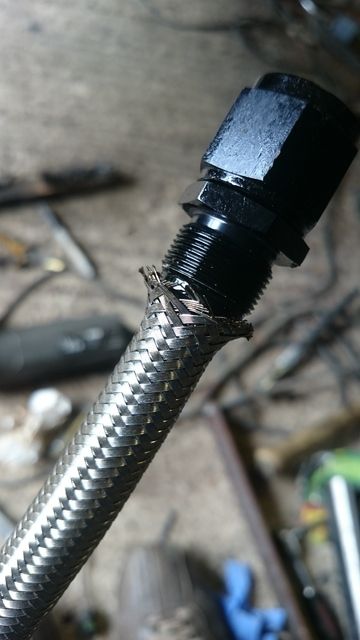
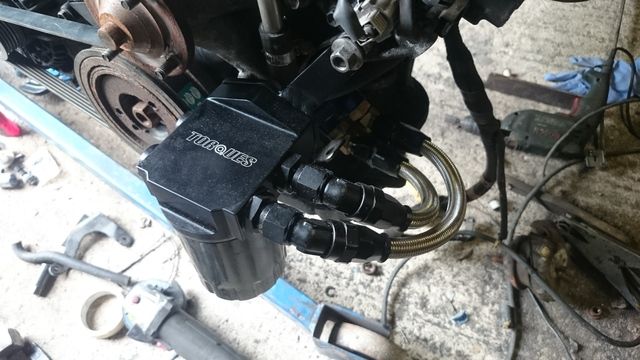
A new toy:
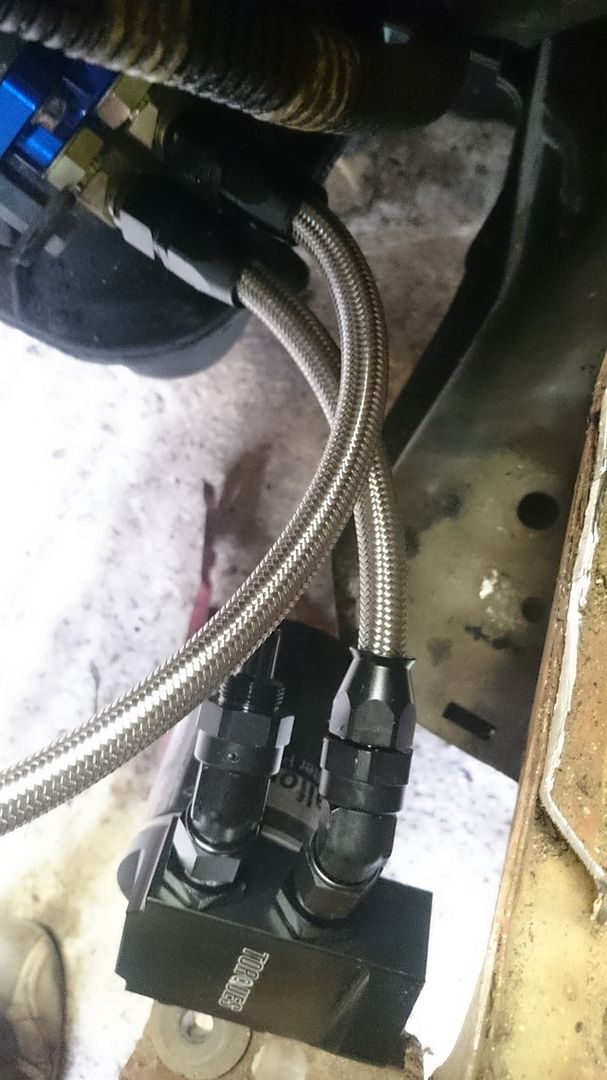
Its an oil filter relocation adaptor, the factory one sticks out a LOT from the block to originally clear the aircon pump. This little thing will allow me to run a remote filter and also a proper oil cooler.
I needed to tackle the steering but this meant making sure the O/S exhaust manifold cleared the steering joint, this in a way is a good thing because the standard manifold is appauling for flow and other tuners have reported massive increases in power by changing them.
In turned out that the whole thing had to be totally and utterly redesigned and took the whole day to do!!
I went from this:
To this:
The engine, subframe and steering rack are all attached and I found a block of wood that was the same dimensions as a section of the chassis rail. The steering joint now sits like this:
Room is tight down the back of the bulkhead so instead of a normal square 2x2 runner layout I went for a diamond shape and used a 3-runner collector and hacked into it to add a 4th.
The runners are all old bits I cut off an old 200sx turbo manifold (aftermarket with loads of handy tight bends) and an aftermarket M3 manifold/downpipe affair I won on ebay for 99p! Its not the neatest job but its all mandral bends and nice and smooth inside.
I have yet to touch the N/S but because there is no need to route the runners round anything I suspect it will be much simpler.
Time to tackle the N/S manifold, I thought it would be quicker... it wasn't
Original design:
The runners for ports 1 and 2 are fine, but 3 and 4 join them abruptly as they pass by, kinda sucks.
As the runners from 1 and 2 are fine I kept them, the back half of where I will start:
The back half is now done and the front half is bolted on:
Add a bit:
Clean and trim:
Add a bit more:
and repeat until finished:
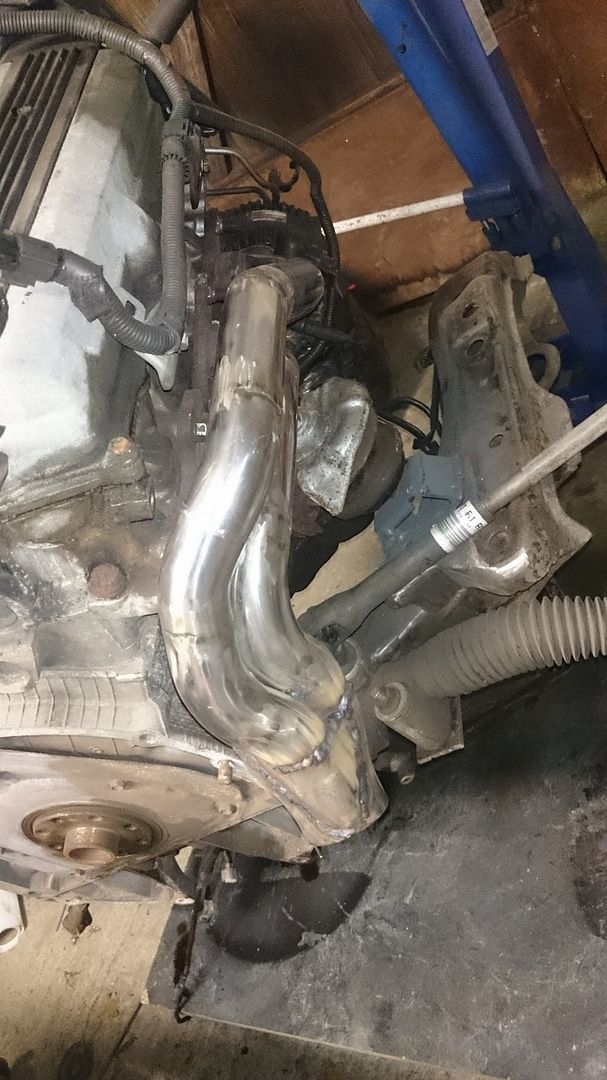
Add a collector:
Next up I wanted to see how the manifolds interact with the engine bay, but first it was time to ditch the silly oversized oil filter housing/cooler and replace it with my shiny thing:
I needed to tweek the position of the rack and thought I would be clever and angle it to make the linkage joint smoother... turned out I cocked it up:
Subframe on and engine in correct place, not bad with number 2 cylinder in line with the front axle:
N/S bank coil is too close to battery tray:
The O/S manifold was kissing the bulkhead, so I removed the engine and did what any self-respecting mechanic would do... hit it with a lump hammer:
Although I redesigned the O/S manifold to run as high as possible it wasn't enough to run a simple two joint linkage for the steering so now I will have to run a 3-joint linkage with a bearing!
Plenty of room up front which I am happy about:
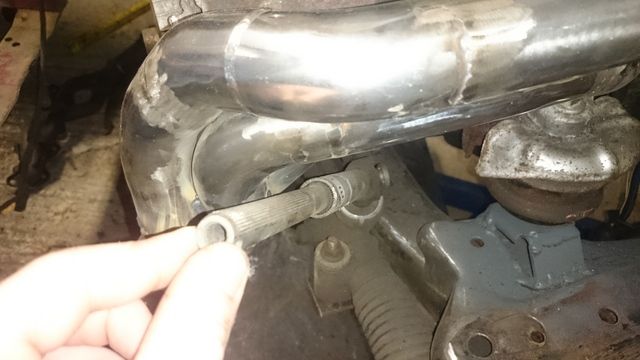
A couple of shots from underneath the car facing upwards on the O/S:
It's pretty tight be clears fine!


 )
)