duncanmartin
Club Retro Rides Member
Out of retro ownership
Posts: 1,320
Club RR Member Number: 70
|
|
Aug 26, 2016 14:47:39 GMT
|
I have a cunning plan.  Instead of welding a piece of 40mm box alongside the existing main beam, I can weld a 20mm box across the bottom of the main boom, and put a piece of plate on the end (with a captive nut welded to it). That will give me enough clearance for the drive part of chain, while still giving me a reasonable point to mount the derailleur on. Clearance: 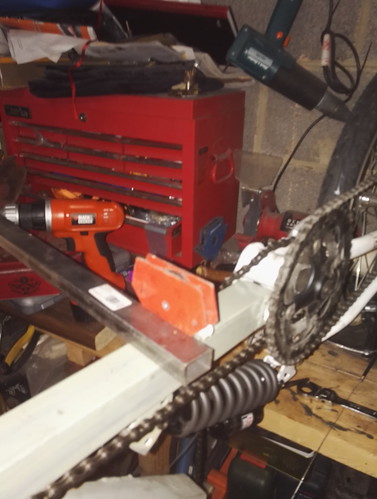 IMG_20160814_165325 IMG_20160814_165325 by duncancmartin, on Flickr Mounting point: 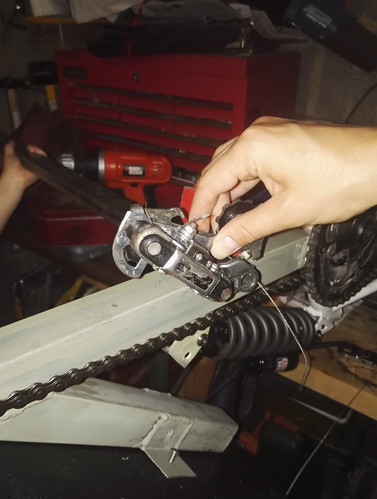 IMG_20160814_165318 IMG_20160814_165318 by duncancmartin, on Flickr I'll have to wait to cut, drill, and weld the end piece though - no garage time today. Cheers Duncan |
| |
|
|
|
|
duncanmartin
Club Retro Rides Member
Out of retro ownership
Posts: 1,320
Club RR Member Number: 70
|
|
Sept 9, 2016 20:28:16 GMT
|
It rolls! And it stops! And the pedals (sort of) allow you to make it go forwards! I welded a nut into some 20x20mm tube, and then welded that to the underside of the main boom: 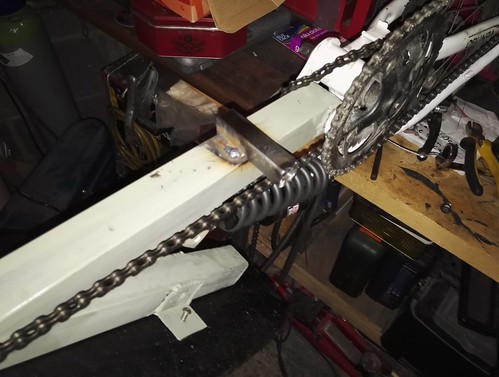 IMG_20160820_110920 IMG_20160820_110920 by duncancmartin, on Flickr Then I attached the derailleur to it, sorted out the chain length and turned it up the right way: 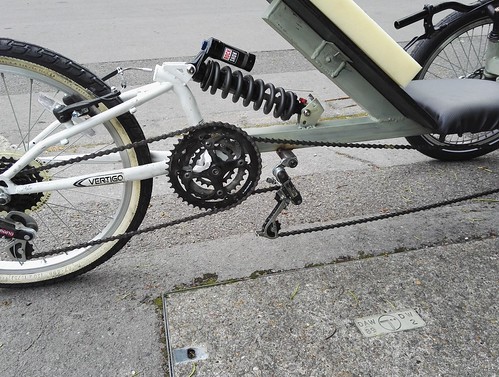 IMG_20160820_120004 IMG_20160820_120004 by duncancmartin, on Flickr Finally, I put handlebars on and the brake levers onto the bars, and tried to ride it! It worked! Unfortunately it was in the biggest gear it has, which was rather hard to pedal, and the derailleur I'm using for tensioning is kinda twisted so it doesn't do what i is suposed to and keep everything in line. I was able to ride it down the street, but coming back up what is only a slight include proved too much! Anyway, here it is after the maiden voyage! 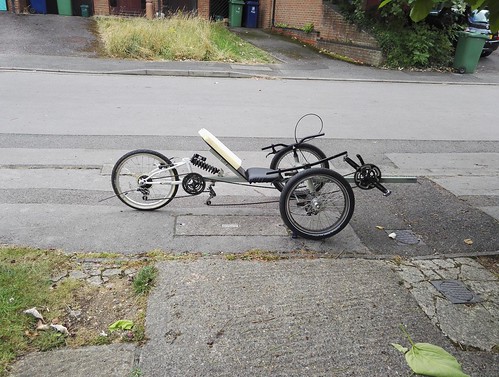 IMG_20160820_115958 IMG_20160820_115958 by duncancmartin, on Flickr I then went to a local bike shop and got some gear cables and outer - I've now sorted out the rear derailleur using a spare thumbshifter, and used another one for a parking brake using the V that was on the back wheel. That seems to work pretty well, but it was hard to take pictures of these bits! It started to rain halfway through these fixes, so I couldn't try another ride on it afterwards. Before I do any more I need to bolt some hooks to the garage wall so that I can hang some of my bikes up - without doing that I will have to carry it in and out of the garage, and it's a heavy old beast! So DIY to do first, and then fine-tuning of the trike! Not sure if I'll get any spare time this weekend, but I've got Monday Tuesday and Wednesday afternoons, so hopefully I can make some progress this week and get it working properly before the end of August (I'm away next weekend so can't work on it or ride it then)! Cheers Duncan PS - yes the brake cables need significant shortening (and the left hand one has much more travel than the right one, which needs to be sorted so I don't end up with too much brake steer), but it's still in dry assembly/proof of concept stage at the moment. There are loads of other bits I need to do before it's finished including (but not limited to): sort the seat out, fix the derailleur tensioner, improve/shorten the handlebars, add grips, shorten the front wheel axles on the outside, tweak the brakes, install a front derailleur (and shifter), shorten the main boom (I reckon it's long enough to fit a 7 foot person with some space to spare)band add chain tube(s) where needed. There is also the possibility of converting to under-seat steering if I don't like the tiller style, and obviously the original plan was to make it foldable. Damn, for a second then I thought I was almost finished!!!  |
| |
|
|
duncanmartin
Club Retro Rides Member
Out of retro ownership
Posts: 1,320
Club RR Member Number: 70
|
|
Sept 9, 2016 20:31:27 GMT
|
There's good news and bad news! The good news is that I've sorted out the issues I was having with the middle derailleur (not helped by the fact that if I have the back chain on the big ring and the front chain on the middle ring, then they clash with each other), and got the rear derailleur indexed properly. I then got to ride the trike up and down and up and down the road. My neighbour also had a go! :thumbsup: Here's a still (note the slope and the handbrake holding it): 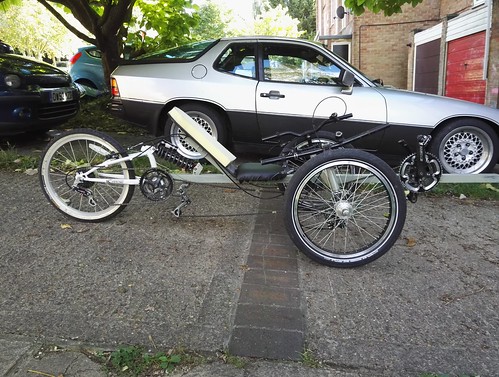 IMG_20160823_162403 IMG_20160823_162403 by duncancmartin, on Flickr There's even a video (horribly shaky, due to being taken by my 7 yo) here: 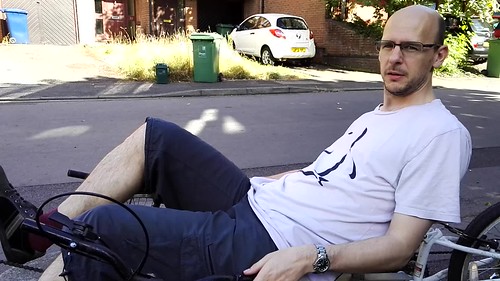 VID_20160823_162700 VID_20160823_162700 by duncancmartinThe bad news is that while I was riding it, I realised that the crank alignment was horrible (this picture should show that the chain is parallel to the main boom, except for where it goes along the chainset, where the front points outwards): 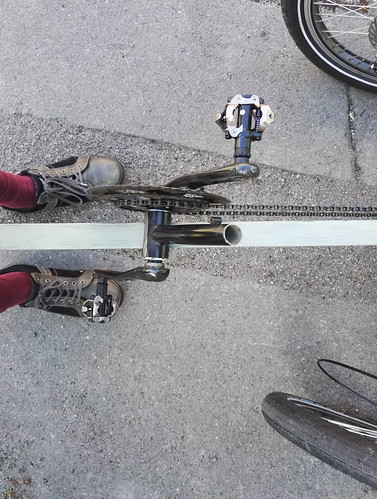 IMG_20160823_162941 IMG_20160823_162941 by duncancmartin, on Flickr 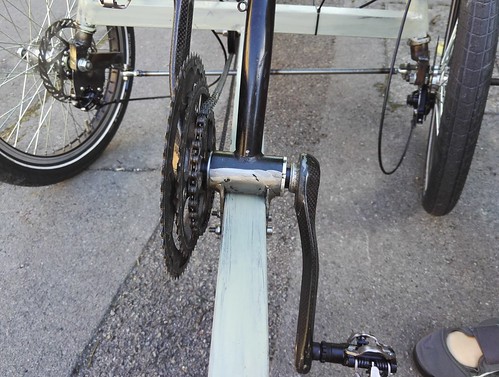 IMG_20160823_162923 IMG_20160823_162923 by duncancmartin, on Flickr On more serious examination, I discovered a crack in the weld holding the bottom bracket to the left hand plate (as seen from sitting in the seat). 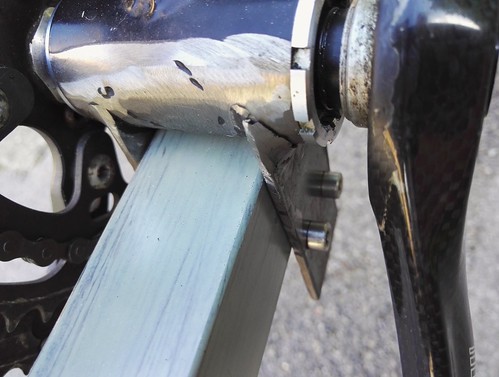 2016-08-24_09-03-47 2016-08-24_09-03-47 by duncancmartin, on Flickr Obviously this will need to come off and get re-welded (and for that I'll need to remove the cranks and the BB). I'm not sure if I need to remove it and then completely re-weld it, or can I get away with straightening everything up, cleaning up the old welded joint where it failed and then welding it again, or need to disassemble and go back to bare metal and 2 separate pieces. I remember (you might even be able to find it on this thread) that I forgot to clean the BB shell properly so the welds were ugly - I thought they were strong enough, but I guess they weren't and that's why this has happened. I also need to sort out the tip on my MIG - I think it's a bit old and warn, which means that sometimes the wire just pushes the torch away from the thing you're trying to weld! It's also a bit splattery. Not going to help with making strong welds... Anyway, at least I have proof that the concept works. The only bit that concerns me is how low the tensioner for the front chain run goes - I'm bound to catch it on a speedbump at some point. It's necessary if I want to run gears at the front though and there's nowhere else to put it (unless I guess I flip it completely and run it where my left ankle would go?). Bright ideas about how to fix this will be forthcoming at some point! Cheers Duncan |
| |
|
|
duncanmartin
Club Retro Rides Member
Out of retro ownership
Posts: 1,320
Club RR Member Number: 70
|
|
|
|
I fixed the crank alignment and re-welded the bottom bracket shell a while ago. But in the last few weeks I have finished the cut and shut on the tube for the front derailleur, fitted it and made it work. 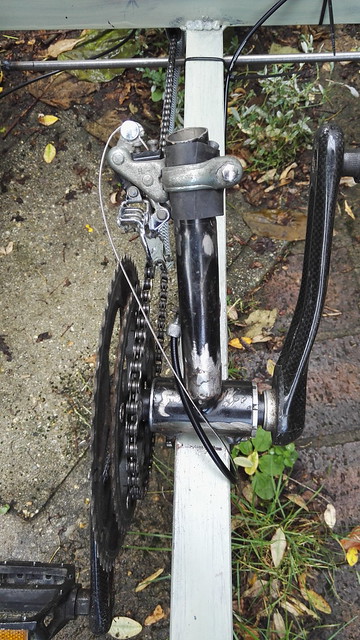 IMG_20170805_150259 IMG_20170805_150259 by duncancmartin, on Flickr Today I had my first ride on it!  IMG_20170805_155224 IMG_20170805_155224 by duncancmartin, on Flickr  IMG_20170805_155231 IMG_20170805_155231 by duncancmartin, on Flickr I did a whole 2.8km! It was huge fun. On the plus side, the gears all work, and they are low enough to mean that I won't need to get off and push much! The handbrake works well, and the front brakes are amazing (and contribute to it's agility because you can do torque vectoring ). On the negative, the gears don't go all that high (the problem with 20" wheels and no step-up gearing). I need to sort out the headsets, because they are loose, and it has wicked bump steer! I also need to make the backrest more effective, or add a headrest, because it felt like I was doing crunches for 15 minutes! And I should chop the handlebars in front of the stem so that they stop whacking me in the shins! Plus, if I actually want to use it, when I've sorted that lot out I need to make some mudguards and work out how to mount lights and a flag. Much progress made, more to do. |
| |
|
|
|
|
|
|
|
|
good effort! looks very much like the ICE trikes layout, other than the steering!
tricky thing to get right i would imagine, Ackerman angles and all that, length of steering arms and rods, ice seem to have it nailed though as every one ive ridden has steered beautifully (we're a Dealer since beginning of 2016, sold 16 now i think)
|
| |
|
|
duncanmartin
Club Retro Rides Member
Out of retro ownership
Posts: 1,320
Club RR Member Number: 70
|
|
|
|
good effort! looks very much like the ICE trikes layout, other than the steering! tricky thing to get right i would imagine, Ackerman angles and all that, length of steering arms and rods, ice seem to have it nailed though as every one ive ridden has steered beautifully (we're a Dealer since beginning of 2016, sold 16 now i think) I'd love an ICE - they look like fantastic machines. Sadly they (and their rivals) are a bit on the pricey side when I don't know how much use I would get out of it. I think the Ackerman stuff is OK because I followed the Atomic Zombie instructions on that. If I can't get on with the tiller style steering, there's a modification that's part of the AZ Warrior trike plans that allows under seat steering. I've got all the bits, but that adds extra complication and I want to try this first! It would have been a lot easier to build a 2 wheeler recumbent though (that might be my next project)! Cheers Duncan |
| |
|
|
duncanmartin
Club Retro Rides Member
Out of retro ownership
Posts: 1,320
Club RR Member Number: 70
|
|
|
|
I fitted an eBay flag today by drilling new holes in the mounting bracket like this:  IMG_20170806_175109 IMG_20170806_175109 by duncancmartin, on Flickr Now it looks like this:  IMG_20170806_175042 IMG_20170806_175042 by duncancmartin, on Flickr and I chopped a small amount off the front part of the bars - they now look like this:  IMG_20170806_175102 IMG_20170806_175102 by duncancmartin, on Flickr They aren't completely chopped, but they make a massive difference to how easy it is to turn without bashing my legs. I don't think the handlebar length is the problem for my back. I think the lack of an upper back rest is the issue - the backrest is currently stopping just below my shoulder blades. I need to build the top bit of the back rest as per the design. The instructions aren't clear on exactly how long it should be (or exactly where on my body the rest should stop) - where do they reach on the ICE trikes when set up correctly? Cheers Duncan |
| |
|
|
|
|
|
|
|
|
What you should do is mould a seat to your back.
Build a simple wooden base in your approximate seating position, lay a bin liner over it, squirt expanding foam into the bag and lay on it until it sets.
Take a fibre glass mould from this, clean up both sides, line with stick on foam, et voila, one custom comfy seat
Dave
|
| |
|
|
richrolls
Part of things

Posts: 318
Club RR Member Number: 38
|
|
Aug 13, 2017 20:09:42 GMT
|
Really nice, that. Have you seen the Jetrike site? here www.jetrike.com/I built one from their plans (free download....YORKSHIRE!) a bit ago for my eldest, he has CP and cannot ride a normal bike. 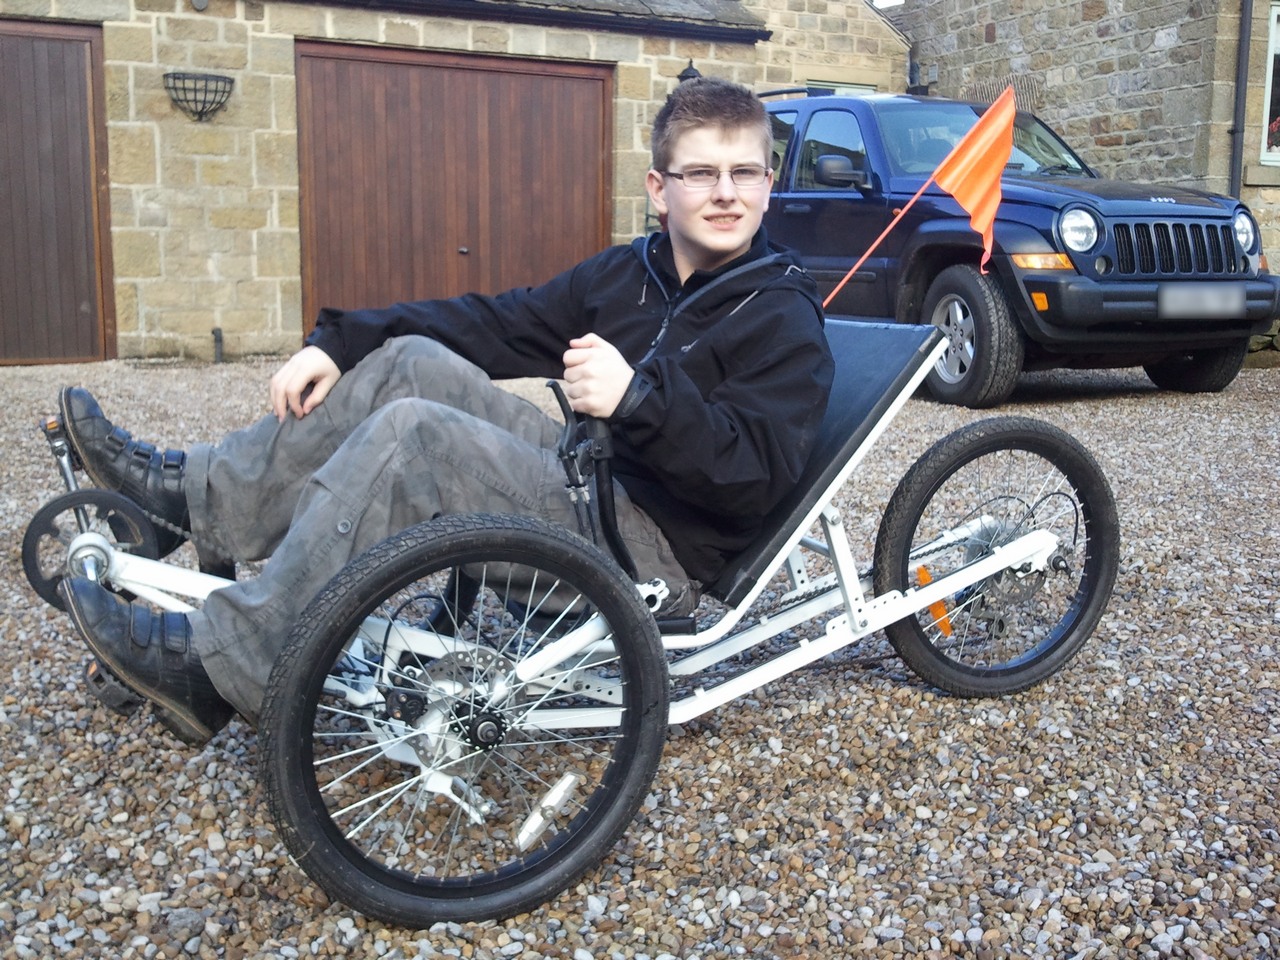 on Flickr 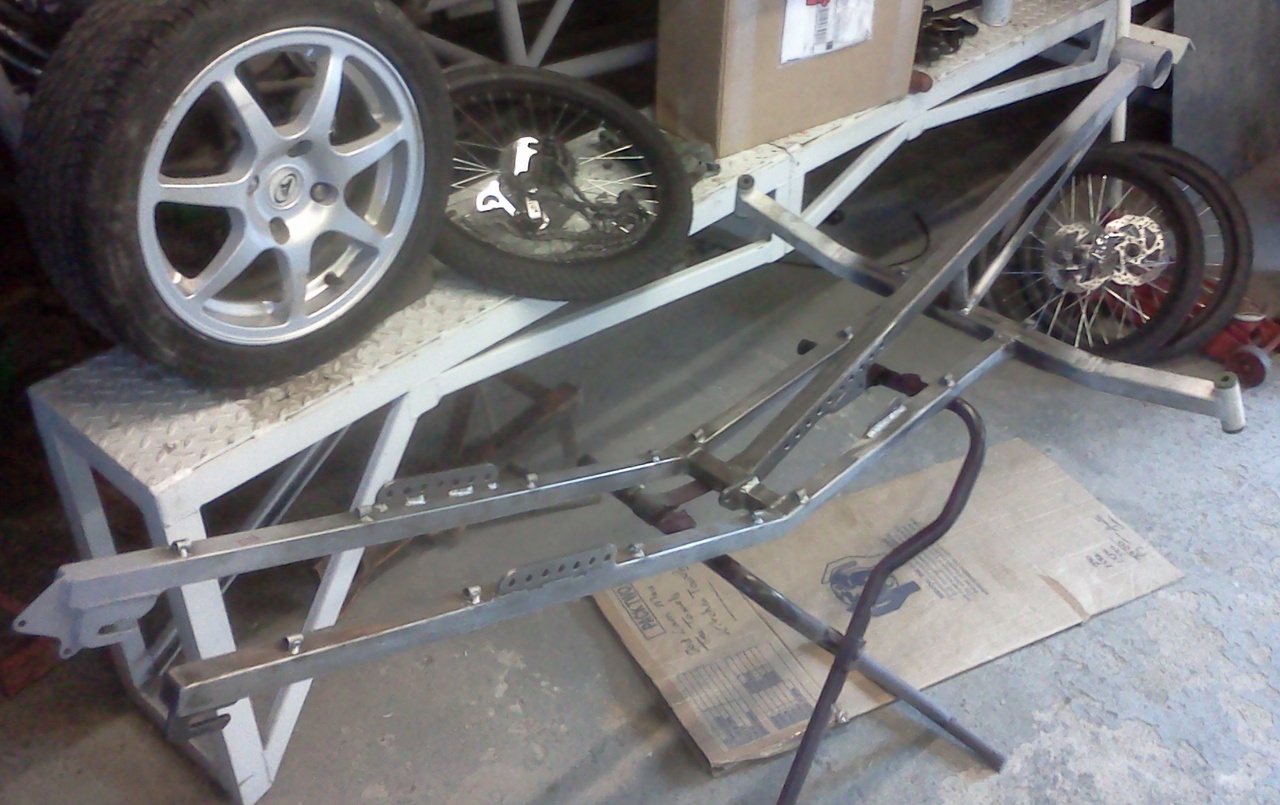 on Flickr 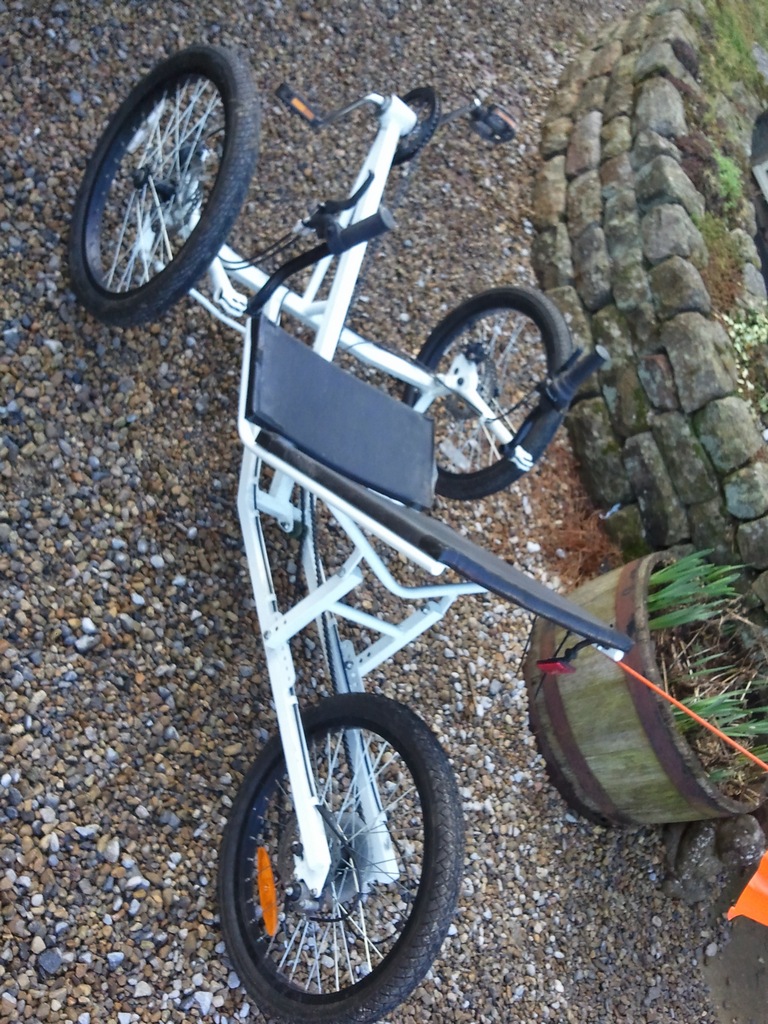 on Flickr Please keep us upto date. That is a very interesting build. I am officially stealing your idea for the BMX wheels/brake set up. |
| |
Last Edit: Aug 13, 2017 20:10:50 GMT by richrolls
|
|
duncanmartin
Club Retro Rides Member
Out of retro ownership
Posts: 1,320
Club RR Member Number: 70
|
|
Aug 14, 2017 20:20:54 GMT
|
|
That's a really cool trike. The adjustable seat is especially neat. I'm intrigued by the way the steering works - what are you using for headsets?
Cheers
Duncan
|
| |
|
|
|
|
richrolls
Part of things
Posts: 318
Club RR Member Number: 38
|
|
Aug 15, 2017 18:46:29 GMT
|
Thanks. Headsets are really as the Jetrike plans, 1" tube and I bushed them with oil filled nylon.Hopefully the pictures will make it a bit clearer....even if the uprights are hung upside down on the paint rail.. 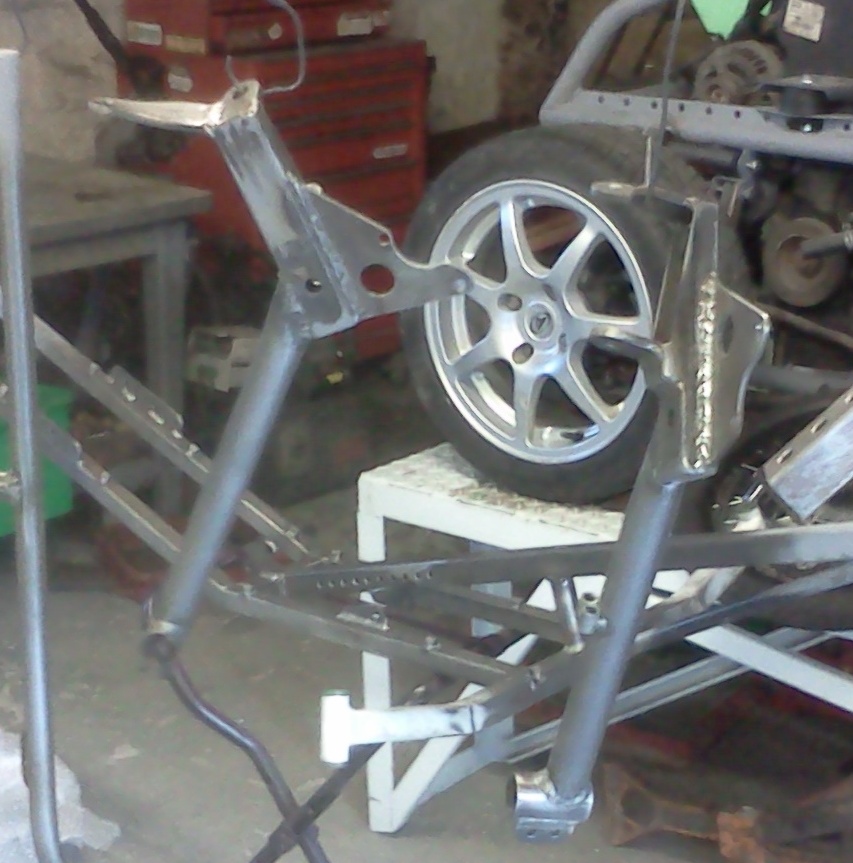 on Flickr The green circles highlight the bushes.  on Flickr The picture below gives a clear (not much) of the steering. The "handlebars" are welded to the uprights/headsets and these are connected via the drag link. this is shorter than the "kingpin" centre distance therefore giving a bit of ackermans blah blah and with the heavy caster angle the wheels on lock lean and give a really good turn in. 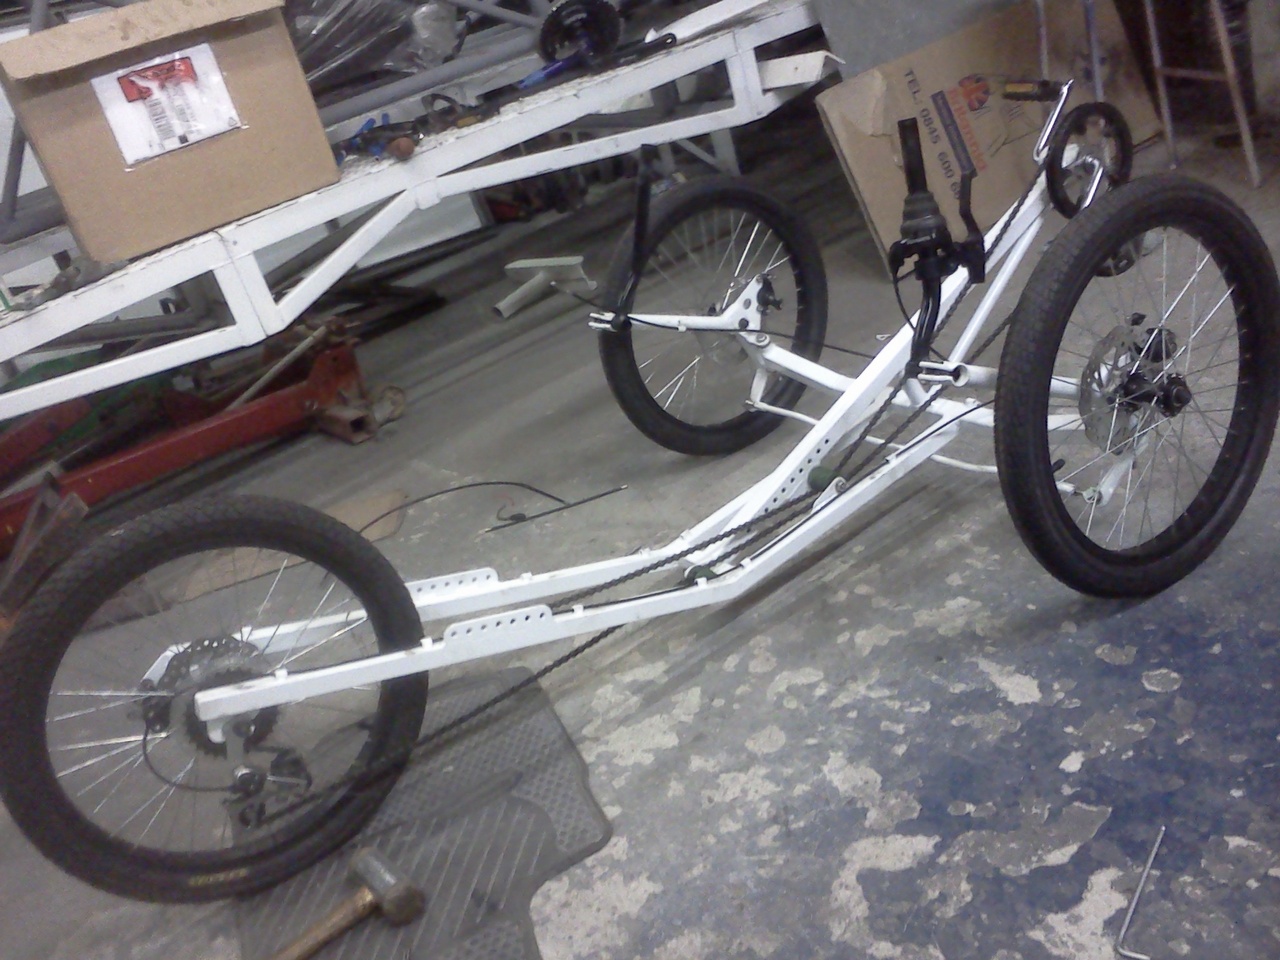 on Flickr |
| |
|
|
duncanmartin
Club Retro Rides Member
Out of retro ownership
Posts: 1,320
Club RR Member Number: 70
|
|
Aug 16, 2017 19:17:14 GMT
|
|
I like that. I fear for the long term durability, but I guess you can just change the bushes when they are worn. Seems like the opposite approach to the zombie one (use as many regular bike parts as possible) - instead you make everything purposely for the design.
Yours looks very nicely executed as well (mine's a bit rough and ready).
Cheers
Duncan
|
| |
|
|
|
|
|
|
|
|
Excellant work
|
| |
It will come in handy even if you never use it
|
|


 Instead of welding a piece of 40mm box alongside the existing main beam, I can weld a 20mm box across the bottom of the main boom, and put a piece of plate on the end (with a captive nut welded to it). That will give me enough clearance for the drive part of chain, while still giving me a reasonable point to mount the derailleur on.


