goldnrust
West Midlands
Minimalist
Posts: 1,889
|
|
|
|
Awesome  It’s such a great mile stone to reach in a project like this when you can finally pack the welder away. Though I normally find a couple of days into paint prep the feeling starts to wear off. Hahaha. |
| |
|
|
|
|
|
|
|
May 14, 2020 19:08:57 GMT
|
|
|
| |
|
|
|
|
|
May 14, 2020 19:11:33 GMT
|
|
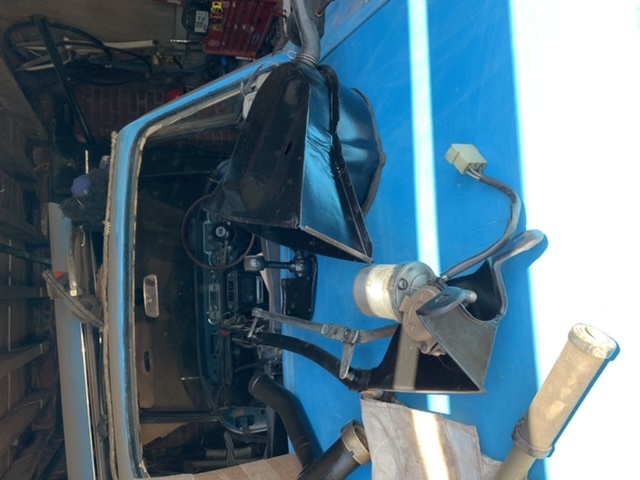
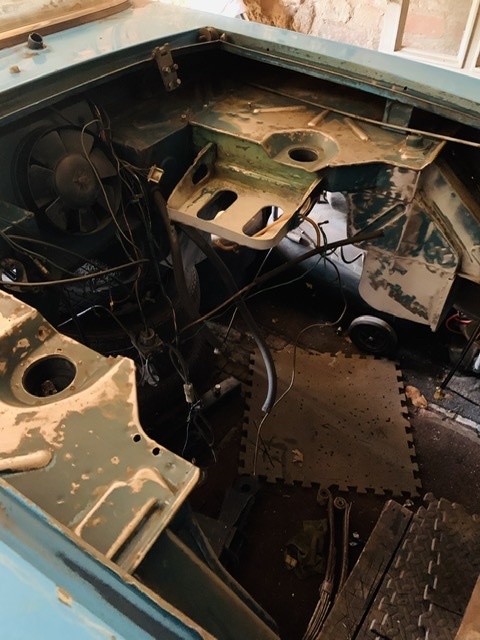
Engine bay also almost fully keyed back with most of the old curse word paint and rust patches sorted. No rot at all in the engine bay thankfully.
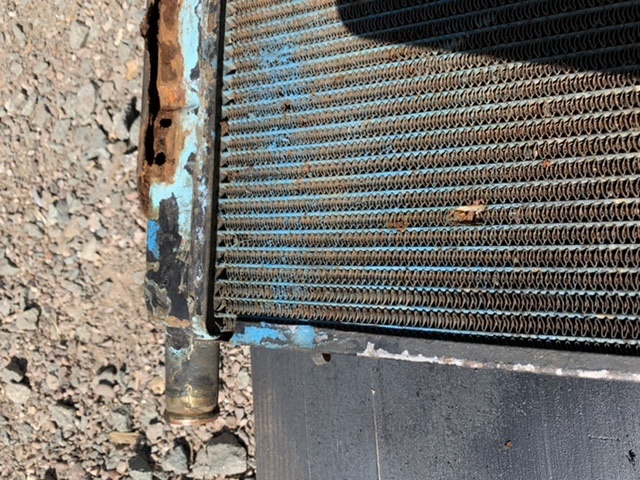
Radiator is FUBAR on the bottom tank. The bracket it sits on as rotted out and peeled away leaving two holes? Is this repairable?
|
| |
|
|
fulvia1436
Club Retro Rides Member
Finally started a thread for my Fulvia life
Posts: 343  Club RR Member Number: 63
|
Flight of the Fulviafulvia1436
@fulvia1436
Club Retro Rides Member 63
|
May 14, 2020 19:20:02 GMT
|
|
It is repairable, but I'd find a more modern aluminium crossflow job to replace that stupid original design. Having said that, I had a brass/copper one made, for not a lot of money, to suit my engine needs.
Spk to Neil at Law-Mech Radiators,
01142 338959
|
| |
Last Edit: May 14, 2020 19:22:23 GMT by fulvia1436
'59 Austin A40, '59 VW Beetle, '63 Mk1 Cortina, '57 Austin Gypsy, '68 Fiat 850 Coupe, '68 Alfa Duetto Spider, '72 Lancia Fulvia 1.3S, '73 Lancia 2000 Sedan ie., '72 Lancia 2000 Sedan, '67 Lancia Fulvia 1.3, '83 VW Passat GL5 Estate, '81 Volvo 245 Estate, '85 Lancia Thema 8V Turbo Estate, '99 Lancia Kappa 20V Turbo Estate, '00 VW Sharan VR6, '06 Fiat Multipla 1.9 JTD, '10 Fiat Multipla 1.9 JTD, '66 Lancia Fulvia 1.3
|
|
|
|
|
May 14, 2020 20:10:24 GMT
|
Justin, i did think to myself today shall i just go ahead and get a modern alloy replacement. Its quite a handsome beast when cleaned up i imagine but what a pain in the  getting it repaired when i could spend my money on something more efficient. Cheers |
| |
|
|
fulvia1436
Club Retro Rides Member
Finally started a thread for my Fulvia life
Posts: 343  Club RR Member Number: 63
|
Flight of the Fulviafulvia1436
@fulvia1436
Club Retro Rides Member 63
|
May 14, 2020 20:40:42 GMT
|
|
Just getting the bu66er in and out is what first turned me over to something different and certainly better. And when the fuel injection got in the way of the fan cowling, that clinched it!
|
| |
'59 Austin A40, '59 VW Beetle, '63 Mk1 Cortina, '57 Austin Gypsy, '68 Fiat 850 Coupe, '68 Alfa Duetto Spider, '72 Lancia Fulvia 1.3S, '73 Lancia 2000 Sedan ie., '72 Lancia 2000 Sedan, '67 Lancia Fulvia 1.3, '83 VW Passat GL5 Estate, '81 Volvo 245 Estate, '85 Lancia Thema 8V Turbo Estate, '99 Lancia Kappa 20V Turbo Estate, '00 VW Sharan VR6, '06 Fiat Multipla 1.9 JTD, '10 Fiat Multipla 1.9 JTD, '66 Lancia Fulvia 1.3
|
|
|
|
|
May 18, 2020 20:06:03 GMT
|
Front lights stripped down, cleaned up, rubbed back and painted. All the screws, adjusters were super curse word so need to refurb those and replace many of them. My rear lights and lenses and not great at all. They will require some love. What’s best to clean manky old lenses? 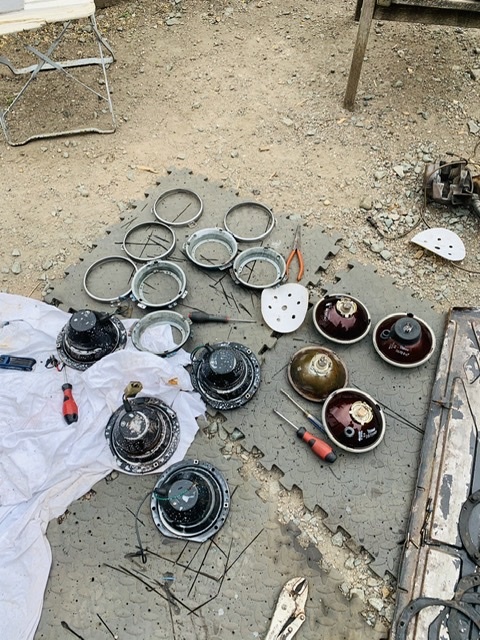 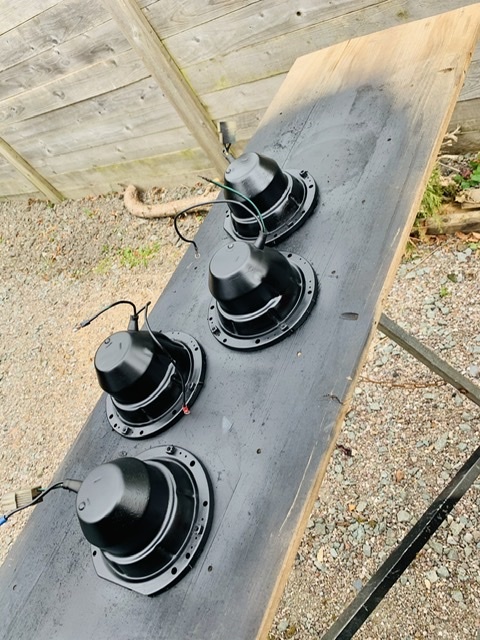 |
| |
|
|
fulvia1436
Club Retro Rides Member
Finally started a thread for my Fulvia life
Posts: 343  Club RR Member Number: 63
|
Flight of the Fulviafulvia1436
@fulvia1436
Club Retro Rides Member 63
|
May 18, 2020 20:12:45 GMT
|
|
Well done with the front light bowls, but personally I've replaced all that rusty, heavy tin with plastic bowls and modern lamps!
When you come to the rear lamps, I've got quite a few old ones that I'm not going to use, so msg me.
|
| |
'59 Austin A40, '59 VW Beetle, '63 Mk1 Cortina, '57 Austin Gypsy, '68 Fiat 850 Coupe, '68 Alfa Duetto Spider, '72 Lancia Fulvia 1.3S, '73 Lancia 2000 Sedan ie., '72 Lancia 2000 Sedan, '67 Lancia Fulvia 1.3, '83 VW Passat GL5 Estate, '81 Volvo 245 Estate, '85 Lancia Thema 8V Turbo Estate, '99 Lancia Kappa 20V Turbo Estate, '00 VW Sharan VR6, '06 Fiat Multipla 1.9 JTD, '10 Fiat Multipla 1.9 JTD, '66 Lancia Fulvia 1.3
|
|
|
|
|
May 18, 2020 20:52:32 GMT
|
|
Damn you Justin and your lightweight / modern upgrades making me jealous. If I wasn’t on such a tight budget at the moment I think I would have also binned half the bits I’ve had to mess with. These lights took me all day, all bloody day to sort. Yes re: rear lights i may just get away with what I have with a bit of TLC but will keep in mind because they are pretty damn tatty. I don’t want perfect or even great. Just half decent really.
|
| |
|
|
|
|
|
May 21, 2020 19:08:41 GMT
|
Cleaning up the rad before I have it repaired and also having a scrape at the fuel tank (no power tools) to see the extent of the rust / holes and damage I’ve discovered. There appears to be a dent on the worst corner. Possibly why it feels so thin here. Anyway I’ll get that patched up too once I’ve removed all the rubberised protective paint. 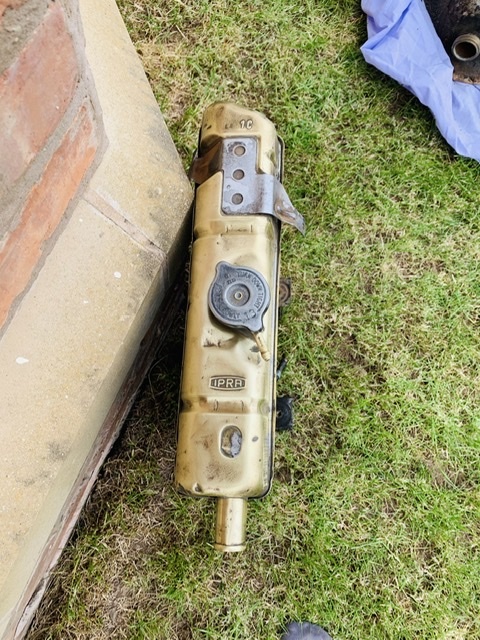 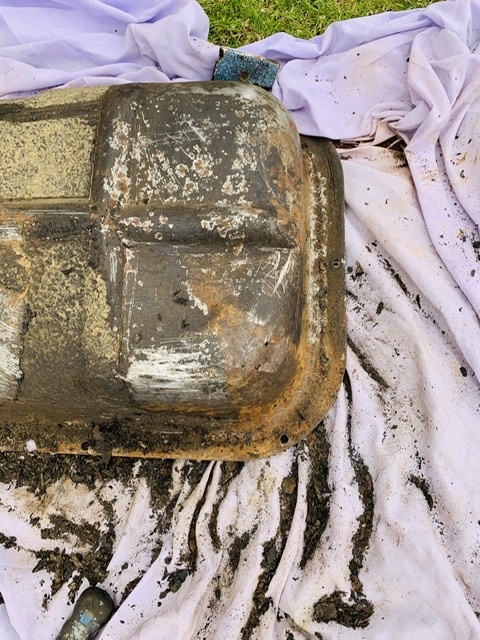 |
| |
|
|
|
|
fulvia1436
Club Retro Rides Member
Finally started a thread for my Fulvia life
Posts: 343  Club RR Member Number: 63
|
Flight of the Fulviafulvia1436
@fulvia1436
Club Retro Rides Member 63
|
May 21, 2020 19:31:15 GMT
|
Cleaning up the rad before I have it repaired and also having a scrape at the fuel tank (no power tools) to see the extent of the rust / holes and damage I’ve discovered. There appears to be a dent on the worst corner. Possibly why it feels so thin here. Anyway I’ll get that patched up too once I’ve removed all the rubberised protective paint.   It's the seam around the top, and the top surface that suffer most. The seam, because it's a seam, and the top, because it suffers from condensation damage and becomes perforated. I've come across a lot of Fulvia owners complaining of petrol smells in the car, and it's always due to fuel under the boot mat. |
| |
Last Edit: May 21, 2020 19:32:17 GMT by fulvia1436
'59 Austin A40, '59 VW Beetle, '63 Mk1 Cortina, '57 Austin Gypsy, '68 Fiat 850 Coupe, '68 Alfa Duetto Spider, '72 Lancia Fulvia 1.3S, '73 Lancia 2000 Sedan ie., '72 Lancia 2000 Sedan, '67 Lancia Fulvia 1.3, '83 VW Passat GL5 Estate, '81 Volvo 245 Estate, '85 Lancia Thema 8V Turbo Estate, '99 Lancia Kappa 20V Turbo Estate, '00 VW Sharan VR6, '06 Fiat Multipla 1.9 JTD, '10 Fiat Multipla 1.9 JTD, '66 Lancia Fulvia 1.3
|
|
goldnrust
West Midlands
Minimalist
Posts: 1,889
|
|
May 21, 2020 20:05:16 GMT
|
|
The top of my tank was like Swiss cheese, and causing the fuel smells that Fulvia1436 mentions. I used cloth soaked in POR15 fuel tank liner to bridge the big holes, which worked great .
|
| |
|
|
|
|
|
May 21, 2020 20:19:58 GMT
|
|
Ah so it’s the top surface that suffers?! Bloomin typical. Would love to pick up an alloy tank if I could but as always it’s funds. Better make a start on the top to see what’s going on. I completely disregarded the top because it looks so good.
|
| |
|
|
fulvia1436
Club Retro Rides Member
Finally started a thread for my Fulvia life
Posts: 343  Club RR Member Number: 63
|
Flight of the Fulviafulvia1436
@fulvia1436
Club Retro Rides Member 63
|
May 21, 2020 21:50:25 GMT
|
|
I still have 2 tanks going begging.
£100 and £200.
I've also got an alloy tank that could be adapted for use in the boot. I'll put up a pic later on. Don't want much ~ need space!
|
| |
'59 Austin A40, '59 VW Beetle, '63 Mk1 Cortina, '57 Austin Gypsy, '68 Fiat 850 Coupe, '68 Alfa Duetto Spider, '72 Lancia Fulvia 1.3S, '73 Lancia 2000 Sedan ie., '72 Lancia 2000 Sedan, '67 Lancia Fulvia 1.3, '83 VW Passat GL5 Estate, '81 Volvo 245 Estate, '85 Lancia Thema 8V Turbo Estate, '99 Lancia Kappa 20V Turbo Estate, '00 VW Sharan VR6, '06 Fiat Multipla 1.9 JTD, '10 Fiat Multipla 1.9 JTD, '66 Lancia Fulvia 1.3
|
|
|
|
|
|
|
|
Nice to see you worrying about something other than major welding sections!....those light bezels look great.
I've had good success with polishing compounds to bring stuff back to decent standard. even very fine wet sanding works well...1200 and up...
JP
|
| |
I know its spelled Norman Luxury Yacht, but its pronounced Throat Wobbler Mangrove!
|
|
|
|
|
|
|
Nice to see you worrying about something other than major welding sections!....those light bezels look great. I've had good success with polishing compounds to bring stuff back to decent standard. even very fine wet sanding works well...1200 and up... JP Yes. 3 years of welding has been hard to swallow at times but glad to move on to some of the finer details I guess. Still a few more bits to weld though. Torch isn’t hung up just yet. Yes I’ve been using very fine papers and pads after a session with the wire wheel. Seems to do the job. |
| |
|
|
|
|
|
May 28, 2020 20:27:46 GMT
|
The boring jobs getting done but nobody else will do them so onwards I go. Rear axle wire wheeled back / sanded out any corrosion and painted in chassis satin black. Much better. Ready for the rear brake backing plates I have finally sourced - what a nightmare getting those. A few more bits at the rear to clean up, calipers etc ready to do a trial run assembly to see what / if I’m missing anything. 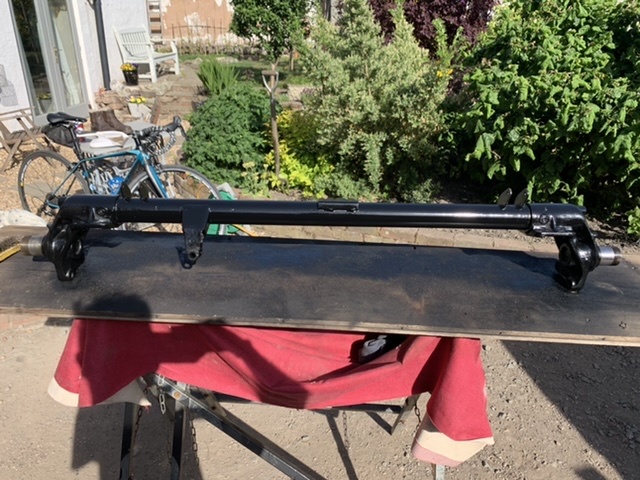 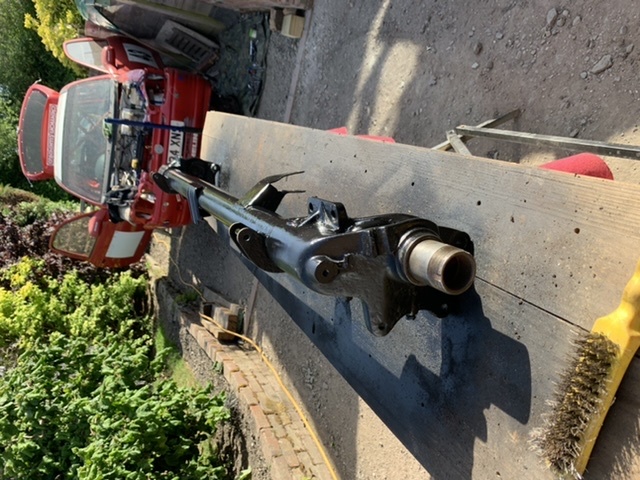 |
| |
|
|
|
|
|
|
|
Quick run through of rear beam and suspension set-up to see if I’m missing anything. Nice to be fitting cleaned and painted items back up underneath even if it’s just giving bits a new lease of life for a while. Will most definitely be removing again before I fit properly to apply some copper slip and grease where needed. Really put a good few hours of keying back the inside like I have in the engine bay also so I can get some primer down later down the line. Also want to weld in a few small brackets to put an OMP navigators foot plate I have kicking about going to waste. Tempted to put a carbon footplate in drivers side also so it’s not so bare when finished. Don’t think I’ll bother carpeting. Keep it fairly raw inside. 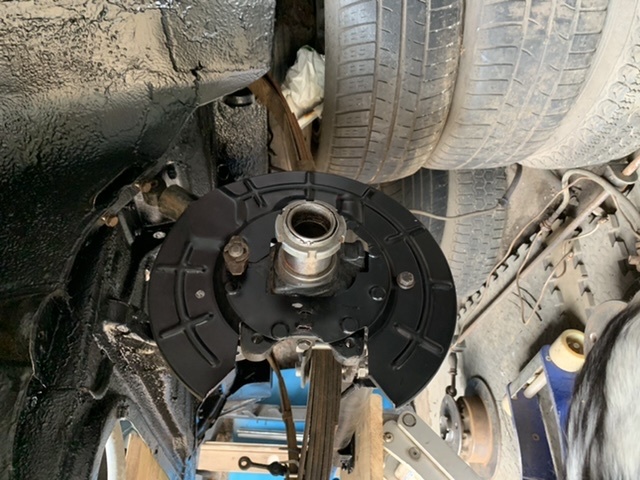 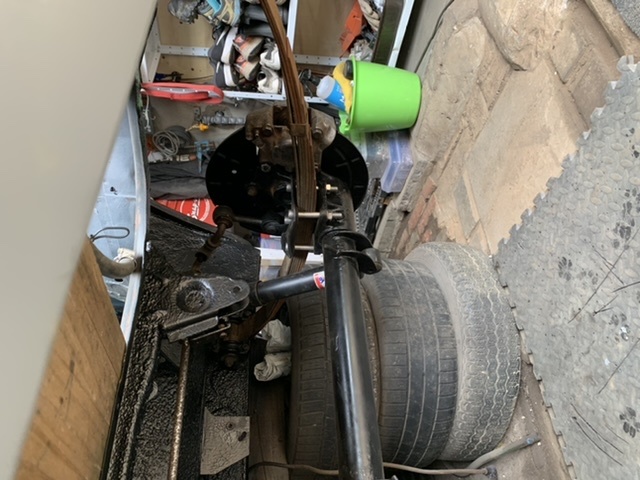 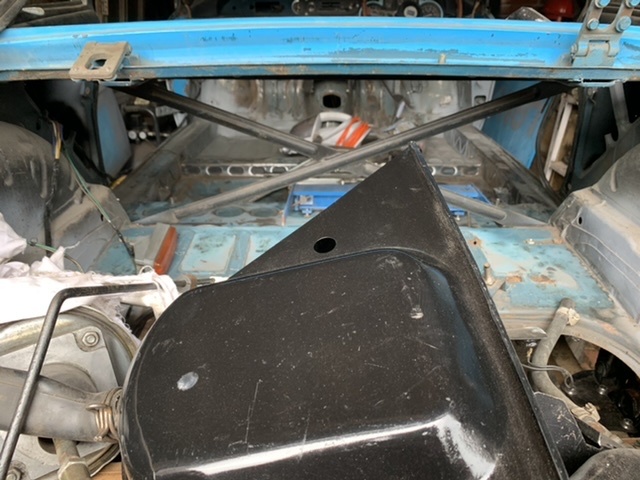 |
| |
|
|
|
|
|
|
|
Managed to get myself a new gas bottle so I could crack on with the last bits of fabrication / repair work. I’m quite glad as wire wheeling rusty old components has become tiresome and I need a break from it. Spot light brackets made up and stitched in. Cibie 45s will hang down from the bracket and will have lamp stay bars to secure below. Need to work on fitting the front indicators in tomorrow due to running no bumpers. May try and utilise the old brackets from the bumpers that allowed them to sit recessed in. I don’t like them sitting on the outside of the body as they are quite bulky items. 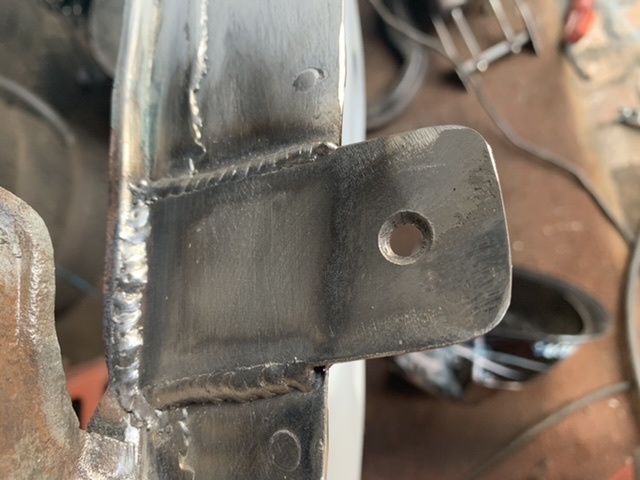 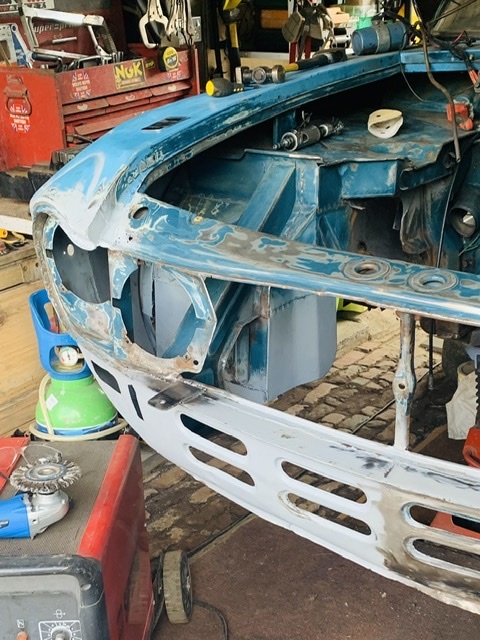 |
| |
|
|
|
|
|
|
|
Front indicators in. Wanted these to sit in rather than on the body so utilised the original brackets from the bumper pods and welded them to the back of the valance. Not the easiest of jobs but 5 hours later and I’m really happy with them. Nice and snug and solid. I was able to use two of the four brackets but fabricated two myself for a better flush fit... front suspension fished out of the shed to start with more wire wheeling and cleaning up...when will it end! 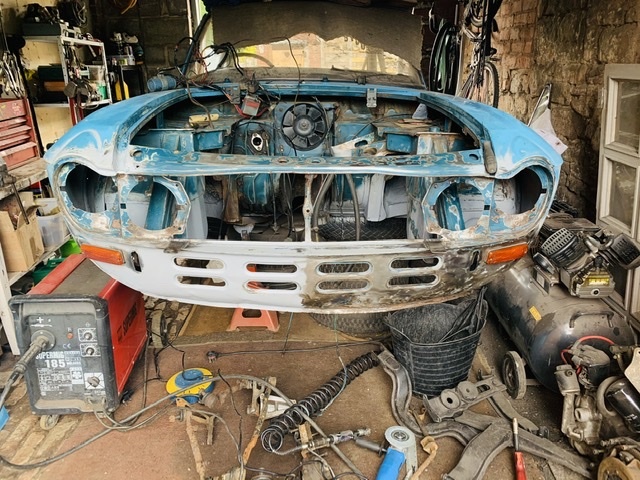 |
| |
|
|
|
|
 It’s such a great mile stone to reach in a project like this when you can finally pack the welder away.
  It’s such a great mile stone to reach in a project like this when you can finally pack the welder away.


 getting it repaired when i could spend my money on something more efficient. Cheers


