jonomisfit
Club Retro Rides Member
Posts: 1,787
Club RR Member Number: 49
|
|
Mar 29, 2020 17:27:39 GMT
|
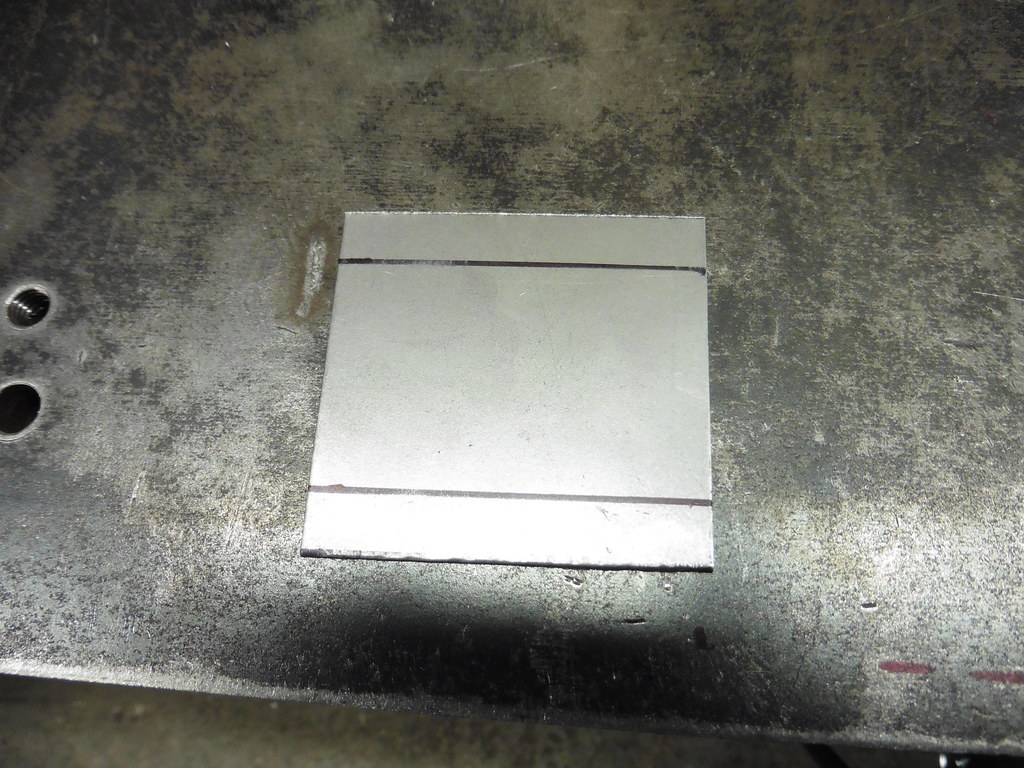
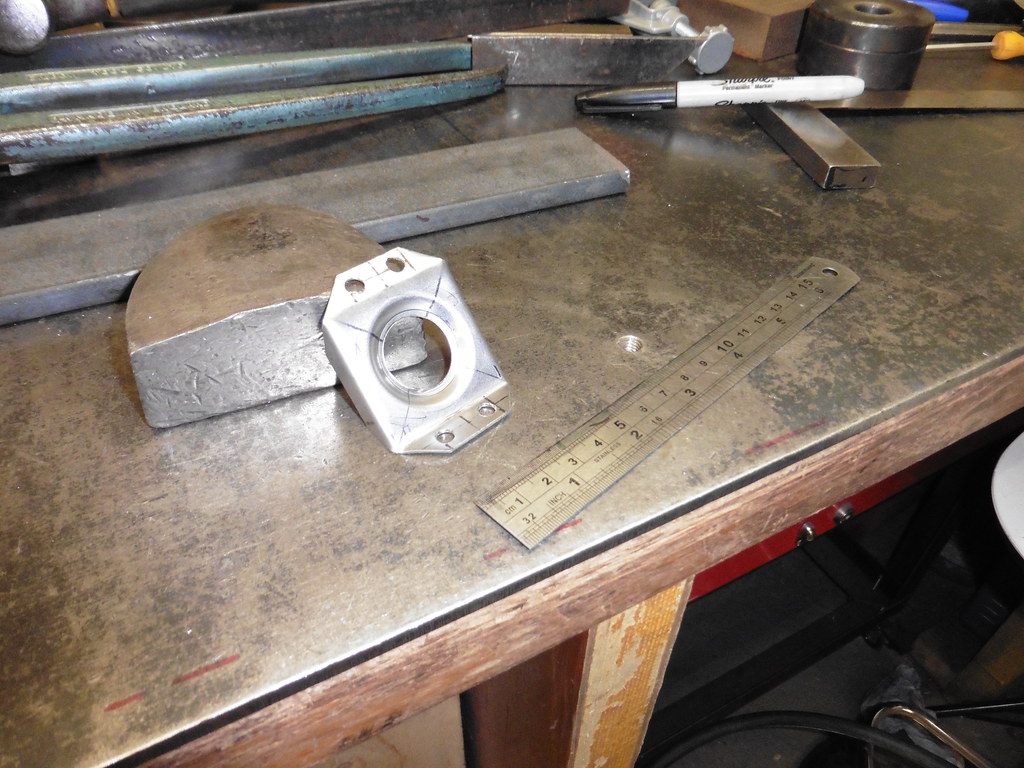
tacked in the other side of the box  P1030203 P1030203 by jono_misfit, on Flickr then cut some steel for the sealing strip  P1030204 P1030204 by jono_misfit, on Flickr to go here  P1030205 P1030205 by jono_misfit, on Flickr marked up some lines  P1030206 P1030206 by jono_misfit, on Flickr because it will only have a fold down one side, unlike the rest of the box, I ran a step behind the lid nuts, then folded up everything  P1030207 P1030207 by jono_misfit, on Flickr started adjusting to shape / trimming  P1030208 P1030208 by jono_misfit, on Flickr it ends up with some weird and wonderful shapes due to the ..... used nature of the floor area.  P1030209 P1030209 by jono_misfit, on Flickr clamped in to position to ensure square and flat.  P1030210 P1030210 by jono_misfit, on Flickr  P1030211 P1030211 by jono_misfit, on Flickr and tacked in 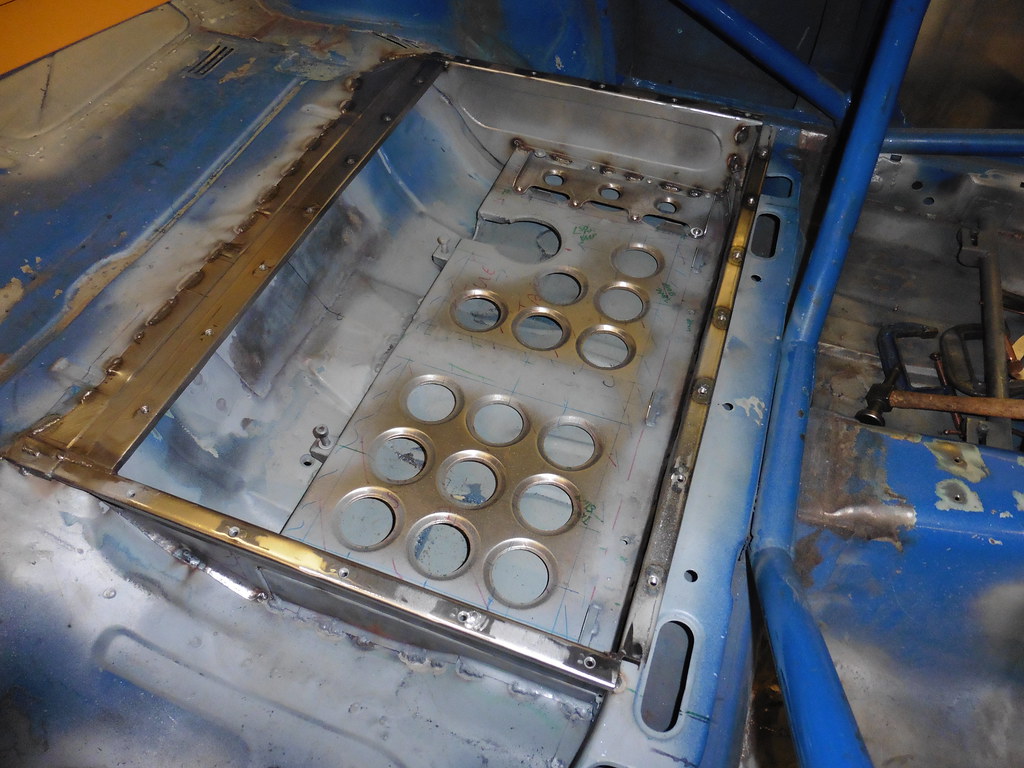 P1030212 P1030212 by jono_misfit, on Flickr I may add a central reinforcing strip, just to stiffen it up a bit.  P1030213 P1030213 by jono_misfit, on Flickr then got some steel and some hammers out  P1030214 P1030214 by jono_misfit, on Flickr cut in half  P1030215 P1030215 by jono_misfit, on Flickr and welded in to the corners  P1030216 P1030216 by jono_misfit, on Flickr to finish them off  P1030217 P1030217 by jono_misfit, on Flickr tank in position  P1030218 P1030218 by jono_misfit, on Flickr  P1030219 P1030219 by jono_misfit, on Flickr i think i'll end up making a hose guide for the feed hose. to make sure it is suitably supported.  P1030220 P1030220 by jono_misfit, on Flickr Looks ok to me, next job will be on to the top. |
| |
|
|
|
|
jonomisfit
Club Retro Rides Member
Posts: 1,787
Club RR Member Number: 49
|
|
Mar 29, 2020 20:11:18 GMT
|
|
|
| |
|
|
|
|
|
|
|
I don't think that the tank mount is going anywhere soon  Superb fabrication work as always - I'm guessing you are on a 'working from home basis' - Chris |
| |
|
|
jonomisfit
Club Retro Rides Member
Posts: 1,787
Club RR Member Number: 49
|
|
|
|
|
Thanks.
It looks sturdy but total weight of its low. I'm conscious of not getting too much extra weight into the car.
I am working from home, however I'm still doing 40hrs of work work mixed with child care, so only really getting a day on the cars per week.
I'd prefer it was more.
|
| |
|
|
ian911
Part of things
 
Posts: 13
|
|
|
|
|
Wow!That rear tank support piece was vert complexed,hats off to you mate, how did you form the dimples that match the original floor swages?
|
| |
|
|
jonomisfit
Club Retro Rides Member
Posts: 1,787
Club RR Member Number: 49
|
|
|
|
|
Thanks.
A vice, a hammer, and some 25mm box section.
I opened the vice jaws about 30mm, positioned the part over them, then tapped the 25mm box down onto the panel into the gap at an angle. It gave a tapering swage runout.
With a bit of dressing once in position it fitted ok.
Theres also a dip mid floor thats wider, so I did similar then gave it a tickle with the stretcher to add a bit more depth, before dressing with the hammer.
|
| |
|
|
jonomisfit
Club Retro Rides Member
Posts: 1,787
Club RR Member Number: 49
|
|
|
|
Box welded in  P1030326 P1030326 by jono_misfit, on Flickr  P1030327 P1030327 by jono_misfit, on Flickr and given a bit of orange prevention  P1030328 P1030328 by jono_misfit, on Flickr  P1030329 P1030329 by jono_misfit, on Flickr Sunday should be on to starting the top. I also tidied up the workshop a bit, and started looking at what tools I need for the CNC lathe. Boxford are so kind as to use a custom insert size (9mm) rather than the normal 7 or 11, so I need to buy new tooling. Boxford tips are £12 + vat each and they wont sell them to me as i'm not registered as a machine owner... Luckily the tips might be an odd size but the shanks are 10x10, so normal tooling can be used. On the plus side I've learned a bit about the ISO coding on tools and inserts, and cromwell / cutwell have what I need. the downside is a decent holder is about £50+vat, but tips are <£5 each. |
| |
|
|
jonomisfit
Club Retro Rides Member
Posts: 1,787
Club RR Member Number: 49
|
|
|
|
Bolted the fuel tank in  P1030330 P1030330 by jono_misfit, on Flickr  P1030331 P1030331 by jono_misfit, on Flickr then took some measurements and did a dodgy sketch  P1030332 P1030332 by jono_misfit, on Flickr cut some aluminium sheet and started marking out  P1030333 P1030333 by jono_misfit, on Flickr more marking out  P1030334 P1030334 by jono_misfit, on Flickr start trimming  P1030335 P1030335 by jono_misfit, on Flickr more trimming, and make some holes  P1030336 P1030336 by jono_misfit, on Flickr swage the hole edges over, these are for access to the filler neck, vent / return ports, and fuel sender.  P1030337 P1030337 by jono_misfit, on Flickr start the folds  P1030338 P1030338 by jono_misfit, on Flickr getting closer  P1030339 P1030339 by jono_misfit, on Flickr and in position  P1030340 P1030340 by jono_misfit, on Flickr  P1030341 P1030341 by jono_misfit, on Flickr its all worked out pretty well, other than the sloped rear edge, which I've folded 20mm too long, so will need to anneal the ali, straighten a bit, then re-fold. Which will be tricky but should be doable. I also might re-cut the filler hole slightly larger for a bit more clearance. once i'm happy with it it'll get tigged up. |
| |
|
|
jonomisfit
Club Retro Rides Member
Posts: 1,787
Club RR Member Number: 49
|
|
|
|
|
with much effort and swearing I managed to re-bend the flange. Sits ok, Just a bit of dressing to do when Its sociable to hammer again.
|
| |
|
|
|
|
|
|
|
|
Can't you just hammer at a distance?
Seems a bit obnoxious to go to a public space and hammer things...
|
| |
|
|
jonomisfit
Club Retro Rides Member
Posts: 1,787
Club RR Member Number: 49
|
|
|
|
|
😁
My neighbor to the rear is only about 3m from the garage back wall.
So I'm always cagey about doing noisy things after 7pm.
|
| |
|
|
jonomisfit
Club Retro Rides Member
Posts: 1,787
Club RR Member Number: 49
|
|
|
|
I went out the back this evening for some aluminium tig practice. I managed to get some setting that worked, so had a go on the first couple of seams  P1030342 P1030342 by jono_misfit, on Flickr  P1030343 P1030343 by jono_misfit, on Flickr whilst it wont win any prizes, its definitely a big step forward in my ali welding. |
| |
|
|
|
|
|
|
|
I know it's meant to seal off from the cabin... But can you find some swage stickers or something, so it matches the rest of the car?  On the subject of sealing, is aluminium an accepted sealing material? I would have thought it would have to be steel of a certain thickness to hold fire at bay for a while or something. (No actual idea what the requirements are. Could be ok to make it out of cardboard for all I know!) |
| |
|
|
jonomisfit
Club Retro Rides Member
Posts: 1,787
Club RR Member Number: 49
|
|
|
|
|
I was going to swage it, but due to the throat on the bead roller I couldn't get it to fit.
If you look at tracks cars etc, they don't even shield the tank and pumps. Rally cars there has to be a metallic bulkhead.
It's meant to keep fuel and fumes in, it says fire as well, but theres no withstand criteria so cant be for any appreciable duration.
Most ones I've seen are aluminium, including the ones provided by pro motorsport fuel cell providers.
|
| |
|
|
jonomisfit
Club Retro Rides Member
Posts: 1,787
Club RR Member Number: 49
|
|
Apr 10, 2020 20:10:01 GMT
|
Drilled off the tank cover for the hold down bolts the side flanges are a bit tighter than I would have liked.  P1030344 P1030344 by jono_misfit, on Flickr  P1030345 P1030345 by jono_misfit, on Flickr  P1030346 P1030346 by jono_misfit, on Flickr I folded down the edges then made some infill pieces for the corners  P1030347 P1030347 by jono_misfit, on Flickr welded them in  P1030348 P1030348 by jono_misfit, on Flickr  P1030349 P1030349 by jono_misfit, on Flickr they still need cleaned back then marked up the fuel filler hole and enlarged  P1030350 P1030350 by jono_misfit, on Flickr on to the fuel sender access port  P1030351 P1030351 by jono_misfit, on Flickr piece of ali  P1030352 P1030352 by jono_misfit, on Flickr rounded the corners and marked out  P1030353 P1030353 by jono_misfit, on Flickr marked some more lines  P1030354 P1030354 by jono_misfit, on Flickr Which I then ran a bead round.  P1030355 P1030355 by jono_misfit, on Flickr The beading pulled it out of shape a bit so I gave it a go with the shrinker/stretcher to get it flat again. marked out again and folded some flanges  P1030356 P1030356 by jono_misfit, on Flickr fitted some riv nuts  P1030357 P1030357 by jono_misfit, on Flickr cover in place. 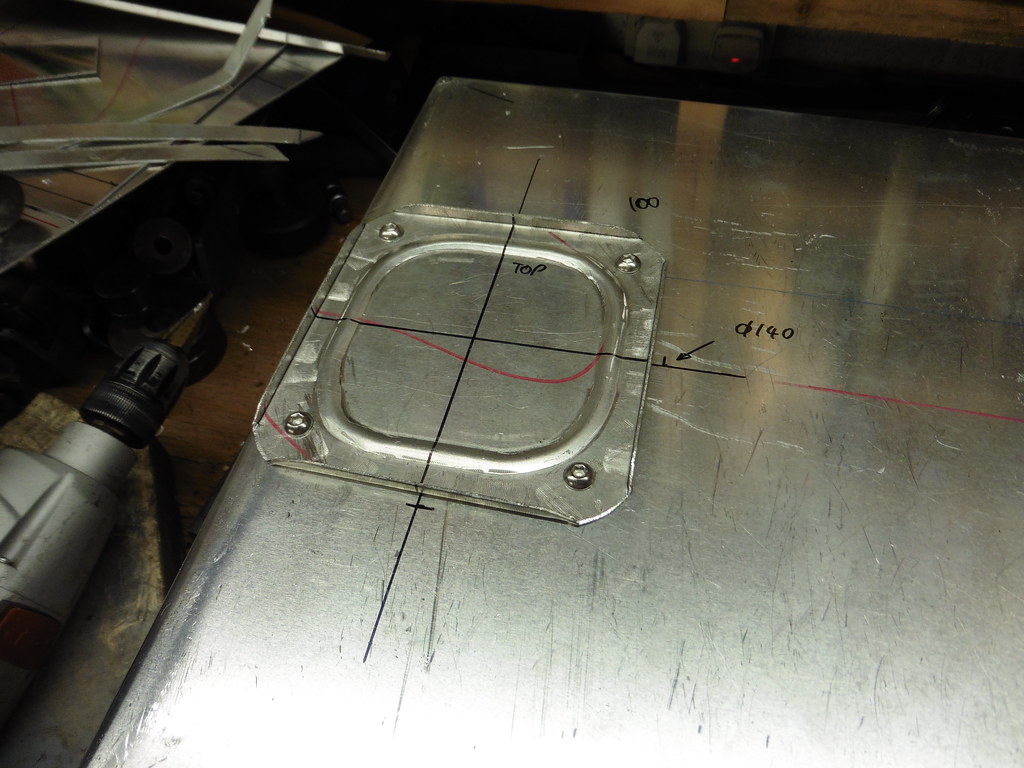 P1030358 P1030358 by jono_misfit, on Flickr the panels removable so I can get into the fuel sender connections without having the remove the whole tank cover. just in case. cut a stip of ali and formed round a handy former (a cutting die)  P1030363 P1030363 by jono_misfit, on Flickr ran a bead round it  P1030364 P1030364 by jono_misfit, on Flickr start tigging on  P1030365 P1030365 by jono_misfit, on Flickr (and take a break for a re-grind on the tungsten after I dipped it :-( ) welded in 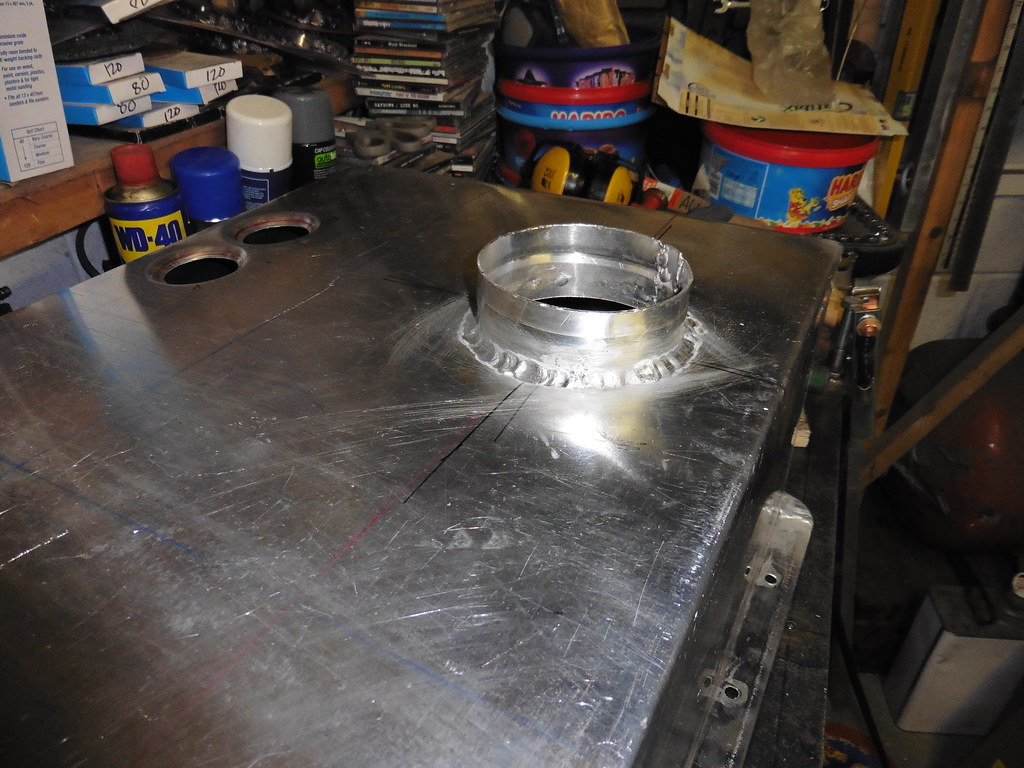 P1030366 P1030366 by jono_misfit, on Flickr  P1030367 P1030367 by jono_misfit, on Flickr needs cleaned up. but gives a nice 95mm diam stub to clamp some aluminium ducting hose to (to protect the fuel filler hose) fitted the cover again, all sits nicely 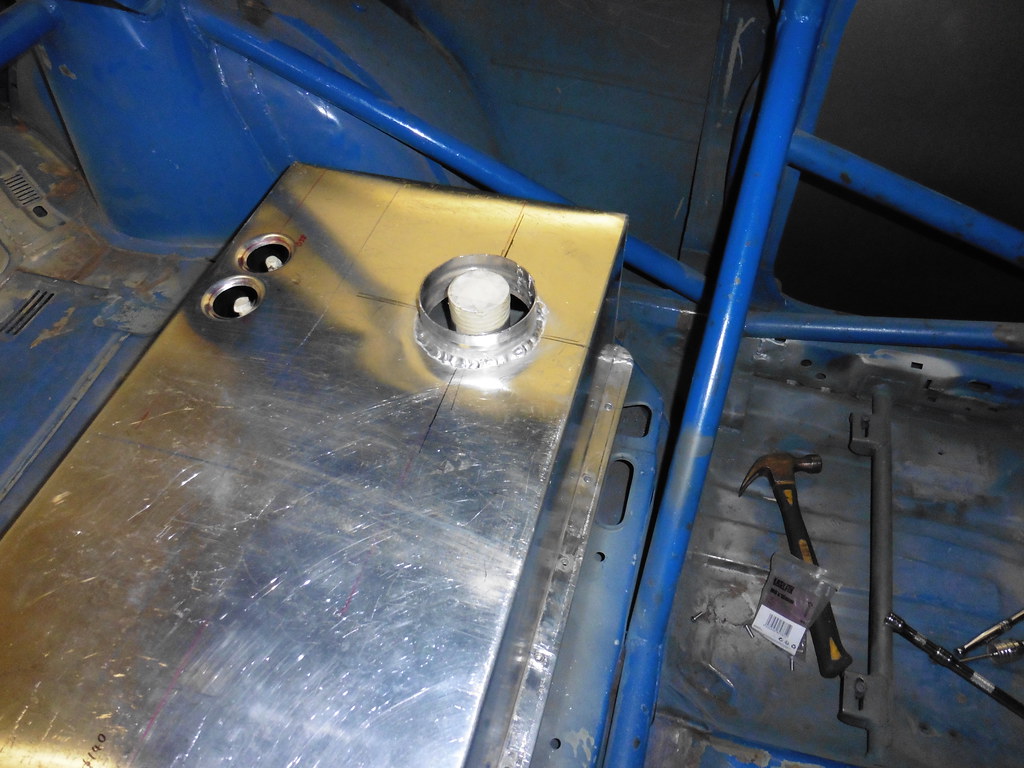 P1030368 P1030368 by jono_misfit, on Flickr 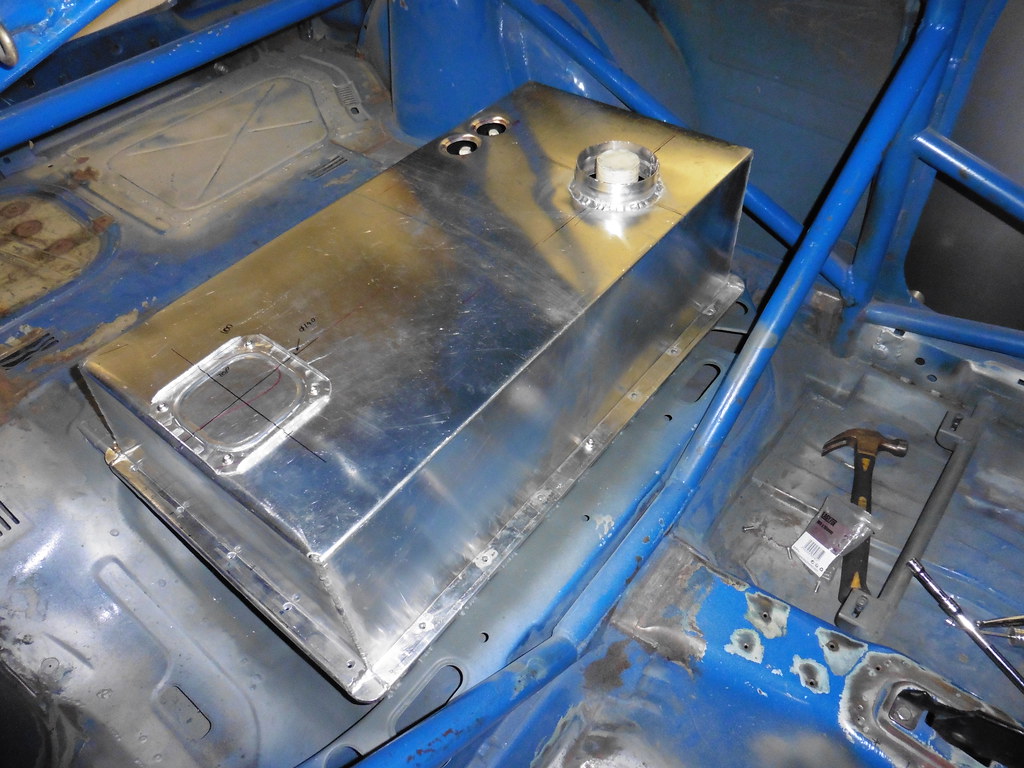 P1030369 P1030369 by jono_misfit, on Flickr  P1030370 P1030370 by jono_misfit, on Flickr looks huge, but is lower and more central than the normal fuel tank location.I also think I went a bit big on the tank size, so I may end up trimming the tank down at a later date. next session will be looking at a cap for the vent / return points. |
| |
|
|
jonomisfit
Club Retro Rides Member
Posts: 1,787
Club RR Member Number: 49
|
|
Apr 12, 2020 20:01:34 GMT
|
Vent / return cap these two  P1030373 P1030373 by jono_misfit, on Flickr mark out some bits  P1030374 P1030374 by jono_misfit, on Flickr cut a piece of ali  P1030375 P1030375 by jono_misfit, on Flickr mark out  P1030376 P1030376 by jono_misfit, on Flickr cut some holes  P1030377 P1030377 by jono_misfit, on Flickr trim and fold  P1030378 P1030378 by jono_misfit, on Flickr clamp into position  P1030379 P1030379 by jono_misfit, on Flickr weld  P1030380 P1030380 by jono_misfit, on Flickr  P1030381 P1030381 by jono_misfit, on Flickr trim another piece of metal  P1030382 P1030382 by jono_misfit, on Flickr goes here 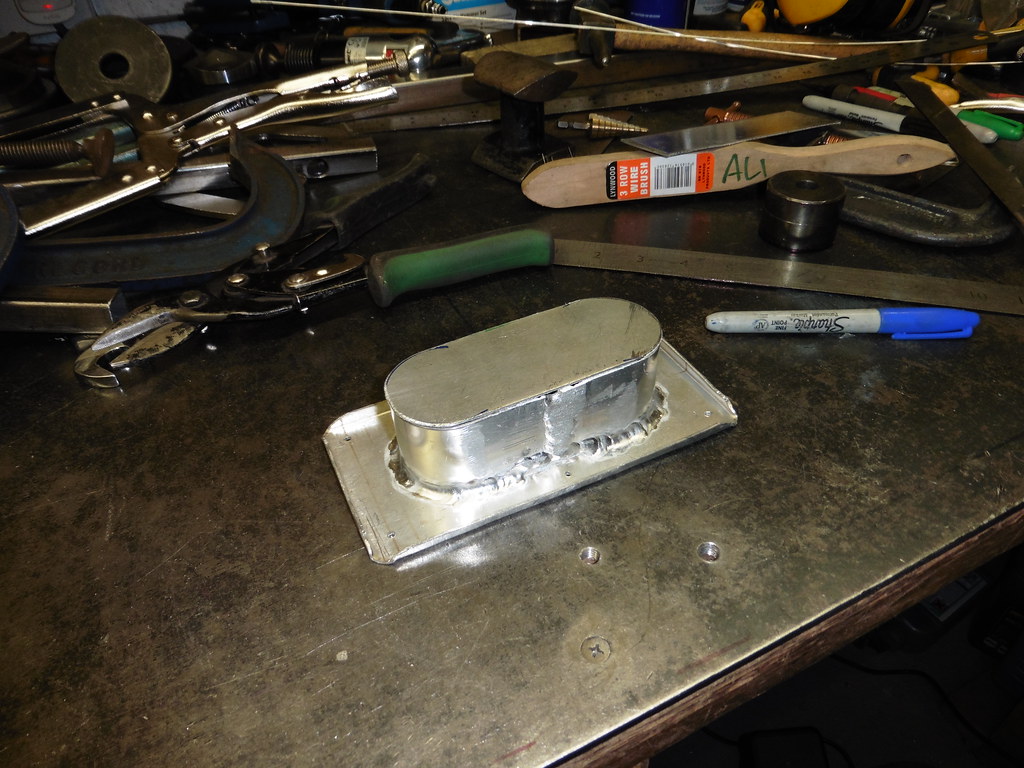 P1030383 P1030383 by jono_misfit, on Flickr welded on 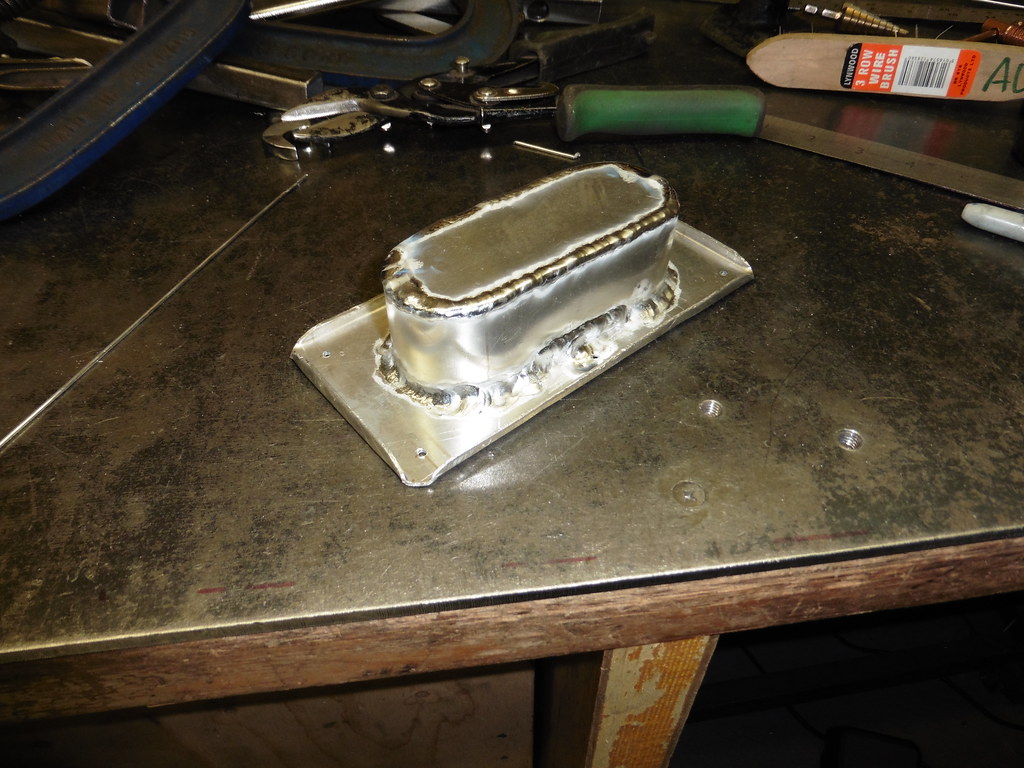 P1030384 P1030384 by jono_misfit, on Flickr drill cover and fit riv-nuts 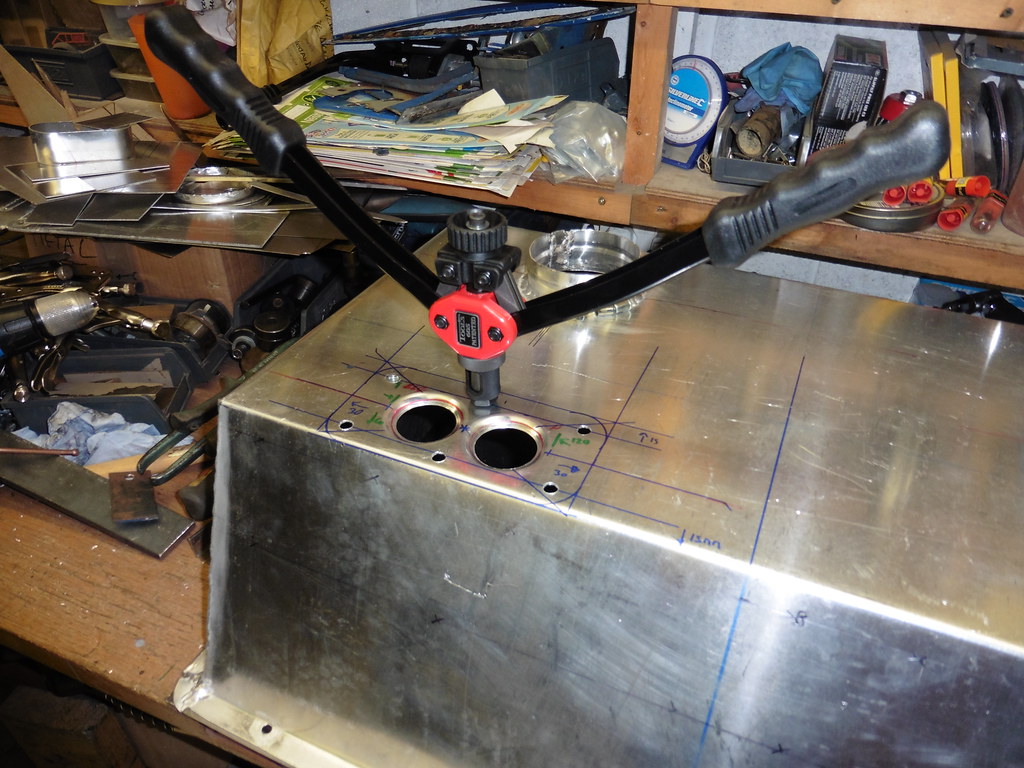 P1030385 P1030385 by jono_misfit, on Flickr cover bolts on like so  P1030386 P1030386 by jono_misfit, on Flickr tank cover back in situ  P1030387 P1030387 by jono_misfit, on Flickr  P1030388 P1030388 by jono_misfit, on Flickr I also bolted in a bearing to support the steering column through the bulkhead.The rubber bush thats standard is the source of many wayward steering on sierras and escorts.  P1030389 P1030389 by jono_misfit, on Flickr checked clearances with the seat in  P1030390 P1030390 by jono_misfit, on Flickr loads of room for a batter or extinguisher  P1030391 P1030391 by jono_misfit, on Flickr checked the pedal position again  P1030392 P1030392 by jono_misfit, on Flickr and swapped the seat to the passenger side  P1030393 P1030393 by jono_misfit, on Flickr you sit far too far back to be able to rest your feet on the bulkhead, so a foot rest is required. |
| |
|
|
jonomisfit
Club Retro Rides Member
Posts: 1,787
Club RR Member Number: 49
|
|
Apr 12, 2020 20:06:45 GMT
|
<cont> put a string line across the car so I can assess what the maximum height of a brace bar could be.  P1030394 P1030394 by jono_misfit, on Flickr take a load of dimensions, and sketch out a design. Mark out some ali  P1030395 P1030395 by jono_misfit, on Flickr some heel ribs  P1030396 P1030396 by jono_misfit, on Flickr fold  P1030397 P1030397 by jono_misfit, on Flickr cut out and fold two sides and tack in 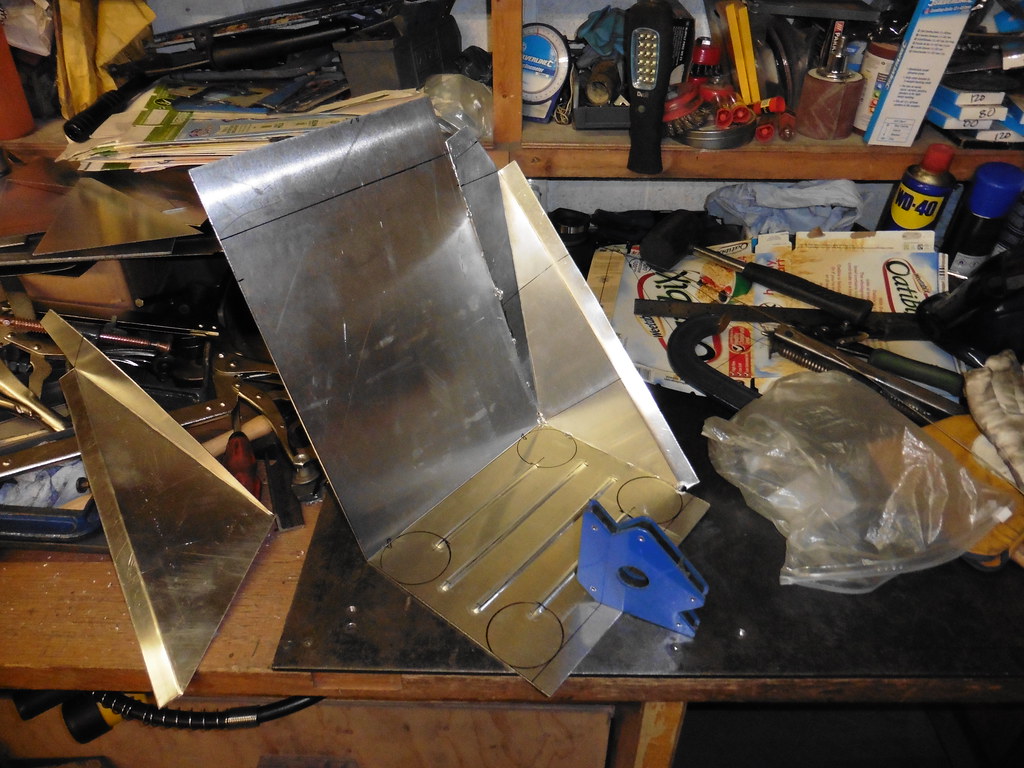 P1030398 P1030398 by jono_misfit, on Flickr  P1030399 P1030399 by jono_misfit, on Flickr trial fit in car  P1030400 P1030400 by jono_misfit, on Flickr  P1030401 P1030401 by jono_misfit, on Flickr  P1030402 P1030402 by jono_misfit, on Flickr the top needs trimmed down still as its touching the dashboard, but feels like it should work nicely. The strange slightly folded bits at the side are so I can roll the edge over some 6mm ali rod I have. For me in the passenger seat it feels like the right position and angle to be a comfortable sit in the car. Once the trans tunnel to cage bar is in to fix it to it will be pretty rigid. Will maybe get another go on it later in the week. |
| |
|
|
|
|
|
Apr 13, 2020 13:31:04 GMT
|
|
Solid update!
Would the heel box not do with being a bit wider?
I haven't been in a rally car, but I know I like to have my feet sort of wide if I'm in my mates car when he's giving it some beans around corners..
If there's room, that is.
|
| |
Last Edit: Apr 13, 2020 13:32:57 GMT by varelse
|
|
jonomisfit
Club Retro Rides Member
Posts: 1,787
Club RR Member Number: 49
|
|
Apr 13, 2020 13:49:29 GMT
|
|
I'll take a pic when I'm out later.
For me it's a comfortable position with a bit of room to position feet. The bucket seat pretty much forces you legs to be straight out from the hips not splayed, so you're heels end up pretty close together.
I could probably make a bit wider at the top, but the bottom is tight for space where I need fuel lines to go past.
|
| |
|
|
ian911
Part of things
 
Posts: 13
|
|
Apr 13, 2020 17:58:31 GMT
|
|
Your a clever curse word
|
| |
|
|
 P1030203 by jono_misfit, on Flickr
 P1030204 by jono_misfit, on Flickr
 P1030205 by jono_misfit, on Flickr
 P1030206 by jono_misfit, on Flickr
 P1030207 by jono_misfit, on Flickr
 P1030208 by jono_misfit, on Flickr
 P1030209 by jono_misfit, on Flickr
 P1030210 by jono_misfit, on Flickr
 P1030211 by jono_misfit, on Flickr
 P1030212 by jono_misfit, on Flickr
 P1030213 by jono_misfit, on Flickr
 P1030214 by jono_misfit, on Flickr
 P1030215 by jono_misfit, on Flickr
 P1030216 by jono_misfit, on Flickr
 P1030217 by jono_misfit, on Flickr
 P1030218 by jono_misfit, on Flickr
 P1030219 by jono_misfit, on Flickr
 P1030220 by jono_misfit, on Flickr





 Superb fabrication work as always - I'm guessing you are on a 'working from home basis' - Chris


