Darkspeed
Club Retro Rides Member
Posts: 4,884
Club RR Member Number: 39
|
|
|
|
Haha, it's the journey not the destination for me. Inventing side projects is what keeps it fun. I should consider that route as "buying" side projects is not turning out to be the best way to complete anything. My current journeys have resulted in me not having arrived anywhere in a decade ...........  Whats the thinking on the "X" crossover and two systems, rather than a simple collector and single system? |
| |
|
|
|
|
jonomisfit
Club Retro Rides Member
Posts: 1,790
Club RR Member Number: 49
|
|
|
|
|
That's what the escort, summer house, and postman pat van have been for. Making sure progress on the morris isn't too swift.
Cross over as I couldn't definitively determine if they are needed or not on v6 engines. Some say yes, balances pulses, others say no, not needed.
Why not combine to a single pipe,space mainly.
I want the exhaust tucked up out the way and with a single pipe it would need to be bigger for the flow and it won't be possible to get it past some of the obstacles on exit route without hanging very low.
Either sill / beam mount if I side exit the exhaust, or passing under the beam if I rear exit.
V6 sierra standard exhausts run two pipes for this reason, and strangely so did the 4 pot escort cosworth. It split post down pipe runs as two pipes under the car and recombines at the back box.
The rally cars run an oval section exhaust down the tunnel and a megaphone side exit. But they also "trim" the rear beam mount by about 50mm to clear the oval section. I don't really want to do that
|
| |
|
|
|
|
|
Apr 22, 2023 21:28:32 GMT
|
jono_misfit, on Flickr I need to tweak it a bit further , but that was all I had time for today. Lovely bit of fabrication there dude :-) |
| |
|
|
jonomisfit
Club Retro Rides Member
Posts: 1,790
Club RR Member Number: 49
|
|
Apr 23, 2023 20:08:55 GMT
|
Thanks More pipes..... i trimed off some bits 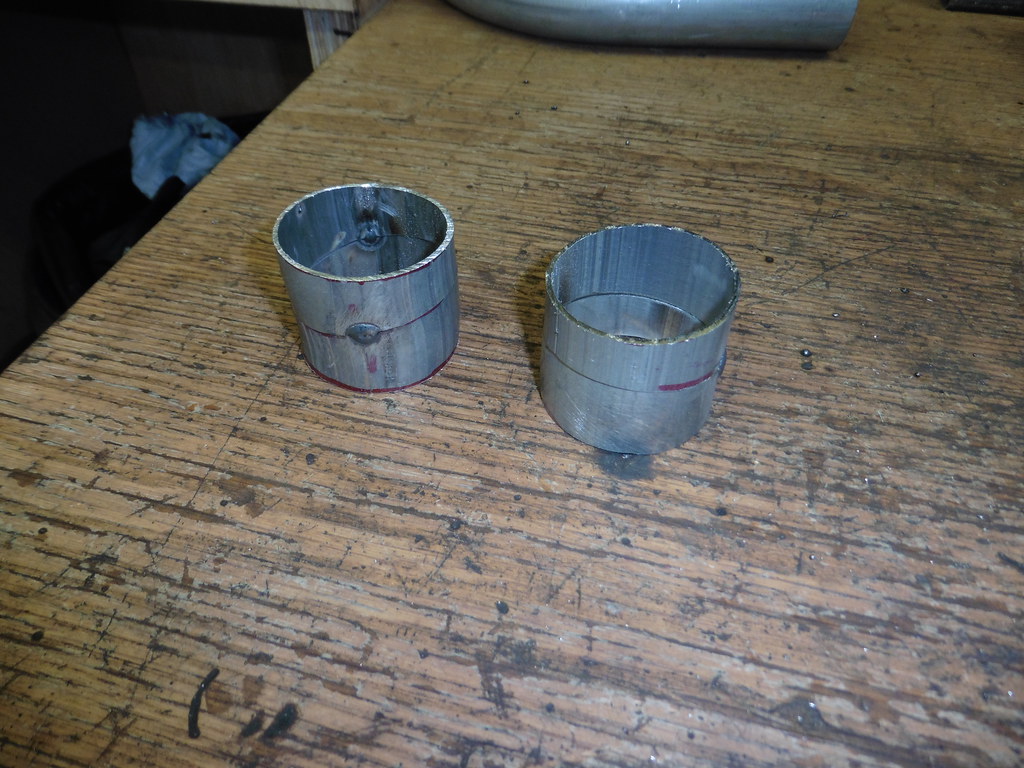 P1070846 P1070846 by jono_misfit, on Flickr which brought one side in tighter as its tight in the tunnel  P1070847 P1070847 by jono_misfit, on Flickr welded up the down pipe  P1070848 P1070848 by jono_misfit, on Flickr  P1070849 P1070849 by jono_misfit, on Flickr  P1070850 P1070850 by jono_misfit, on Flickr I checked it after each weld to make sure it hadnt moved then did the other down pipe 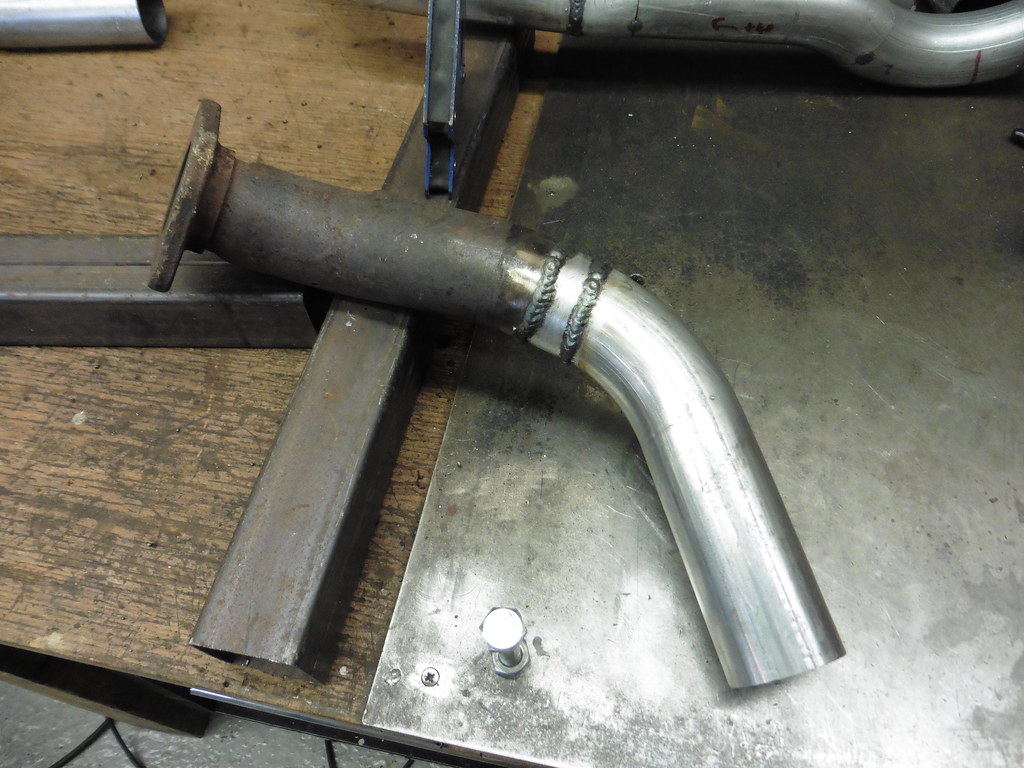 P1070851 P1070851 by jono_misfit, on Flickr  P1070852 P1070852 by jono_misfit, on Flickr not easy to see, but its got a smooth weld round on the inside  P1070853 P1070853 by jono_misfit, on Flickr finished welding up the gearbox offset  P1070854 P1070854 by jono_misfit, on Flickr smooth welds  P1070855 P1070855 by jono_misfit, on Flickr  P1070859 P1070859 by jono_misfit, on Flickr could be a bit smaller, but I cnat see it being too much of an issue back in and check allignment, clears nicely. It looks like its touching the tunnel but its about 20mm clear  P1070860 P1070860 by jono_misfit, on Flickr  P1070861 P1070861 by jono_misfit, on Flickr onto the next tube, straight length so cut with the mitre saw  P1070862 P1070862 by jono_misfit, on Flickr I bought some flanges to weld on so I can dismount different parts of the exhaust. I'm intending to skid the bottom faces once they are all in  P1070863 P1070863 by jono_misfit, on Flickr Adding tubes to get the cross over to align to the down pipes  P1070864 P1070864 by jono_misfit, on Flickr In a bout of seredipidy a pieve of tube i'd cut 5mm too short for somethign else was exactly the right length to extend the offset here.  P1070865 P1070865 by jono_misfit, on Flickr All put together. I added a flex joint so there is avenue for movement and so i'm not trying to get four fixed points to align.  P1070866 P1070866 by jono_misfit, on Flickr in situ  P1070867 P1070867 by jono_misfit, on Flickr  P1070868 P1070868 by jono_misfit, on Flickr  P1070869 P1070869 by jono_misfit, on Flickr not the easiest to see, but the exhaust is well up out of the way and there are other things lower than it  P1070870 P1070870 by jono_misfit, on Flickr  P1070871 P1070871 by jono_misfit, on Flickr a few more tacks on it  P1070872 P1070872 by jono_misfit, on Flickr  P1070873 P1070873 by jono_misfit, on Flickr I need to sort hangers and routing to the back of the car. I think i'm going to have to give up on doing a side exit, as there simply isnt room to have any real amount of silencer in the run. Cry. |
| |
|
|
|
|
|
Apr 23, 2023 20:22:04 GMT
|
|
The std exhaust split into 2 to get enough catalyst and muffler volume under there to meet the emissions, drive by noise and ground clearance requirements.
|
| |
|
|
teaboy
Posted a lot
   Make tea, not war.
Posts: 2,126
|
|
Apr 23, 2023 21:11:50 GMT
|
|
Exhaust looks mint, dude.
|
| |
|
|
mk2cossie
Club Retro Rides Member
Posts: 3,063  Club RR Member Number: 77
|
|
Apr 23, 2023 21:20:35 GMT
|
Not that it will be much help, as the floor pan is completely different, but this is my setup. And never had any issues at track days at Brands Hatch with noise 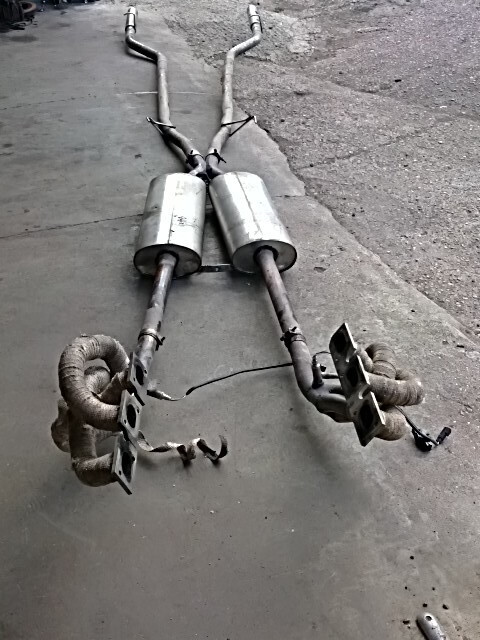 Both silencers are perforated tube type, and each system is 2 inch |
| |
Last Edit: Apr 23, 2023 21:21:26 GMT by mk2cossie
|
|
jonomisfit
Club Retro Rides Member
Posts: 1,790
Club RR Member Number: 49
|
|
Apr 30, 2023 19:37:18 GMT
|
a package arrived....  P1070874 P1070874 by jono_misfit, on Flickr a look over and it looks good  P1070875 P1070875 by jono_misfit, on Flickr  P1070876 P1070876 by jono_misfit, on Flickr moment of truth if I measured, modelled, and drew it right  P1070877 P1070877 by jono_misfit, on Flickr perfecto  P1070878 P1070878 by jono_misfit, on Flickr Fitted back on the upright  P1070879 P1070879 by jono_misfit, on Flickr fits great  P1070880 P1070880 by jono_misfit, on Flickr welded up the exhaust centre section  P1070881 P1070881 by jono_misfit, on Flickr and tig welded around the inside of the flange to pipe joint  P1070882 P1070882 by jono_misfit, on Flickr  P1070883 P1070883 by jono_misfit, on Flickr even cleaned back aluminised pipe is manky to weld. working out the next pipes in the chain. clamped to the bench to ensure both bends are in the same plane  P1070884 P1070884 by jono_misfit, on Flickr  P1070885 P1070885 by jono_misfit, on Flickr tacked and fitted back in the car 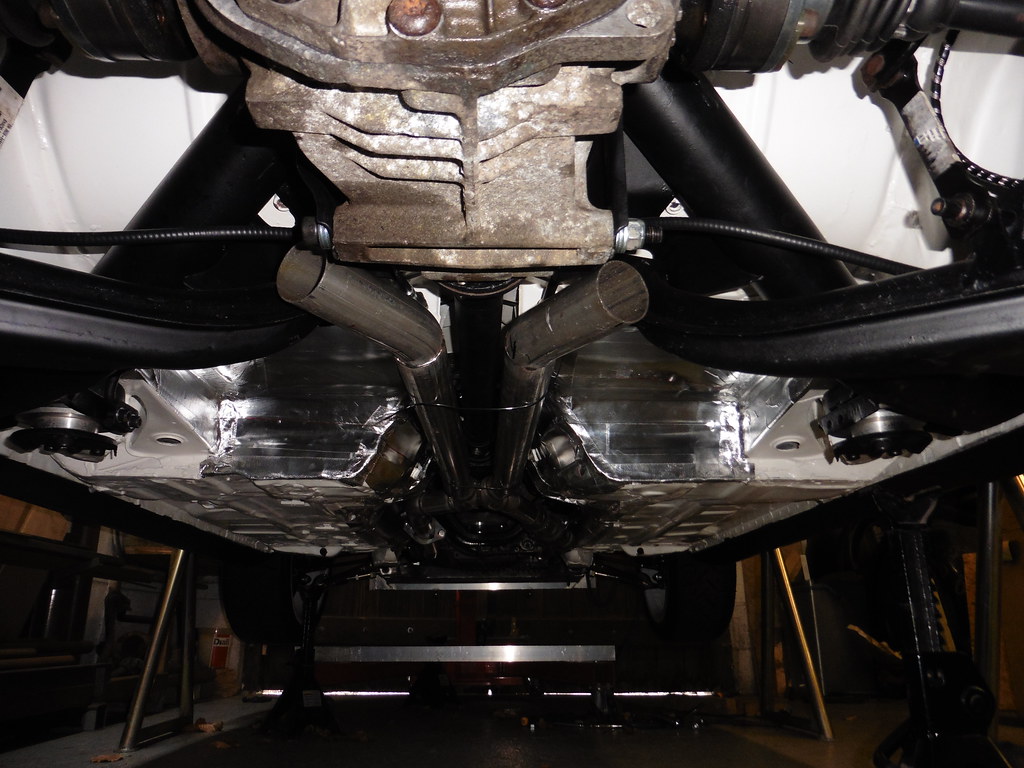 P1070887 P1070887 by jono_misfit, on Flickr  P1070888 P1070888 by jono_misfit, on Flickr I've left it tacked until i've done the silencer boxes so I've got something to aim for. which will go here  P1070889 P1070889 by jono_misfit, on Flickr Mounting wise I think i will weld in some box section and mount to that rather than fix to the floor directly. I just think it'll distort over time. Ideally i'd have done all this before painting the car. Oh well. playing with the silencers to work out how I will put them together  P1070886 P1070886 by jono_misfit, on Flickr tacked the two boxes together to make it easier to handle, and make as compact as I can. marked a centre line, played with some more tubes  P1070890 P1070890 by jono_misfit, on Flickr I bought a load of heavy duty rally exhaust mount bobbins, so will be using them to support the exhaust. liek mini ones, but bigger and more robust 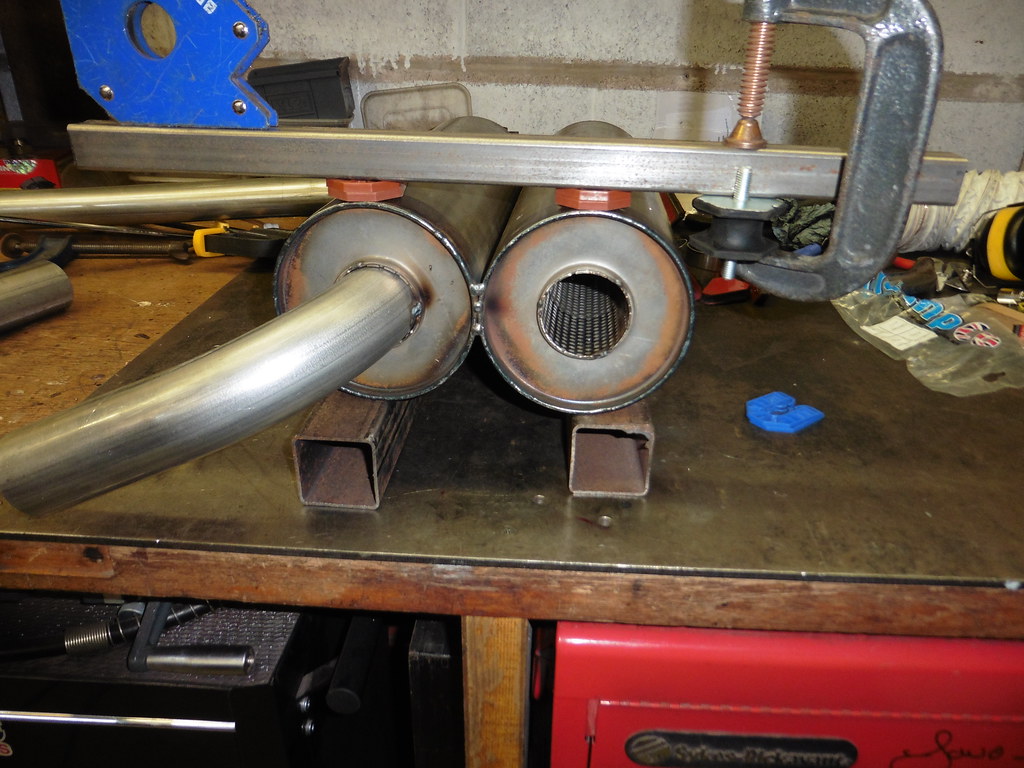 P1070891 P1070891 by jono_misfit, on Flickr trying to work out how I can get them to fit onto the silencers  P1070892 P1070892 by jono_misfit, on Flickr I'll make a strip to go across here  P1070893 P1070893 by jono_misfit, on Flickr drill some holes  P1070894 P1070894 by jono_misfit, on Flickr make some "wings" to stiffen the over hang and get load onto the body better.  P1070895 P1070895 by jono_misfit, on Flickr A box section in place to show total depth.  P1070896 P1070896 by jono_misfit, on Flickr It looks really tall, but when fitted this will come down to about mid point of the diff. More next time. |
| |
|
|
teaboy
Posted a lot
   Make tea, not war.
Posts: 2,126
|
|
Apr 30, 2023 22:11:14 GMT
|
|
Tidy job that, dude.
|
| |
|
|
jonomisfit
Club Retro Rides Member
Posts: 1,790
Club RR Member Number: 49
|
|
|
|
I made the bracket for the other end  P1070897 P1070897 by jono_misfit, on Flickr  P1070898 P1070898 by jono_misfit, on Flickr cut some box to act as the mounting bars  P1070899 P1070899 by jono_misfit, on Flickr then started turning up some threaded inserts to weld in  P1070900 P1070900 by jono_misfit, on Flickr 4 off made  P1070901 P1070901 by jono_misfit, on Flickr decided where I was going to mount the boxes, then welded in the inserts  P1070902 P1070902 by jono_misfit, on Flickr the top will be difficult to get to after they are welded in, so primed and painted first  P1070903 P1070903 by jono_misfit, on Flickr  P1070904 P1070904 by jono_misfit, on Flickr ready to test fit  P1070905 P1070905 by jono_misfit, on Flickr checking the position  P1070906 P1070906 by jono_misfit, on Flickr and tacked in 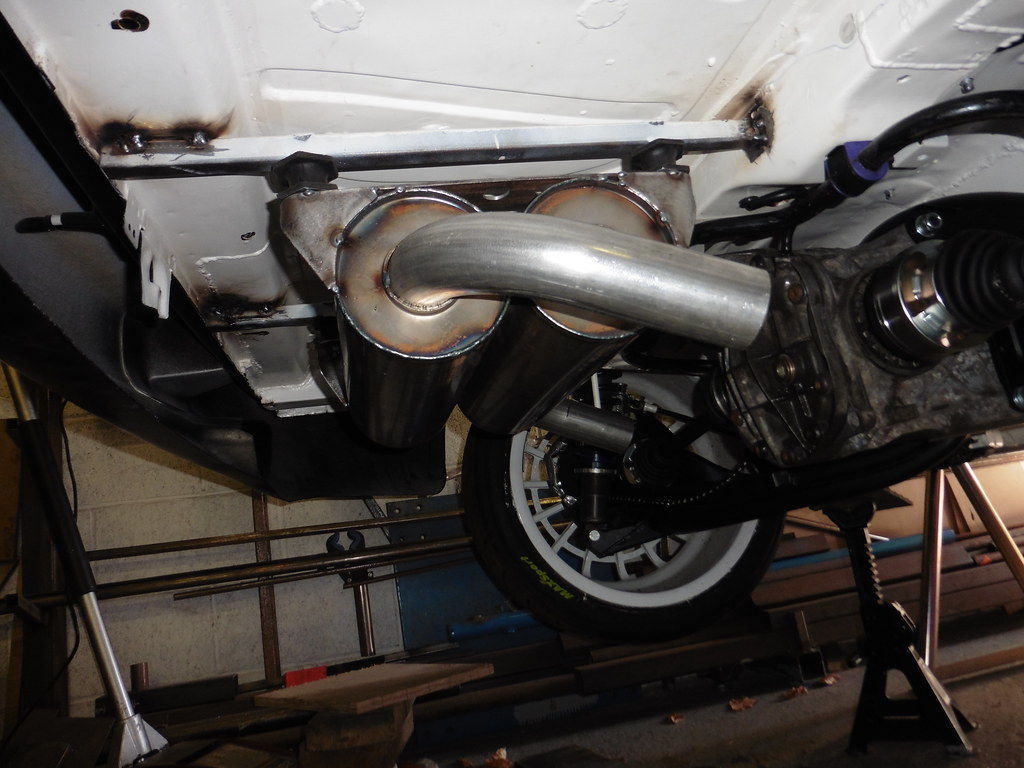 P1070907 P1070907 by jono_misfit, on Flickr boxes out the way and tubes welded in  P1070908 P1070908 by jono_misfit, on Flickr a fair amount of clean up and painting needed, but they are in  P1070909 P1070909 by jono_misfit, on Flickr I tried the boxes back on after and they go straight in, no messing, and they are really securely mounted. I'll complete the exhaust, then remove them, clean it up, and repaint the affected areas. I'll also fit some heat shielding above it to prevent the boot floor cooking. |
| |
|
|
|
|
|
|
|
|
You're doing a great job on this! Just a word of caution; all of the rubbermounts of that type that I have seen can't take a hanging load, they are supposed to take a compression load. They will hold for a while and then they will tear apart in the rubber.
Regards David
|
| |
|
|
Darkspeed
Club Retro Rides Member
Posts: 4,884
Club RR Member Number: 39
|
|
|
|
You're doing a great job on this! Just a word of caution; all of the rubbermounts of that type that I have seen can't take a hanging load, they are supposed to take a compression load. They will hold for a while and then they will tear apart in the rubber. Regards David Which is what I have always found with them as well - And even when mounted in compression they can still shear - but at least nothing falls off - Hence with the Stratos : - 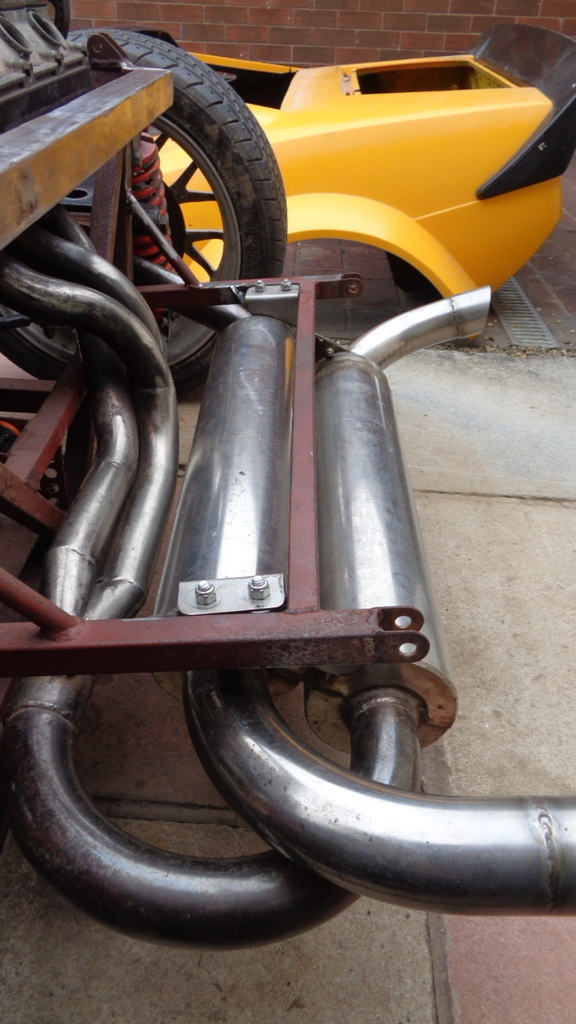 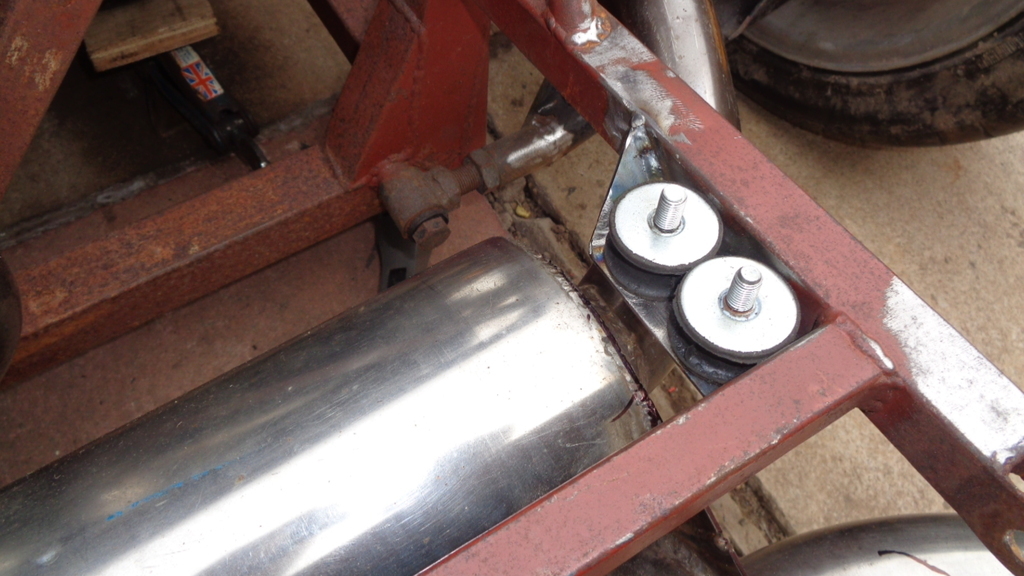 |
| |
|
|
jonomisfit
Club Retro Rides Member
Posts: 1,790
Club RR Member Number: 49
|
|
|
|
|
Thanks both for the input.
Agreed, bonded rubber joints in tension aren't a recipe for long life.
I did think about this when working out how I was going to mount it, but figured they'll last long enough to be acceptable to me.
If not I can always change the design later.
A number of the other mounts will be in compression as well, so hopefully this will give a good enough service life. I will find out with time 😀
|
| |
|
|
Darkspeed
Club Retro Rides Member
Posts: 4,884
Club RR Member Number: 39
|
|
|
|
The one you have used look pretty substantial items. There also looks to be a handy area to loop cable ties round if they do let go.  |
| |
|
|
jonomisfit
Club Retro Rides Member
Posts: 1,790
Club RR Member Number: 49
|
|
|
|
|
They're 40mm in diameter with 8mm studs. A bit like mini ones, but a lot larger.
Sold by motorsport tools for rally cars. The pictures of them in use show them in tension like I've used them, on some pretty high end builds.
I may fit a safety loop / lanyard of wire rope to prevent the boxes dropping if the mounts do fail.
|
| |
|
|
|
|
|
|
|
|
Yes, I have used of similar size. Like you say, perhaps it will last long enough for what you need it for and when they brake its not the end of the world to change them.
/David
|
| |
|
|
jonomisfit
Club Retro Rides Member
Posts: 1,790
Club RR Member Number: 49
|
|
|
|
I'd left the camera inside this morning, so pics starts part way through the day. I did the exhaust hanger just in front of the diff, tacked it together then took it out to weld up. Fully welded the tubes 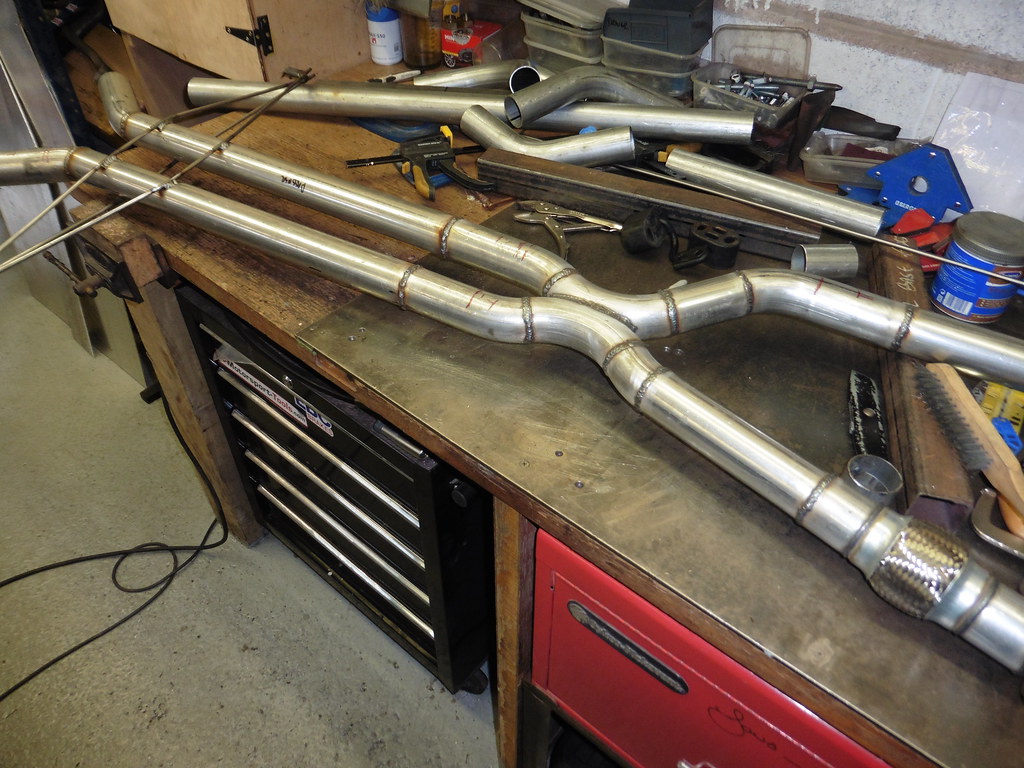 P1070910 P1070910 by jono_misfit, on Flickr exhaust hanger 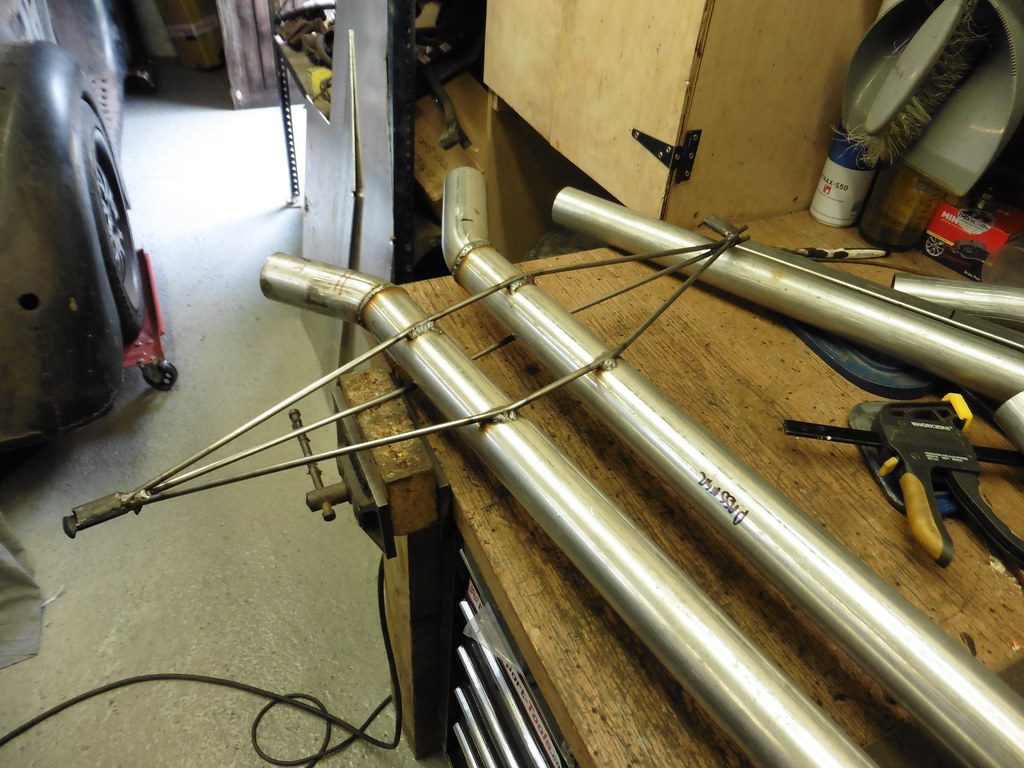 P1070911 P1070911 by jono_misfit, on Flickr 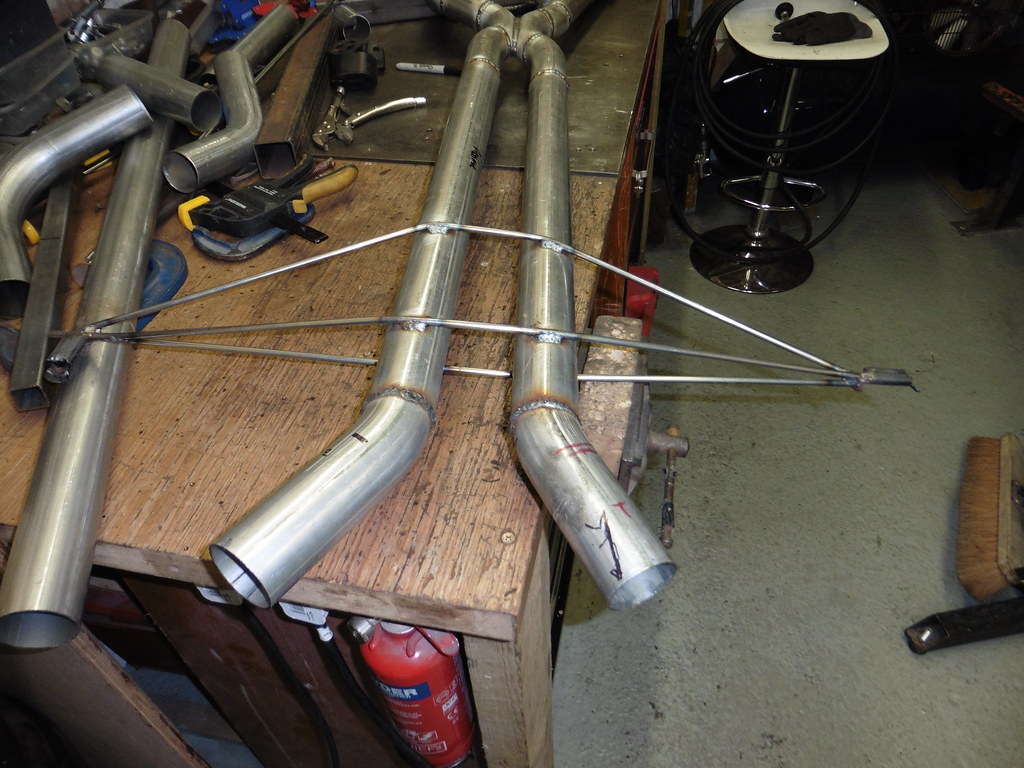 P1070912 P1070912 by jono_misfit, on Flickr this will have some skid plates added to it which will stiffen it up further exhaust back in and link pipes to the silencers made  P1070913 P1070913 by jono_misfit, on Flickr the exhaust is nice and high still, whilst still clearing  P1070914 P1070914 by jono_misfit, on Flickr  P1070915 P1070915 by jono_misfit, on Flickr  P1070917 P1070917 by jono_misfit, on Flickr Silencer needs one of the pipes looped back on itself  P1070918 P1070918 by jono_misfit, on Flickr  P1070919 P1070919 by jono_misfit, on Flickr back in, then start lining it up for the exhaust outlet  P1070923 P1070923 by jono_misfit, on Flickr  P1070924 P1070924 by jono_misfit, on Flickr I need a tight 90 deg bend (but also have run out of 90 bends) so cut some tube into wedges  P1070920 P1070920 by jono_misfit, on Flickr and tacked together  P1070921 P1070921 by jono_misfit, on Flickr tacked onto tube 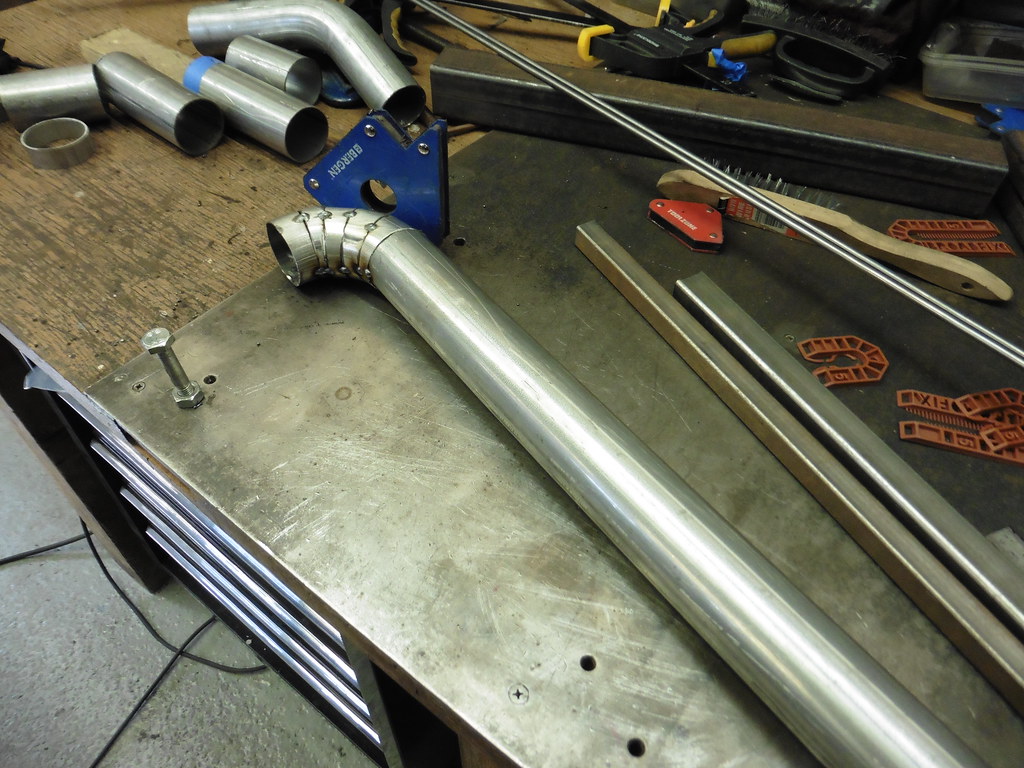 P1070922 P1070922 by jono_misfit, on Flickr it'll come out next to this and then i'll make an end tip  P1070923 P1070923 by jono_misfit, on Flickr although.... Just realised, i could probably have done the loop back pipe by cutting the 180 deg bend in half, adding 50mm of tube and just run it stright up the side of the silencer..... |
| |
|
|
jonomisfit
Club Retro Rides Member
Posts: 1,790
Club RR Member Number: 49
|
|
|
|
I had things to do much of today, so not long in the workshop. Welded up the bend  P1070926 P1070926 by jono_misfit, on Flickr tacked together  P1070927 P1070927 by jono_misfit, on Flickr fully welded back boxes  P1070928 P1070928 by jono_misfit, on Flickr  P1070929 P1070929 by jono_misfit, on Flickr then welded up the mid section  P1070930 P1070930 by jono_misfit, on Flickr marked up some templates for the skids / hanger stiffener  P1070931 P1070931 by jono_misfit, on Flickr  P1070932 P1070932 by jono_misfit, on Flickr into steel  P1070933 P1070933 by jono_misfit, on Flickr  P1070934 P1070934 by jono_misfit, on Flickr well..... cant have just flat plates.....  P1070935 P1070935 by jono_misfit, on Flickr |
| |
|
|
mk2cossie
Club Retro Rides Member
Posts: 3,063  Club RR Member Number: 77
|
|
|
|
|
Where did you get the dimple dies from? And what thickness sheet can they be used on?
Thinking of using one on the sill centre section on mine for a bit of fancifulness, even tho it will never be seen 🤔
|
| |
|
|
jonomisfit
Club Retro Rides Member
Posts: 1,790
Club RR Member Number: 49
|
|
|
|
I bought them from Ebay about 10 years ago, but there are similar ones still for sale on it. Dimple die setI've regularly used on 1.5 & 2mm mild steel and 3mm aluminium. I've also used on 3mm mild steel but the it wasnt really that happy, and had to give it a good go with the press to do the swage. The die didnt die though.... |
| |
|
|


