jonomisfit
Club Retro Rides Member
Posts: 1,790
Club RR Member Number: 49
|
|
Jan 21, 2019 19:39:01 GMT
|
|
It's a genuine escort cosworth.
Essentially a siera floorpan in an escort mk5 body but there are a few other tweaks. Front wheel centre is further forward than the normal escorts.
Floor pan has a few minor differences to sieras as well.
|
| |
Last Edit: Jan 21, 2019 19:40:23 GMT by jonomisfit
|
|
|
|
jonomisfit
Club Retro Rides Member
Posts: 1,790
Club RR Member Number: 49
|
|
|
|
the passenger sill needed a further patch. 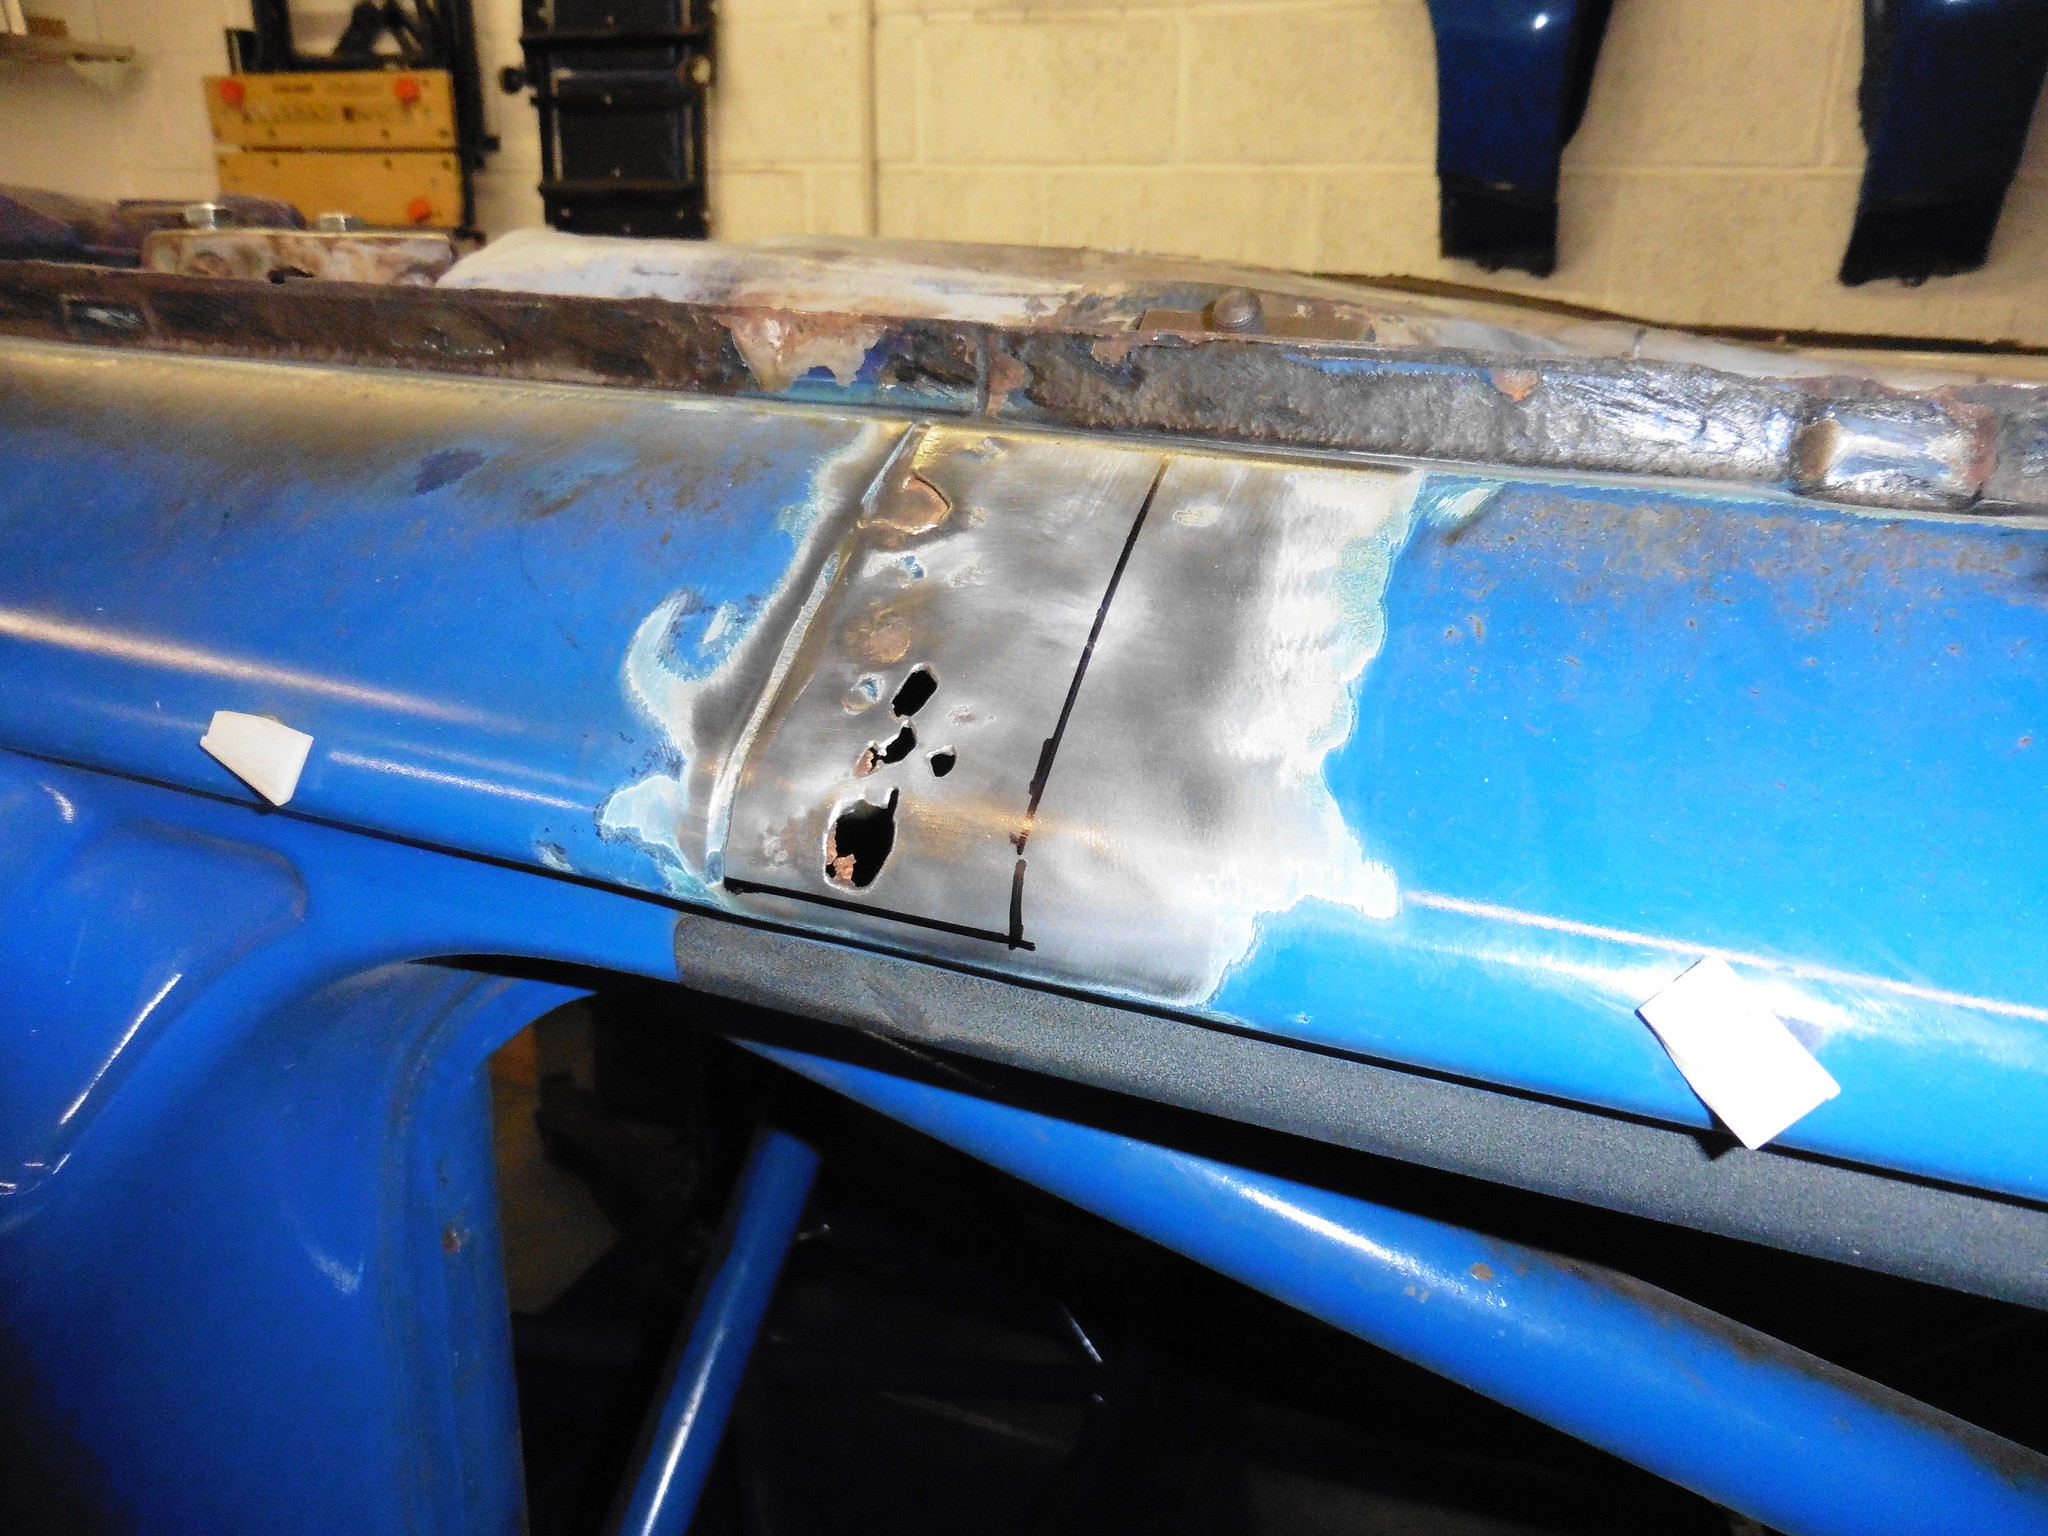 P1020079 P1020079 by jono_misfit, on Flickr This is a common rust area on escorts. Its where the front sill and rear quarter are joined. its spot welded and brazed, and i think this combination causes a moisture trap and then the rot. The pic above shows the rust occurs at the end of the internal lip. I didnt want the rest of the sill to move, so cut a profile. 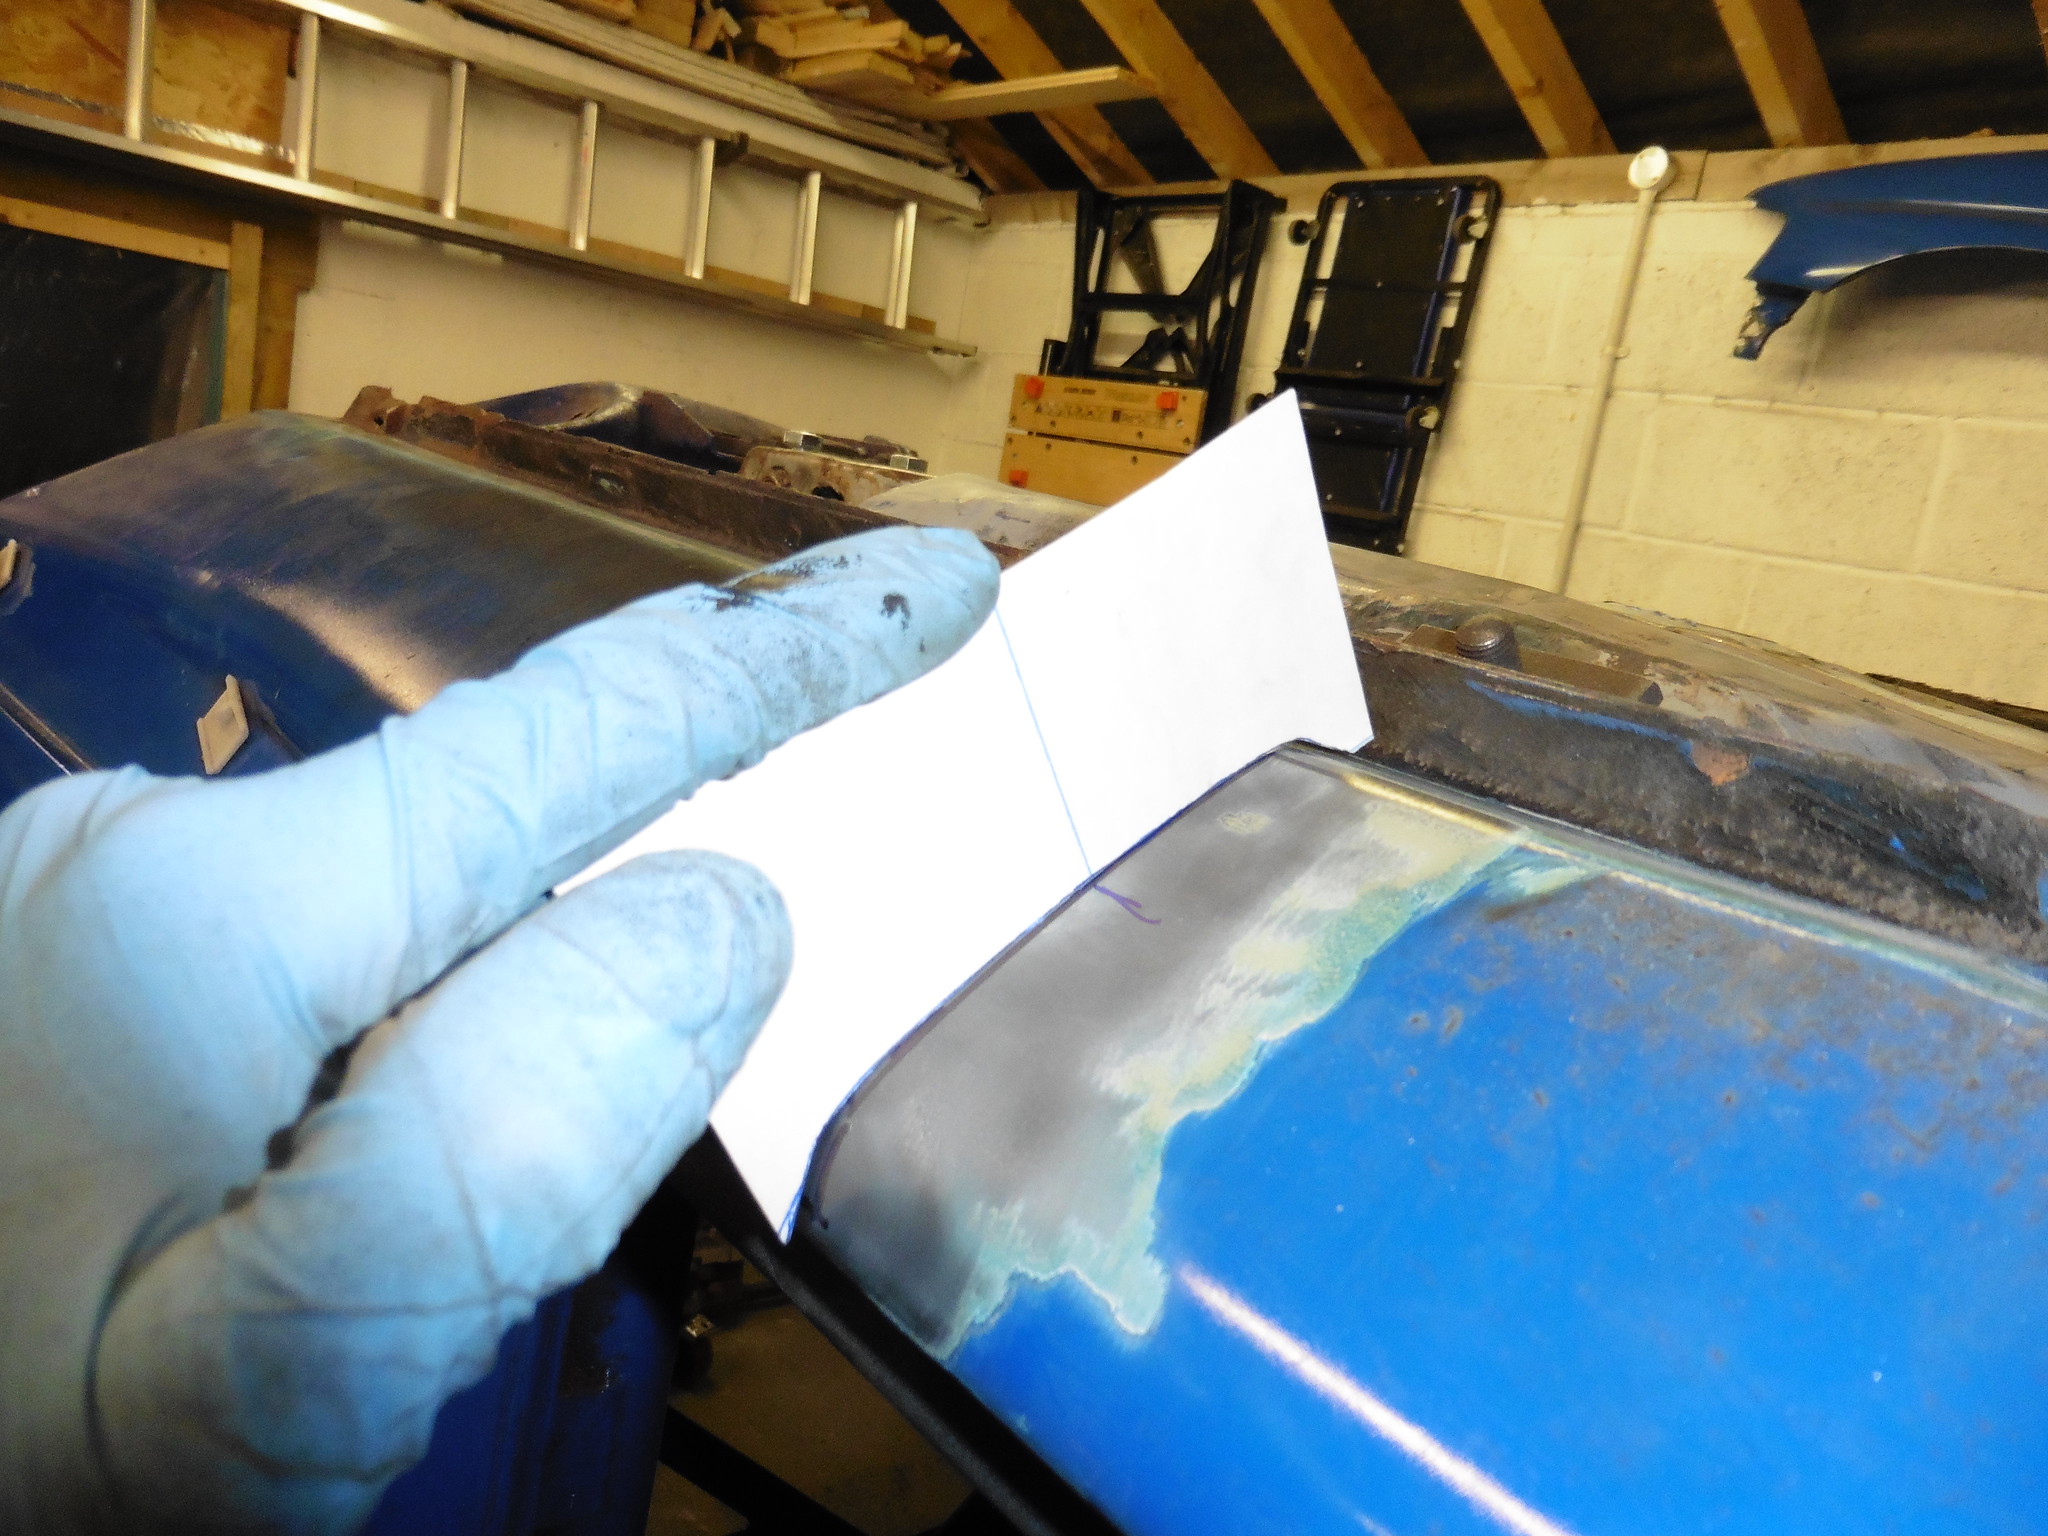 P1020081 P1020081 by jono_misfit, on Flickr transfer to steel 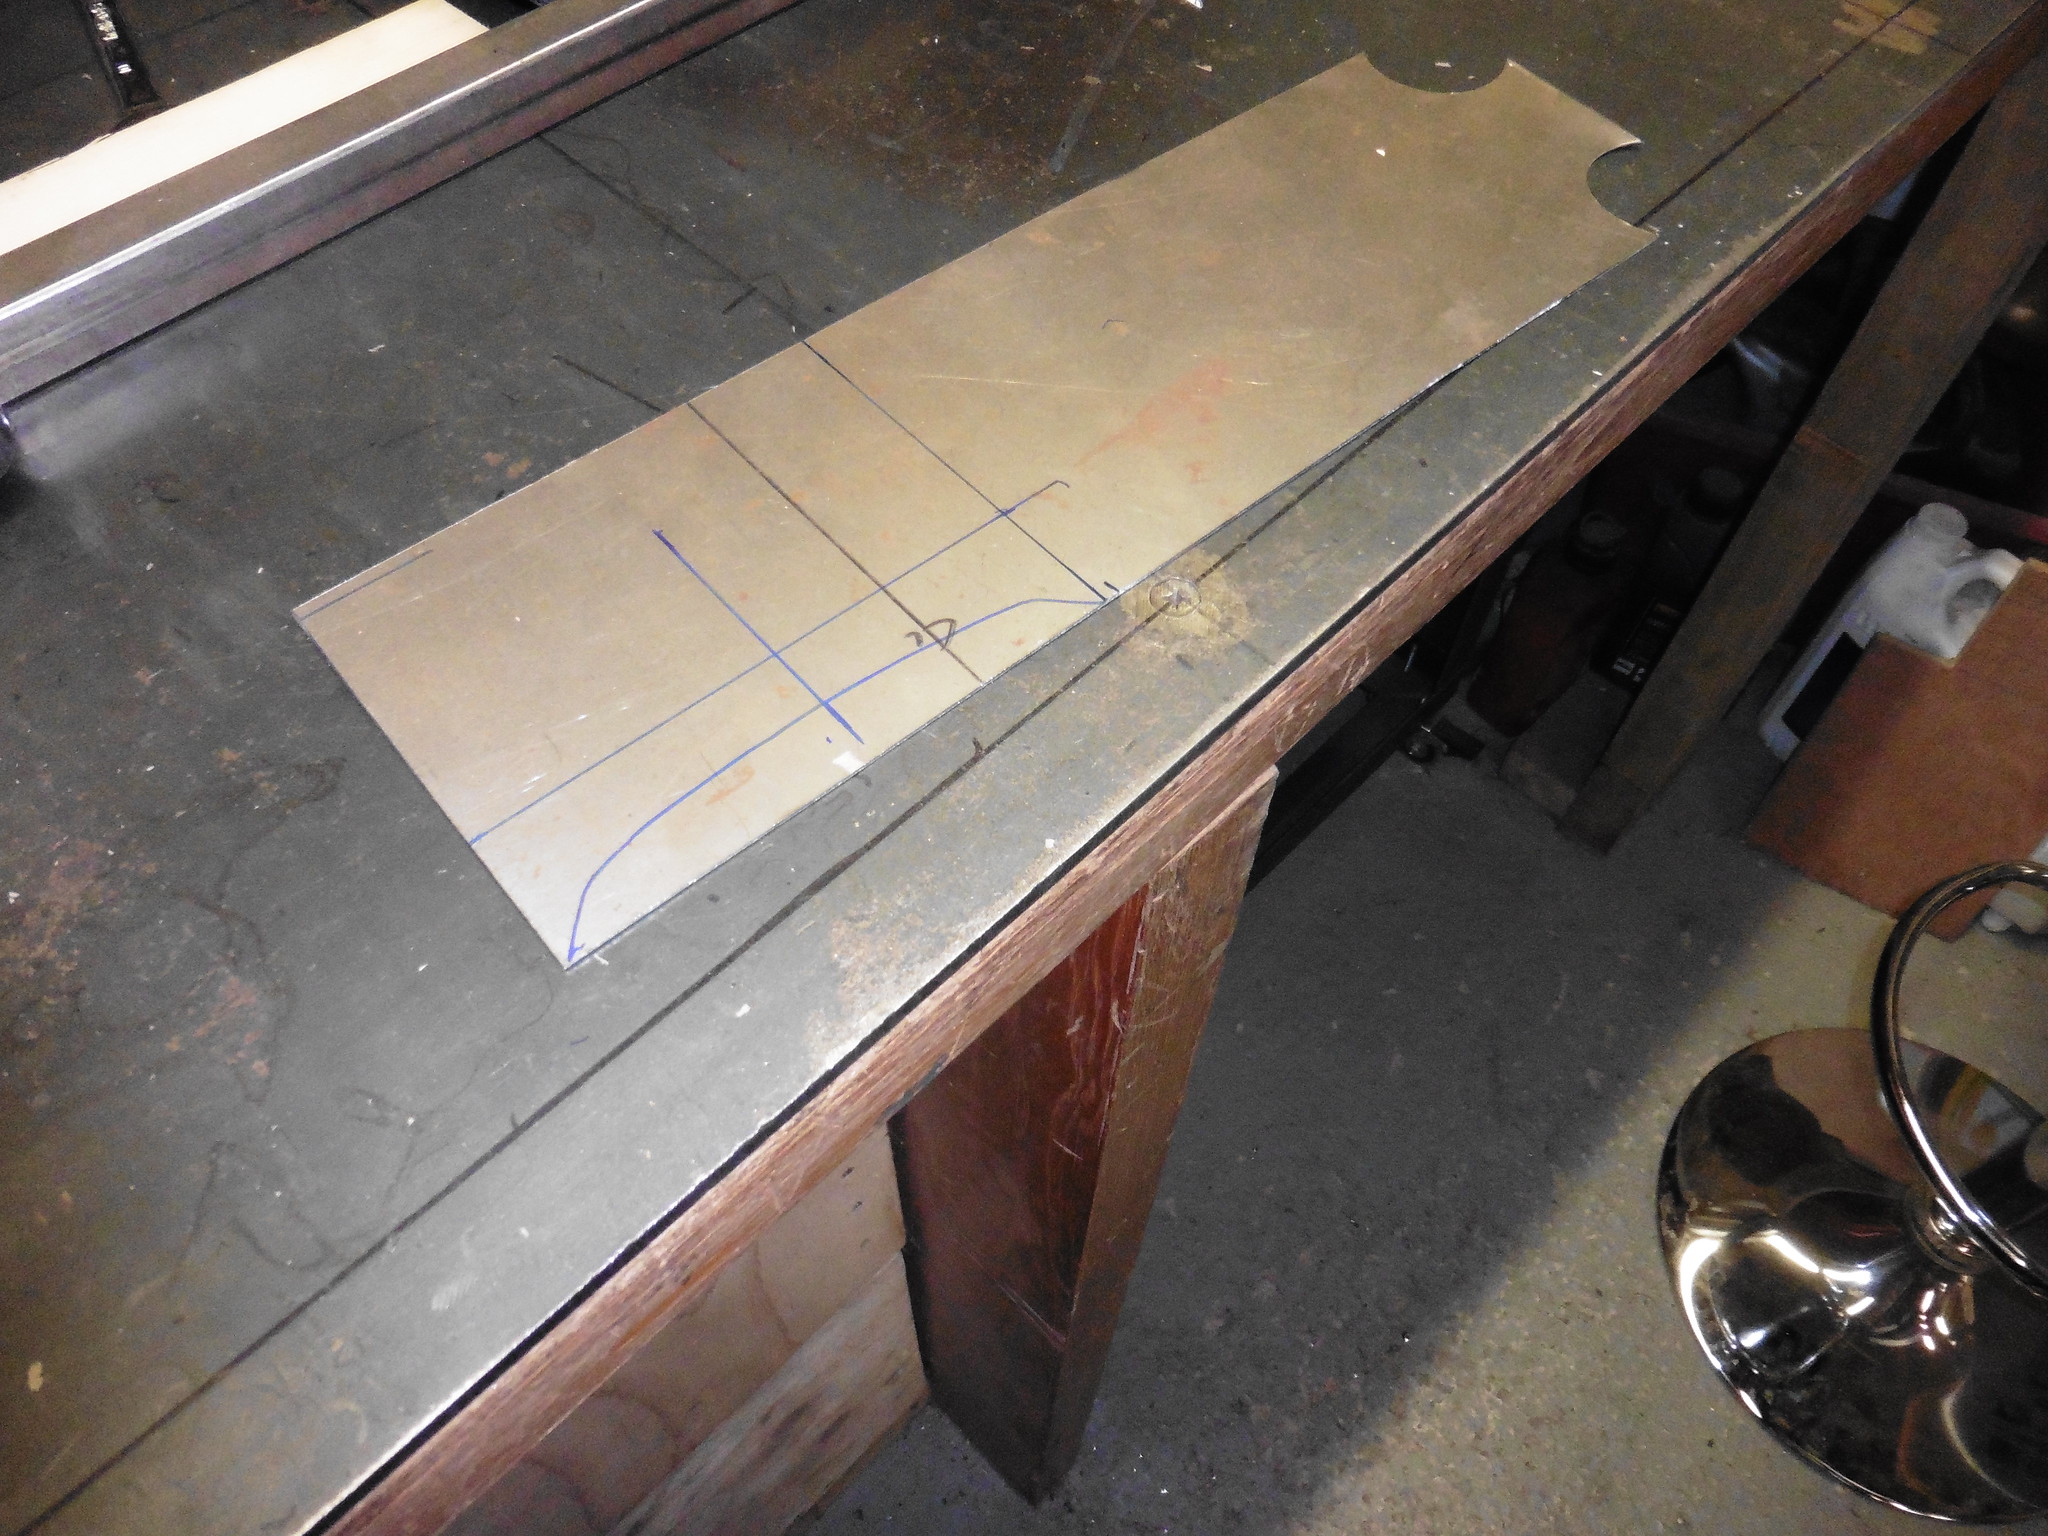 P1020082 P1020082 by jono_misfit, on Flickr forget to take a picture of it tacked on..... forget to take a picture of the rust getting cut out.... Pic of the removed sill section 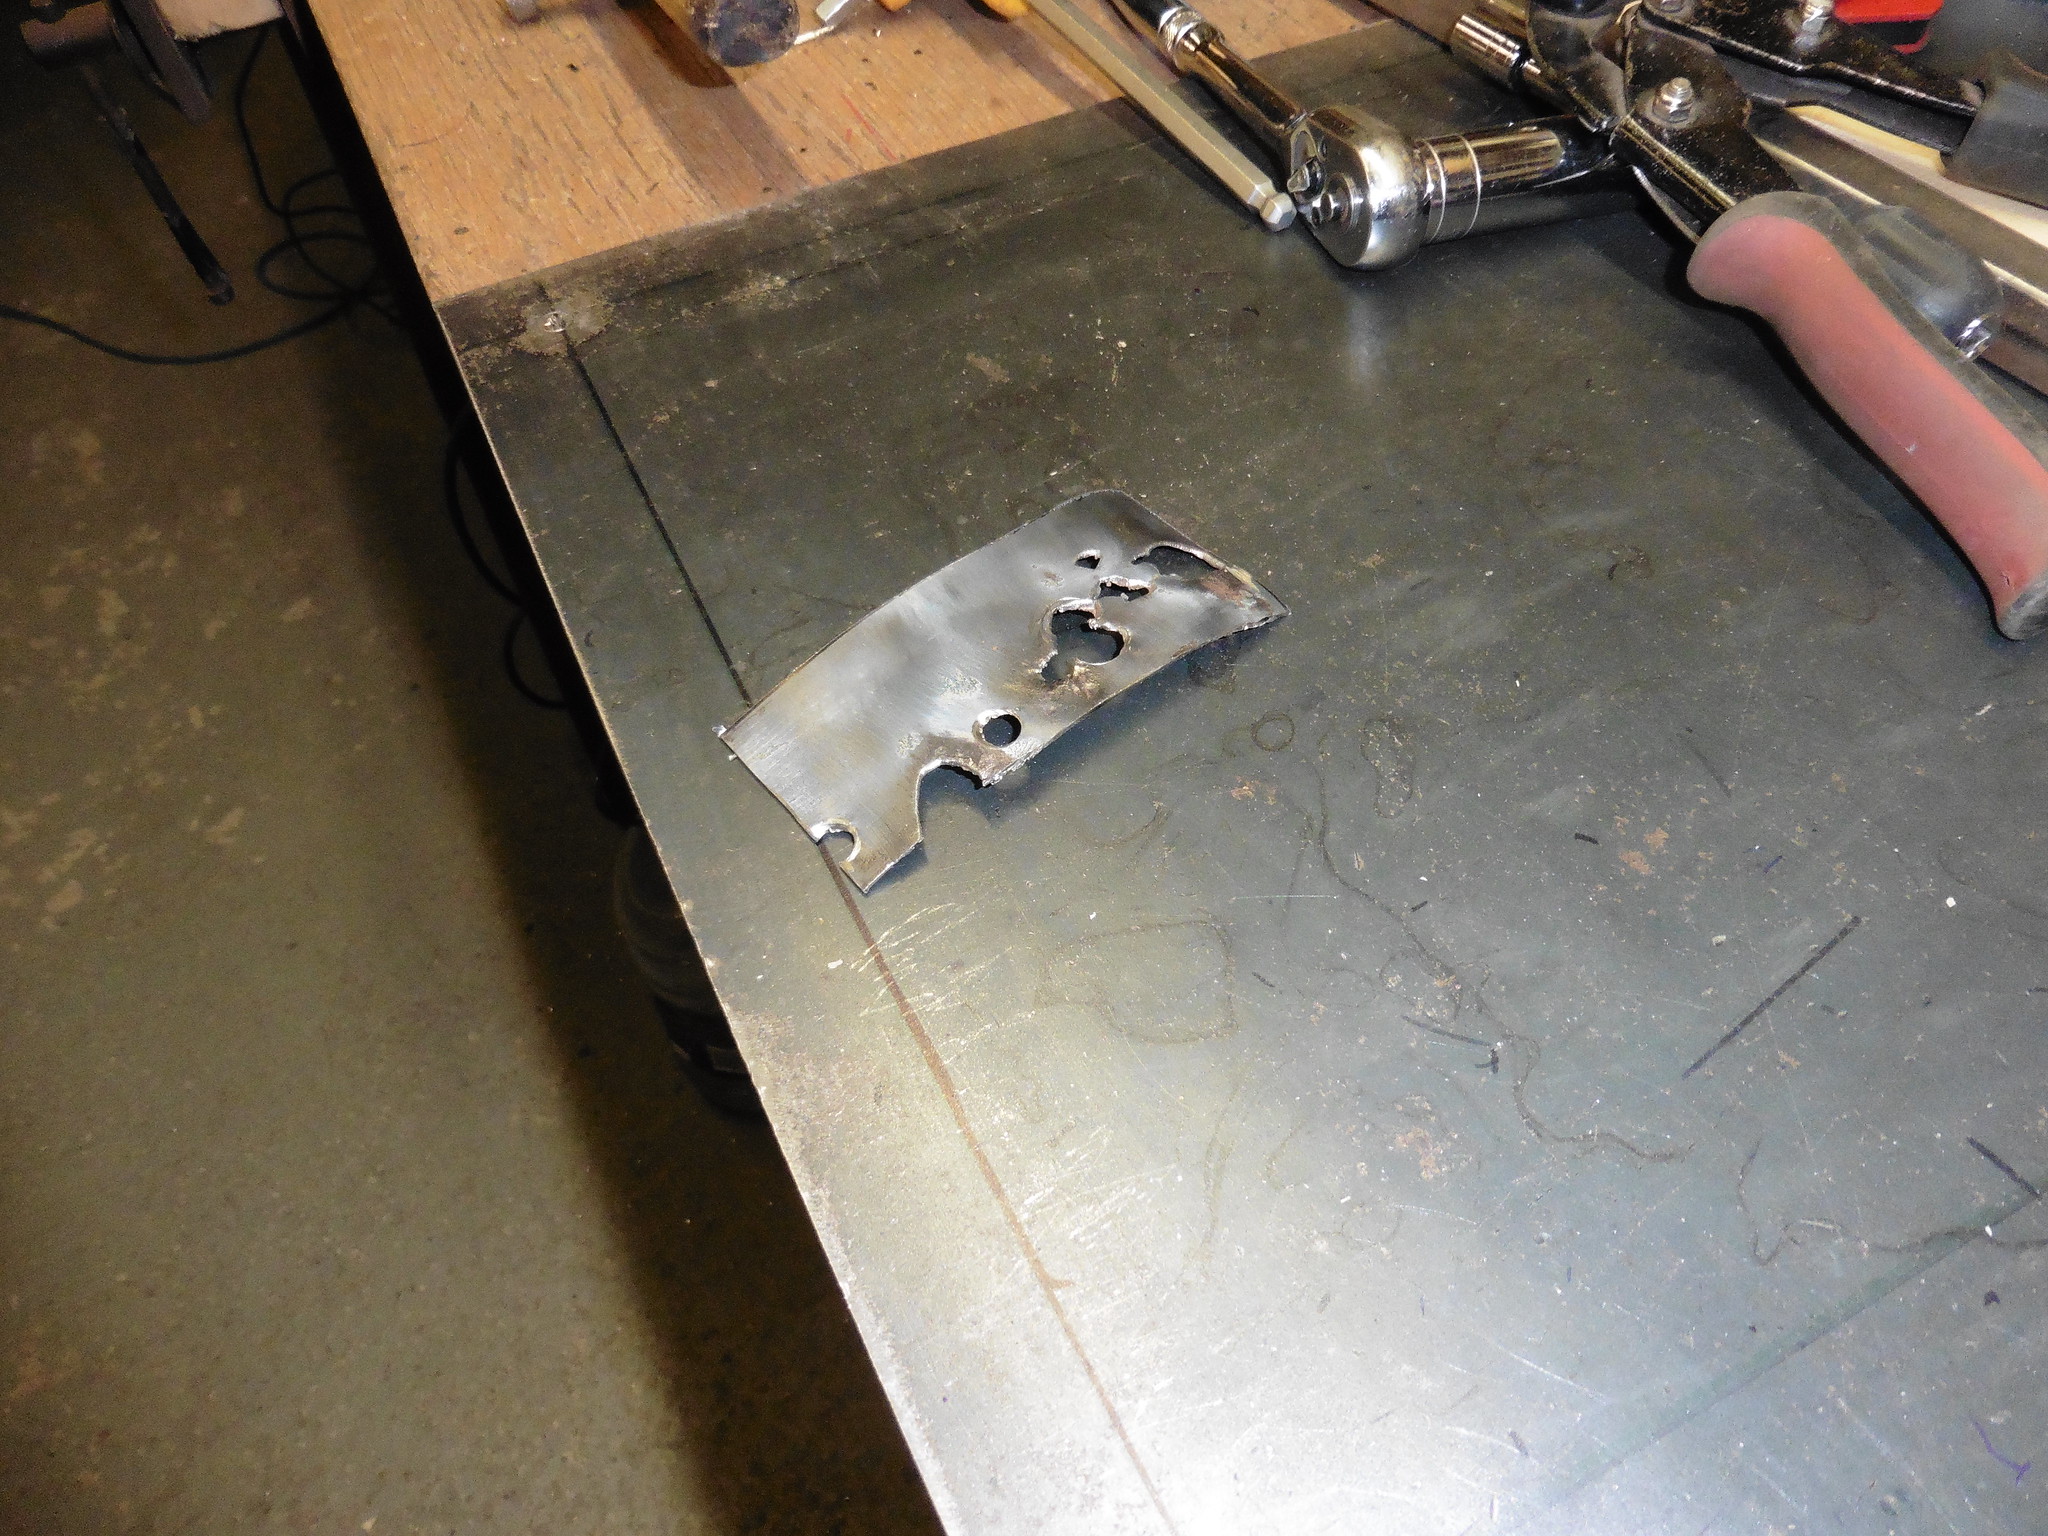 P1020083 P1020083 by jono_misfit, on Flickr cleaned back ready for welding 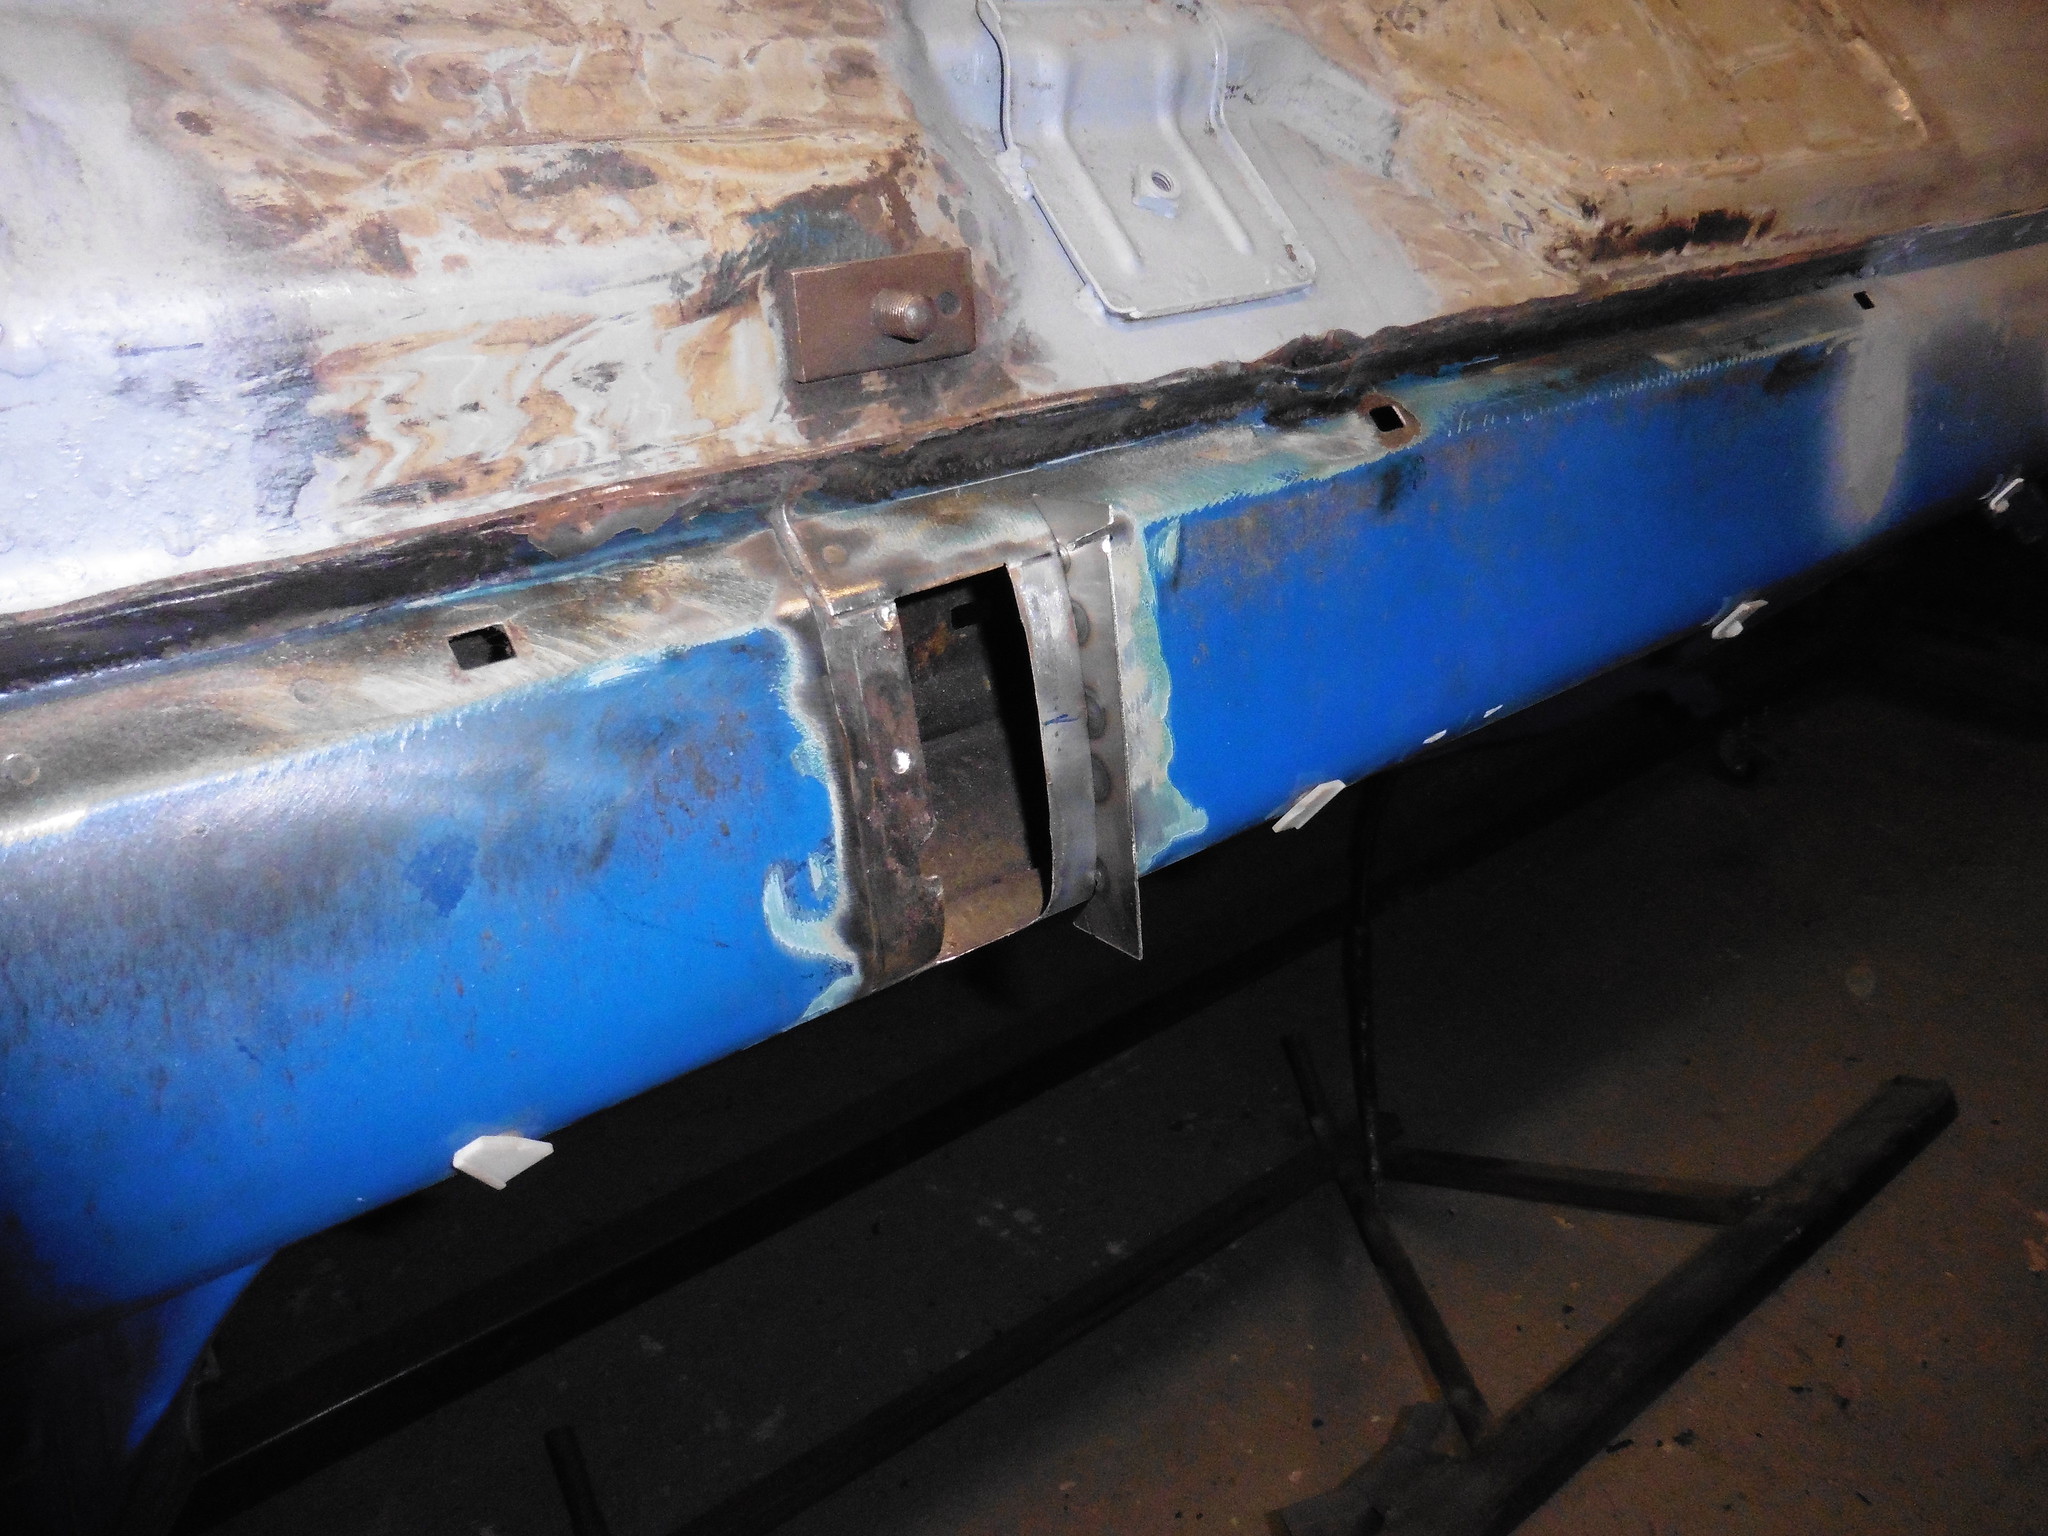 P1020084 P1020084 by jono_misfit, on Flickr patch 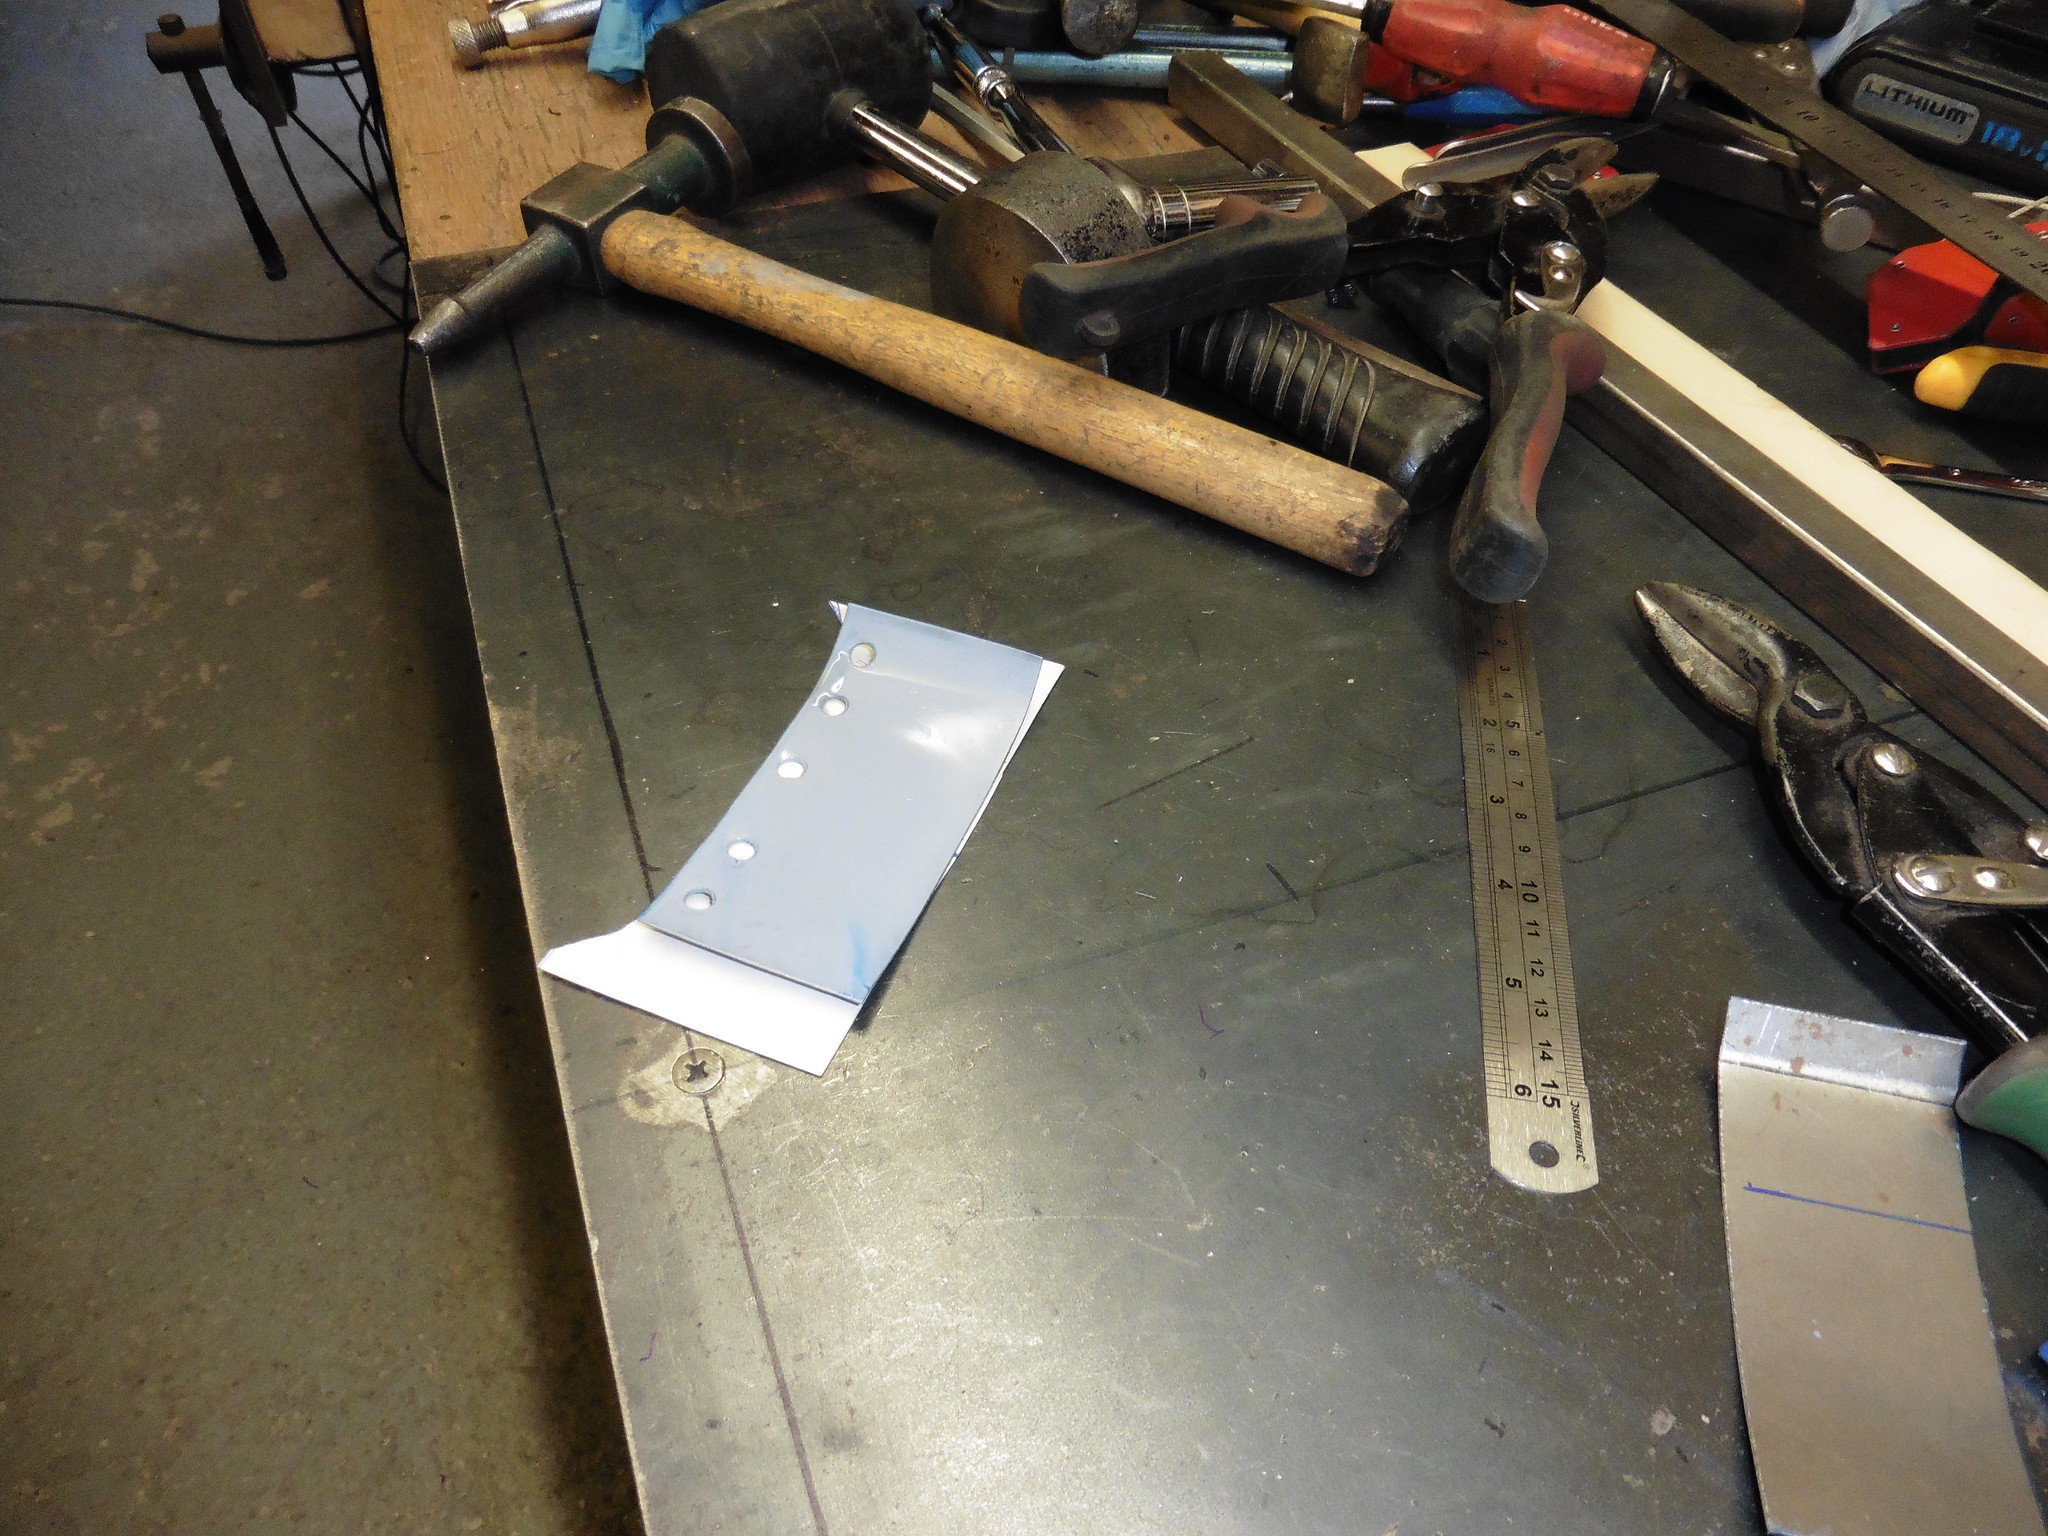 P1020085 P1020085 by jono_misfit, on Flickr etch primed 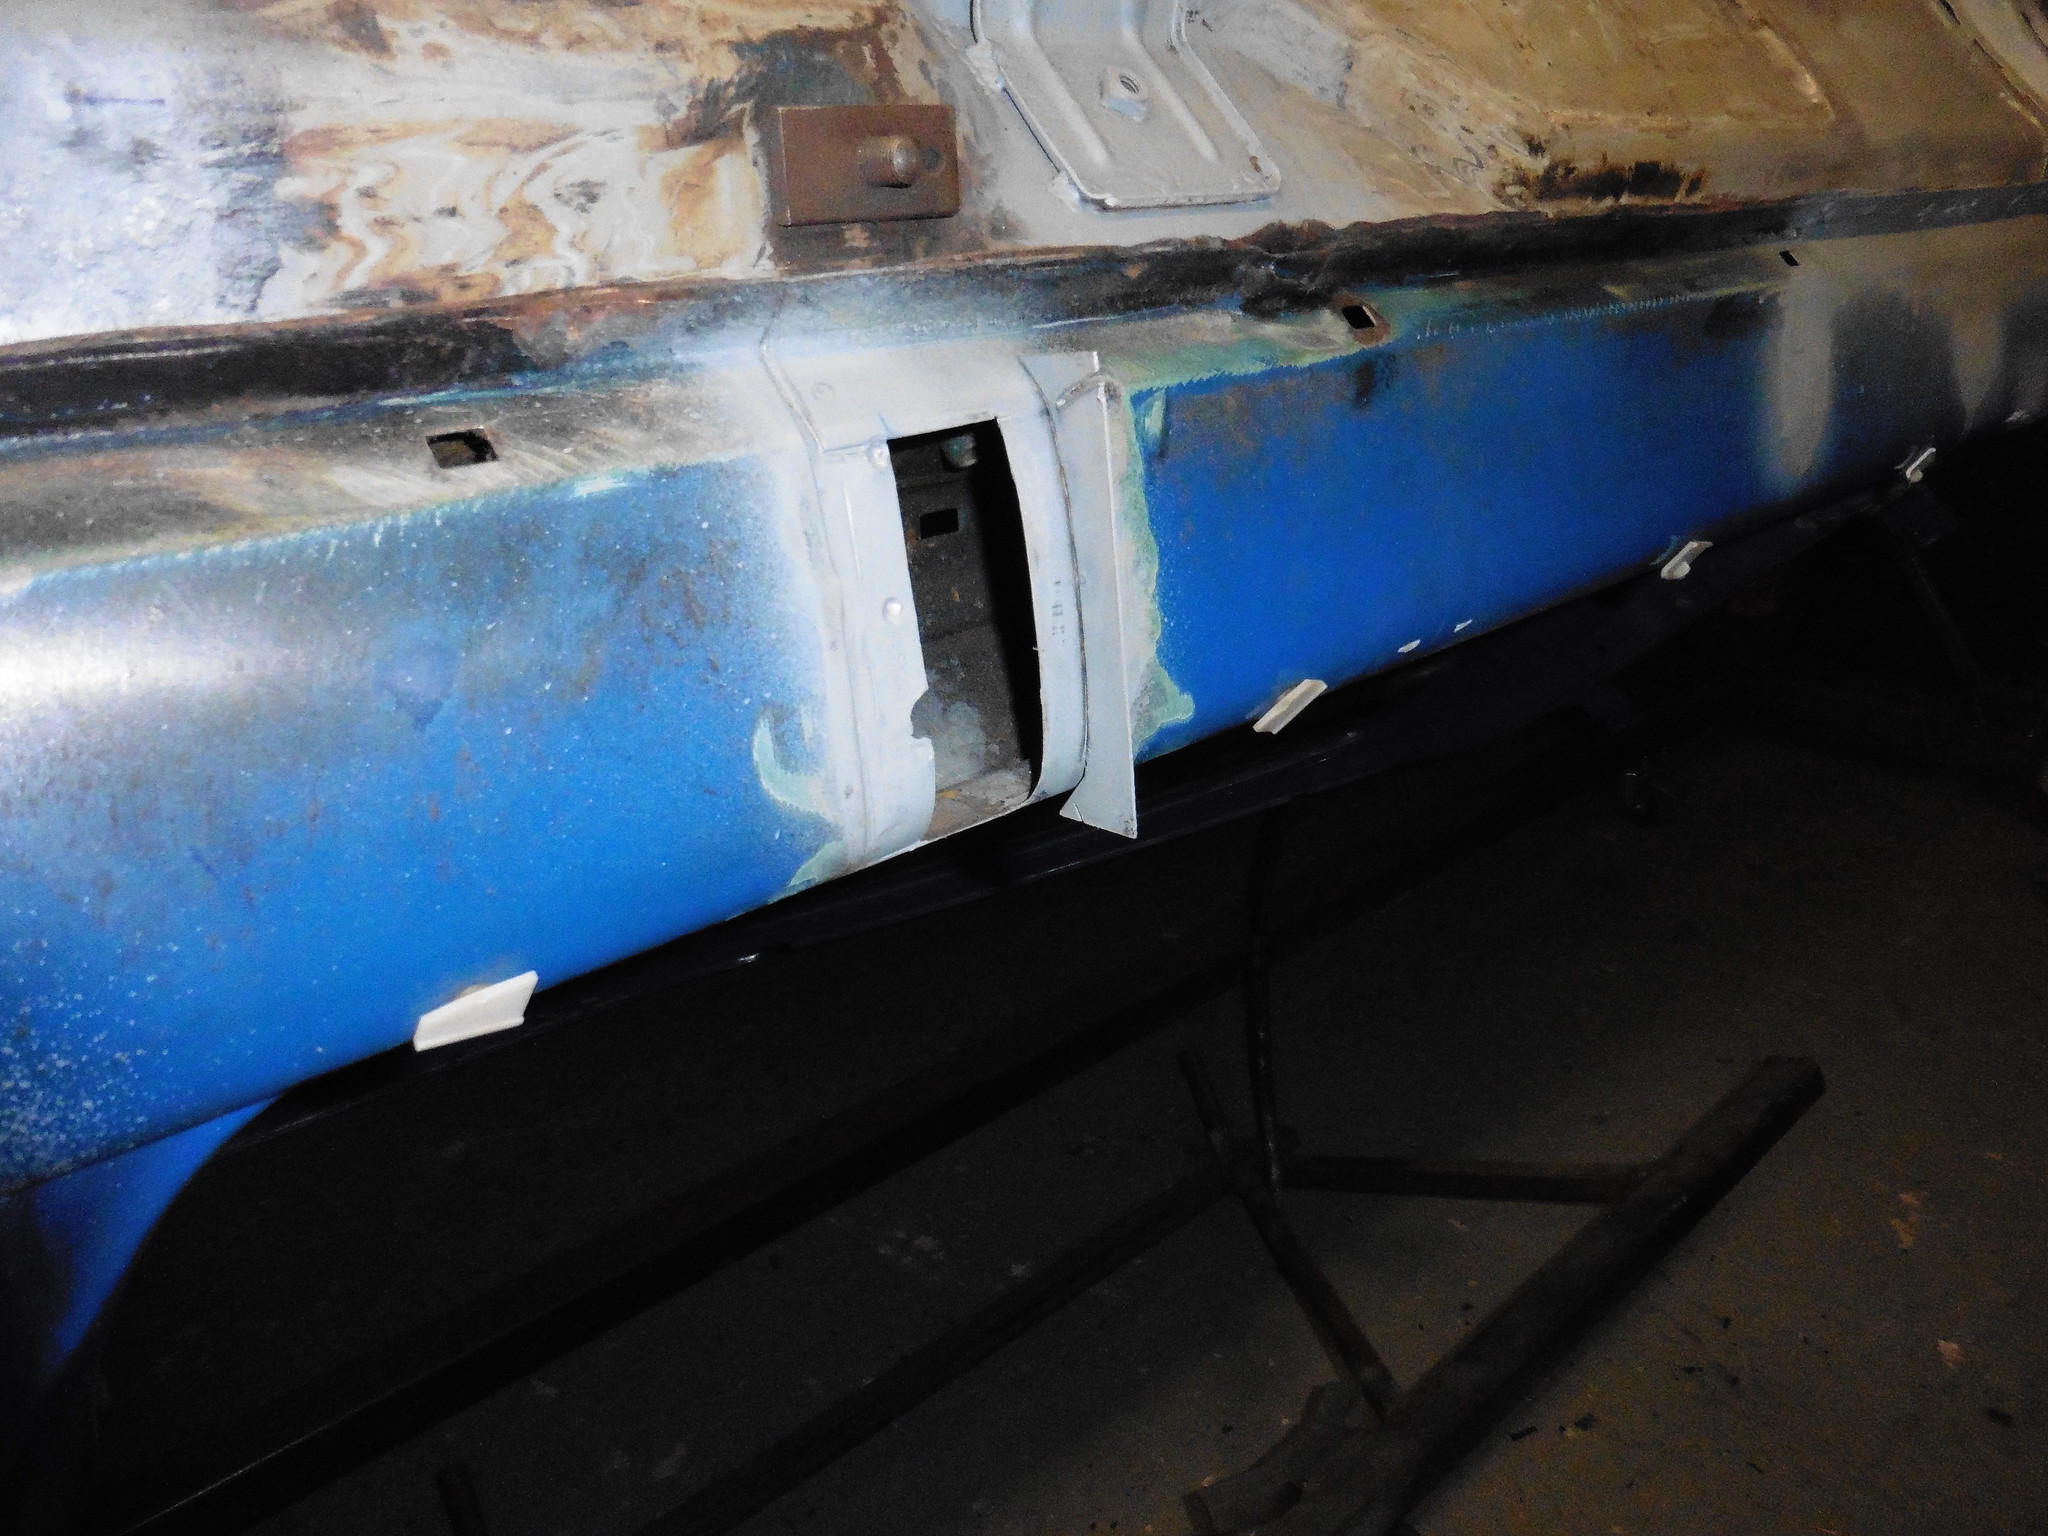 P1020086 P1020086 by jono_misfit, on Flickr welded in 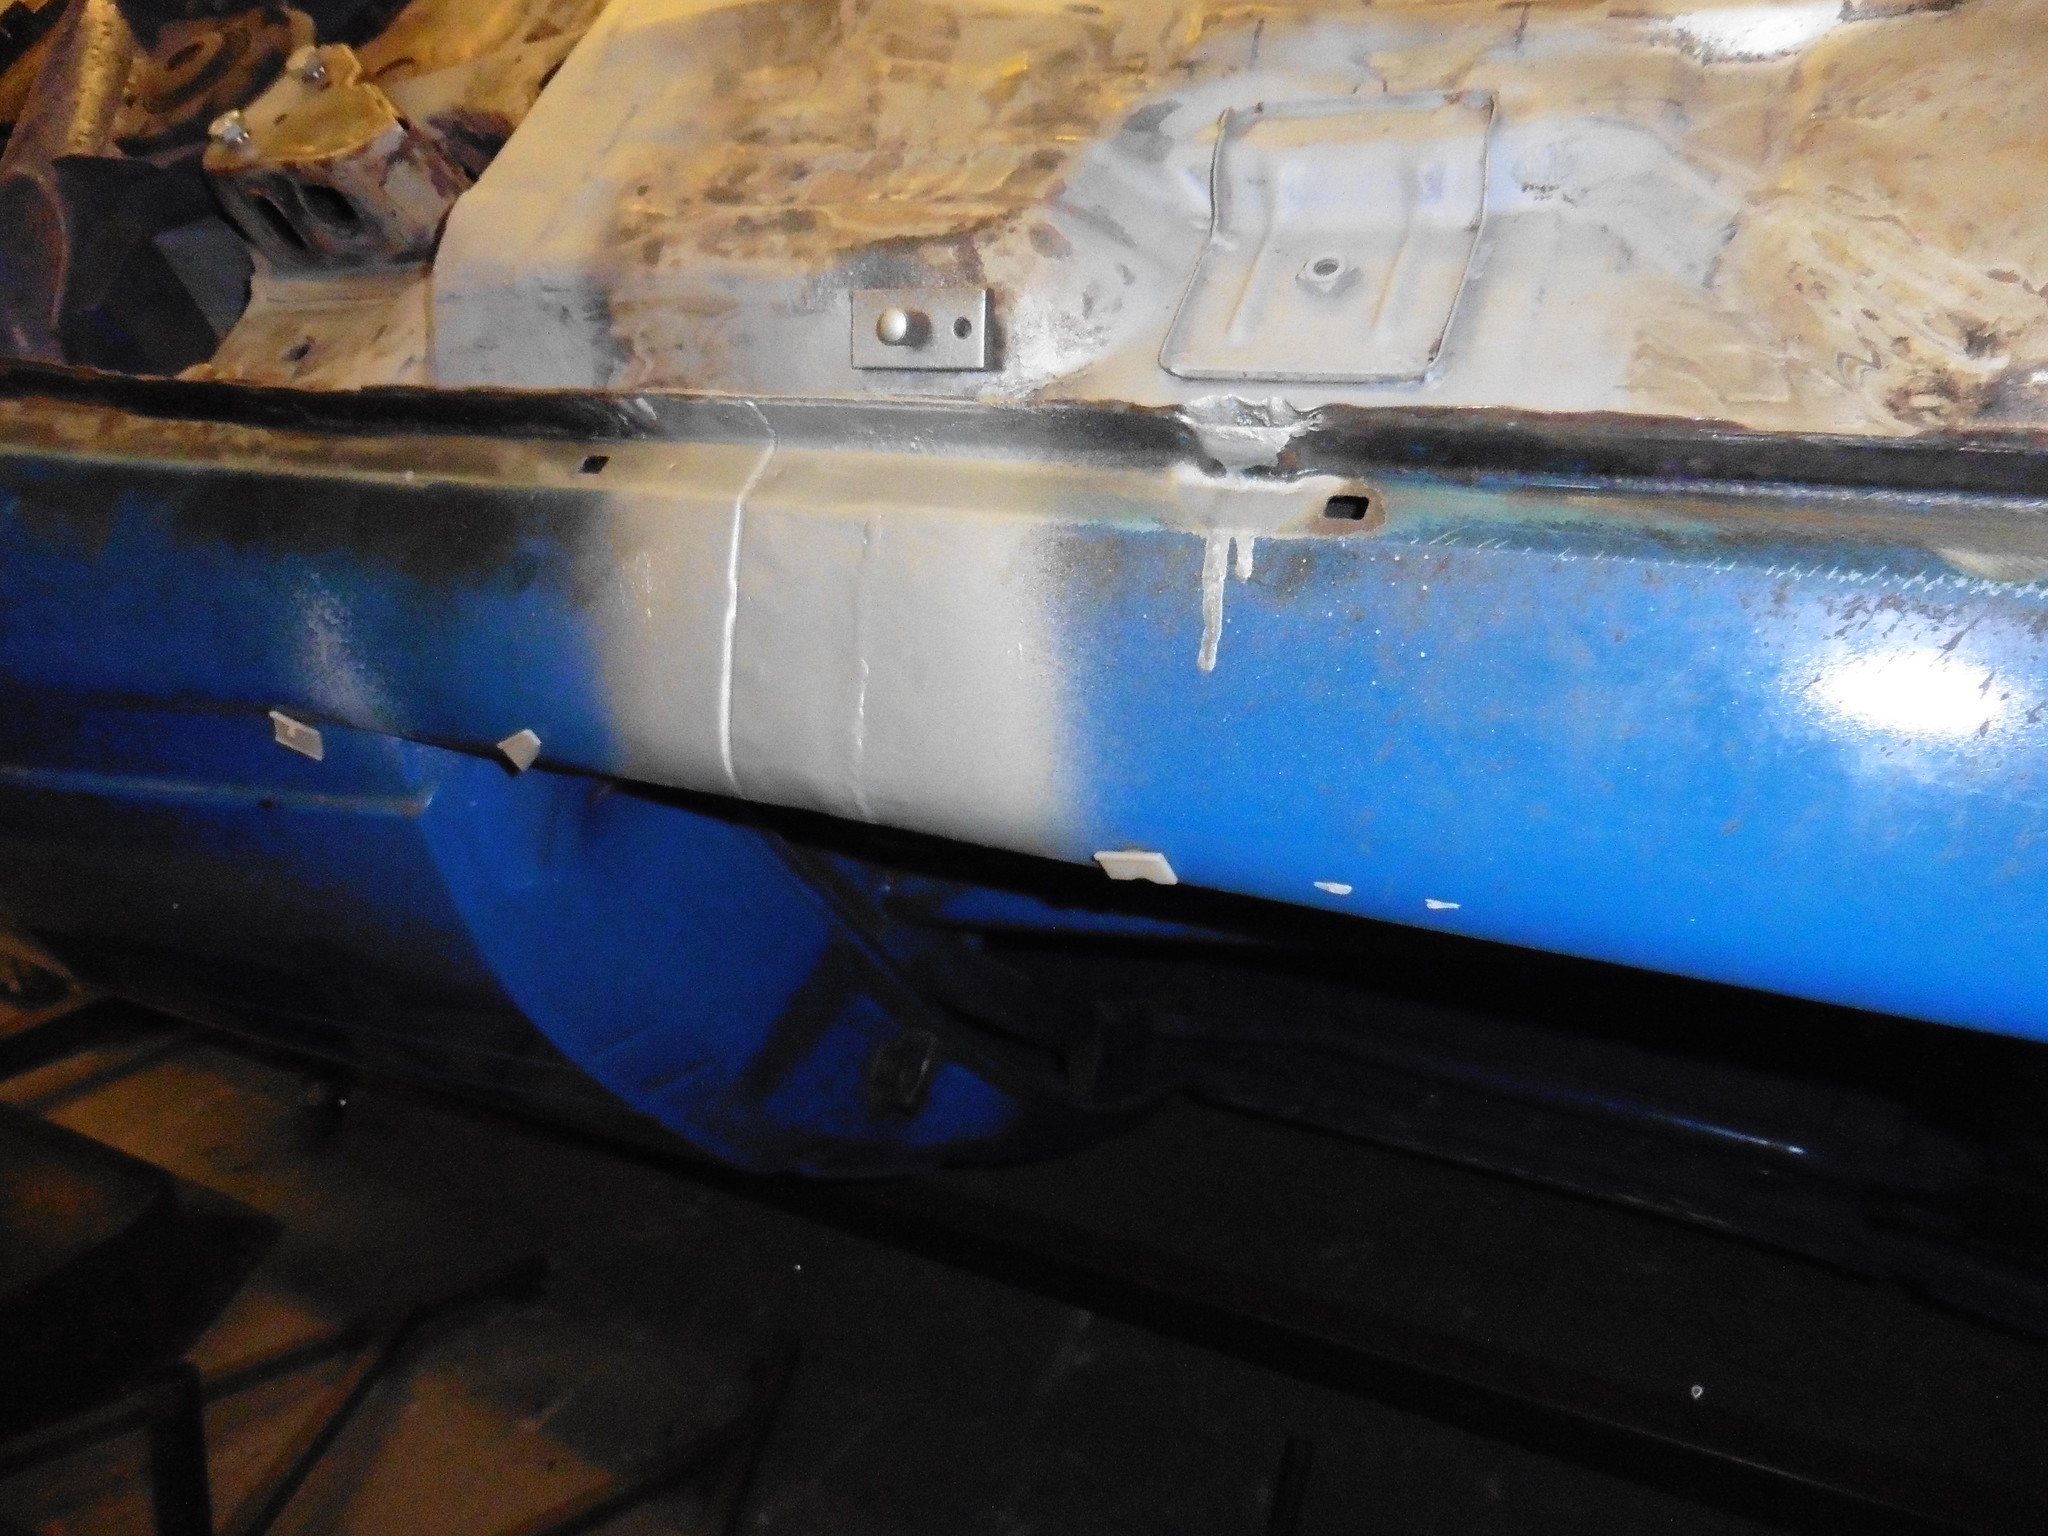 P1020087 P1020087 by jono_misfit, on Flickr 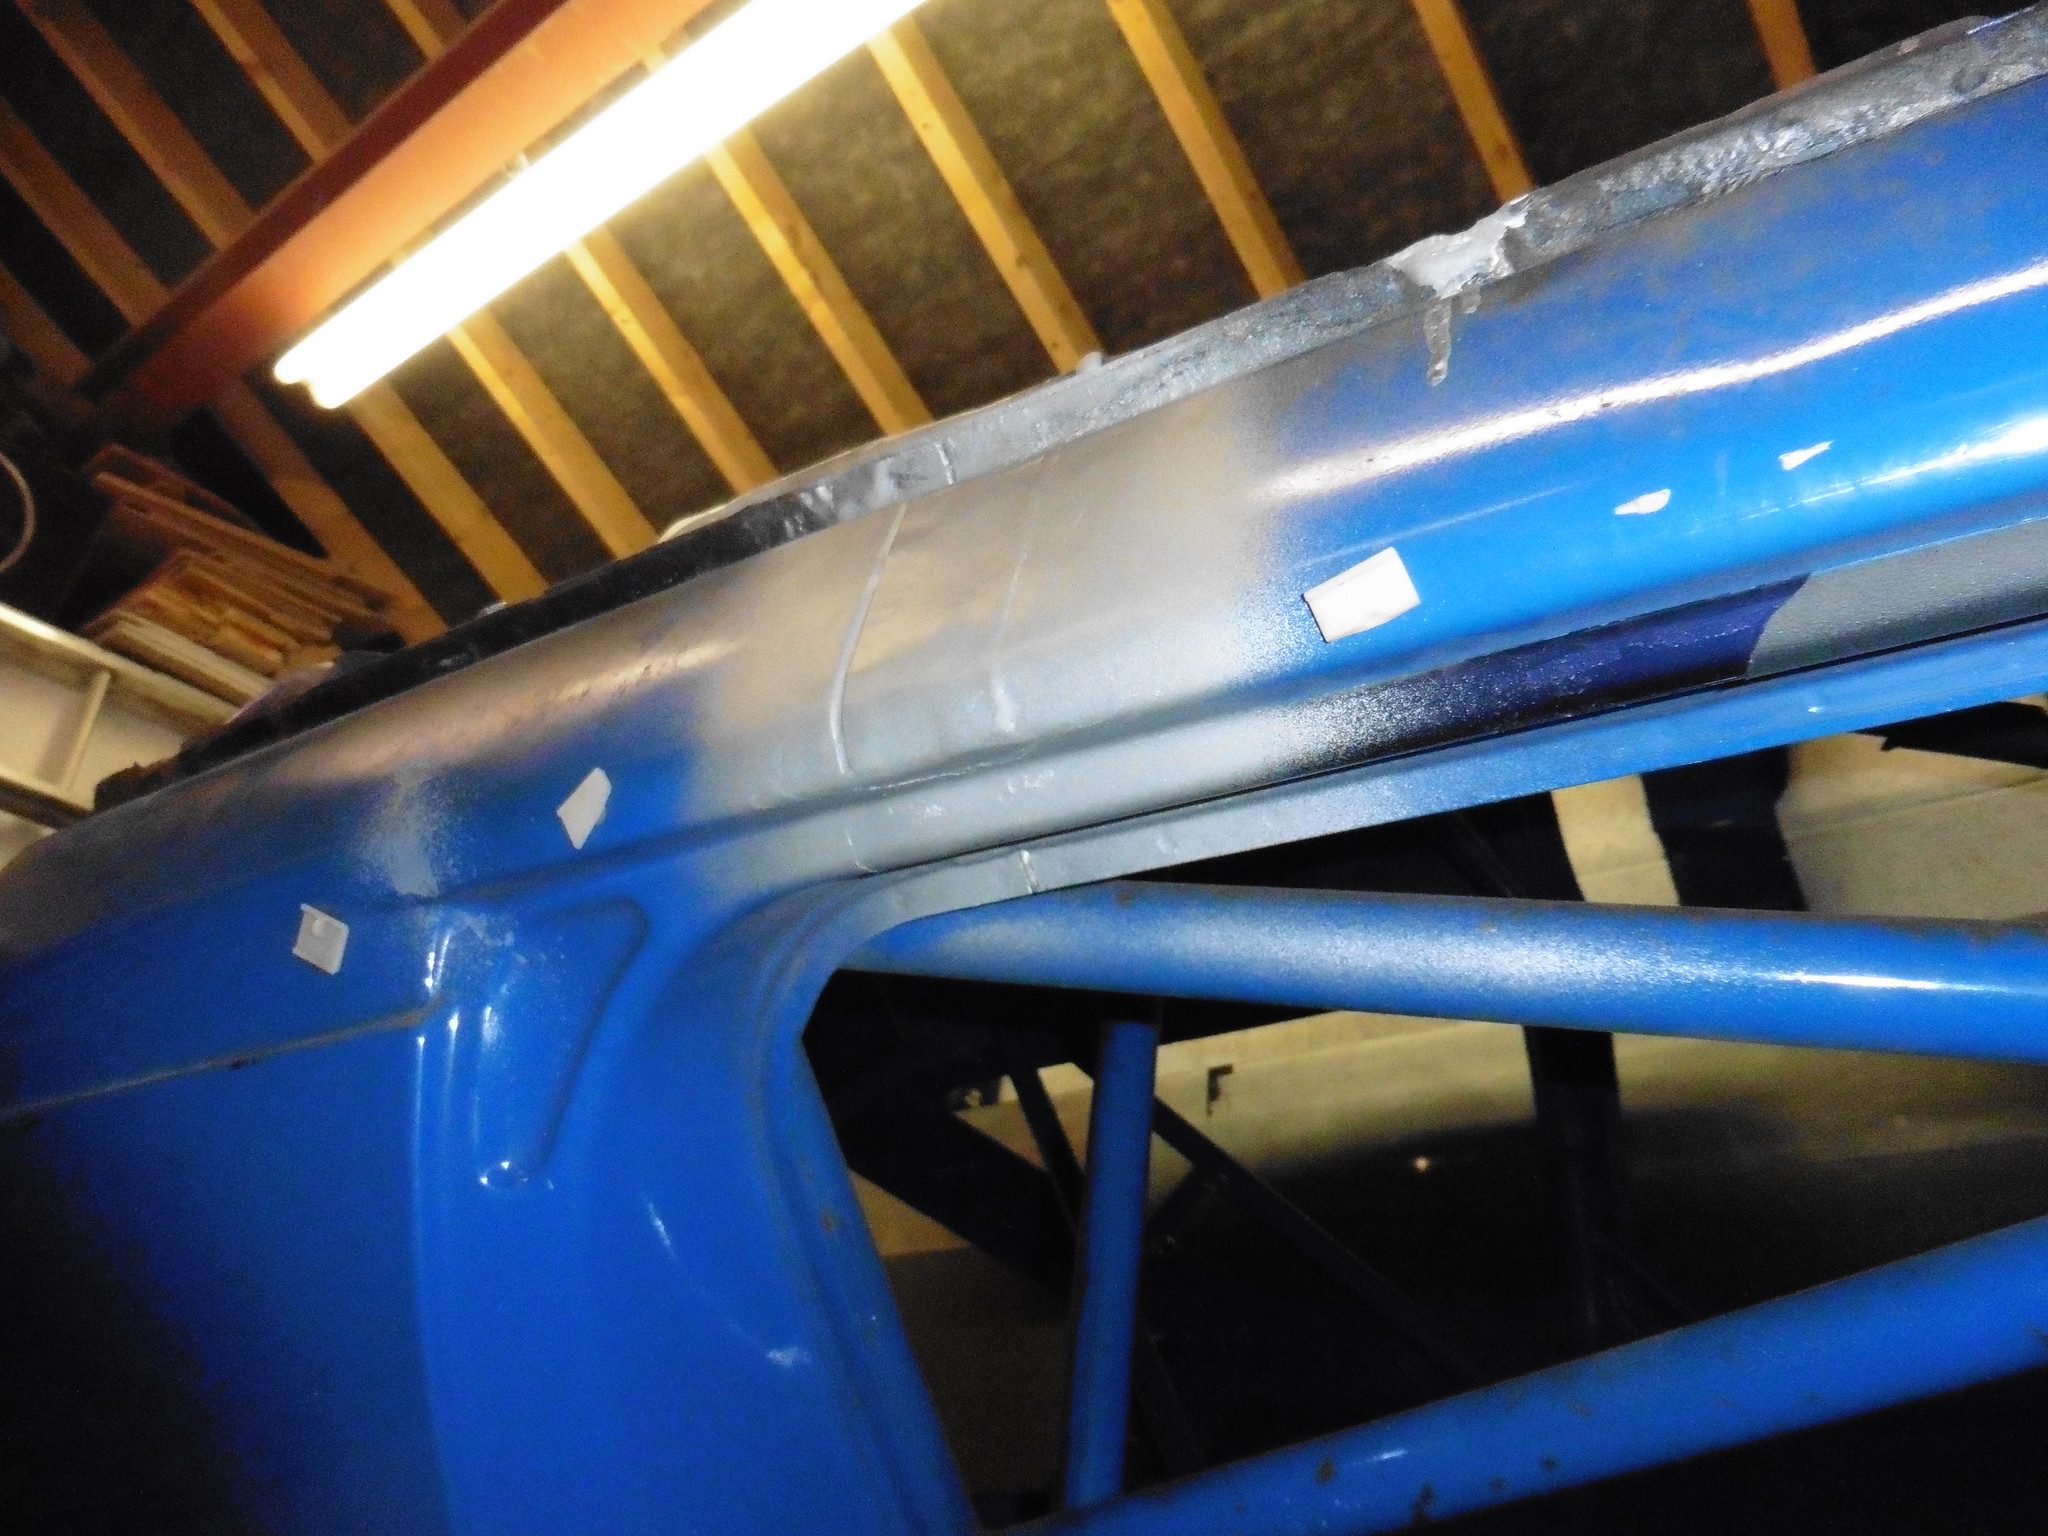 P1020088 P1020088 by jono_misfit, on Flickr 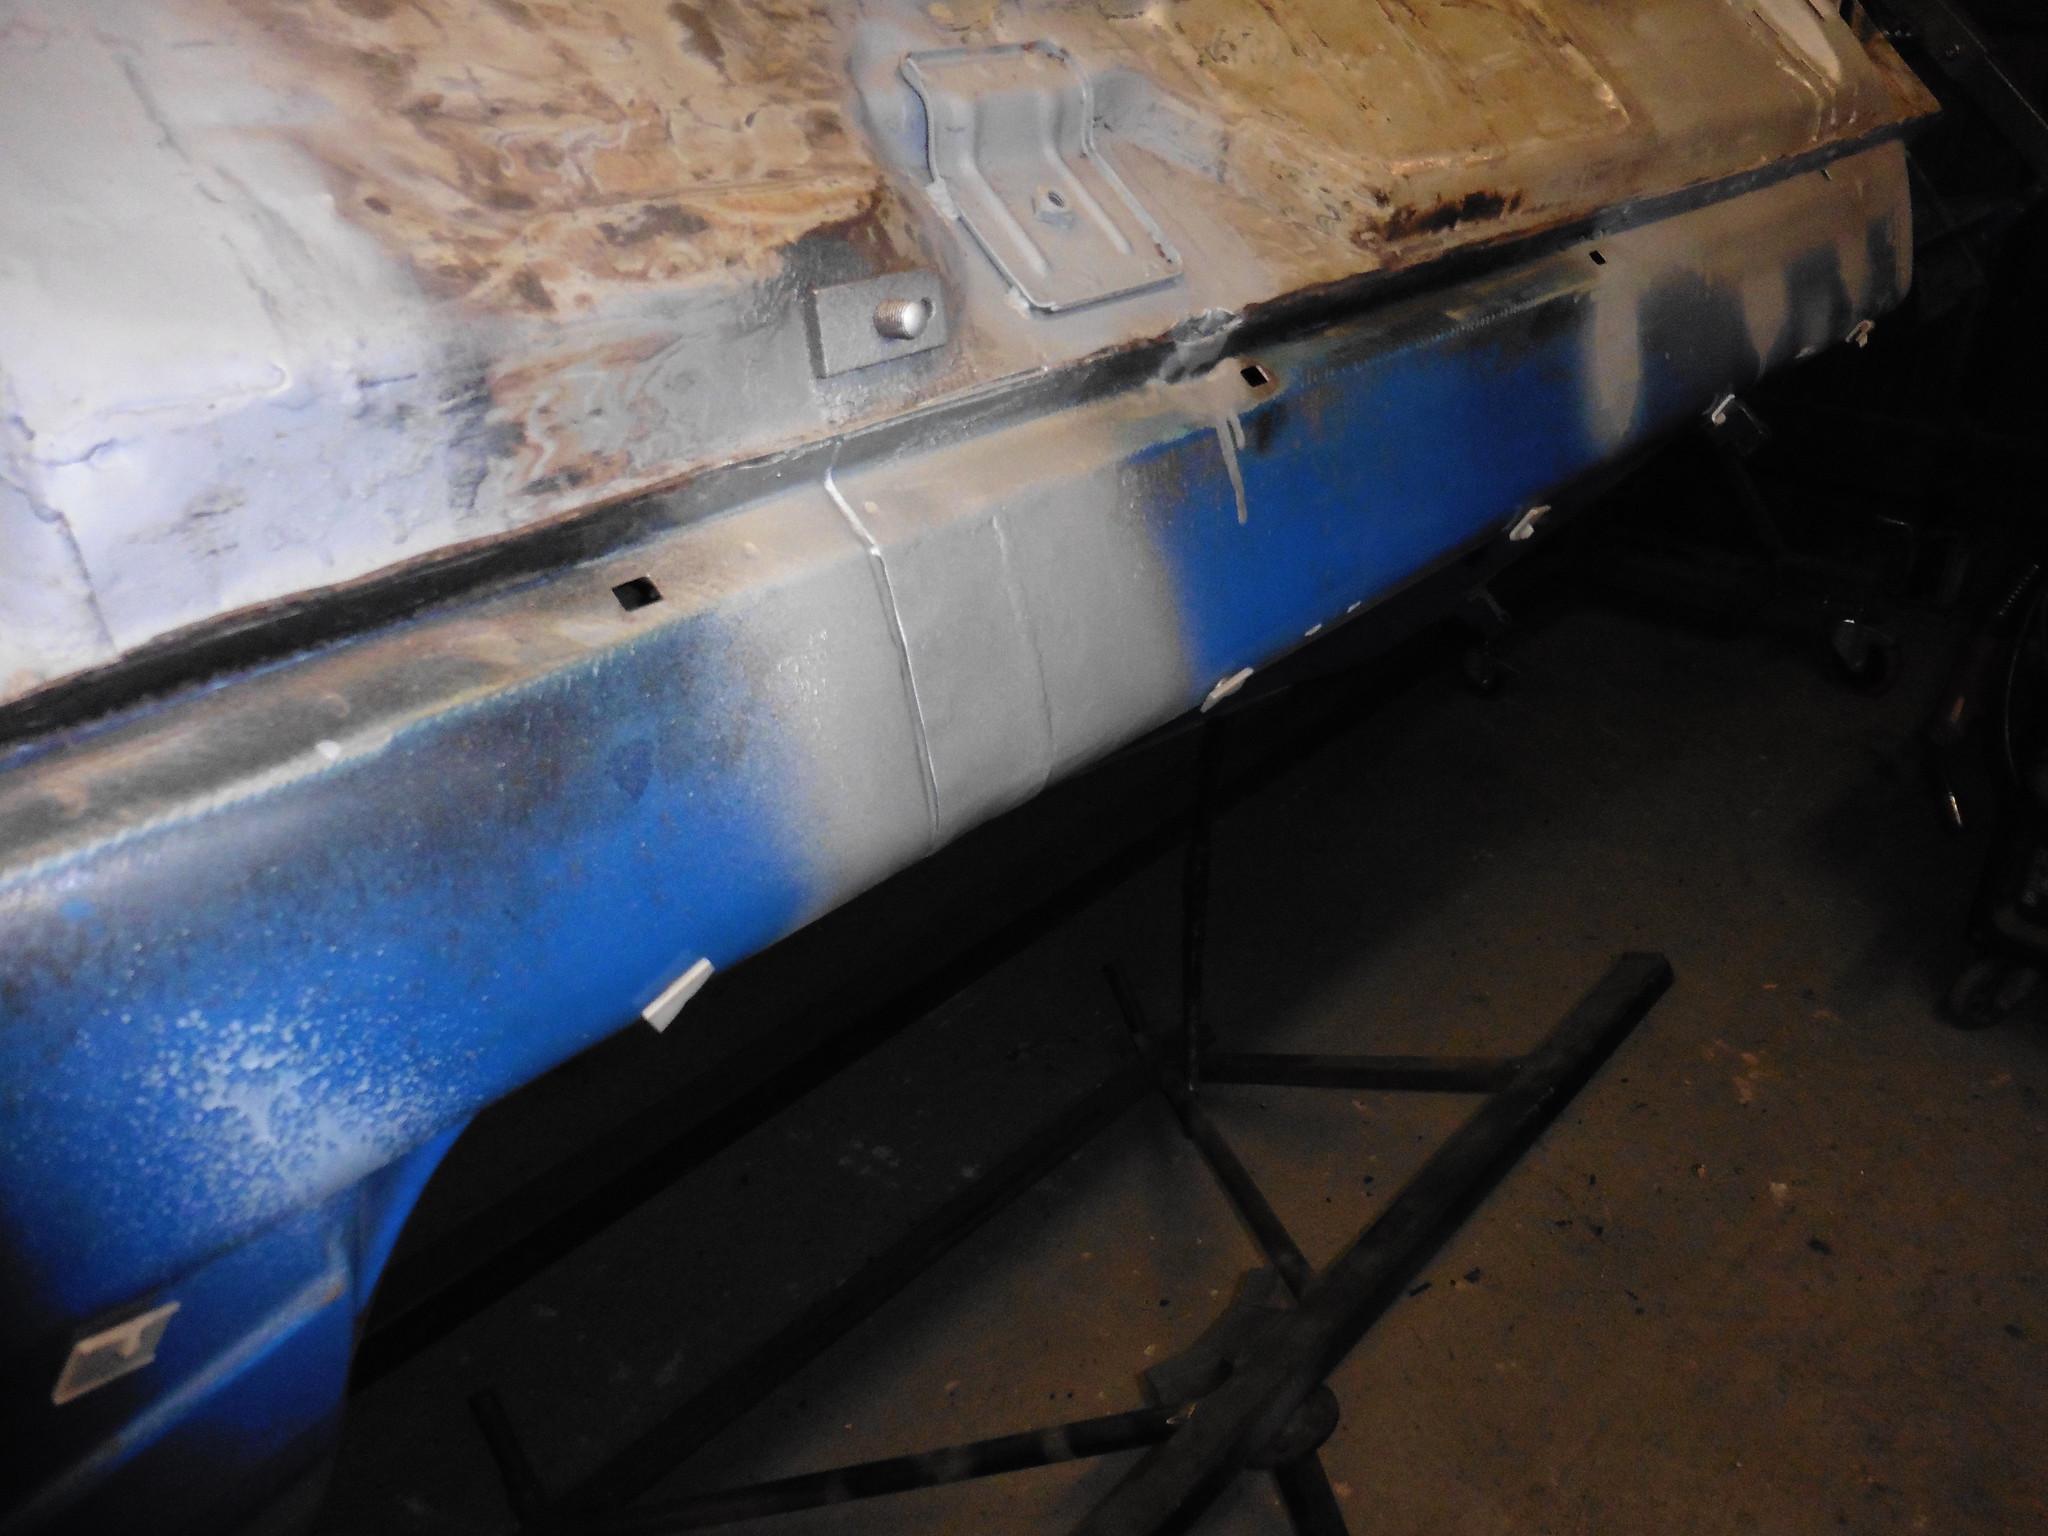 P1020089 P1020089 by jono_misfit, on Flickr Whilst its not invisible repair, its not bad. Its also hidden under the side skirts. I then spun the car round on the spit looking at various things that need done. I also contemplated some more underseal removal, but the morris beckoned. |
| |
|
|
jonomisfit
Club Retro Rides Member
Posts: 1,790
Club RR Member Number: 49
|
|
|
|
Flipped the car over on the spit and started a thorough investigation of the rust.  P1020101 P1020101 by jono_misfit, on Flickr however there's that much black underseal on everything, plus the factory foam underseal that I cant see much. 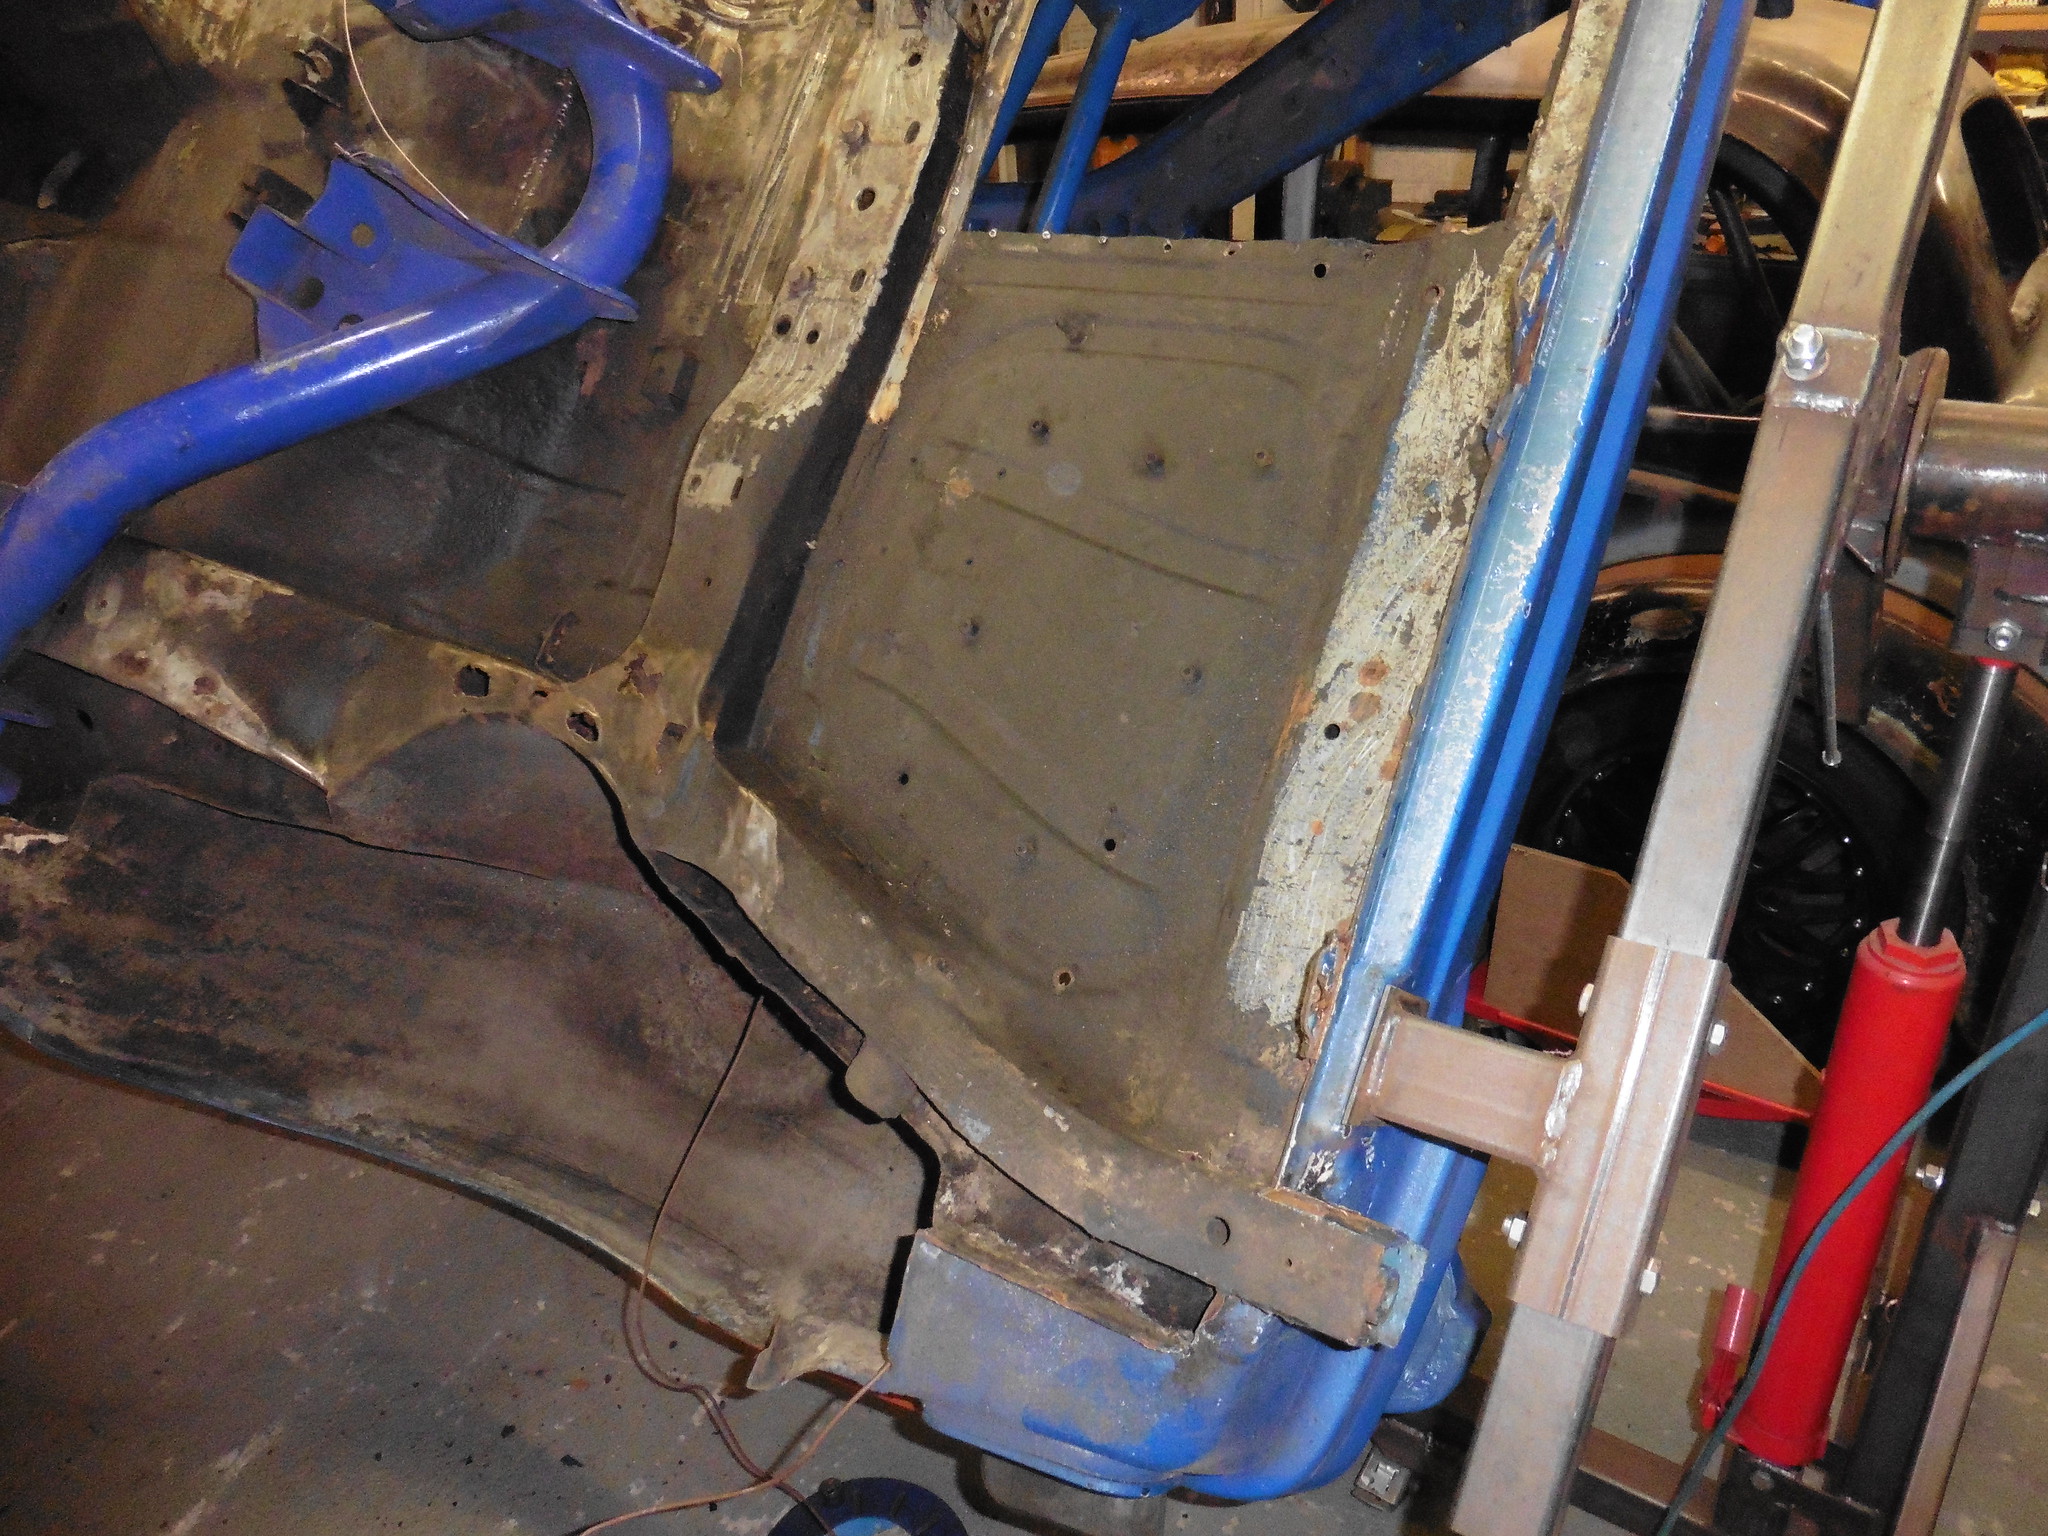 P1020102 P1020102 by jono_misfit, on Flickr but the thicker bits of black sprayed on underseal are evidently hiding some bad spots 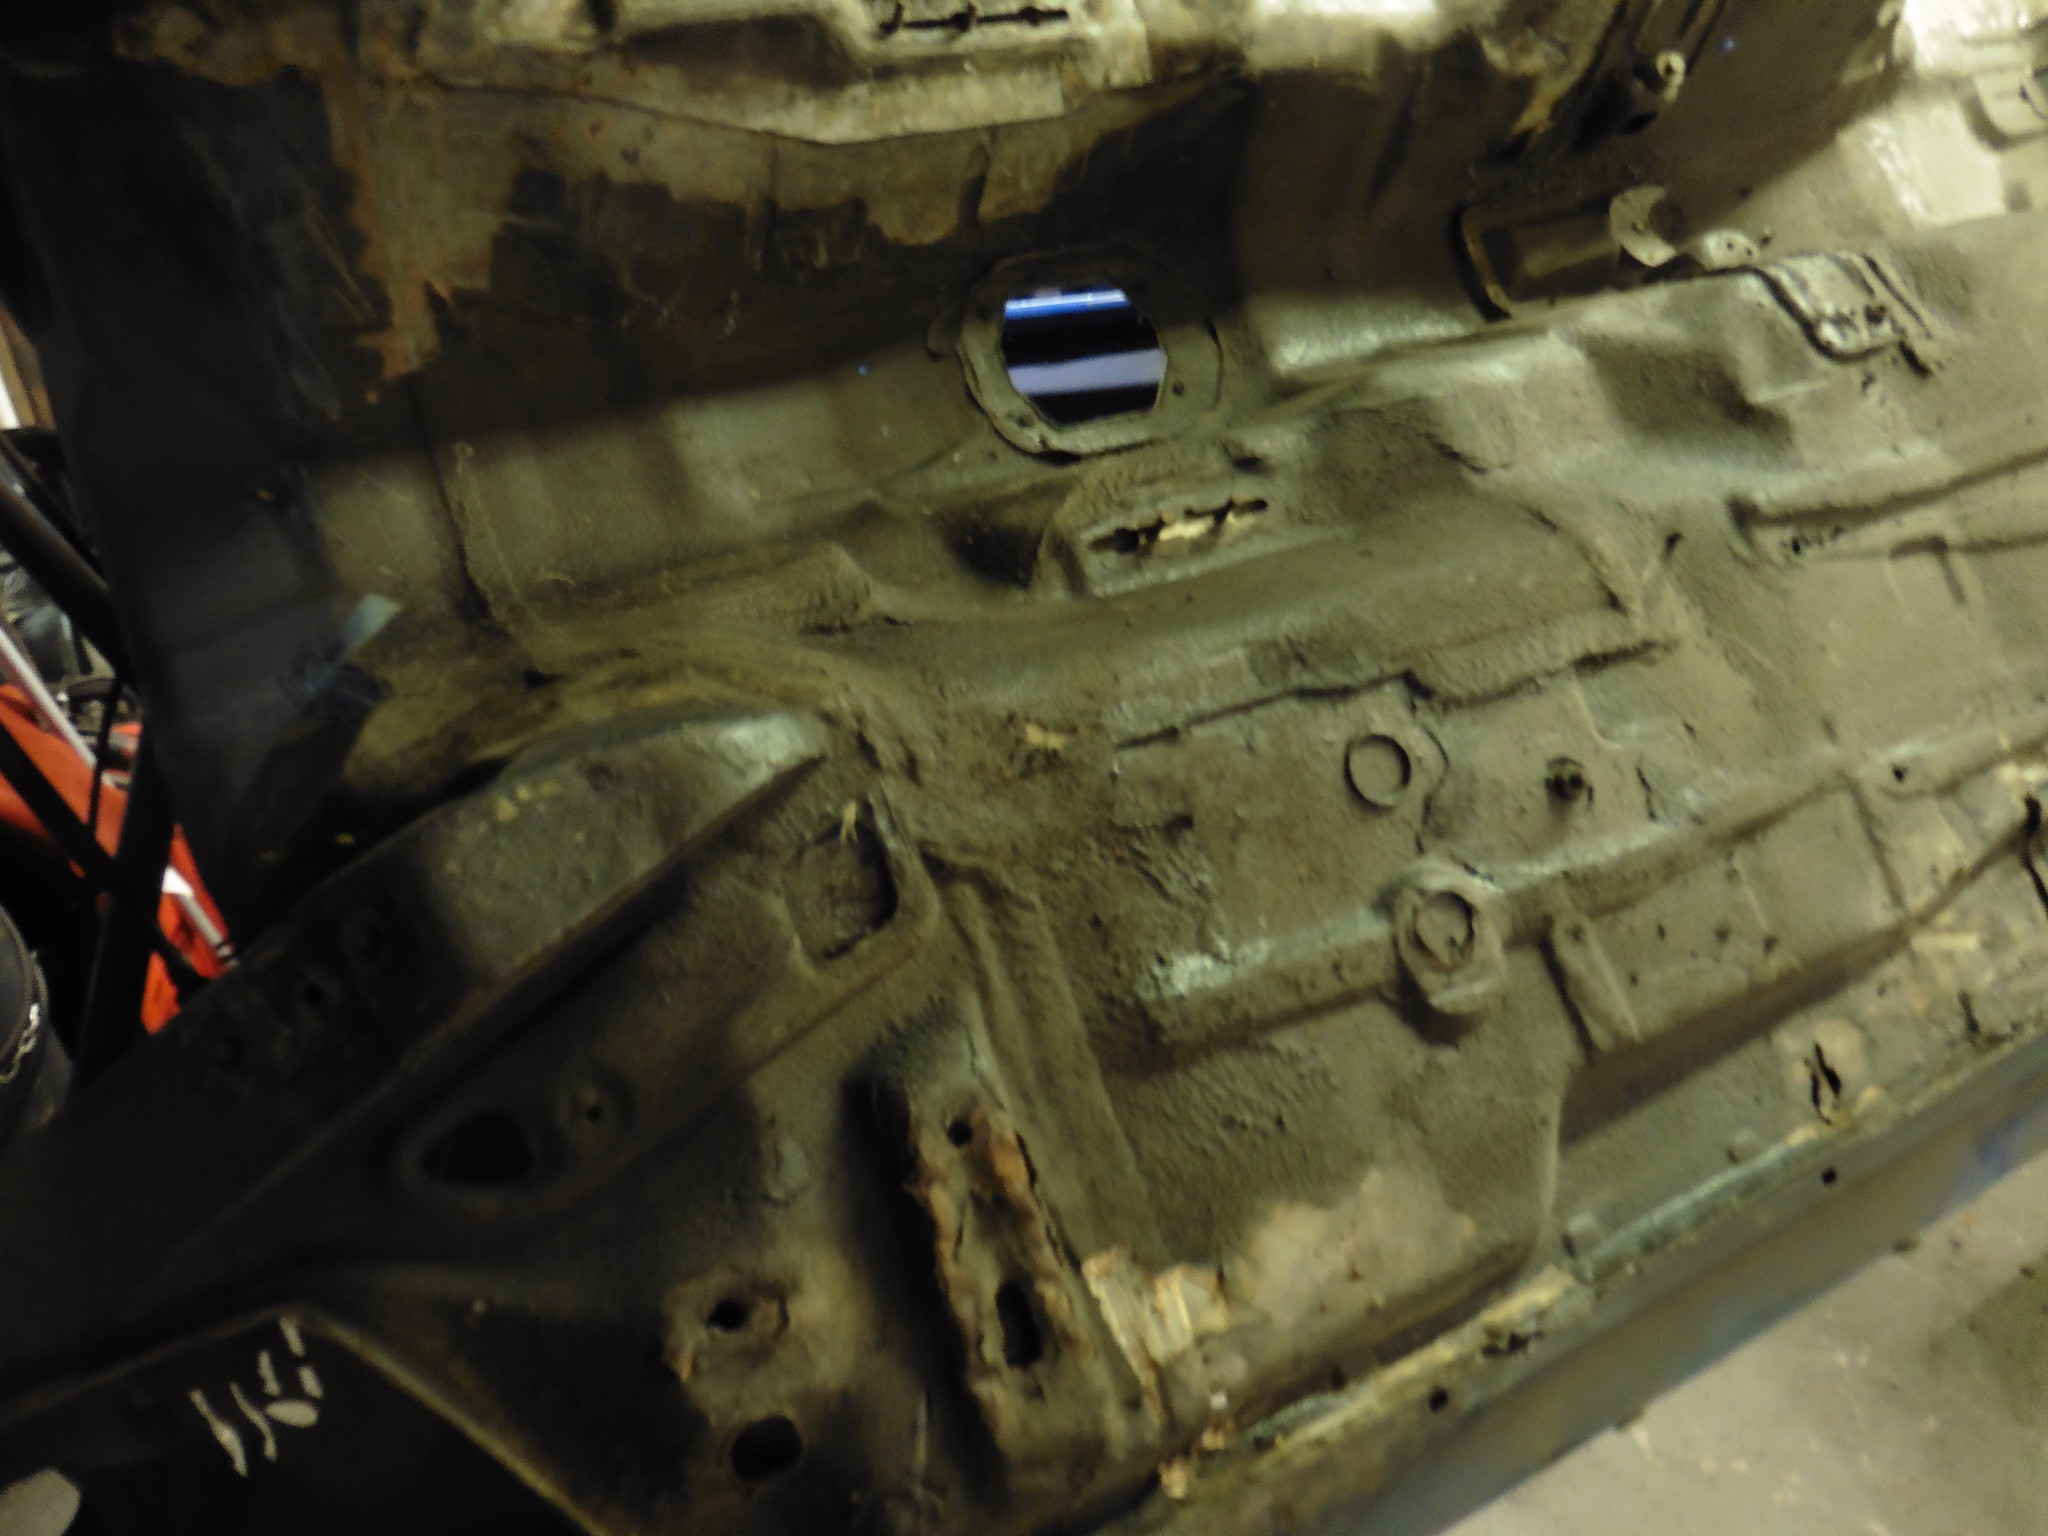 P1020103 P1020103 by jono_misfit, on Flickr start the scraping process 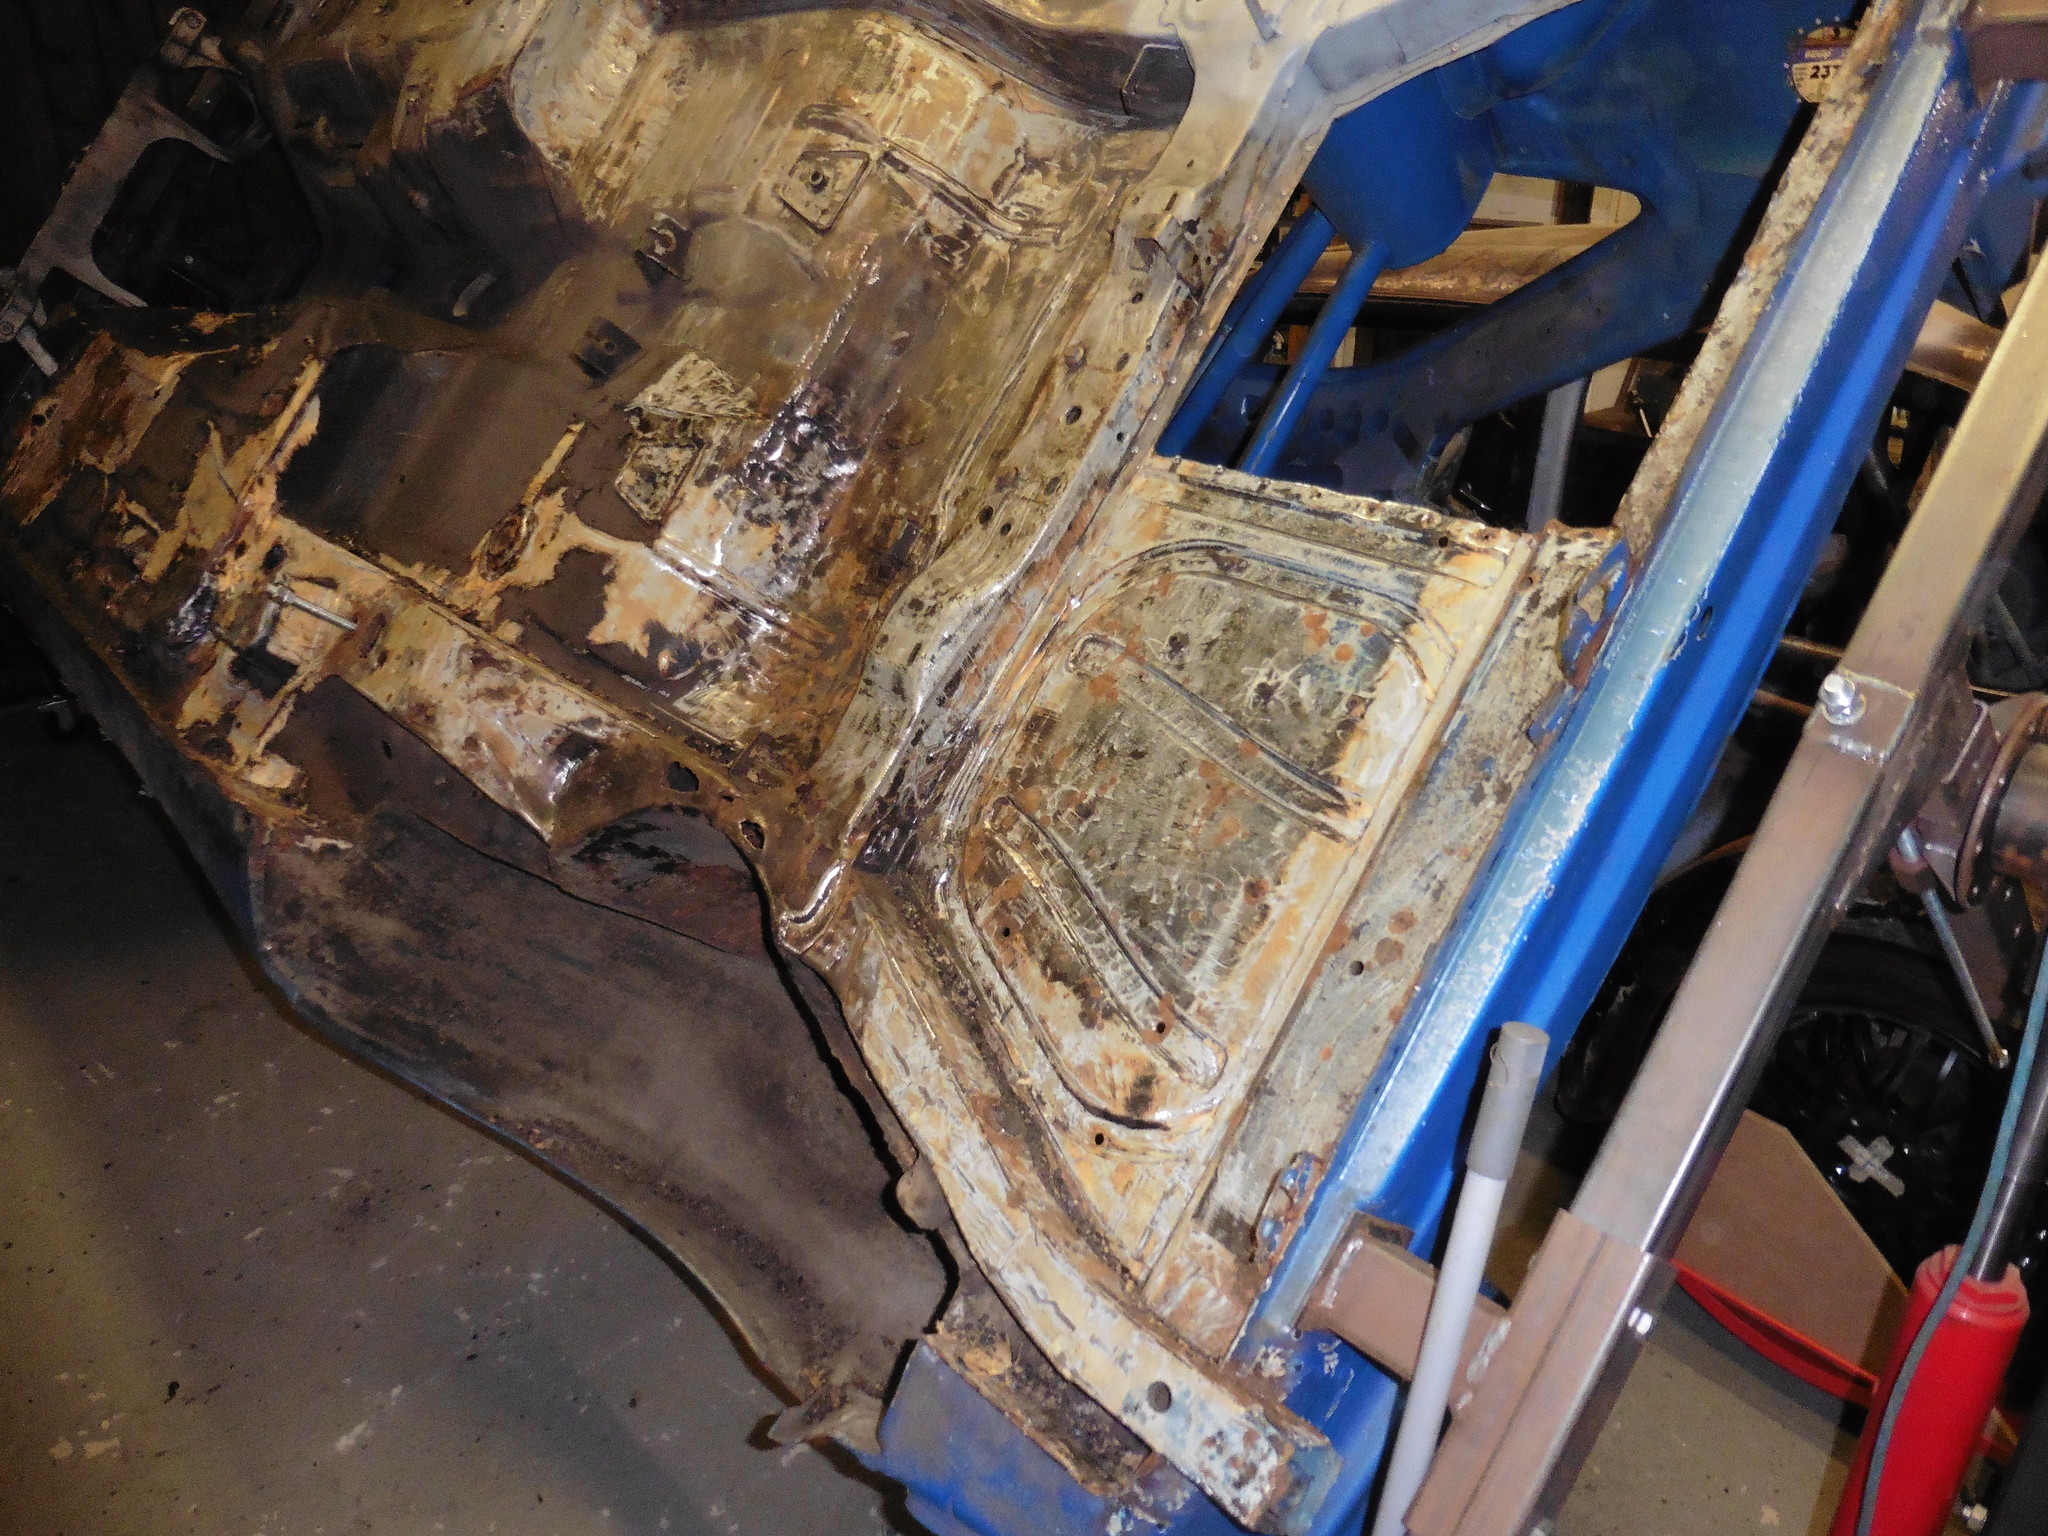 P1020104 P1020104 by jono_misfit, on Flickr 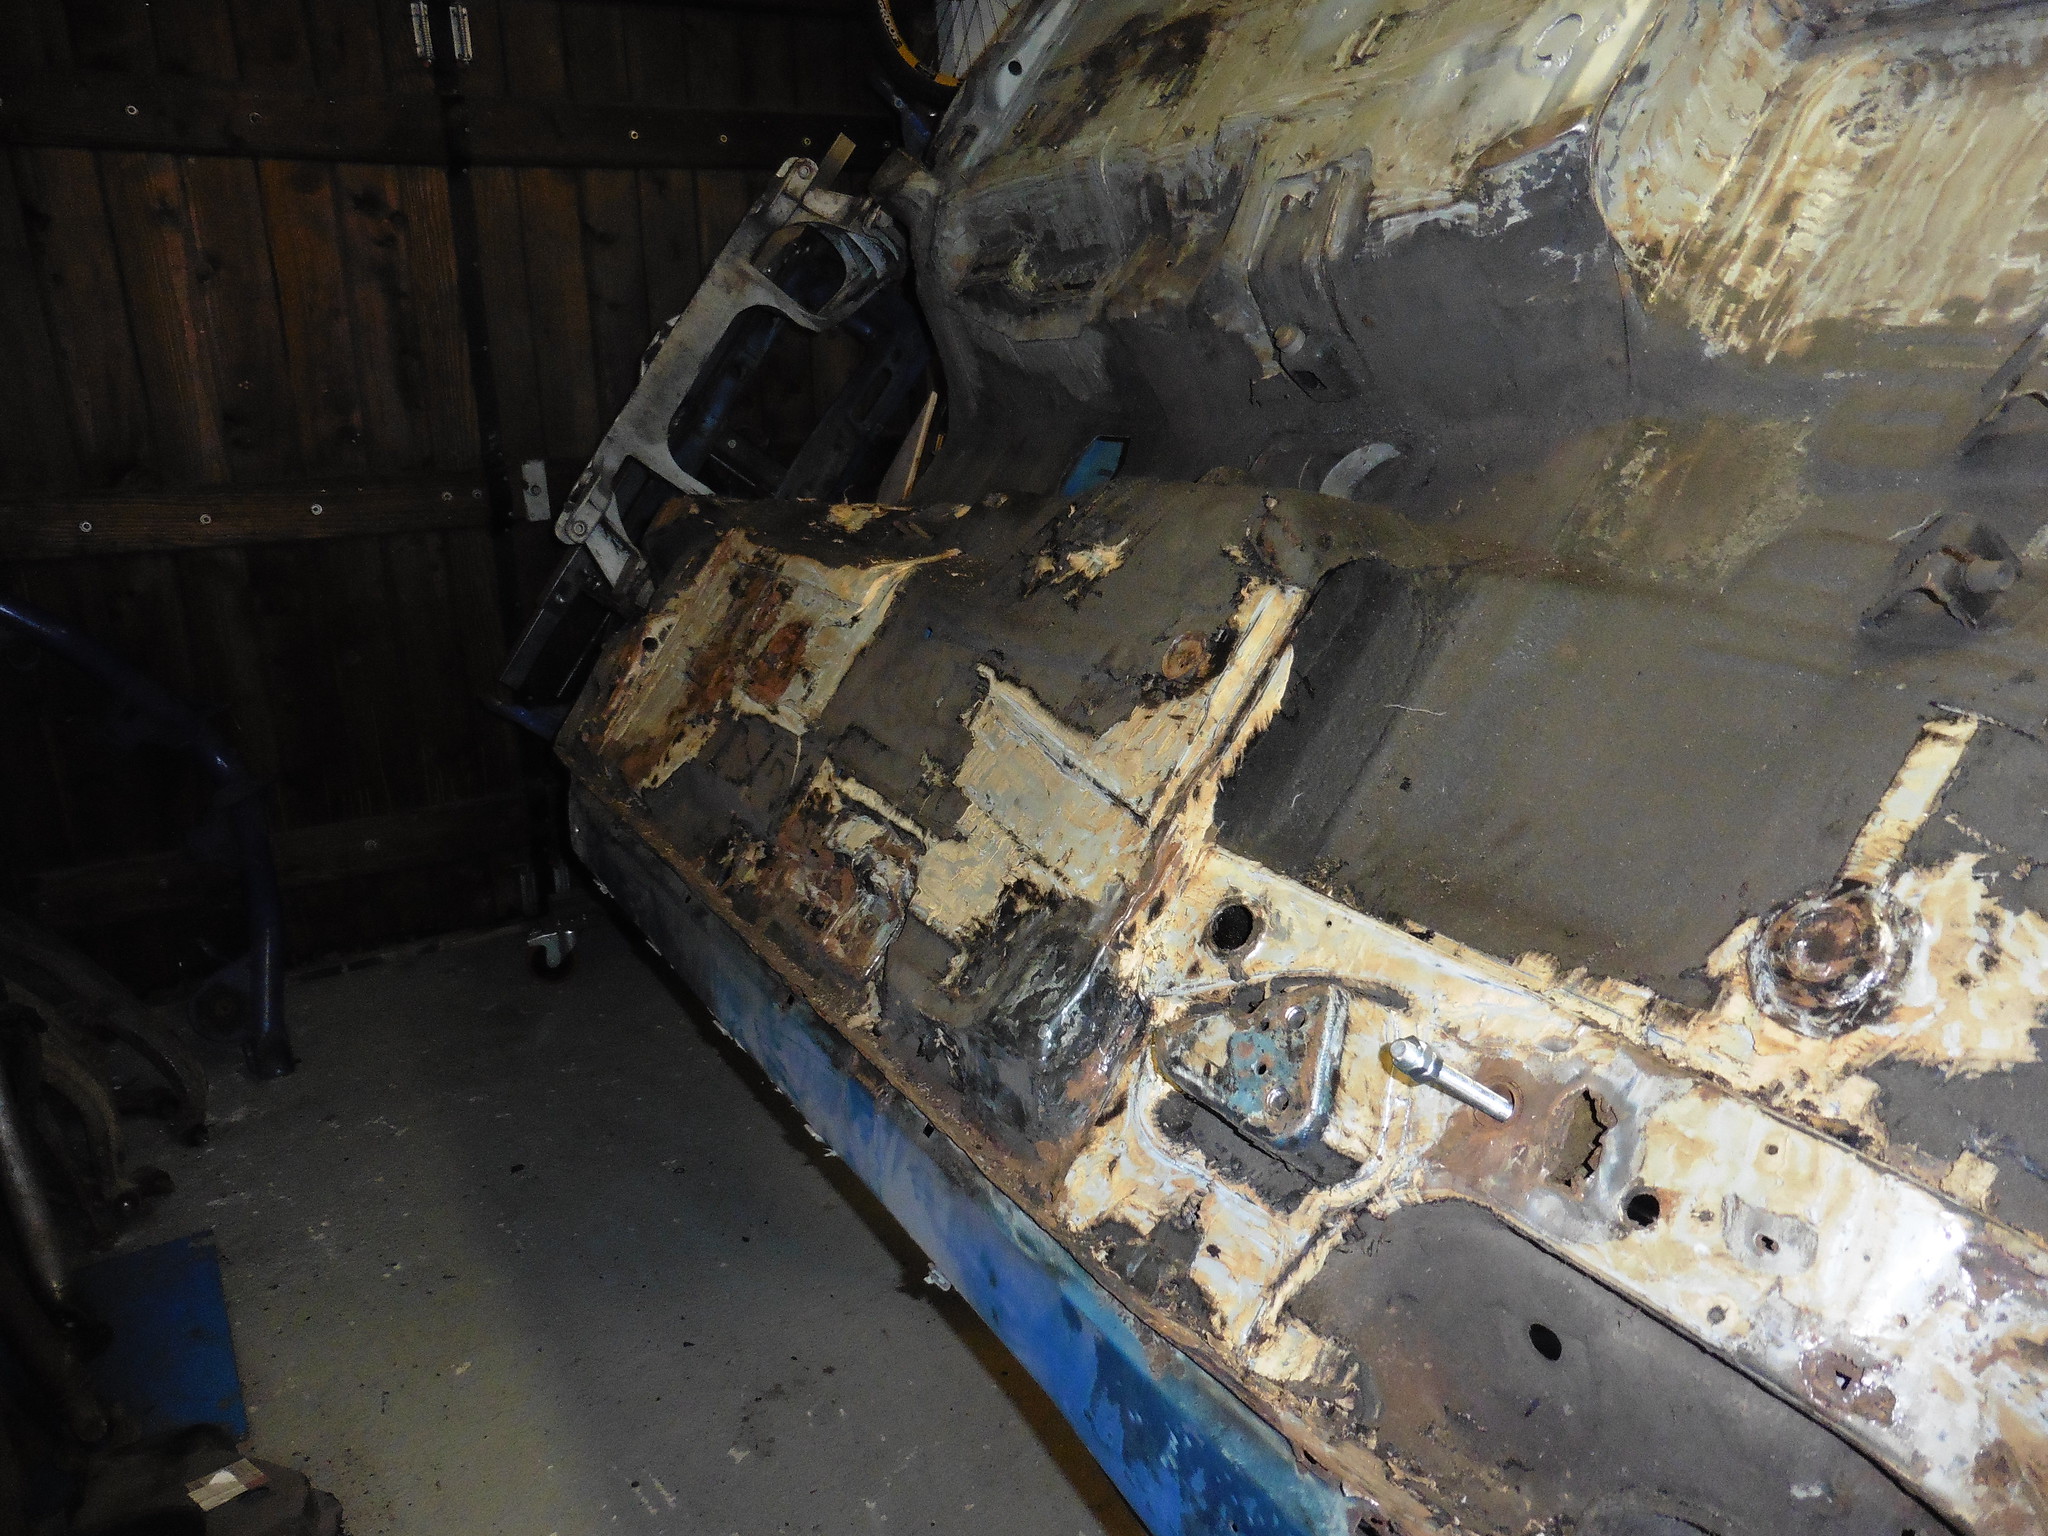 P1020105 P1020105 by jono_misfit, on Flickr this is the state of the rear chassis leg (and hence why I bought a new one to use) 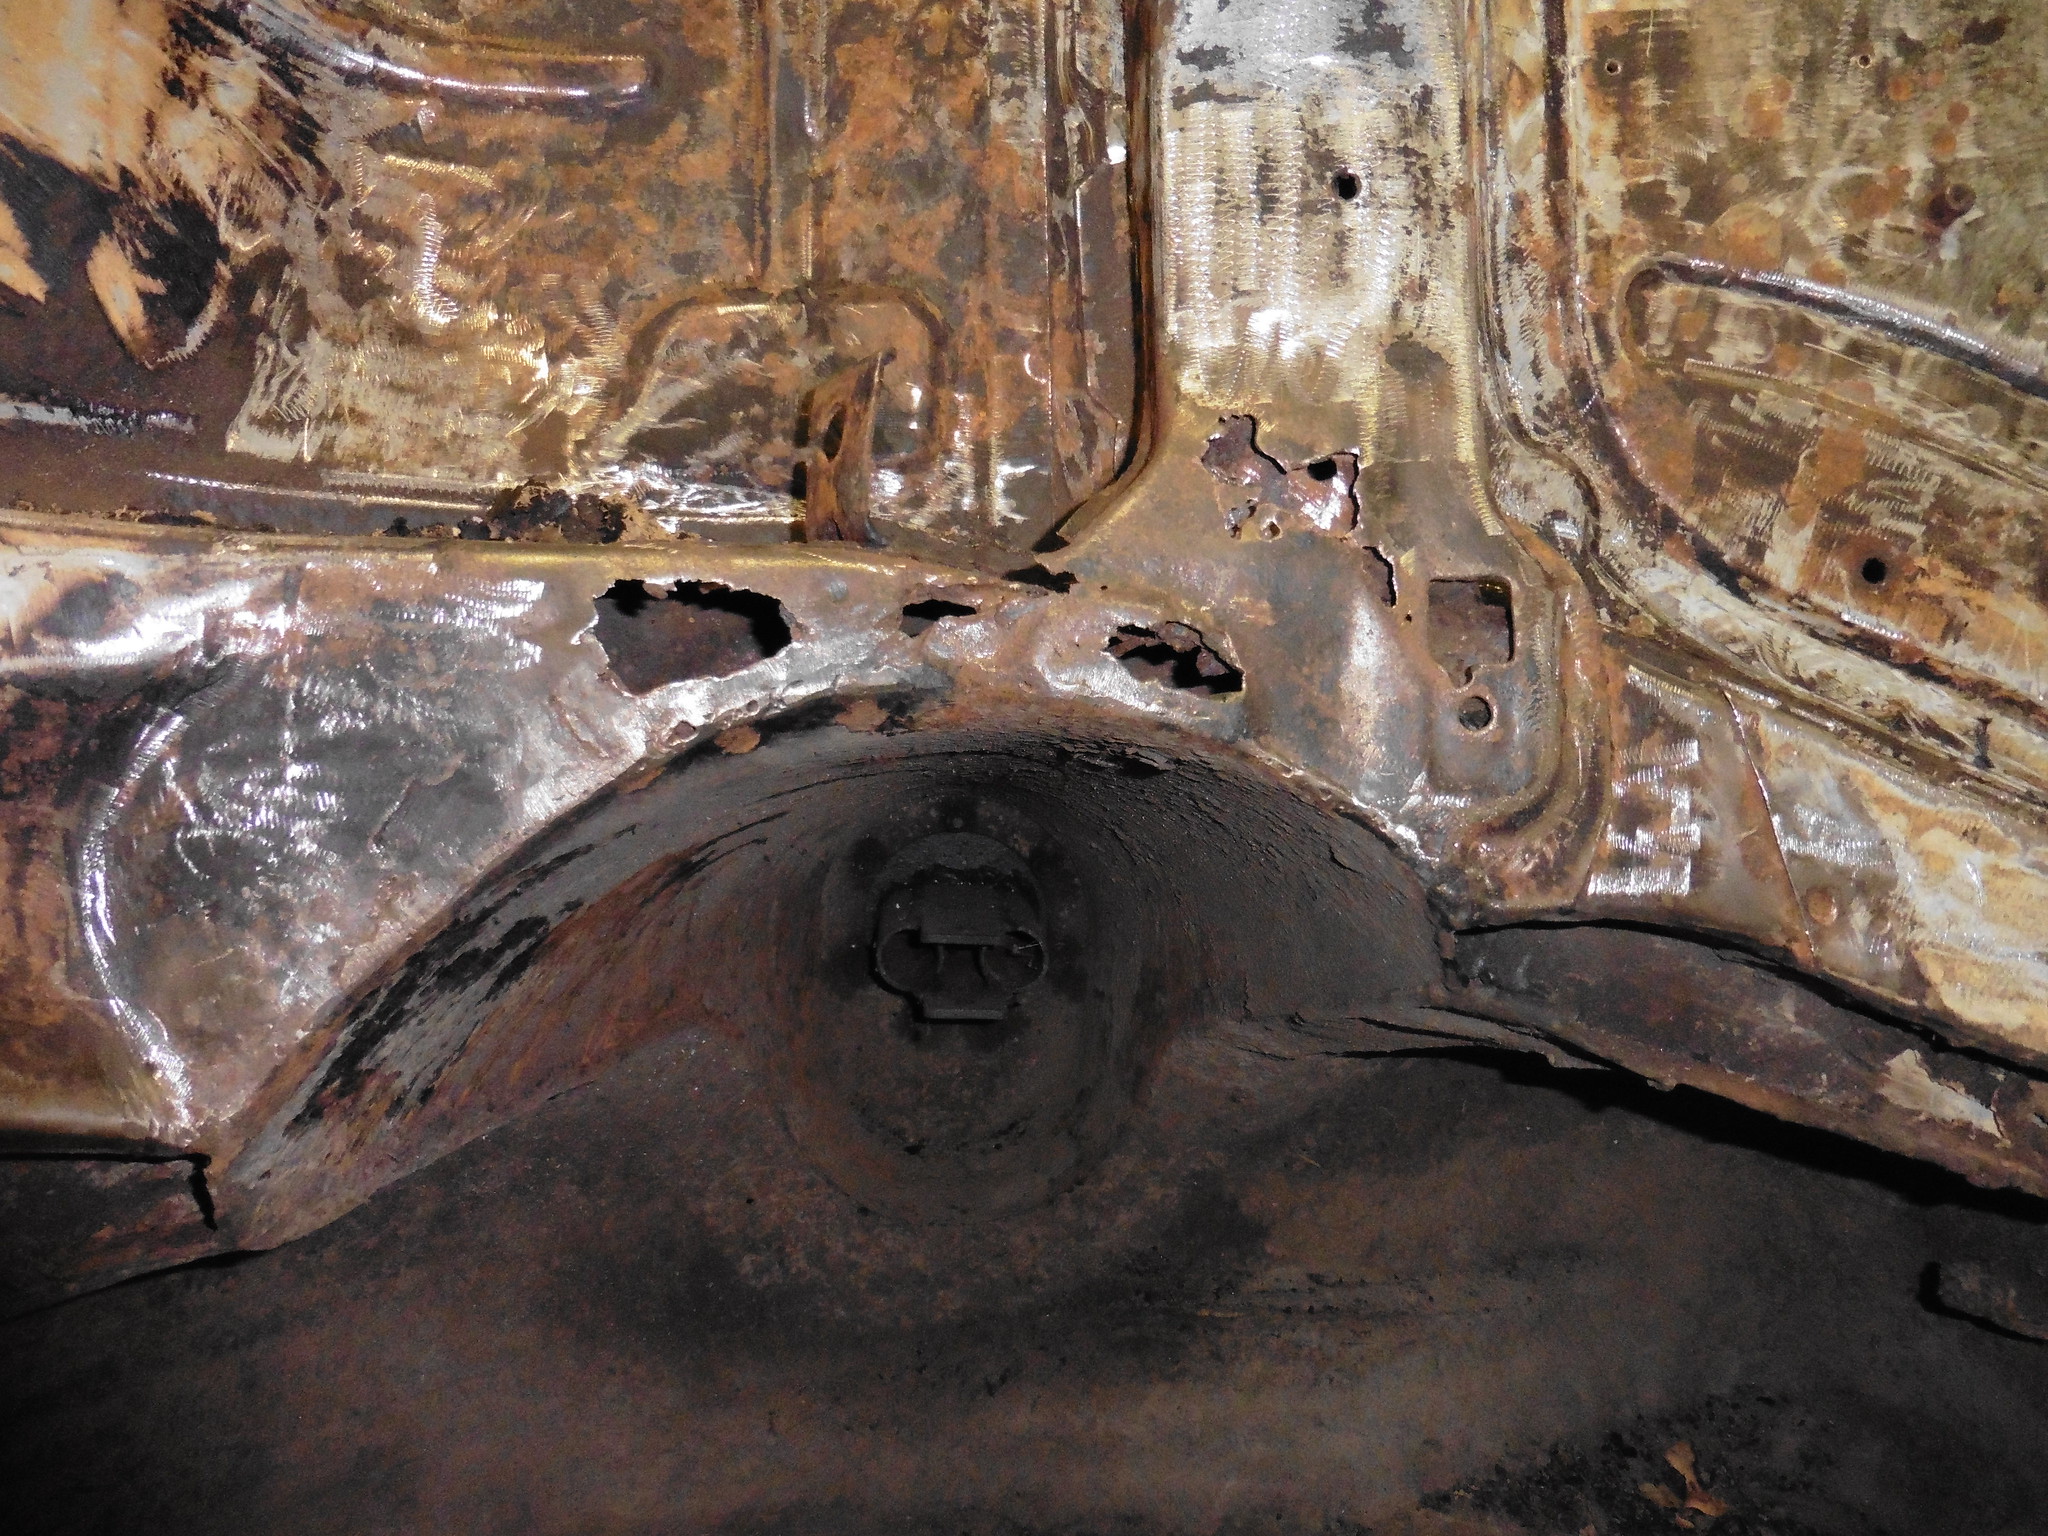 P1020106 P1020106 by jono_misfit, on Flickr there is not much metal left in there, and its not just at the bit where the turret was welded in. It continues along the whole length 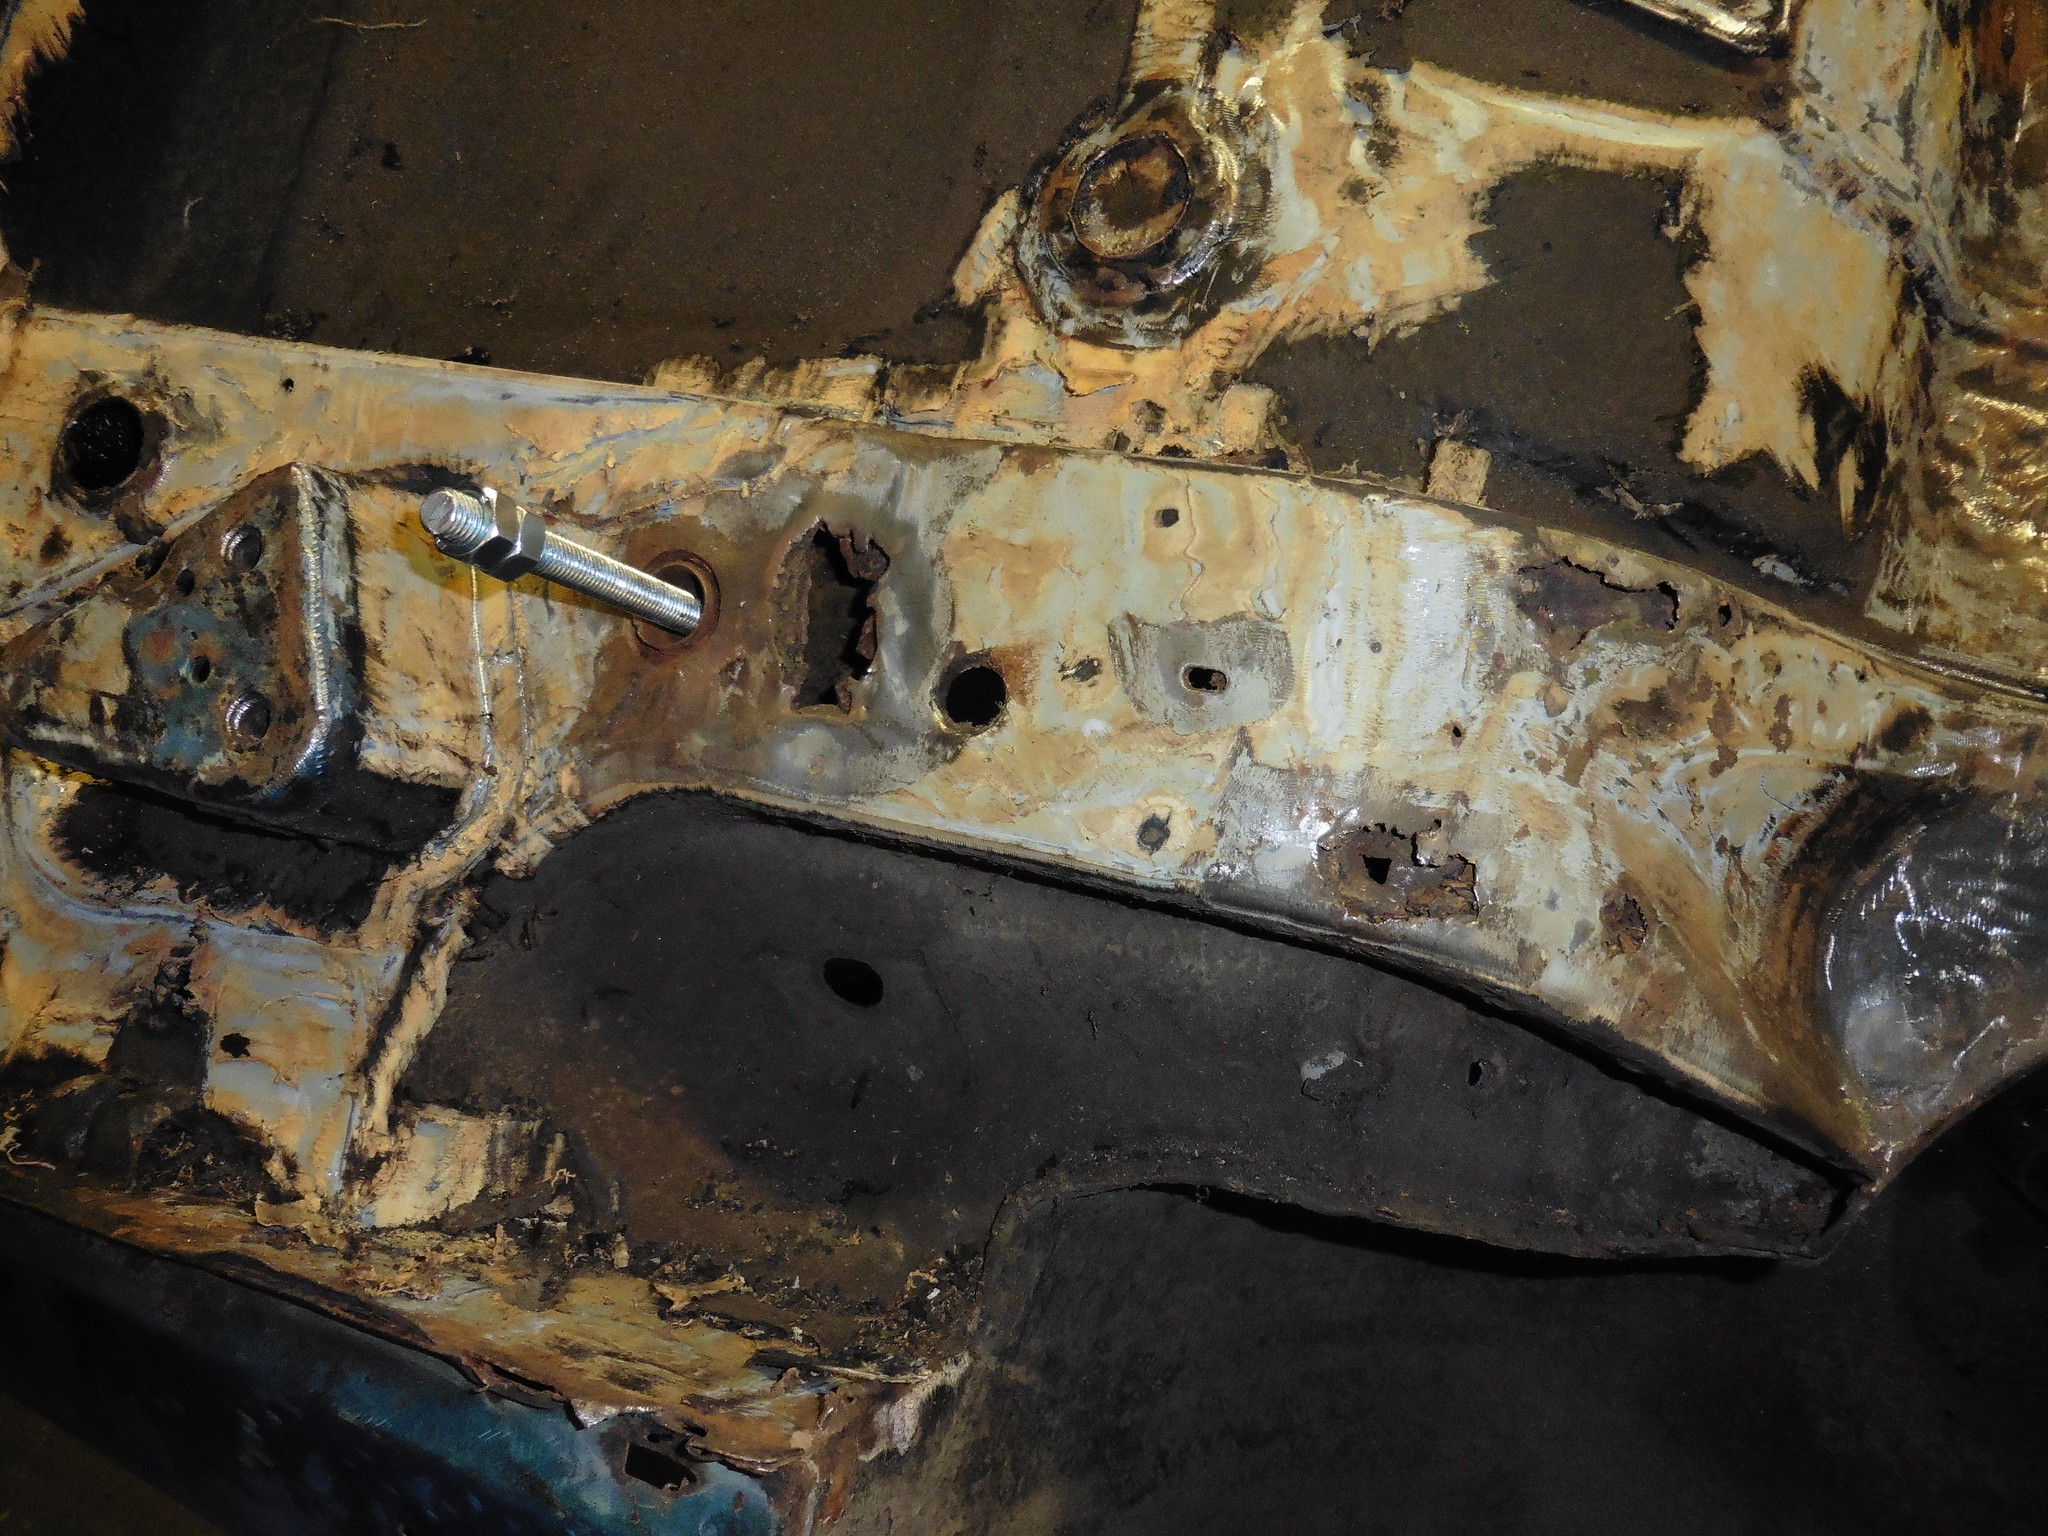 P1020107 P1020107 by jono_misfit, on Flickr with the state of this whole side, i wonder if it was the side next to a wall etc. As its much worse than the nearside, which on the cars i've worked is usually the worst for rust. 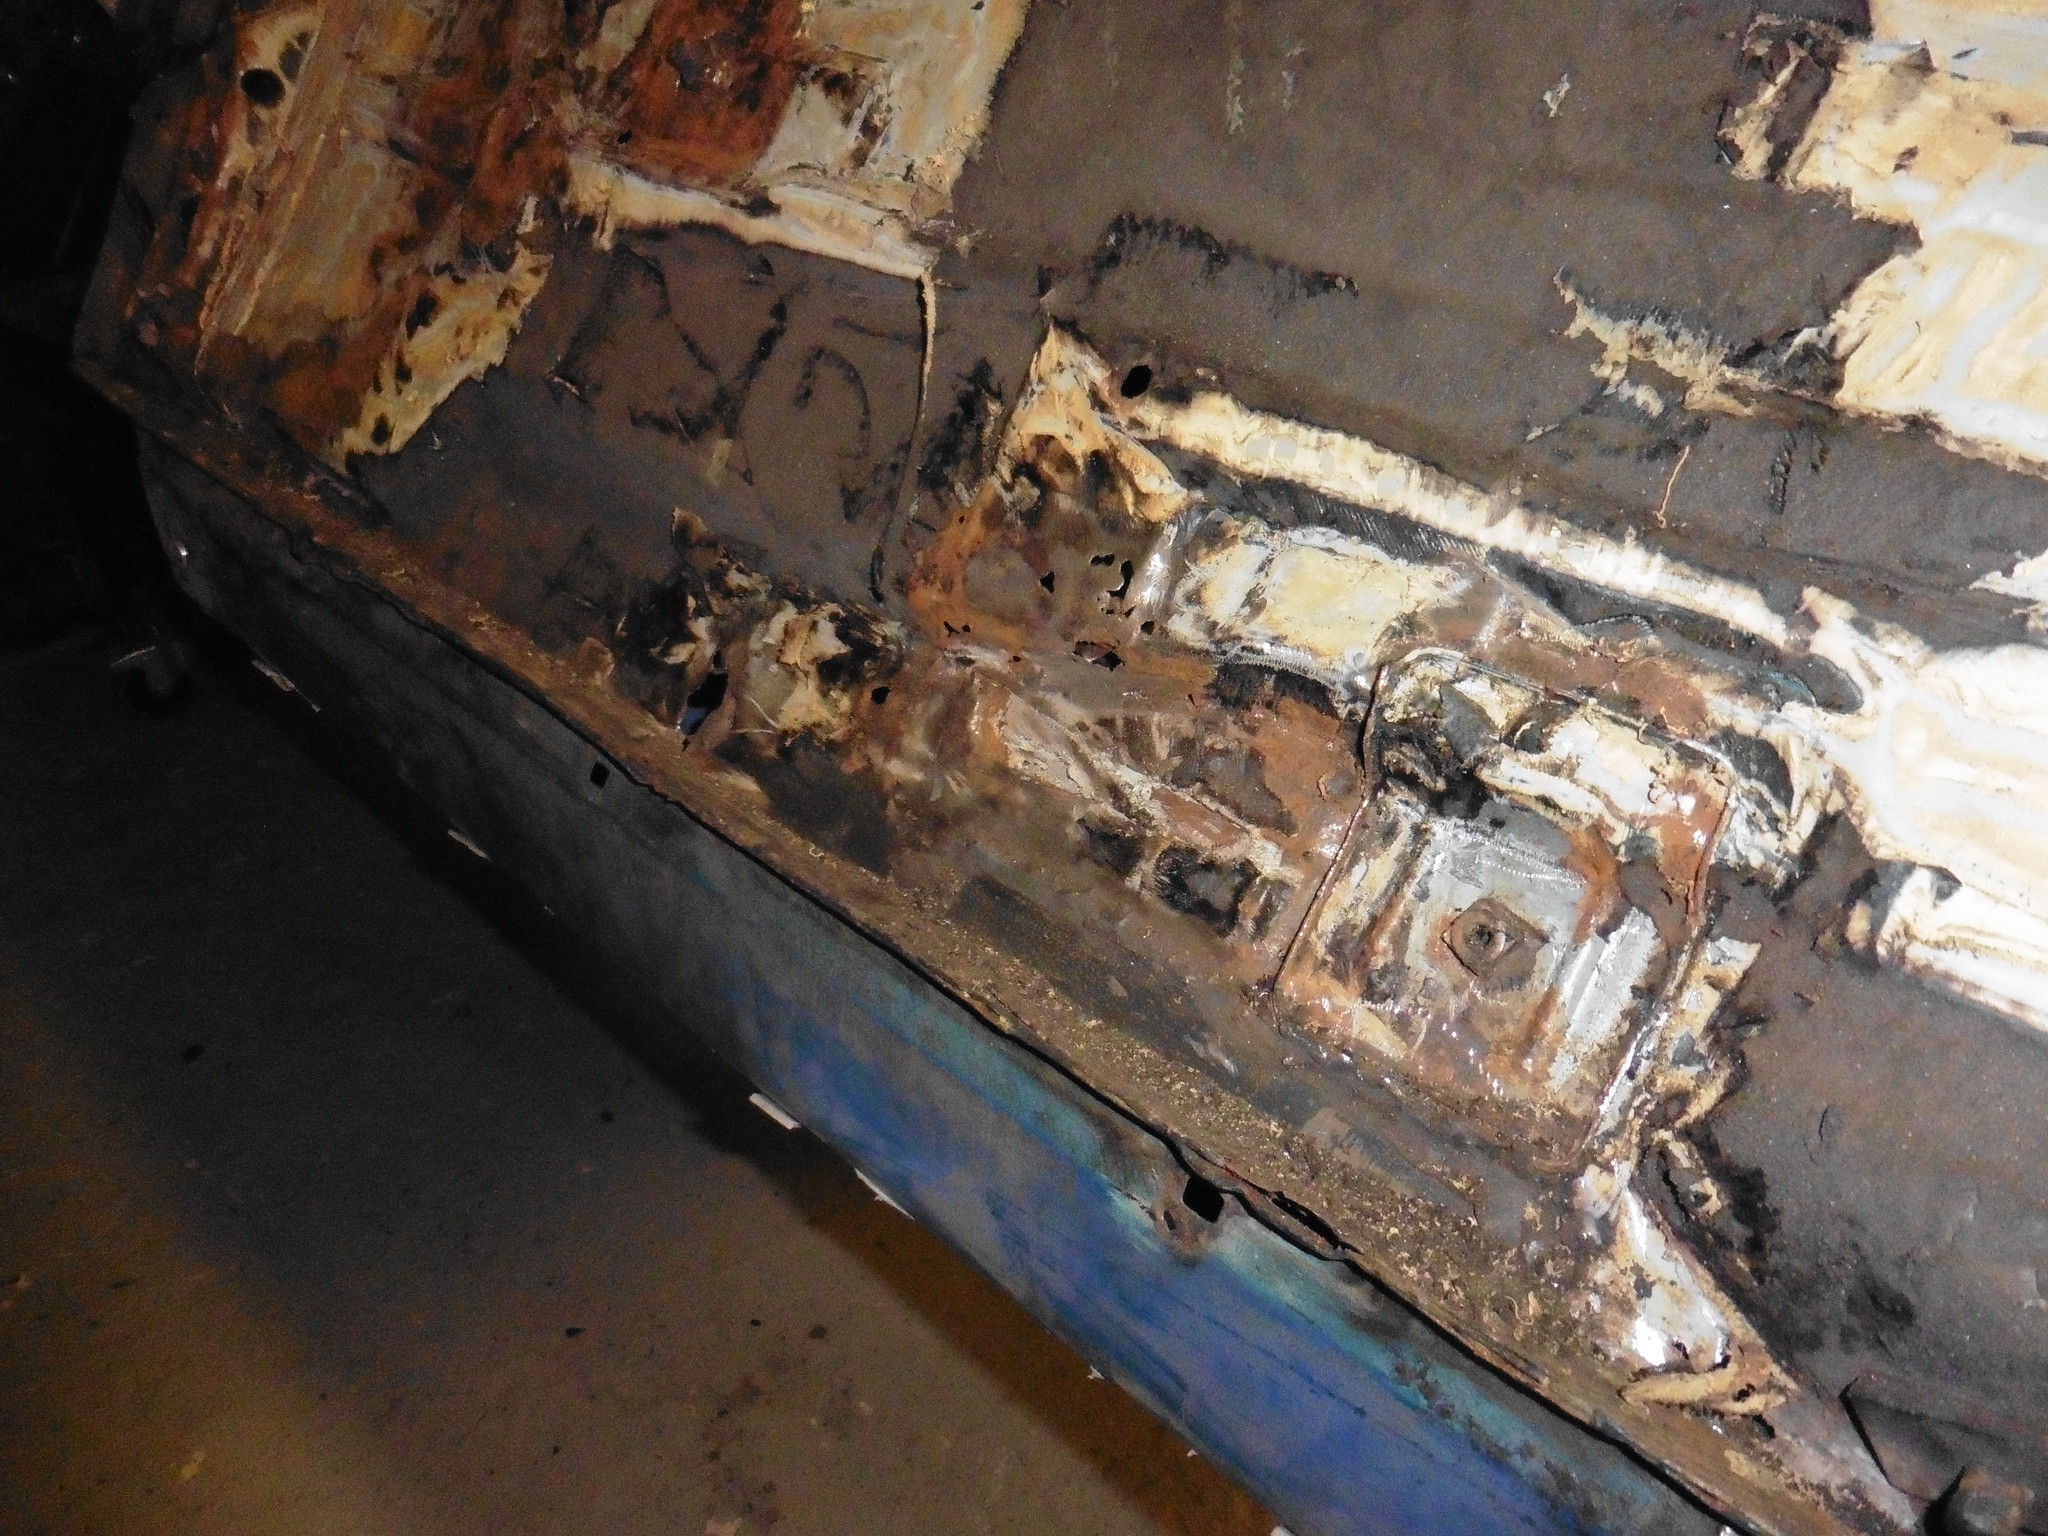 P1020108 P1020108 by jono_misfit, on Flickr Everywhere something inside has been welded there is corrosion through the metal. 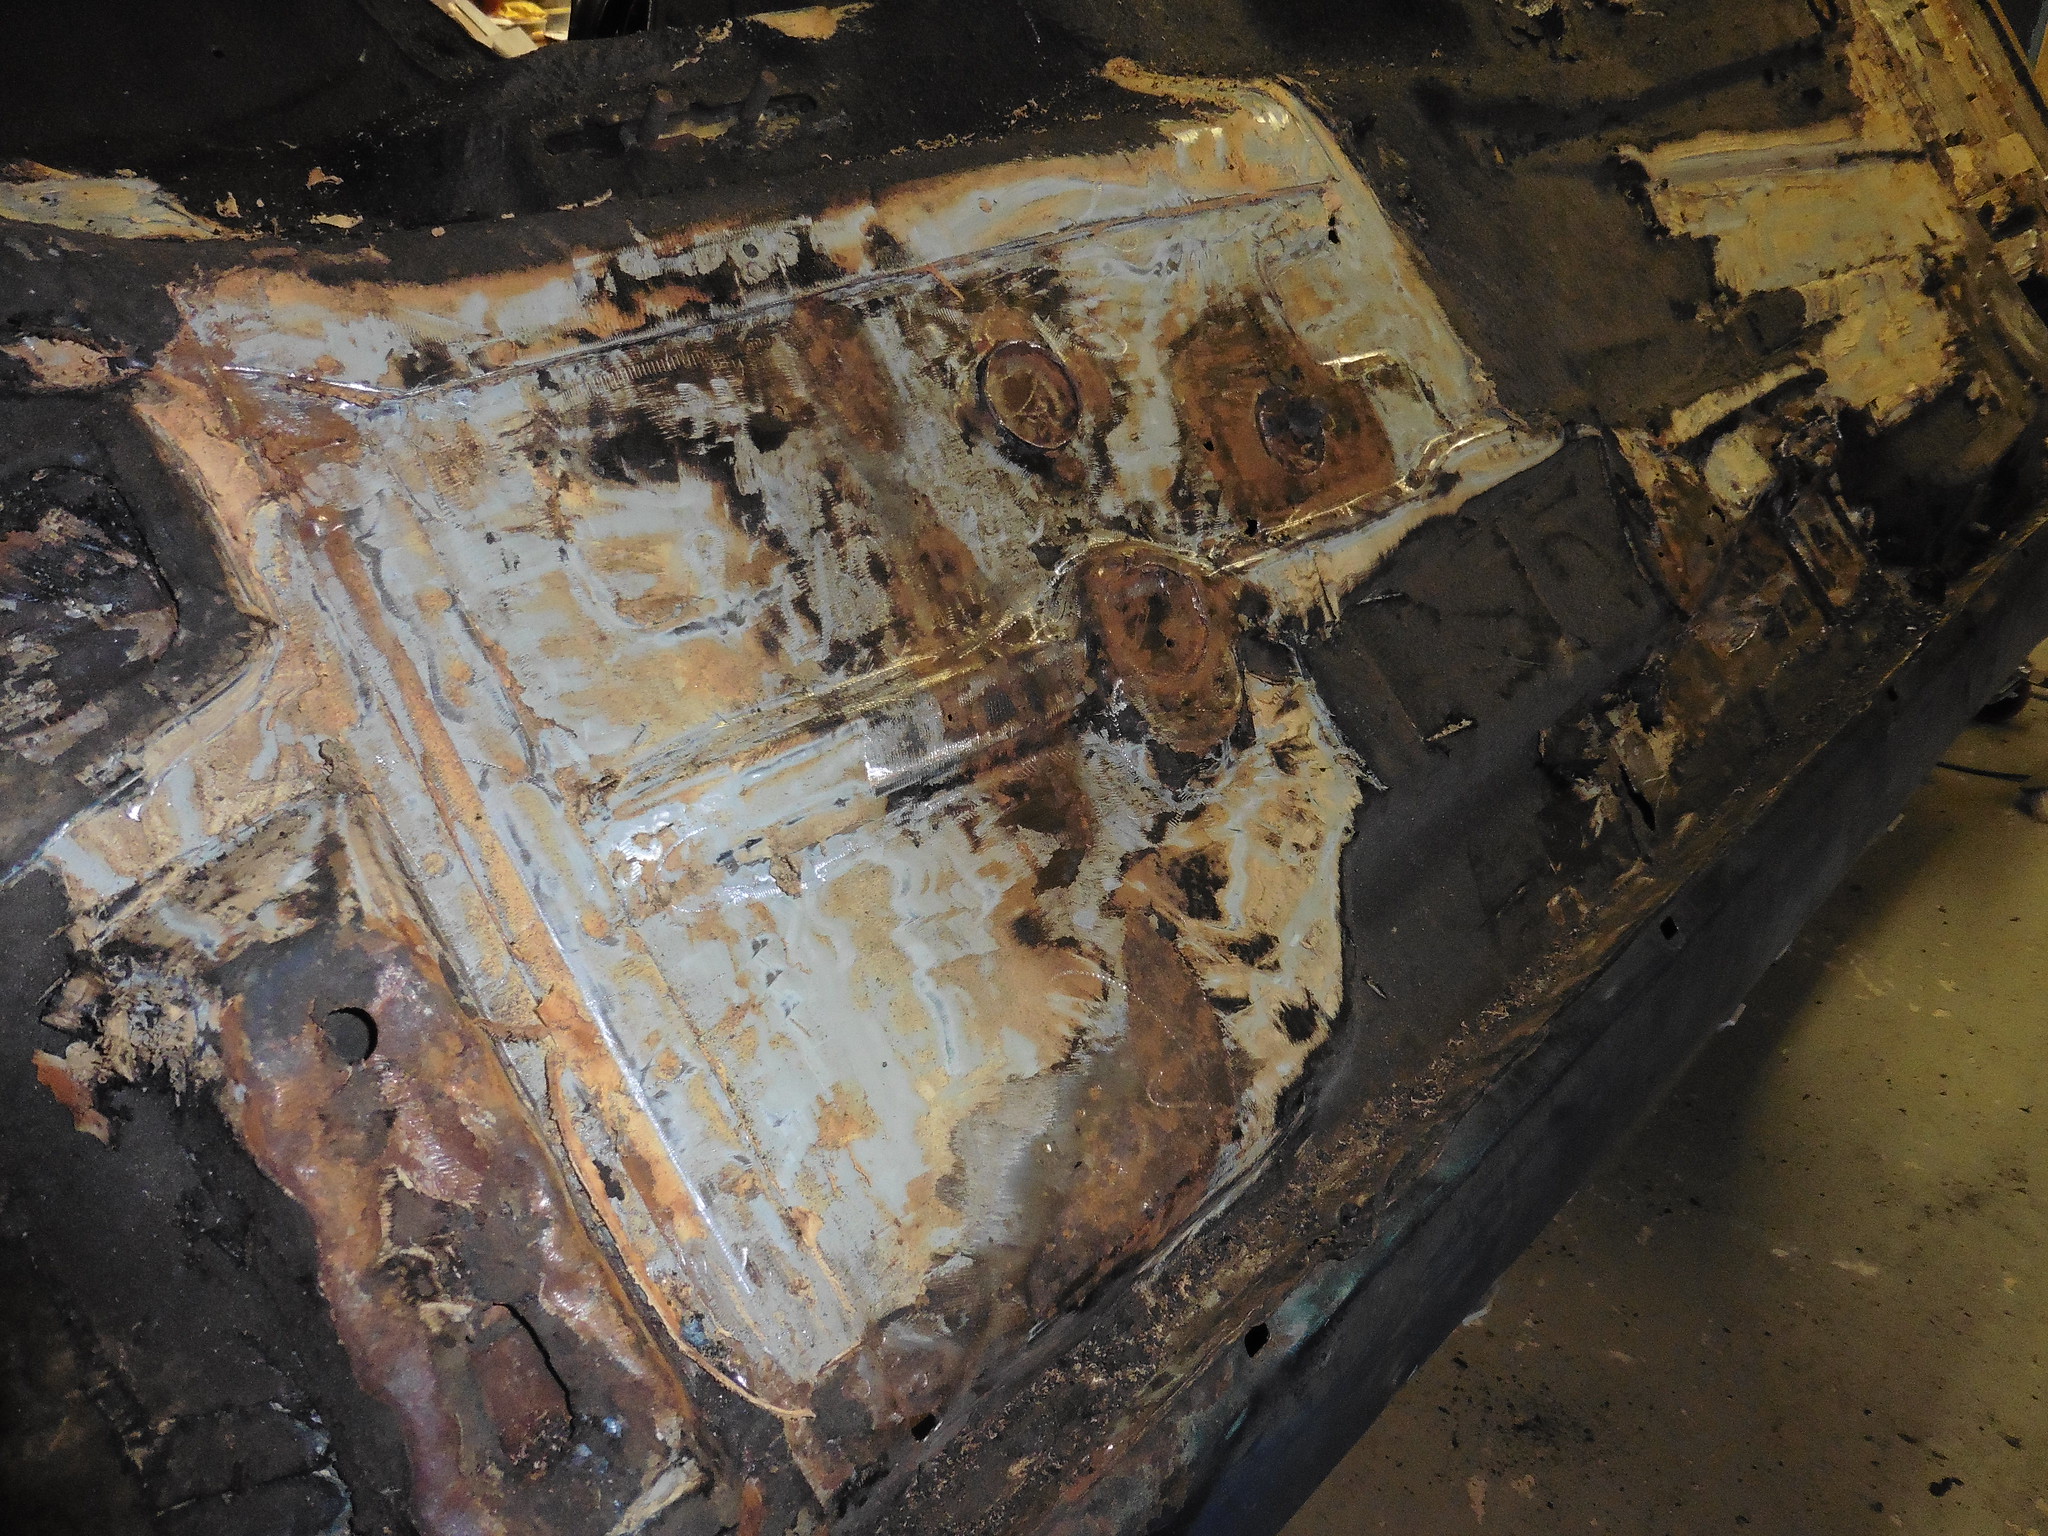 P1020109 P1020109 by jono_misfit, on Flickr there are also some truly woeful repairs that look like they were welded over the top of very poorly cleaned back metal, and none of them have cut out any of the rust, just plate on top. Still its not actually as bad as it could be. At this point though I came in as: it was 6pm and it makes a fair dim removing the underseal I was black from head to foot Any my hands felt like they were going to fall off from the vibrations of the multi tool. I'll do some more cleaning back in the odd fit here and there. Plus may make some exploratory cuts on the chassis leg to see if its better to let in a section from the new panel or a full leg removal and re-place. Which comes with suspension mount location concerns... |
| |
|
|
v8ian
Posted a lot
  
Posts: 3,832
|
|
|
|
Your Doing well, I have had enough Rusty Fords over the years to know what you are up against, Honestly I would have thought Fords would have improved their rust proofing but Ford would only think the life expectancy of the car would probably only be 10 years, you have a result,  keep up the good work....... |
| |
Atmo V8 Power . No slicks , No gas + No bits missing . Doing it in style.
Austin A35van, very different------- but still doing it in style, going to be a funmoble
|
|
|
|
|
|
|
|
It wont make you feel any better but its nice to see Ford can make a car that rusts as well as a Vauxhall, keep up the good work you put me to shame!
|
| |
|
|
jonomisfit
Club Retro Rides Member
Posts: 1,790
Club RR Member Number: 49
|
|
|
|
Fords rust, its a universal of life, like dropped toast always falls butter side down. Right, lets see how bad this rust really is. the first incision. 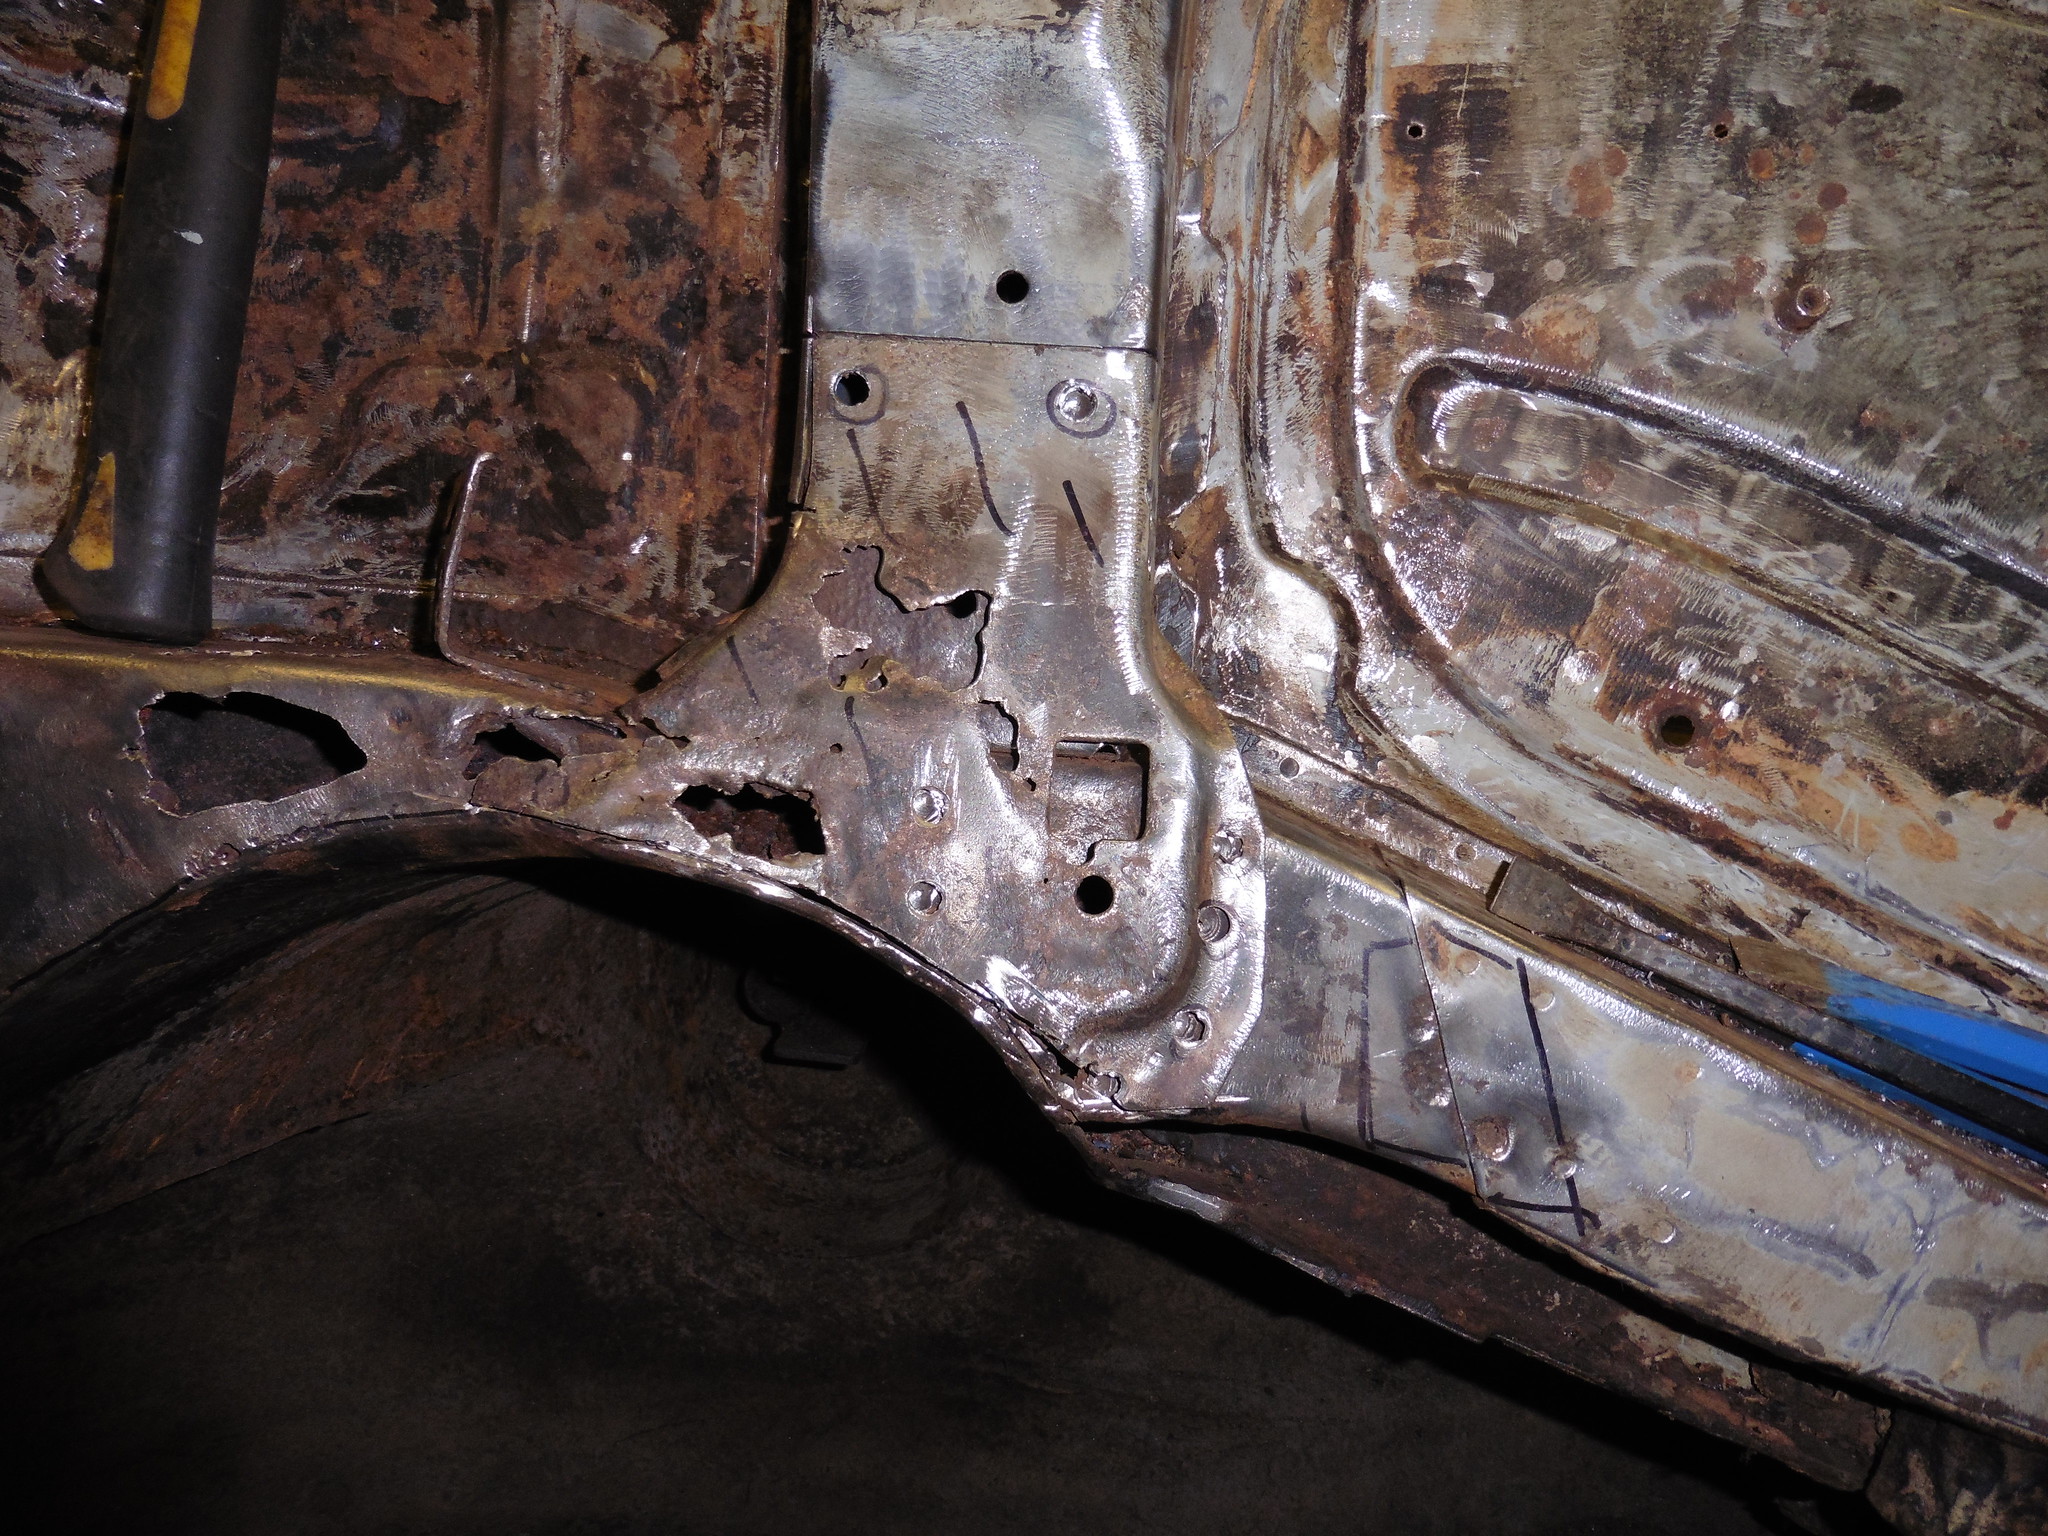 P1020110 P1020110 by jono_misfit, on Flickr not actually as bad as I thought.  P1020111 P1020111 by jono_misfit, on Flickr the bit I cut off is every bit as bad as i thought.  P1020112 P1020112 by jono_misfit, on Flickr not much left of the leg there  P1020113 P1020113 by jono_misfit, on Flickr right, lets see how bad the rest of the leg is. Exploratory cut. 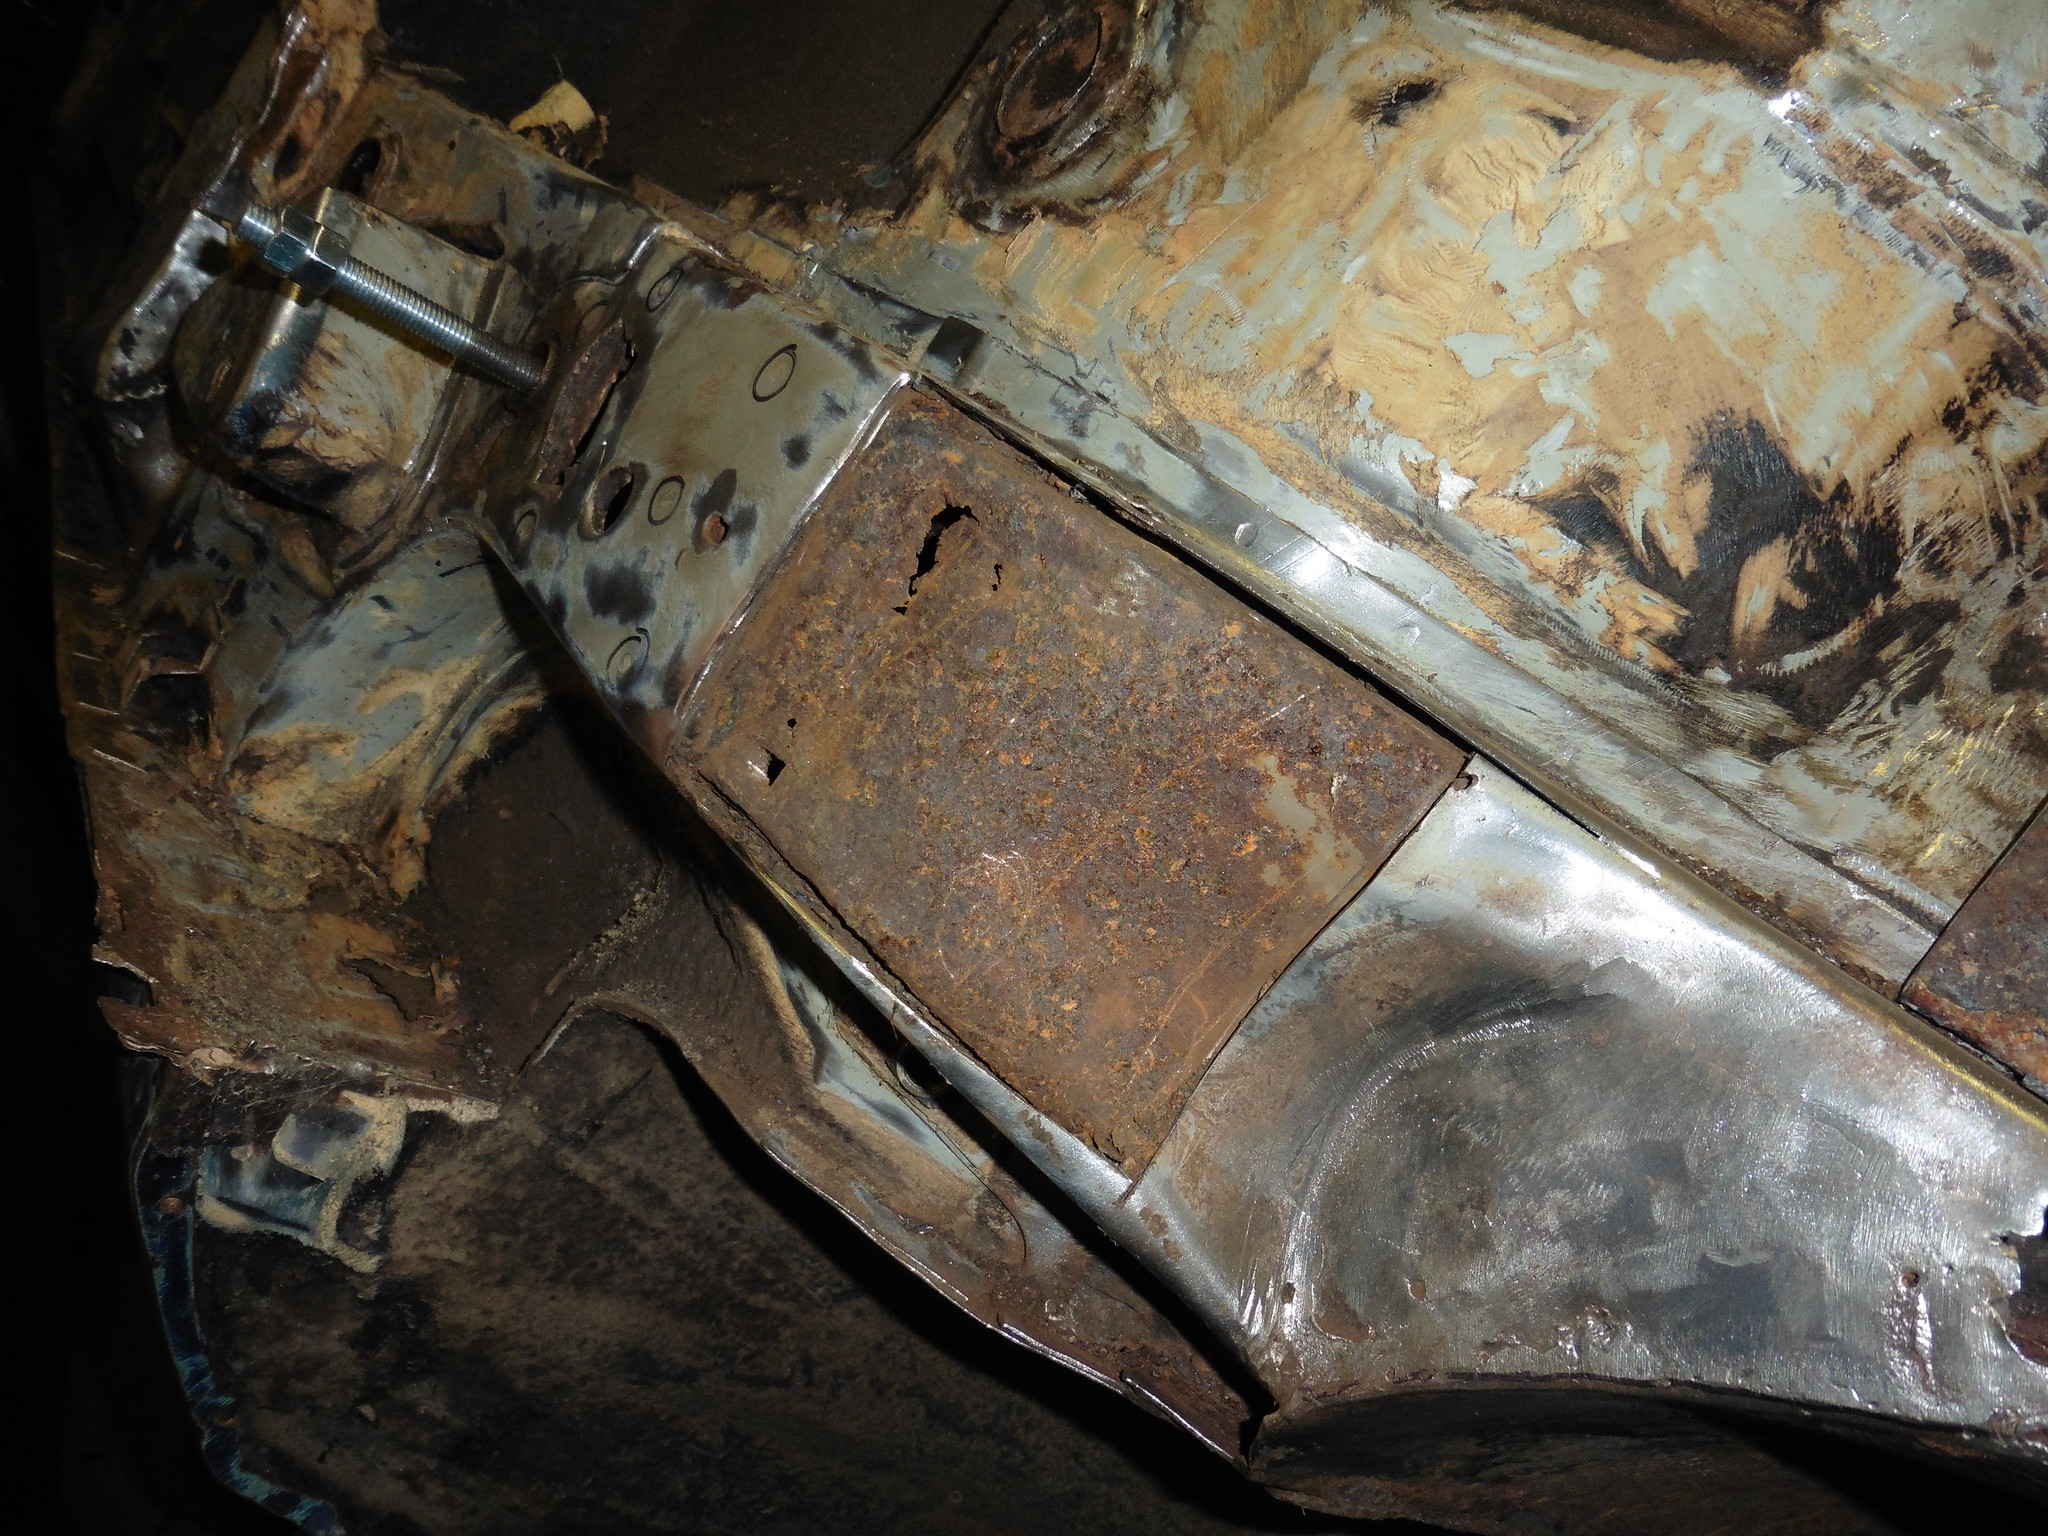 P1020114 P1020114 by jono_misfit, on Flickr in between the inner and outer skin is pack SOLID with rust. Its not rust that fallen in the gap, its expanded rust thats grown between the skins 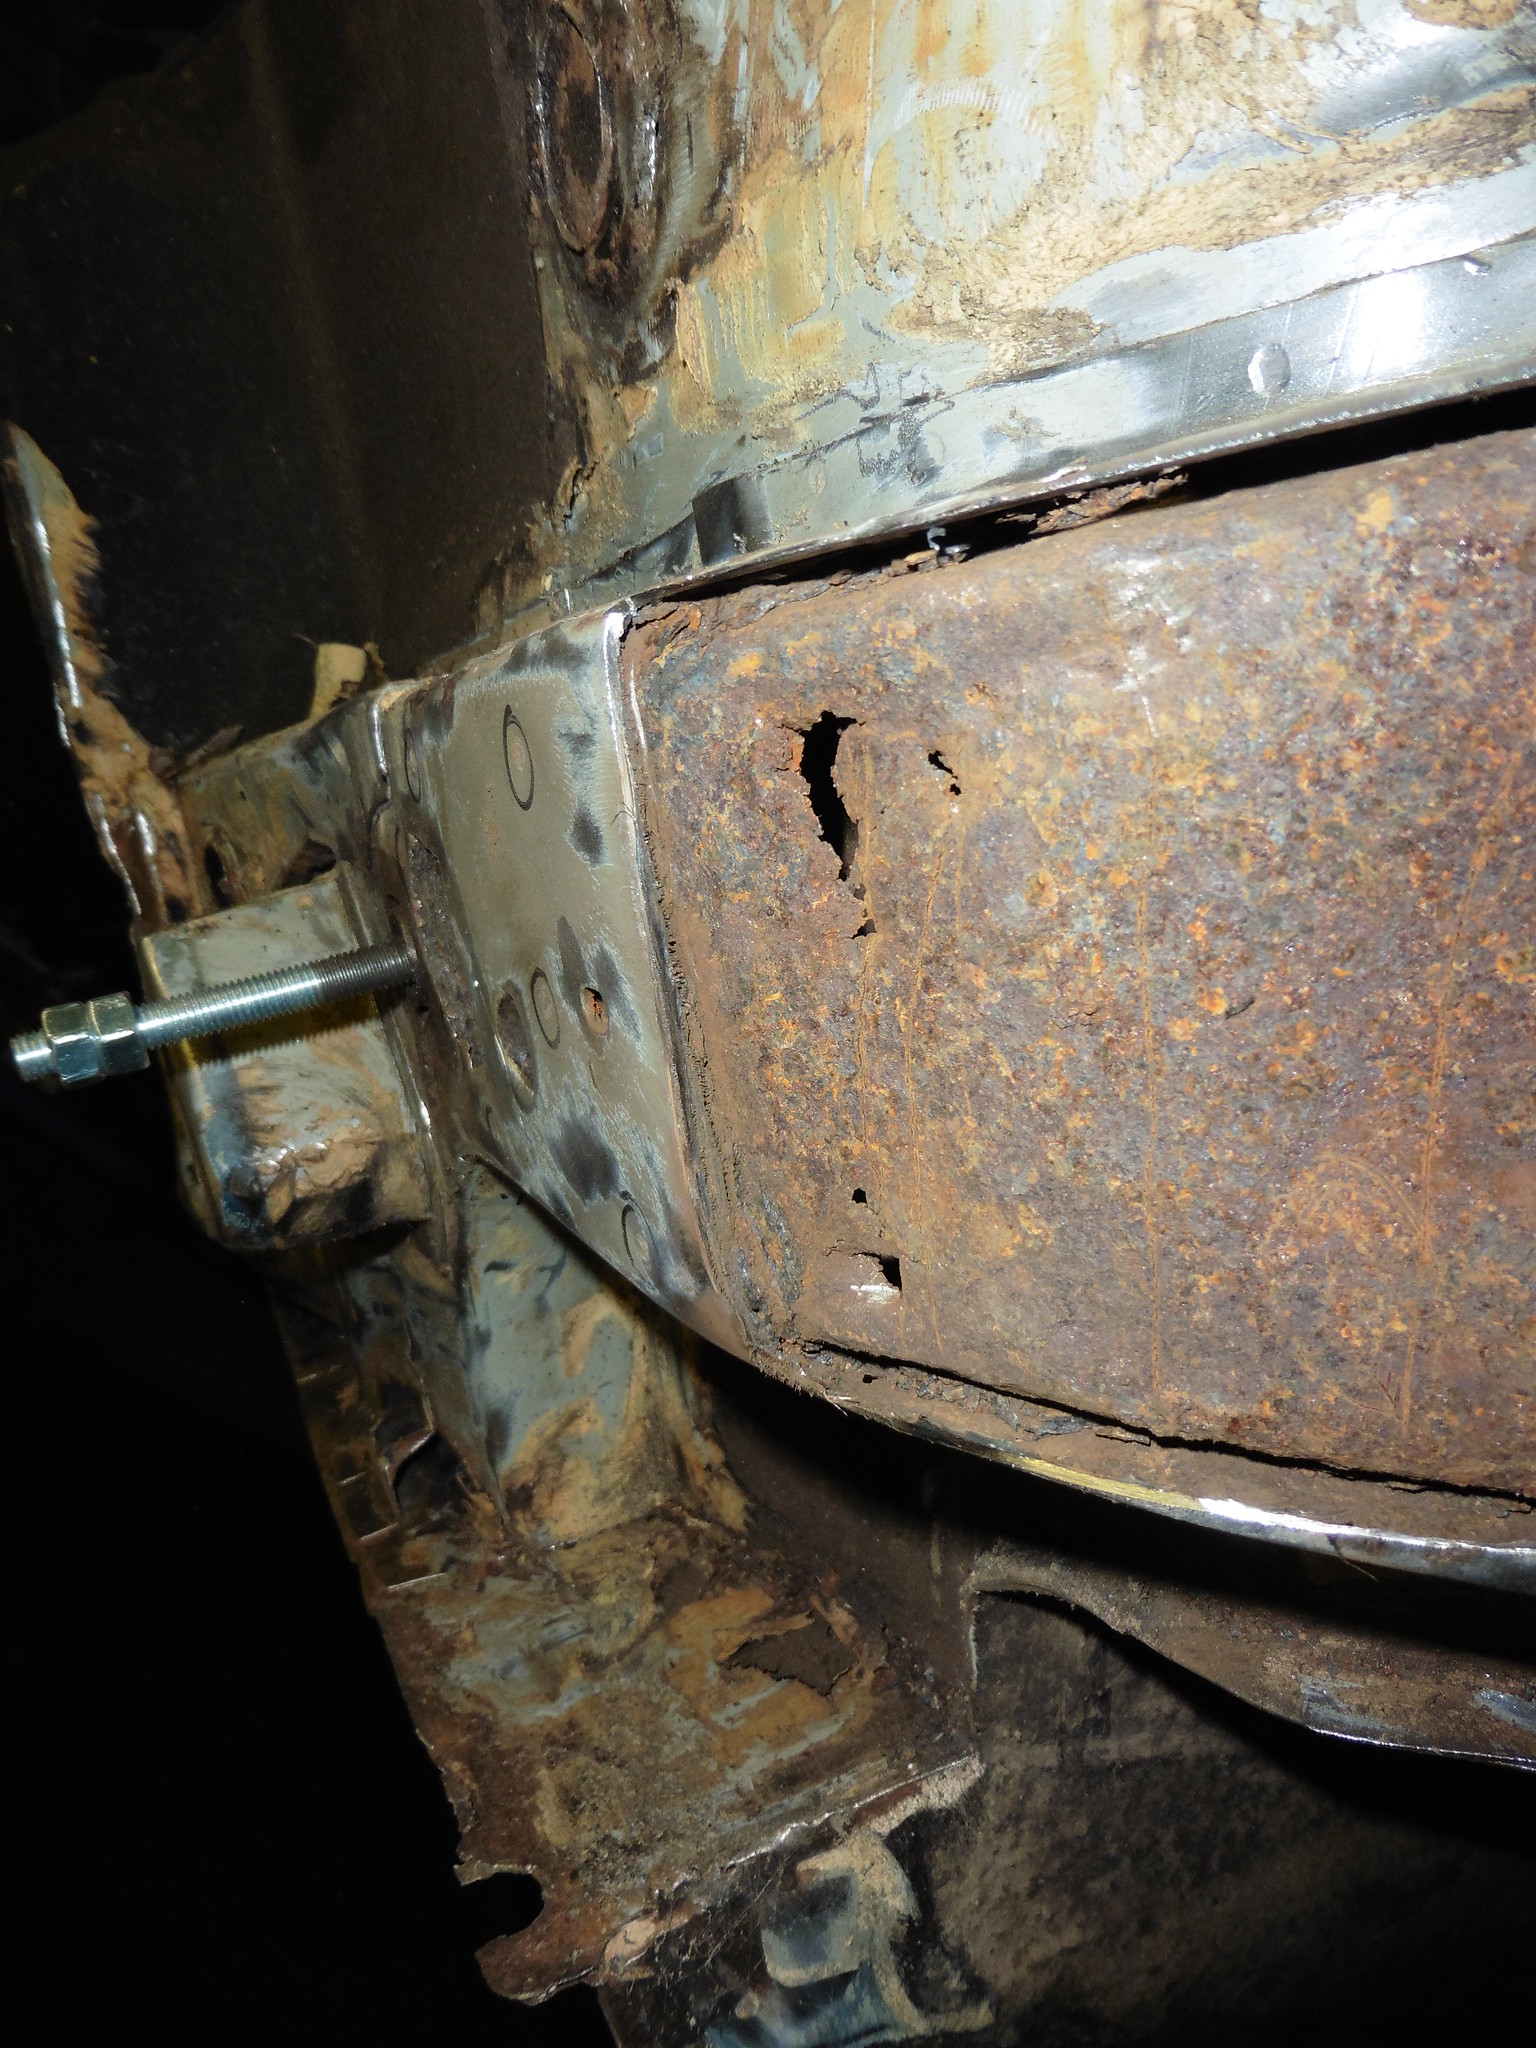 P1020115 P1020115 by jono_misfit, on Flickr and through the inner skin 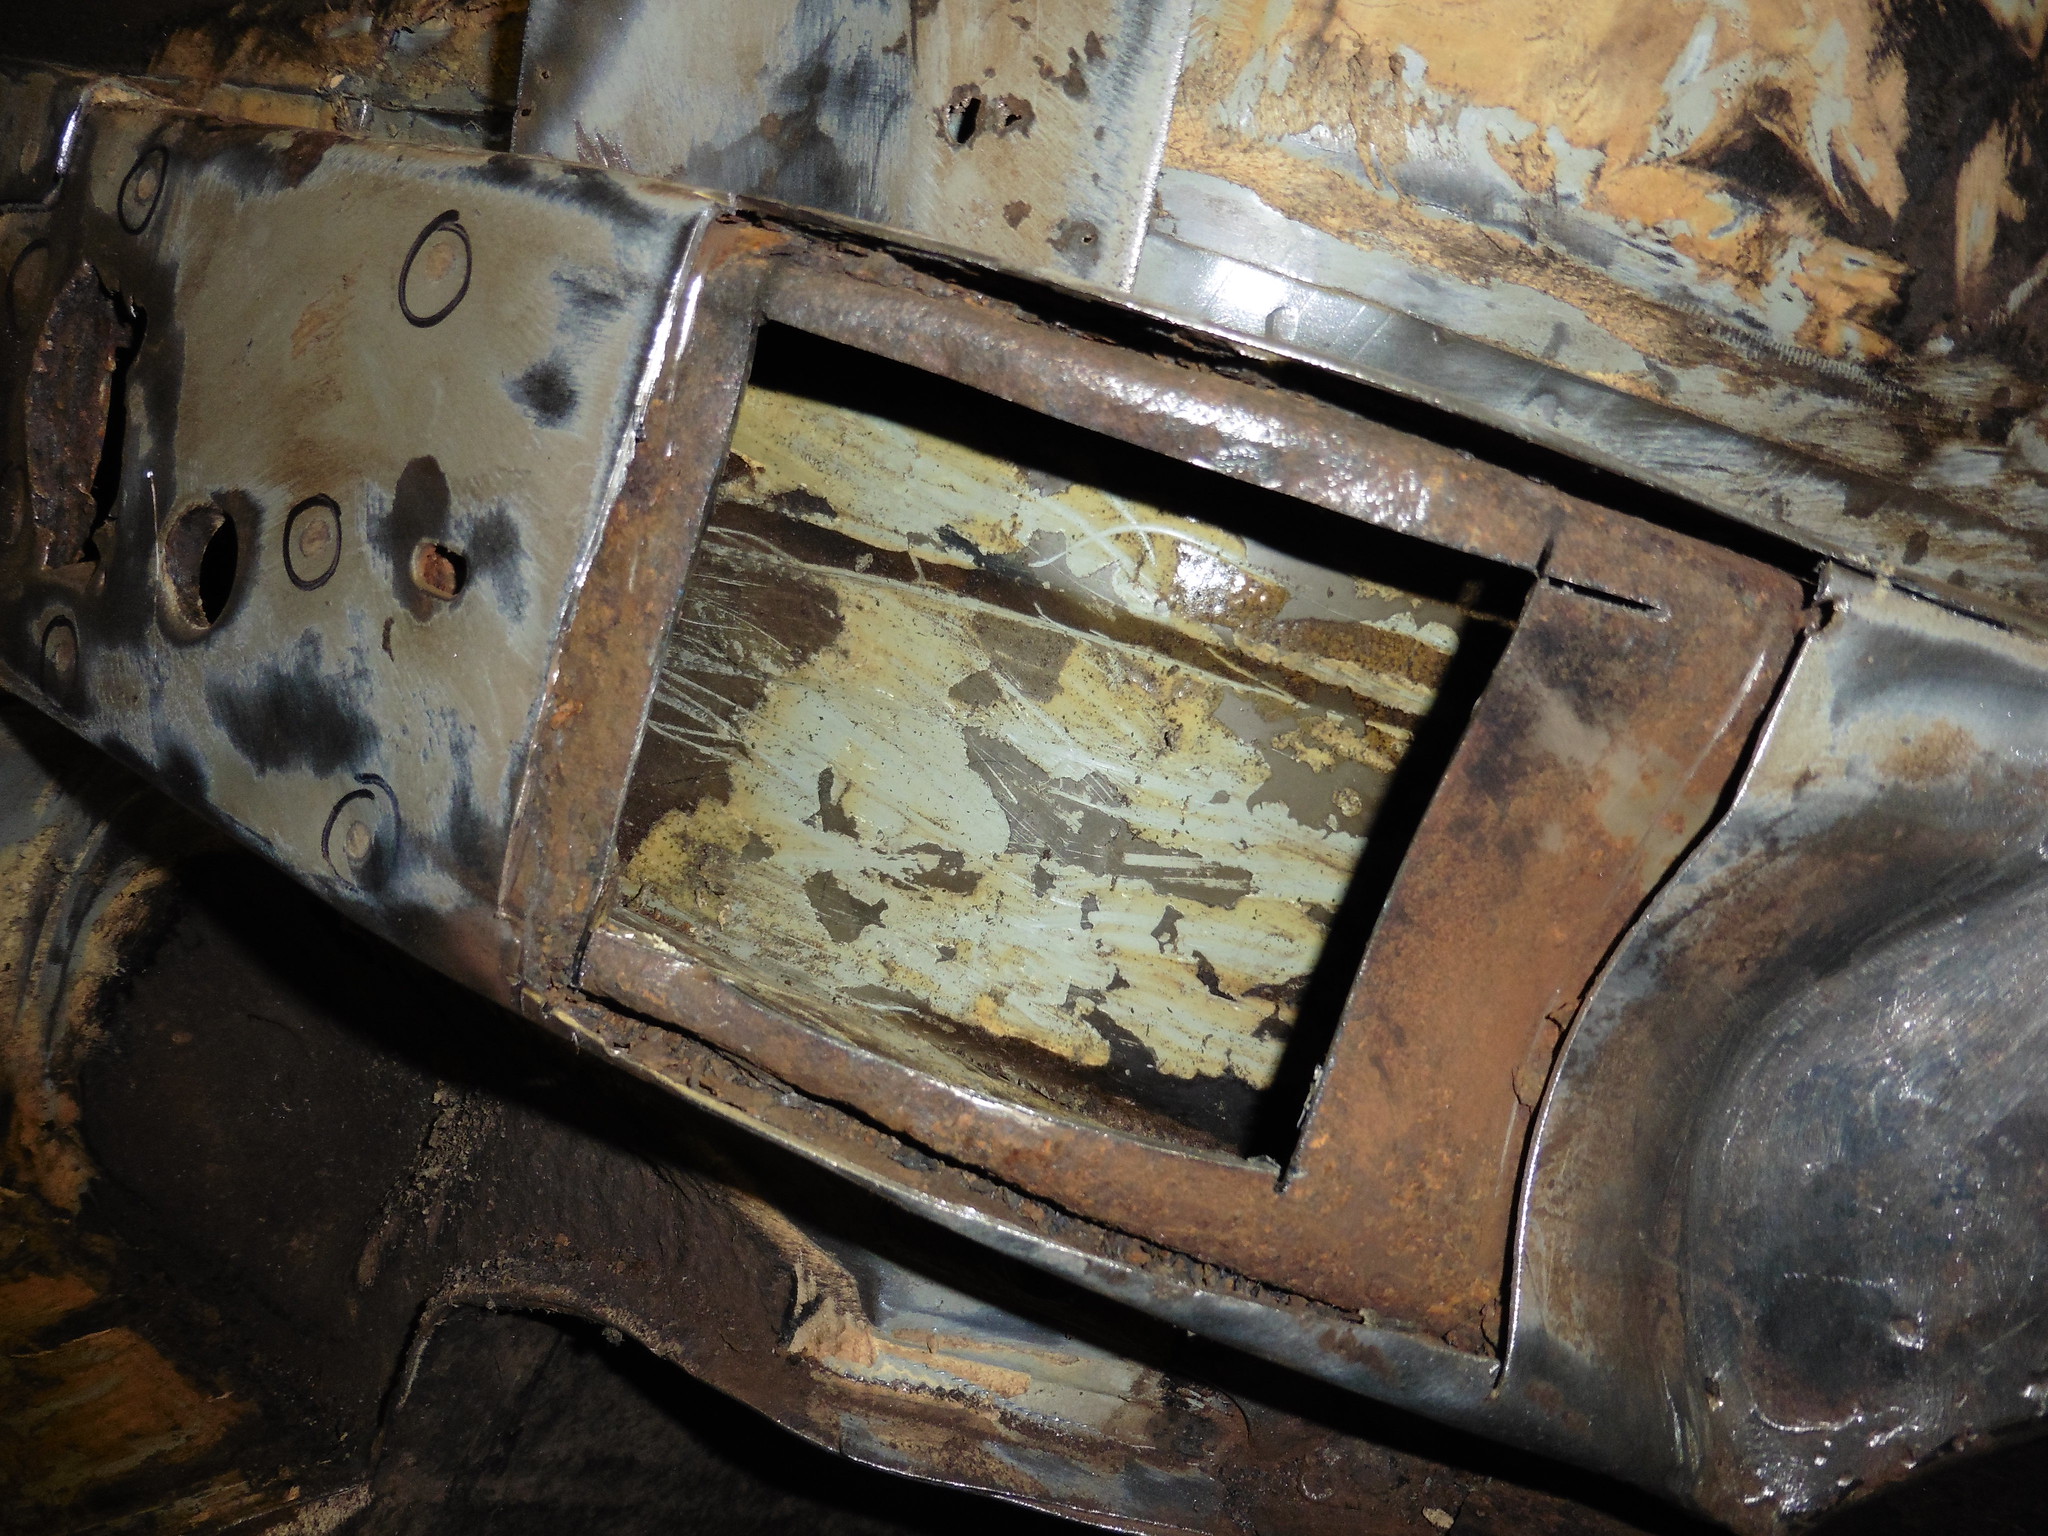 P1020116 P1020116 by jono_misfit, on Flickr comparison time. Outer skin - pinholling of rust through to the outer surface  P1020117 P1020117 by jono_misfit, on Flickr back face 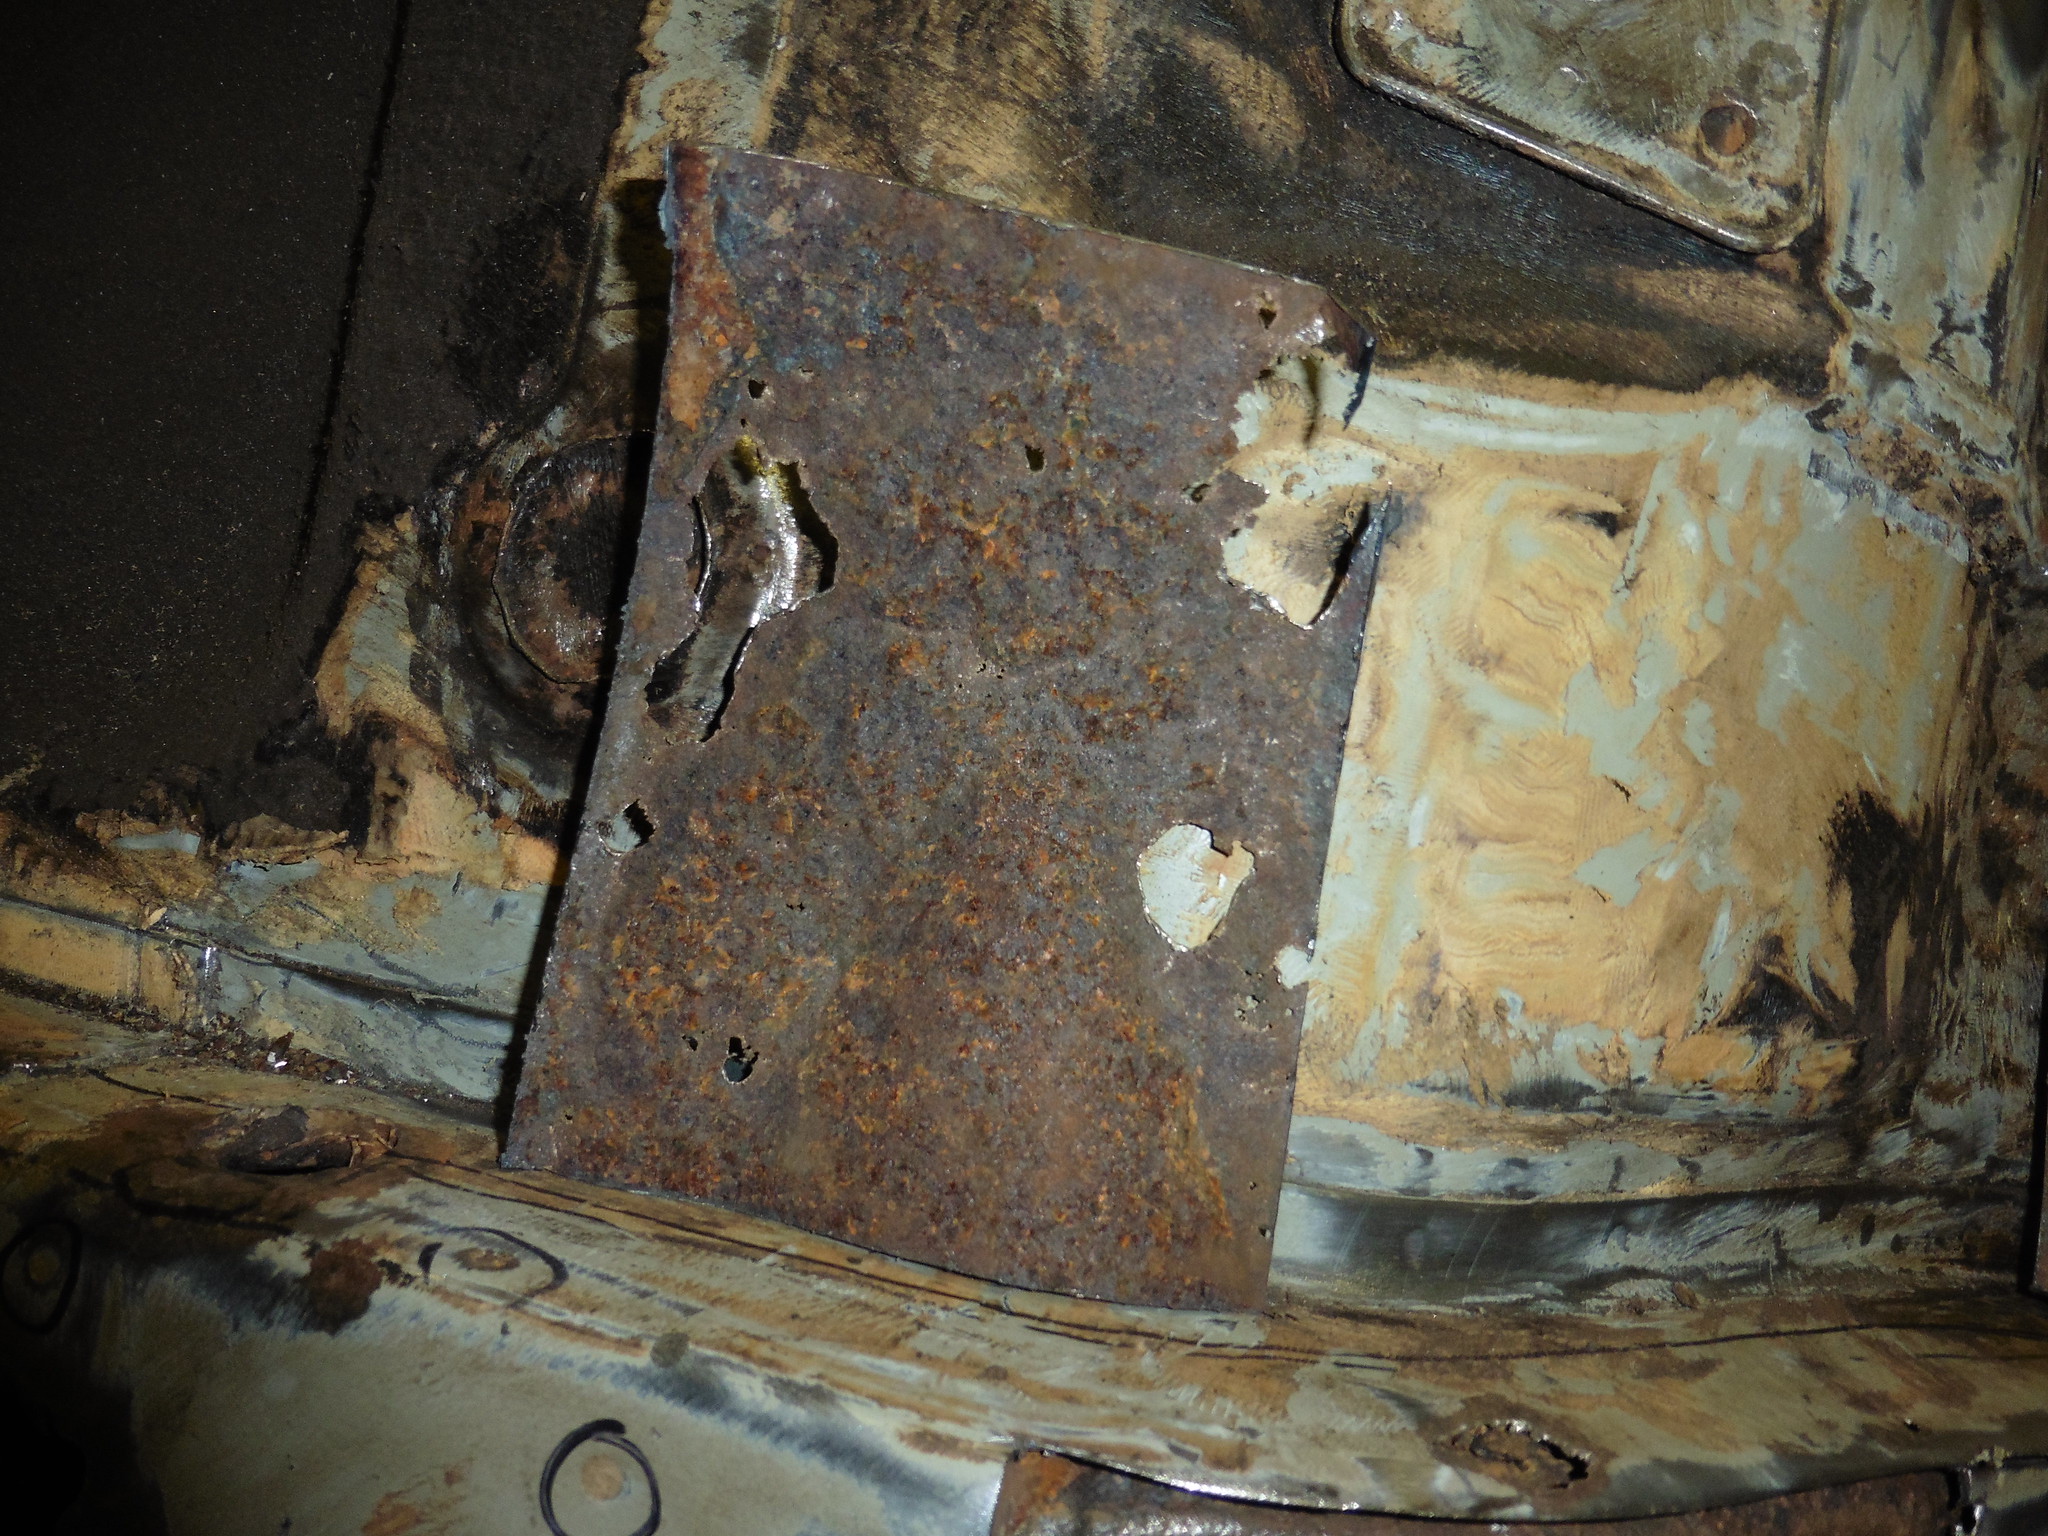 P1020118 P1020118 by jono_misfit, on Flickr inner skin outer face 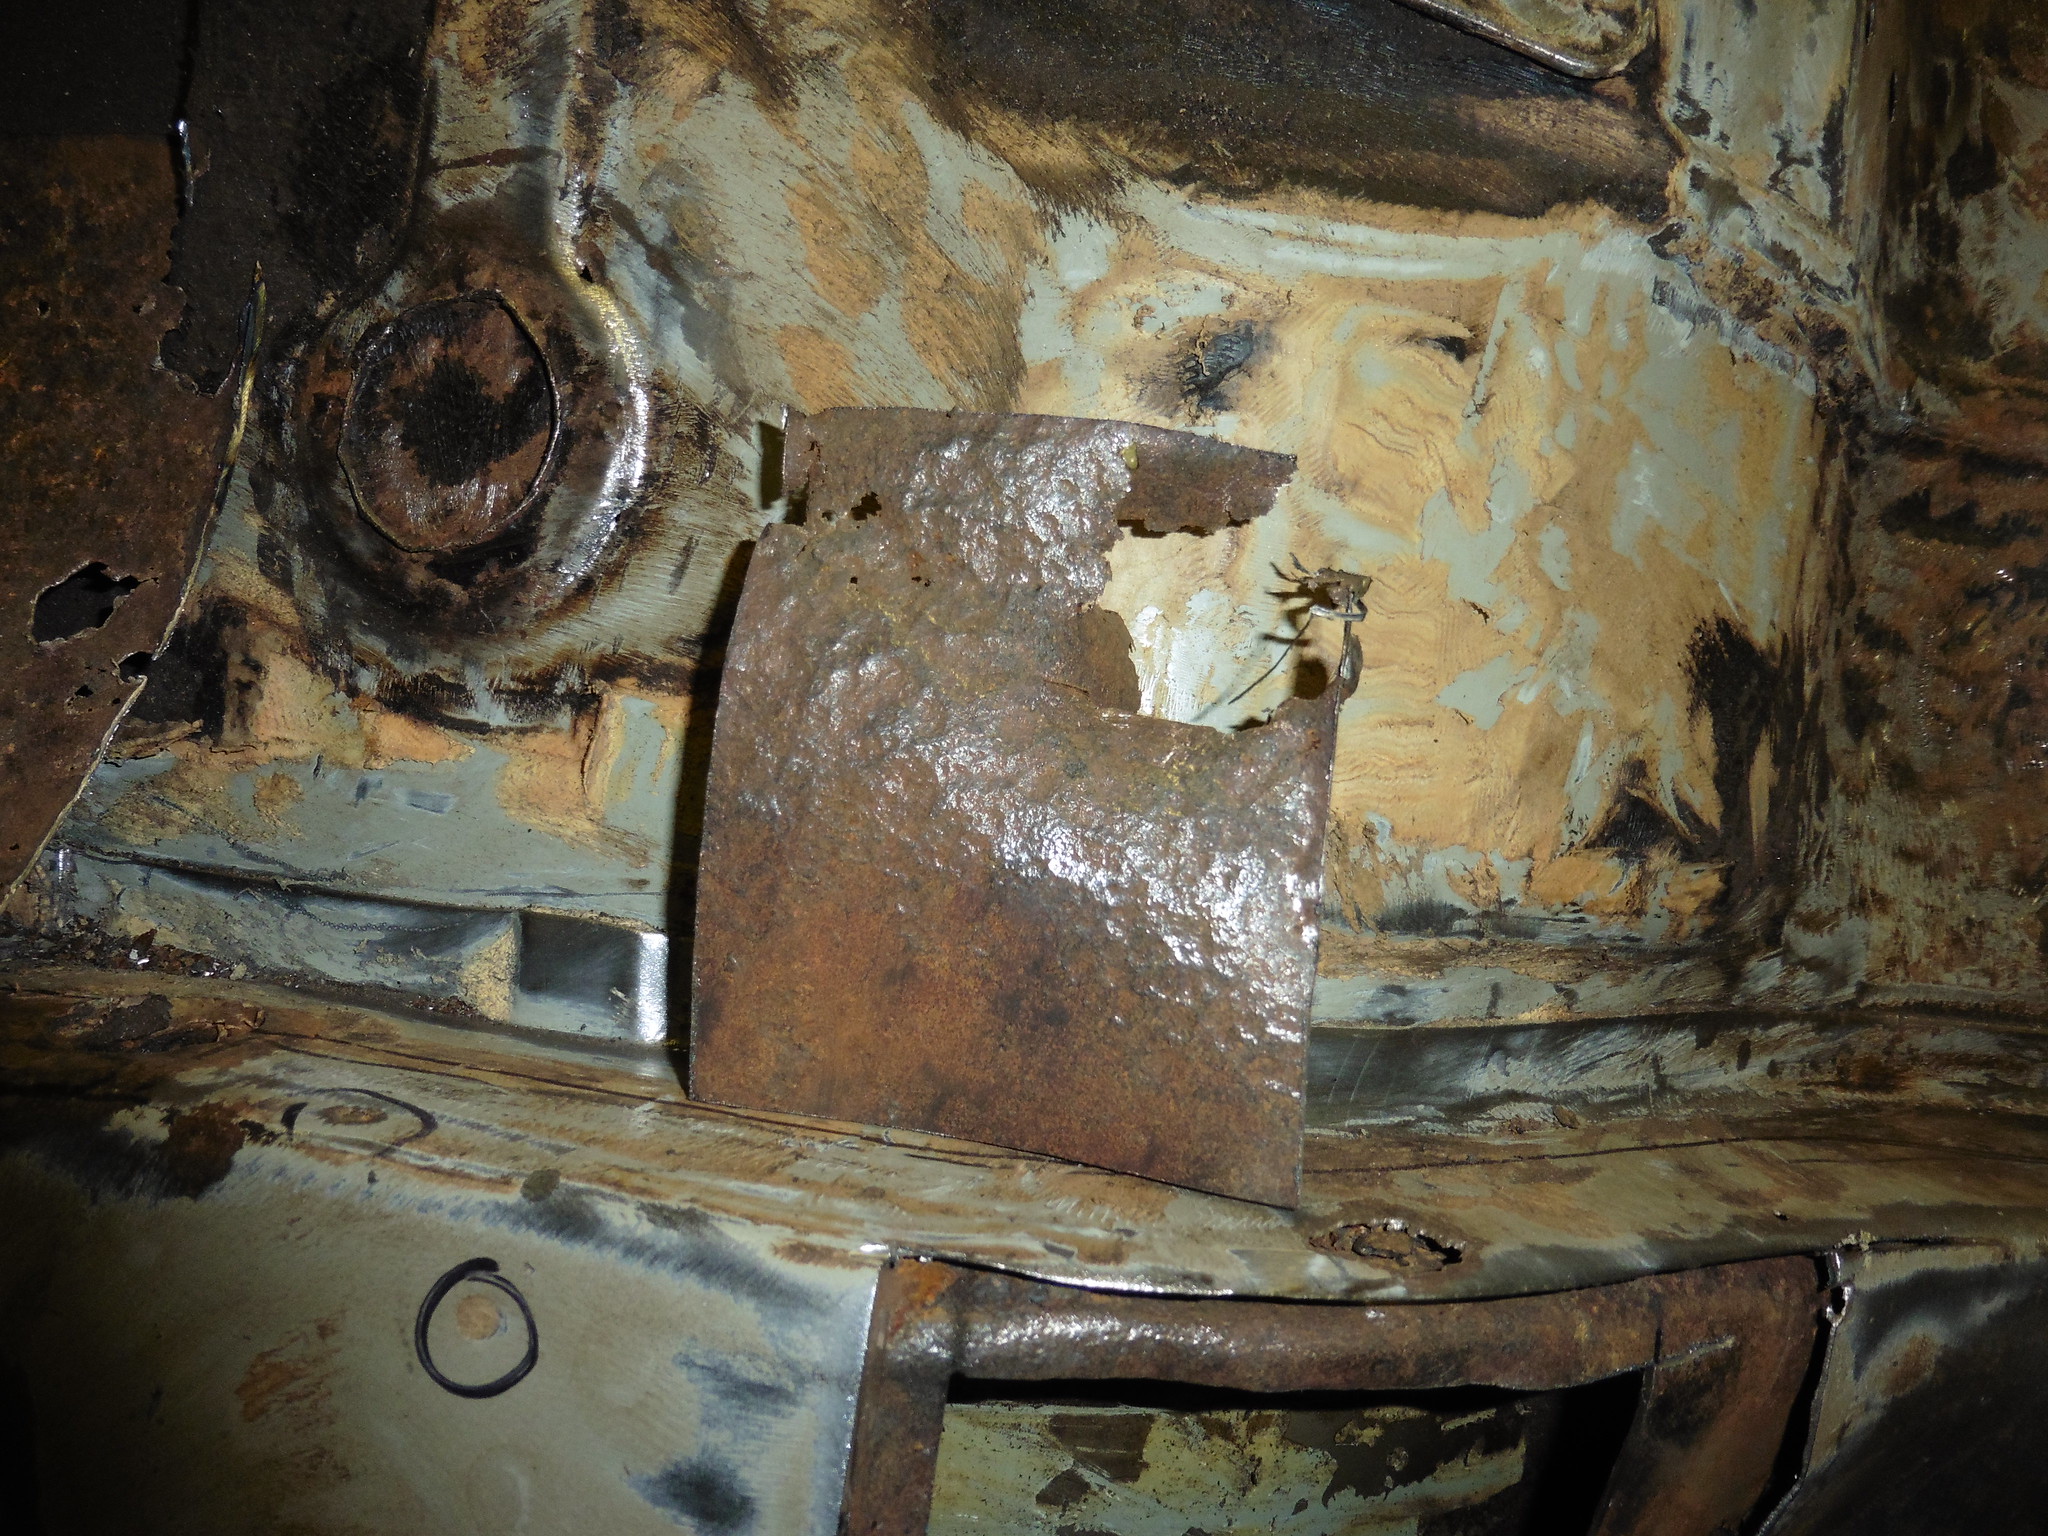 P1020119 P1020119 by jono_misfit, on Flickr inner skin inner face.  P1020120 P1020120 by jono_misfit, on Flickr Rust has eat right through all of it. The sides of the chassis rail look ok, but I can see rust packed between the two skins 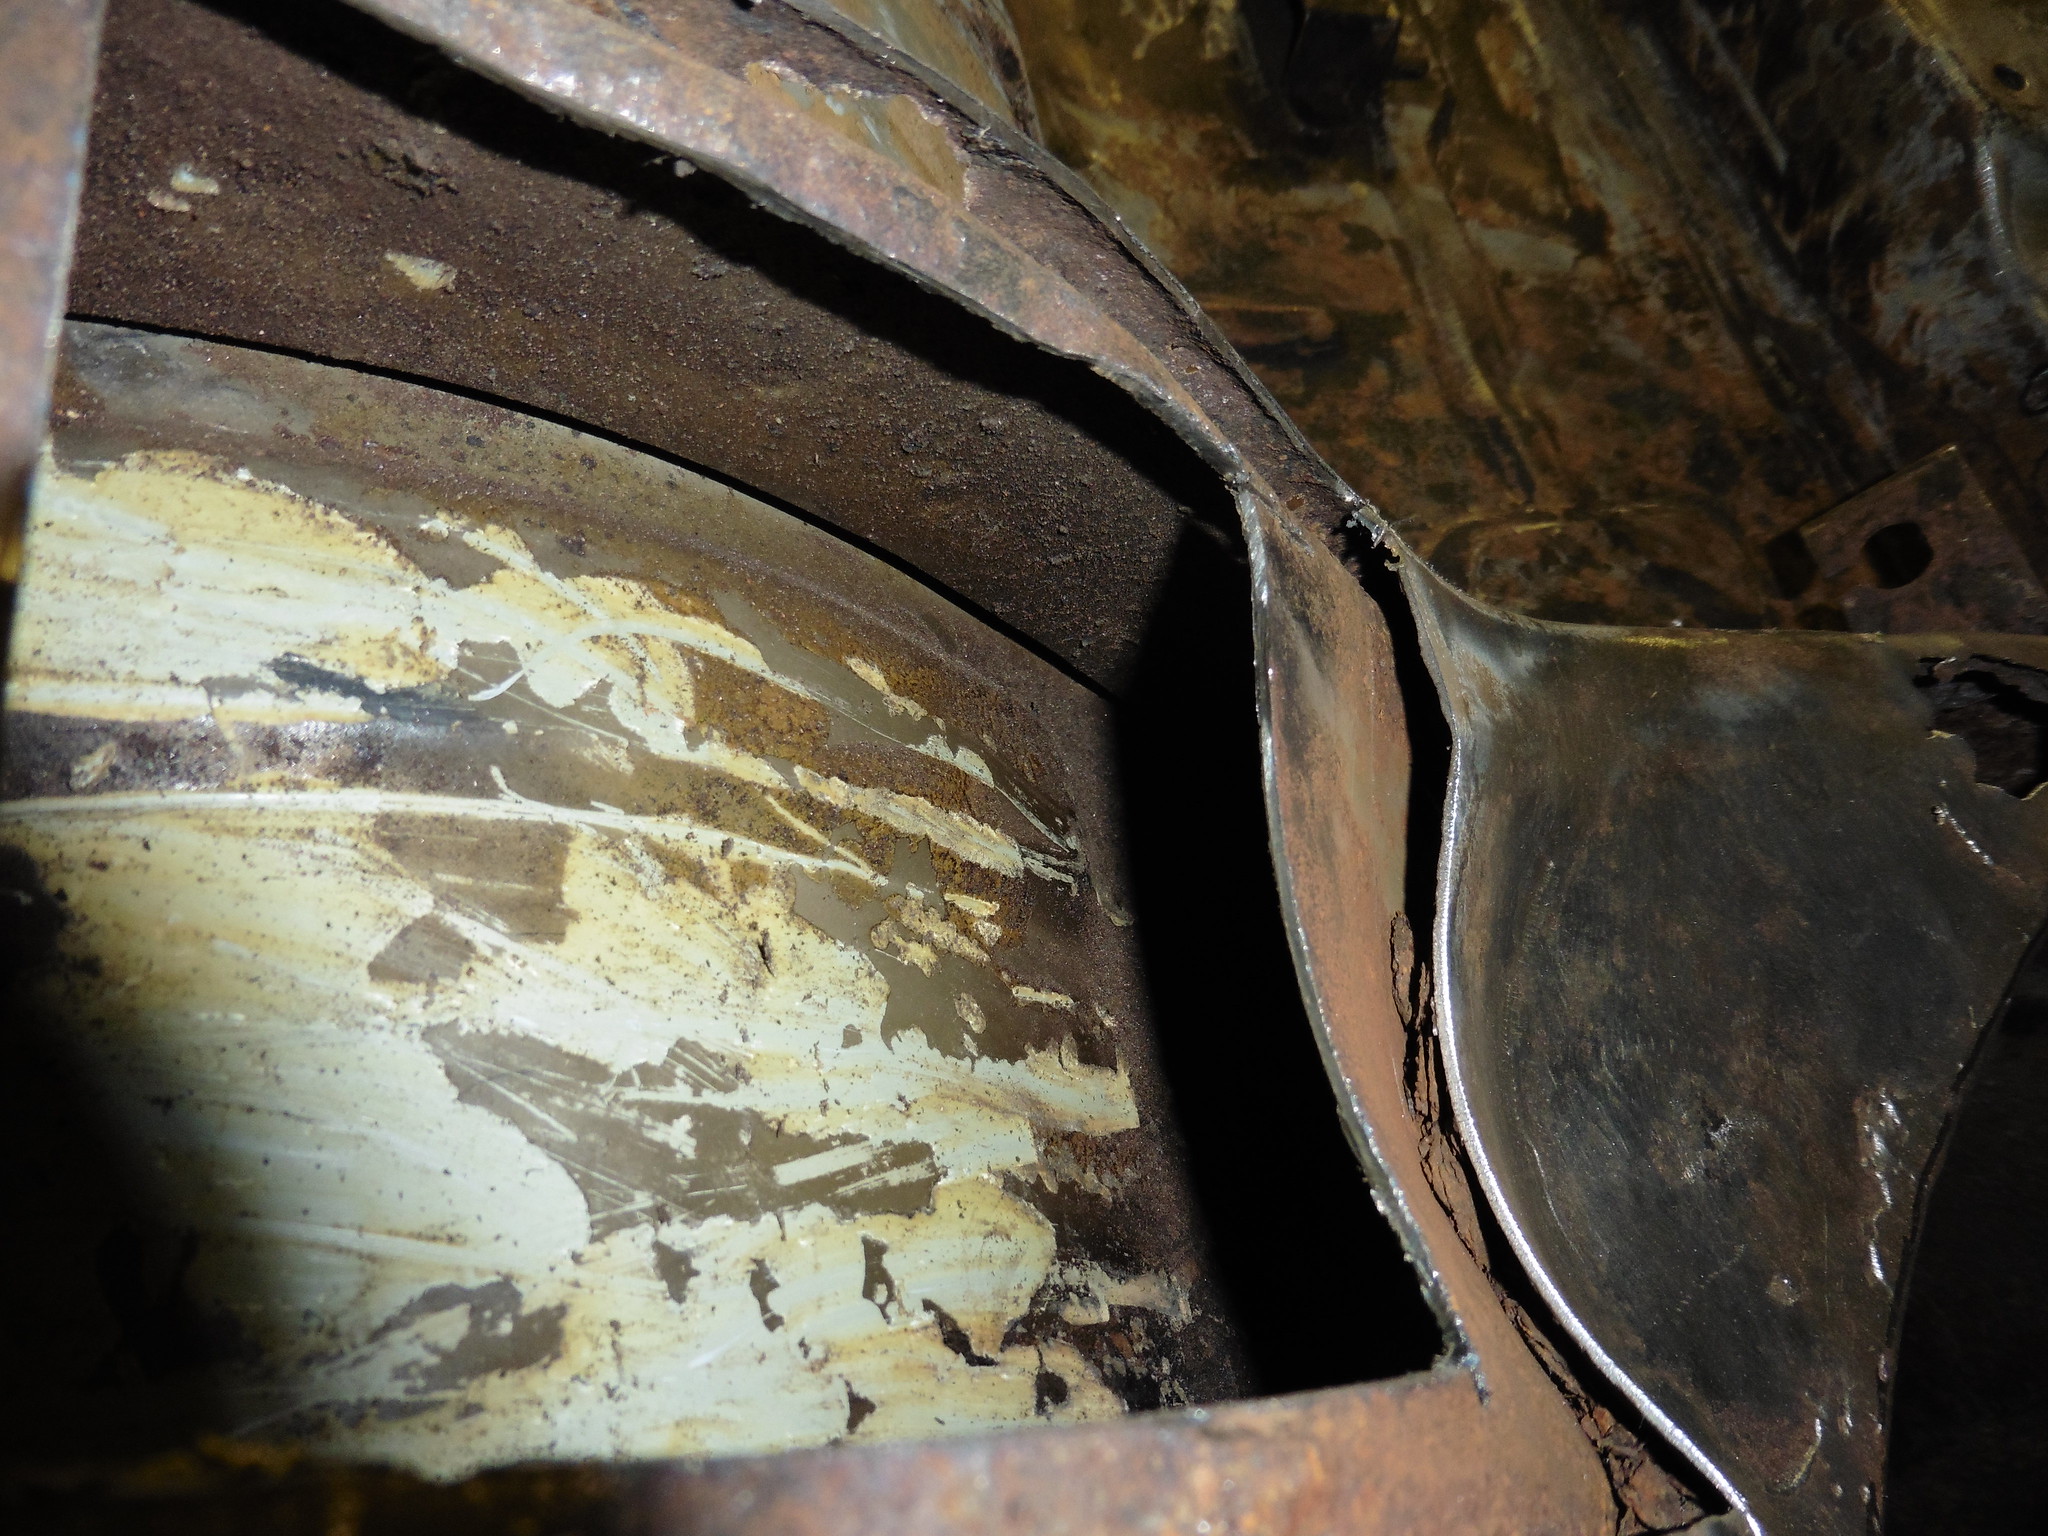 P1020121 P1020121 by jono_misfit, on Flickr 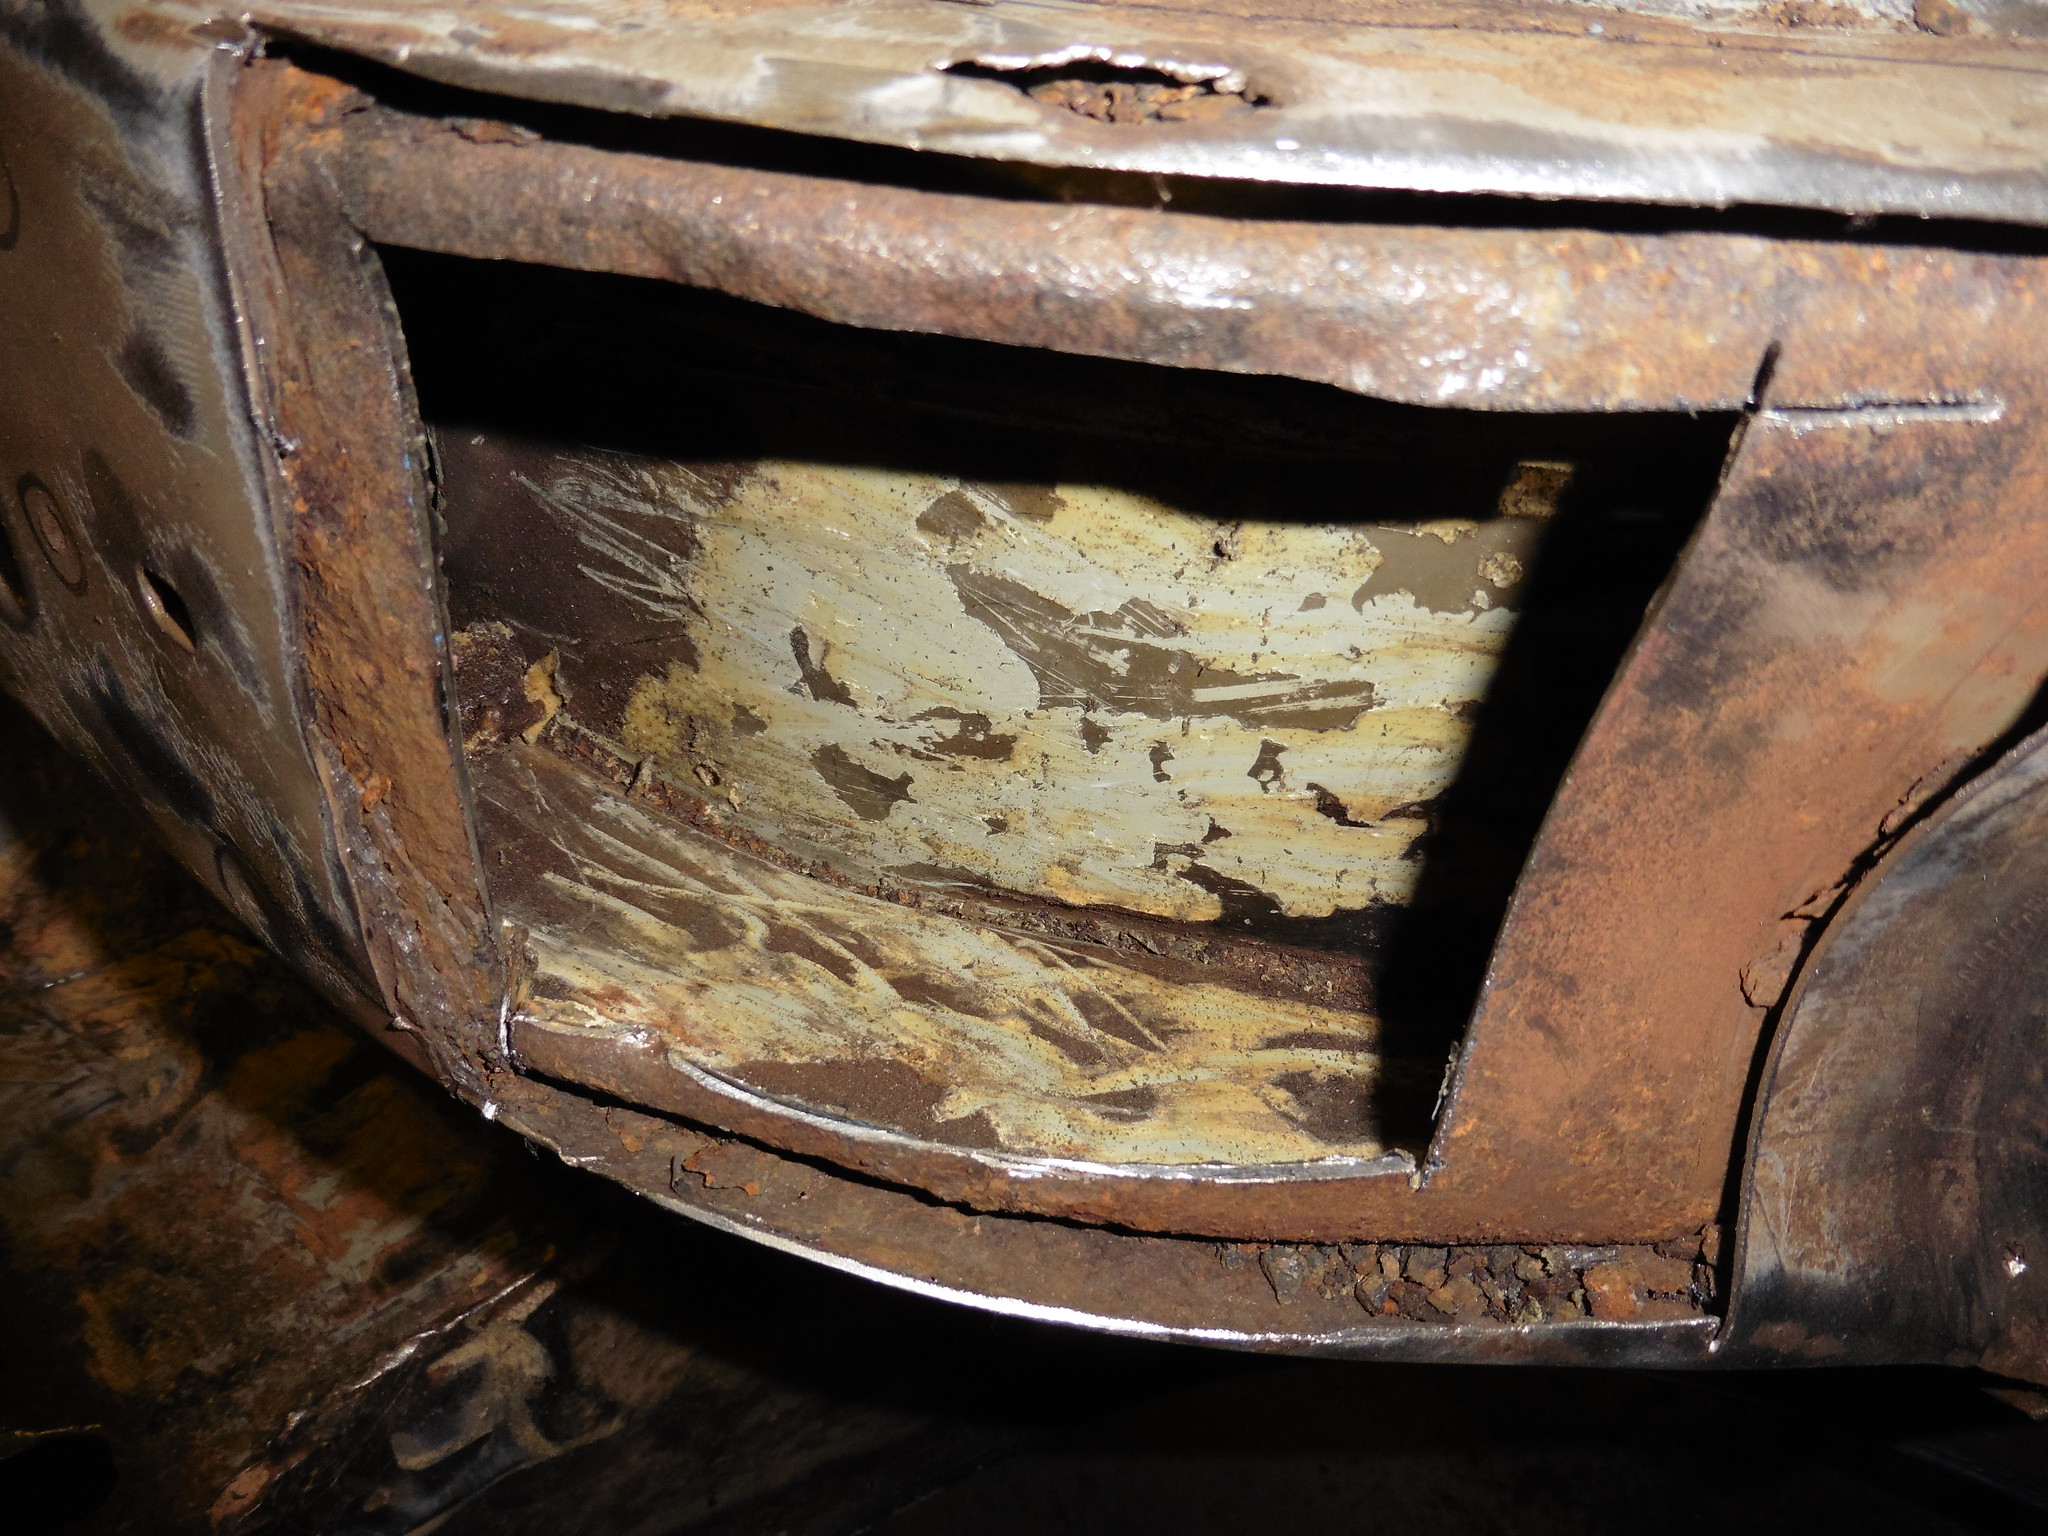 P1020122 P1020122 by jono_misfit, on Flickr extend the incision 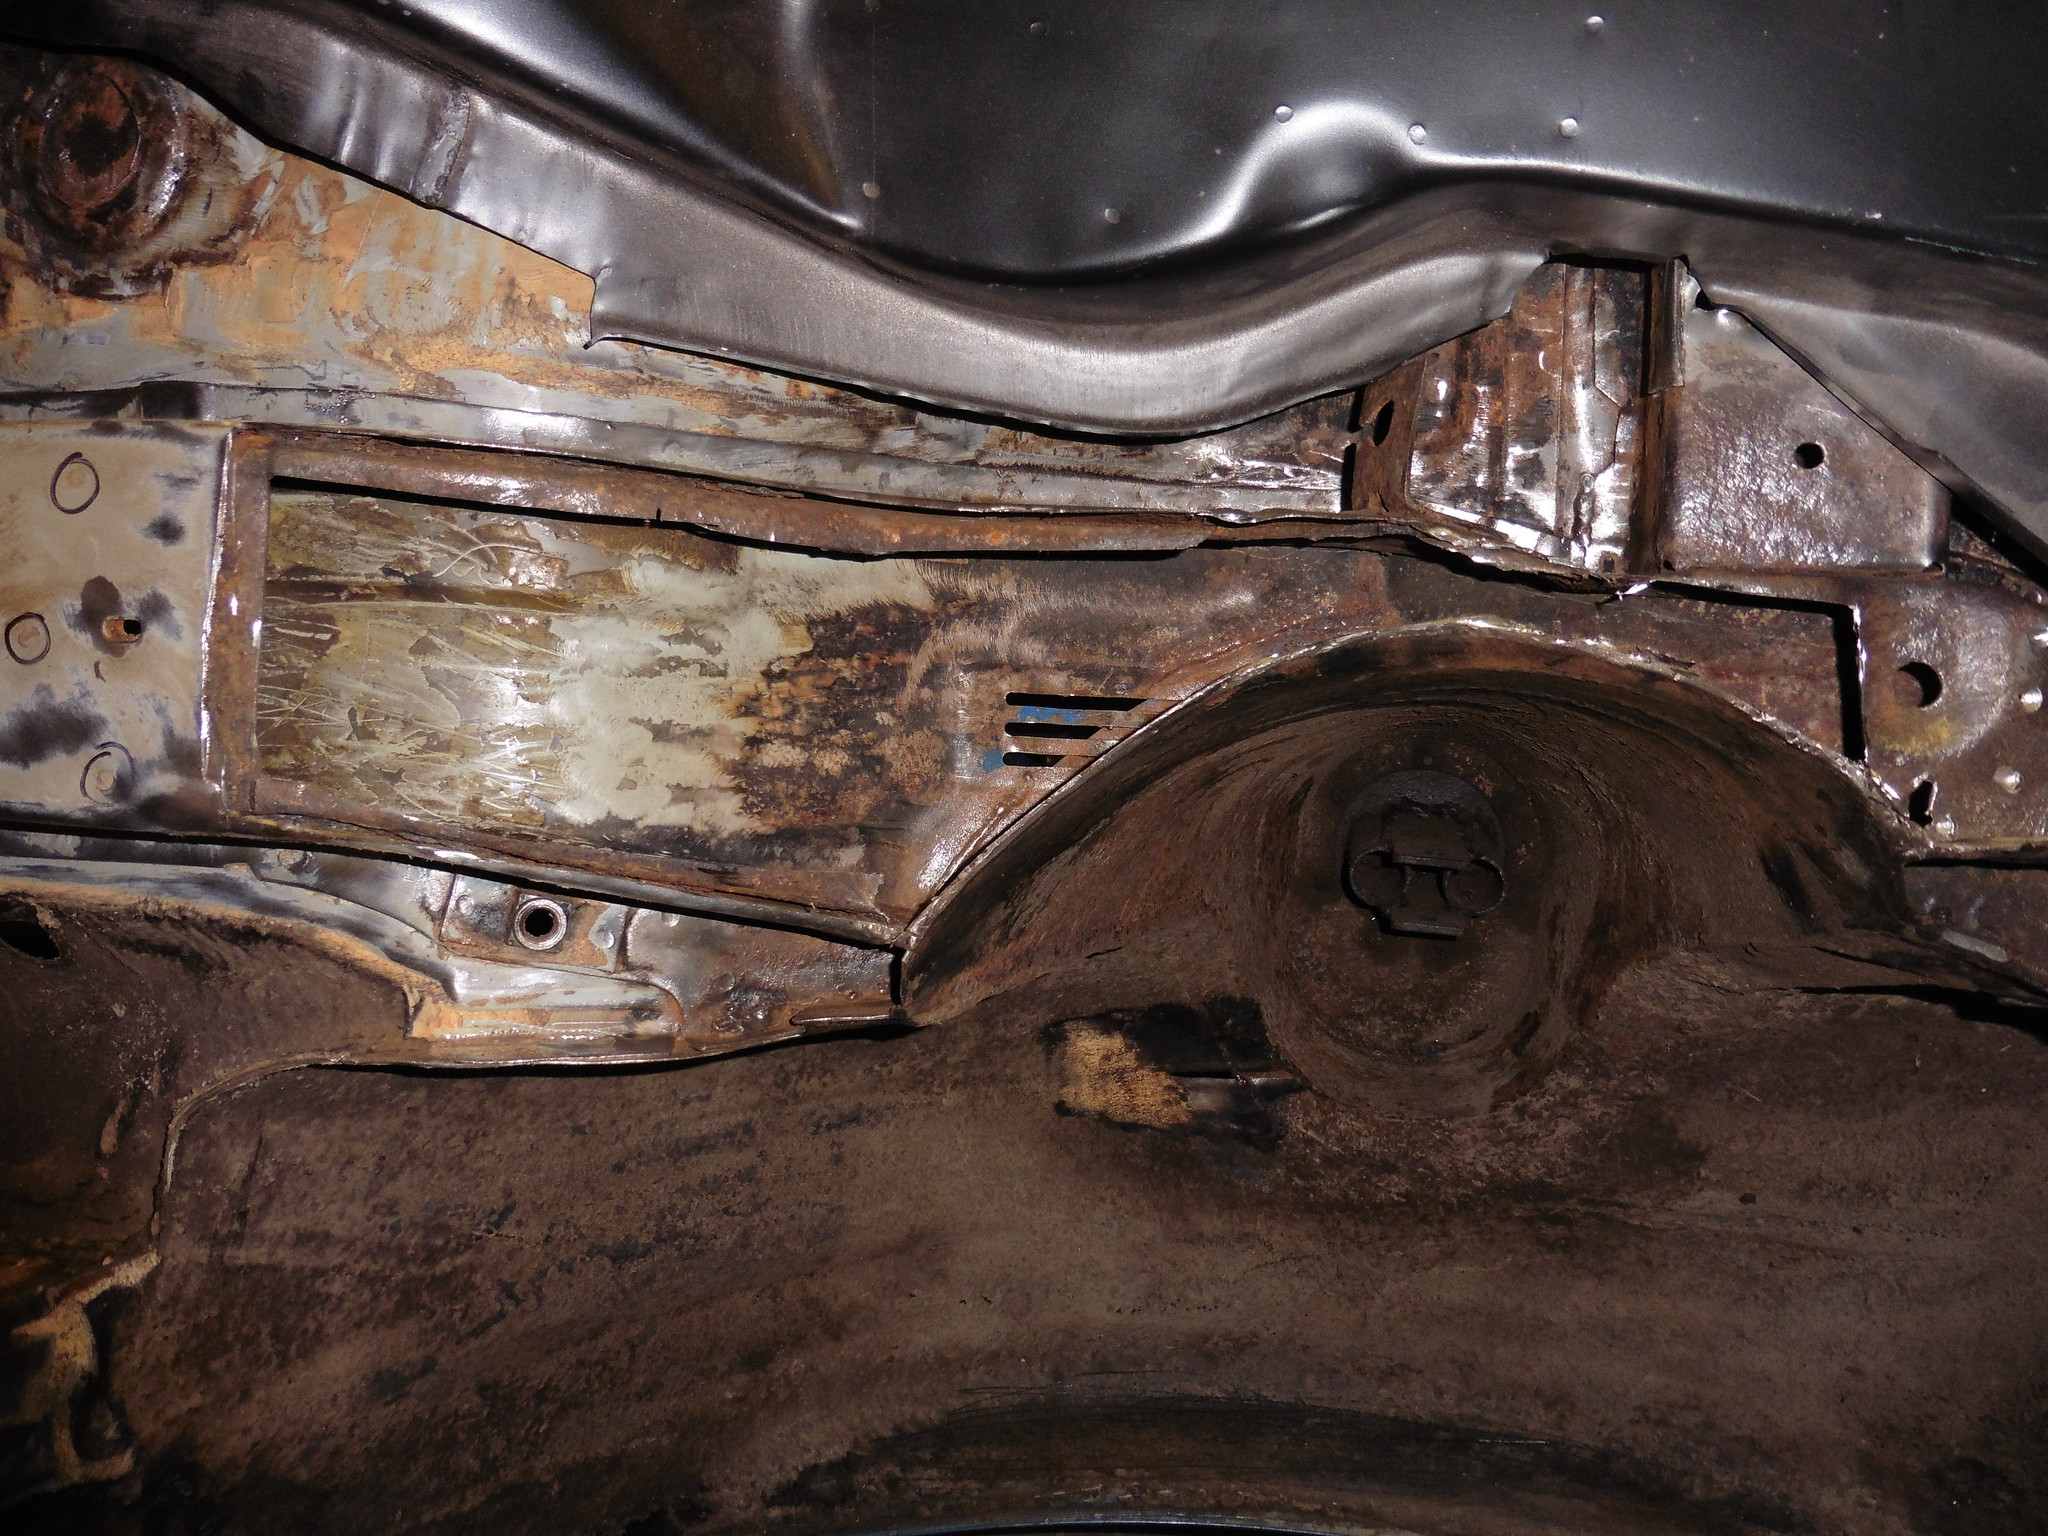 P1020123 P1020123 by jono_misfit, on Flickr whilst orange, the turret and inner floorpan are in good condition. Its only very light surface rust that comes off easily with the brush. 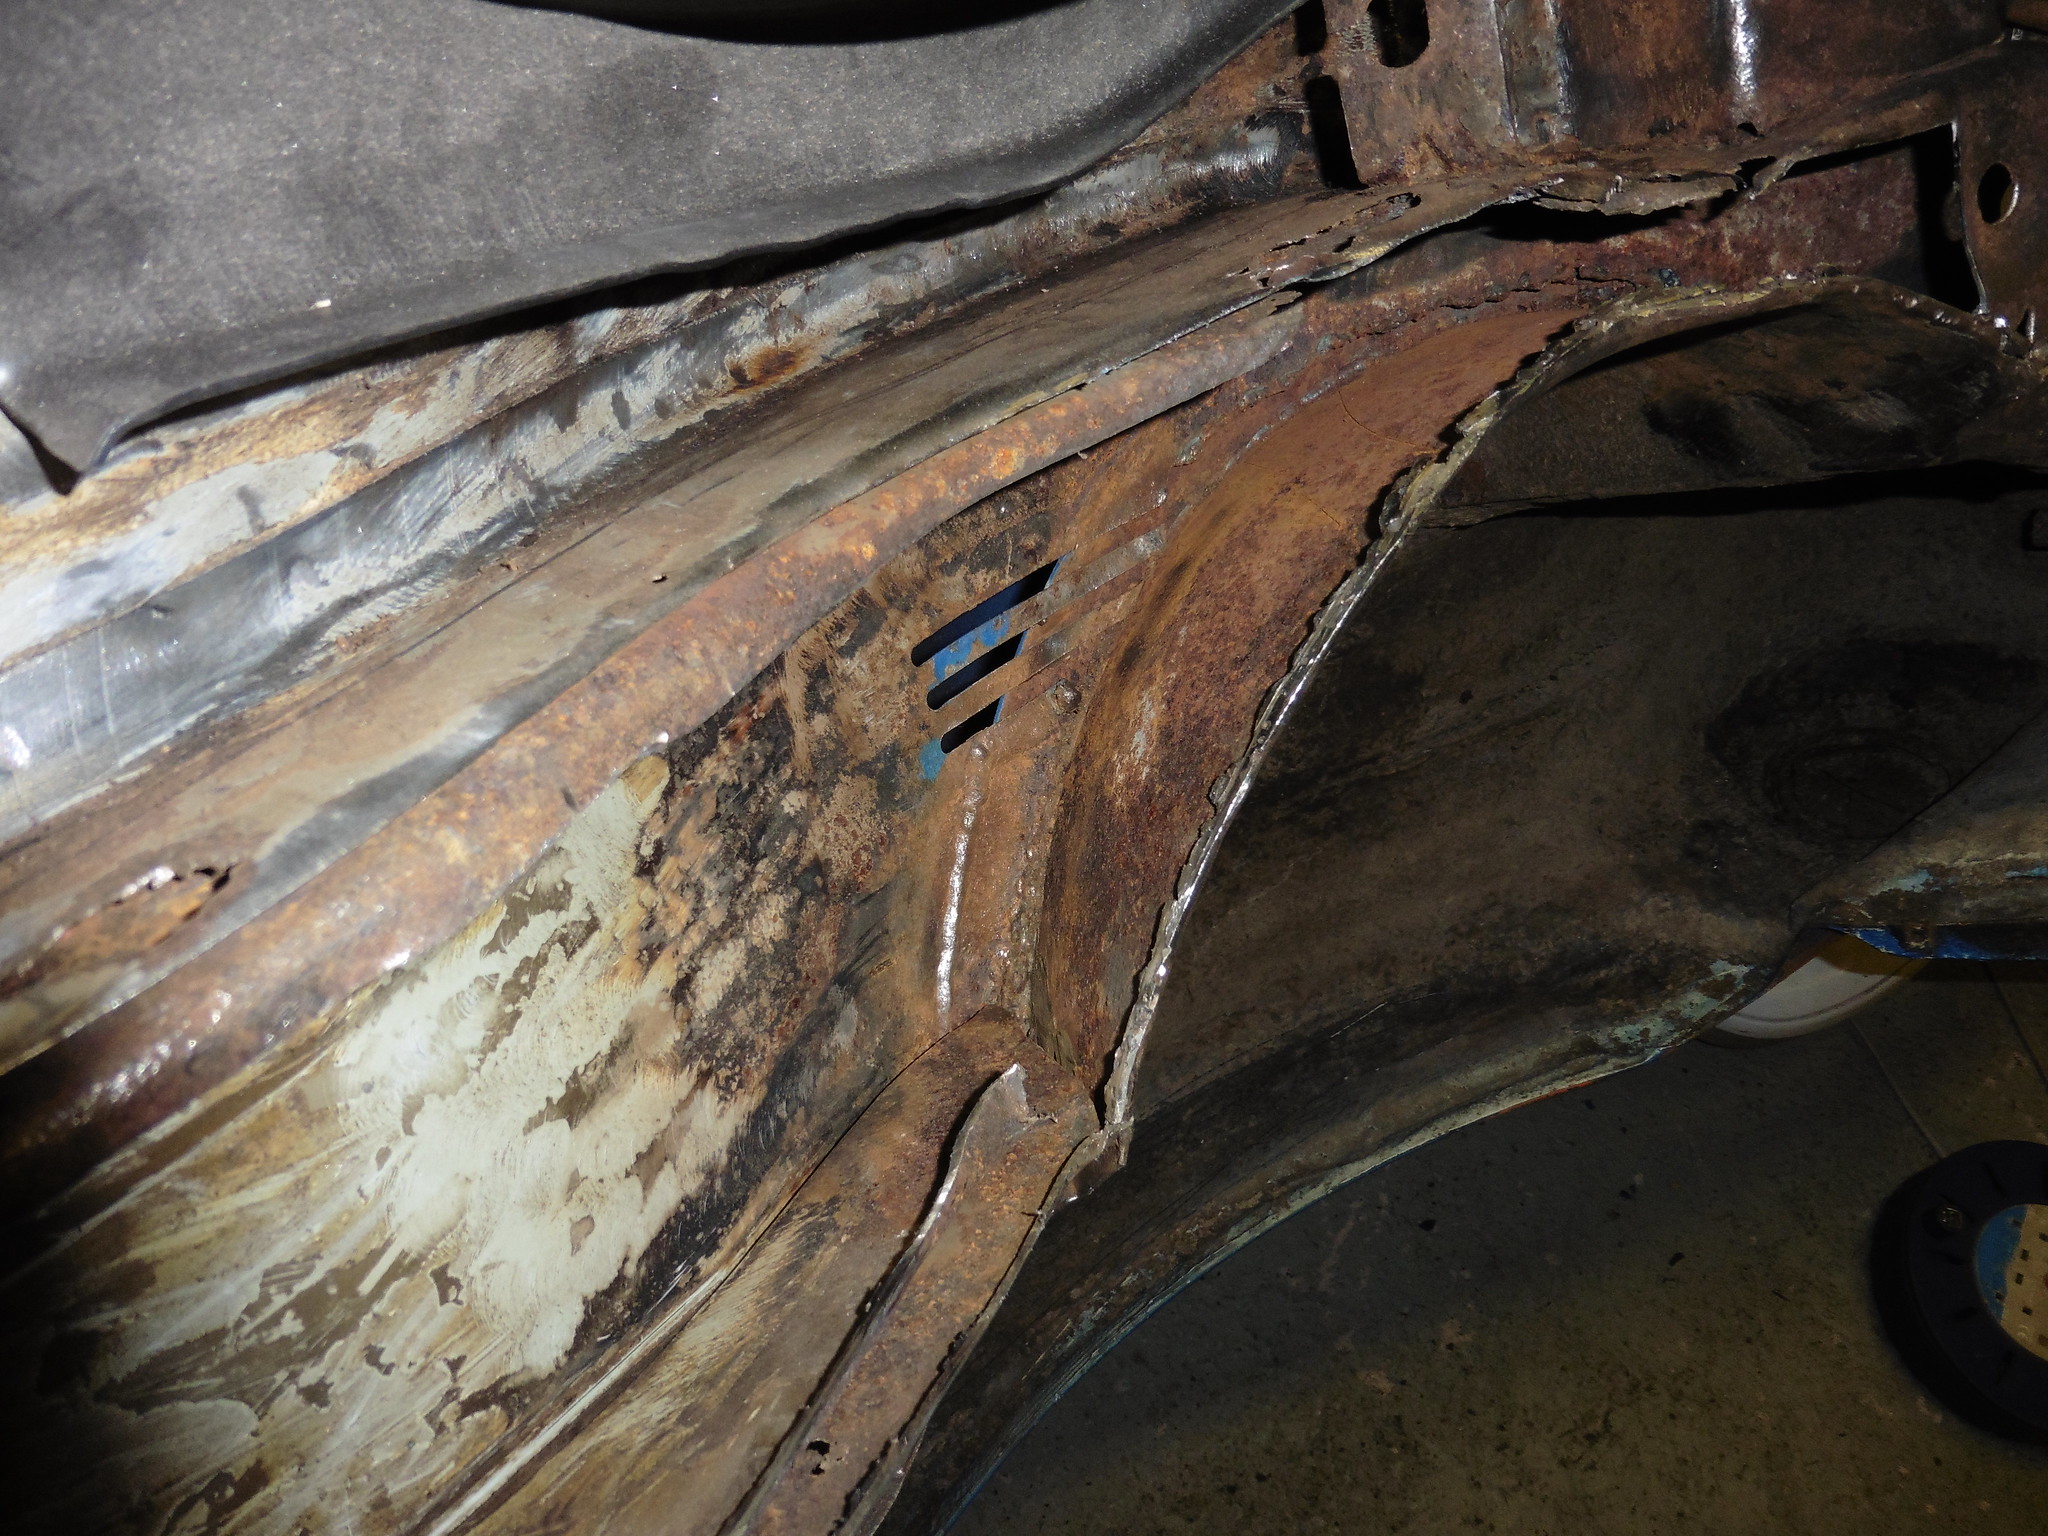 P1020124 P1020124 by jono_misfit, on Flickr they didnt clean the edges up much before welding the turrets in. clean back a bit more 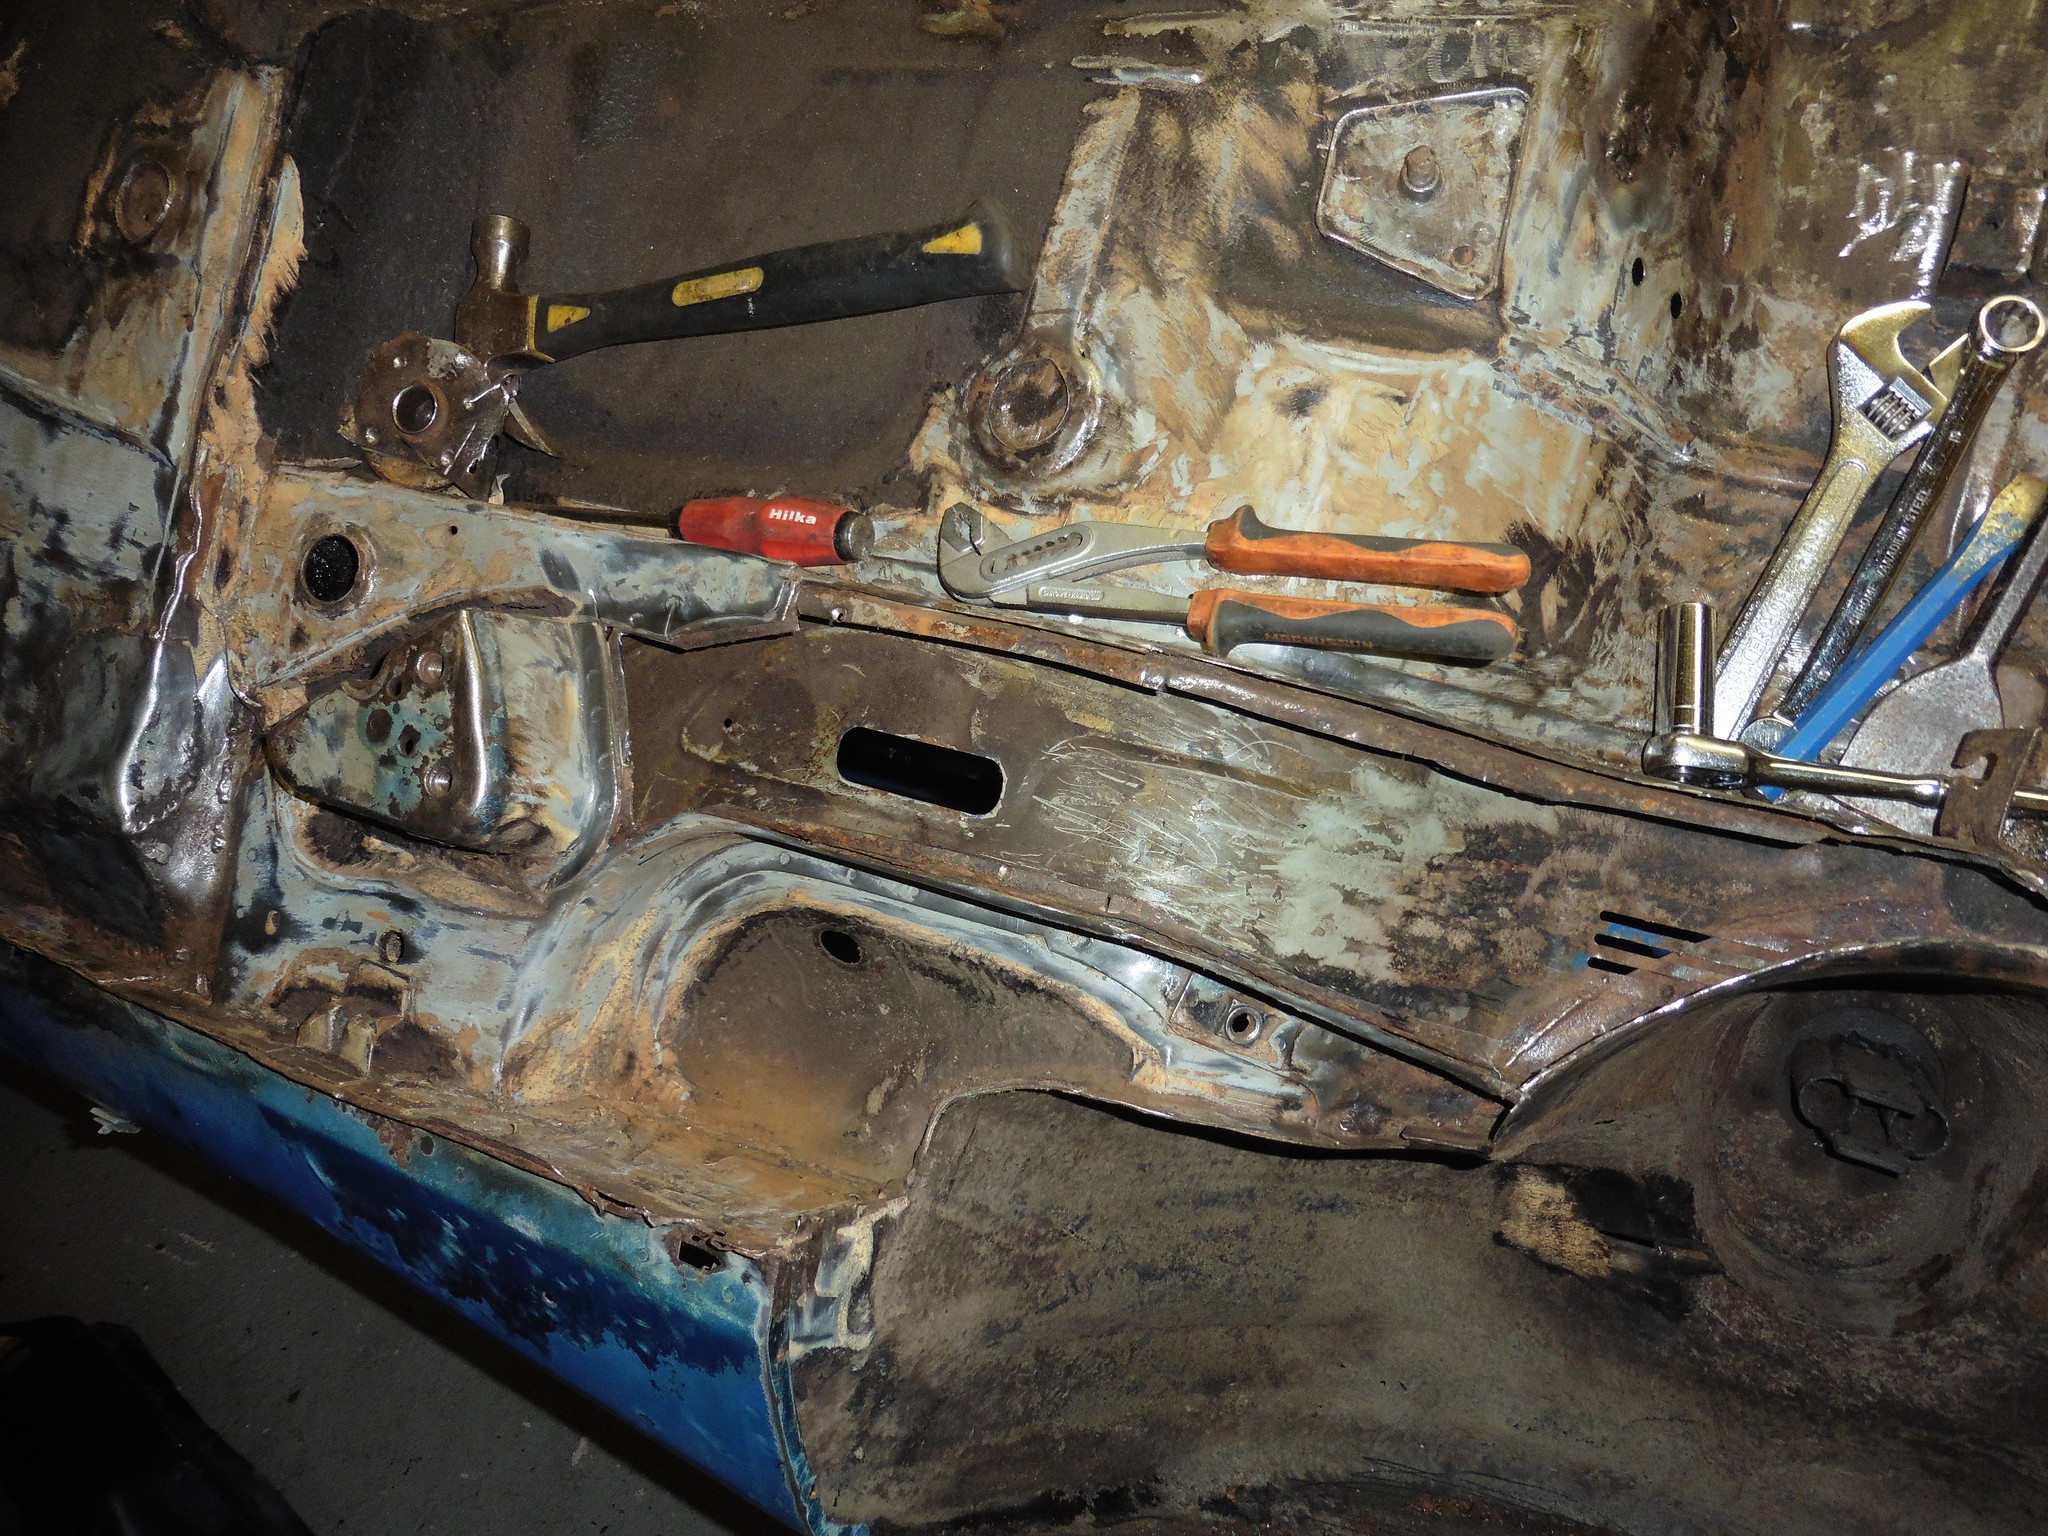 P1020125 P1020125 by jono_misfit, on Flickr nothing else for it. Drill drill, grind grind. Half the chassis leg out. 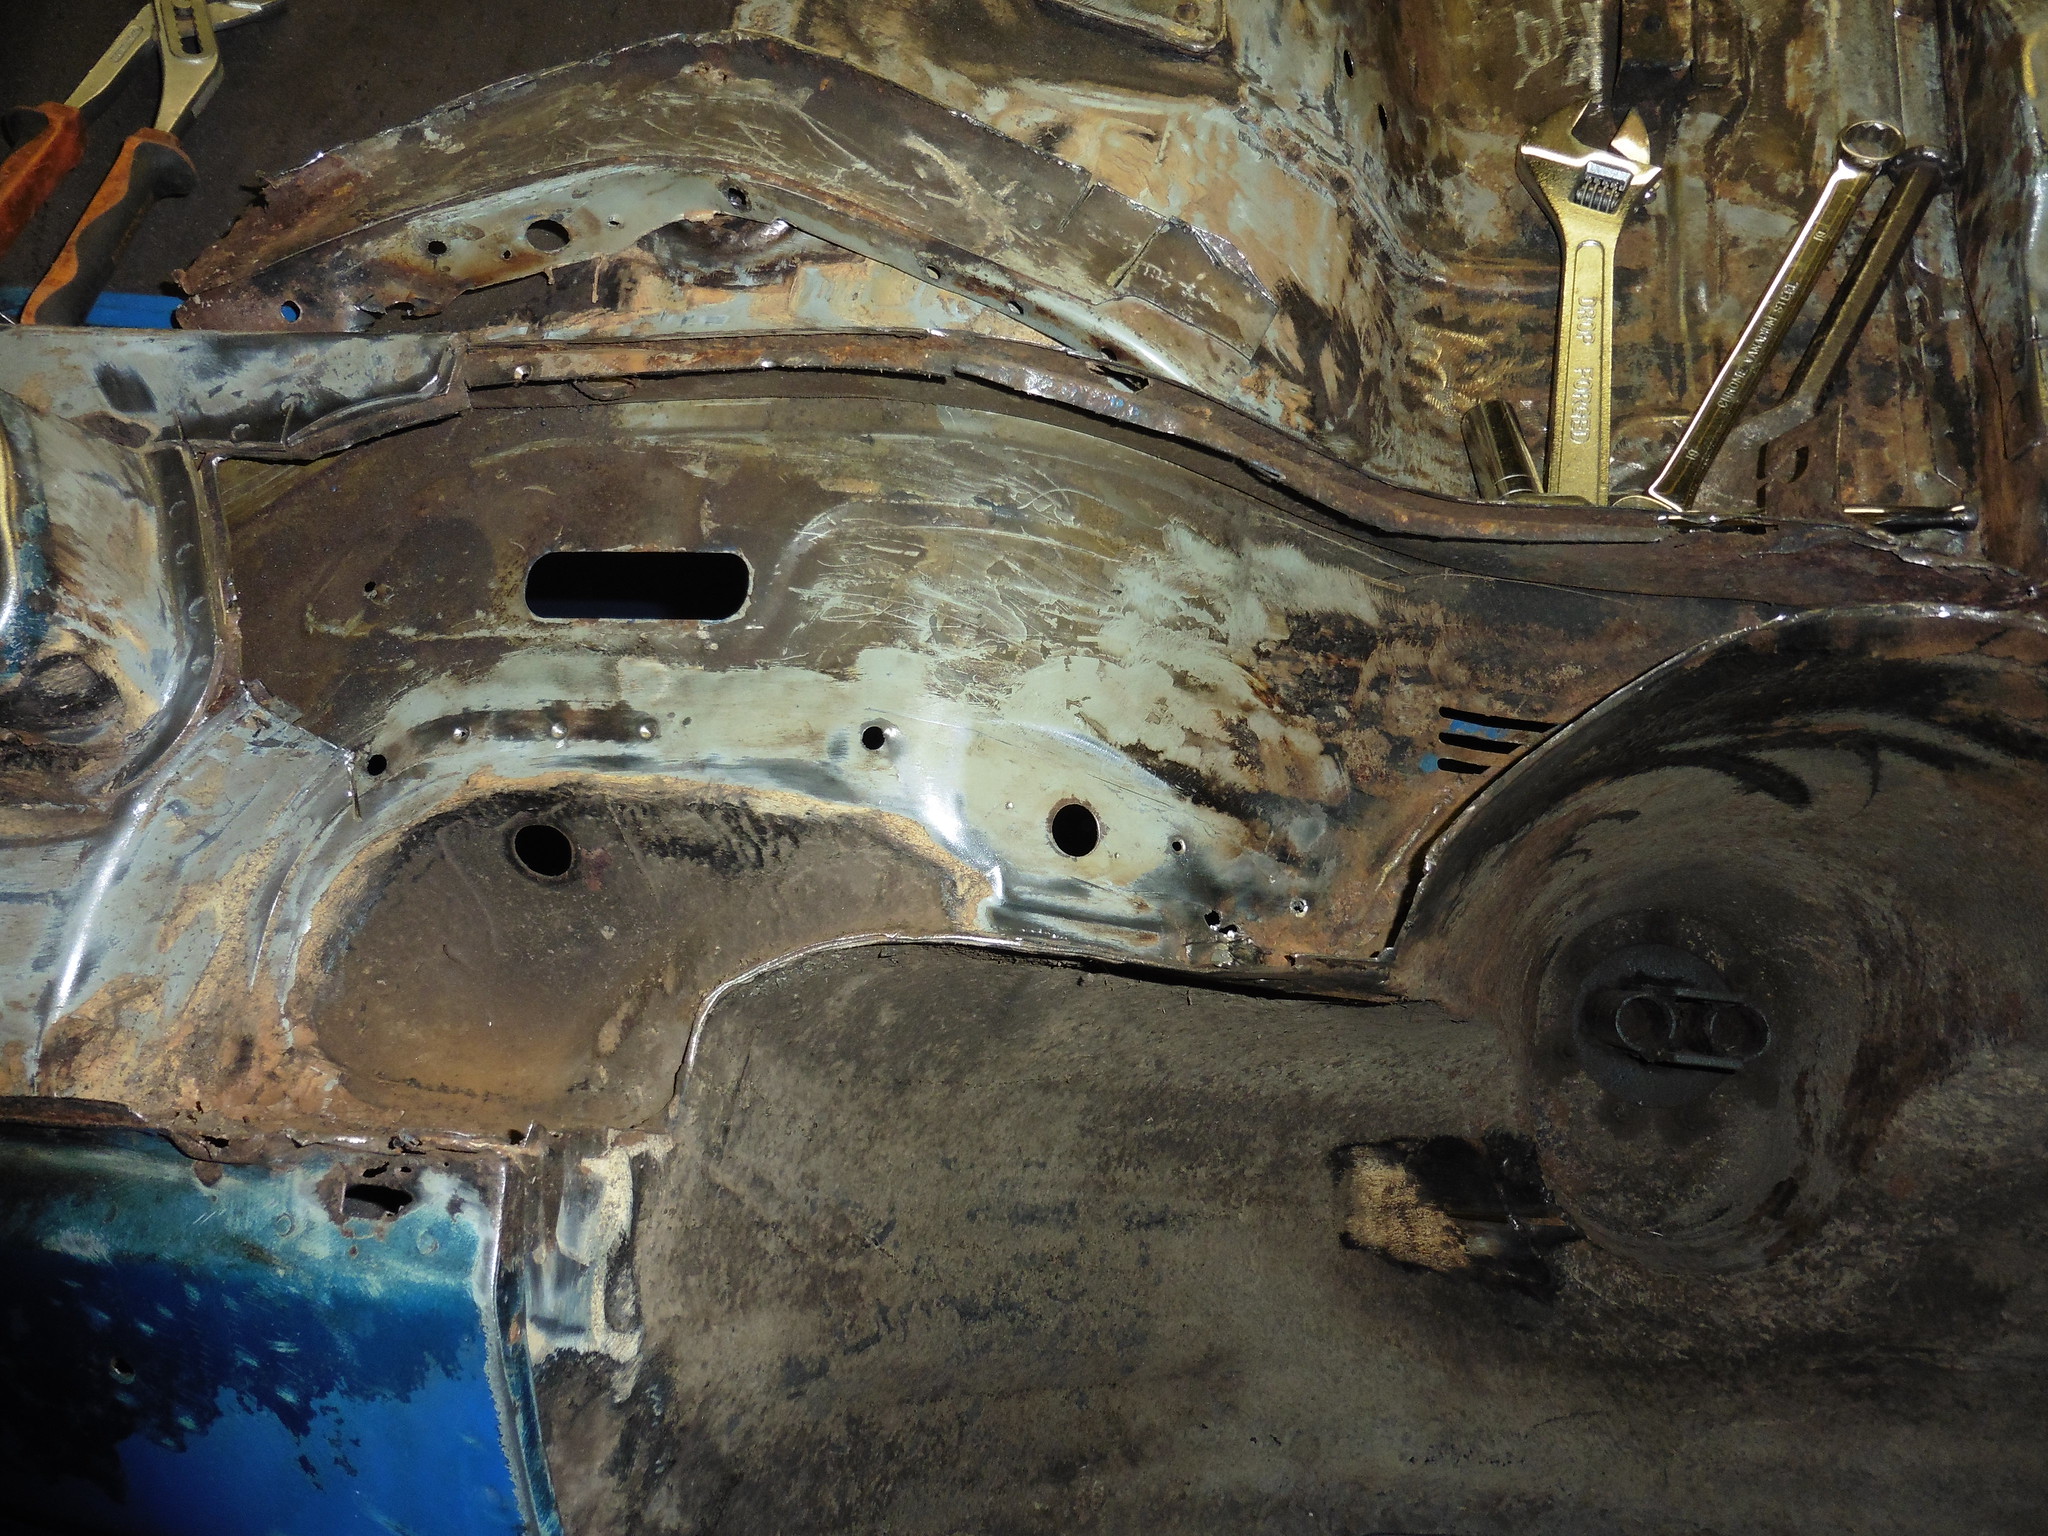 P1020126 P1020126 by jono_misfit, on Flickr its a hefty lump 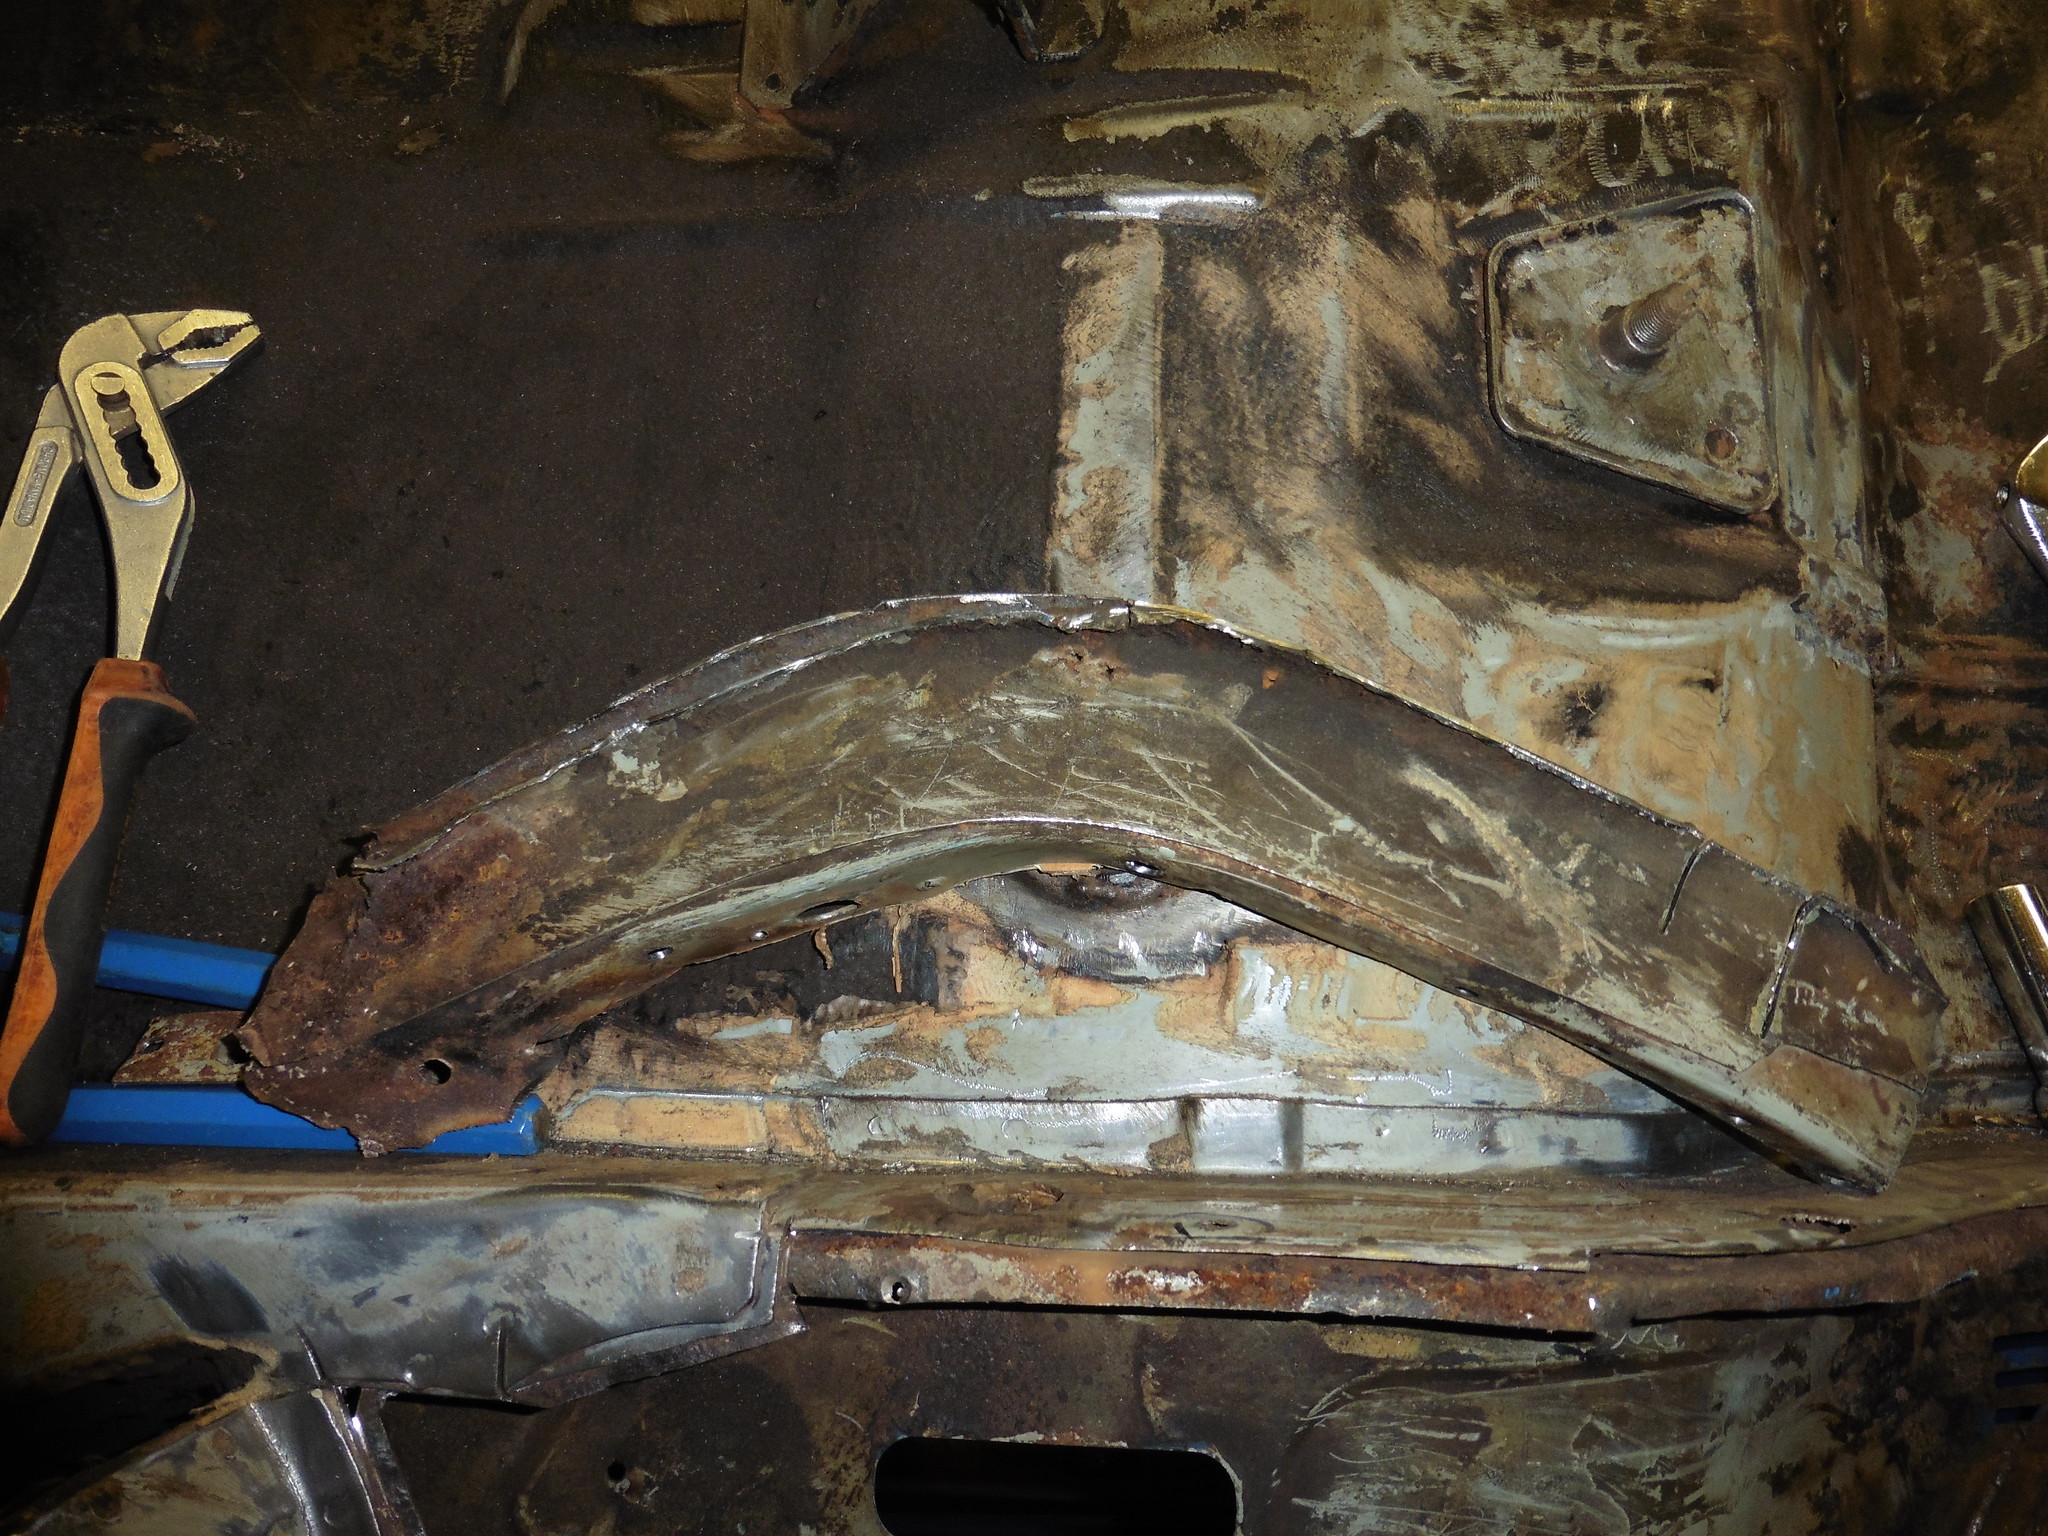 P1020127 P1020127 by jono_misfit, on Flickr and this is why i've removed it all. packed solid with rust. 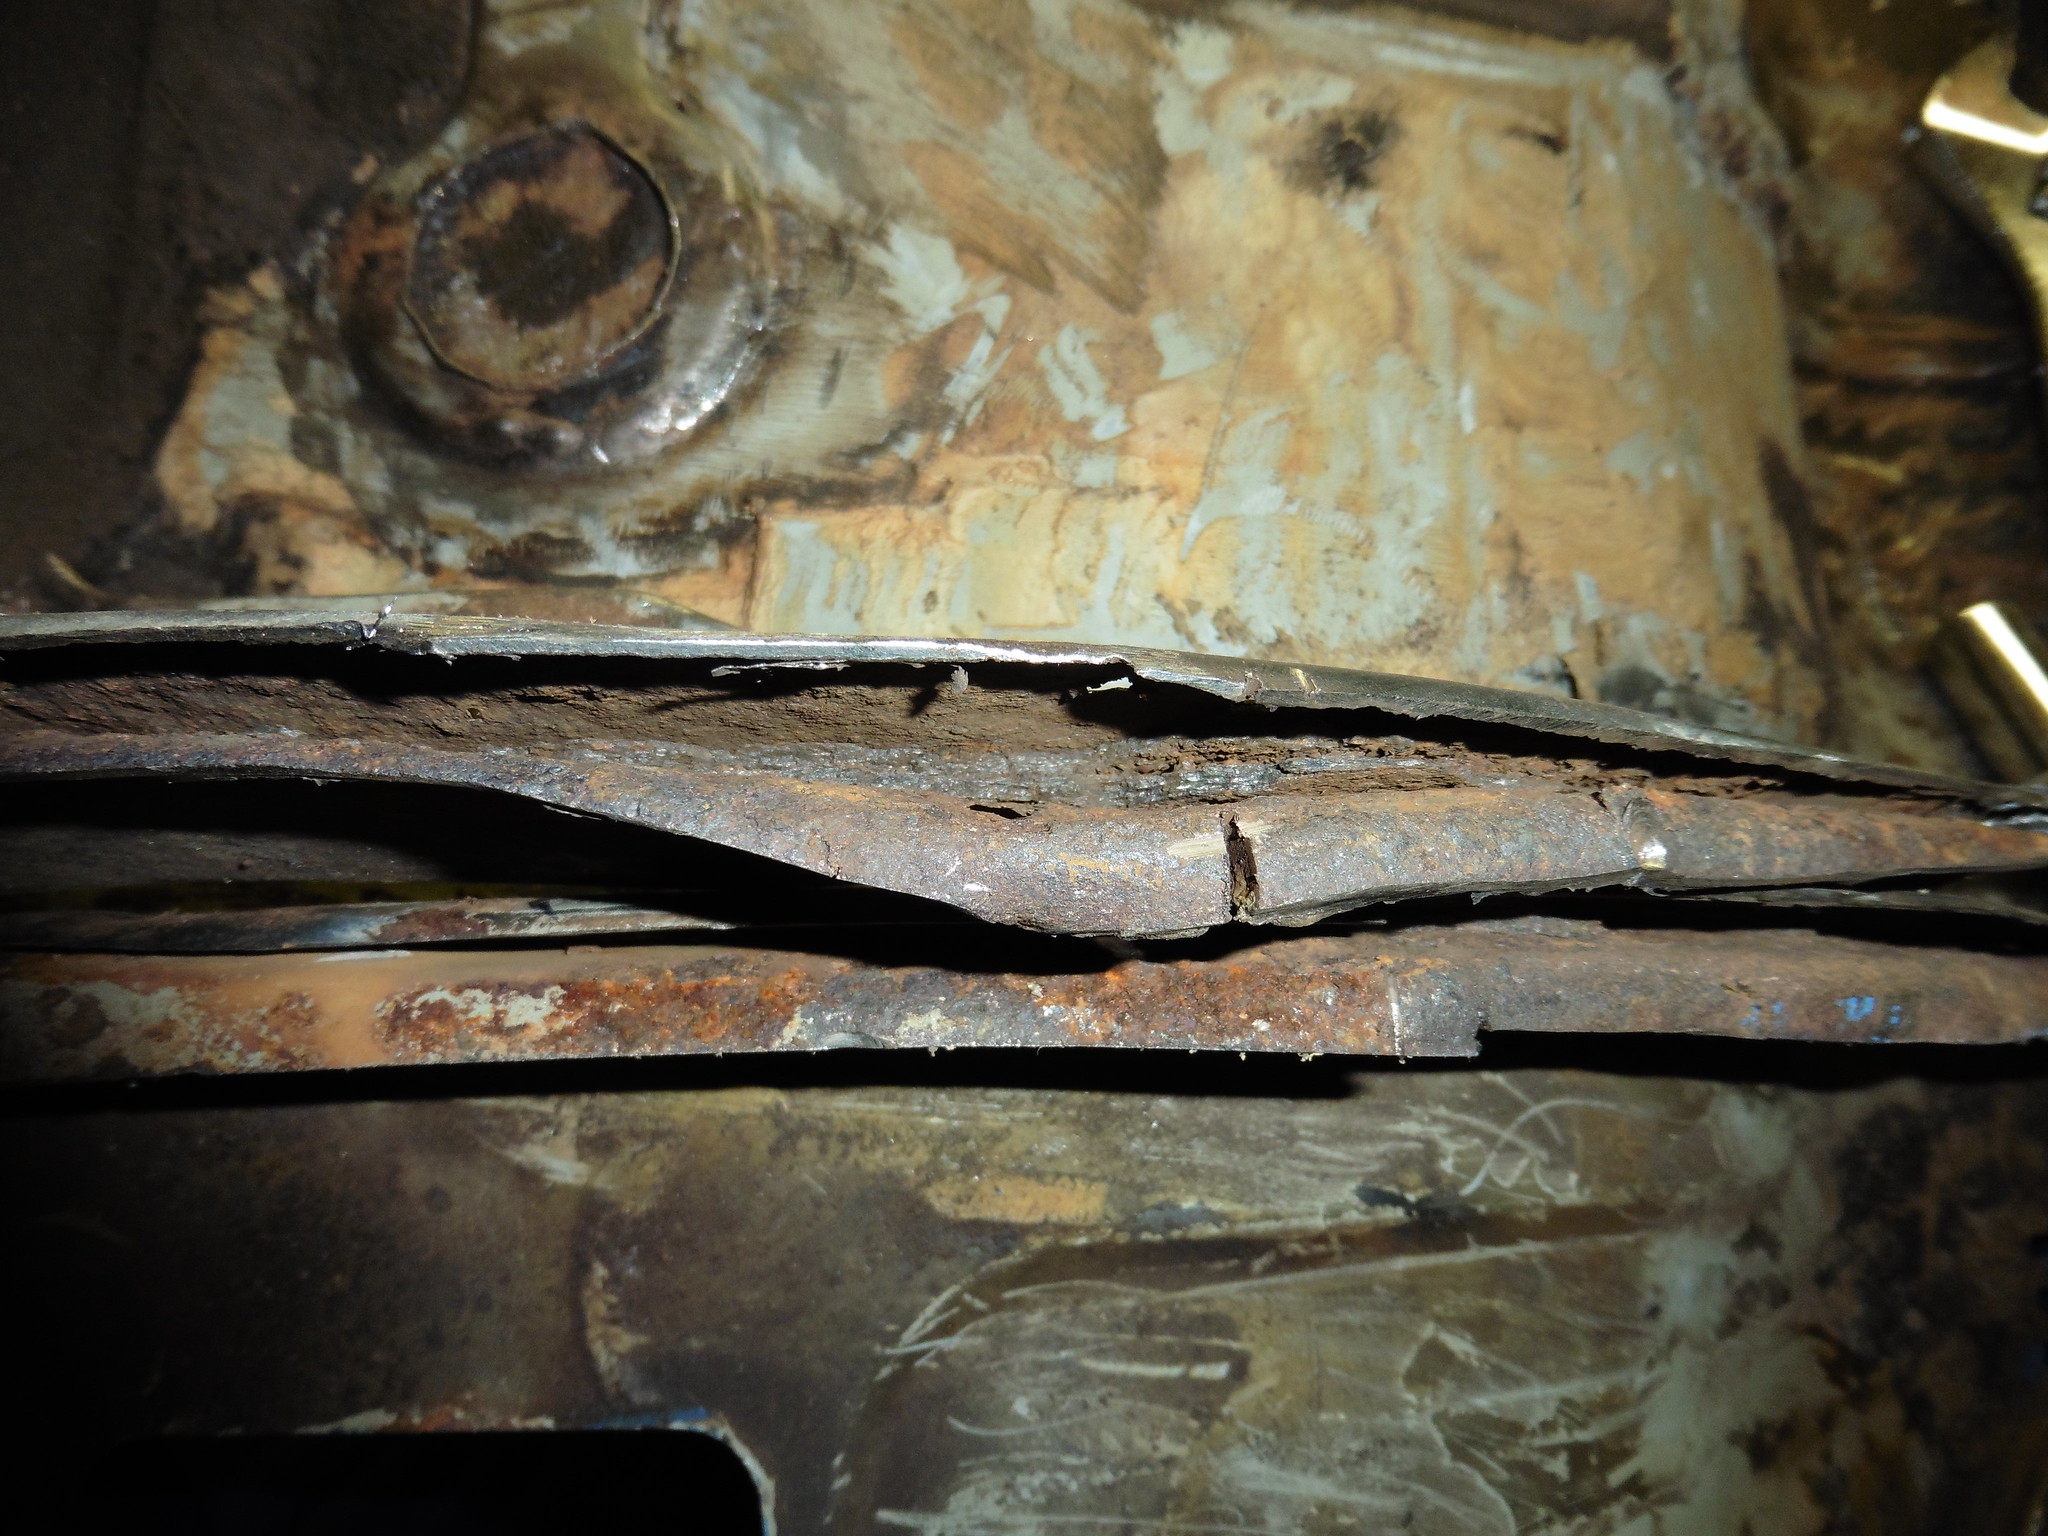 P1020128 P1020128 by jono_misfit, on Flickr in for a penny....  P1020129 P1020129 by jono_misfit, on Flickr this side is in a similar condition  P1020130 P1020130 by jono_misfit, on Flickr it needs dressing / cleaning back, but what remains is solid now. 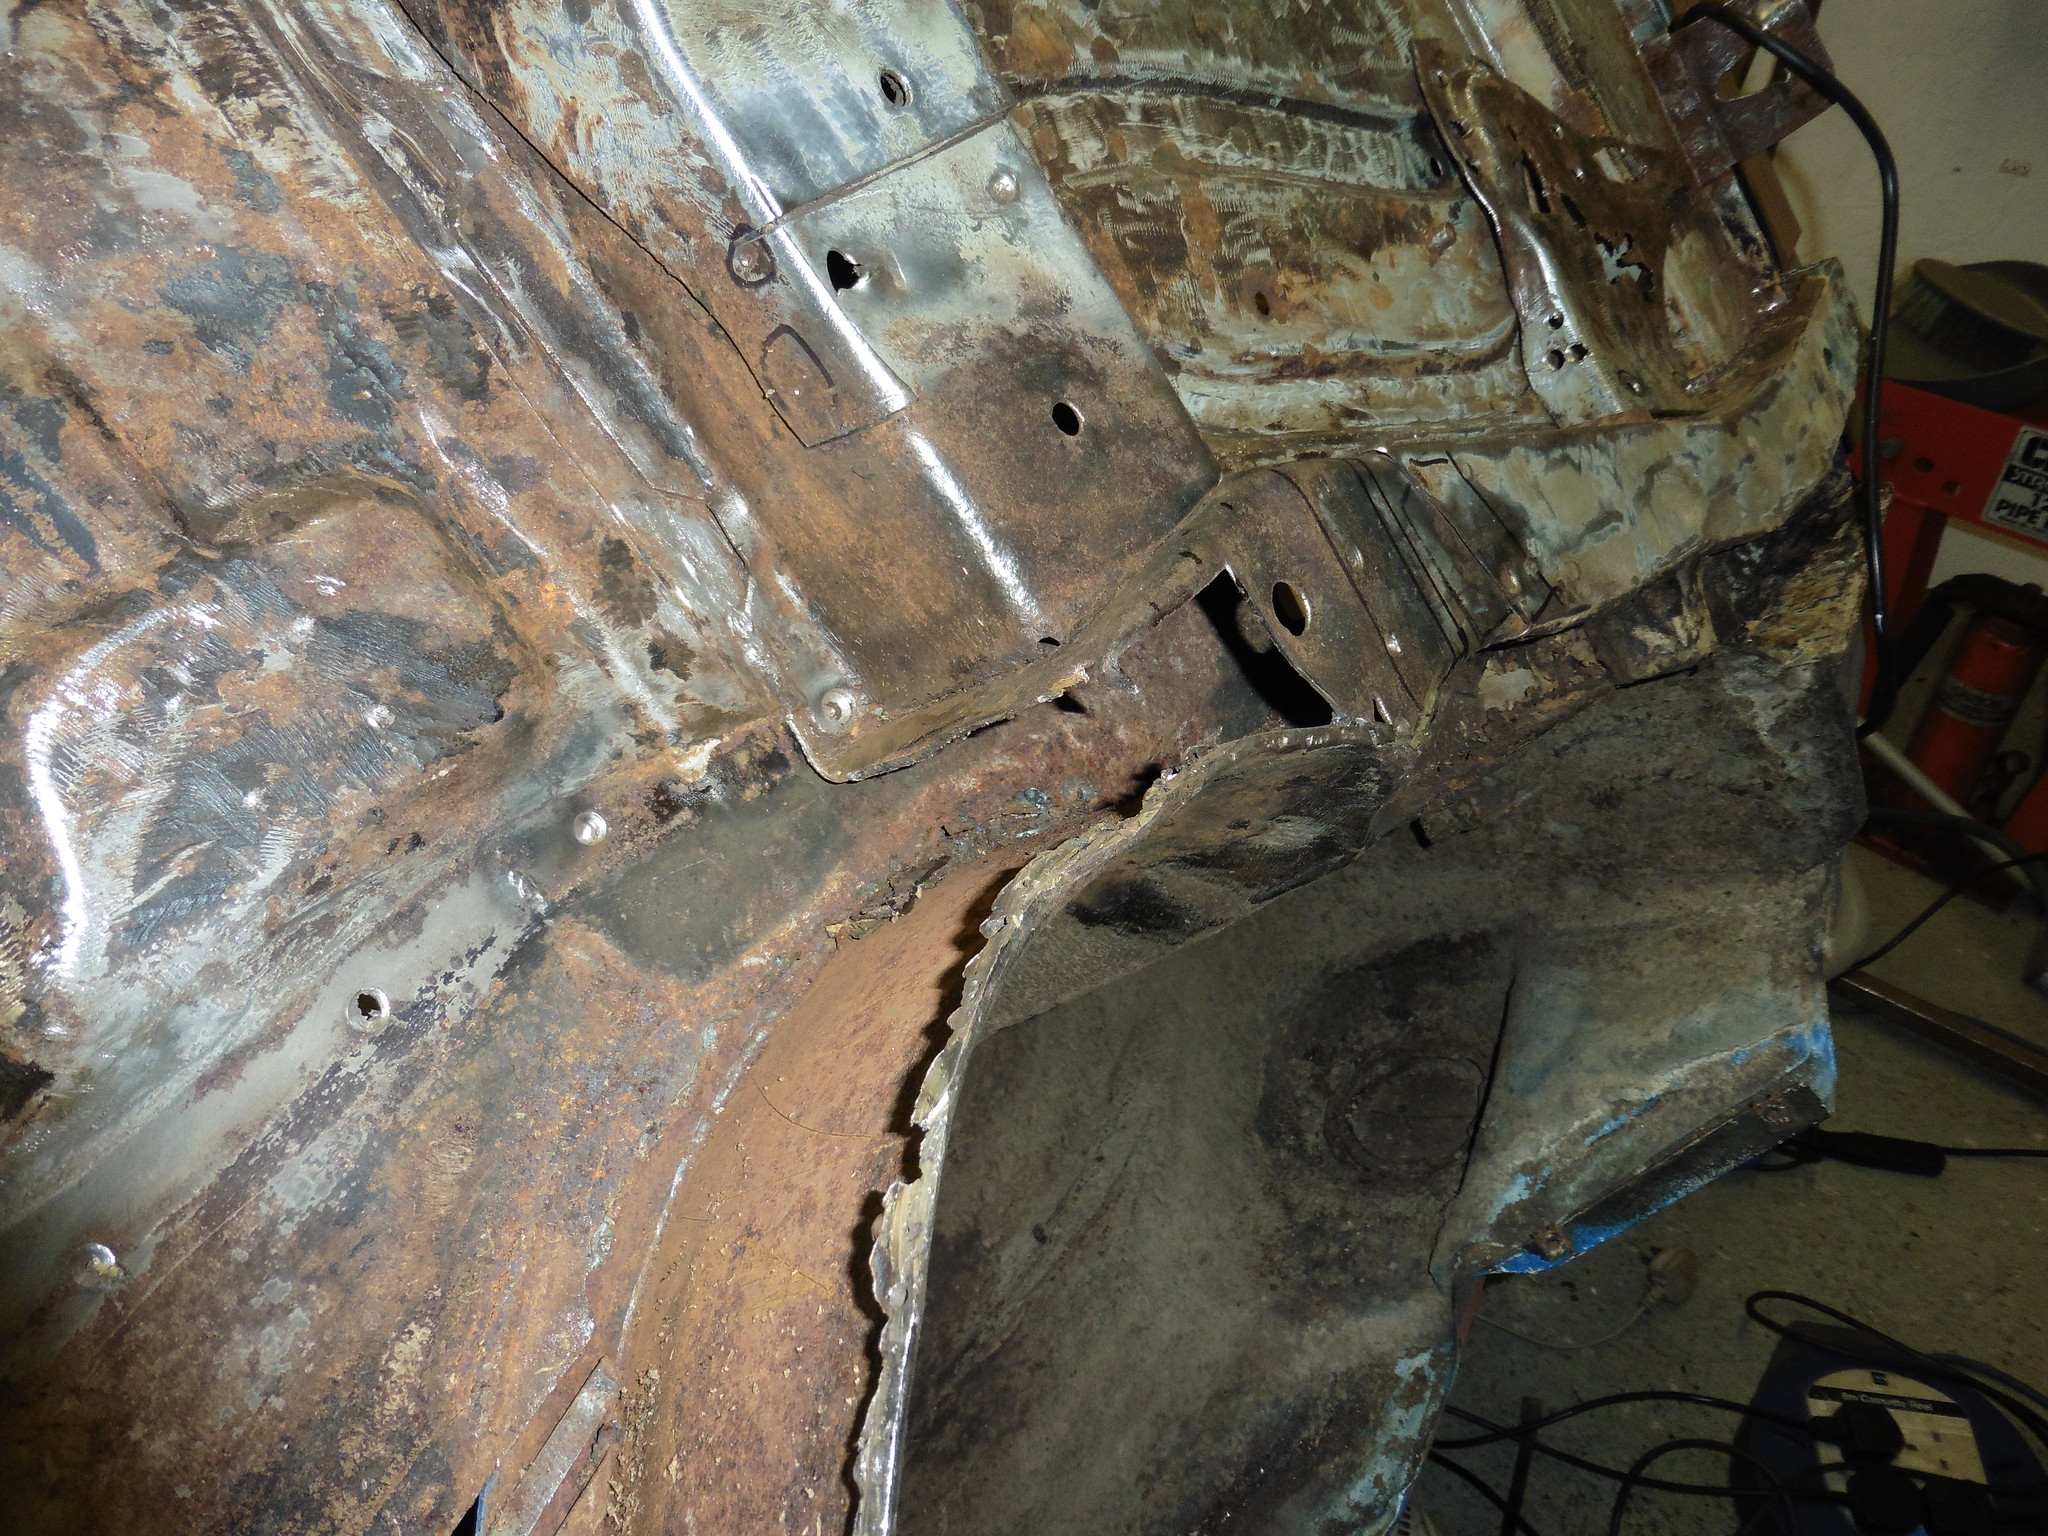 P1020131 P1020131 by jono_misfit, on Flickr i forgot to take any pics for a bit. I removed the inner skin from under the suspension mount. I'll trim the new panel so this slides under then I can plug weld to it. Wizzed round everything with the grinder, power file, twist knott wire brush, and some sandpaper. Surfaces all cleaned up and rust inhibited. then primed. Electrox super zinc paint anywhere that wont see a weld (dark grey), and etchweld anywhere that will be welded (light grey). this should hopefully protect it a bit.  P1020132 P1020132 by jono_misfit, on Flickr 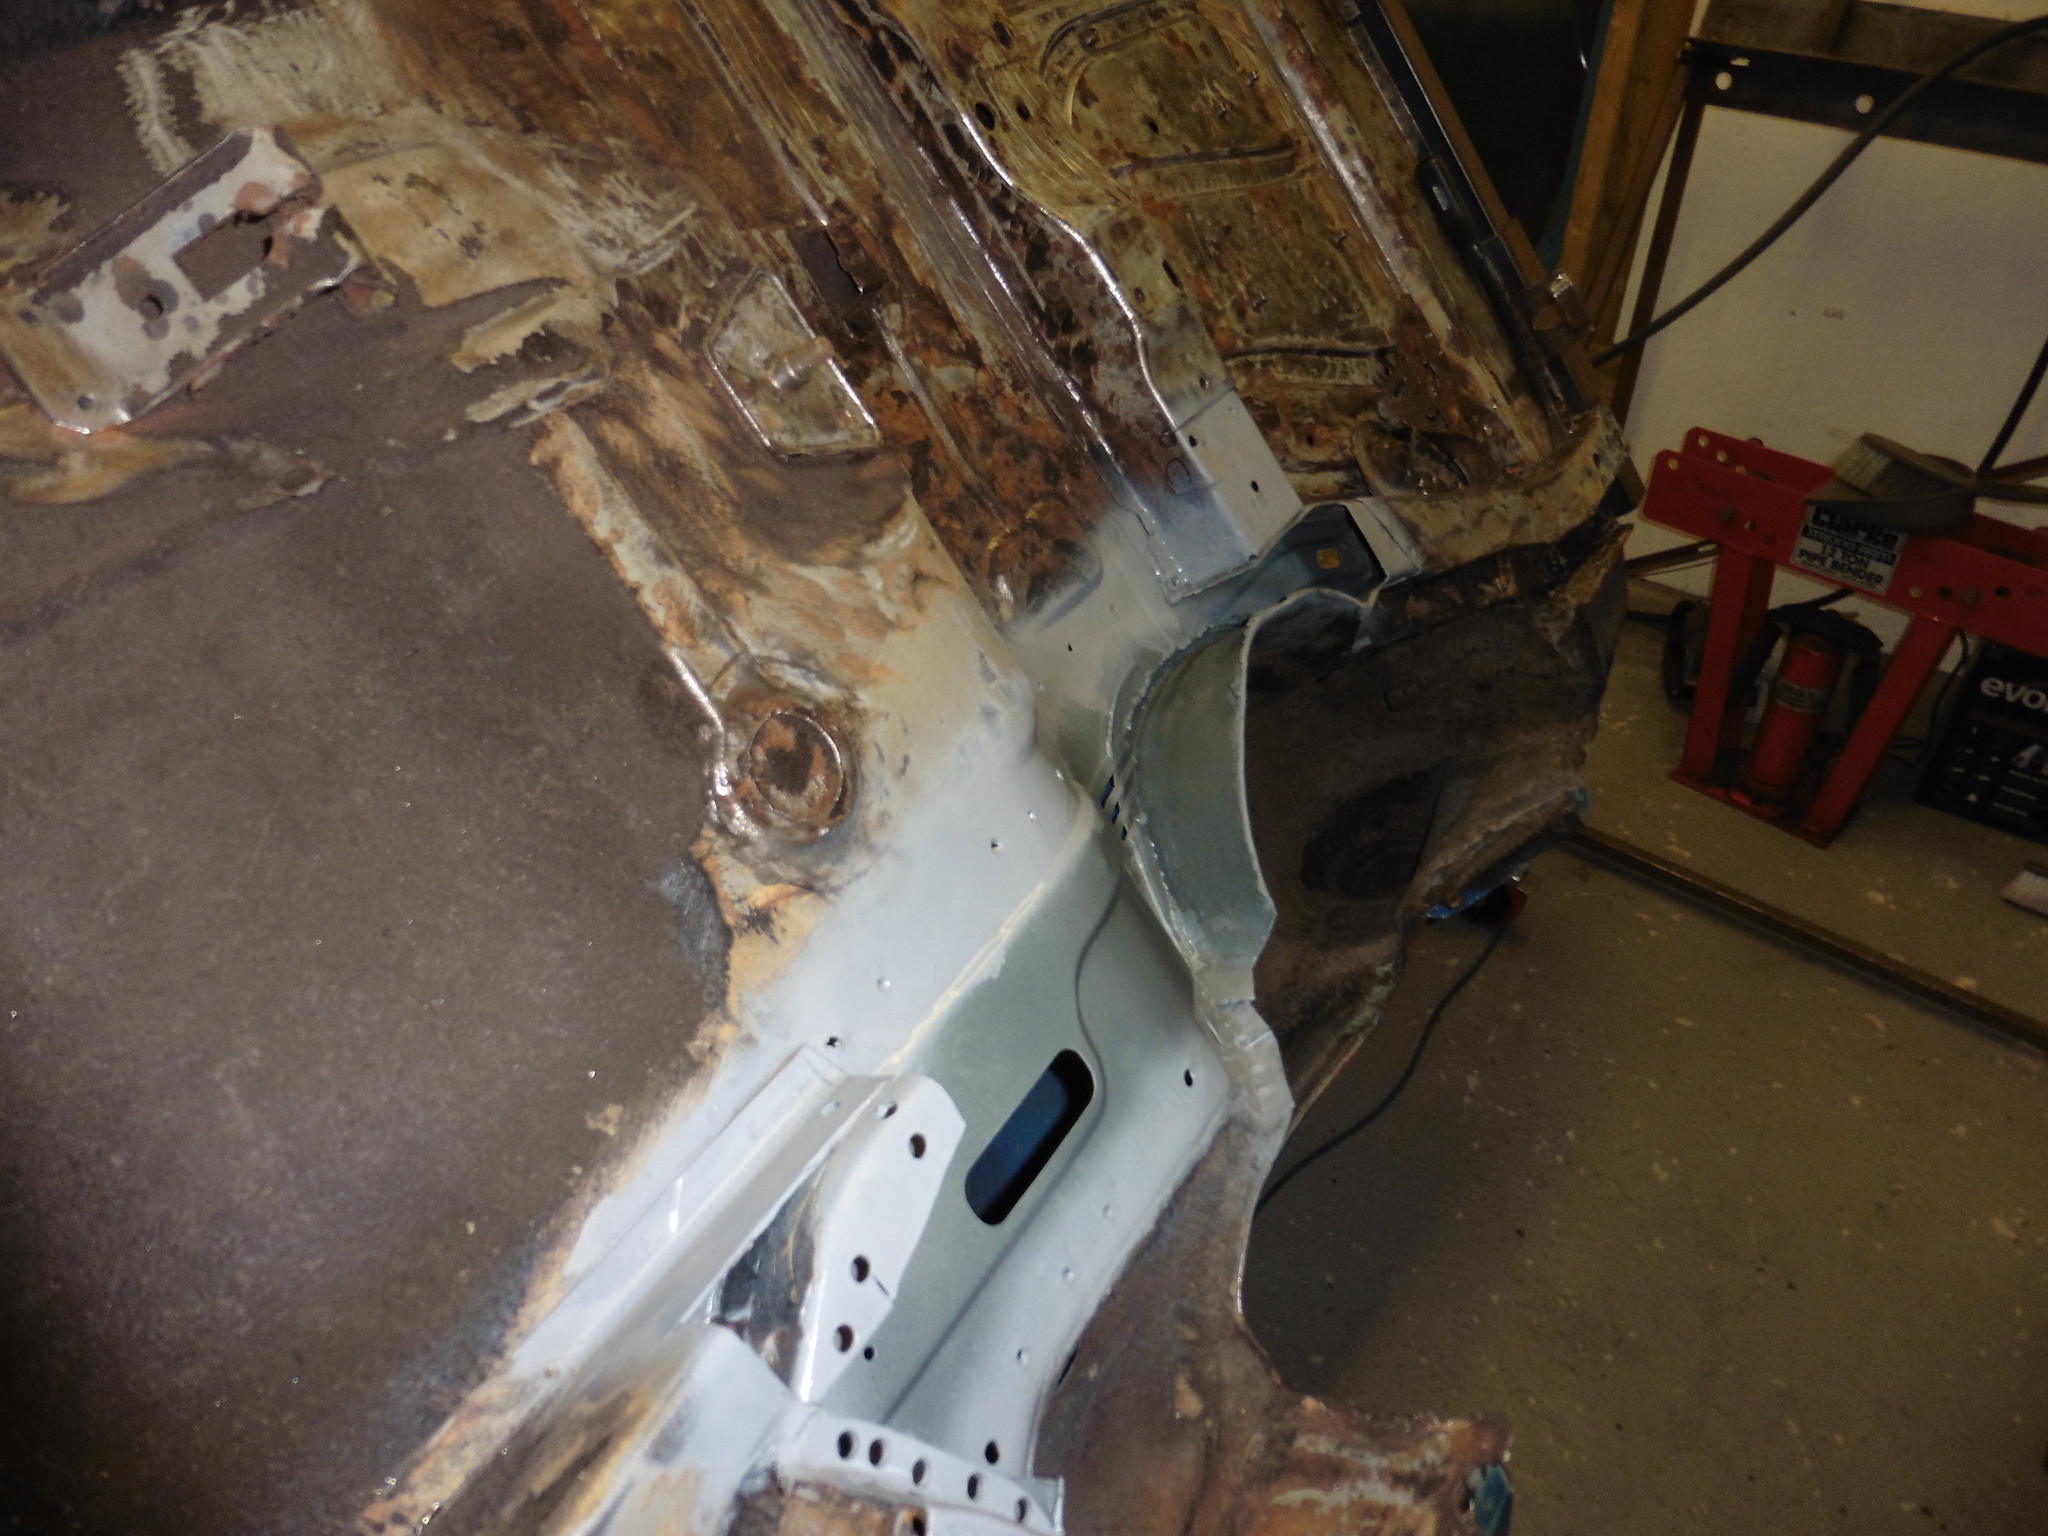 P1020133 P1020133 by jono_misfit, on Flickr cleaned back the locating boss for the rear beam and etch primed it ready for re-fitting. 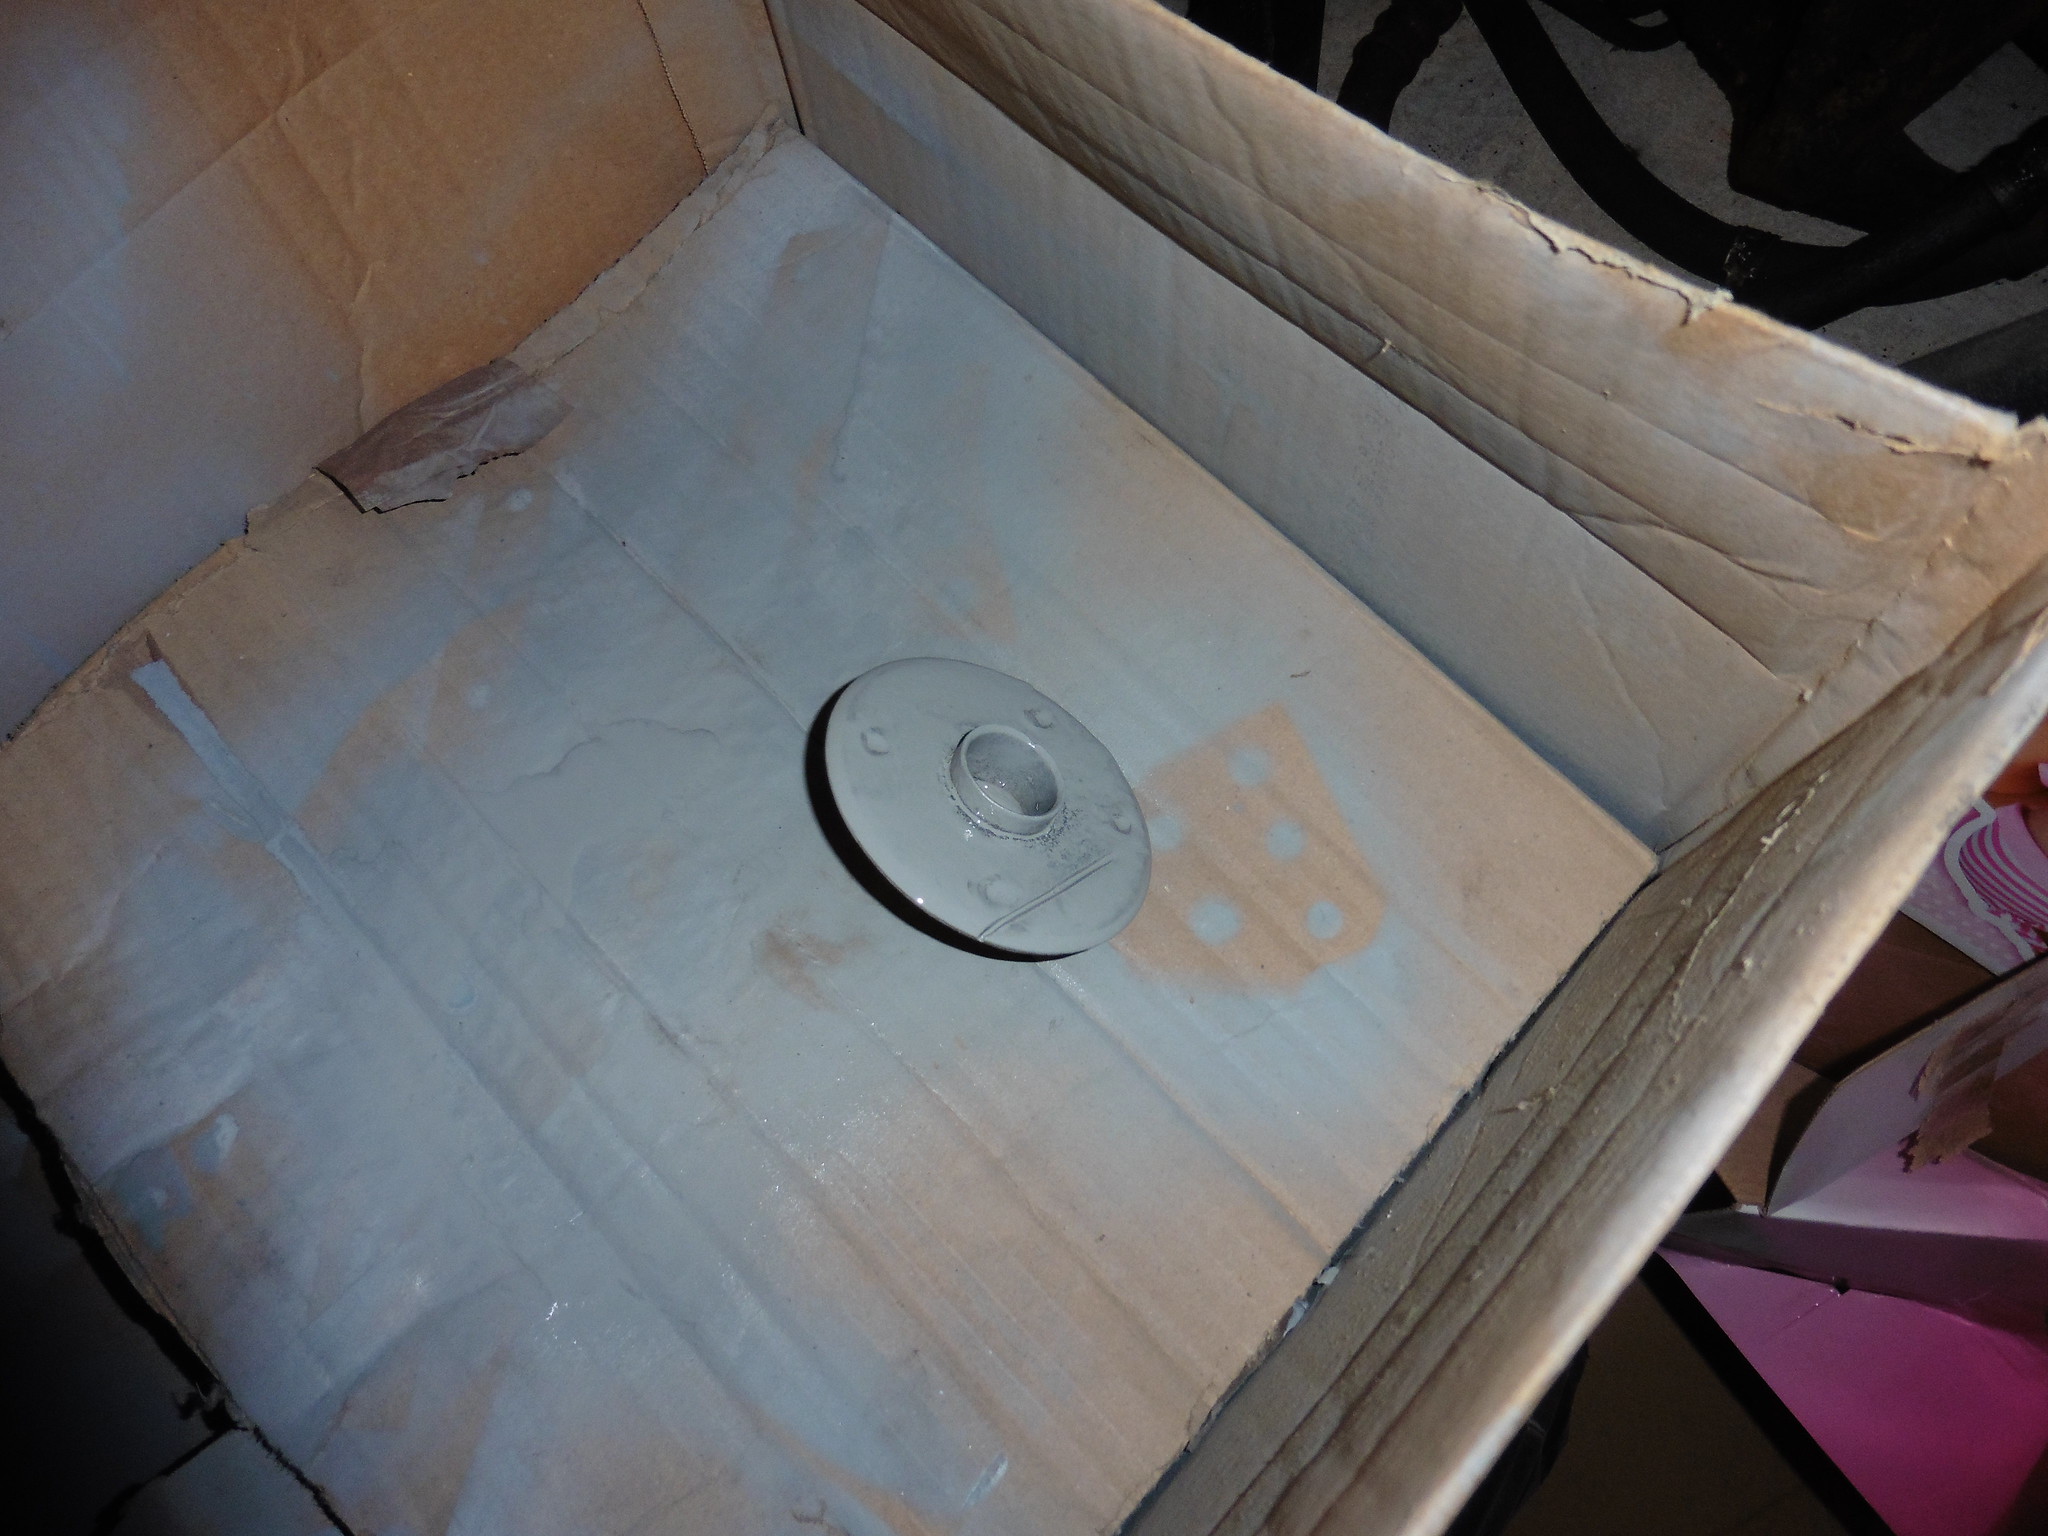 P1020134 P1020134 by jono_misfit, on Flickr I did a bit more cleaning up of underseal / sound deadening but didnt take any pics. The best bits were the rivnuts that had been fitted through the sound deadening tar sheet.... which just pulled out. That was it on the escort for the week. |
| |
|
|
|
|
|
|
|
Feb 11, 2019 11:54:31 GMT
|
crikey! putting my thoughts onto keyboard (not always a good idea) but following this thread via my bookmark there is this weird dichotomy. on one hand you think of escort cosworth, you think motorsport, exotic, you think powerful, rare, bona fide future classic. then you flip a 20 year old one over on a rotisserie, stripped bare (metaphorically and literally) and it becomes just another semi rusty 3 door 90s hatchback. no different to a 200 quid escort LX in how well it has lasted, or how much it costs to restore. weird isnt it, how we assign value to things. continue to be impressed with the thorough digging and quality of repairs  existential interlude over. |
| |
Last Edit: Feb 11, 2019 11:55:14 GMT by darrenh
|
|
|
|
|
Feb 11, 2019 18:16:26 GMT
|
|
Wow sierras in drag really do rot like a good Ford should
Great work
|
| |
Last Edit: Feb 11, 2019 18:17:27 GMT by fordperv
|
|
|
|
|
Feb 11, 2019 20:36:04 GMT
|
Could be worse. My 92 RS had rear arches fitted over the originals when they started rusting. So the bodyman (butcher) hammered the quarter panel to flush fit the repair. With a firemans axe I think. Possible a chainsaw?? He then snot tacked the repairs on and applied a bucket of filler! Classy.  DSC_2360 DSC_2360 by quickrack, on Flickr  DSC_2366 DSC_2366 by quickrack, on Flickr |
| |
Last Edit: Feb 11, 2019 20:43:18 GMT by Deleted
|
|
jonomisfit
Club Retro Rides Member
Posts: 1,790
Club RR Member Number: 49
|
|
Feb 11, 2019 20:56:17 GMT
|
|
Escort cosworths rust just as badly as any 90s ford, likely worse in many regards as when you peel them back they really are a bitsa. Quite a few structural panels don't join as you would expect and just have globs of filler hiding the miss match.
The forum for them is full of repair threads, but its a closed forum and you rarely threads for them on open forums. The state some get into is horrific and make mine look pretty OK.
I think a lot of the double skinning doesn't have good electrophoretic coating between the layers, hence the rust. Definitely seems the case with the rear legs, which are the same as any sierra, all of which are horrific for rusting. If you ever see a sierra with a patched rear spring hanger / leg, then the whole leg is likely in the state mine was.
Thankfully the arches look pretty clean on mine and don't appear to have been bodged like that!
|
| |
|
|
samta22
Club Retro Rides Member
Stuck in once more...
Posts: 1,276  Club RR Member Number: 32
|
|
|
|
Could be worse. My 92 RS had rear arches fitted over the originals when they started rusting. So the bodyman (butcher) hammered the quarter panel to flush fit the repair. With a firemans axe I think. Possible a chainsaw?? He then snot tacked the repairs on and applied a bucket of filler! Classy.  DSC_2360 DSC_2360 by quickrack, on Flickr  DSC_2366 DSC_2366 by quickrack, on Flickr Perhaps it was the same guy who did my Celica arches in exactly the same way  . How and why anyone thinks that is an acceptable approach to repair baffles me. I guess body shops are up against it time and cost wise so it's a case of getting it done the fastest and cheapest way possible. Great to see the progress on the escort, even it is a bit of a horror story in places. Bit by bit is the only way to go and it will soon come together. Keep up the good work. |
| |
'37 Austin 7 '56 Austin A35 '58 Austin A35 '65 Triumph Herald 12/50 '69 MGB GT '74 MGB GT V8'73 TA22 Toyota Celica restoration'95 Mercedes SL320 '04 MGTF 135 'Cool Blue' (Mrs' Baby) '05 Land Rover Discovery 3 V8 '67 Abarth 595 (Mrs' runabout) '18 Disco V |
|
|
|
|
Feb 12, 2019 11:28:28 GMT
|
Could be worse. My 92 RS had rear arches fitted over the originals when they started rusting. So the bodyman (butcher) hammered the quarter panel to flush fit the repair. With a firemans axe I think. Possible a chainsaw?? He then snot tacked the repairs on and applied a bucket of filler! Classy.  DSC_2360 DSC_2360 by quickrack, on Flickr  DSC_2366 DSC_2366 by quickrack, on Flickr Perhaps it was the same guy who did my Celica arches in exactly the same way  . How and why anyone thinks that is an acceptable approach to repair baffles me. I guess body shops are up against it time and cost wise so it's a case of getting it done the fastest and cheapest way possible. Great to see the progress on the escort, even it is a bit of a horror story in places. Bit by bit is the only way to go and it will soon come together. Keep up the good work. Time & Cost = You do have a choice here - either pay to have it done properly - or have it bodged - it's the consumer / vehicle owner that funds both ends of the market - thing is though at the bodging end of the market if they just stick a plate over the perforated rust ingested panels on the exterior of the car and disguise it with filler & paint what do think they have done with any rust perforated / rust effected panels on the underside of the car - it's not worth thinking about and let me assure you 'Professional Bodgers' don't ! Has you were Jon |
| |
Last Edit: Feb 12, 2019 11:29:22 GMT by Deleted
|
|
Wilk
Part of things
 
Posts: 528 
|
|
Feb 12, 2019 21:18:08 GMT
|
Paying good money to have it repaired Properly doesn't always get the right results I had a body man price me for 'doing it right'. To basically cut out the rusted section, make a copy New bit, weld it in factory so you couldn't tell it'd been touched. I dropped the car off Wednesday and called in Friday on way home from work. The car was up in the air so I snuck underneath. Something didn't look right. There were no factory indents in the new sections. I went home and checked out the areas in photos I'd taken previously Needless to say I called a halt and brought the car home. I then removed the repair section to find the original rusted panel still underneath This was a well trusted reputable shop and I'd seen the work then done on a few cars. I won't be going back or recommending   So I had a go myself...  |
| |
If it can be fixed with a hammer, then it must be an electrical fault
|
|
|
|
|
Feb 12, 2019 21:37:23 GMT
|
|
A good restorer will always allow his doors to be open to his / her clients - he / she will also take documented images of the work in progress so that the client is provided with a virtually step by step process of the work that is undertaken to the vehicle has they have nothing to hide - any restorer / bodyshop that cannot be bothered to undertake this simple task is surely not worthy of the work in the first place. But I see so many owners fail it's quite simple - get what you want done in writing even if it just an e mail then there is no argument on your expectations - more to the point you are well within your rights to refuse to pay for the work if it's not what you agreed in writing in the first place
Back again has you were Jon
|
| |
|
|
mk2cossie
Club Retro Rides Member
Posts: 3,063  Club RR Member Number: 77
|
|
Feb 12, 2019 23:02:33 GMT
|
Now book marked, and shocked at the rusty horrors hidden in the double skinned parts  |
| |
|
|
|
|
|
Feb 13, 2019 10:37:37 GMT
|
|
That's twice now the @grumpynorthener has told you to get back to work! You'd best hop to it!
|
| |
|
|
jonomisfit
Club Retro Rides Member
Posts: 1,790
Club RR Member Number: 49
|
|
Feb 13, 2019 11:21:16 GMT
|
|
I know. I almost feel guilty for having a day job and not progressing it!
Possibly Sunday for some progress.
|
| |
|
|
|
|
|
Feb 13, 2019 12:49:38 GMT
|
|
We all have a weight slowing us down Jon but we can't have one without the other.
|
| |
|
|
jonomisfit
Club Retro Rides Member
Posts: 1,790
Club RR Member Number: 49
|
|
Feb 17, 2019 21:56:29 GMT
|
what a pain in the backside Chassis leg roughly in position 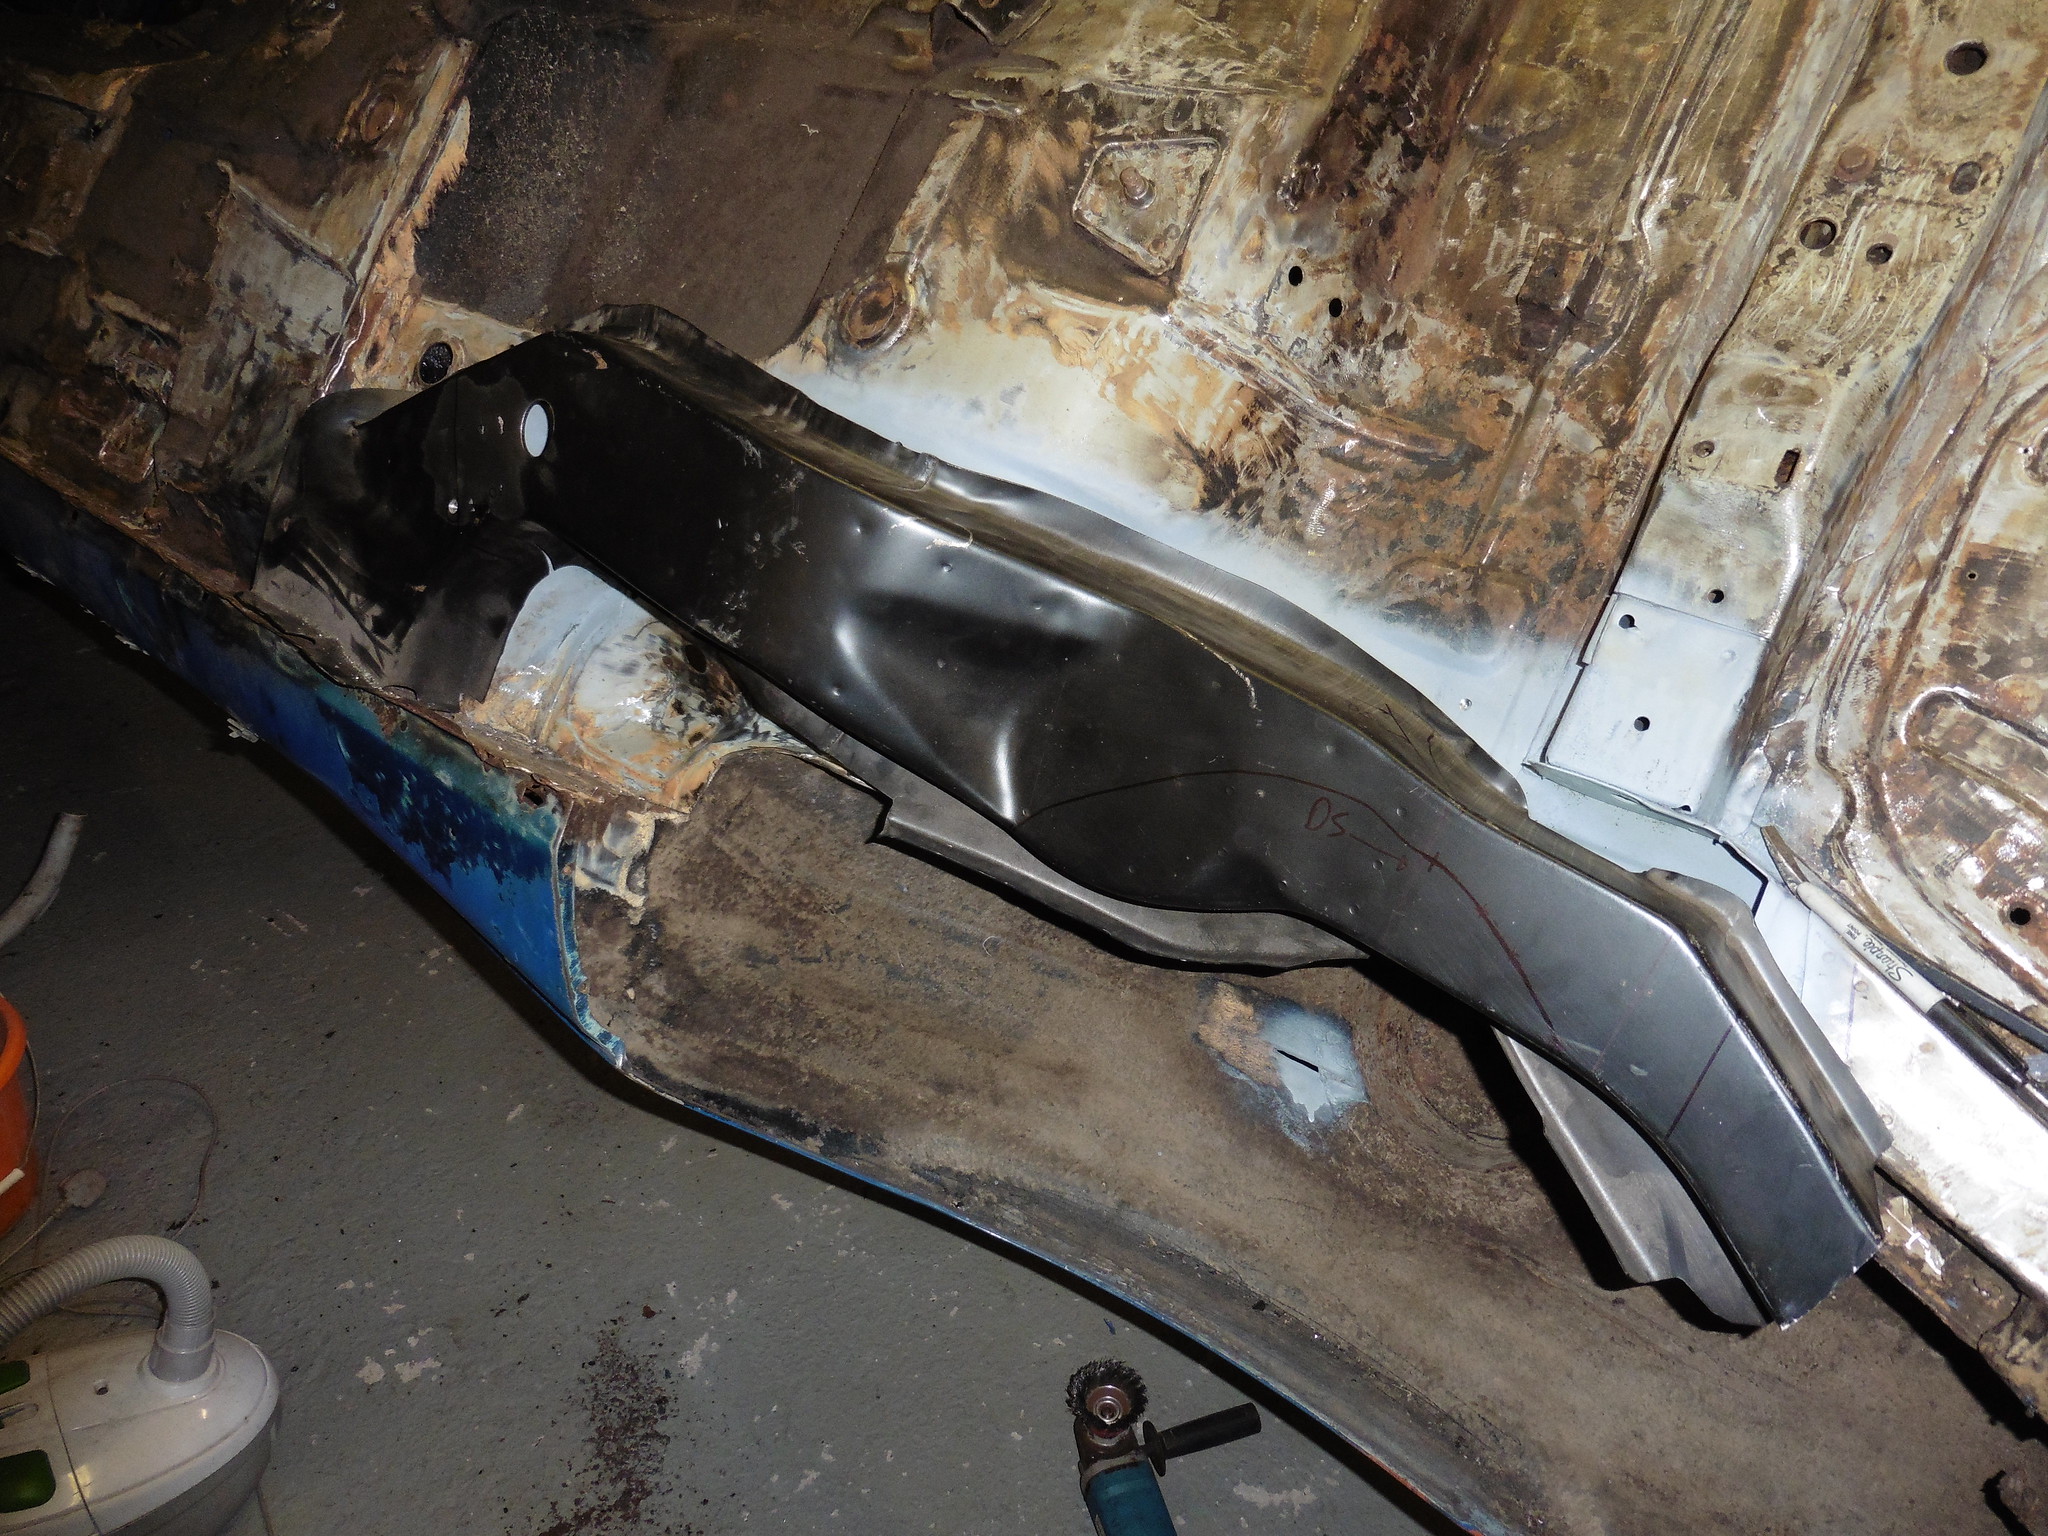 P1020138 P1020138 by jono_misfit, on Flickr and some initial trim lines  P1020139 P1020139 by jono_misfit, on Flickr some trimming 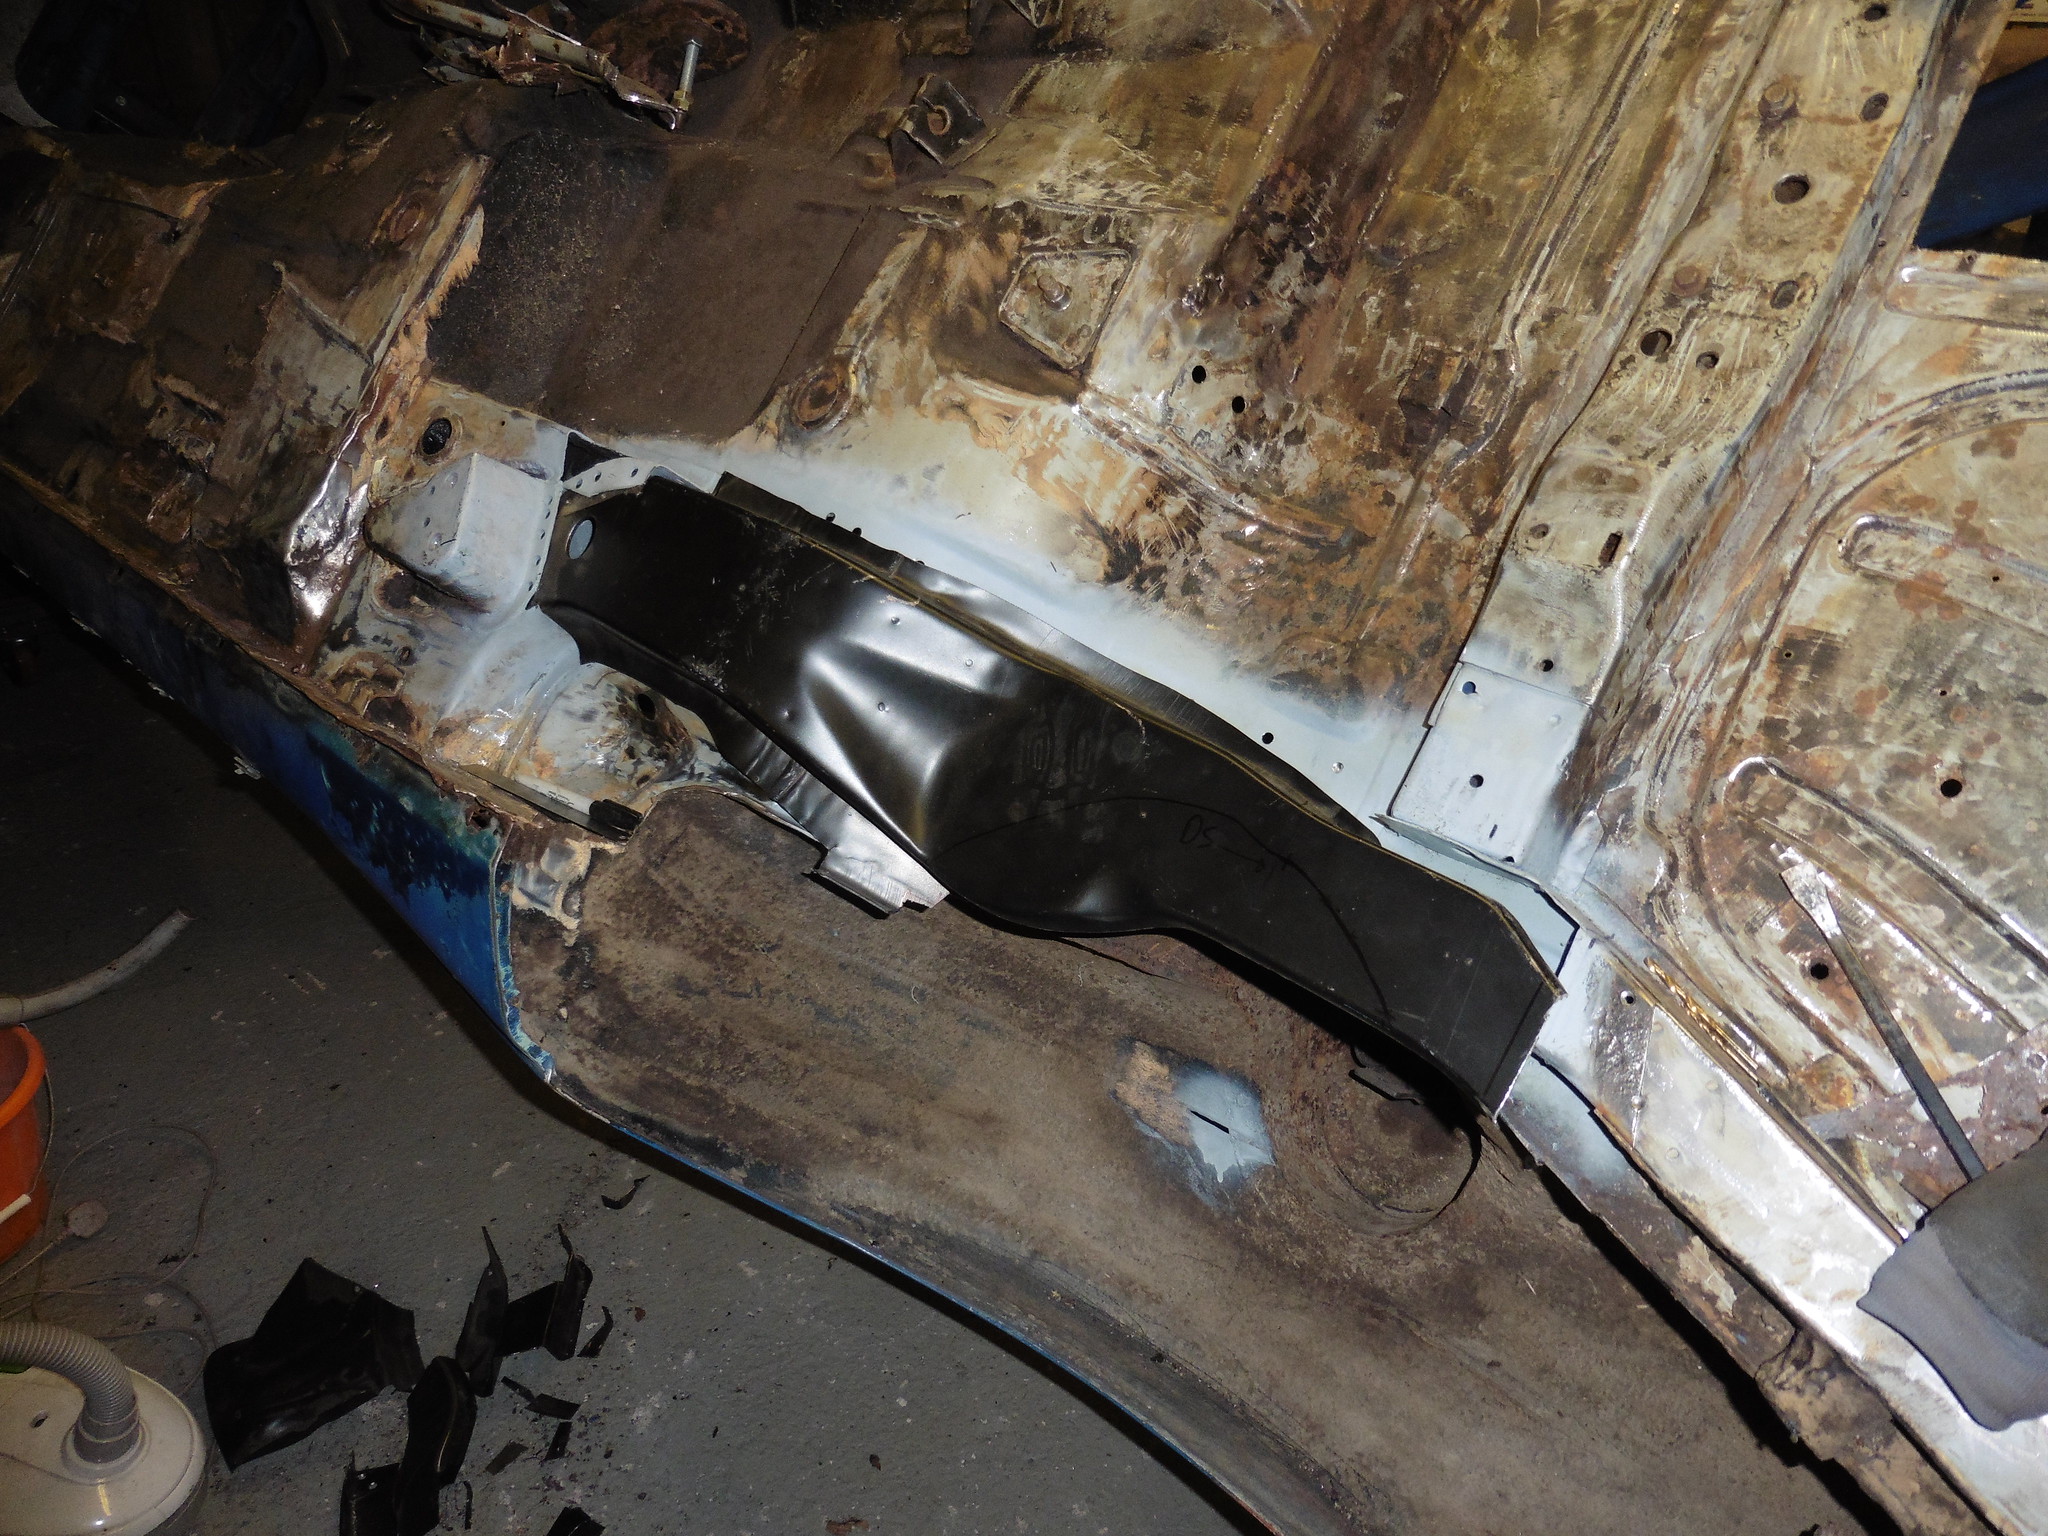 P1020140 P1020140 by jono_misfit, on Flickr some more trimming  P1020141 P1020141 by jono_misfit, on Flickr some more trimming 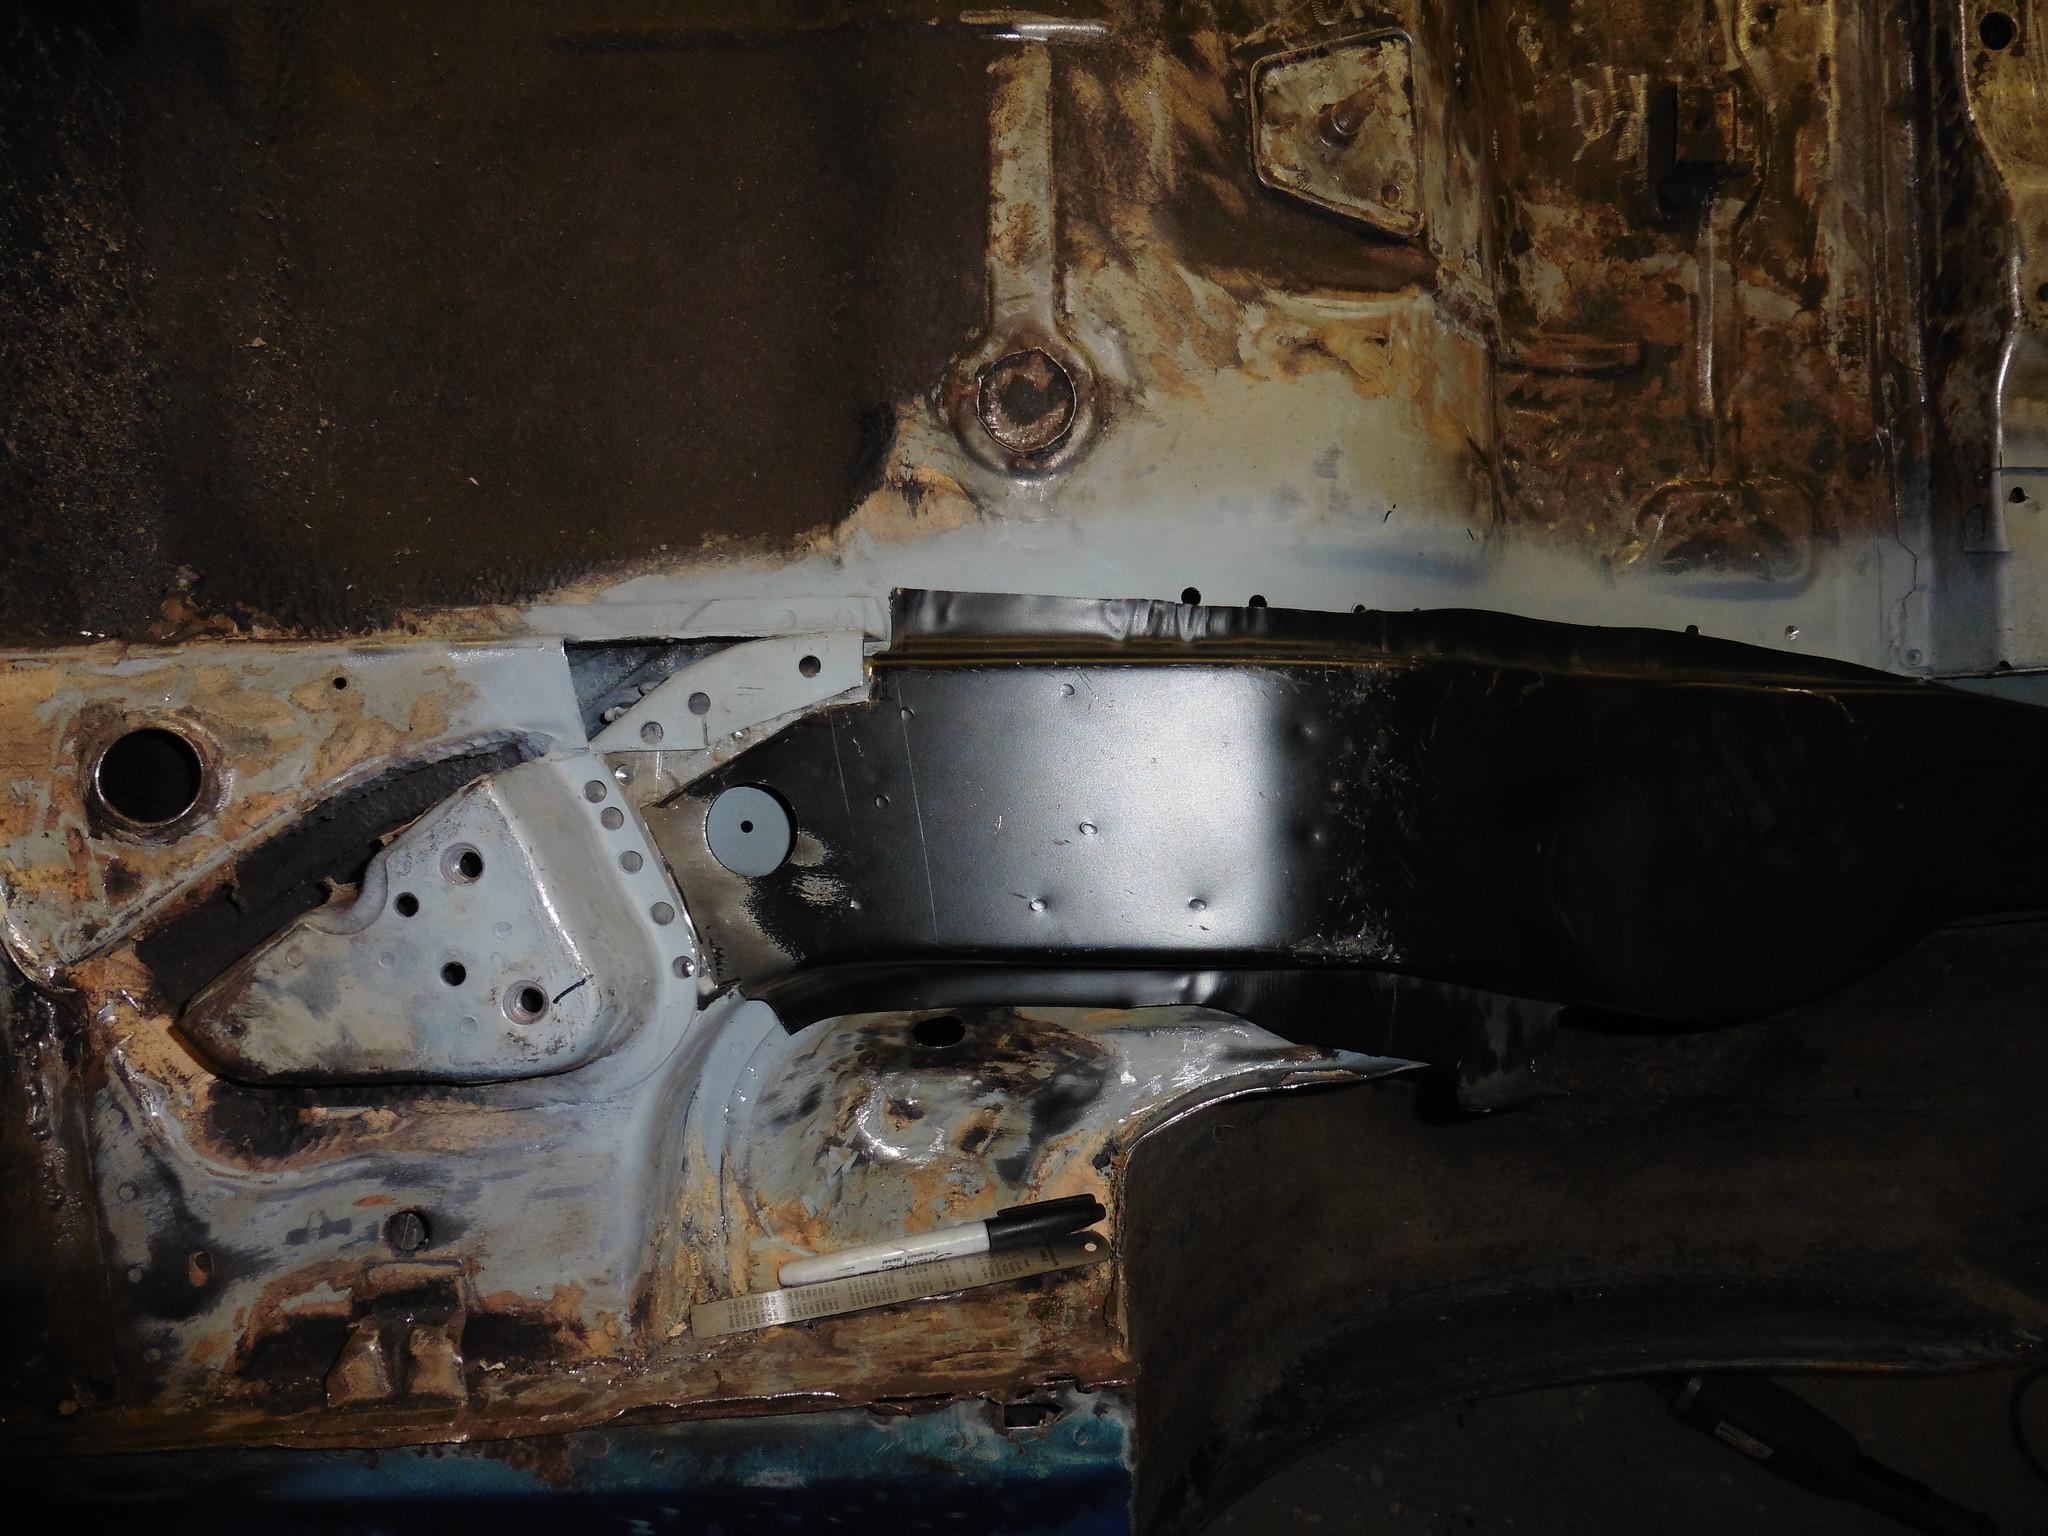 P1020142 P1020142 by jono_misfit, on Flickr and more required 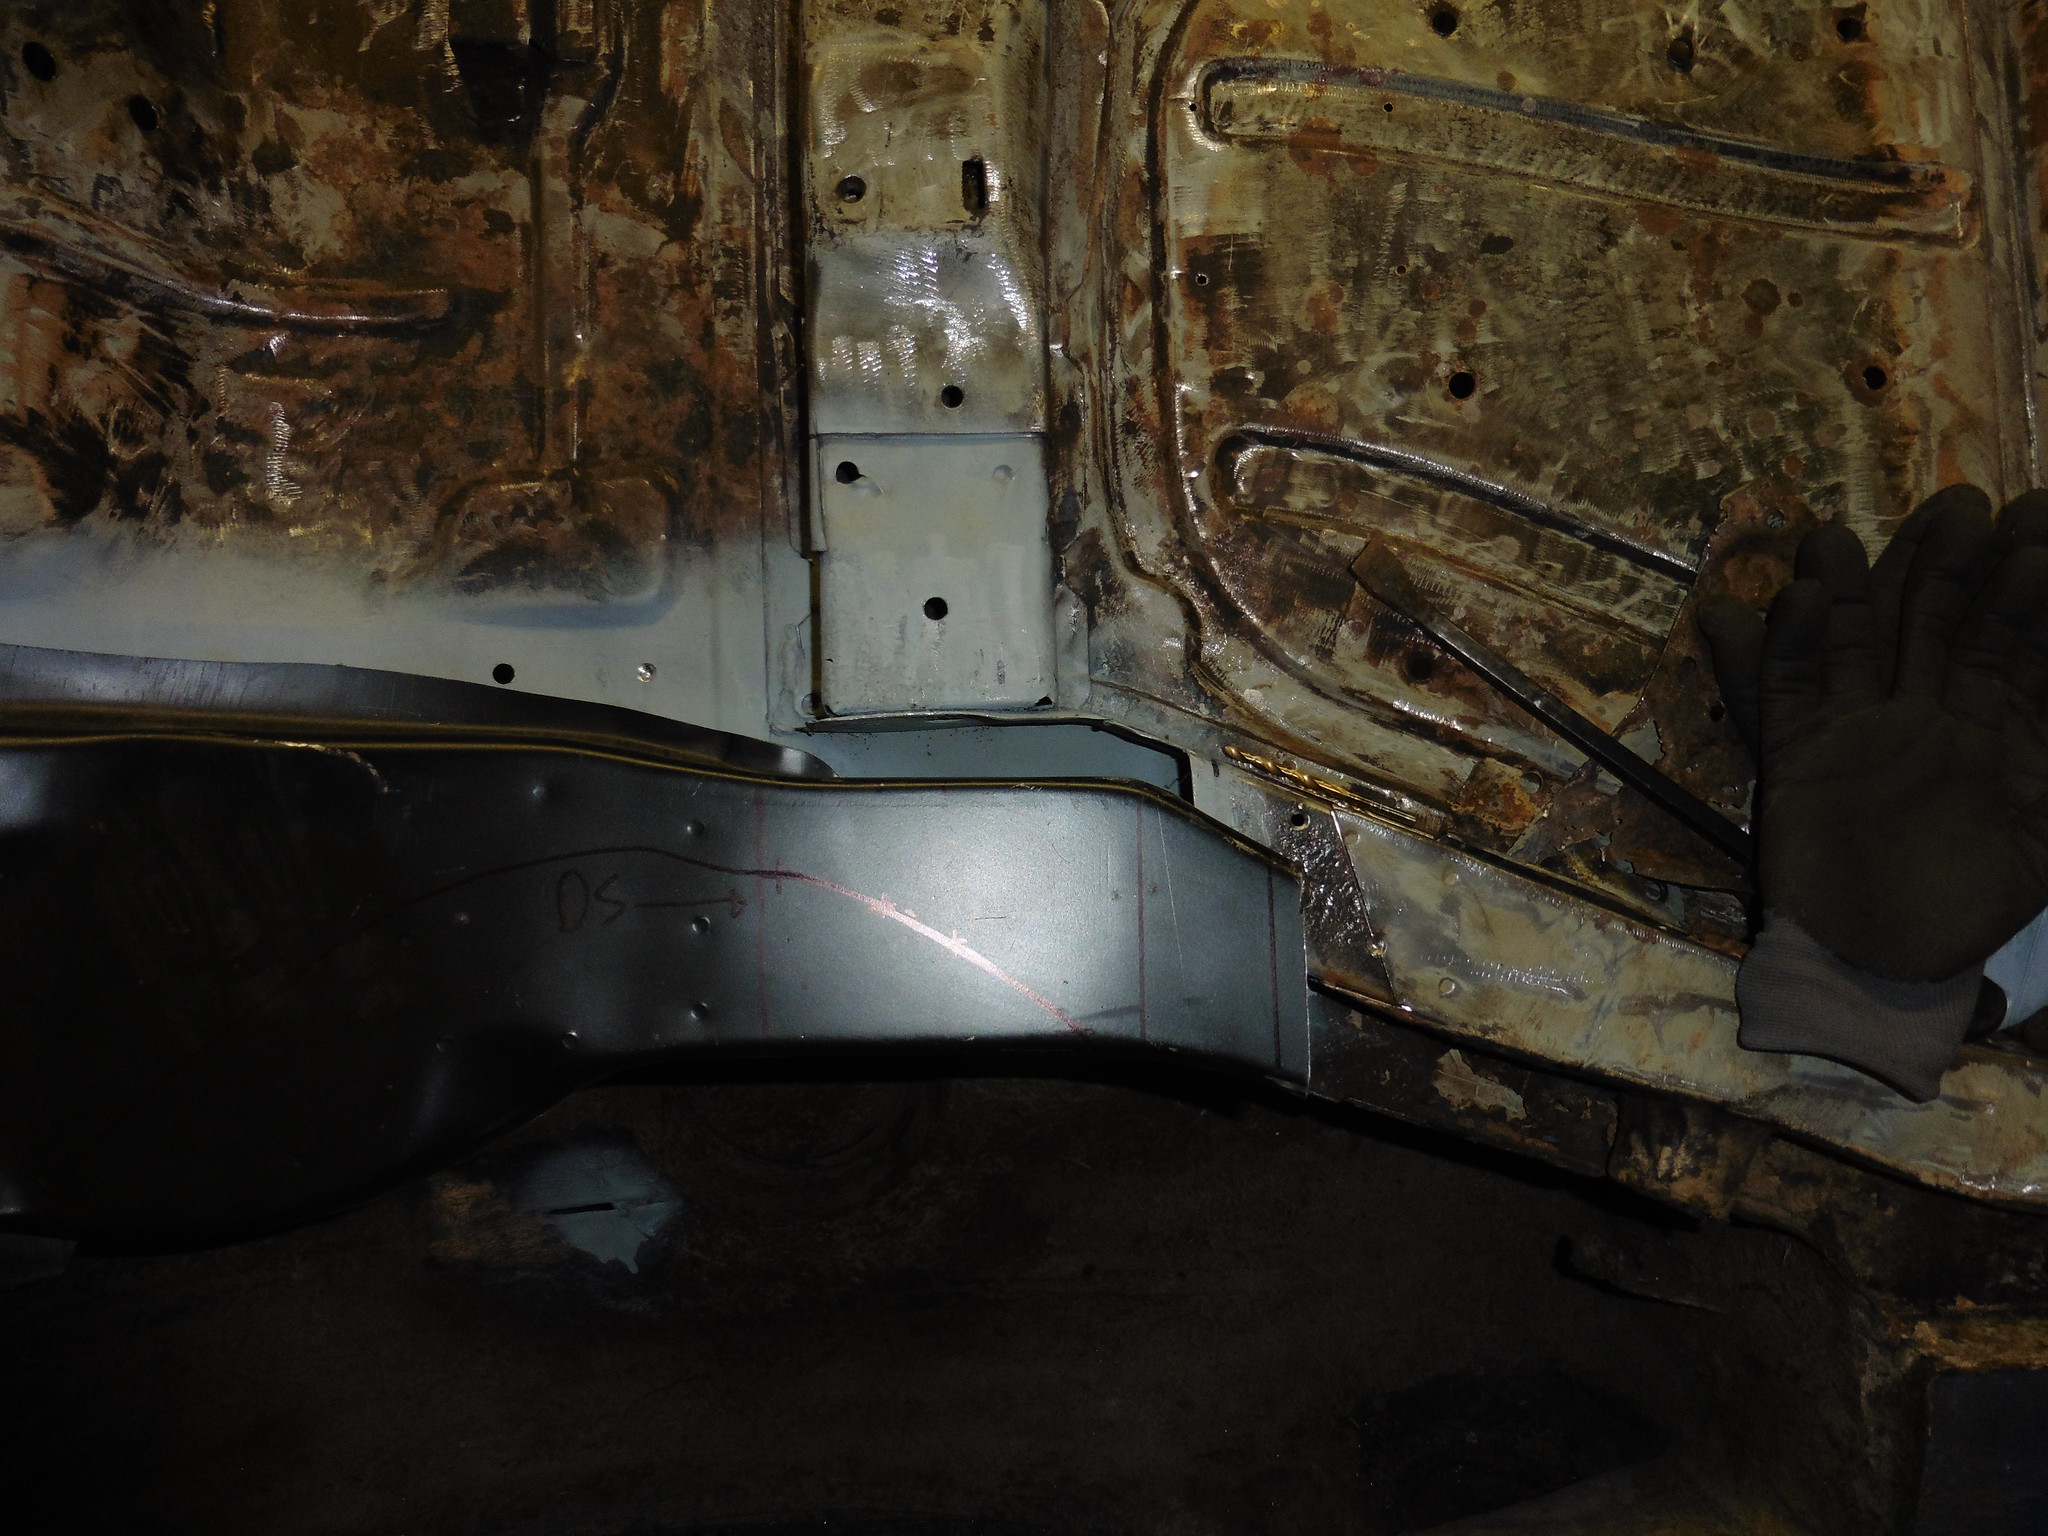 P1020143 P1020143 by jono_misfit, on Flickr the right hand black line needs to line up to the black mark on the existing chassis leg. and this is where the problems really started. I could either get the hole for the beam mount in the right place, or the flange that runs down the angle, or the flange that goes flat on the floor, or the angled kick in the rear of the chassis leg, but not more than one at any one time. much measuring check, measuring, checking. The chassis leg is pants. its 5mm too shallow in some parts, its 5mm too deep in others, its 5mm too wide in some bits, the holes not in the right place, some bits are the wrong shape, and just generally its poorly made. not worth the money! Fit issues 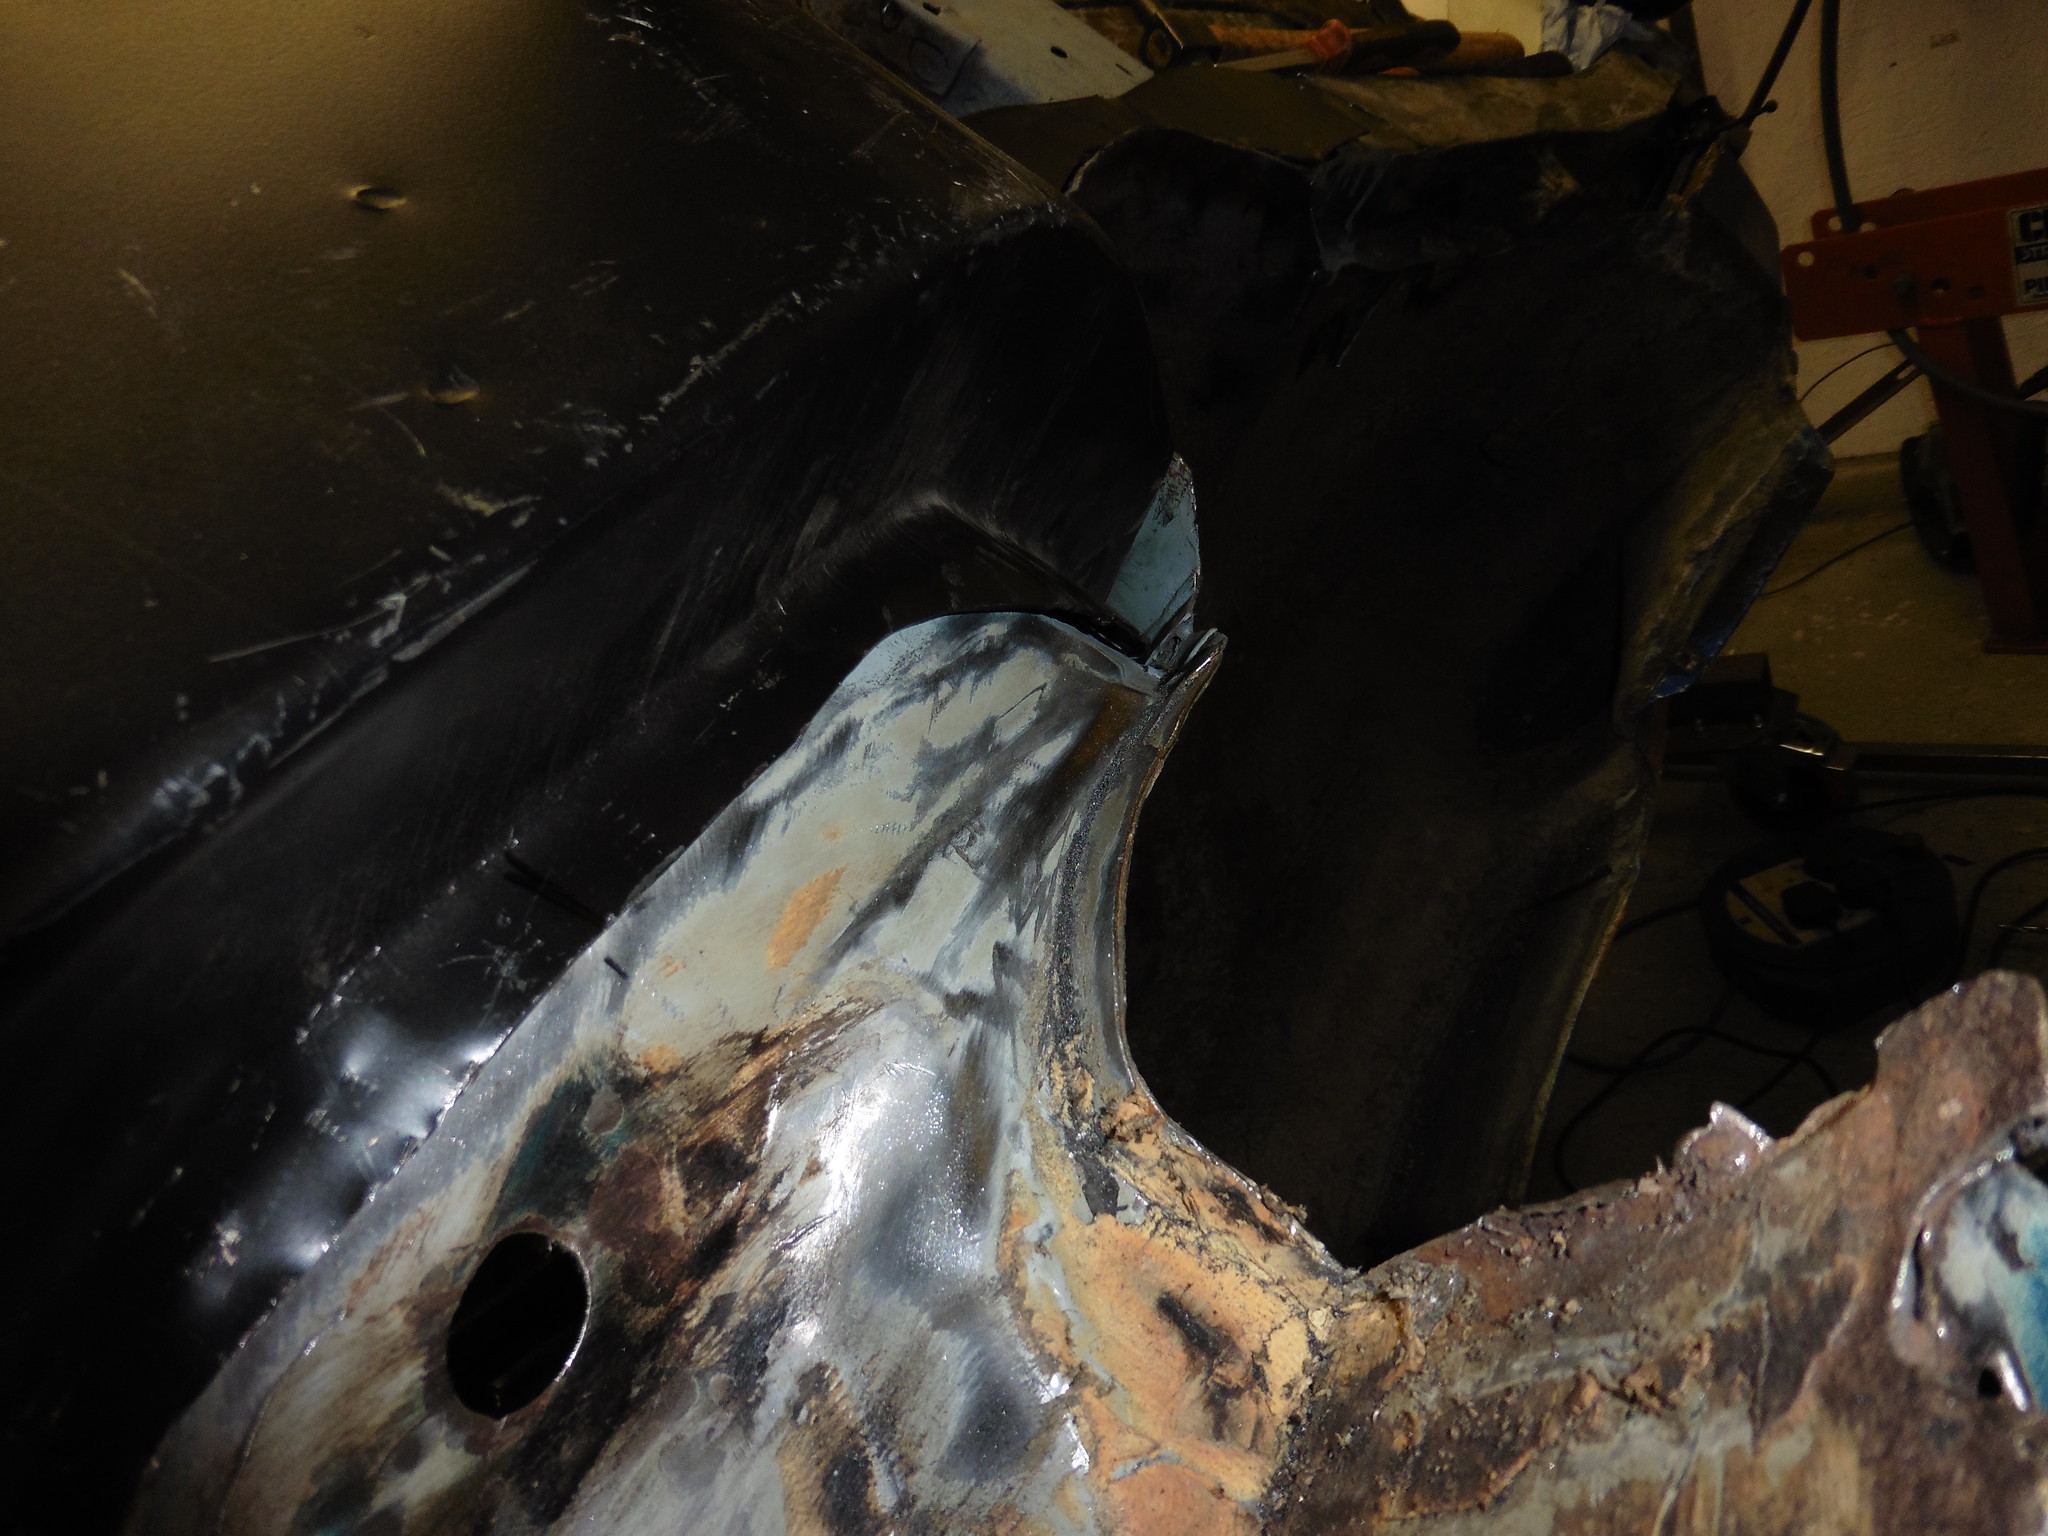 P1020146 P1020146 by jono_misfit, on Flickr Still nothing that re-setting of flanges, trimming, hammering, and generally much fettling cant get to a less bad position. Forgot to take pics for a while, but eventually managed to get some improvement, trimmed to the turret 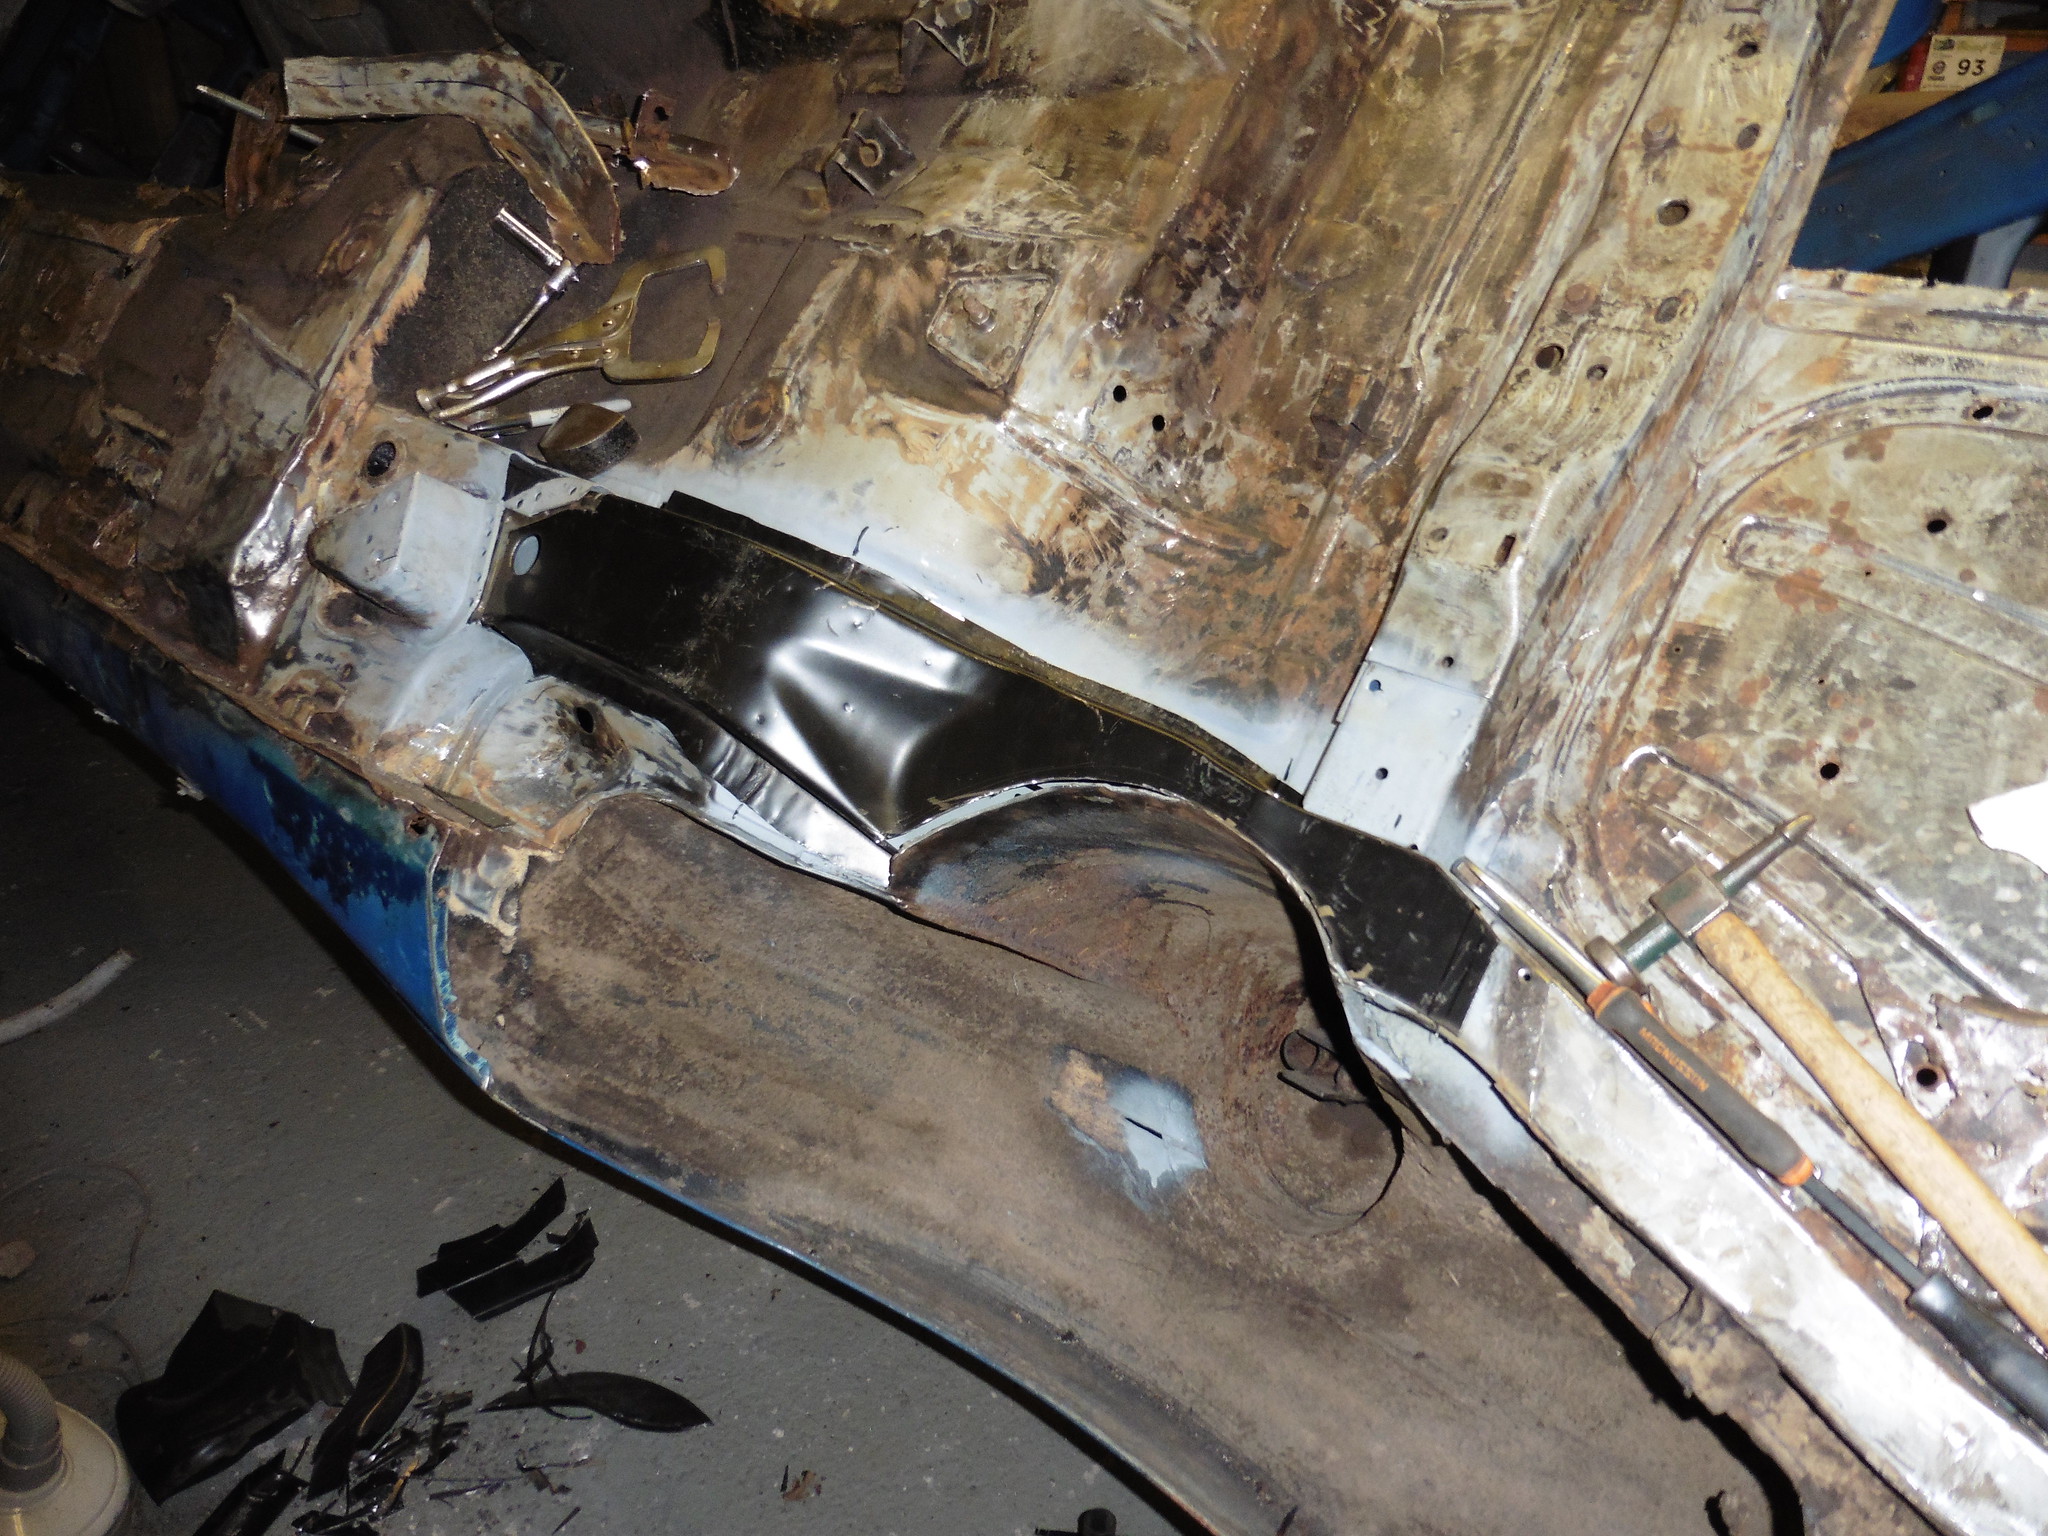 P1020144 P1020144 by jono_misfit, on Flickr I've had to relieve a few bits to get it in 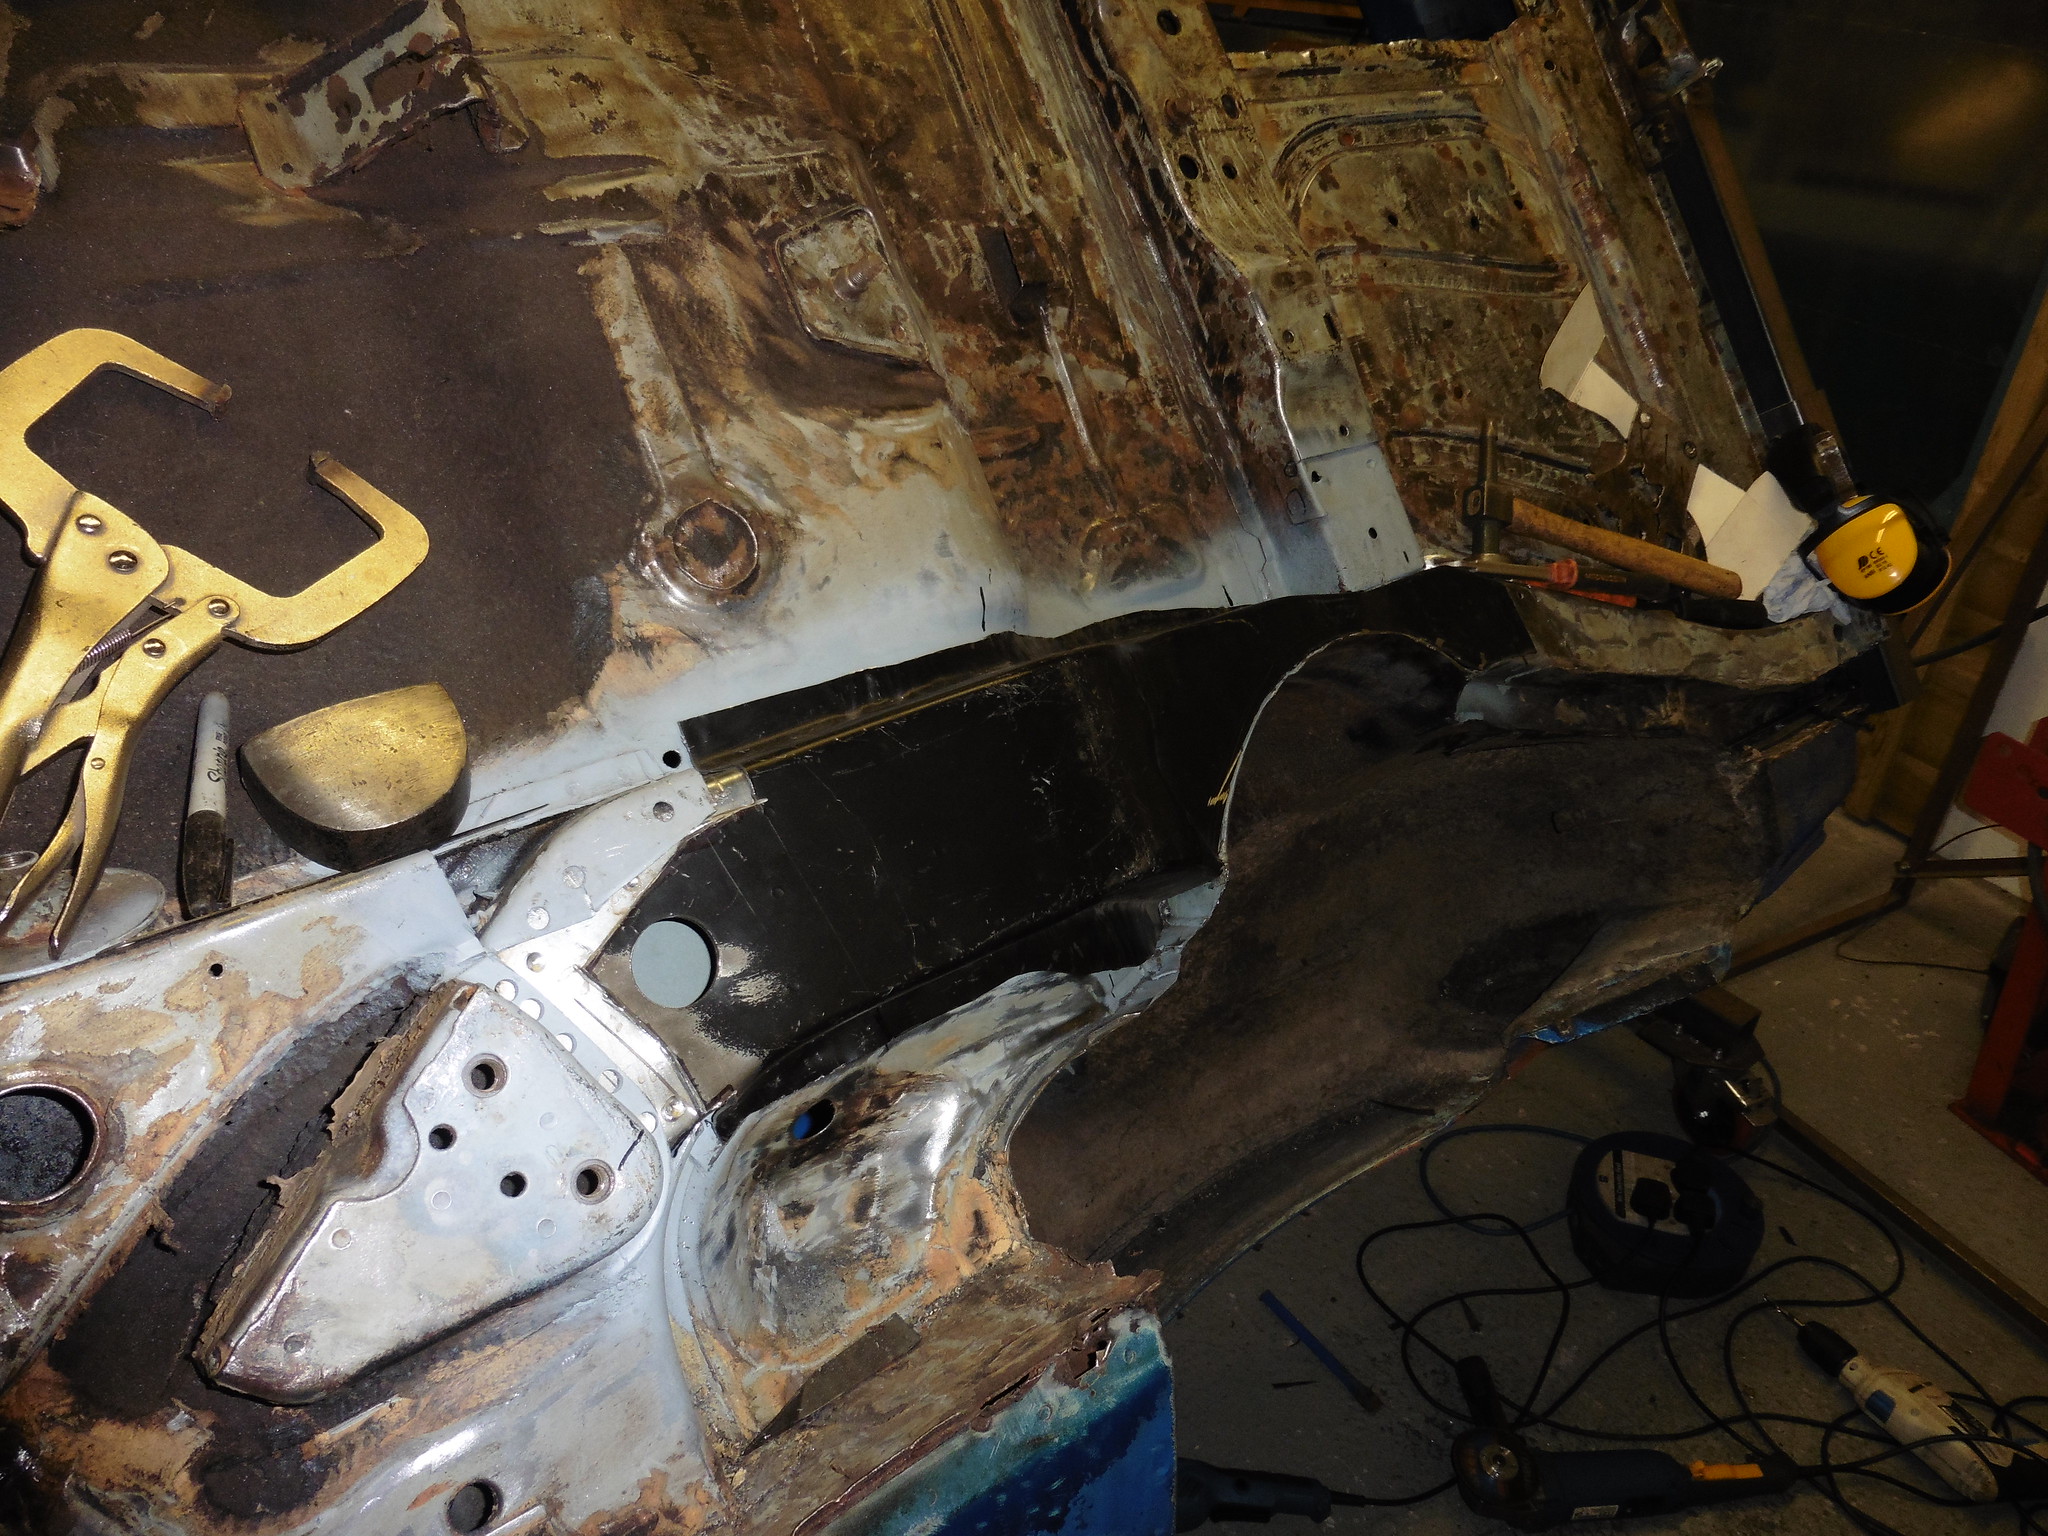 P1020145 P1020145 by jono_misfit, on Flickr re-set flange 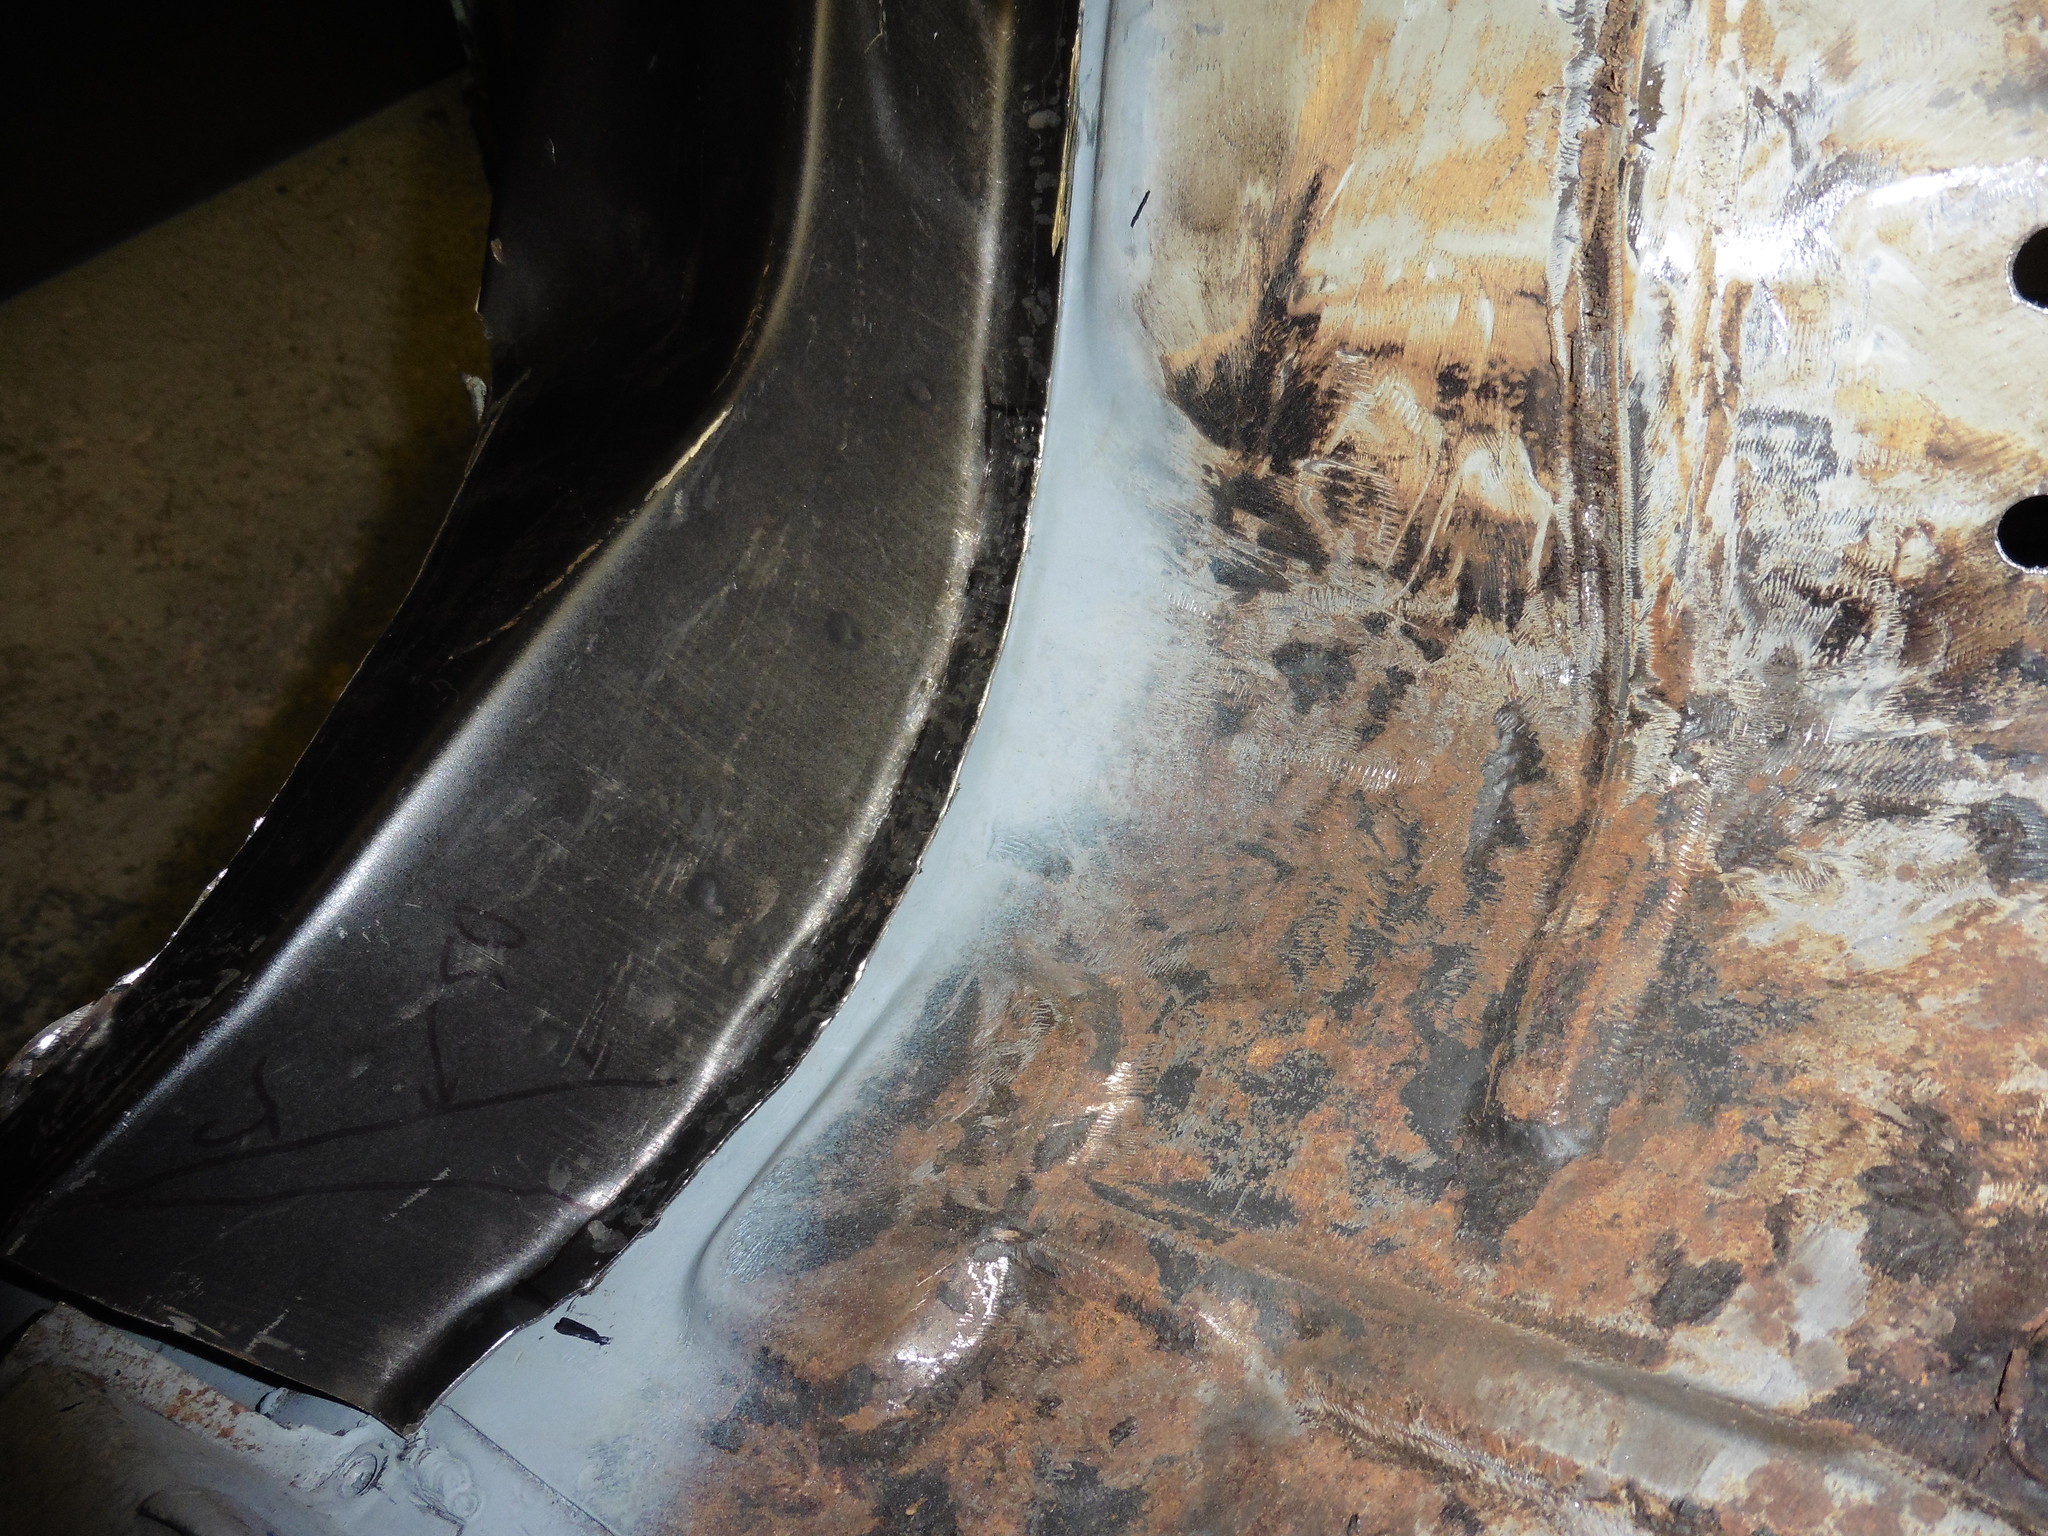 P1020147 P1020147 by jono_misfit, on Flickr beam mounts into position to check 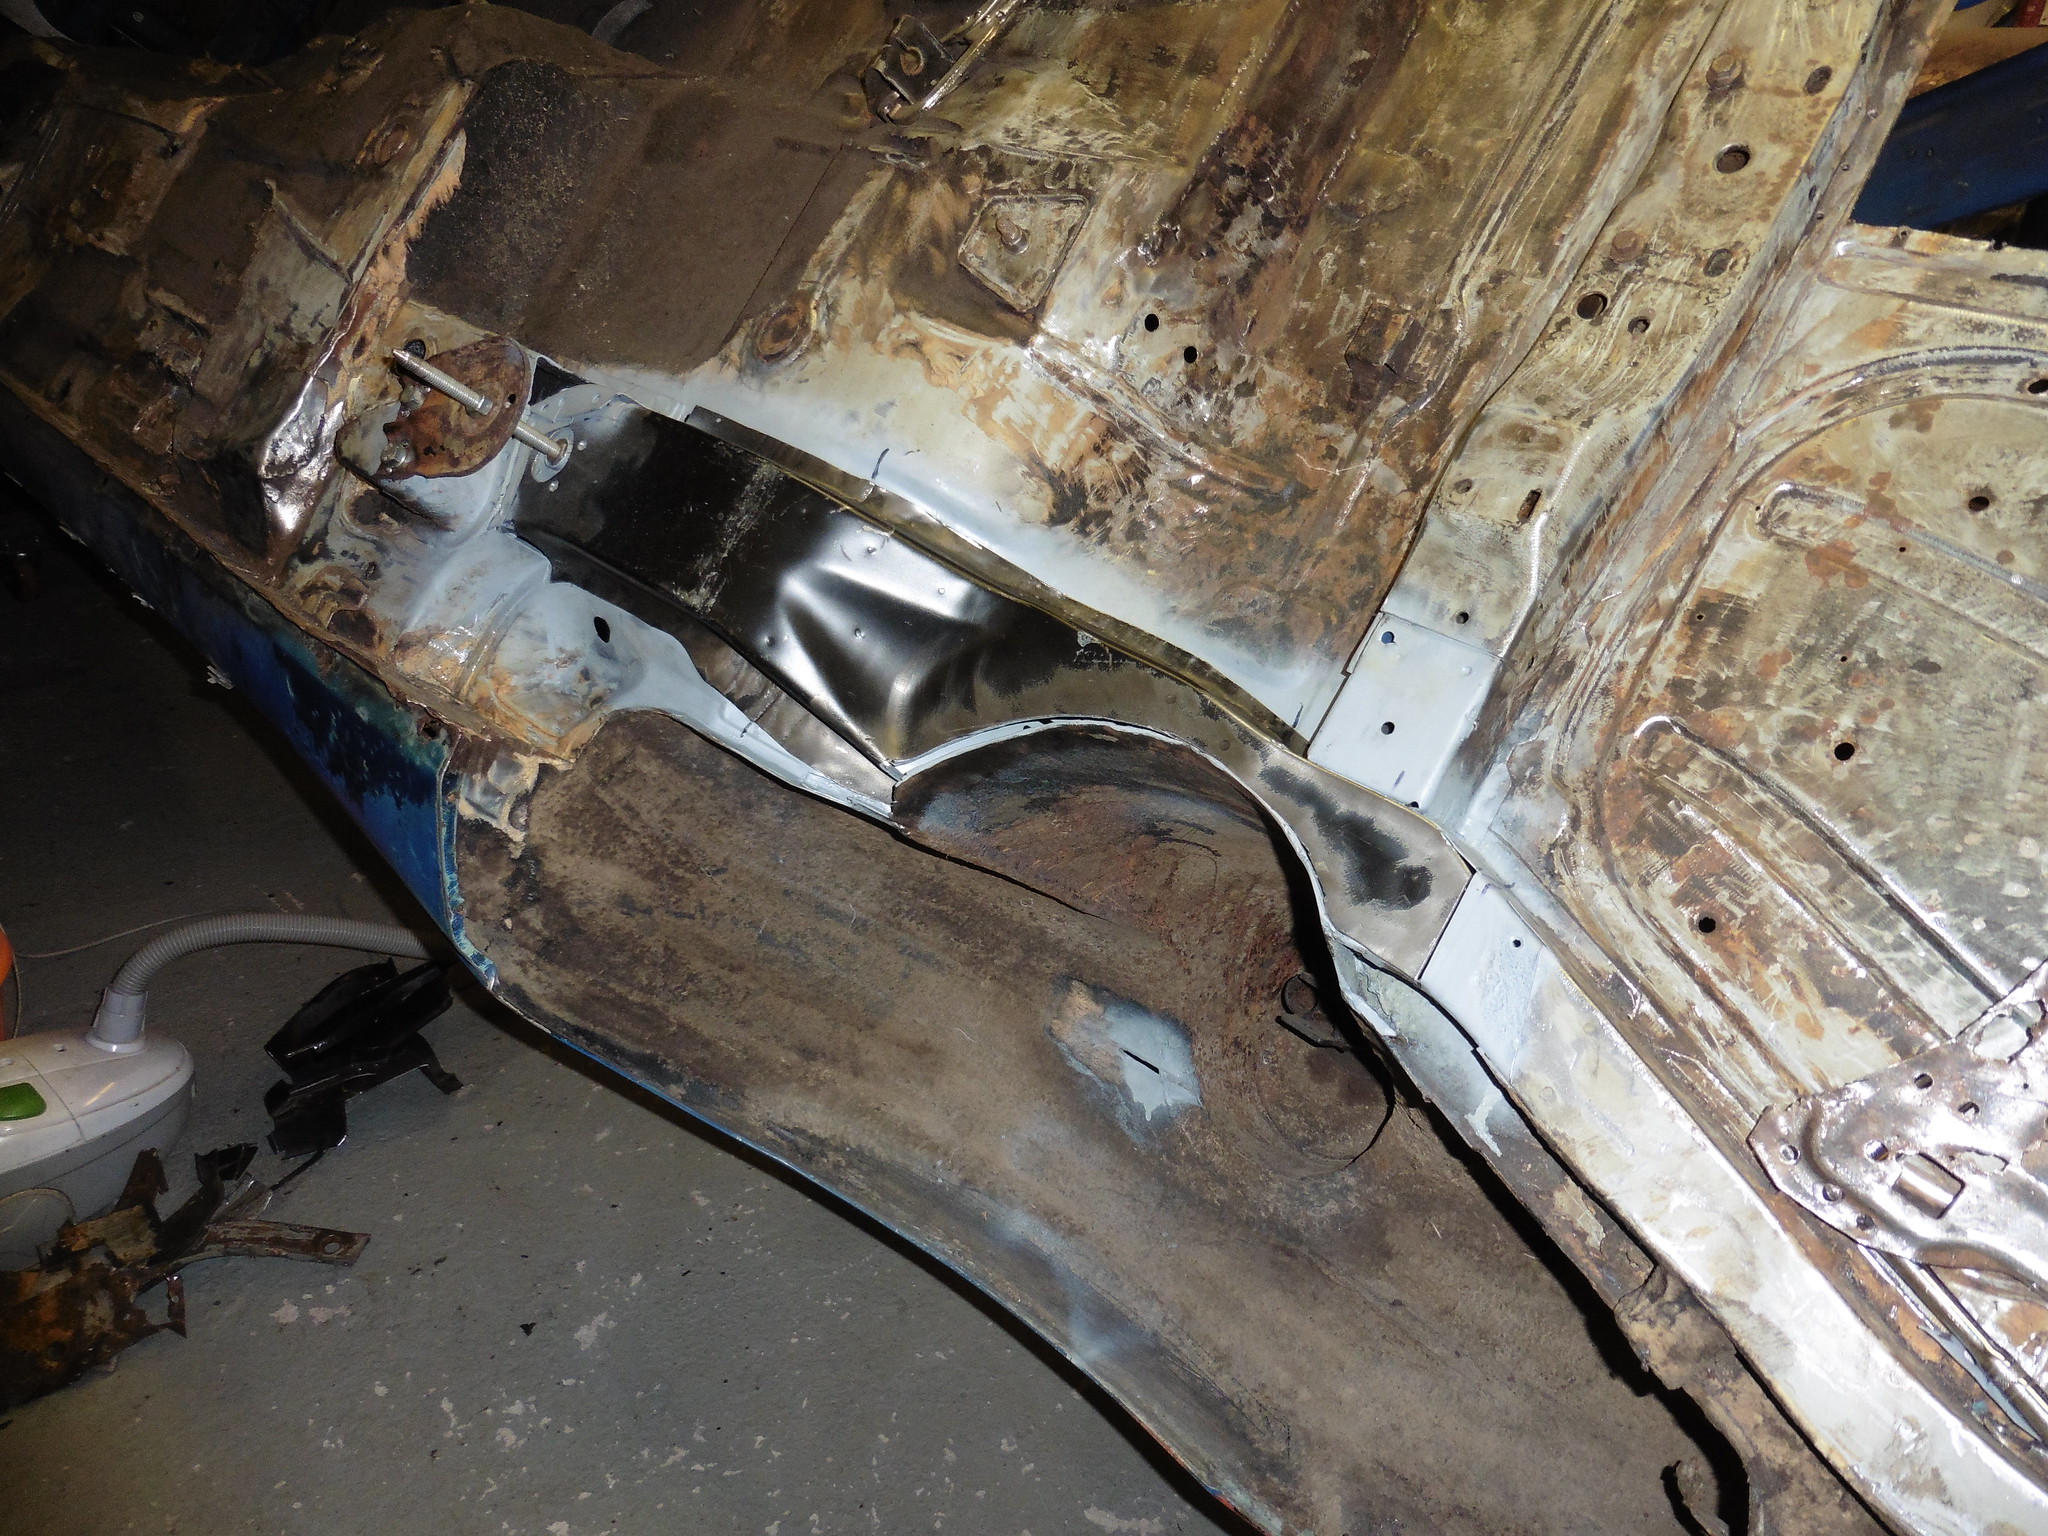 P1020148 P1020148 by jono_misfit, on Flickr you can just about see how oval i've had to make the hole to get the beam mount in! 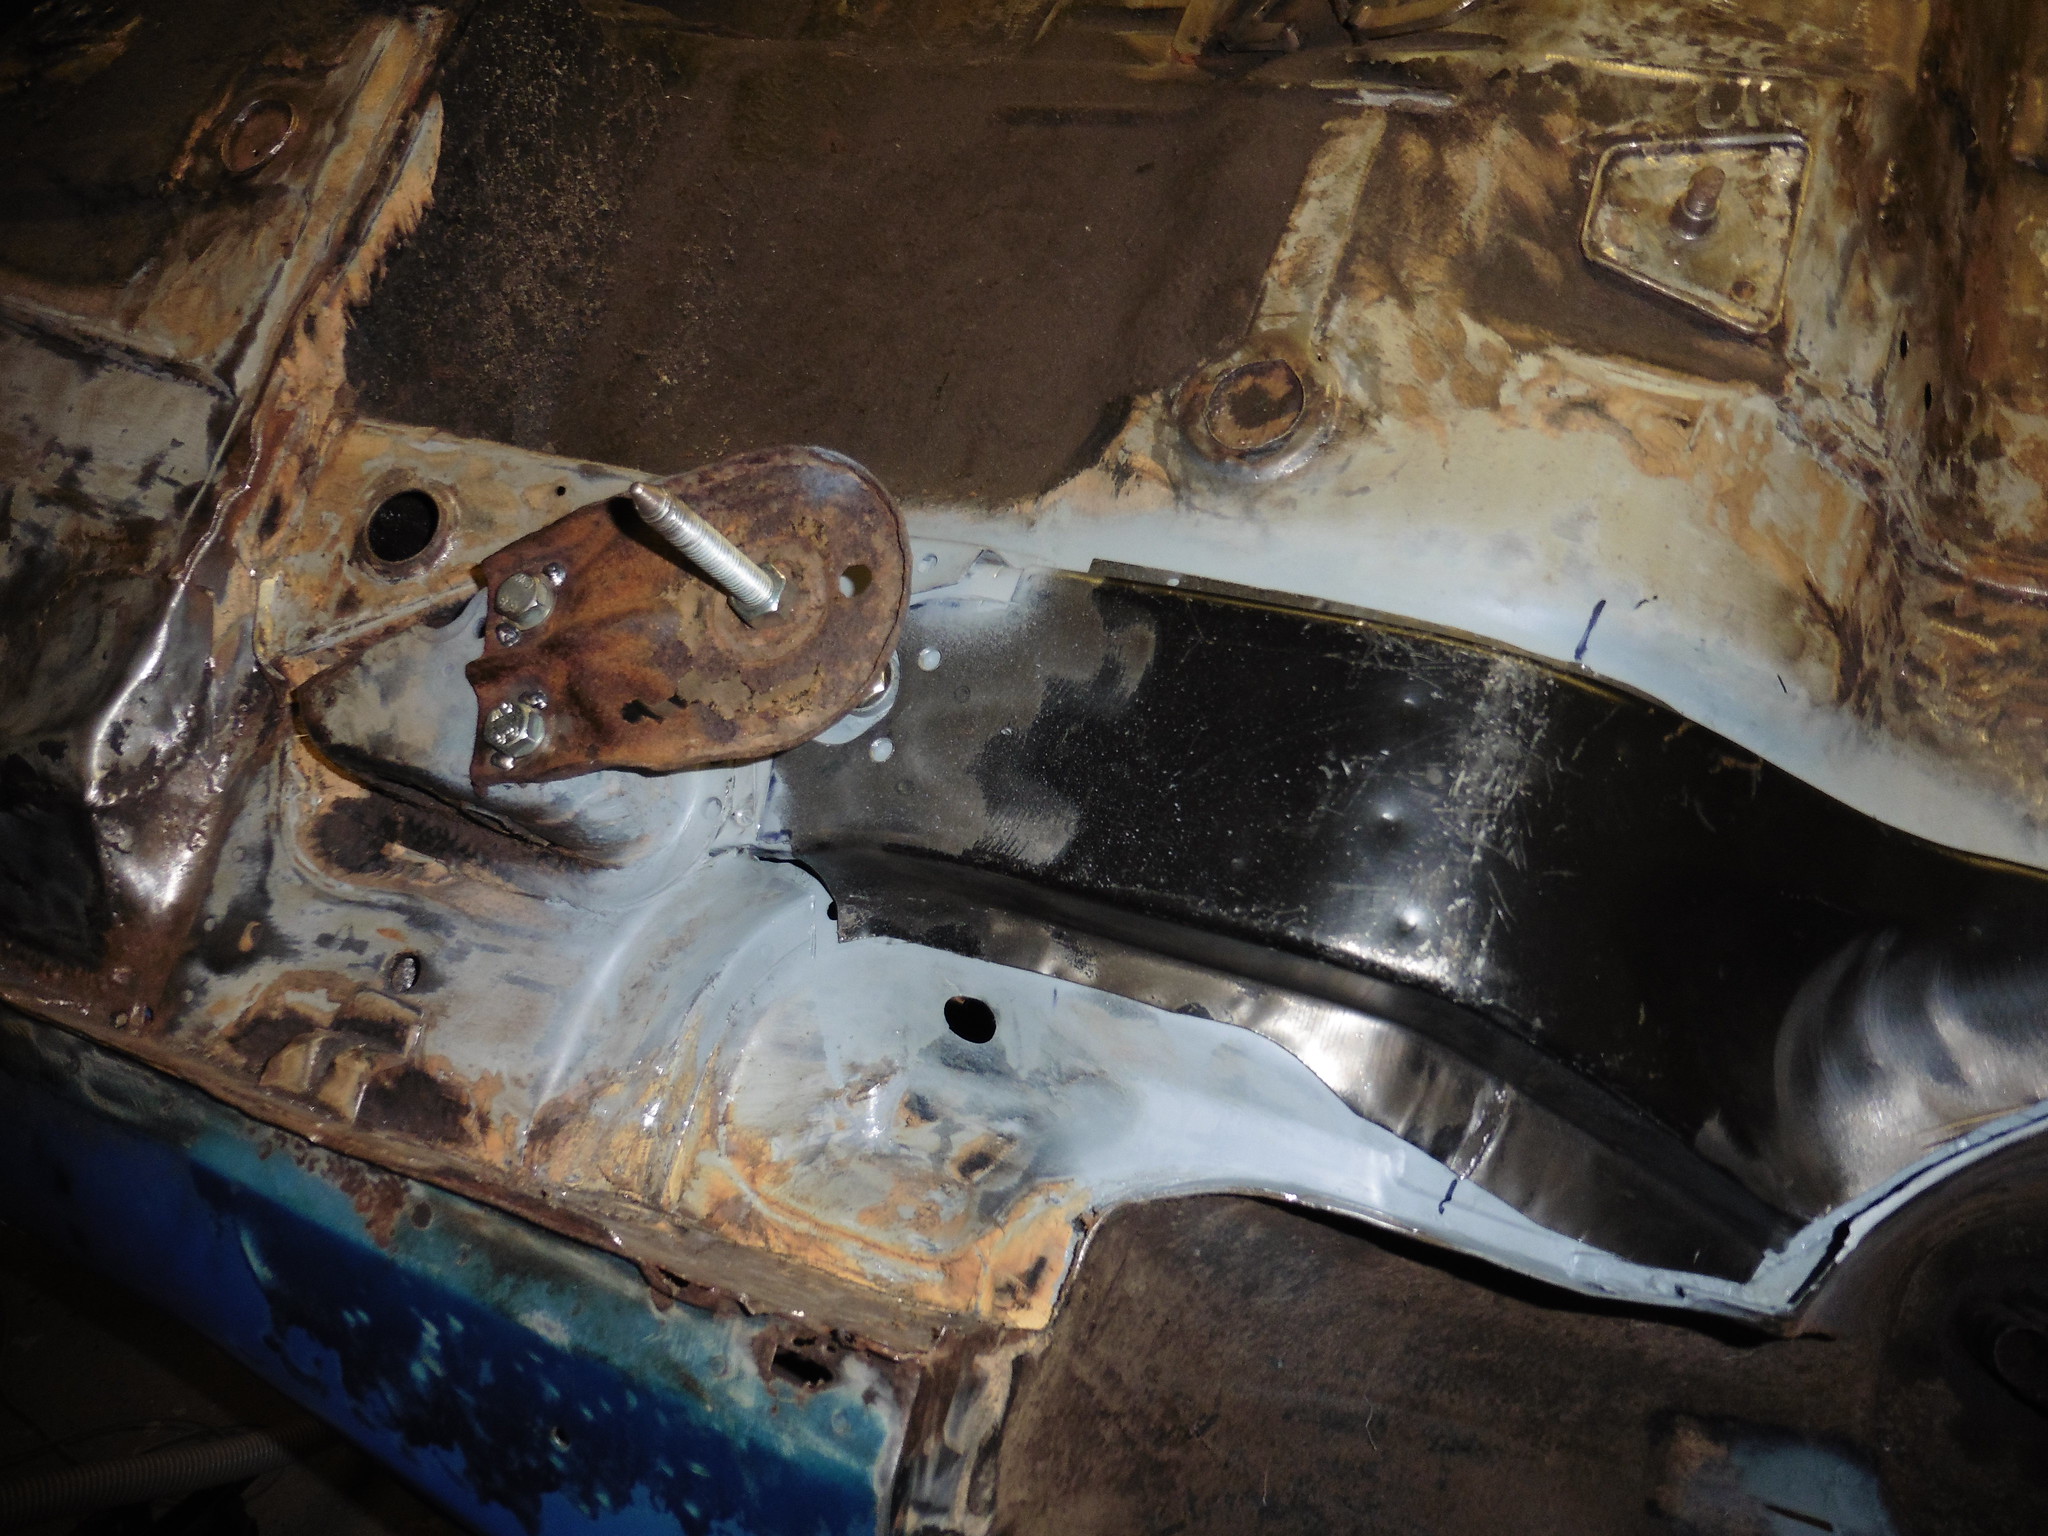 P1020149 P1020149 by jono_misfit, on Flickr 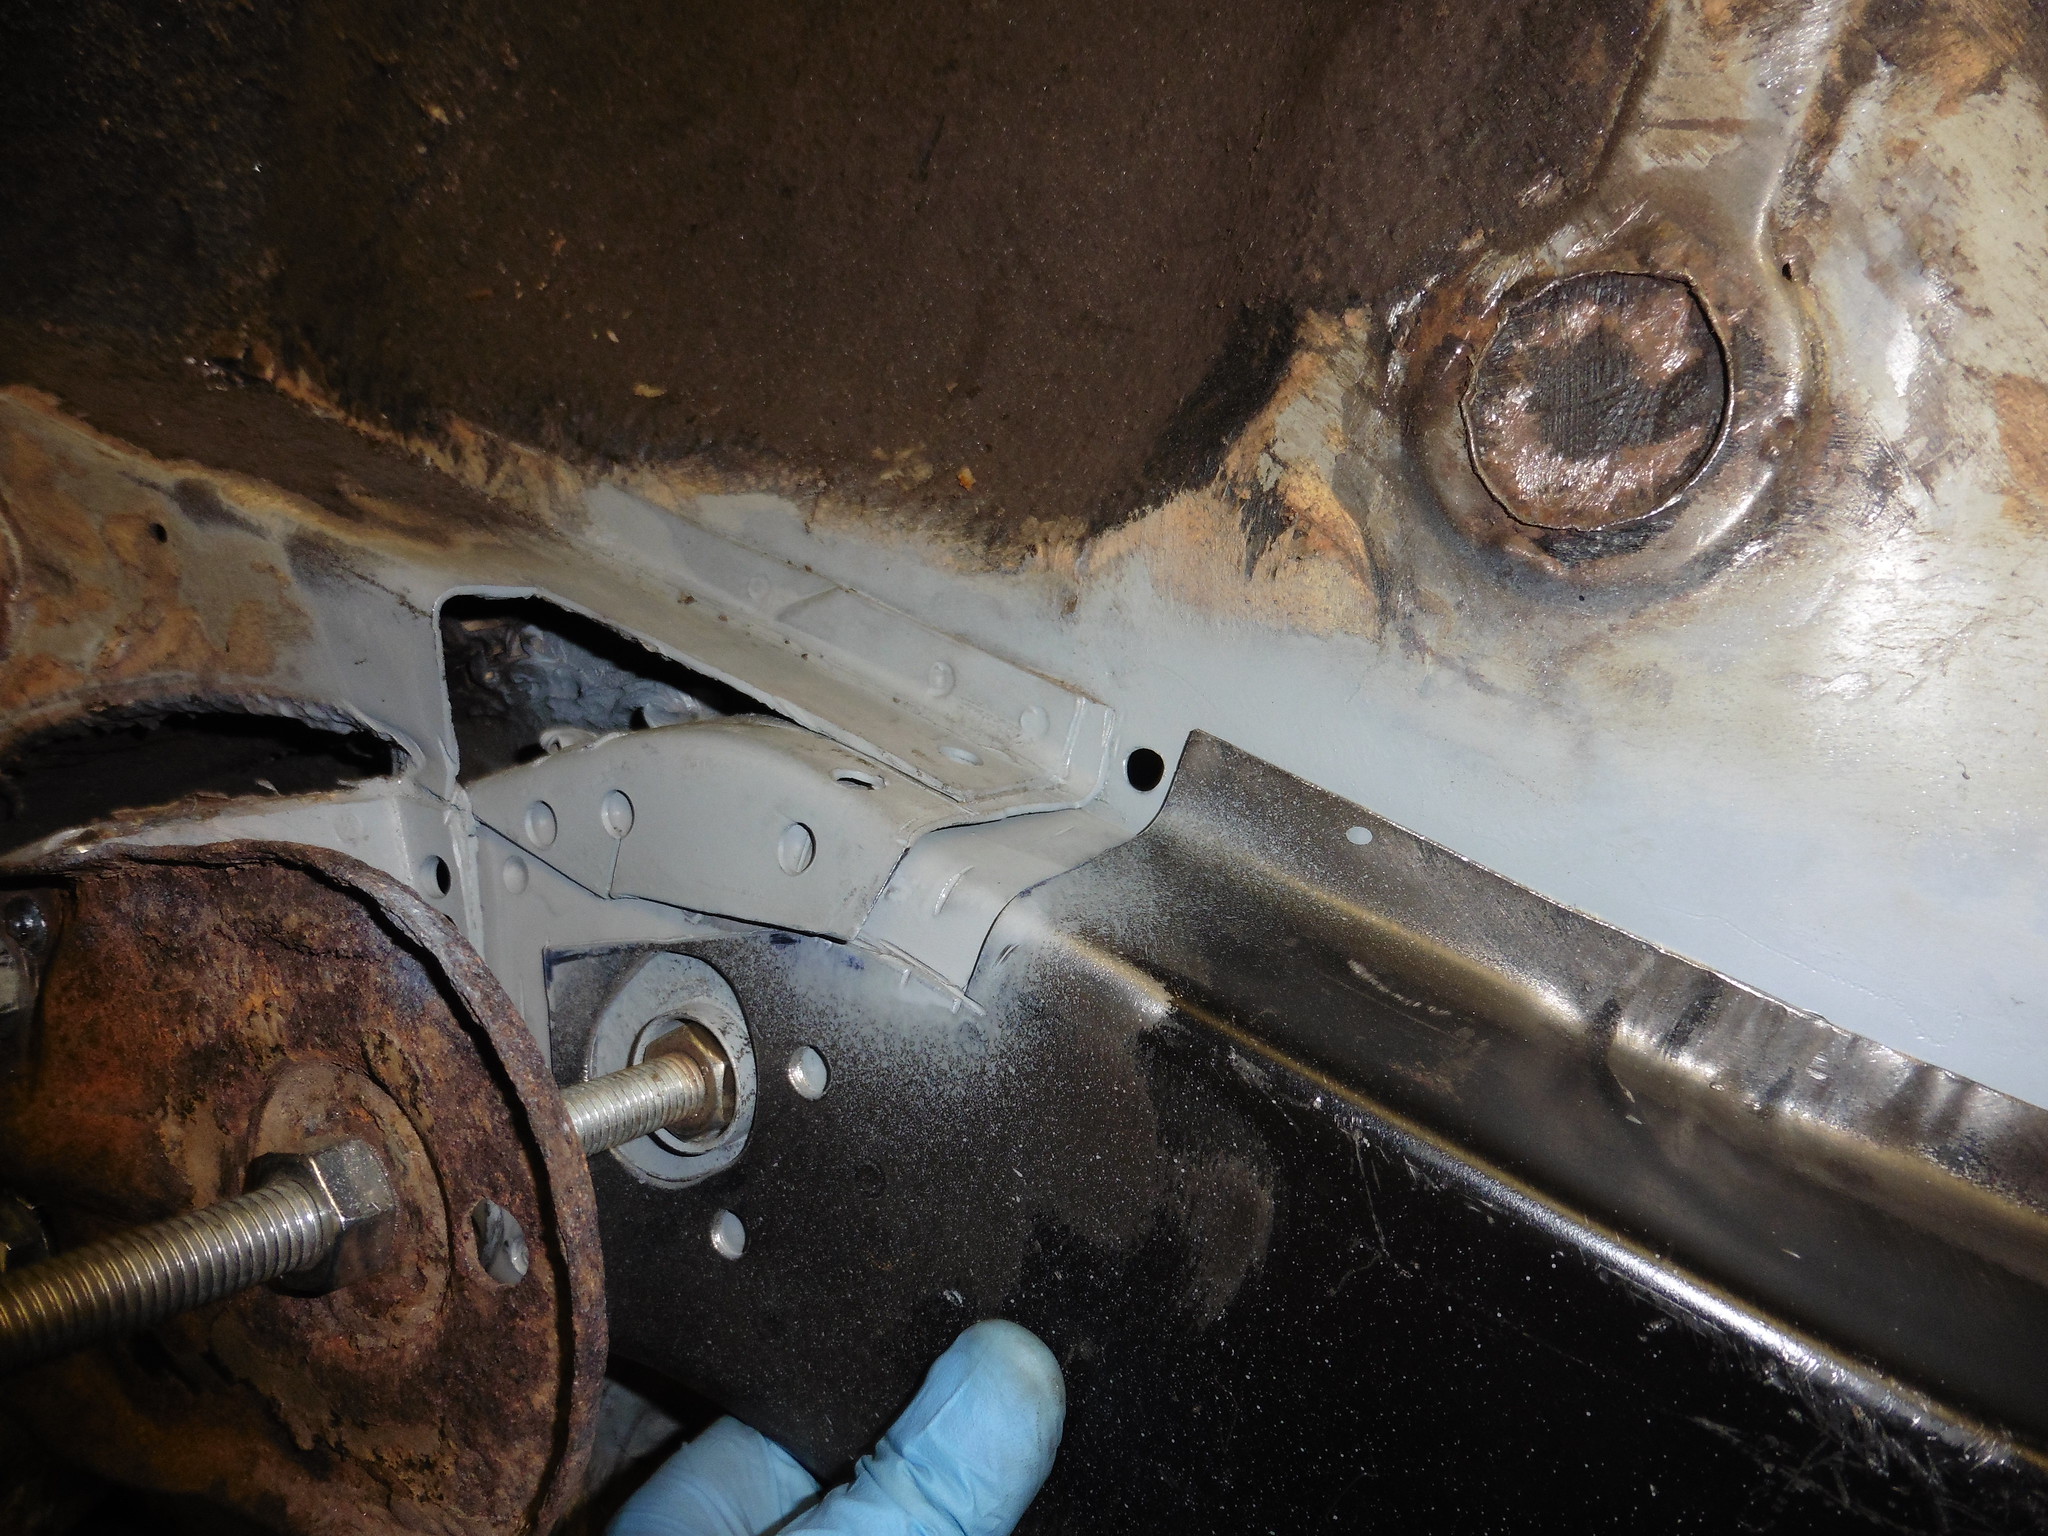 P1020150 P1020150 by jono_misfit, on Flickr I've also had to cut it and leave closing sections in order to get it in  P1020151 P1020151 by jono_misfit, on Flickr will have to put in a closer plate here 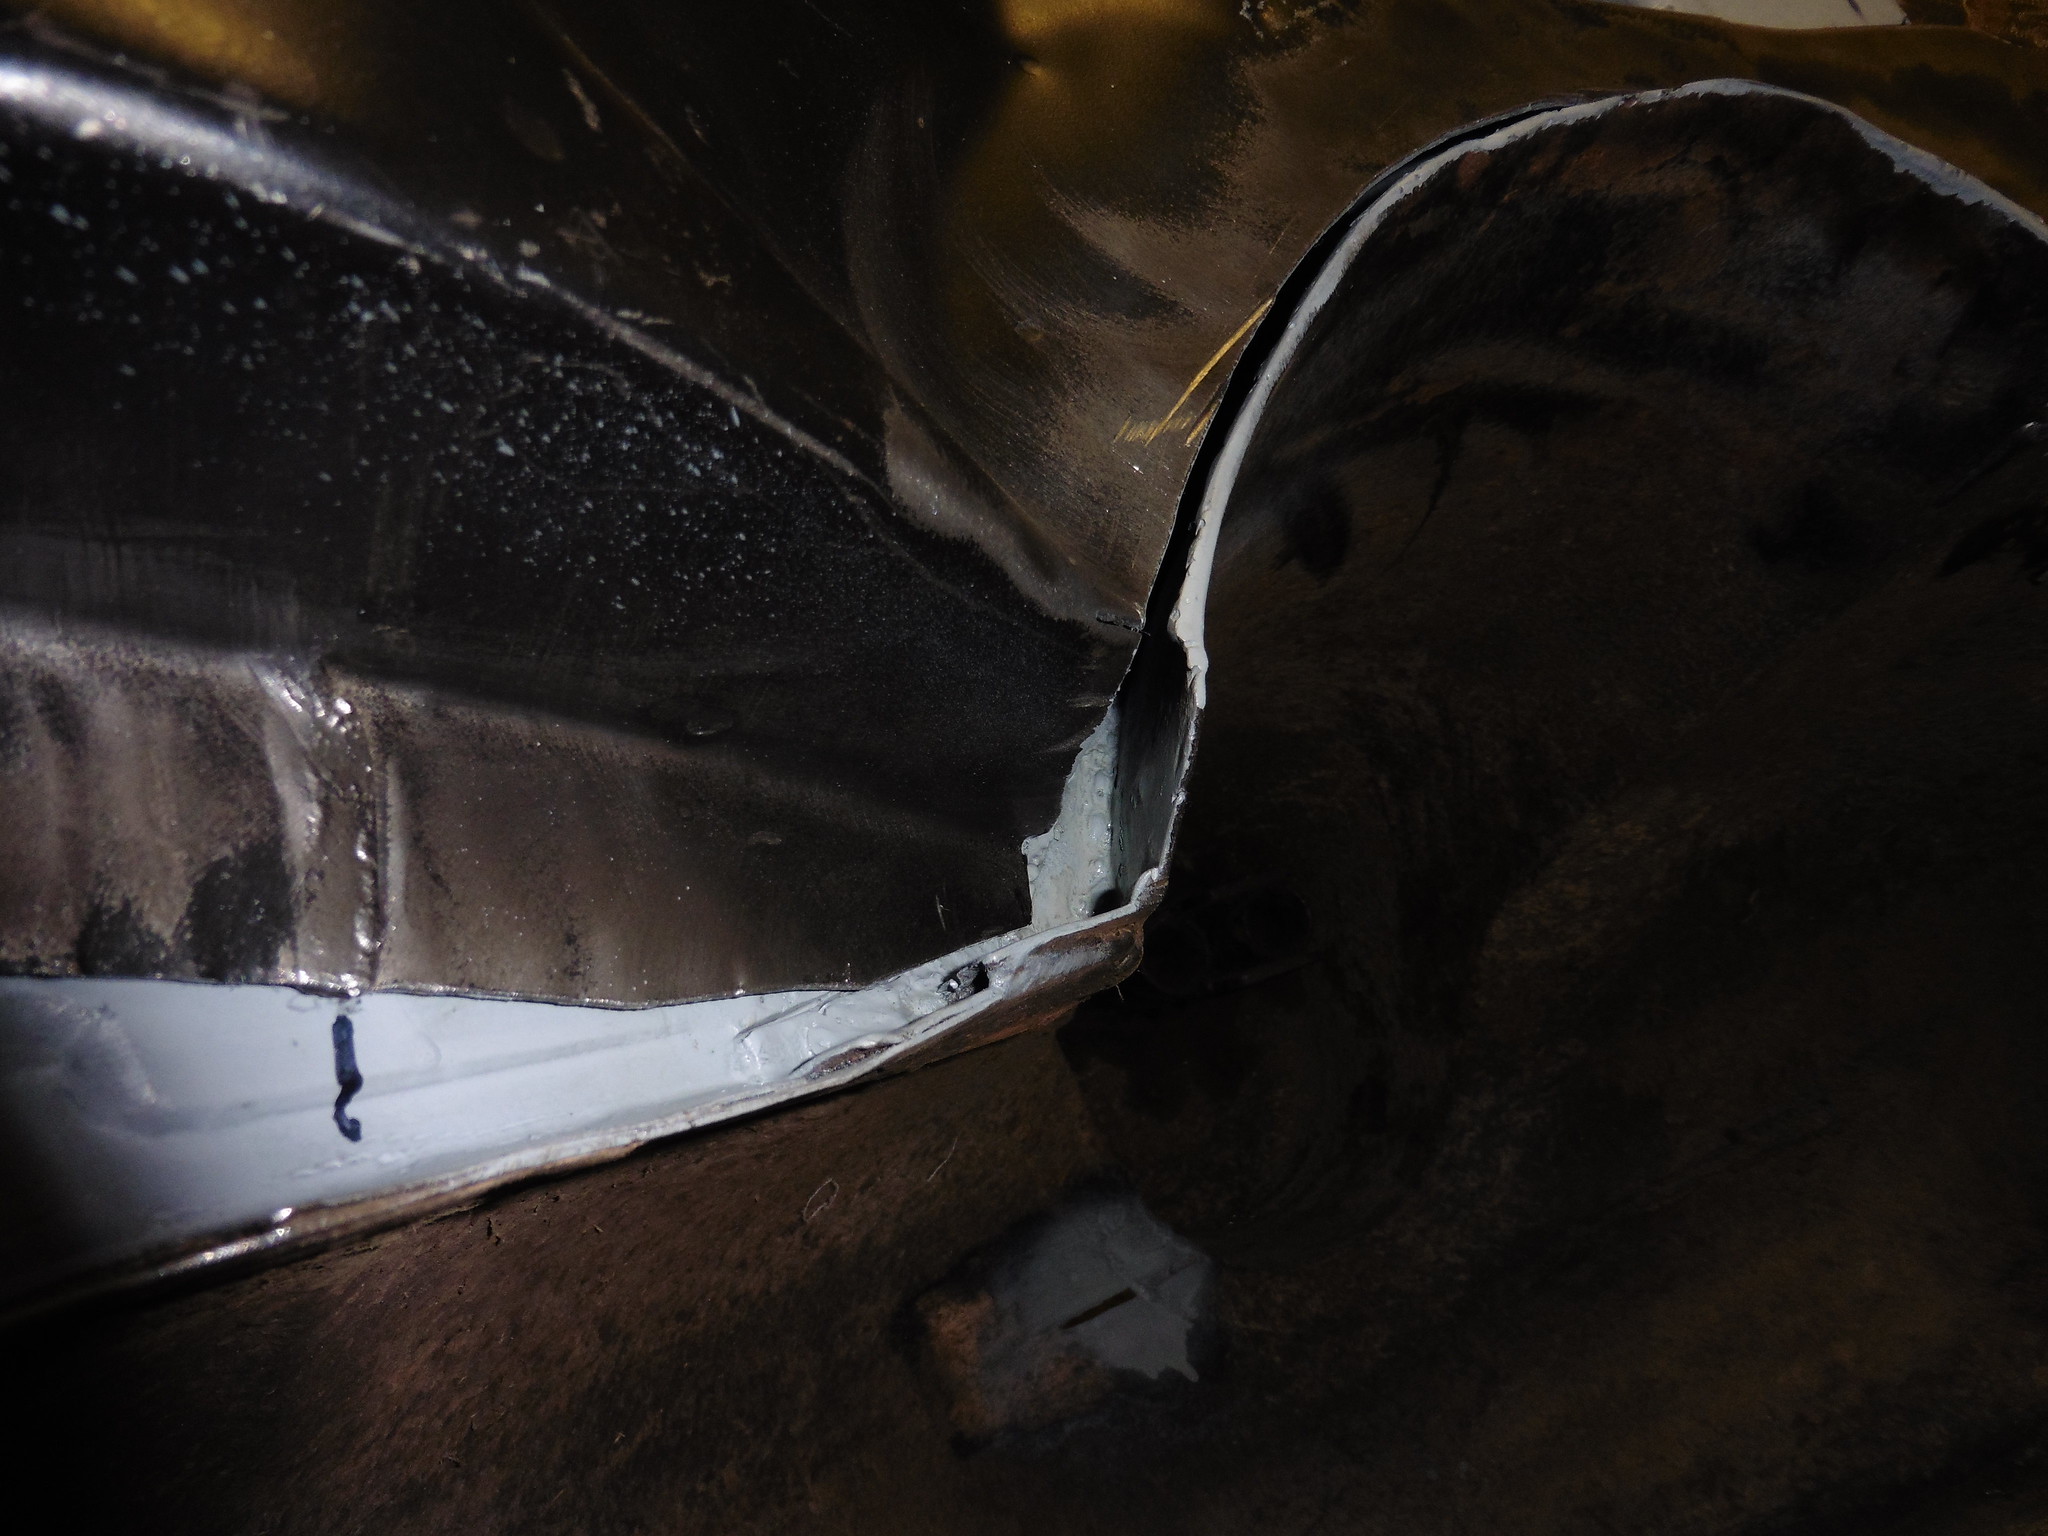 P1020152 P1020152 by jono_misfit, on Flickr and here  P1020153 P1020153 by jono_misfit, on Flickr the replacement chassis leg completely ommits the step in height that goes under the diff mount transverse. hence the disappearing wedge. clean up everything, remove the black pain inside the chassis leg, spray it with the ultra zinc primer, dry, put in position and tack  P1020155 P1020155 by jono_misfit, on Flickr 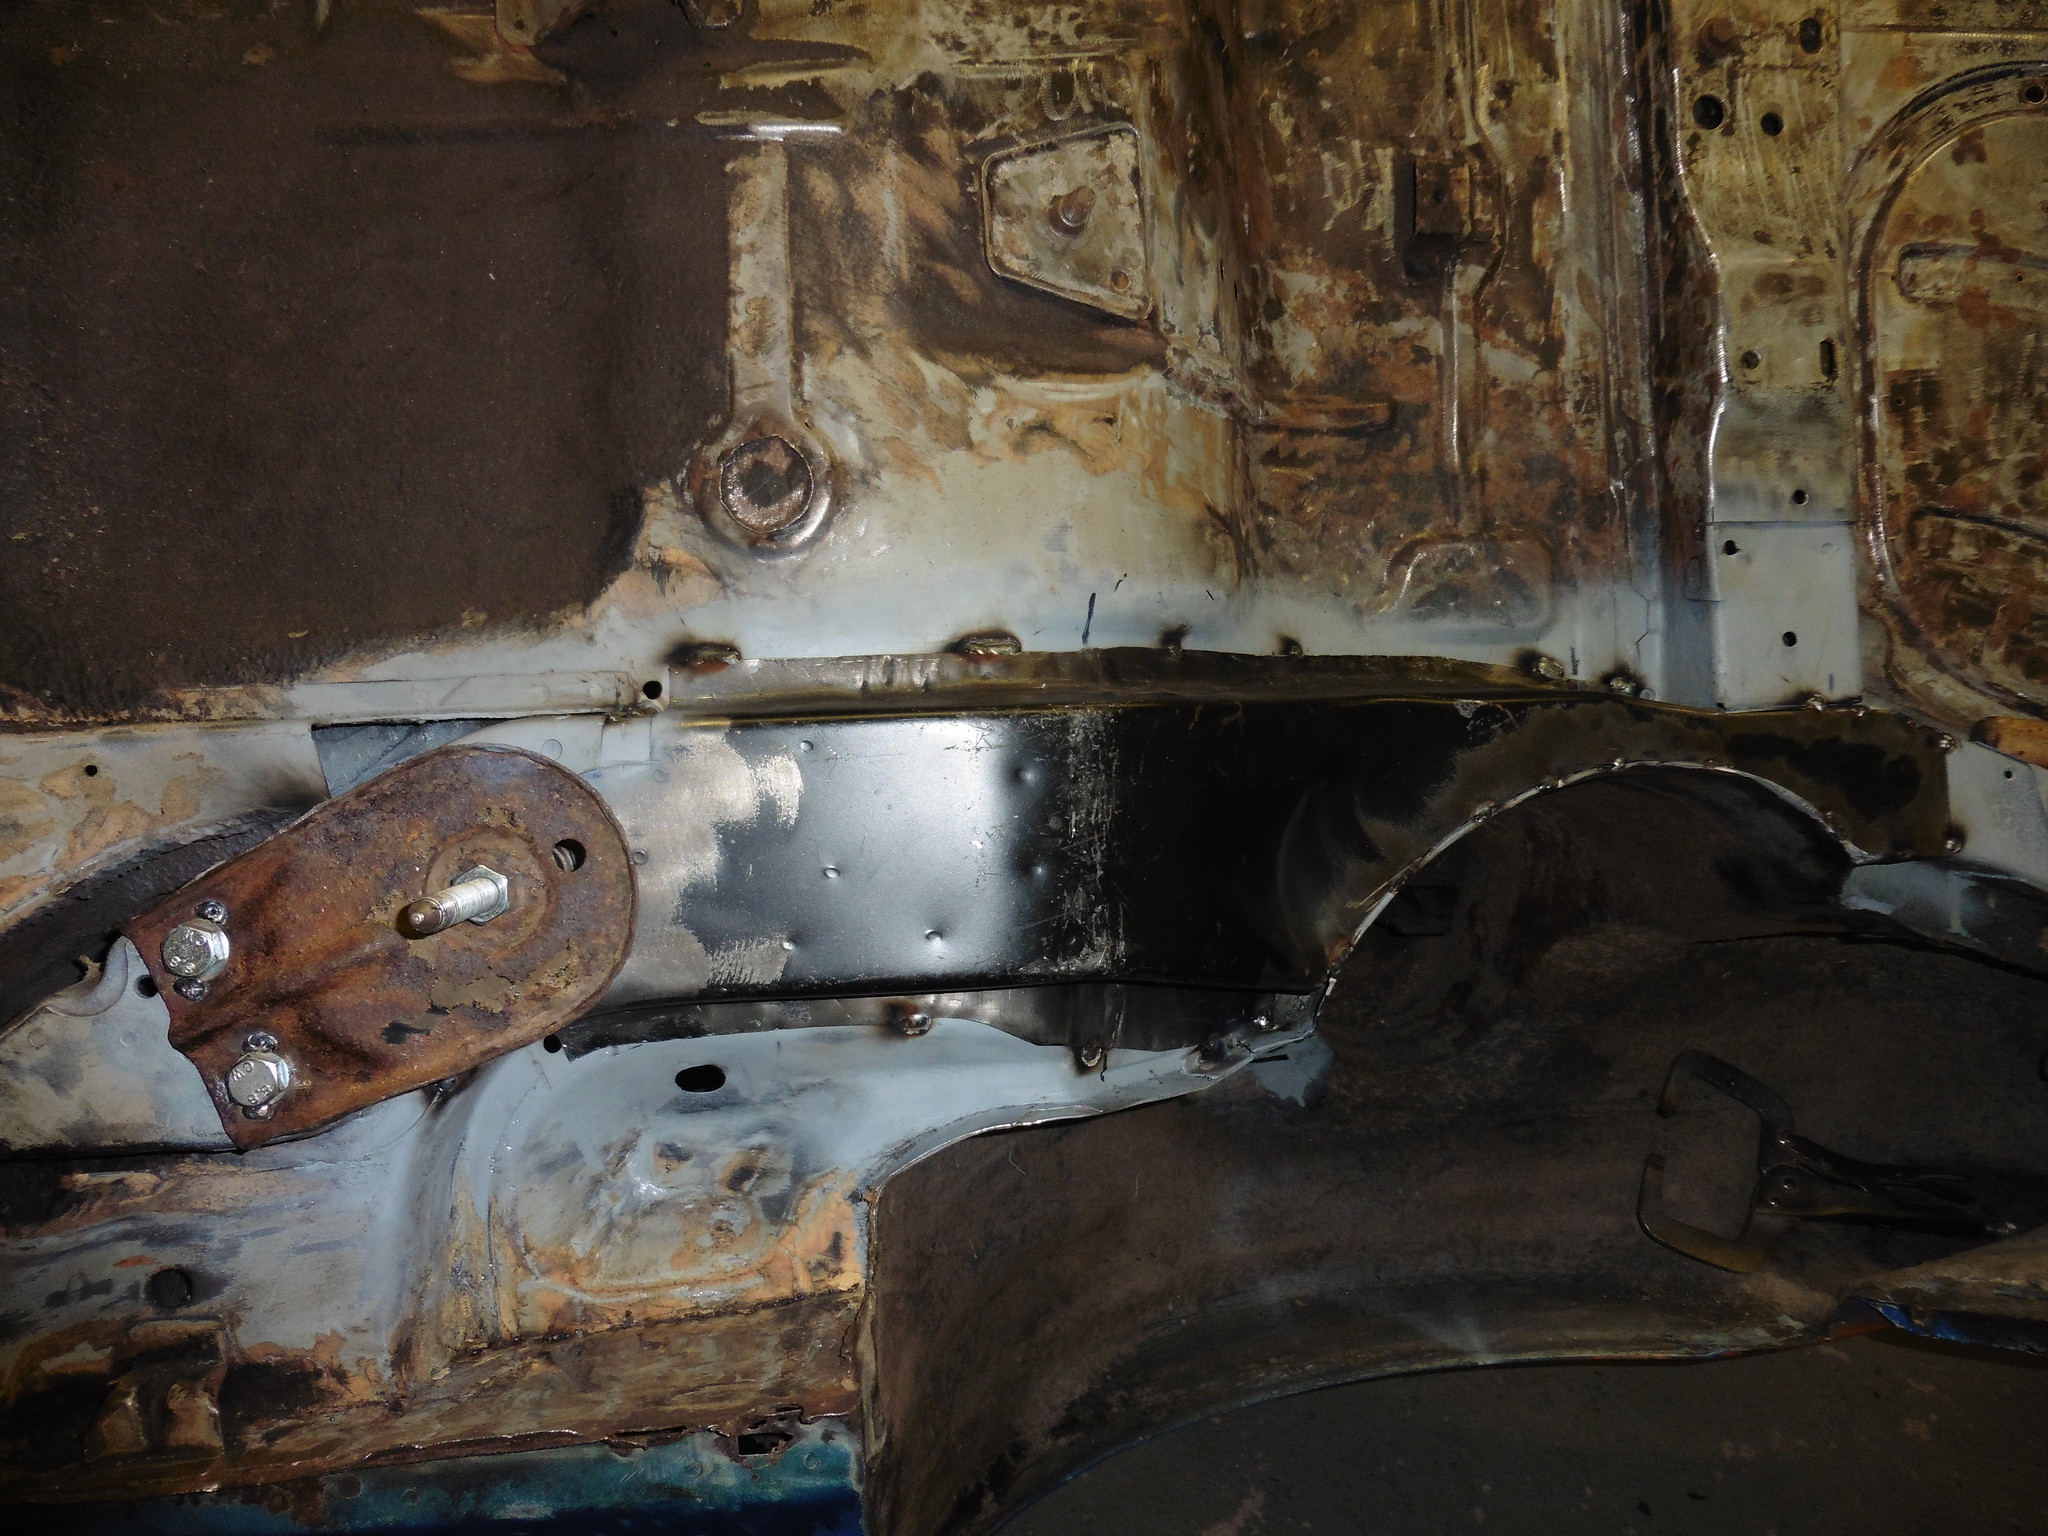 P1020156 P1020156 by jono_misfit, on Flickr then check the beam fits ok, it does with wiggle. 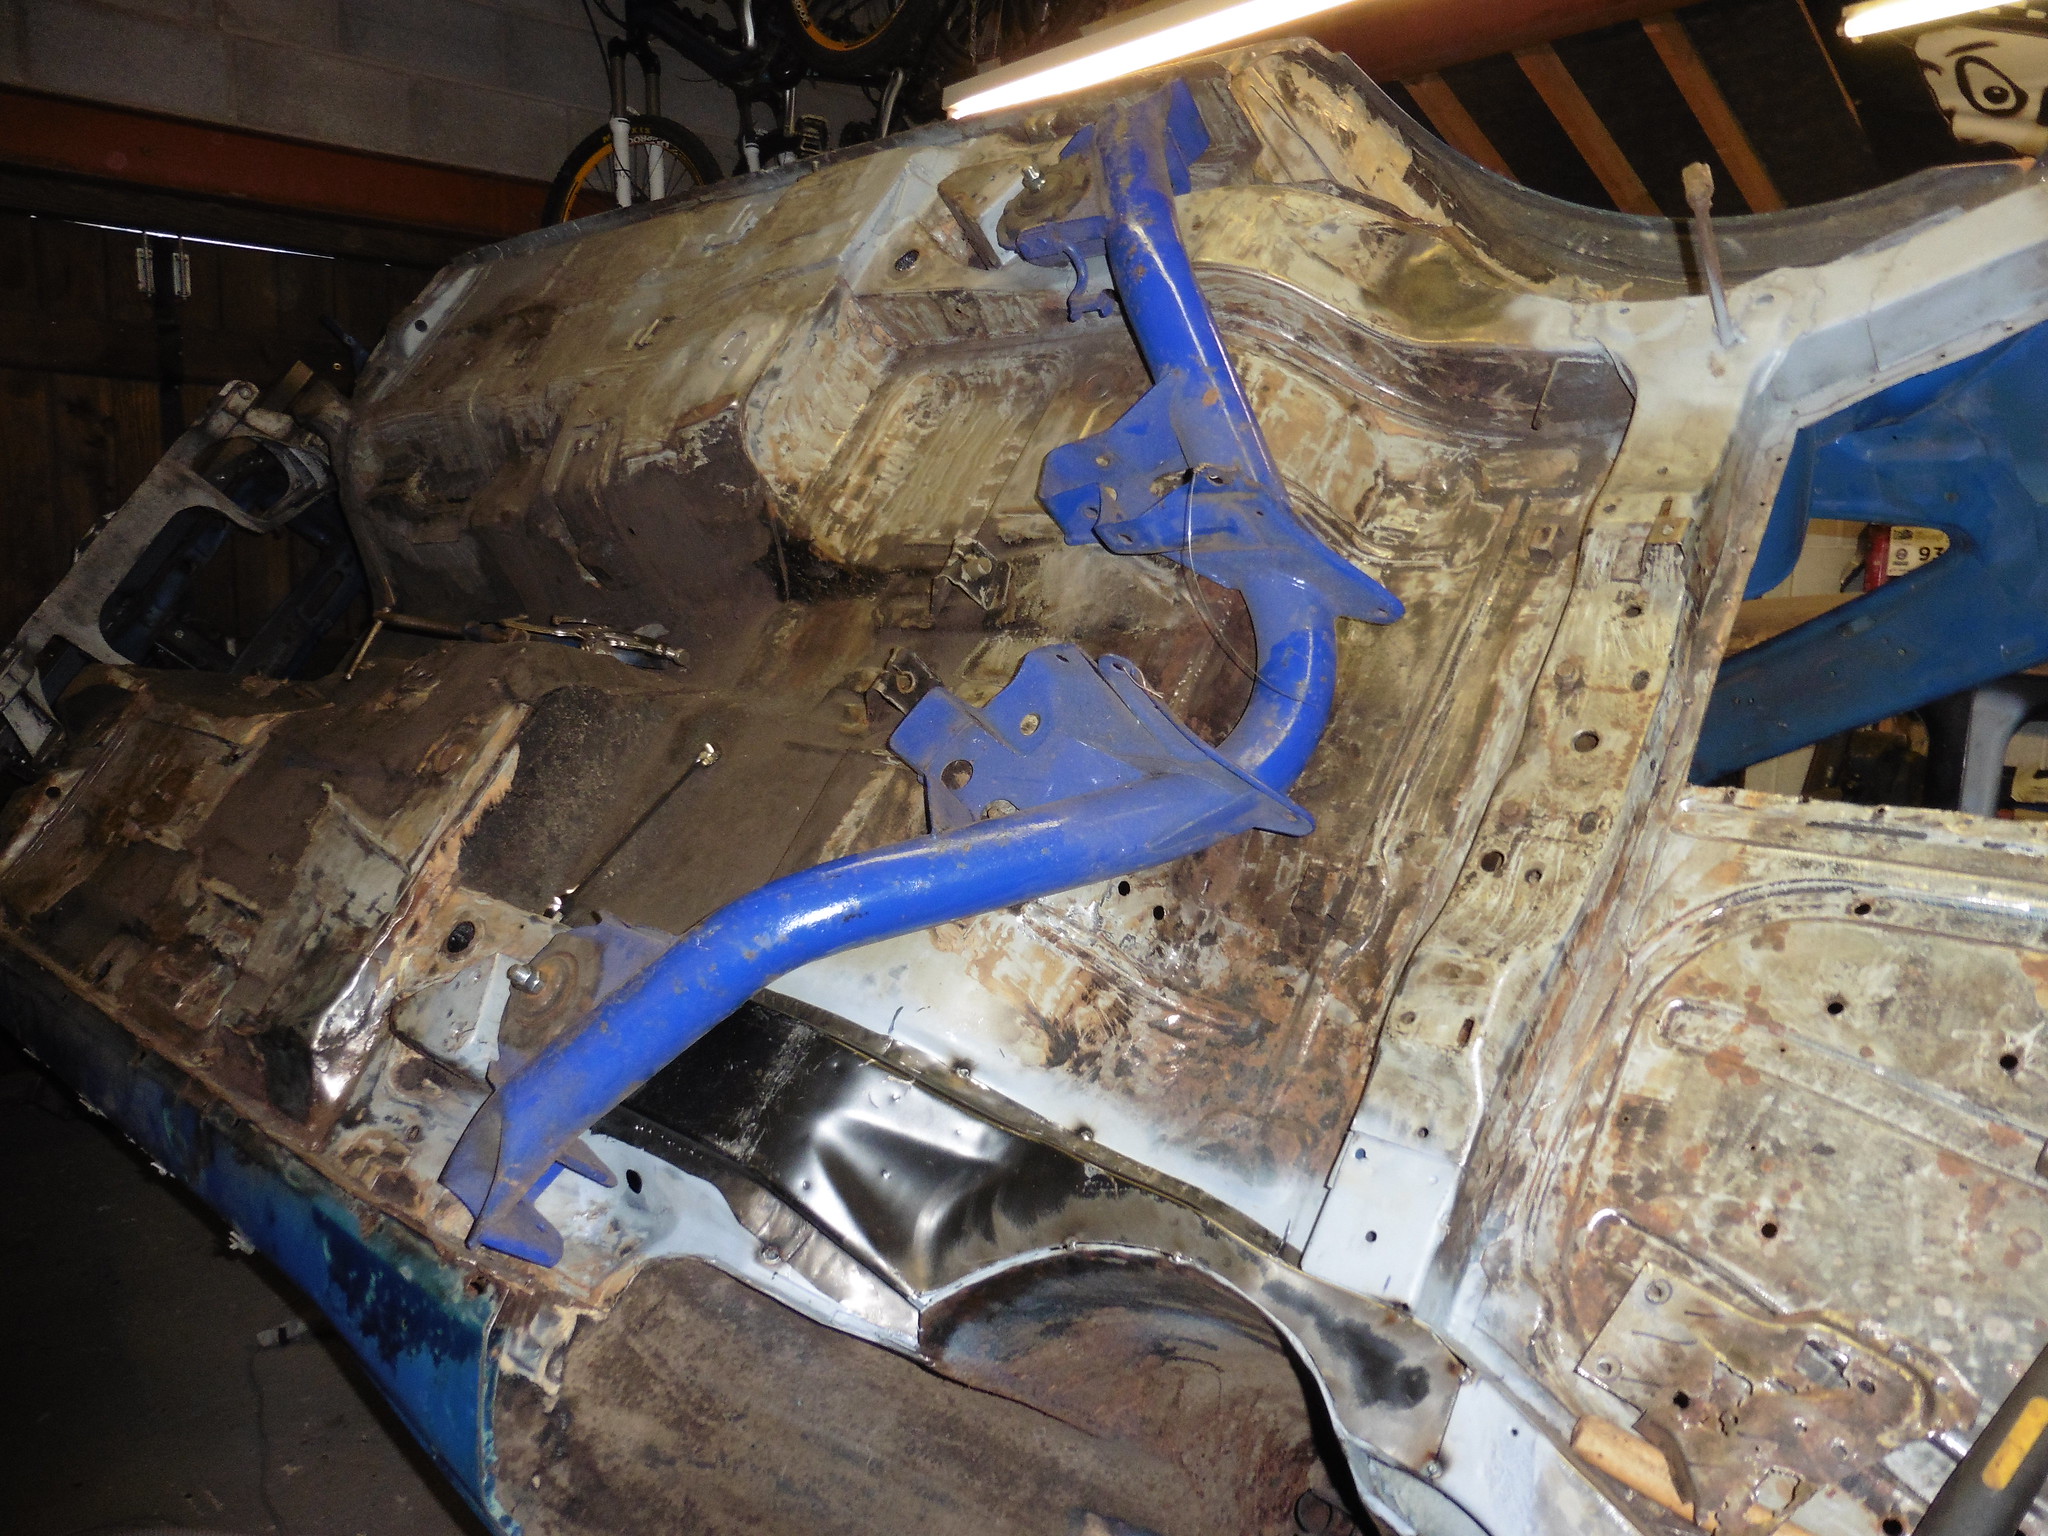 P1020154 P1020154 by jono_misfit, on Flickr then weld weld weld 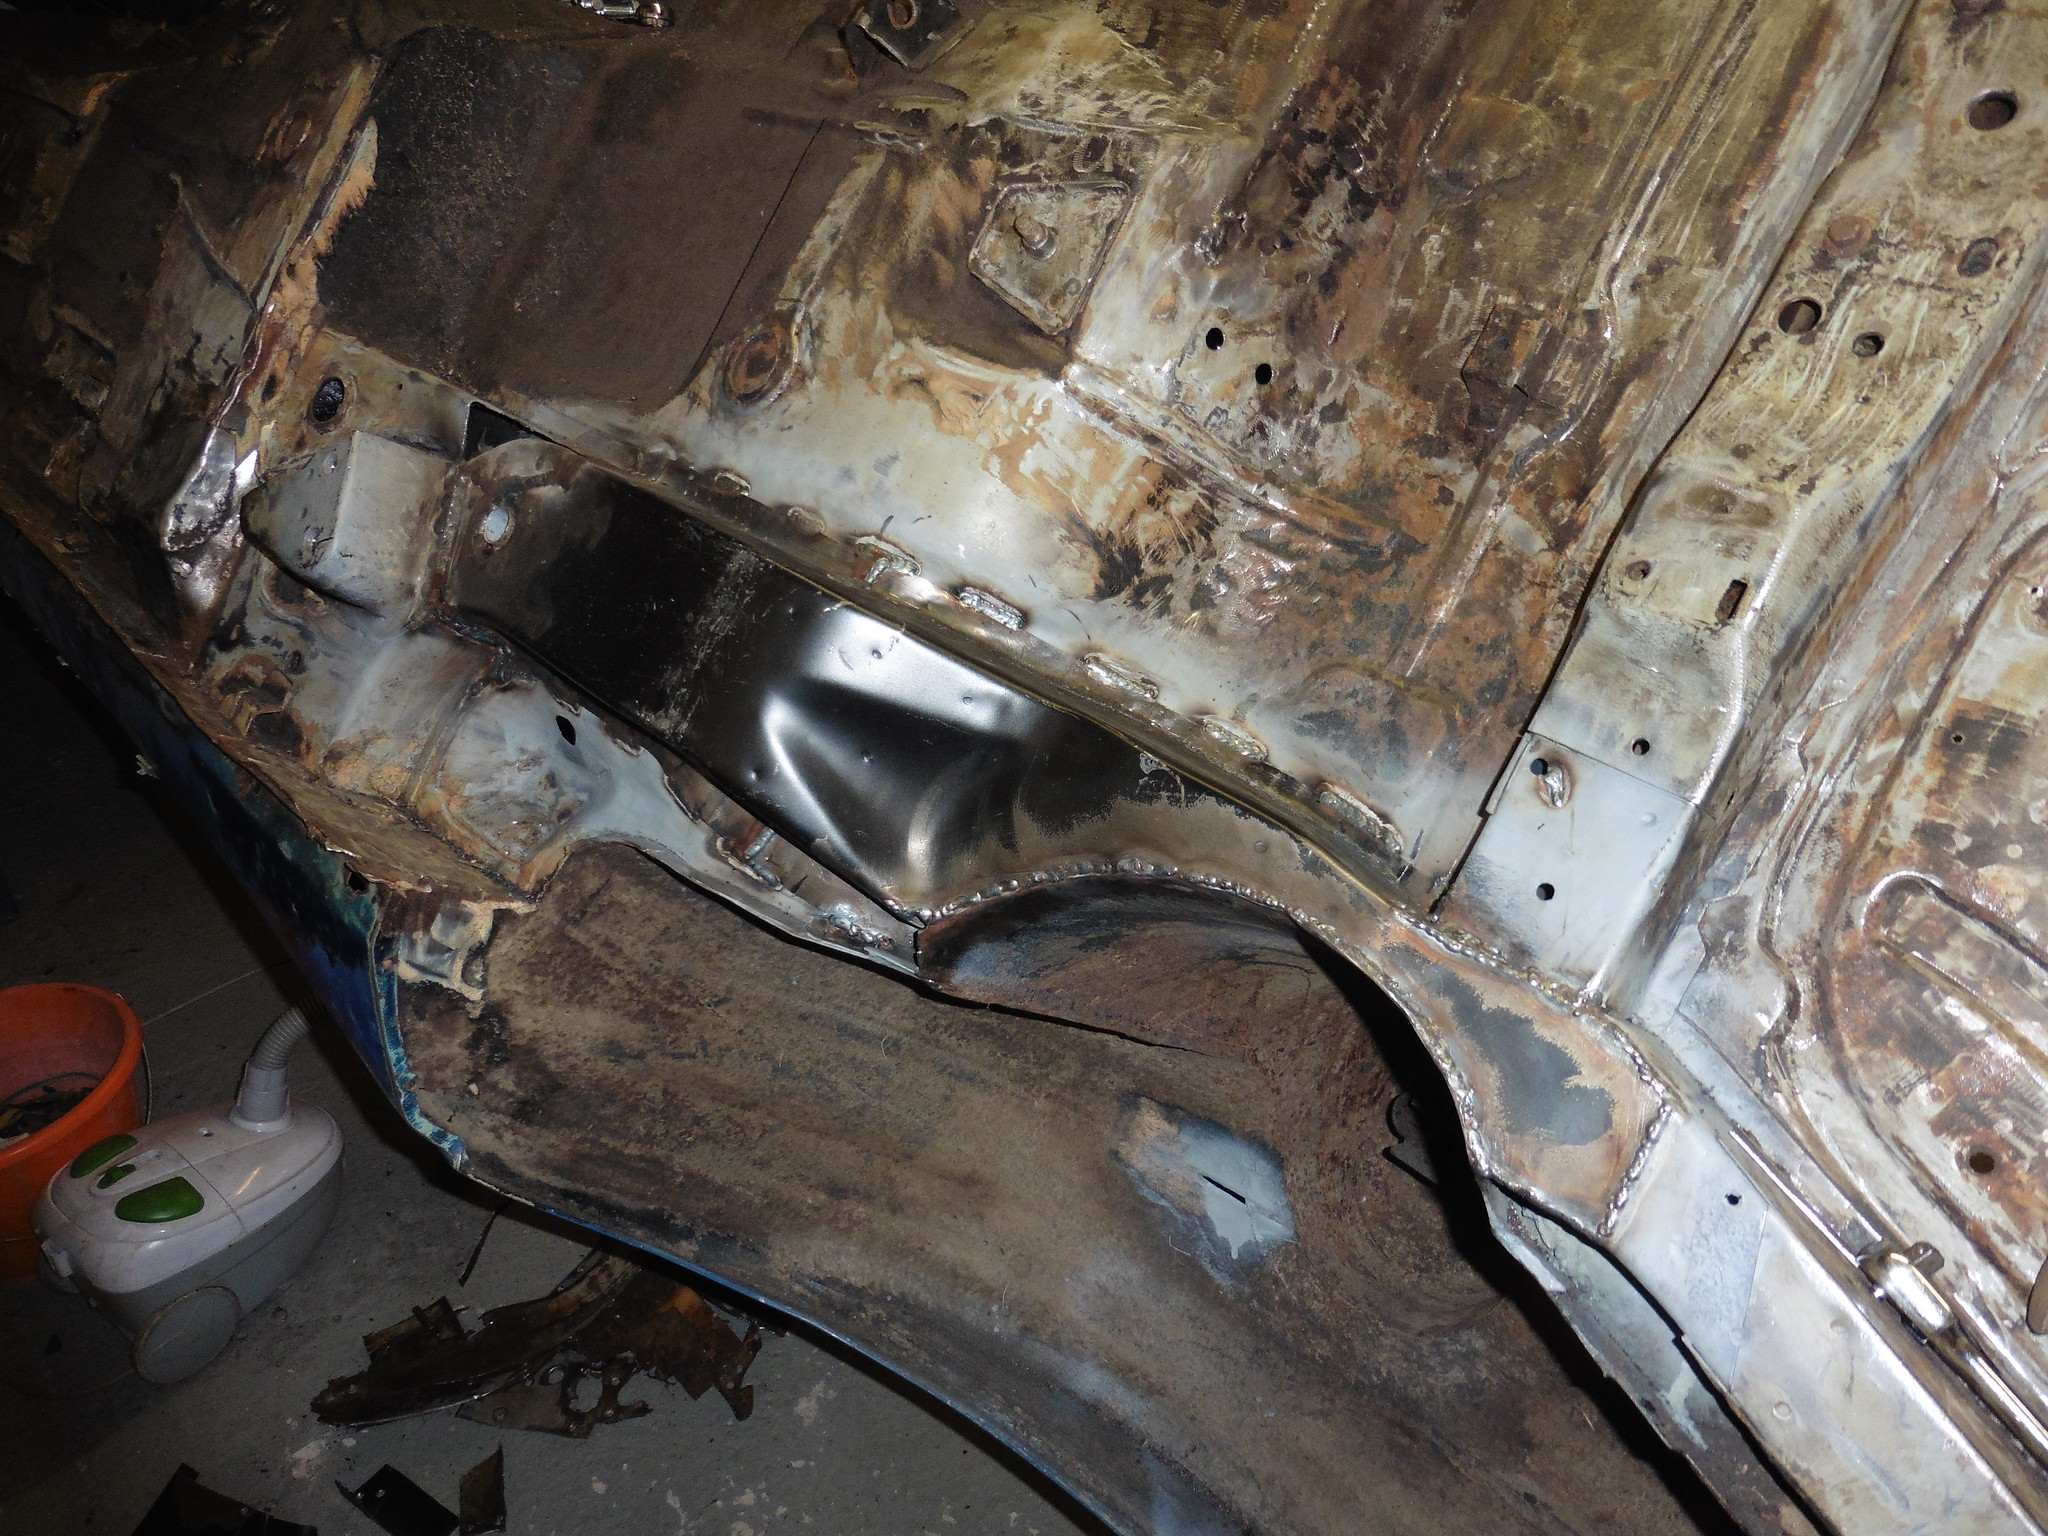 P1020157 P1020157 by jono_misfit, on Flickr 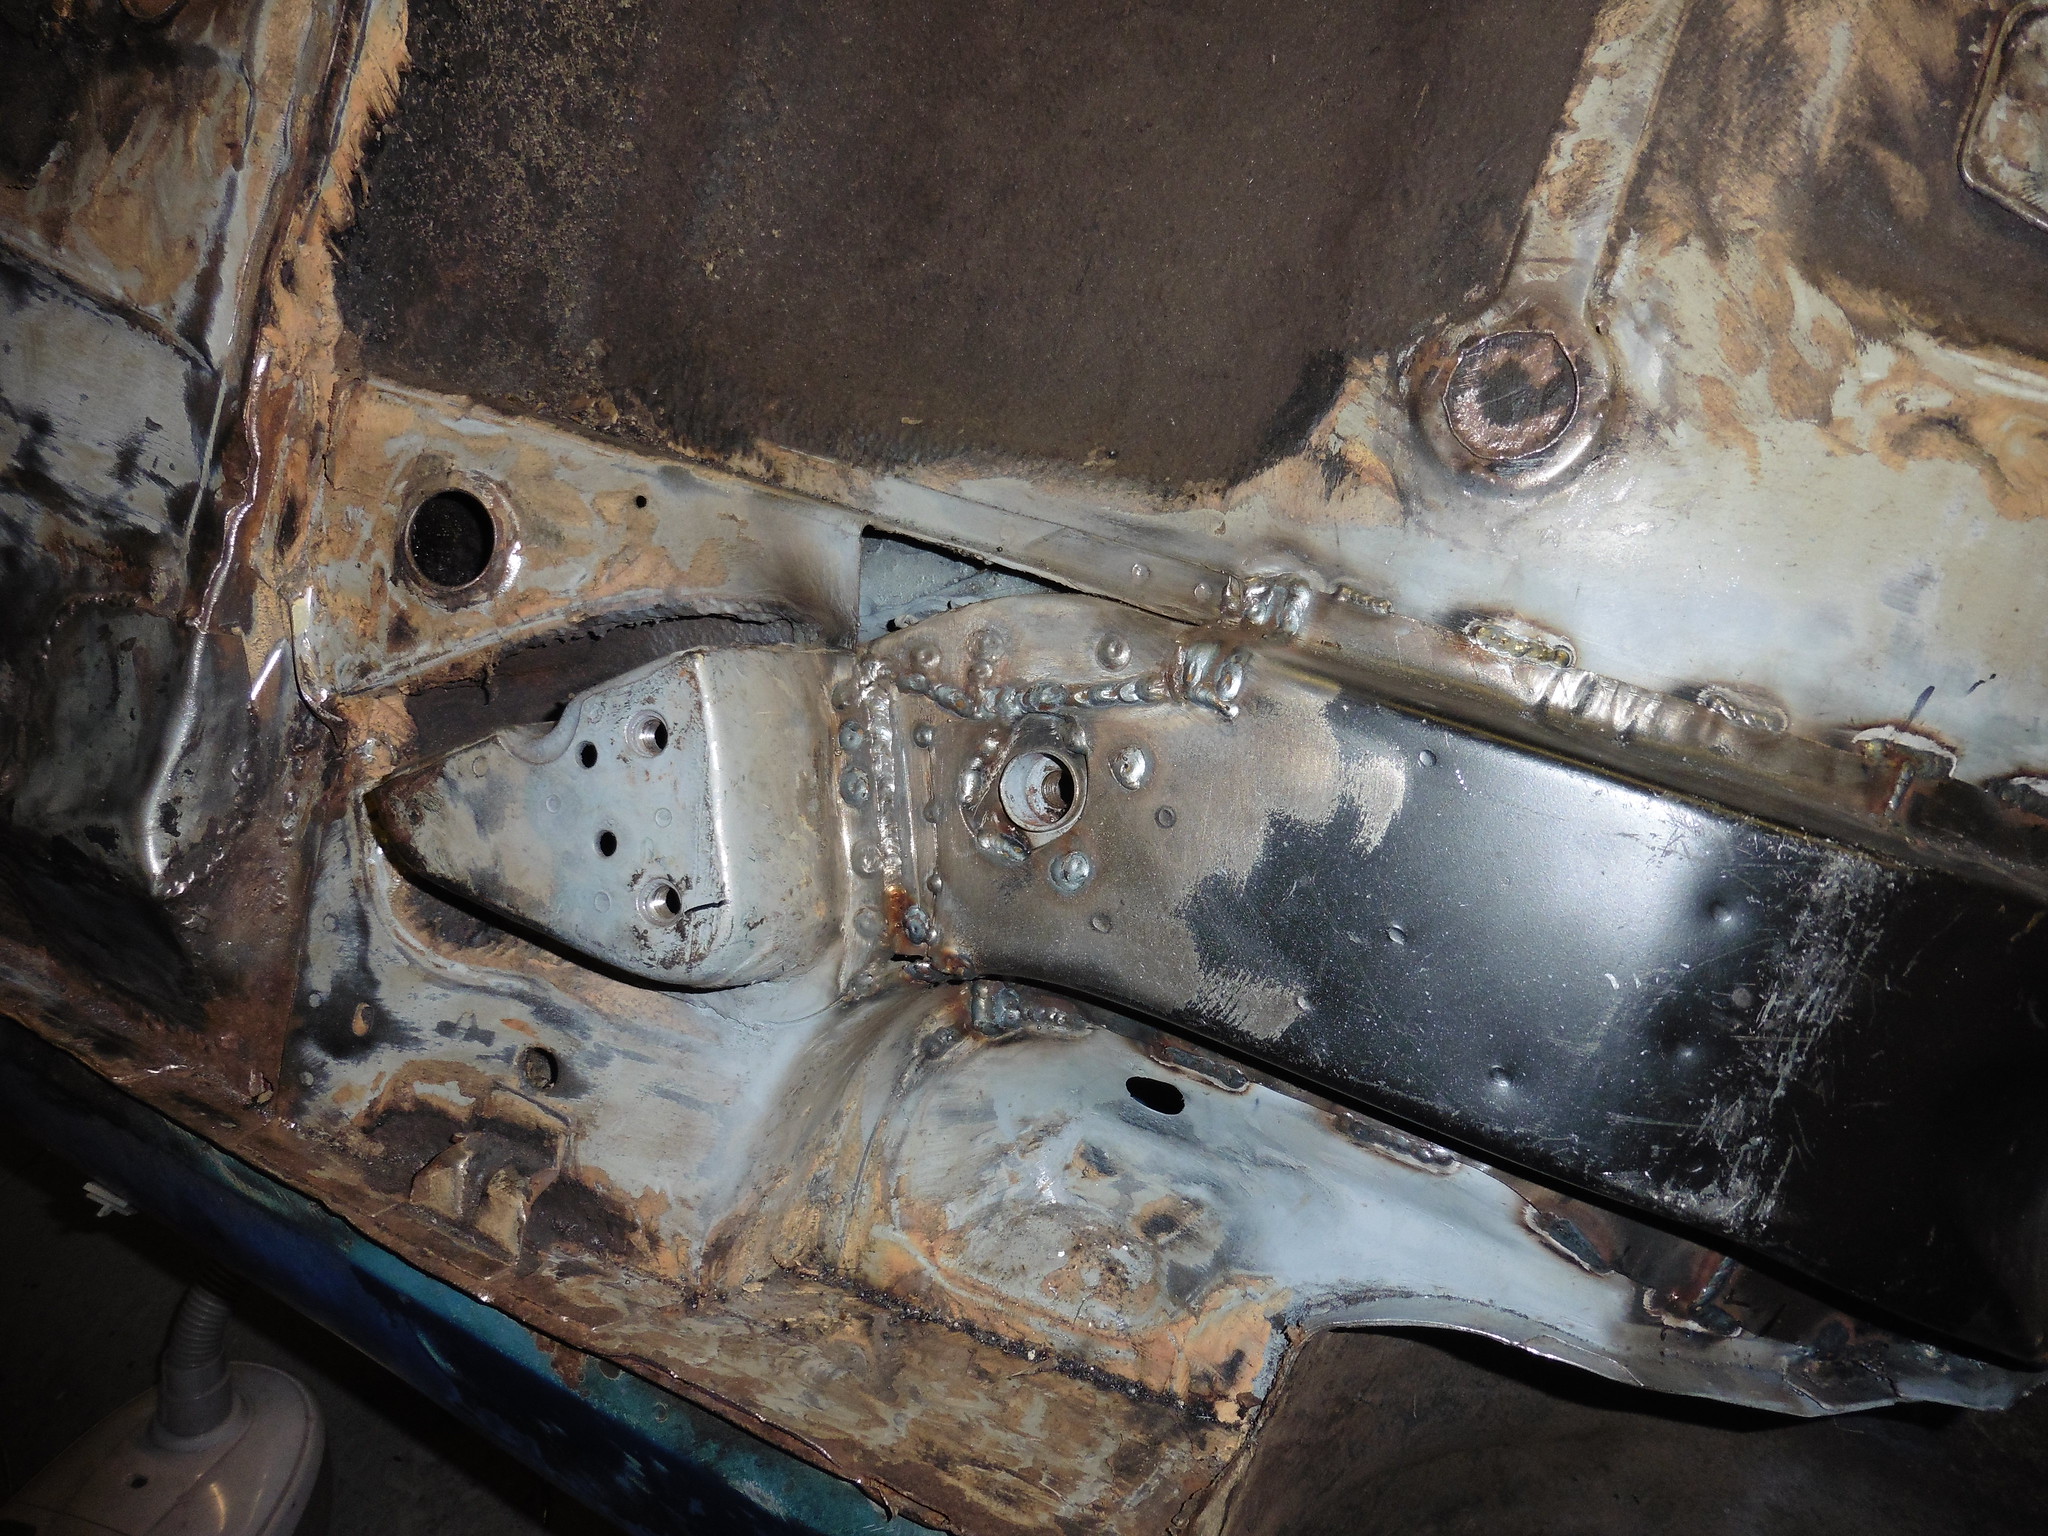 P1020158 P1020158 by jono_misfit, on Flickr 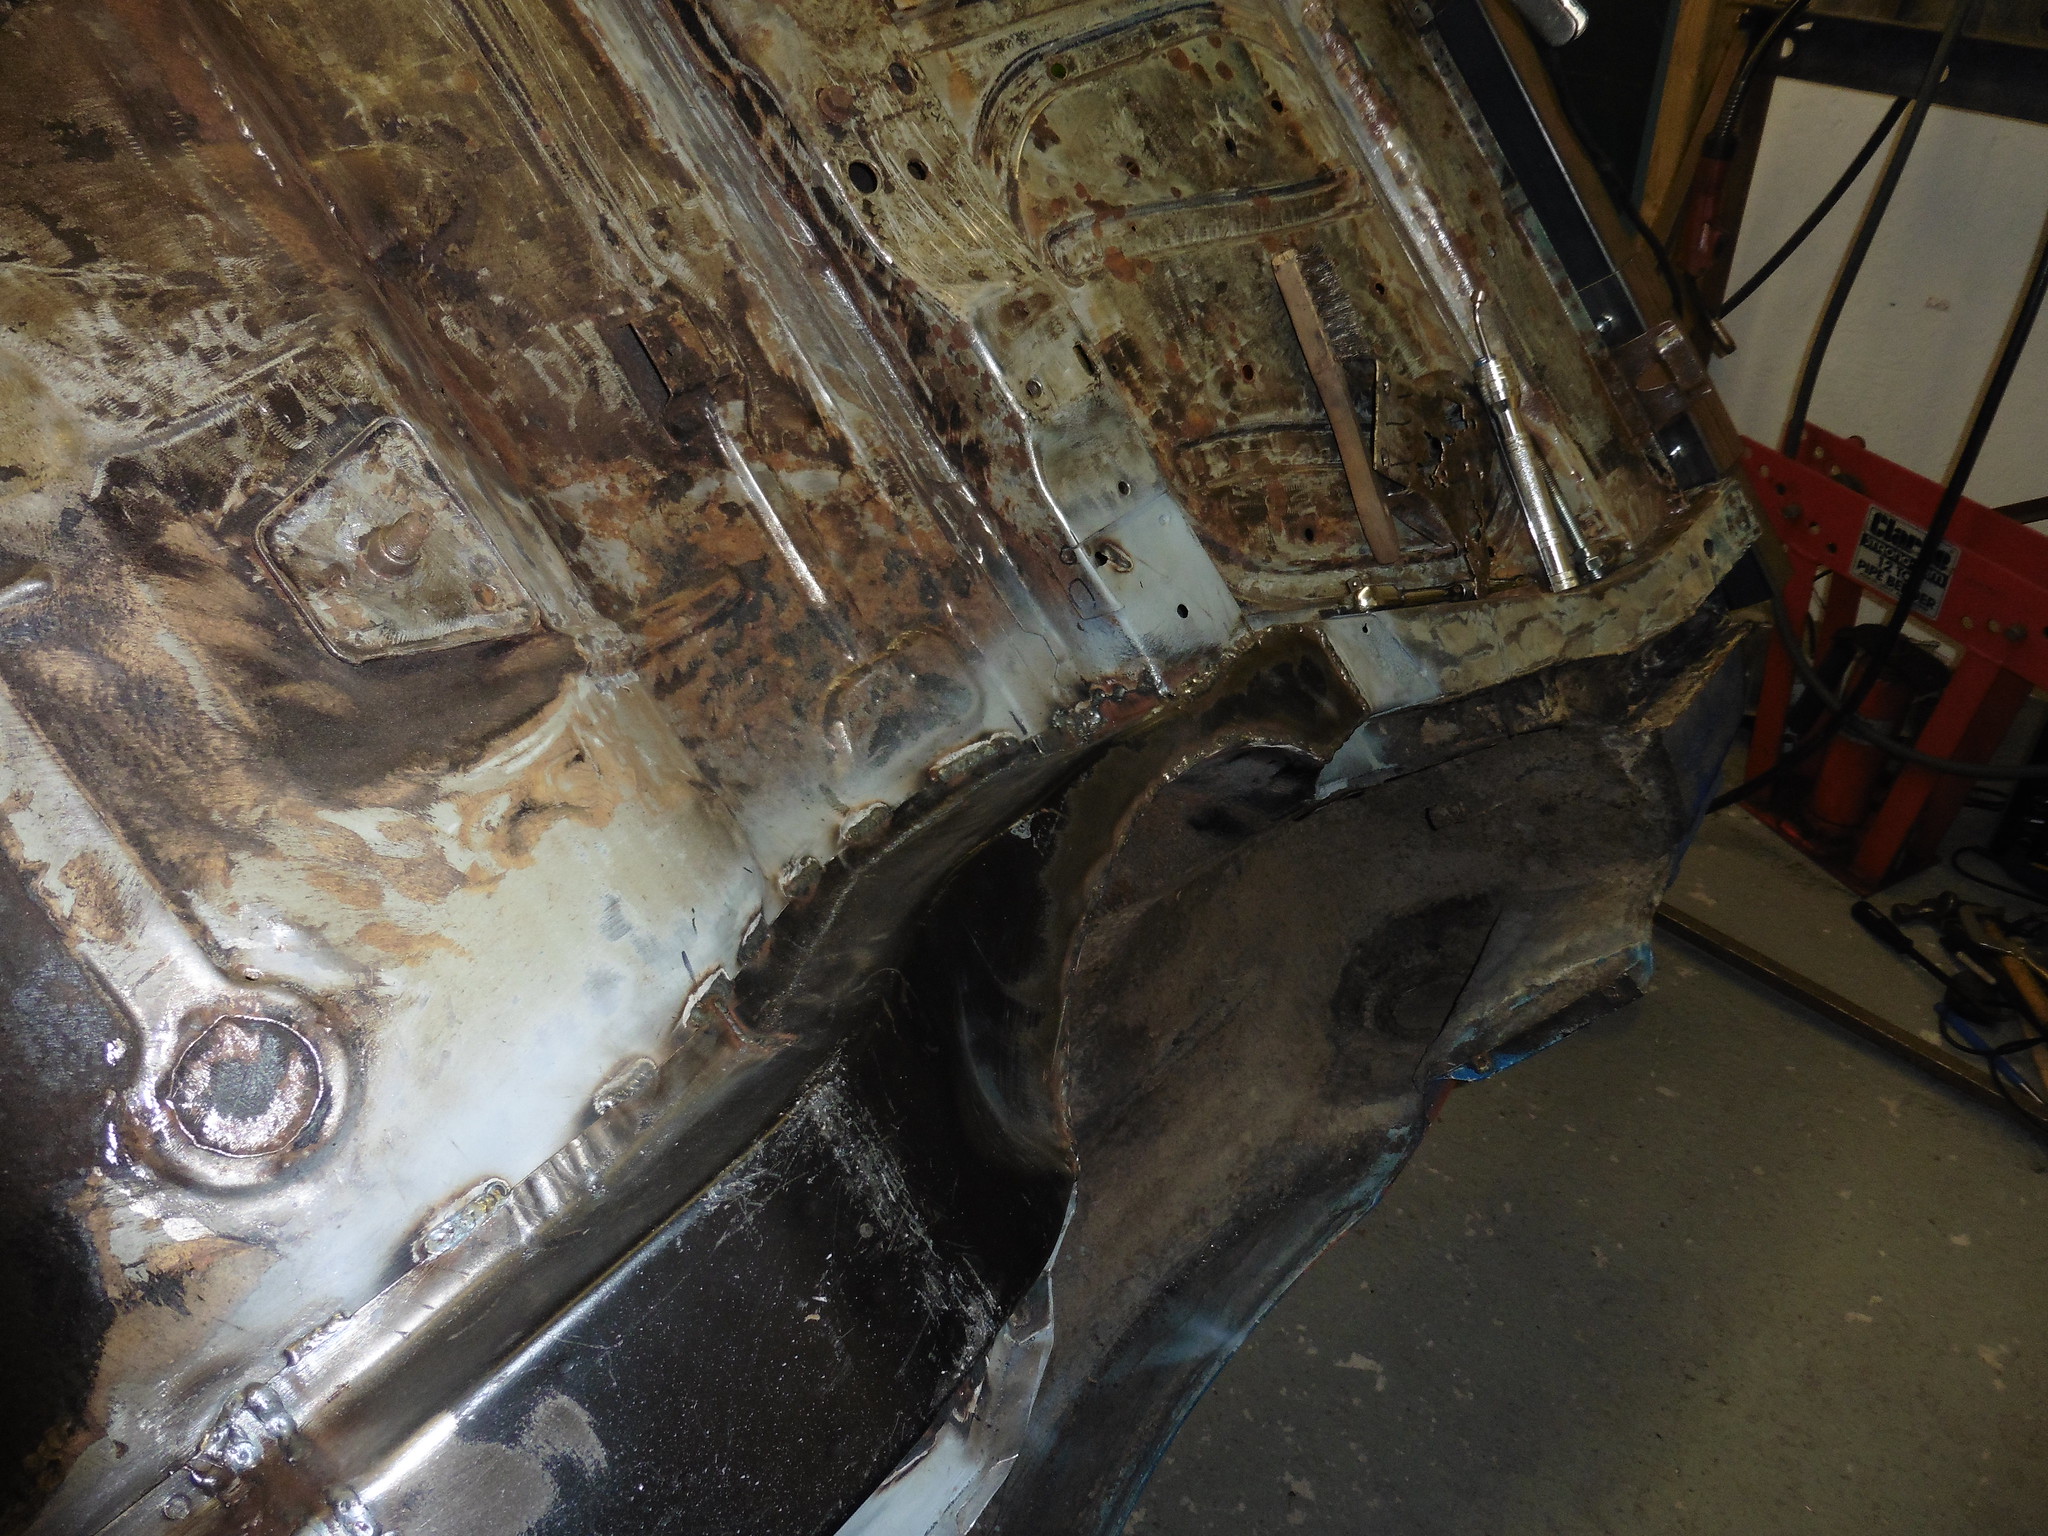 P1020159 P1020159 by jono_misfit, on Flickr and check the beam is still an ok fit. 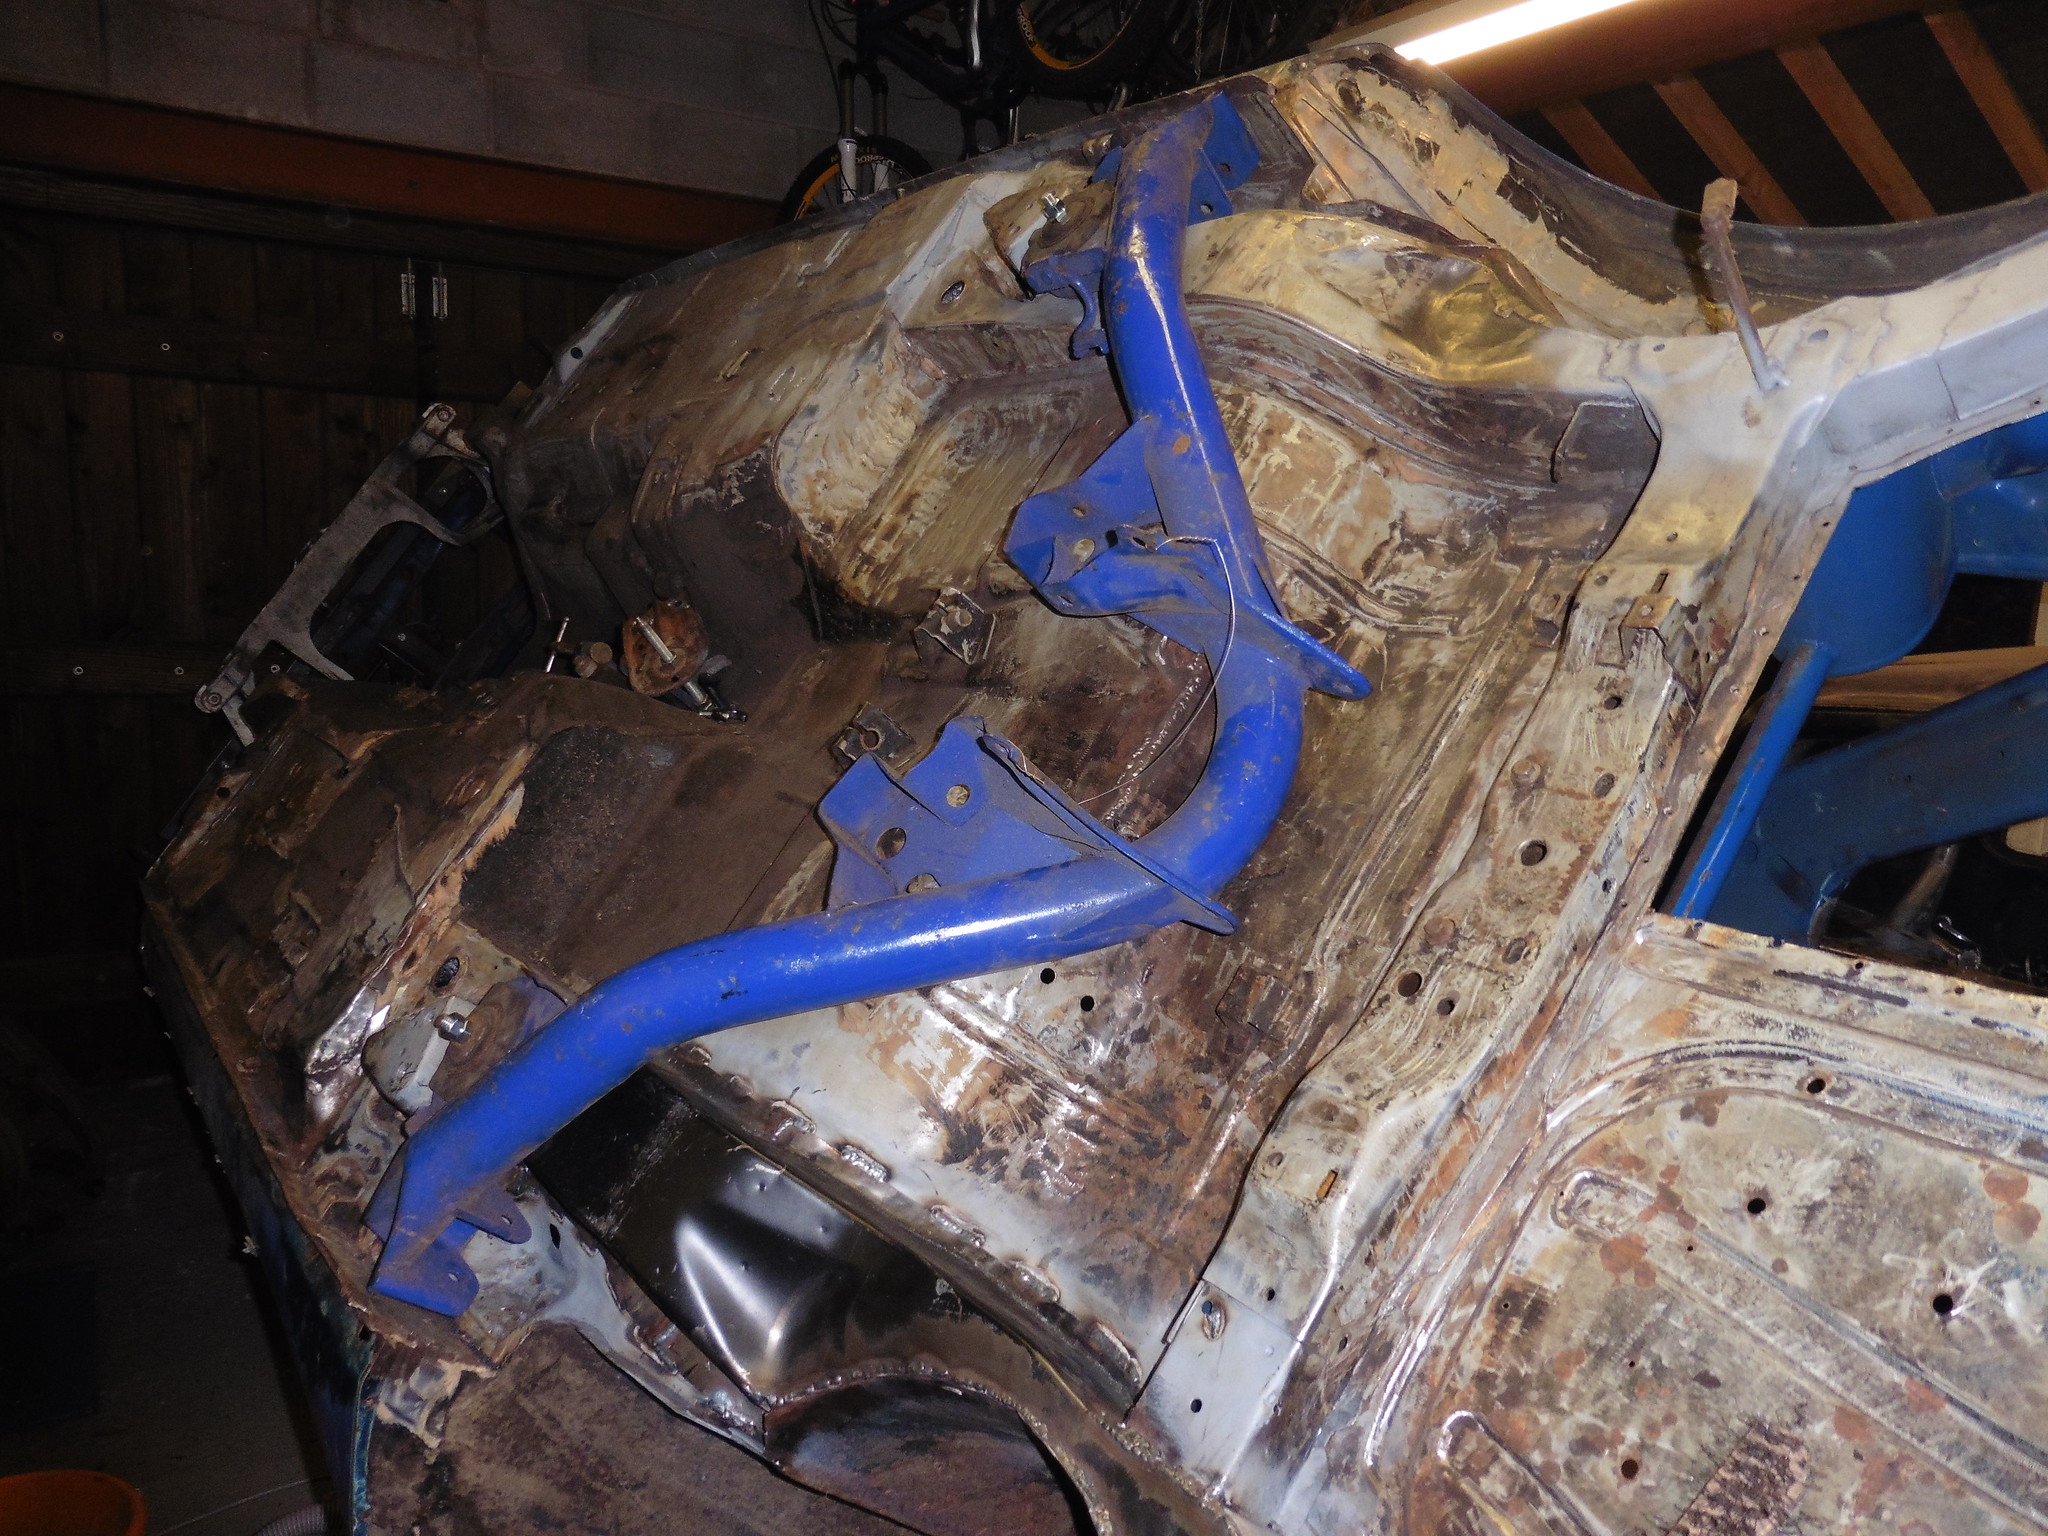 P1020160 P1020160 by jono_misfit, on Flickr Still some small closers to make up and weld in, but that was a long run to getting it in. I also need to do the plug welds from inside the car, but thats easier when I turn it over in the spit. |
| |
|
|


 keep up the good work.......


 . How and why anyone thinks that is an acceptable approach to repair baffles me. I guess body shops are up against it time and cost wise so it's a case of getting it done the fastest and cheapest way possible.


