jonomisfit
Club Retro Rides Member
Posts: 1,790
Club RR Member Number: 49
|
|
Jul 11, 2019 17:57:57 GMT
|
|
It's only double skinned in a couple of places. The jacking point I removed and the gearbox mount. The rest of it is single skinned with a mid pan reinforcing member.
I've got no history but I think it was once a rally car, then used for circuit racing / track days, judging by the driver / codriver seat mounts, then the battery mount that was in place of the codriver seat.
|
| |
|
|
|
|
jonomisfit
Club Retro Rides Member
Posts: 1,790
Club RR Member Number: 49
|
|
Jul 11, 2019 21:22:17 GMT
|
Well.... i think its best to say the panel fit wasn't what I was hoping for, but it was probably in line with what I was expecting. I think most of the issues are Sierra rwd floor pan v's escort / sierra AWD floorpan, but some look like manufacturing issues. Anyway enough of the moaning. Start knocking out the bigger dents and cleaning up the strengthening plate  P1020472 P1020472 by jono_misfit, on Flickr  P1020473 P1020473 by jono_misfit, on Flickr cleaned, de-rusted, and primed  P1020474 P1020474 by jono_misfit, on Flickr then I roughly clamped the floorpan in place so I could get a sense of the job ahead  P1020475 P1020475 by jono_misfit, on Flickr then doodled on where I'll need to cut it  P1020476 P1020476 by jono_misfit, on Flickr the strange cut line is to avoid some of the features that will cause me issues, but also include those i need, whilst covering all the rust areas.. this floorpan piece under the cage food needs some adjusting  P1020477 P1020477 by jono_misfit, on Flickr and this is the main culprit of not fitting well, both the step on the left, and the height of the step  P1020478 P1020478 by jono_misfit, on Flickr but before blaming anything else I need the footwell stiff and in the right position, so tack on the bits i fettled earlier clamp into position.  P1020479 P1020479 by jono_misfit, on Flickr 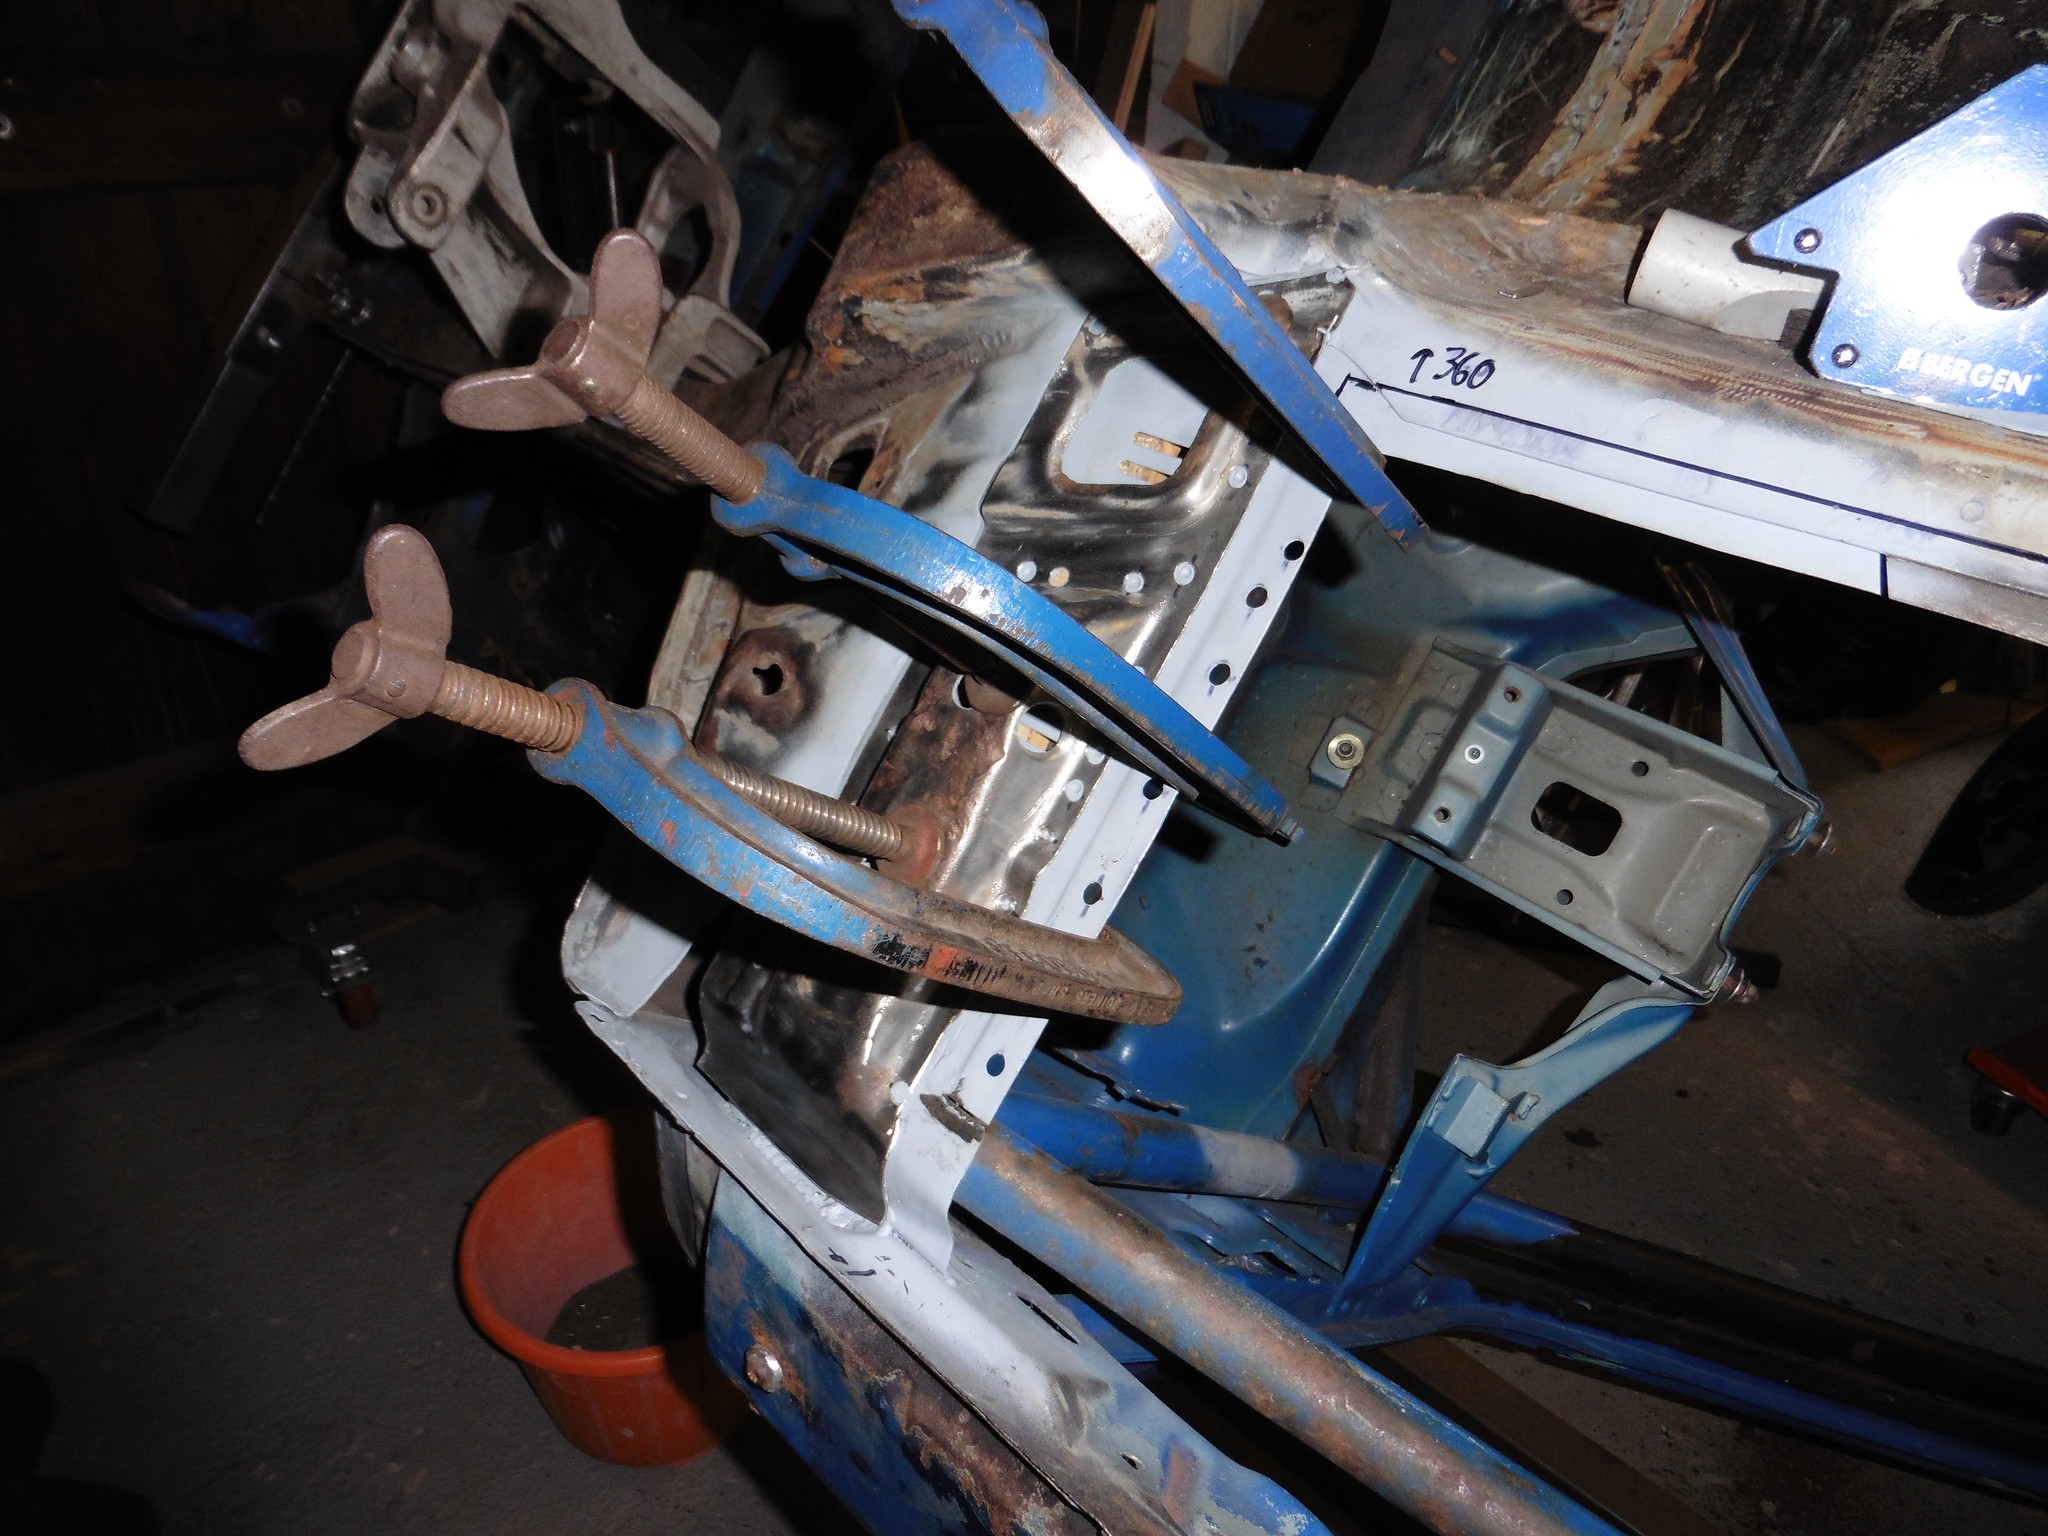 P1020480 P1020480 by jono_misfit, on Flickr tacked in. Not fully welded as if I need to adjust anything I want it to be fairly straight forward to remove.  P1020481 P1020481 by jono_misfit, on Flickr  P1020482 P1020482 by jono_misfit, on Flickr the gap on the left has opened a bit more than i would have liked  P1020483 P1020483 by jono_misfit, on Flickr fairly flat floor, which is good as it was pushed up before. 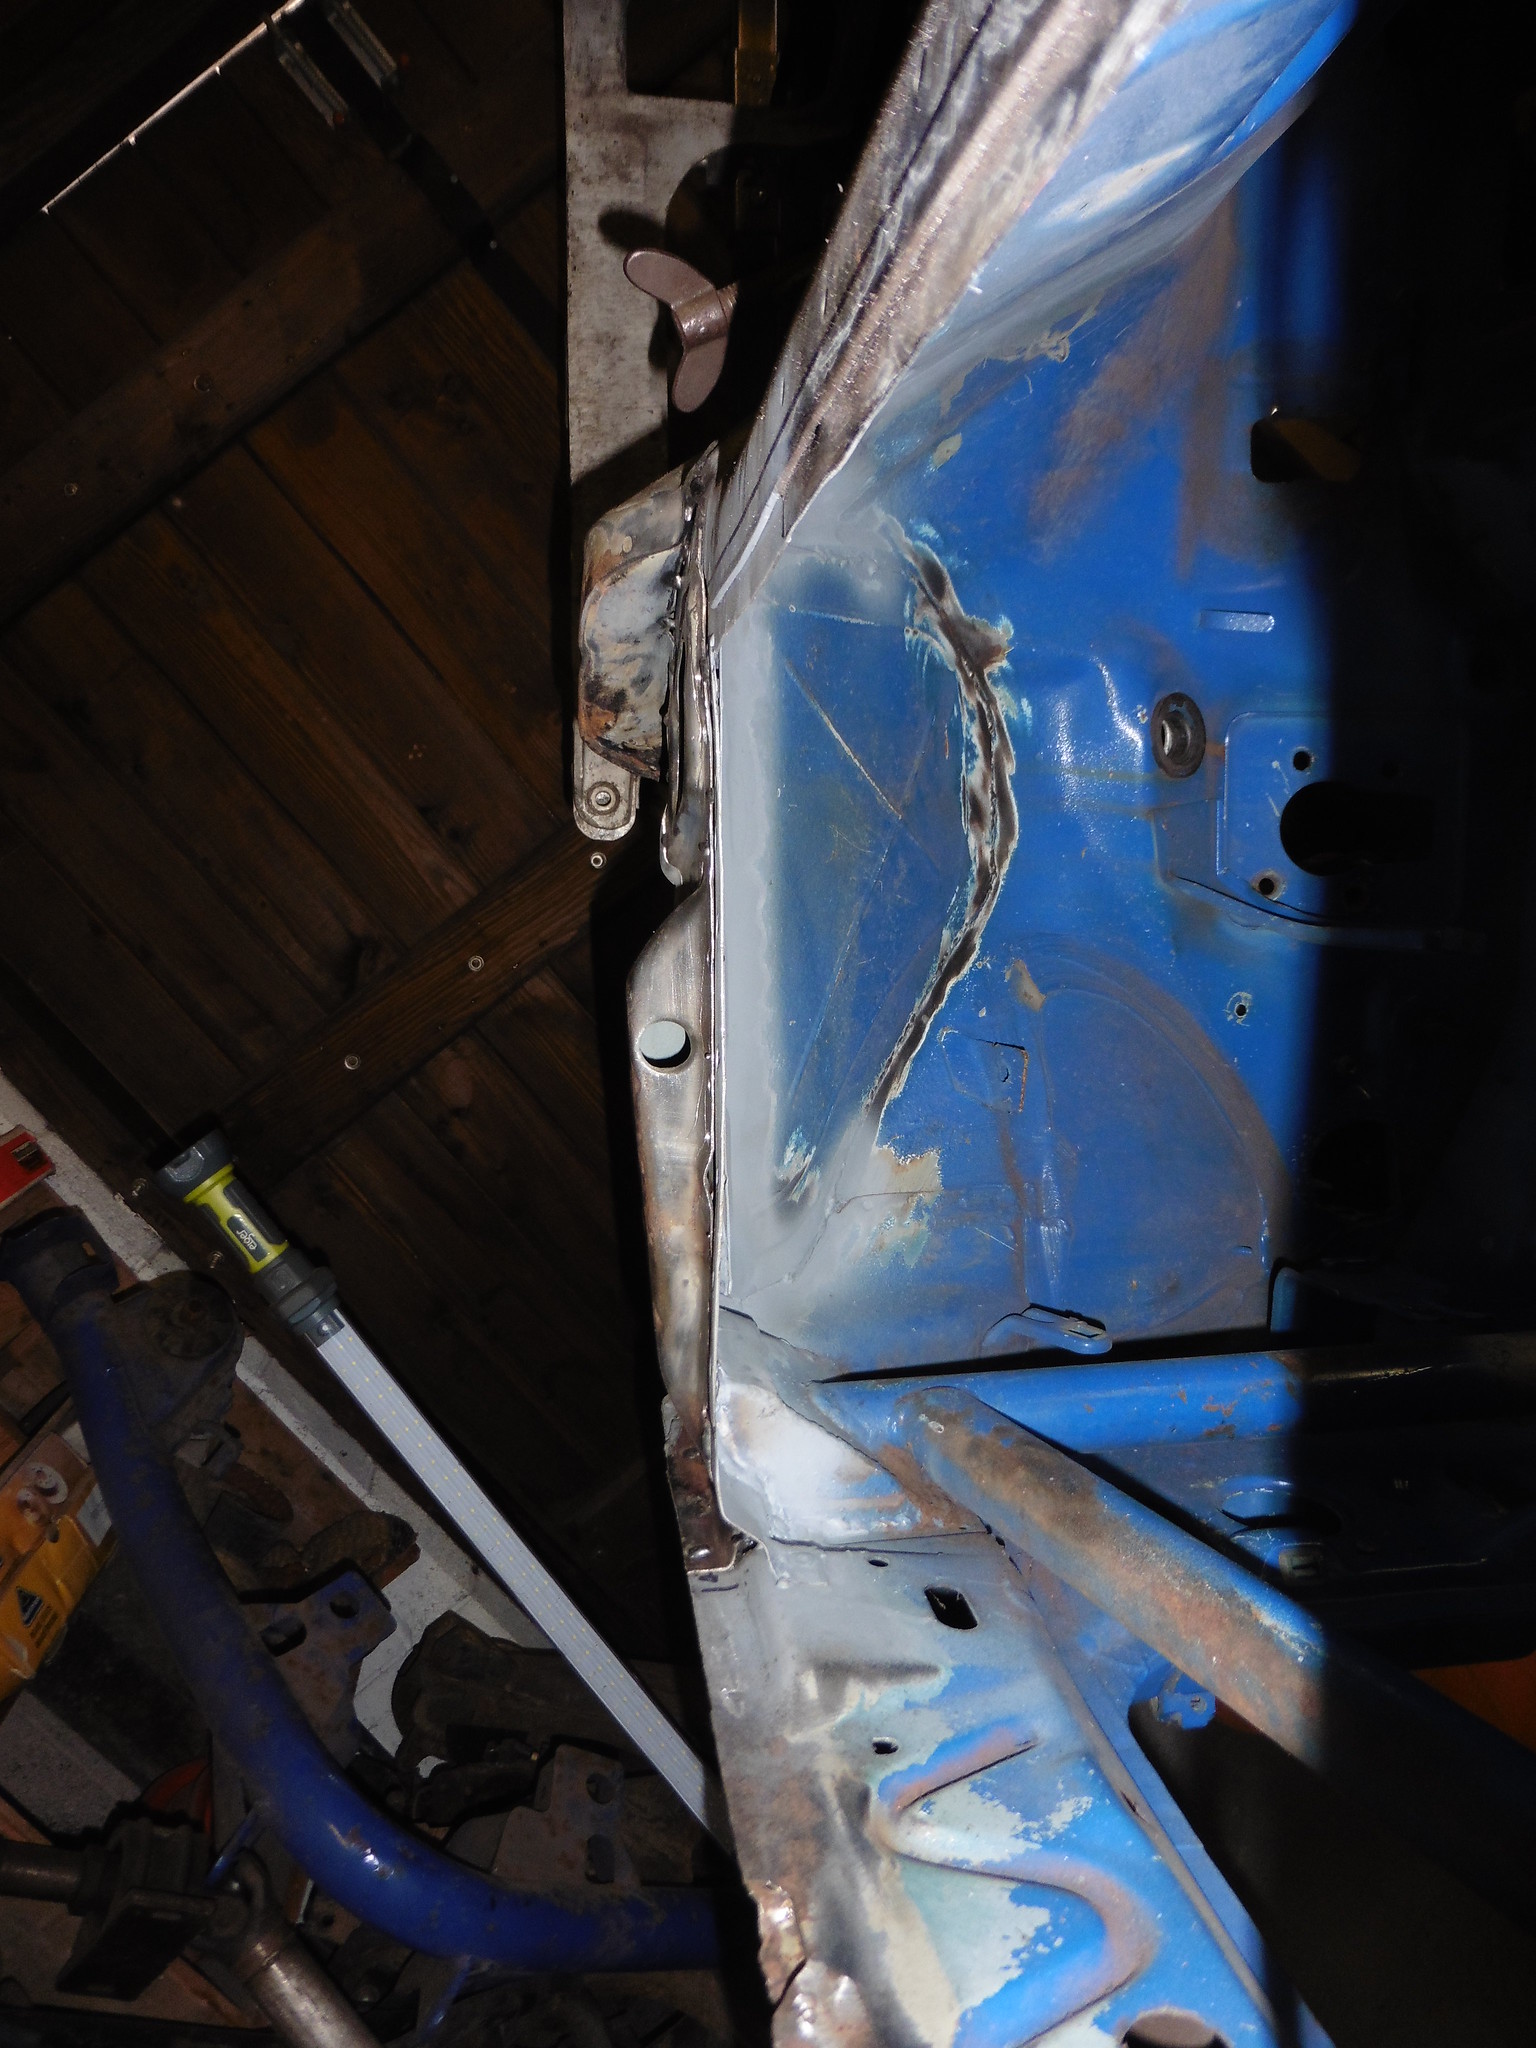 P1020484 P1020484 by jono_misfit, on Flickr pulled on the big boy pants and cut the panel  P1020485 P1020485 by jono_misfit, on Flickr  P1020486 P1020486 by jono_misfit, on Flickr re-trialling to see what needs further adjusted 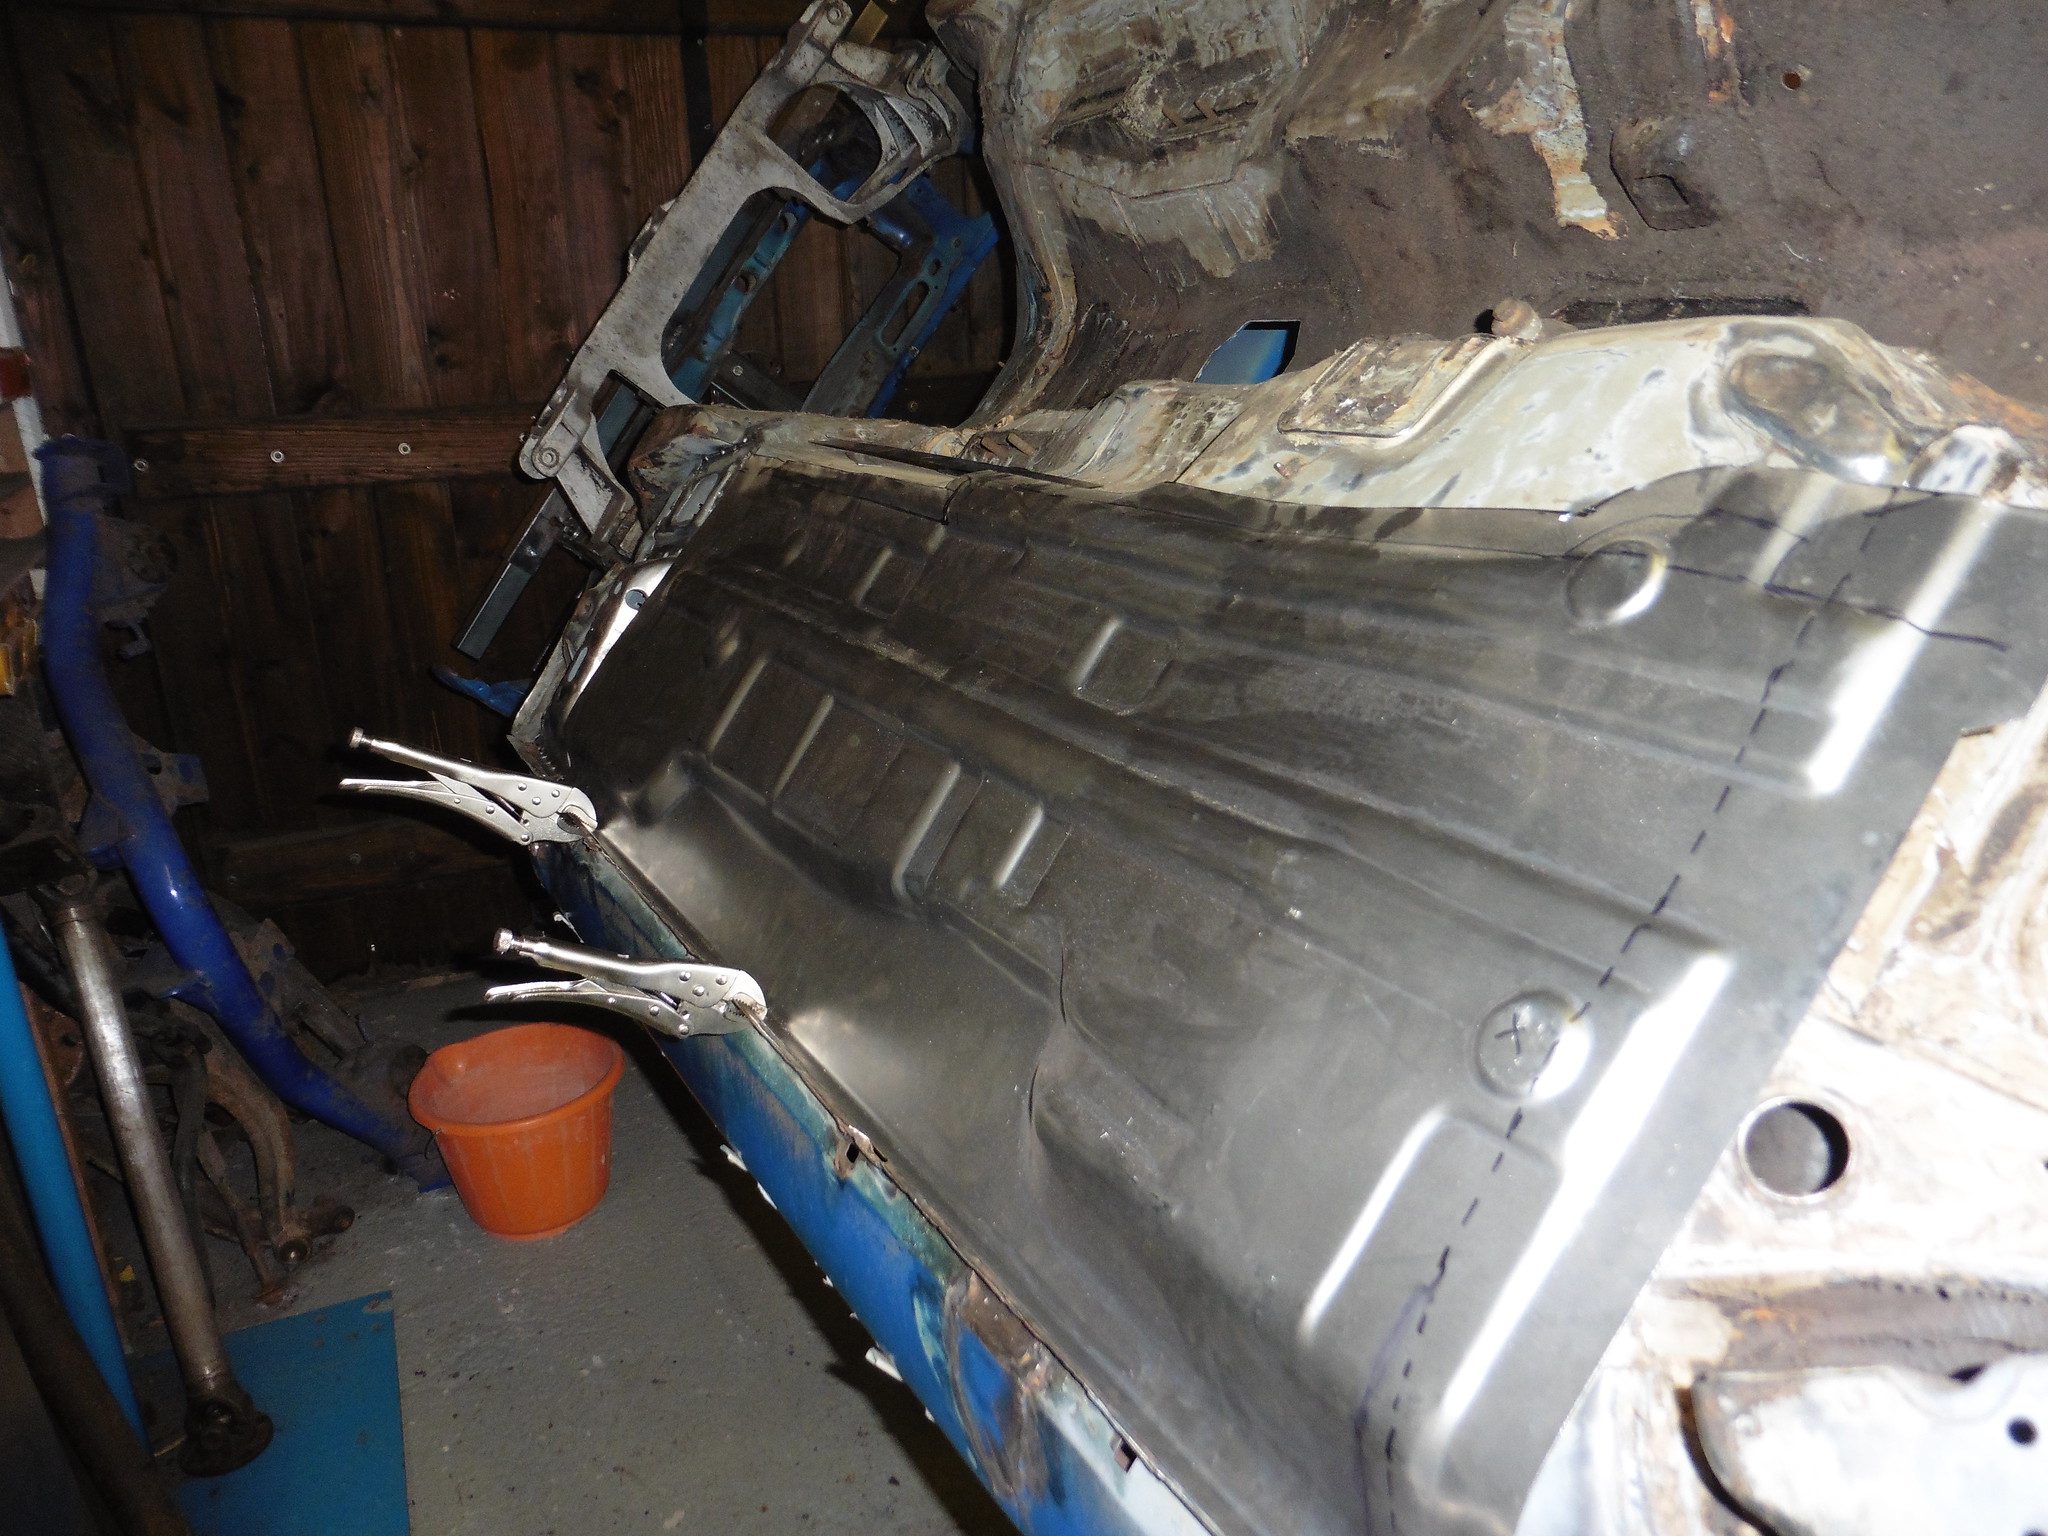 P1020487 P1020487 by jono_misfit, on Flickr most of its a fair fit, however this corner is still 17mm high  P1020488 P1020488 by jono_misfit, on Flickr 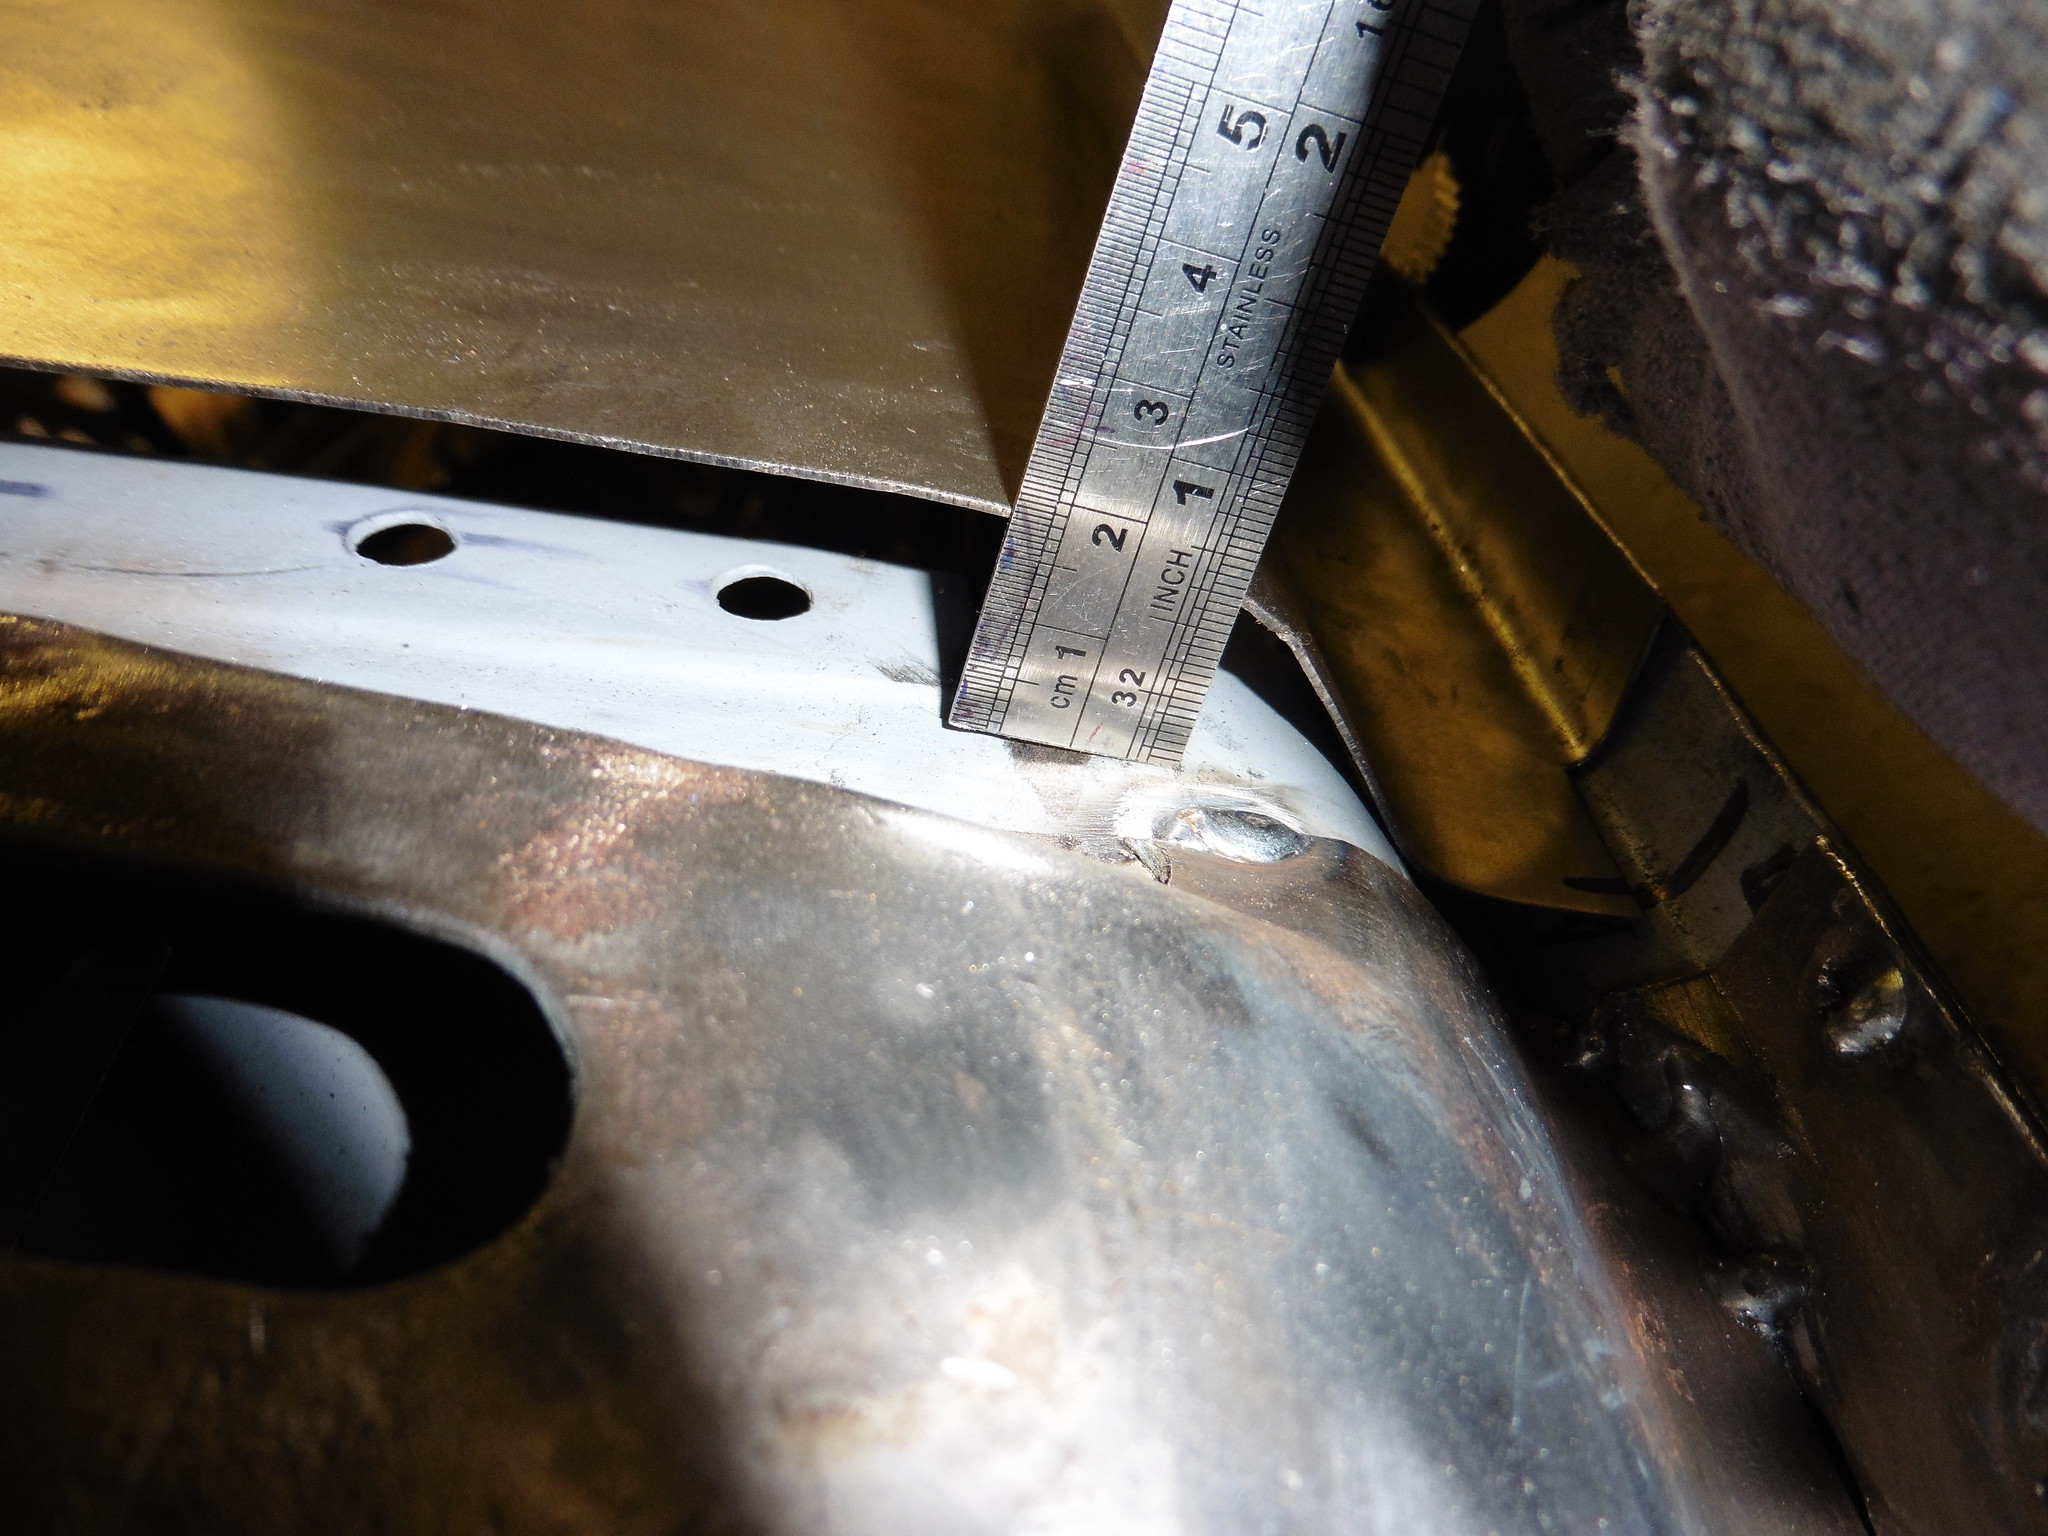 P1020489 P1020489 by jono_misfit, on Flickr Its supposed to fit inside, but I cant get enough movement on it. I measured, and the pressing is about 15mm deeper than the one I cut out. I'm assuming its a rwd/AWD difference thing... this seems to be one of the culprits  P1020490 P1020490 by jono_misfit, on Flickr the escort floor has an additional pressing to step over this difficult to see, but its the welded area  P1020491 P1020491 by jono_misfit, on Flickr marked up some further adjustment points  P1020492 P1020492 by jono_misfit, on Flickr nothing for it, but to slice the step area to allow some adjusting 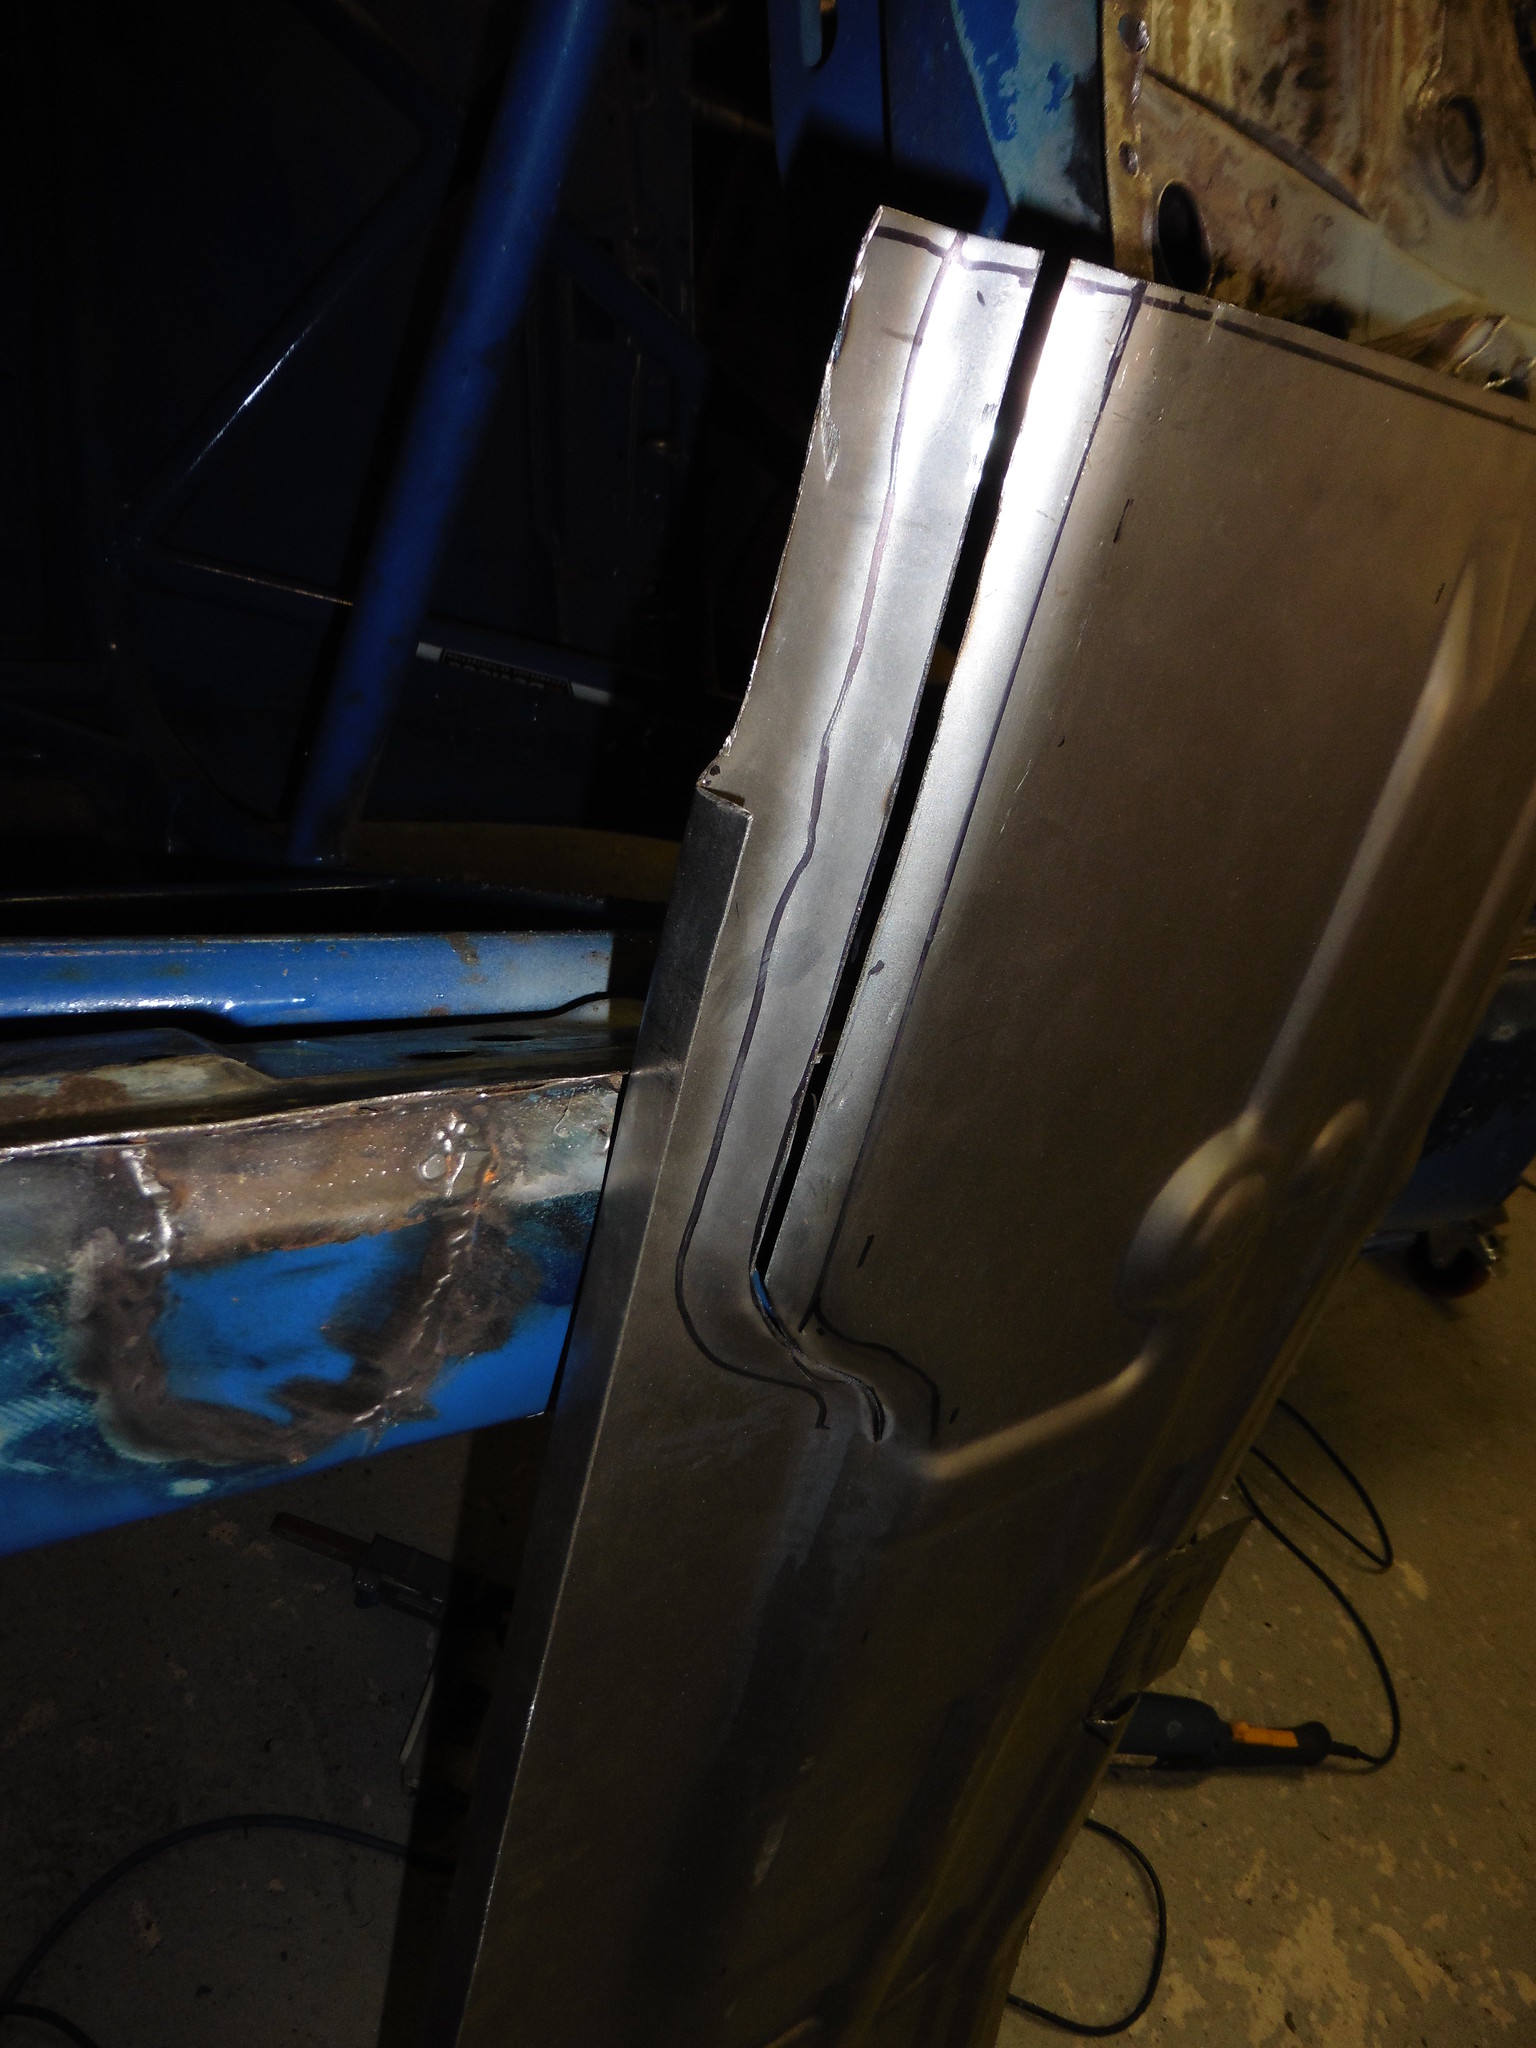 P1020493 P1020493 by jono_misfit, on Flickr started flatting some of the unwanted features  P1020494 P1020494 by jono_misfit, on Flickr clamp in again, this time with the front end tucked inside as required  P1020495 P1020495 by jono_misfit, on Flickr getting better  P1020496 P1020496 by jono_misfit, on Flickr a slight bit of dressing required on the step to fit better  P1020497 P1020497 by jono_misfit, on Flickr there's a lot of tension here, so the slice probably isnt to the right length to take out the stress 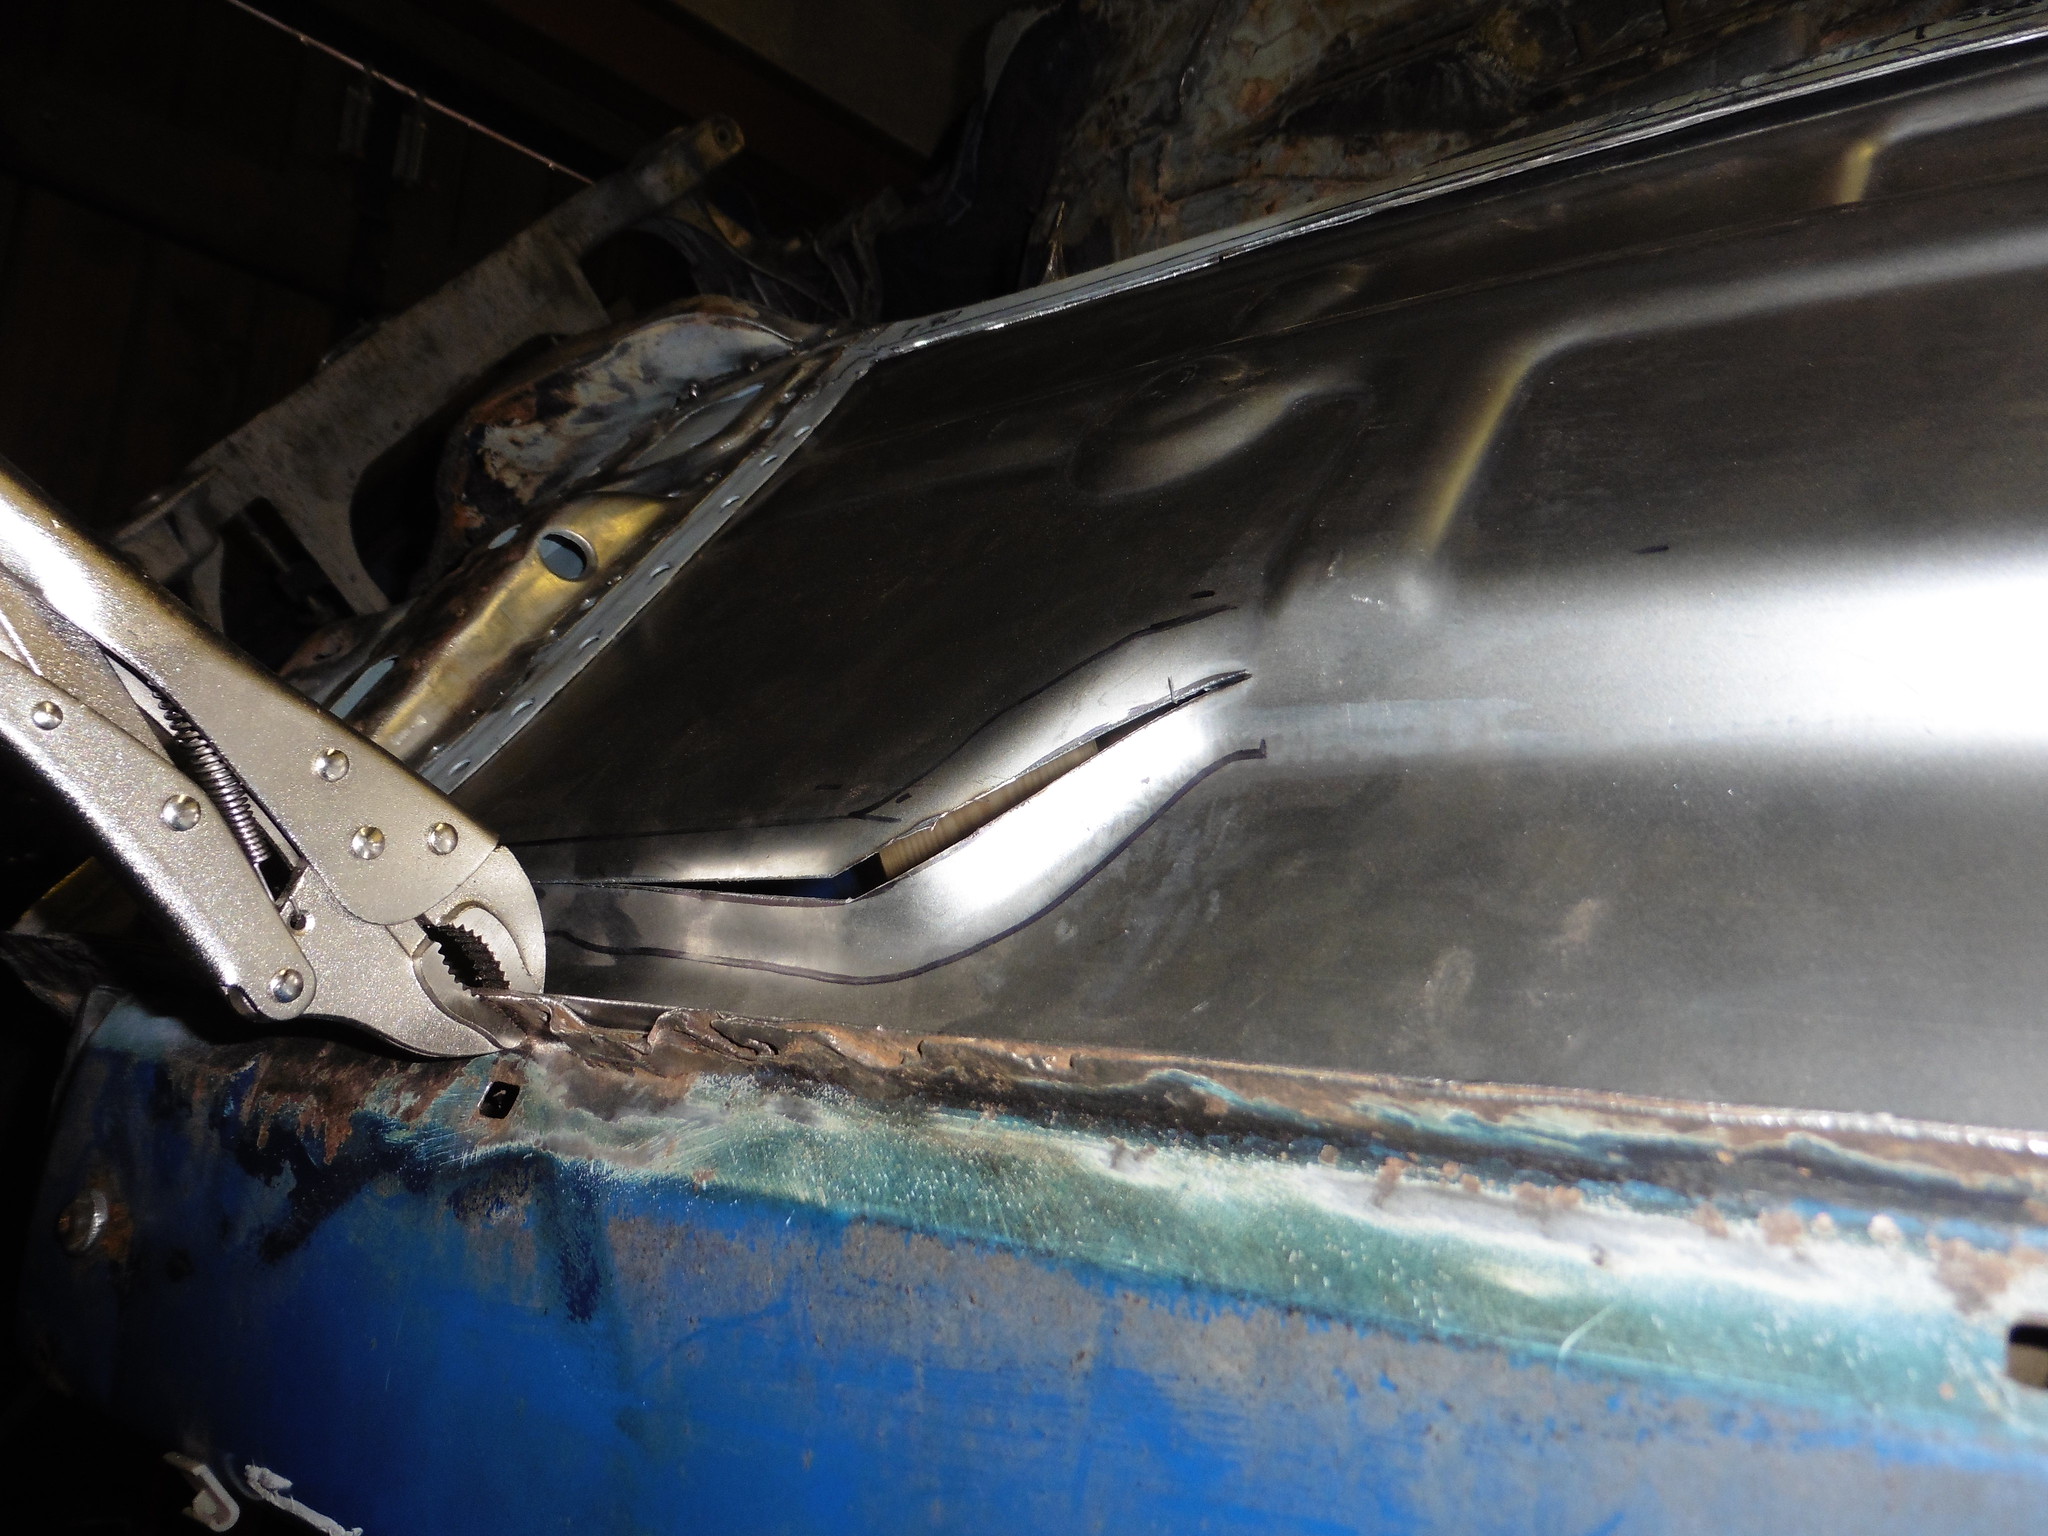 P1020498 P1020498 by jono_misfit, on Flickr much better, tension relieved and also allows the mid floor brace to touch correctly. 600mm of slotting to get it right....  P1020499 P1020499 by jono_misfit, on Flickr still a load of tidying up and trimming to go, but feeling like its starting to get there now. Even though it wont be perfect, it'll be considerably better than the floor that was in there previously. Probably back to it Saturday. |
| |
Last Edit: Jul 11, 2019 21:25:38 GMT by jonomisfit
|
|
Darkspeed
Club Retro Rides Member
Posts: 4,884
Club RR Member Number: 39
|
|
Jul 11, 2019 21:40:06 GMT
|
|
Even if it irks a little that the new panel is not a perfect fit it's looking pretty good from where I'm sitting, plus it must to be better working with good clean steel.
|
| |
|
|
jonomisfit
Club Retro Rides Member
Posts: 1,790
Club RR Member Number: 49
|
|
Jul 11, 2019 21:52:06 GMT
|
|
That it is.
|
| |
|
|
|
|
|
Jul 12, 2019 10:44:12 GMT
|
24 inches of slot. sigh excellent work  |
| |
|
|
jonomisfit
Club Retro Rides Member
Posts: 1,790
Club RR Member Number: 49
|
|
Jul 12, 2019 20:31:45 GMT
|
I got out the workshop for a couple of hours this afternoon. I cut out a superfluous drain point that would get in the way, and started flattening the ribs to get it to sit flat at the flange.  P1020500 P1020500 by jono_misfit, on Flickr there's still quite a bit of dressing to go, then i need to bend a small step down in the floor. also removed the additional step at the front end that was in the floor here and isnt needed.  P1020501 P1020501 by jono_misfit, on Flickr then used the stepping dies in the bead roller to step down this bit.  P1020502 P1020502 by jono_misfit, on Flickr did some more trimming / tidying up  P1020503 P1020503 by jono_misfit, on Flickr and its starting to get there now.  P1020504 P1020504 by jono_misfit, on Flickr a little bit more adjusting on the back end and it should all sit right. The gap at the top is an illusion as the panel has lifted up, when in position it is a nice but weld will about a 1mm gap. the front end is starting to fit nicely now after all the adjusting. 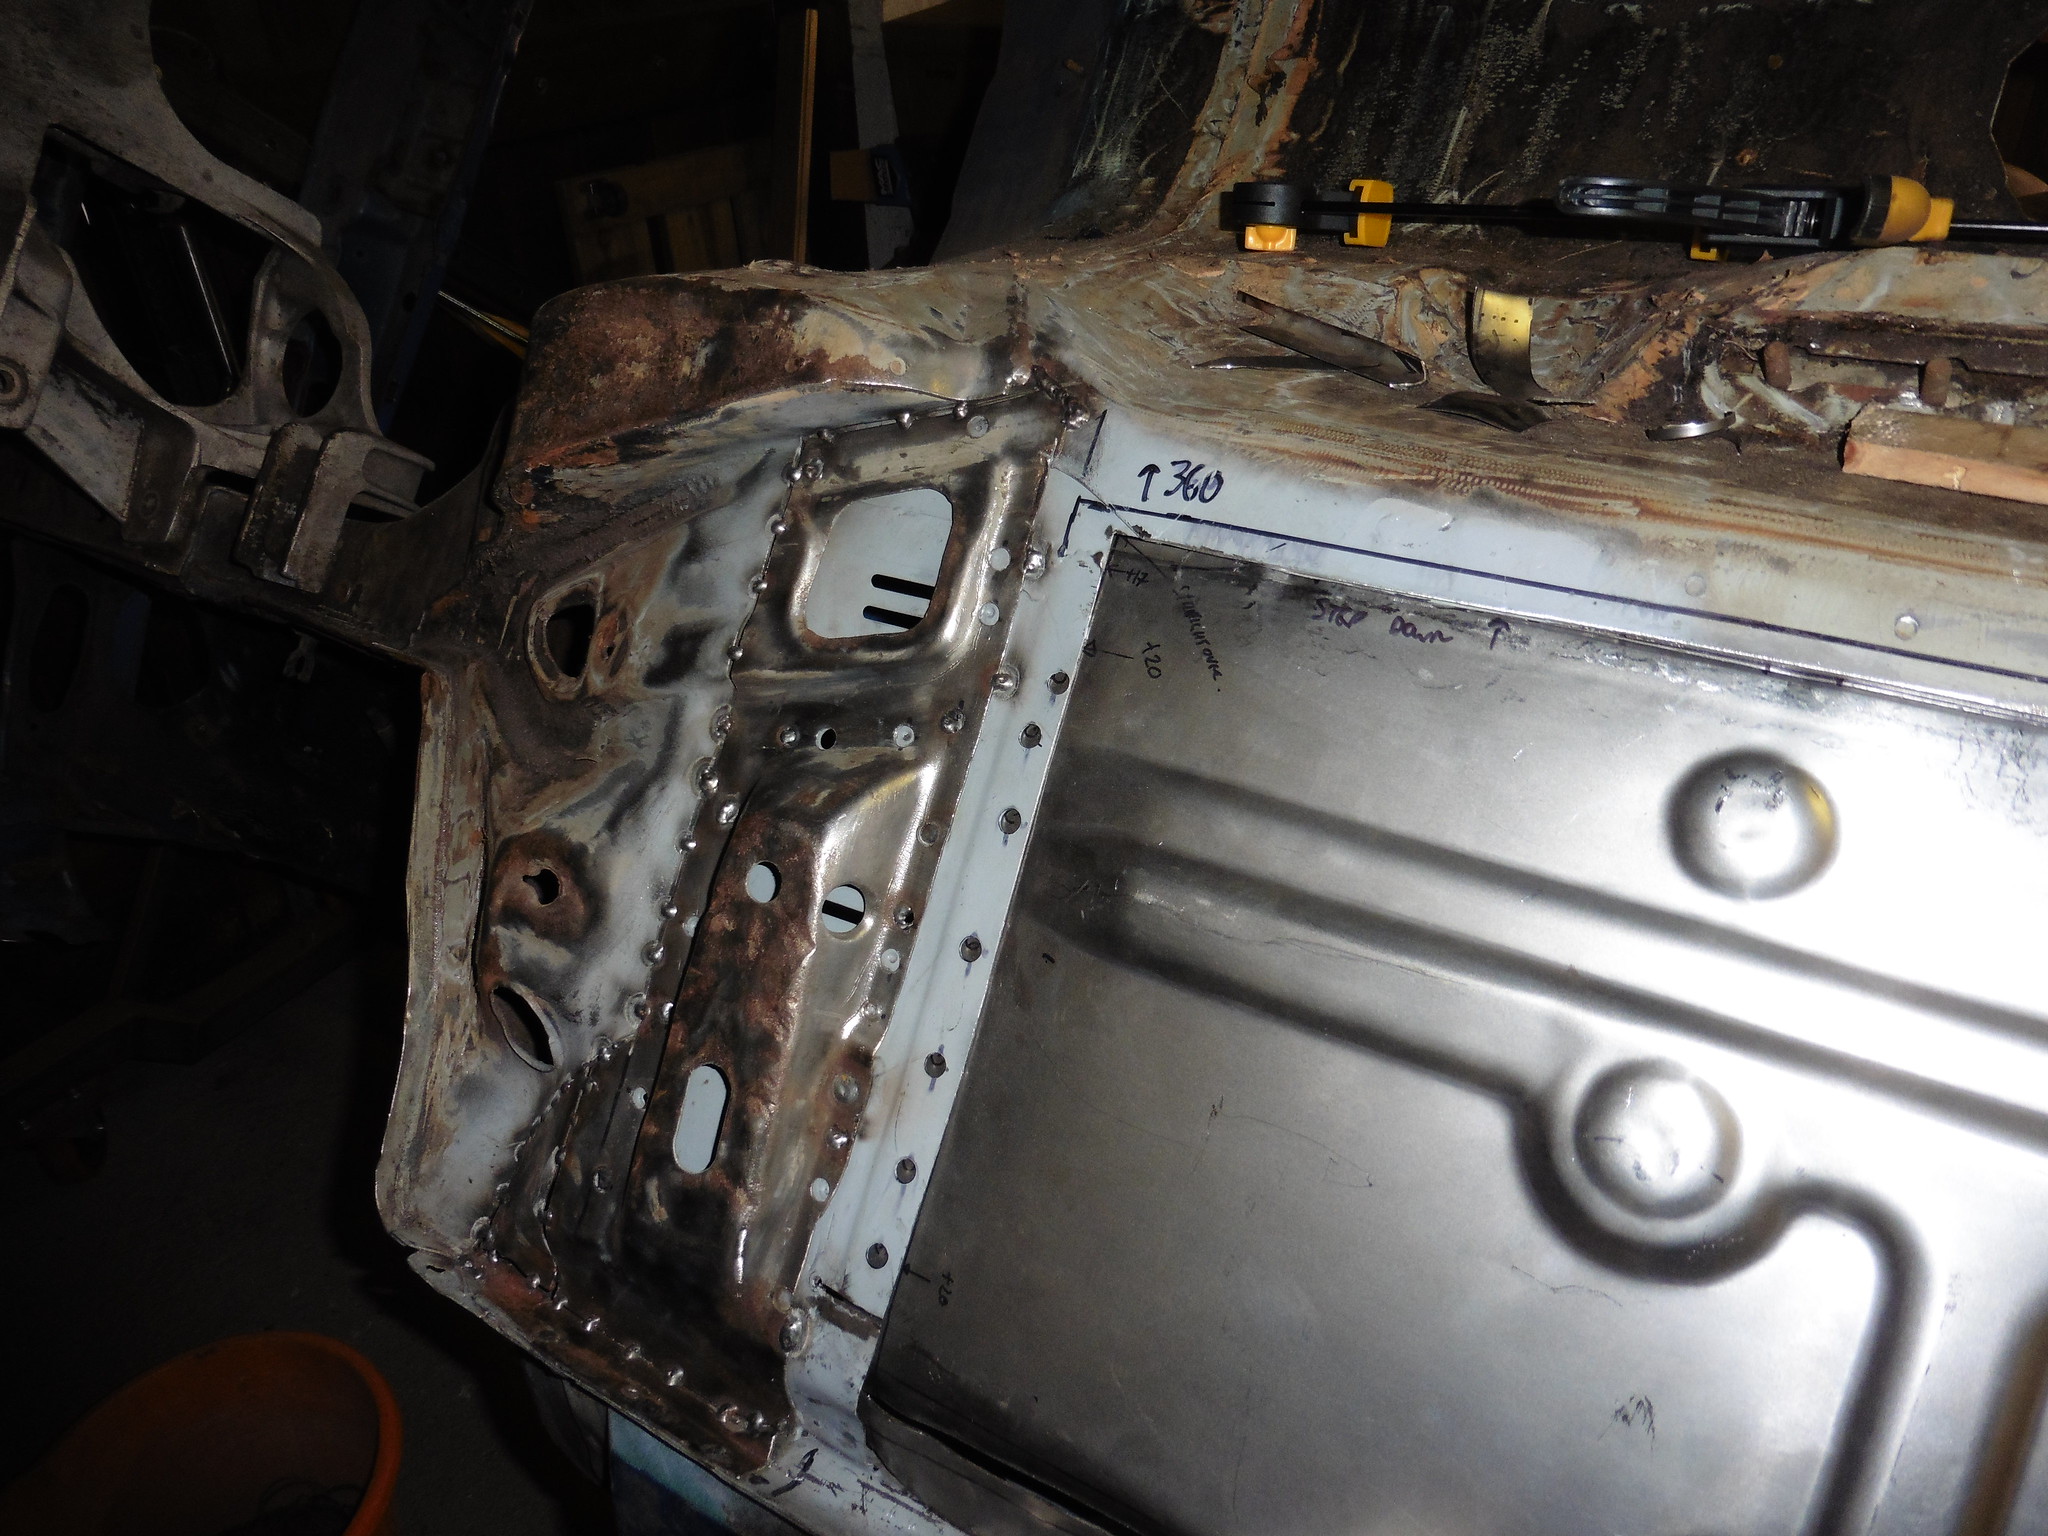 P1020505 P1020505 by jono_misfit, on Flickr a few more fettles and on the next session I should be on to welding it in As can be seen on the long back section i'm joining the panel in, in the midst of the pressing (weld into the corner) to try and minimise distortion. It also happens to be the bit after which the floor pan is quite a bit different and I encounter gearbox / prop / etc. brackets that will be a pain to move.  P1020506 P1020506 by jono_misfit, on Flickr |
| |
|
|
jonomisfit
Club Retro Rides Member
Posts: 1,790
Club RR Member Number: 49
|
|
Jul 13, 2019 17:33:25 GMT
|
SO i needed to finish this back corner, now I know where the floor will be.  P1020507 P1020507 by jono_misfit, on Flickr take a template  P1020508 P1020508 by jono_misfit, on Flickr convert to steel 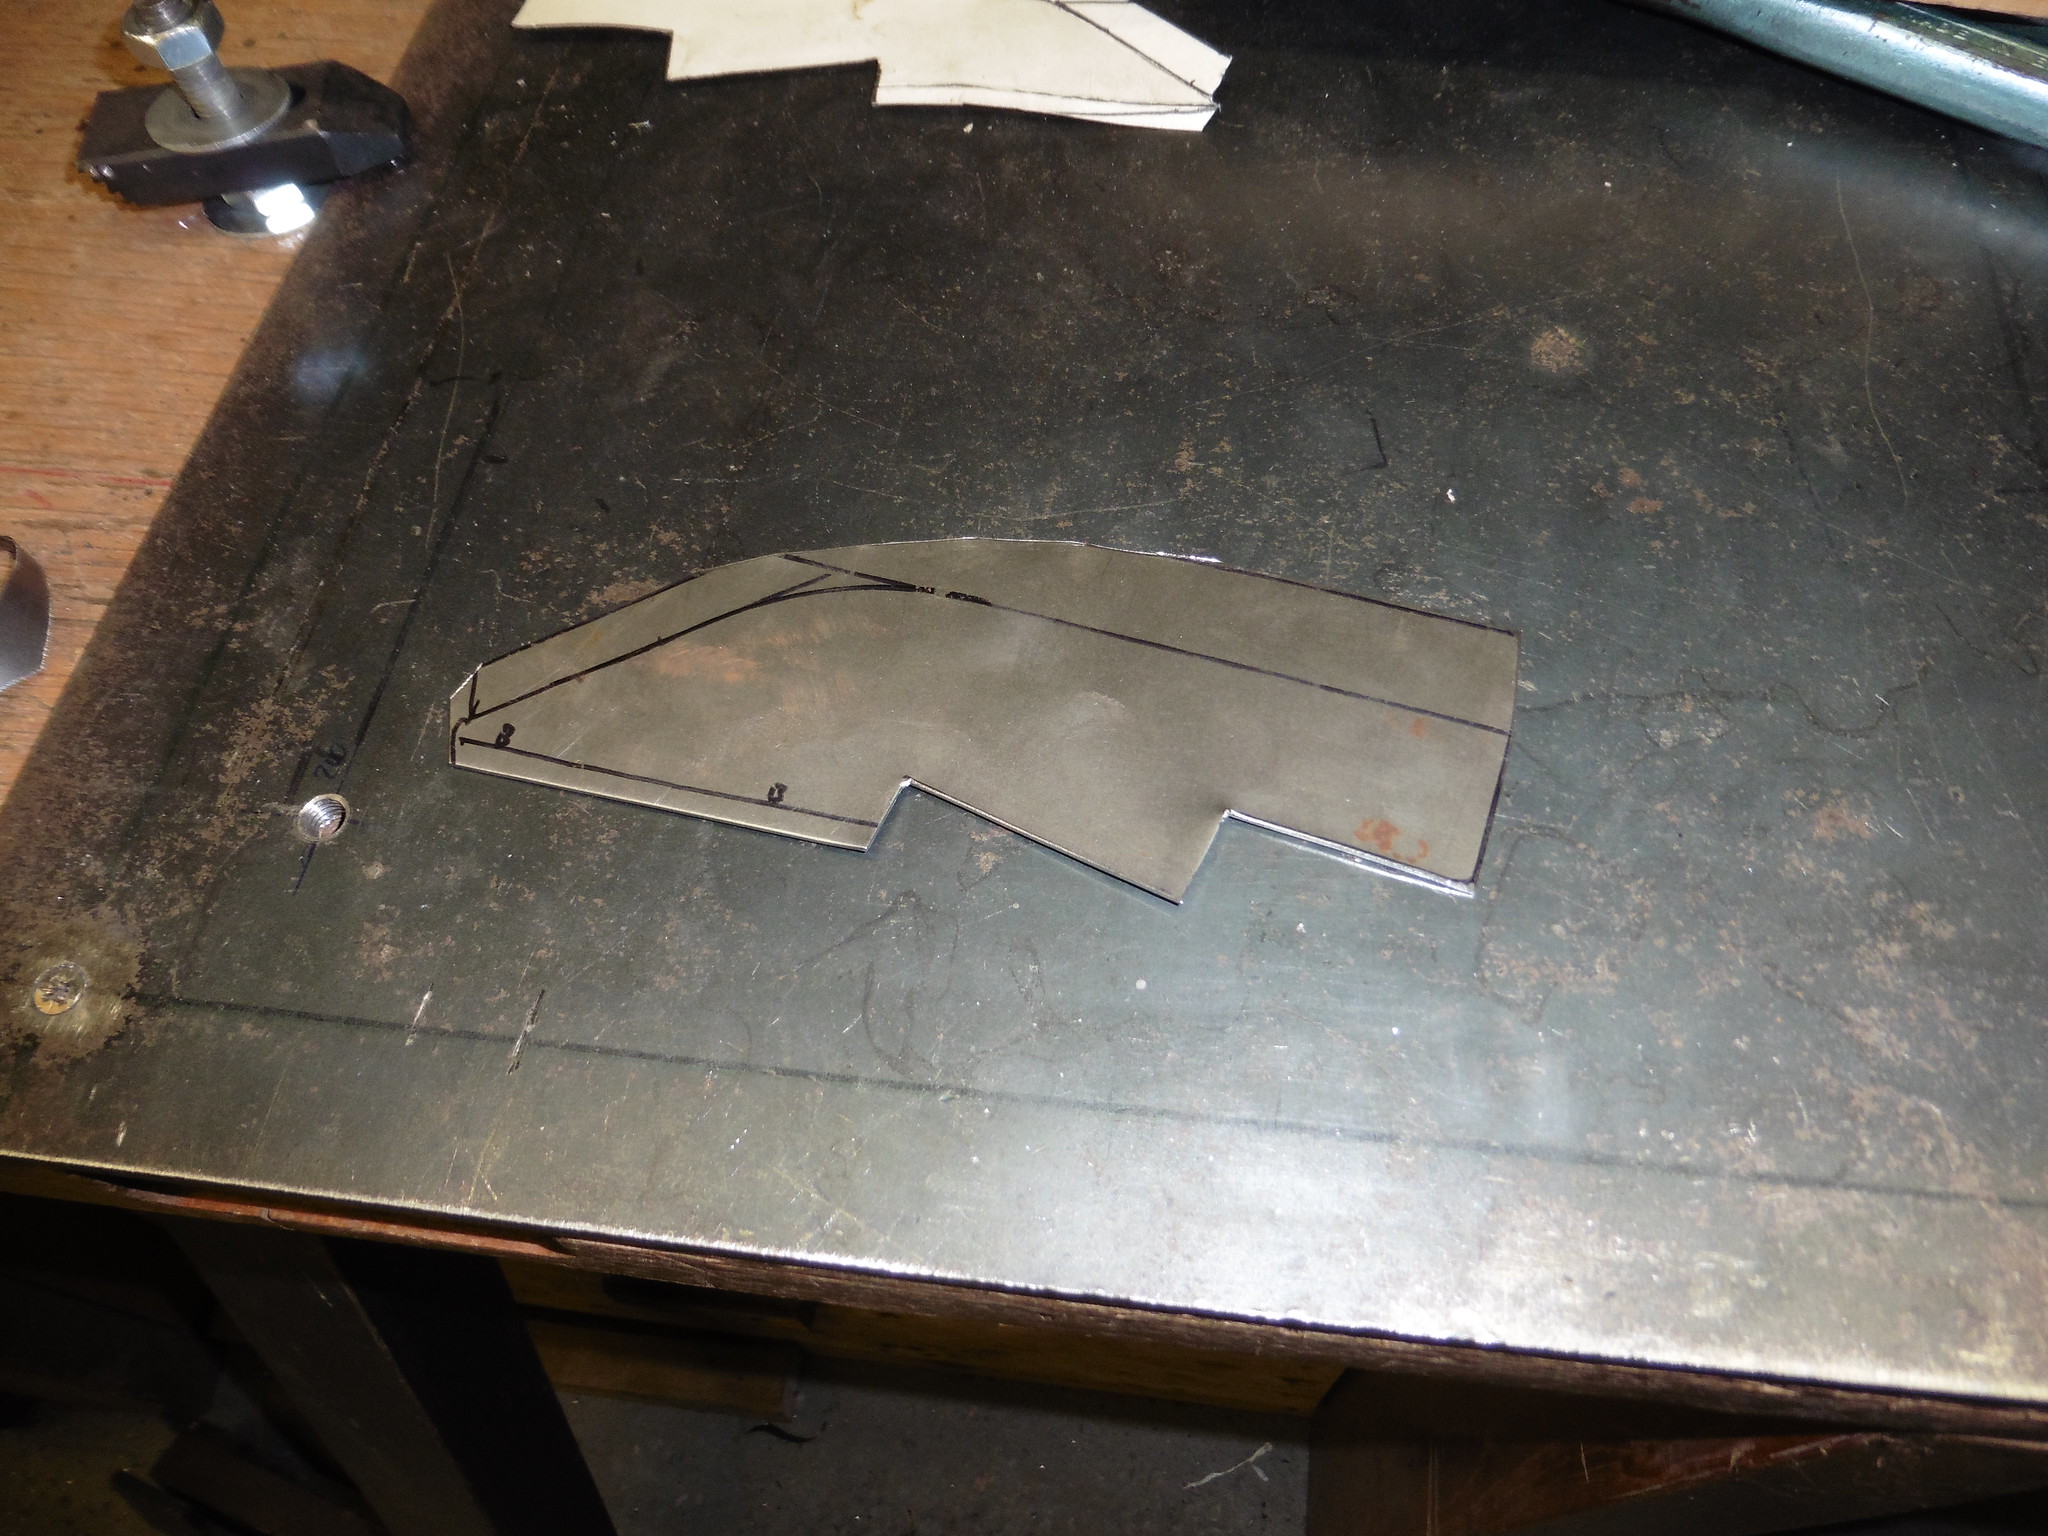 P1020509 P1020509 by jono_misfit, on Flickr adjust it over metal things  P1020510 P1020510 by jono_misfit, on Flickr  P1020511 P1020511 by jono_misfit, on Flickr add a step to it  P1020512 P1020512 by jono_misfit, on Flickr rust treated, then primed all the touch points on the floor  P1020513 P1020513 by jono_misfit, on Flickr  P1020514 P1020514 by jono_misfit, on Flickr then clamped it in and tacked. 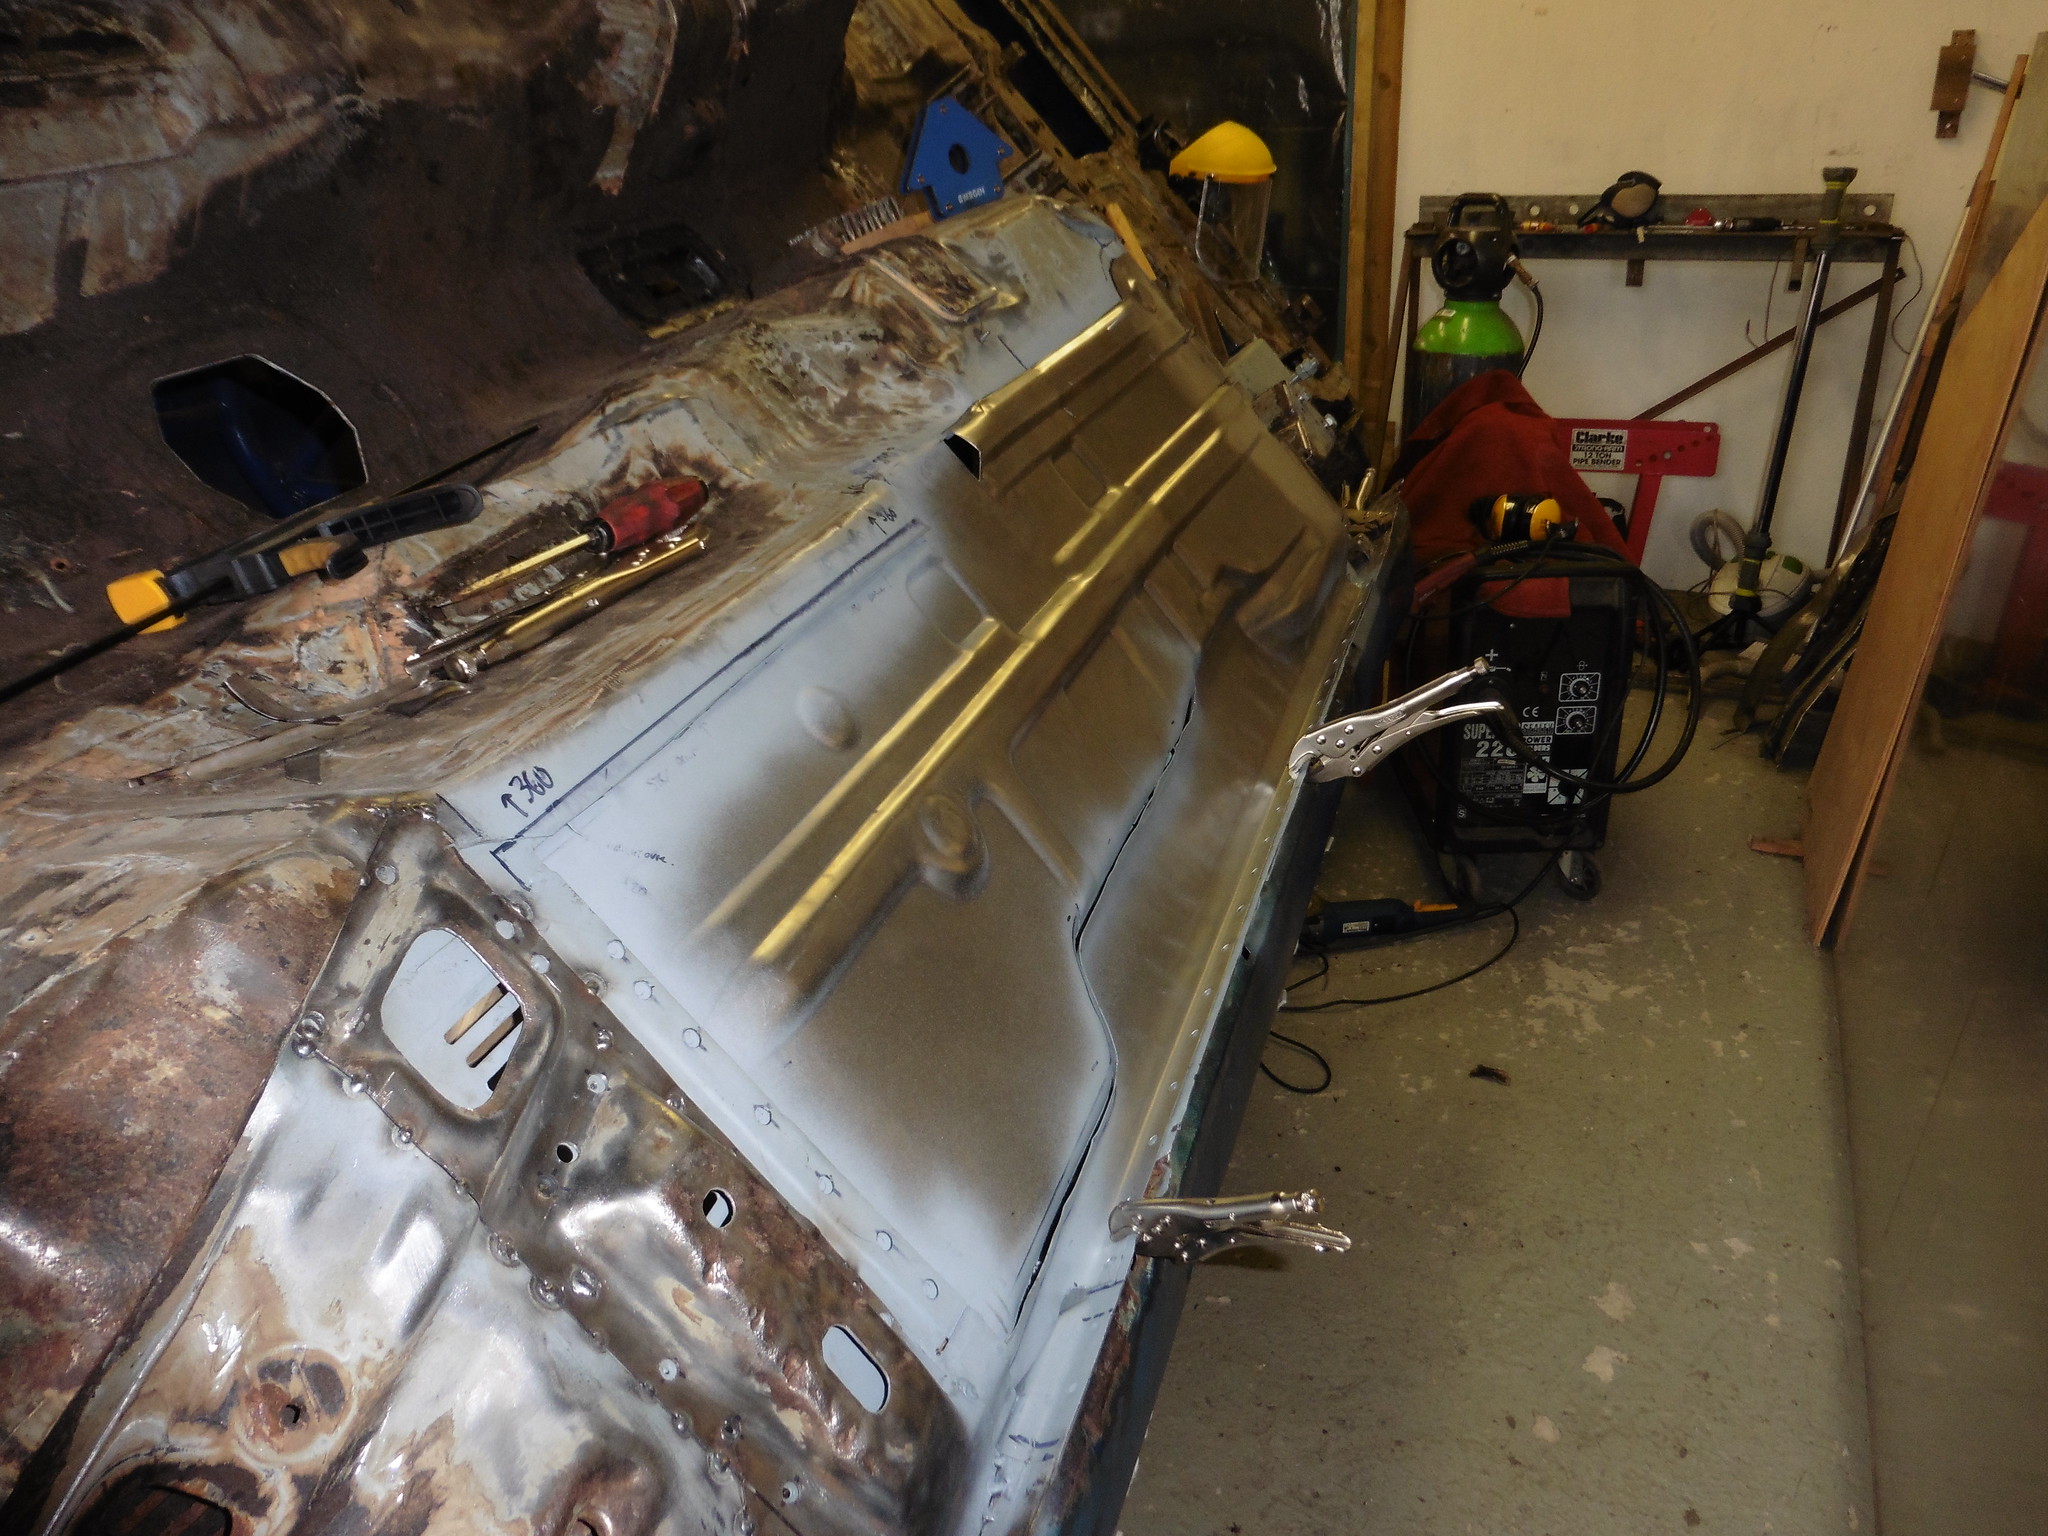 P1020515 P1020515 by jono_misfit, on Flickr 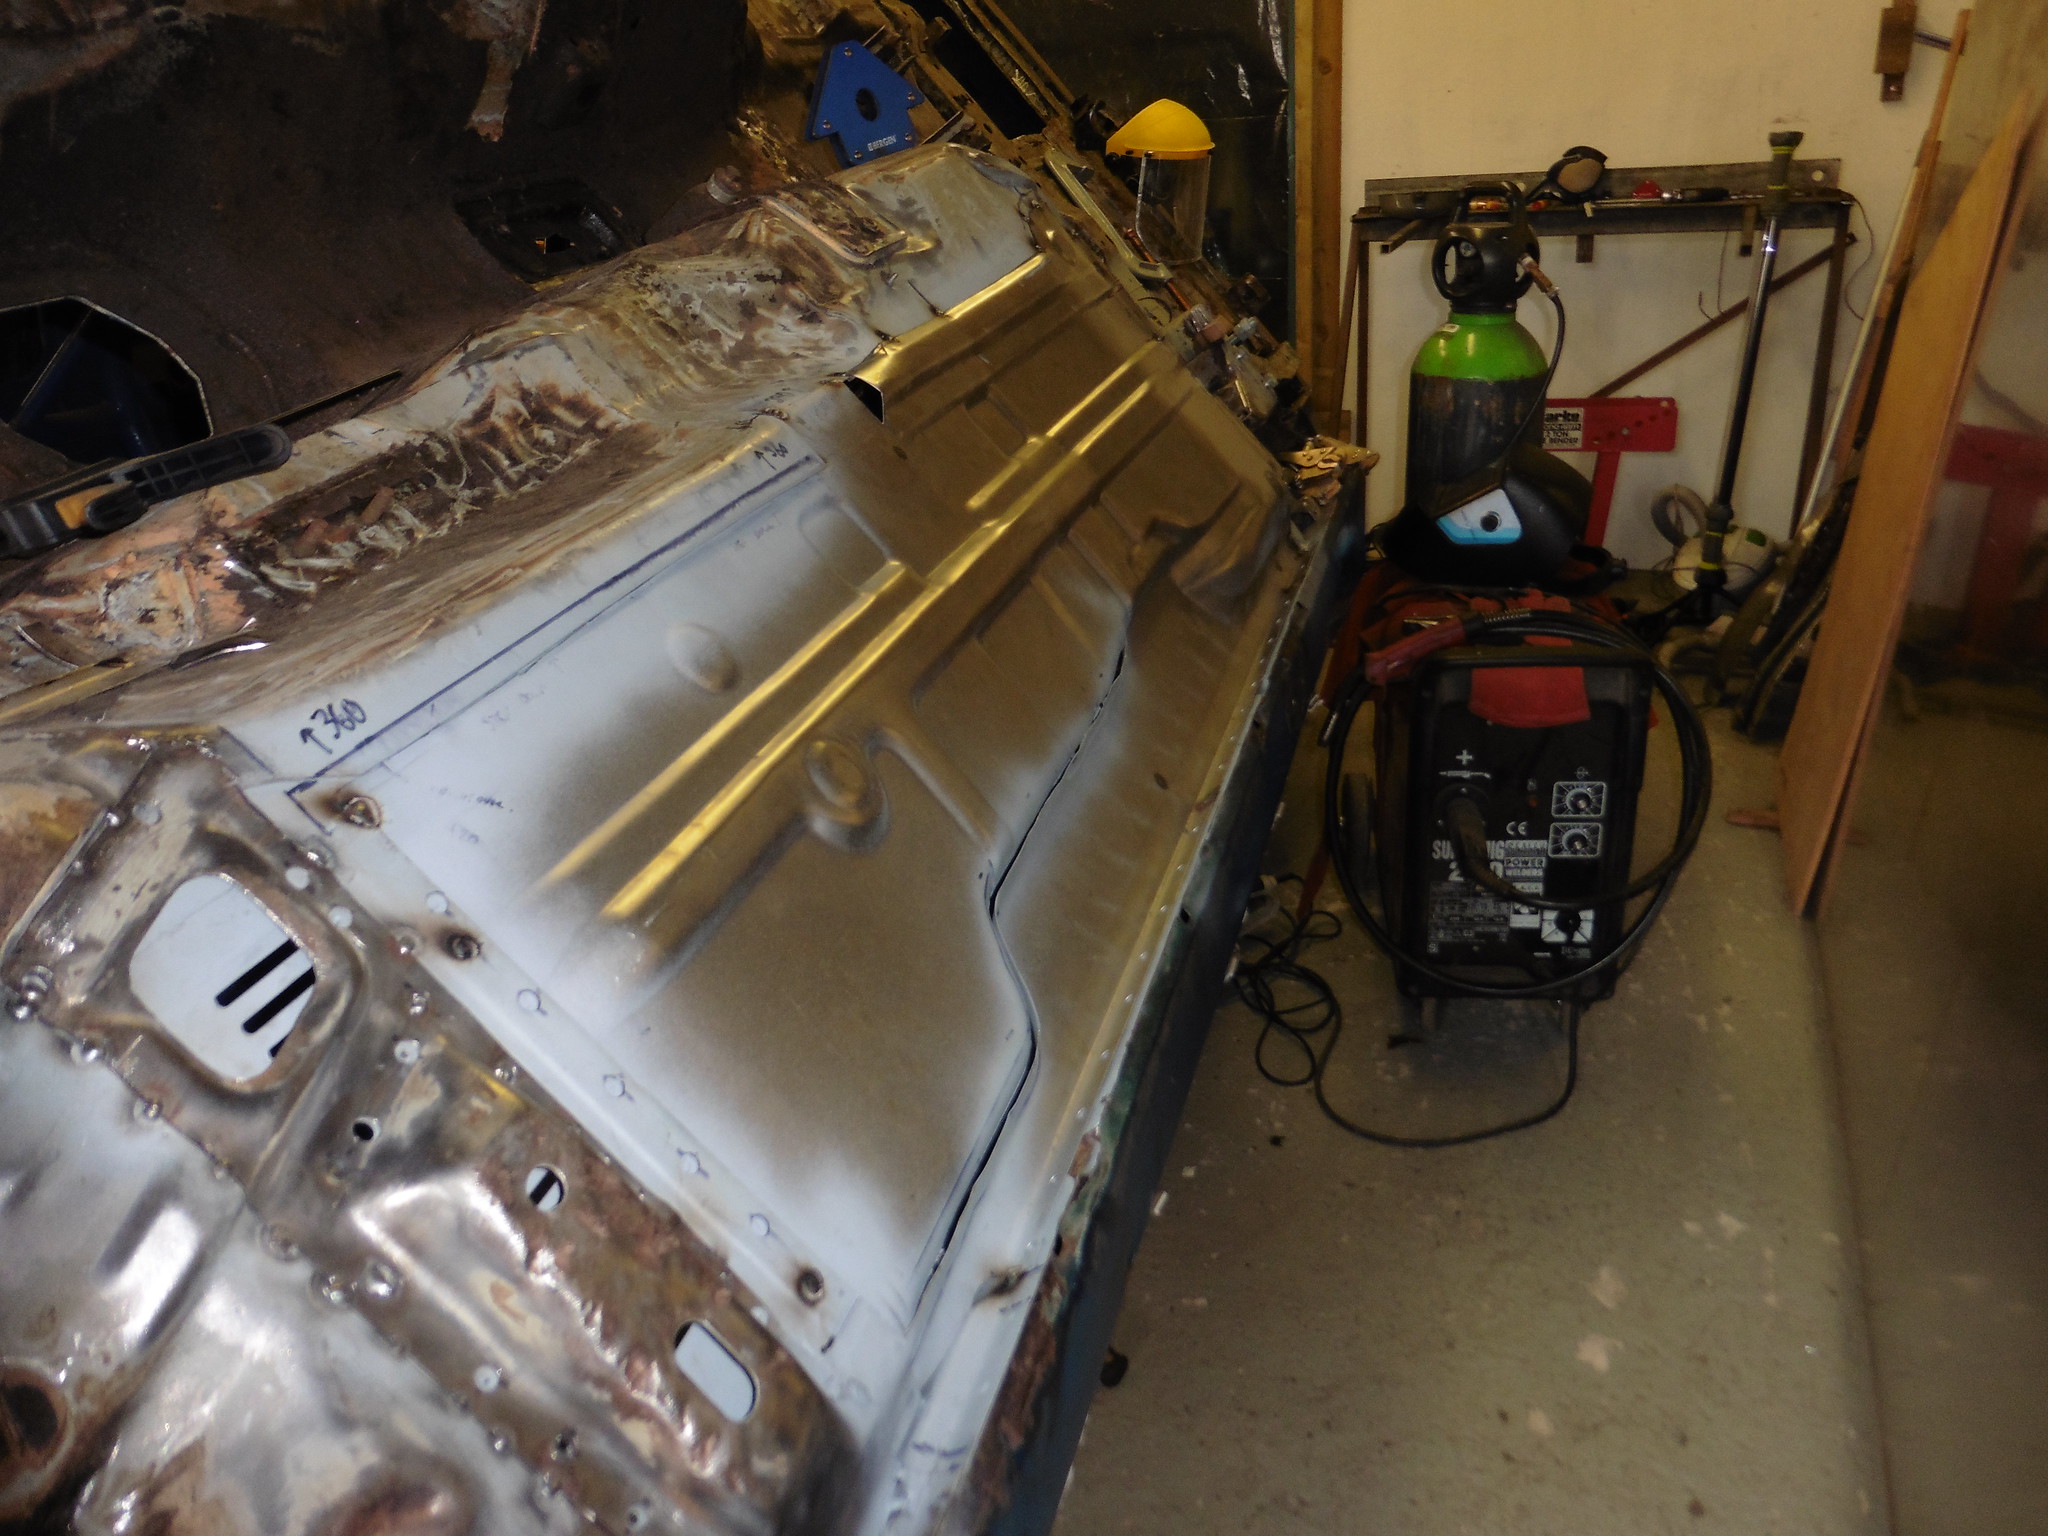 P1020516 P1020516 by jono_misfit, on Flickr 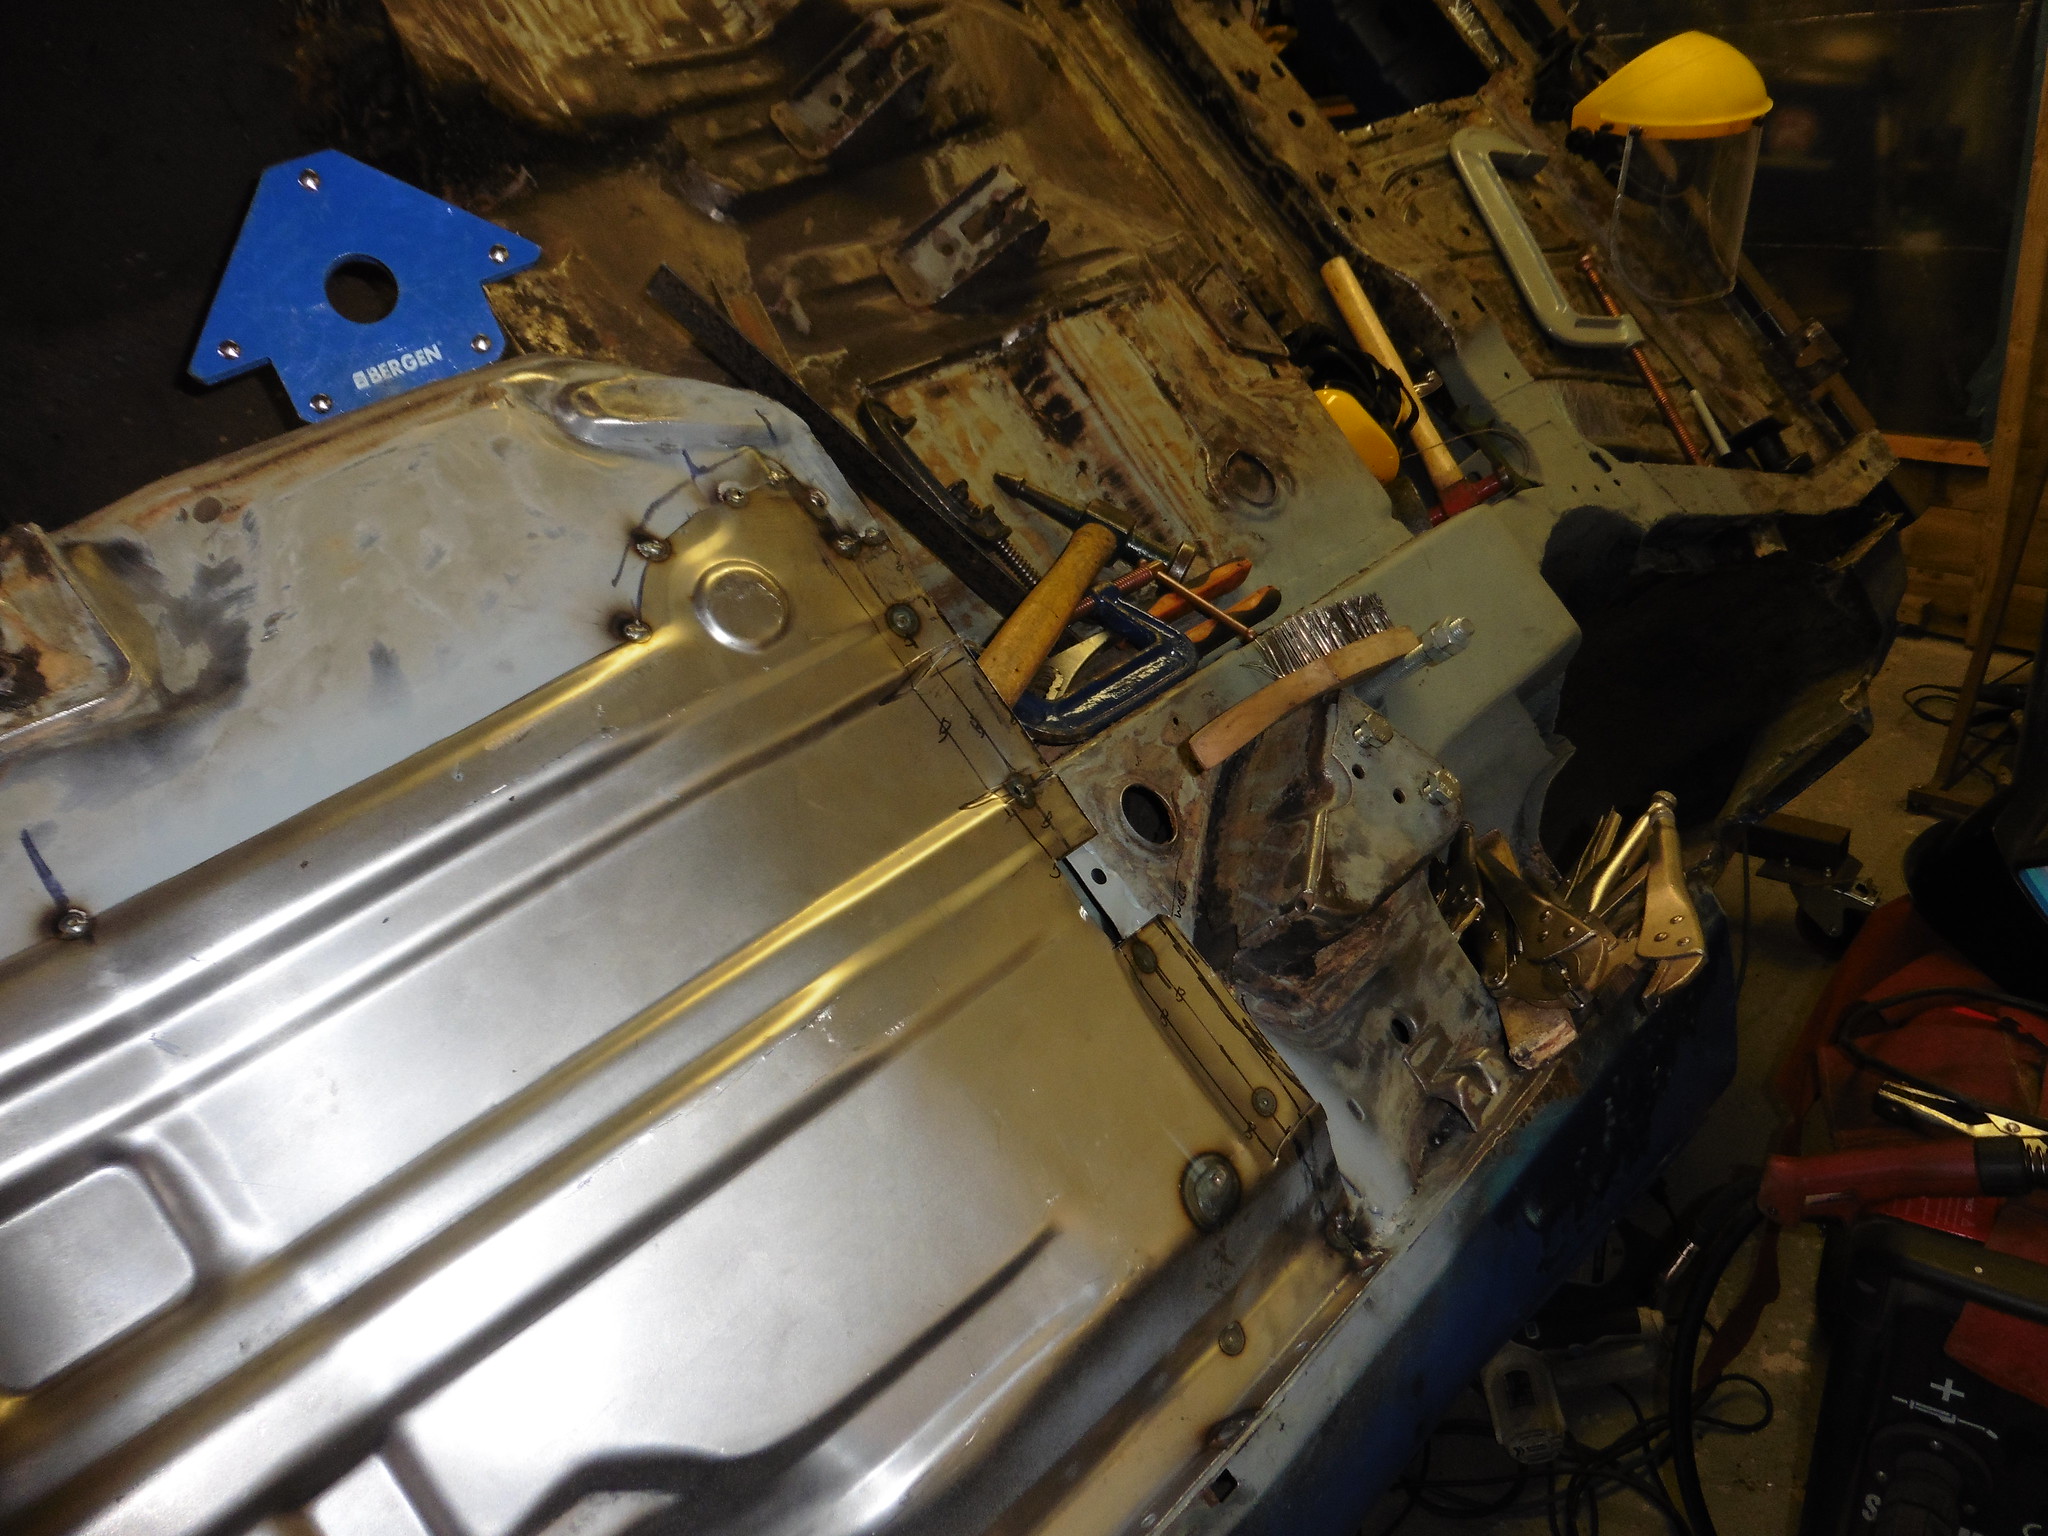 P1020517 P1020517 by jono_misfit, on Flickr adjusted some bits, then tacked some more  P1020518 P1020518 by jono_misfit, on Flickr  P1020519 P1020519 by jono_misfit, on Flickr then slowly extended the tacks until the floor pan was welded in, then flipped over and stitched back in a few key places  P1020519 P1020519 by jono_misfit, on Flickr  P1020521 P1020521 by jono_misfit, on Flickr 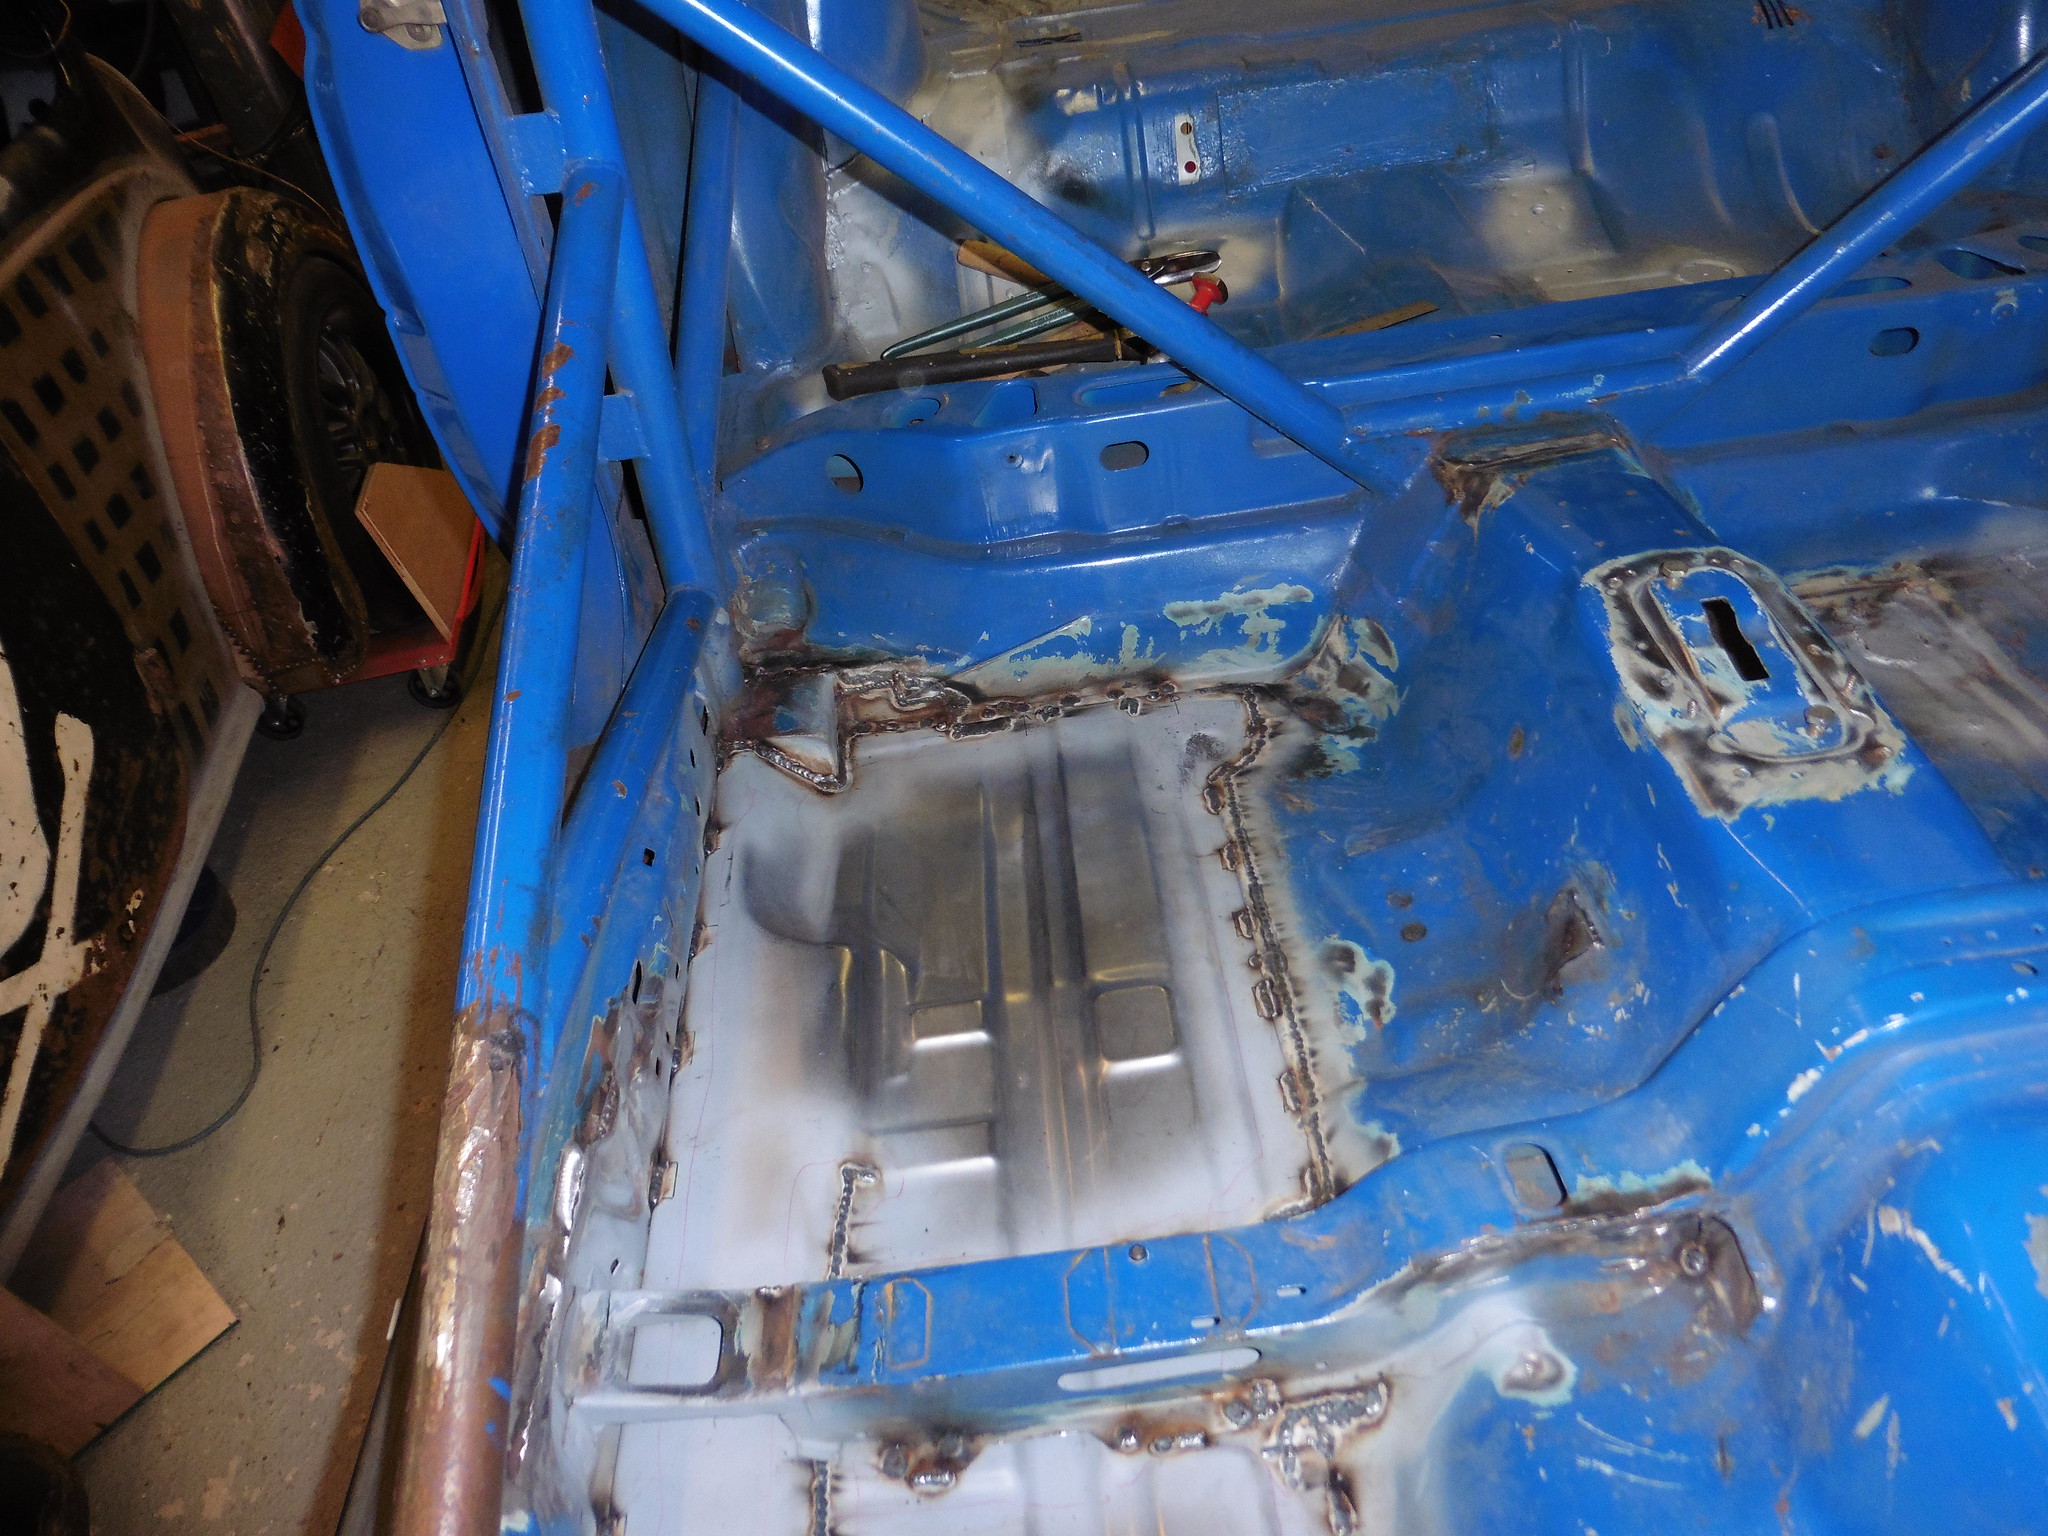 P1020522 P1020522 by jono_misfit, on Flickr  P1020523 P1020523 by jono_misfit, on Flickr and also went back and fully welded the outrigger  P1020524 P1020524 by jono_misfit, on Flickr tidied up a couple more pieces  P1020525 P1020525 by jono_misfit, on Flickr  P1020526 P1020526 by jono_misfit, on Flickr cleaned up the footwell, but am leaving the rest until I'm certain theres no further welding to the floor 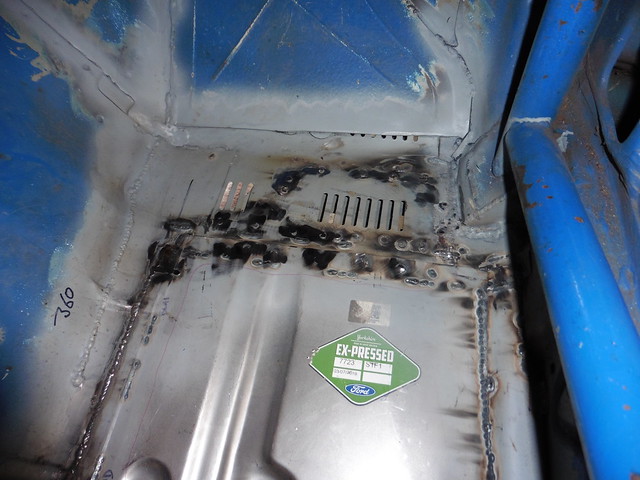 P1020527 P1020527 by jono_misfit, on Flickr I'll be replacing the foot plate, so took some dims  P1020528 P1020528 by jono_misfit, on Flickr  P1020529 P1020529 by jono_misfit, on Flickr as its going to sit for a couple of weeks, and its ridiculously humid here at the moment, I gave the floor a quick once over with cheap weld through primer to protect from flash rust. It'll be cleaned off on the clean up for the actual paint  P1020537 P1020537 by jono_misfit, on Flickr  P1020538 P1020538 by jono_misfit, on Flickr I had a look round, there are still a fair number of repairs to do, but this should be the biggest done now. |
| |
|
|
Darkspeed
Club Retro Rides Member
Posts: 4,884
Club RR Member Number: 39
|
|
Jul 13, 2019 19:44:49 GMT
|
|
Nice feeling when you sign off on a major piece of work.
What's the plan for the drive-train with this?
|
| |
|
|
wc
Part of things
 
Posts: 45
|
|
Jul 13, 2019 20:07:05 GMT
|
|
Floor is a thing of beauty now!
|
| |
|
|
jonomisfit
Club Retro Rides Member
Posts: 1,790
Club RR Member Number: 49
|
|
Jul 13, 2019 21:40:27 GMT
|
|
At the moment its going to be cosworth v6 engine and awd transmission with lsd diffs.
Will see how that changes as it progresses. The price on yb engines has gone insane, so may consider a different turbo engine at some point.
Thanks.
|
| |
|
|
Darkspeed
Club Retro Rides Member
Posts: 4,884
Club RR Member Number: 39
|
|
Jul 13, 2019 23:55:50 GMT
|
At the moment its going to be cosworth v6 engine Watch out the sound of a V6 is quite intoxicating. |
| |
|
|
|
|
|
Jul 14, 2019 10:12:26 GMT
|
At the moment its going to be cosworth v6 engine and awd transmission with lsd diffs. Will see how that changes as it progresses. The price on yb engines has gone insane, so may consider a different turbo engine at some point. Thanks. I drove the ons ford built 25 years ago, if I remember correctly it was 2wd. As a road car it was nicer then the YB, much more refined and a quicker throttle response. |
| |
|
|
jonomisfit
Club Retro Rides Member
Posts: 1,790
Club RR Member Number: 49
|
|
Jul 19, 2019 20:30:22 GMT
|
I managed a couple of hours today. New floors in, so i'll replace the extra foot plate some steel required  P1020539 P1020539 by jono_misfit, on Flickr an application of a pen, some trimming and a trip to the bead roller  P1020542 P1020542 by jono_misfit, on Flickr try it out in the car  P1020540 P1020540 by jono_misfit, on Flickr  P1020541 P1020541 by jono_misfit, on Flickr I think a few extra beads will help  P1020543 P1020543 by jono_misfit, on Flickr and a couple of tweaks so it fits better 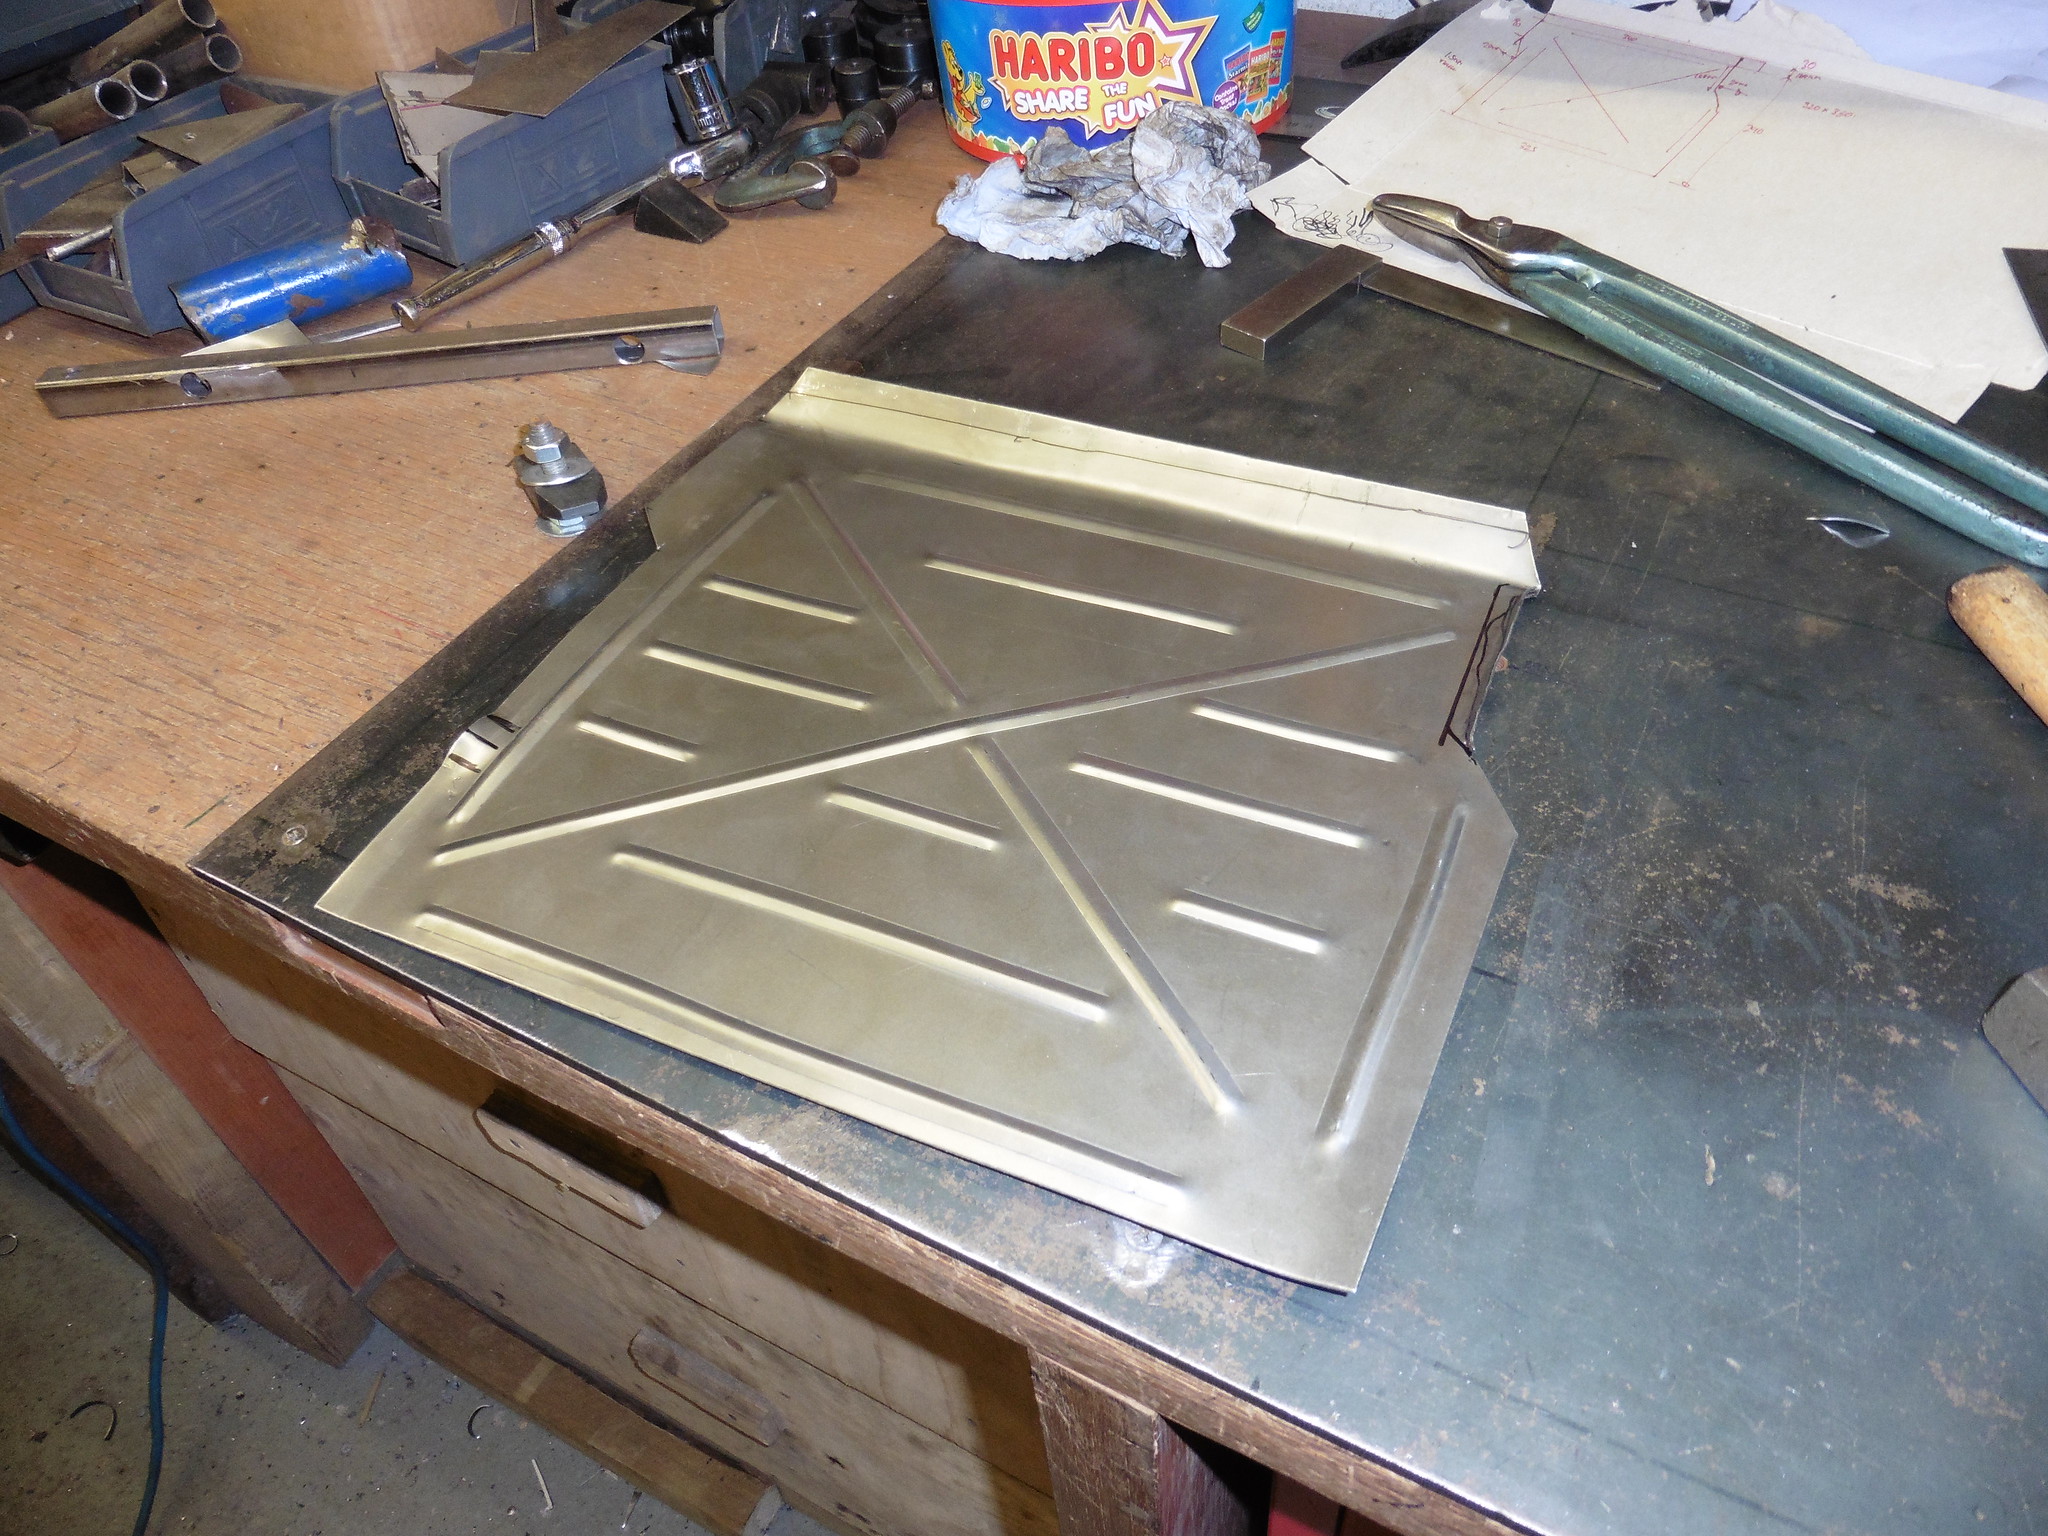 P1020544 P1020544 by jono_misfit, on Flickr and check back in the car  P1020545 P1020545 by jono_misfit, on Flickr i primed it so I can weld it in (and uber primed the floor to try and protect it) As that was going to take a while to dry I thought i'd look at the sill repairs hmmm, this patch is suspicious 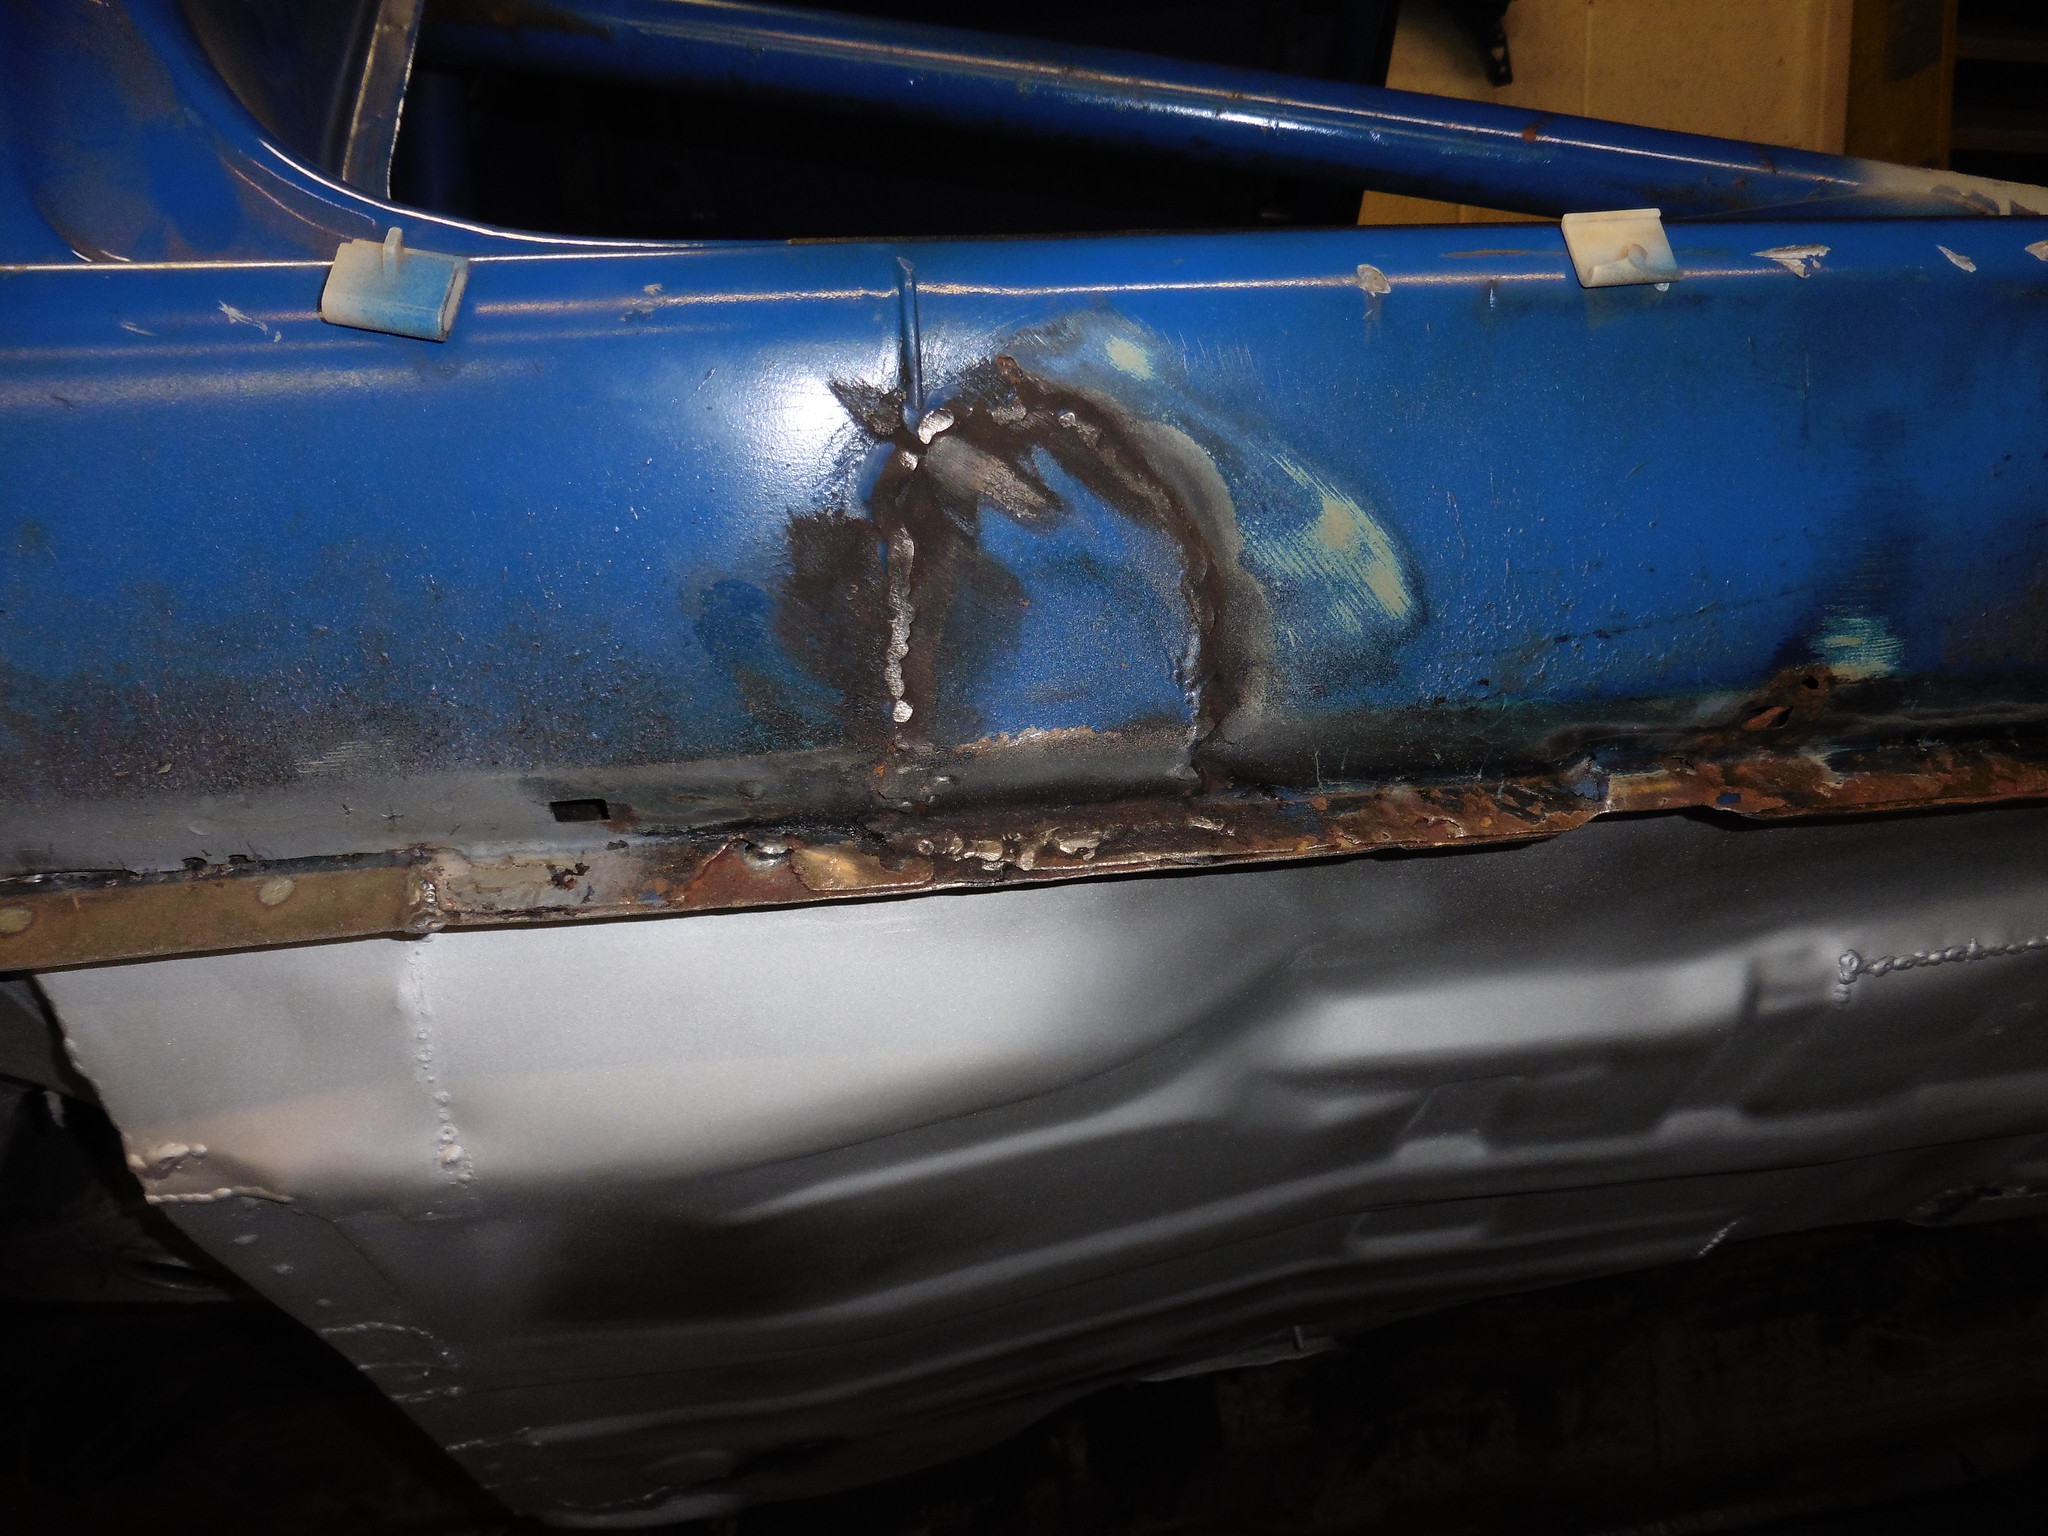 P1020546 P1020546 by jono_misfit, on Flickr bit thin round this...  P1020547 P1020547 by jono_misfit, on Flickr cut off the patch  P1020548 P1020548 by jono_misfit, on Flickr well....they cut out some of the rust before plating it, just not all of it. having had a bit of a look and a scape its nicely clean on the mid sill though, thankfully. there are a few patches to do  P1020549 P1020549 by jono_misfit, on Flickr  P1020550 P1020550 by jono_misfit, on Flickr should get chance to start some point this weekend |
| |
|
|
|
|
|
Jul 19, 2019 21:31:55 GMT
|
love your builds, surely a newer jag v6 or a 3.5L toyota V6 would do it a lot more justice  |
| |
Last Edit: Jul 19, 2019 21:32:13 GMT by legend
|
|
jonomisfit
Club Retro Rides Member
Posts: 1,790
Club RR Member Number: 49
|
|
Jul 19, 2019 21:44:30 GMT
|
|
It quite probably would, however as its awd getting the sump / diff support right is a bit of a pain.
The Ford Sierra/ cosworth awd system has the diff mounted on the side of the sump with a cross shaft running through it.
For getting it mobile the engine will be what I have, but I'm going to look into other engines after that. I'll add them to the list.
|
| |
|
|
|
|
|
|
|
|
C20LET from calibra turbo. A) because link to cosworth and ford bellhousings plentiful B) same power and torque as Yb, C) it would annoy purists D) see point C
|
| |
Last Edit: Jul 20, 2019 0:09:08 GMT by darrenh
|
|
jonomisfit
Club Retro Rides Member
Posts: 1,790
Club RR Member Number: 49
|
|
|
|
|
One I like that I've seen is a skyline engine conversions.
With big power the gearboxes are a bit weak so people do a skyline gearbox conversion. This one the guy cut out that step and fitted the full engine/ box and about 600 bhp.
|
| |
|
|
|
|
|
|
|
One I like that I've seen is a skyline engine conversions. With big power the gearboxes are a bit weak so people do a skyline gearbox conversion. This one the guy cut out that step and fitted the full engine/ box and about 600 bhp. sounds like a plan to me!! |
| |
'80 s1 924 turbo..hibernating
'80 golf gli cabriolet...doing impression of a skip
'97 pug 106 commuter...continuing cheapness making me smile!
firm believer in the k.i.s.s and f.i.s.h principles.
|
|
jonomisfit
Club Retro Rides Member
Posts: 1,790
Club RR Member Number: 49
|
|
Jul 21, 2019 19:43:04 GMT
|
trimmed back the rust from the mid sill join. Had a good look up inside the sill. Other than a lot of loose crud that has fallen into the sill its in very good condition in there. I cleaned back the remains of the mid sill seam as it has some light surface rust. I'm pretty certain its the braze that does for this joint. cleaned it up and painted the opening.  P1020556 P1020556 by jono_misfit, on Flickr I also cut out some of the other rust points  P1020557 P1020557 by jono_misfit, on Flickr then started making the infill panels  P1020558 P1020558 by jono_misfit, on Flickr forgot to take pics, but bent the panel to shape and put two steps on the panel to aid welding in and to replicate the piece I cut out Welded it in  P1020559 P1020559 by jono_misfit, on Flickr welded in some other patches  P1020560 P1020560 by jono_misfit, on Flickr and the rest of the sill joint. All needs cleaned back but I managed to pretty much minimise the distortion so far  P1020561 P1020561 by jono_misfit, on Flickr cleaned back and filled in a little pinhole  P1020562 P1020562 by jono_misfit, on Flickr peeled back and straightened a dent in the outer skin at this point, then welded it back in  P1020563 P1020563 by jono_misfit, on Flickr then onto the long front repair, which has the drain point to add back in 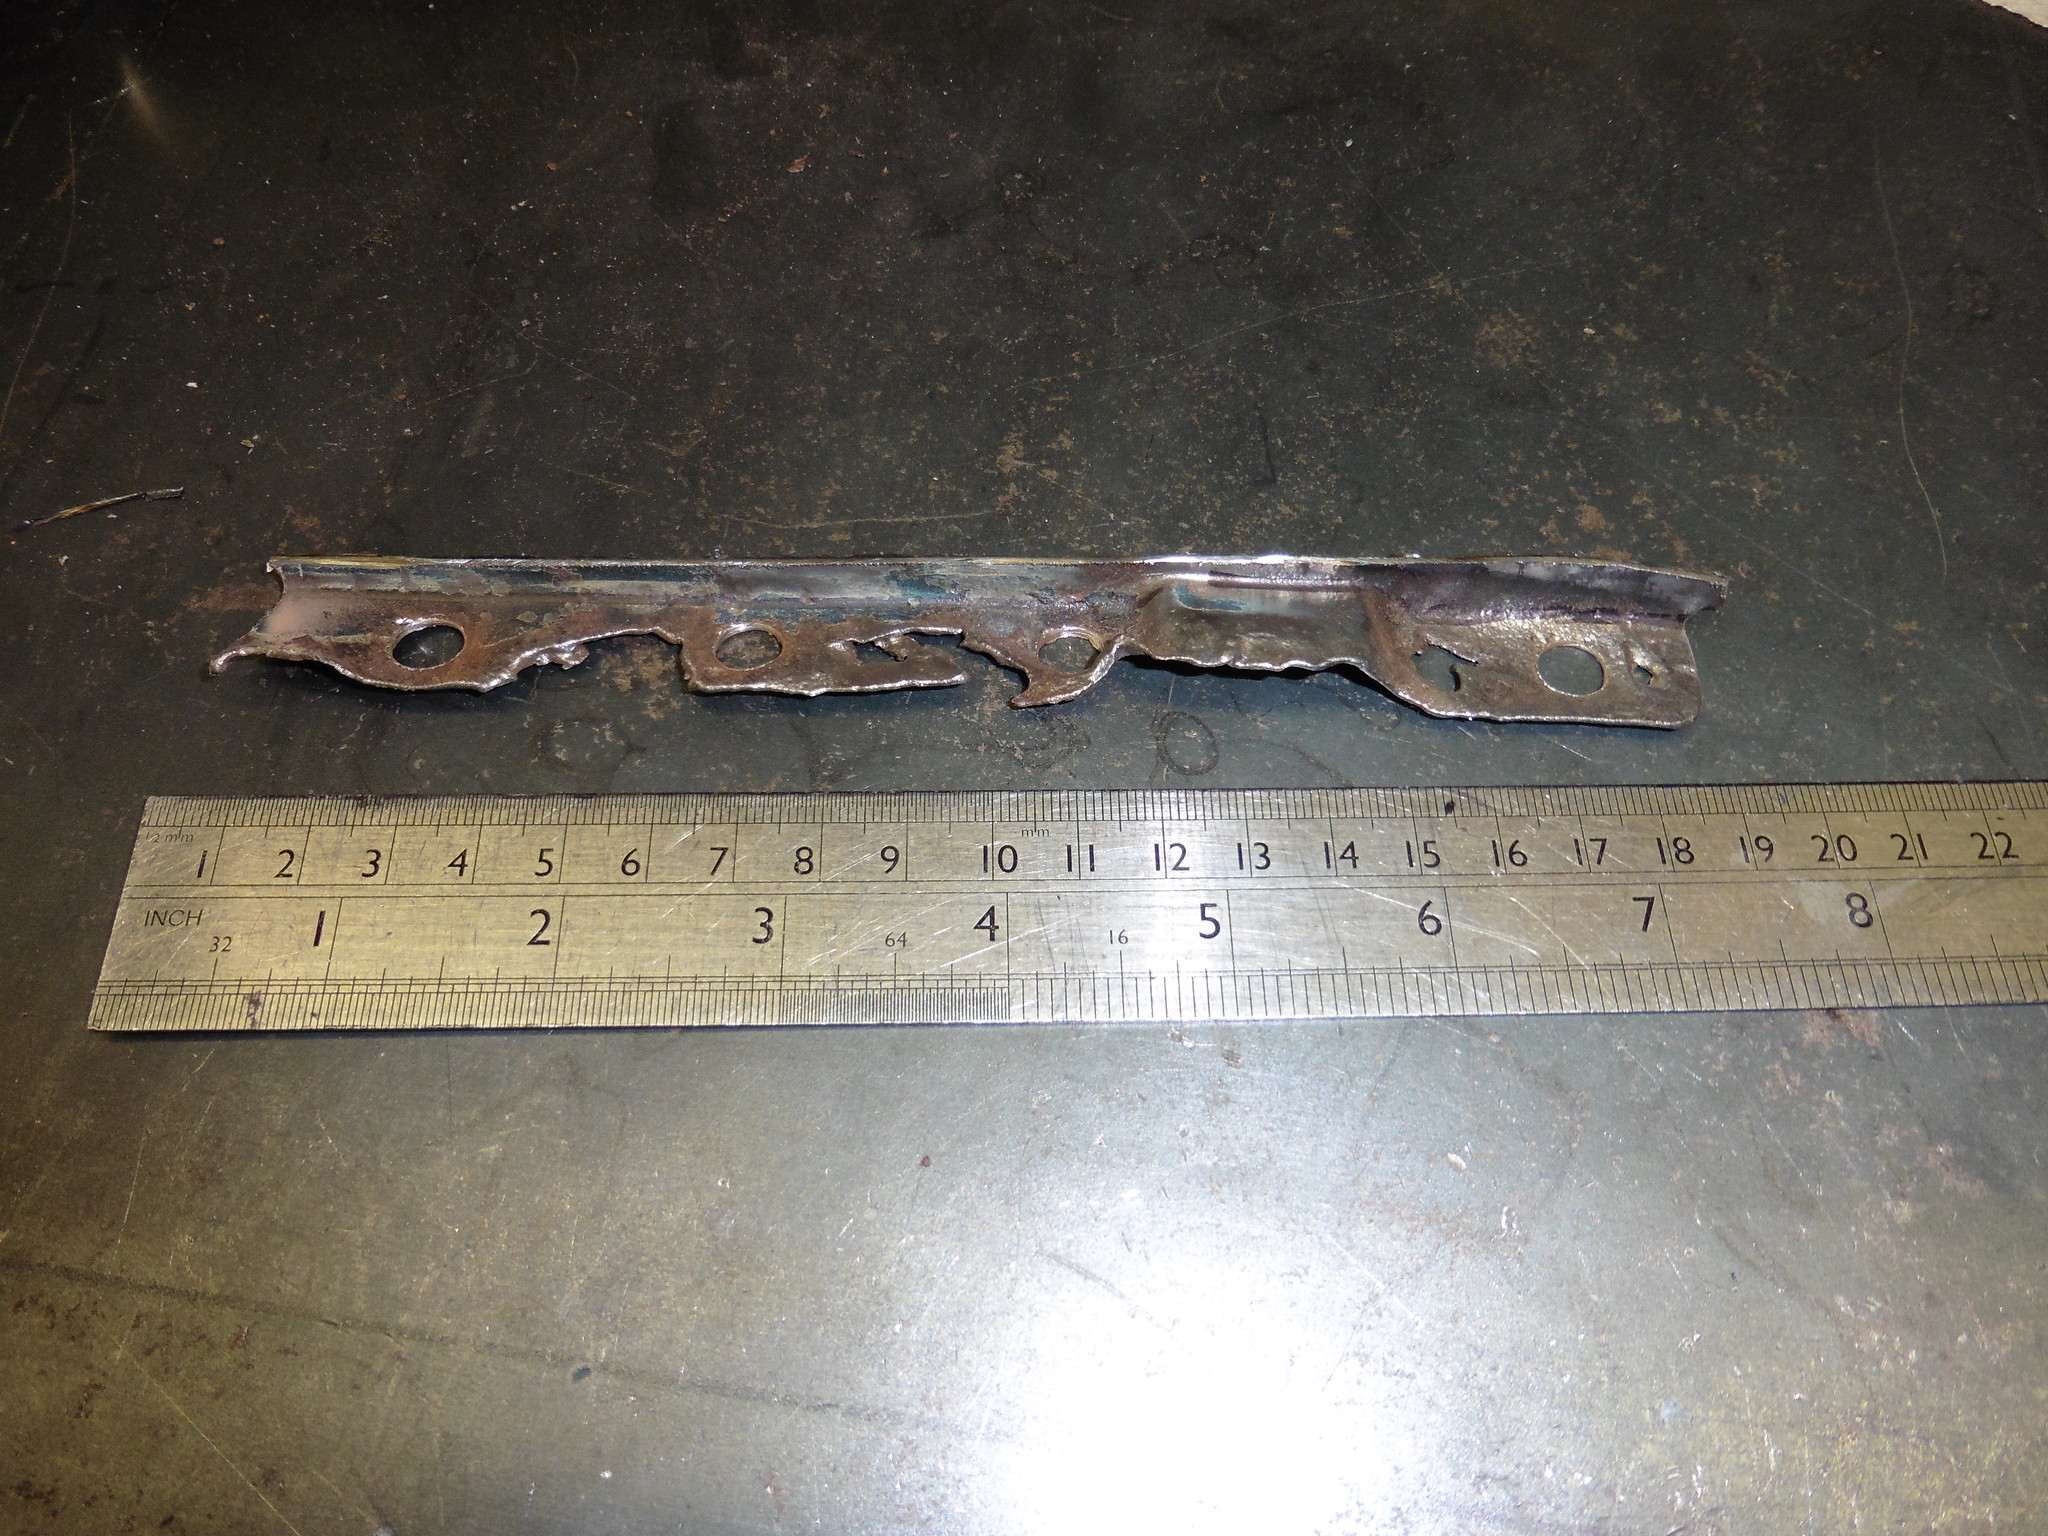 P1020564 P1020564 by jono_misfit, on Flickr folded up a piece of steel, slit it strategically and hammered it lots, with added clampage  P1020565 P1020565 by jono_misfit, on Flickr hammered and clamped it some more  P1020566 P1020566 by jono_misfit, on Flickr ready to prime and weld in, drain isnt as deep as the original, but the distortion was going to get too much.  P1020567 P1020567 by jono_misfit, on Flickr welded in  P1020568 P1020568 by jono_misfit, on Flickr cut out to rust patches, both around mounting points for the side skirt  P1020569 P1020569 by jono_misfit, on Flickr again some more strange damage of some holes cut / drilled into the sill, so welded them up  P1020570 P1020570 by jono_misfit, on Flickr A few more patches needed, but ran out of time for today. |
| |
|
|
Darkspeed
Club Retro Rides Member
Posts: 4,884
Club RR Member Number: 39
|
|
Jul 21, 2019 20:22:17 GMT
|
|
It's the only way things/projects get finished - you just keep nibbling away at them whenever possible.
|
| |
|
|


