|
|
|
|
|
Apologies for gracing the pages of the July edition of 'Practical Classics' unfortunately I feature on the front cover, page 5 and then pages 136 - 138 with a guide & detailed step by step instructions on how to cosmetically refurbish alloy wheels - this was shot in my workshop over 12 months ago but we have just got around to publishing it - the wheel that I demonstrate the process upon is off a Maserati Spyder My, what clean overalls you have!  I thought the flat cap was a nice touch. Never seen the wipe on guide coat before so, as usual, you continue to educate us. |
| |
|
|
|
|
|
|
|
Jun 16, 2018 19:19:20 GMT
|
Apologies for gracing the pages of the July edition of 'Practical Classics' unfortunately I feature on the front cover, page 5 and then pages 136 - 138 with a guide & detailed step by step instructions on how to cosmetically refurbish alloy wheels - this was shot in my workshop over 12 months ago but we have just got around to publishing it - the wheel that I demonstrate the process upon is off a Maserati Spyder My, what clean overalls you have! I thought the flat cap was a nice touch. Never seen the wipe on guide coat before so, as usual, you continue to educate us. Dry guide coat is readily available in the market - just wipe it on with the applicator and set to sanding back - various brands of it available via your local automotive refinishing factors or e bay etc - makes blocking back very easy but I tend to use it on smaller repairs - larger repairs - like full panels I use a cheap matt black aerosol |
| |
|
|
|
|
|
Jun 16, 2018 19:40:59 GMT
|
I had to use the trailer in the week to collect a clients Jowett and has it so happens also deliver one less than 20 miles away from the one I was collecting - the trailer run was a short notice thing - most of my work is planned months in advance but this was for a accident damaged vehicle that was now not running due to the damage - the owners insurance company required an estimate on the work and it would have been pointless undertaking the 350 mile round trip just to do the estimate so I opted to take the trailer and collect the car - bring it back to the workshop where the vehicle could be fully inspected for the work required - once back home I noticed that the trailer would require some remedial work before being used again 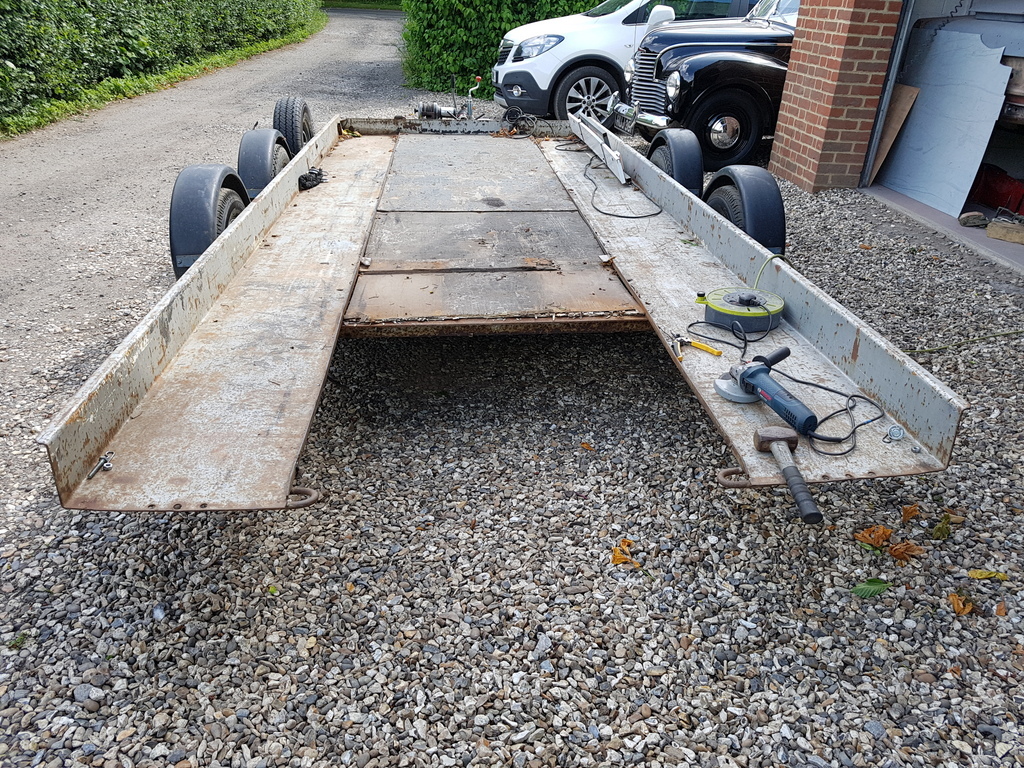 The rear cross member was woefully under spec and had departed from it's poor weld on one side - it was only the old ply centre sheet holding it in place 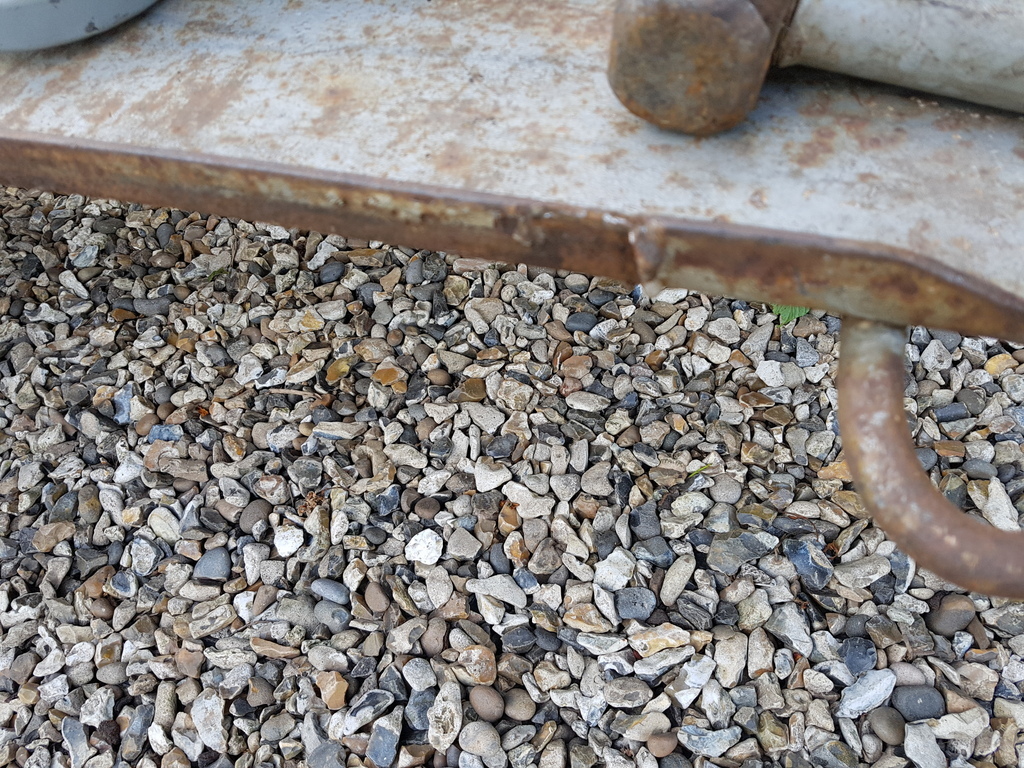 Chopped it out and cleaned the areas up 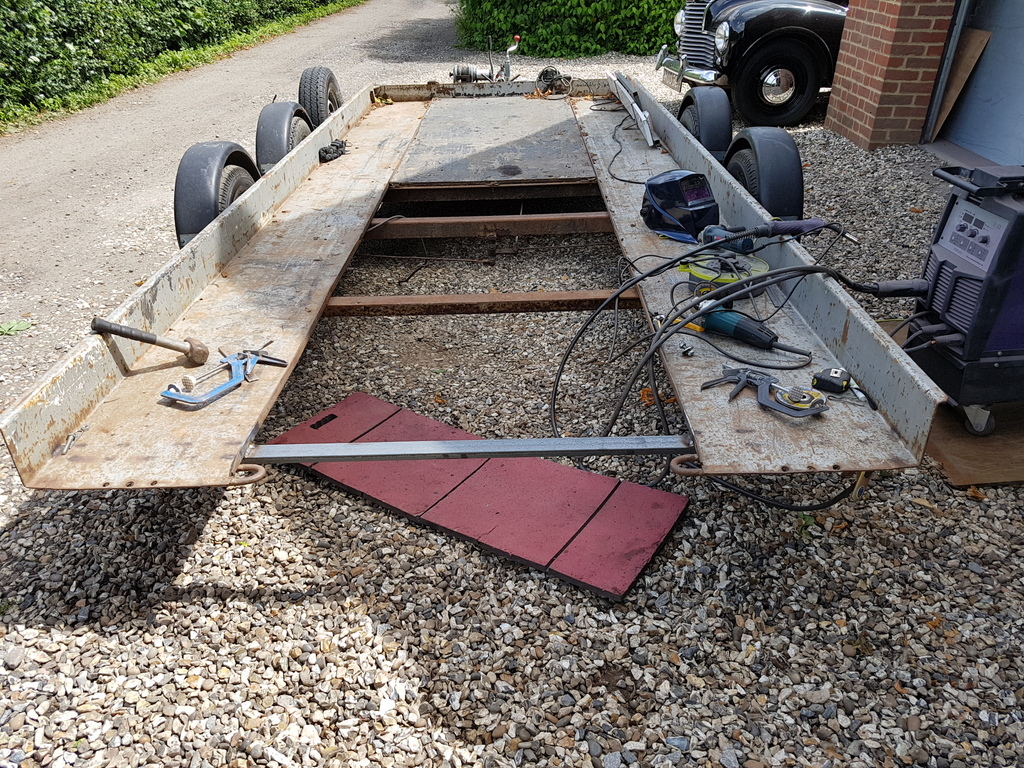 Then fitted a decent sized rear cross member of equal angle and welded into place 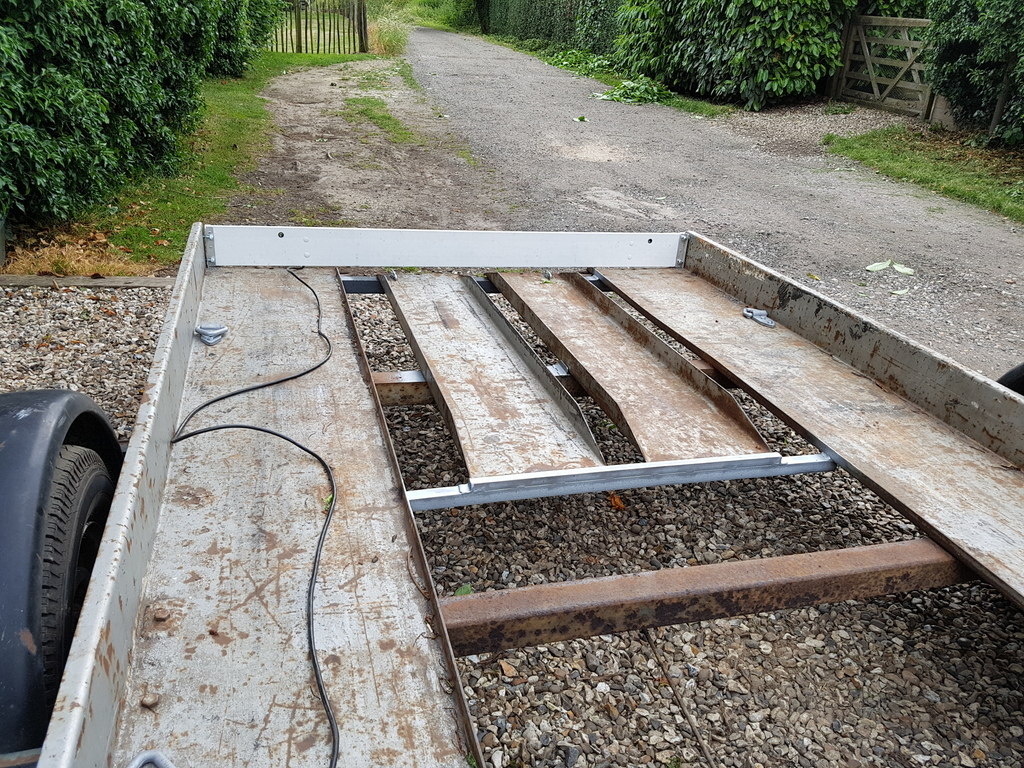 The old system of securing the ramps went at the same time and I built a new set up that took seconds to secure the ramps rather than the old system which relied on a couple of nuts & bolts at one end along with a wing & prayer at the other end of the ramp 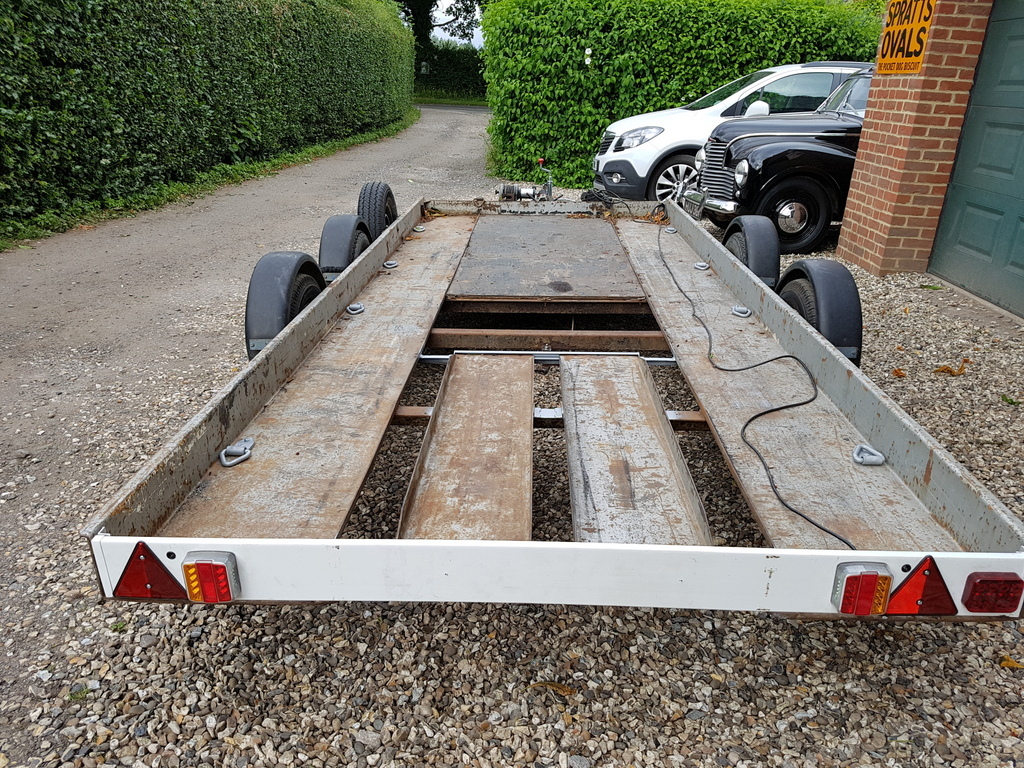 Also altered the rear axle brake rod setup so that it did not foul against it's self - cleaned the centre linkage up replaced the pivot bolt and greased it all up  Altered the lighting board mounting brackets but now need to order some 10mm diameter pins & R clips rather than have to mess about with bolting it into place - I also bolted the tie down eyes on the load bed at the same time - still a fair bit more work to do on the trailer but when I have a little more time - for now it's back usable & safe |
| |
Last Edit: Jun 16, 2018 19:43:17 GMT by Deleted
|
|
eurogranada
Europe
To tinker or not to tinker, that is the question...
Posts: 2,490
|
|
|
|
|
I somehow missed this whole thread....
You sir, are one busy man! Do you sleep? Do you eat? Do you ever even just sit down? You make it seem like there are 40 hours in a day! And I considered myself a pretty hard worker but I'm no match for you at all!
I do really love seeing how as busy as you are, as many things at one time you have in progress, you are always willing to help people out and seem to be truly happy doing what you're doing and how you are doing it. That in itself is inspirational! My house move has contributed a lot to my own happiness, but I wish I could feel a little more like you do about work.
Anyway, just wanted to say I have great respect and admiration for people like you and my hobby has lead to me getting to know a few that have inspired me to be a better person as well. And I love your detailed threads!
|
| |
|
|
|
|
|
|
|
Need to use the trailer for a pretty long distance run at the end of this week so went over to the barn to collect it 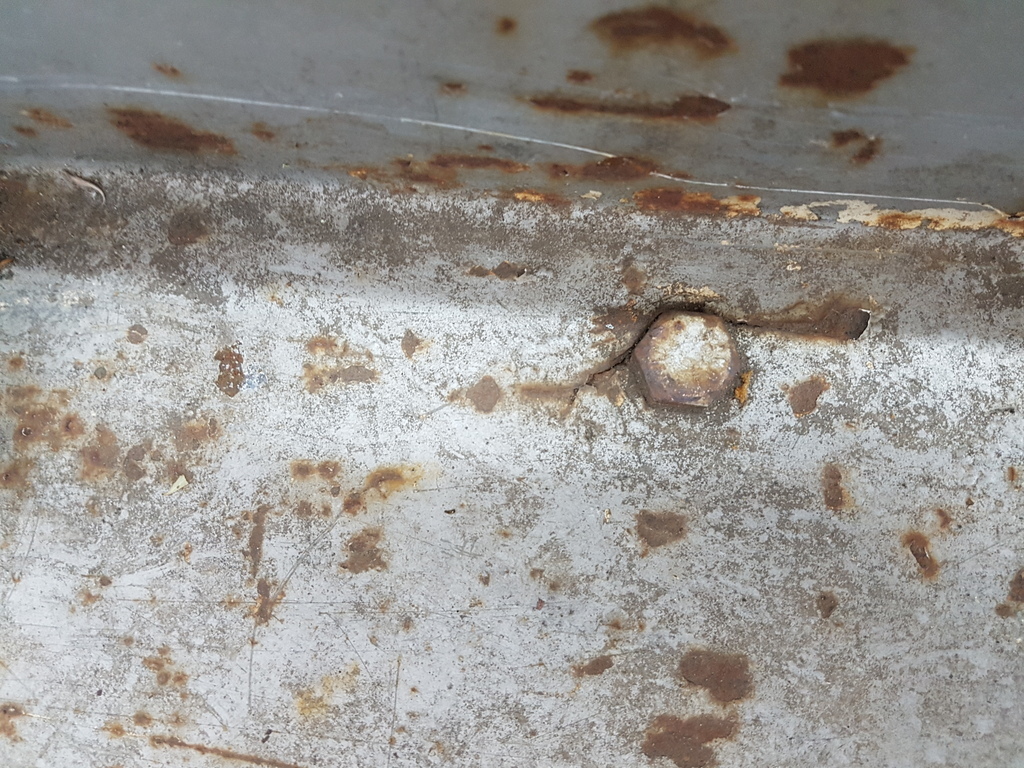 I noticed that the bolt holes for the axle mountings had started to form cracks in the steel 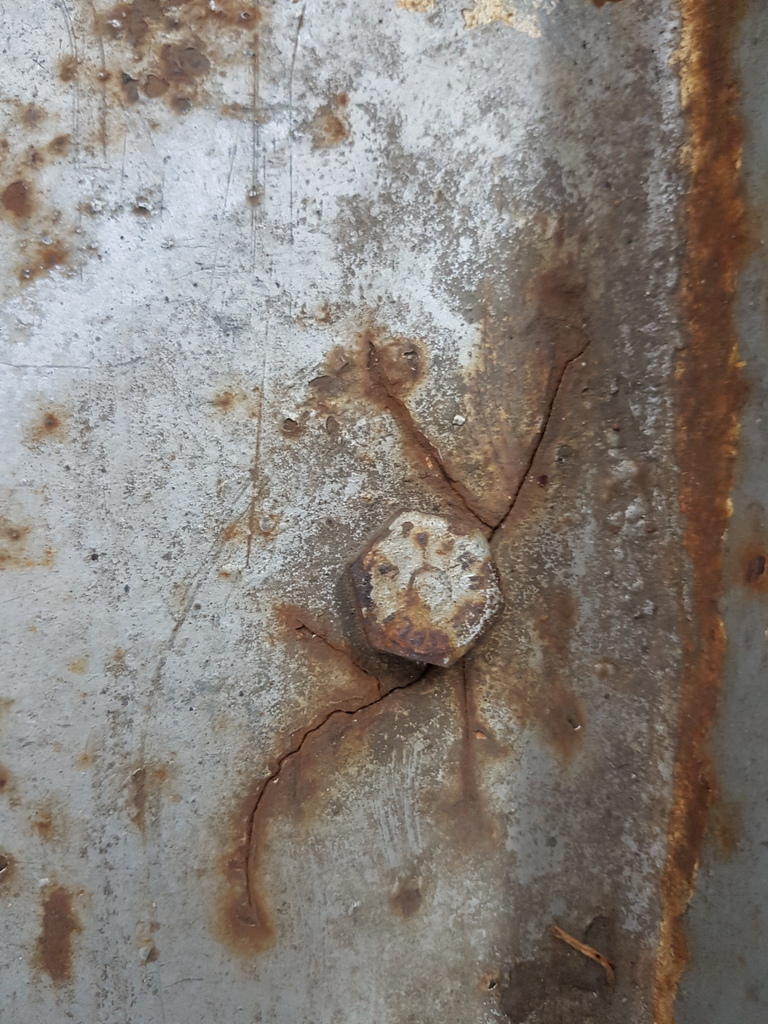 Some of them had been previously repaired but not during my ownership 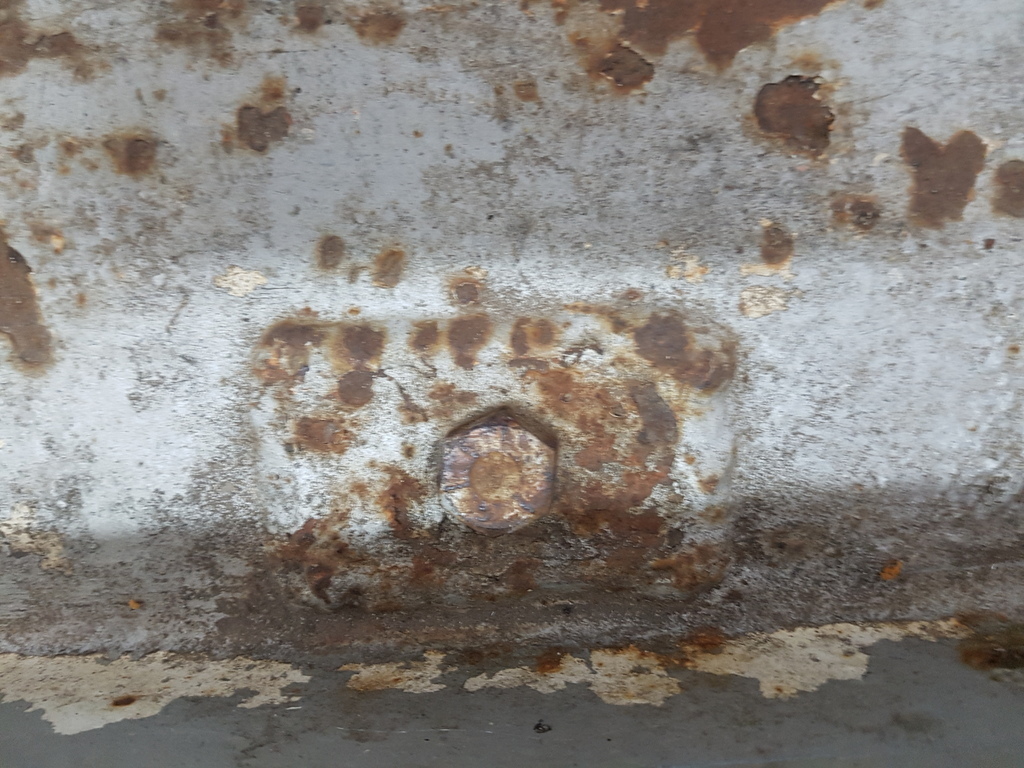 Not wanting loose a trailer axle whilst towing - or at any other time come to that 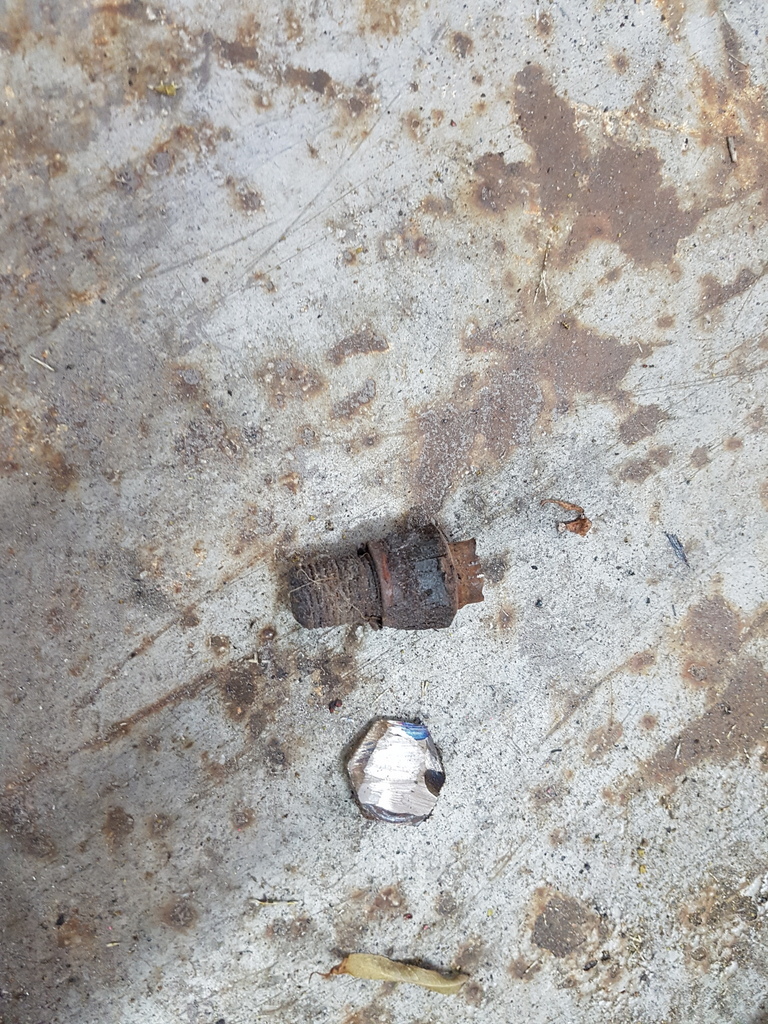 Chopped the seized bolts out 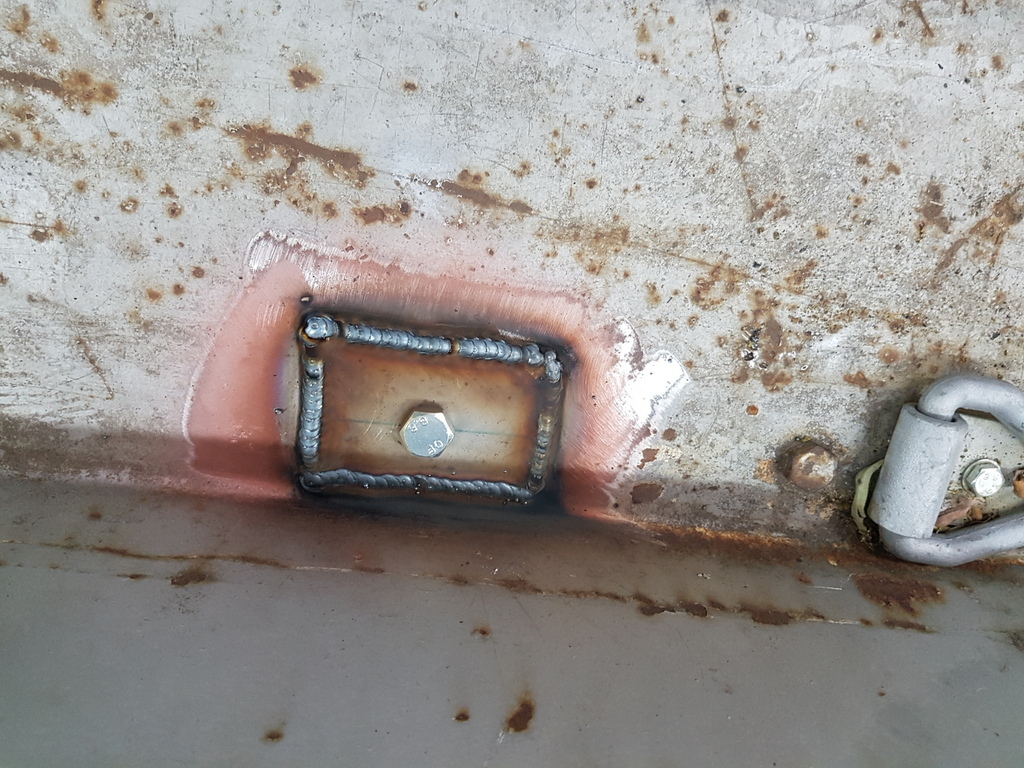 Re-plated the four mountings that causing concern complete with new 12mm bolts / nyloc nuts / washers etc 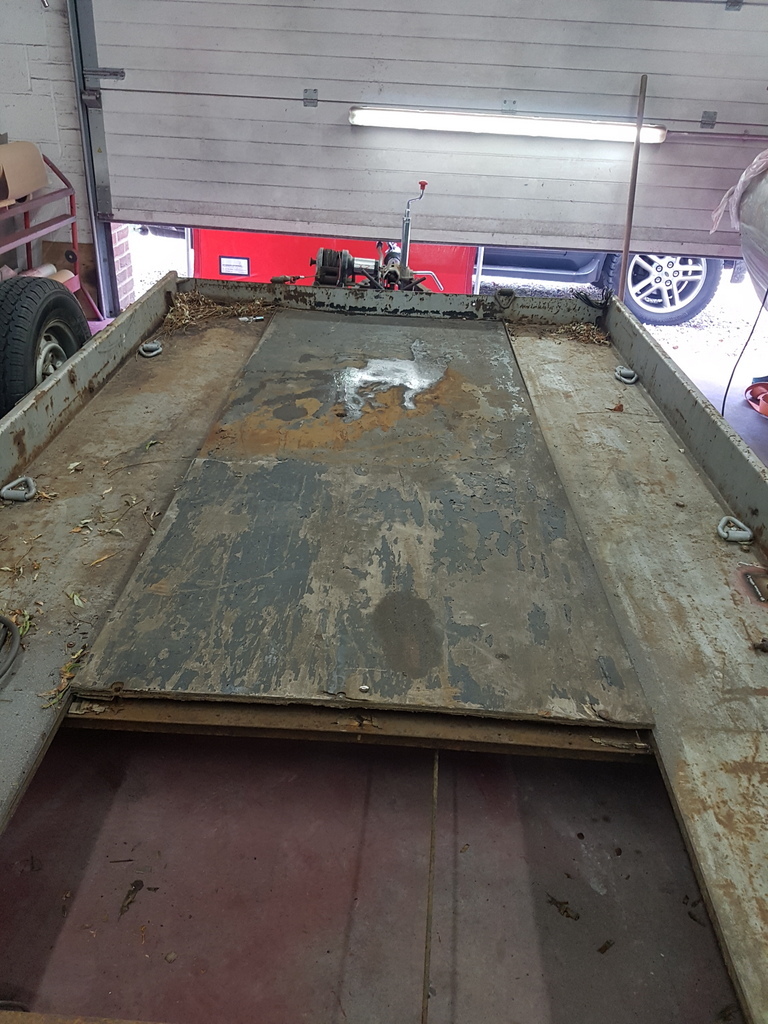 Removed the front section of ply sheeting - that did not take much removing and will remain removed has part of the trailers weight loss programme 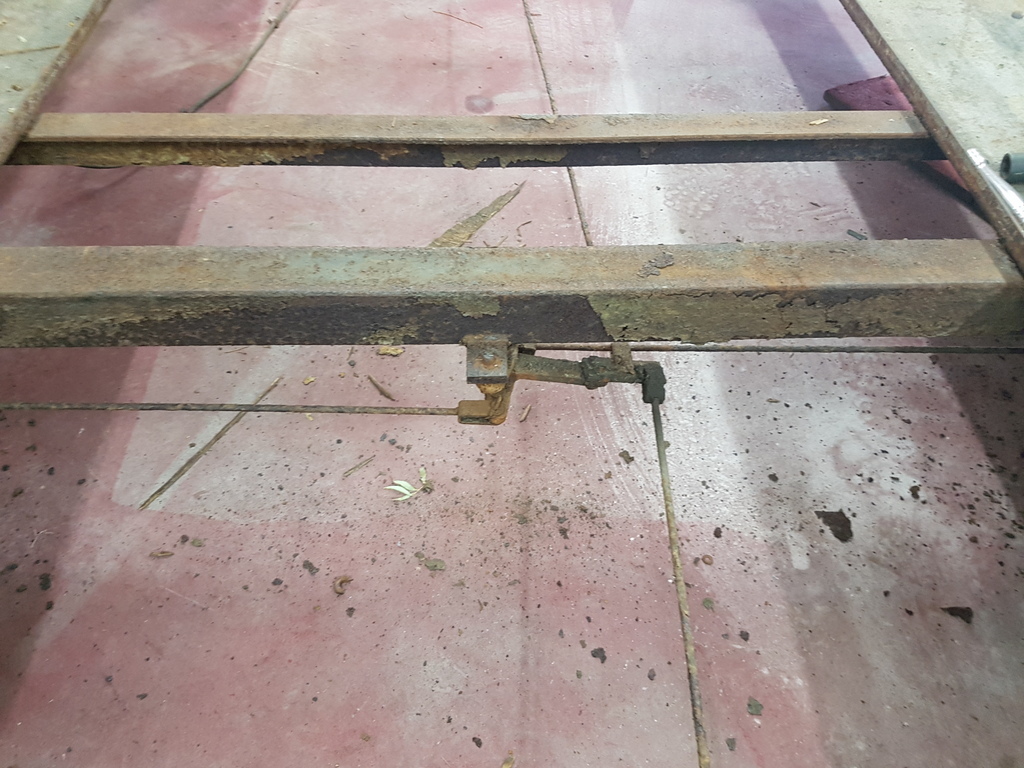 Pivot mount for the brake splitter arm was seized and the arm centre quite worn hence lots of play in it 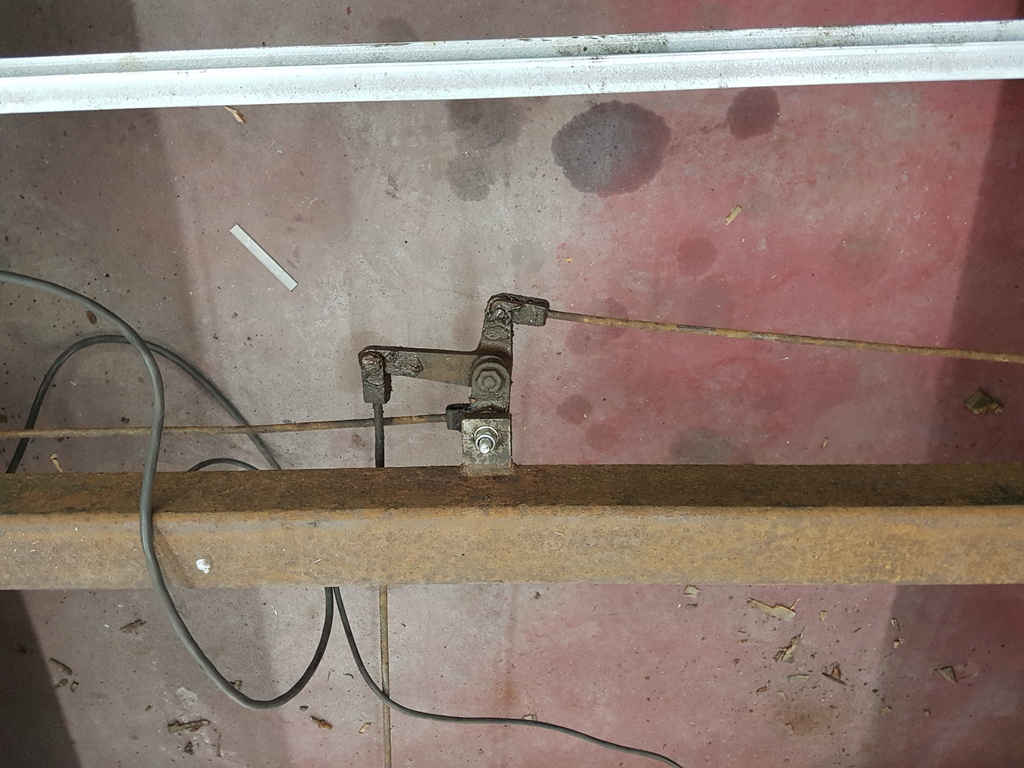 Re-drilled, new bolt - links all cleaned up & greased - checked for operation etc 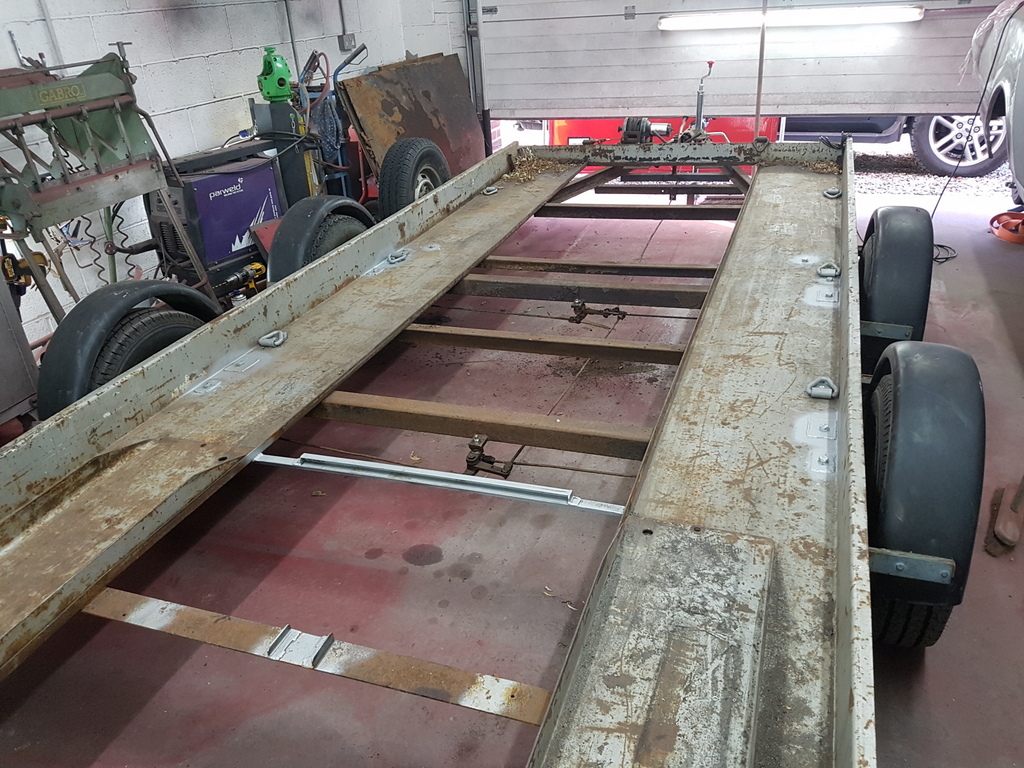 Loads of old fittings / fixings chopped off / cleaned up etc - also replaced all the remaining axle mounting bolts on the previously repaired areas 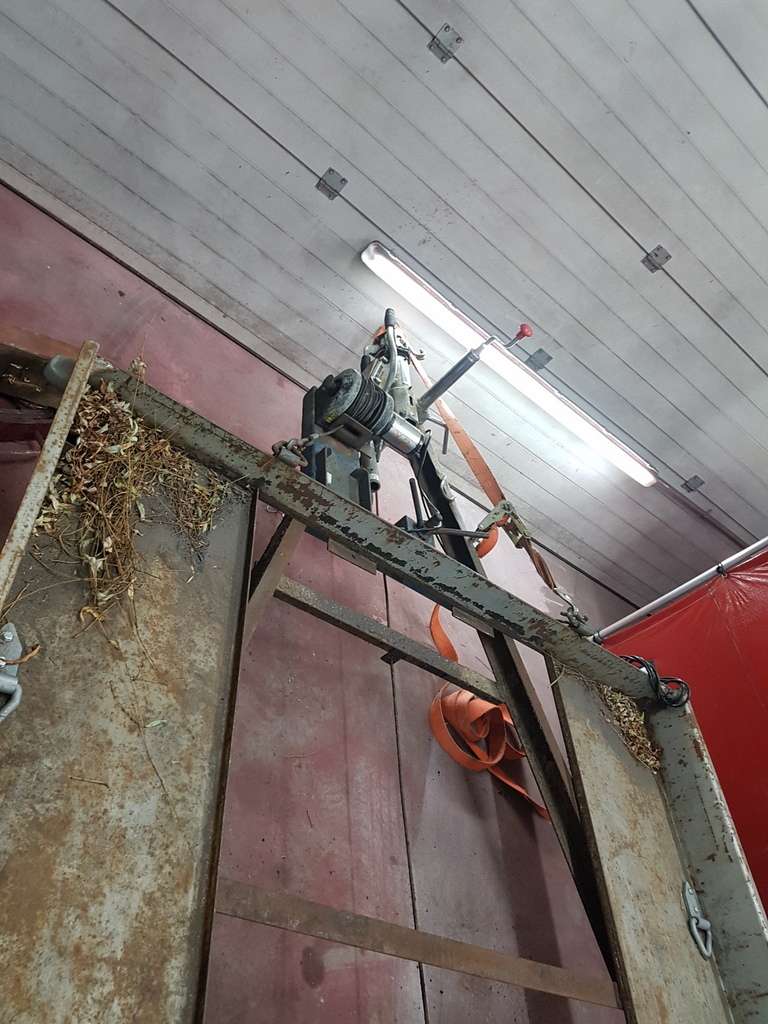 I had to get inventive at the end of the day to allow the workshop door to close - without a major reshuffle in the workshop the trailer is 50mm too long - but with a ratchet strap on the hitch I could pull the hitch in enough against the hydraulic damper to get the door closed - I have a few more alterations to sort tomorrow on it but then must get on with workshop progress. |
| |
|
|
|
|
|
|
|
Another day on trailer duties 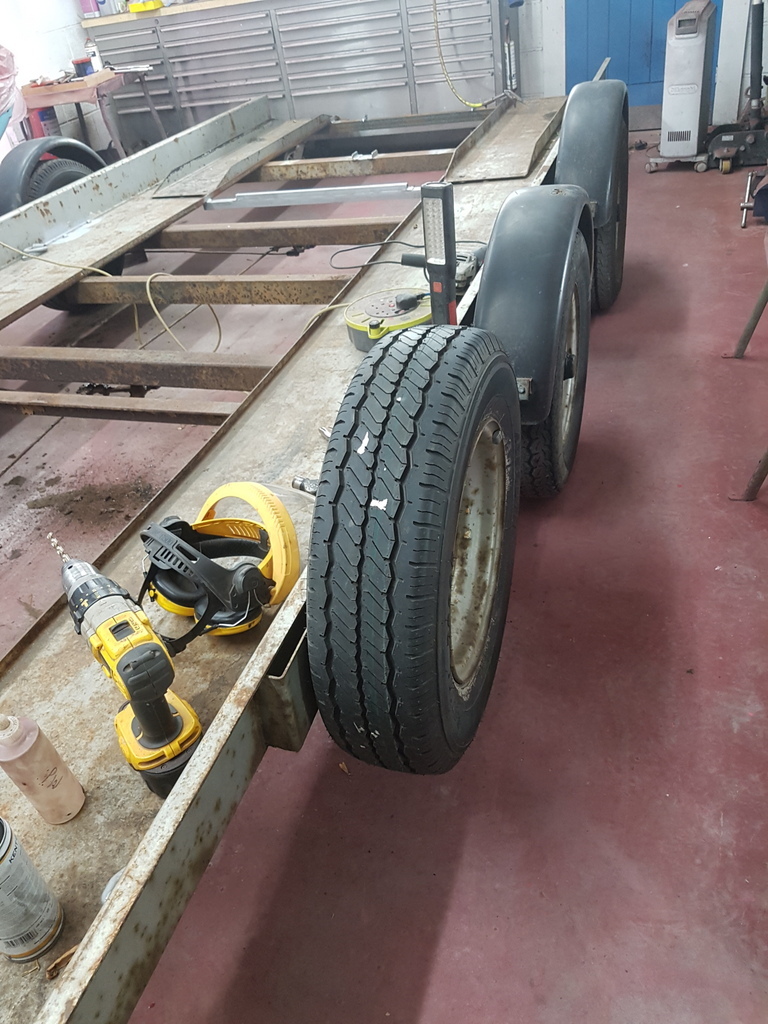 The spare wheel was hung from the side of the trailer - and I don't like it here - it's just another obstruction that gets in way and at certain angles fouls the direct line of sight when reversing 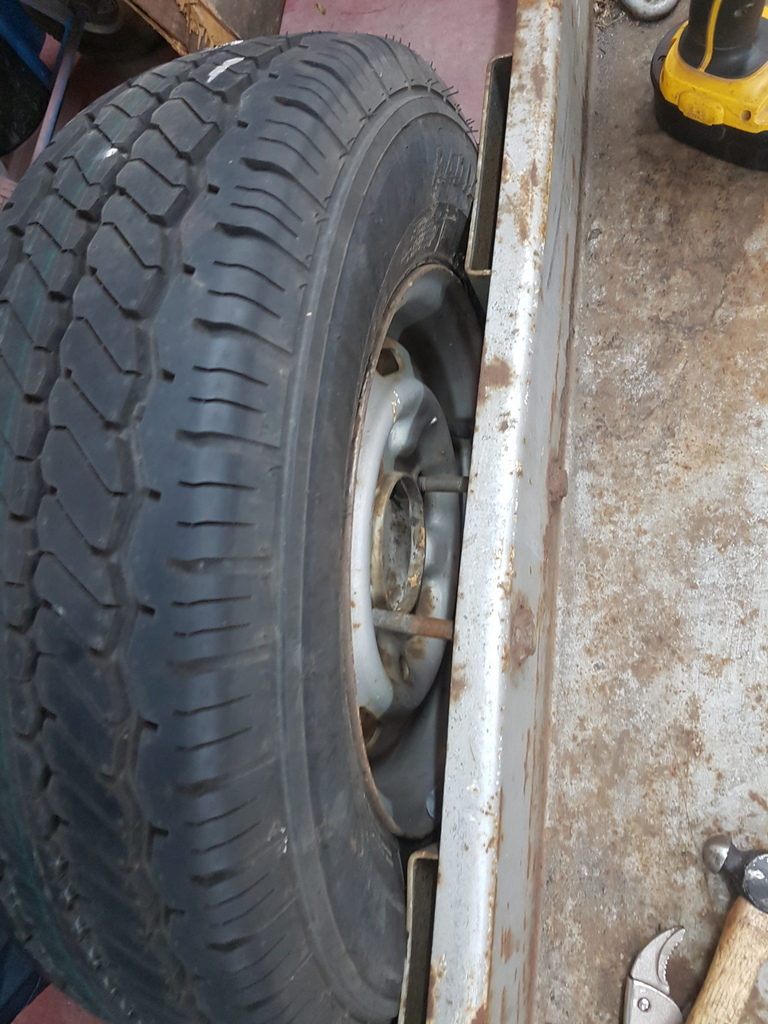 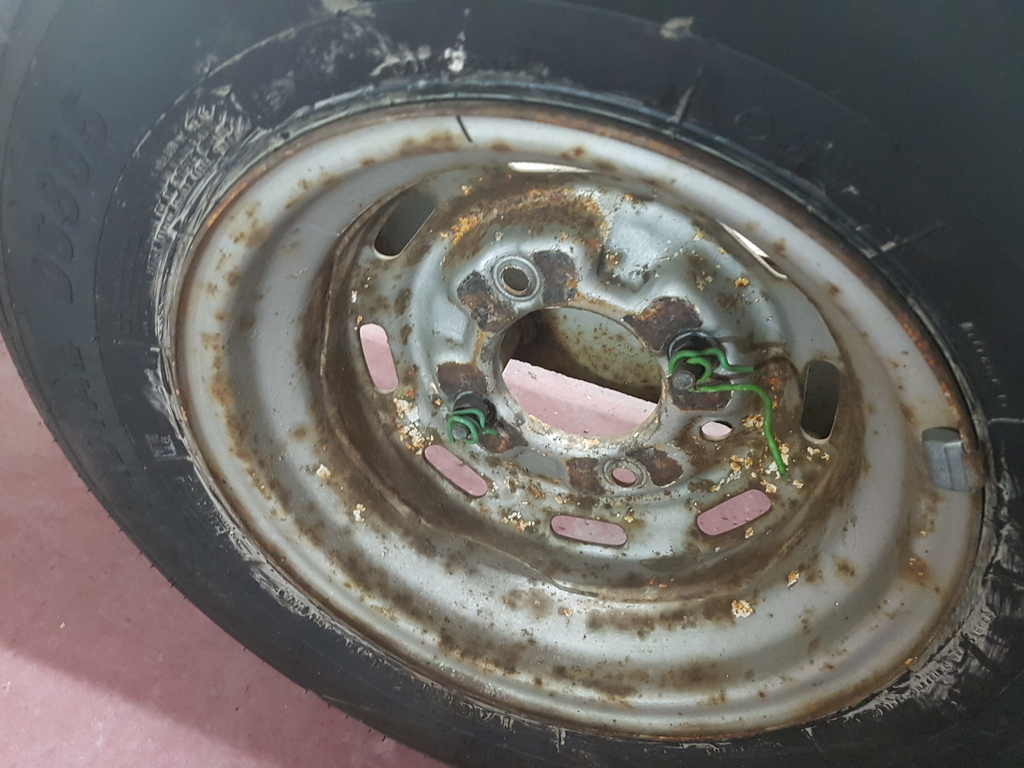 When I say hung - more bodged on than anything 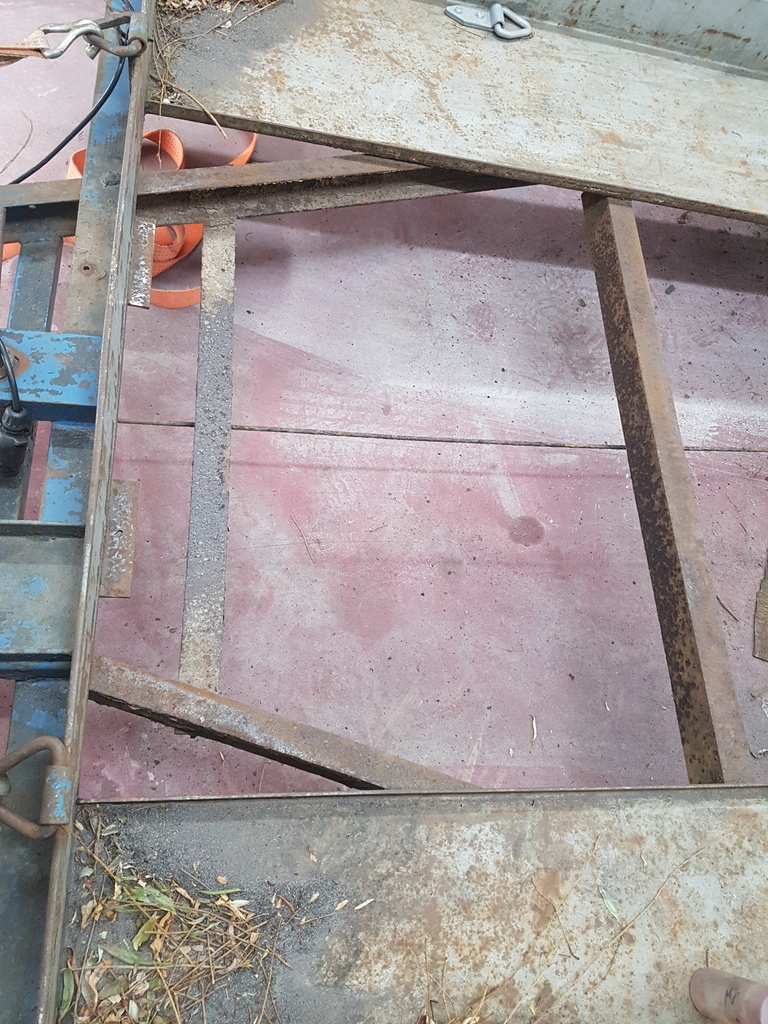 New location will be at the front of the trailer on a fabricated frame 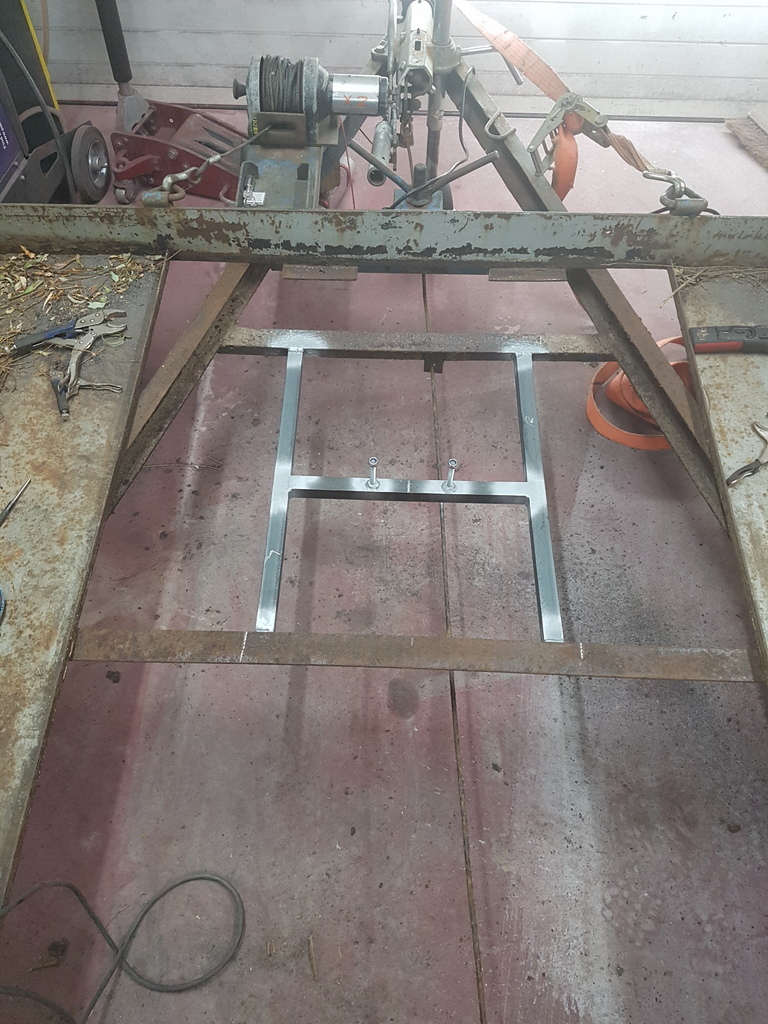 Frame made & welded in 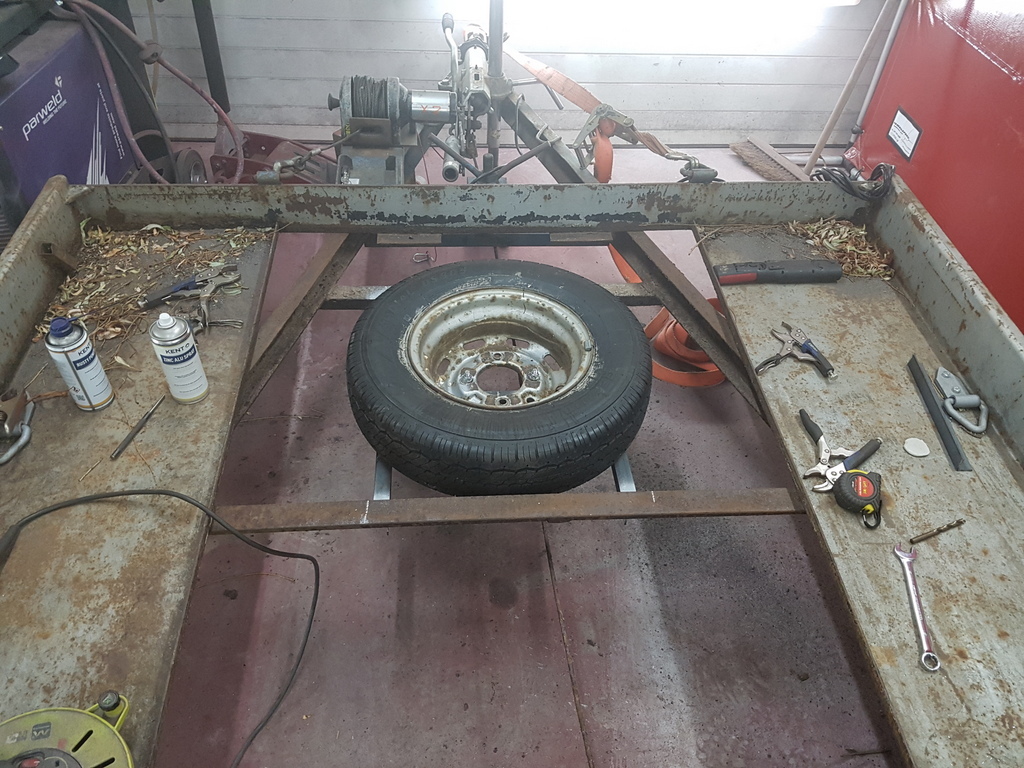 Spare wheel fitted - I doubt if I will ever have anything on the trailer with a low enough front that the spare will foul but if so a couple small planks of timber under the front wheels of whatever is being transported will see the clearance required being made 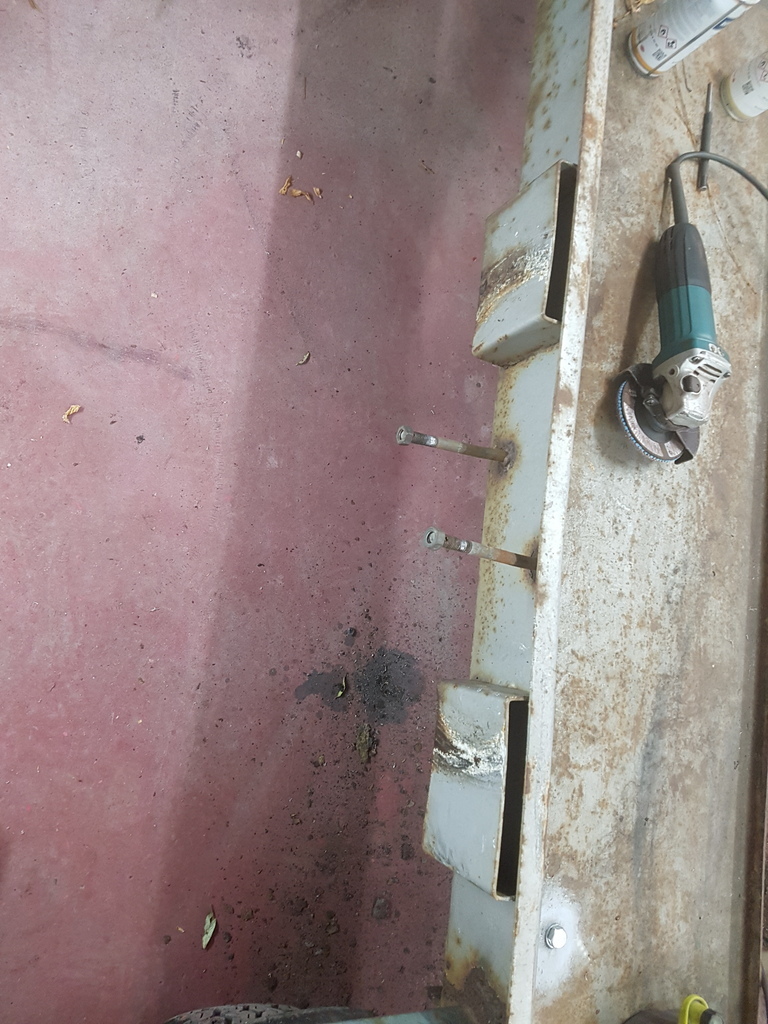 So the original spare wheel brackets could now be removed & scrapped 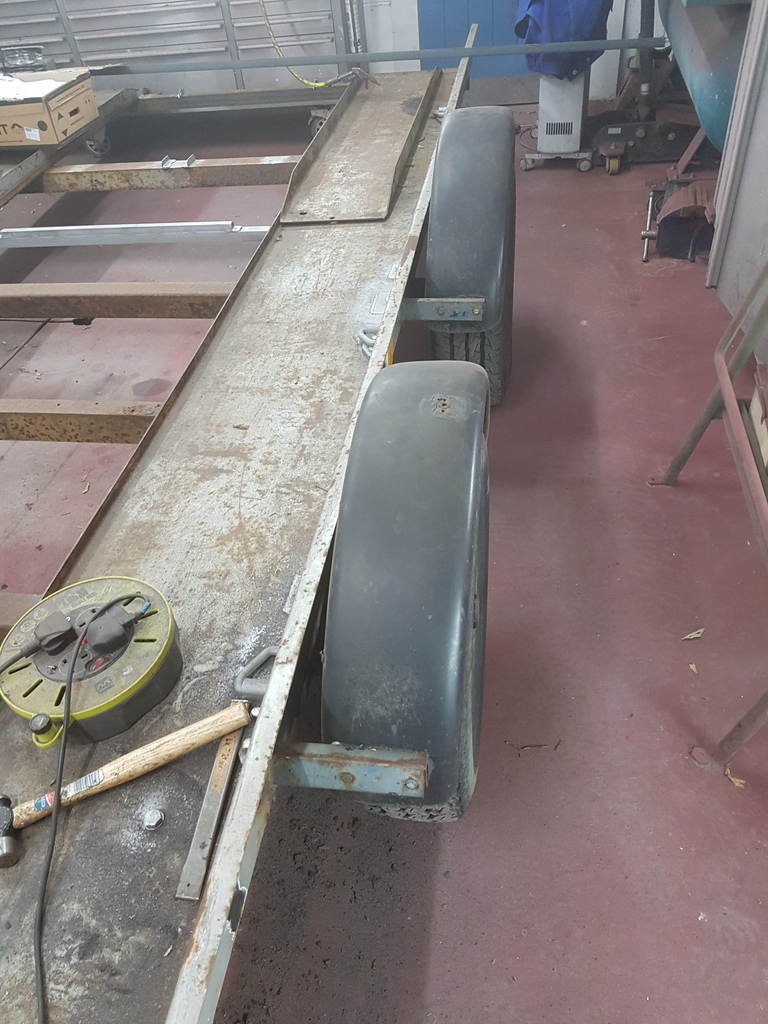 Next was the mudgards - these are steel 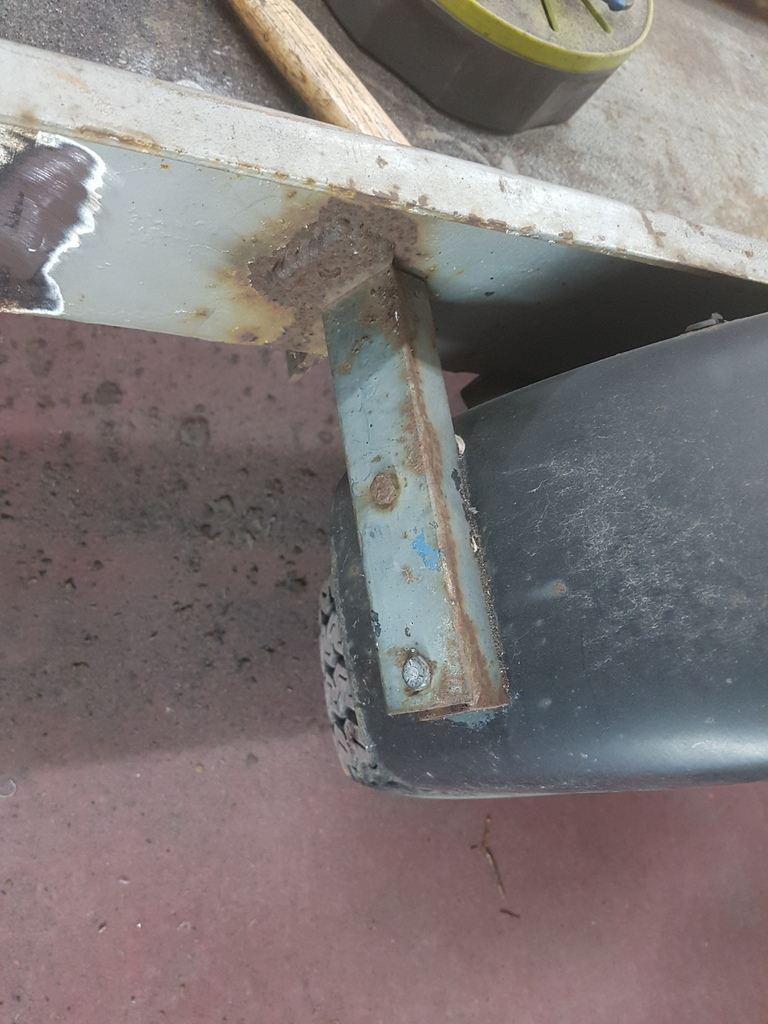 And mounted via a bodge of brackets and steel box section 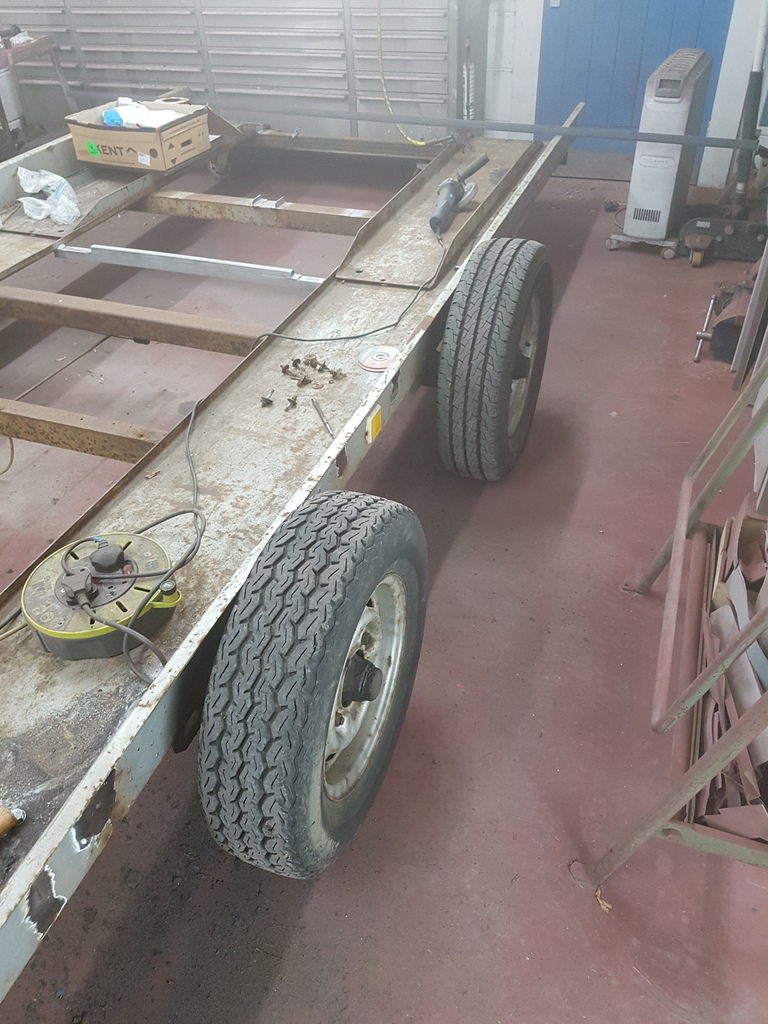 All of which were removed / chopped / scrapped 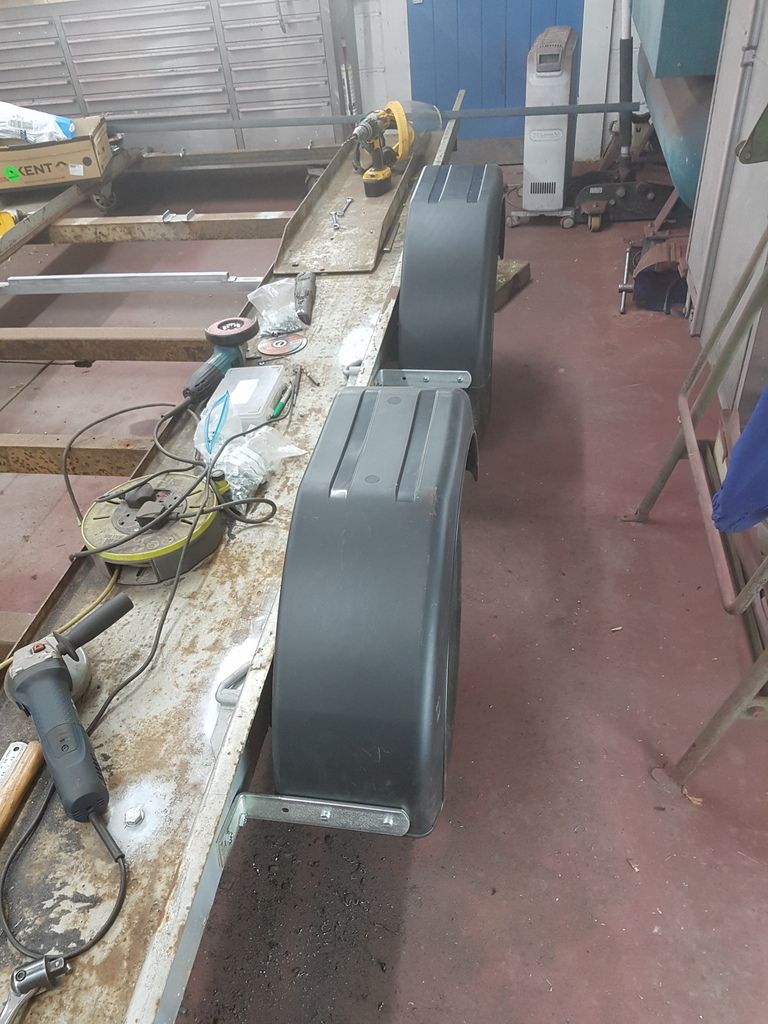 New plastic maintenance free mudgards fitted and more weight reduced from the trailer overall 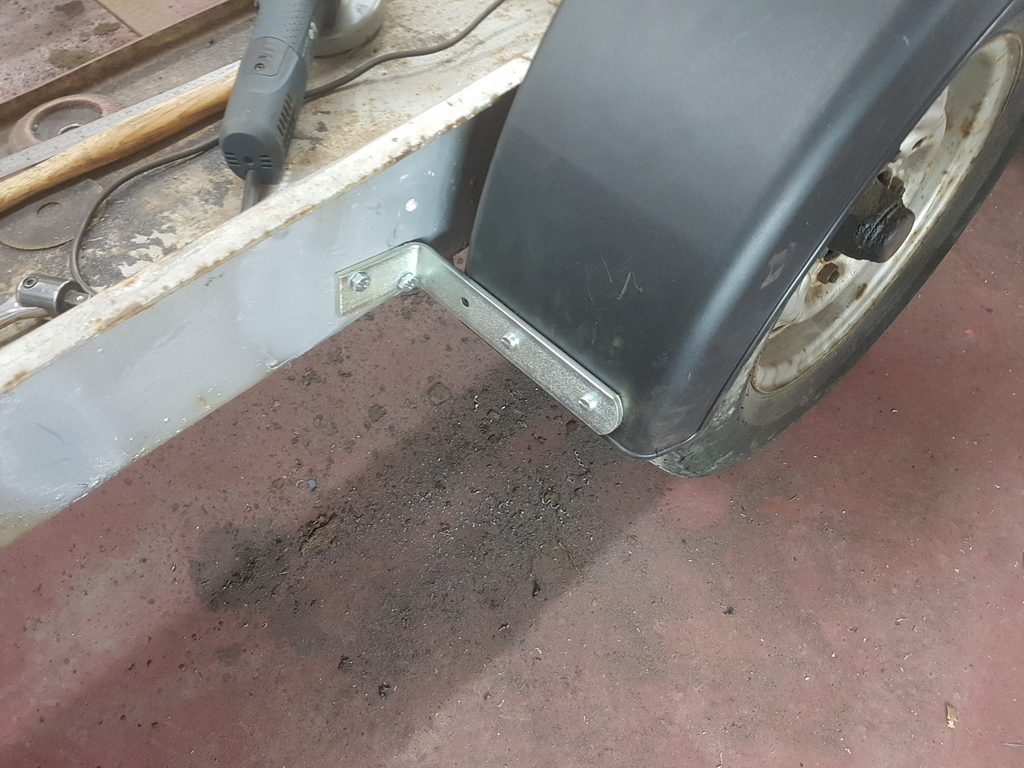 Retained by strong /built for the job galvanised brackets 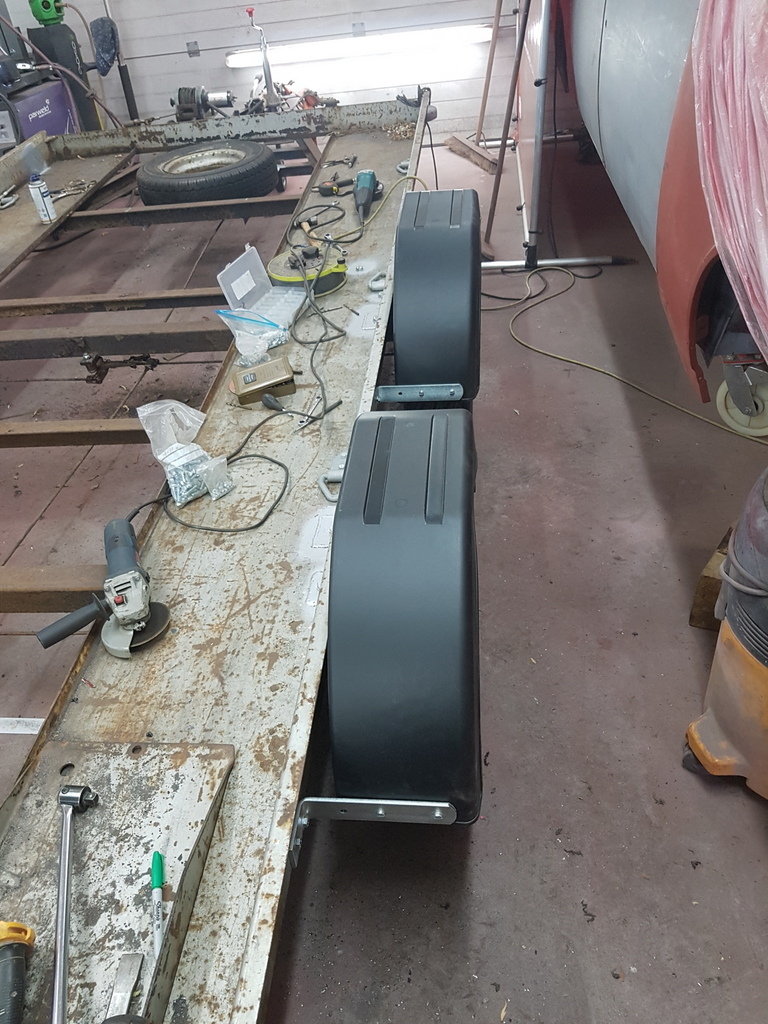 Then the offside received the same treatment 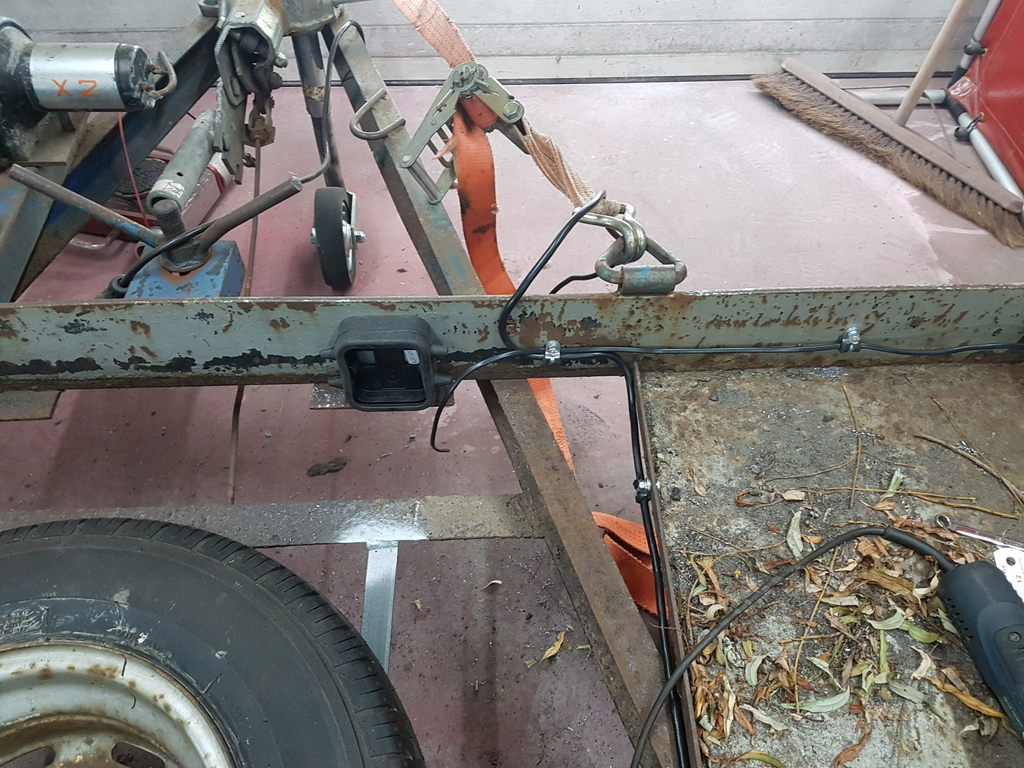 Really need to crack on with the paying work side of things but it's difficult to put the next job on the trailer off - decided to keep going for the sake of half a day whilst the trailer is in the workshop and get the lights sorted - pet hate of mine is not being able to see what you are towing so I am a big fan of trailer marker lights 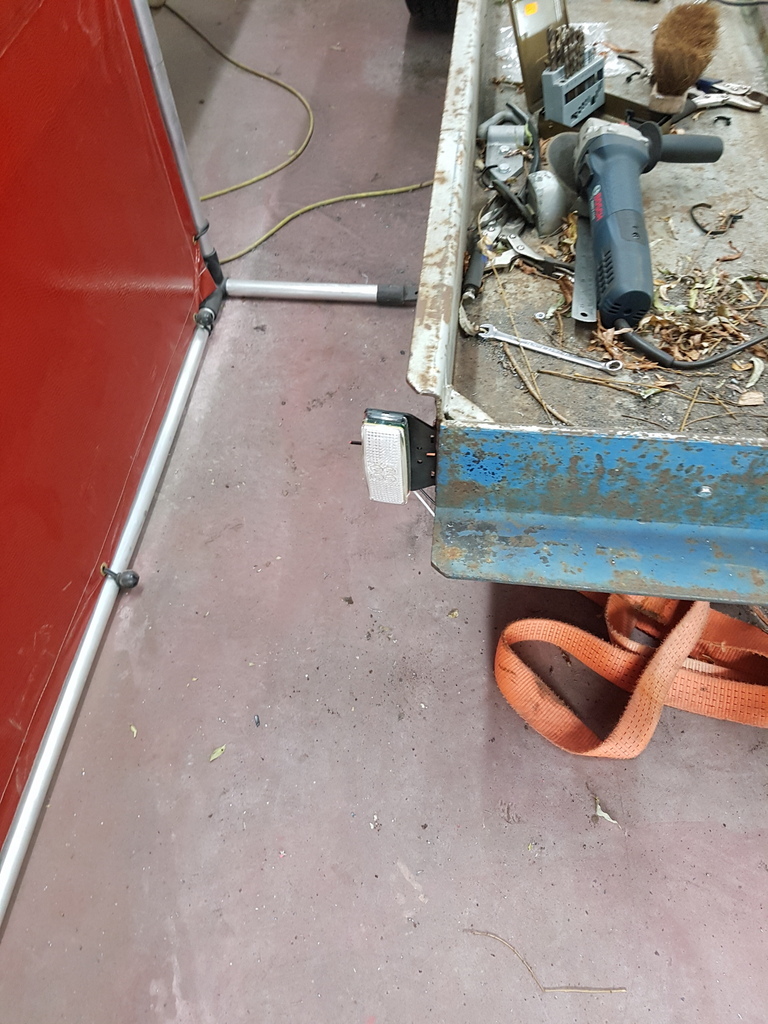 Front ones on  And will be wired back to a weatherproof junction box at the front Marker lights are also planned for the front mudguard (white / red) and again stalk lamps for the rear of the trailer in addition to the lighting board - everything will be LED rather than filament bulbs / bulb holders 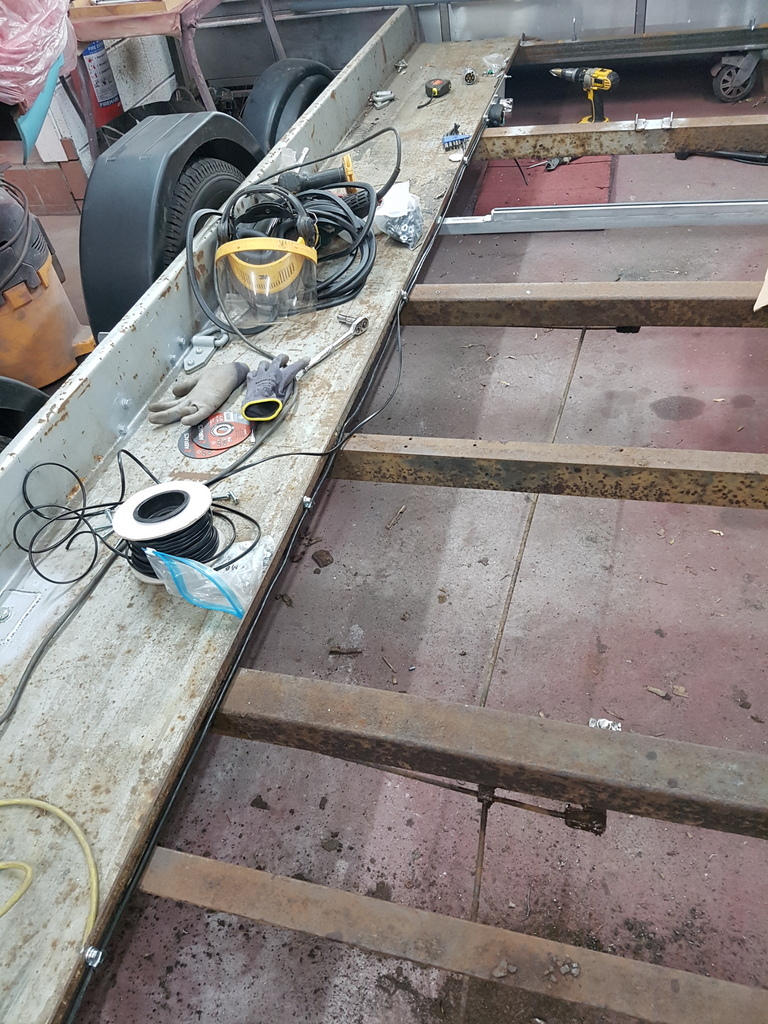 Cable run to the rear 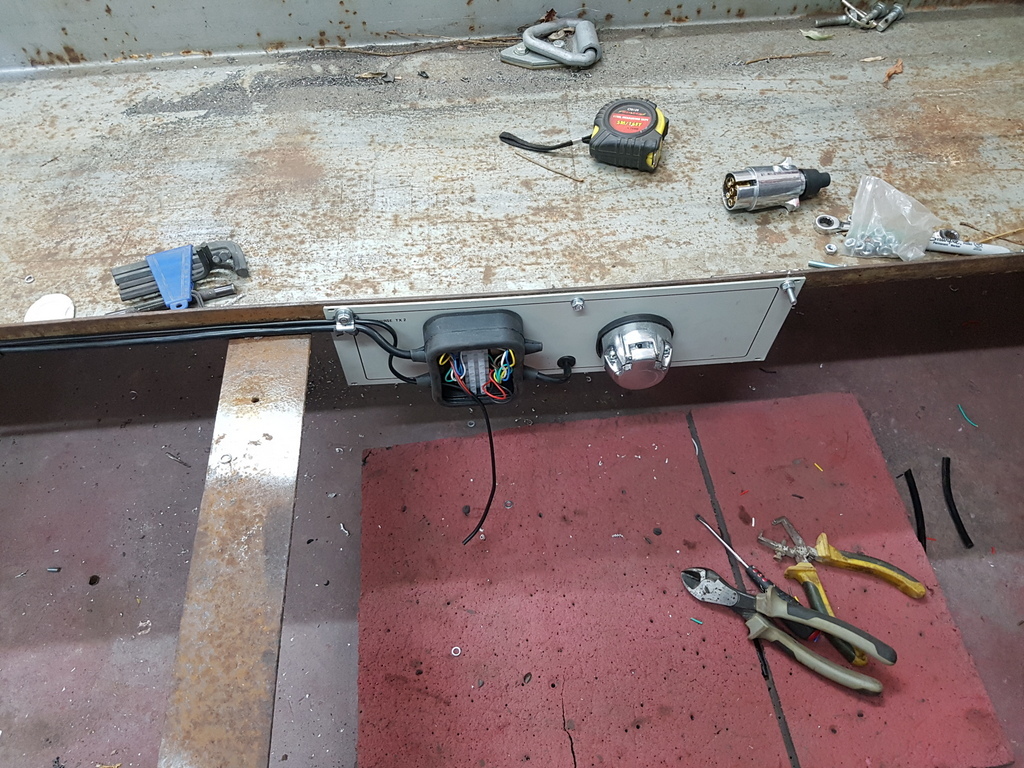 Splits at the second junction box to allow the centre & rear marker lamps to be wired in - the trailer socket allows for the rear lighting board to be disconnected and removed out of the way - the board will just be on a short fly lead with a plug to connect to the rear socket hopefully I shall get this completed tomorrow and out of the way - then I can get some real work done |
| |
Last Edit: Aug 7, 2018 21:23:29 GMT by Deleted
|
|
jamesd1972
Club Retro Rides Member
Posts: 2,841  Club RR Member Number: 40
|
|
|
|
|
nice - all it needs now is a rub down and some paint !
Difficult to know when to stop ? Need a few more years out of it now..
James
|
| |
|
|
|
|
|
|
|
|
Great work, you don't want to be stopped by the Fuzz for not having the trailer illuminated properly.
|
| |
Last Edit: Aug 7, 2018 22:23:23 GMT by peteh1969
|
|
|
|
|
|
|
nice - all it needs now is a rub down and some paint ! Difficult to know when to stop ? Need a few more years out of it now.. James No rubbing down I'm afraid - However it will be going to my shot blasters where everything will be removed and the trailer bare metaled - then back to mine to a good dose of 2 pack zinc based primer - prior to few coats of a strong 2 pack top coat - unsure of colour but probably something like a mid to lightish grey that can be mistaken for a weathered galvanised finish. |
| |
|
|
|
|
|
|
|
Are you going to be putting white reflective stickers on the upper parts of the new mud guards as they are wider than the where the marker lights are? Pete - Not thought about that yet but the front mudgards are also getting front / rear marker lamps |
| |
|
|
|
|
jamesd1972
Club Retro Rides Member
Posts: 2,841
Club RR Member Number: 40
|
|
|
|
|
Are you doing a socket at the front of the trailer to connect to a replaceable twin ended lead to the tow car ? Works well as easy to replace if trodden on driven over, dragged, snagged or just generally tired. All the horse boxes I've seen do this.
Nice job, think you need some signwriting or go faster stripes !
James
|
| |
|
|
|
|
|
|
|
|
Attention to detail.
Neat work.
|
| |
|
|
|
|
|
|
|
Last day on the trailer for now 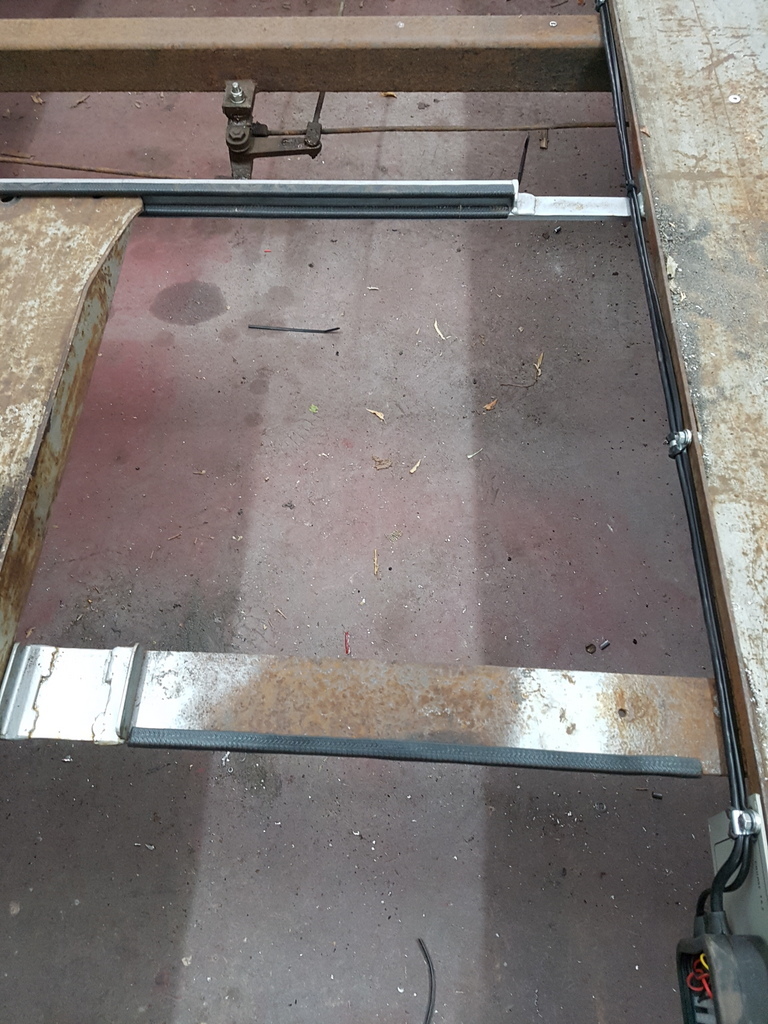 Although the ramp stowage system that I fabricated works - it's very noisy - you can hear the ramps clattering about in the housings has I drive down the road - simple fix then of some plastic U shape edge trim over the equal angle edges that the ramps sit on top of results in the desired dampening effect 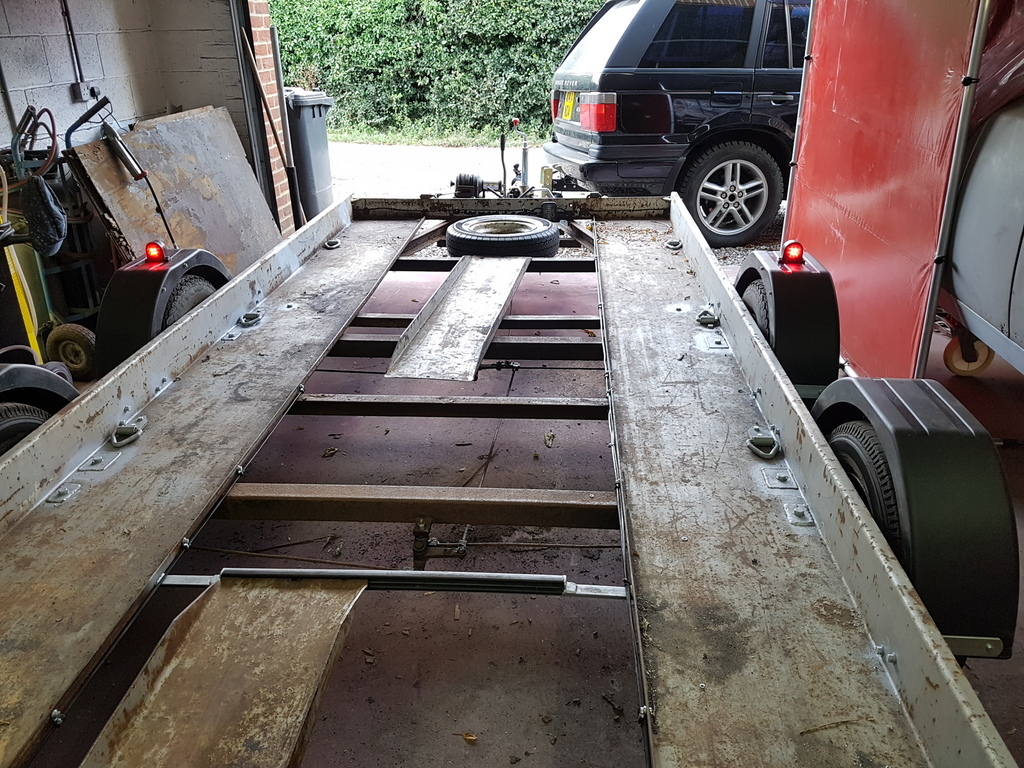 Loads more cable runs, drilling for the cable fixings, connecting up & installation of the lamps resulted in this 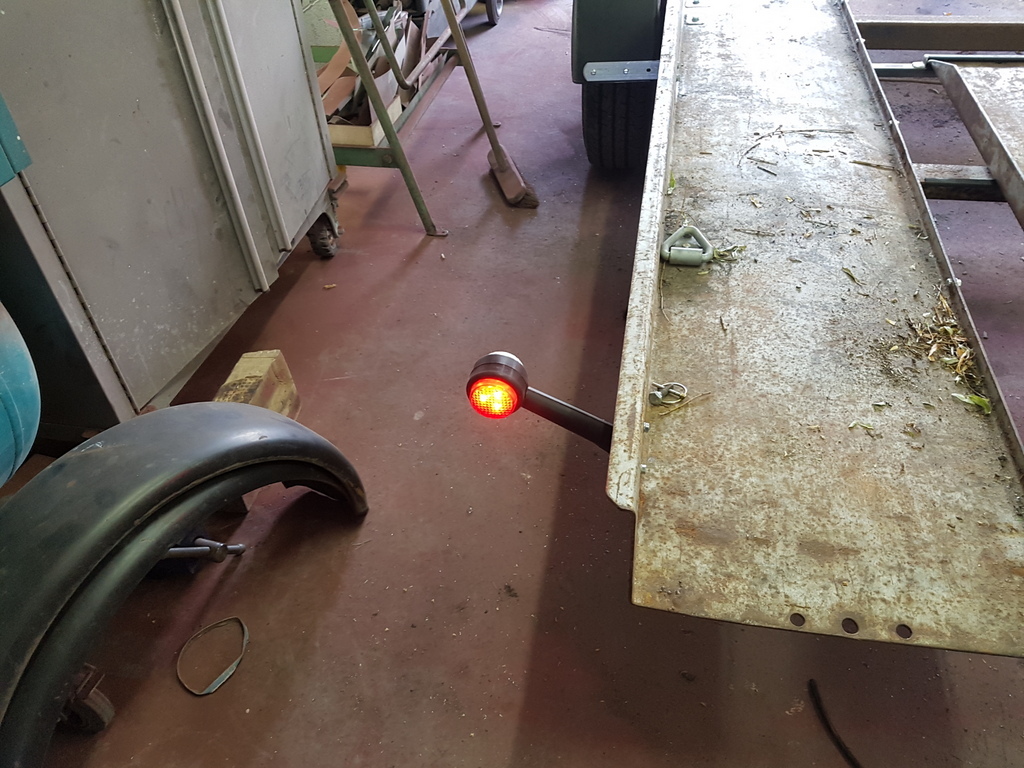 And this 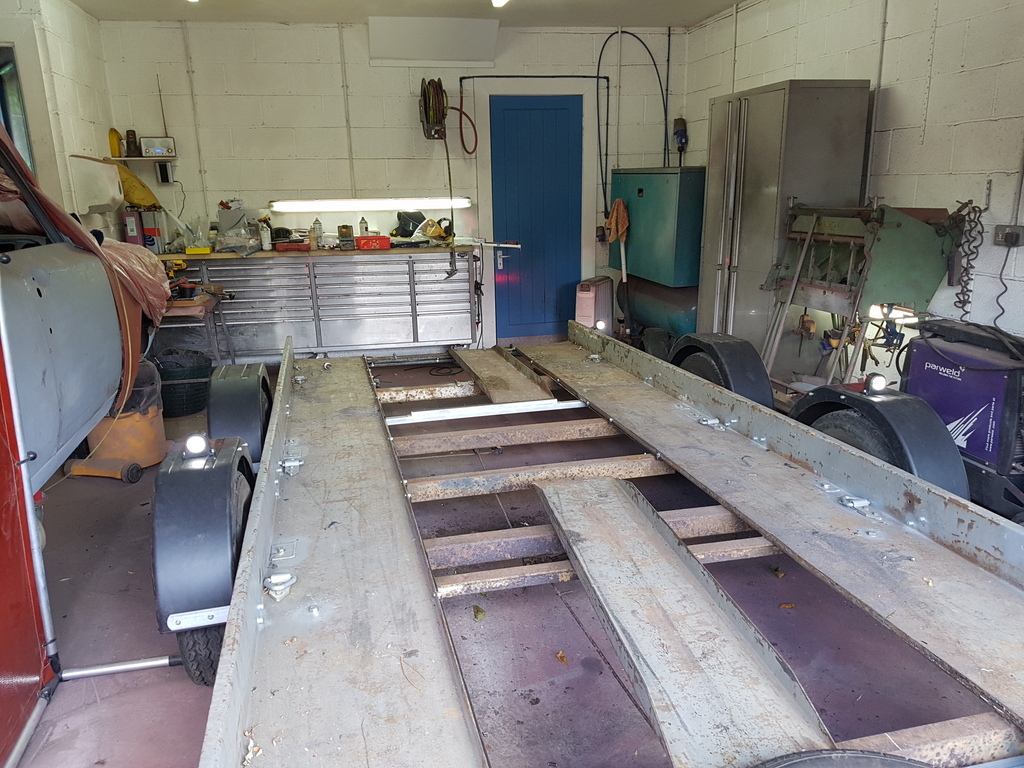 And this 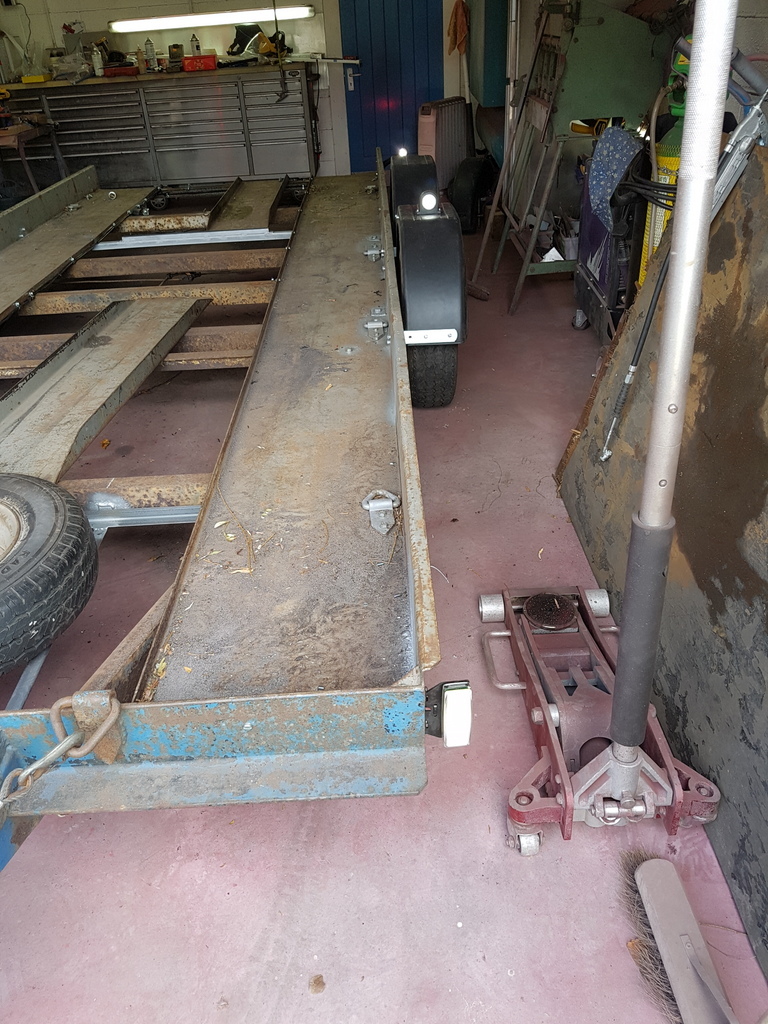 I thought it was all going well until I realised that the supplier had sent me two left hand rear stalk marker lamps instead of a left & right - correct replacement is now in the post So that's it for now 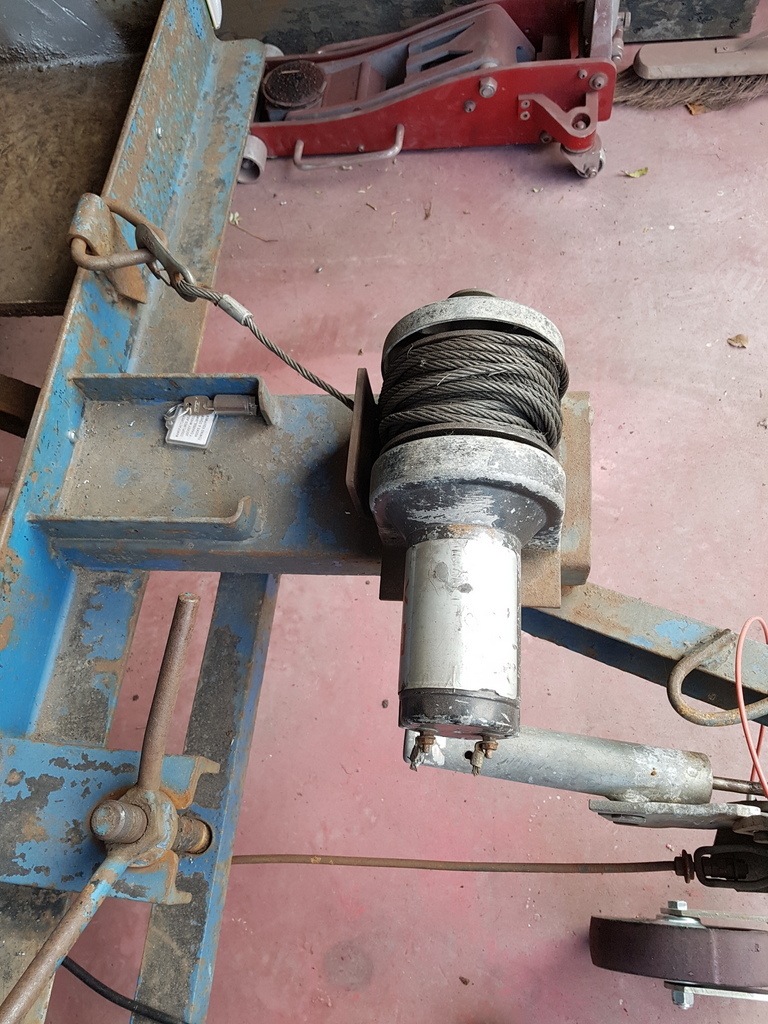 Although this winch works it will be coming off and getting skipped - it's old - the release clutch is U/S 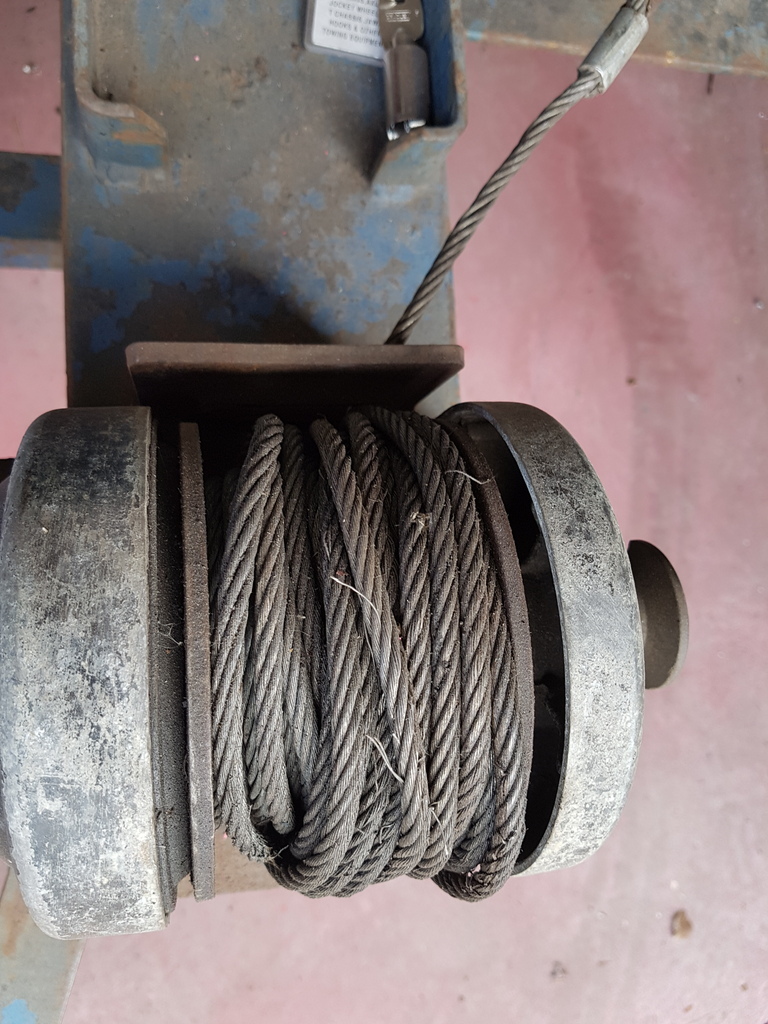 And the cable makes my hands bleed just by looking at it - it's lethal and has been over tensioned to the point that it's like a spring if let go of it - SKIP sooner than later - it will be replaced with something a little more compliant & stronger 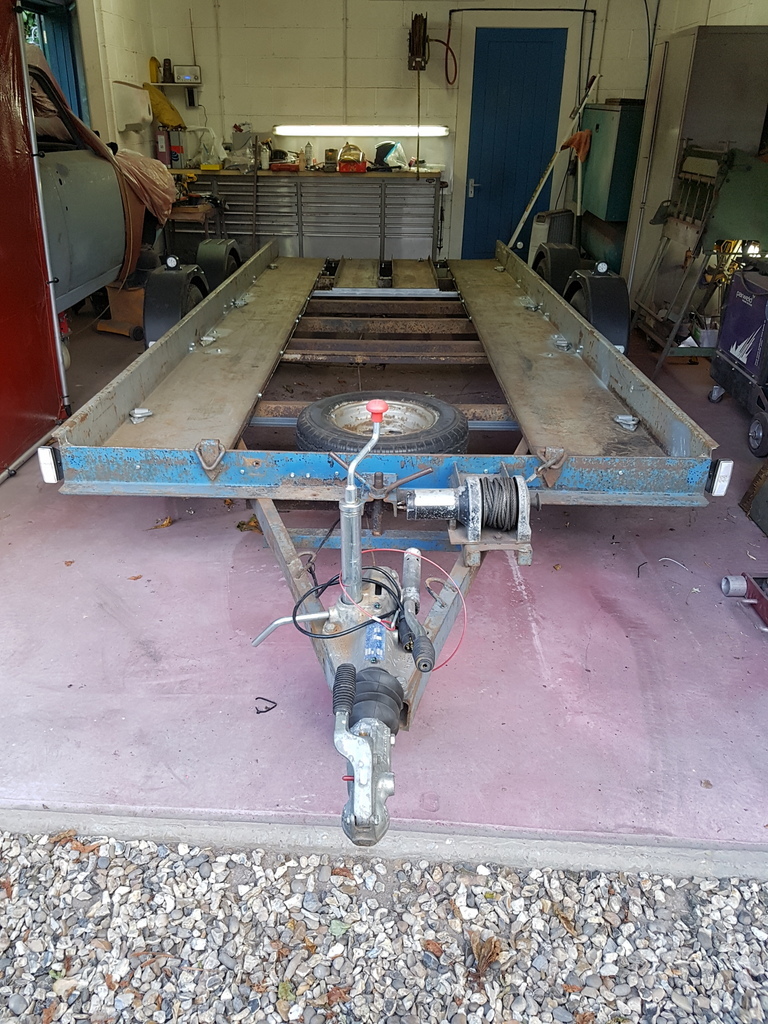 This week is turning out to be a 'sort it' week rather than a productive week - don't get me wrong things are getting done - just the wrong things i.e. I should be restoring cars and not repairing trailers / sorting things in the workshop or building new shelving for the stores in the loft - I suppose it all helps in making things easier and eventually more productive  |
| |
Last Edit: Aug 8, 2018 20:08:41 GMT by Deleted
|
|
glenanderson
Club Retro Rides Member
Posts: 4,112
Club RR Member Number: 64
|
|
|
|
I thought it was all going well until I realised that the supplier had sent me two left hand rear stalk marker lamps instead of a left & right - correct replacement is now in the post. I remember a mate of mine getting very cross about receiving two right hand stalks like that years ago, the type that had 5w bulbs in. He was even crosser when I pointed out that you could pop the red and white lenses out and swap them over... 😃 I don’t imagine it’s as straightforward with LED ones though. |
| |
My worst worry about dying is my wife selling my stuff for what I told her it cost...
|
|
jamesd1972
Club Retro Rides Member
Posts: 2,841
Club RR Member Number: 40
|
|
|
|
|
|
| |
|
|
|
|
|
|
|
I was thinking of the more lazy man's version - like 12v powered 2.5 ton - simple plug in Anderson type connectors to a separate slave battery - I often end up dragging a few barn finds back to my place that have flat tyres / seized brakes and I have got fed up of struggling getting them on to a trailer |
| |
|
|
|
|
|
|
|
Last modification on the trailer before I run out of dryish weather in order to get the trailer blasted & painted - has previously stated this winch needs to be skipped 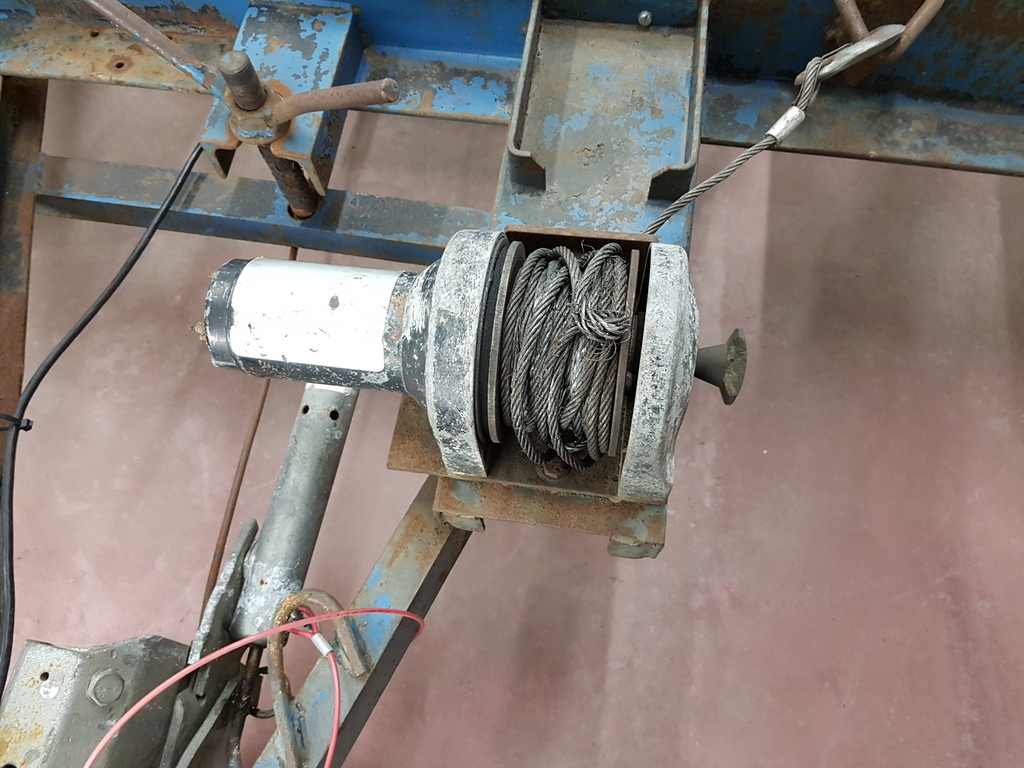 Has does the bracket that retained it 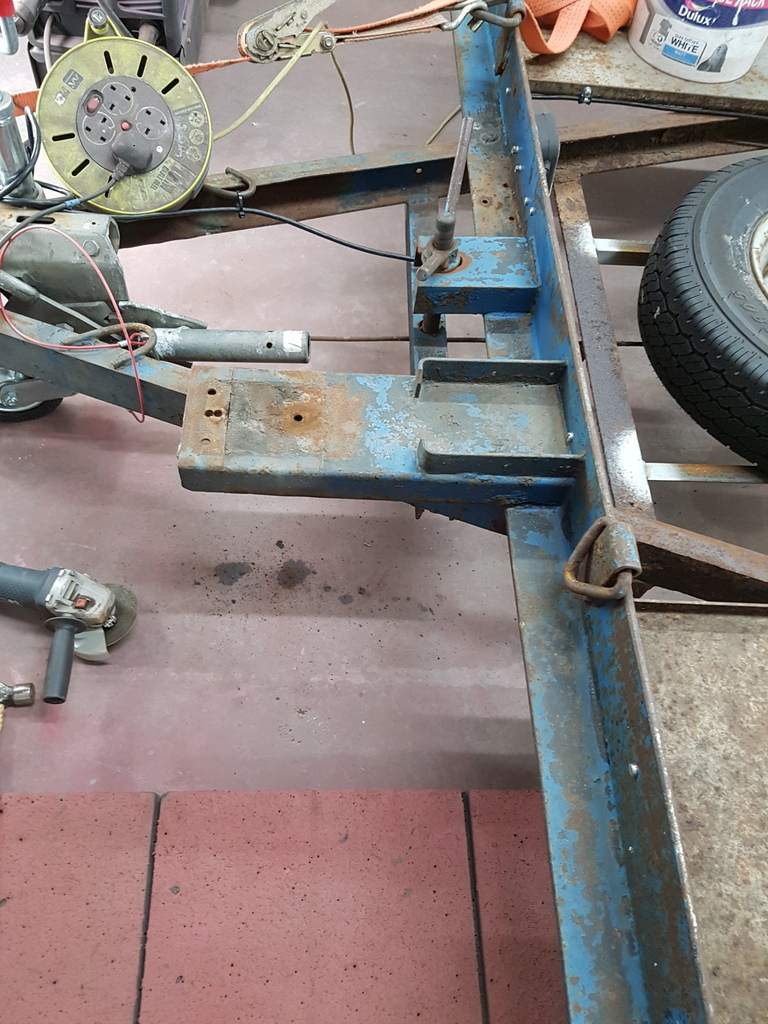 Several cutting discs and some heavy duty hammer work later had it out of the way & cleaned back 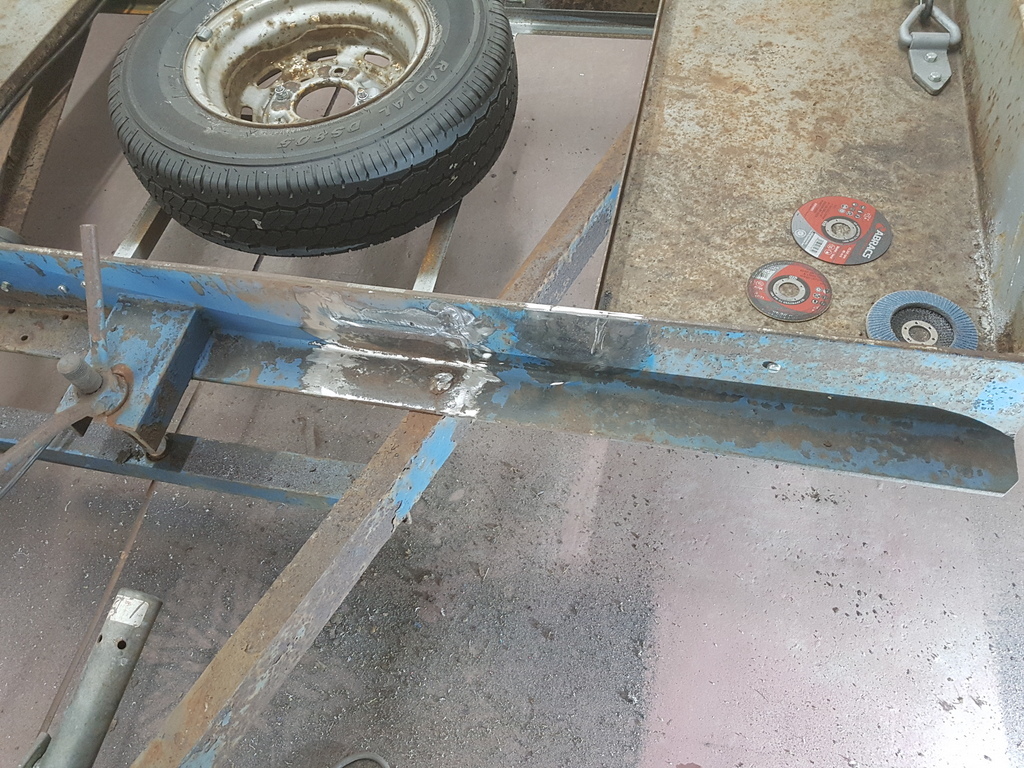 Pathetic excuse for a trailer winch is being replaced with this 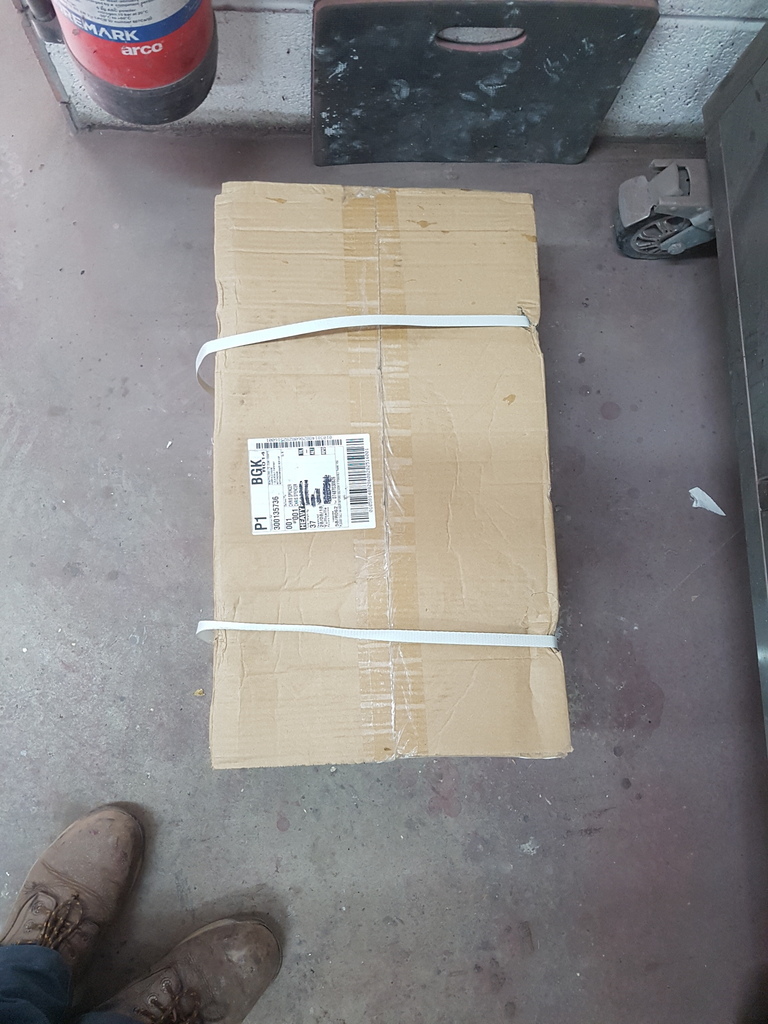 Well not exactly but with what is inside the box 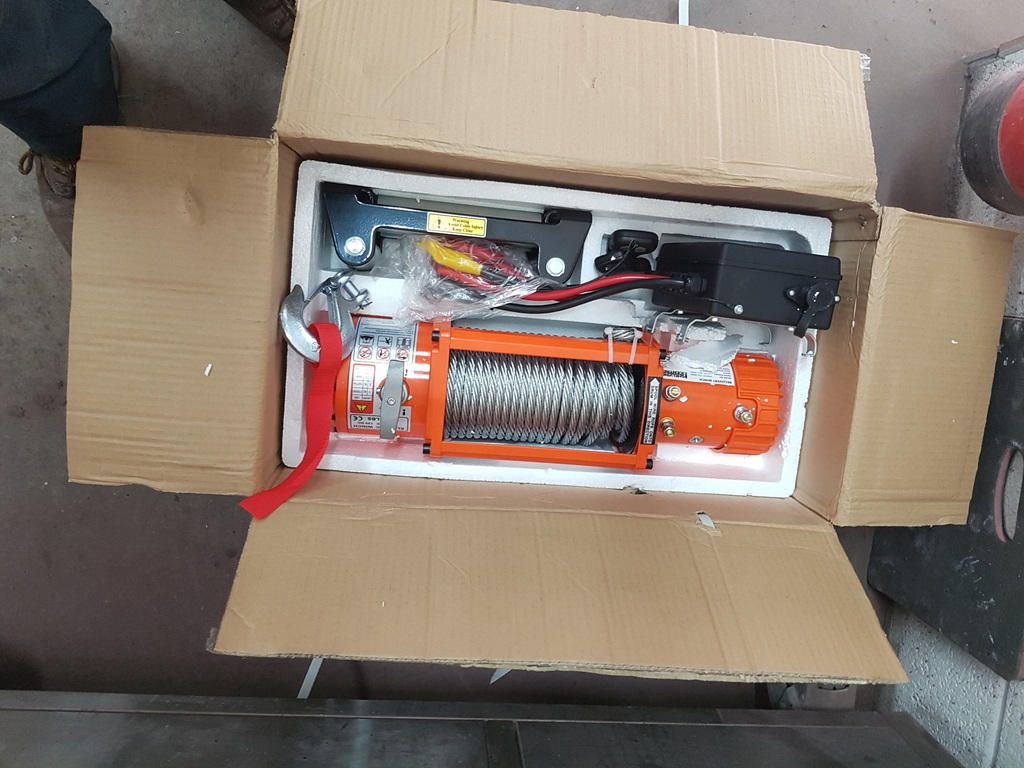 Some winches are stupid money - I will only use it occasionally and this is a decent mid range one - no fancy name or label but solid in construction, remote operation for single handed loading and sensible money 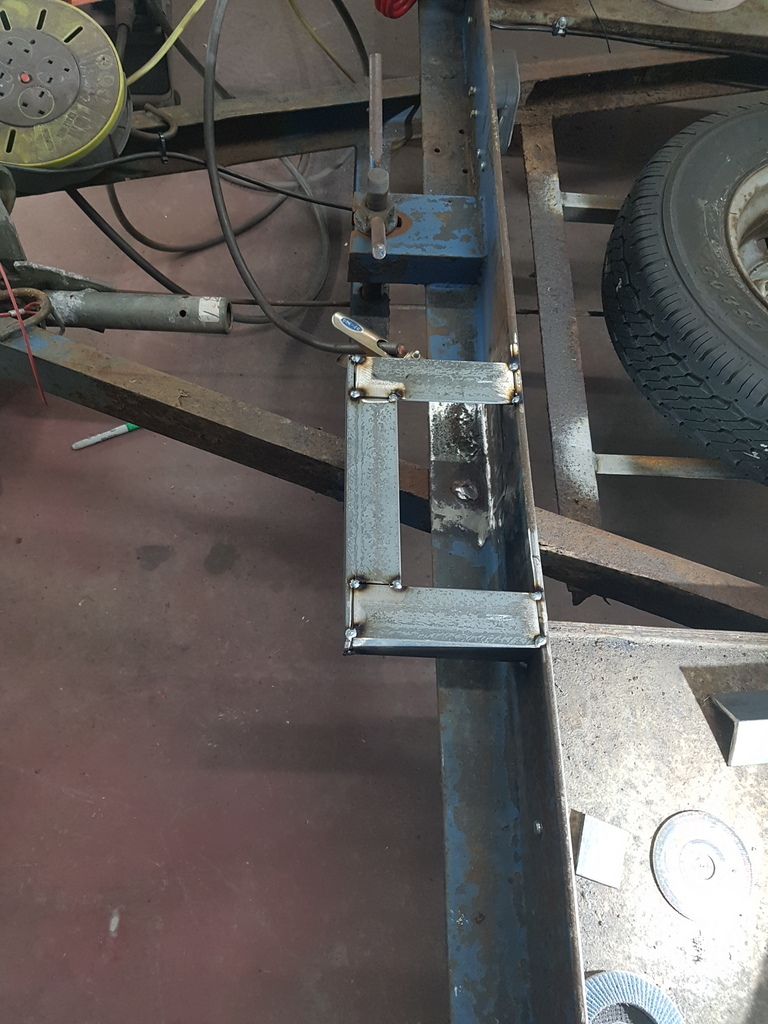 Cut & tacked a frame together from some 5mm wall 50mm equal angle 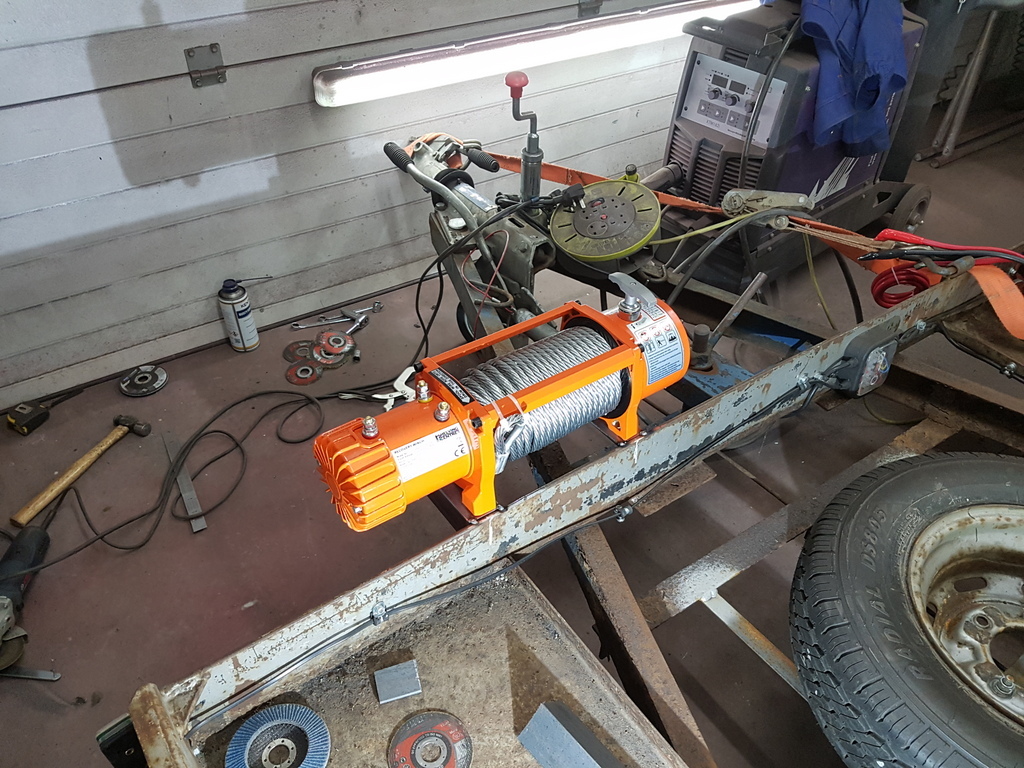 Trial fit before I weld the frame up 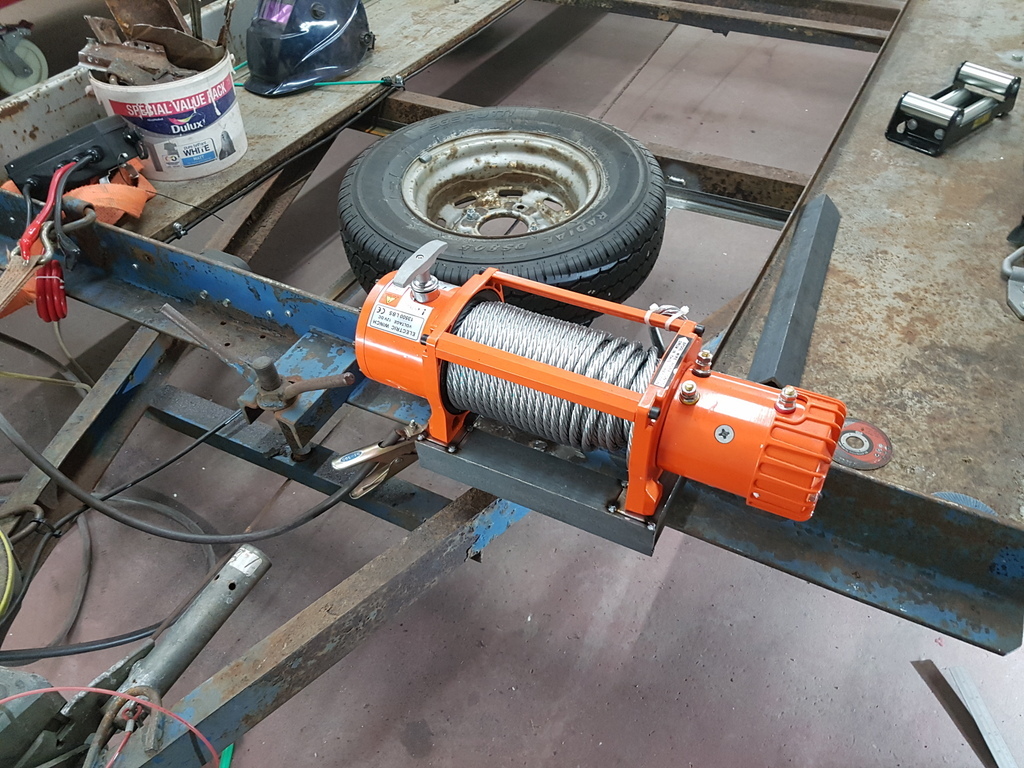 Set the winch off centre from the trailer has I need to access the centre tie down for the tilt bed - that was Saturday morning gone and had to leave it at that point in order to attend a 40th party for a good friend of ours - I will crack on and get this wrapped up today - more later |
| |
Last Edit: Sept 2, 2018 6:32:49 GMT by Deleted
|
|
|
|
|
|
|
You have been busy with the trailer and I recognize some of the pieces in the dulux bucket as well  |
| |
|
|
|
|
|
Sept 2, 2018 10:38:50 GMT
|
You have been busy with the trailer and I recognize some of the pieces in the dulux bucket as well  |
| |
|
|
|
|
|
Sept 2, 2018 20:02:45 GMT
|
Welded the new frame up and added a pair of diagonal bracings 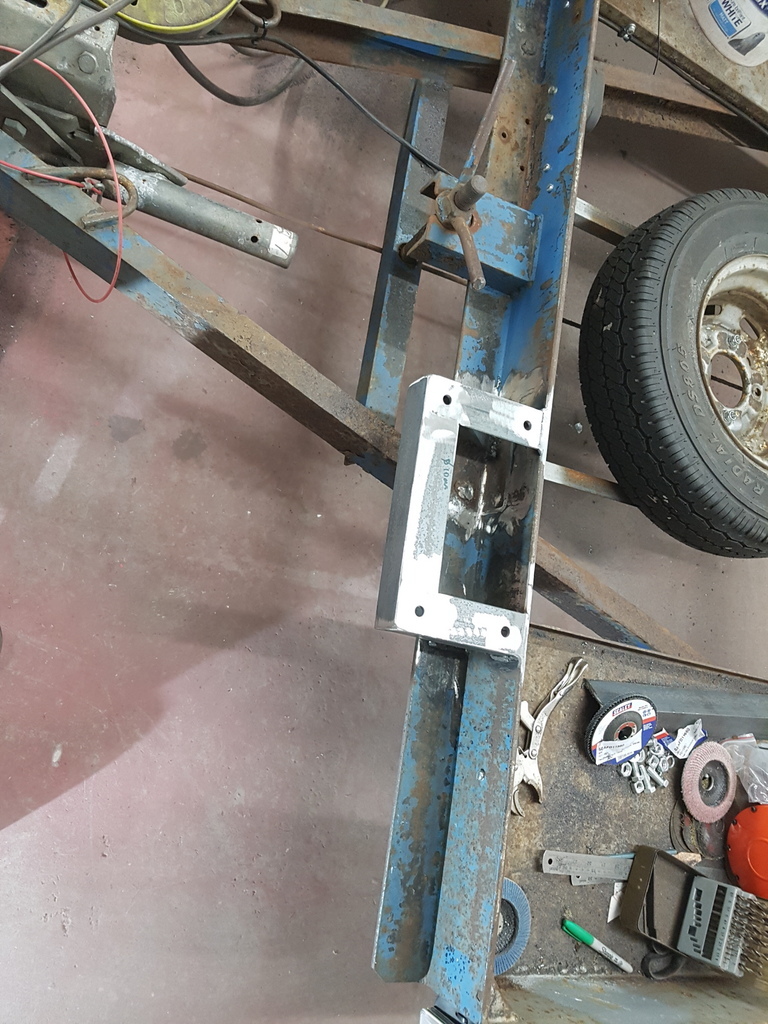 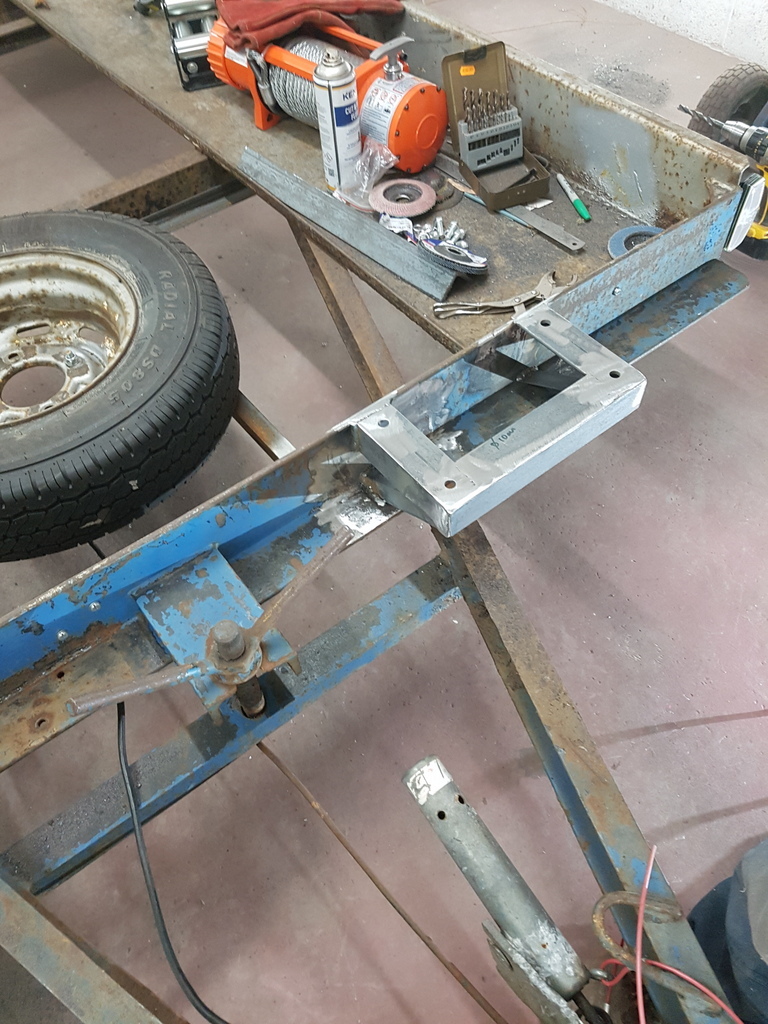 Then added a pair of uprights to bolt the fairlead to - I could have purchased a predrilled mounting plate for the winch & fairlead but I would have had to make a mounting bracket up to fasten the pre drilled mounting plate to - so that seemed pretty pointless - I bolted the winch on with anti tamper fittings just to deter the light fingered brigade 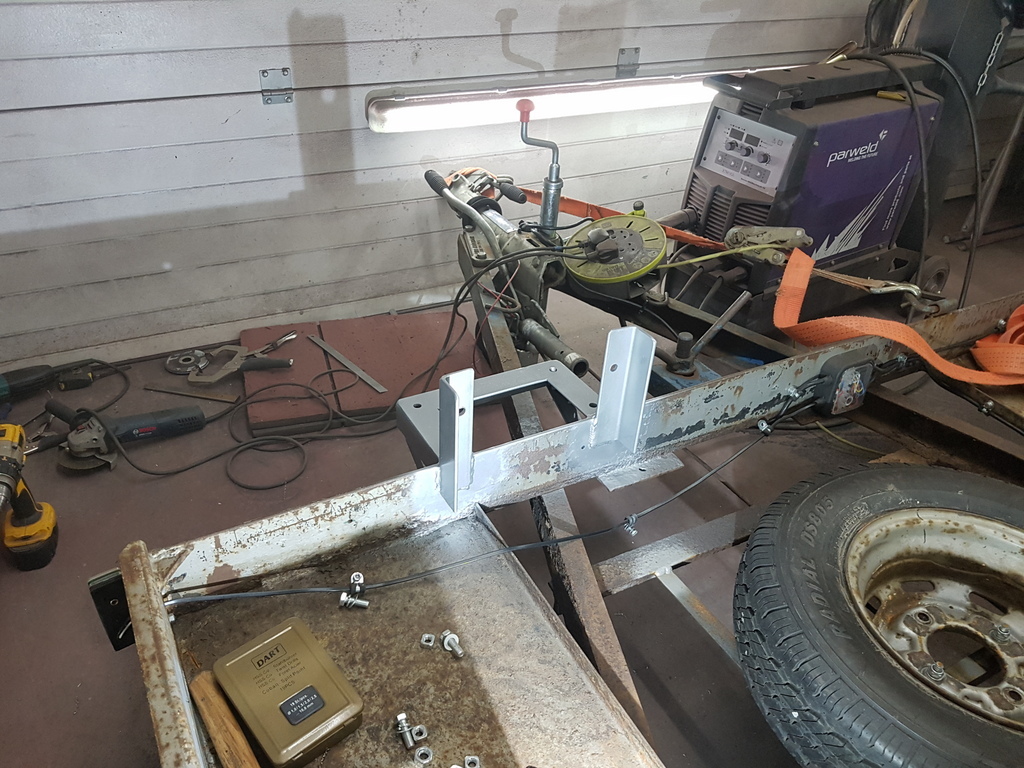 Winch & fairlead bolted up 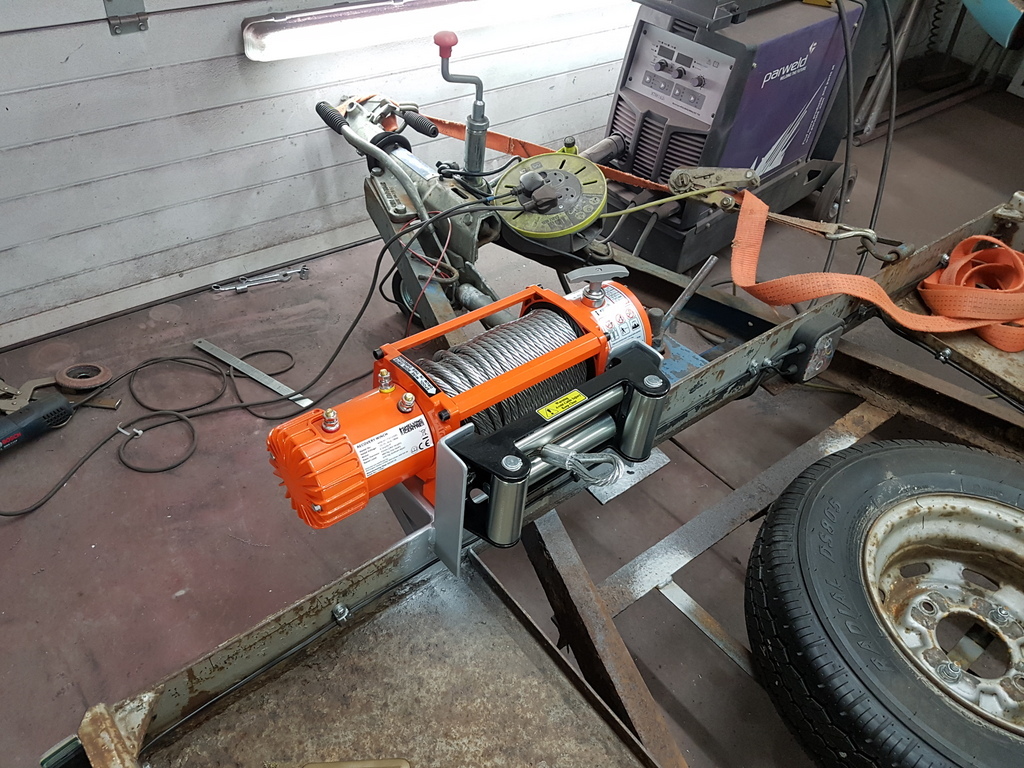 Wiring & control box fitted 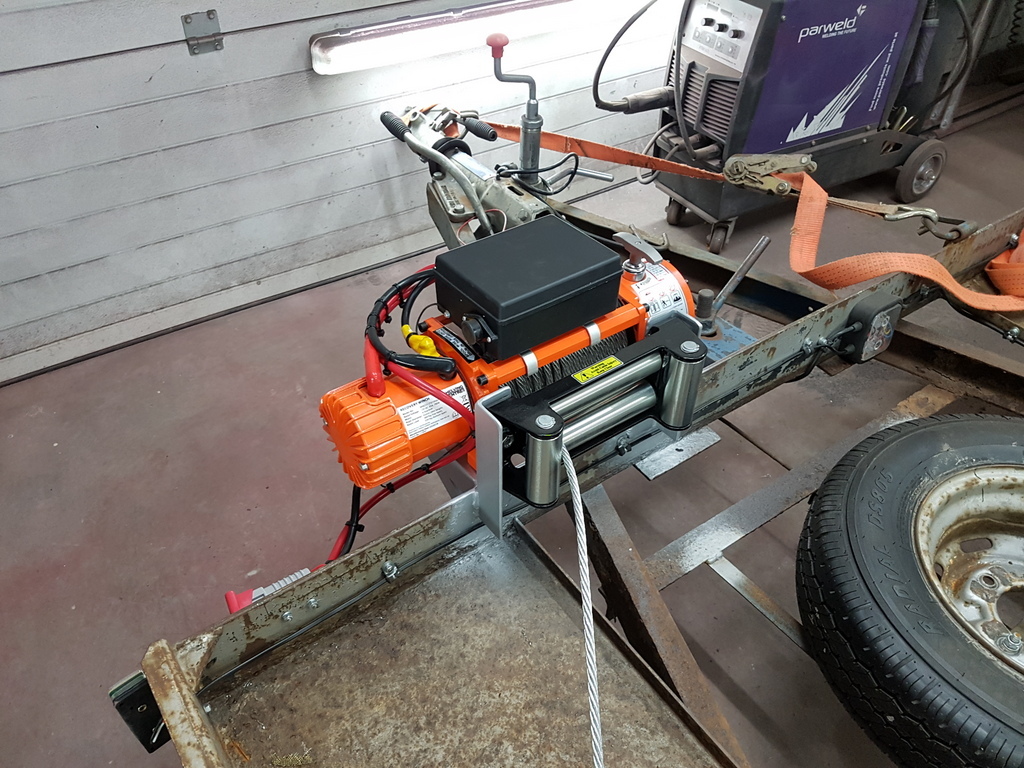 I have wired it back to terminate to a 'Anderson' connector 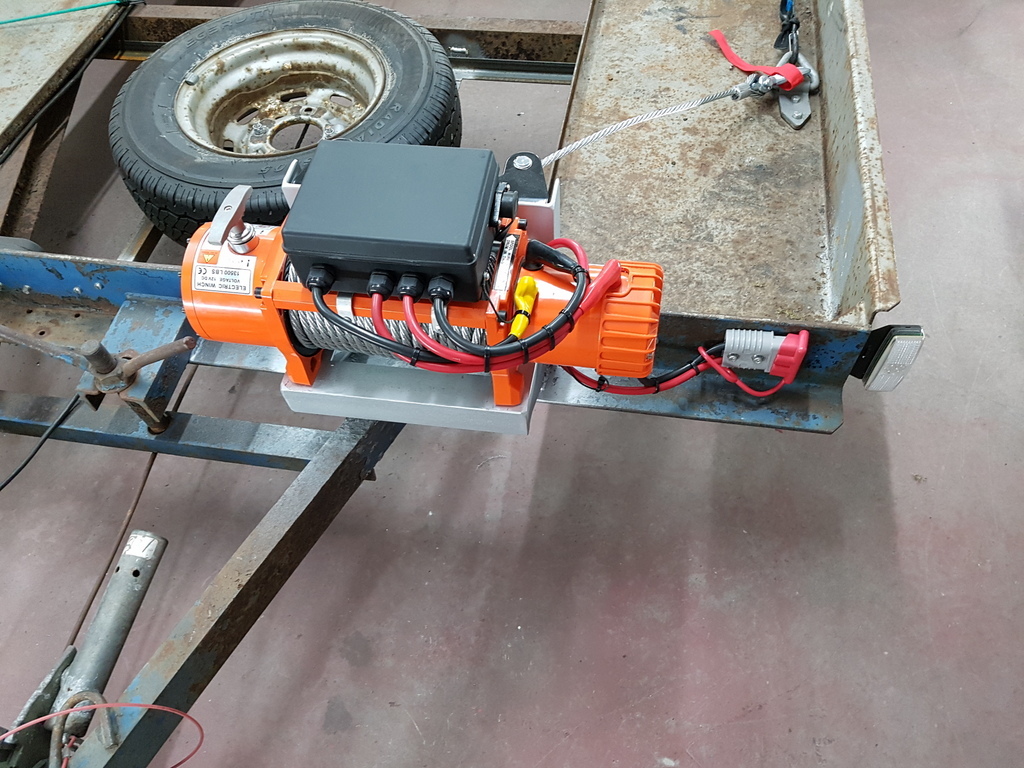 So it's just a matter of plugging the slave leads in and connecting to a slave battery 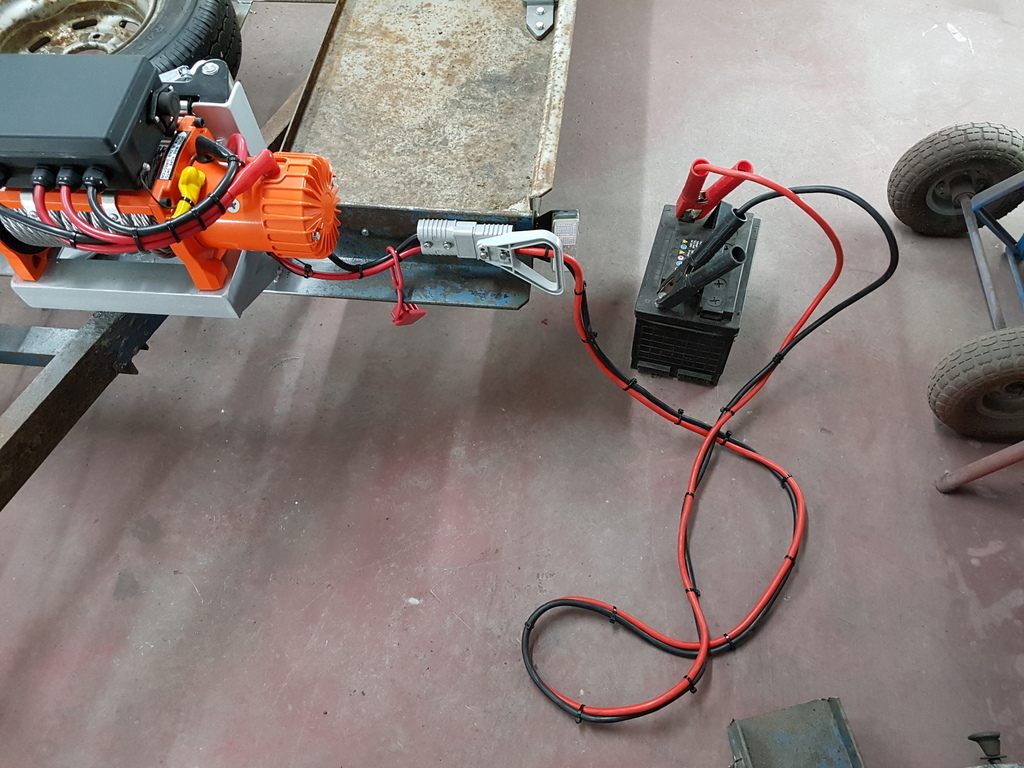 Tested up and works fine but yet to try it under load - it even came with a cover 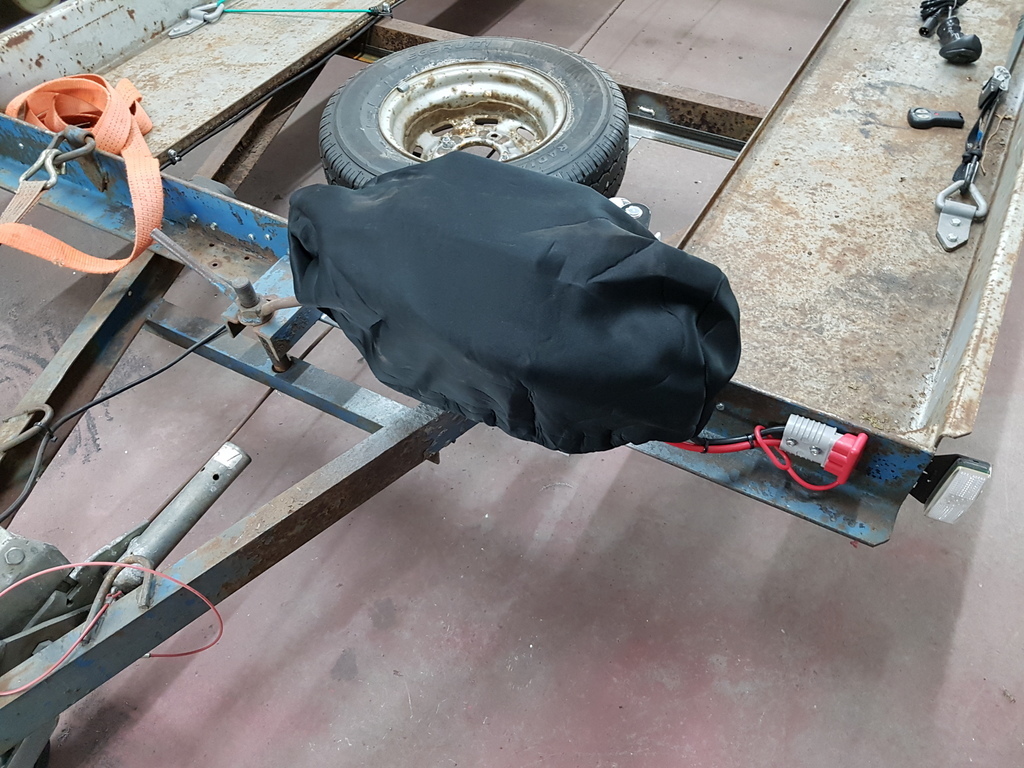 Sid did drop in for quick look but showed little interest - I found him outside a short while later paying homage to the sun gods 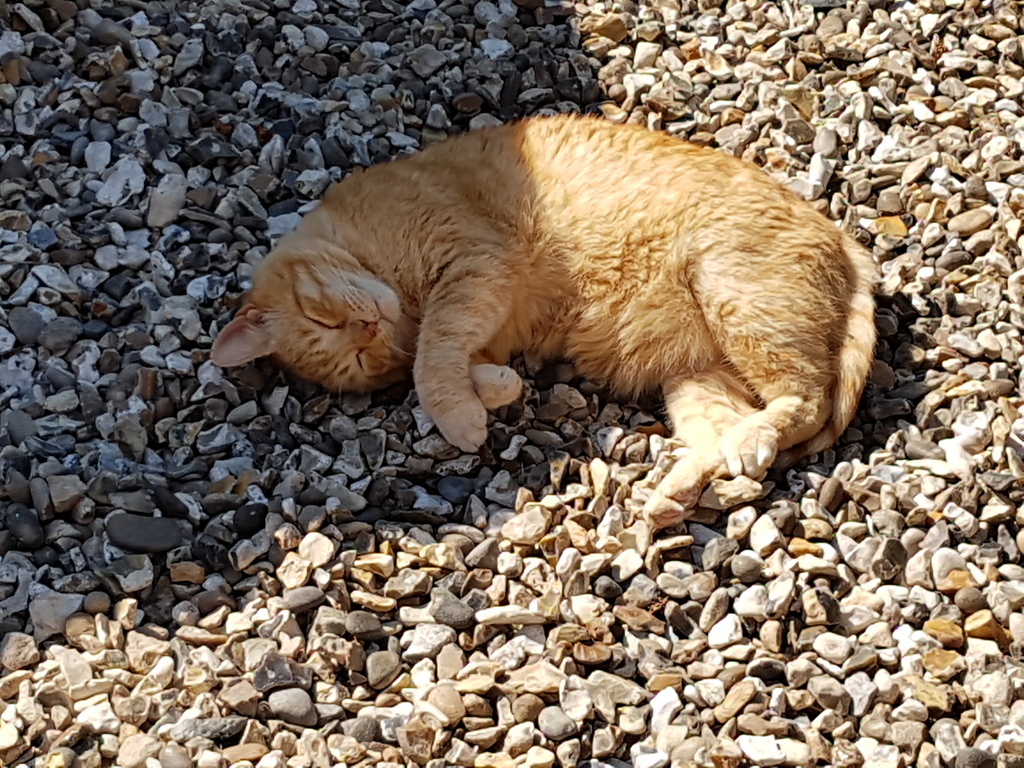 |
| |
Last Edit: Sept 2, 2018 20:05:50 GMT by Deleted
|
|
|
|


