Tamber
Part of things
  Shattered. Held together by spite and tape.
Posts: 341
|
|
|
|
|
Thankfully, they're not too badly pitted, but there's some definite roughness to the surface of the working area... mostly horizontal lines that you can just about feel with a thumbnail, probably scratches from grit becoming embedded in the seal or whatnot.
I keep thinking a gaiter would help keep the curse word out, but then the rest of my brain catches up and points out that it would until it didn't, and then all it'd do would be hold trash against the swivel and rot it out faster.
Even giving 'em a smear with that thick oil, in the name of preventing/slowing any rust, is probably likely to work against me by attracting grit into it. But for the amount of use it's likely to see, debateable as to whether it's a real problem. If it gets that way in the future, as you say, there's options...
|
| |
-< Welder. Allegedly a mechanic. Bodger of Things >-
* 1958? Bedford RL - Progress: Glacial.
* 1994 Skoda Favorit - It's baaaaaaaack!
* 2018 Herald Classic - Gone!
|
|
|
|
|
|
|
|
|
Thankfully, they're not too badly pitted, but there's some definite roughness to the surface of the working area... mostly horizontal lines that you can just about feel with a thumbnail, probably scratches from grit becoming embedded in the seal or whatnot. I keep thinking a gaiter would help keep the curse word out, but then the rest of my brain catches up and points out that it would until it didn't, and then all it'd do would be hold trash against the swivel and rot it out faster. Even giving 'em a smear with that thick oil, in the name of preventing/slowing any rust, is probably likely to work against me by attracting grit into it. But for the amount of use it's likely to see, debateable as to whether it's a real problem. If it gets that way in the future, as you say, there's options... Just remember, its not leaking oil its just marking its spot :-) |
| |
|
|
Tamber
Part of things
  Shattered. Held together by spite and tape.
Posts: 341
|
|
|
|
It sure is, right now! Thankfully, it's dripping onto either stuff I have stashed under there, or the remains of the laminate flooring in the unit, so it's not soaking into the concrete.  Can't say I'm a great fan of things marking their spot, mind... |
| |
-< Welder. Allegedly a mechanic. Bodger of Things >-
* 1958? Bedford RL - Progress: Glacial.
* 1994 Skoda Favorit - It's baaaaaaaack!
* 2018 Herald Classic - Gone!
|
|
Tamber
Part of things
  Shattered. Held together by spite and tape.
Posts: 341
|
|
|
|
Another vaguely productive evening: The other tracta housing filled with oil, and the nearside still appears to be leak free so I'll call that a resounding success! (It remains to be seen how well that lasts once I start driving it again...) I also pickled my head with wheel dimensions again, this time going as far as to mark it all out in full-scale on a piece of wood, with the end result being... the same numbers as I had the last three times.  I keep doing this; I've worked it out, I'm satisfied with the answer, and it's very close to the number in the manual (but not the same, this is expected. The new wheels will be very slightly wider.) And then time passes, and I look at the truck again, realise it's got 9.00-20s on it, and panic over whether or not my planned 295/80R22.5 will fit. The truck's meant to have 11.00-20s on it, ffs; 295mm is a little over 11-1/2 inches. It'll fit, width-wise, no problem. |
| |
-< Welder. Allegedly a mechanic. Bodger of Things >-
* 1958? Bedford RL - Progress: Glacial.
* 1994 Skoda Favorit - It's baaaaaaaack!
* 2018 Herald Classic - Gone!
|
|
|
|
|
Feb 17, 2023 12:46:53 GMT
|
|
EP00 semi-fluid grease might buy you a few years with that swivel surface (compared to gear oil)
|
| |
|
|
Tamber
Part of things
  Shattered. Held together by spite and tape.
Posts: 341
|
|
|
|
EP00 semi-fluid grease might buy you a few years with that swivel surface (compared to gear oil) Definitely worth considering! We'll see what happens, if the oil continues falling out too quickly then that might just happen...
In other news, a fit of productivity was brought on by painkillers, resulting in: 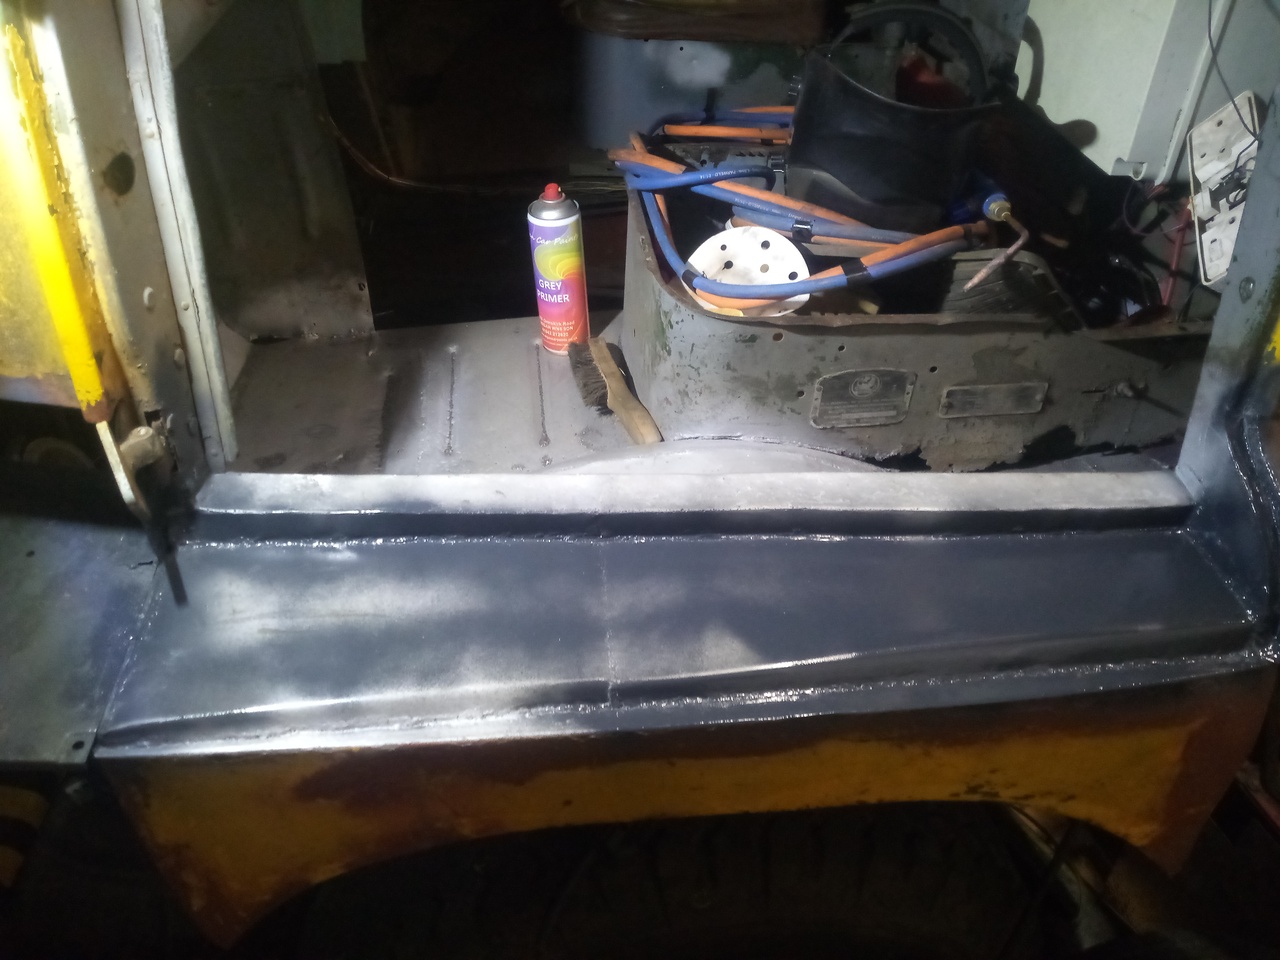 That's right. I've finished welding the passenger's side door-step! ...Well, the top face of it, anyway. Underneath still needs trimming and whatnot, and the floor isn't totally complete yet. (And then I've still got loads to do elsewhere, and...) 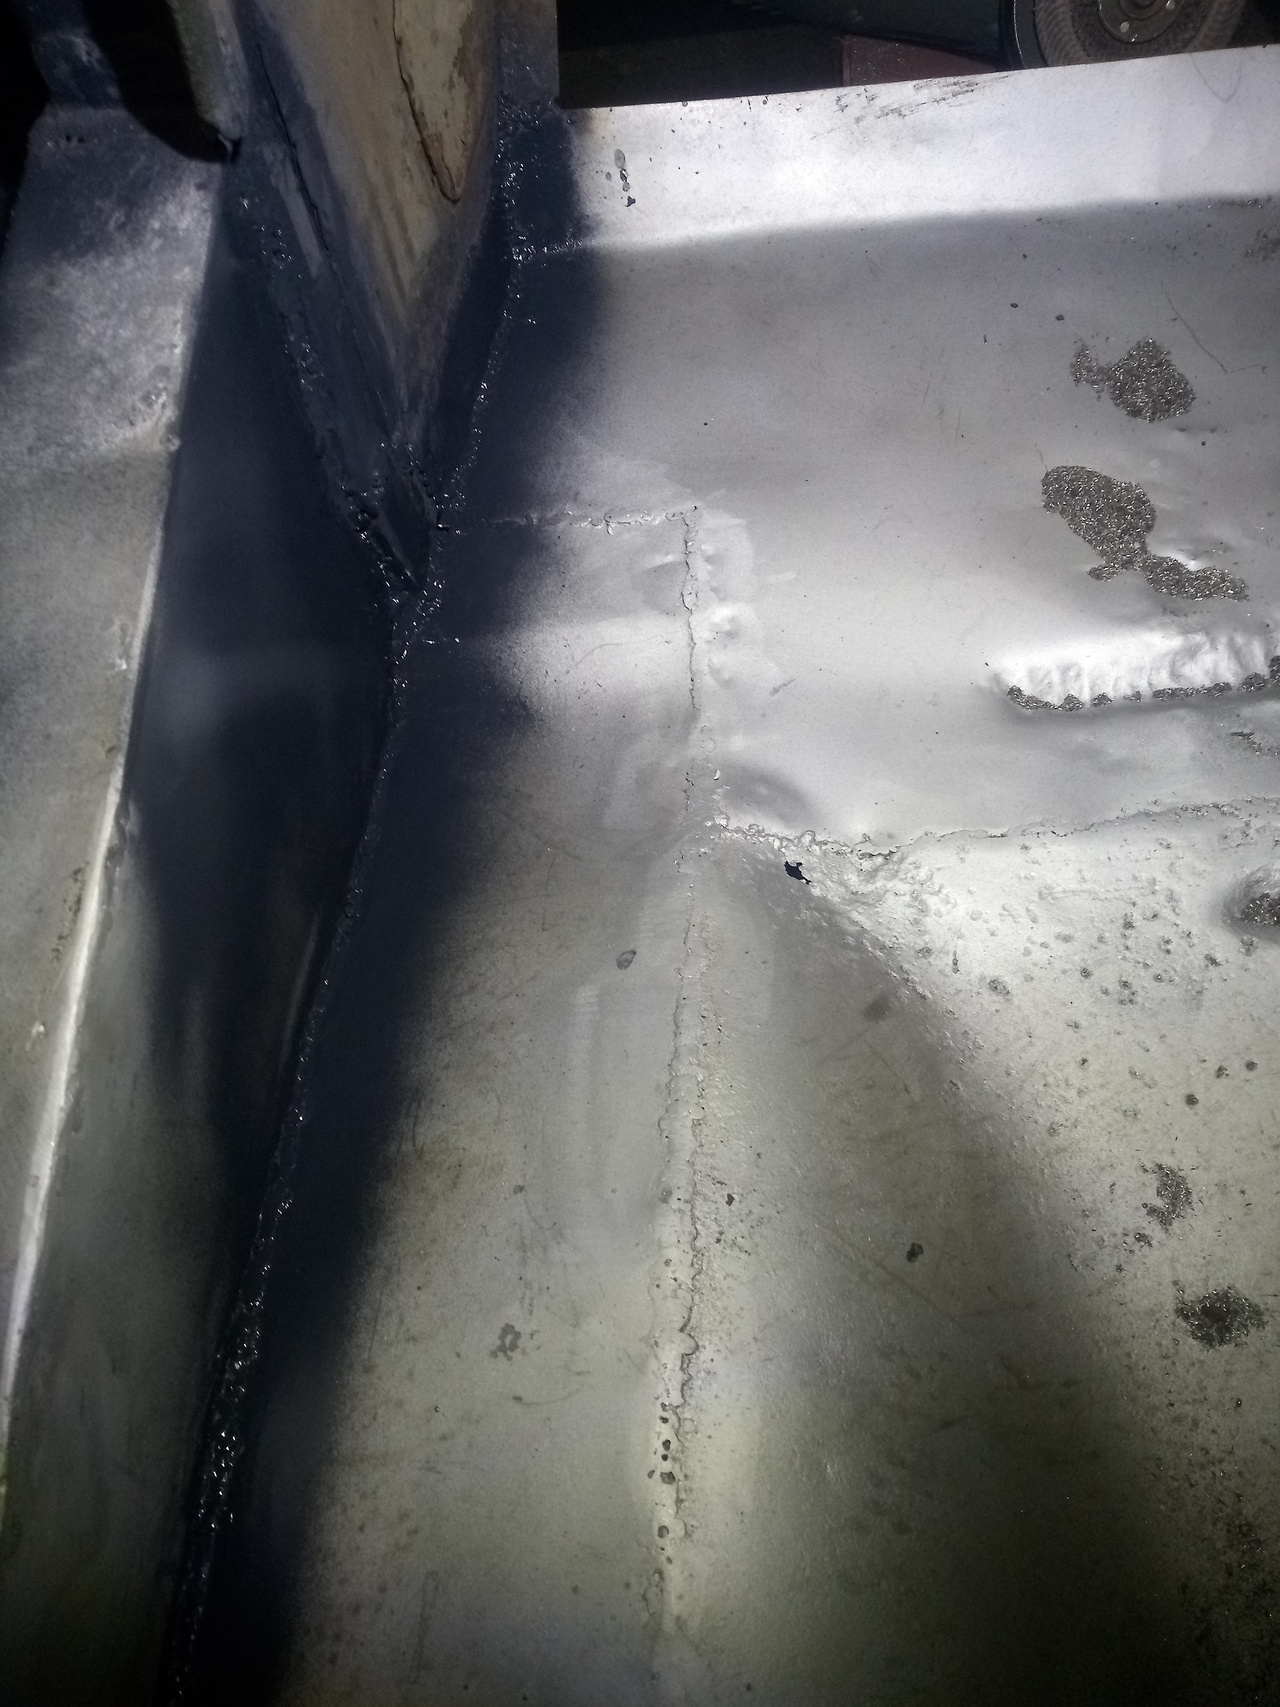 Welds ground up on the inside, and a quick squirt of etch primer (As opposed to/on top of my usual zinc weld-through primer.), at least until I ran out of etch primer.  You can still clearly see that little patch at the edge of the wheel-well, where it's a bit thin, that I need to tackle but I don't wanna right now. The welds on the underside haven't yet been touched, but all of that will get done too, in time. I'm trying to hit the high spots that are holding up other things, but I still haven't gotten a good plan for what's 'blocking' what, yet. I want to get all the repair-work around the engine-bay done in time to have the engine back in this year, ideally by summer, but we'll see how that goes. (As per usual, it's health & time permitting.) Flush with success on that, I decided to tackle ... headlights. Because why not! I bought myself some new headlight mounting rings a couple of years back because one of my original ones has dissolved away to nothing; and it does appear that they should fit to my original headlight buckets, which I want to do for reasons, even though the plastic mounting rings give much more convenient access for changing the bulbs. However, the new mounting rings are fiddly enough to fit onto the original 3 spring-loaded screw adjusters setup of the original headlight buckets that it would no longer be fun trying to change bulbs by removing the headlight. (The original is just a twist & pop out sort of affair.) Which means... a hole needs to happen! And, half an hour or so later, sure enough: 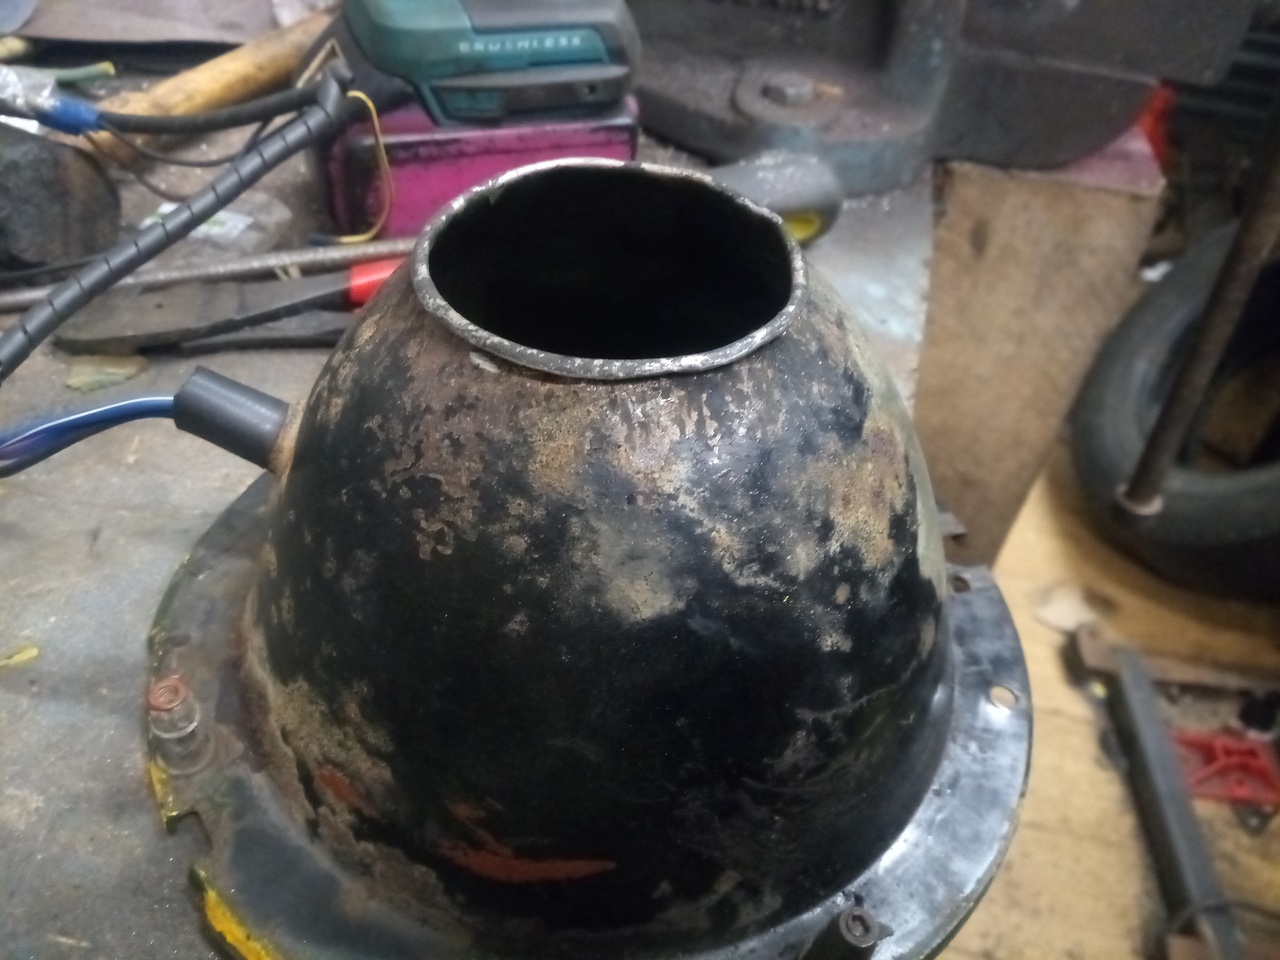 And in comparison to an unbothered one: 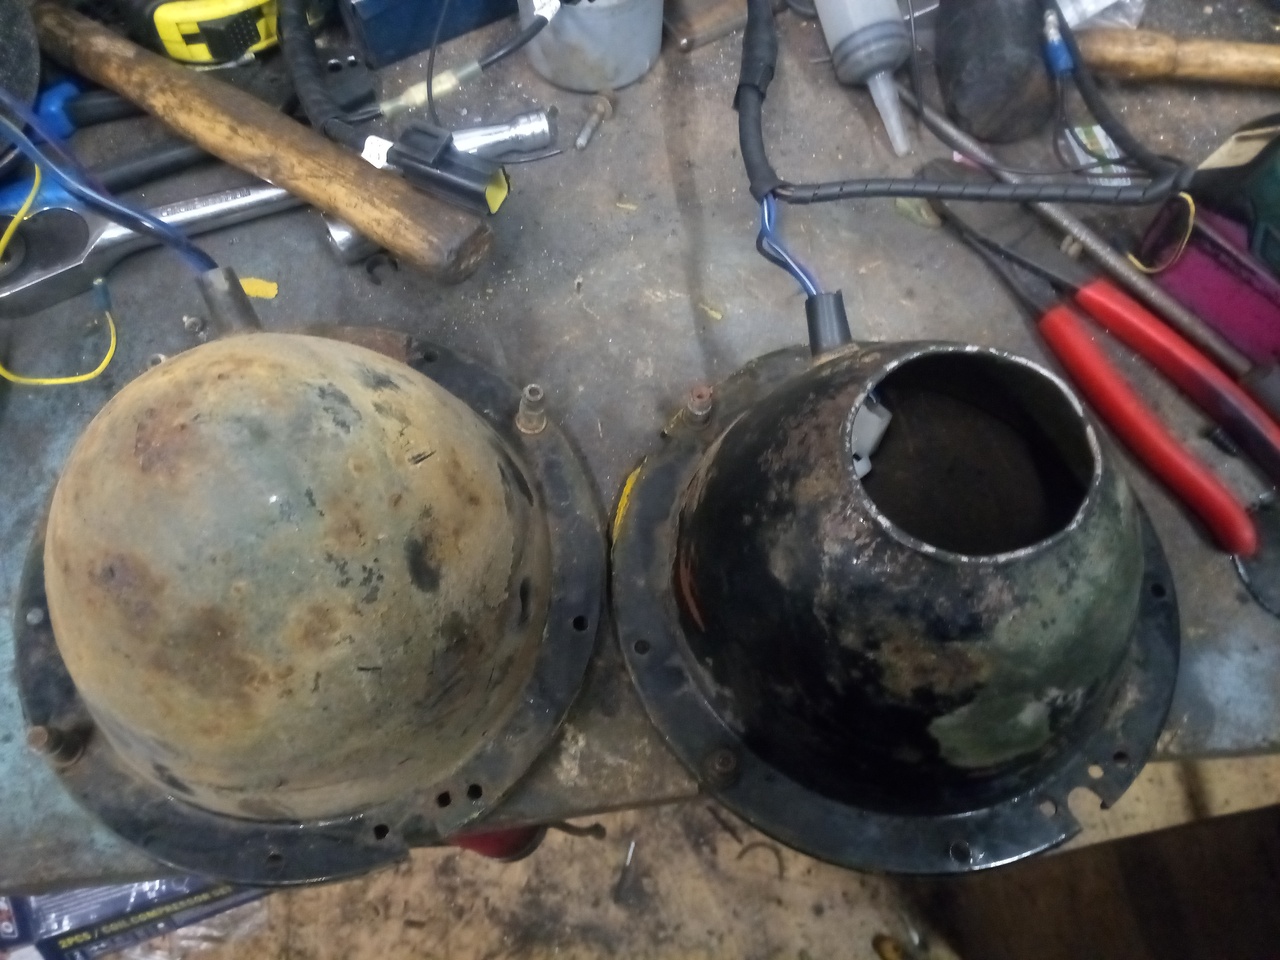 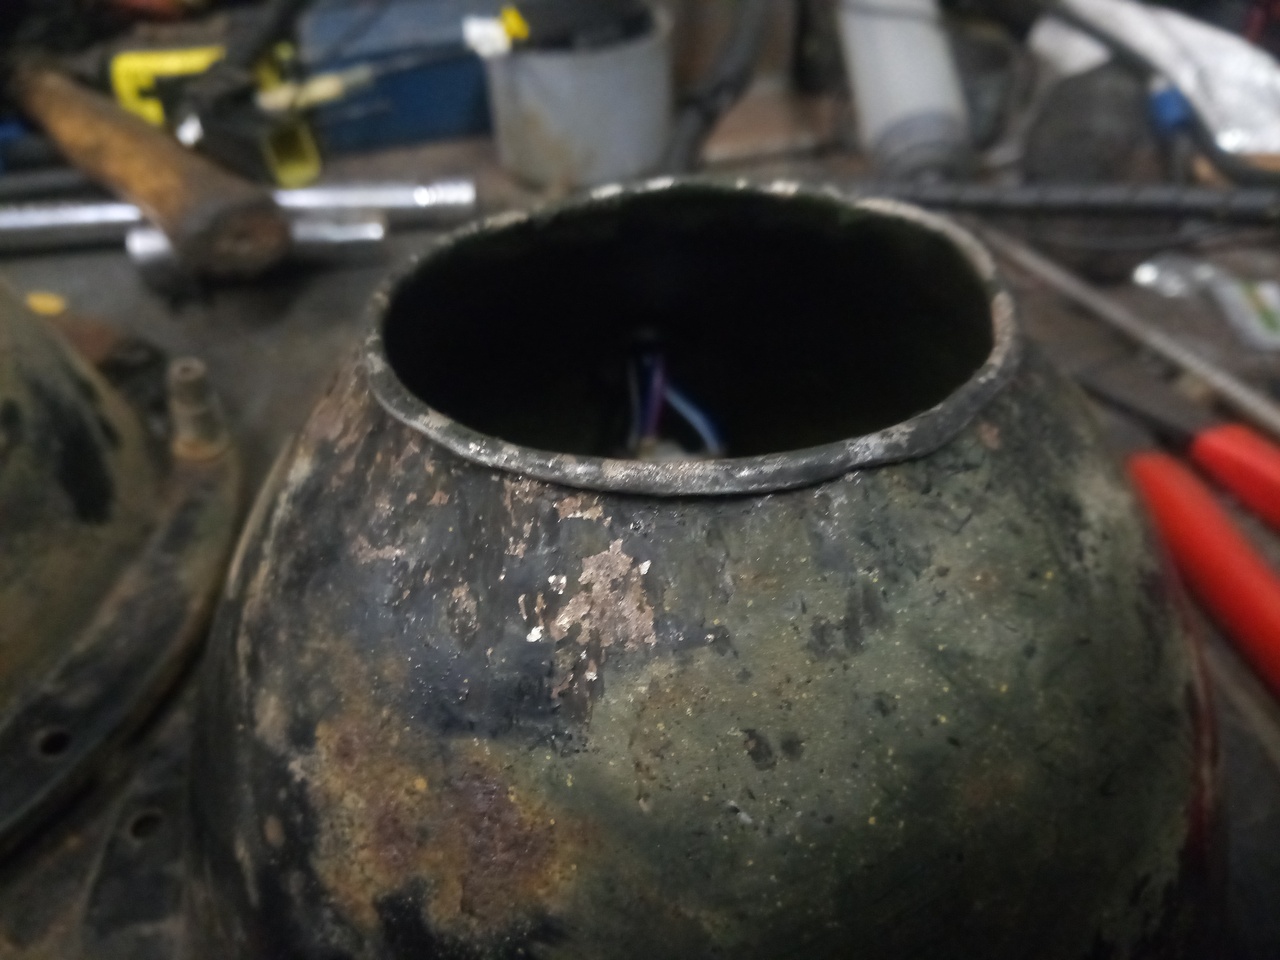 I can neaten the edge up on that a bit more yet and make it a bit more finished, but it was nearly 9pm at this point and despite the best efforts of my painkillers from earlier my knees were starting to buzz at me. And it works out quite nicely, I think! Sufficient room to manipulate the clip, wiggle the bulb out/in, and fit the plug. I've worked on modern stuff with much worse access! (You can go right to hell, Mercedes, with that stupid upwards-hinging access panel on the Atego that can't hinge up far enough to release, unless you tilt the cab.) 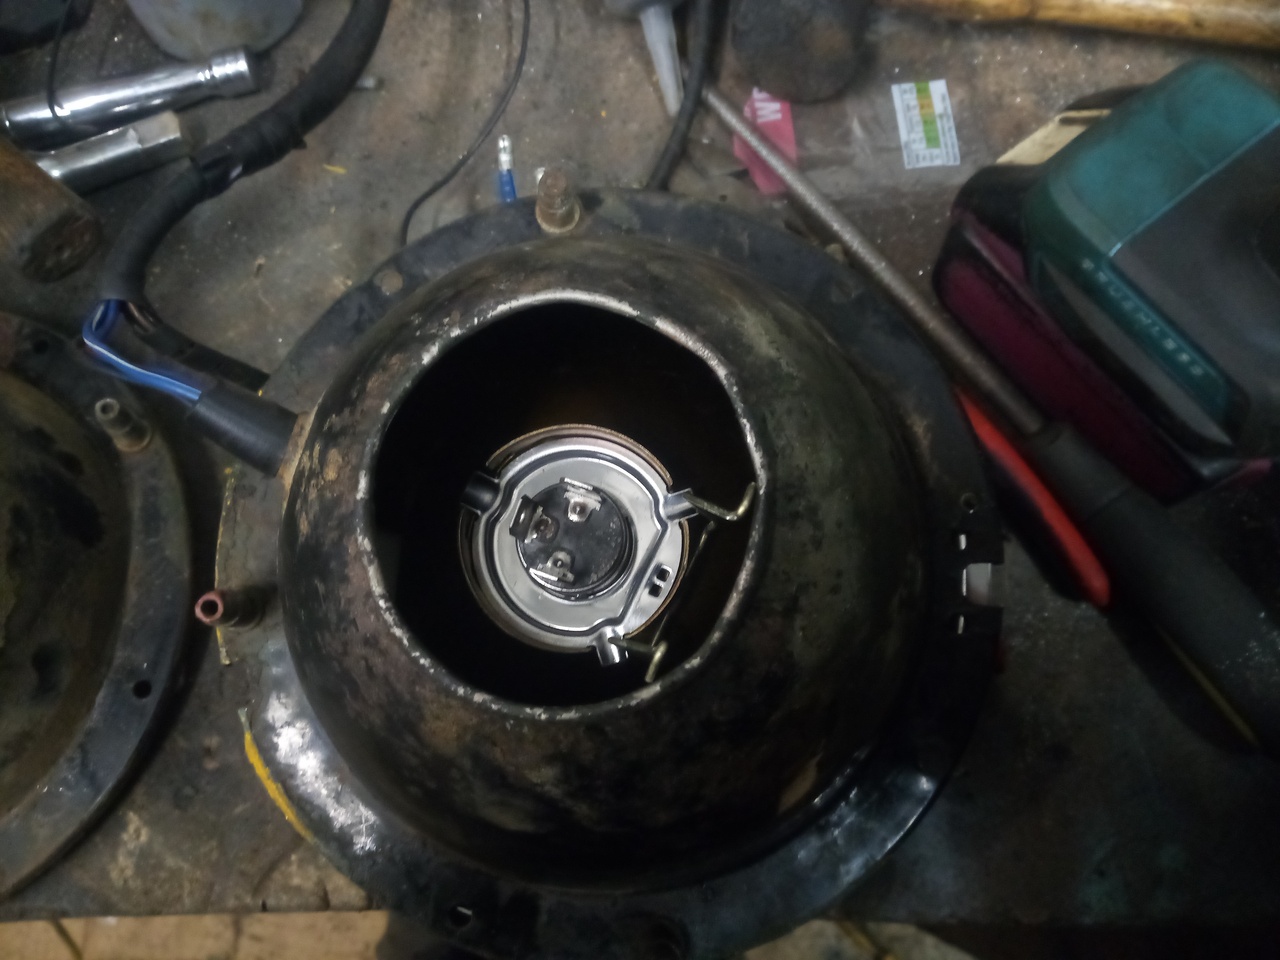 Process here starts with a hole-saw to draw around, like so: 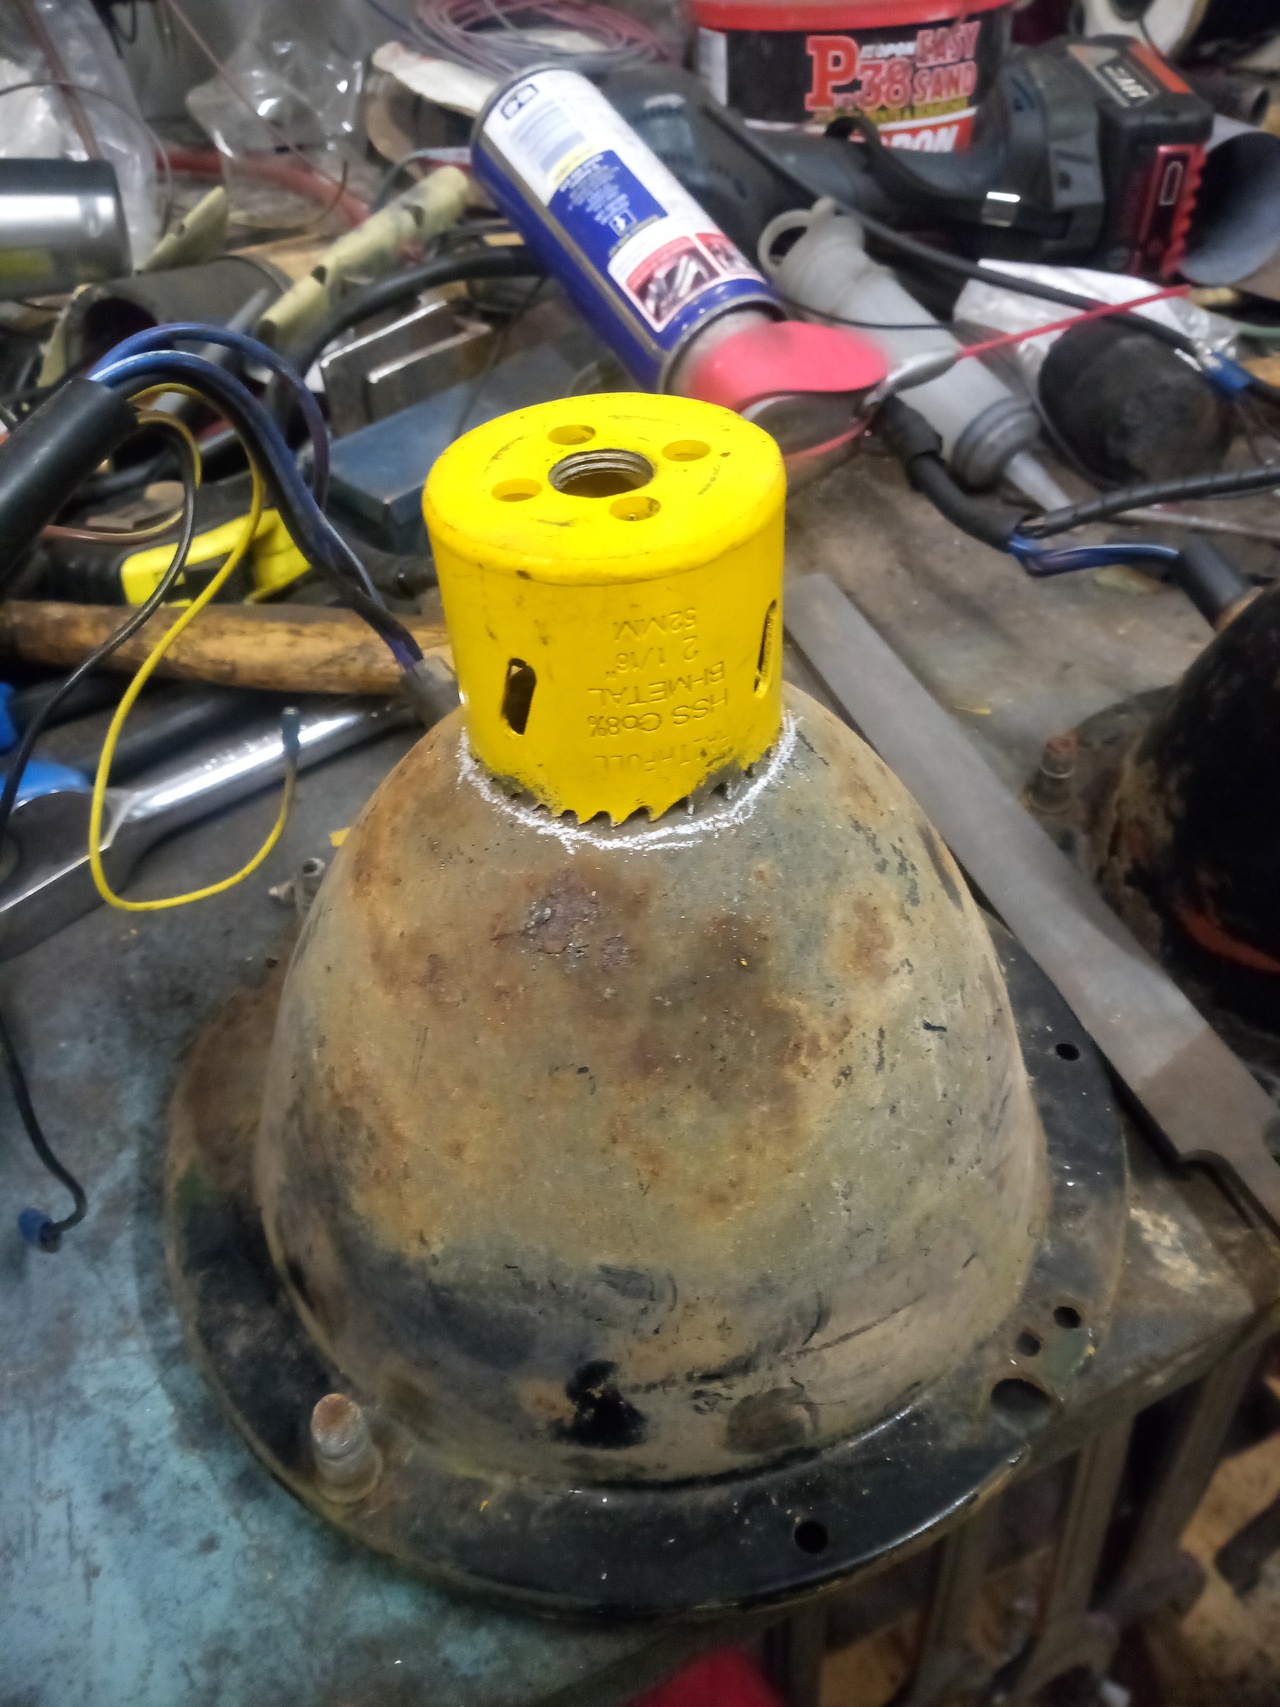 Pictures will follow of the rest of the process but it goes a bit like so: - Slice off the back of the bucket, across the line
- Neaten up the hole with files, to take off the burrs and make it more consistently round
- Flare the edges of the cut outward, gradually working around until a lip stands up
- Roll the newly-created lip down over itself, gradually working around until there's a nice rolled edge that won't chew your fingers off the next time you want to change a headlight bulb.
With a little care, and finish-work to neaten it up, you'd never know it didn't come from factory like that! It'll be our secret!  Oh, and after all that, all three of the adjusting screws snapped off when I tried to loosen them.  But fear not, I have a cunning plan (That will just have to wait until the relevant parts arrive.) |
| |
-< Welder. Allegedly a mechanic. Bodger of Things >-
* 1958? Bedford RL - Progress: Glacial.
* 1994 Skoda Favorit - It's baaaaaaaack!
* 2018 Herald Classic - Gone!
|
|
Tamber
Part of things
  Shattered. Held together by spite and tape.
Posts: 341
|
|
|
|
|
...Also, the chrome trim-rings -- dented and speckled and scratched as they are -- polish up fantastic and it really highlights every imperfection, and I love it.
|
| |
-< Welder. Allegedly a mechanic. Bodger of Things >-
* 1958? Bedford RL - Progress: Glacial.
* 1994 Skoda Favorit - It's baaaaaaaack!
* 2018 Herald Classic - Gone!
|
|
|
|
|
|
|
|
I had leather gaiters on my series 2 landrover swivels, they worked a treat the seeping oil keeping the leater nice and supple.
|
| |
|
|
Tamber
Part of things
  Shattered. Held together by spite and tape.
Posts: 341
|
|
|
|
H'okay, then! Done the other headlight bowl, so now I have a nice explanatory series of photographs. There will be no circles and arrows, but there will be a paragraph of the back of each one, explaining what each one was, to be used in evidence against ... ...hold on. *ahem* - Mark out your hole, right on the peak of the bowl.

- Slice off the back of the bucket, across the line.
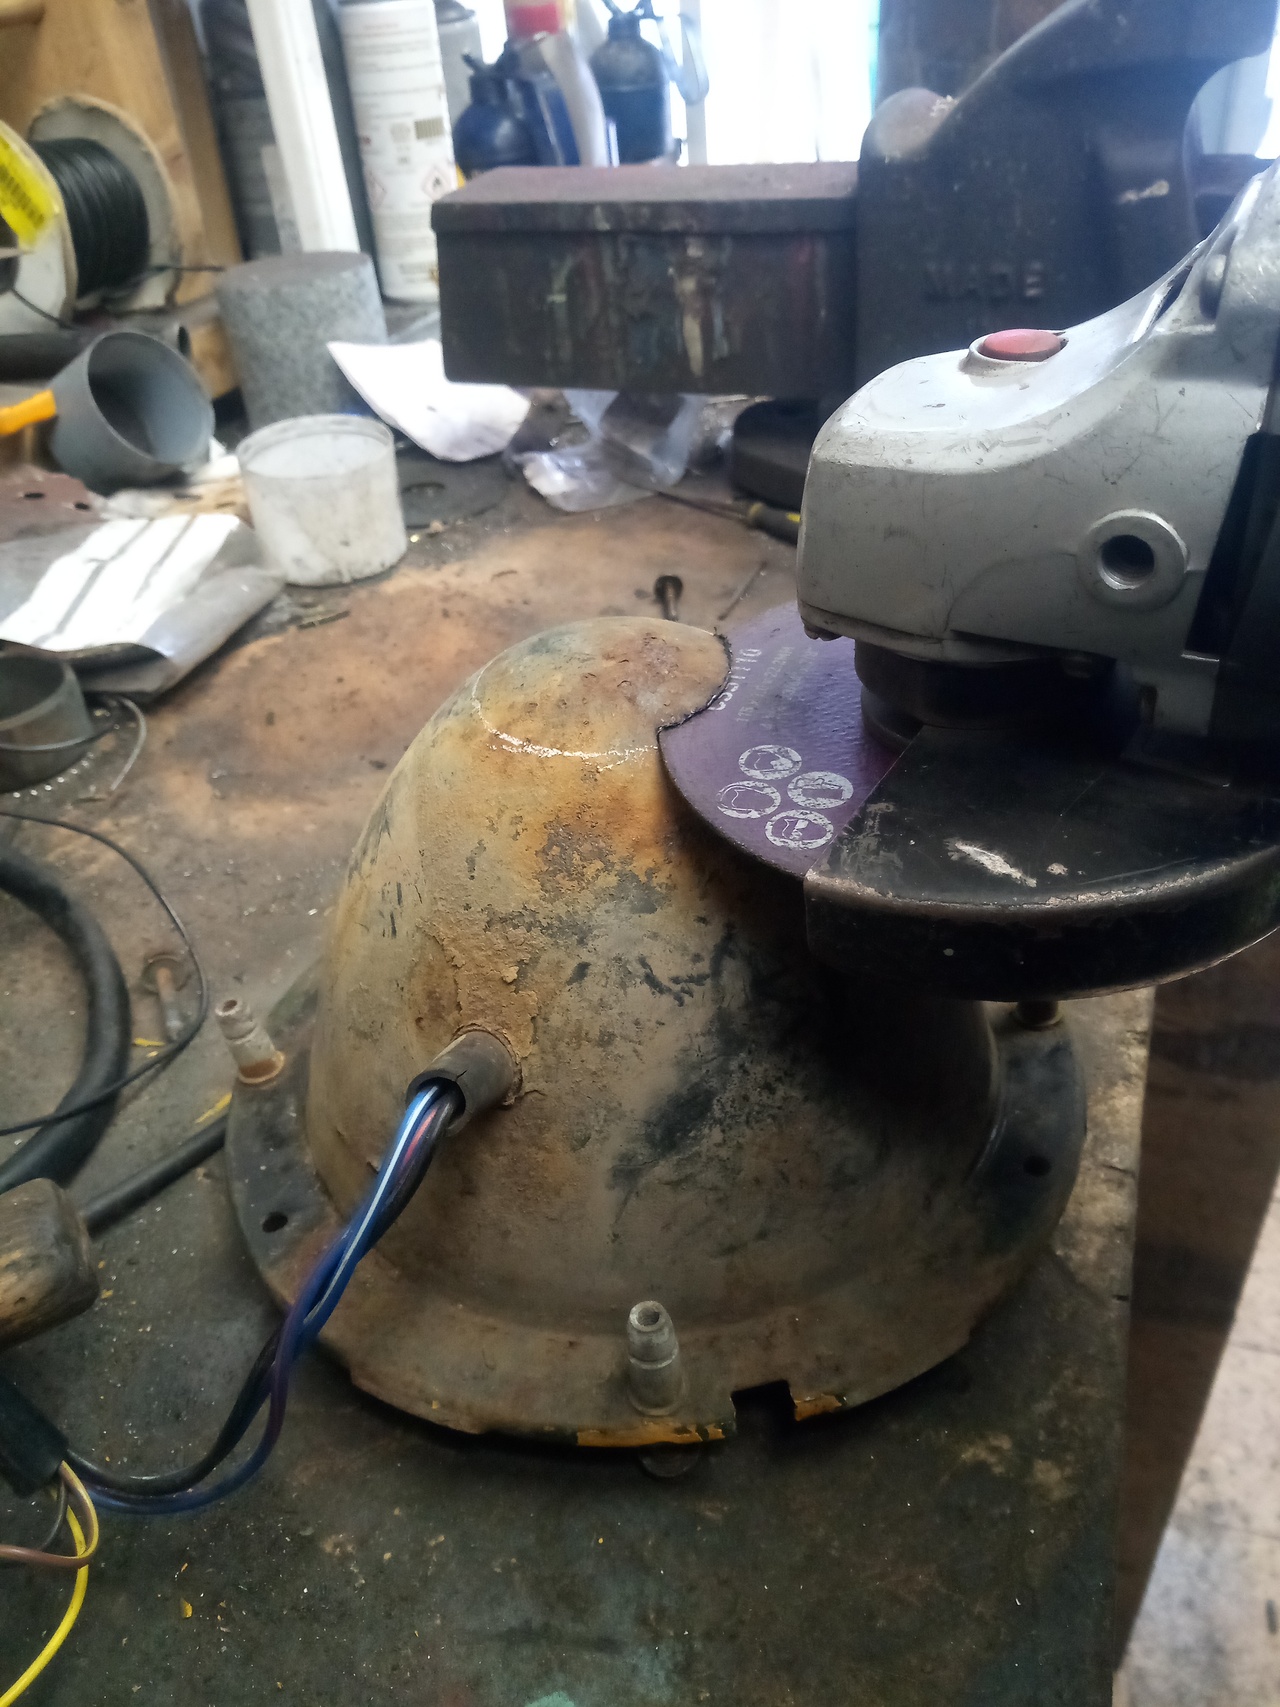
Which leaves you with a ragged hole, hungry for flesh:
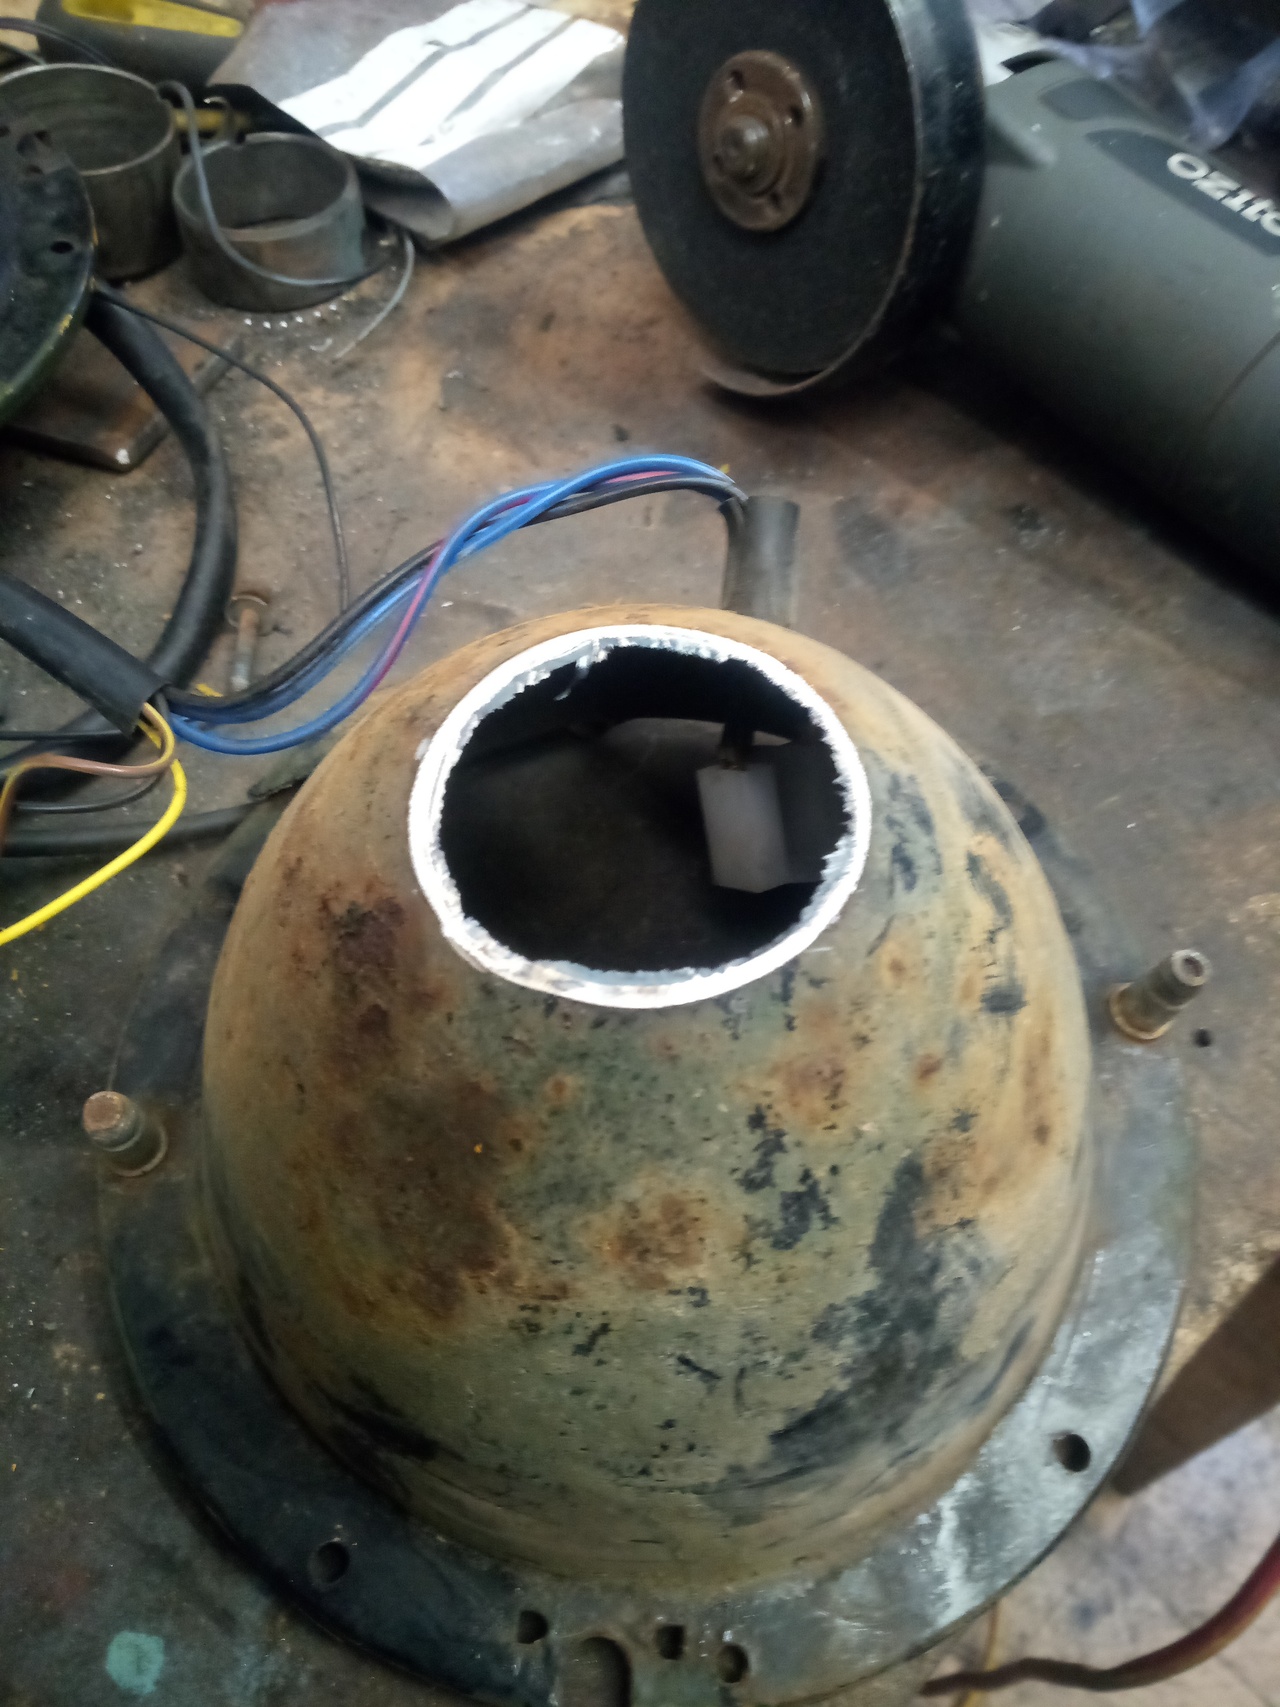
- Take your files...
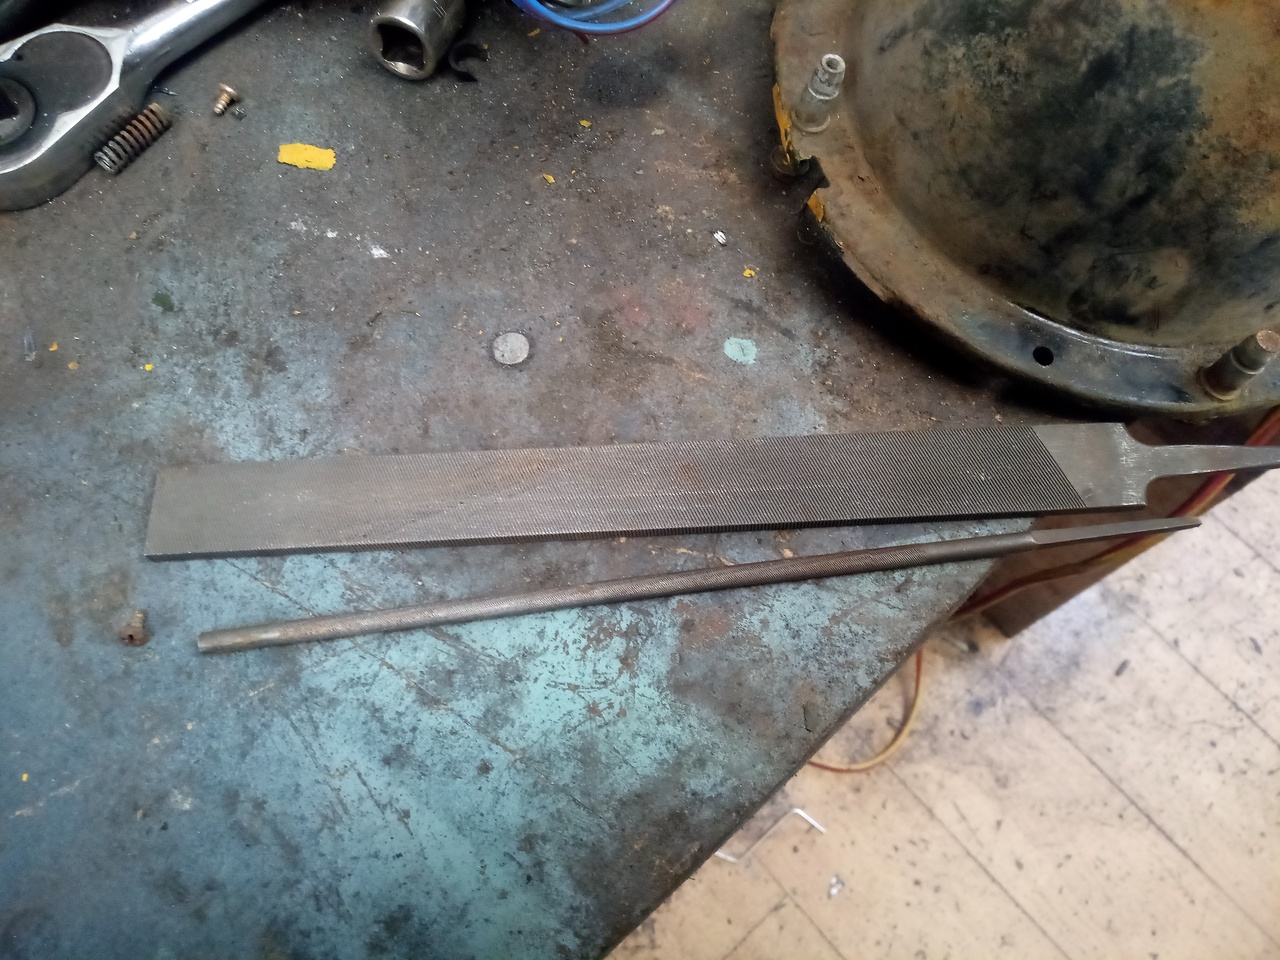
(...and put handles on them. To lessen how much it hurts when you dig the tang into your soft squishy bits.)
Neaten up the hole with them, to take off the burrs and make it a little more consistently circular. Ish.
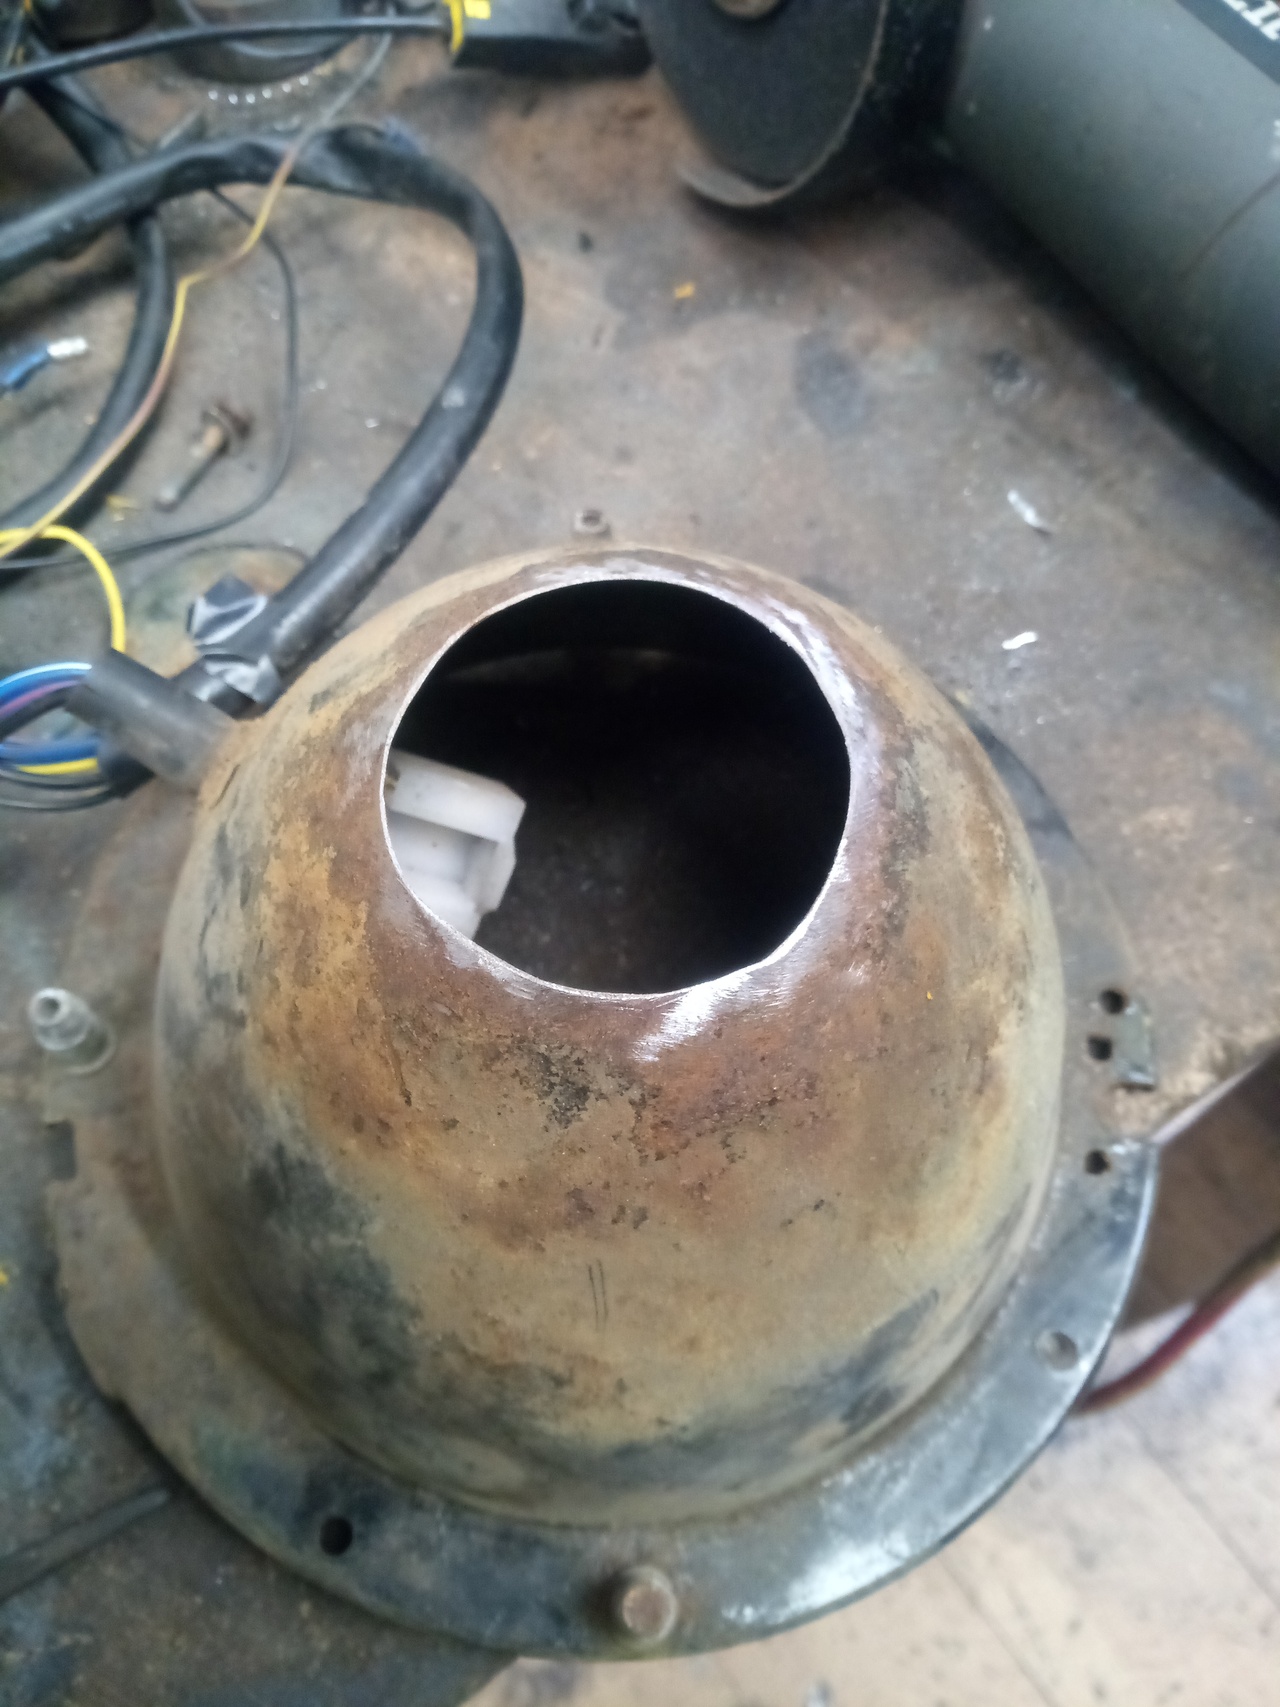
- Flare the edges of the hole outward, gradually working around until a lip stands up...
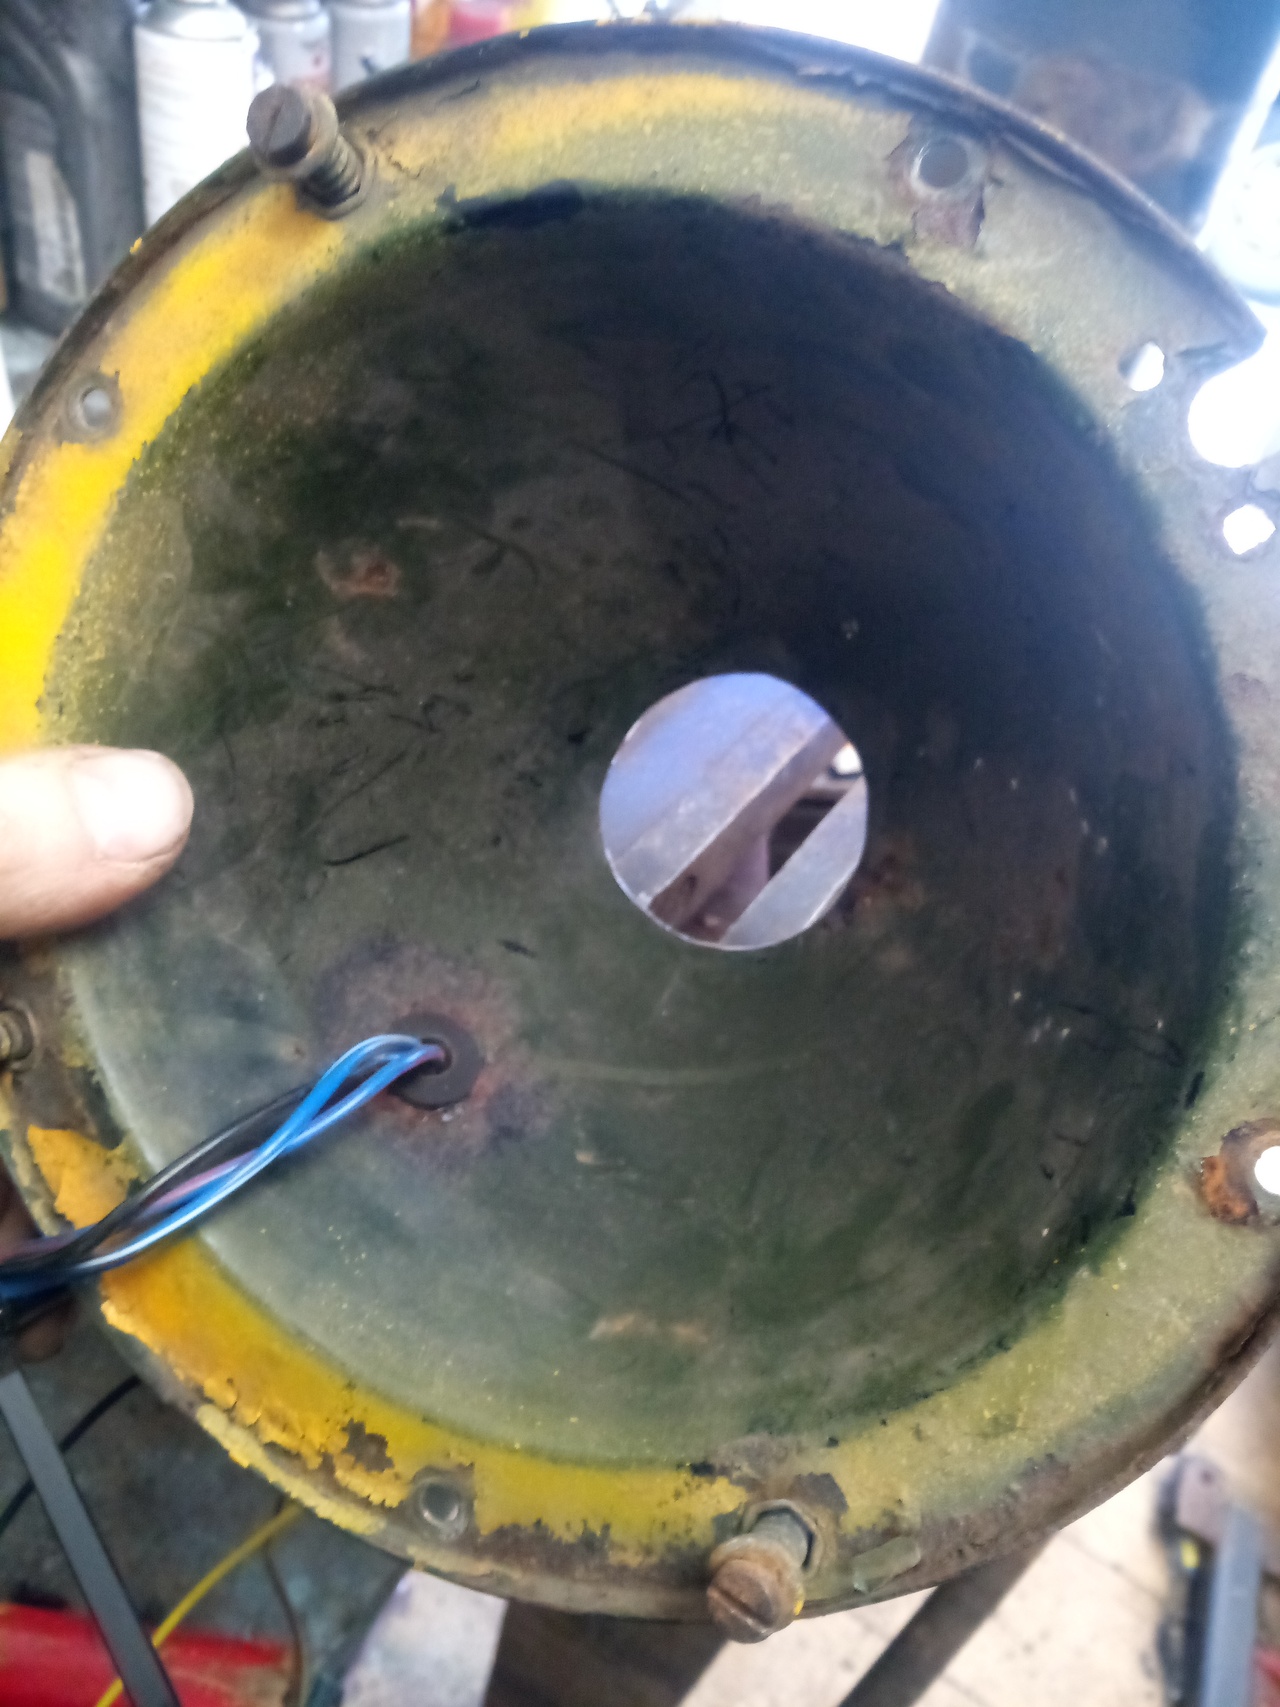
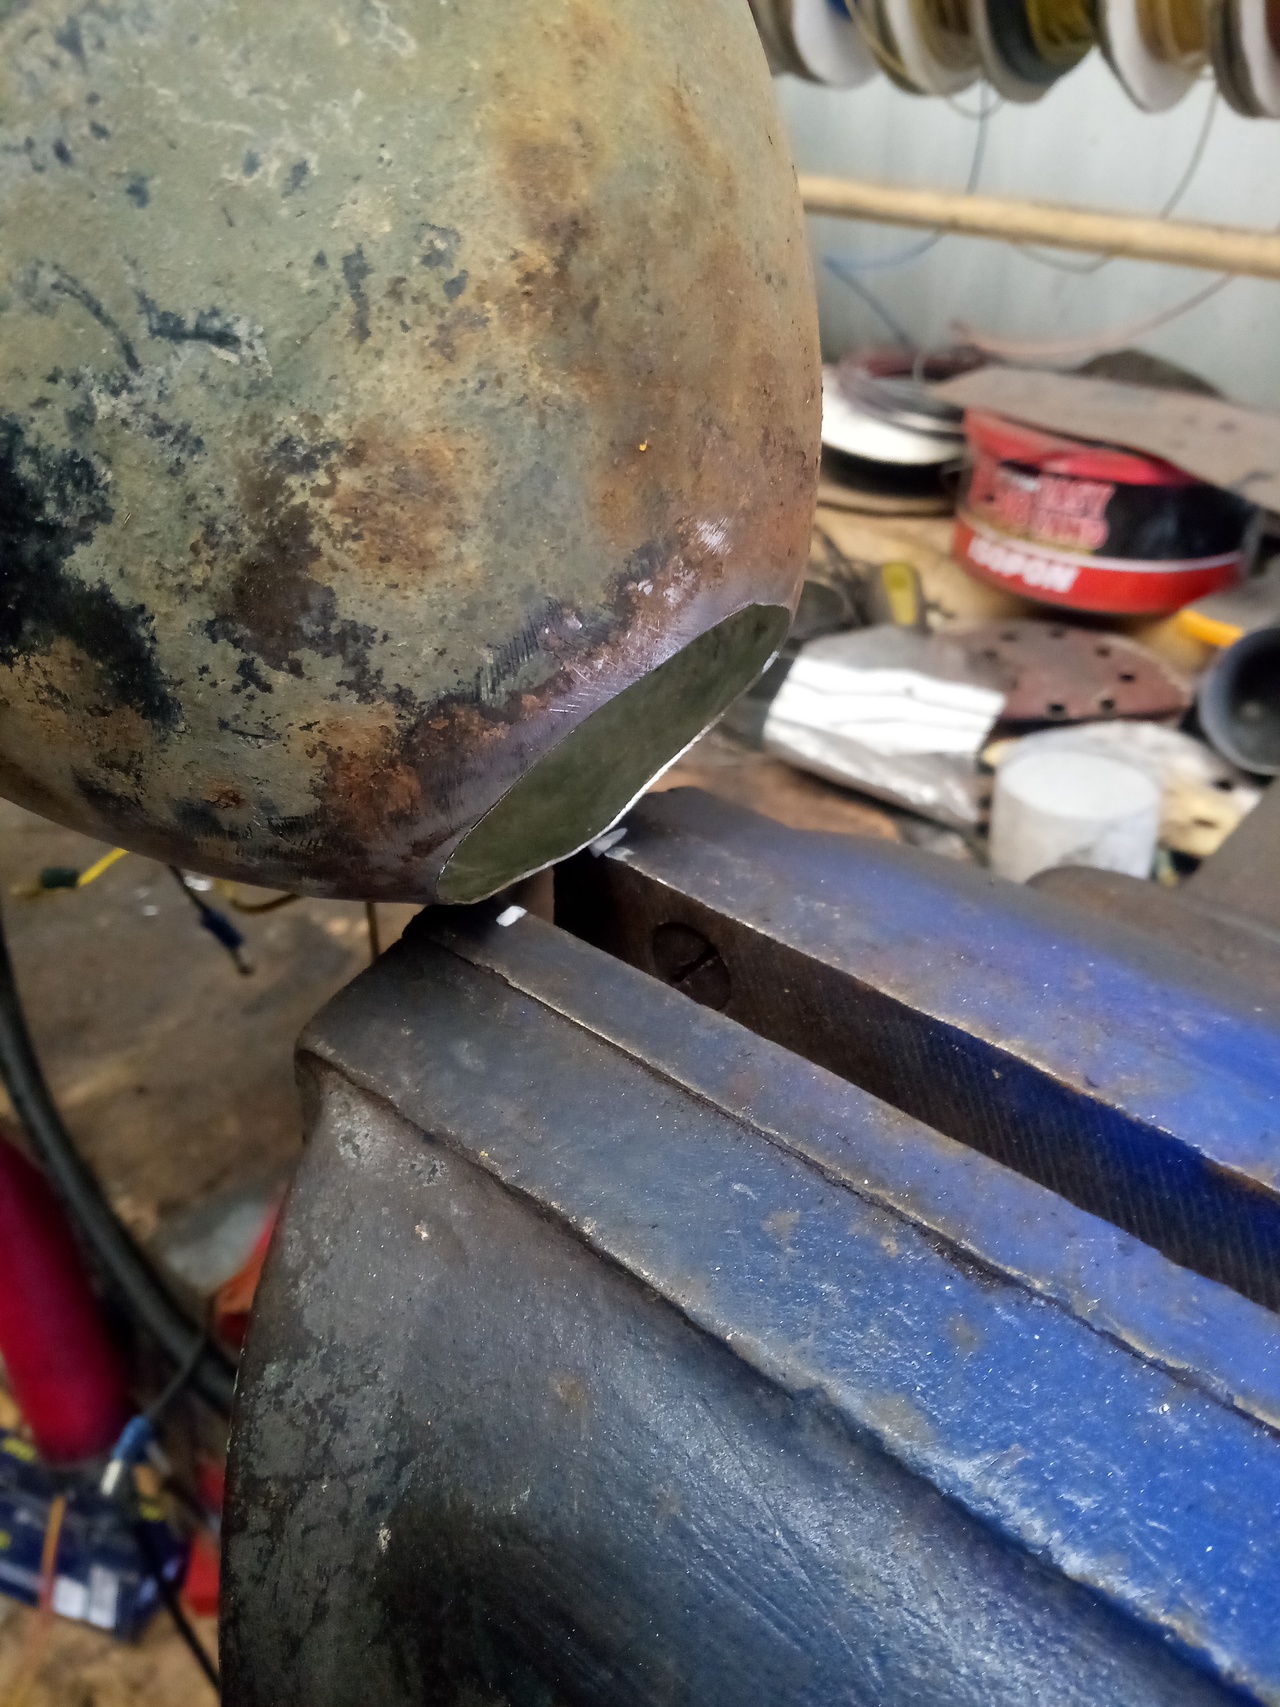
A vice being used, here, to provide a notch to tap the metal down into, by use of the pointy-ended body hammer from the inside.
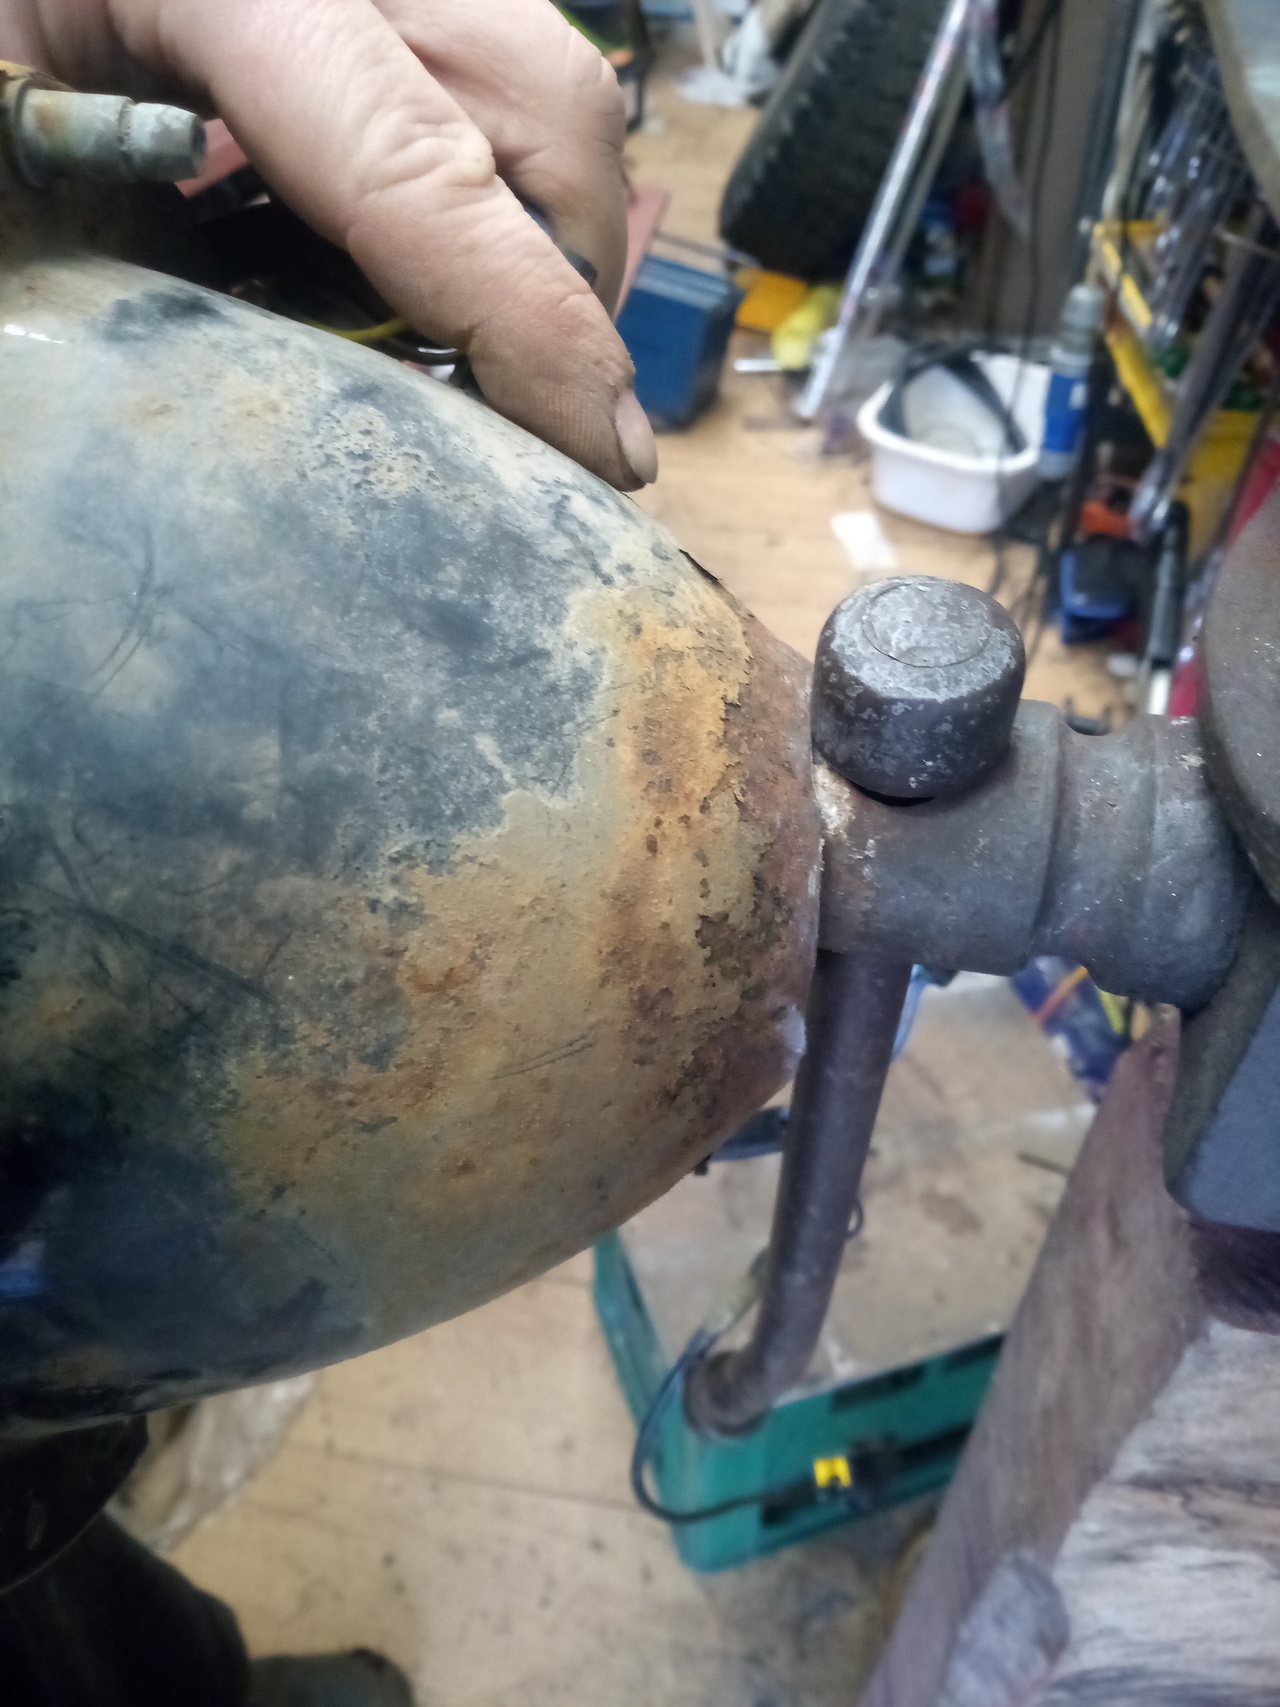
Once a bit of a flare is started, the handle of the vice is then employed as the anvil in combination with the pointy end of the body-hammer again, striking about 6mm or so from the cut edge, to turn it outwards a little further.
After a few rounds of this, you should have a nice flare started...
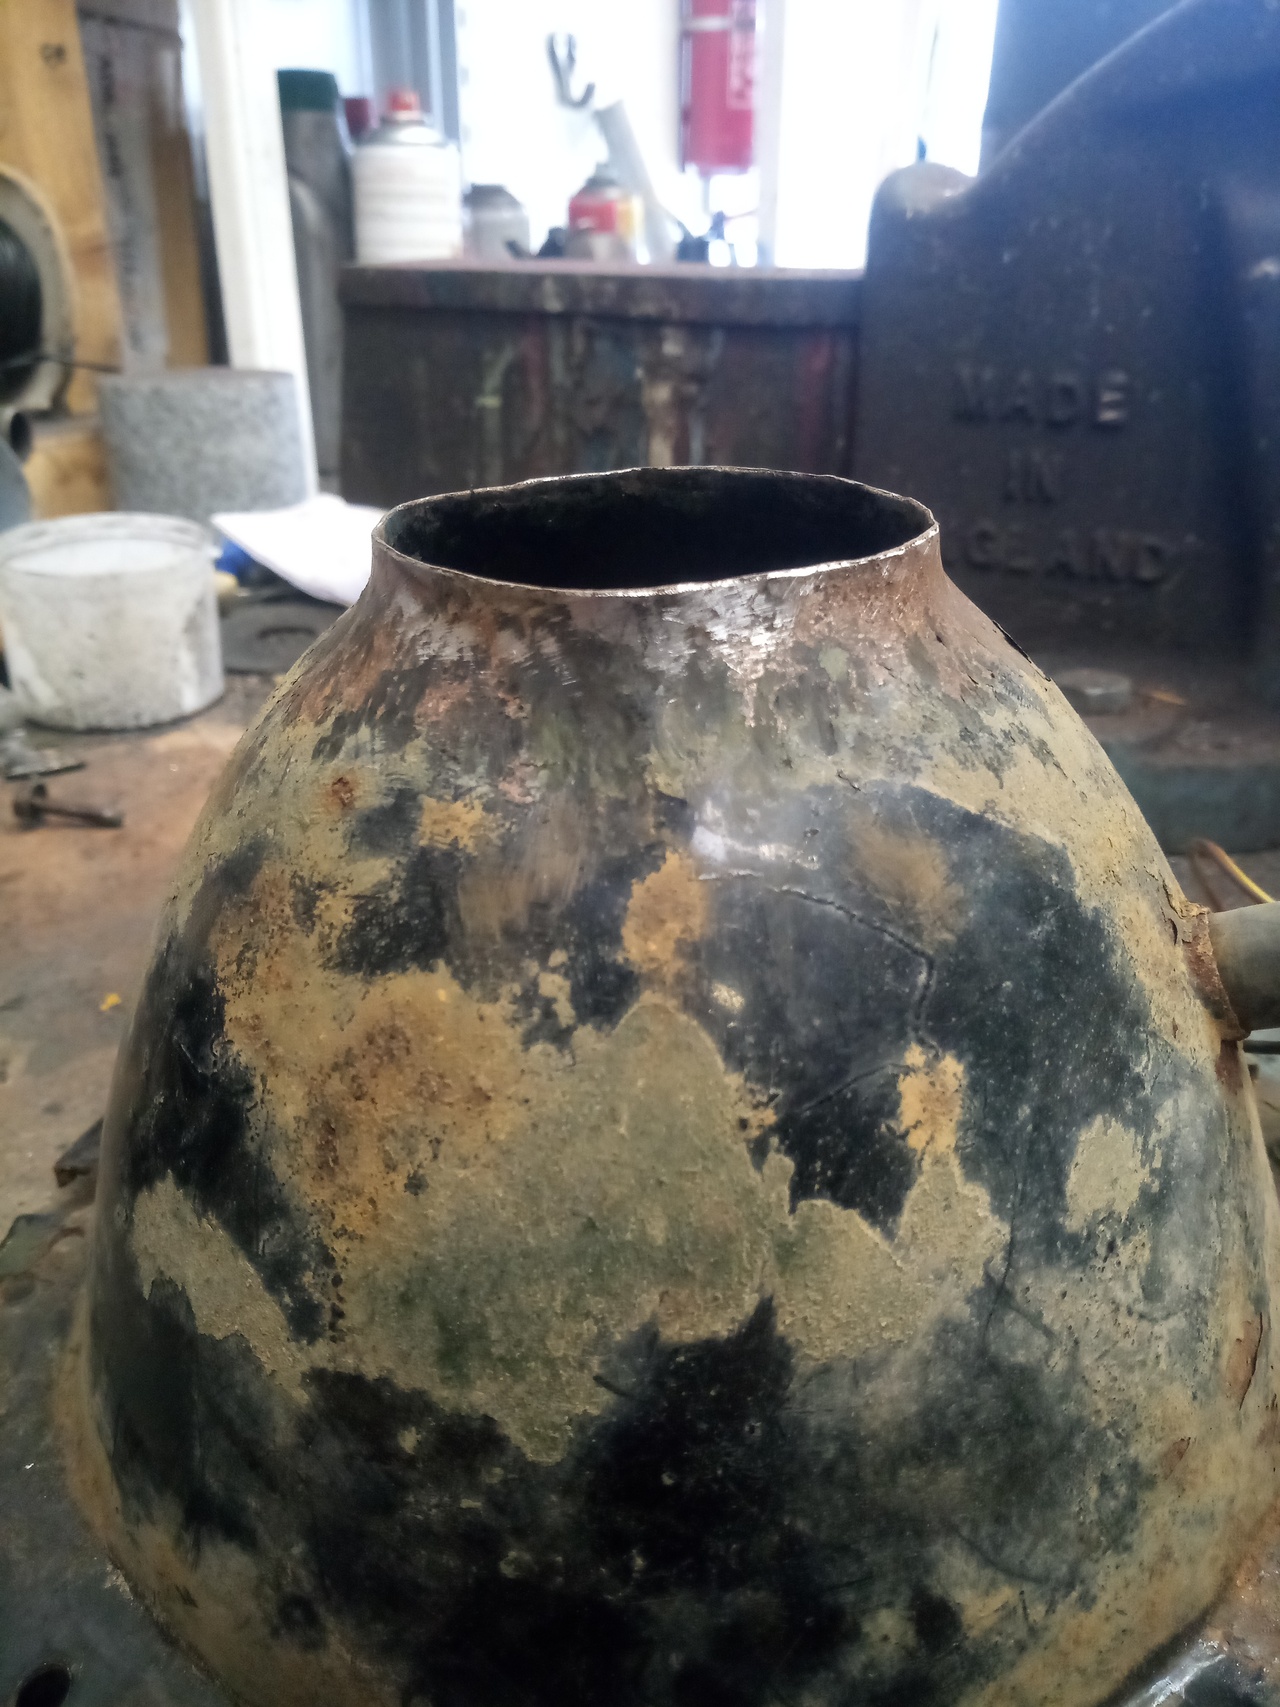
- Roll the newly-created flare outwards and down over itself; again using the vice as an anvil...
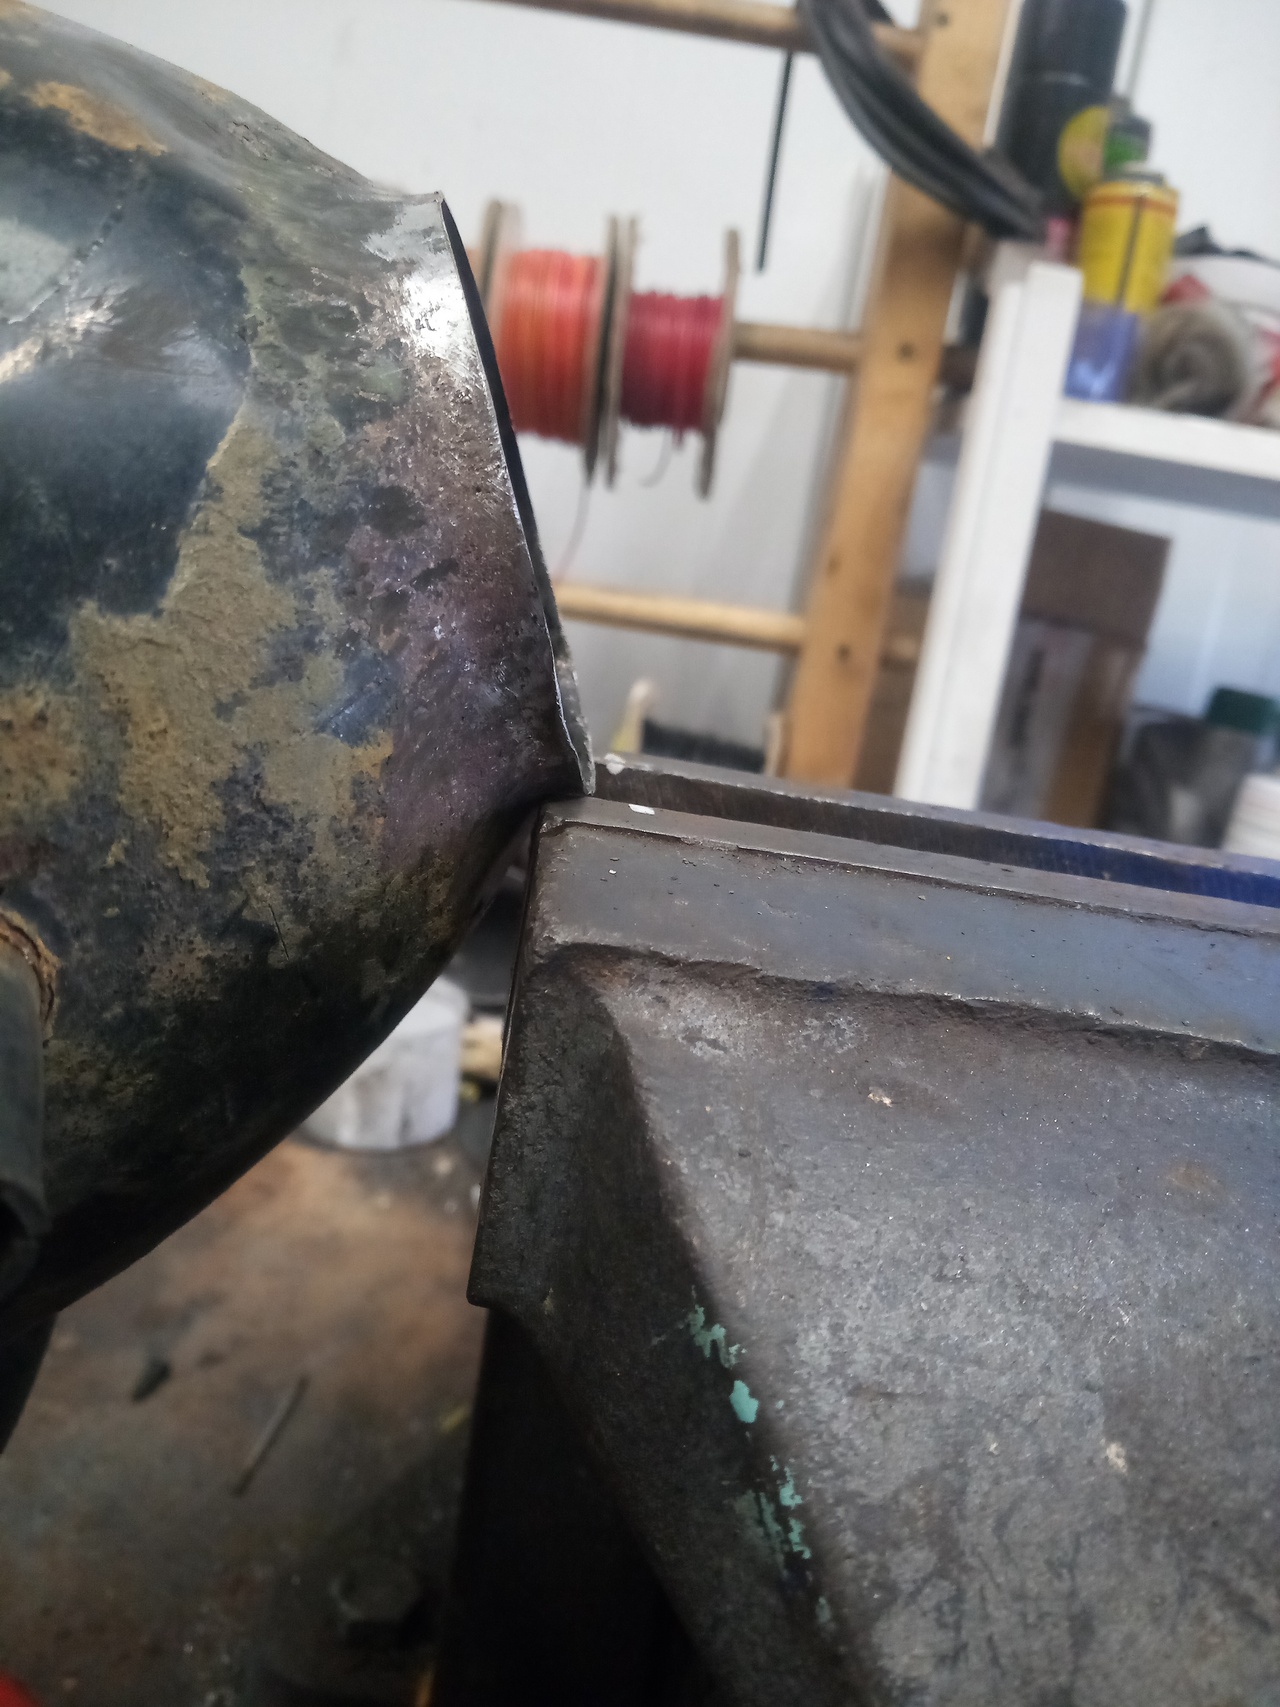
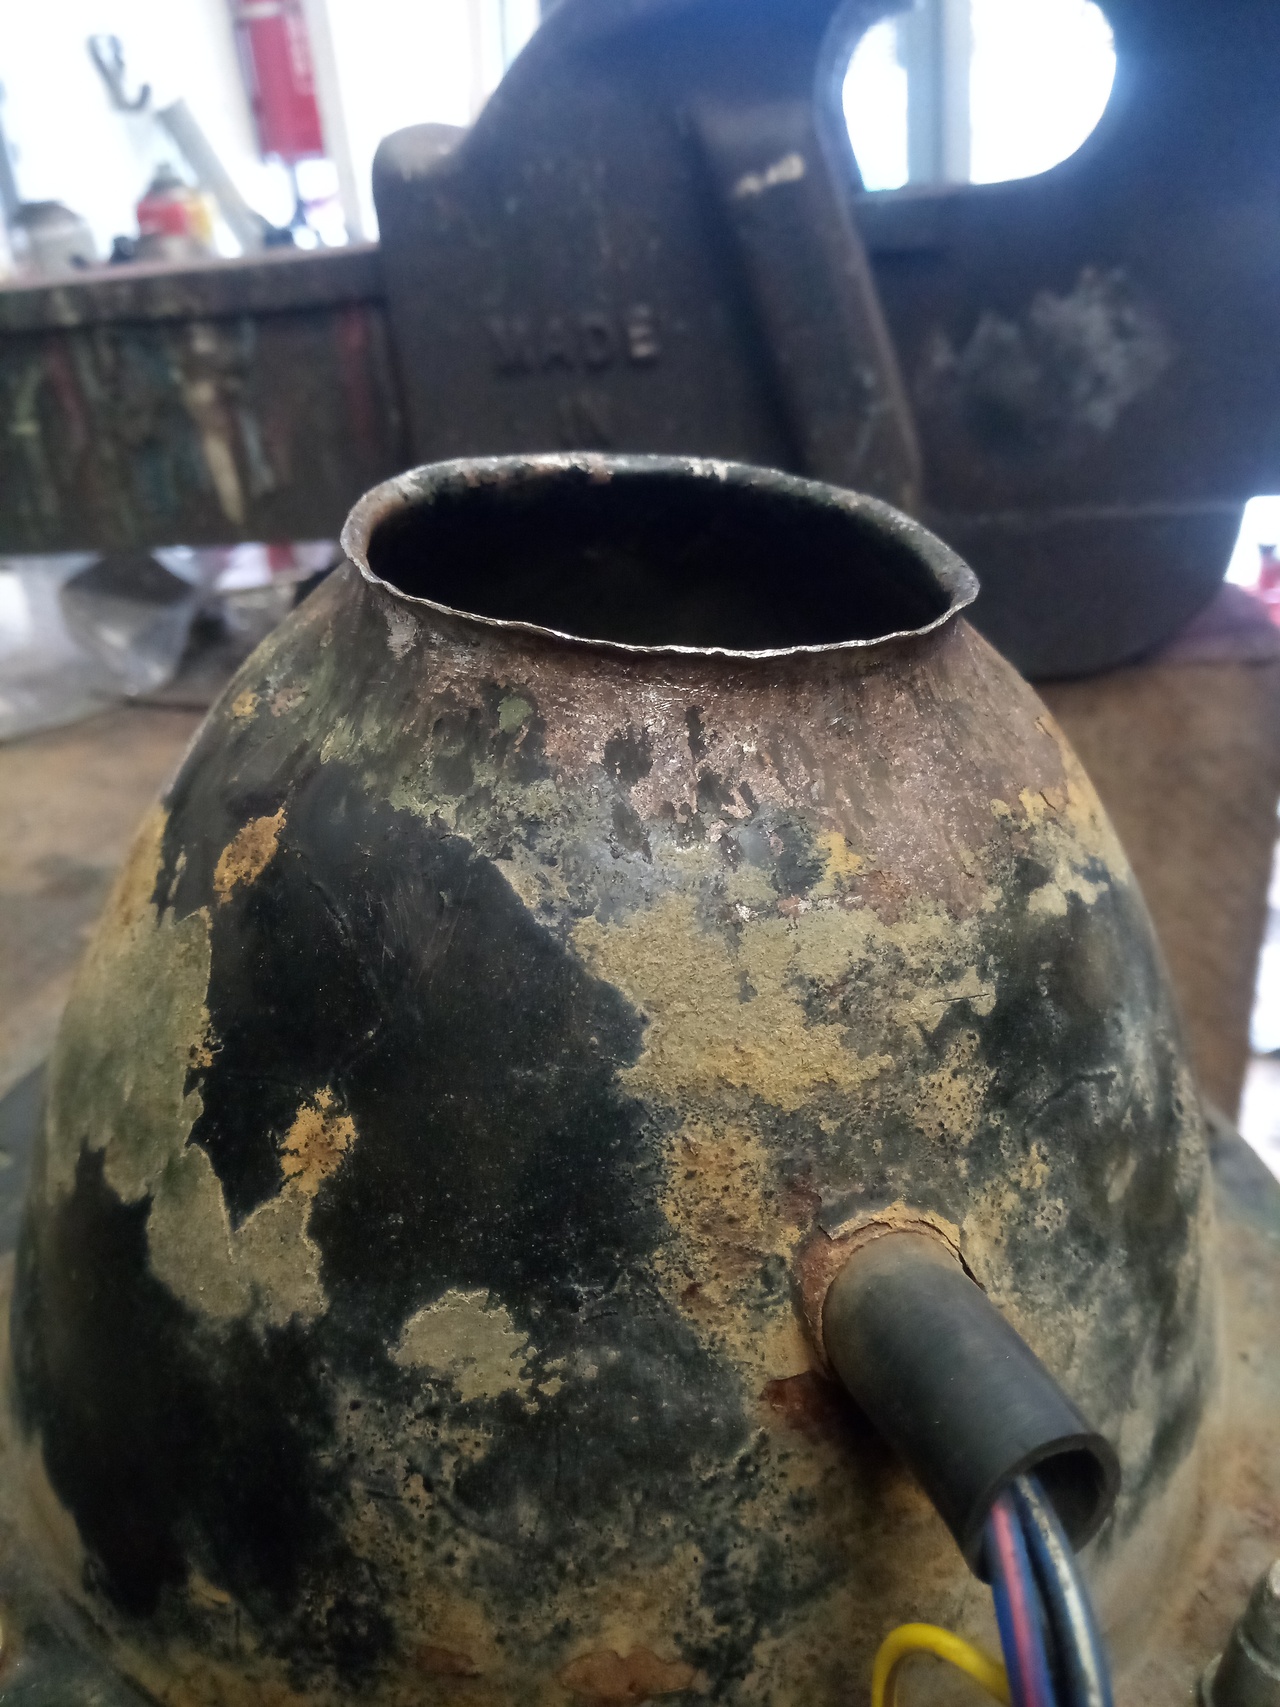
Once the flare has started to turn down nicely, and I was starting to run out of room on the edge of the vice jaw, I switched to using the flat face of the hammer making glancing blows that hit more sideways than directly onto the surface.
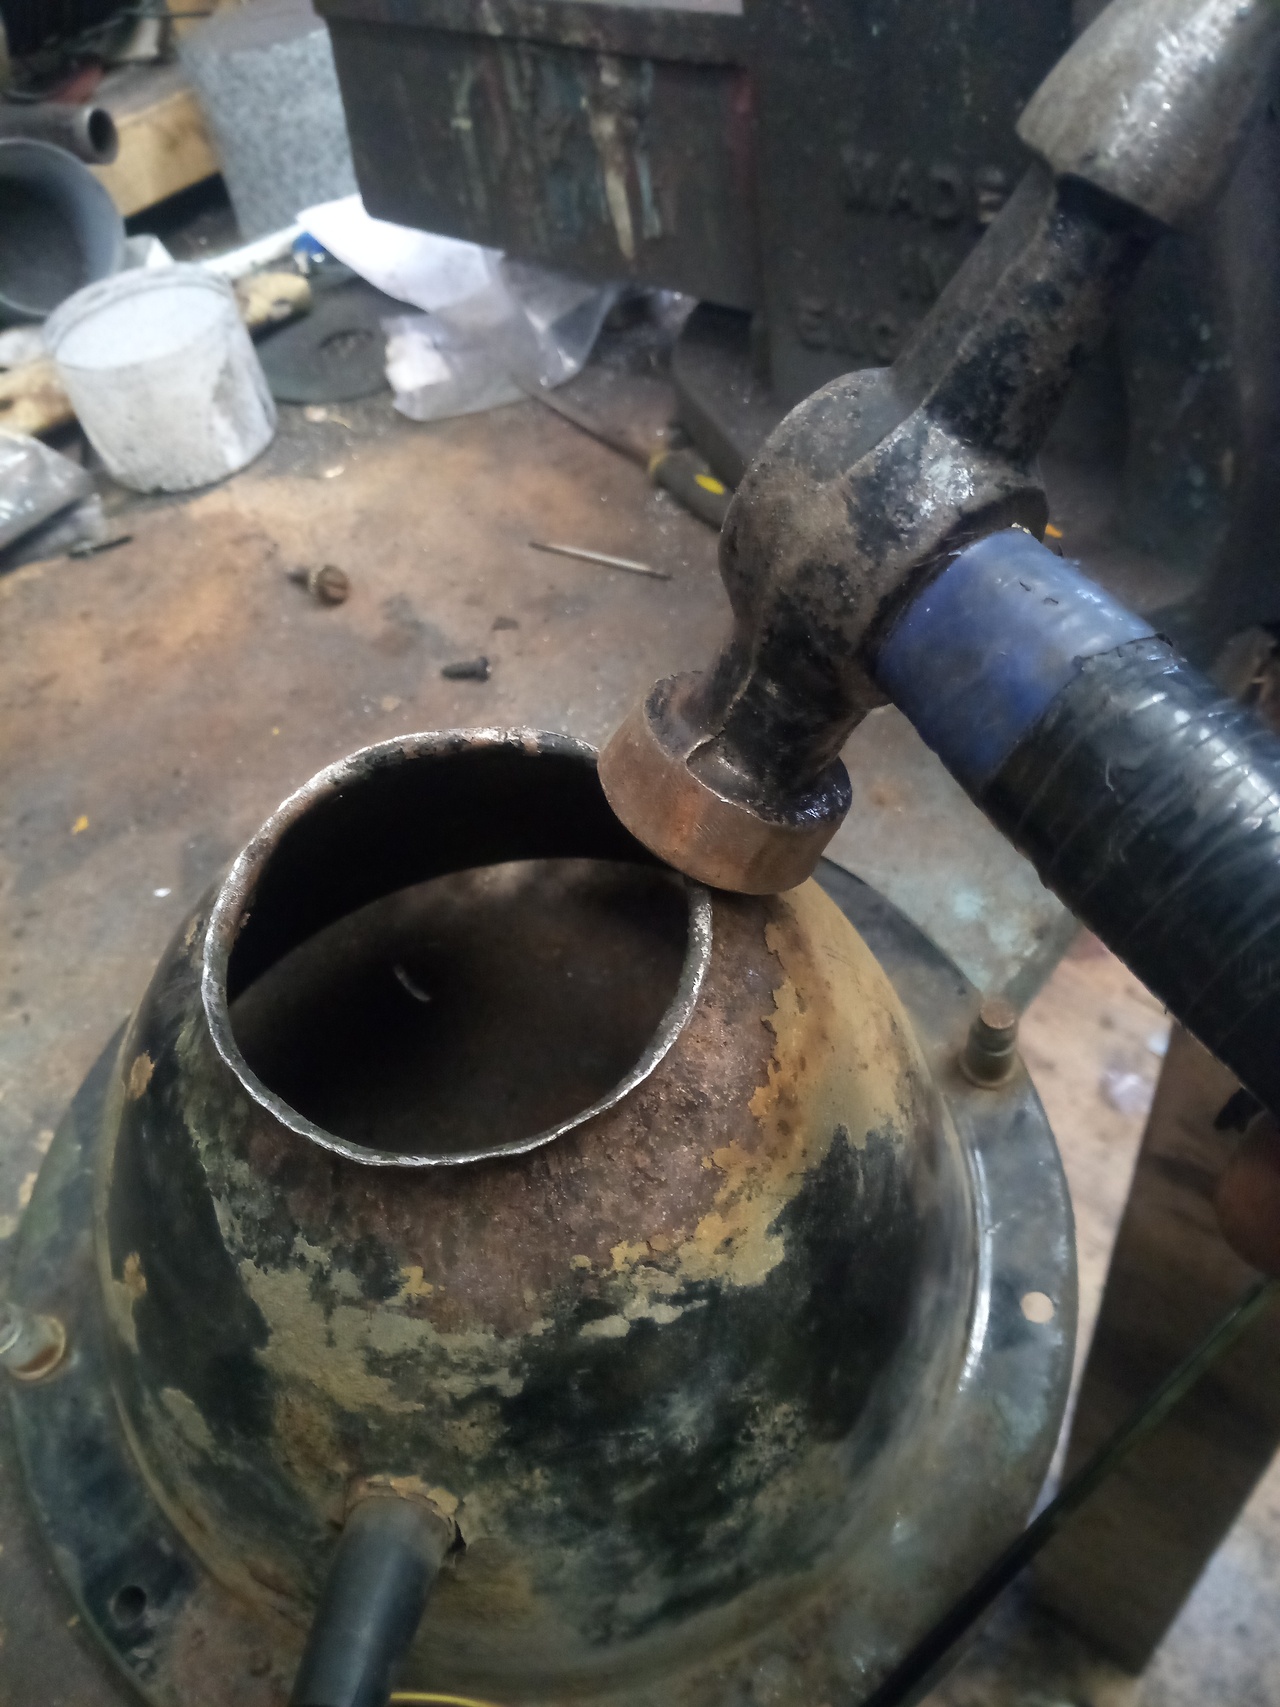
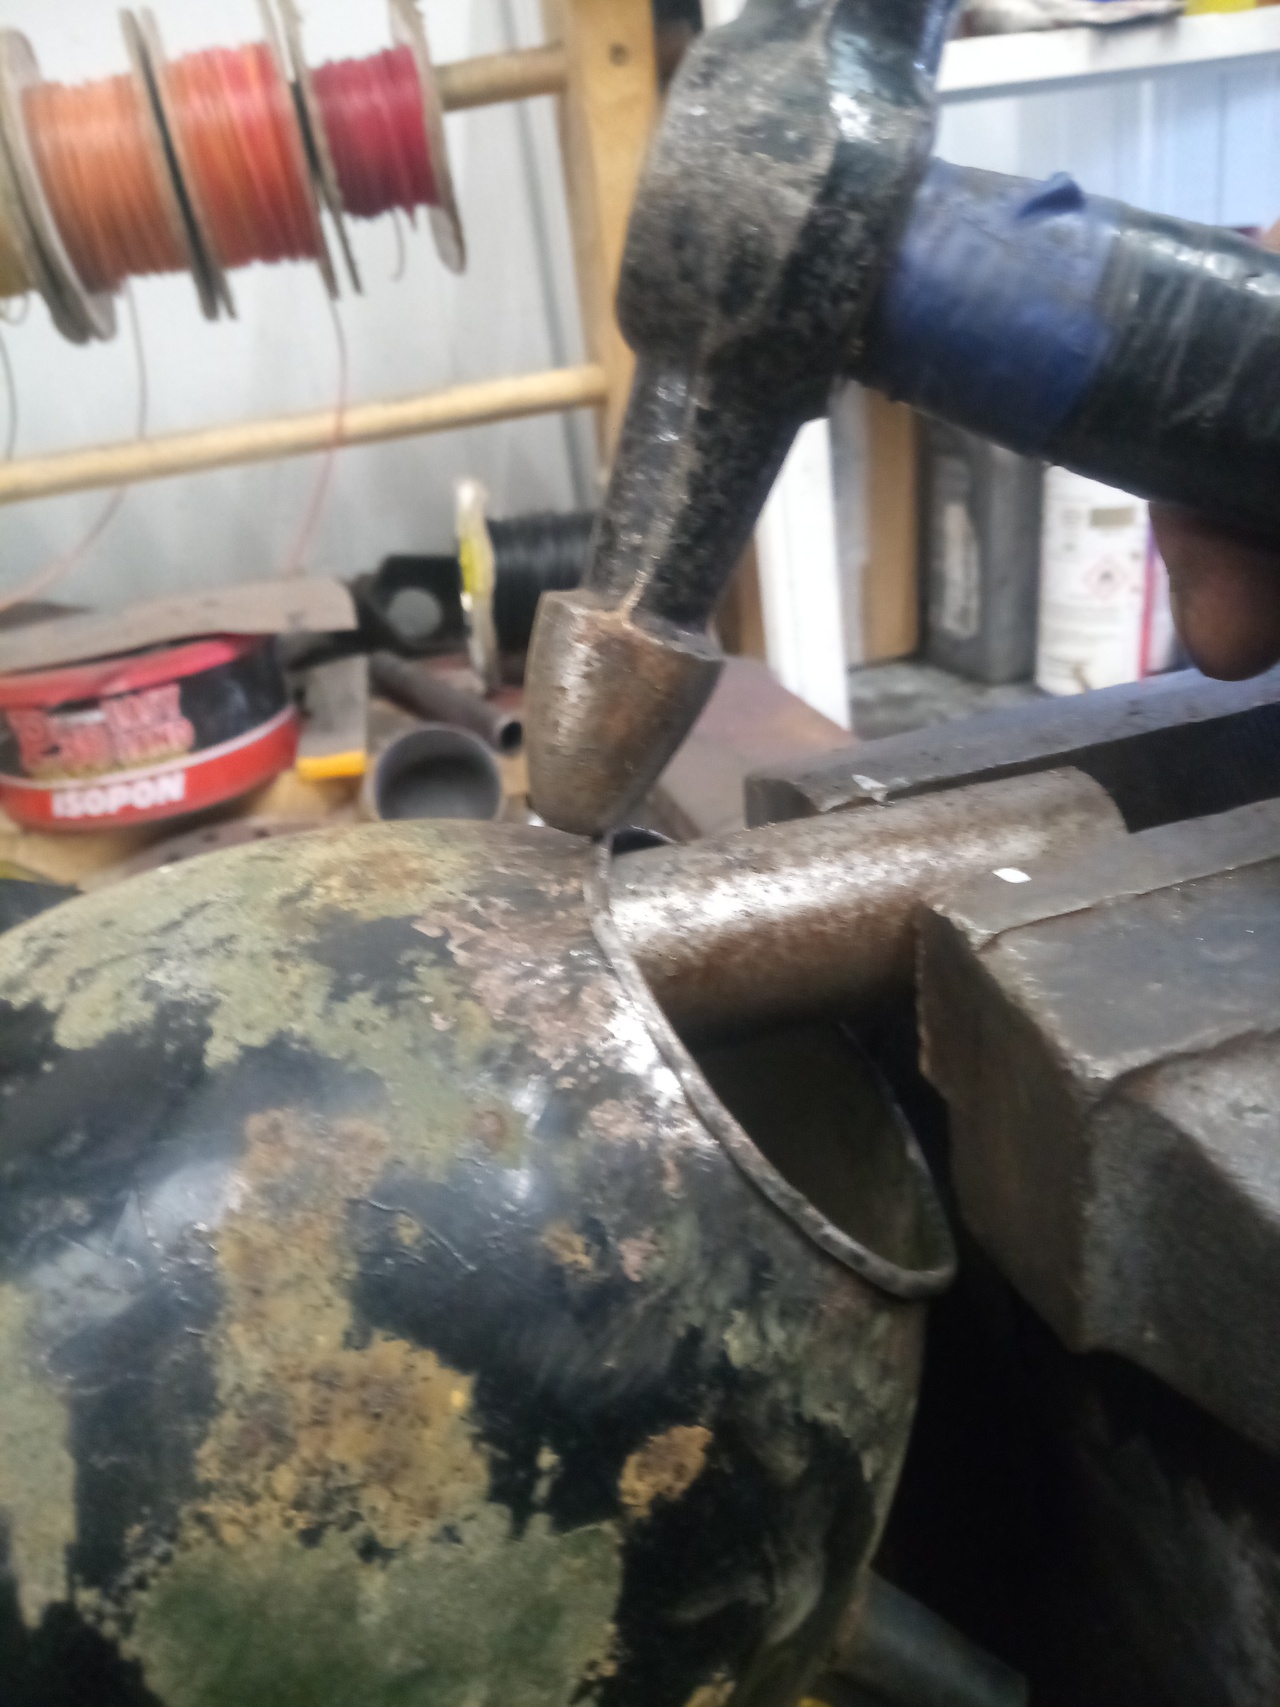
(Picture the hammer moving diagonally from top left to bottom right of this picture, glancing off the flared edge with each strike.)
- Once the edge is rolled over, switch to a convenient bit of offcut round bar in the vice, gradually working around with the pointy end of the hammer tightening up the rolled edge, until it's nice and snug, and has no sharp edges that would chew your fingers off the next time you want to change a headlight bulb.
- Et wollah:
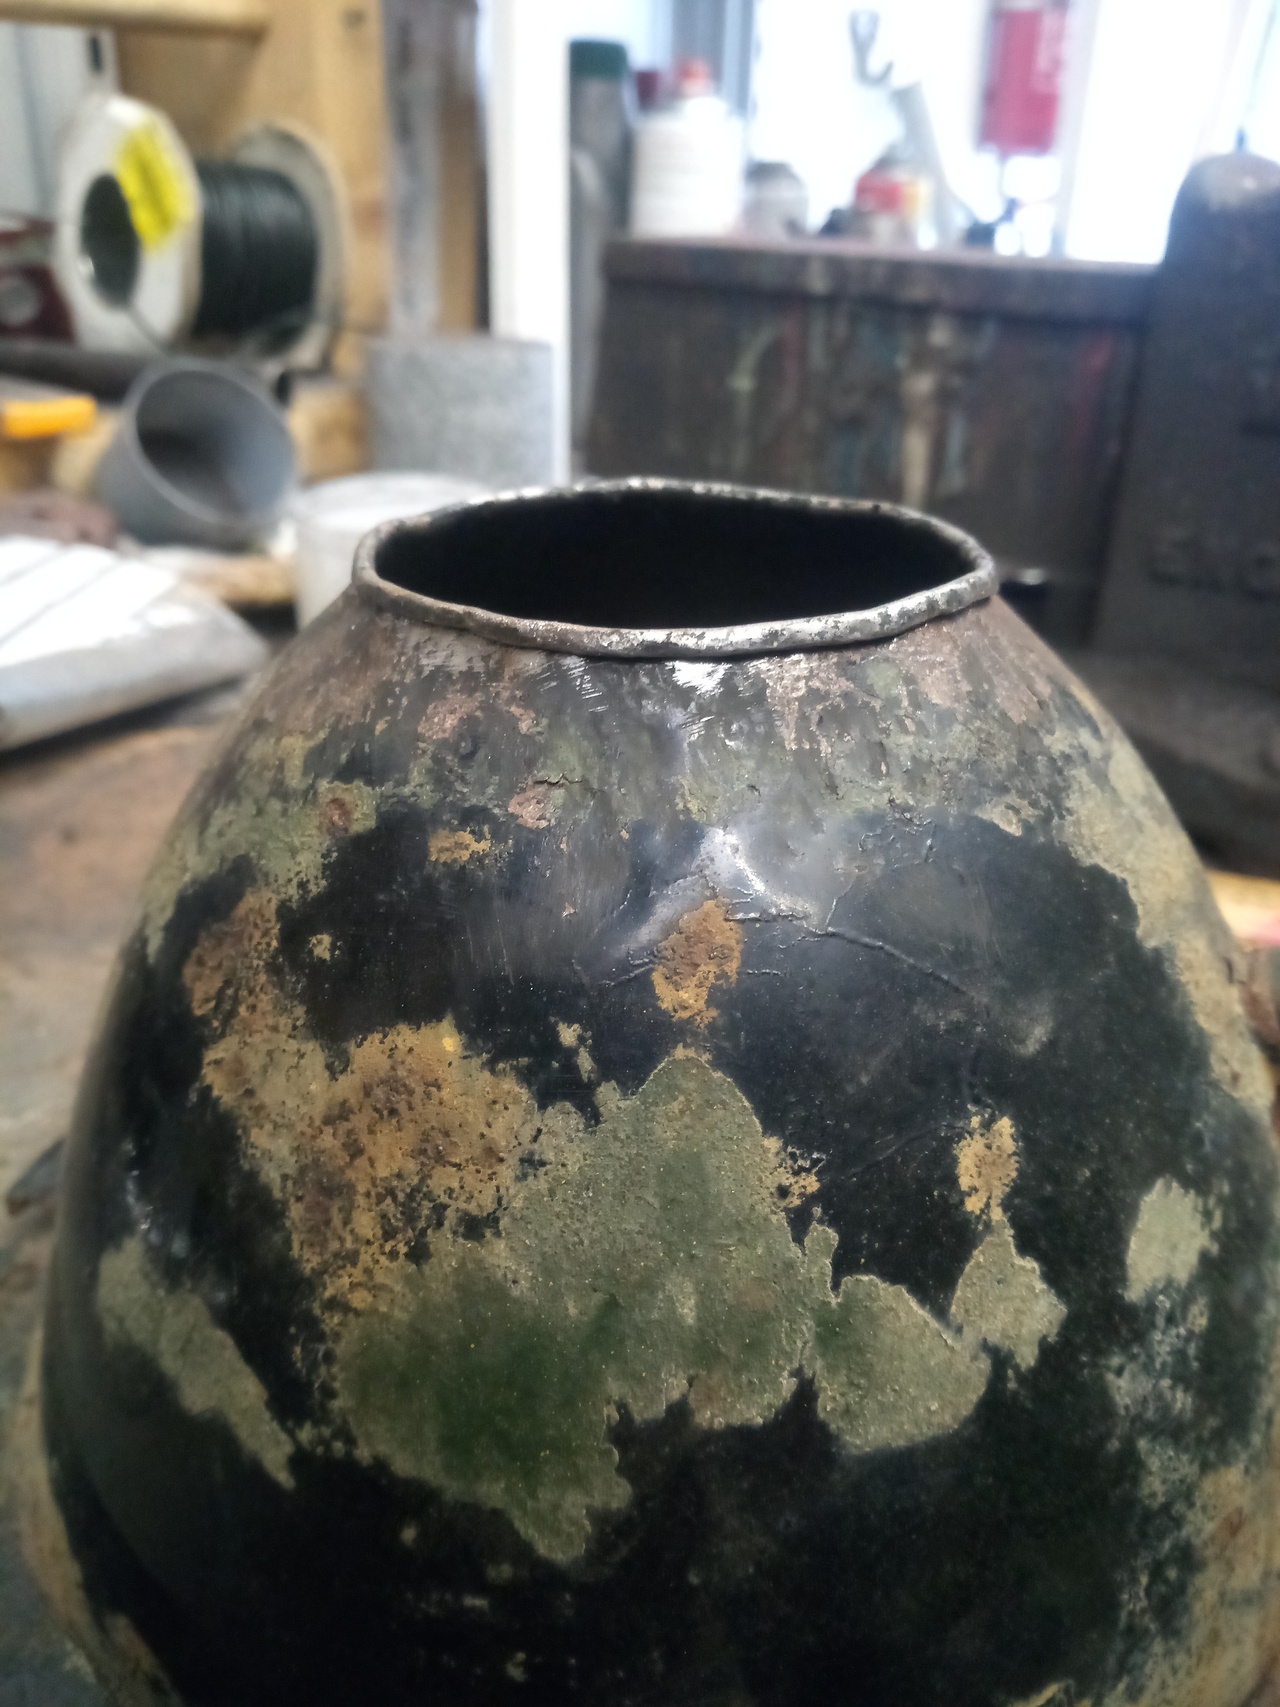
One not perfect, but perfectly good enough, rolled edge that's safe to for you to cram your clumsy mitts into in the dark, pouring rain, and howling gale and not end up leaking the red stuff all over your metalwork. And it only took half an hour of incessant tap tap tap tap tap with a hammer, driving everybody else crazy!
And that makes... Two of Them! 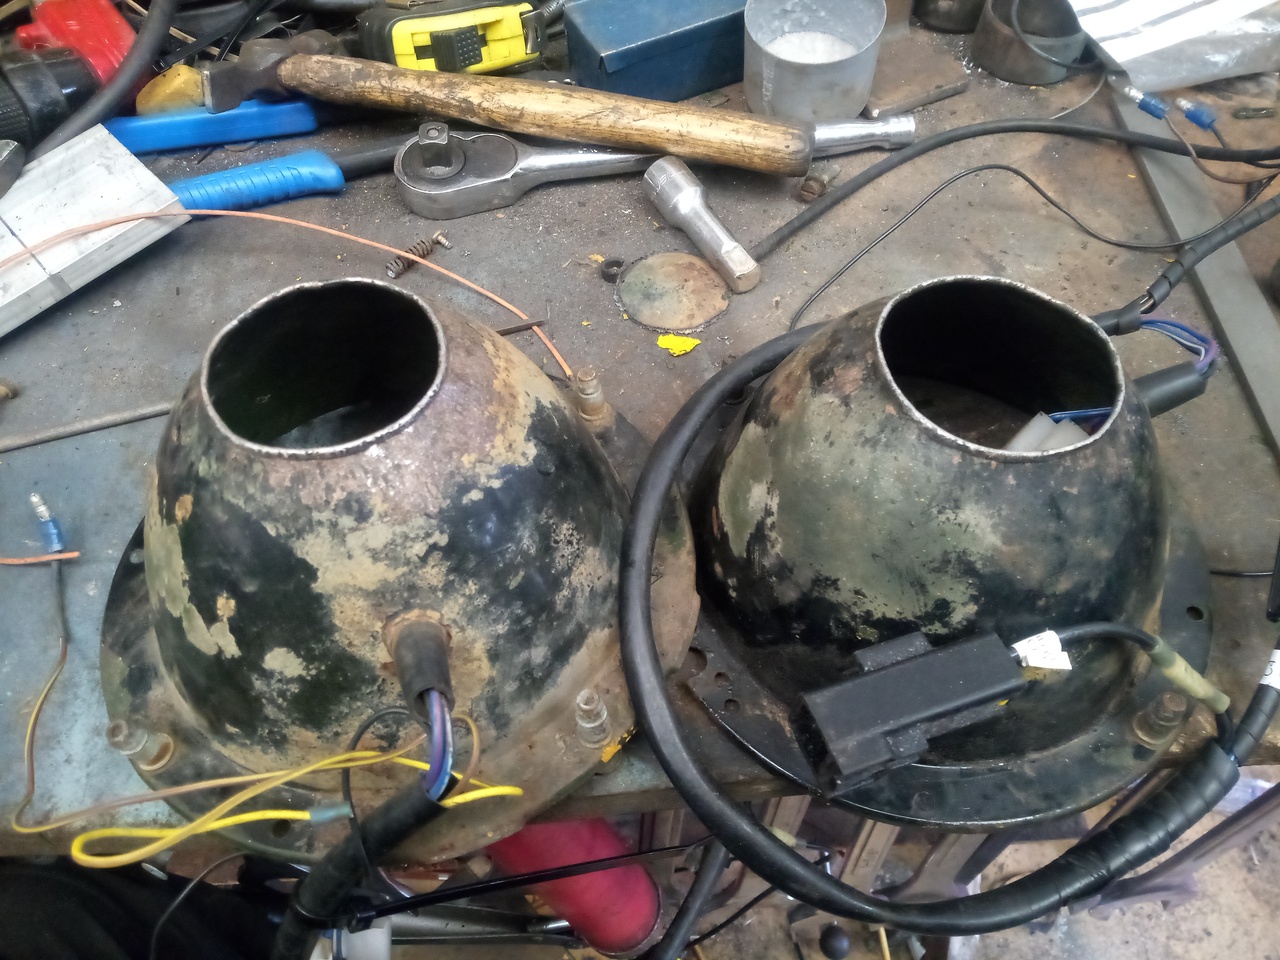 At this point, if you want to follow my process exactly, you can break off the adjuster screws, to match the other one you broke the adjuster screws off previously. Oh, and you probably want to apply some paint to that bare metal so that it doesn't rot away and turn into a ragged hole that'll gouge you open on a cold winter night in the rain and blowing gale...
Bonus: 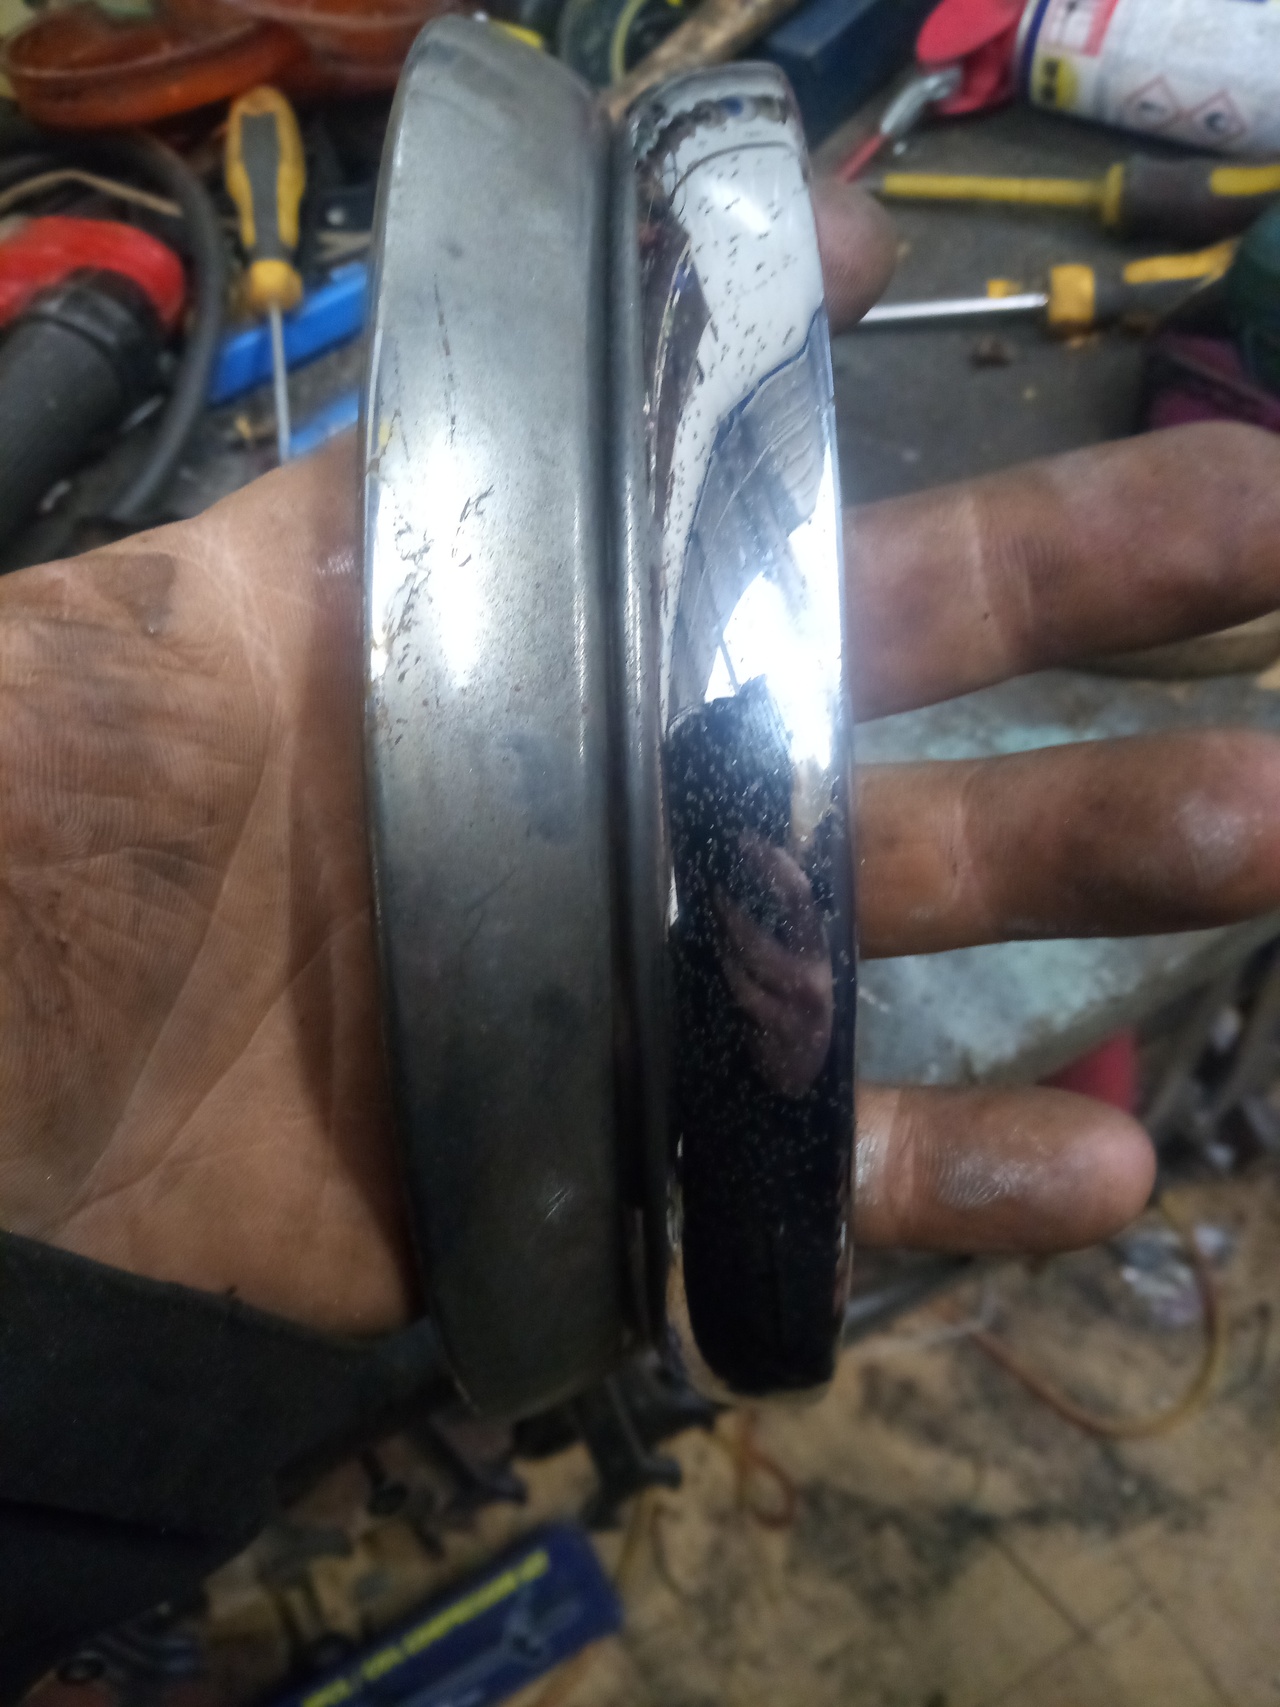 polishy polishy~ 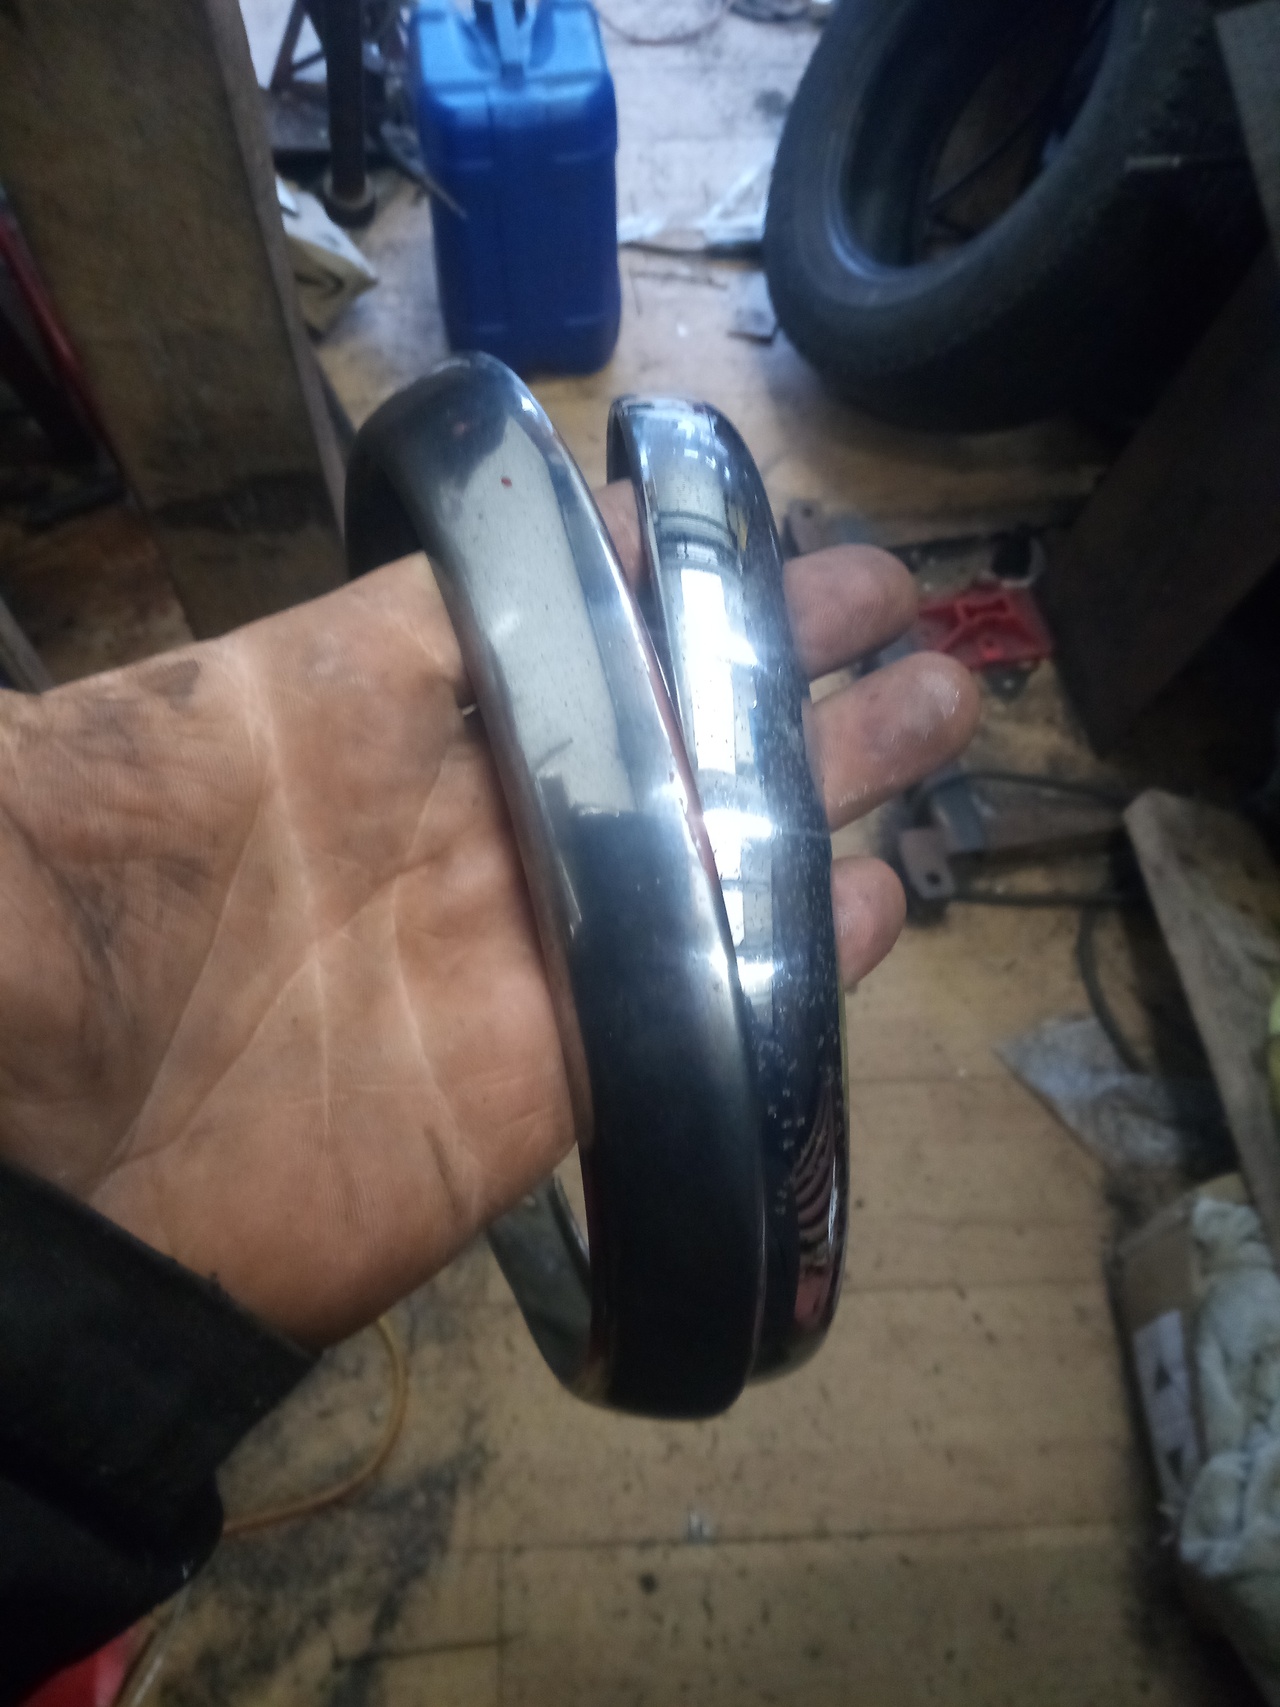 I can get that better, but it's fine for now. |
| |
-< Welder. Allegedly a mechanic. Bodger of Things >-
* 1958? Bedford RL - Progress: Glacial.
* 1994 Skoda Favorit - It's baaaaaaaack!
* 2018 Herald Classic - Gone!
|
|
|
|
|
|
|
|
Why can't you just unscrew the three screws holding the inner trim ring and remove the light like you do on a normal sealed beam headlight?
Now that there is no back on the bowl will you make something to cover this so the light doesn't fill up with water?
|
| |
|
|
|
|
Tamber
Part of things
  Shattered. Held together by spite and tape.
Posts: 341
|
|
Feb 19, 2023 20:52:05 GMT
|
Why can't you just unscrew the three screws holding the inner trim ring and remove the light like you do on a normal sealed beam headlight? On the original mounting rings, with a full outer flange, the adjuster screws go through slotted holes so it slots in and twist-locks kinda like a 3-lug bayonet fitting, and if I were able to keep them I would just remove the full light every time because it was so easy... But one of the originals is so badly rotten that it disintegrates a little more each time I try to take it out, and I'd bought these new ones that have a plastic ring that replaces the original bowl and leaves the entire back of the light exposed. Neither of those are ideal, so I was going to just put the new rings on the headlights, and fit them to the original bowls, problem solved! Except the new rings don't mount with the same type of keyholed holes, and they're nightmarish to fit to the adjusters. (Which are all seiezed and now broken anyway) And the lights are retained to the ring by 3 loose tabs, rather than being sandwiched between two full rings, so the second I touch that it'll just become a shower of pieces and suffering, and I have no real desire to have to play a game of Operation every time I want to change a headlight bulb, because it's guaranteed to be in the worst possible conditions as it is. Now that there is no back on the bowl will you make something to cover this so the light doesn't fill up with water? Yup. How? Not sure yet, but I'll know it when I see it.  Pretty sure I can still fit the rubber boot on the back of the headlight itself, though, so that might go a long way to preventing water ingress. |
| |
-< Welder. Allegedly a mechanic. Bodger of Things >-
* 1958? Bedford RL - Progress: Glacial.
* 1994 Skoda Favorit - It's baaaaaaaack!
* 2018 Herald Classic - Gone!
|
|
Tamber
Part of things
  Shattered. Held together by spite and tape.
Posts: 341
|
|
Mar 19, 2023 22:05:15 GMT
|
...hmmm. Either I never received the rivnuts and screws to go with 'em, or I have an unopened envelope somewhere that I can't find. I might find 'em the next time I have a big tidy-up. If not, then I'll order more and that'll make the buggers turn up.
Since last time: Discovered an annoying bit of corrosion on the radiator: 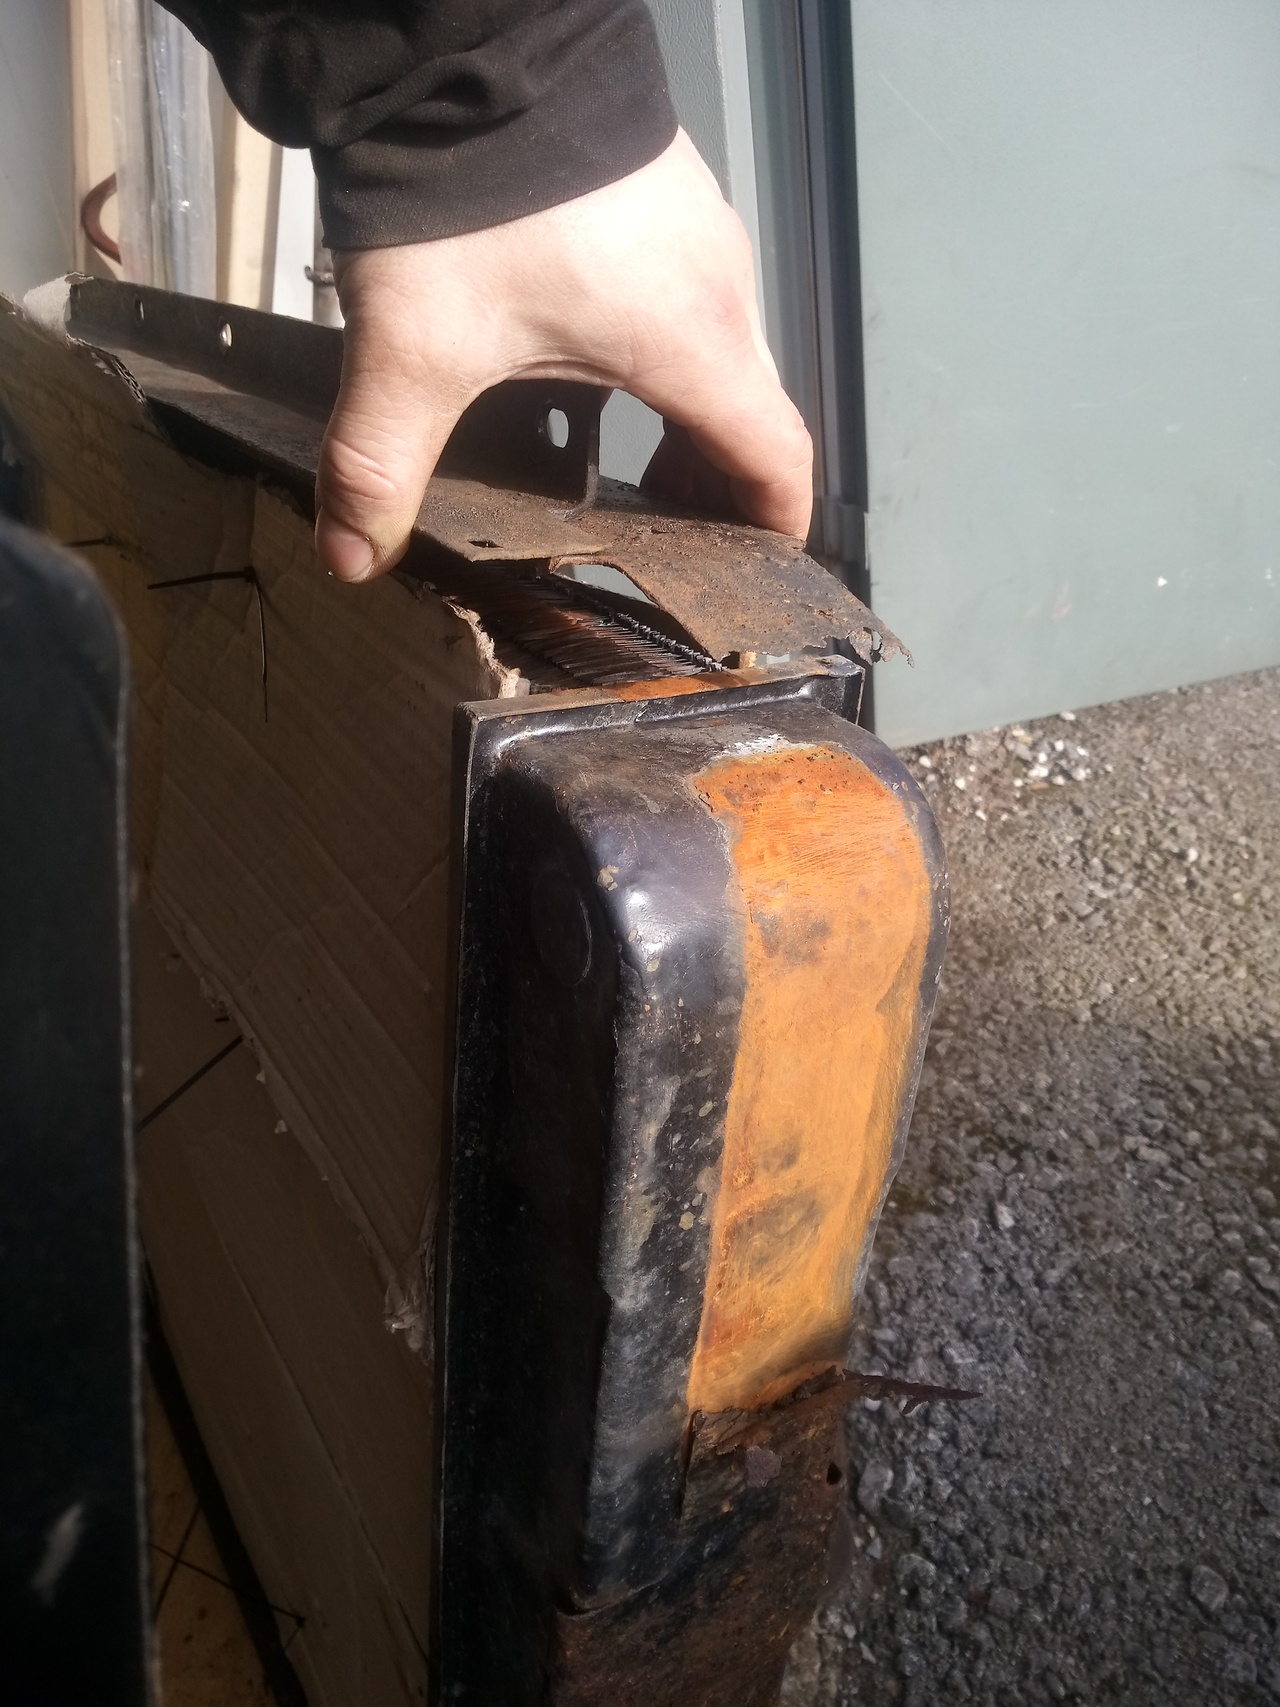 Thankfully, this shouldn't cause any leaks, it's just a structural concern, but I'm confident I can fix it. Radiator is currently sitting in the back of the workshop for now, swaddled in cardboard. Spotted why this tool locker likes to fill up with water: 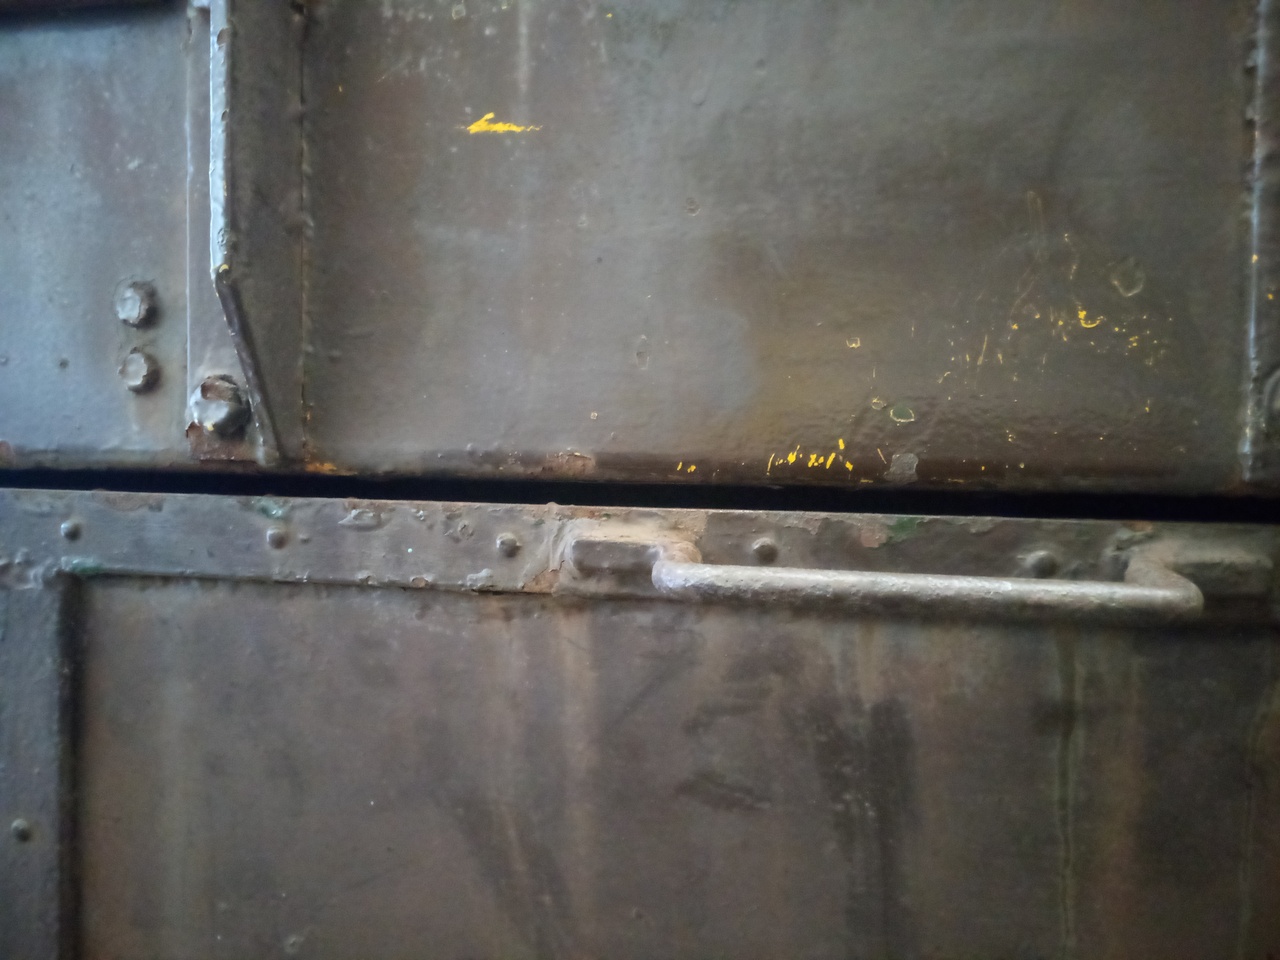 Another thing that shouldn't be too hard to fix. Also low priority for the time being, but I would like to have it sorted before the truck next has to start living outside.
Found my tin of black paint! ...And fought one hell of a paint skin: 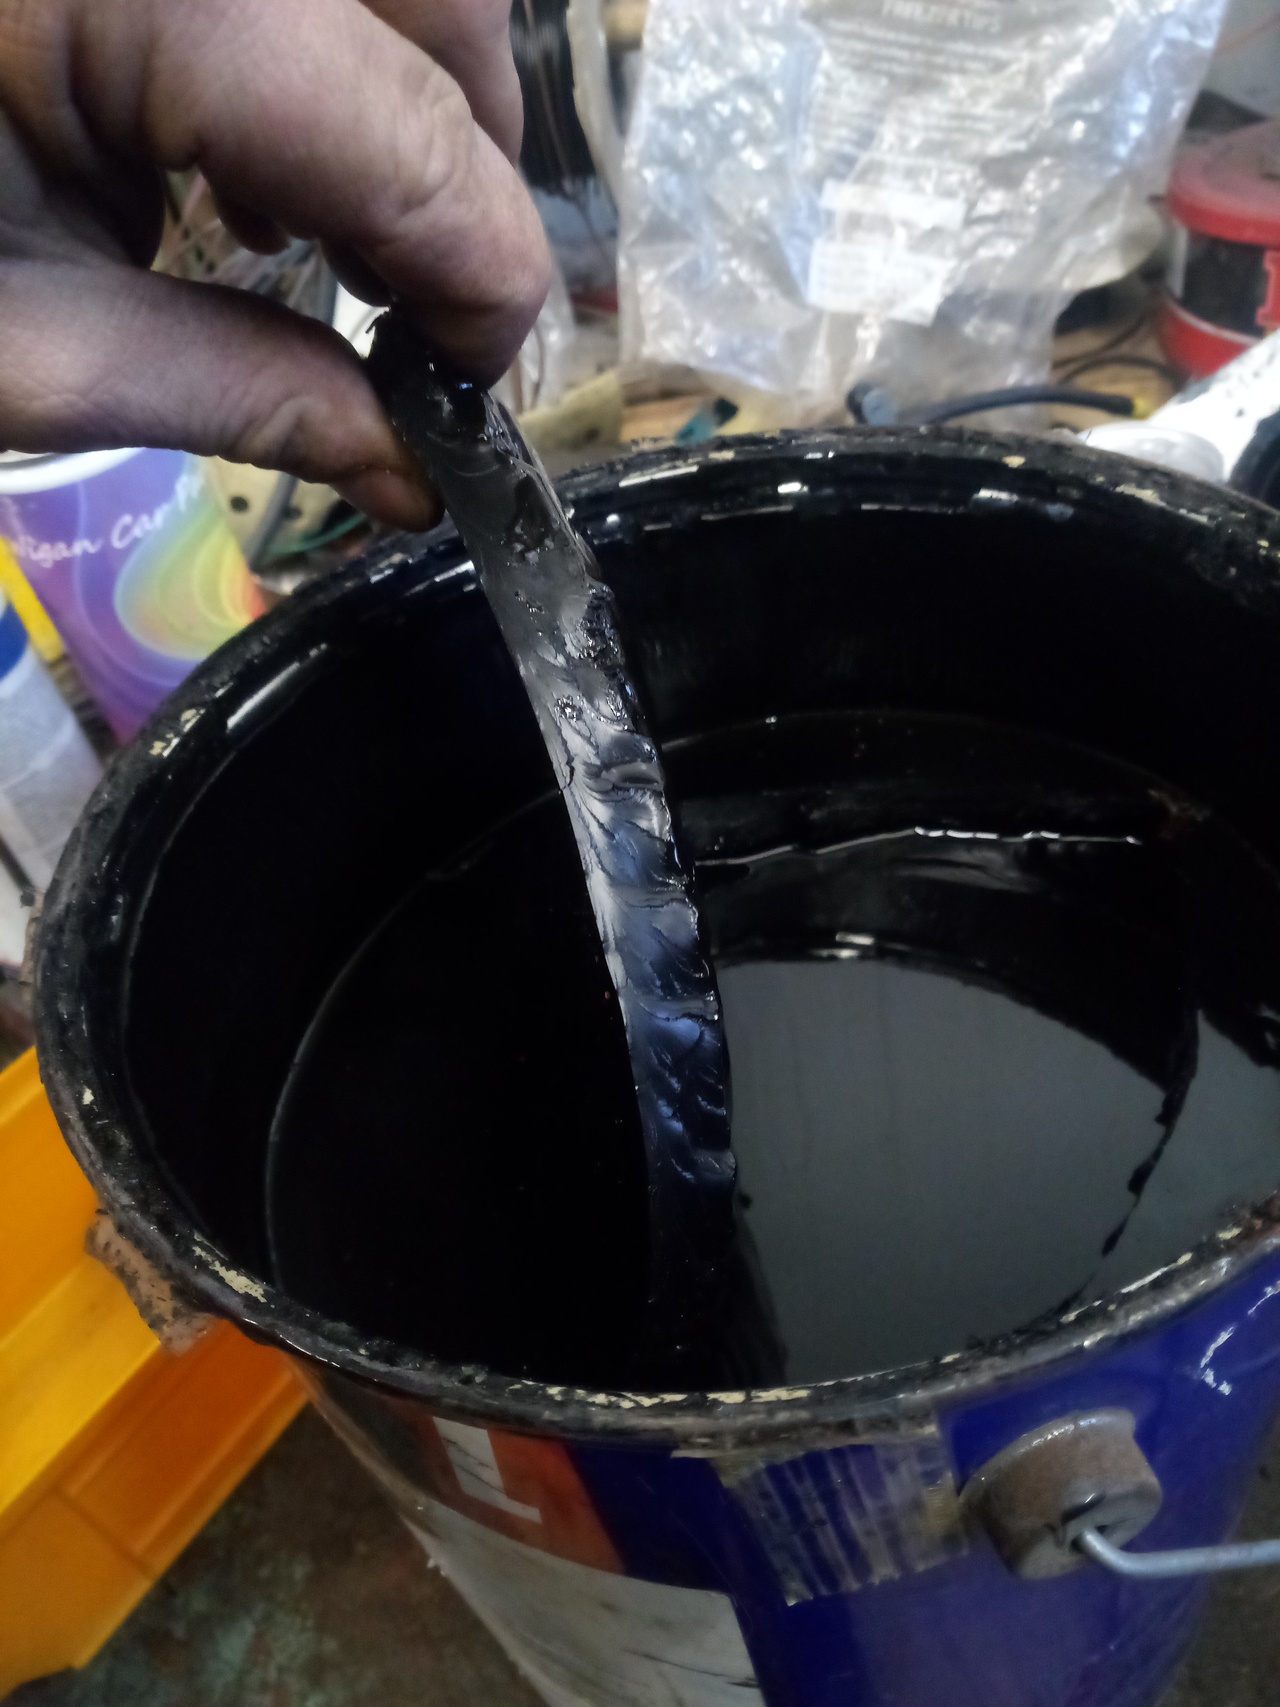 Paint skin battle won, the brush-waggling can get underway. 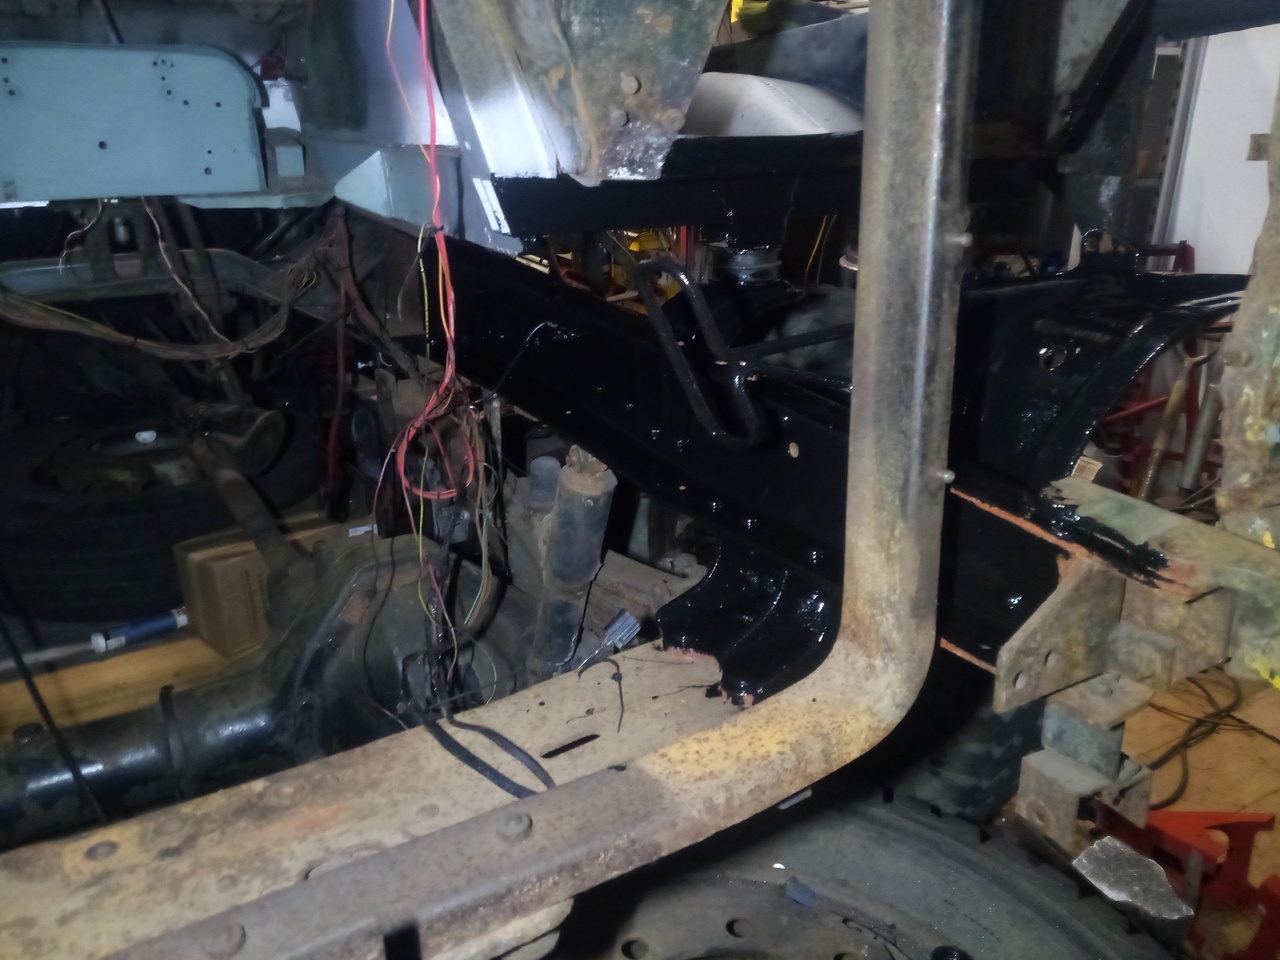 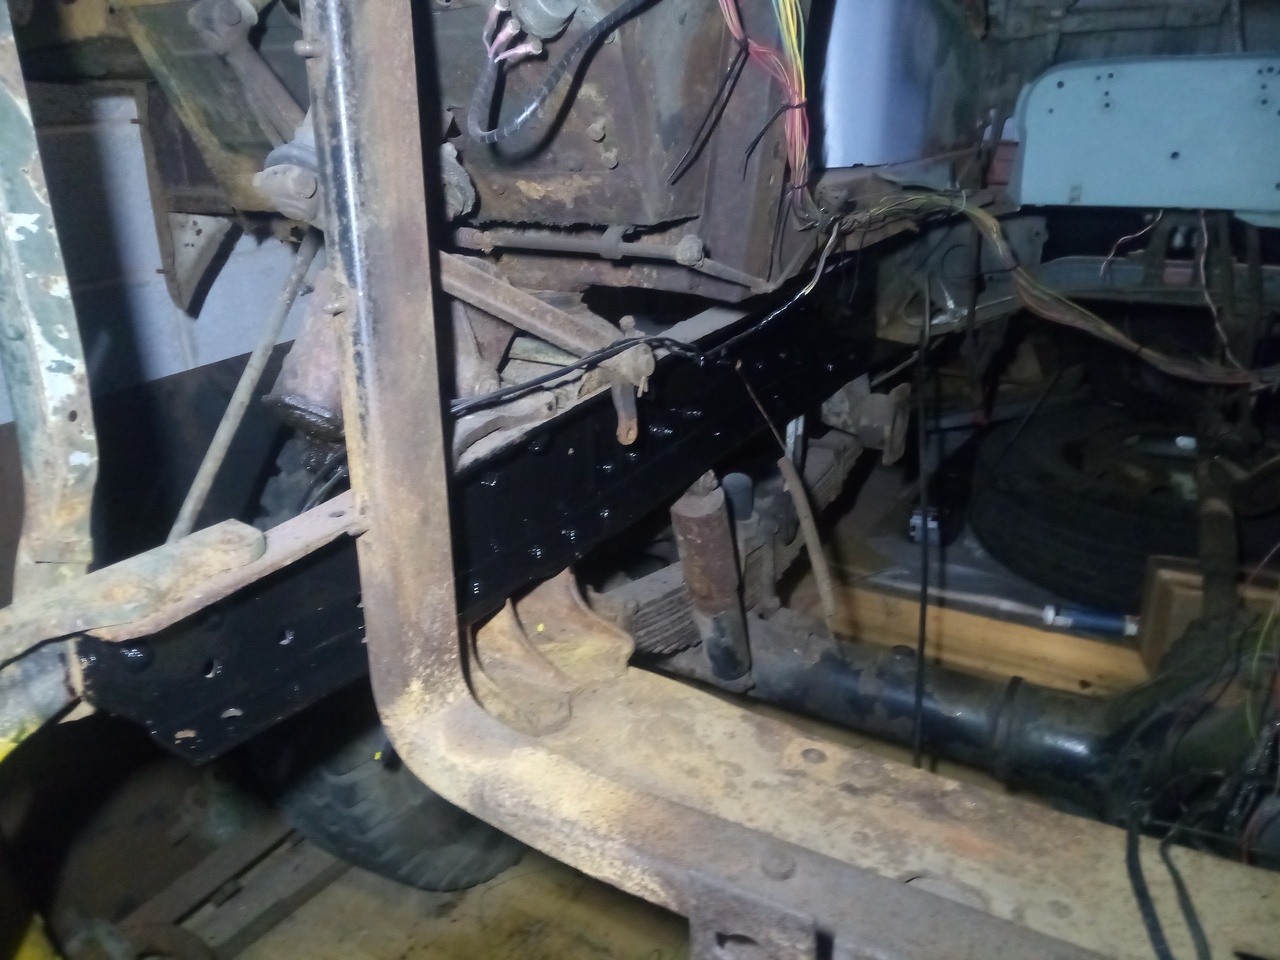 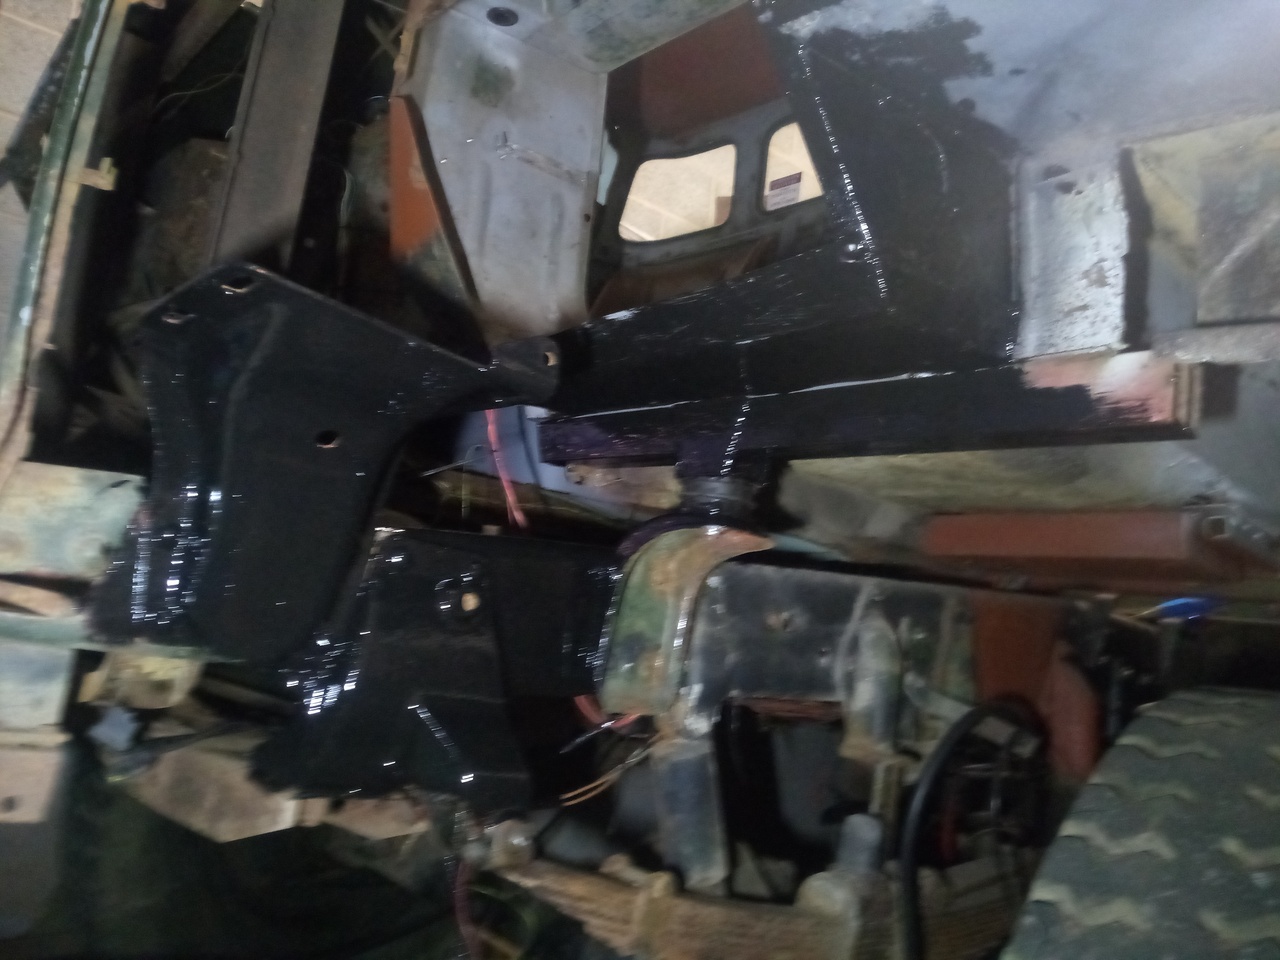 I've set myself the goal of having the engine back in the truck before September, which gives me a clear list of priority items, mostly prep-work in and around the engine-bay. Generally, stuff that will be significantly more awkward to do with the engine in the way.
While I was in there, and with some extra working room thanks to the removal of the radiator, I thought I'd pick away at the wiring a little more; tidy up some of that horrible temporary stuff that was accumulating behind the dash. (Rotten, rained-on choc-block terminal strip...) 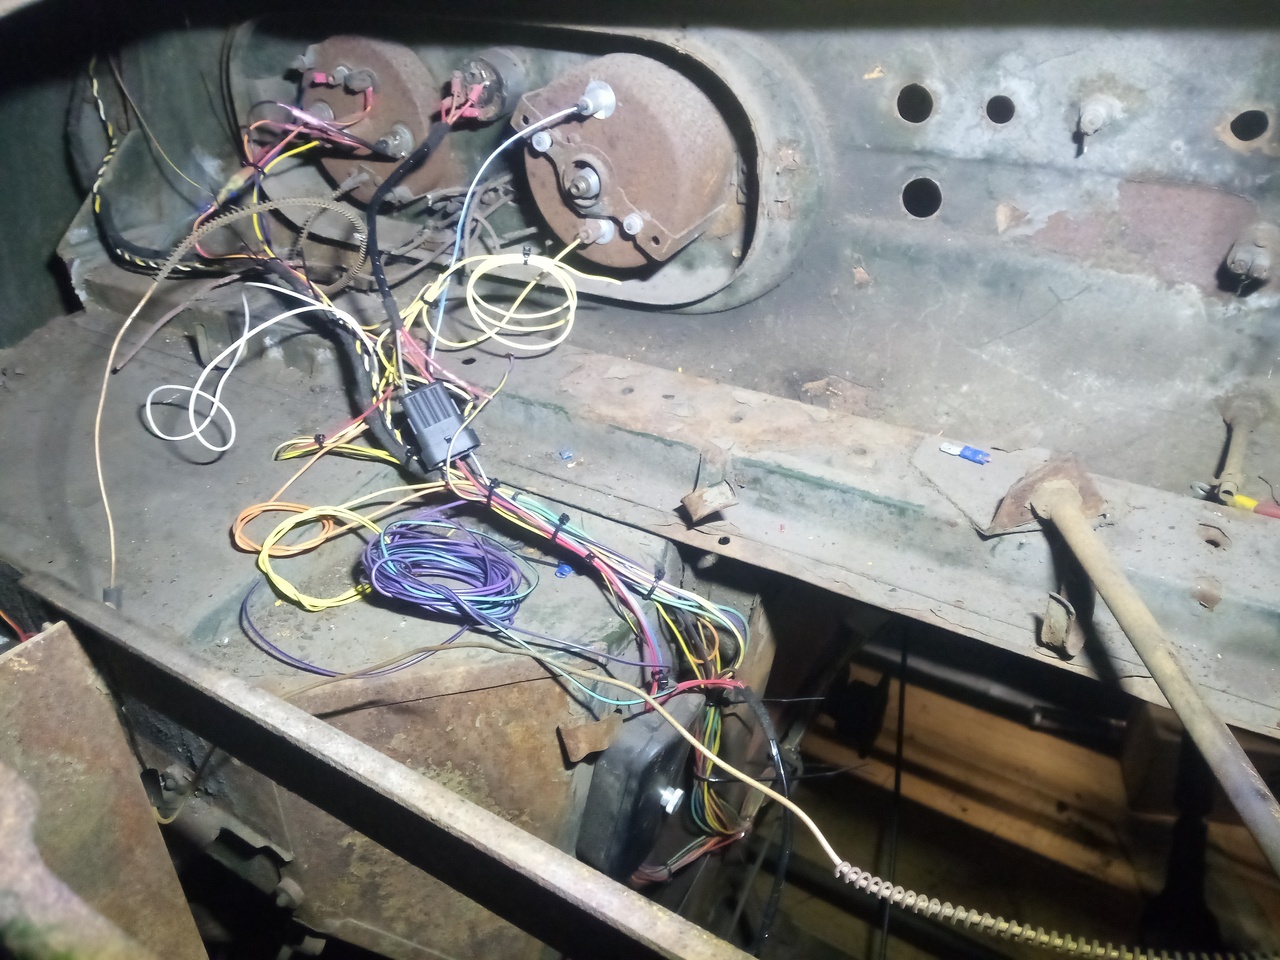 And that vantage point really shows off how varied the corrosion is in the truck... Top of the driver's side footwell, and cheek vent: 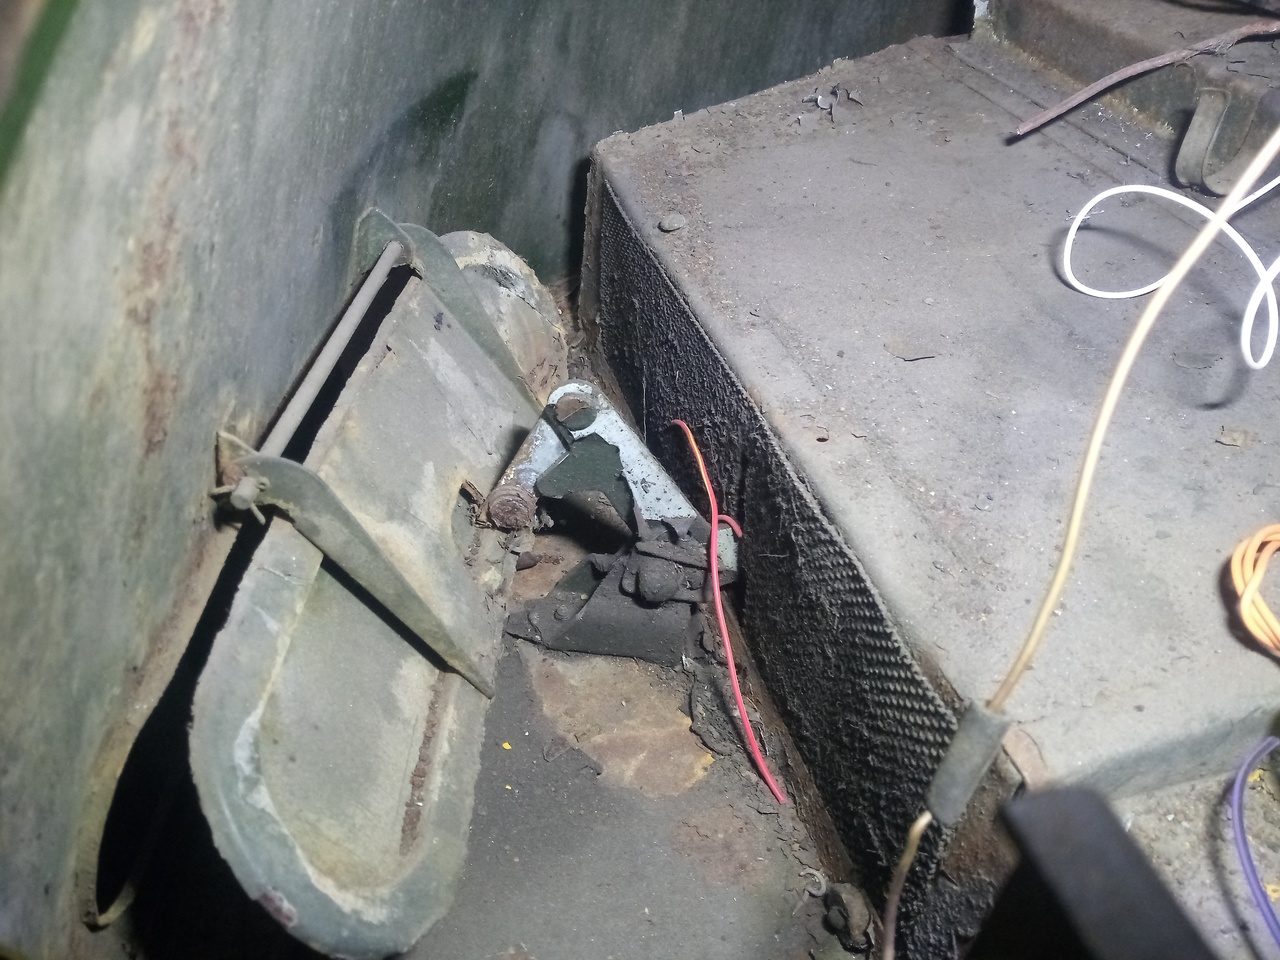 I think this should be relatively painless to clean up, paint, and call good. Top of the passenger's side footwell, and where the cheek vent used to go: 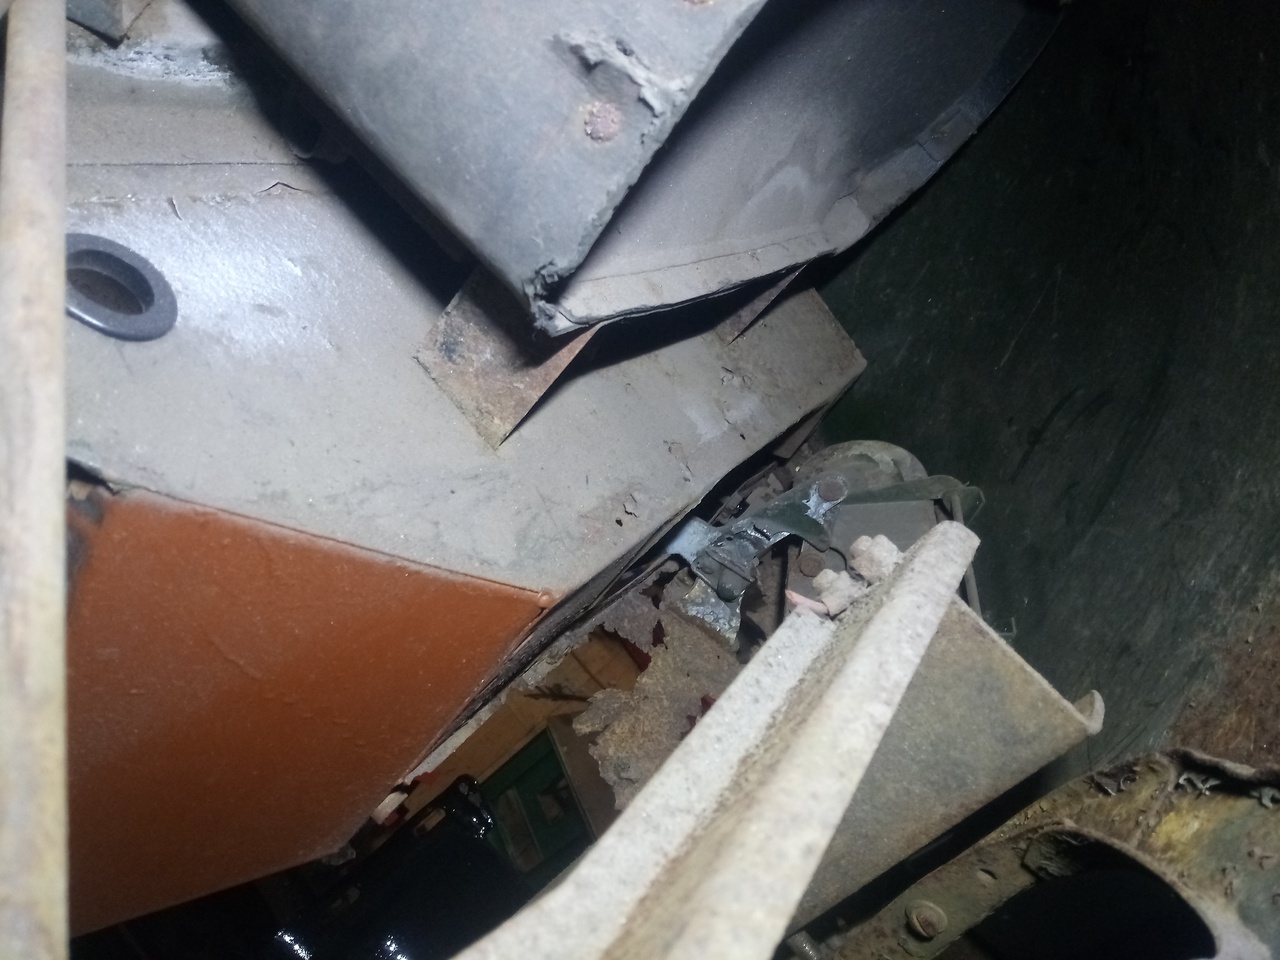 This side, however, is going to involve some CAD work and a grinder.
I also spent some more money (ow) and got a nice big length of battery cable to run to the rear of the truck, to supply power to my trailer relay box. That's mostly complete now, though I still need to fit the little load-sensing trailer indicator warning thing. I also don't want to fit it as is, because it's supposedly designed to be wired inline with the feed out to the socket, yet they've chosen to build it with hair-thin wires. Not the most confidence inspiring. (It's a Ryder TF1152.) 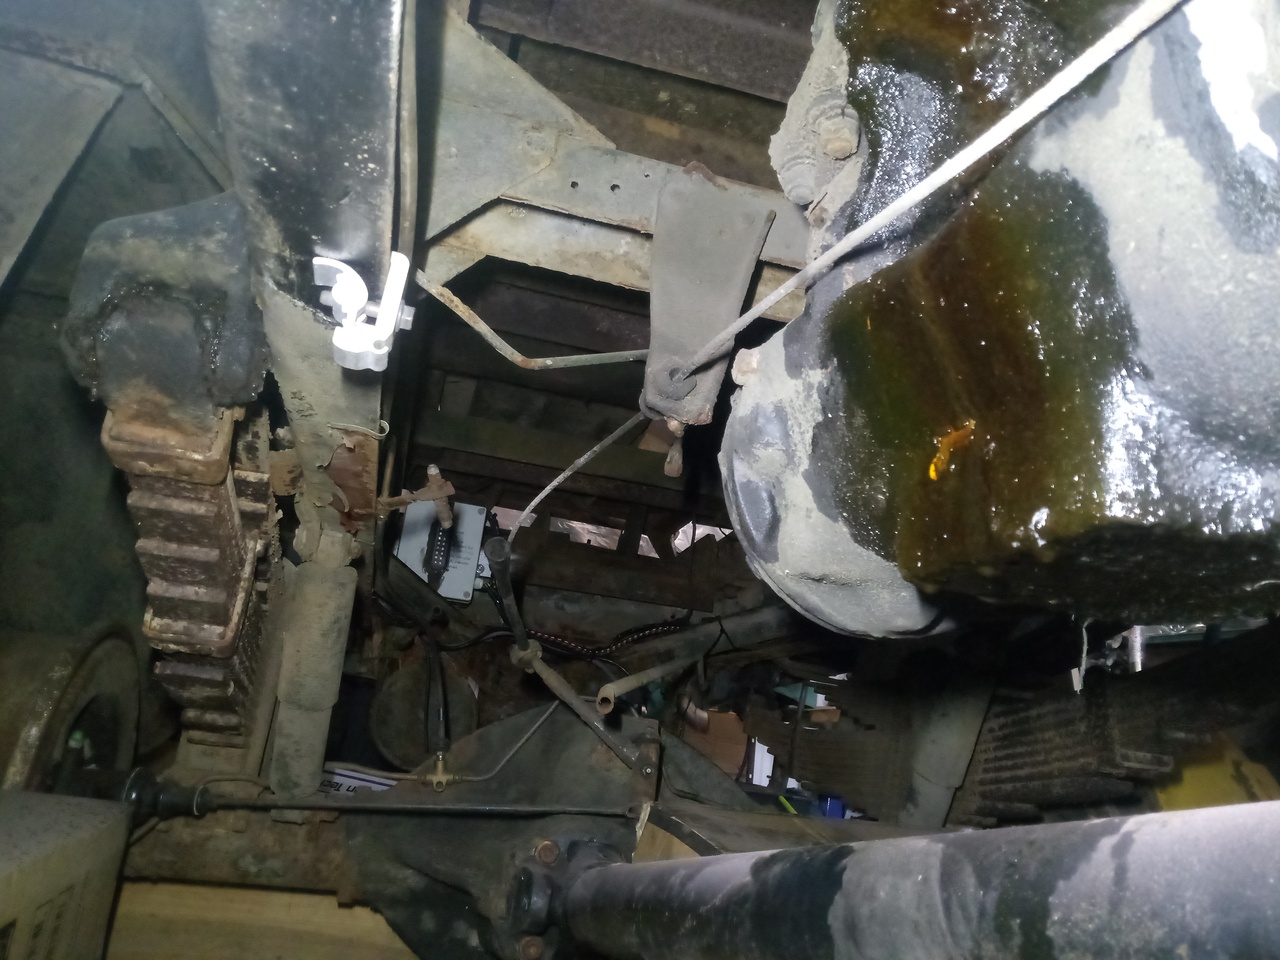 Shown here, the relay box hiding in the back of the chassis, and the oil leak from the winch that I am currently ignoring because fixing it will be a nightmare of a job. 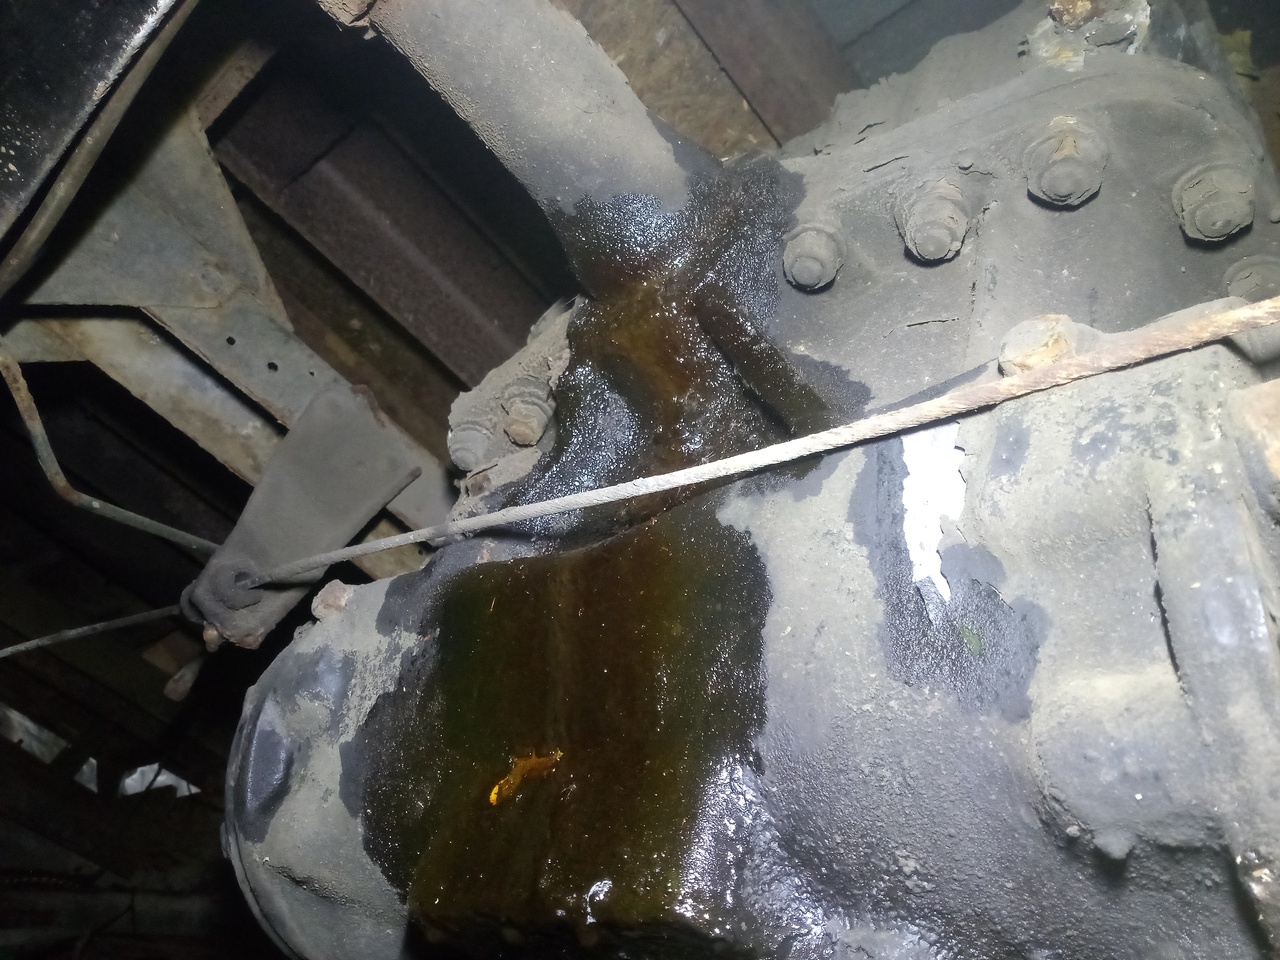 *shudder*
In better items, the main distribution block is coming in quite handy. I've got a little bag of midi fuses for it, and also a length of copper bar to make up the tiny little bus-bars that connect the bottom terminal of the fuse, to the post where the cable connects. 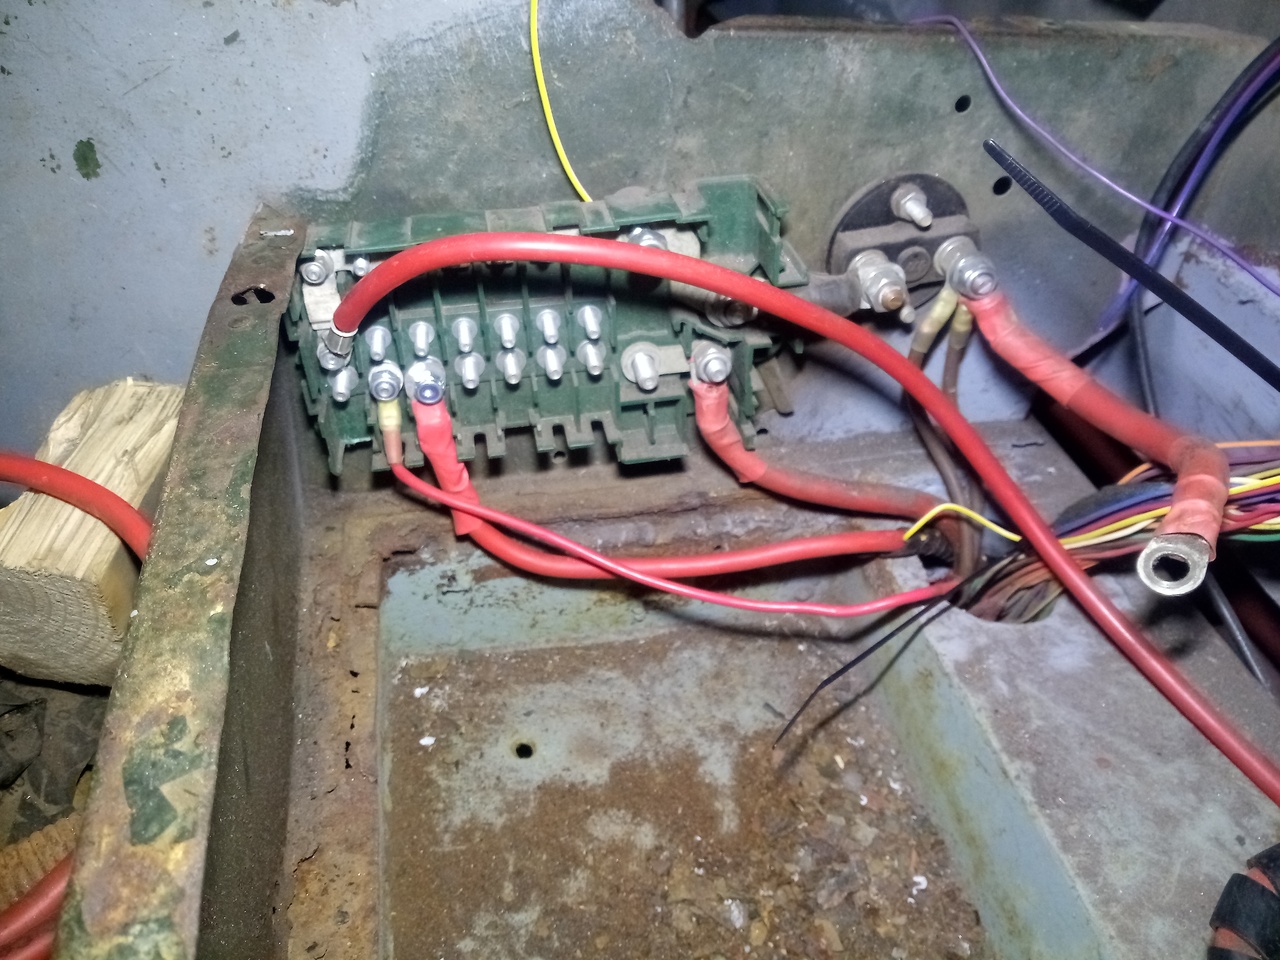 This distribution block is from a BMW X5, and if you decide you're going to grab one for power distribution purposes, make sure you get the little dog-bone bus-bars because they are not built in, like I assumed they were. So that's why that cable jumps right to the centre of the block, onto the same terminal as the fuse, for now.
Moving right along, next is the removal of the radiator support & front crossmember, for the dual purposes of both improved access (no more trying to fold myself in through the rad support opening), and painting aforementioned items. Of special interest -- and I don't recall if I mentioned it last time I took it apart, but if so then here we go again -- are the nuts that hold the front crossmember in: 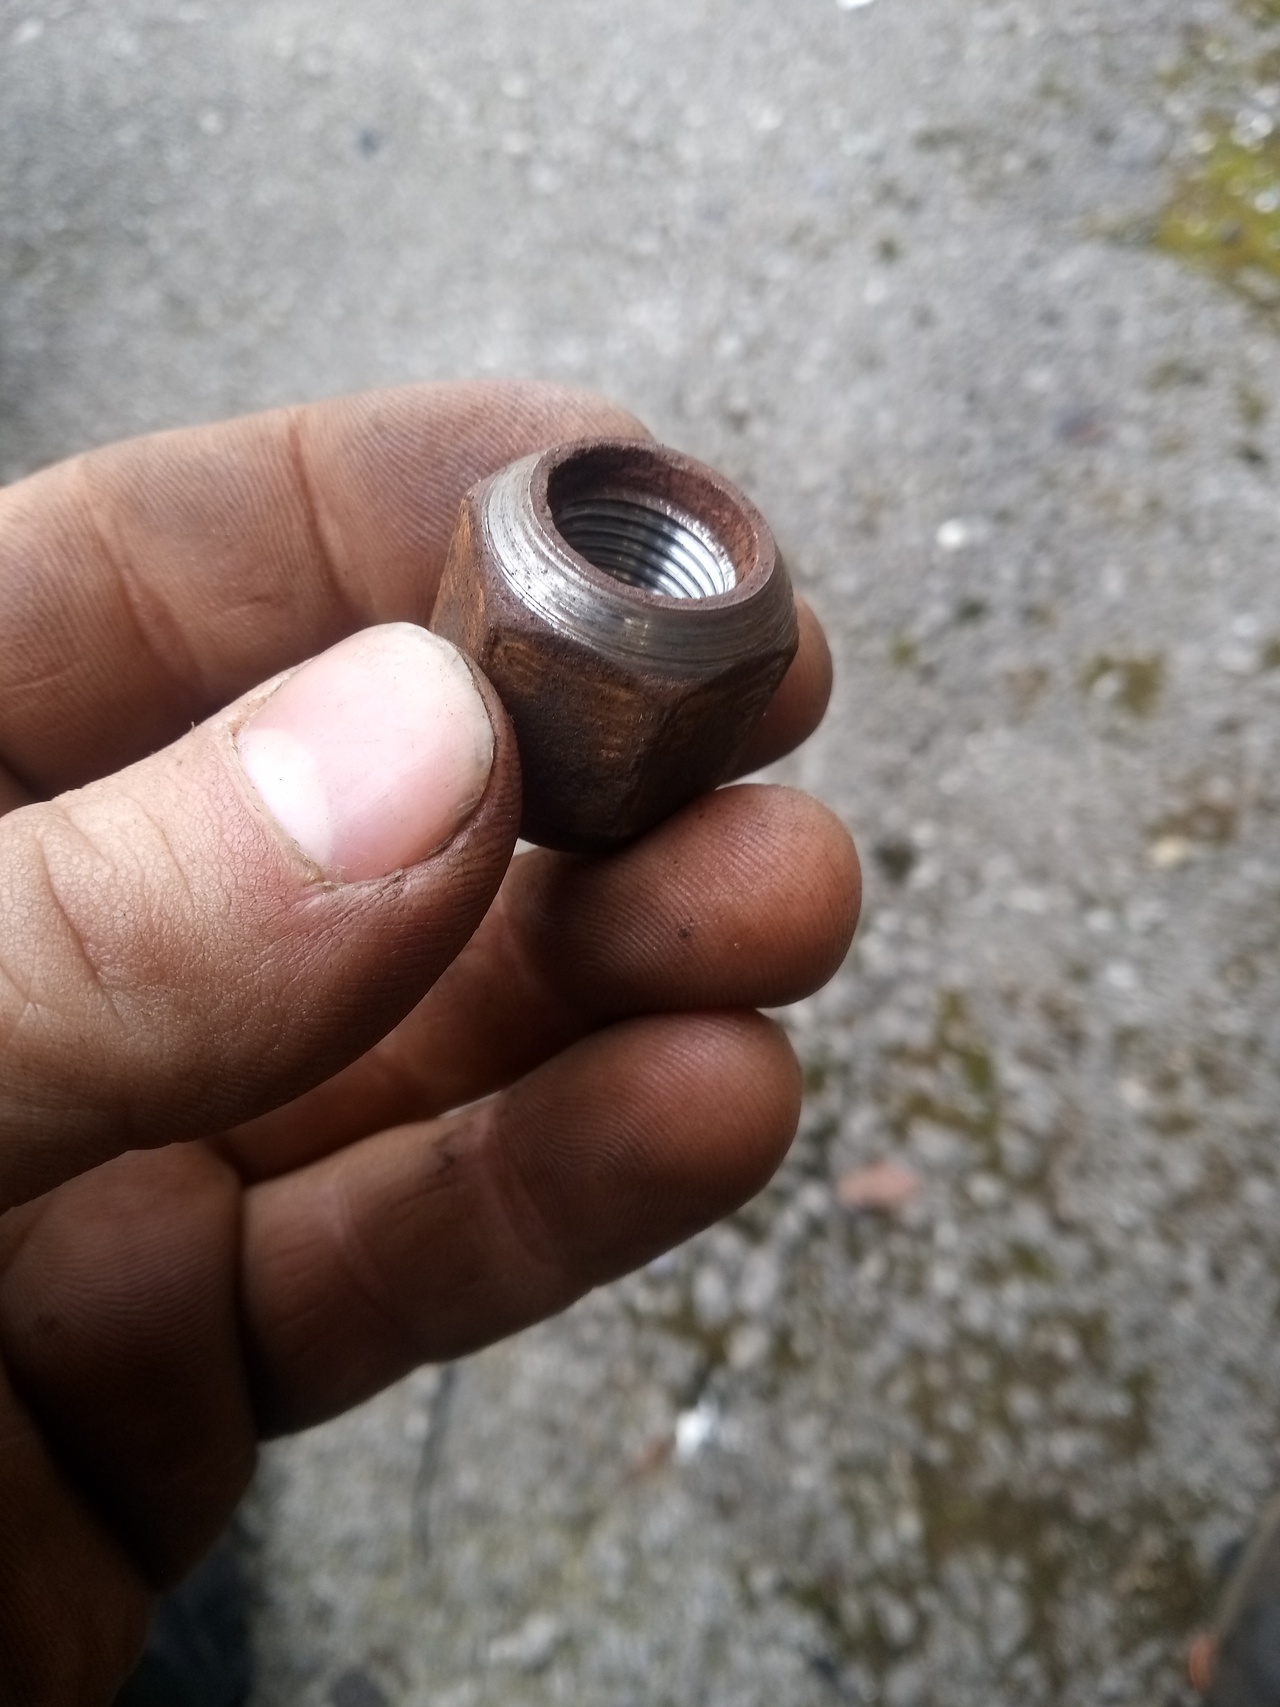 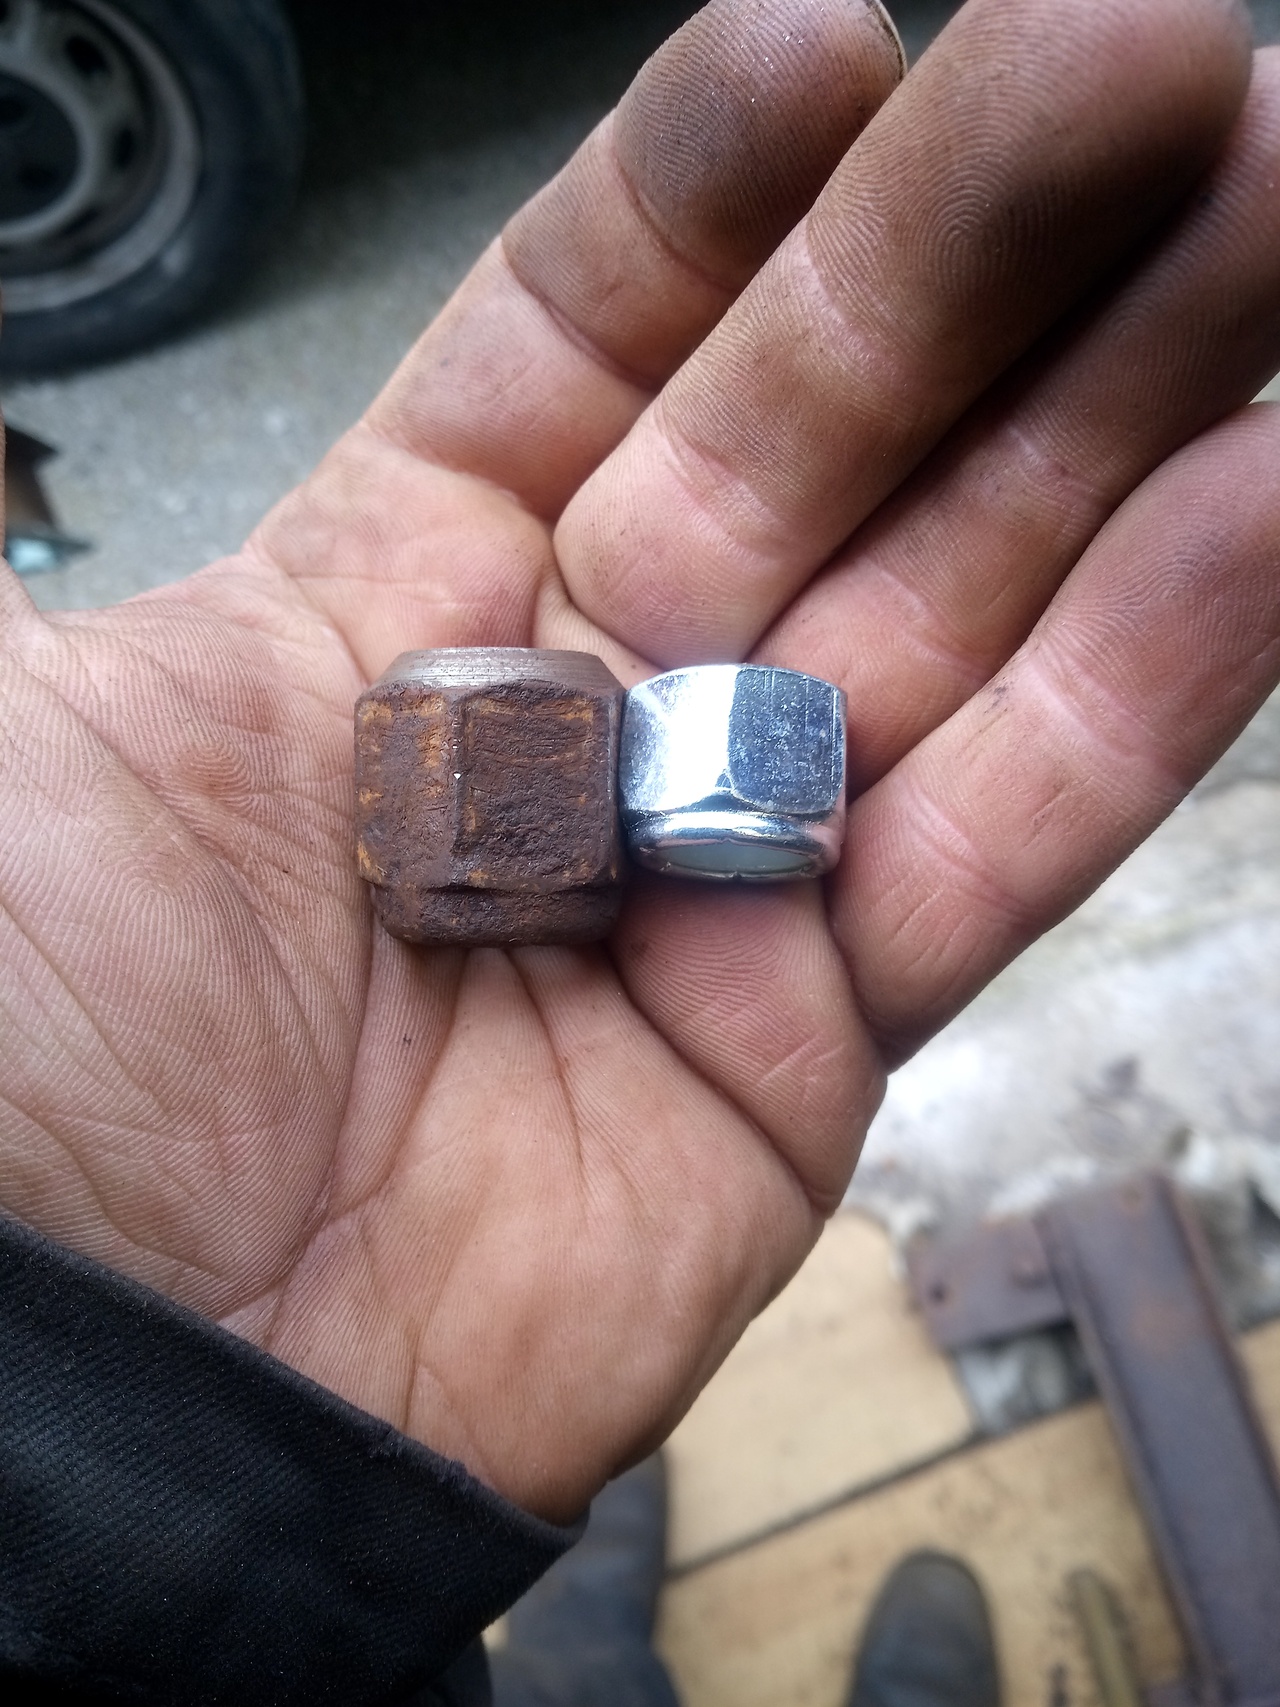 They're a strange thing: double-height, conical seat, 9/16UNF nylocs. The crossmember has little chamfers to accept, and locate on, the conical bits of the nuts. 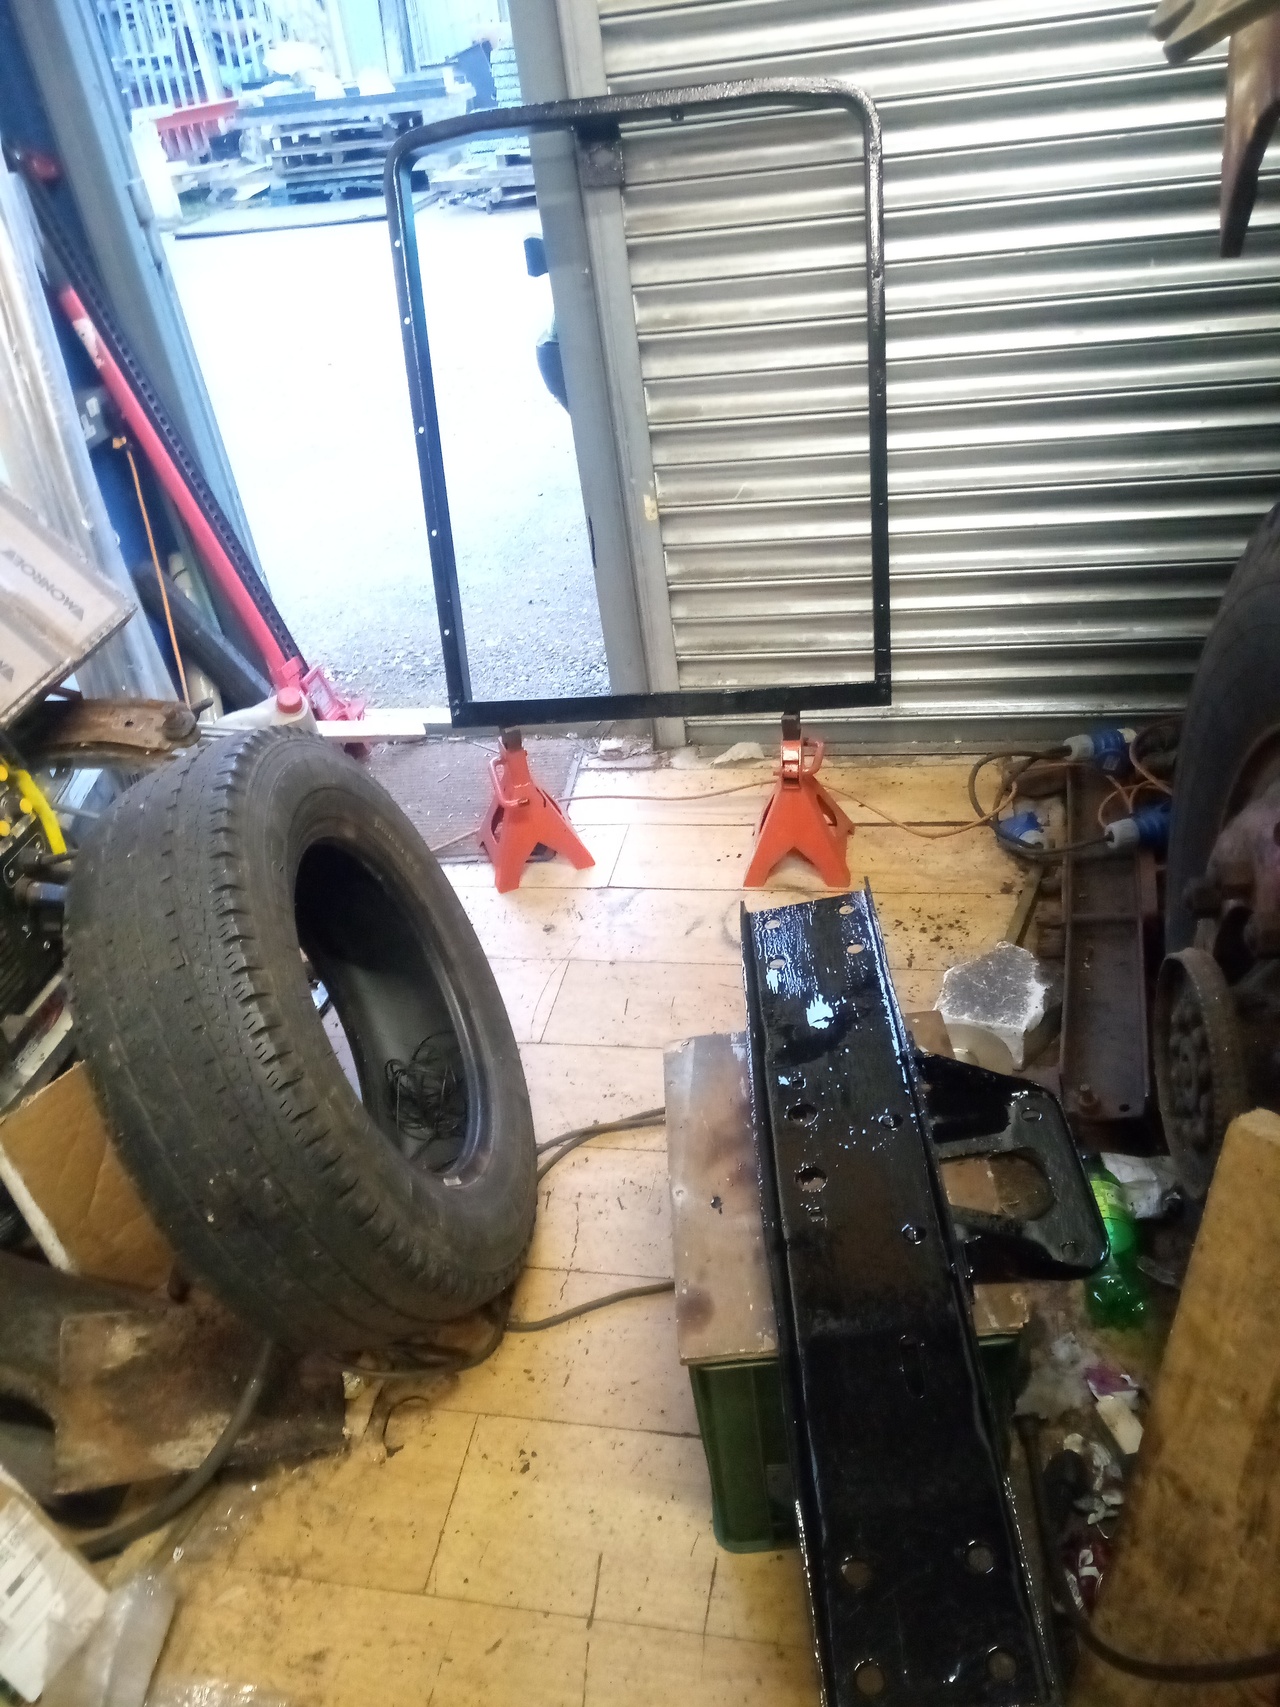 Painting ensued. Naturally, it kept sprinkling with rain as the day wore on, but I managed to get enough done to call it a productive day. Radiator frame fully painted, front crossmember fully primed and half painted. Additional thanks go out to the kind gentleman from a couple of units down, who donated a tin of UPol Zinc-182 primer. It's all the small things, that make a big difference. 
And that brings us to today, where I once again get overly excited and stuff wiring in before being totally finished with everything else! I do like a good bit of wiring. 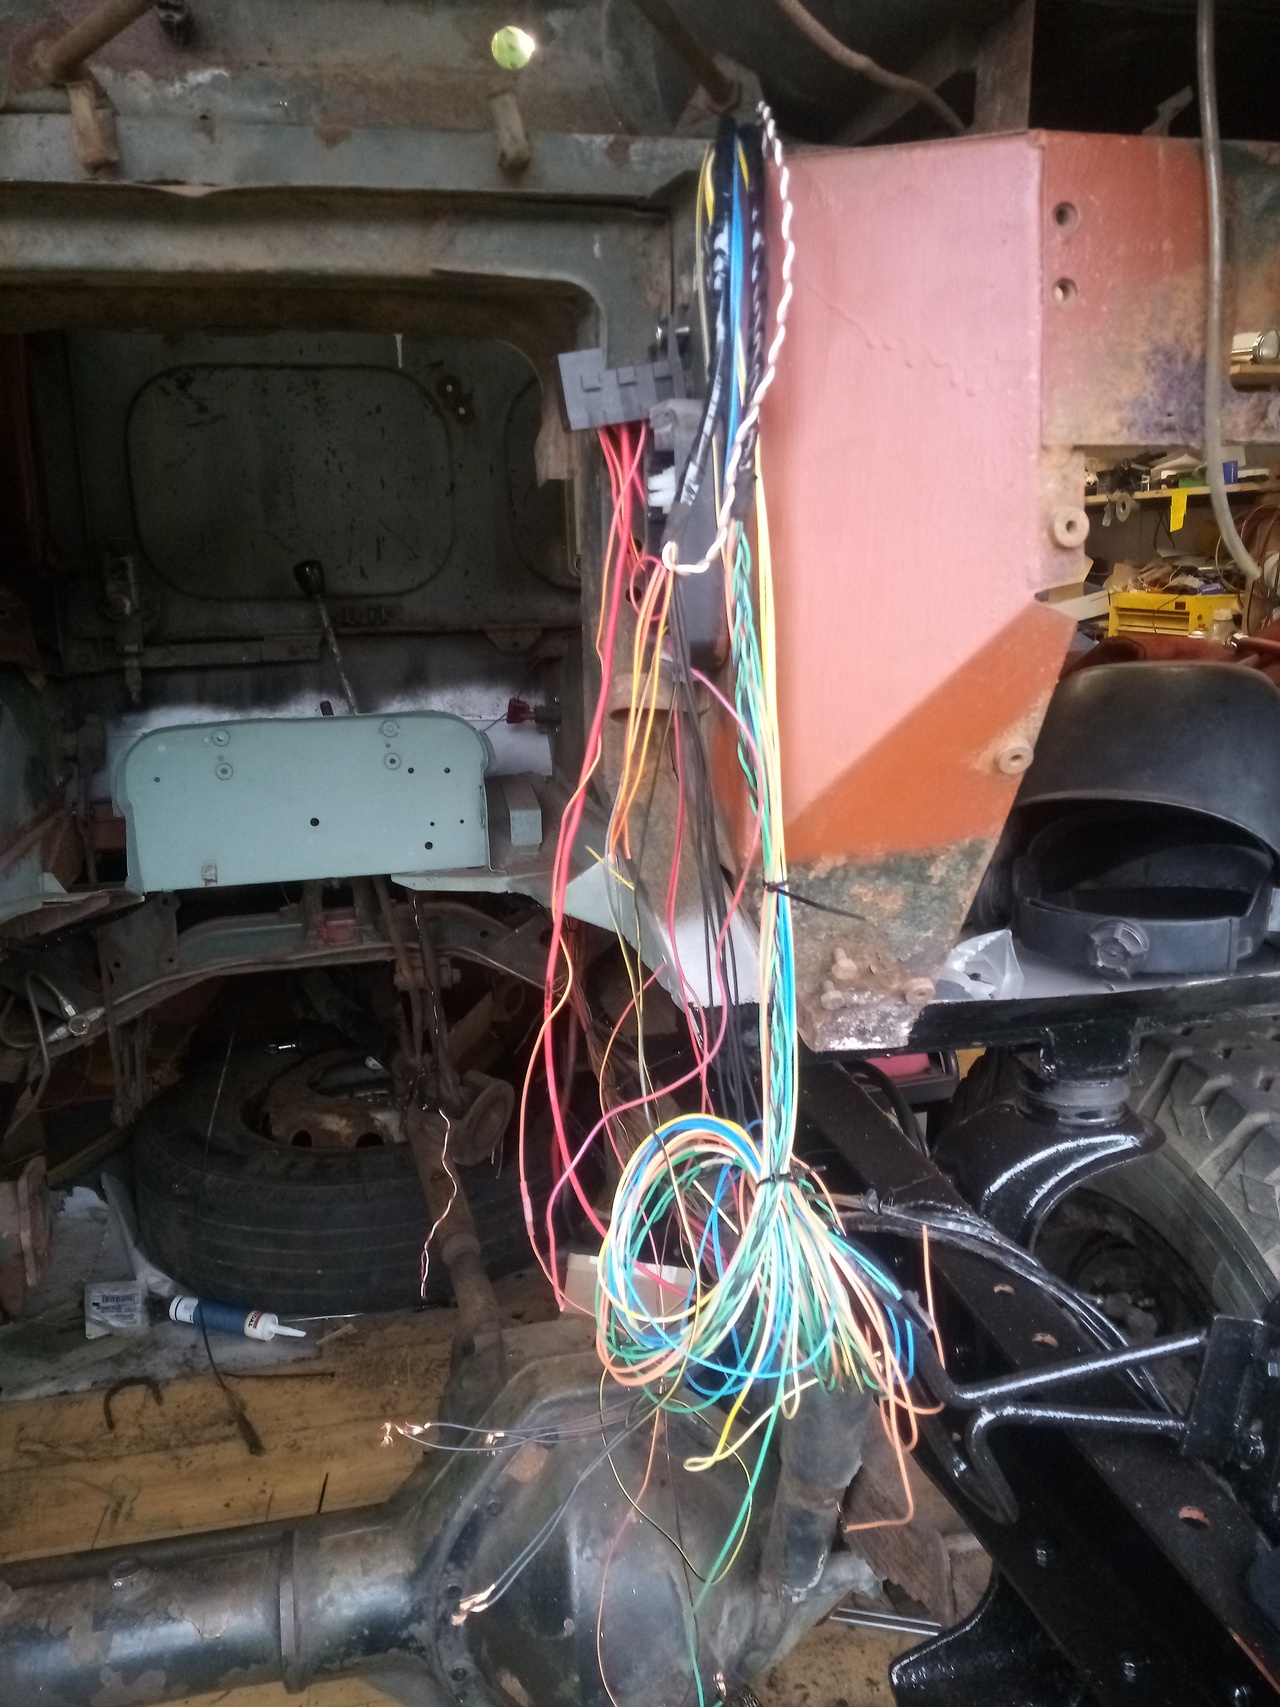 That's the ECU loom stuffed through its grommet (mostly so I can stop tripping over it in the workshop), and the funky little relay setup that will provide power to the ECU, wideband controller, ignition coil, and injectors. Thanks to a quirk of the MS2-like controller, I have to make sure I don't provide power to those latter two items until the ECU is fully booted and the engine is ready to start, which is achieved through a pair of relays set up to self-latch at the appropriate time. I am going to have a fun time drawing up schematics for all of this... 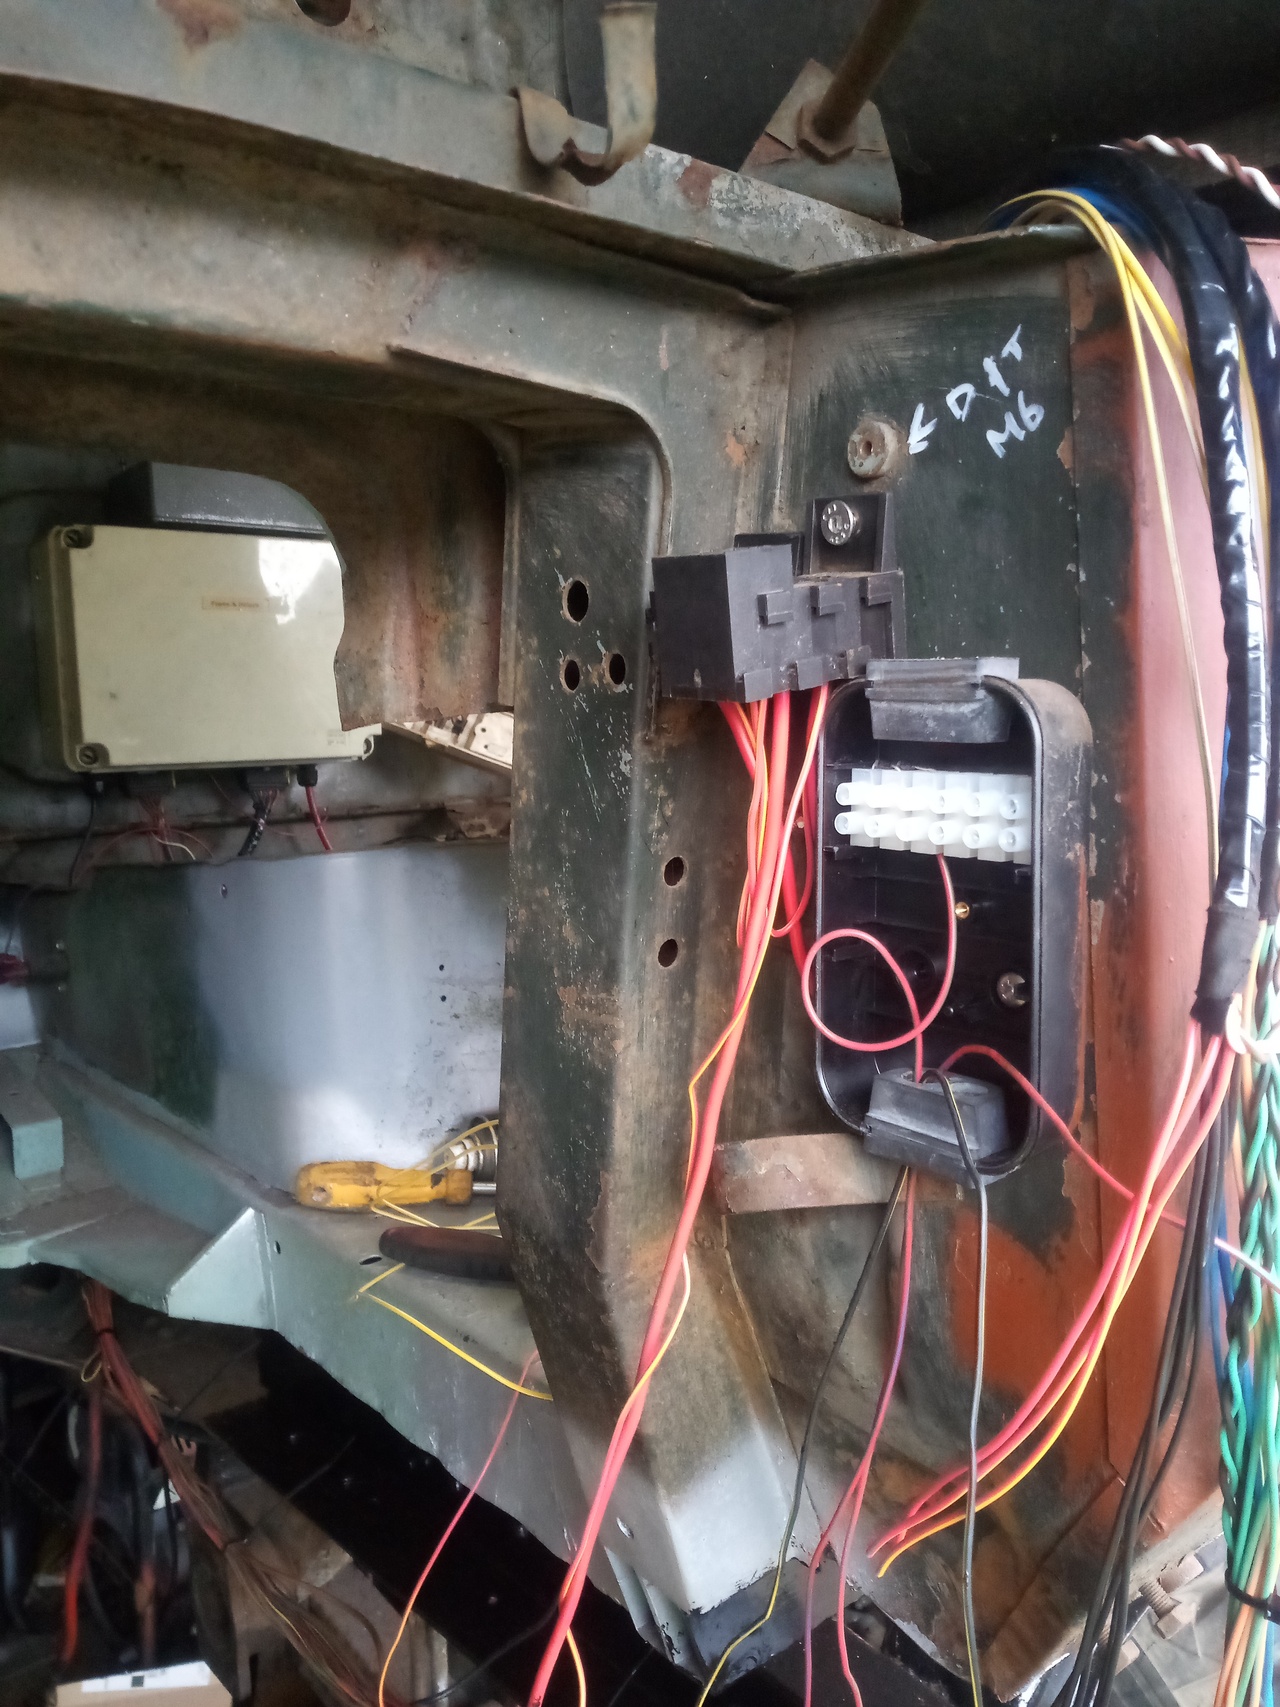 The first relay is triggered by ignition power, providing 12v to the ECU & wideband controller, as well as forwarding the power feed to the second relay's terminal 30. The second relay is triggered by the starter switch (terminal 50, if you will) and latches itself on, providing power to the injectors and ignition coil. The whole mess releases itself upon the ignition being turned off, and there are diodes to prevent it backfeeding & holding the starter engaged. If you're thinking that's an awful lot of wire, you're not wrong!  Enough for various sensors, an idle control valve, 3 injectors, and the 3 coils (with capacity to convert to individual per-cylinder coils if desired later.) Good job I like wiring! (If someone asked me to come up with a wiring harness for their truck, I don't think it'd be to quite this level of excess, to be quite honest. There's a lot of stuff that's changed as I was doing it, which has lead to some vestigial weirdness, and also I just ... enjoy wiring things. For one, the sensible option would be to just buy a trailer relay box...  )
Having come to a stopping point on that, the next item on my priority list is that offside cab crossmember. So up comes the cab... 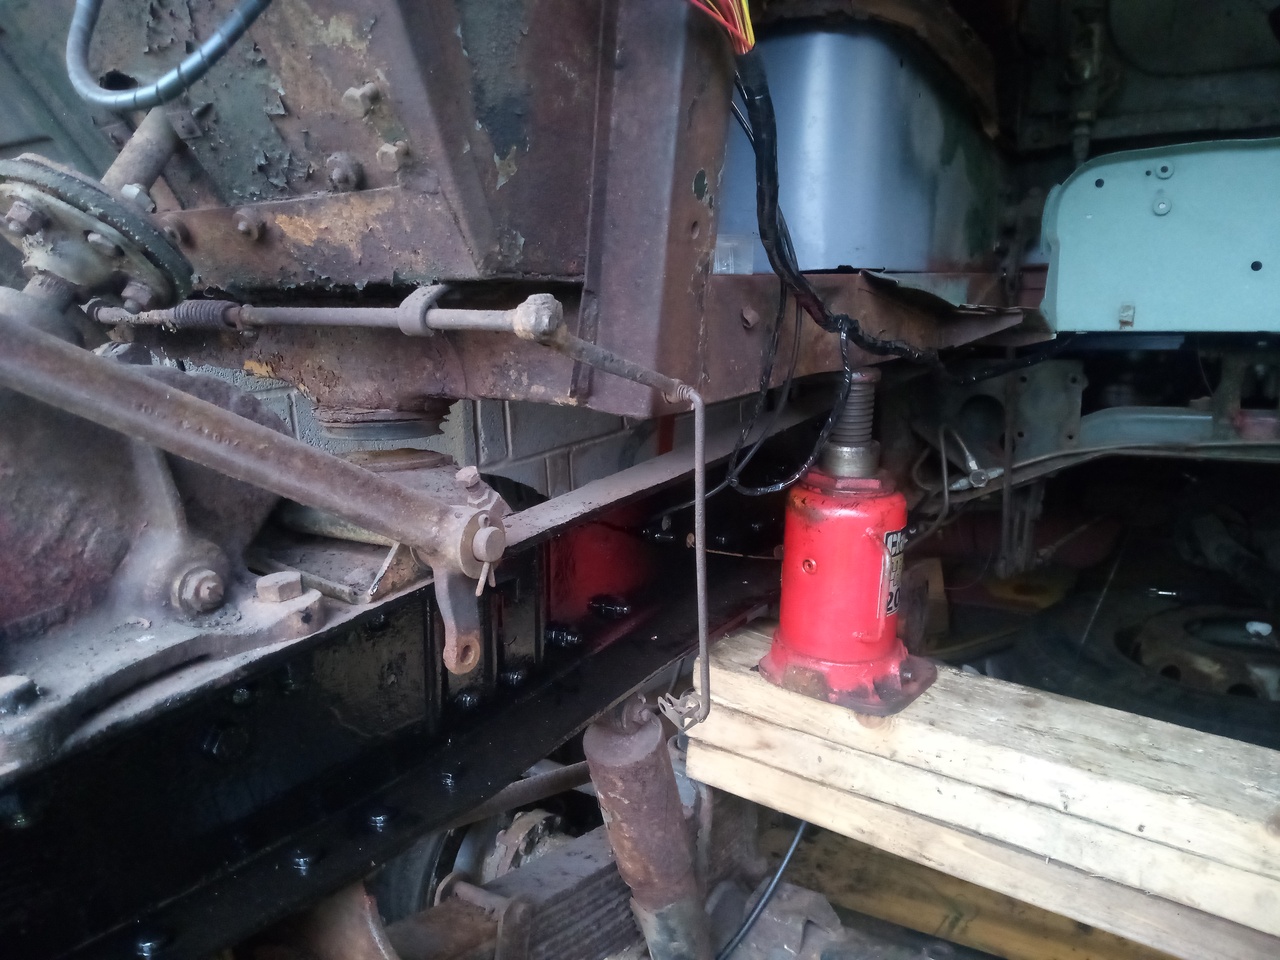 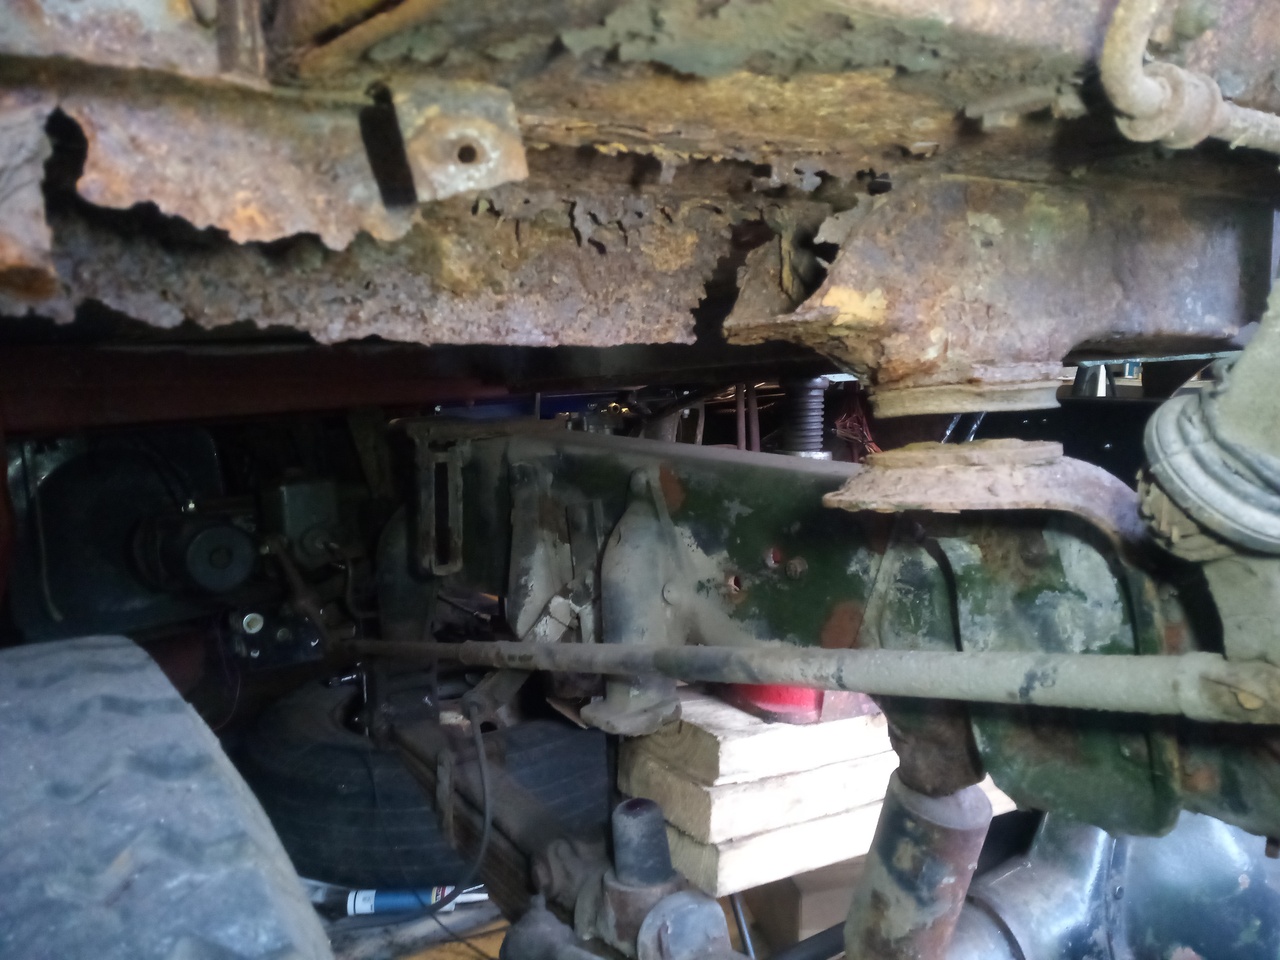 I remember lifting the nearside with the farm-jack, but for some reason I couldn't manage it this time without hitting everything, so instead I settled on this... uh. work of art 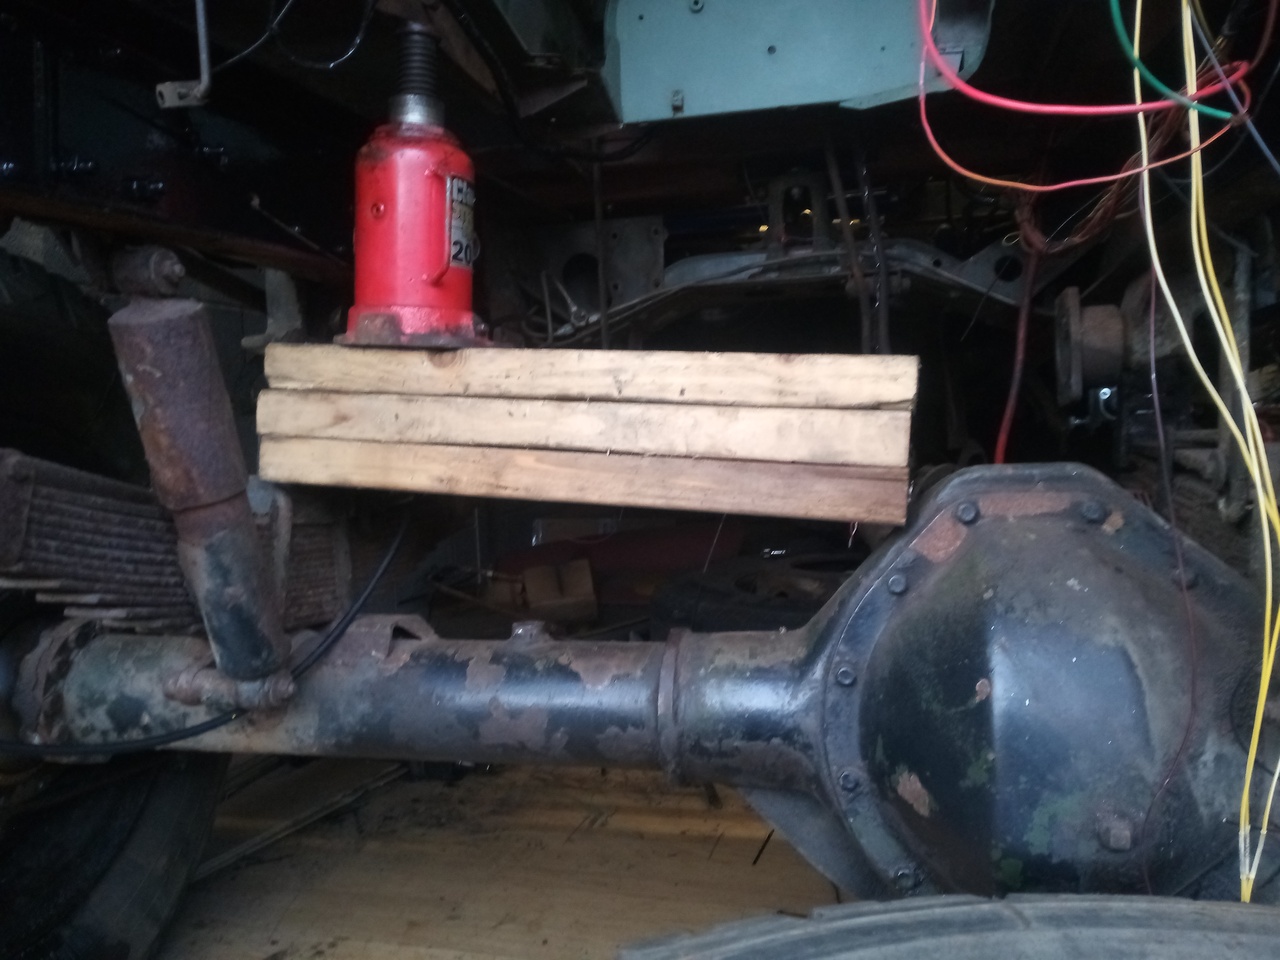 Thankfully, the driver's side floor is less teabagged than the passenger's side was; but it's still going to be a good bit of work! 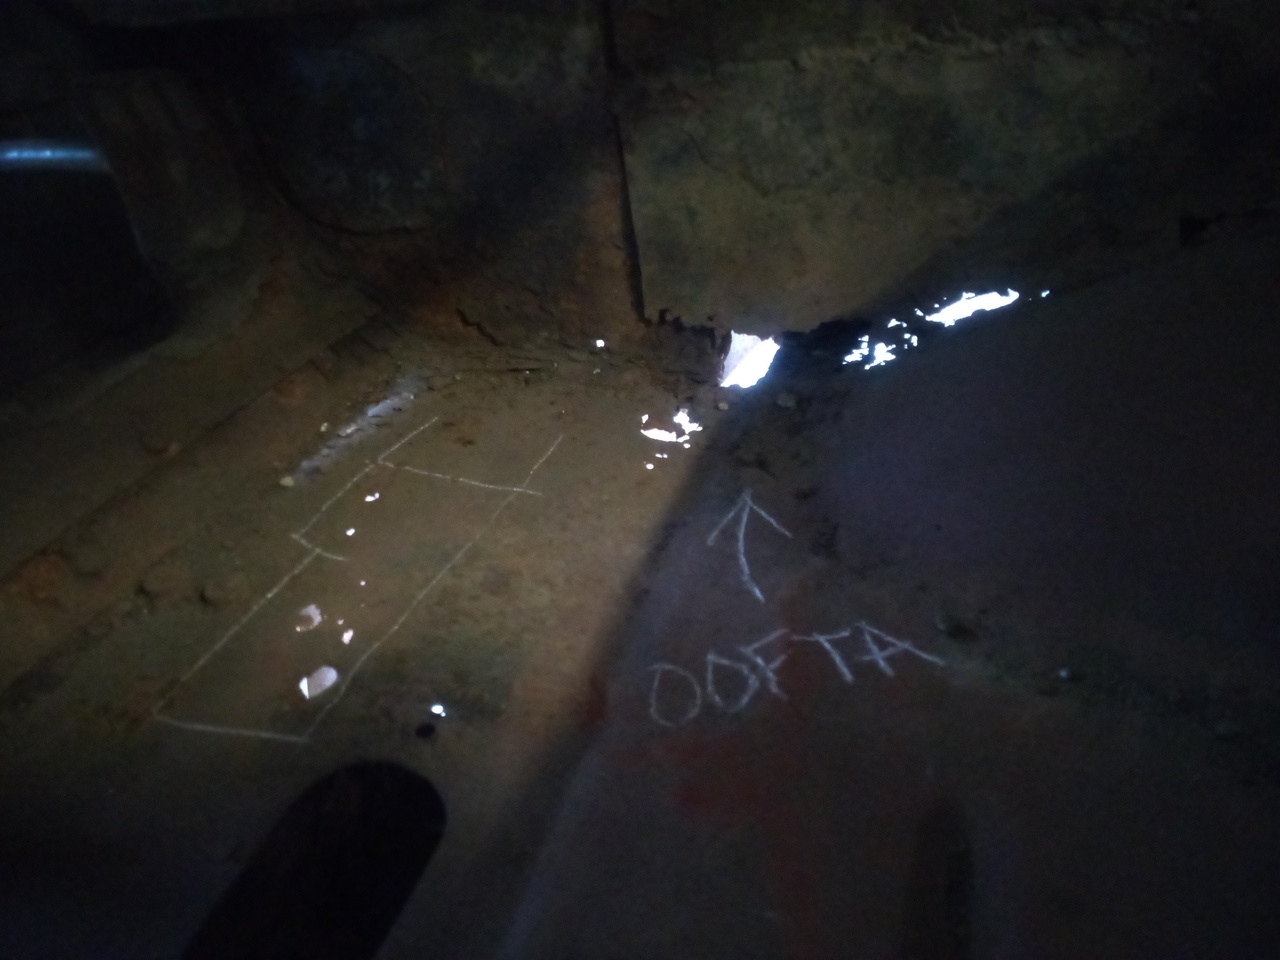 And the only way to make progress, is to find a bit to start with... 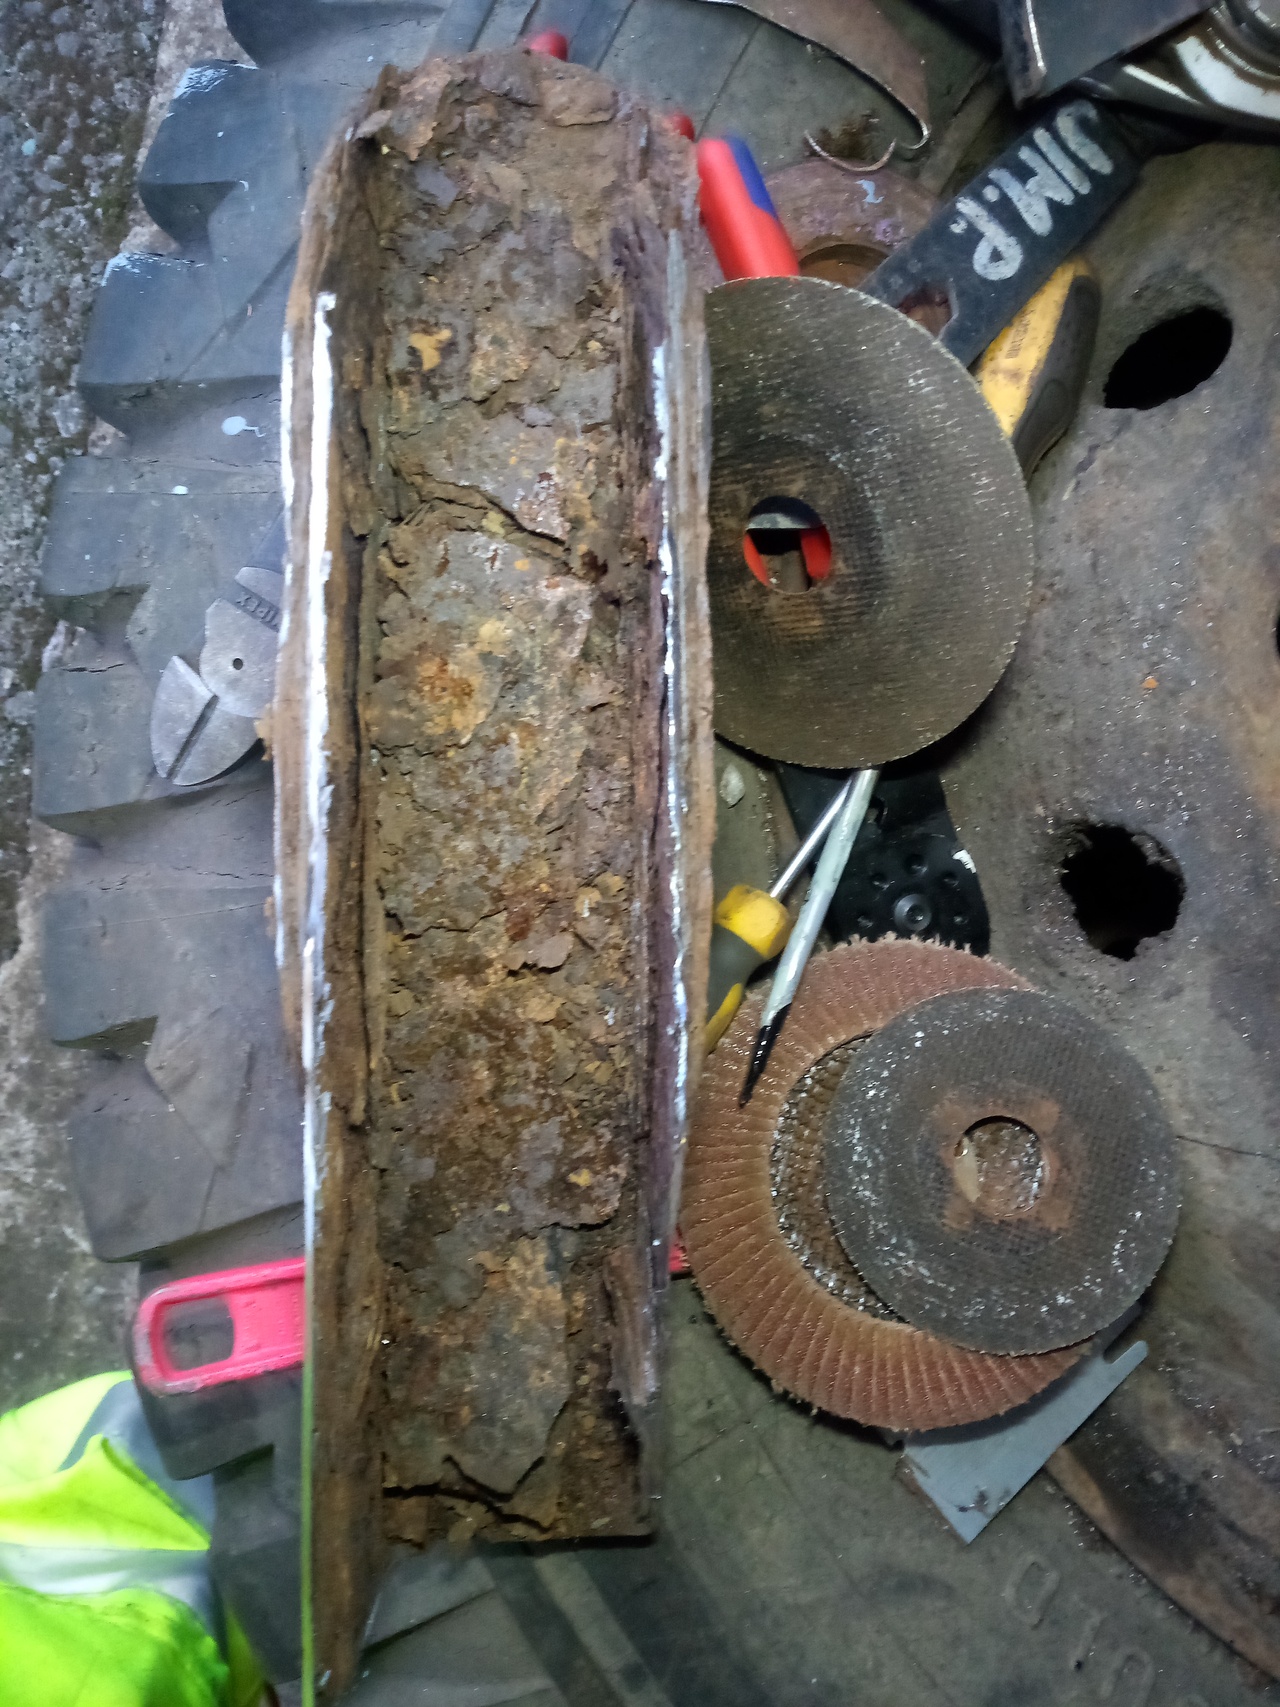 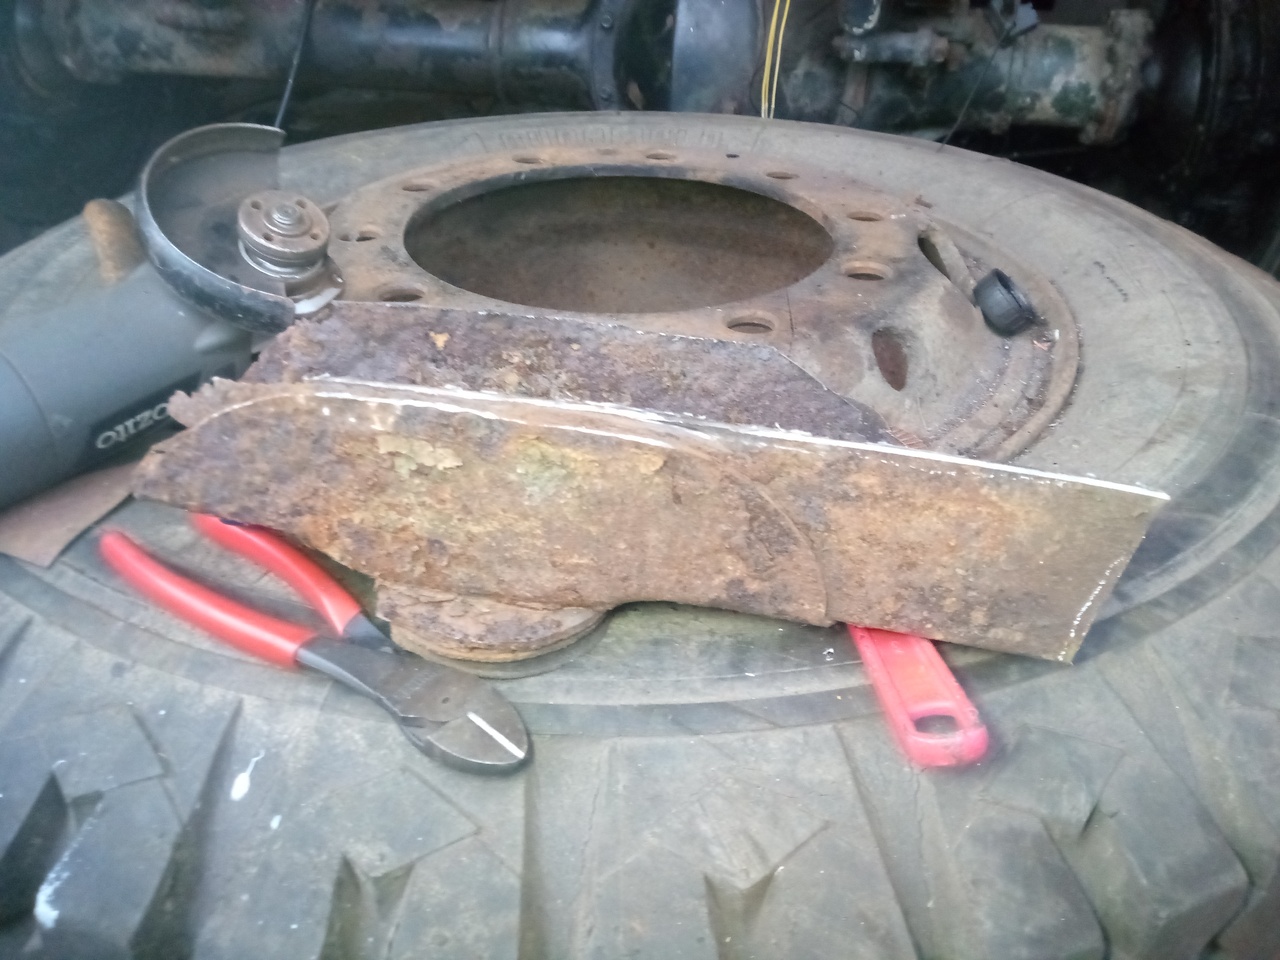 That's better! 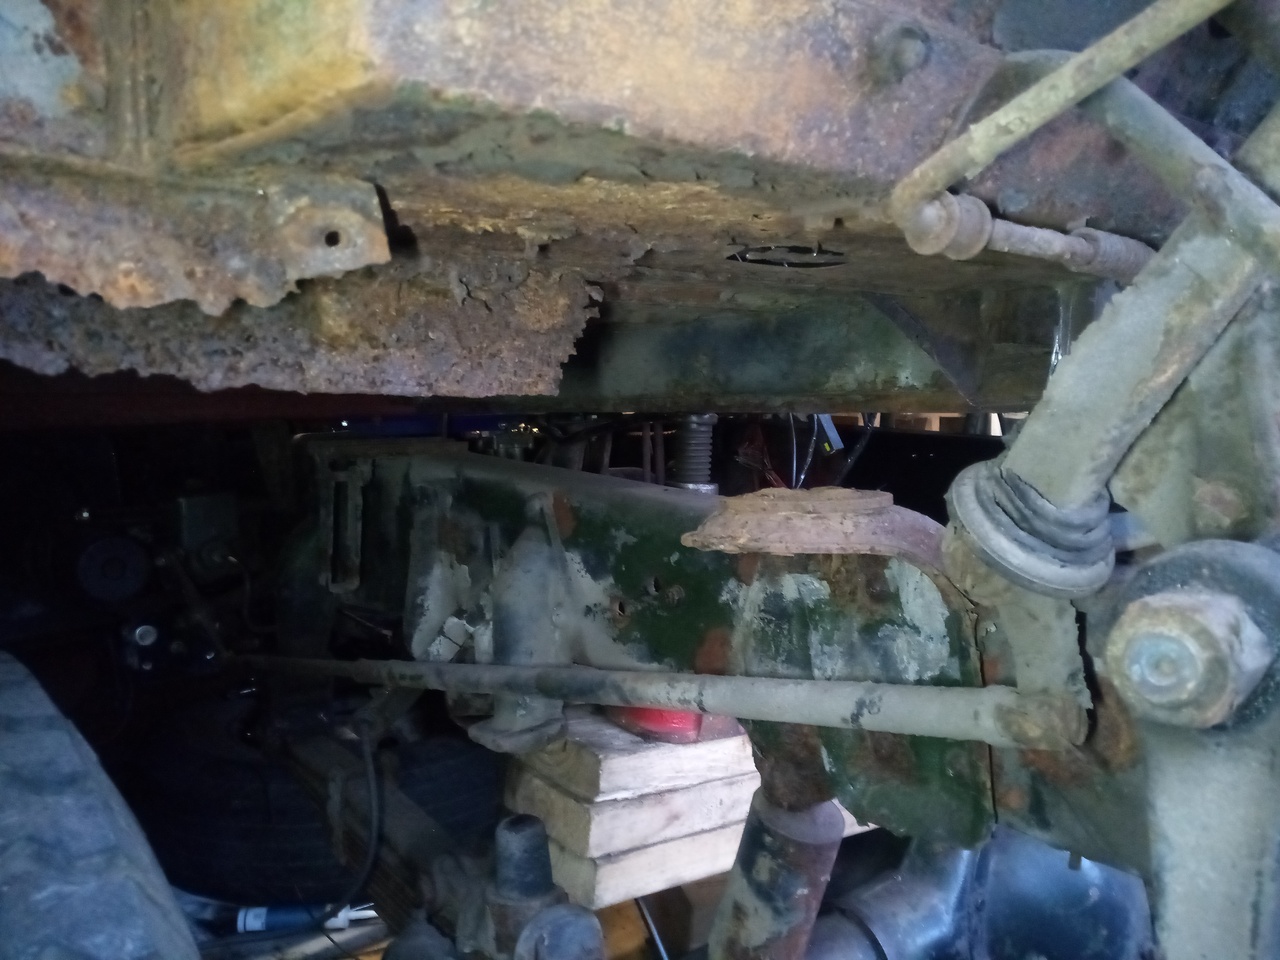 |
| |
-< Welder. Allegedly a mechanic. Bodger of Things >-
* 1958? Bedford RL - Progress: Glacial.
* 1994 Skoda Favorit - It's baaaaaaaack!
* 2018 Herald Classic - Gone!
|
|
|
|
|
|
|
Which leaves you with a ragged hole, hungry for flesh Reminds me of an ex of mine... I share your love of wiring, but it's amazing how long it takes to do it properly! |
| |
Sometimes, others may not understand why you like a car so much. Sometimes, you may not even understand why you like a car so much. But none of that matters; all that matters is that you like the car, and having it makes you happy.
|
|
Tamber
Part of things
  Shattered. Held together by spite and tape.
Posts: 341
|
|
Mar 26, 2023 21:34:22 GMT
|
Right. Bus-bars. 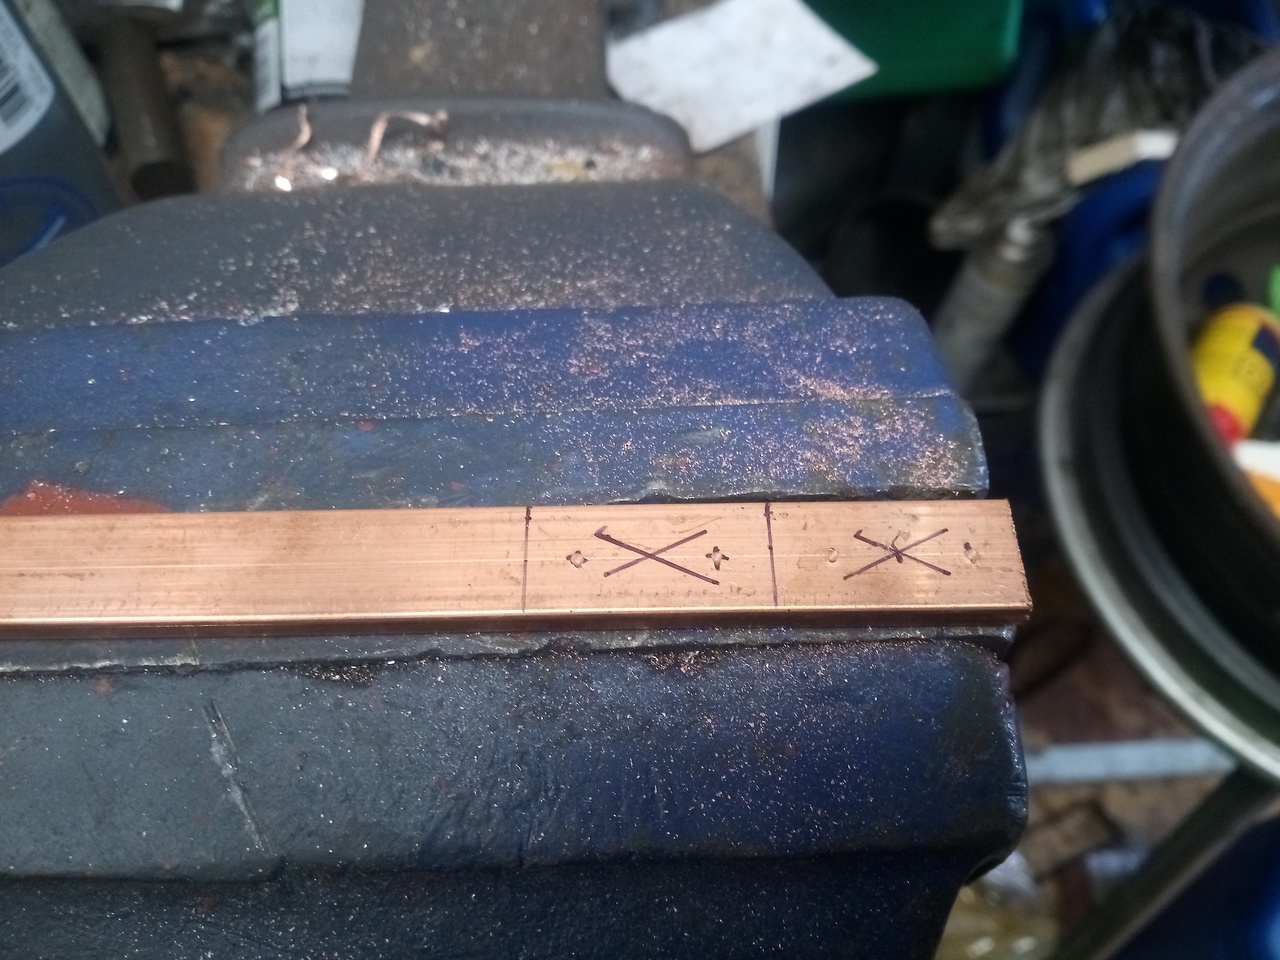 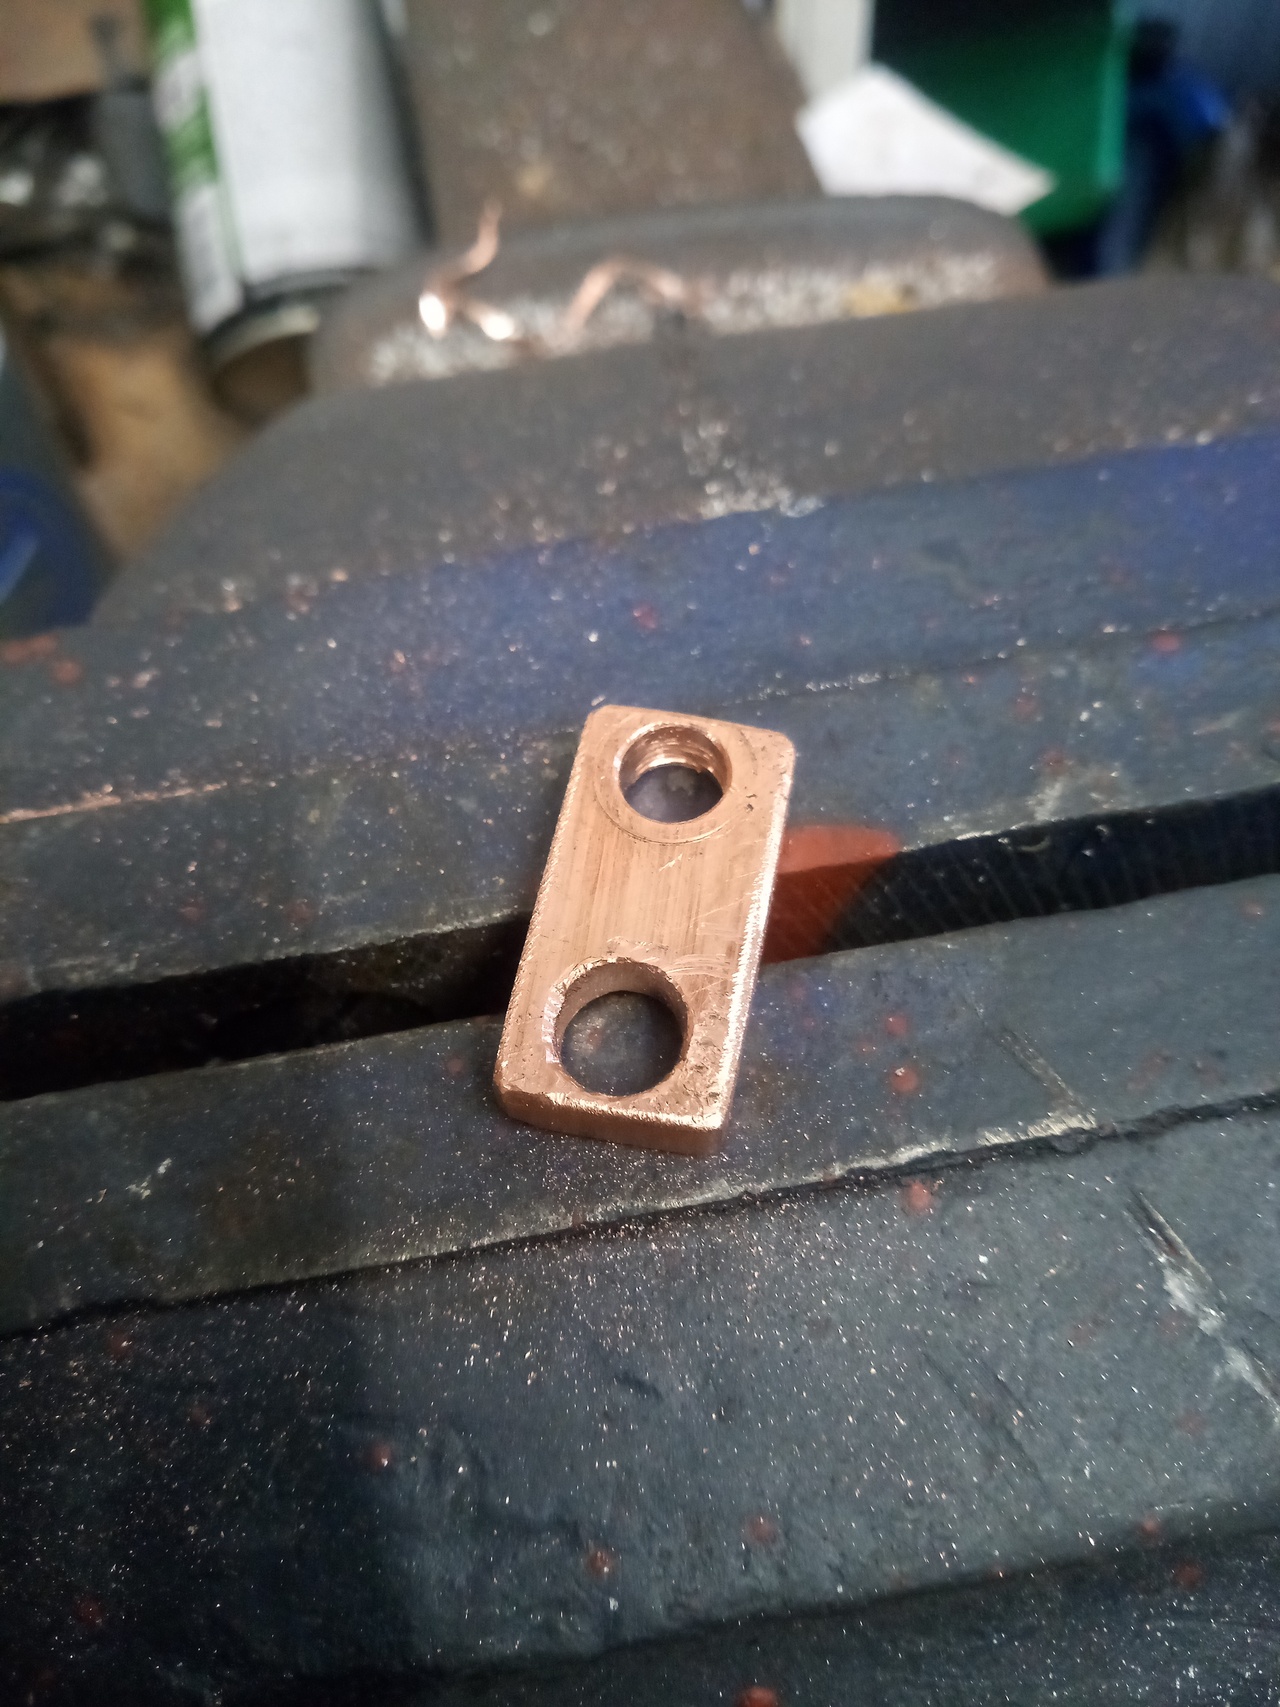 Dimensions for same: 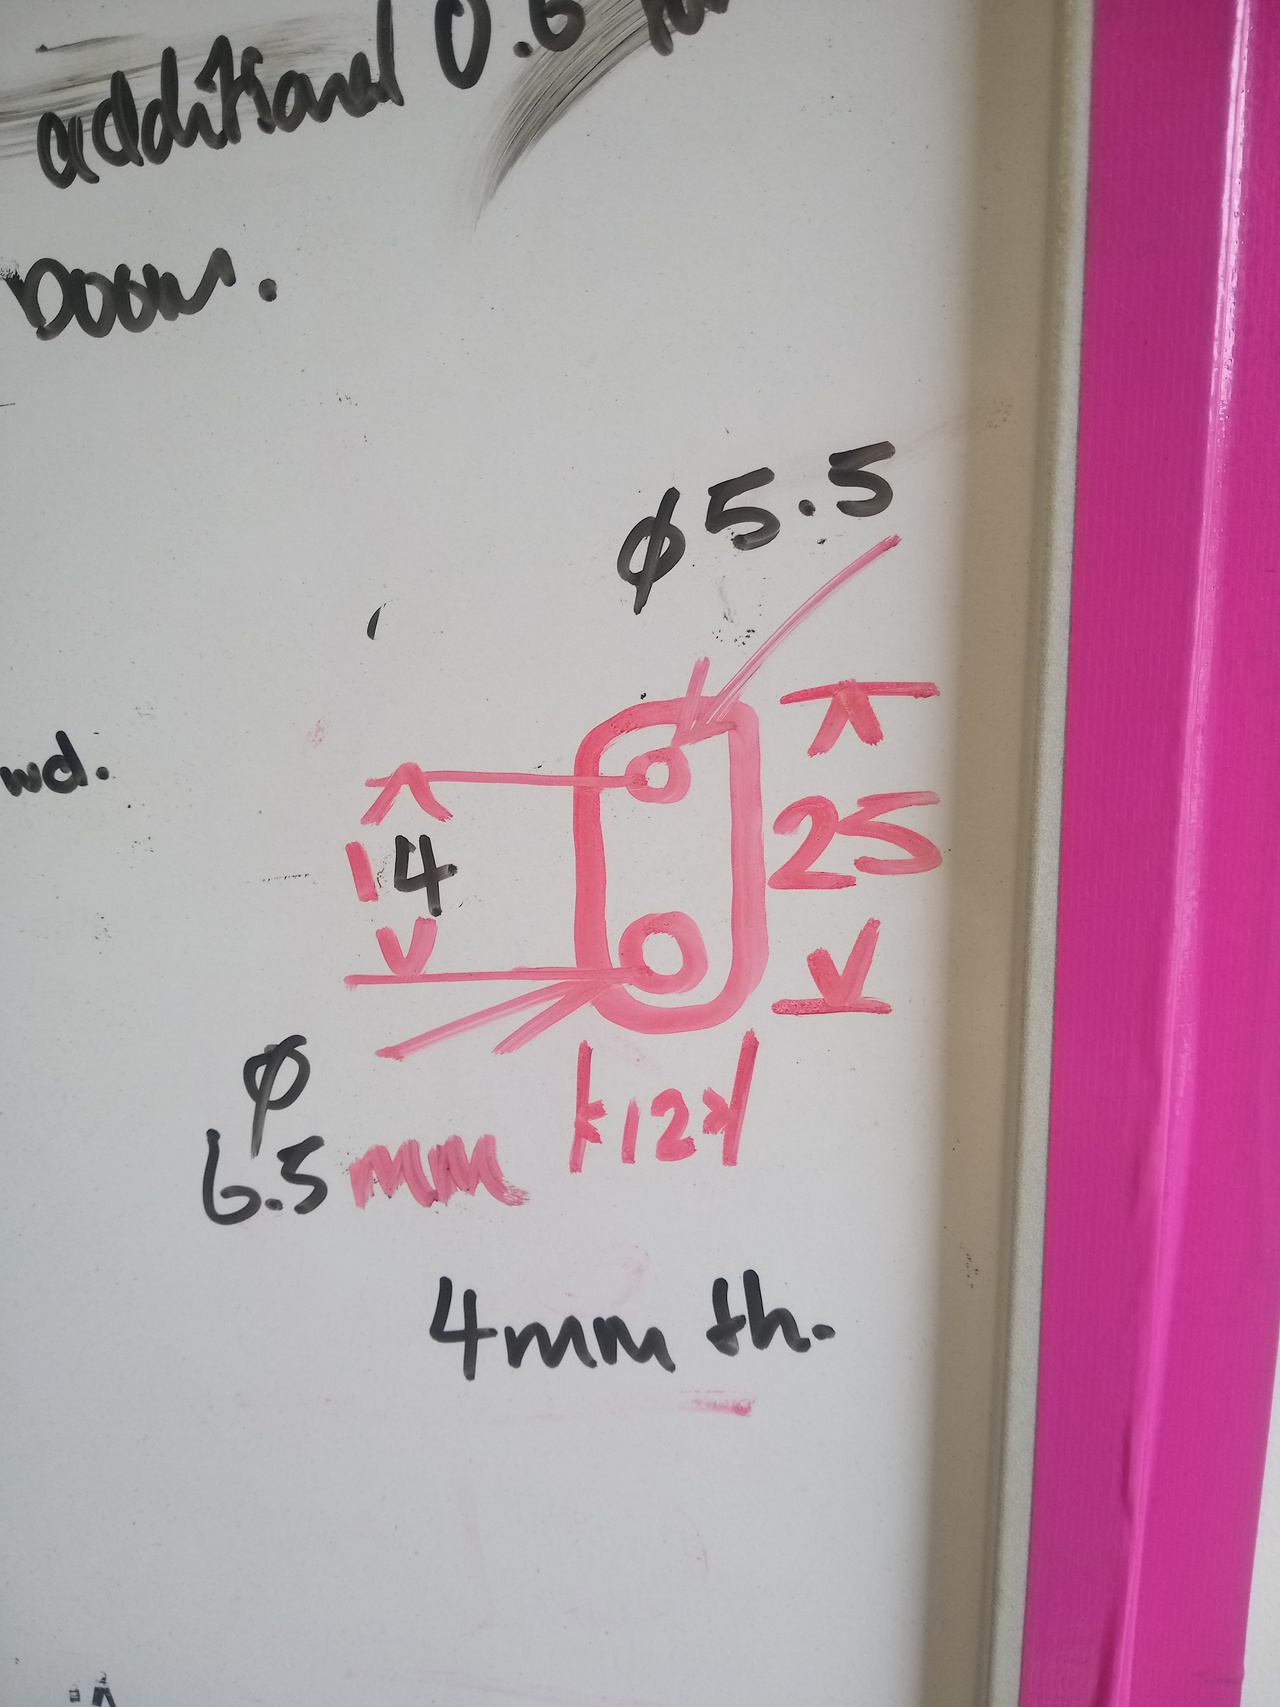 They fit in here like so: 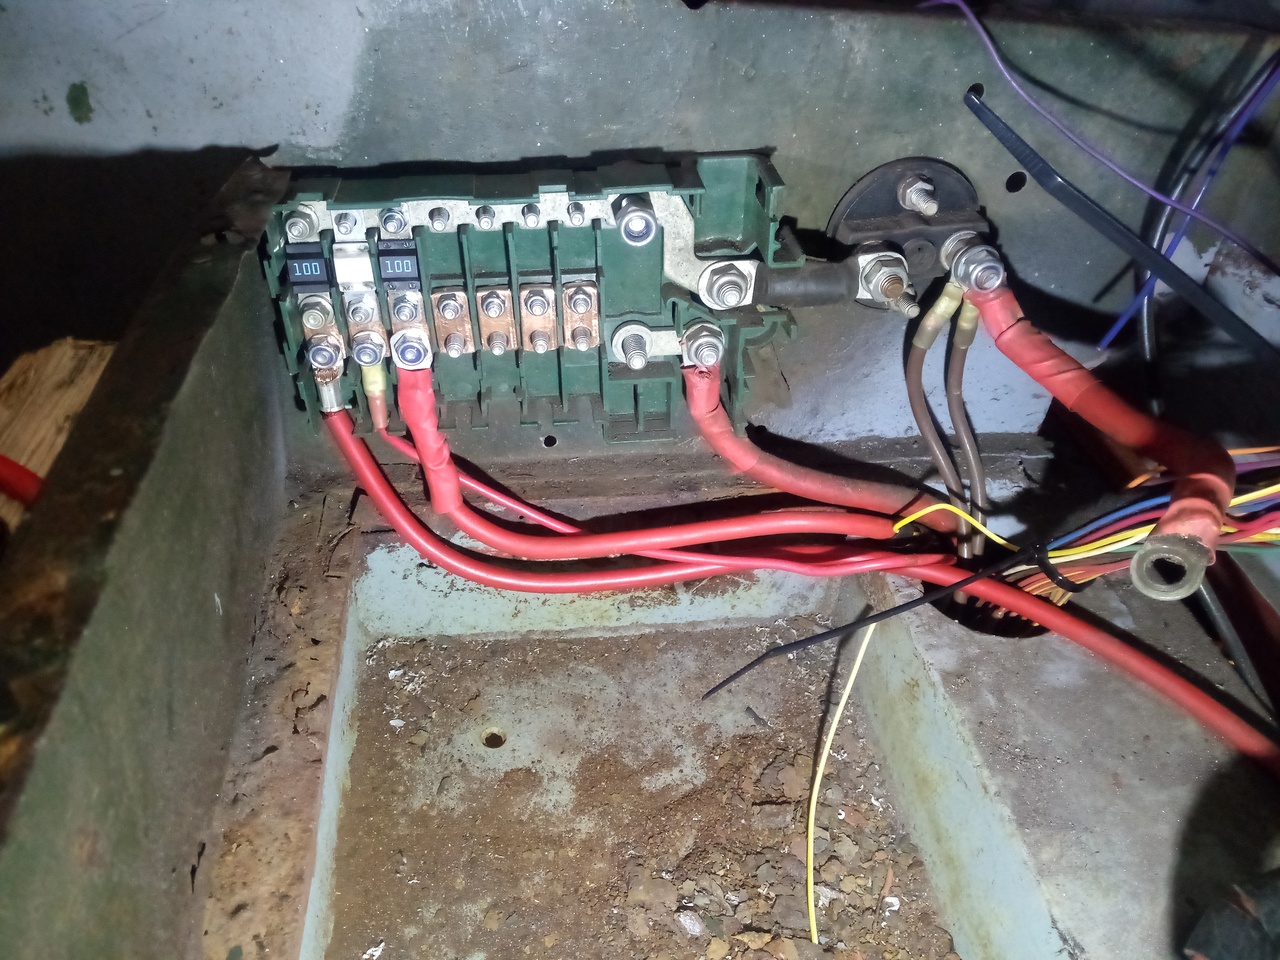 And at this point I dropped everything and hurtled off to troubleshoot wiring for a customer. (I built 'em a wiring loom for a fuel pump, for an Audi 1.8t swap into a Mk2 Golf GTI, and it wasn't working. Turned out not to be entirely my wiring at fault (other than the impact switch was wired backwards in the pigtail, so you had to crash the car for the fuel-pump to work.  ), but the wrong type of crazy VW relay in the fusebox that was looking for the wrong switching. Swapped that out, fuel pump works (along with their ignition feed to the ECU.) Swap a wire on a different relay, and ignition coils work properly. Grand stuff, but that took the rest of the day.)
Well, as they say, tomorrow is a different day. And today sure was. 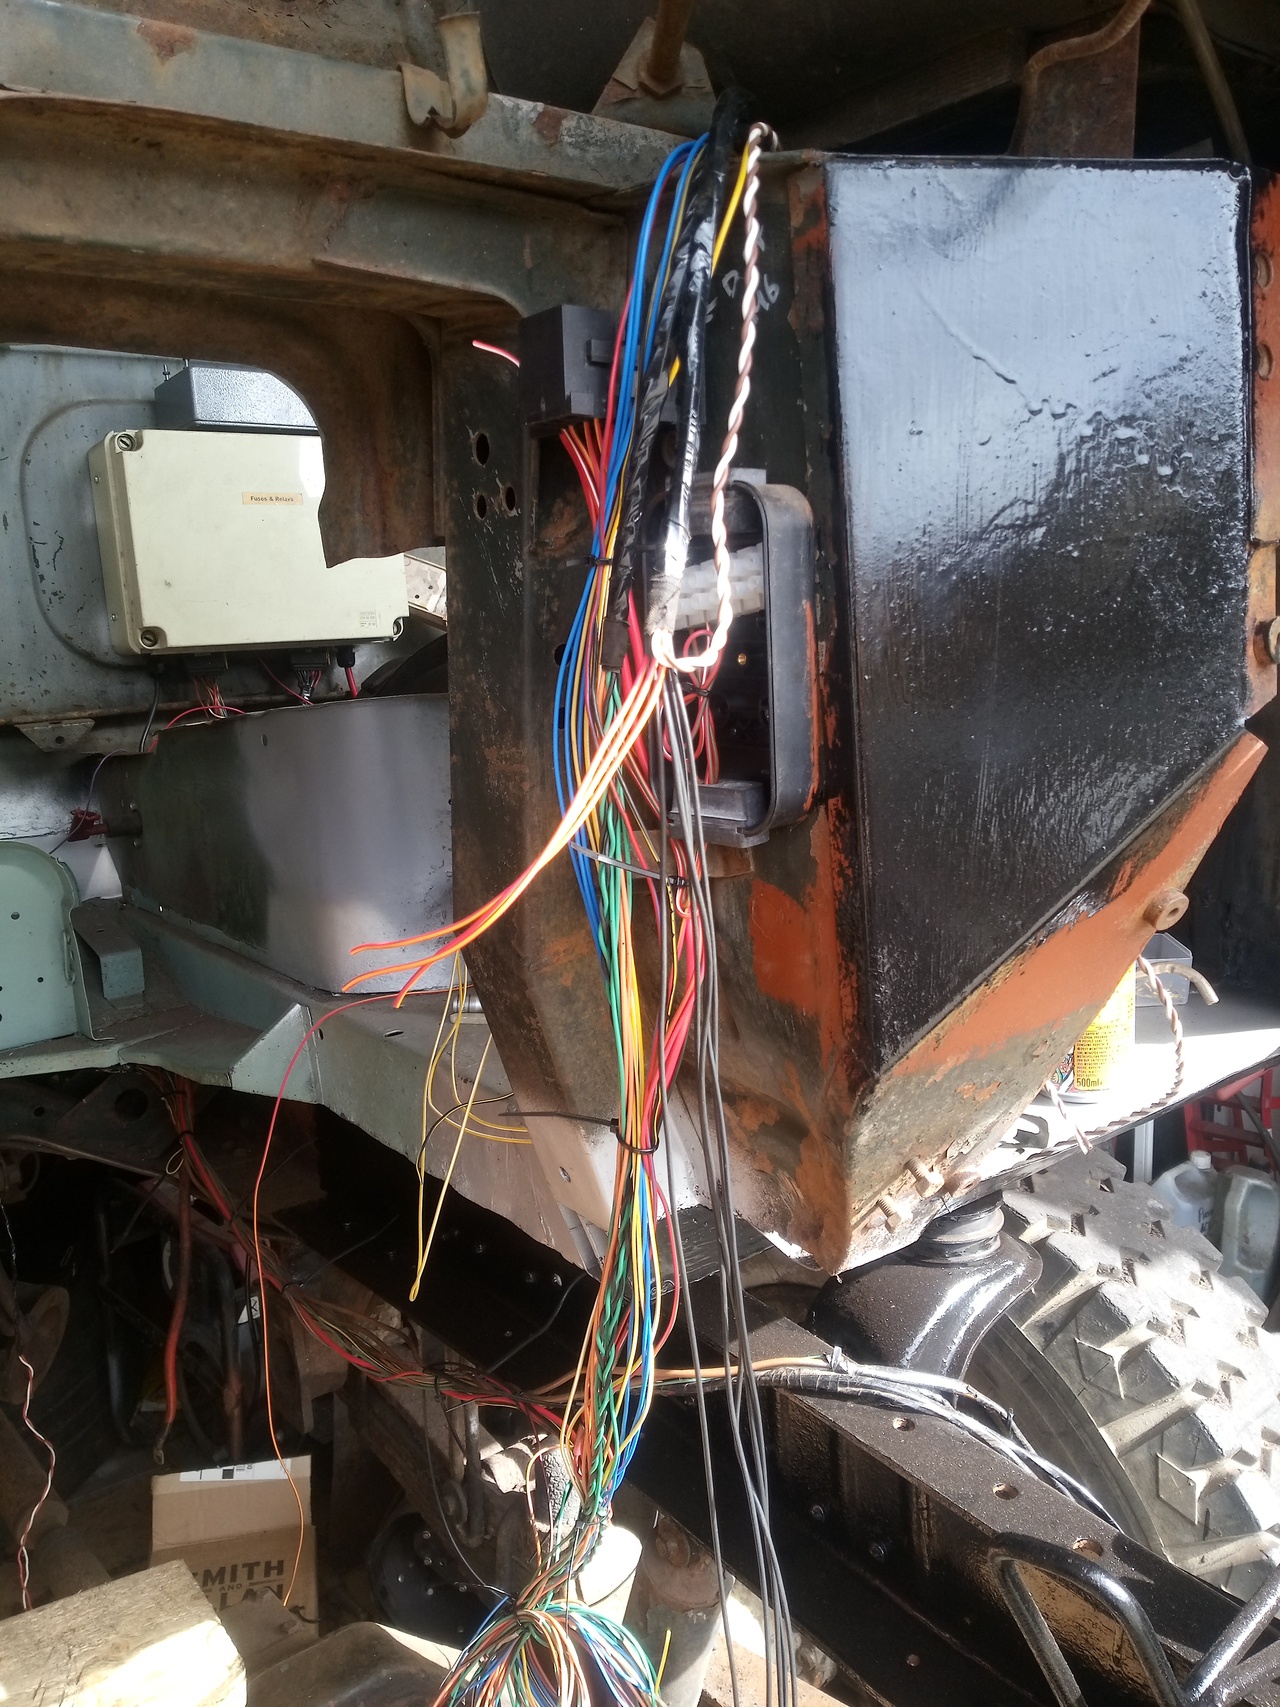 Feeds in and out, with diodes, to kick in the relay at the appropriate time, and let it self-latch. 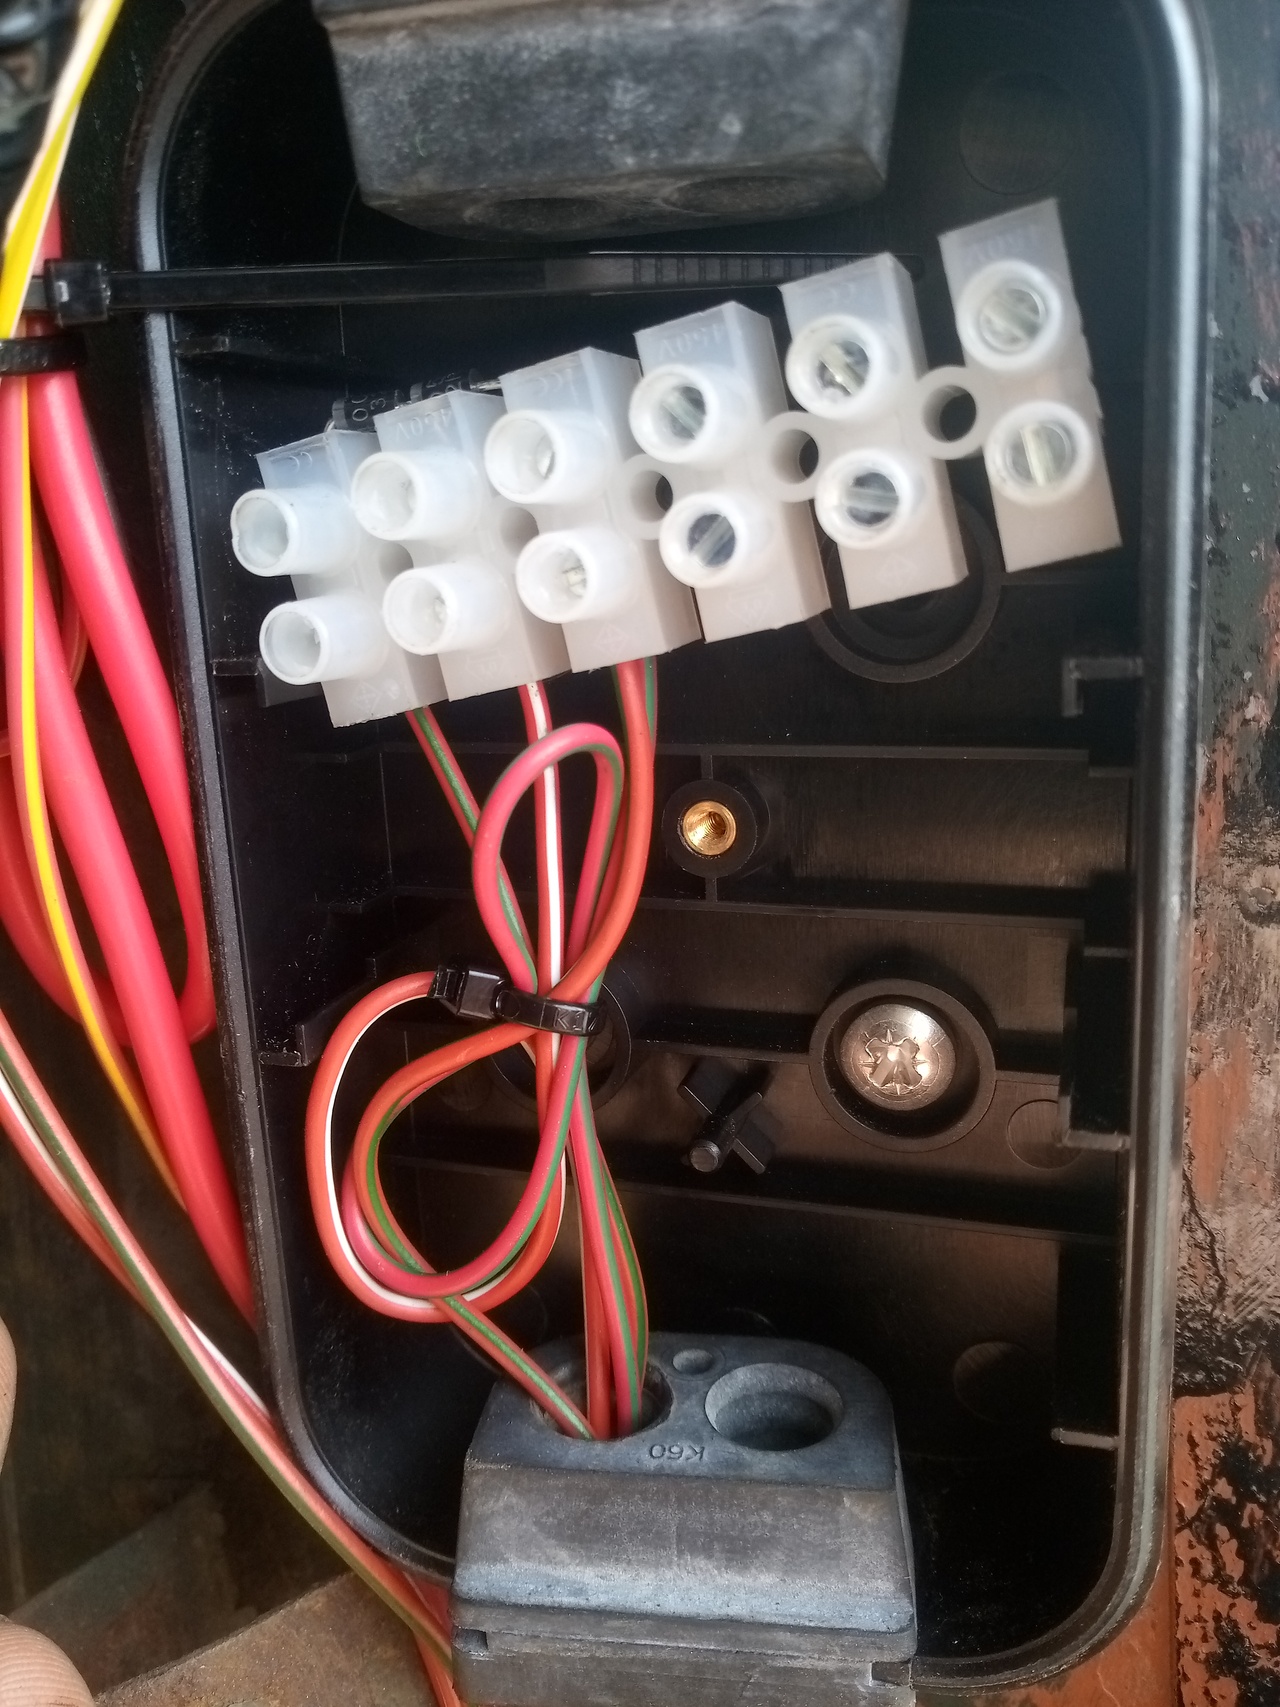 With that productivity out of the way, time for the soothing sound of an angle grinder, for several hours! 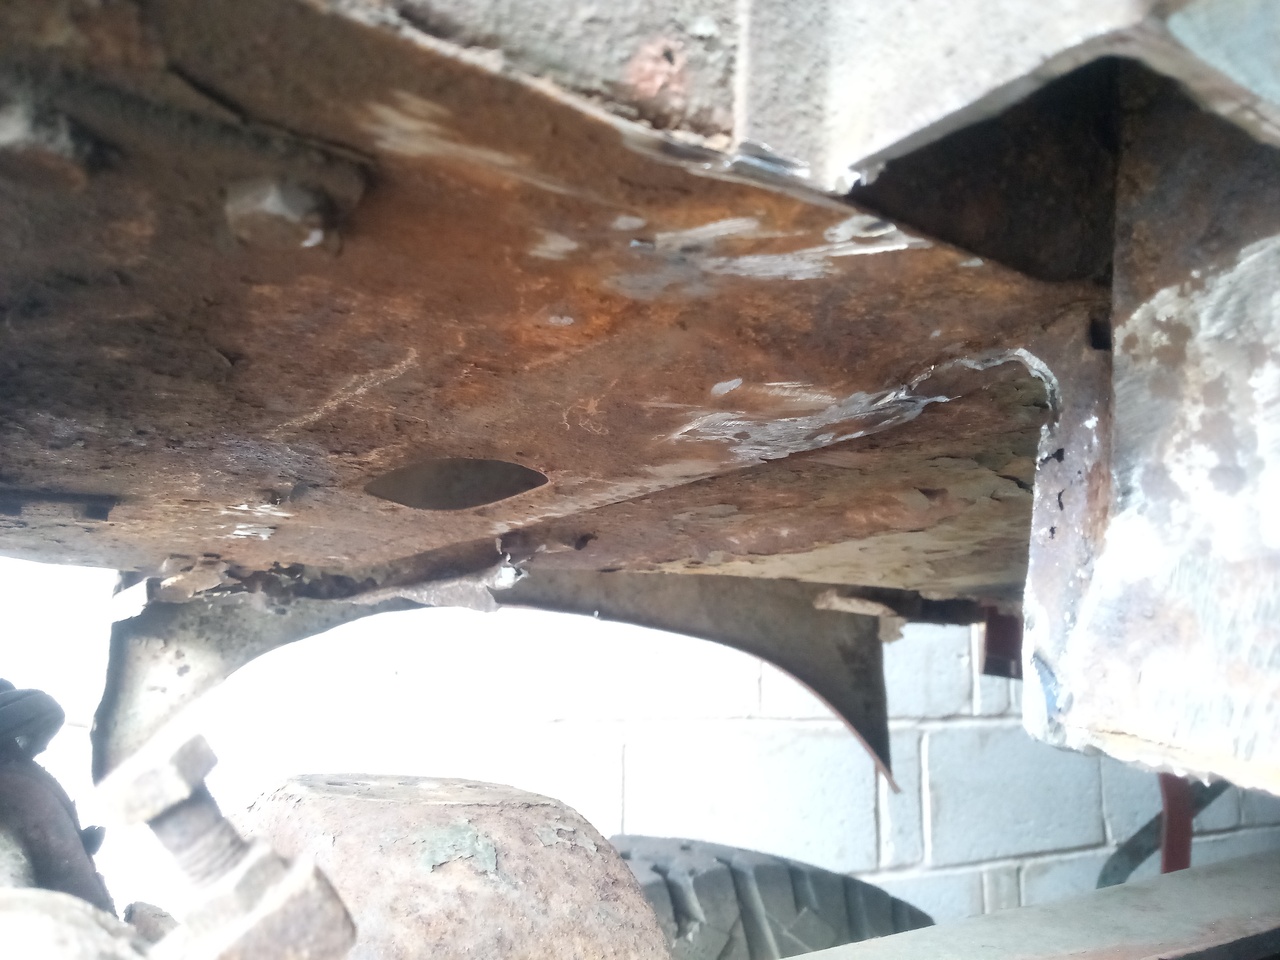 Some bonus flap-disk action~ 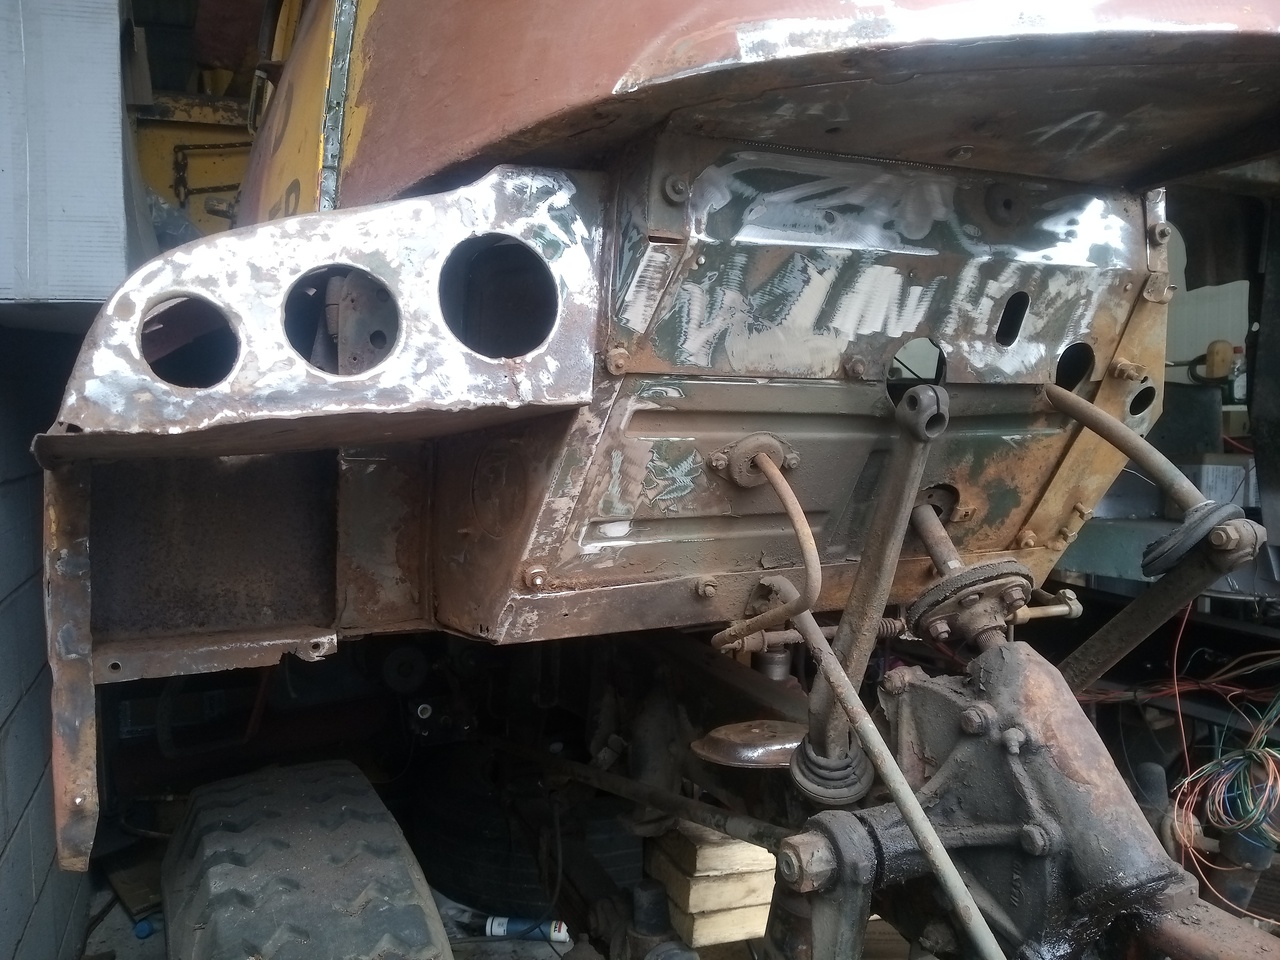 Uncovered some previous repairs underneath the green paint. 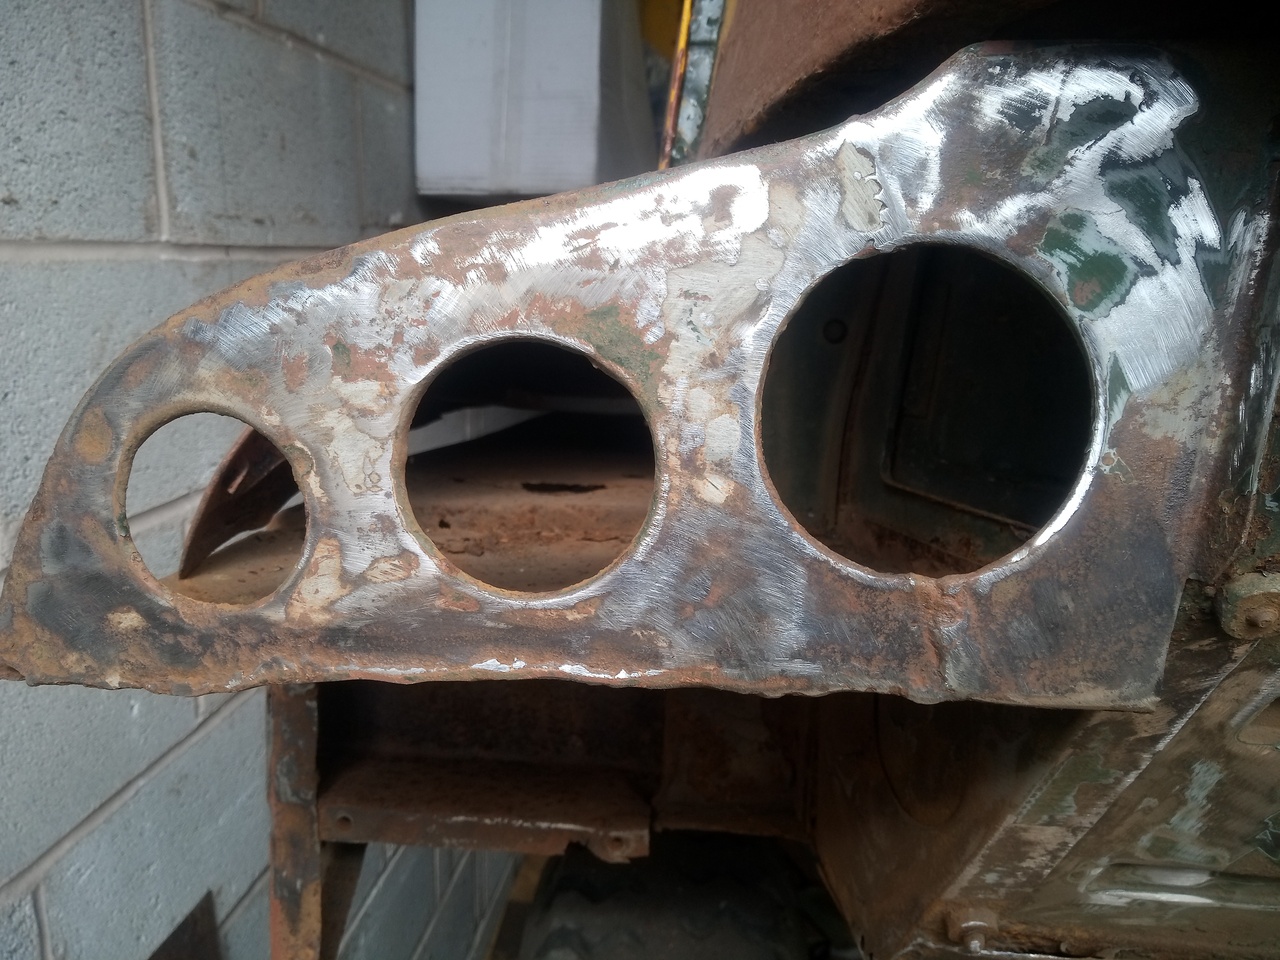 Covered up the floor underneath a growing mountain of filth. 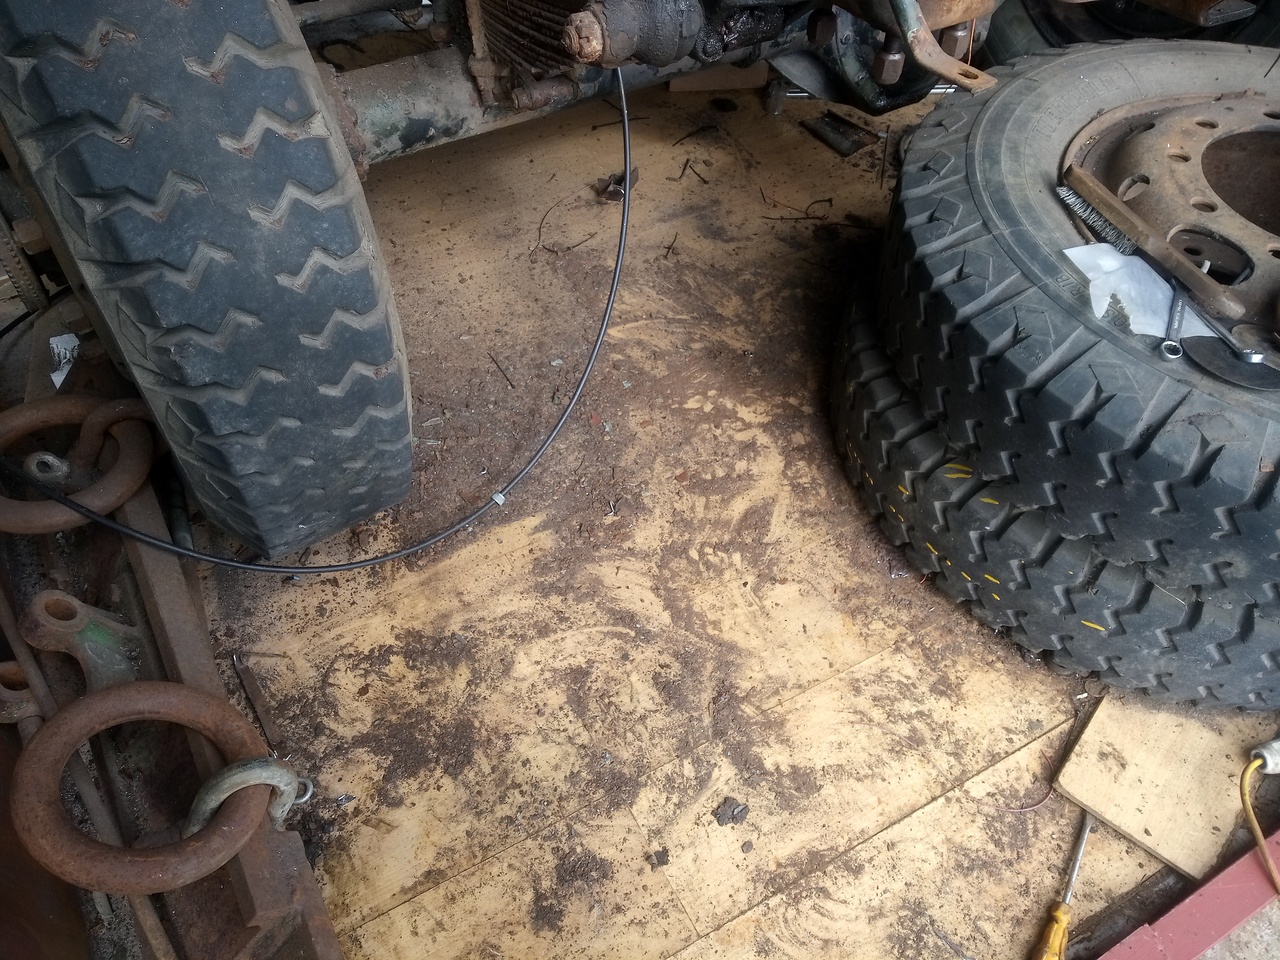 Stuffed the previously-built new cab crossmember underneath 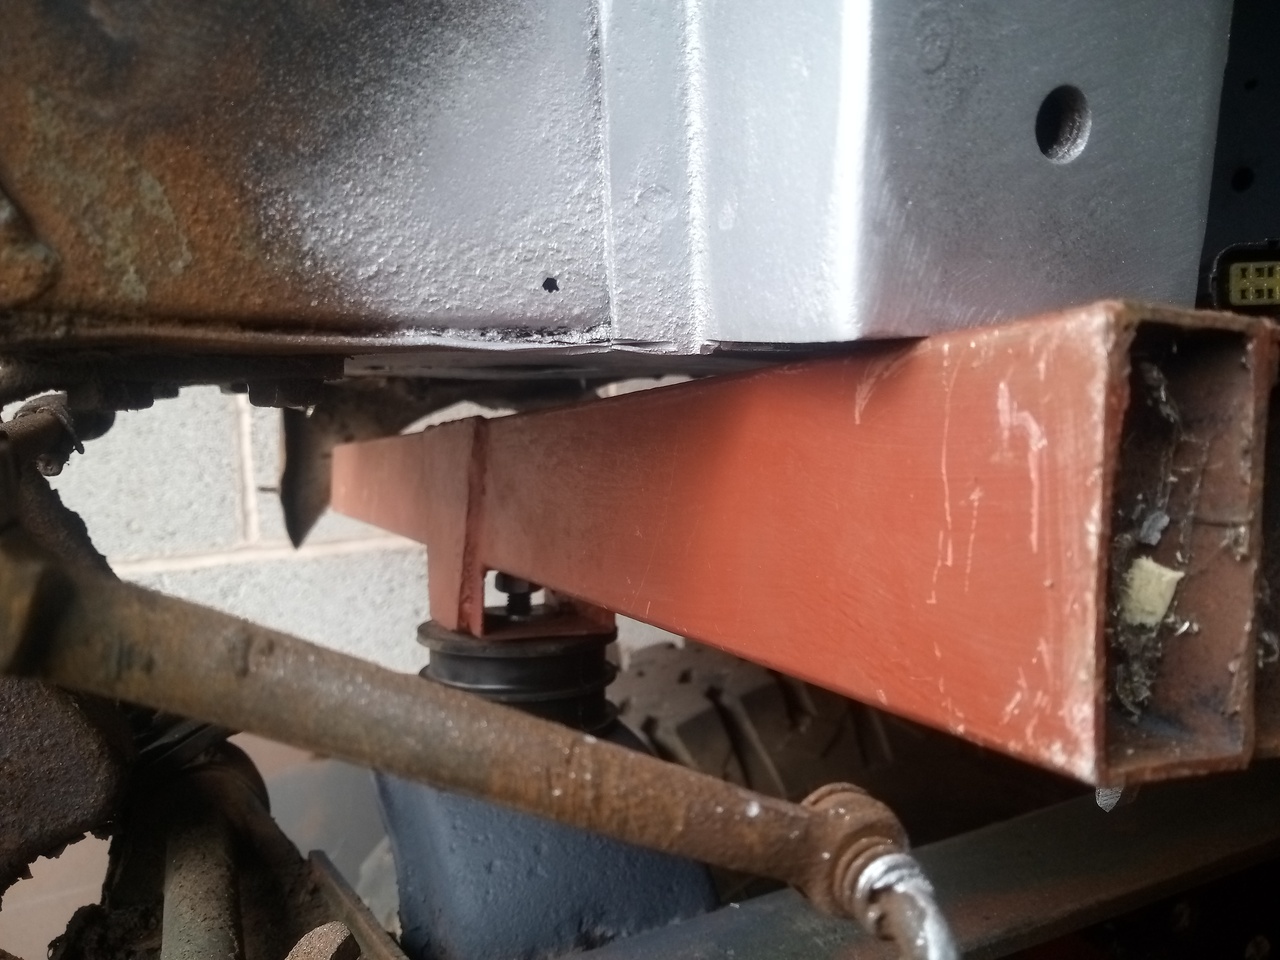 Mark and trim to the existing framework angle. 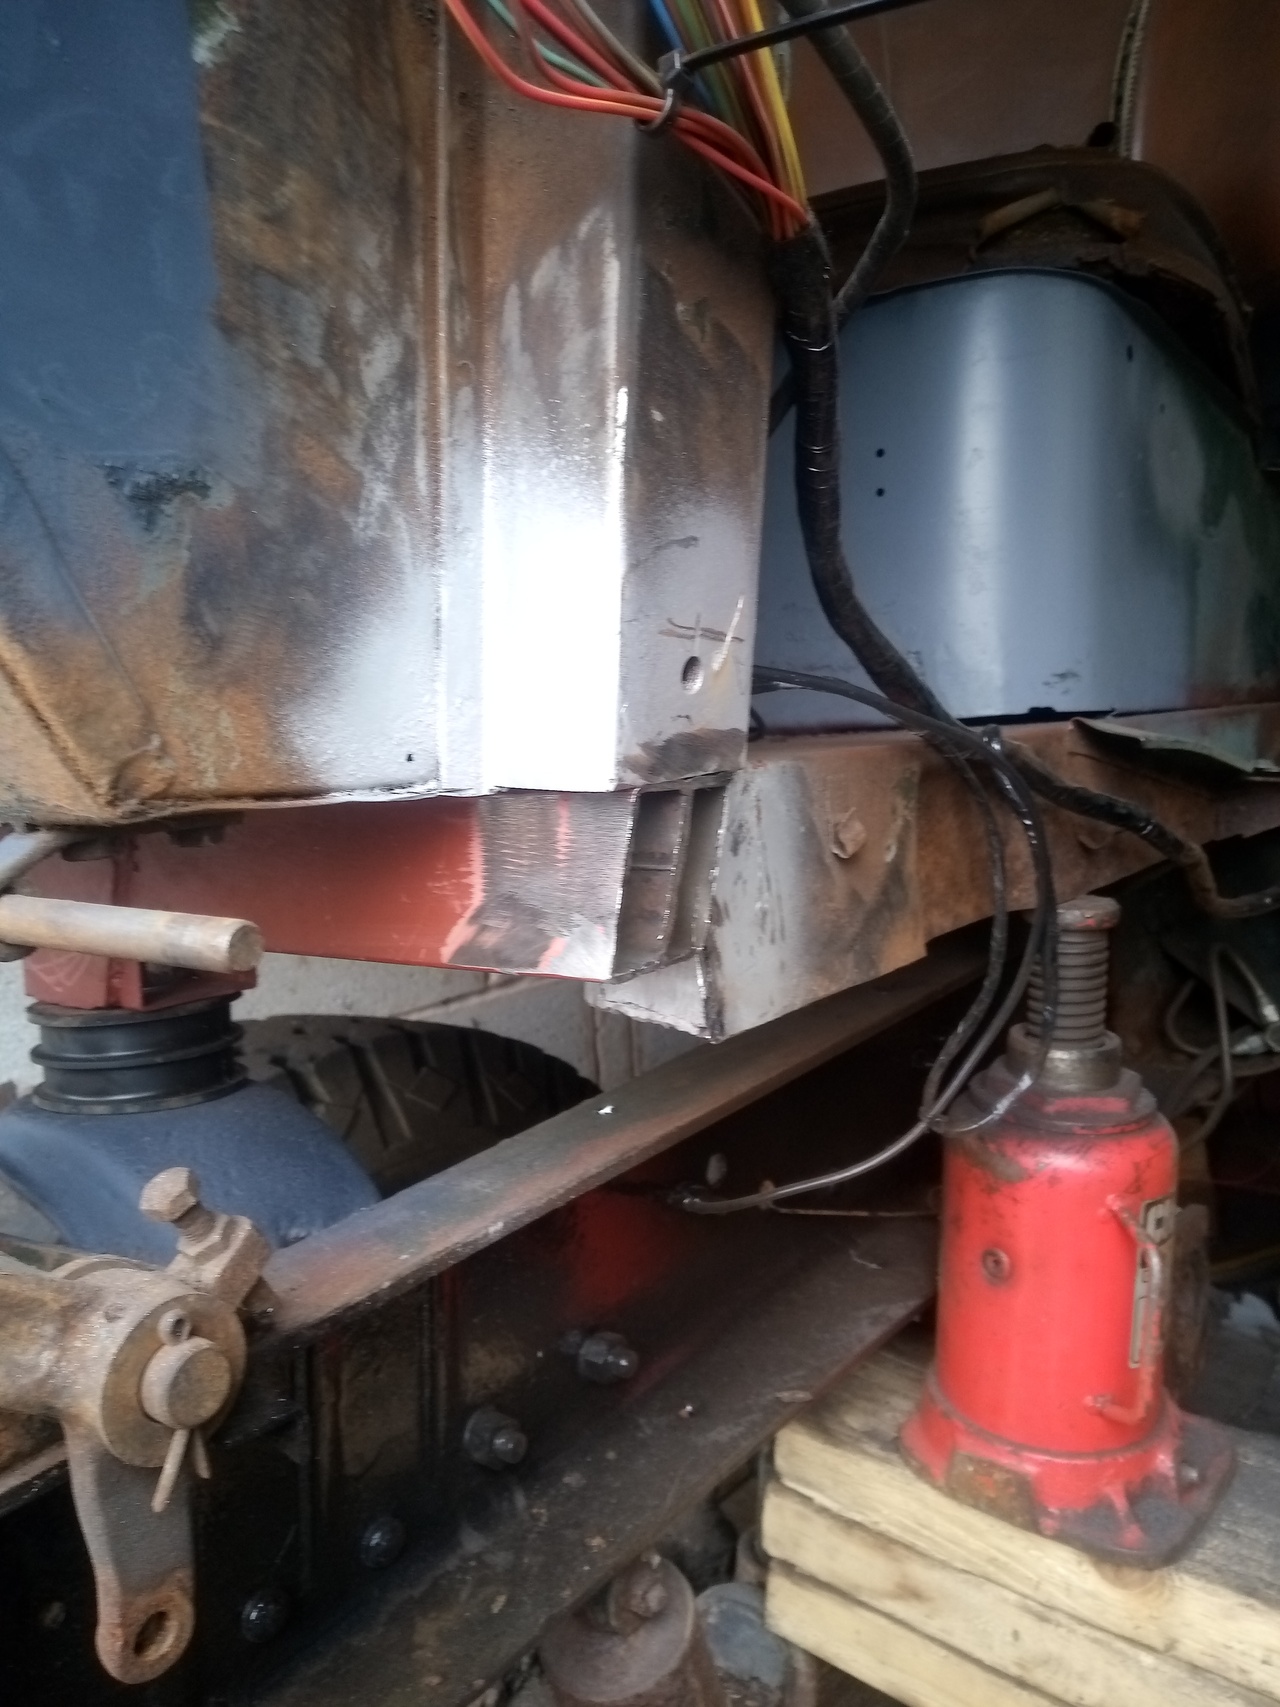 Do the typical mechanic thing and curse the fool who designed this, 'cause they clearly don't know anything, and have never worked on anything before... 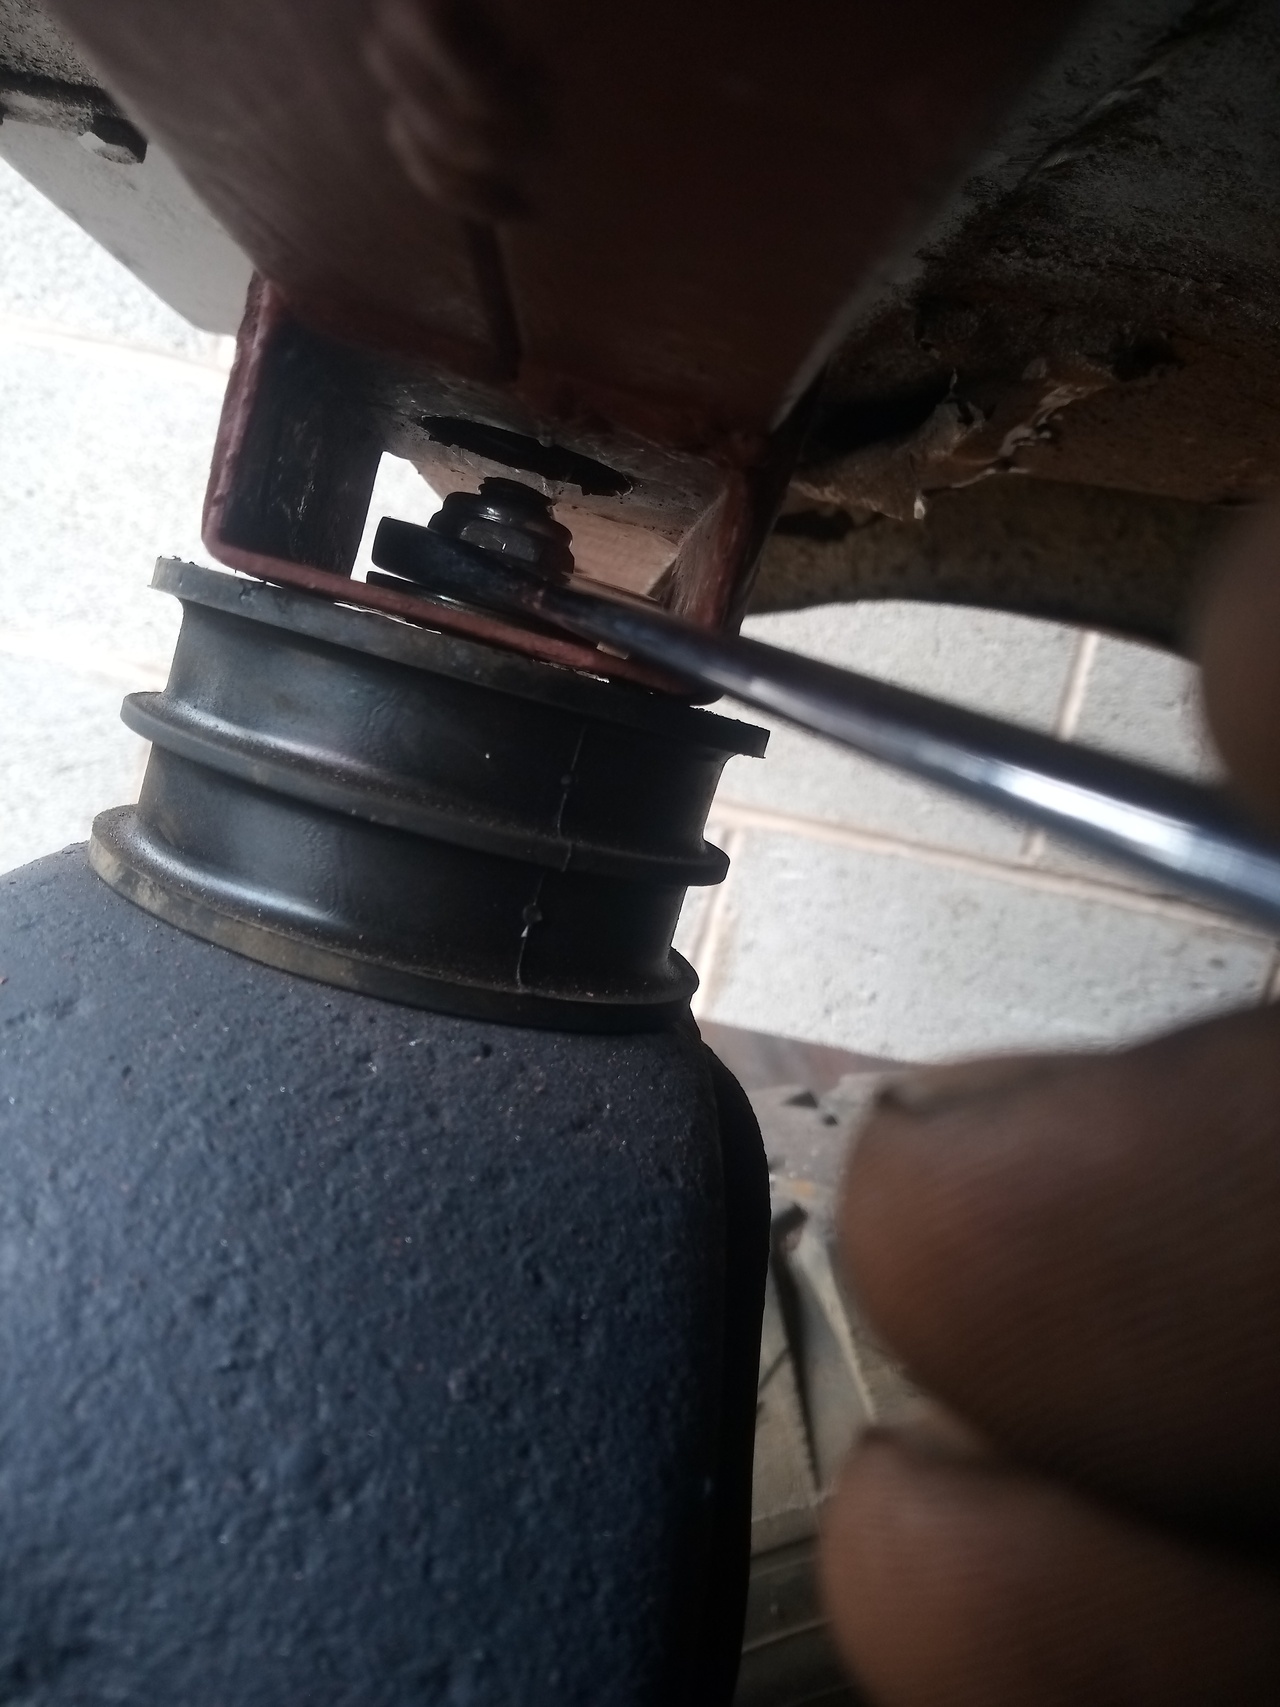 (...and no, my socket does not fit through the nice convenient hole I made for the socket to go through. Augh.) Marvellous! 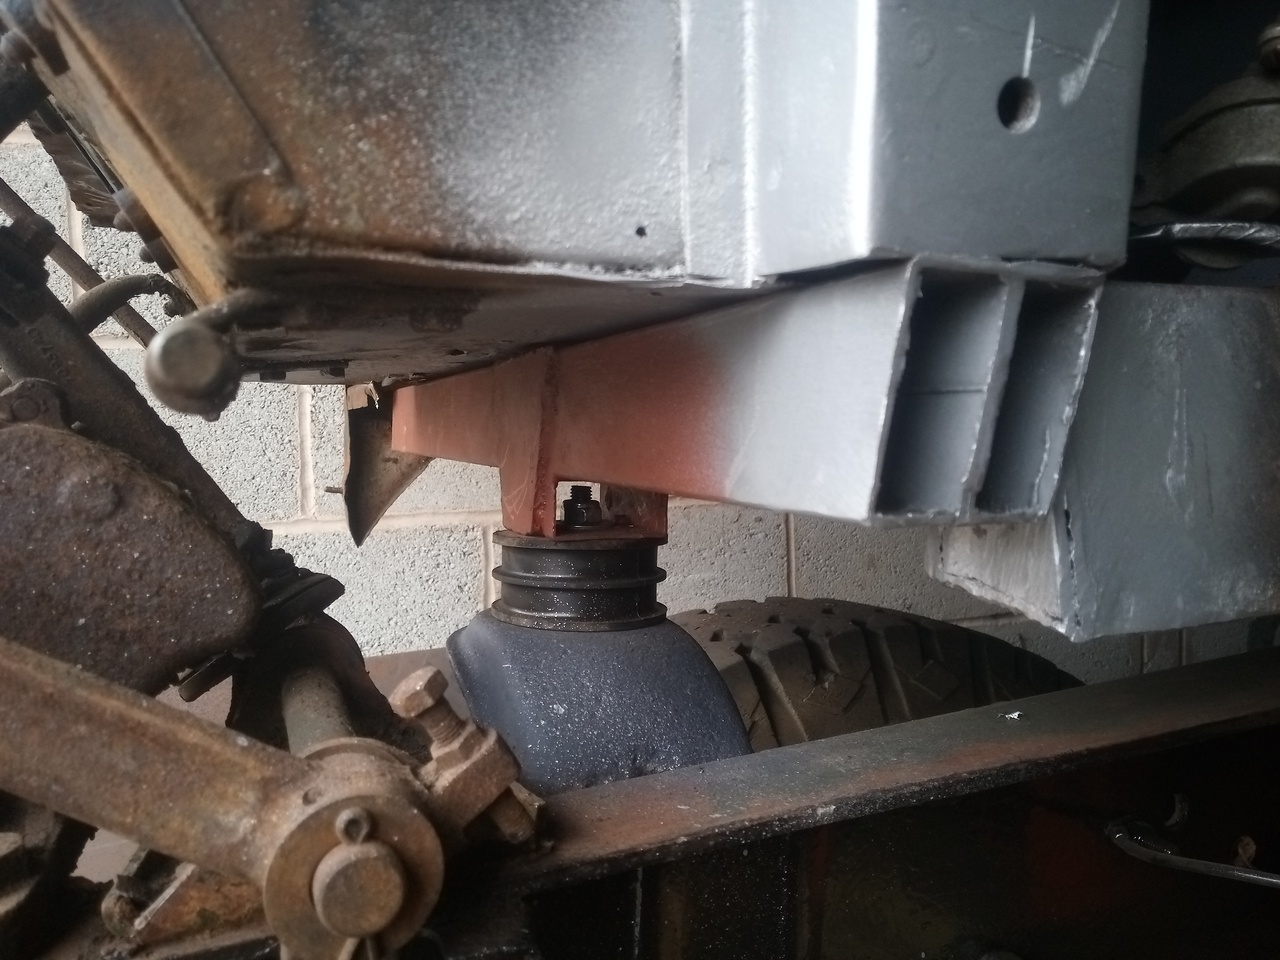 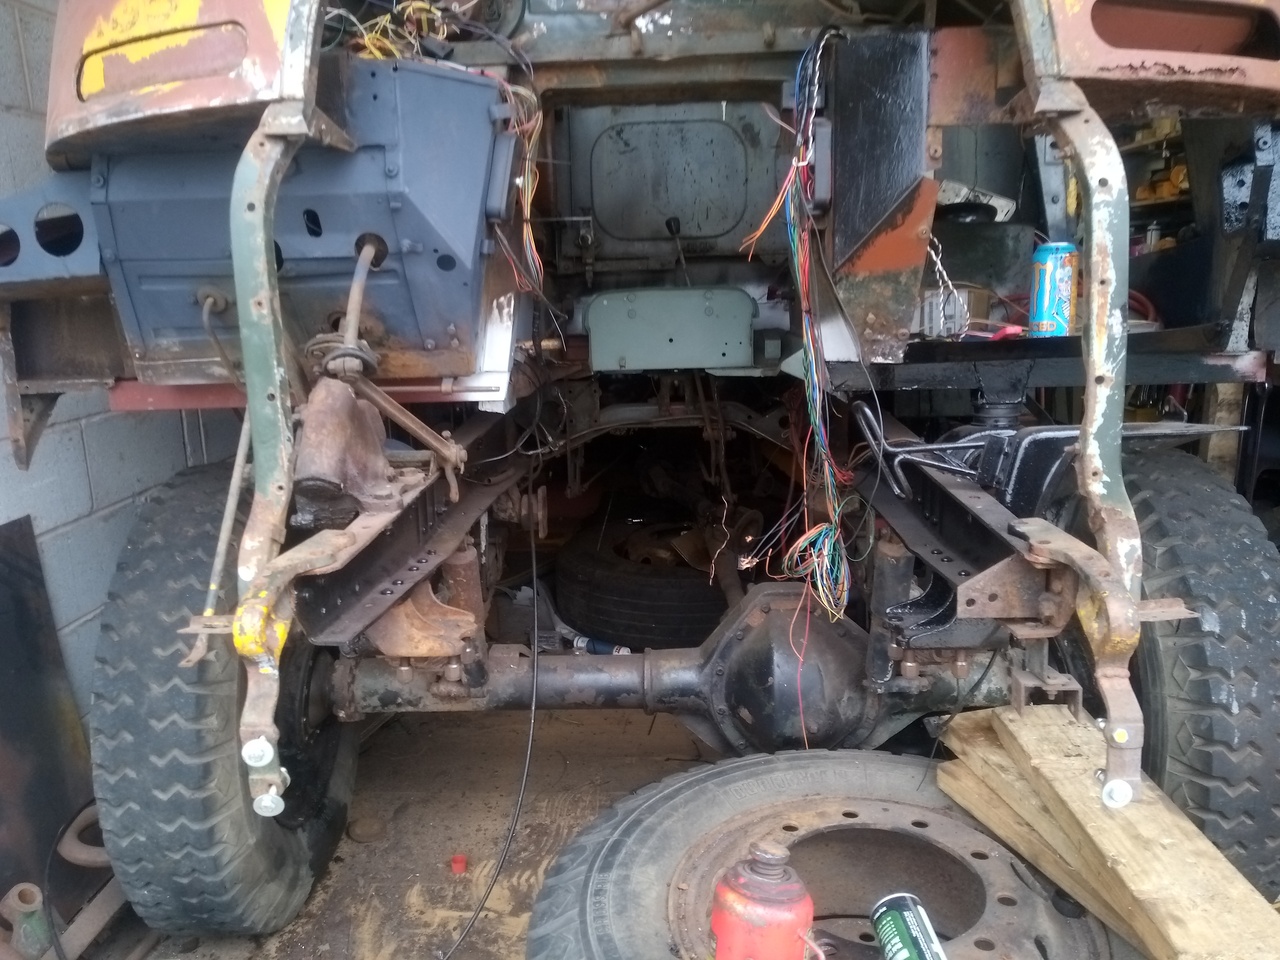 I also ended up stripping both pedals out, and took the clutch pedal lever off to grease the pivot point. Turns out it's supposed to be oiled regularly, with a little oil dropper hole, and it hasn't actually seen any lubrication in a long time judging by the build-up of fretting rust. A grease nipple would probably be better. The shopping list continues to grow. More to come, later. Probably next weekend. I'm exhausted. Time for another week of work. |
| |
-< Welder. Allegedly a mechanic. Bodger of Things >-
* 1958? Bedford RL - Progress: Glacial.
* 1994 Skoda Favorit - It's baaaaaaaack!
* 2018 Herald Classic - Gone!
|
|
Tamber
Part of things
  Shattered. Held together by spite and tape.
Posts: 341
|
|
Apr 16, 2023 21:44:29 GMT
|
Little done to the truck since then, such is life. I ordered more steel, in preparation for the bank holiday weekend; it turned up the Tuesday after the bank holiday.  The new offside cab crossmember is tacked in place, though, and ready for another weldathon. I finally decided on a colour for the cab interior, though: BS381C 626 Camoflage Grey. It's nothing too special, but I think it's fairly easy on the eyes, so I can live with that. Painted some bits as a test, and they turned out mostly okay. 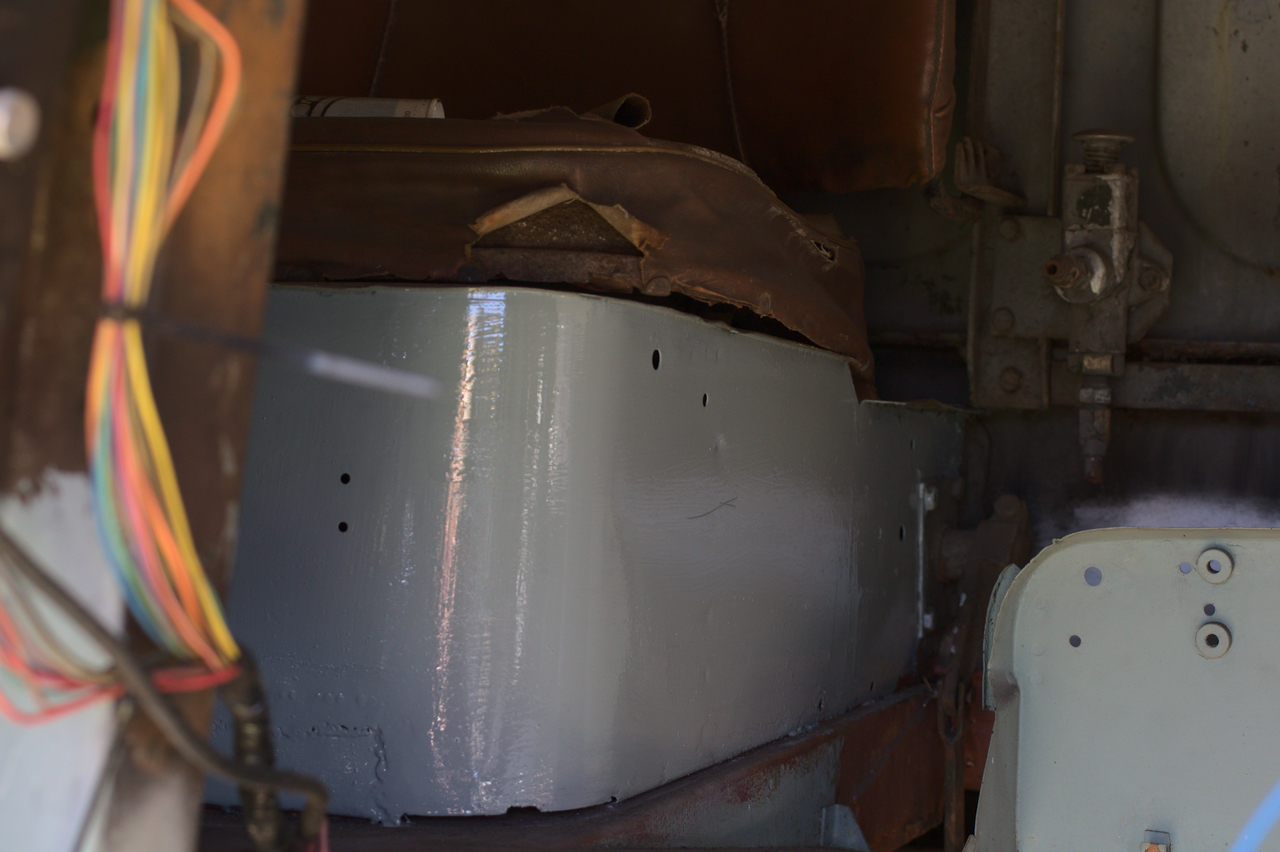 And since that picture was taken, I've refitted the handbrake lever; which does help the cab feel another step closer to finished, even though that's a long way off. Still feel like my self-imposed goal of having the engine back in my September is reachable! This weekend was a complete wash as far as work on the Bedford goes, tho. Dropped the steel off at the unit, went to rush to help my brother with stickering his Jetta for the trip to Elsecar; in a foul mood, dumped the clutch a bit too abruptly leaving the unit, and my engine decided it was going to try make a bid for freedom. Apparently the torque rod bolt -- which is a whole storied lash-up of its own -- didn't back out this time. It only went and snapped off at some point, and the only thing holding the engine in place was the remains of the bolt acting like a locating peg, and the big stupid reinforcement plate I added to stop the torque-rod bending was acting as a limit stop. So now I have to try and extract all of that mess at some point. That will be exciting. It's a grade 10.9 M12 bolt, heavily loctited into the cast iron pedestal on the engine, and it's broken off a good 15mm up in the hole. Anyway, we just sorta shoved the engine back into place so I could reinstate the torque-rod with its ... "peg" in the hole, and called it a day. That's a problem for future me. On the note of successes, though: The car I did the fuel-pump wiring work for, made it to Elsecar after some absolutely heroic efforts on the part of its owner in finishing up the engine swap and getting it MOT'd! 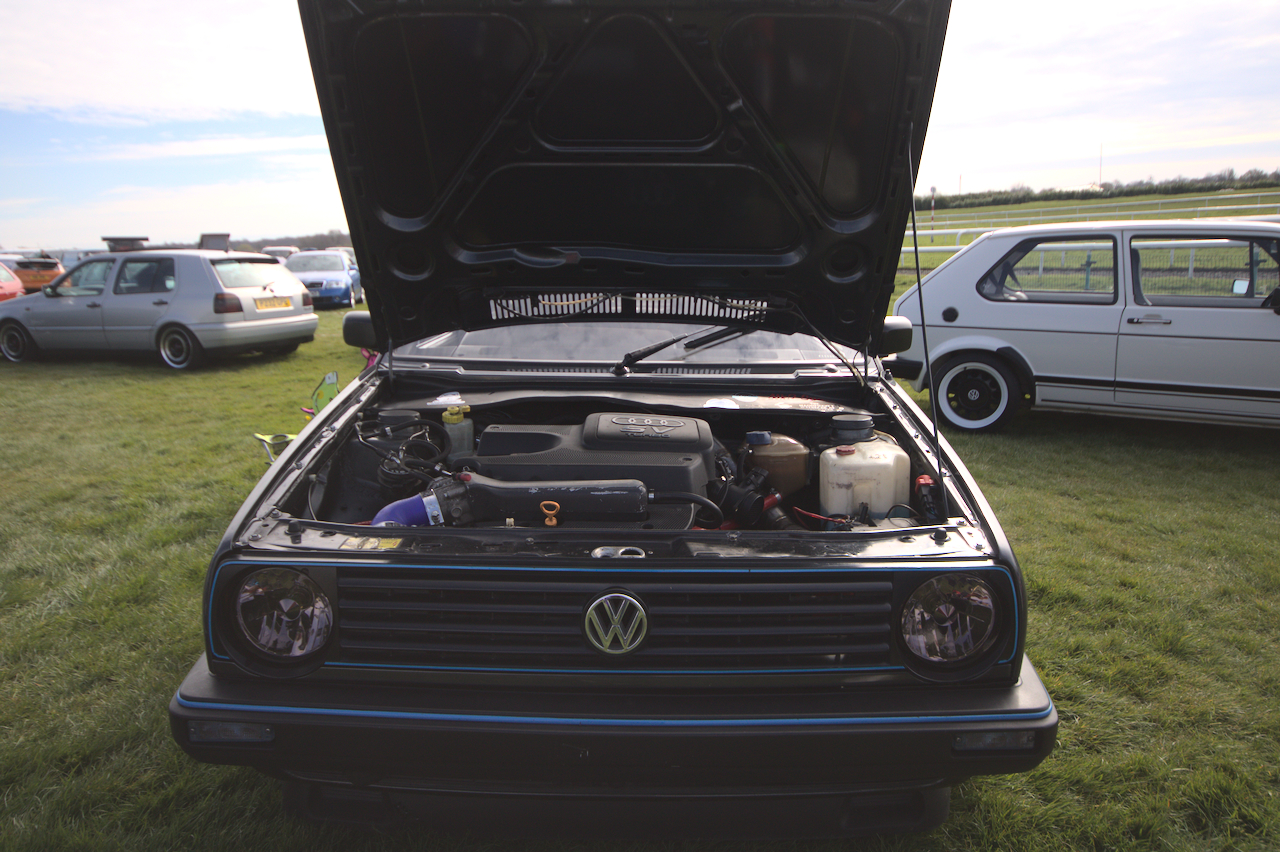 And I got some nice photos, throughout the day. (flickr album: flic.kr/s/aHBqjAzZD9 ) ...I have apparently won some additional work in lightly reworking the wiring loom splice-job on that Golf, at some point in the future, though; which I am a little nervous about. |
| |
-< Welder. Allegedly a mechanic. Bodger of Things >-
* 1958? Bedford RL - Progress: Glacial.
* 1994 Skoda Favorit - It's baaaaaaaack!
* 2018 Herald Classic - Gone!
|
|
Tamber
Part of things
  Shattered. Held together by spite and tape.
Posts: 341
|
|
May 14, 2023 23:25:44 GMT
|
Well, then. Let's get caught up, shall we? Are you sitting comfortably? No? That's fine, neither am I. My knees and hips are killing me... half-tempted to drill and tap them for grease-nipples. 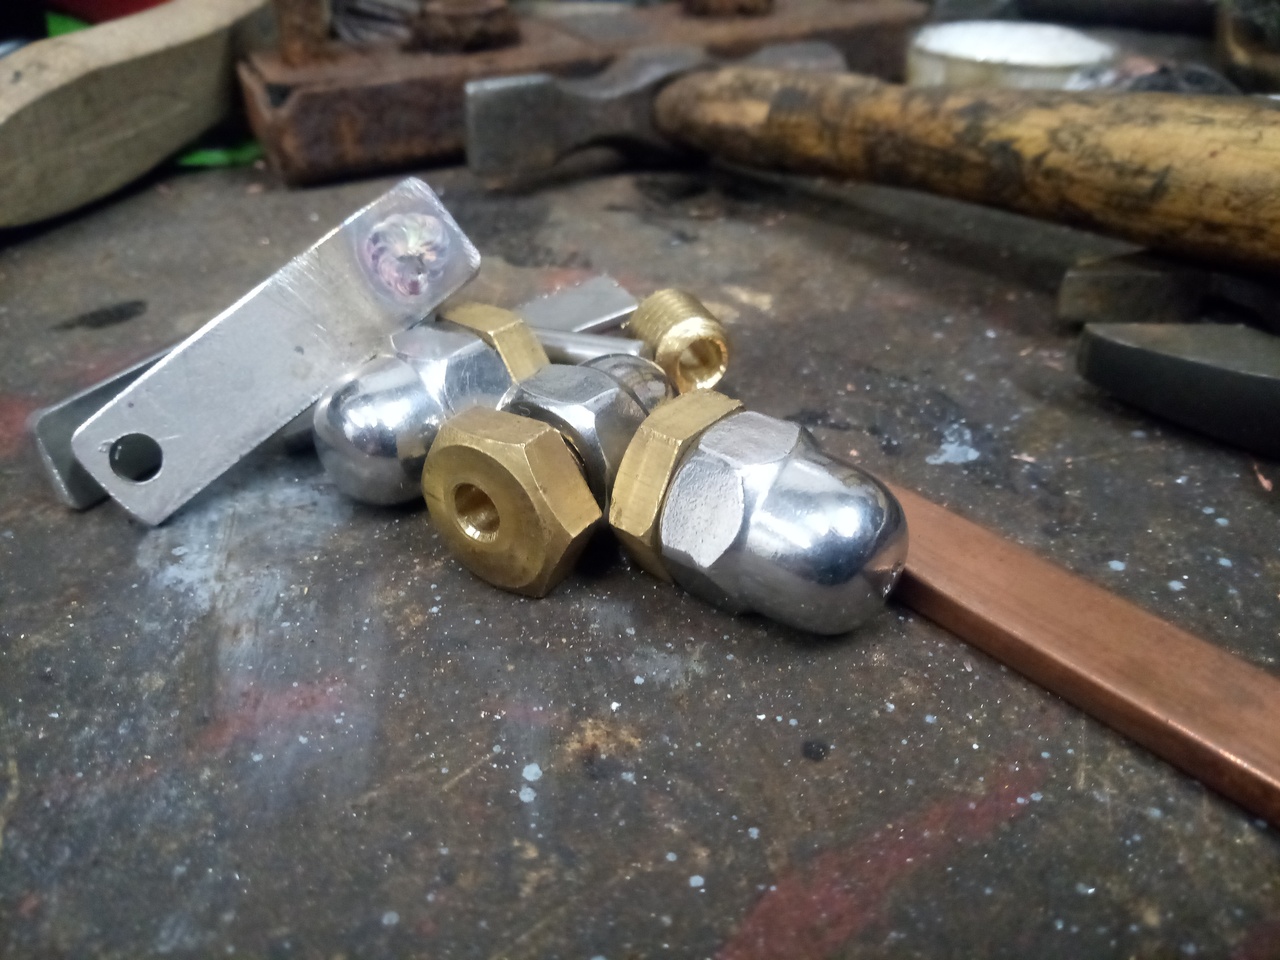 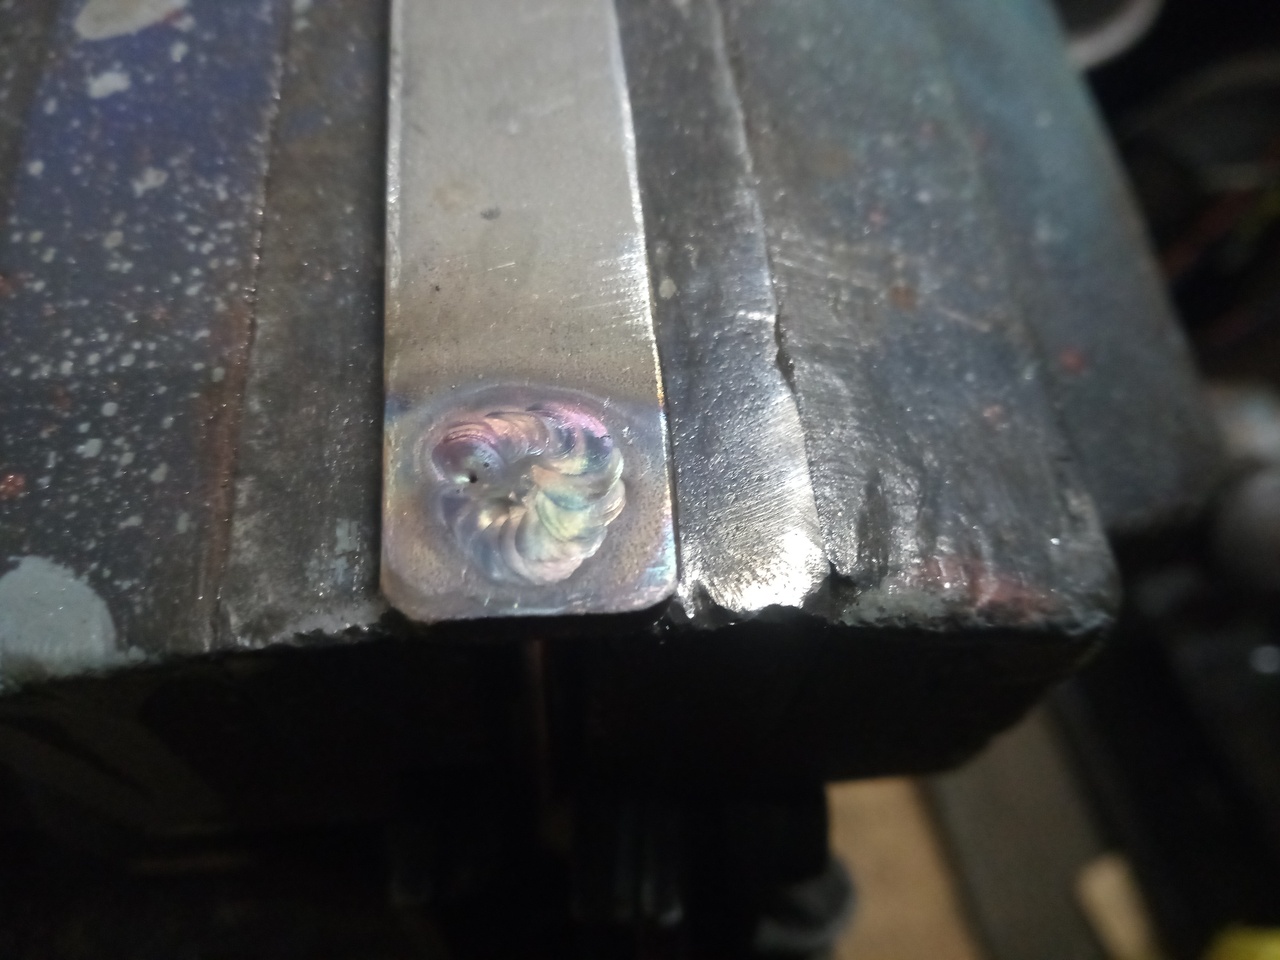 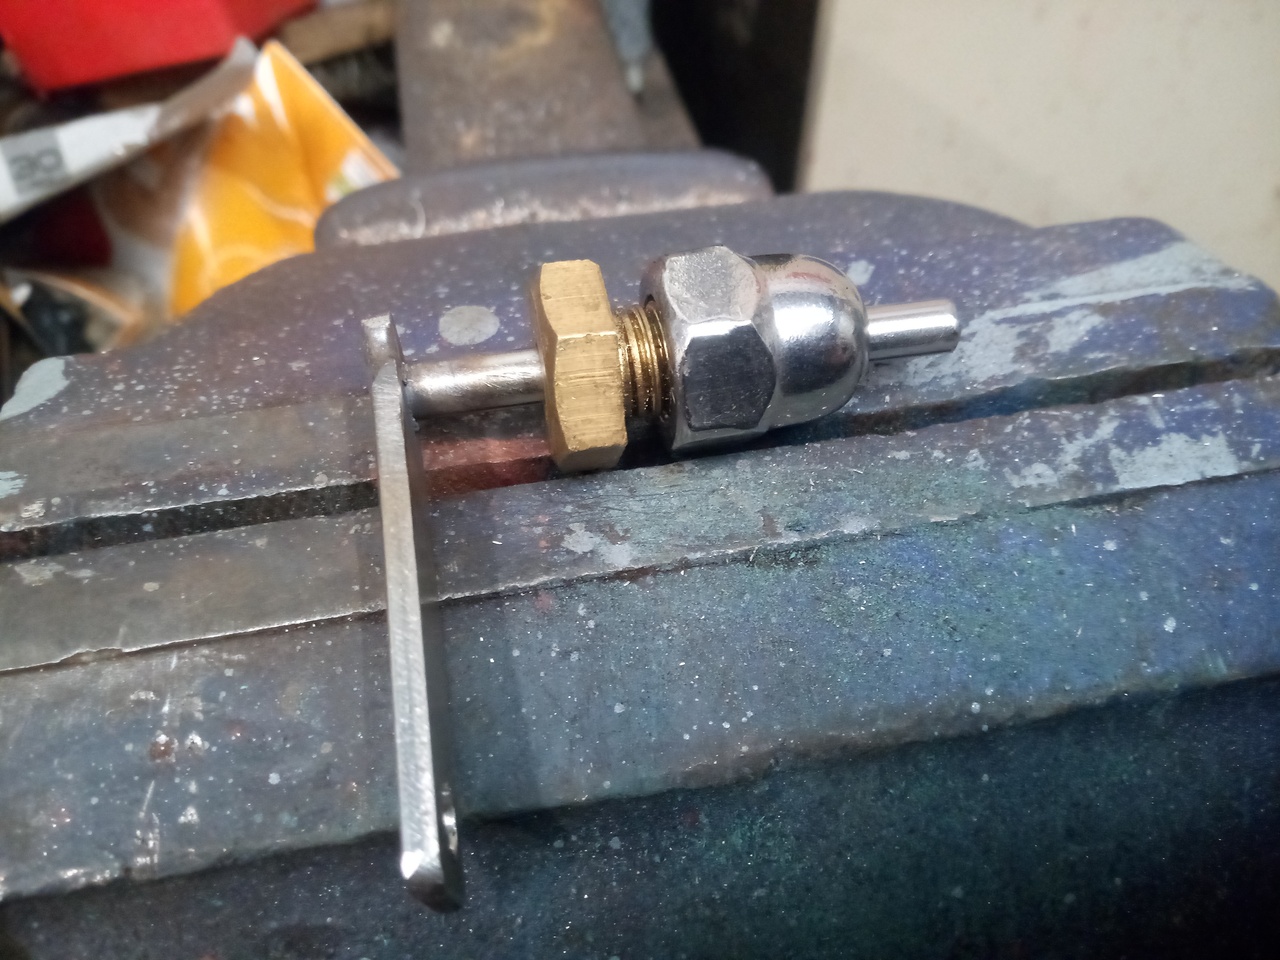 Can you tell what it is yet? ... That's right! It's a... 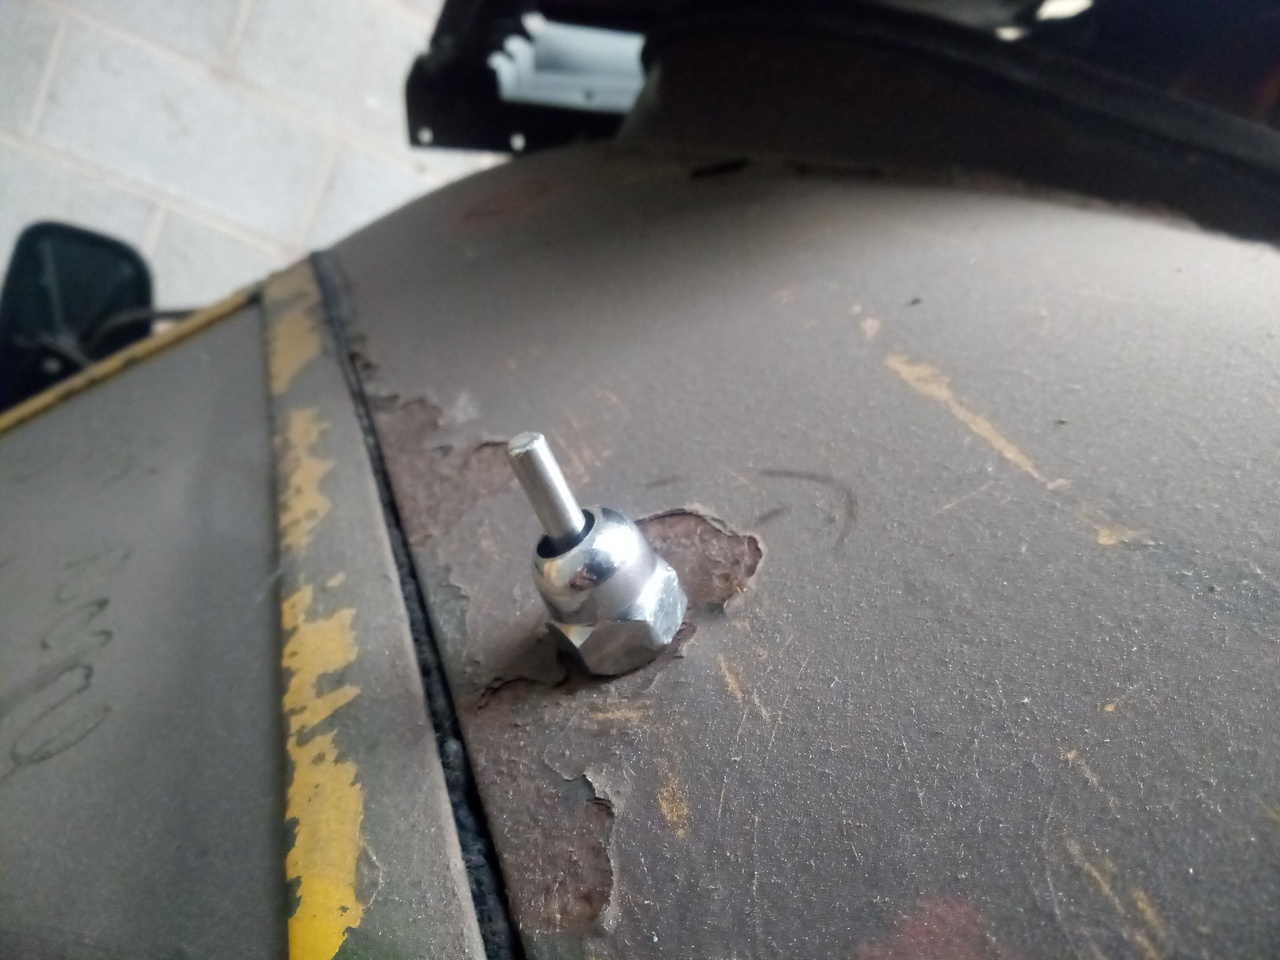 Wiper spindle.  Don't mind the wonkiness, the trial/test version was a misaligned loose mess for an assortment of reasons but it proved the concept enough that I decided to go ahead with it. There's some o-rings, washers, and a bit of grease involved as well in the final assembly. The shaft will have a flat filed on it so that I can fit the land-rover adapter bobbins; now if only I could find the wiper arms and the other adapter bobbin. The adapter that I know where it is, is stuck on the other (original) spindle and refuses to come off; and the arms have disappeared into the aether. Thankfully, they're not too expensive and at least this way I'll have spares if the first set I bought ever turn up again. (They're probably in the lockers that I can't get to, on the other side of the truck.  ) Crunching on forwards... Noodle wrangling, and painting. 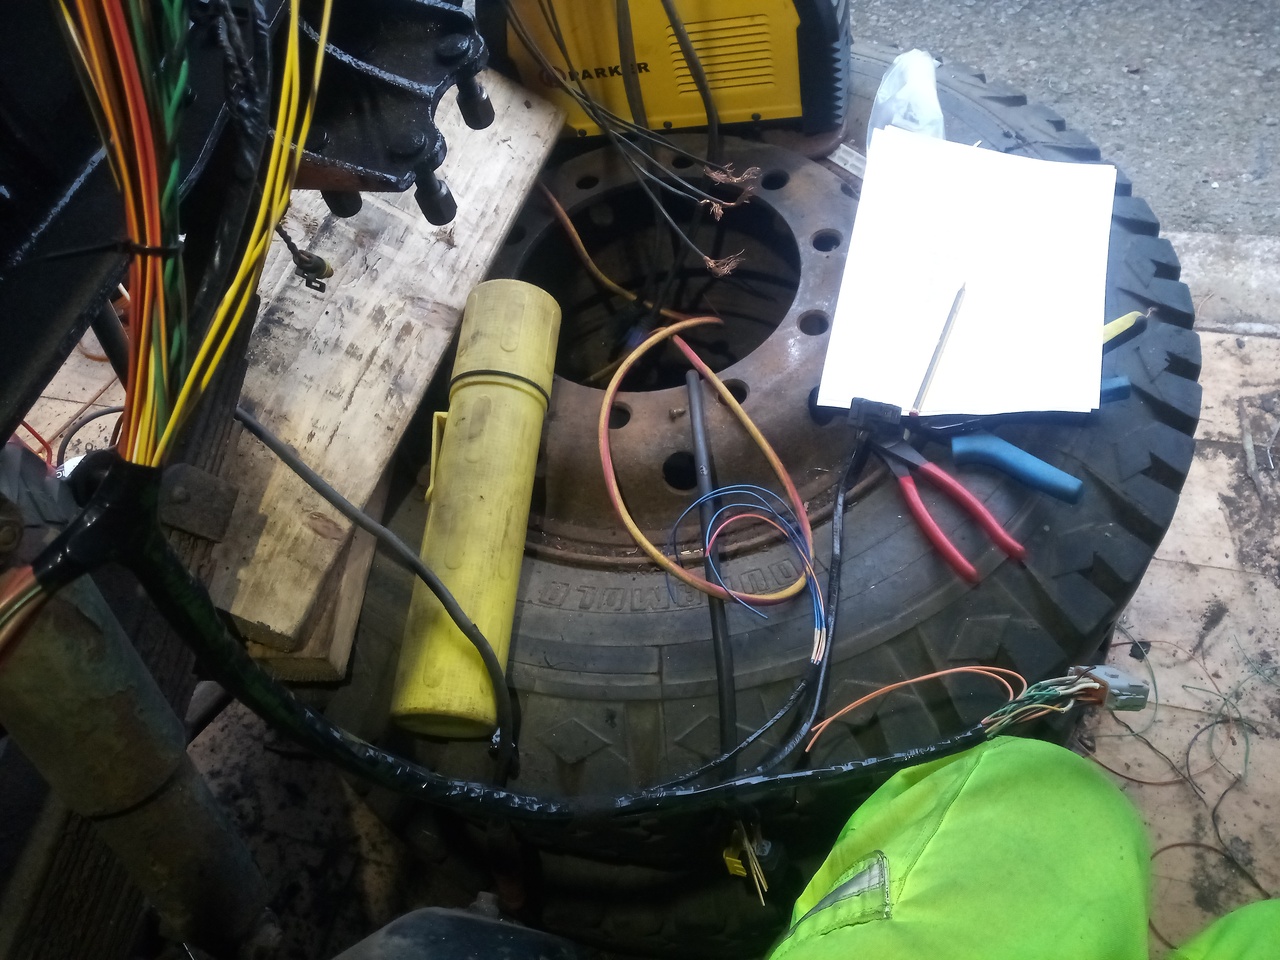 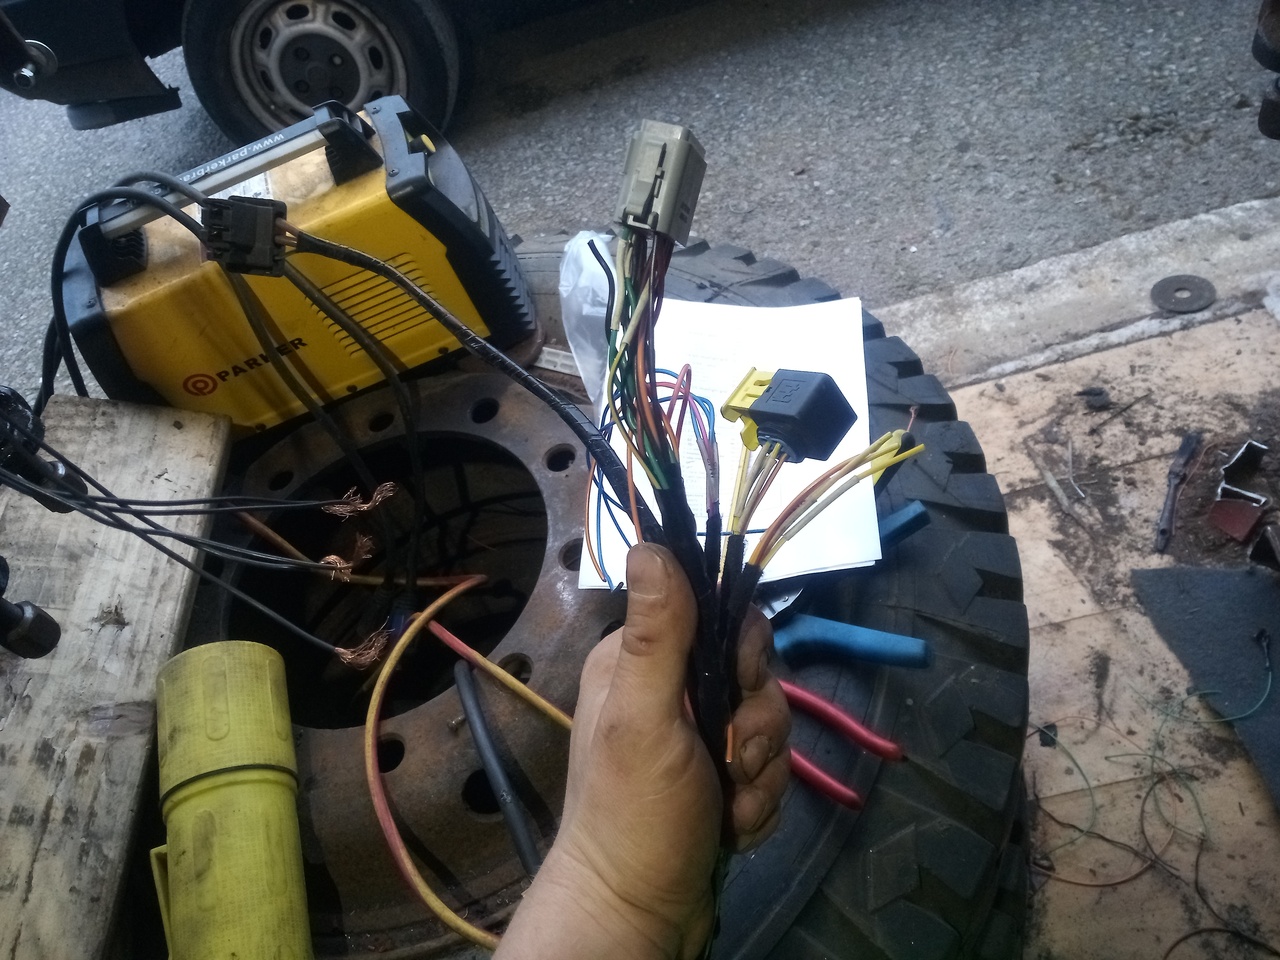 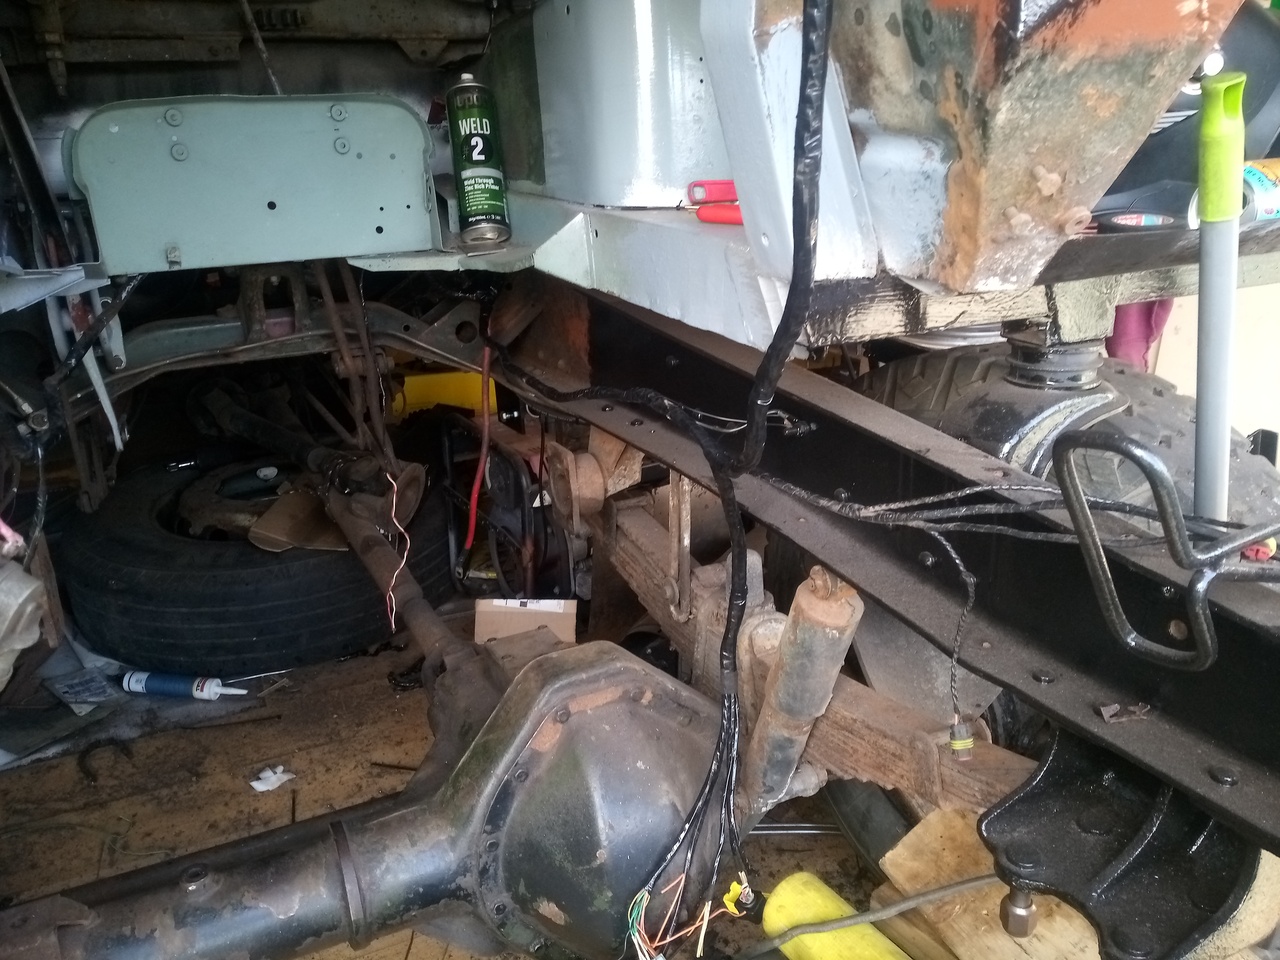 Taking a break from noodle-wrangling for a little bit, I decided to tackle something else. I'm a fan of using modern production parts where they make my life easier, but I also have Weird-Brain where there's just stuff I don't want to make permanent modifications to. So! I want nice grippy rubber pedal pads on the brake and clutch, but I also don't want to trash the original pedals because they're worn from hundreds of thousands of applications of size eleven boot, and that tells a story of its own, yeah? Well... 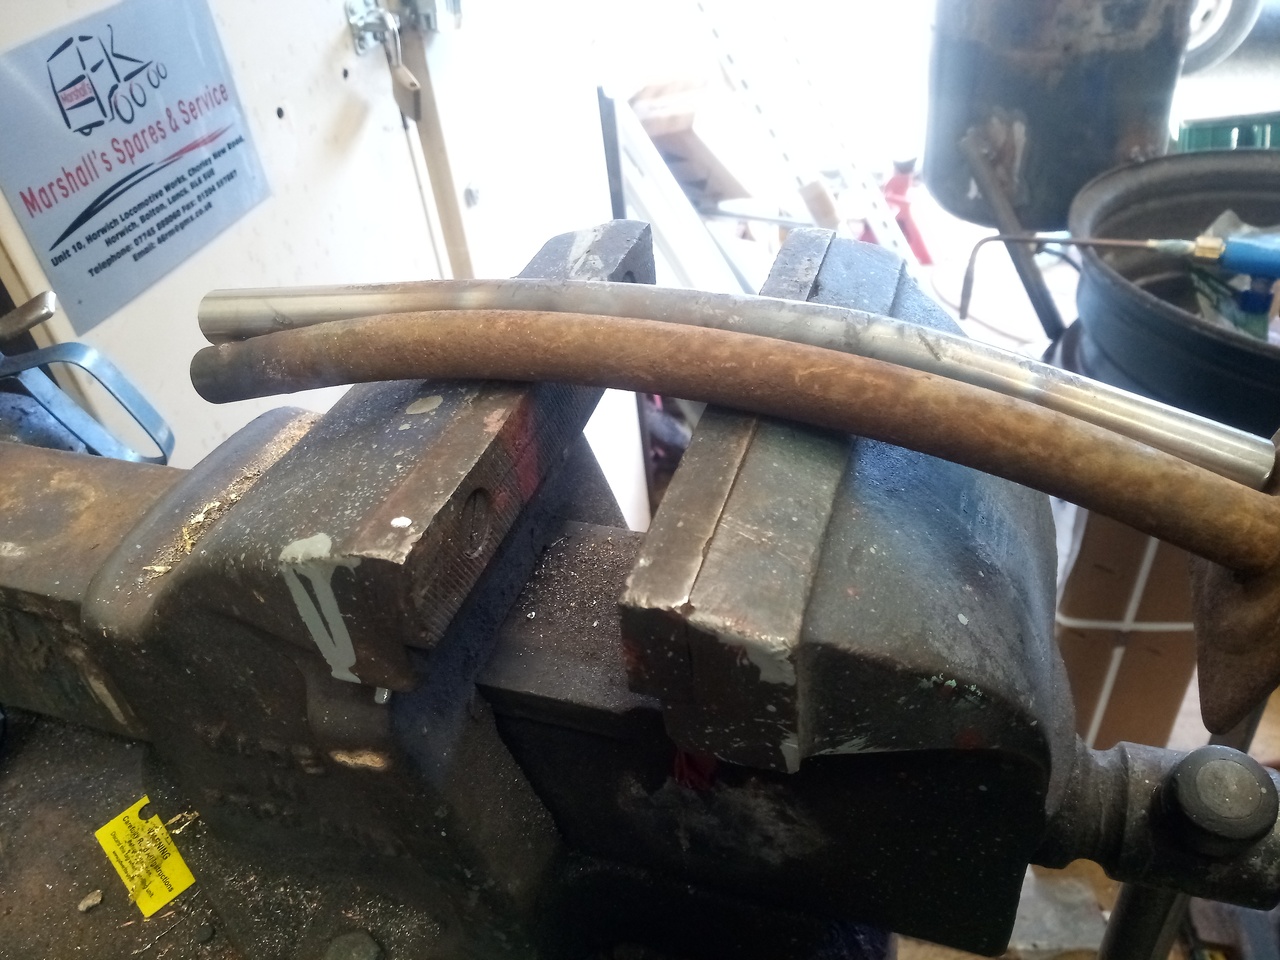 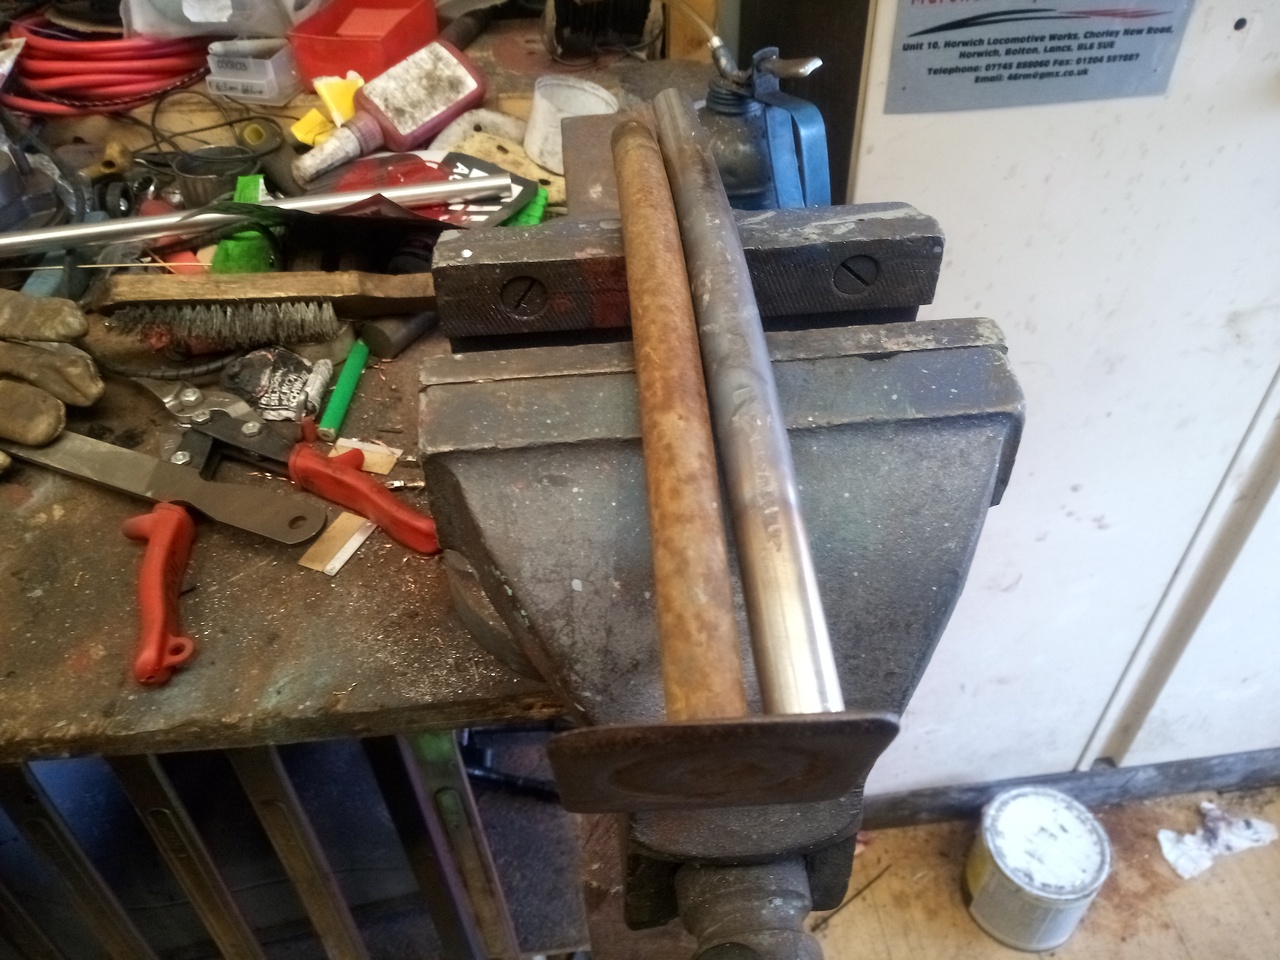 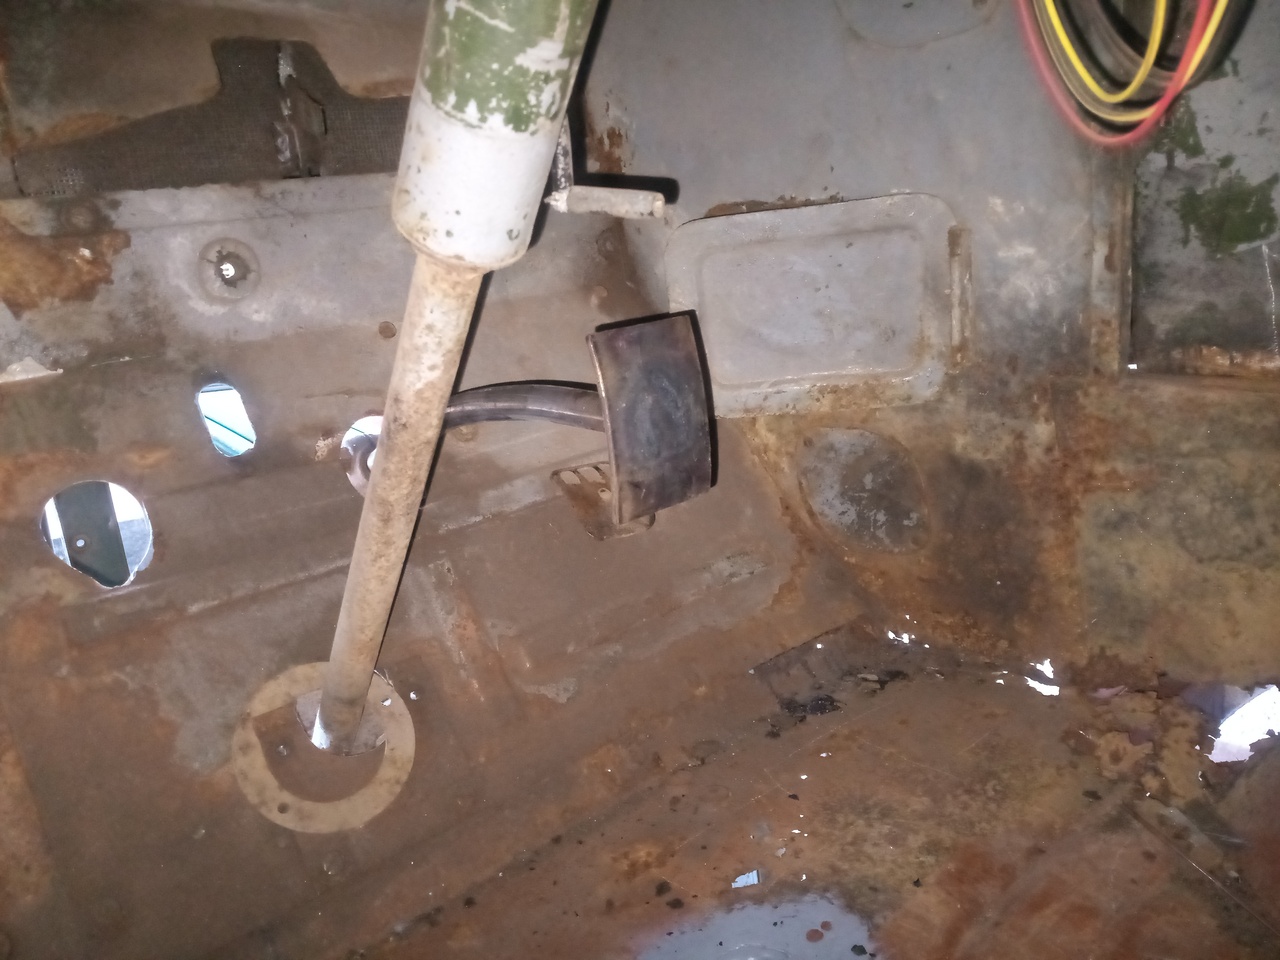 And, as they say, wollah! 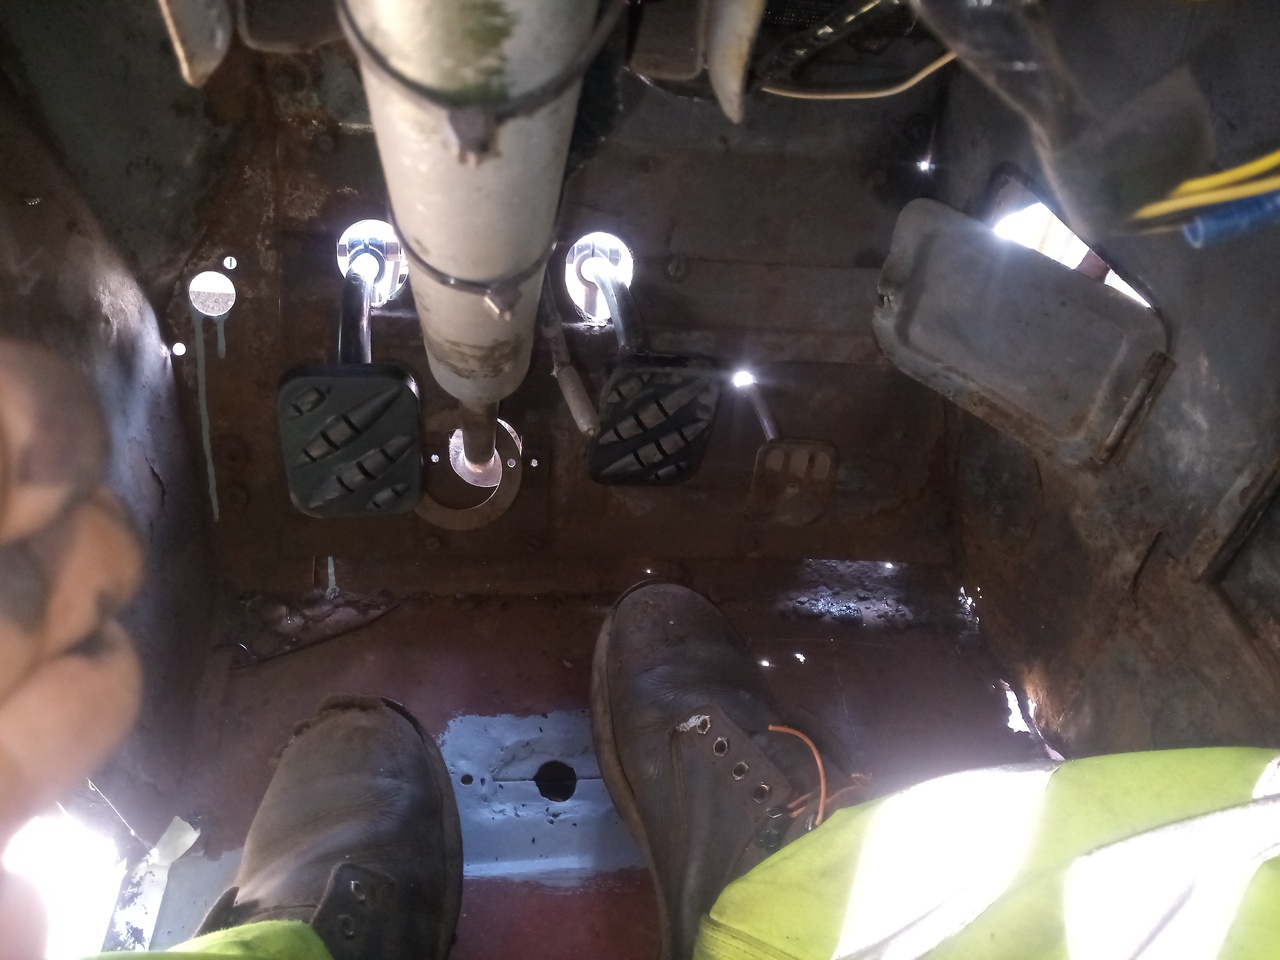 (Can you tell what they're off?  ) There's still some adjustment and tweaking to be made to line them up perfectly, but they're functional as they are. They were made to the same dimensions as the factory originals, other than the metal pedal itself. The brake pedal maybe needs a stronger return helper spring, because it doesn't quite fully return every time. But, of course, to fit that clutch pedal I had to clean and paint the clutch pedal arm, and refit it with some grease in place of the powdery rust on the pivot shaft. 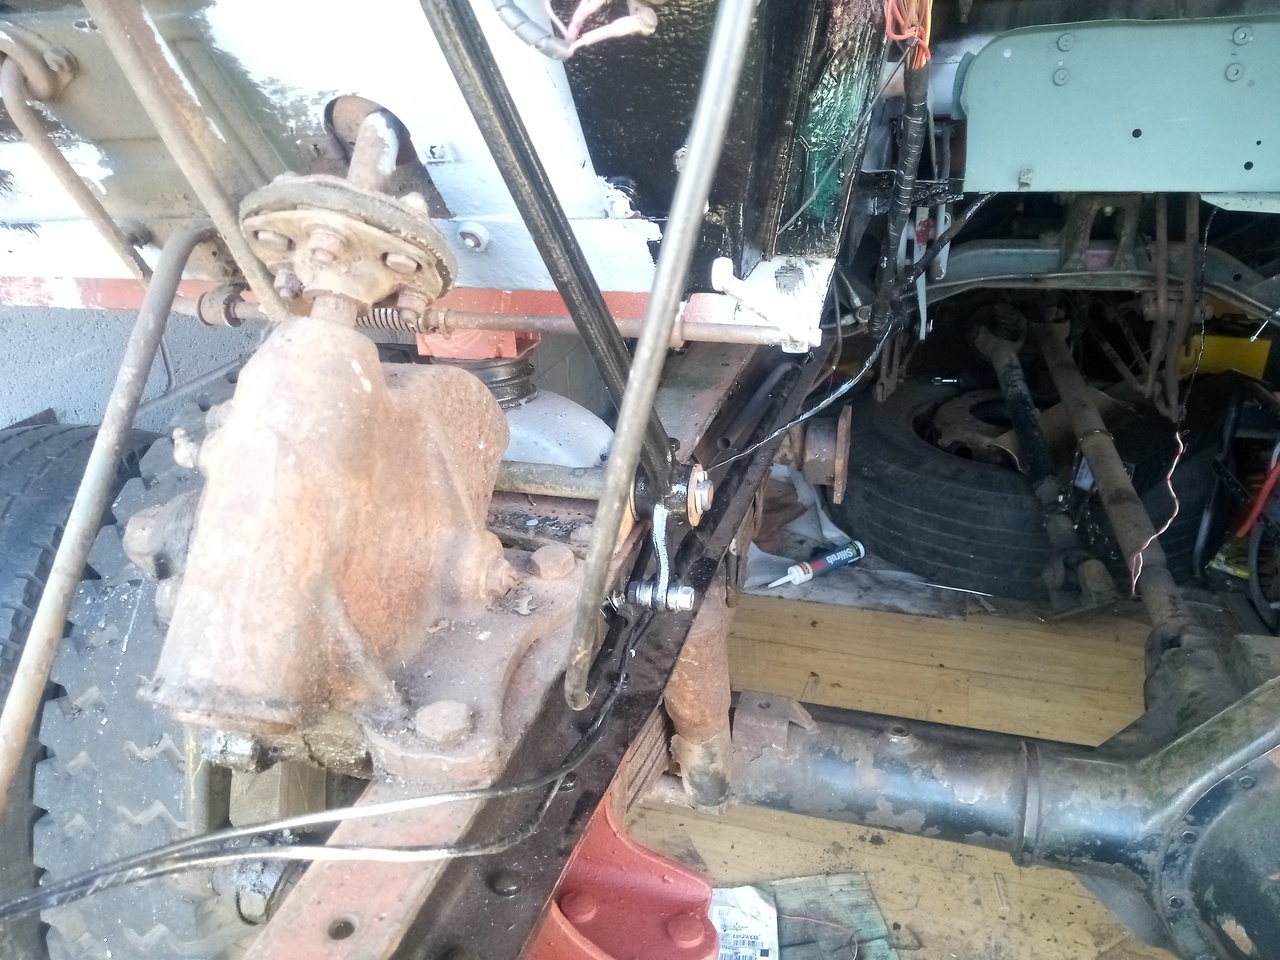 And then I had to temporarily move the return spring to give a much heavier return pull on the pedal, because it turns out that having grease in place of rust means the pedal moves that much easier now. It'll probably be fine once there's a clutch pivot there. Oh, yeah, and a bit more painting happened. 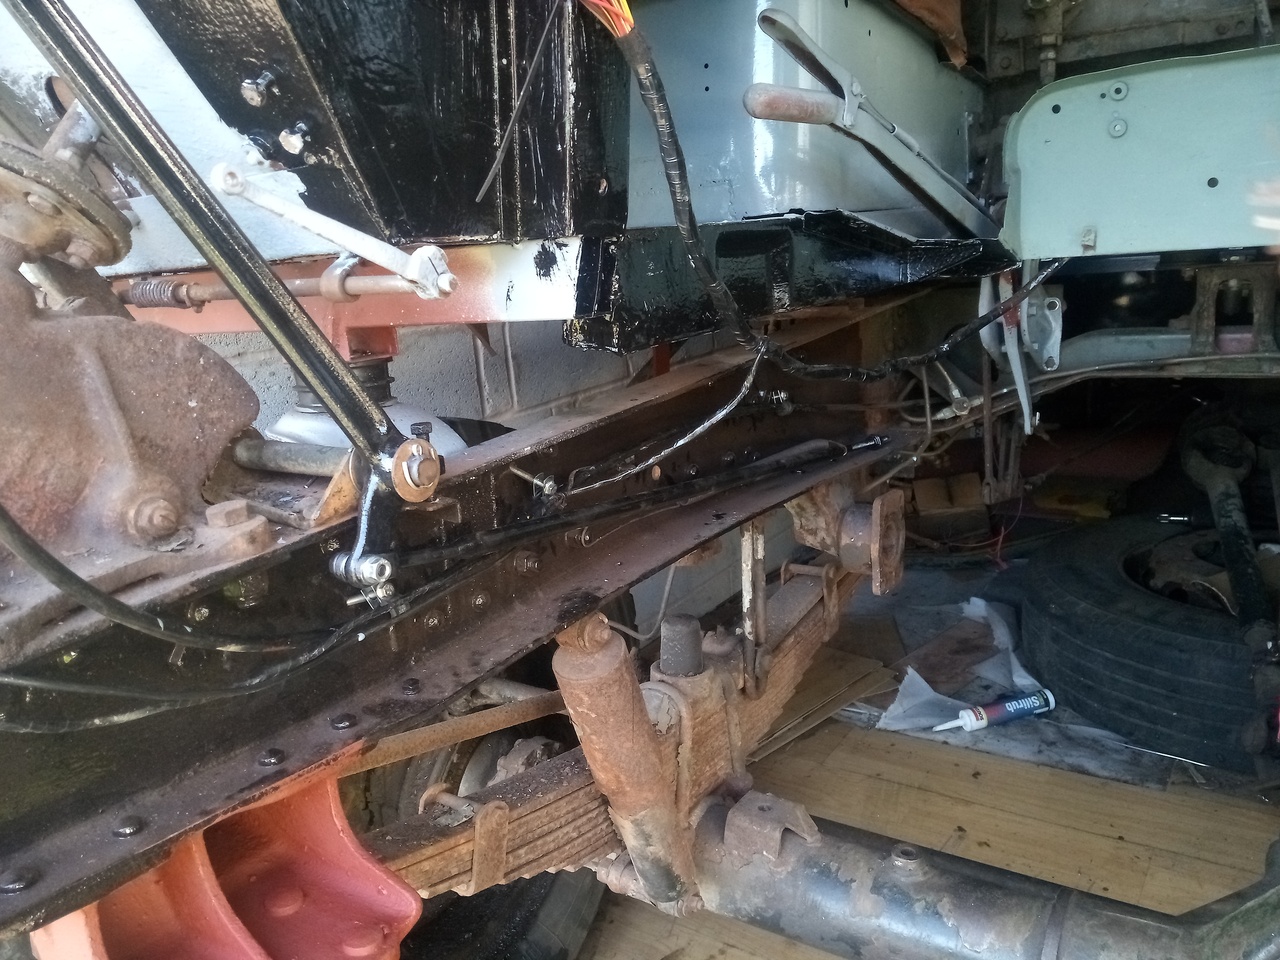 And a little bit more noodle-wrangling. 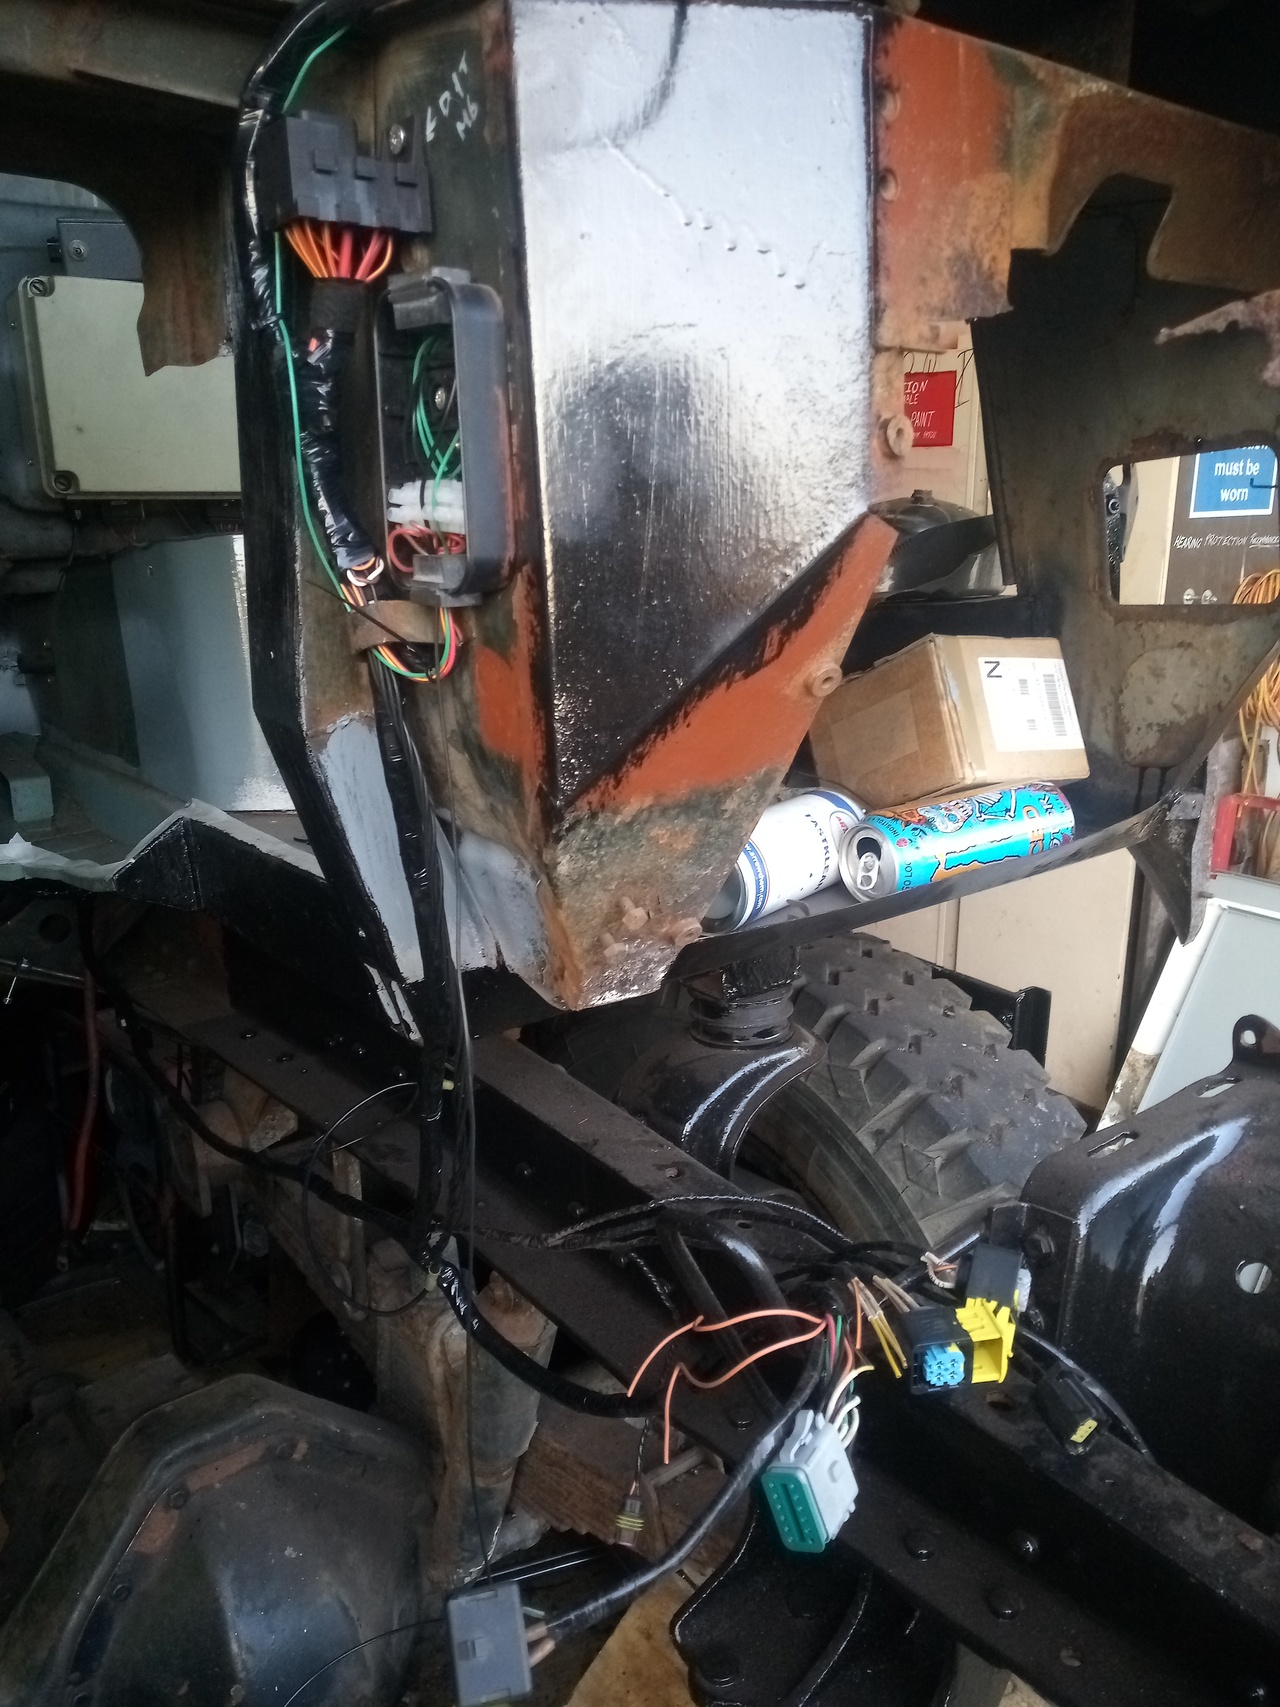 Which brings our engine bay to looking like this! 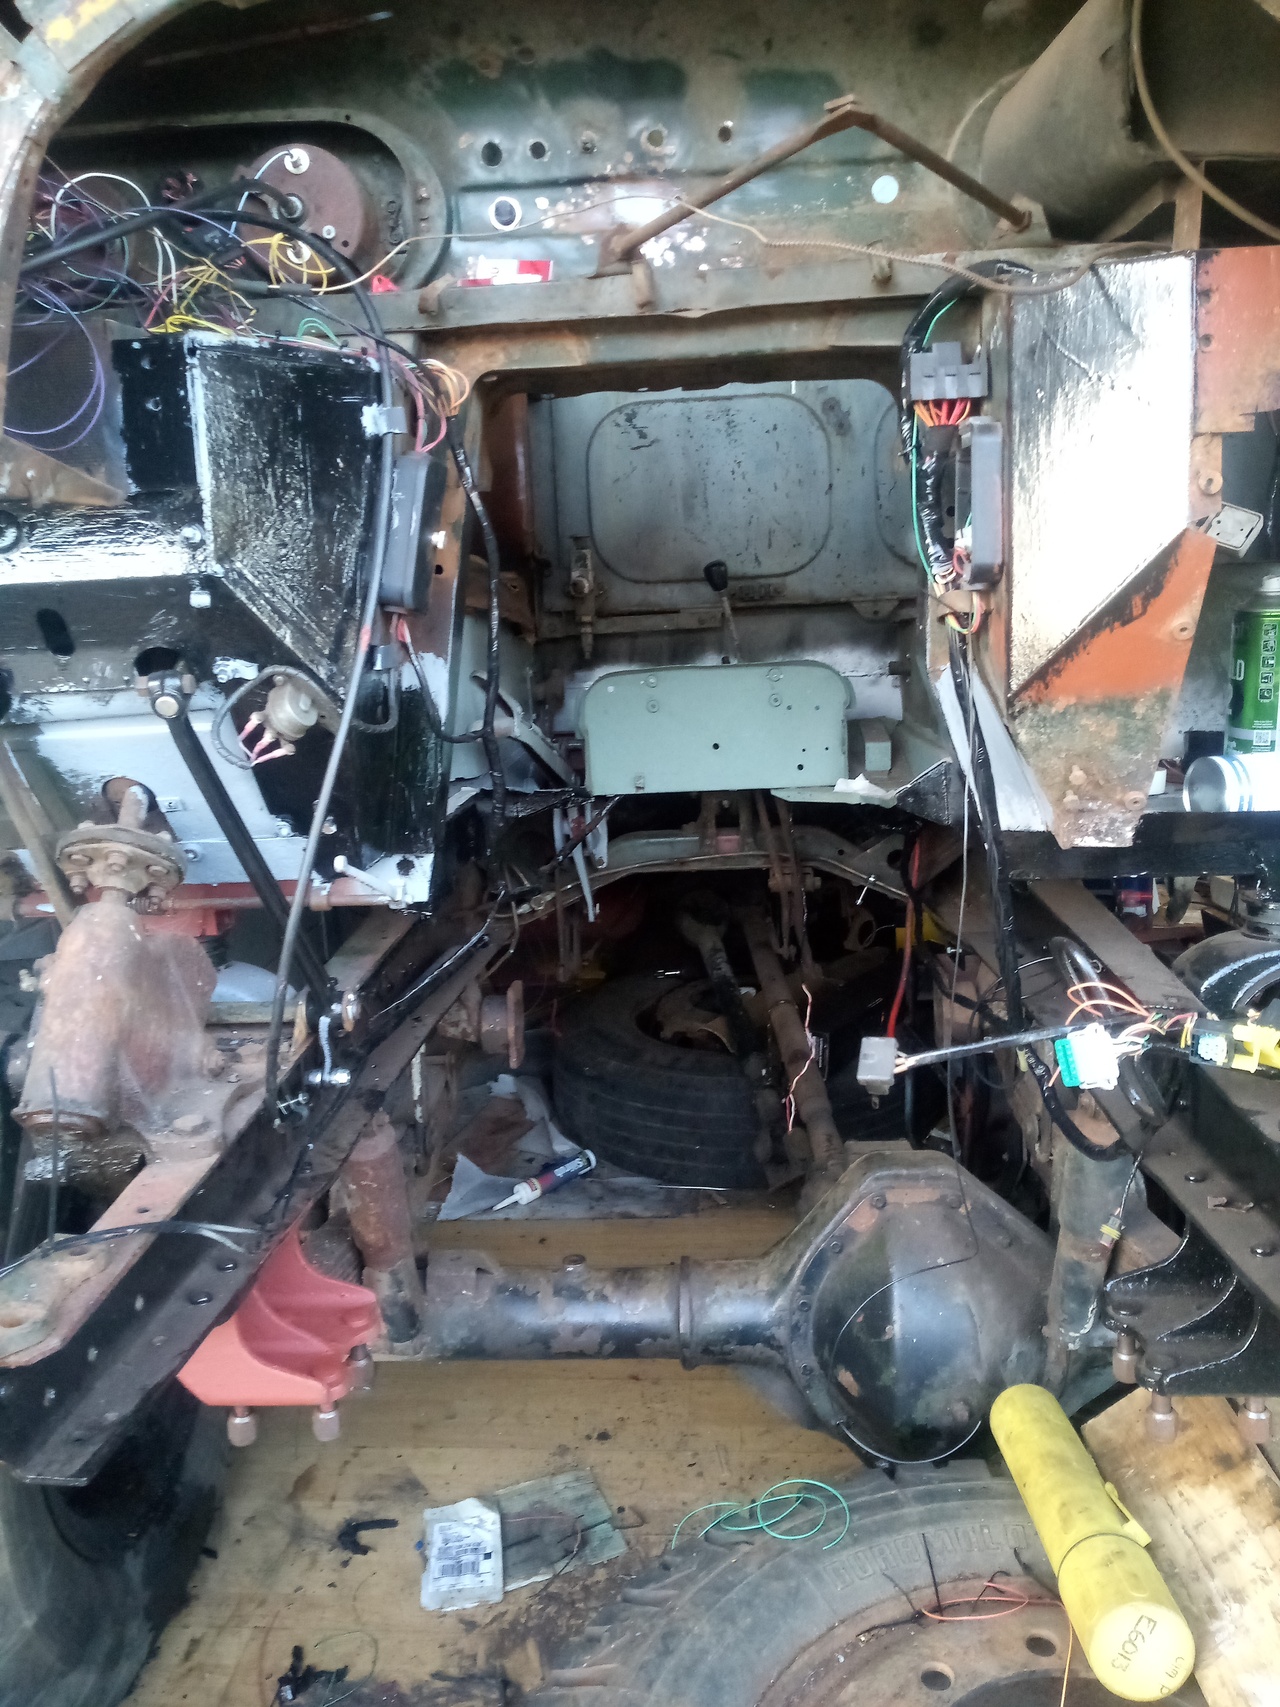 I've started P-clipping brake lines and whatnot, but that's stalled out on needing some more appropriately sized bolts. (Or I could just get happy with the countersink tool and use a bunch of those nice countersunk stainless screws I have. Hmmmm.) I've also managed to get the floor panel between the seats screwed down into place, so that makes me feel better. But that did let me notice that I don't quite have clearance for the transfer case levers to go all the way back without hitting my floor mounting bracket. I'm chipping away at the priority "blocking items" for getting the engine back in, with the intent of having ... well, the engine back in, before September. From memory, I have... - Clean & paint the chassis and crossmember behind the engine
- Clearance the bracket at the back of the cab, so the transfer-case levers clear
- Finish cleaning, priming, and painting the engine bay.
- Clean, prime, and paint, the inside of the dash! ...which probably means I have to weld up all those extra drilled holes, too.
- Secure brake pipes & wiring properly
- Passenger footwell welding nearest the engine. (and maybe take out that shoddy attempt at a hammer-formed bead)
- Maybe clean and paint the front axle, while I have the room? ...hmmm, the bottom of the diff cover is leaking a touch too, so maybe I should sort that out as well!
On the note of all the extra holes in the dash, I'm still scratching my head over how many of them I'm going to need to fill, and what else I might need to add in. Oh, yeah, and I need to fix the remote trigger for my tig welder, because a wire broke off that the other week and as I went to fix it I discovered my soldering iron had run out of gas, and when I went to fix that I discovered that my refill can is empty.  More to come as it happens. I had a productive Saturday this time around, with several hours of tinkering; and paid for it this Sunday. Unfortunately, work on the truck is constantly plagued by a lack of time, lack of money, and a lack of health; but as long as I keep chipping away at it when I can, it will become something nice! (...or it'll kill me. One or the other.  ) |
| |
-< Welder. Allegedly a mechanic. Bodger of Things >-
* 1958? Bedford RL - Progress: Glacial.
* 1994 Skoda Favorit - It's baaaaaaaack!
* 2018 Herald Classic - Gone!
|
|
Tamber
Part of things
  Shattered. Held together by spite and tape.
Posts: 341
|
|
Jun 18, 2023 21:44:35 GMT
|
Tiny little morsel of an update, mostly from late May. 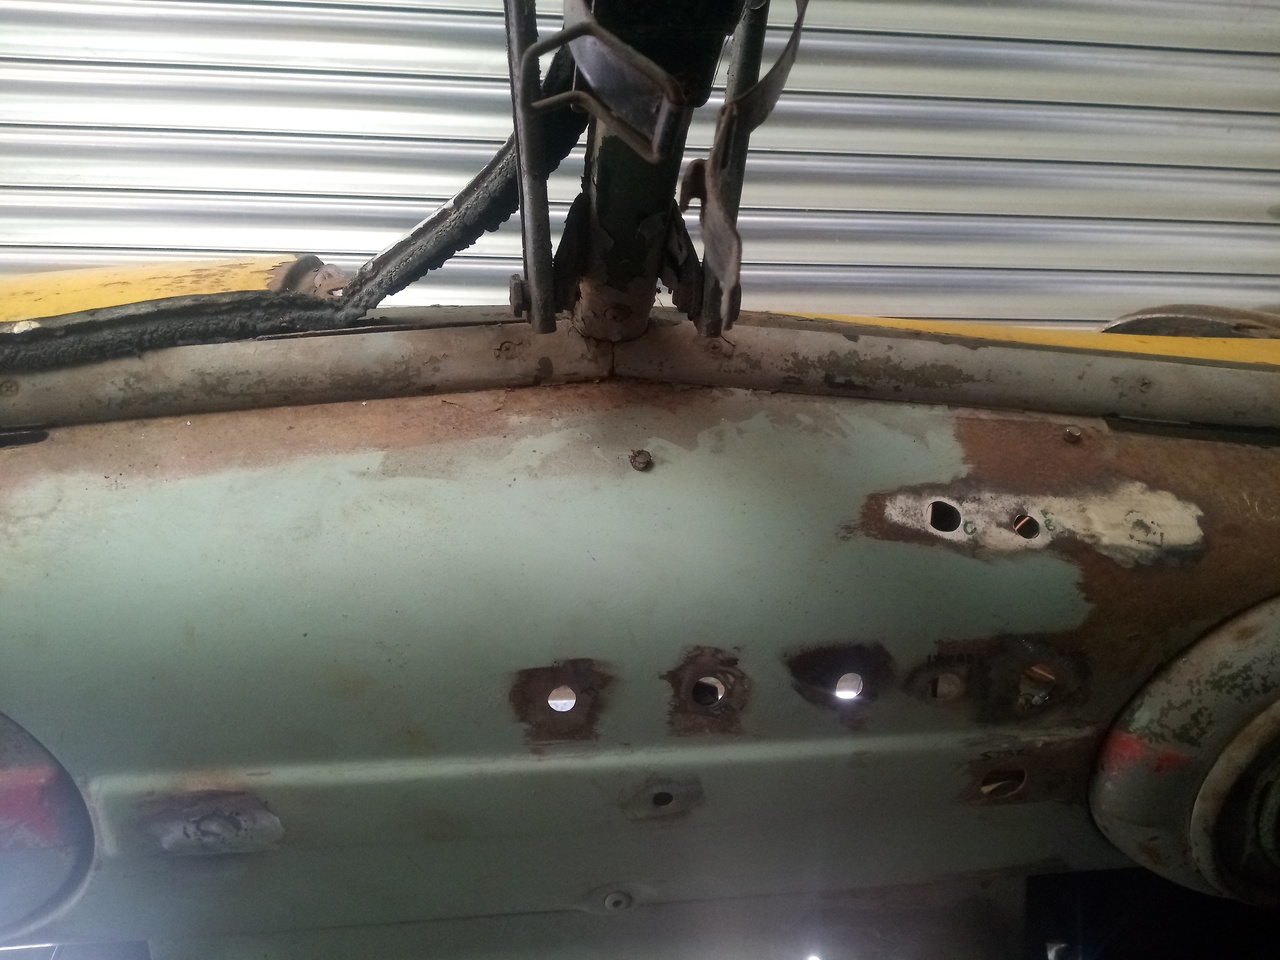 Welding up the surplus holes in the dashboard continues. 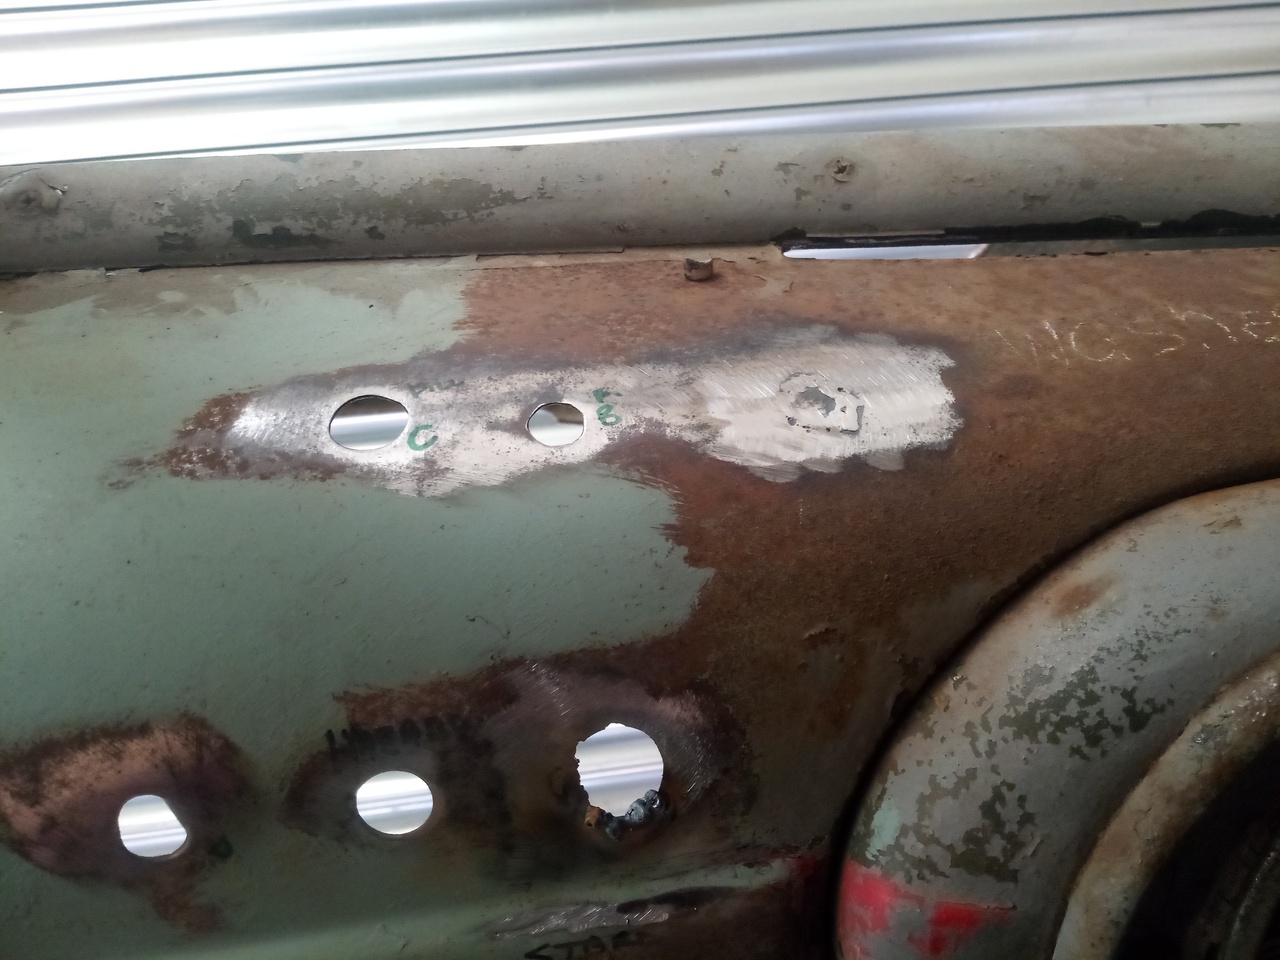 Including slightly shrinking the size of one of the ones I'm going to keep, because it's just a bit too baggy for the warning light I want to put in it. 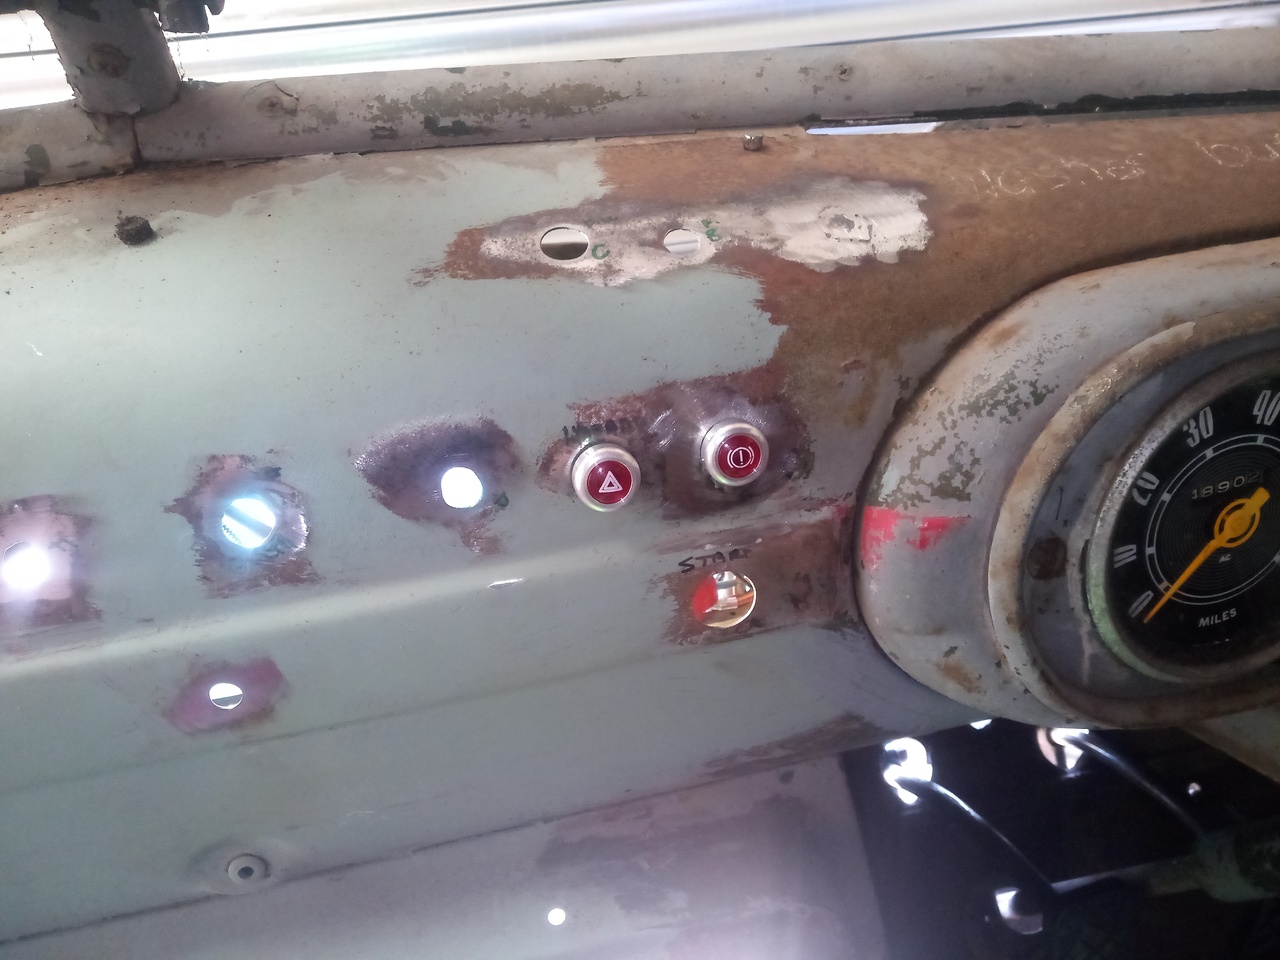 Not quite done yet, but better! I'm also going to end up keeping the starter button hole, and one other hole -- probably in line with the warning lights -- to put a washer pump button in. The hazards warning light uses the extra contacts on the hazard switch -- normally used to ensure power is supplied to the indicator flasher relay for hazards use when the ignition is off -- along with a couple of diodes to prevent crossfeeding of the left and right indicators, to flash only when the hazards are on. The other warning light -- and attendant VERY ANNOYING BUZZER -- comes on via a pair of pressure switches installed in the air system gauge feeds, so that I get audiovisual irritation when there's not enough air for the air assist/trailer brakes. I also have an additional input, in case I want to go through the trouble of adding fluid level switches to the master cylinder. Seems like a good idea to reduce the possibility of unexpected disaster. Whether it still seems like a good idea after I have to mess about trying to find level switches, and get them set up, is a different matter entirely. The switches are installed in a little aluminium block that I've drilled and tapped to make an air manifold out of, that I don't appear to have taken a picture of. And, conveniently, there are a pair of threaded inserts in the cab frame behind the dash, that I can use to mount it! But I didn't have any 5/16 UNC bolts, and since I'm constantly broke from having to feed the landlord's money habit (*grumblegrumble*) I didn't particularly feel like ordering any, so I thought I'd tap them out to M8 and use bolts that I actually have! ... The World's Worst Tap and Die Set strikes again. The cheese-grade tap is now a curse word combination of M8 and 5/16, and I'm going to have to try remember to grab my M8 tap set from work at some point, then I can finish the job properly.  Oh! I did manage to order in those wiper arm adapters, so I can get that done at some point. And I've got a set of wiper arms & blades in my ebay basket for later, so that I can try all of that stuff out and find out that none of it fits with the sweep I've got, or something. 
I continue to move very slowly. This project is on its 7th year, and 3rd location!  I'm going to have to see if I can book some time off in July/August and overcome the Bad Brain Juice™/Assorted Medical Woes™, because I've got the fun and joys of having to get my car through MOT coming up (Ough, that's gonna suck. More rust welding! I hate welding sheet metal and rust! Good job I don't have a project that's 60% that!  ), and also I want to meet that self-imposed deadline of getting the engine in before September. |
| |
-< Welder. Allegedly a mechanic. Bodger of Things >-
* 1958? Bedford RL - Progress: Glacial.
* 1994 Skoda Favorit - It's baaaaaaaack!
* 2018 Herald Classic - Gone!
|
|
Tamber
Part of things
  Shattered. Held together by spite and tape.
Posts: 341
|
|
Jul 15, 2023 20:19:22 GMT
|
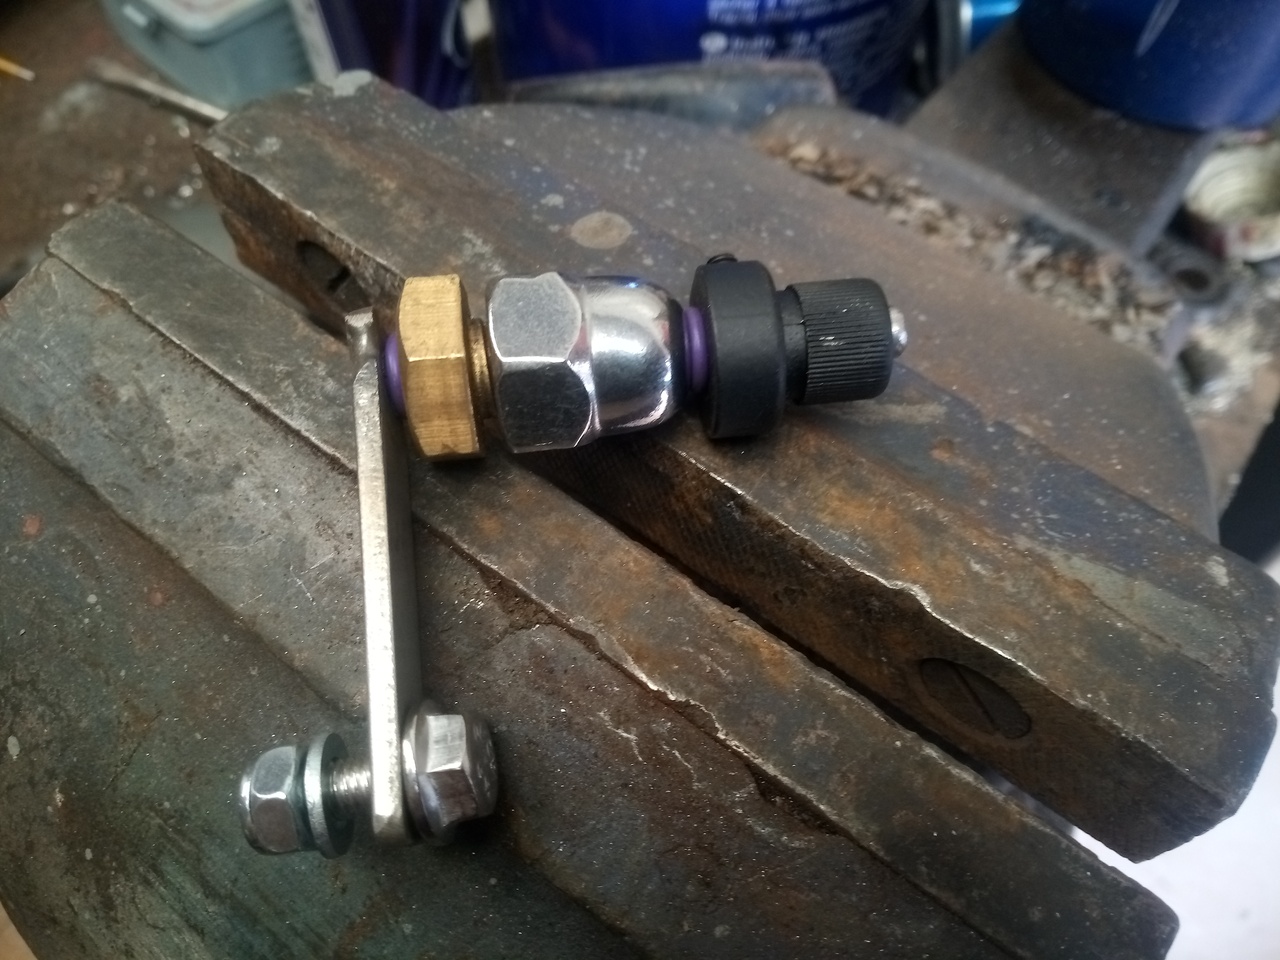 Remember these things? 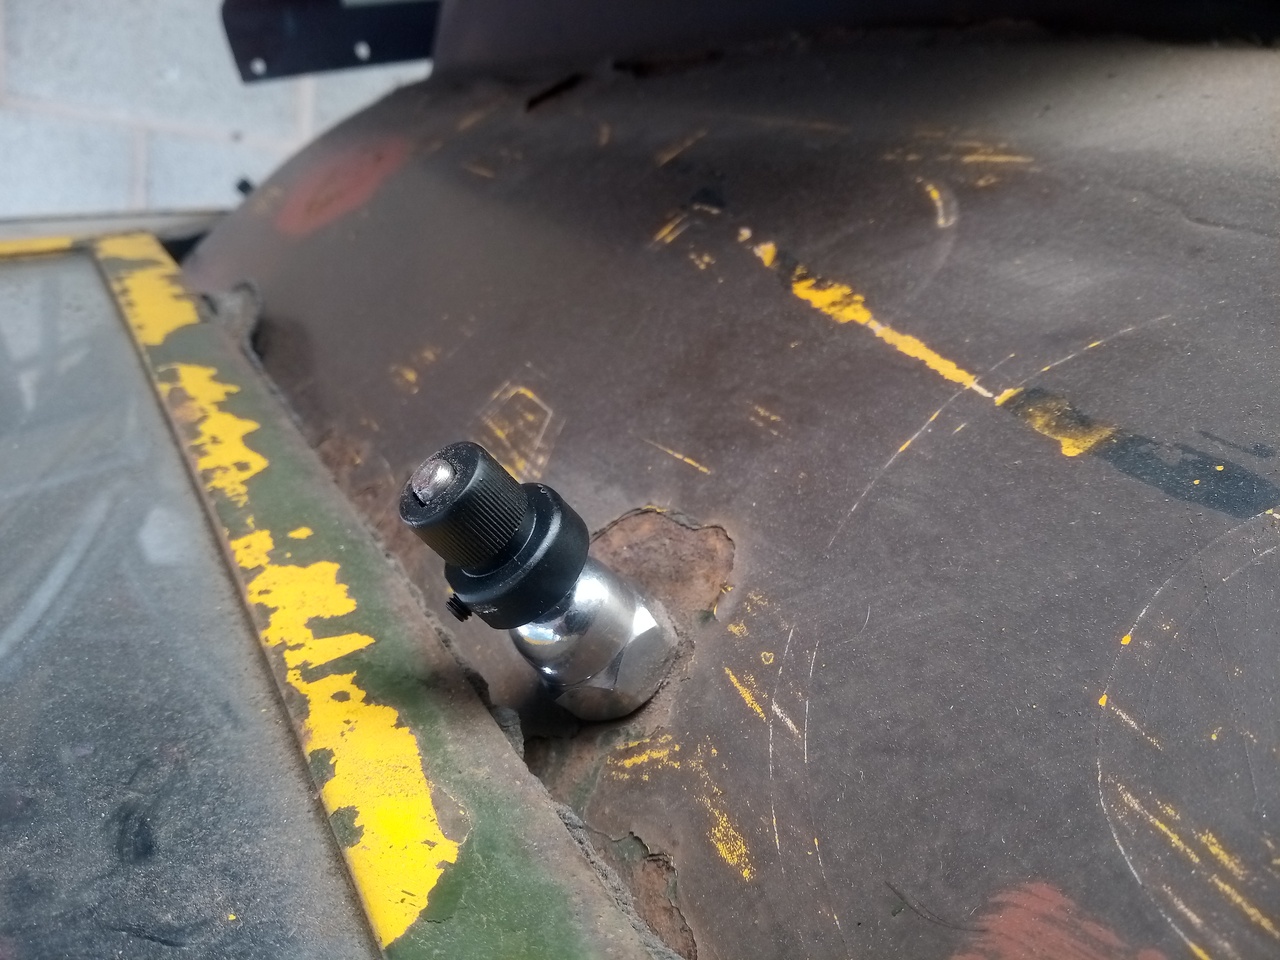 They go here. 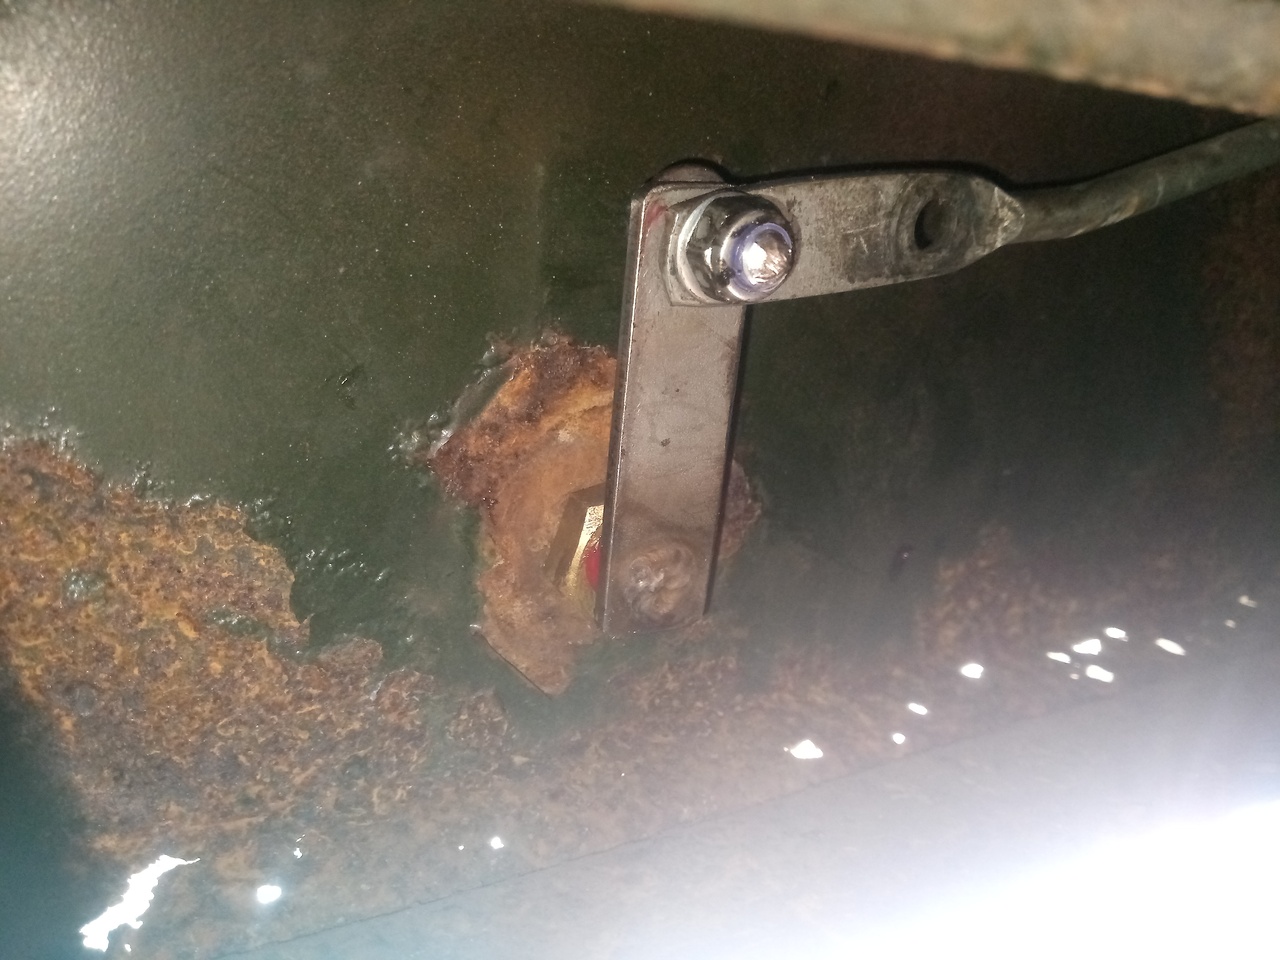 And with a bit of jiggery-pokery the linkage attaches like so. And when the wiper motor is powered, it wiggles them! And when my new wiper arms turn up -- because I still haven't found the previous set I bought -- I can find out just how wrong I got the geometry.  Now, I did some maths to work out how long these needed to be, but it's very difficult to measure the arm on the wiper motor and I've clearly gotten the length wrong because the sweep looks very narrow indeed. That's easy enough to rectify, with another hole drilled in the new spindle arm and relocate the bolt; but I'm loathe to do that until I have the wiper arms on and know how far I can push things. Quite pleased with that, I set about attaching things like brake pipes and the speedo cable with P-clips, and bolts that aren't a foot long. And when I trundled my way through that, I thought I might as well scrub up and paint some primer on the last bits of the inner chassis legs where I won't be able to get to them after the engine's in! And after that I figured, I've already got the paintbrush out... how about doing an interior panel in that nice grey that it's supposed to be? 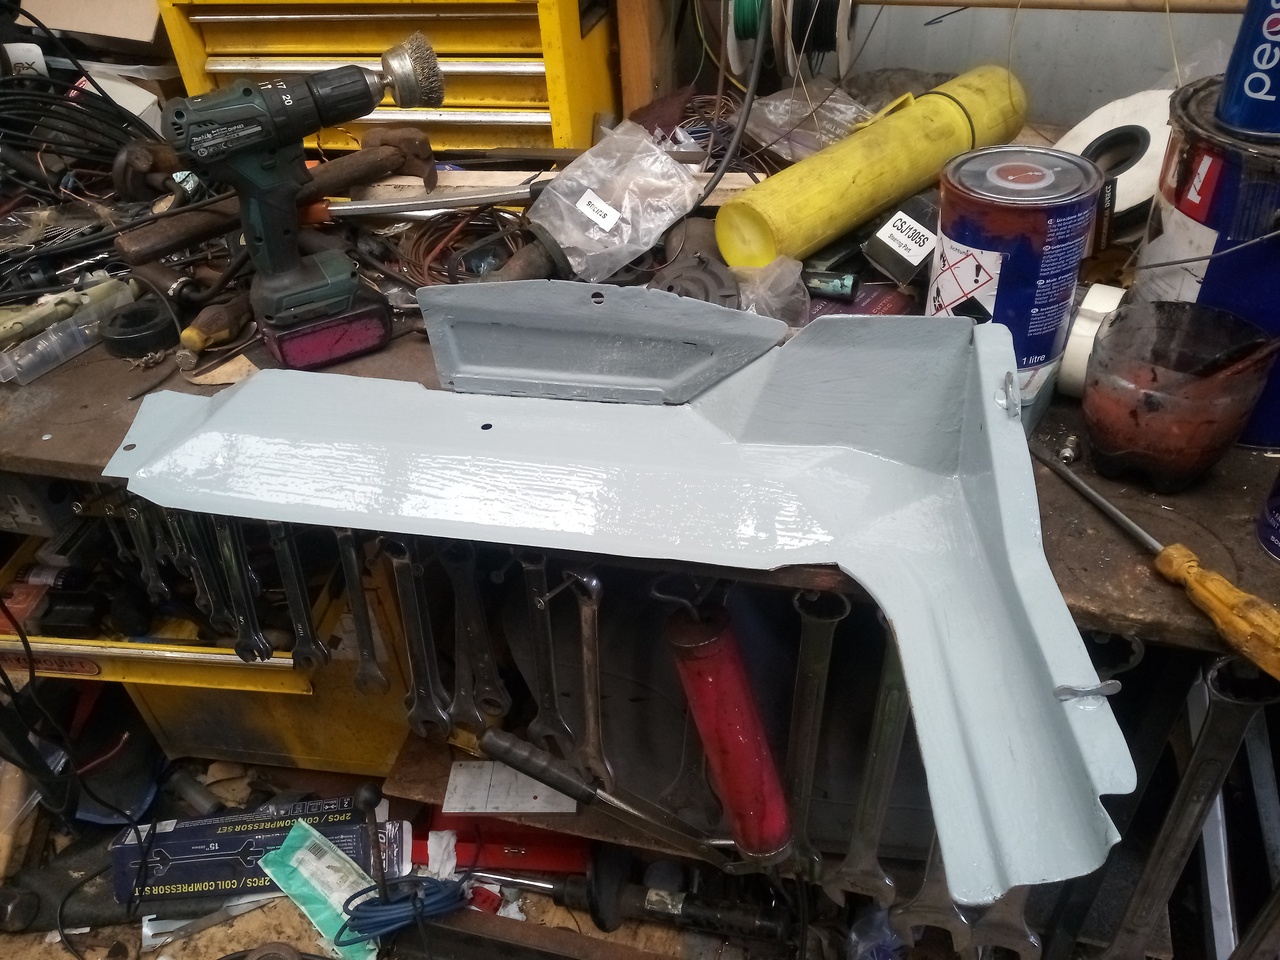 Yeah, like that. That's quite pleasing. That'll get another coat or two, and some sanding, and it'll be quite good. I have just discovered, though, that I have made a major miscalculation; my car's MOT runs out at the end of this month, so I have ... two weeks to fix my car and get a pass. And I have an exhaust to make! ...so that's going to take priority! No pressure! |
| |
-< Welder. Allegedly a mechanic. Bodger of Things >-
* 1958? Bedford RL - Progress: Glacial.
* 1994 Skoda Favorit - It's baaaaaaaack!
* 2018 Herald Classic - Gone!
|
|
Frankenhealey
Club Retro Rides Member
And I looked, and behold, a pale horse! And its rider's name was Death
Posts: 3,885
Club RR Member Number: 15
|
|
Jul 15, 2023 22:02:59 GMT
|
The other warning light -- and attendant VERY ANNOYING BUZZER -- comes on via a pair of pressure switches installed in the air system gauge feeds, so that I get audiovisual irritation when there's not enough air for the air assist/trailer brakes. Very important to be very annoying and loud! Brake failure is bad on any old vehicle without split circuit brakes but on an RL it's a brown trouser moment that still gives me nightmares IMHO slow is good. At least that's what I tell myself  Look after yourself |
| |
Tales of the Volcano Lair hereFrankenBug - Vulcan Power hereThe Frankenhealey here |
|
Tamber
Part of things
  Shattered. Held together by spite and tape.
Posts: 341
|
|
Jul 20, 2023 22:37:06 GMT
|
Wiper arms and blades came in, and a few things have been learnt. 1. I very definitely got the geometry of my new spindles wrong. Barely 45° of sweep!  Not too bad to fix, just means redrilling a hole; and now that I've put the arms and blades on, I know what my clearances are, so I know how much to change it. 85° should do it, with the 13" blades. 2. Pretty sure my wiper sweep was backwards. Again, not too hard to fix, just flip the spindles so the arm is on the other side of the linkage and reattach. 3. The defender wiper arms I've bought have the wrong crank in them. They're about the exact opposite to what I need; but that's not a massive surprise because my wiper spindles are above the windscreen, the Defender's are below. Another thing that's not too bad to fix, as they're only steel. I can cut them off and weld them on at a different angle. Customising the part is a damn-sight easier than building it from scratch! And they were cheap. ...yes, I know this is a bit silly, focussing on the wipers when I still have gaping holes in the cab that I need to fix  But I'm rolling with what my brain permits me to do, and it's still things ticked off the list. This weekend is going to prioritise the car, though. Maybe I should make a thread on that... |
| |
-< Welder. Allegedly a mechanic. Bodger of Things >-
* 1958? Bedford RL - Progress: Glacial.
* 1994 Skoda Favorit - It's baaaaaaaack!
* 2018 Herald Classic - Gone!
|
|
|
|


 Pretty sure I can still fit the rubber boot on the back of the headlight itself, though, so that might go a long way to preventing water ingress.


 )
)


