|
|
|
|
|
Keep up the good work, my friend. At the end of the tunnel is a kick ass car. I, and many others I'd imagine are following your progress with much interest.  |
| |
|
|
|
|
|
|
|
|
|
|
Like all the cars ive had, they give with one hand and take with the other.
The repairs are looking good and good progress for sure, shame about the new found rot.
I have a metal folder and it really is a great thing to have - much quicker, much more accurate, and makes any repairs sections that I have made look much neater. I bought a secondhand 4ft Edwards which didn't break the bank.
|
| |
|
|
|
|
|
|
|
|
holy smokes that hole escalated , well done for the drive and positive attitude ,its going to b great to drive once done .
|
| |
|
|
|
|
|
Aug 30, 2019 10:48:53 GMT
|
|
Could be a lot worse at least you have plenty of solid metal to weld to, being mostly being flat panels it will go back together pretty quickly, keep up the good work it will be great when done.
|
| |
|
|
|
|
|
Aug 30, 2019 18:54:33 GMT
|
|
Keep going - you're doing a cracking job!
|
| |
1968 Mini MkII, 1968 VW T1, 1967 VW T1, 1974 VW T1, 1974 VW T1 1303, 1975 Mini 1000 auto, 1979 Chevette, 1981 Cortina, 1978 Mini 1000 1981 Mini City, 1981 Mini van, 1974 Mini Clubman, 1982 Metro City, 1987 Escort, 1989 Lancia Y10, 1989 Cavalier, 1990 Sierra, 1990 Renault 19, 1993 Nova, 1990 Citroen BX, 1994 Ford Scorpio, 1990 Renault Clio, 2004 Citroen C3, 2006 Citroen C2, 2004 Citroen C4, 2013 Citroen DS5. 2017 DS3 130 Plenty of other scrappers!
|
|
goldnrust
West Midlands
Minimalist
Posts: 1,889
|
|
Aug 30, 2019 19:15:26 GMT
|
Cheers guys  I appreciate the pep talk!  @elkyholic Yeah, it would be lovely to have a decent sized 'proper' folder, I've used one at my dads' work in the past and it's much better than the small DIY ones. ...But there's definitely no room in my shed for it! That, and I have promised myself that this will be the last big restoration (yeah right... ) so after this one sill it's hopefully gonna collect dust in the corner! I stopped in at MachineMart today on the way home from work and picked up a cheap metal folder, so I'll try that out over the next few days! I'm not expecting it to be marvellous, but it should do the trick. kevins yes it could definitely be worse! This is the first part of the car that I've found (so far!) where sections are actually rusted away, instead of just being a bit frilly. Looking at some of the Daimler/Mk2 Jag restorations across the web, so many of them are easily as bad as this sill over the whole body. The sort of thing where you can't even tell where the original metal would have gone, because it's all just missing. So I've been pretty fortunate I think. I suspect in a way that it being off the road for the last 30 years has helped save it in that respect. |
| |
|
|
|
|
|
Aug 30, 2019 23:45:49 GMT
|
Another great goldnrust thread. Keep up the superb work. These are lovely motors to drive. |
| |
|
|
|
|
|
|
|
|
Yay- this is panning out exactly like all your car projects do. "oh its just a little patch needed here so I'll cut this bit out and then fix it..... hang on, oh curse word! "
As you've seen I made up totally usable sill sections just using my little 4ft folder. You do end up with very small ridges but they are barely noticable and anyway- its a sill that faces the ground so who cares how smooth it is.
All mig welders I have used, including our newer invertor type, have a noticeable drop in performance when using a long extension cord or two. I use beefy cords with a minimum 1.5mm2 section wires but even then they stBUt your welds still look fine anyway! Perfectly fine for floor repairs. Mig welds never look sexy.
|
| |
|
|
goldnrust
West Midlands
Minimalist
Posts: 1,889
|
|
Sept 1, 2019 19:53:47 GMT
|
Well I hope it doesn't keep going that way Alex! Next time I want to find that the little patch is indeed just a little patch! Interesting about the extension length. This was using a 50m extension on a reel when the welder started complaining. But it's also the same one I've used for all of the rest of the welding I've done, and all of the welding on the Spitfire without problem (as far as I know!) Anyway, I didn't get a huge amount done this weekend, but I did make a start on repairing this sill and that is a nice feeling. Nice to be on the reassembly stage again.  I cut out all of the grotty bits on the inner sill, then made up a multitude of little patches to fill them. The new metal folder helped here, as instead of bending each patch separately, I just made up a 2ft long section of the right bend then chopped it into sections to use. Much quicker  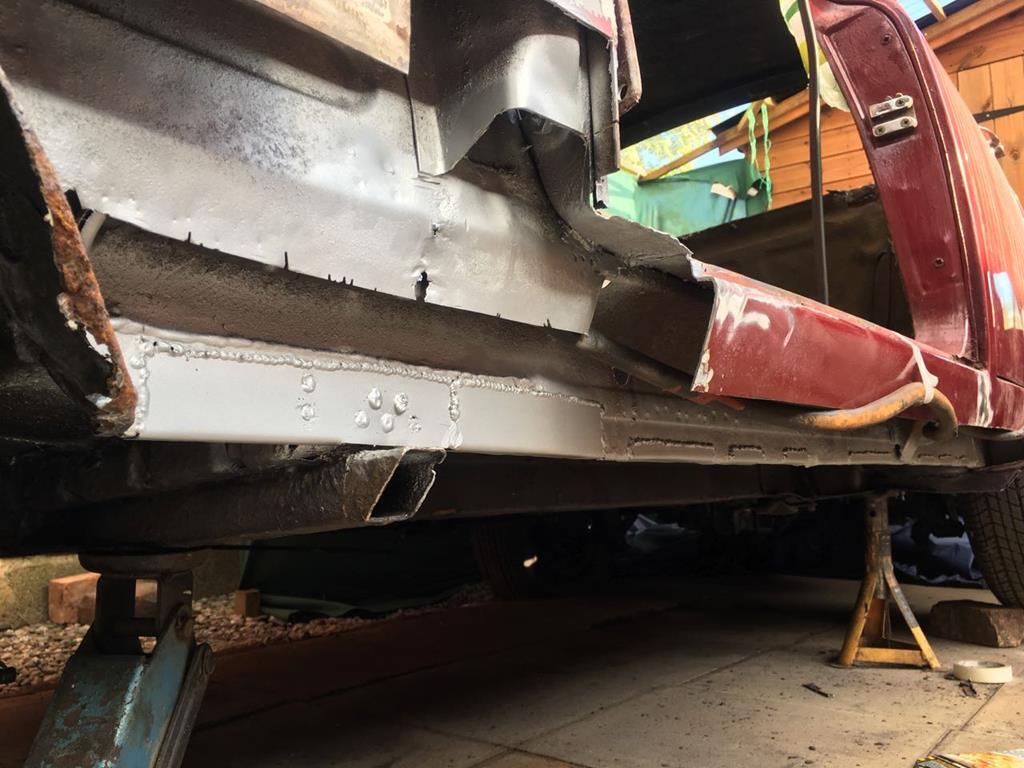 With the welder on the short extension lead it performed just as it usually does, so that's good  After that I made up the patch for the middle sill. I've been reading jonomisfit 's great Morris 8 thread, so figured I'd have a (curse word) go at some swaged holes, just using a couple of sockets and my press, to add a little more strength to this middle sill piece. They don't look brilliant (needed the proper tool really and to drill the bloody holes in a straight line!) but I could definitely feel that the piece felt stiffer after adding them. 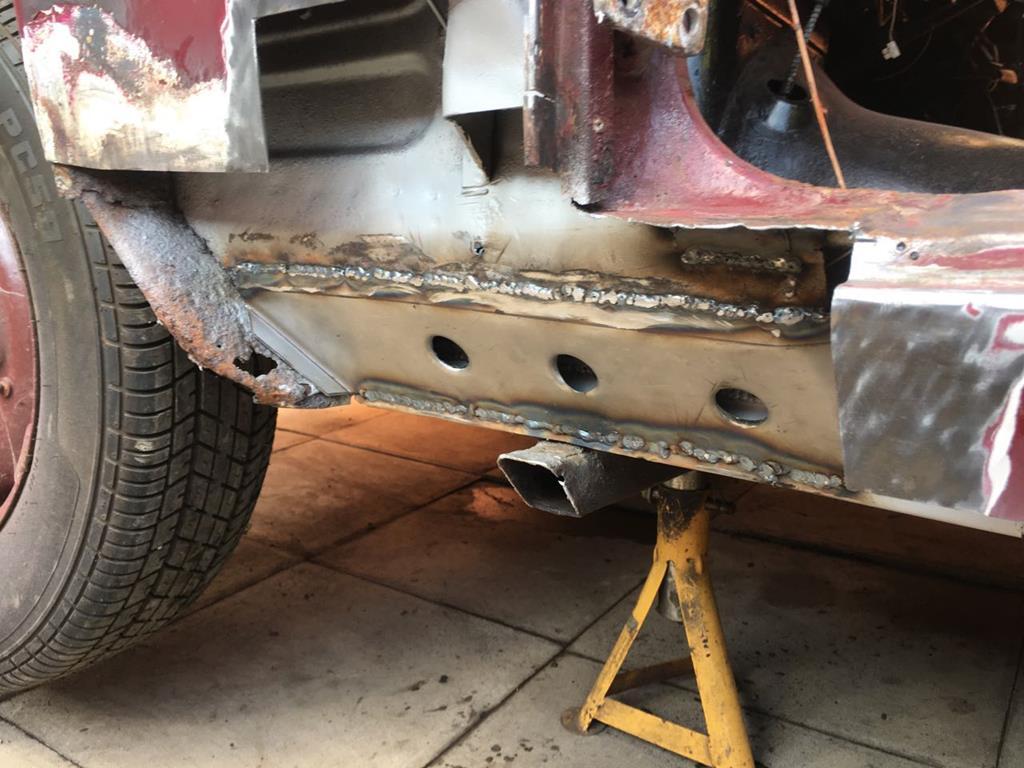 The next job is to extend that sort of box section of the A pillar down and then join the end of the main sill into it. That's going to require a more complex cardboard template! |
| |
|
|
jonomisfit
Club Retro Rides Member
Posts: 1,790
Club RR Member Number: 49
|
|
Sept 1, 2019 19:56:22 GMT
|
|
Everyone loves a bit of swagey hole goodness
|
| |
|
|
|
|
|
|
|
|
|
|
Top job cracking on with it!
Maximum effort!
|
| |
|
|
|
|
|
Sept 5, 2019 12:56:25 GMT
|
|
a positive spin on your attempt at definitely not buying a rotter this time, is that you are providing such good content to the forum!
|
| |
Last Edit: Sept 5, 2019 12:56:49 GMT by darrenh
|
|
|
|
|
Sept 5, 2019 21:56:21 GMT
|
Have just found this thread. I'm in for lots of melty metal goodness  |
| |
|
|
|
|
|
Sept 5, 2019 22:50:57 GMT
|
|
Doing a cracking job
|
| |
|
|
|
|
|
|
|
Ooh Matron!  |
| |
|
|
goldnrust
West Midlands
Minimalist
Posts: 1,889
|
|
Sept 7, 2019 21:02:36 GMT
|
Haha thanks guys. I'm glad it's keeping you all entertained! Onwards with the welding updates it is then... So, where were we, with the middle sill now in, the next job was to build down the box section that forms the base of the A pillar. I wasted a few hours getting carried away with my new metal folder and trying to do too much of a fancy CAD template, and was getting nowhere initially. So I took a step back and made it out of 2-3 more simple pieces and it worked much better. 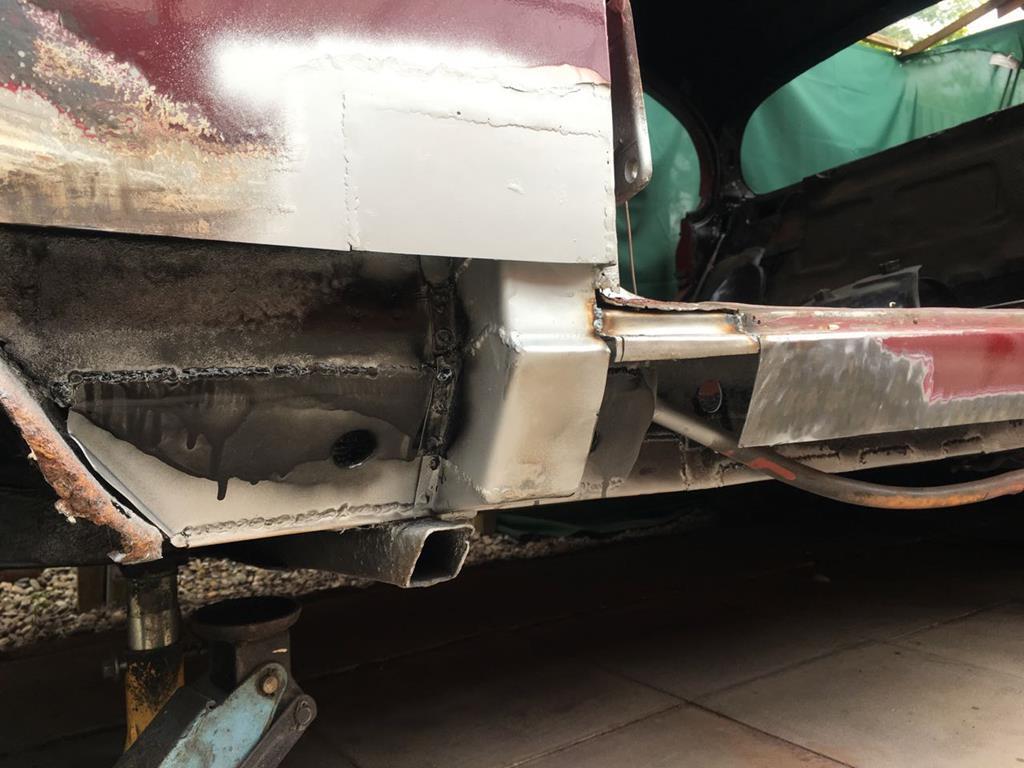 So its not pretty, but it should be plenty strong and once I get the wing fixed up no-one will ever see it again! Today, the next step was the daunting one, making up the sill repairs. I've done plenty of sill repairs in my years of welding up old cars, but to try and make a full length sill section myself was a new challenge. As my table top metal folder is only 2ft wide, I worked out I needed to make up the repair shape in 3 sections. The upside of which is the ability to take this photo showing th 3 sips to making it! 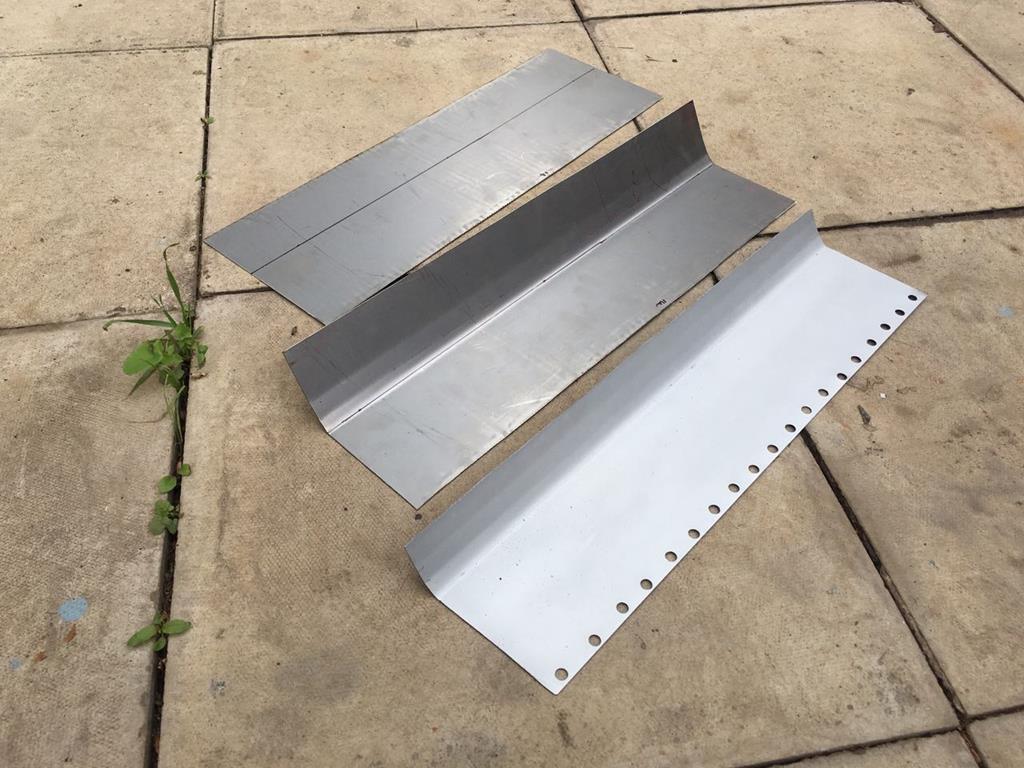 Top one is measure and cut out a bit of sheet steel, mark where the main fold needed to go. Middle is folded into shape, using the drivers side sill as a guide to get the bends right. I did one main bend then some small bends to get a consistent curve to it. Bottom is ready to be tacked in, with the top edge trimmed to make a neat butt joint with the existing sill, holes for plug welds drilled and a liberal coat of weld through primer. You'll notice the neatly lined up holes. I measured and marked them out properly for once! Normally I just drill a bunch of holes by eye, but it didn't work so well on the middle sill, so figured I'd do it properly! There was plenty of fettling to try and get the shape just right, a lot of looking along the sill, holding up straight edges etc to get it right. I had it partly tacked up a couple of times, and ended up breaking the tacks and having another go. Third time lucky, having decided it was about as good as I could hope for, I got all of the pieces tacked in place at the same time. 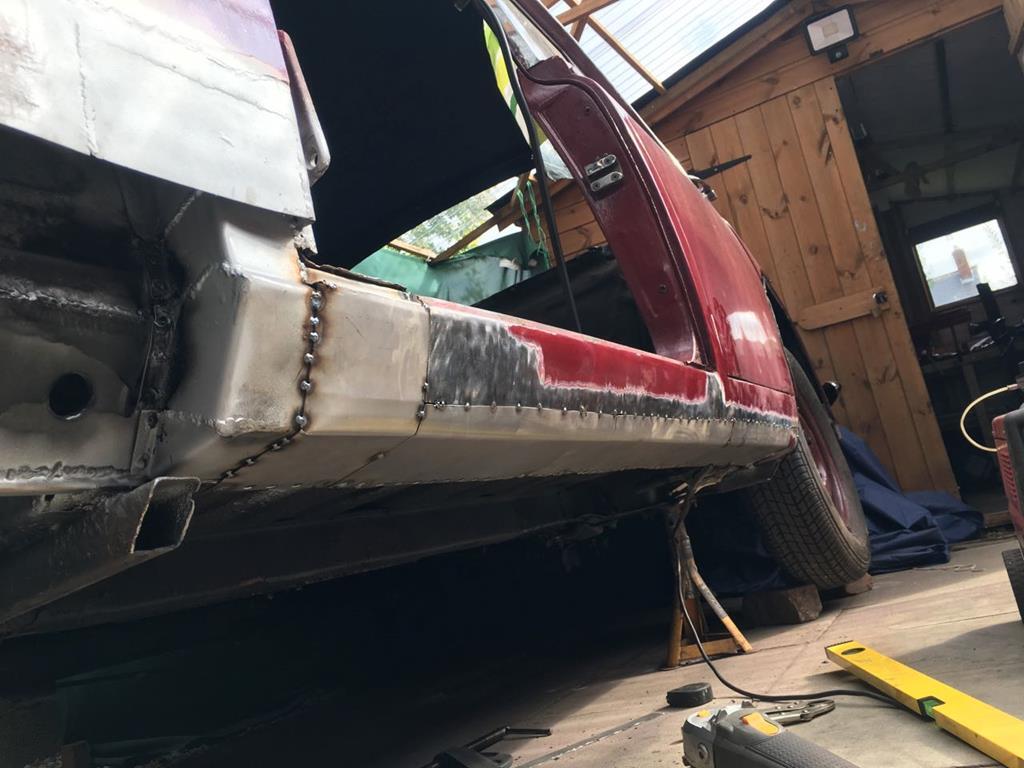 And so there was nothing for it but to do a million plug welds and a 6ft long seam of 'dot to dot' welding to seam weld the upper edge with (hopefully) minimal distortion. 3 plug welds in, and I ran out of welding gas. Why does it always run out just when you don't want it to?! A quick trip to the shop and a new bottle of gas and I was sorted. Much welding later... 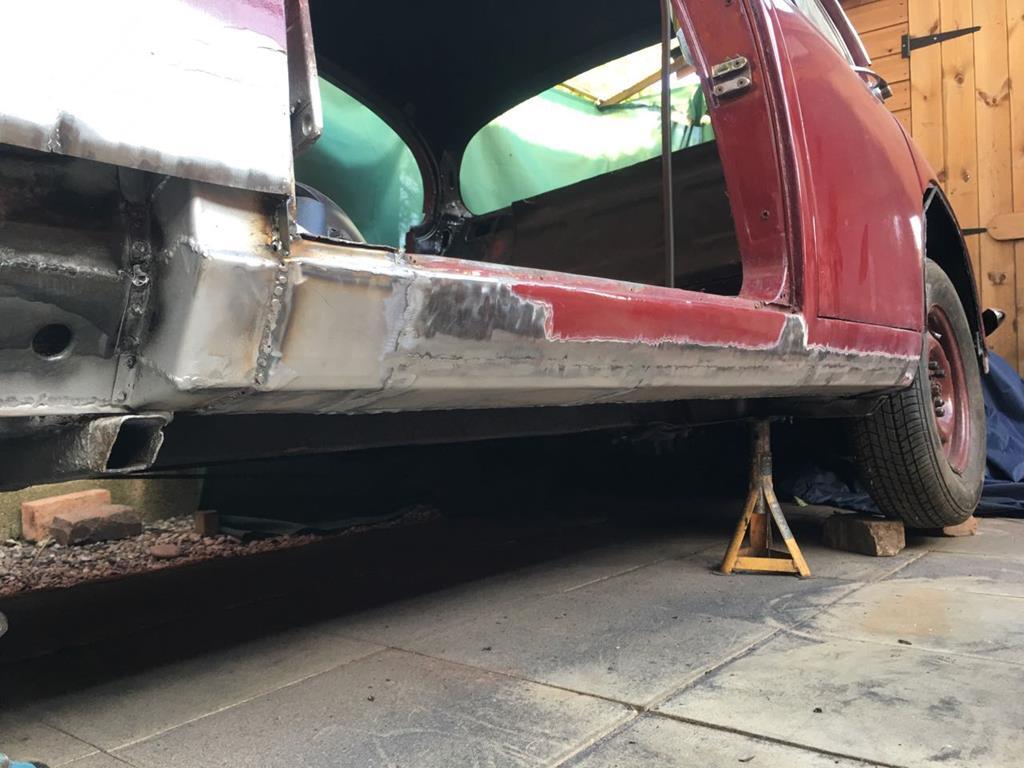 I'm fairly happy with that. As ever there's things to consider for next time, but for now on to the next panel! And that means that once again there's light at the end of the welding tunnel as this is the last panel, the lower edge of the front wing / front edge of the sill. I did consider getting a repair panel for this, but as I still had an hour or so of time this afternoon, and plenty of steel, I figured it couldn't hurt to just have a go at making it myself. In that time I got about half way through making it, but I think it's gonna for out ok. 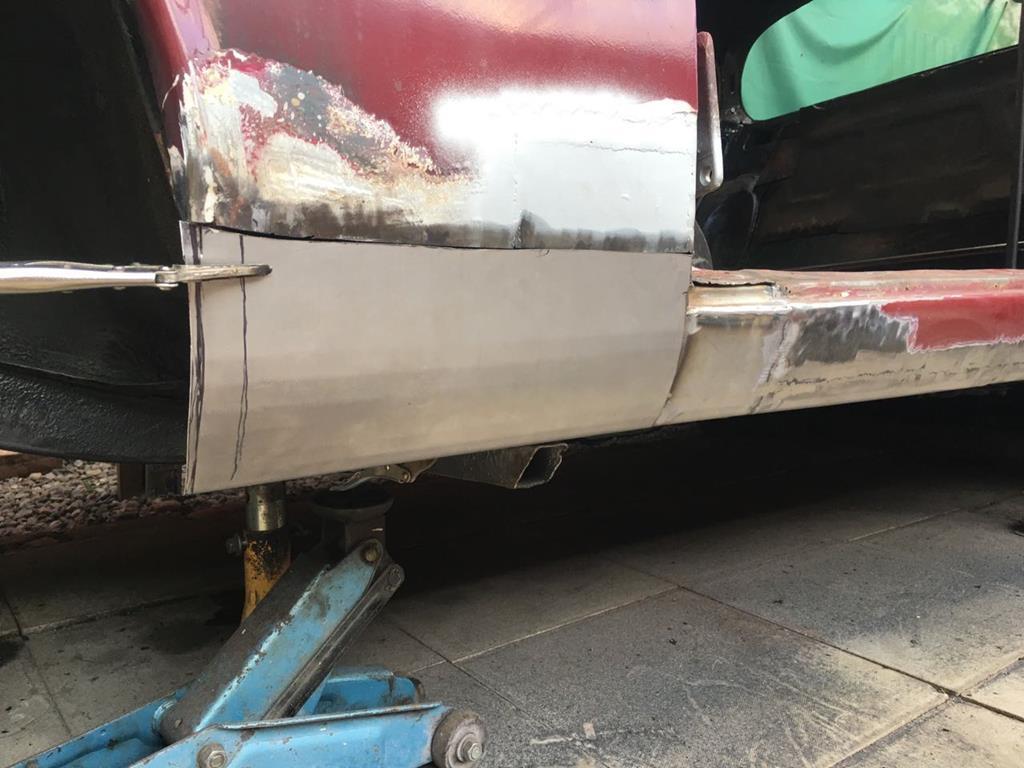 It's always going to need a thin skim of filler to get the surface just right, but I figured that was a given! I bent up the main curve for the sill similarity as I did for the previous repair, and then trimmed it down using the drivers side as a guide to getting the wheel arch curve right. Once the back half is tacked, I'll bend the front edge out gently to make the arch flare, then finalise the wheel arch curve before welding on a return lip. I built up my Lancia wheels arches in the same way and it worked well, so it should work out ok here too  So this is all good news, one more session of welding to get this wing finished and then I can hopefully put the welder away for a bit! |
| |
|
|
|
|
|
Sept 7, 2019 21:10:59 GMT
|
|
Top quality work, and such a lovely car to be restoring
Massive respect to you
|
| |
Fraud owners club member
2003 W211 Mercedes E class
1989 Sierra sapphire
1998 ex bt fiesta van
|
|
|
|
|
|
|
|
Looking good. The folder was a good buy then as the repair sections are looking very tidy.
|
| |
Last Edit: Sept 8, 2019 5:23:47 GMT by Deleted
|
|
|
|
|
|
|
looks very strong and clean well done chap.  |
| |
|
|


