|
|
|
|
|
|
This is another thread I keep up because I love 500's and little Fiats in general (my Mum had a 126) and I admire your skills, aesthetic and ways of getting things done. BTW, has your friend in Europe sent any updates on the Abarth/Zagato coupe?
Kind regards, John
|
| |
|
|
|
|
|
|
|
|
|
Thanks guys. More updates soon...  |
| |
|
|
|
|
|
|
|
jjeffries, My buddy is working on his Zagato. Here are some pics. 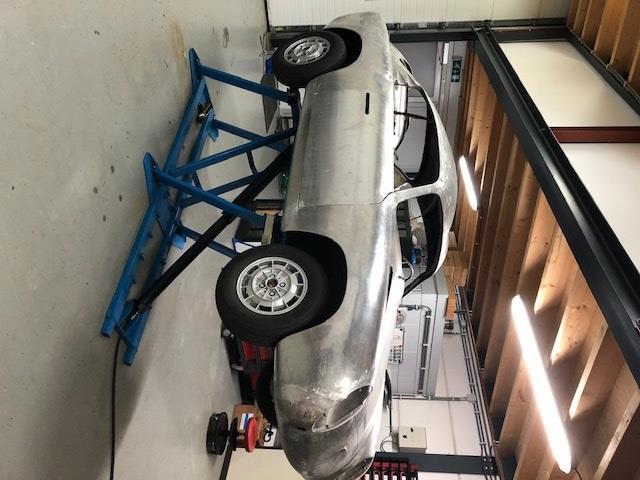 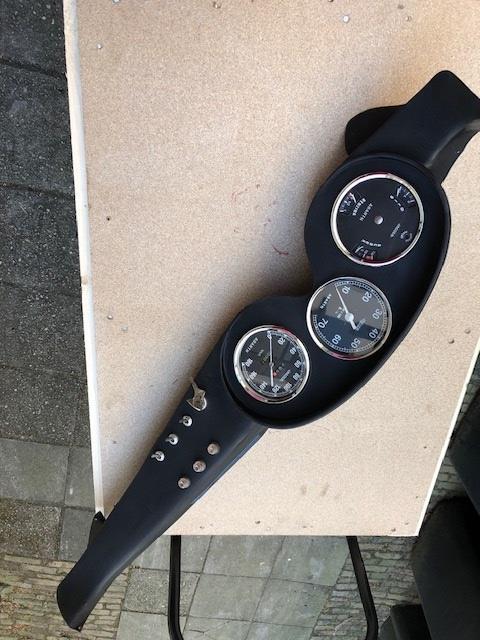
|
| |
|
|
|
|
|
|
|
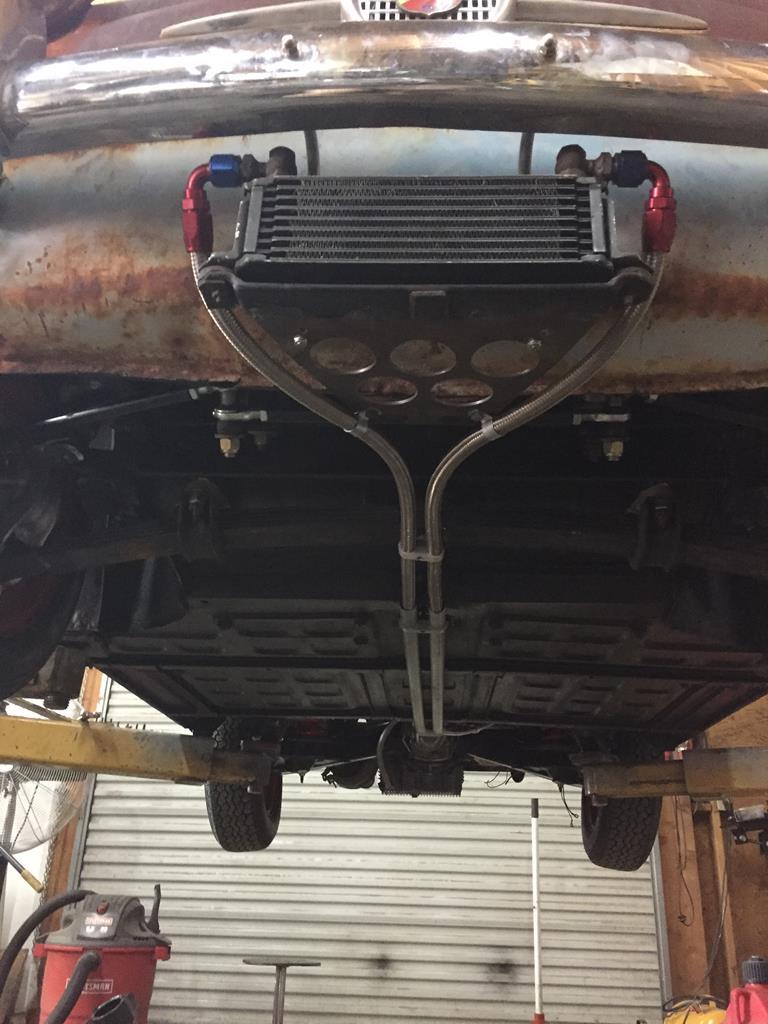
Oil temp is pretty much the achilles heel of these engines. They don't have an oilcooler ( like almost all of the other aircooled engines do ), so an oil temp gauge is a must. So you can slow down a bit when the temp gets too high. But that doesn't really fix the problem. Fiat specialist sell a oil cooler kit but I think that is a bit expensive, for what it is. So I decided to go another route... I bought a Tilton pump, like this one. 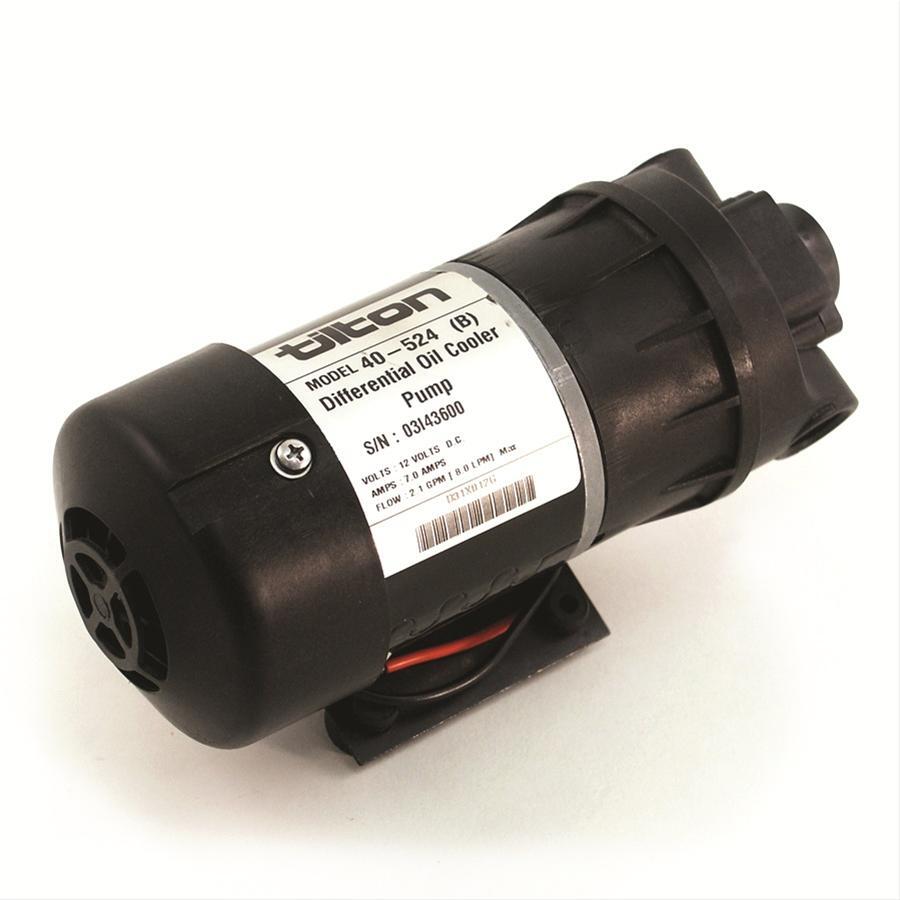 I wanted to use -8 AN lines, but the cooler I had came with banjo fittings that I could not get in that size. Fortunately the old brittle hoses were still on the cooler, so I could cut the ends off and weld on some -8 bungs. 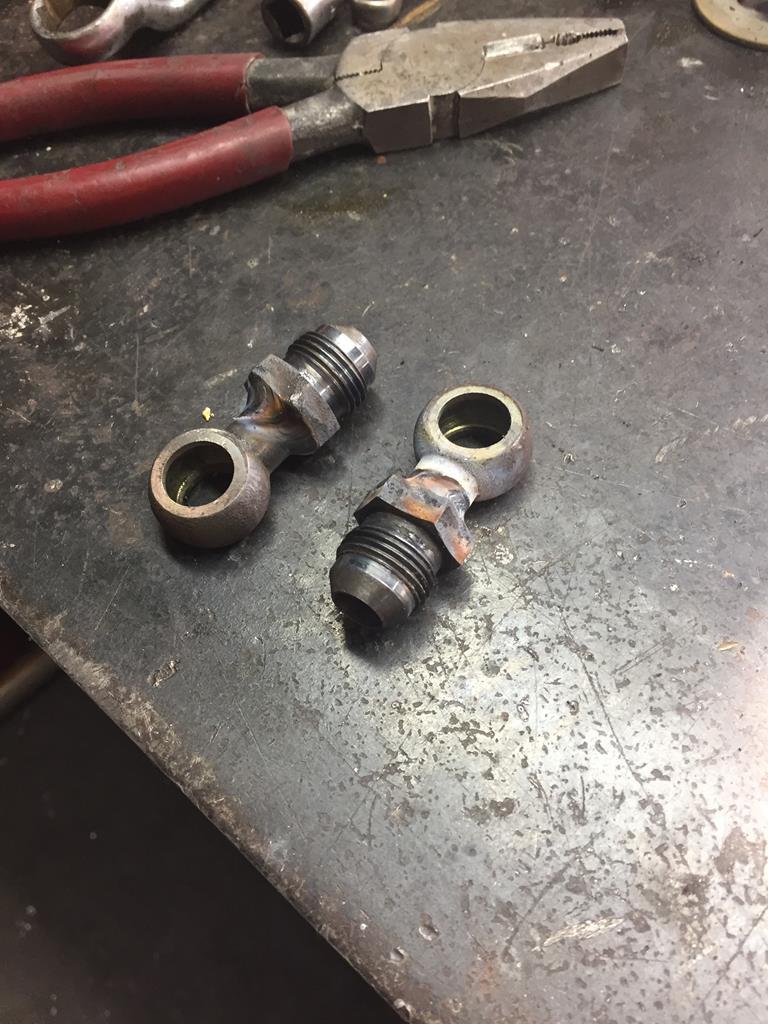 |
| |
|
|
|
|
|
|
|
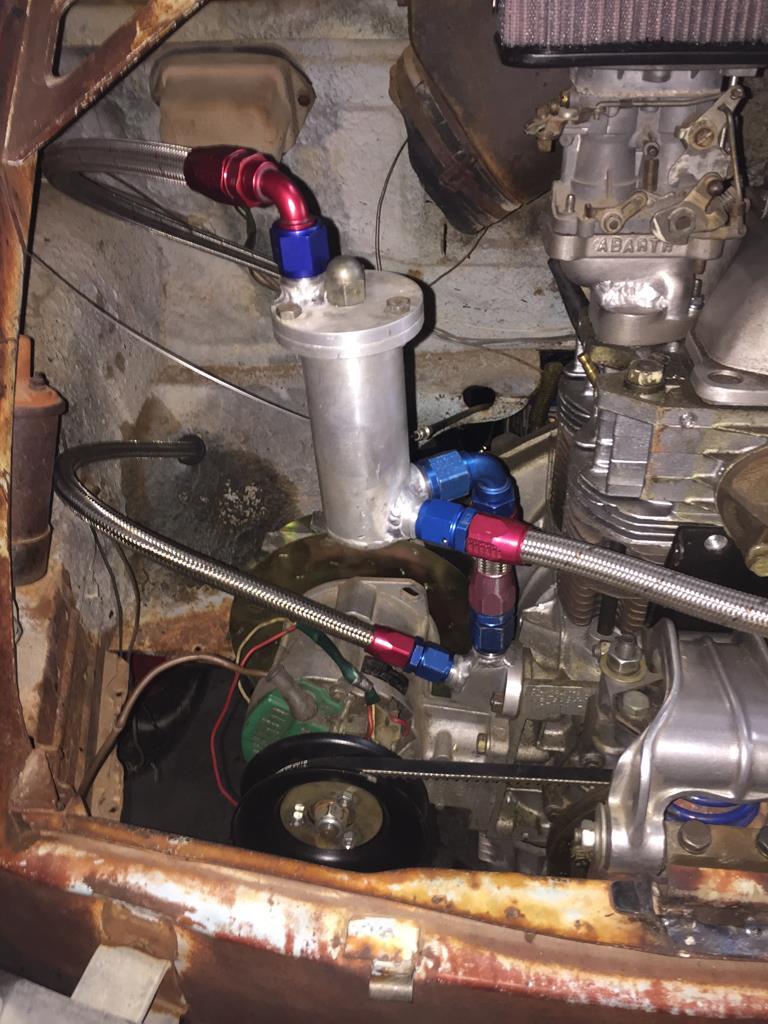
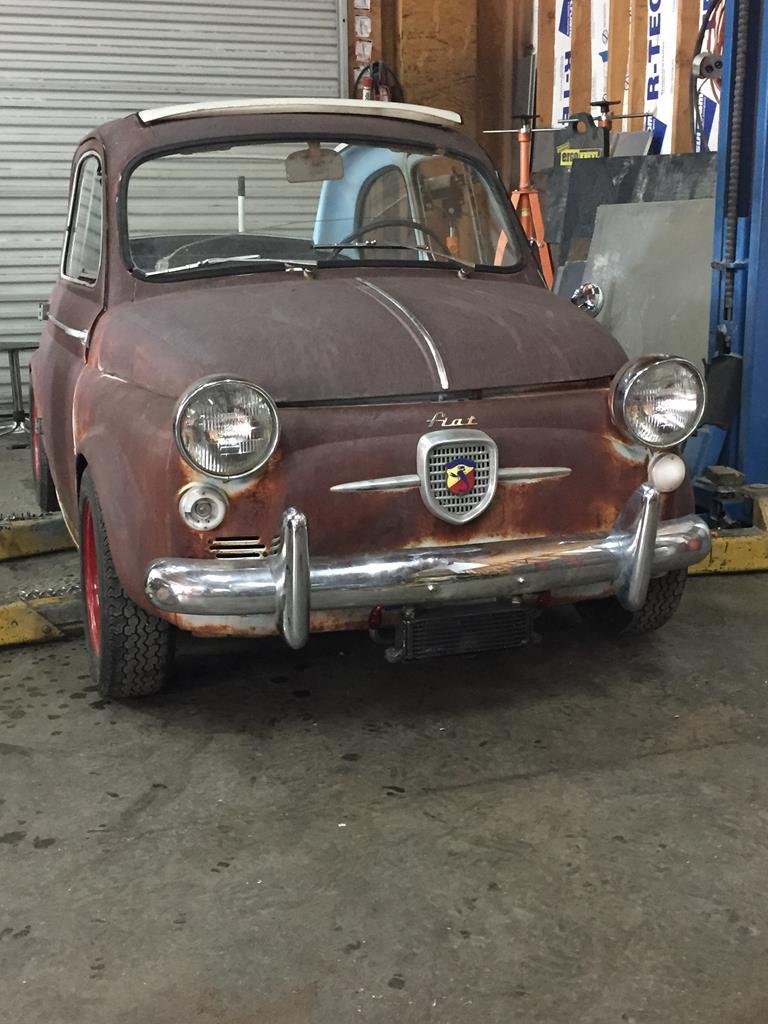
The best place for the cooler is under the front bumper. It gets the best air there. 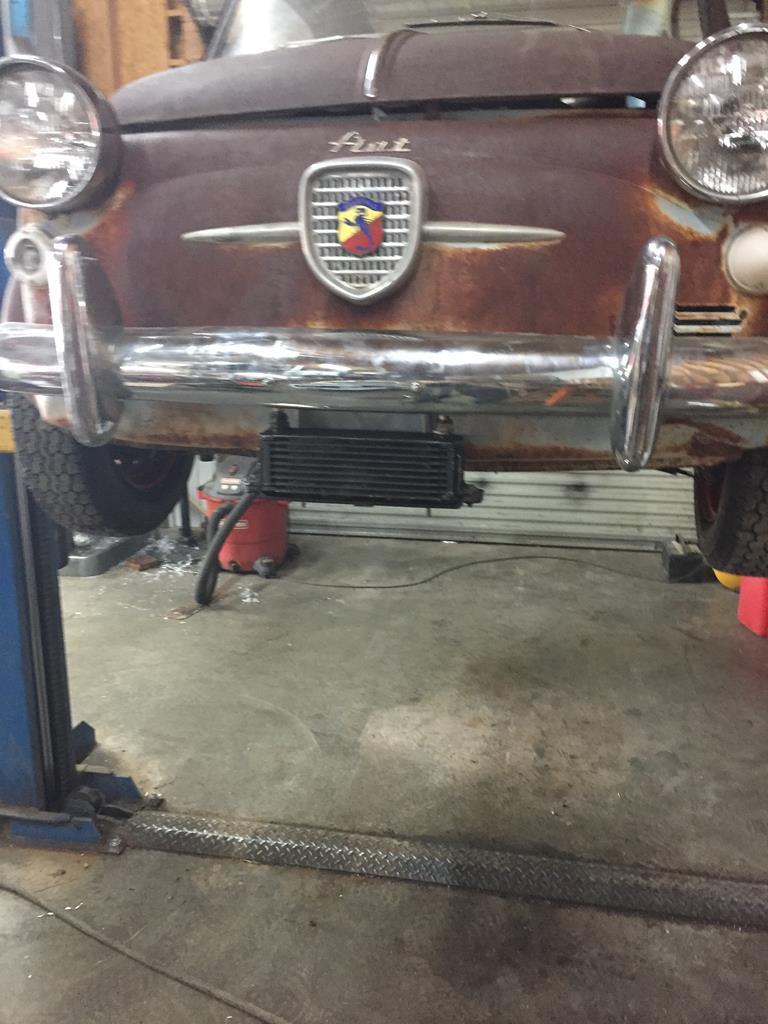 On the engine side, I had to find a spot to plumb into for oil in and oil out. Oil out is easy. Just drill and weld a -8 bung to the oilpan, under the oil level. I didnt really want to do this to an original vintage Abarth oilpan, but I already had to weld a hole shut. ( It was drilled & tapped, and judging by the copious amounts of epoxy, it leaked...) 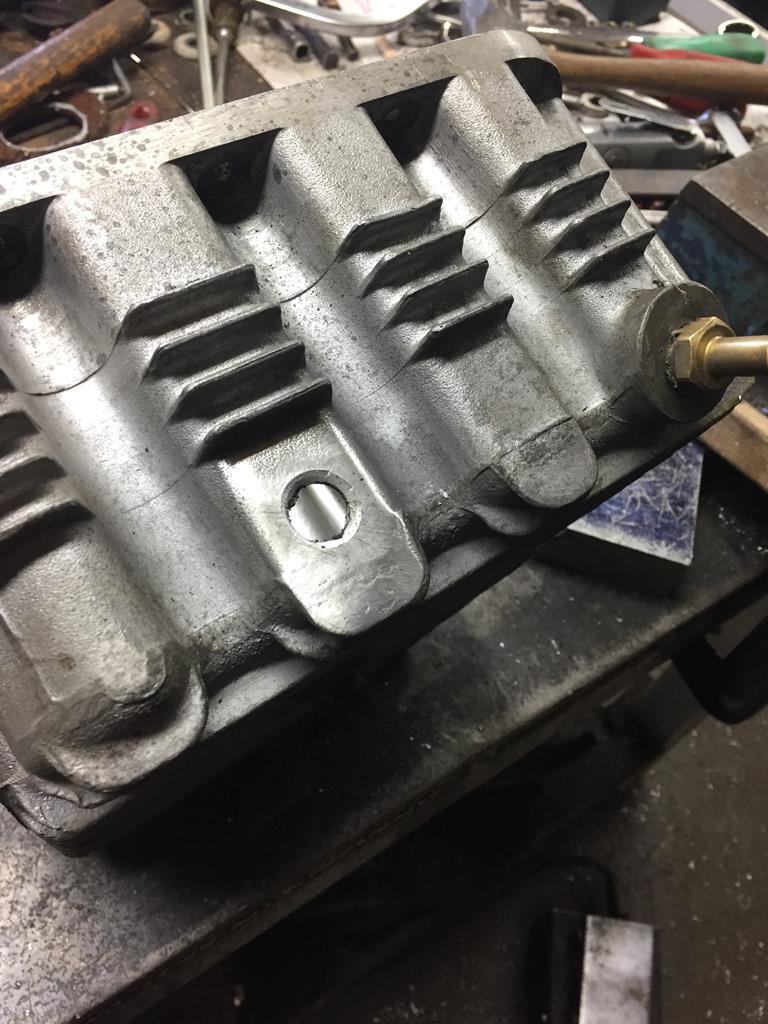 |
| |
|
|
|
|
|
|
|
The original spot for the fuel pump has 2 separate channels into the block, which means I can use 1 for the oil return, and the other for the crank case ventilation. 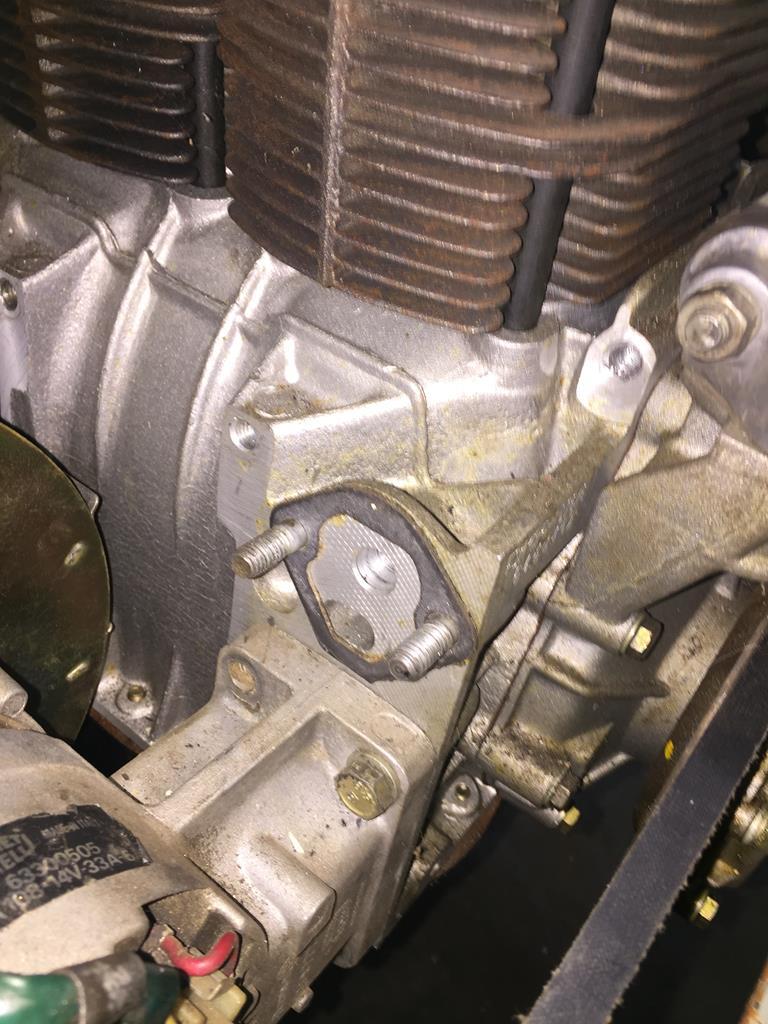 I made a little adapter with the flange shape of a fuel pump, with 2 holes to match the block. On the other side of it I welded on a -8 bung for the oil return, and a -10 bung for the breather. 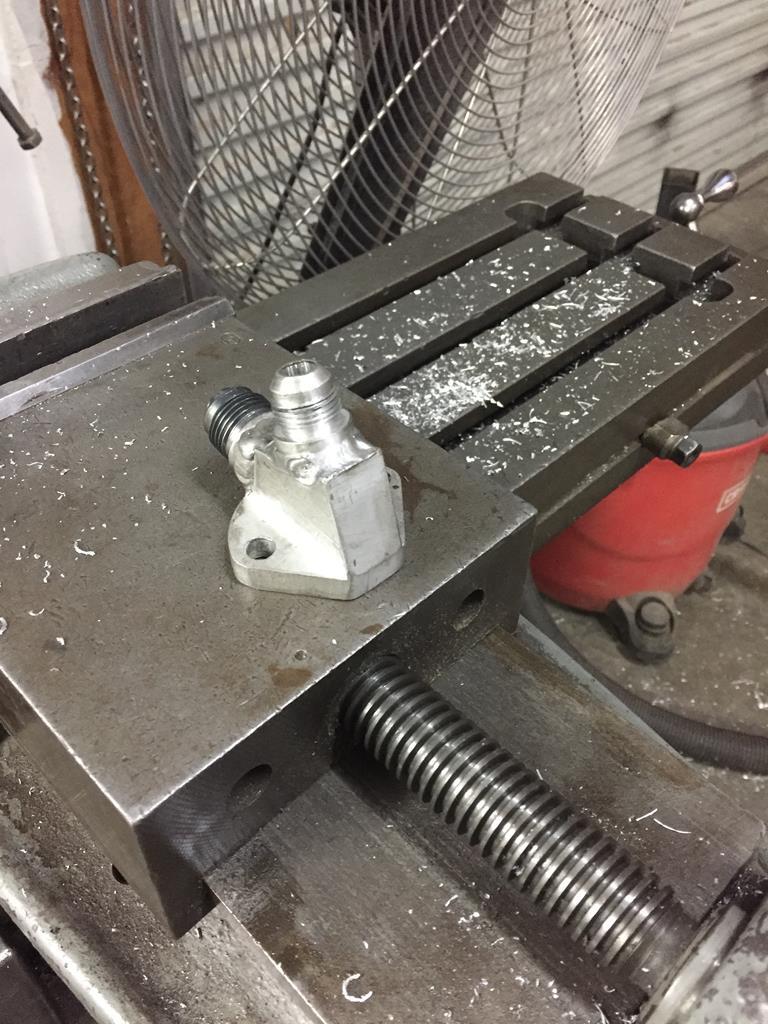 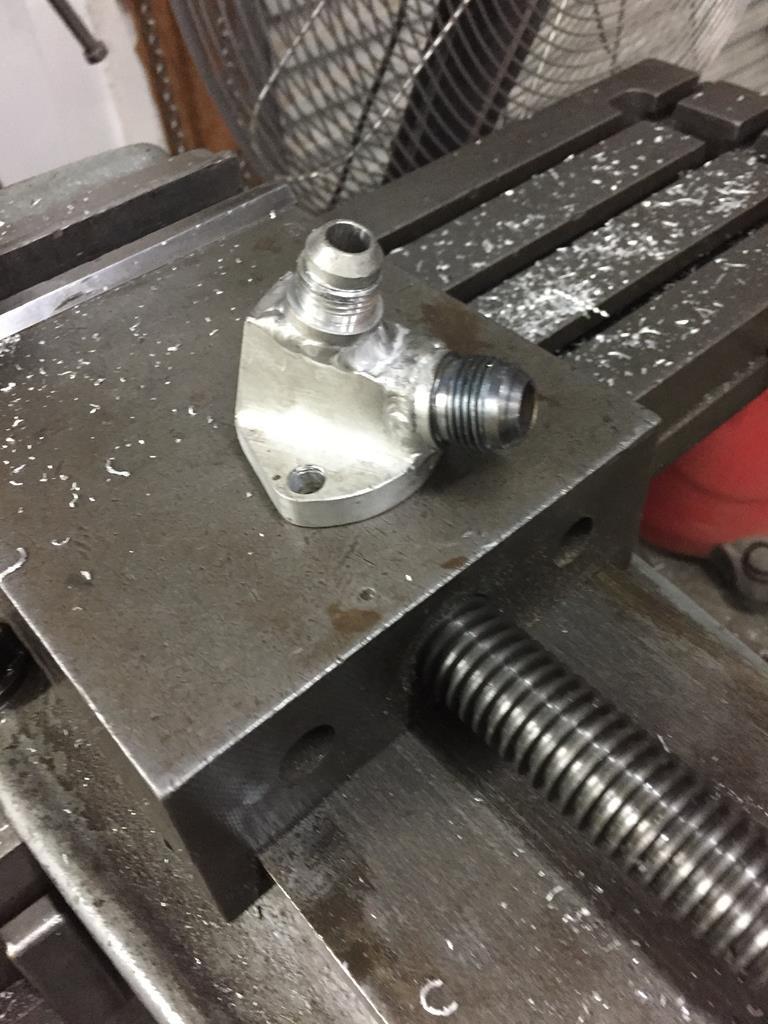 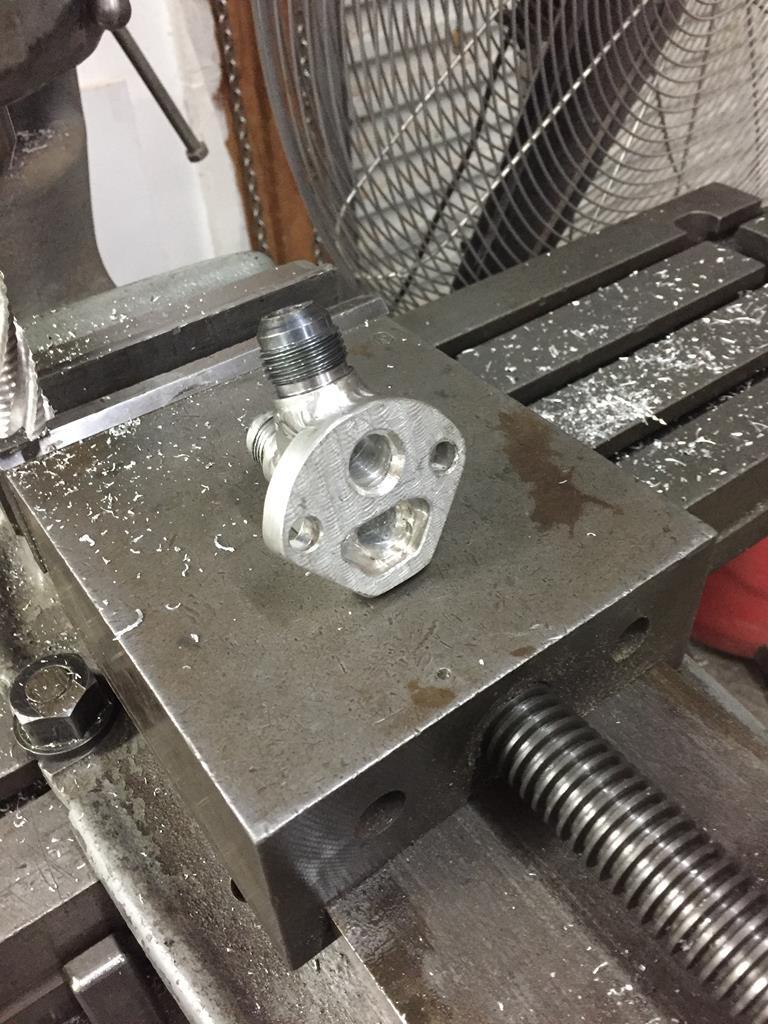 |
| |
|
|
|
|
|
|
|
|
Thanks for the update on both cars.
John
|
| |
|
|
|
|
|
|
|
Here it is mounted to the engine. 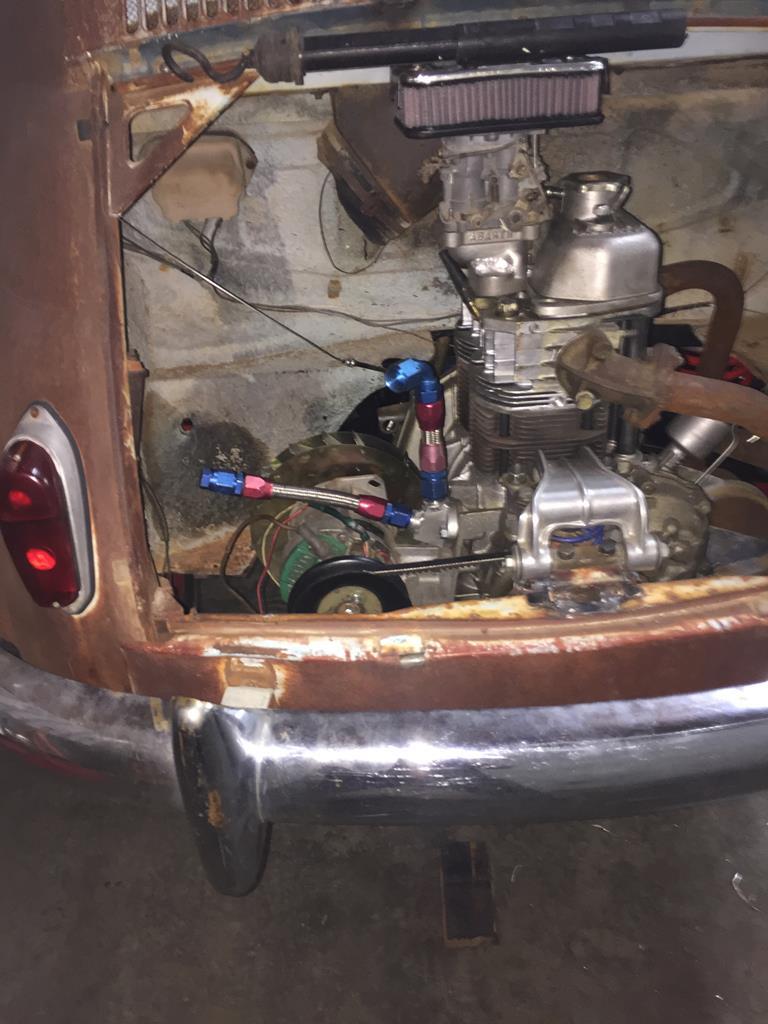 They sell breathers, some very nice with Abarth lettering casted in with baffles inside. But again, expensive for what it is. And I thought it could be good to have a sightly larger version of it for this engine. Its a 2 cylinder inline, 4 stroke. That means the pistons move up and down together, so the inside capacity of the crank case grows and reduces by 650cc every revolution. I welded a flange to a piece of thin wall aluminum pipe, and capped the bottom. 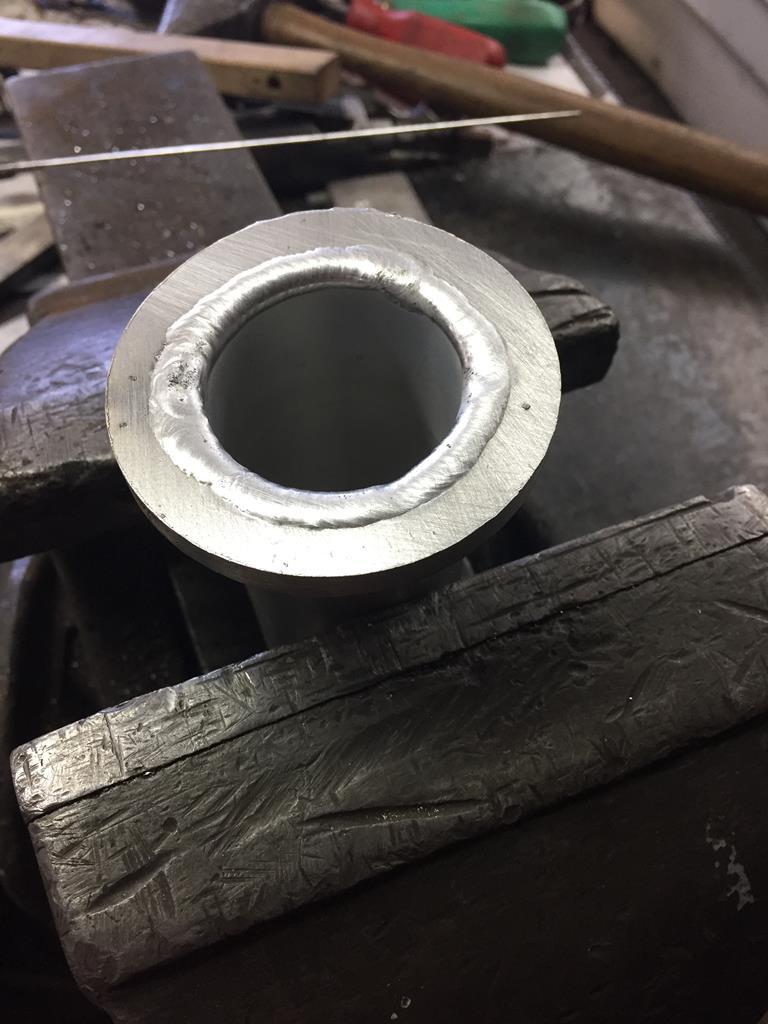 The top bolts on with 3 M6 bolts, and it has a M10 treaded rod in the middle. 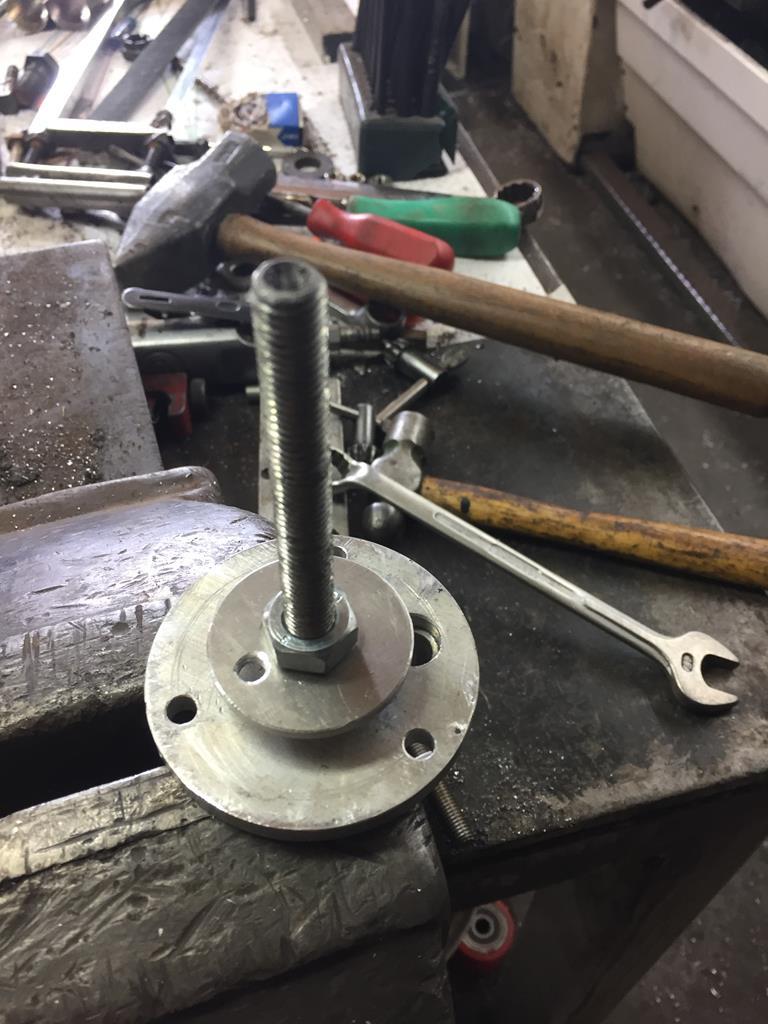 I made 8 discs to the inside dia. of the tube with a offset small hole in each one. These discs get stacked with the offset holes 180 deg off the one beside it . 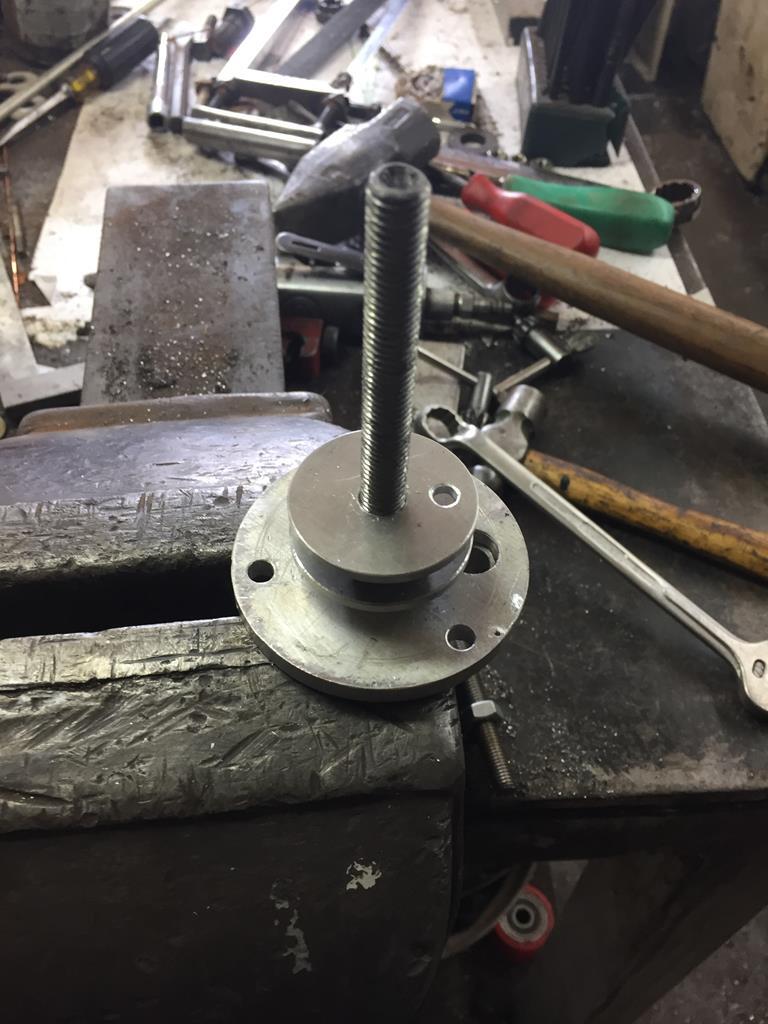 With a M10 nut between each one. 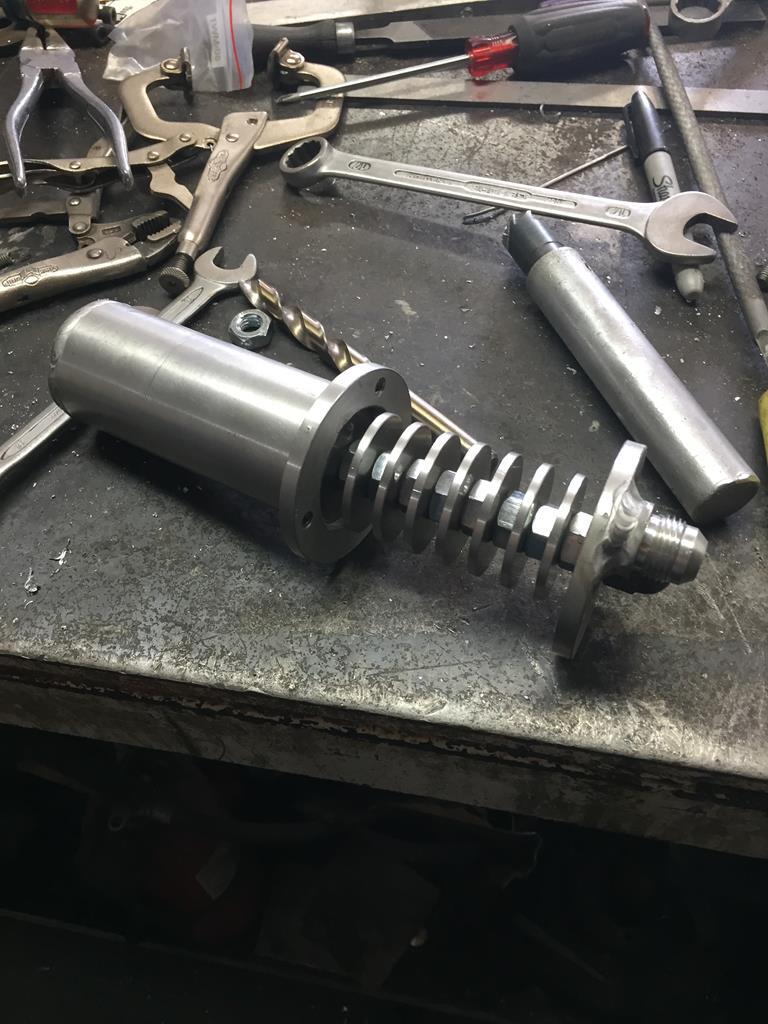 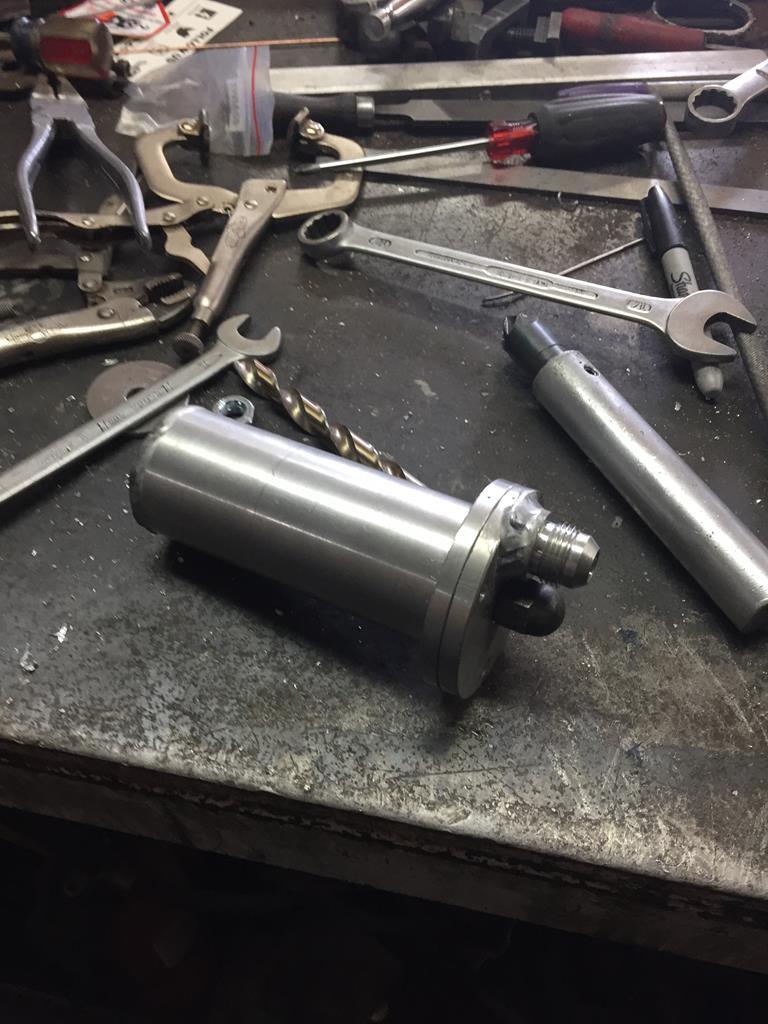 |
| |
|
|
|
|
|
|
|
I could save some weight by using aluminum spacers instead of the M10 nuts, but I decided to try it this way first. Here it is on the engine. 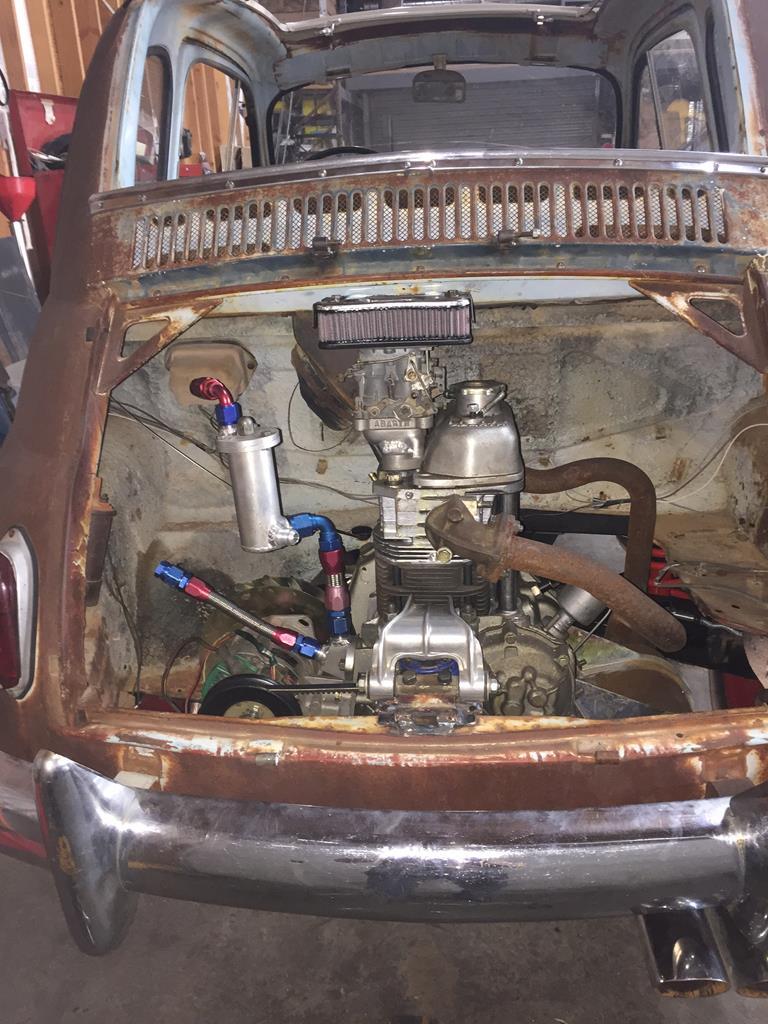 The baffles don't go all the way to the bottom, so there is a little chamber under them. This is where I welded on the -10 bung to connect to the crank case. And a -8 one to plumb into the valve cover. 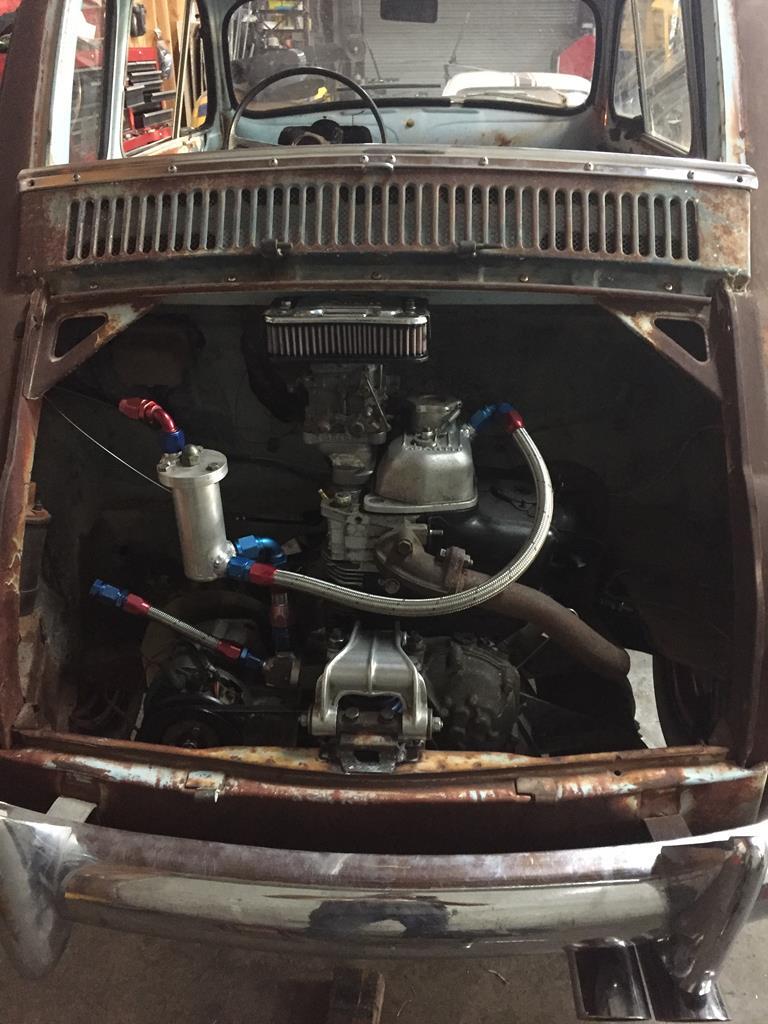 |
| |
|
|
|
|
|
|
|
|
|
|
|
|
I have some ideas for a catch can, but I'll make that later.
|
| |
|
|
stealthstylz
Club Retro Rides Member
Posts: 14,962
Club RR Member Number: 174
|
1958 Fiat 500 Nuova Americastealthstylz
@stealthstylz
Club Retro Rides Member 174
|
|
|
|
I've got a 600 engine with some Abarth bits on in for machining next week. First time I've ever seen one, they're a nice design.
|
| |
|
|
|
|
|
|
|
Some more things I've done, but didn't show yet... The stock exhaust on a 500 is a terrible thing, that seems to muffle the sound by chocking the engine while letting the exhaust pulses work against eachother. Pretty much like the stock exhaust on a early VW. What I have is a sports exhaust that was cut down a bit to work in the spaceframe racer. I had some chrome twin tips lying around so I could use those to restore the length. 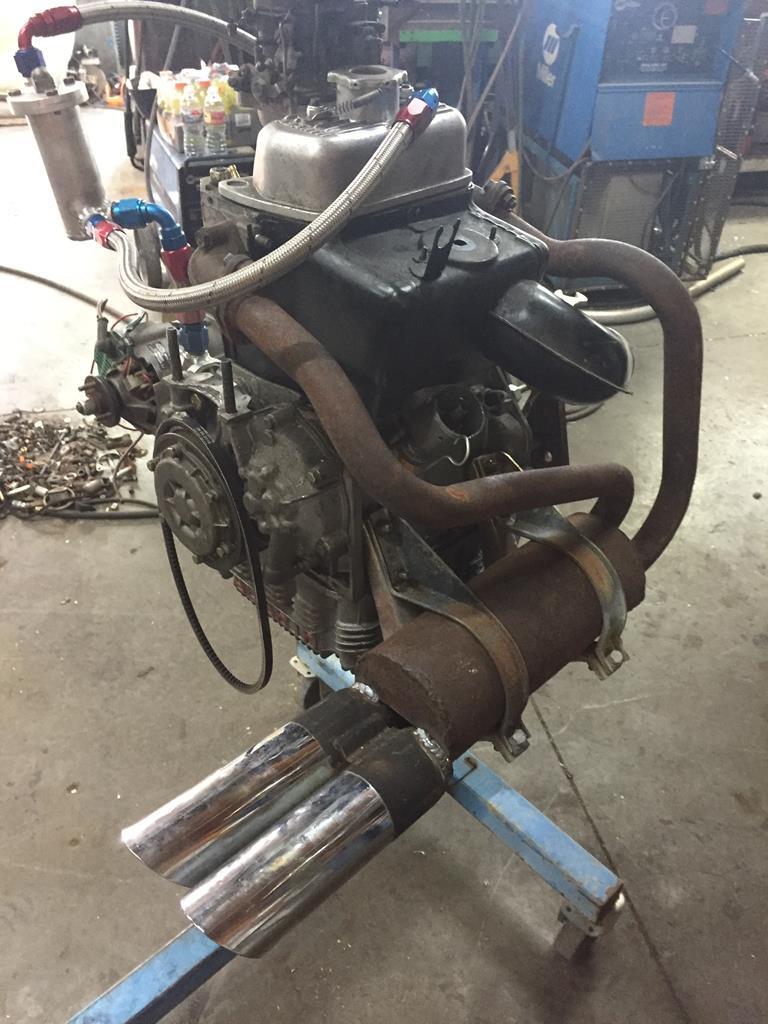 On the other side I had to weld up some cracks, but that is all done and ready to go. But to get the tips where I wanted them I had a space issue with the RHS rear bumper overrider. The bumpers on these cars are incredibly rare. And so are the over riders. They were only used on the American versions of a couple of types of Fiats, and only for a couple of years. Mine are not perfect, but nice enough. 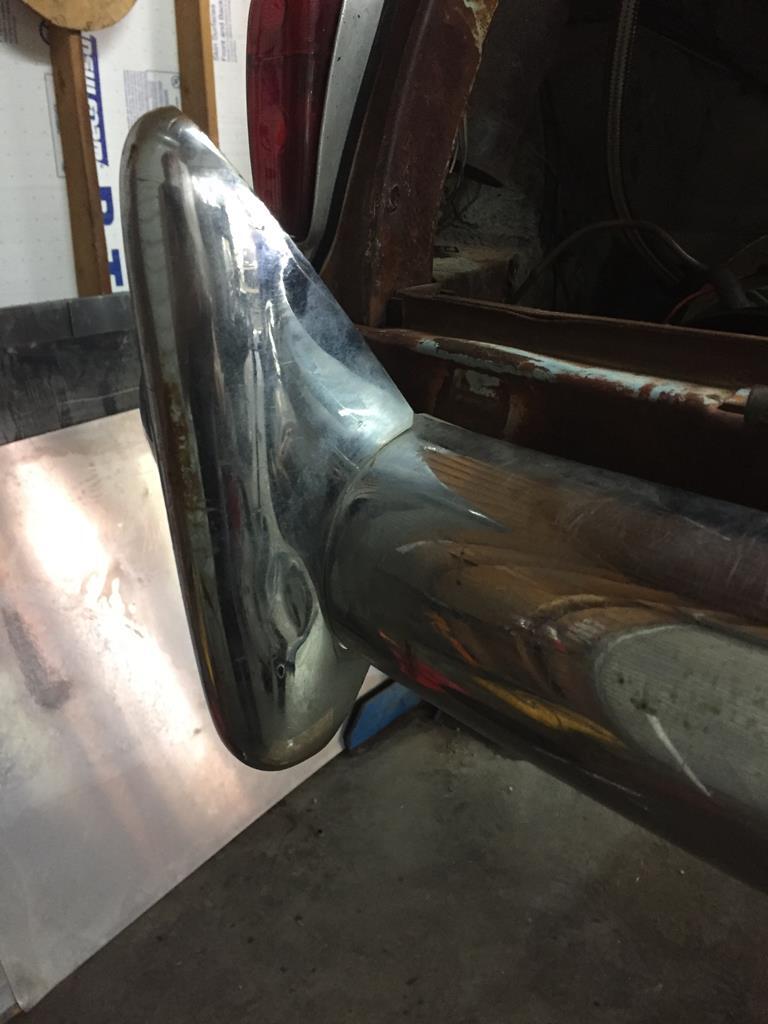 Modifying one to get clearance for the exhaust tips would be insane... Or would it...  I toyed with the idea of not using any of the overriders, but I did not like the way that looked. I think the oversize headlights need the oversize bumper parts to balance them out. Not mounting the RR one, but still use the rest looked wrong too. And lowering the tips enough to clear, or mount them to the right or to the left of them looked just terrible. But fortunately I parted out the '58 Fiat 600. This was a completely rotten 600 that had been modified as a EV ( badly done ), and the lead acid batteries with the help if its shag carpet interior mounted to plywood boxes ( to keep any moisture in the car and against the sheetmetal as long as possible... ) Before I got it, somebody cut the entire nose off the car ( probably as a wall hanger). The thing was a mess, but it has given up a lot of hard to find parts for my '58 500, and my buddy's Zagato. One of those parts was a right rear bumper overrider. It was mangled, the stud had been broken off and badly rewelded. But as far as I could see, it was identical to the 500 one. After some careful lovetaps with a rawhide hammer on my anvil, it looked better than I thought it would. Cool  I'll cut that one down, and the original can go into the box marked "priceless Nuova artifacts" 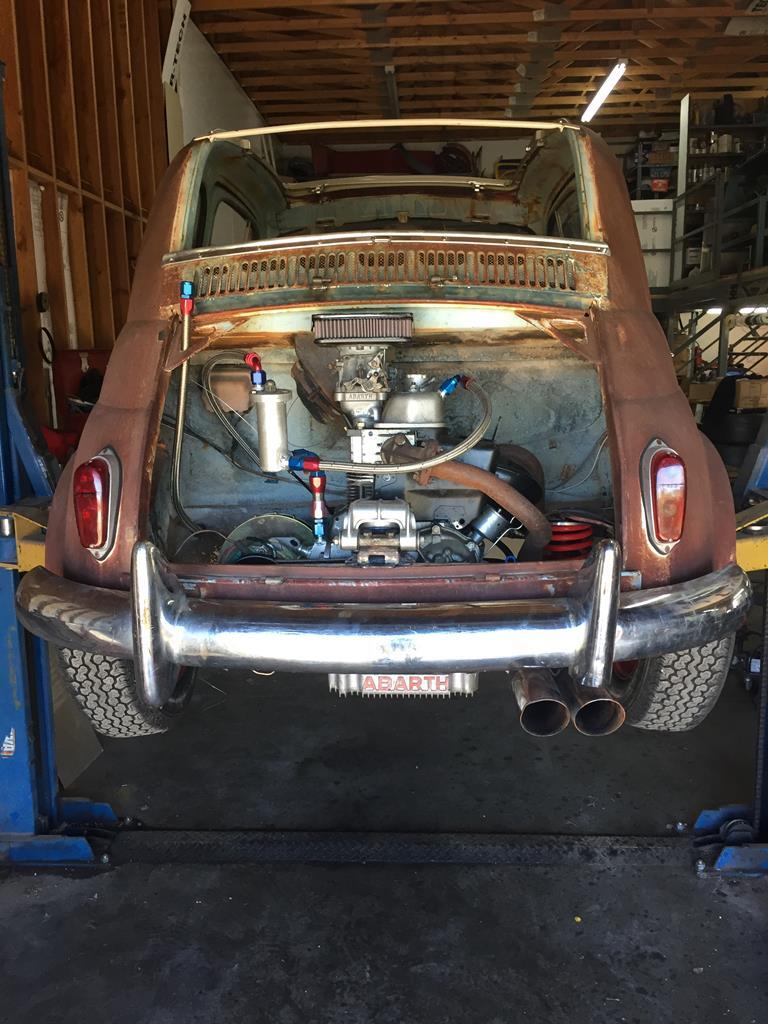 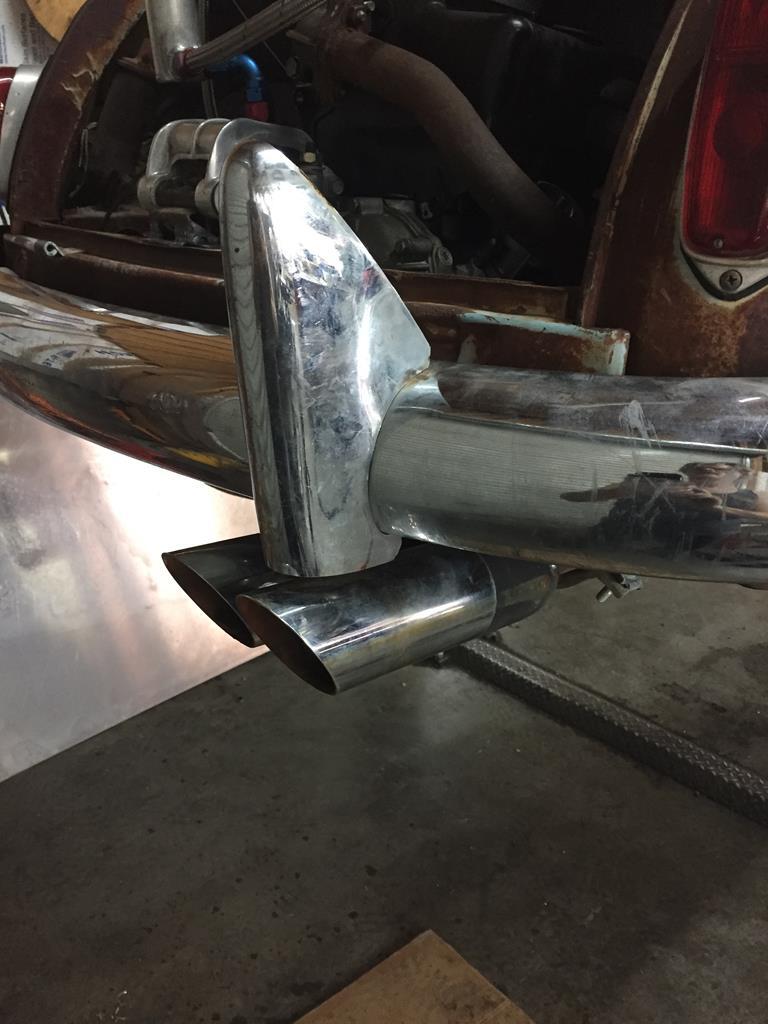 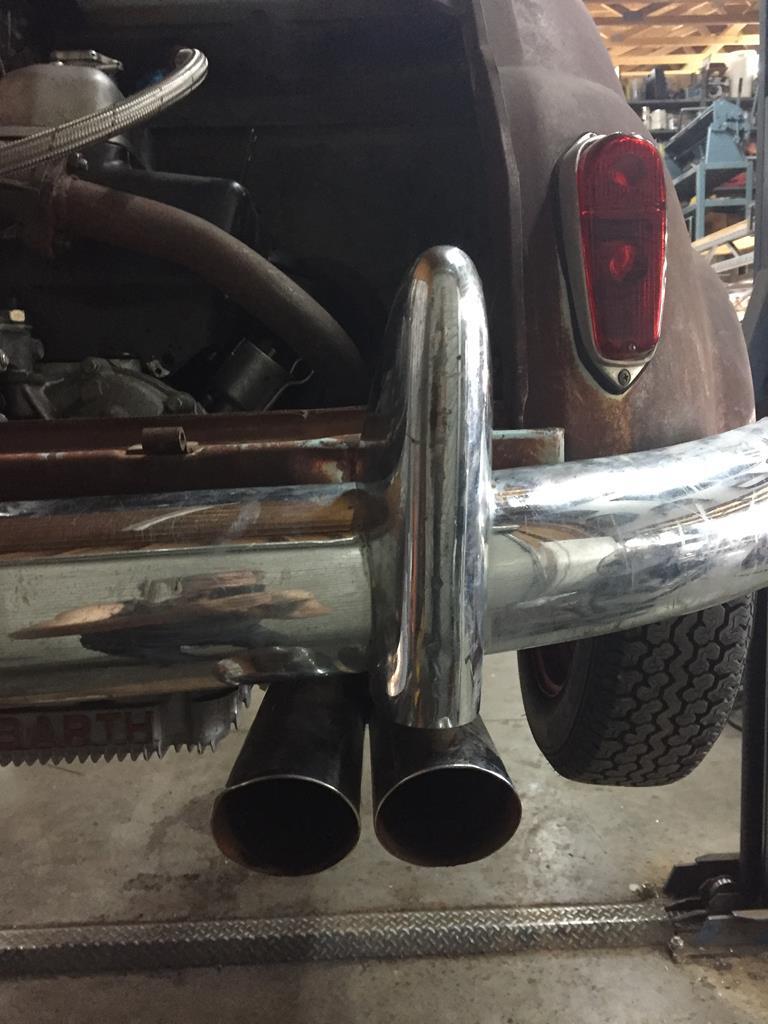 |
| |
|
|
|
|
|
|
|
One more thing I had to do to get clearance for the exhaust, as well as for the intake was lowering the engine. The Abarth intake I bought is a lot taller than the spacer under the original carb, and the carb ( a Fiat 850 Spider progressive twin choke 30DIC Weber ) is taller too. I bought a short K&N filter element for a vintage Colombo filter housing, but I needed about an inch more space. 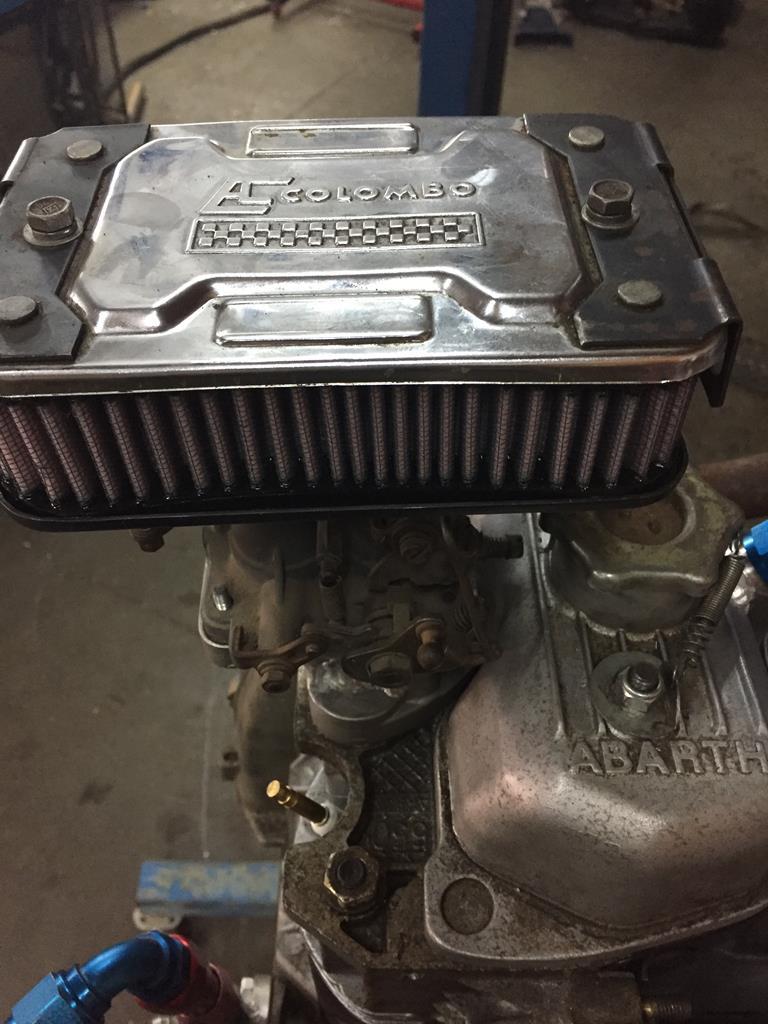 Normally this is not a problem, the engine sits at an uphill angle, so dropping it just gets it a bit closer to level. The usual way of doing that is with a shim under the motor mount, but that works well up to about 1/2 inch. After that it gets harder to get the motor mount in and out when you are working on it, etc. So instead I cut the bracket down that the mount bolts to. It sits the way I want it now, and I have the clearance I need... 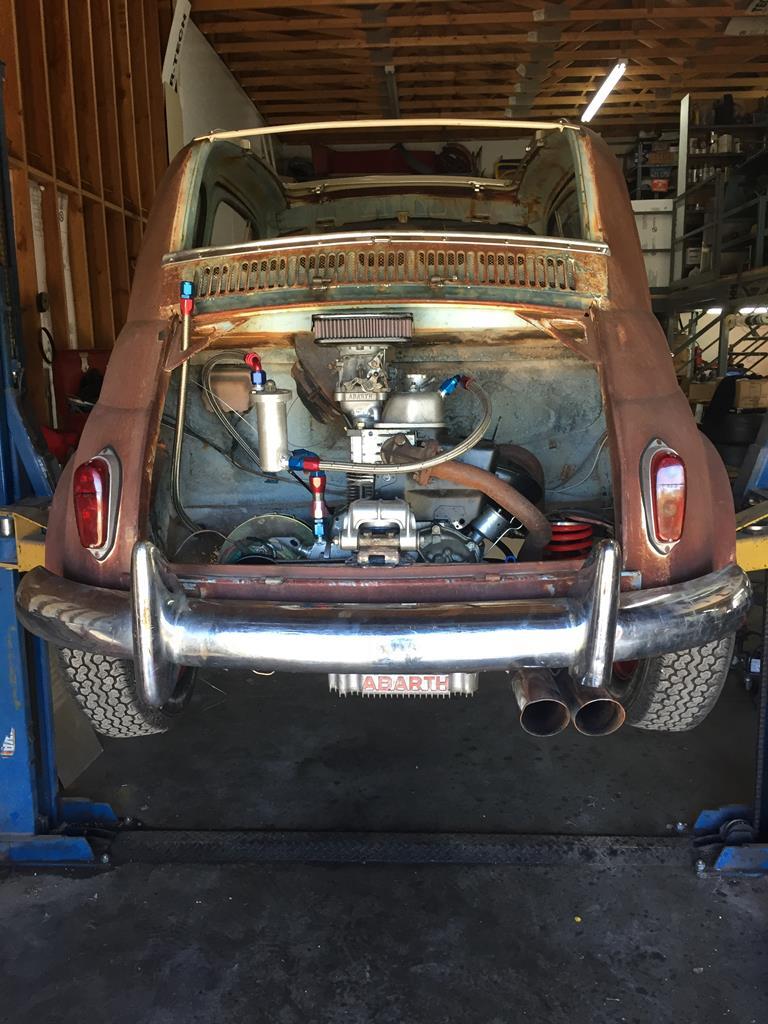 |
| |
|
|
|
|
|
|
|
Here are some pics of that poor little 600... 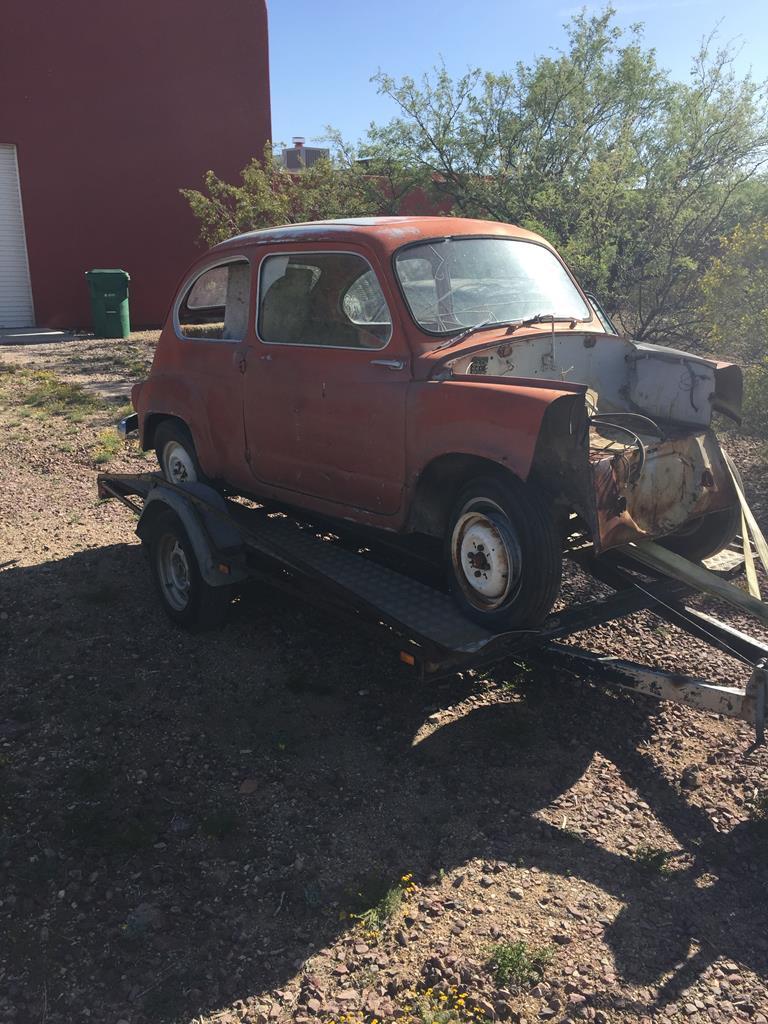 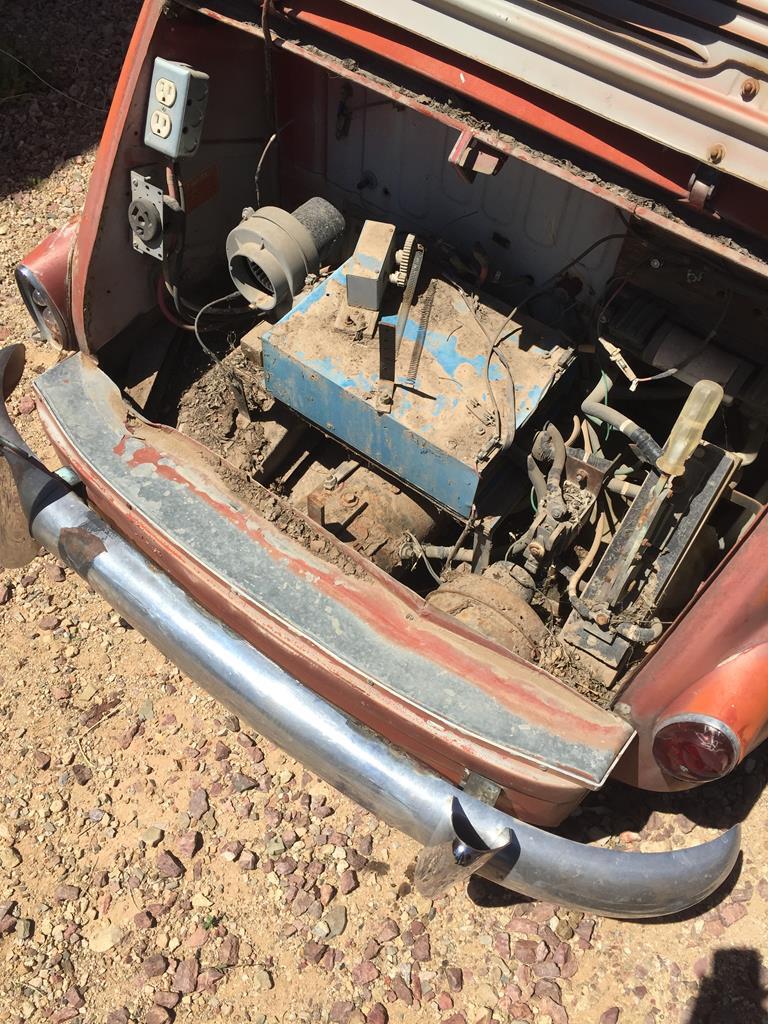 |
| |
|
|
|
|
|
|
|
The intake I bought is probably a copy of an old racing piece. To keep the inside smooth and to cut down on turbulence they did not mount it the same way as the stock carb spacer on a 500. Which has a heart shaped cavity to clear the headbolts ( studs & nuts, actually ). 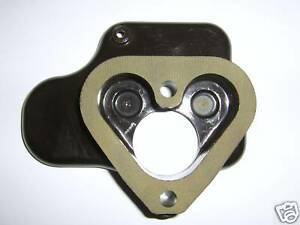 Doing it that way, you cant use the M6 mounting between the headstuds, so they drilled M6 size holes inline with the studs. The idea must have been to get special nuts with a M6 bolt sticking out of the top of it, but smaller than the 17mm wrench size, because the pockets for the were machined very small. I thought this was all a potential headache, and I converted it all back to the original Fiat 500 mounting system. So I welded up the outside holes, machined the lower flange like the original spacer ( with the heart shape ), built up some more weld on the outside to support the clamping force of the center M6 bolt, and machined the inside for that bolt. I used a Allen head M6, to get the least interruption of the flow. 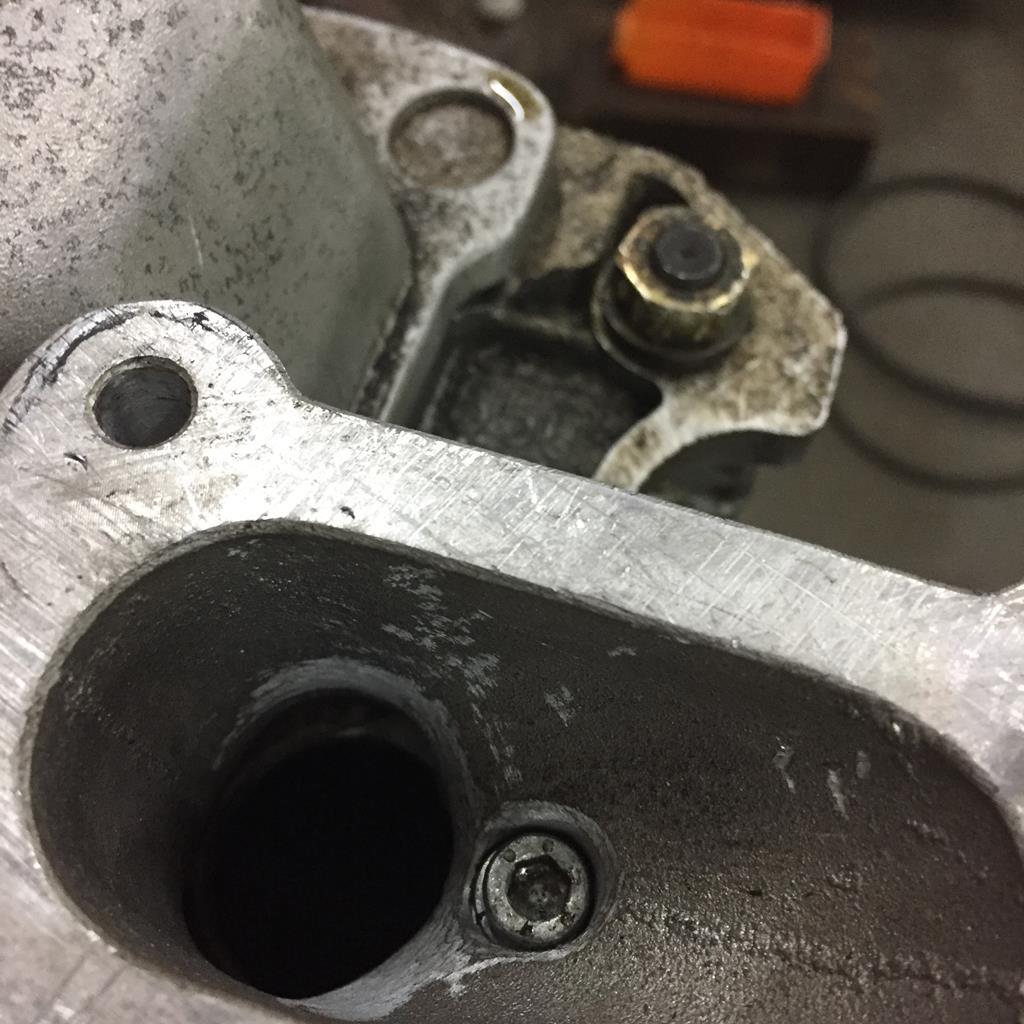 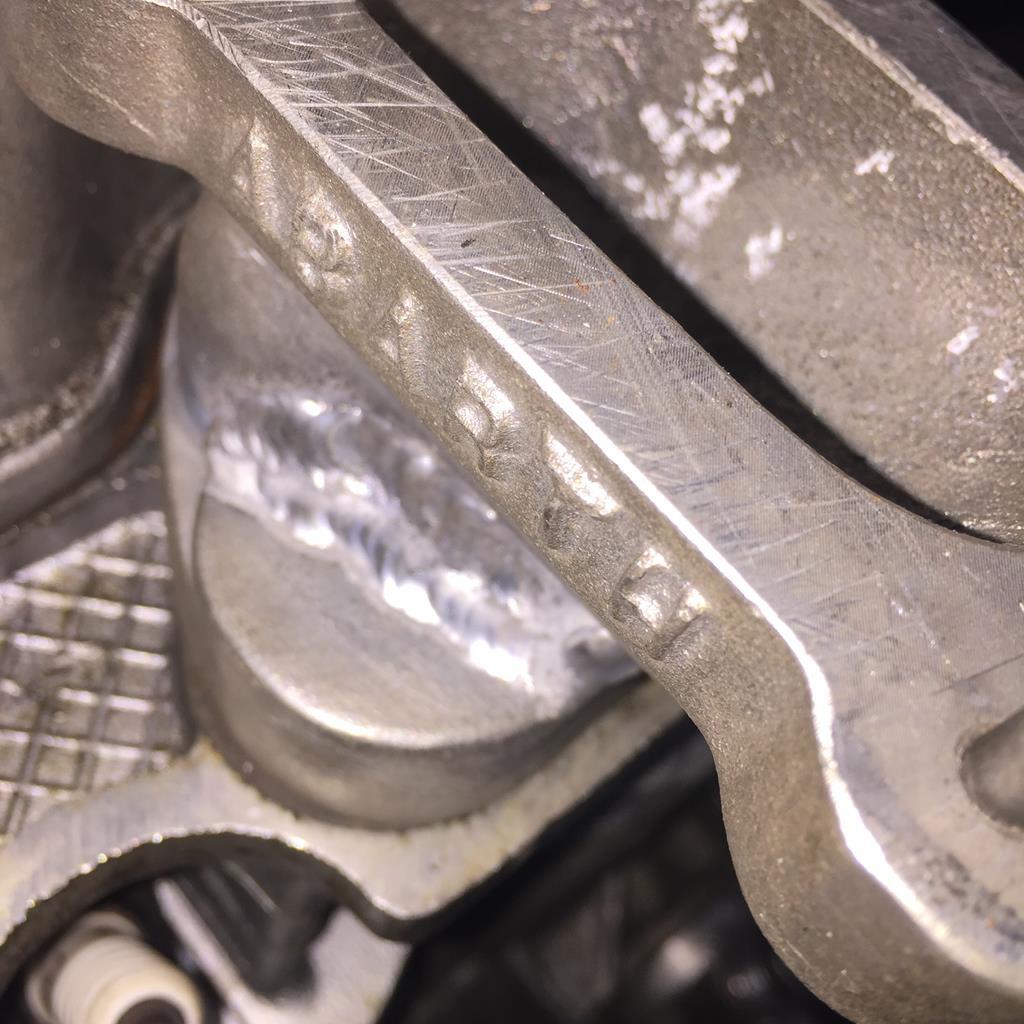 I'll lose some efficiency compared to how the intake was supposed to be, but for a street car, I think it will be just fine. |
| |
|
|
|
|
|
|
|
Here is some of the plumbing under the car. Oil pump, fuel pump, etc... 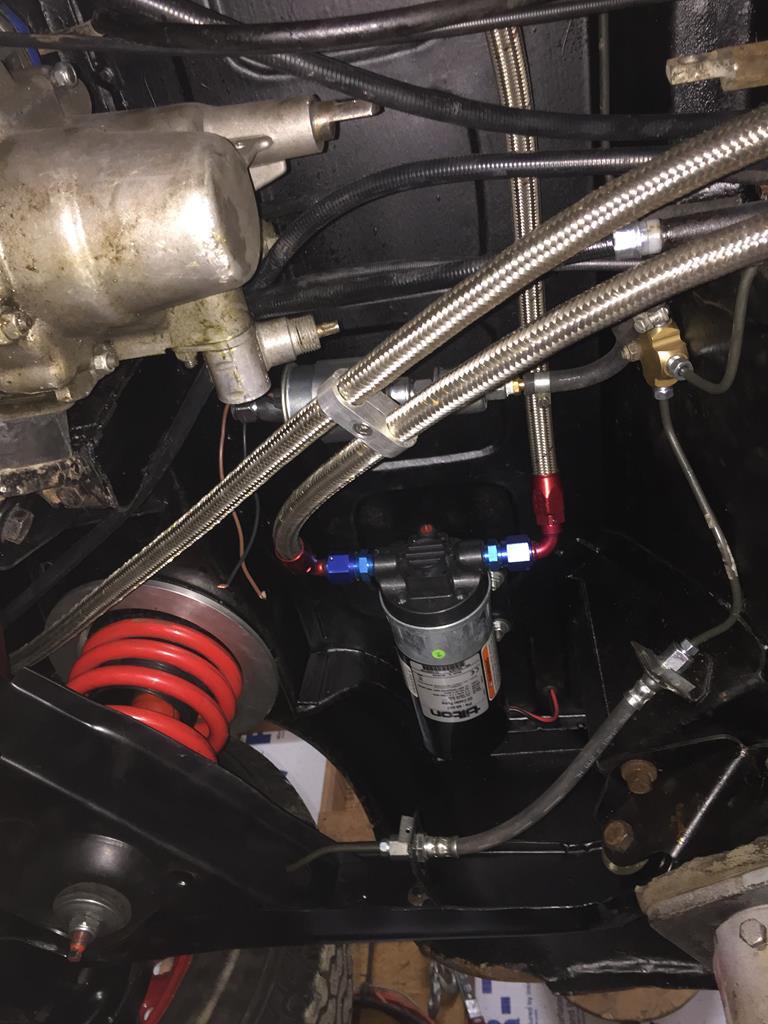 |
| |
|
|
|
|
|
|
|
Next thing was the camshaft. I wanted a slightly bigger cam than stock. A New Old Stock Alquati A2 cam came with the spares stash I got with the spaceframe racer, which should be just about perfect. But just because its in a box marked "A2", and the cam has A2 punched into it, doesn't mean that's what it is. 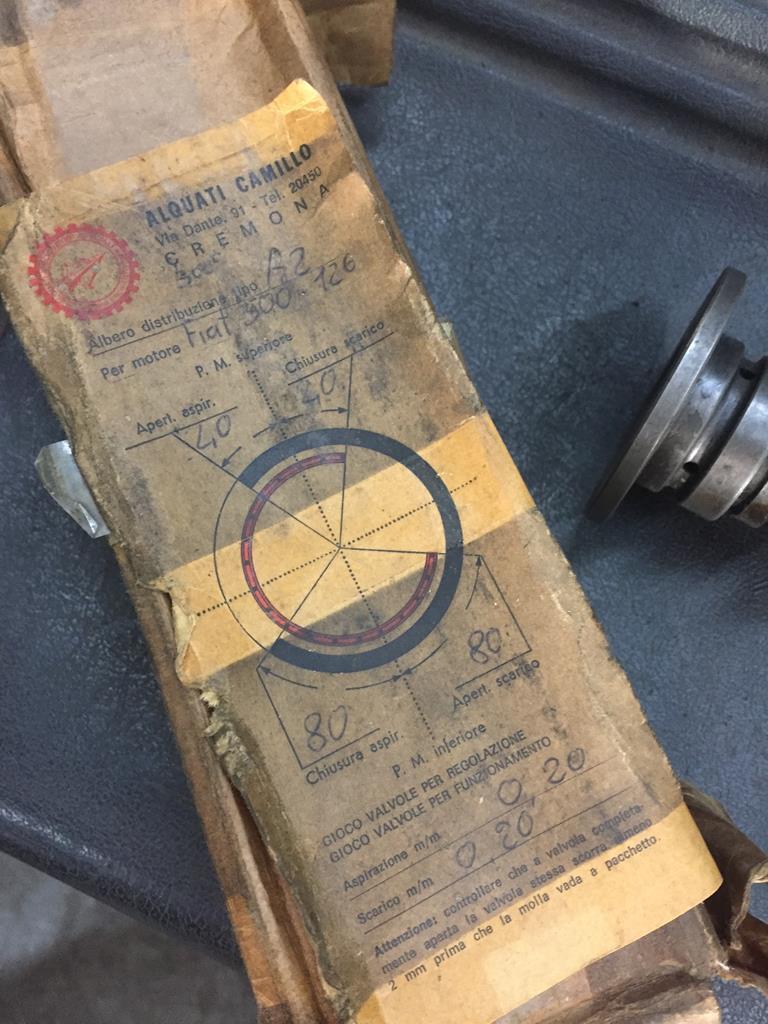 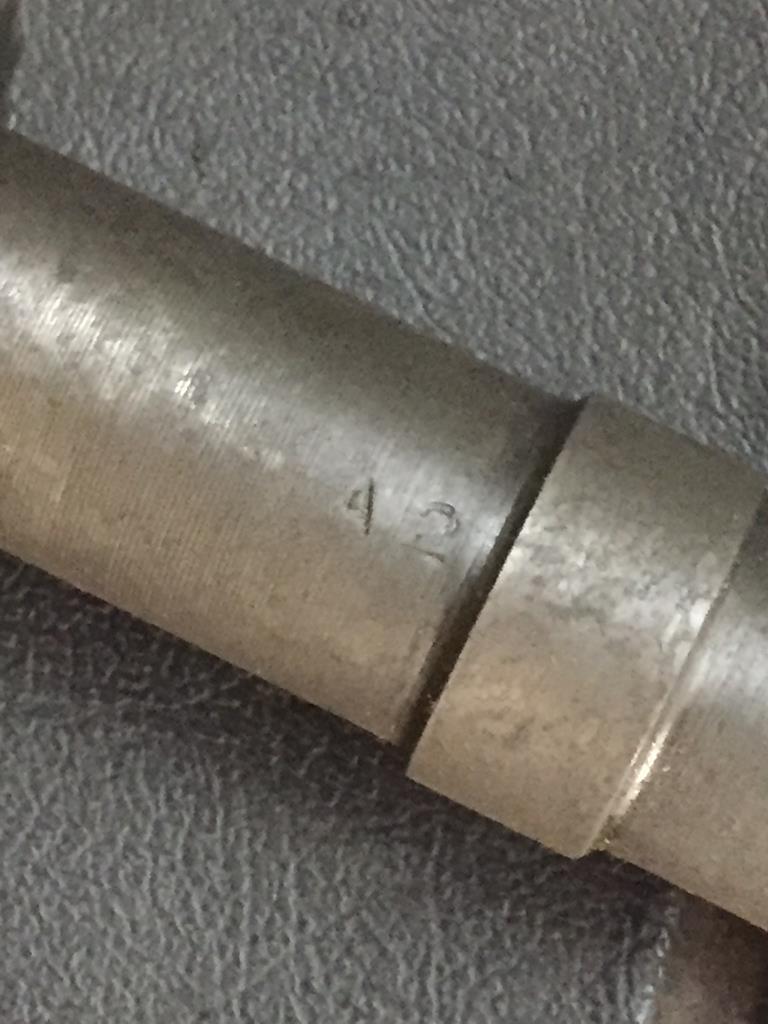 I had to measure to be sure... |
| |
|
|
|
|
|
|
|
First you have to find true Top Dead Center to measure off. I cant put a dial indicator on the piston, because I'm not removing the head. So I first had to make a piston stop out of an old sparkplug. 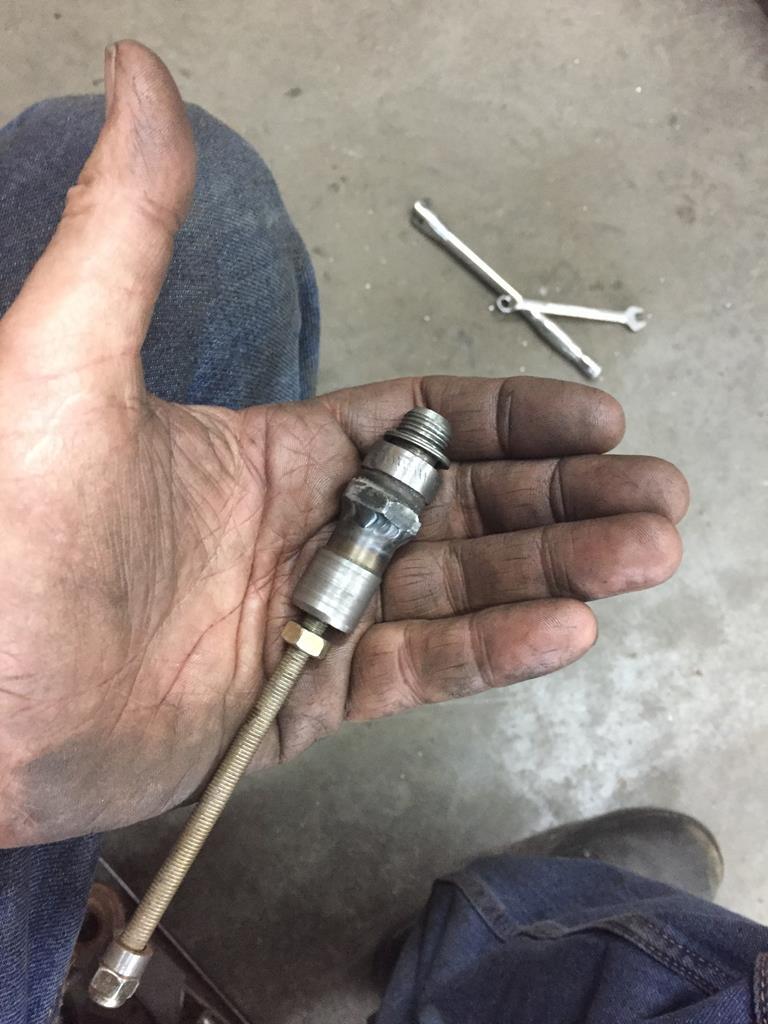 The center 1/4" fine treaded rod can be extended far into the combustion chamber, so when you turn the crank it bottoms out on the piston. ( very carefully... ) You turn the crank towards TDC , in both directions, and by adjusting the center rod, and bending a piece of thick welding wire mounted to the engine you can find TDC. once the piston stops at , say, 20 deg before and after, TDC is exactly in the middle. The degree wheels I can easily get here are meant for V8 engines. So I had to modify that too. Bu drilling 6 M6 sized holes to match the Fiat pulley, and I made a flange with an old socket welded on so I can turn it. 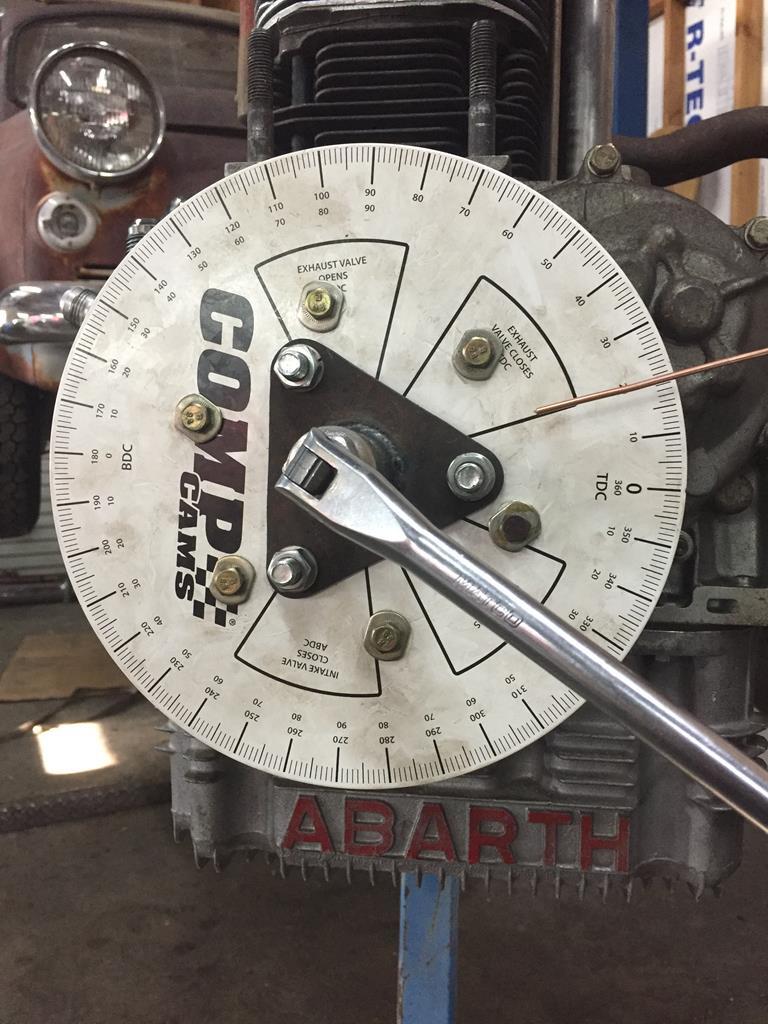 |
| |
|
|
|
|
|
|
|
After finding true TDC, I checked the TDC marking on the Fiat Pulley to the cast in pointers on the timing chain cover. 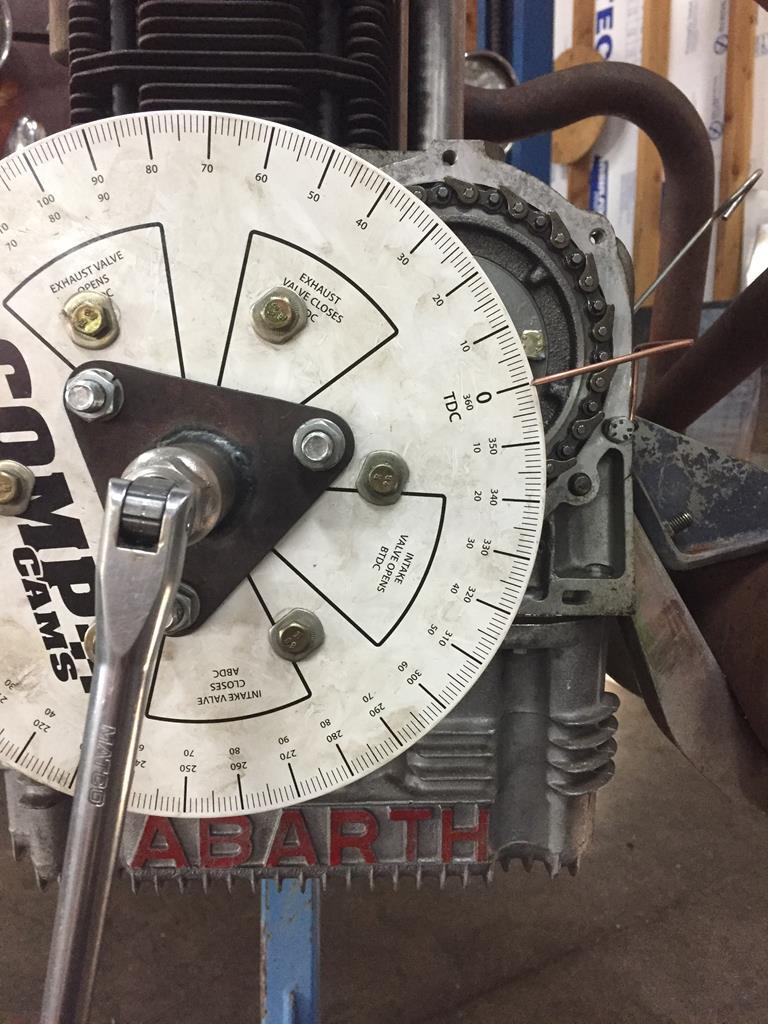 Way off... Good to know. 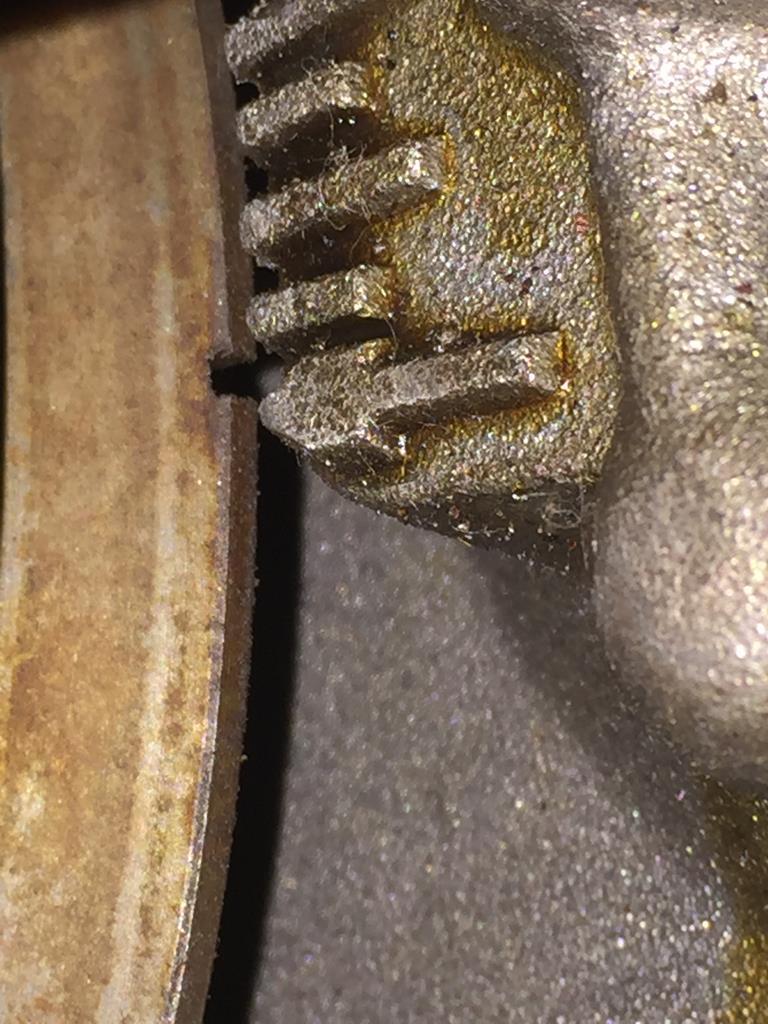 After that I measured the stock cam timing, just to have a baseline. And then I put the A2 in and measured that. After careful measuring ( twice, to be sure ) it turned out the cam was way advanced. Advancing a cam usually is done to improve torque. help.summitracing.com/app/answers/detail/a_id/4706/~/advancing-%2F-retarding-a-camshaftBut I measured 7 degrees, which is excessive. Maybe that was done for emissions, or it was just sloppy machining... Going back through my parts stash I found another set of NOS timing chain sprockets, and putting the 2 drive sprockets on top of eachother, I could easily see a difference. I put those in , remeasured the timing, and its right where it should be. Glad I took the time to do that...  |
| |
|
|
|
|


