|
|
|
|
|
|
That carb re-bushing was very resourceful and clever, including understanding to not drill all the way through … something I’d have gotten wrong, assuming I’d have gotten as far as you have, which is quite doubtful. Overall, such a huge project and massive achievement. Top marks!
John
|
| |
|
|
|
|
|
|
|
Nov 28, 2022 18:31:59 GMT
|
That carb re-bushing was very resourceful and clever, including understanding to not drill all the way through … something I’d have gotten wrong, assuming I’d have gotten as far as you have, which is quite doubtful. Overall, such a huge project and massive achievement. Top marks! John Thanks John, its coming together quite well now, not long before it will be back on its wheels and I can try moving it under its own steam! |
| |
|
|
|
|
|
|
|
I just wanted to show another example of the citric acid doing its thing, this piece was put in soak over night and then removed and given a scrub over with some sand paper.
The other side that is as removed is shown for comparison.  |
| |
|
|
|
|
|
|
|
|
|
That does look good, unfortunatly i've just started to paint the suspension this evening so a little late but something to think about for the next project which will probably be a mini :-) |
| |
|
|
|
|
|
Dec 18, 2022 22:35:25 GMT
|
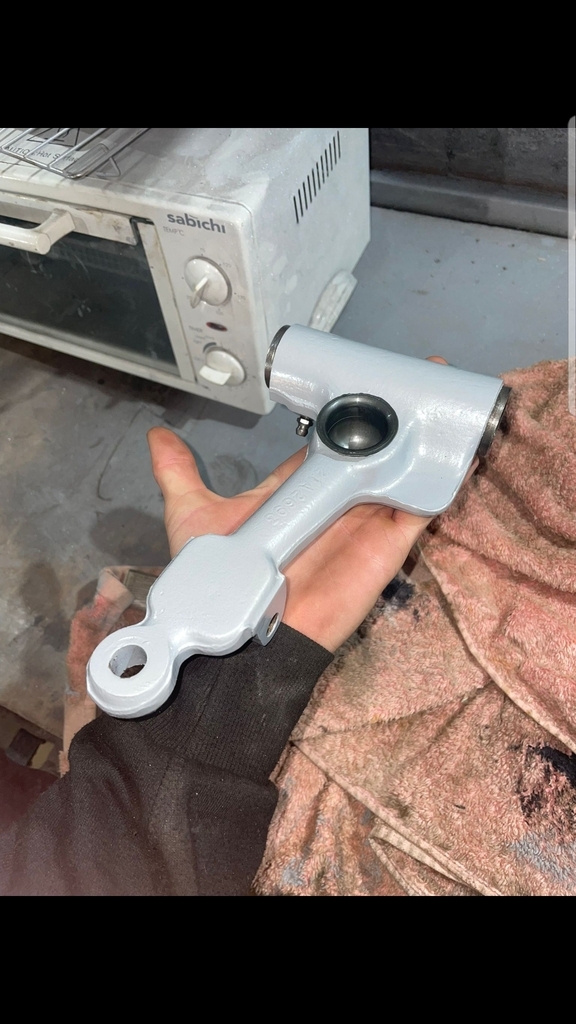
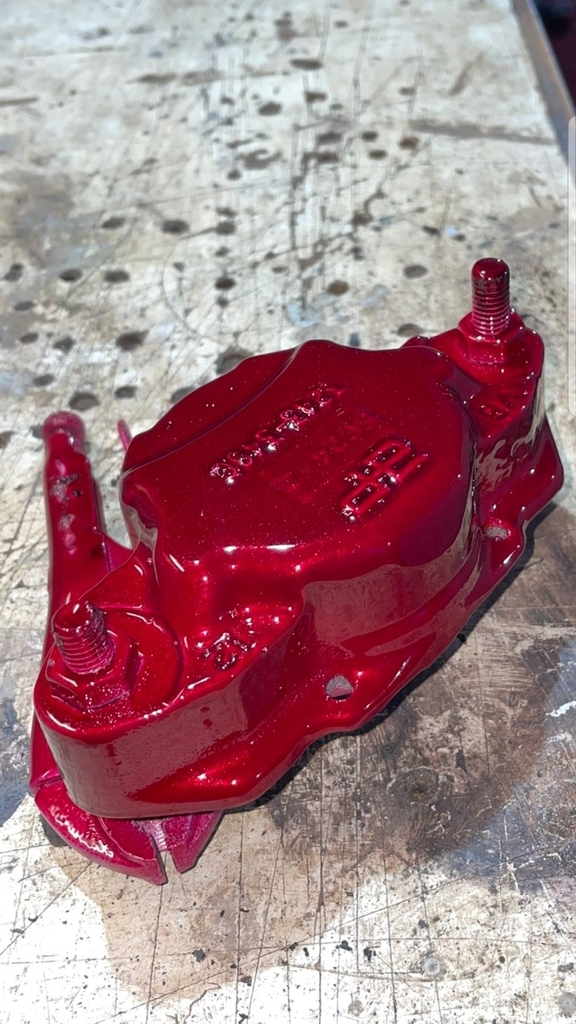
So a little bit more of an update, i've been painting the various suspension bits and started to put it back together, these are some of the bits being painted:
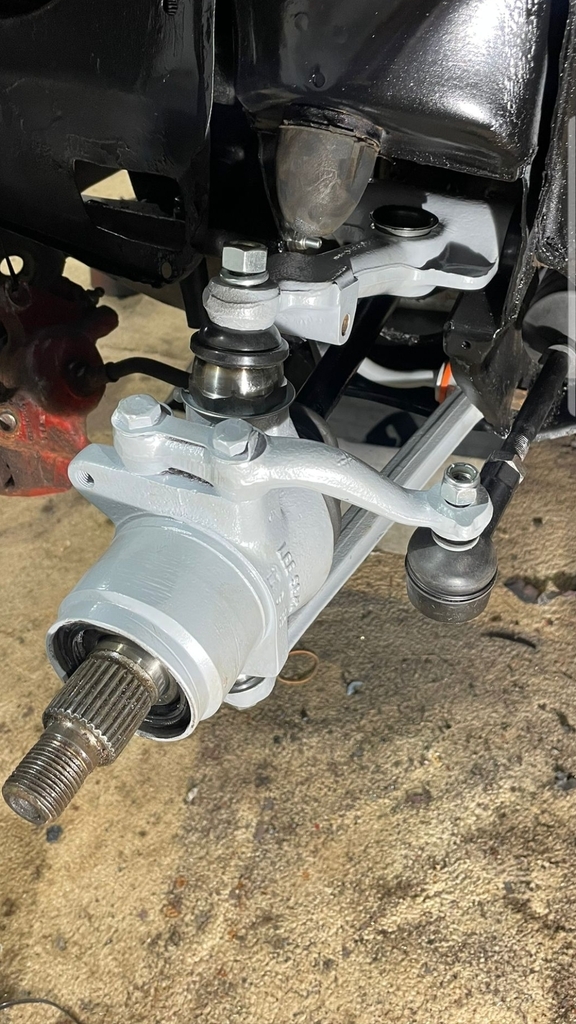
Then a few bits refitted to the subframe, the top and bottom arms:
I tried the old steering box to work out how bad the geometry with the rack and pinion steering actually is. The standard box has a slight tracking change across its range of probably around 2mm.
The rack which I don't have any pictures of has a change of around 10mm across the range which is generally used which works out as around 1.8 degrees which isn't as bad as I was expecting, it is a lot more when the arm drops to the bottom but that would only be on hard cornering and when this happens the car isn't loading the wheel up.
Its a hot topic in the Jaguar world and those that have the rack conversions seems generally happy with them whereas the armchair experts deride them massively. I had one on my 1966 S-Type and it seemed fine to me and hopefully this one will be the same. The othe MK2 has a standard steering box (manual) and to be hones its horrible and you need arms like a body builder to steer it a low speeds.
Next up came fitting the springs, i've done three cars now and the correct way to do it is insert some threaded rods into the bolt holes for the spring pan and pull it up and then when its up put the bolts in. The other two I did without the threaded rods and its a pain to do and awkward so this time I bought some 9.5mm bar and cut it into 250mm lengths and put a 3/8 unf thread on one end. This allowed me to pull it up with a threaded bar through the centre (its actually the loading tool for my rotiserrie) and it was really easy.
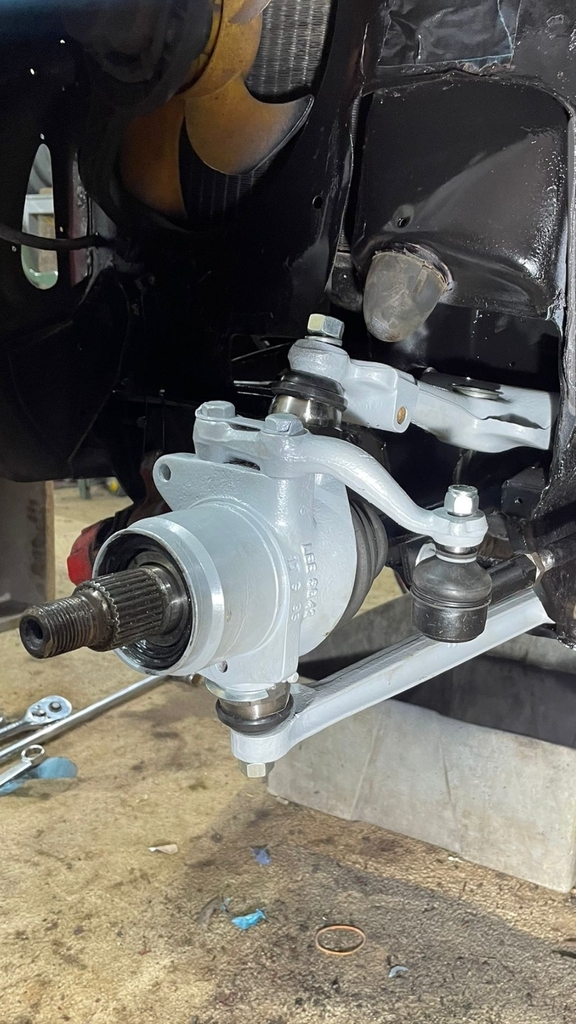
And then with it all bolted up:
I've still got to do the other side and then a few bits and pieces to clean and paint and a few bits to be delivered and then the subframe can go in.
I've also ordered a set of tyres that were on offer, these are 185/80/15 Hi-Fly brand which are car tyres not van tyres and the same as I have on the other MK2 and seem ok, certainly for how I will drive it anyway!
|
| |
|
|
goldnrust
West Midlands
Minimalist
Posts: 1,889
|
|
Dec 19, 2022 10:09:22 GMT
|
|
Those Hi-Fly tyres seem to be pretty much the only tyre out there in the standard size that isn't either a £££ branded 'classic' tyre or a van tyre, don't they! Can't complain about mine. No they don't have the ultimate grip of a performance tyre, but it's not like I slide off the road at every corner... haha
Interesting about the bump steer maths. Clearly the rack does introduce considerably more bump steer, but as you say if its mostly at the extremes of travel then you're not going to notice it as much on the road. Will be interested to hear your thought when you can drive your two cars back to back. Have you driven one of the cars with the powered box? I have to say mine felt kinda strange when I first drove the car, but now I'm used to it I've no complaints. Certainly I don't feel like it impacts on my enjoyment of spirited driving, and the power assistance makes it perfectly light and easy around town and parking.
|
| |
|
|
|
|
|
Dec 19, 2022 11:19:49 GMT
|
Those Hi-Fly tyres seem to be pretty much the only tyre out there in the standard size that isn't either a £££ branded 'classic' tyre or a van tyre, don't they! Can't complain about mine. No they don't have the ultimate grip of a performance tyre, but it's not like I slide off the road at every corner... haha Interesting about the bump steer maths. Clearly the rack does introduce considerably more bump steer, but as you say if its mostly at the extremes of travel then you're not going to notice it as much on the road. Will be interested to hear your thought when you can drive your two cars back to back. Have you driven one of the cars with the powered box? I have to say mine felt kinda strange when I first drove the car, but now I'm used to it I've no complaints. Certainly I don't feel like it impacts on my enjoyment of spirited driving, and the power assistance makes it perfectly light and easy around town and parking. I've never driven one with a powered box to be honest, the cars I have driven have either been manual steer or had the XJ6 rack. The manual steering is 5 turns lock to lock and it just not great when driving compared to a modern car or the other classics i've had such as the AH Sprite or the various minis.
I'm sure if I used the manual box more/daily I would get used to it but its a pain to manouvre and the PAS Rack conversion came up cheap from a car that had been scrapped due to terminal corrosion.
|
| |
|
|
|
|
|
Dec 19, 2022 16:24:47 GMT
|
|
Dimax radar classic 185/80r15 designed for the classic car market....they come in H and V speed ratings. About £60-80 a corner
|
| |
|
|
|
|
|
Dec 19, 2022 21:47:17 GMT
|
Dimax radar classic 185/80r15 designed for the classic car market....they come in H and V speed ratings. About £60-80 a corner Its not one i've seen before, looks good but prices seem to be around £80 each whereas the ones I bought were £219 for 5 (as I needed the spare as well) and as goldnrust said they are ok on my other one for the type of car but I can see that you might want something a bit better for your E-Type.
I'm not going to be pushing the handling on the MK2 with the speed of the lowly 2.4, even the 3.8 isn't exactly a fire ball these days :-)
|
| |
|
|
|
|
|
|
|
|
|
|
Looking good Homer!
I've been looking at tyres for mine even though they're the least of my worries at this stage and yes, ooof, they are pretty costly! particularly so here in NZ with the shipping.
Out of interest, had you considered running cross plies to stay period correct? Or are they just too hairy to drive on in modern traffic?
|
| |
1964 Daimler 2.5 V8 (project)
2015 Disco 4 SDV6
|
|
|
|
|
|
|
|
With the paint, assuming you used that Hammer rite in the pic and brushed it on? It has come out nice! How does the gloss level look in person?
The front suspension and diff are nearing the top of my list, and am deciding between Hammer rite, and spraying epoxy primer/2k black. What made you go with the Hammer rite?
|
| |
1964 Daimler 2.5 V8 (project)
2015 Disco 4 SDV6
|
|
|
|
|
Dec 20, 2022 11:21:26 GMT
|
Looking good Homer! I've been looking at tyres for mine even though they're the least of my worries at this stage and yes, ooof, they are pretty costly! particularly so here in NZ with the shipping. Out of interest, had you considered running cross plies to stay period correct? Or are they just too hairy to drive on in modern traffic? I've only driven a couple of cars on the road on crossplies and I wasn't that keen, they seemed to lack grip although that was probably due in part to their age but also the contact patch of the tyre seems a lot narrower than the radials. My car has crossplies on some of the rims and they are a lot narrower (and also probably pre 1977 as thats when the car was last on the road) and you can see how narrow they are.
I think though that radial tyres offer such a massive improvement and were available in period that unless you are going for a concours restoration its far better to go with tthe more modern tyre, especially with the way other people drive these days and it helps that they are generally less expensive as well.
|
| |
|
|
|
|
|
Dec 20, 2022 11:27:20 GMT
|
With the paint, assuming you used that Hammer rite in the pic and brushed it on? It has come out nice! How does the gloss level look in person? The front suspension and diff are nearing the top of my list, and am deciding between Hammer rite, and spraying epoxy primer/2k black. What made you go with the Hammer rite? Yes i've used Hammerite smooth black, I know a lot of people don't like it but it covers well, is easy to apply, fairly safe (unlike 2K) and when you chip it (as you inevitably will) its easy to touch it up.
The downside is that on the larger surfaces like the subframes you can see the brush marks but it still looks fine to me. Its not good a being brushed onto smooth surfaces (shiney metal) and it likes pre rusted or cast better as it has a good key.
If you are going for the best of the best then epoxy and 2K black will look better but its a lot more work and for me clearing the garage out to spray 2K and getting all my gear setup takes a while and I don't want to keep doing it for every piece thats needed as I don't really have room and I like to be able to pop into the garage, do a couple of hours and then go back in the warm 
Anything that needs to look really good I have sprayed with Hammerite spray (smooth) alhough that tends to be a bit thin but its ok for things like brackets in the engine bay. The engine I did with some engine enammel and sprayed that on and it looks good but was soft for a very long time.
|
| |
|
|
|
|
|
Dec 21, 2022 21:02:25 GMT
|
So today I fitted the front subframe, it had warmed up a fair bit outside which was good as I needed to have the garage doors open to wheel it around from one side to the other and put it in as my garage although a double isn't that big with a pair of MK2 jags in it.
With the aid of my trusty trolley jack I lifted it into postion, the rope was used to keep the front down so it didn't slide off the jack as its heavy at the rear and I keep adjusting it as I lifted it up to get the angle right.
Only hitch was I had fitted the rear mounts the wrong way around and they are offset so I had to drop it down and swap them around after which it was all in.
I also painted the front hubs and they will be ready to put back together with new discs.
I tided the garage up a bit as its a tip and loaded the car up for a pre christmas tip run (hopefully it will be quiet) and then took the tyre off the pare wheel, it was an old (40+ year crossply) and it was really hard to remove, i'm not sure if it was the tyres age, what its made of or just that manually taking tyres off is hard but I really struggled to break the bead on the first side and in the end I cut through the bead metal cord. The second side was ok so maybe the next one won't be so bad. I need to build something big enough to soak the wheels in citric acid and the get them ready to paint.
I think I will pay probably pay someone to fit the new ones though.
|
| |
|
|
jamesd1972
Club Retro Rides Member
Posts: 2,922  Club RR Member Number: 40
|
Econo Jag MK2 1967 2.4 Autojamesd1972
@jamesd1972
Club Retro Rides Member 40
|
Dec 22, 2022 15:42:36 GMT
|
|
Nice progress.
Quick daft question to double check, you haven't painted the disk to hub mating face have you ?
Believe this can cause issues, apologies if you are already on the case !
James
|
| |
|
|
|
|
|
Dec 22, 2022 20:22:27 GMT
|
Nice progress. Quick daft question to double check, you haven't painted the disk to hub mating face have you ? Believe this can cause issues, apologies if you are already on the case ! James I have but will sand it off before fitting the discs, its quicker to do this than mask them off. |
| |
|
|
|
|
|
|
|
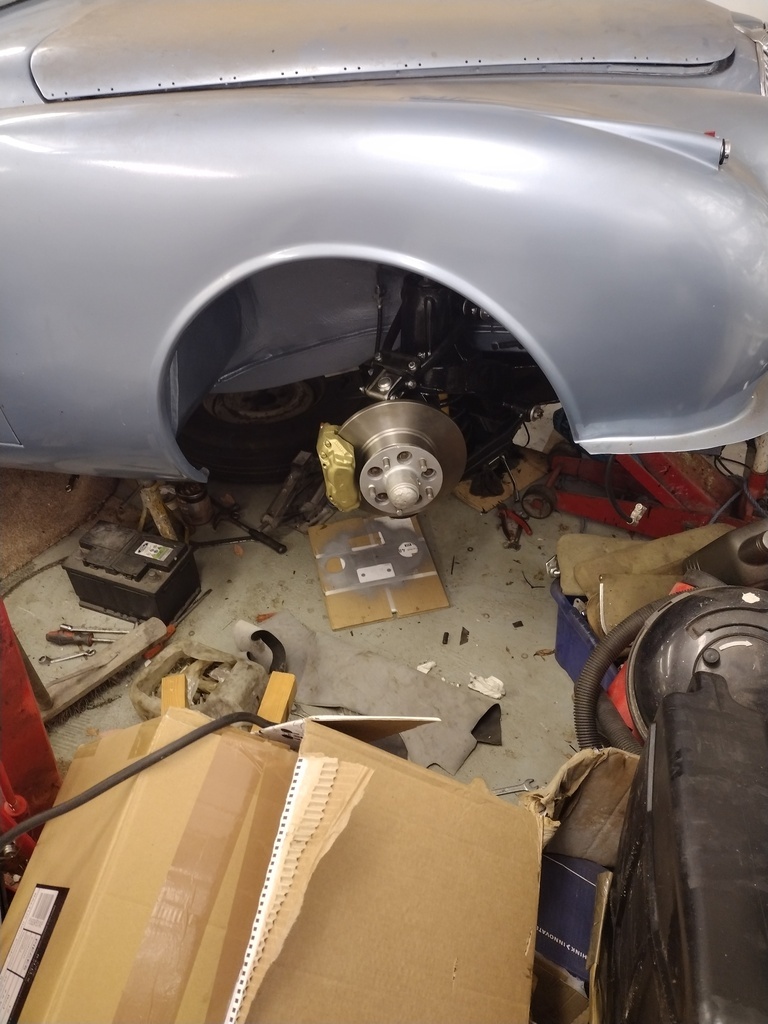
So not many pictures but had a great day in the garage, managed to get a 5 hour garage pass which was helped in part as my daughter came out to help daddy so my wife couldn't tell me off for nott spending time with the kids 
I manage to get the front hubs, discs and callipers fitted, made some brackets for the front flexible hoses to mount to the callipers, fitted the antti roll bar, lower pipes to the power steering rack, and the front and rear propshaft.
In all the excitement I only got one photo and it doesn't seem to want to load.
 |
| |
|
|
|
|
|
|
|
Here we go, I used the Retrorides uploader as the link from Imgur wouldn't work for some reason.
 |
| |
|
|
|
|
|
Jan 11, 2023 22:02:21 GMT
|
I've started cleaning the wheels up to paint, first was removing the old cross ply tyres which i've done by hand and has been an absolute pain. I used a trolley jack in the end with a rope tied through the wheel to break the bead and then levered them off (which was the easy bit). When i've done radial tyres before its been fairly easy and so I was surprise at how hard these were, i'm not sure if i've just been lucky before, if the crossplies are harder to remove or if its just that they have been on the rims for the best part of 50 years! I've done three so far and the other two have radials on (although these are probably 30-40 years old) so it will be interesting to see if they are any easier. Once this was done i've given the wheels a rub with some sandpaper to get the worst of the loose rust off, then chuck them in some citric acid, then repeated the process the next day then left them again in the acid overnight and then washed and dryed them with warm water and cleaned off the remaining paint etc. with a wire wheel in a drill. Its a slow process but quite theraputic, having said that i've done one and half wheels so far, I might feel differently after the 5th one!
|
| |
|
|
|
|


