|
|
|
|
|
The evergreen 'Herald rear jack-up' = Hole in Hedge conundrum.... Herald WILL!! GT6 WILL (... but going faster)!! Drive carefully, folks OVIMORNot quite, in theory the converstion to an XJ6 rack has two issues:
It causes bump steer It affects that ackerman angle.
In practice I found that it drove fine, it might scrub a bit more on tight turns when parking but this is hardly noticable.
Most people on Jaguar Forums who go on about the problems with this conversion have never driven one with it and just latch onto the theoritcal technical issues and the legend goes on and on.
|
| |
|
|
|
|
|
|
|
|
|
|
I wouldn't be at all suprised if the geometry issues are there to at least some degree on the original set up as well, old tall narrow tyres can live with these sort of issues but fit modern low profiles or lower it and they become evident.
|
| |
|
|
|
|
|
|
|
I wouldn't be at all suprised if the geometry issues are there to at least some degree on the original set up as well, old tall narrow tyres can live with these sort of issues but fit modern low profiles or lower it and they become evident. Quite possibly and although the ackerman angles are almost certainly better on the original setup the 5 turns lock to lock on the manual steering make it like steering a boat.
The original power steering boxes are in theory better but still a bit vague in my (admitidly limited) experience and are quite difficult to rebuild due to the availability of spare parts. Most people who convert using the XJ6 rack either have a manual steering box or a very leaky original PAS one.
|
| |
|
|
bstardchild
Club Retro Rides Member
Posts: 14,976
Club RR Member Number: 71
|
Econo Jag MK2 1967 2.4 Autobstardchild
@bstardchild
Club Retro Rides Member 71
|
|
|
I also bought a pair of brackets to convert to an XJ6 rack for £40 as well so with a secondhand rack and an electric pump from something like a Vauxhall Astra I should be able to do it reasonably economically. You should watch this before you think about fitting your steering rack. Thanks for posting that - it really was a very enjoyable video in many ways |
| |
|
|
goldnrust
West Midlands
Minimalist
Posts: 1,889
|
|
|
|
The original power steering boxes are in theory better but still a bit vague in my (admitidly limited) experience I can confirm that the power steering box in my Daimler, definitely still feels like a box rather than the precision of a rack. The weirdest thing is the variable ratio though. The 1/2 turn each way of centre is a low ratio, feels like a 4 or 5 turns lock to lock type speed, but then past that it ramps up very quickly and works at the ratio of something more like 2 turns lock to lock. I didn't feel I'd got used to it yet in the few miles I drove! I have to say having experience bump steer issues in other cars, I would be loathed to do anything that might increase it! Still if you have personal experience of the rack conversion and you're happy with how it drives it makes total sense to make the swap. |
| |
|
|
|
|
|
|
|
The original power steering boxes are in theory better but still a bit vague in my (admitidly limited) experience I can confirm that the power steering box in my Daimler, definitely still feels like a box rather than the precision of a rack. The weirdest thing is the variable ratio though. The 1/2 turn each way of centre is a low ratio, feels like a 4 or 5 turns lock to lock type speed, but then past that it ramps up very quickly and works at the ratio of something more like 2 turns lock to lock. I didn't feel I'd got used to it yet in the few miles I drove! I have to say having experience bump steer issues in other cars, I would be loathed to do anything that might increase it! Still if you have personal experience of the rack conversion and you're happy with how it drives it makes total sense to make the swap. The main objection people have with the conversion is the alteration to the ackerman angle and while they are correct it does change it substantially its only an issue on really tight turns, for example low speed manouvring.
I had this conversion in my 1966 S-Type and even at motorway speeds it felt great. Best memory I have is blowing away four chavs in a Nova on the dual carriageway near me when I was running late for meeting, according to my passenger the look on their faces as I flew past was priceless.
|
| |
|
|
|
|
|
Jun 21, 2020 22:27:19 GMT
|
|
|
| |
|
|
|
|
|
Jun 21, 2020 22:31:51 GMT
|
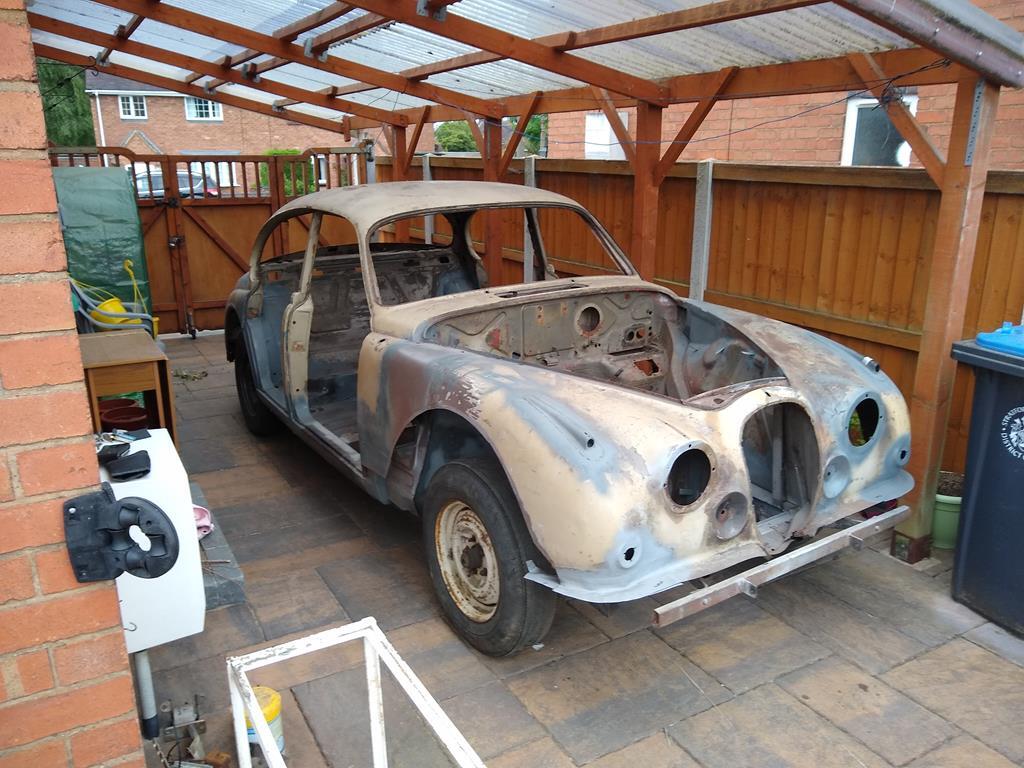
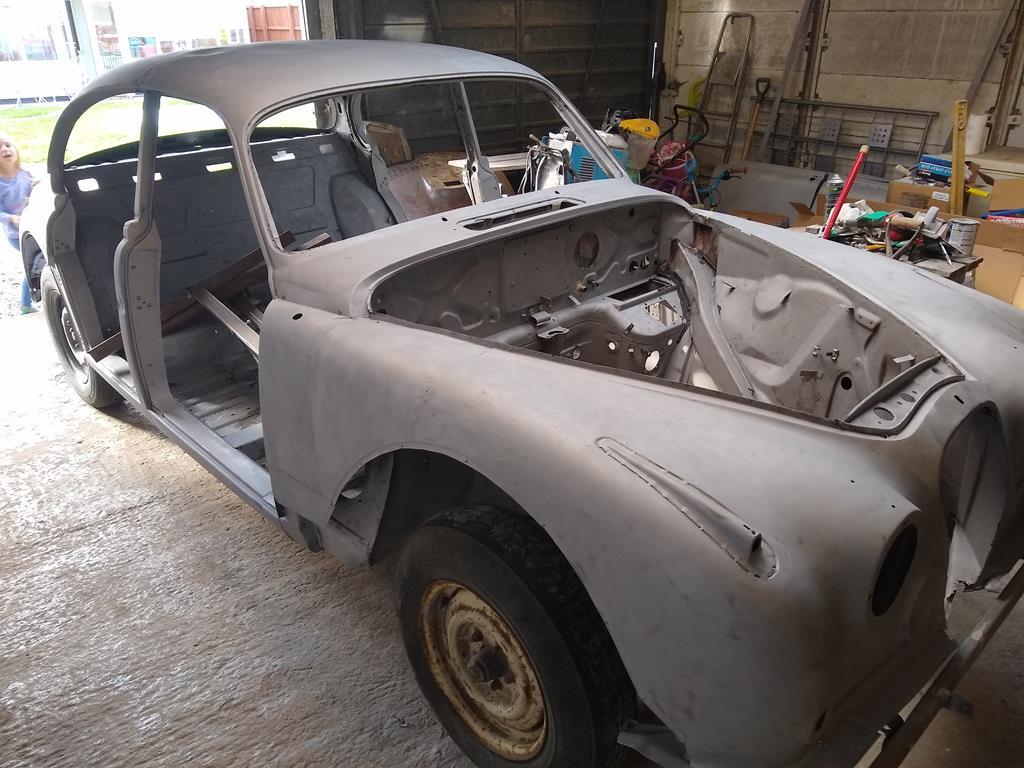
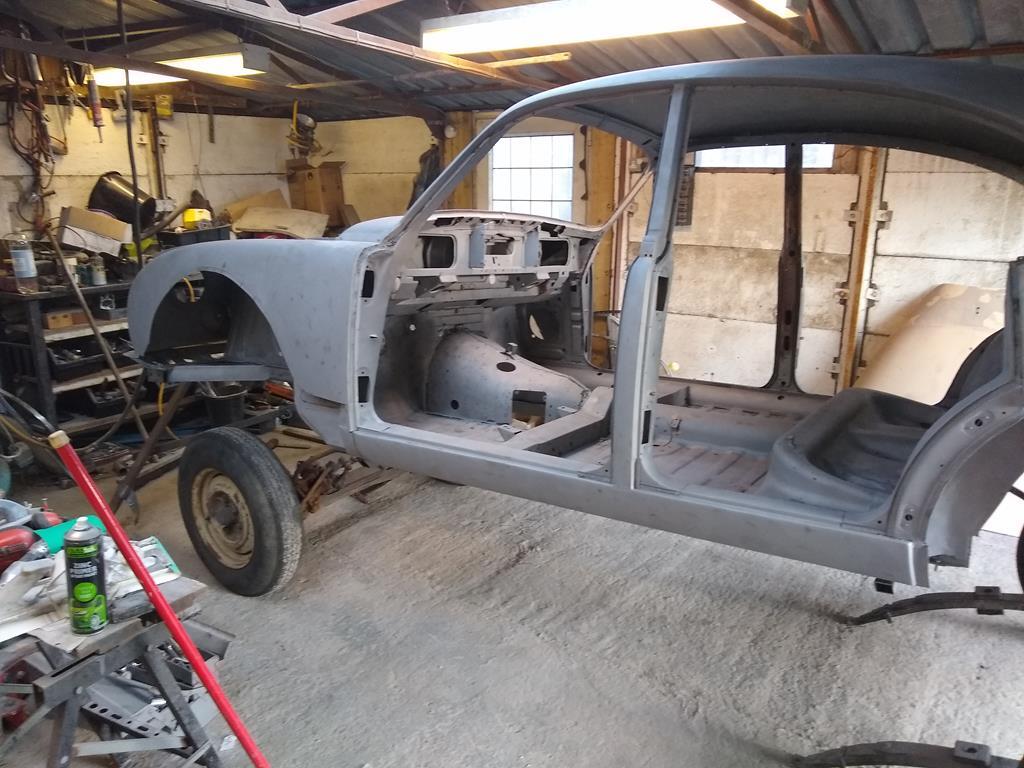
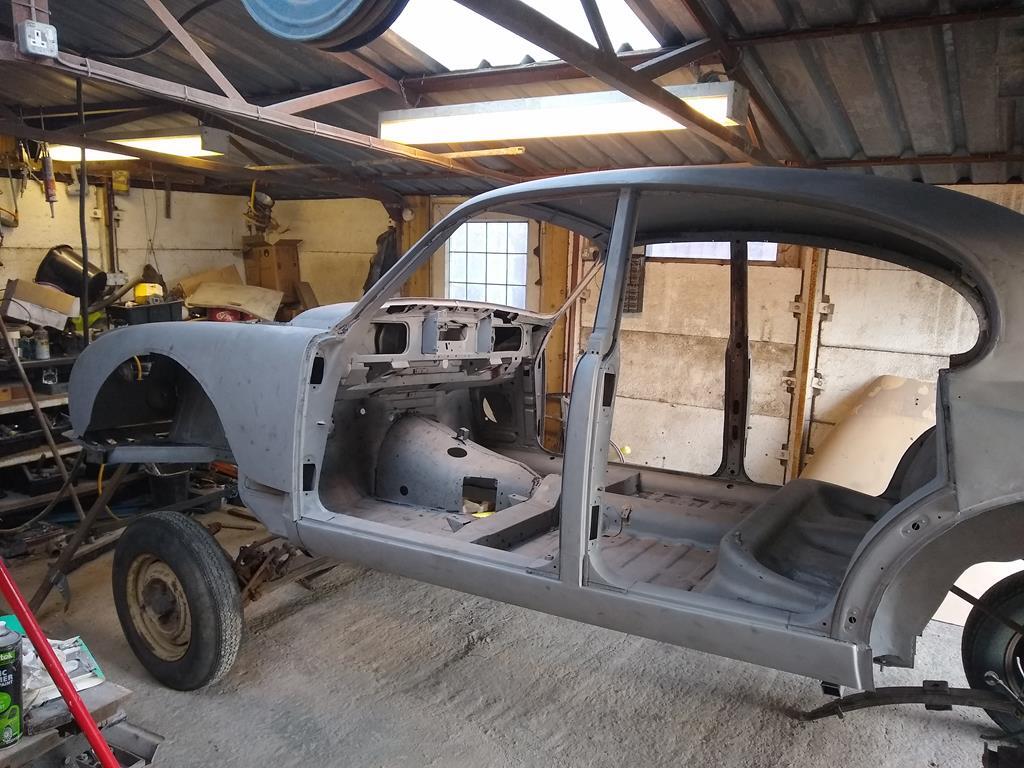
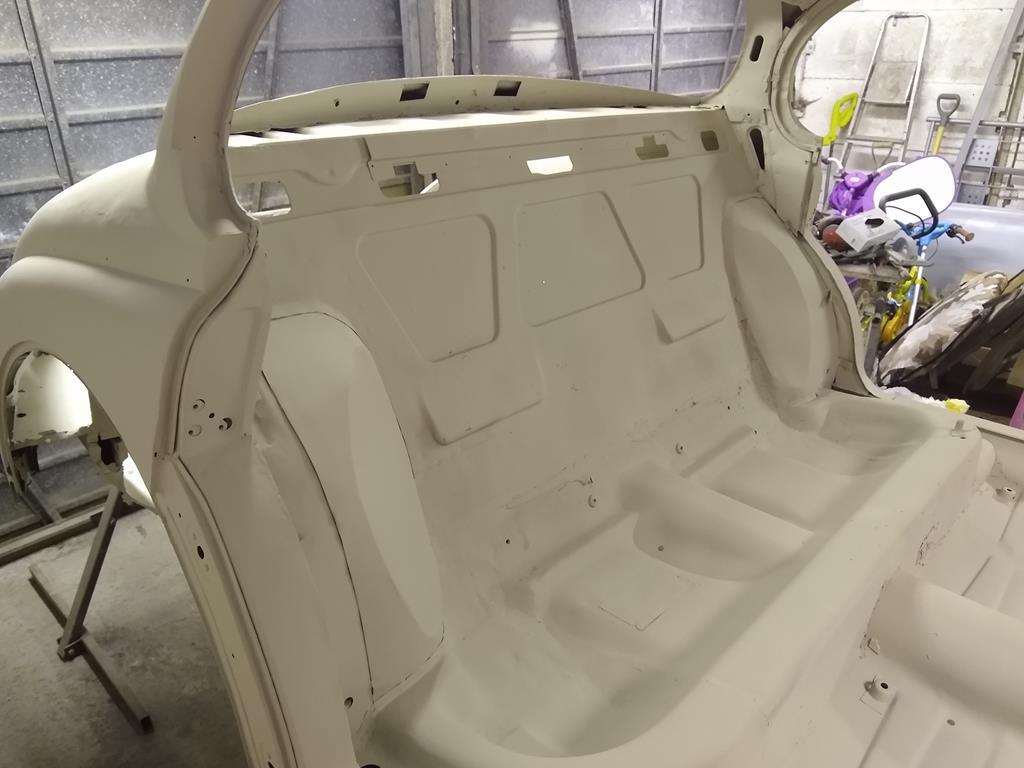
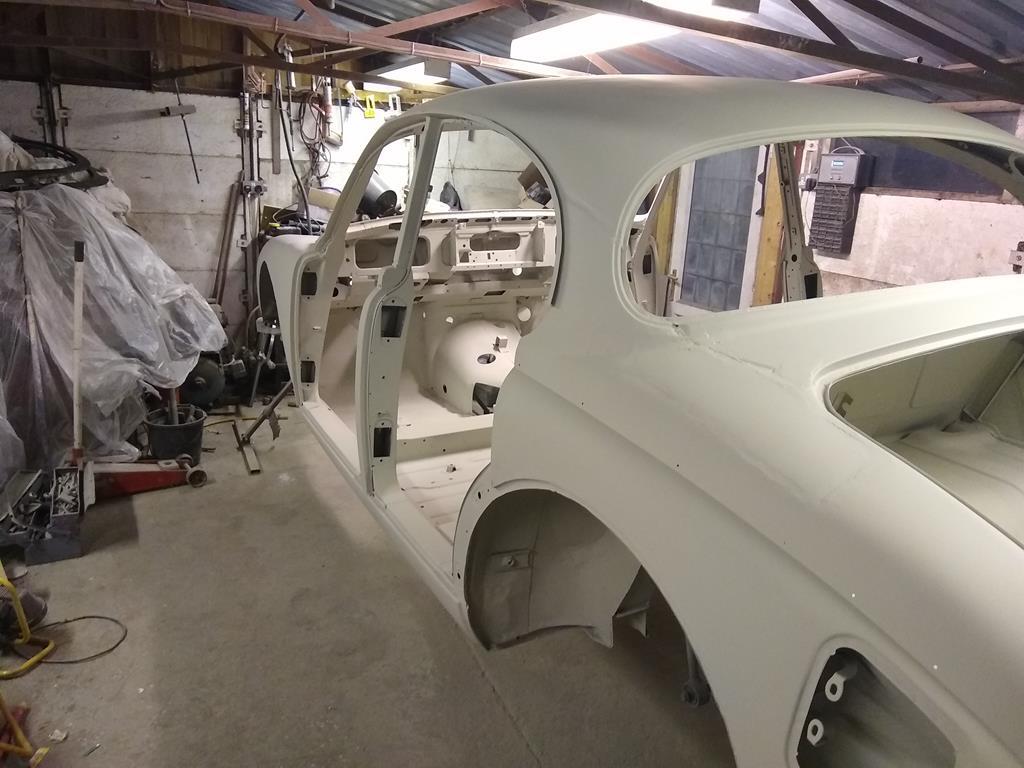
From the work I had done previously to the car I had found that the car had had a new nearside front wing, its also had both offside doors replaced and there was a crease in the rear of the front wing. There was also a big dent in the roof and a lot (and I mean a lot) of filler that was cracking out. Blasting the car revealed a dent in the B/C post and took the filler out of the roof. B/C Post 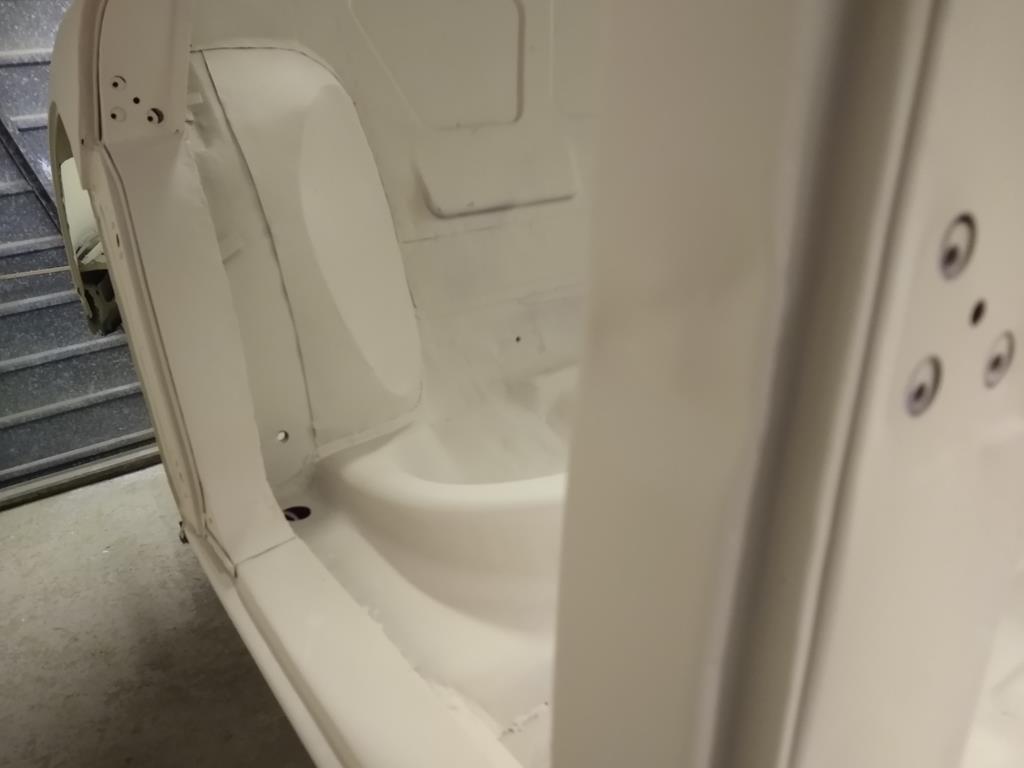 Edge of roof, nasty! 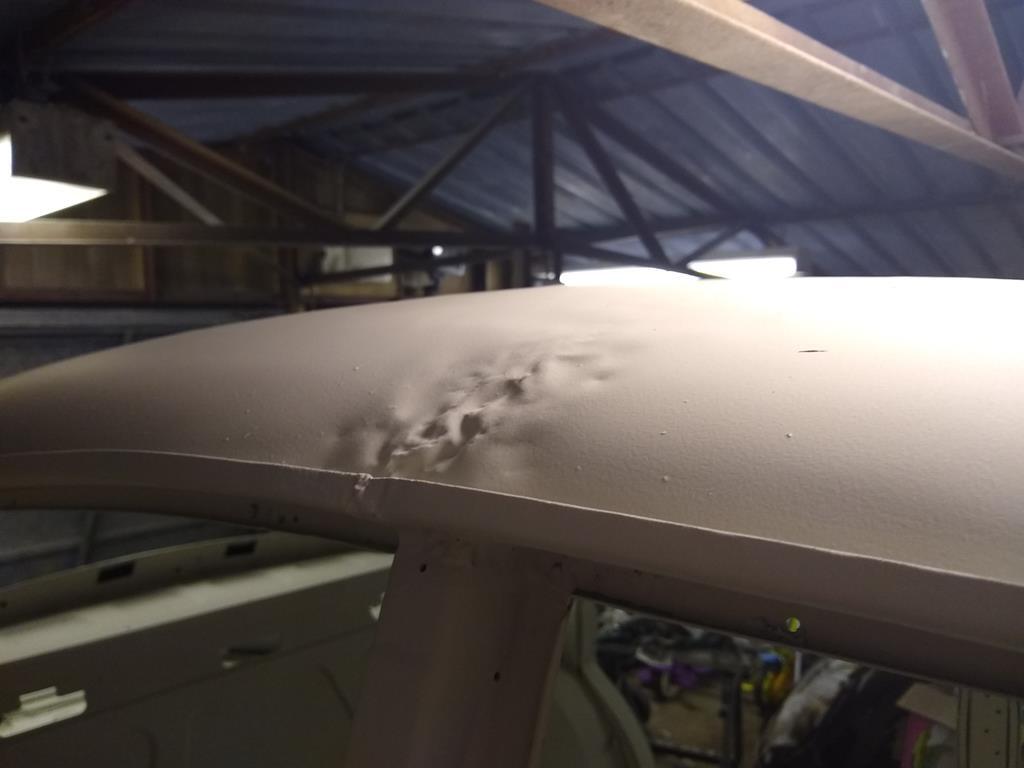 Middle of roof, its like a scale map of the Malvern hills :-( 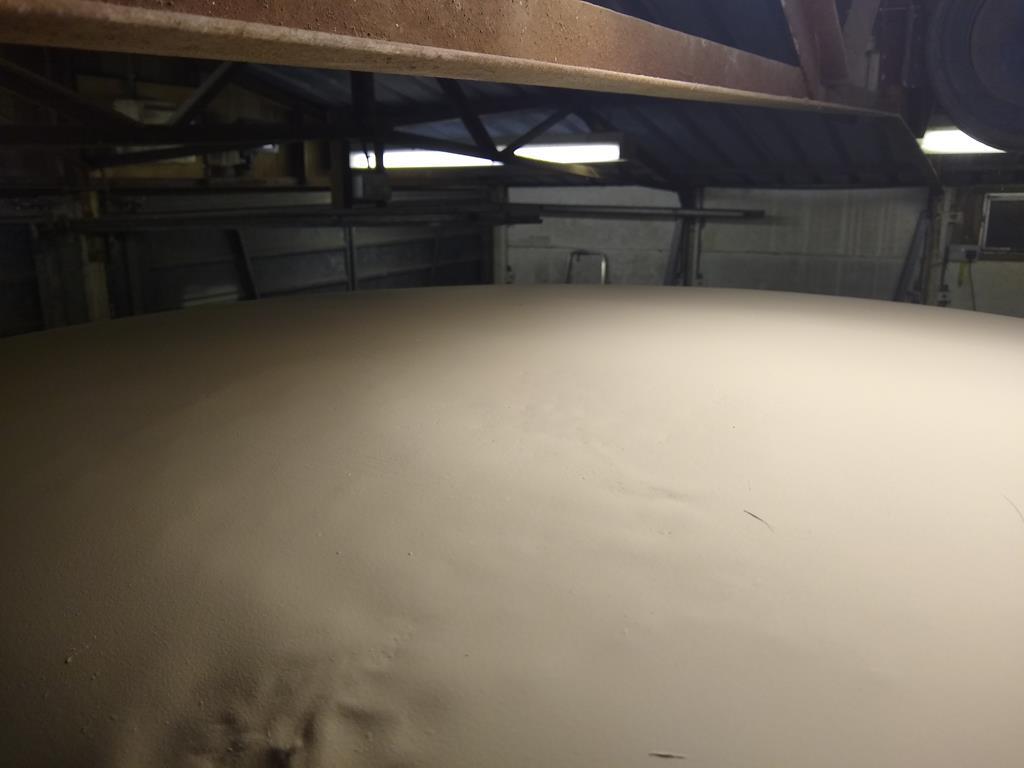 |
| |
|
|
|
|
|
|
|
|
That roof isn't nice at all - the good thing is that at least you are working with a decent thickness of steel to start with - secondly the repairs to date have only been attempted / amateur repairs and thirdly its a convex shaped roof and not a large flat roof which would far more challenging - The area above the B post I'm assuming is difficult to access from the underside with the side roof rail just by the fact that they appear to have utilised a bar of some description to attempt to knock the damage outwards - That could be largely improved with some time & care even if the access is difficult (might even be worth sectioning part of the side roof rail out to allow access then welding it back in) and if its still a little deep it could be leaded / body soldered to correct the profile - the rest of the roof could also be improved with some time & care - you may have to shrink some areas - but its still going to require a lot of work / effort to obtain the correct profiles - The advantage you have is that having restored several vehicles prior to this you will have the confidence along with a good skill base to give this a go and stick at it until you attain the correct result - might be more work than what you initially anticipated but it will be worth it - if its any consolation I have straightened up far worse - even to the point of removing really badly distorted sections and welding in fresh steel before today - Good luck and if you need any advice don't hesitate to bug me for it - Chris
|
| |
Last Edit: Jun 22, 2020 6:21:01 GMT by Deleted
|
|
|
|
|
|
|
That roof isn't nice at all - the good thing is that at least you are working with a decent thickness of steel to start with - secondly the repairs to date have only been attempted / amateur repairs and thirdly its a convex shaped roof and not a large flat roof which would far more challenging - The area above the B post I'm assuming is difficult to access from the underside with the side roof rail just by the fact that they appear to have utilised a bar of some description to attempt to knock the damage outwards - That could be largely improved with some time & care even if the access is difficult (might even be worth sectioning part of the side roof rail out to allow access then welding it back in) and if its still a little deep it could be leaded / body soldered to correct the profile - the rest of the roof could also be improved with some time & care - you may have to shrink some areas - but its still going to require a lot of work / effort to obtain the correct profiles - The advantage you have is that having restored several vehicles prior to this you will have the confidence along with a good skill base to give this a go and stick at it until you attain the correct result - might be more work than what you initially anticipated but it will be worth it - if its any consolation I have straightened up far worse - even to the point of removing really badly distorted sections and welding in fresh steel before today - Good luck and if you need any advice don't hesitate to bug me for it - Chris Thanks Chris, it will certainly be interesting. I knew the roof wasn't great when I bought it as there was a large area of filler cracking out of it but is a fair bit worse than I expected.
A few years ago I cut up a MK2 jag that I bought for spares and I kept the roof for it, as I was running out of space I put it on e-bay for 99p start and I got 99p for it! Wish I had kept it although replacing the roof would probably be just as much work as repairing this one.
The other alternatives if my repair doesn't go well are a webasto or a Morse style vinyl roof :-)
|
| |
|
|
|
|
bstardchild
Club Retro Rides Member
Posts: 14,976
Club RR Member Number: 71
|
Econo Jag MK2 1967 2.4 Autobstardchild
@bstardchild
Club Retro Rides Member 71
|
Jun 22, 2020 17:34:05 GMT
|
When I had my Rally car shell shot blasted I knew it had a huge amount of filler in the roof because - one it had been rolled at least once in it's life and two it originally had a sunroof that had been removed and a patch welded in to fill the hole. Now my blasters don't like doing large sections of panels due to distortion risks but I'd told them it couldn't be any worse than it is now. However it came back in a lot better shape - something to do with the heat generated in the metal during the blasting process as a lot of the shallow dents in the roof popped back to something very close to the original profile Since that point I gathered up a complete roof (without a sunroof) so it doesn't matter now 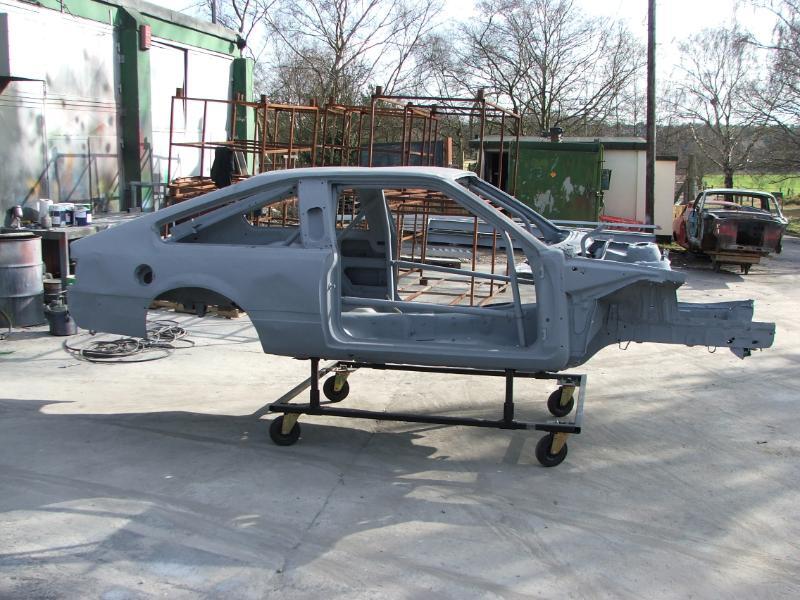 |
| |
|
|
|
|
|
Jun 29, 2020 18:02:22 GMT
|
|
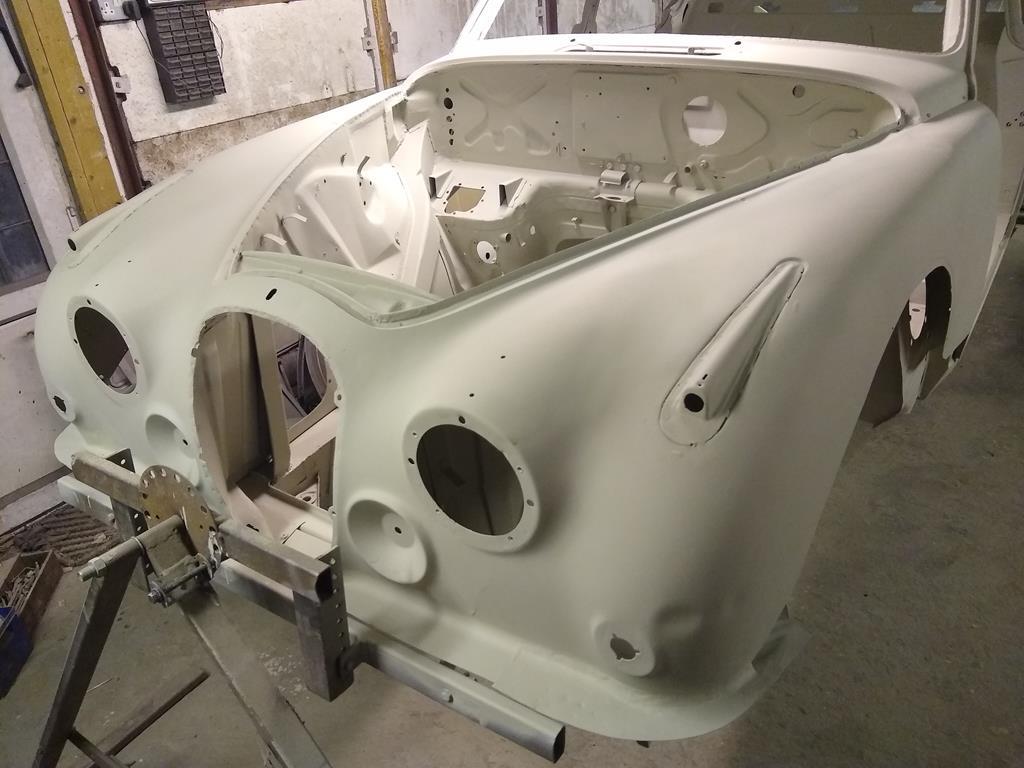
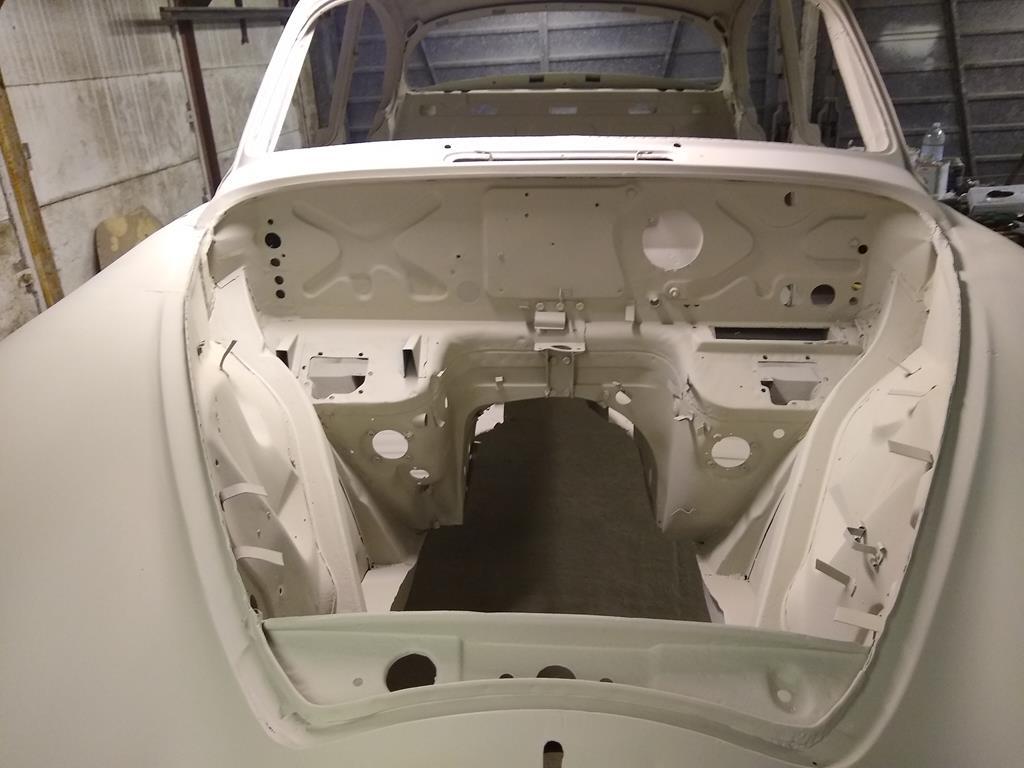
I've welded in the front arch on the o/s complete with the baffle panel (no pictures yet) and have turned my attention to filling the arch and sidelight pod.
With the sidelight pods these have both been removed, one was replaced the other repaired and new sectons welded in underneath them so I know they are all solid and no rust, however, I did the same on the last MK2 and after a few years one of them has started to crack slightly which suggests that water has probably got in and started to corrode again.
I'm not sure what to do to prevent this happening here. they are originally leaded in but even that doesn't seem to stop the problem as it eventually gets pushed out by the rust.
Is it just a case of trying to seal the inside better and using filler again or does anyone have any cunning ideas (looking at you particuarly Grumpynortherner!).
|
| |
|
|
|
|
|
Jun 29, 2020 19:10:36 GMT
|
I've welded in the front arch on the o/s complete with the baffle panel (no pictures yet) and have turned my attention to filling the arch and sidelight pod. With the sidelight pods these have both been removed, one was replaced the other repaired and new sectons welded in underneath them so I know they are all solid and no rust, however, I did the same on the last MK2 and after a few years one of them has started to crack slightly which suggests that water has probably got in and started to corrode again. I'm not sure what to do to prevent this happening here. they are originally leaded in but even that doesn't seem to stop the problem as it eventually gets pushed out by the rust. Is it just a case of trying to seal the inside better and using filler again or does anyone have any cunning ideas (looking at you particuarly Grumpynortherner!). Sidelight pods on the MK2 are pigs to sort - we used to remove them to ensure that all rust was chased out - then either reuse or replace them - still used body solder / lead for the face side of the panel seam - a high quality seam sealer for the underside - we used to go over them twice with the sealer - always drilled a small hole in the base of the pod to allow any water ingress from the lamp / condensation to egress - then built a splash plate that covered the entre underside of that area - retained on tabs welded to the underside of the wing then the splash plate bolted to the tabs - make sure the splash plate covers the wiring harness feed / grommet to the lamp - lots of good quality underbody protection and spray the inside of the pod with a good cavity wax once the car is painted - never had one returned for remedial works |
| |
Last Edit: Jun 29, 2020 19:12:23 GMT by Deleted
|
|
|
|
|
Jun 30, 2020 18:11:49 GMT
|
I've uploaded a few photos of progress to the front offside wing.
This is the front arch trial fitted using self tapping screws (I had already had all this fitted up before blasting so it was just a case of screwing it all back together).
Next with the arch and inner baffle welded in.
In this one you can also see where I welded in some captive nuts for the bonnet hinges.
Then all ground up ready for filling.
|
| |
|
|
|
|
|
Jun 30, 2020 21:50:18 GMT
|
|
Nice work!
John
|
| |
|
|
|
|
|
|
|
|
would it be worth deleting the side light pods and just adding that function to the headlights?
|
| |
|
|
eurogranada
Europe
To tinker or not to tinker, that is the question...
Posts: 2,556
|
|
|
|
|
Just found this and read up. Wow is all I can say. Wish I had the skills to match...
|
| |
|
|
|
|
|
|
|
would it be worth deleting the side light pods and just adding that function to the headlights? It would be shame to loose them as they are a nice original feature and i've done all the welding to repair them now. The original 1960's S-Type didn't have these although the front wings were fairly similar (also had a different nose cone with the lights recessed into them and a different shaped indicator and seperate sidelight. |
| |
|
|
|
|
|
|
|
would it be worth deleting the side light pods and just adding that function to the headlights? It would be shame to loose them as they are a nice original feature and i've done all the welding to repair them now. The original 1960's S-Type didn't have these although the front wings were fairly similar (also had a different nose cone with the lights recessed into them and a different shaped indicator and seperate sidelight. They are such a period feature of the car that removed it becomes instantly noticeable by anyone who knows the model to the point that if it ever came to the open market you would restrict the sale / devalue the car |
| |
|
|
|
|
|
|
|
I also bought a pair of brackets to convert to an XJ6 rack for £40 as well so with a secondhand rack and an electric pump from something like a Vauxhall Astra I should be able to do it reasonably economically. Hey Homer, Quite a bit of progress since your last update on Jagforums, great work! Sorry to hear about the house move. But at least you still have your garage! I have a couple of questions please. I have pondered the PS issue over and over. I think, given that everything is now off the car, I'm not going for 'original' (No Sireeee) and the obvious benefits, I've decided that PS will be fitted. Now, which PS system? I have read an article recently about modifying the steering column to incorporate a Corsa EPS system. It seems straight forward and it keeps the original geometry plus it only costs around £100. BUT, it means I have to (possibly) refurb the existing steering box, if there's any play in the original system, this will not improve matters obviously. So looking at the method you are proposing, what costs are involved? The rack I've seen on eBay for less than £100.Then £40 for the brackets (where did you source those BTW?) and an electric pump. Do the track rods from the XJ6 fit? Is it any model of XJ6 rack that fits do you know? I'm not overly concerned about bump-steer, I don't intend to drive it that hard to notice (I can't imagine that it would be SO bad to make it dangerous for the driving I intend to do), and as you say, incorrect Ackerman will only scrub the tyres a bit. So, any advice you can share would be appreciated. Next question, Your recent front wing/arch/sill panel replacement. I did something similar with one of mine, but the panel was cut down so much, the replacement was simply butt welded in without too much of an issue. The other side, I will need to use pretty much ALL of the panel. It appears that you've overlapped yours on the arch, then spot-welded. I don't have a spot-welder unfortunately, so would you recommend I butt weld again, or is there any benefit to overlapping and seam welding? I've not a great deal of experience in welding, only what I've done so far on my car. Third question, where did you get a replacement sidelight pod? Thanks and keep us updated! |
| |
|
|
|
|


