jamesd1972
Club Retro Rides Member
Posts: 2,919  Club RR Member Number: 40
|
|
|
|
|
Will be watching door tops with interest as we have bits collected in the shed that need to be sorted out into something that fits. I was wondering about using silkaflex type PU to stick in the channels to prevent the self tappers being the little rust making traps they appear to be.
Carry on.
James
|
| |
|
|
|
|
|
|
|
Jul 20, 2021 10:15:25 GMT
|
|
ooooooh .must hide this from veronica , she complains a lot about series 3 steering weight..
|
| |
|
|
xfu990
Part of things
 
Posts: 78
|
|
Jul 20, 2021 12:20:58 GMT
|
Want one  |
| |
|
|
glenanderson
Club Retro Rides Member
Posts: 4,338
Club RR Member Number: 64
|
|
Jul 21, 2021 13:19:14 GMT
|
Glen...you have had that hat for a long time, yes?  Kept meaning to reply back to this… just found the earliest photo of me in the hat. 1977 Silver Jubilee at school, aged 8, second prize in the fancy dress. 😃  |
| |
My worst worry about dying is my wife selling my stuff for what I told her it cost...
|
|
thomfr
Part of things
  Trying to assemble the Duett again..
Posts: 689
|
|
Jul 21, 2021 17:23:22 GMT
|
|
And already flanked by a hot babe!
Thom
|
| |
73' Alfa Giulia Super
64' Volvo Duett
65' Volvo Duett
67' Volvo Amazon 123GT
09' Ford Focus 1.8
20' VW ID4
71' Benelli Motorella
65' Cyrus Speciaal
The difference between men and boys is the price of their toys
|
|
|
|
|
Jul 21, 2021 22:31:26 GMT
|
I'm not sure that nurses outfit suited you Glen  |
| |
|
|
glenanderson
Club Retro Rides Member
Posts: 4,338
Club RR Member Number: 64
|
|
Jul 21, 2021 22:58:49 GMT
|
The nurse is my little sister.  |
| |
My worst worry about dying is my wife selling my stuff for what I told her it cost...
|
|
|
|
|
Jul 21, 2021 23:27:57 GMT
|
The nurse is my little sister.  … and Glen will defend her honour to anyone who makes any comments! Really, what a lovely photo. Things were less complicated then, especially for kids. John |
| |
|
|
thomfr
Part of things
  Trying to assemble the Duett again..
Posts: 689
|
|
|
|
The nurse is my little sister.  :-) |
| |
73' Alfa Giulia Super
64' Volvo Duett
65' Volvo Duett
67' Volvo Amazon 123GT
09' Ford Focus 1.8
20' VW ID4
71' Benelli Motorella
65' Cyrus Speciaal
The difference between men and boys is the price of their toys
|
|
glenanderson
Club Retro Rides Member
Posts: 4,338
Club RR Member Number: 64
|
|
|
|
|
Trust me, she’s always been more than capable of defending herself. 🤣🤣
|
| |
My worst worry about dying is my wife selling my stuff for what I told her it cost...
|
|
|
|
thomfr
Part of things
  Trying to assemble the Duett again..
Posts: 689
|
|
Jul 22, 2021 13:58:23 GMT
|
Here one of myself (around 1981 aged around 10) beside a French diva ;-)  Thom |
| |
73' Alfa Giulia Super
64' Volvo Duett
65' Volvo Duett
67' Volvo Amazon 123GT
09' Ford Focus 1.8
20' VW ID4
71' Benelli Motorella
65' Cyrus Speciaal
The difference between men and boys is the price of their toys
|
|
glenanderson
Club Retro Rides Member
Posts: 4,338
Club RR Member Number: 64
|
|
Jul 22, 2021 21:55:14 GMT
|
So. A bit of luck with manifolds… I had a look on eBay and there wasn’t anything local, and the ones that would post/courier were a bit steep. On the off chance, I stuck a wanted post on the Facebook page of a bunch of likeable fruitcakes that put Cummins lorry engines into Land-Rovers, to see if anyone had the bits I need sat in their way. Got a response from a chap quite close by who’d got a 300 Tdi sat in his workshop that’d nipped up after a waterpump failure, the week before it’d been destined to get pulled out anyway. He was quite happy to sell me the manifolds, oil pipes and dipstick, so I scooted off to collect them last night. 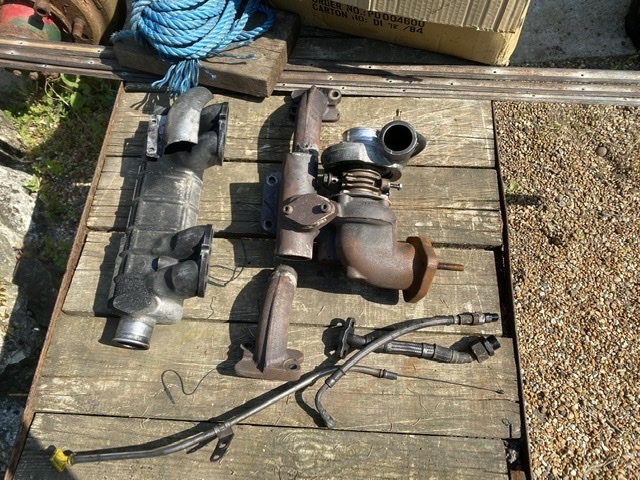 I can use the engine I picked up from forkliftfred as a test mule for their fitment to the Land-Rover, but initial offering up looks very favourable. The only thing that needs working out is the dipstick fitment into the block as the 200 uses a gland nut and olive, and the 300 is a push fit with an O-ring. I’m sure I can work something out. A big bonus is that the turbo was replaced just three months before the engine failed, and is absolutely mint. I’ve been trying to do some jobs that have been getting put off for ages, despite me having the bits to do them. One of the things that has been driving me steadily madder and madder is the sliding glass rattling in the front door windows. I have early 90/110 style door tops (mine are actually ex military), and these are generally miles better than series ones. They’re all aluminium construction, so aren’t plagued with the rot that the steel frames of earlier ones are, and both bits of glass slide, so ventilation options are better too. However, the channels the glass run in are just felt lined, and with time the felt wears and shrinks, ultimately allowing the glass to rattle against the frames. The old felt looks like this next to the new: 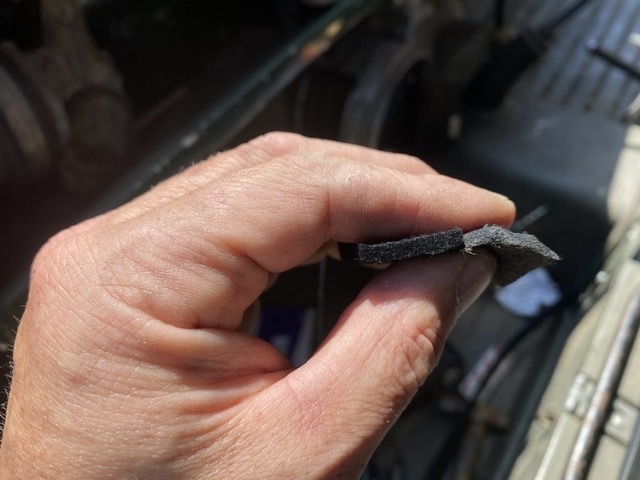 Getting the old felt out is easy enough. You can just hook a bit out and pull, but you need the glass out to get the new stuff in. First thing is to drill out the two rivets at the ends of the bottom runner. 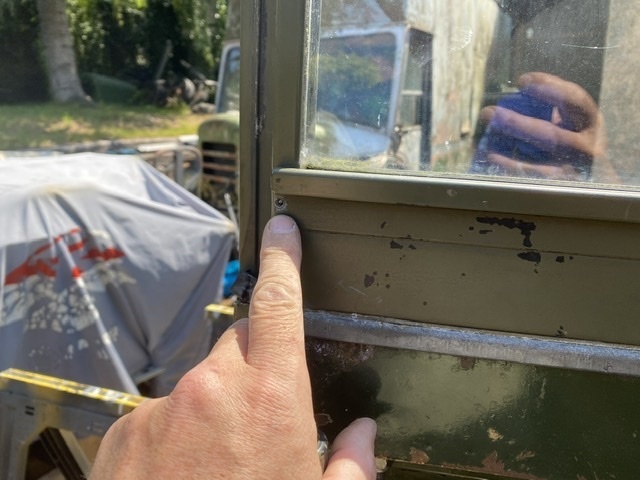 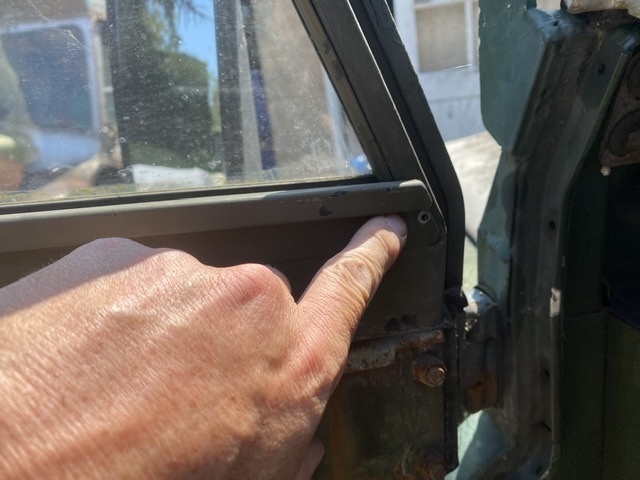 Then the four holding the lock mechanism in. 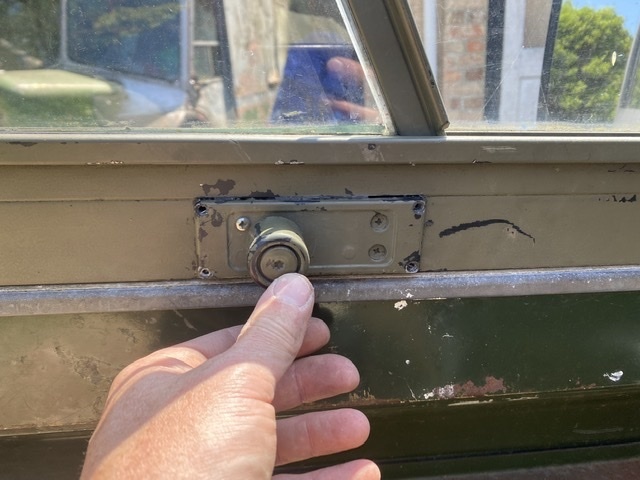 With them out, you can prize the mechanism out of the frame. Sometimes these are held in just with the rivets, other times there’s a bit of silicone as well. My two had one of each. Maybe it changed with time at the factory, maybe it depended on who was putting them together. They don’t need any sealant, and I never bother as it just makes future servicing harder. 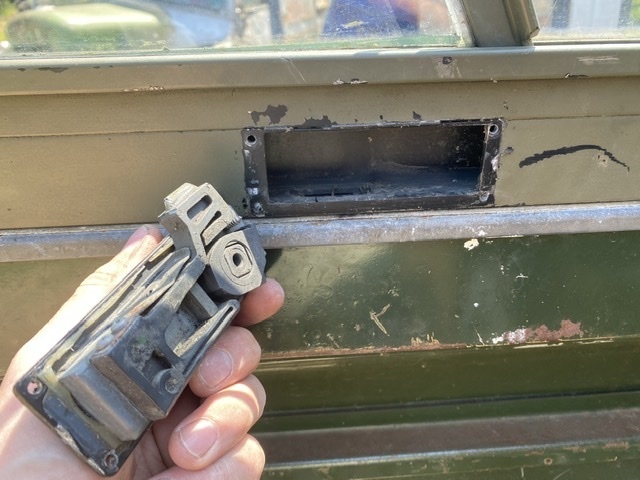 Next, there are four self tapping screws between the runners. 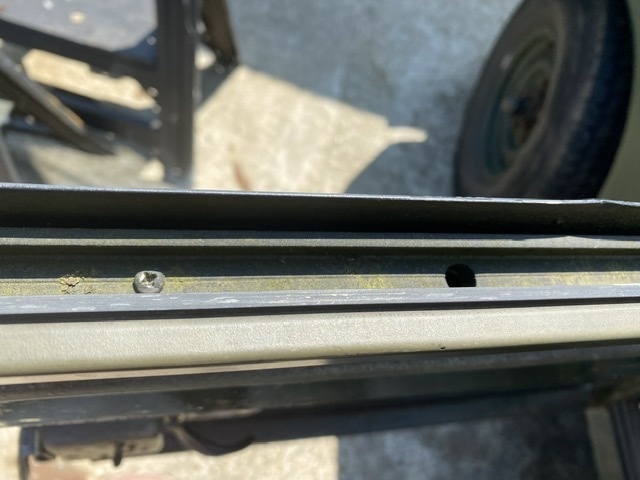 With those out, you can then prize out the bottom runner/channel and both bits of glass will come with it. 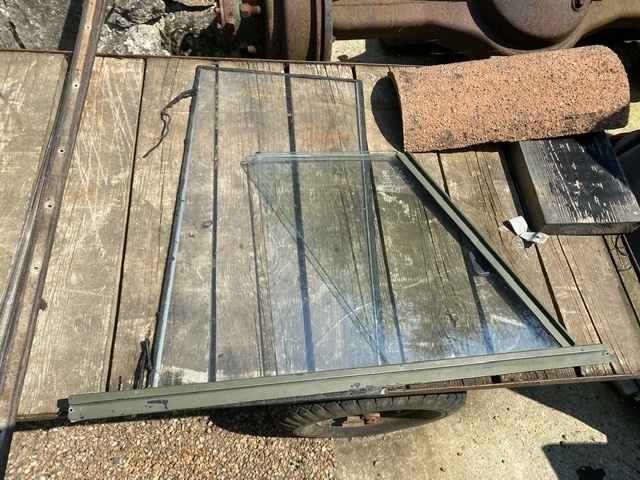 Then it’s simply a case of hooking out the old felt, then folding the new in half and pushing it into place. Simples. 🙂 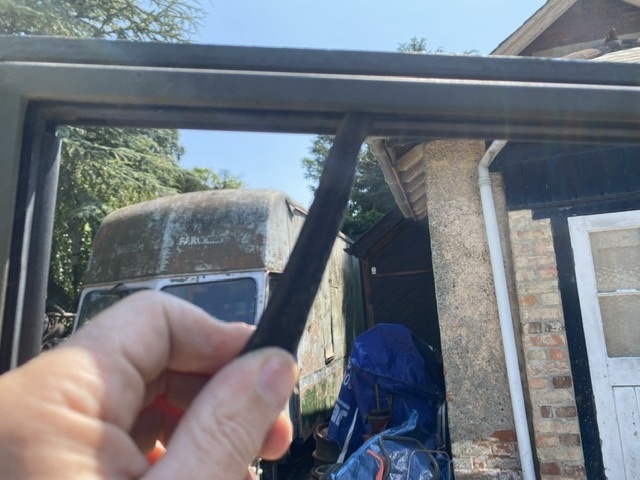 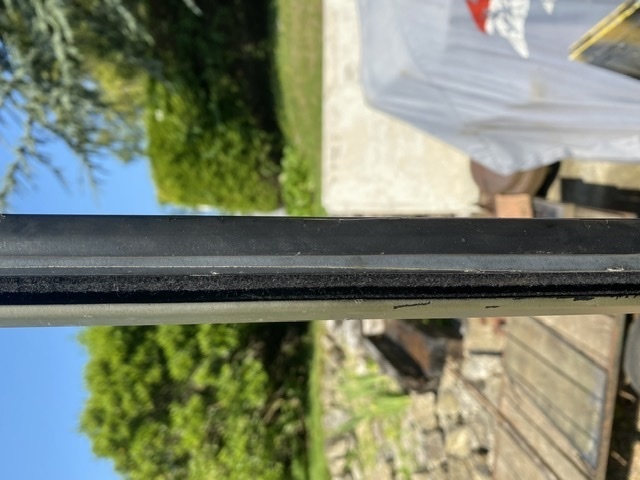 I took the opportunity to finally remove the squaddy applied overspray from the glass. Given the very basic nature of these seals, they do last a surprisingly long time. These door tops have been fitted to my motor for at least twenty years now, and they were not new when I got them. They’ve only got unbearably rattly in the last few months. New felts cost a princely £10 per side. I could probably have sourced them cheaper too, if I shopped around. 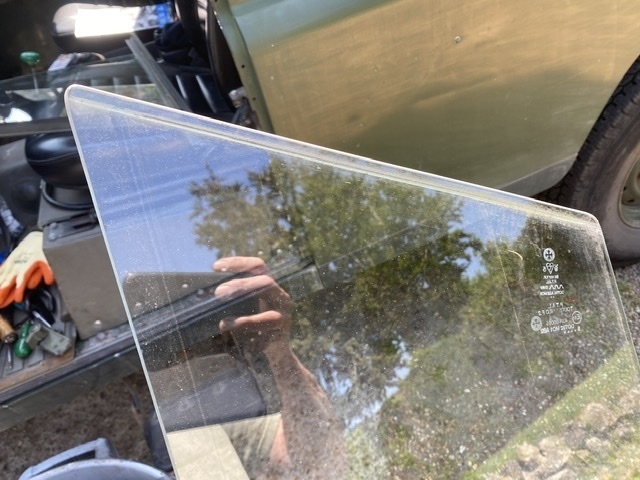 Reassembly is a reverse of the above. I didn’t think to take a picture of them all done, but I’ll get one tomorrow. 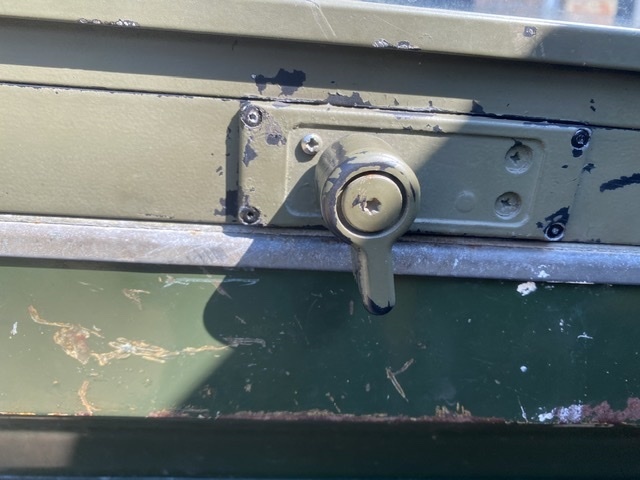 I did try some of this flock lined rubber extrusion to start with, but it just didn’t have the right thickness and I couldn’t get the glass back in with it. Shame, because it might have been better long term. 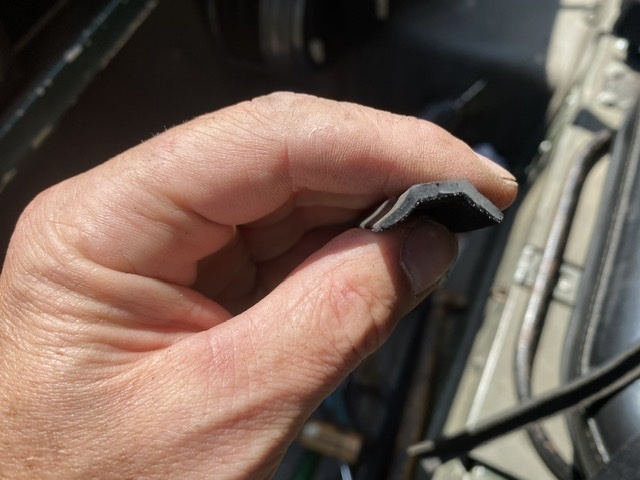 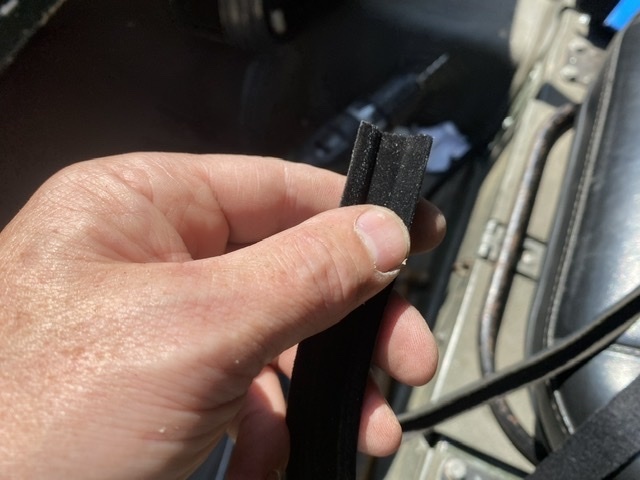 More in a bit. |
| |
My worst worry about dying is my wife selling my stuff for what I told her it cost...
|
|
|
|
|
|
|
snuggy  |
| |
|
|
glenanderson
Club Retro Rides Member
Posts: 4,338
Club RR Member Number: 64
|
|
Jul 23, 2021 23:19:03 GMT
|
Yes As promised, a picture of the finished door top. Staggeringly, it looks absolutely exactly like it did before I spent two hours working on it. Doesn’t rattle though. 😀 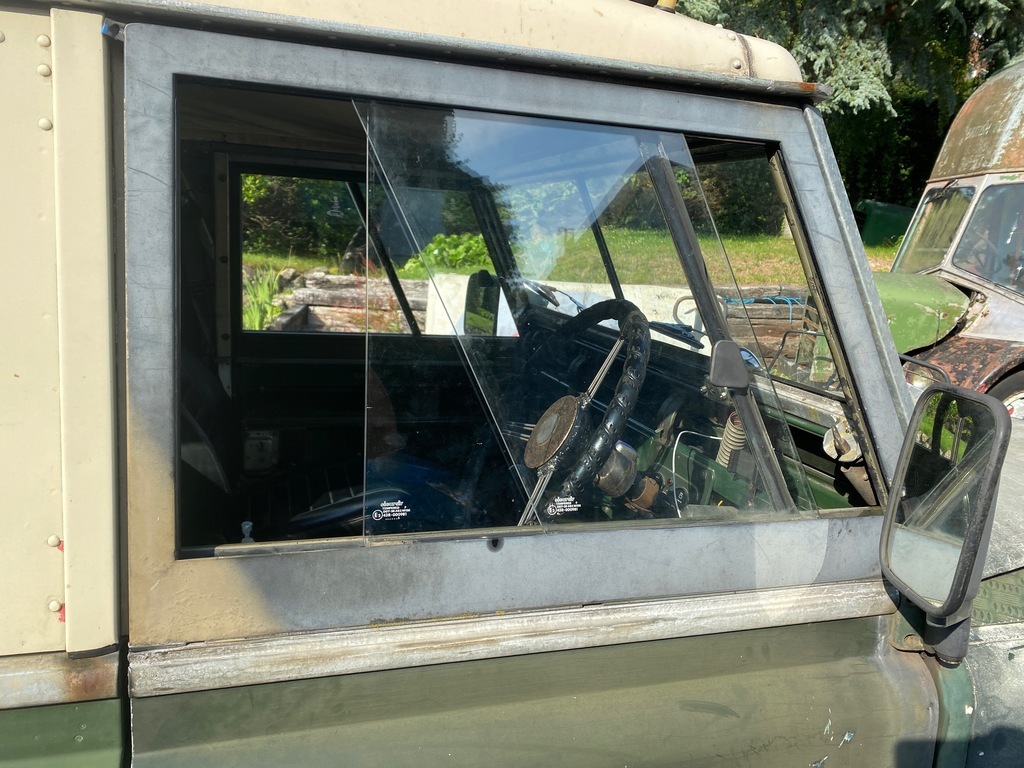 Next job is another that I have been putting off for ages, and moving the stuff around from place to place. I finally decided I’d had enough of falling over the bits, and spurred on by actually having the back of the motor completely empty for once, decided to get stuck in. With the tools, rubber mat gone, and half a henry’s worth of muck hoovered out, it looked like this: 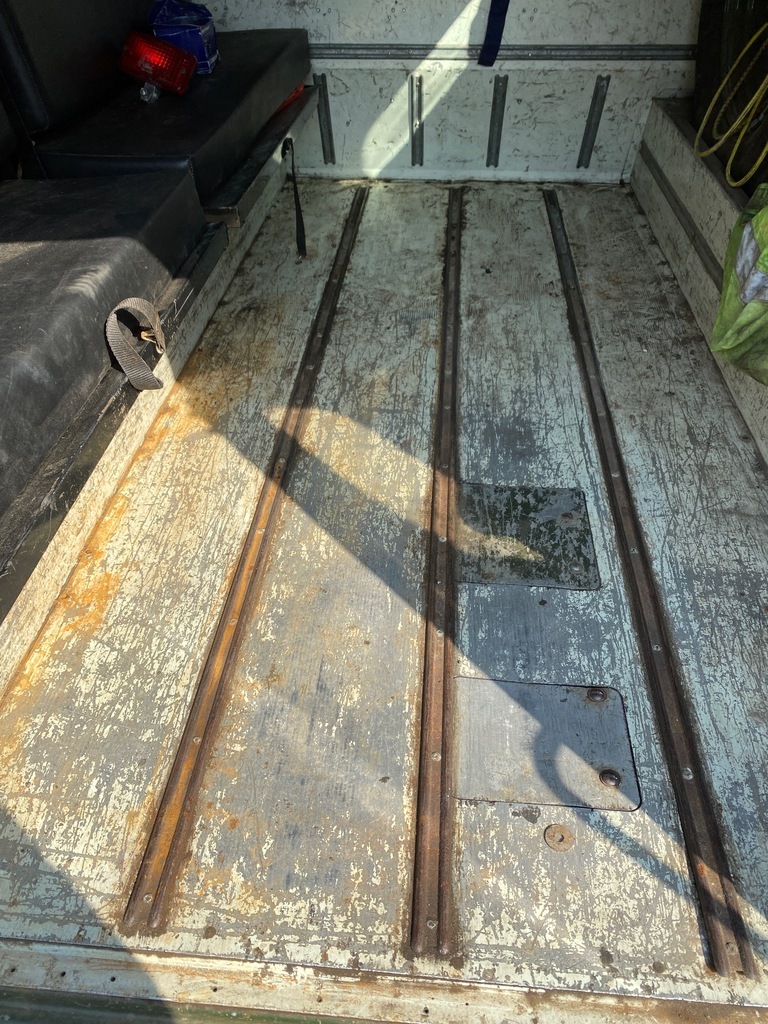 The steel rubbing strips have long since lost their galvanised finish and are well past their best. The plan is to replace the centre one with a better example from my stores, and to fit two runs of Unwin cargo tracking in place of the outer ones. 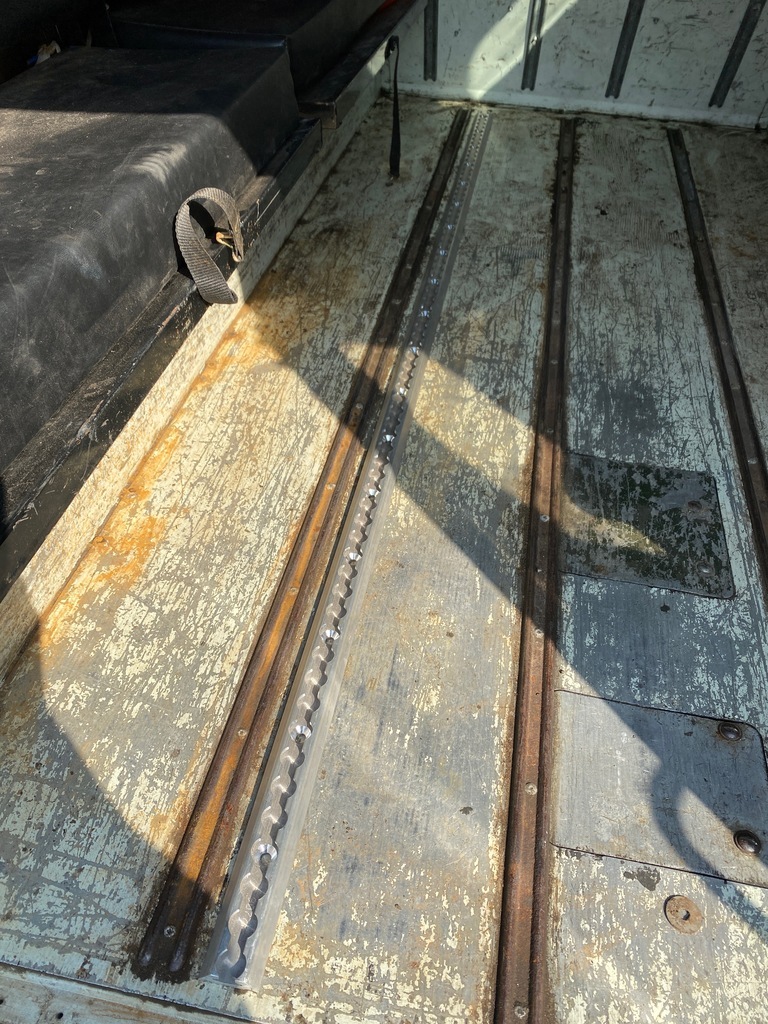 The strips are just pop riveted down, it took a few minutes to drill them out and remove them. Then a bit more time to clean out the muck that’d accumulated underneath. I did think about scrubbing the floor panel down and giving it a coat of paint, but it seems pretty pointless as it’s always covered with the mat. I might change my mind, but it’s the load area of a working vehicle, it can’t go rusty, it hardly ever gets cleaned and nobody sees it anyway. 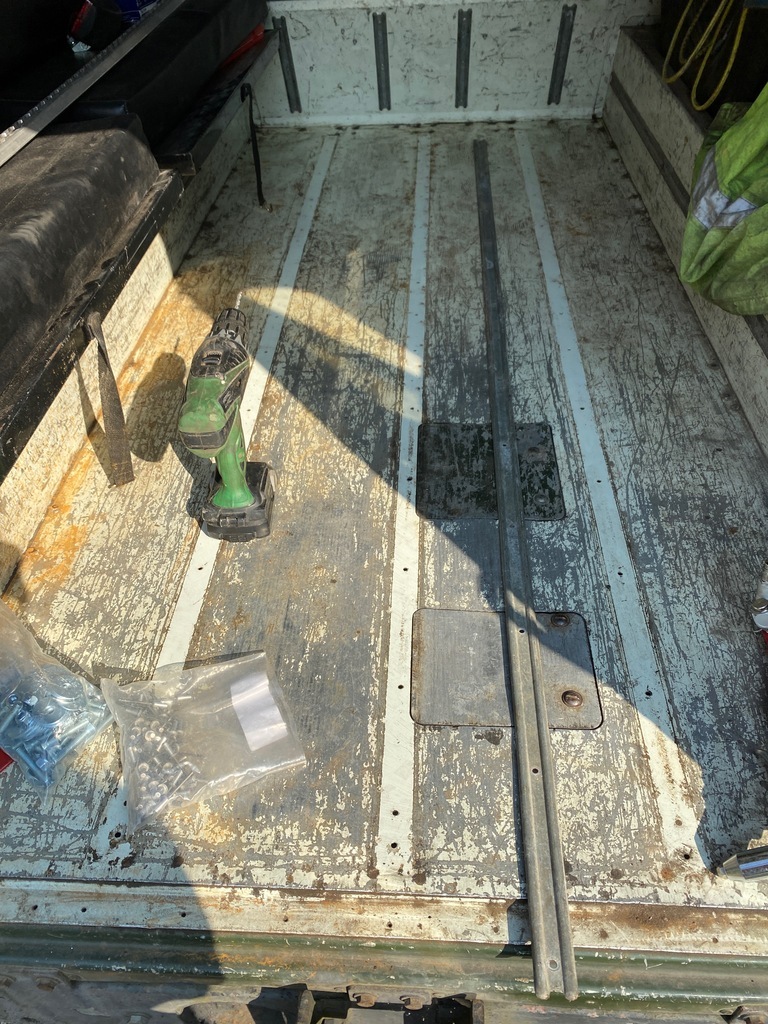 So, the next step is to offer up the cargo track. Unlike the version Dez used in his pickup, this is surface mount, so I don’t need to rebate anything. I did consider laying a bit of rhino floor in, with the flush mount track instead, but given the leaky nature of these beasts I felt it would’ve just ended up trapping a layer of moisture and causing different problems. The stuff is mounted with countersunk bolts at 4” centres. I don’t know if it originates from the US, or if it was a British thing, but it’s definitely 4” not 100mm. I marked a line through the centre of the original rubbing strip mounting holes, so that if I ever want to remove them the extra holes can be covered up, then set about drilling the floor to suit. 18 each side. The floor is only a single skin of 14 swg alloy, so I feel that some spreader plates are called for. Unfortunately, access to the underside of the floor is obstructed by the reinforcing ribs that run lengthways under the floor, and crossmembers going widthways, leaving six fixings each side that you cannot get a nut on to. I don’t think that nutserts are the answer here, so I’ve had to get a bit lateral... This is a picture of a spare floor panel showing the lengthways rib, and the line of holes marks where the rubbing strip would go on the other side. 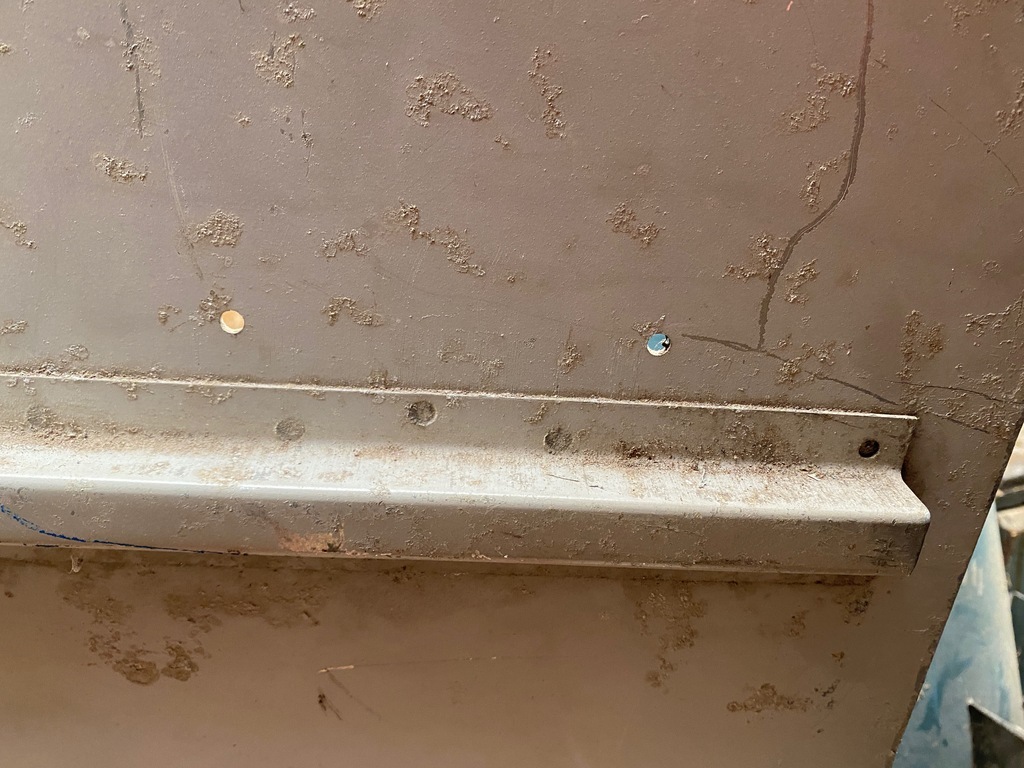 Remember, a while back, I said about salvaging a rake of aluminium shelving from my uncle’s garage? Well, it seems appropriate to use some of it here in an attempt to stave off the dreaded galvanic corrosion. These strips are 32mm wide and 3mm thick, so combined with some heavy washers should be ideal. Splitting the mounting holes into pairs makes the most sense, as it means I can work with shorter strips that are easier to slide into place, and it also gives me a little wiggle room with tolerances. 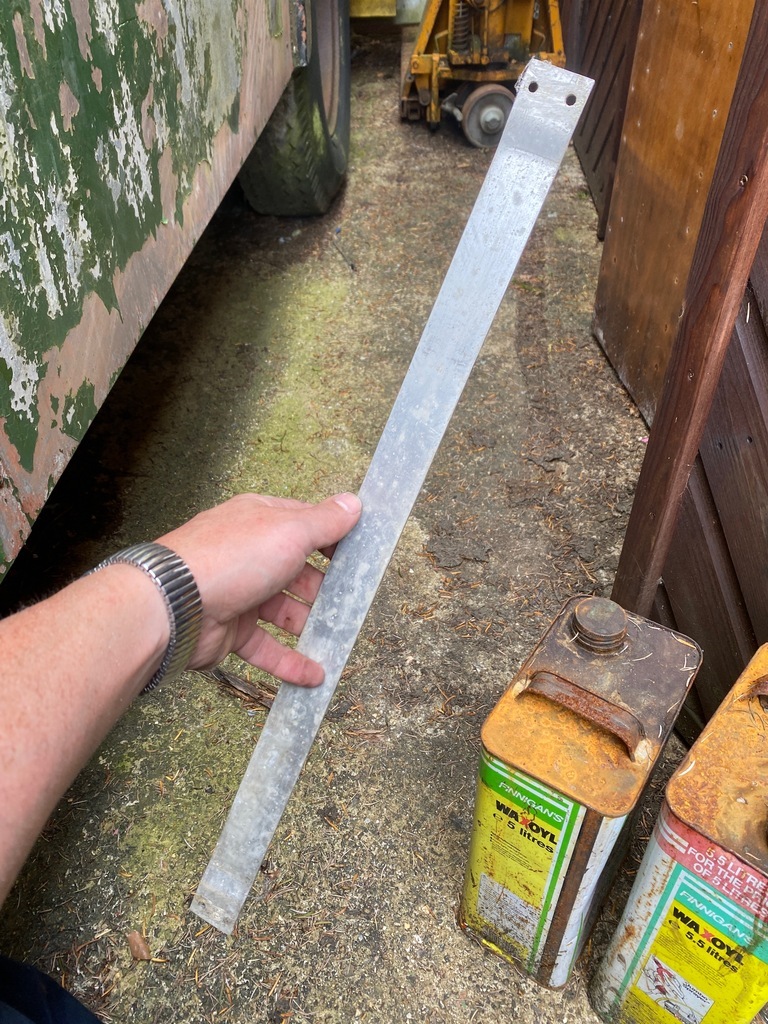 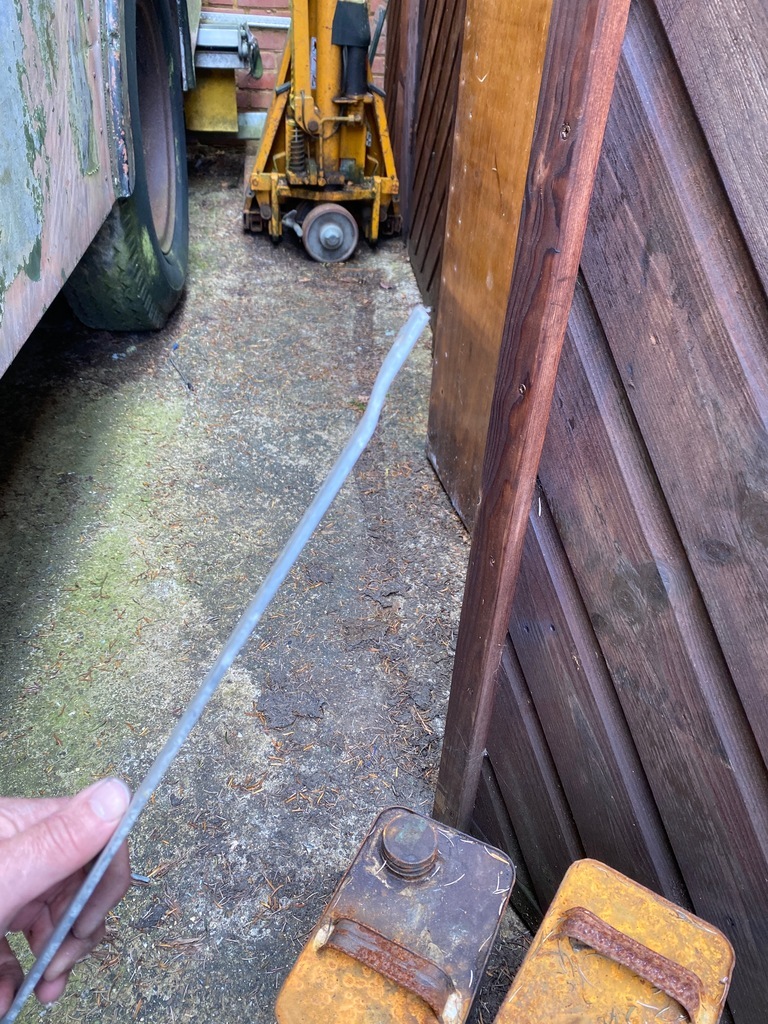 So, to start with I chopped half a dozen up into suitable lengths to bridge two fixings. Offering them up it was clear that they’d sit on the skew against the lengthways reinforcing, so I decided that some form of packing was going to be worthwhile. Another rummage in the scrap turned up some alloy sheet, the same thickness as the reinforcing, salvaged from an old roof panel I cut up years ago. This got cut into suitable strips. 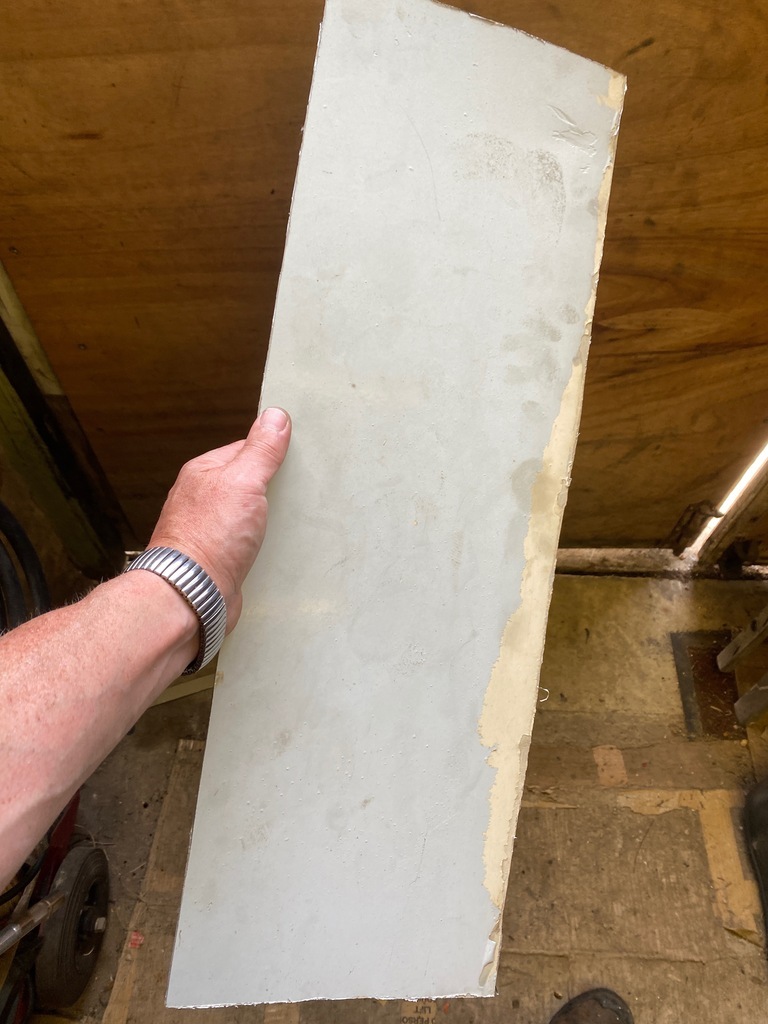 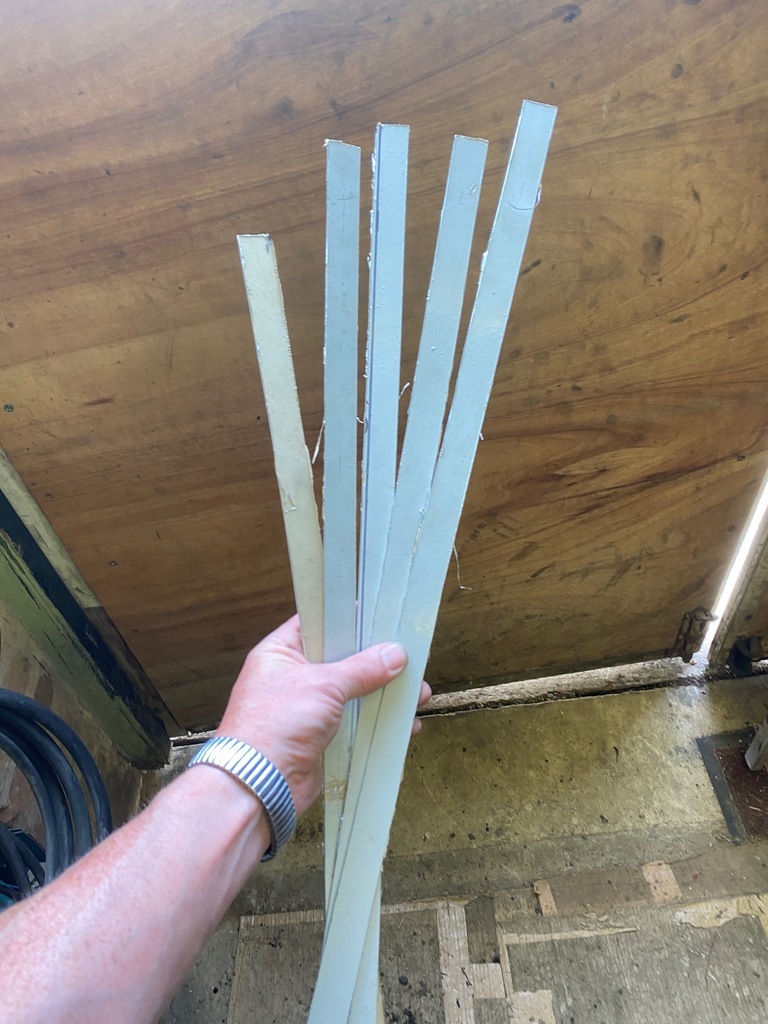 These strips were then cut to length and held in place on the spreader plates with a couple of countersunk alloy rivets. 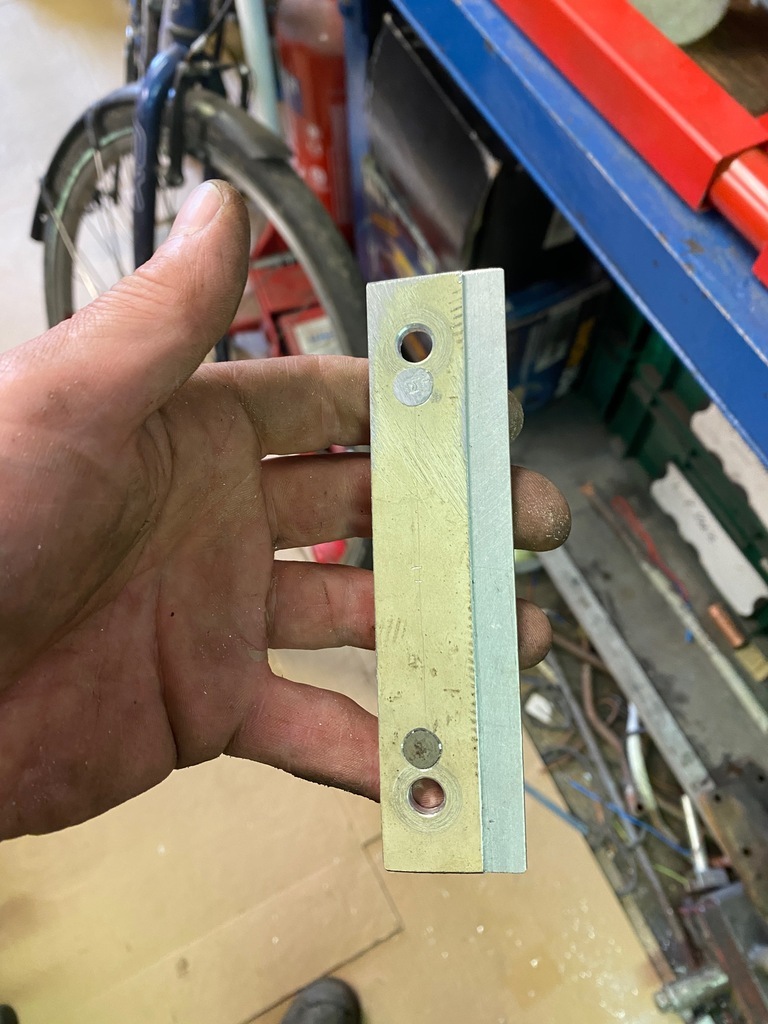 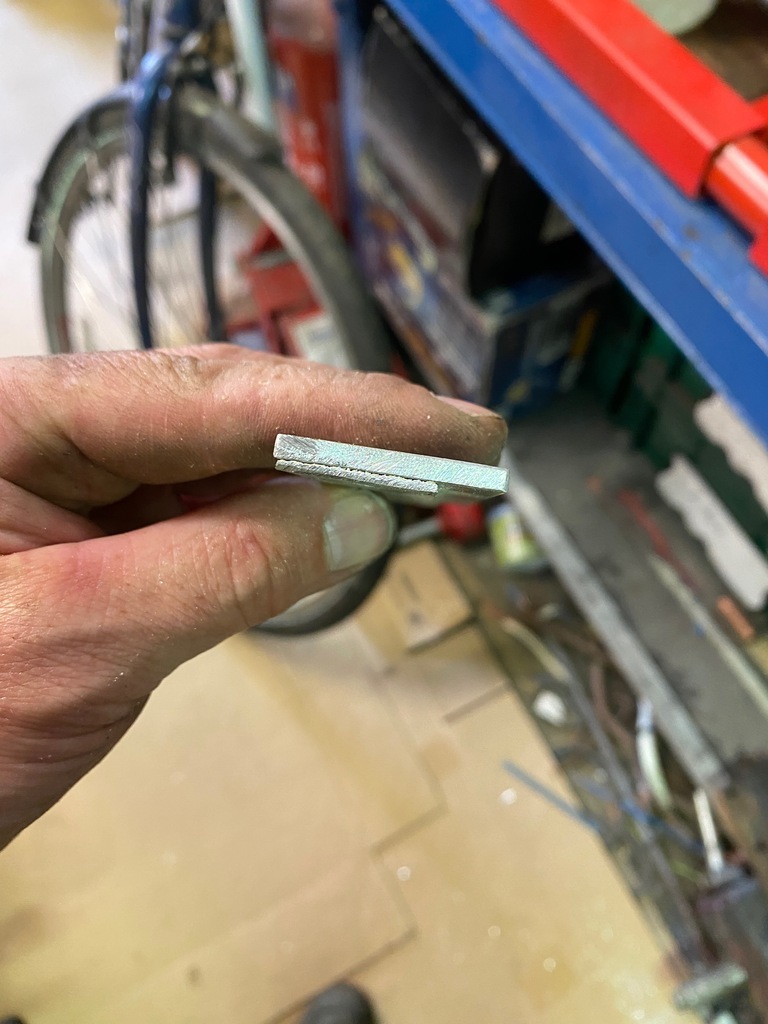 These are the easy ones, three each side. They fit up like this: 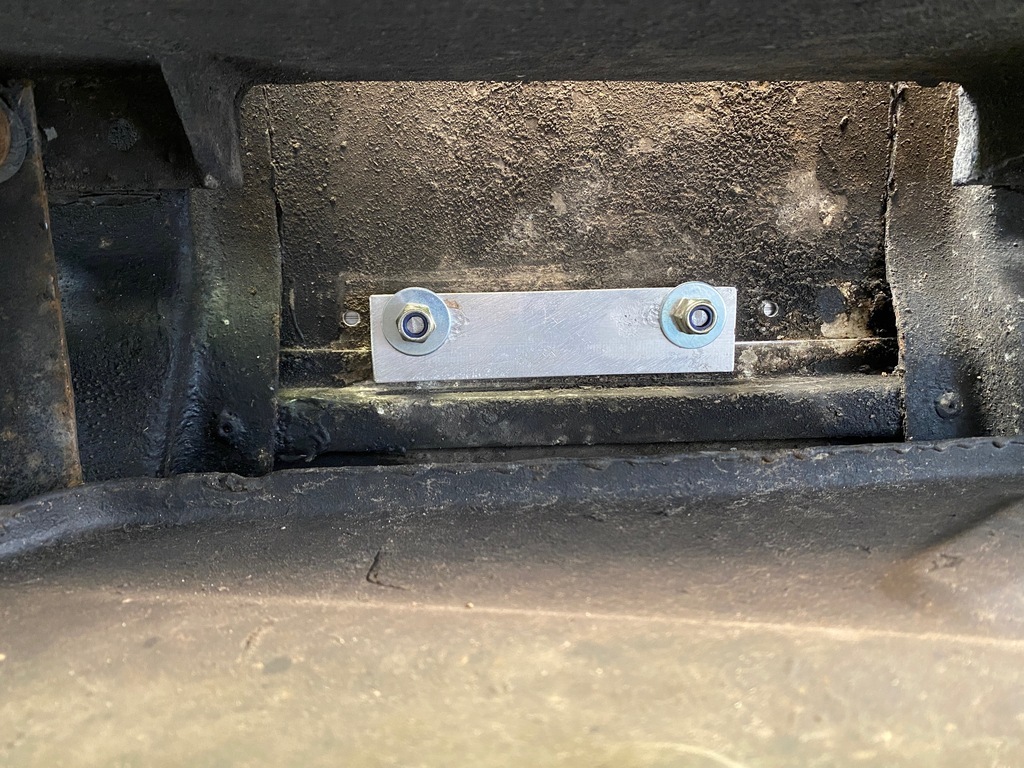 The others are a little more awkward. They need sliding in under the crossmembers, and one end needs to have some kind of captive thread. There’s no room for anything other than about an 8mm thick piece of plate, which I don’t have. However, the ends of the bits of shelving that I’m using are already joddled by 3mm and have two holes in them, so it seems to me the best way is to double up at that end. With the packing piece as well I have just about 8mm to drill and tap into, which should be plenty. I’d be leery of doing them all like this, but 6 out of 18, pretty much evenly spaced, I’m quite happy with. 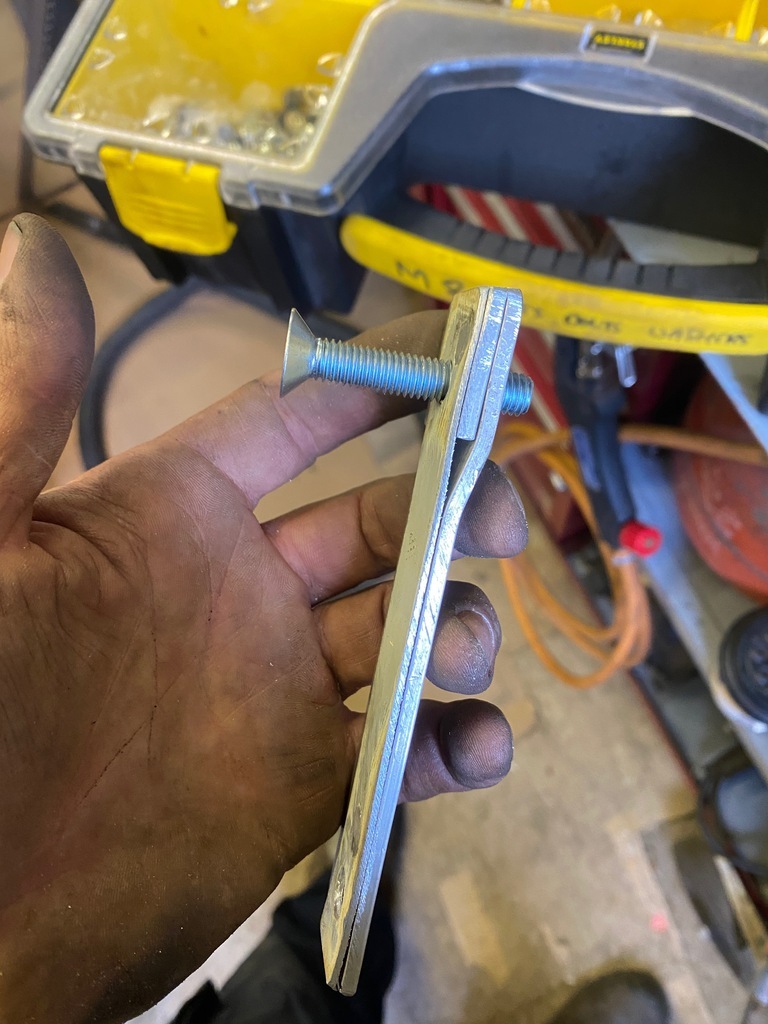 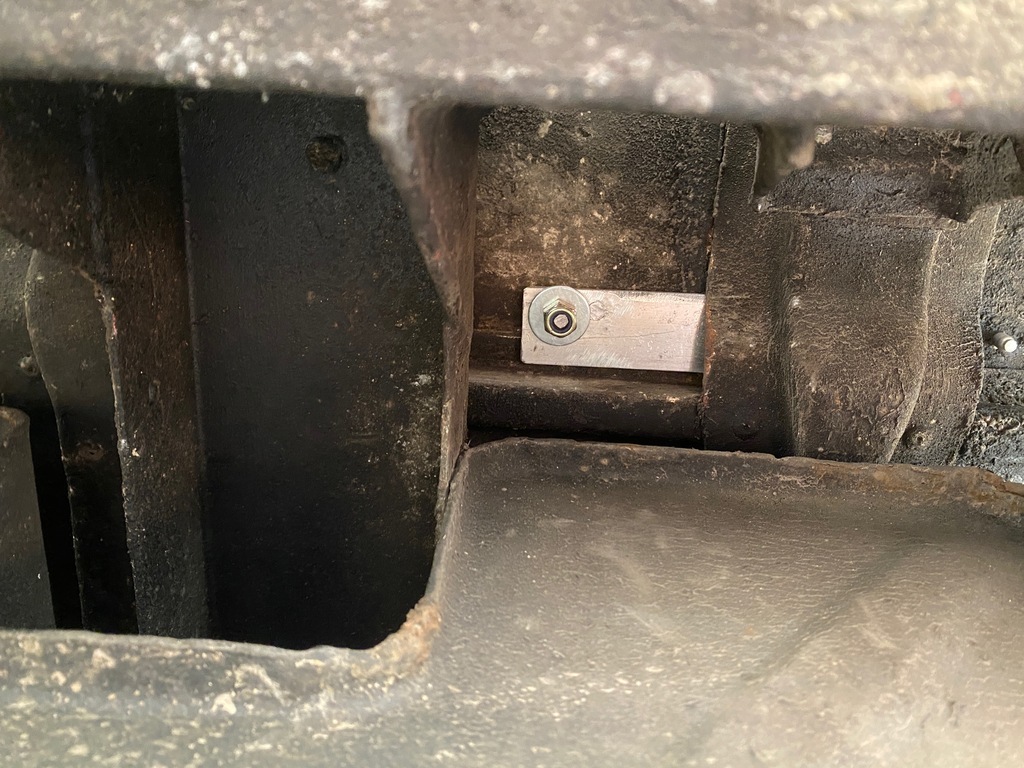 At close of play today I’m about half way through. As ever, doing the job properly takes longer than you’d think. I’ve got all the blanks cut, and now that I’ve made a few I’m back in the zone. Can’t honestly remember the last time I hand set solid rivets. It’s complicated by the fact I need three different types, two of which are mirror images of each other, and that Land-Rover tolerances are such that pretty much each one is slightly different. |
| |
My worst worry about dying is my wife selling my stuff for what I told her it cost...
|
|
glenanderson
Club Retro Rides Member
Posts: 4,338
Club RR Member Number: 64
|
|
Jul 23, 2021 23:42:39 GMT
|
Oh, nearly forgot. Today’s tip: If you need to shorten a bolt, it’s always worth deburring the cut end afterwards, particularly where access for assembly is going to be awkward, as feeling blind to fit a nut on a bolt with a sharp edge is asking for leaky fingers. Years and years of having my old man, then my apprentice instructors, bang on about never leaving a sharp edge on anything has left its mark, not to mention the times I’ve sliced myself on sharp stuff others have left. I simply cannot help reaching for a file after cutting something. Holdimg a countersunk (or button head) bolt, however, tight enough to do it properly is a pain in the posterior, so I’ll show you my trick. First, before you do any cutting, spin an ordinary plain nut down past the point you want to cut. Then hold the excess in the vice as usual and cut through with a hacksaw at the appropriate place. Next, hold the nut in the vice, with the bolt protruding a bit, at 45° to the horizontal. 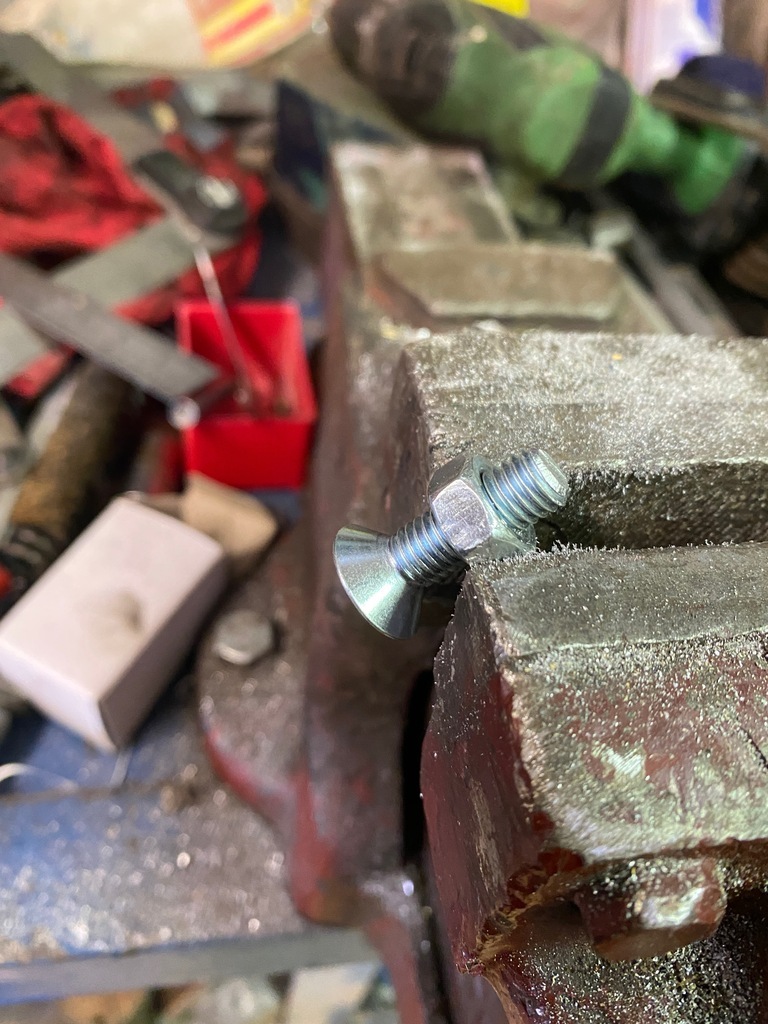 This allows you to hold the bolt between the fingers of one hand and rotate it slowly, and use a file, held flat in the other, to put a neat chamfer all the way around. Spinning the nut off afterwards straightens any remaining deformed threads, and makes fitting a new nut easy. 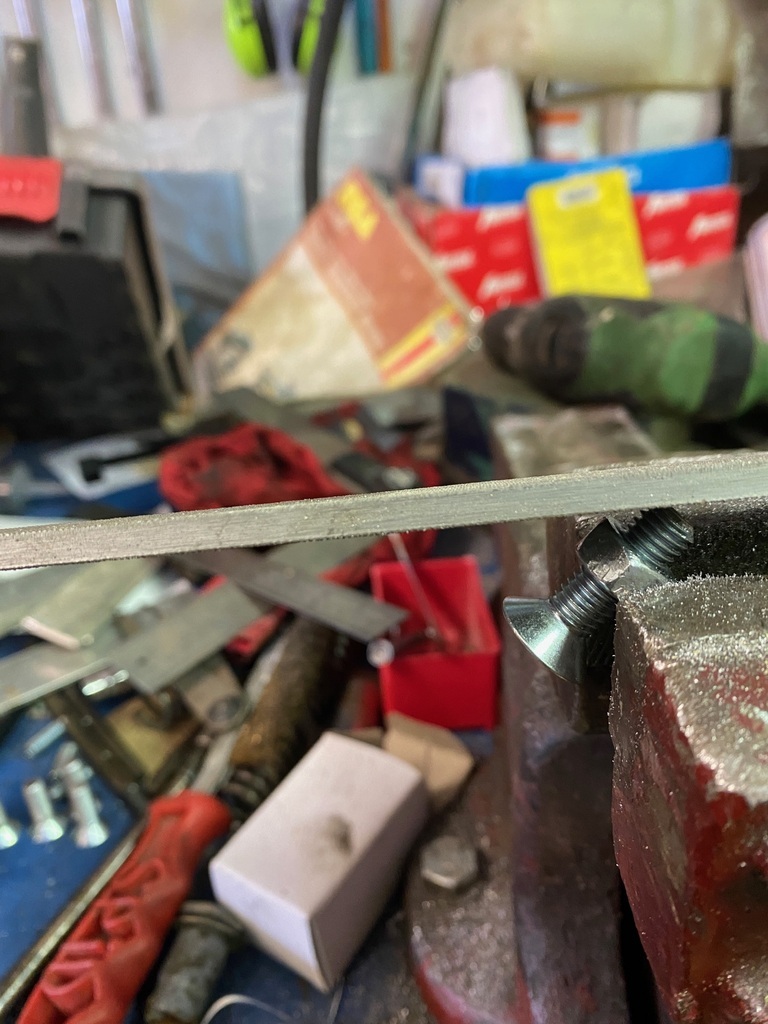 I couldn’t manage to work the camera, file and still have a hand free to spin the bolt, but I’m sure you get the idea. 👍😀 |
| |
My worst worry about dying is my wife selling my stuff for what I told her it cost...
|
|
|
|
|
Jul 24, 2021 21:26:23 GMT
|
|
I'm with you on filing any burrs on anything. I even de-burr any stock metal before putting it back into stores.
|
| |
|
|
|
|
|
Jul 30, 2021 14:28:13 GMT
|
|
I've got a similar problem with the sliding window on the back of my truck cab so that's a good cheap fix. Just time consuming I guess?
Secondly, I need more pictures of the large crusty vehicle in the background of your pictures.
Thirdly, Is it ironic that you have two rusty tins of Waxoil?
|
| |
|
|
glenanderson
Club Retro Rides Member
Posts: 4,338
Club RR Member Number: 64
|
|
Jul 30, 2021 14:40:18 GMT
|
I've got a similar problem with the sliding window on the back of my truck cab so that's a good cheap fix. Just time consuming I guess? Secondly, I need more pictures of the large crusty vehicle in the background of your pictures. Thirdly, Is it ironic that you have two rusty tins of Waxoil? Firstly yes, and yes. Secondly, fill your boots: forum.retro-rides.org/thread/171403/1966-brs-austin-bmc-noddyThirdly, they were rusty when I got given them. Honest! 🤣 |
| |
My worst worry about dying is my wife selling my stuff for what I told her it cost...
|
|
glenanderson
Club Retro Rides Member
Posts: 4,338
Club RR Member Number: 64
|
|
Aug 10, 2021 22:46:43 GMT
|
Ok, where were we? I was making the spreader plates for under the load bed. Not much to show, just repeated what I did in the last post. In all there were eighteen; six plain ones and twelve with a tapped hole in. They went in much like before. This picture shows how the tapped ones had to slide in between the floor and the crossmembers: 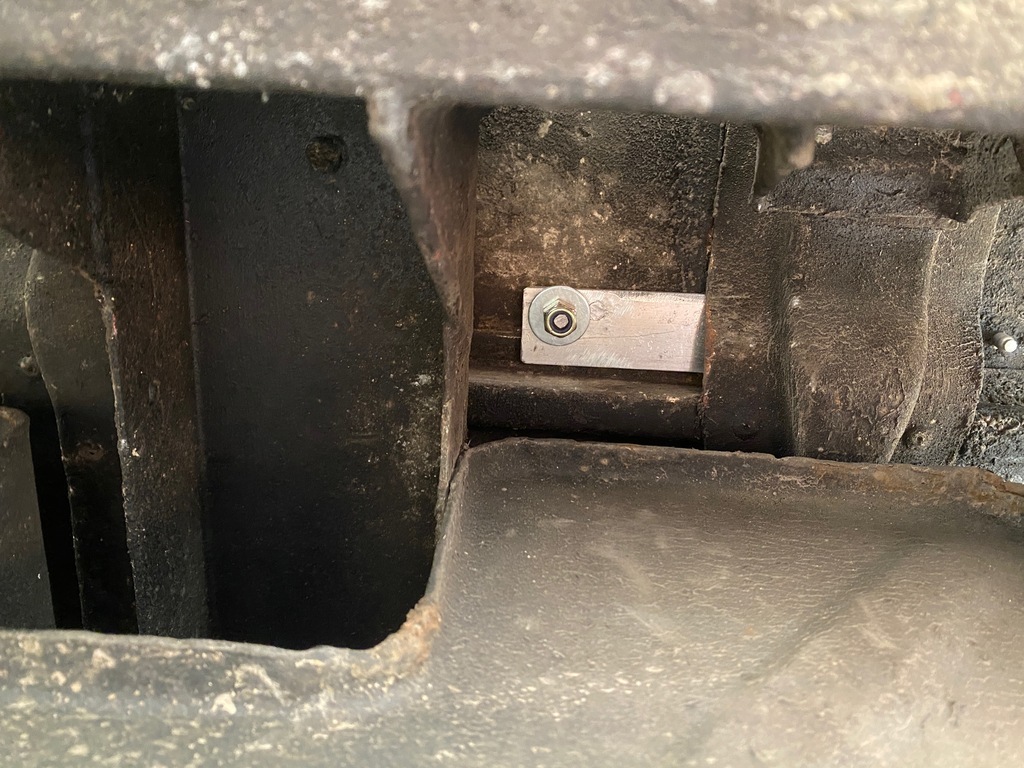 With them all done, and the rails bolted down, we have this: 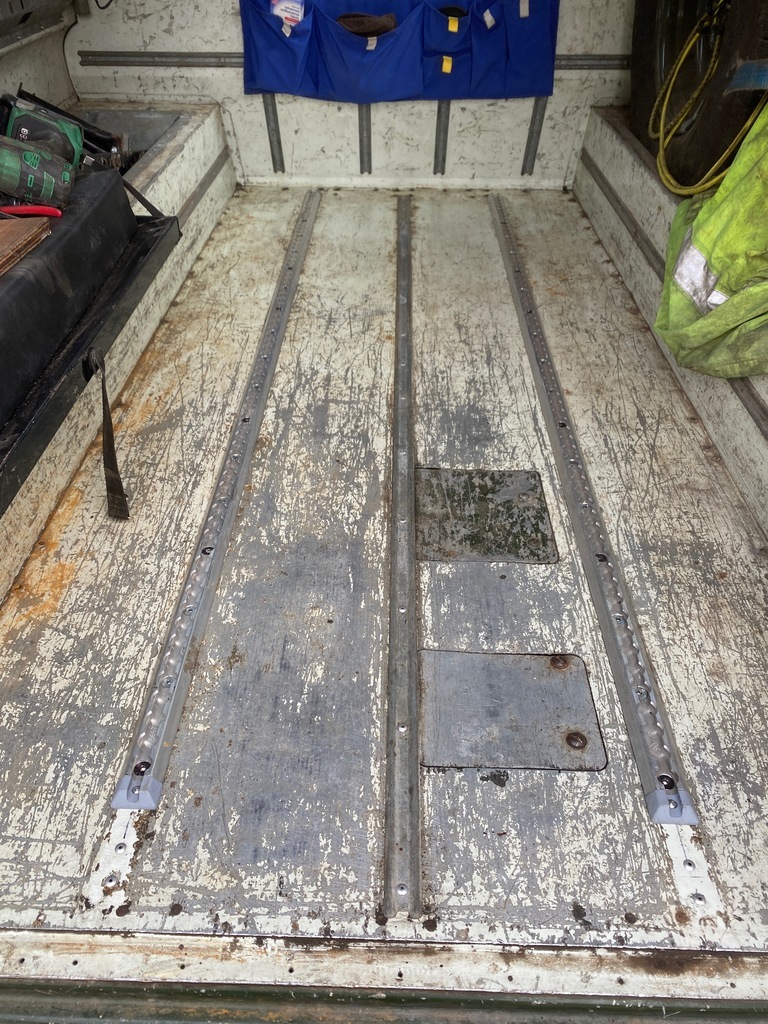 And with the manky old rubber floor mat trimmed to fit around them: 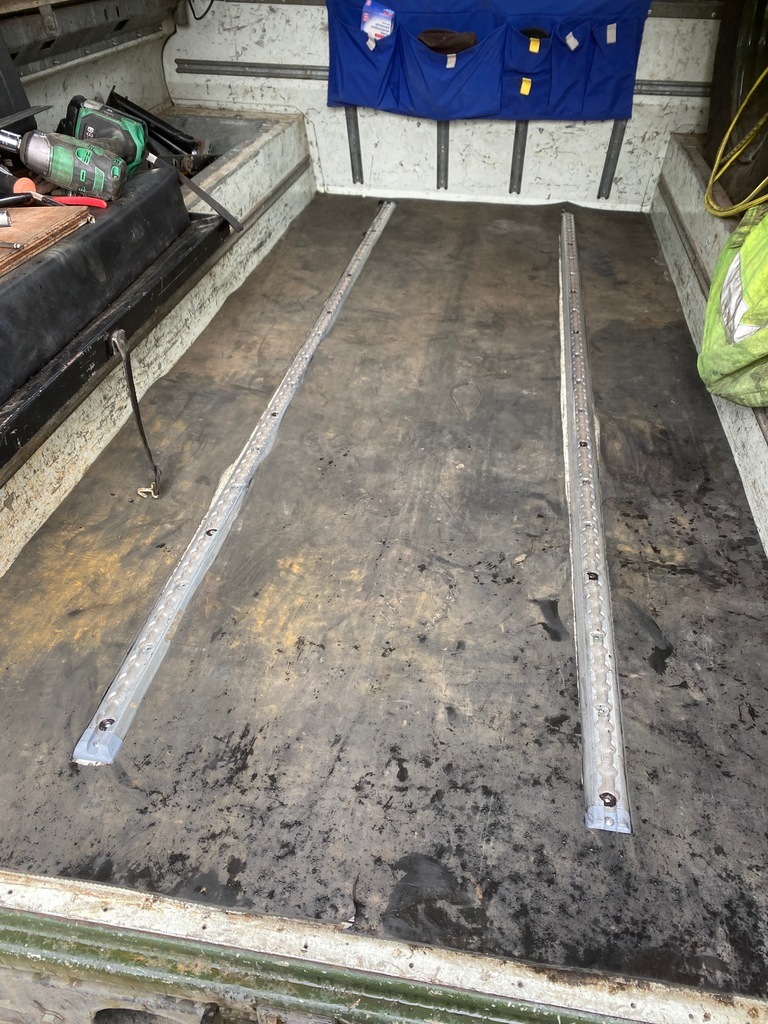 |
| |
My worst worry about dying is my wife selling my stuff for what I told her it cost...
|
|
glenanderson
Club Retro Rides Member
Posts: 4,338
Club RR Member Number: 64
|
|
Aug 10, 2021 23:34:22 GMT
|
The mat is proper, heavy, high voltage insulating flooring rubber. Liberated from a generator room at the local asylum after it was closed up prior to demolition. Years of abuse and spills have seen it go a bit wobbly; there’s a bit of life left in it yet, but it’s past its best. Anyway, with the track finally fitted, I could think about revising the rear seating arrangements. I’ve had some sideways facing folding benches in there for a while, but they’re not very comfortable and you can’t safely use seatbelts with them. Years ago I won a double seat out of a minibus for a princely 99p on eBay. They’ve been in the front of the Austin for ages, with a load of junk piled on them. I dug them out, but was a bit disappointed with the state of them. They were far from pristine anyway, but one of them had a tear in the squab and they were quite badly sun damaged. 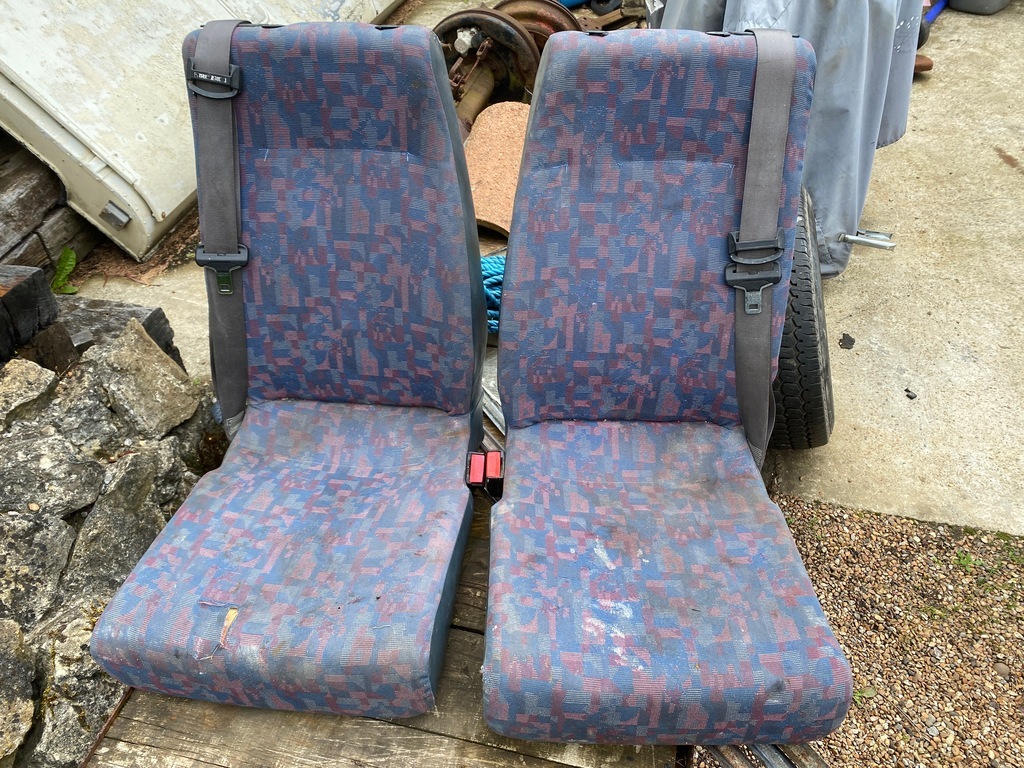 I had a bit of a play with them in the back, and spent a bit of time trying to see if replacement covers were available. They weren’t, or not at anything like sensible money, so I had a look for alternatives. Found these locally, and also two singles, for £30 all in. Happy with that, especially as these are in better nick, a less shouty colour, and also have hard plastic backs that are more durable than the vinyl of the blue ones. 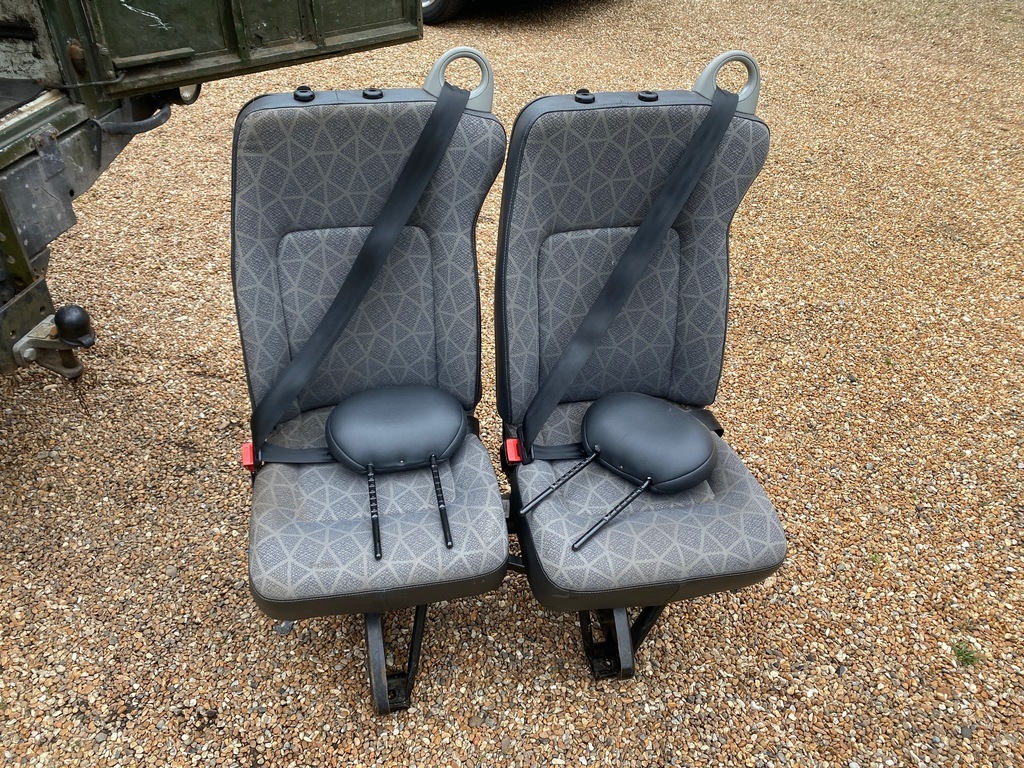 They were on this heavy base which wouldn’t fit into the space available though, so some more head scratching was needed. I did some mocking up with the frame from the blue ones: 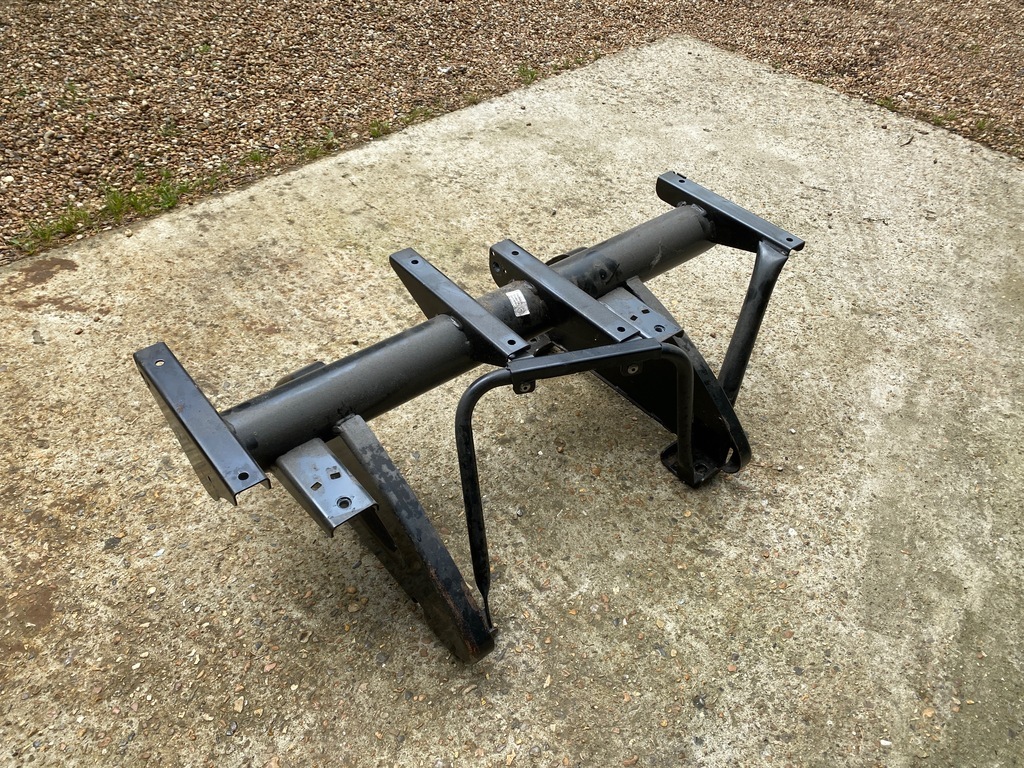 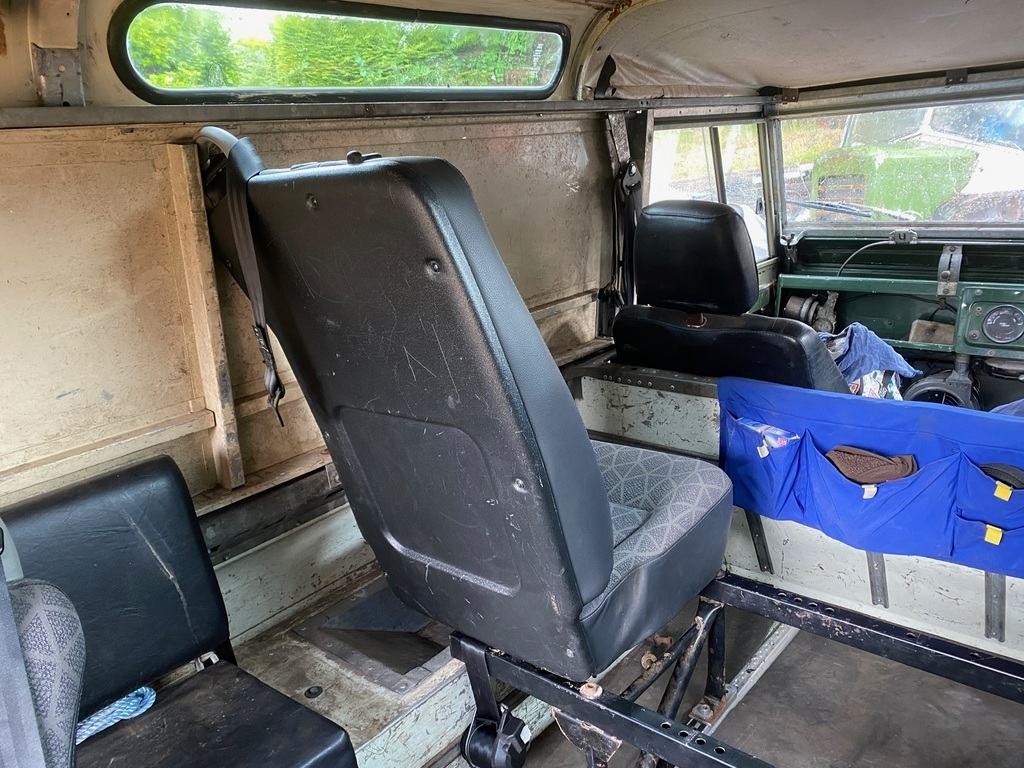 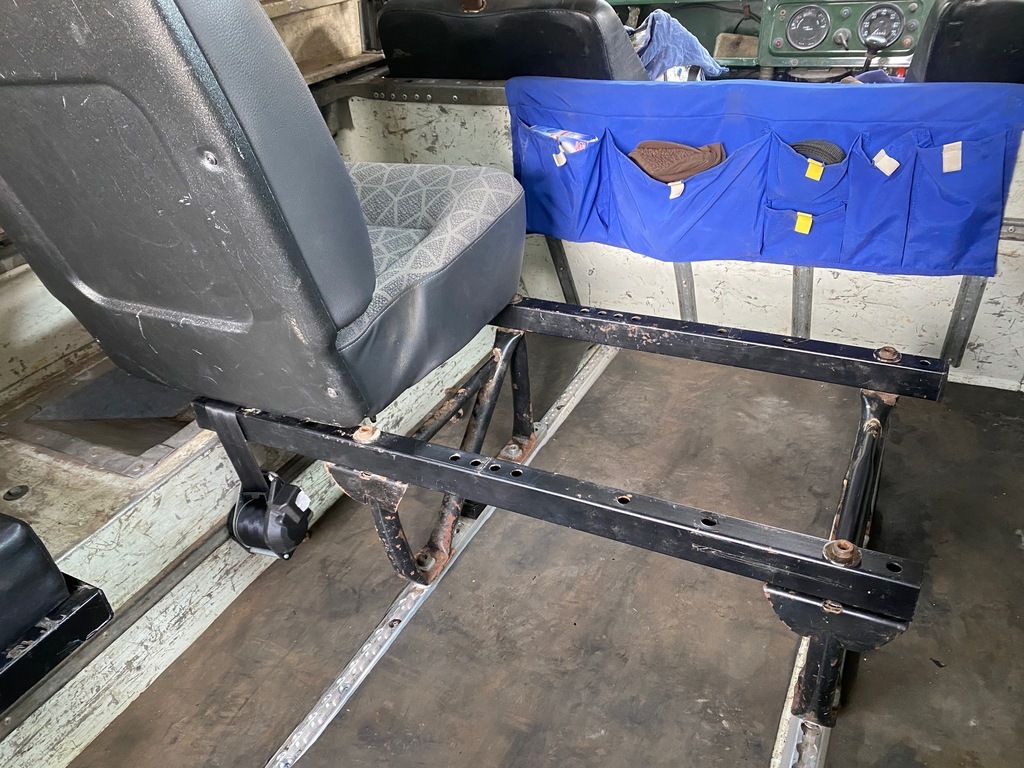 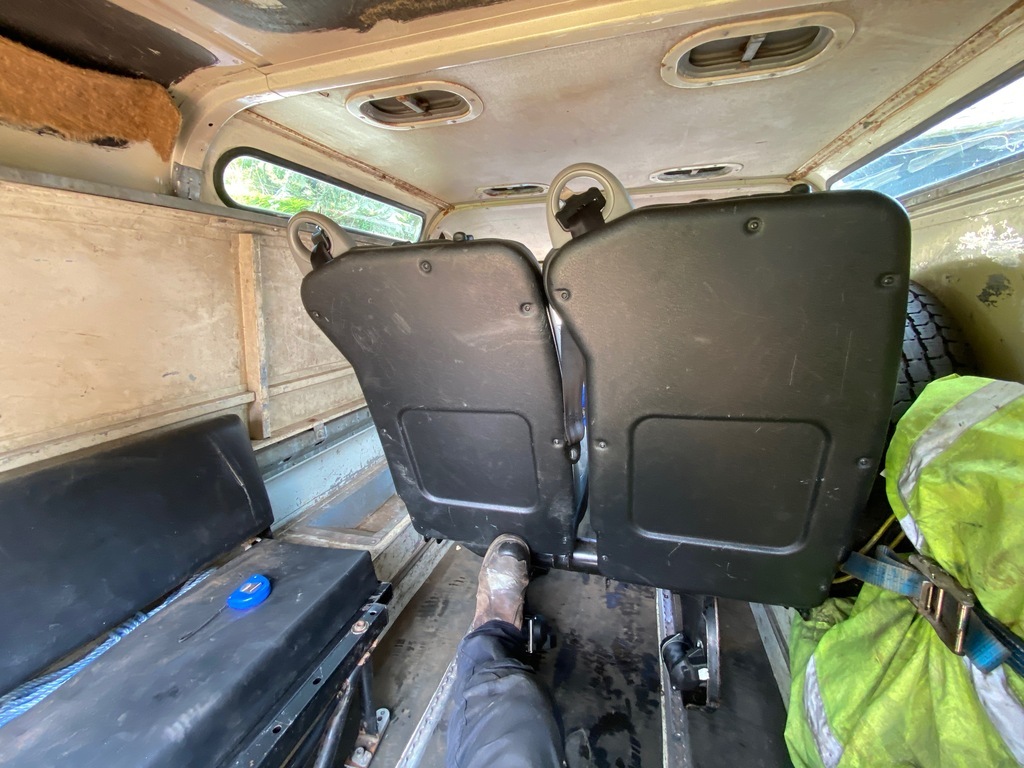 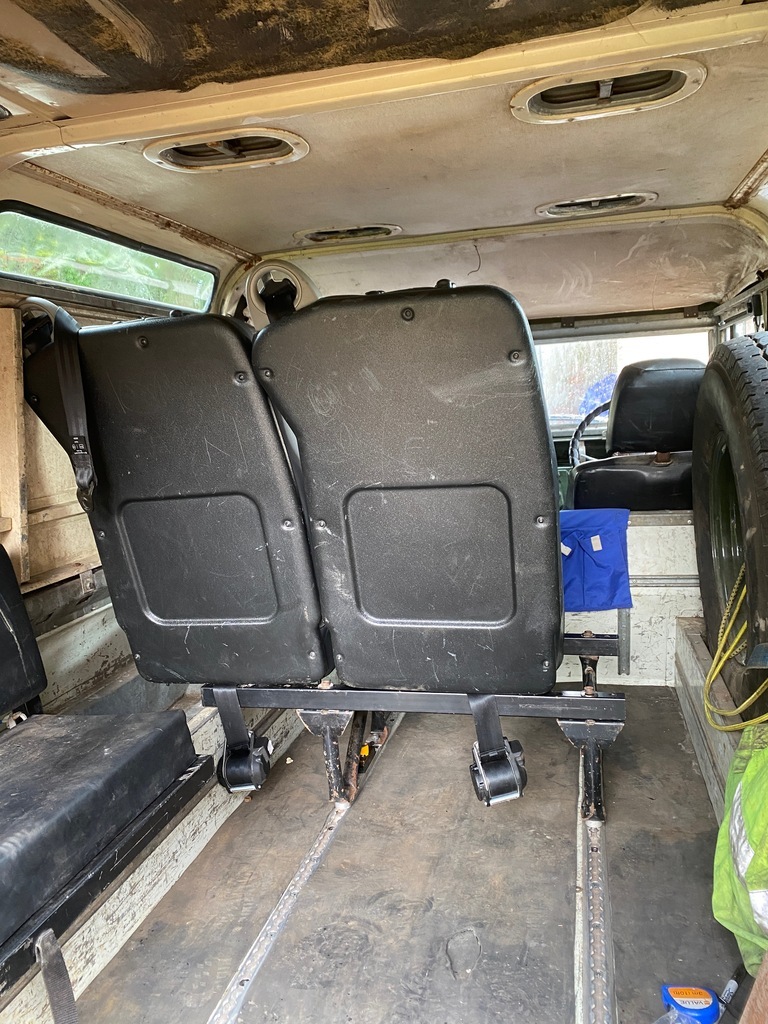 I decided that the best route would be to start from scratch, as neither of the frames were close to ideal. However, looking through the scrap pile revealed that taking that route would mean actually going and buying more materials, and where’s the fun in that? So, I first chopped off the huge feet either side, braced the endmost passenger side mount to its neighbour front and rear, then trimmed back the huge central tube to clear the wheelbox. Another brace over the top of the tube and a final one front to rear, to satisfy myself that enough of the removed strength had been replaced: 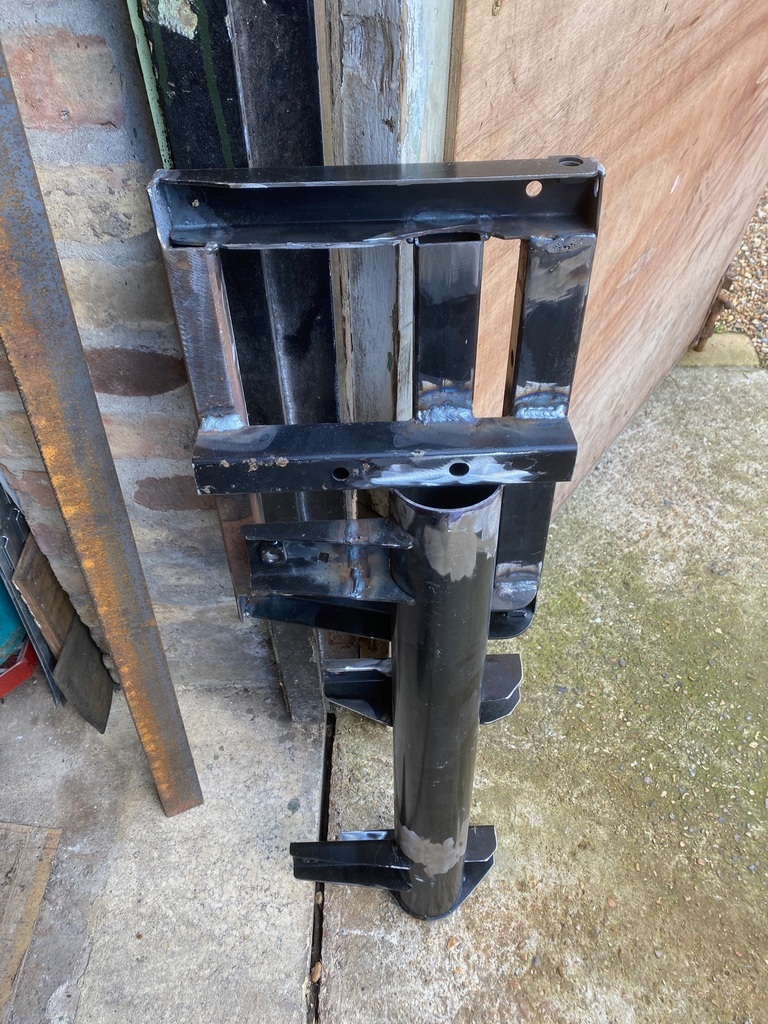 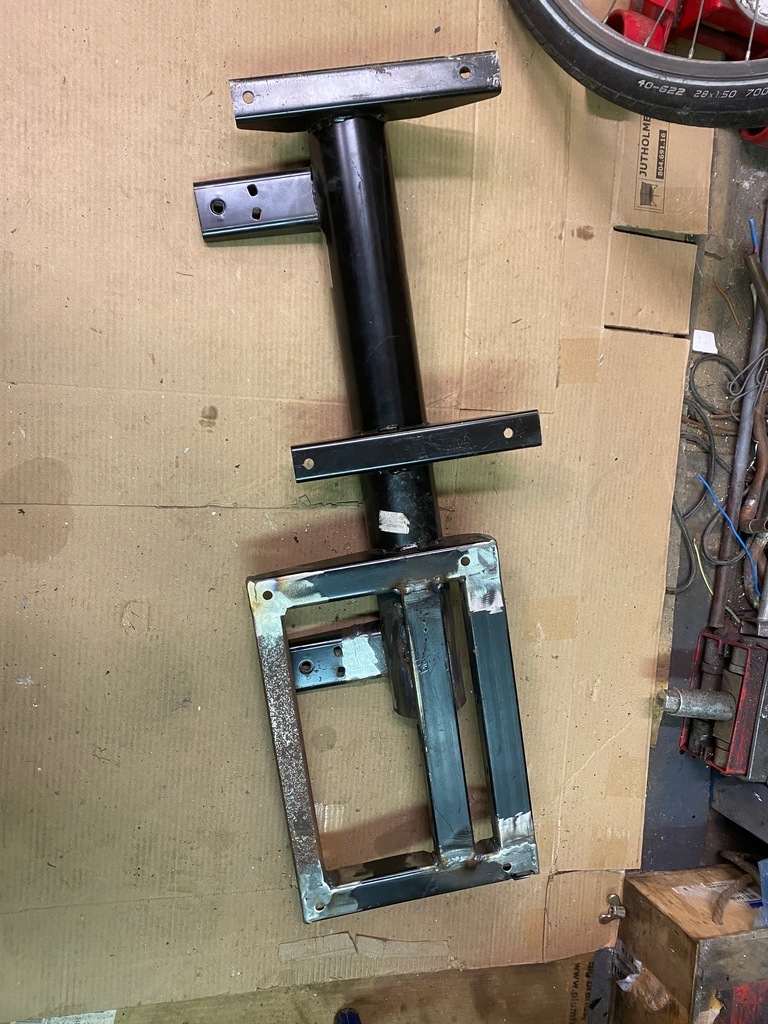 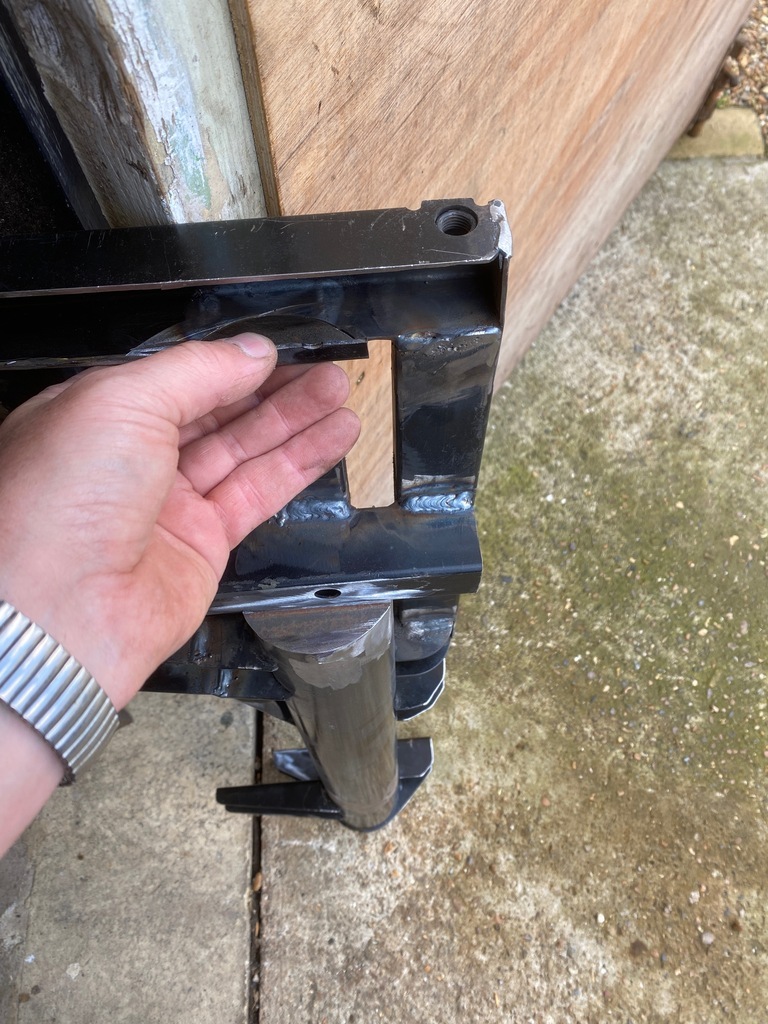 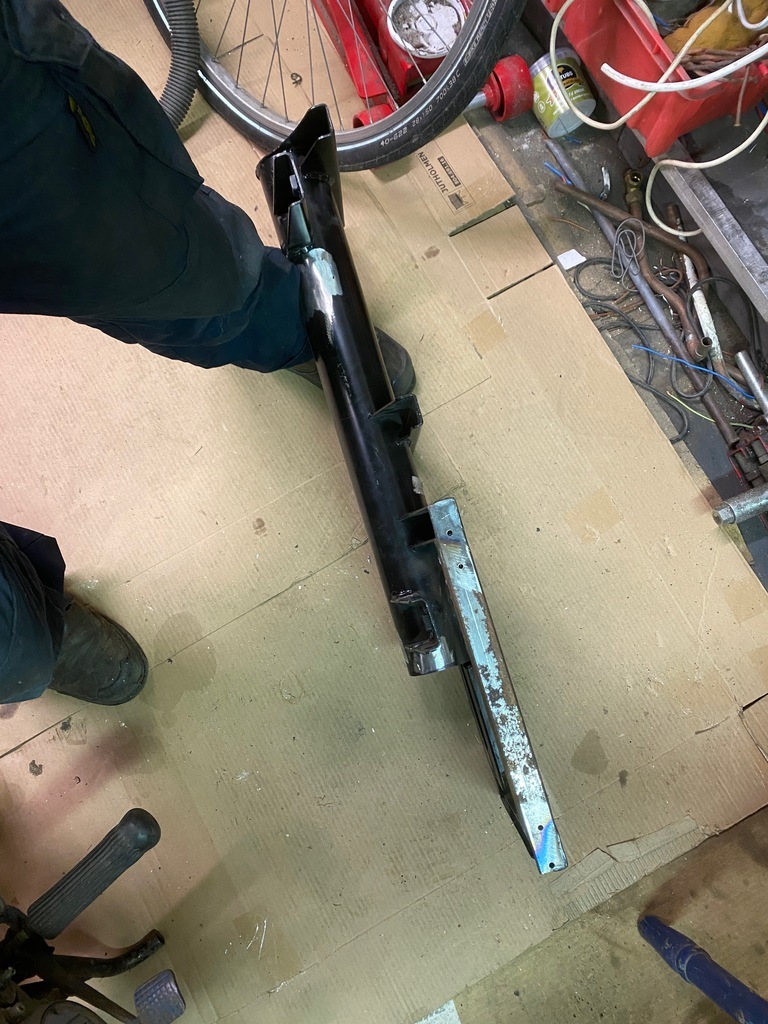 With that done, the passenger side seat would sit part way over the wheelbox, leaving enough room between its partner and the spare wheel that an adult could squeeze past (at least, an adult my size). They both also sit low enough to give just about enough headroom for me to sit comfortably. There’s miles of space for my lad and one of his mates, which is the main thing. With that sorted, I fitted the sliding seat mounts to the tracking and propped the frame into place. The scrap pile yielded enough angle to make four new legs, which got tacked into place, then the whole lot got lifted out and welded fully. Much to my annoyance, and despite my careful tacking and welding, one of the legs had moved slightly after all the welding was completed, so I did have a bit of filing and packing to do to make it sit right as it wasn’t enough to justify cutting it off and repositioning it again. Threw a couple of coats of paint on it and bolted it up. 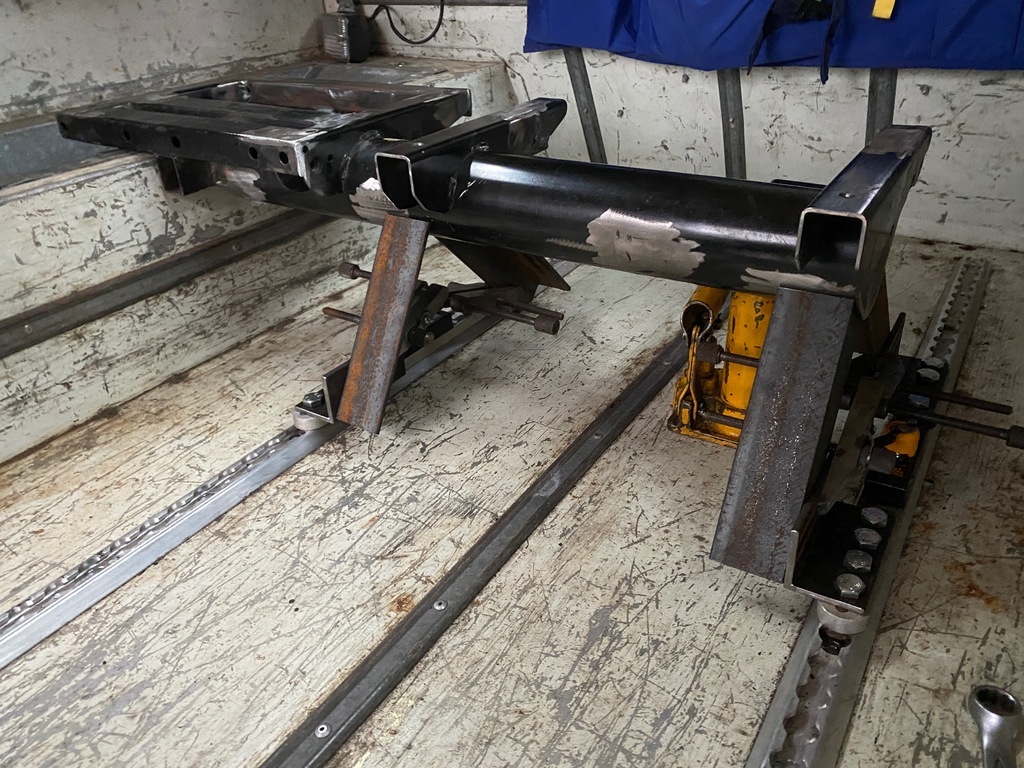 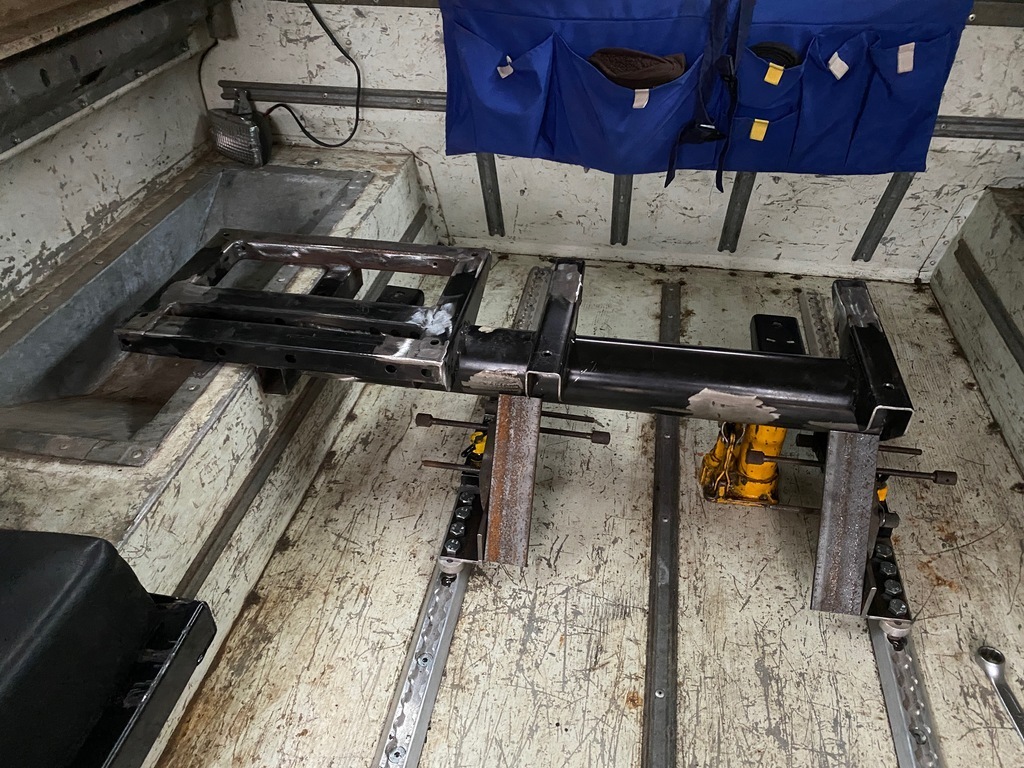 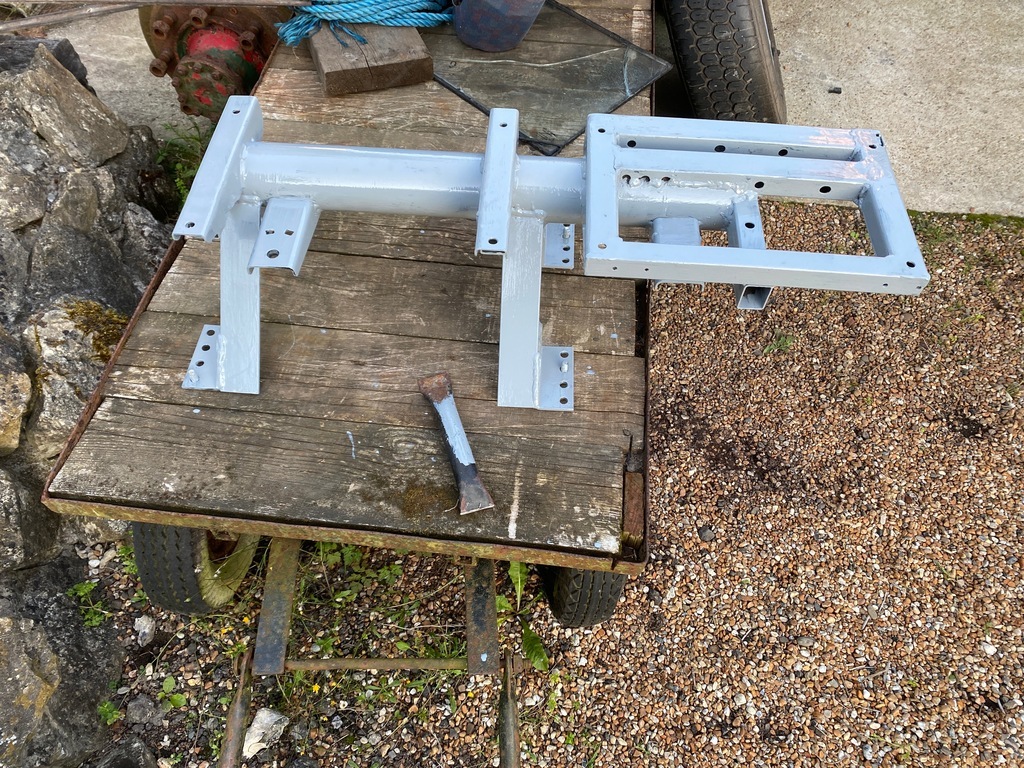 While the paint was drying I moved on to the next stage of the job. I’ve been looking for a set of body sides with factory spec windows in for ages. I’ve even bought a couple of sets, both of which, although cheap, had some serious issues to correct before then needing paint. They had, between them, given me a full set of factory glass though. The worst of the two sets of panels just got chopped up, saving only the sections needed to repair the better ones. I’ve just not got the time or the inclination to do it though, and I’ve given up looking for a decent set... Soooo... |
| |
My worst worry about dying is my wife selling my stuff for what I told her it cost...
|
|
|
|


