glenanderson
Club Retro Rides Member
Posts: 4,361
Club RR Member Number: 64
|
|
|
|
|
I don’t think so Mark. I think the root of the problem is that I am currently doing too little driving, and what I am doing is too short a duration and with too much low speed work. I currently have a 75 amp alternator fitted, which should be more than enough, but even a 100+ version is still not going to be generating enough with the current way I’m using the wagon.
The issue is compounded by the fact that it appears the night heater has a constant low parasitic draw, which is pulling the auxiliary battery down, and because I have a simple voltage sensing split charge relay that means that the auxiliary battery gets the lion’s share of the available charging current.
I’m sure that if I did more miles, or less low speed stuff with all the lights on, that I wouldn’t have any issues.
Putting the smaller diameter crank pulley on isn’t going to help, but as far as avoiding further mechanical damage it’s the only way to go.
I’m going to fit an isolator switch on the night heater, to see if that is enough, and if not then I’ll investigate a smart battery management system instead of the simple relay.
I have also picked up a good, secondhand Eberspacher night heater that should be better than the cheap one I have at the moment, and might have a lower current consumption when not being used.
Hopefully having a drive belt that doesn’t slip, and the fuse out of the heater, will be enough to make a difference in the short term. At the moment I need to get over the dipstick hurdle before I can go any further. 😃👍
|
| |
My worst worry about dying is my wife selling my stuff for what I told her it cost...
|
|
|
|
|
|
|
|
|
|
Would a solar panel and charge controller be an option to keep the aux battery topped up? Though i'm not sure if you have a pop top fitted or not, which would be an issue.
|
| |
|
|
|
|
|
|
|
|
Maybe a Ctek charger & aux battery posts - just keep it topped up when not in use?
|
| |
|
|
glenanderson
Club Retro Rides Member
Posts: 4,361
Club RR Member Number: 64
|
|
Jul 19, 2024 10:43:34 GMT
|
|
Both of those are options.
I have resorted to sticking the battery on charge every now and then, but the issue with that is the necessity to disconnect the battery being charged from the system to prevent the split charge relay cutting in and trying to charge both batteries simultaneously, which confuses a normal battery conditioner like a ctek or optimate. A solar panel would work well enough in the summer months, but will require a proper charge controller and things start to get a little bit more spendy than I’m comfortable with pretty quickly. The other downsides of solar are increased height when I only just squeak into car parks etc as it is, and the major one being that as soon as I get an opportunity to build one, I intend parking the Land-Rover under cover…
Running two alternators would have been the simplest solution electrically, but not if it’s going to make the under bonnet area even more of a Heath-Robinson lashup than it already is.
I have been reading up about dedicated motorhome/marine setups that can take input power from an alternator, a mains hookup and a solar panel, and then maintain two or more batteries properly. These too are a bit spendier than I’m comfortable with, but they do look like the best solution (other than the fact that I can’t justify the cost just now 🤣).
|
| |
My worst worry about dying is my wife selling my stuff for what I told her it cost...
|
|
|
|
|
Jul 19, 2024 12:07:43 GMT
|
|
|
| |
|
|
jamesd1972
Club Retro Rides Member
Posts: 2,921  Club RR Member Number: 40
|
|
Jul 19, 2024 12:56:40 GMT
|
|
Or a second alternator running off a propshaft a la Audi 200 quattro trans am...
Timer on a dumb charger a more cost efficient alternative ?
James
|
| |
|
|
westycapri
Club Retro Rides Member
Posts: 266
Club RR Member Number: 105
|
|
|
|
|
I've got 2 batteries on my campervan with a vsr. If a similar set up to stop the relay clicking on then off with the solar panels as the sun comes up in the morning... really annoying. I put an additional simple relay on the trigger feed to the relay so that it only comes on with the ignition on. Would mean you wouldn't need to disconnect the battery each time you charge it and the batteries would only link when the ignition is on
|
| |
@fantasticmrford
1984 Ford Capri 2.0s
1978 Ford Transit Autosleeper
1975 Landrover Series 111 Dormobile
|
|
glenanderson
Club Retro Rides Member
Posts: 4,361
Club RR Member Number: 64
|
|
Jul 20, 2024 20:46:55 GMT
|
Did a bit today after work. Dragged out the spare engine and fitted the centre section of the manifold to see what room I had to play with. Found another dipstick tube as I had pretty much ruined the first one, and started again. 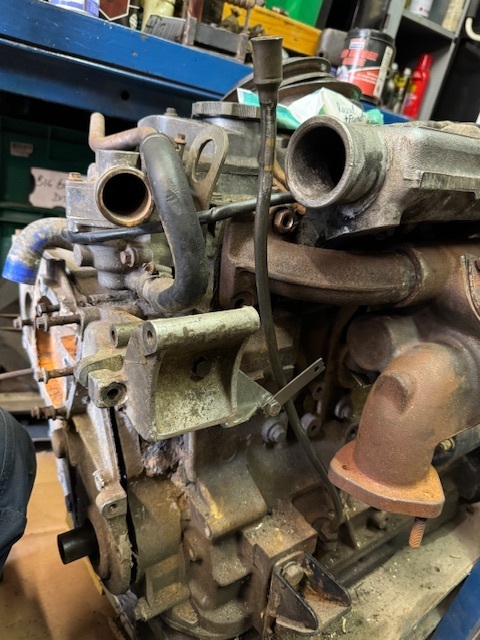 Gently eased it into a shape that allowed it to fit in the space available. I’m not completely divorced from the idea of fitting a second alternator yet, so I also made sure that it would fit around the cut down bracket so that if I revisit it in the future I don’t have to remake the dipstick tube a third time. I will leave the alternator bracket on this spare engine for now, so I don’t mislay it, and I made up a short spacer tube to take its place instead. Welded on the steady tag, then gave it a quick squirt of paint. Hopefully I’ll get it fitted and the Land-Rover back together tomorrow. After that I will be doing a fluids change/top up, new filters, and a couple of other jobs. |
| |
My worst worry about dying is my wife selling my stuff for what I told her it cost...
|
|
|
|
|
Jul 21, 2024 23:45:07 GMT
|
I struck lucky with one of these for my campervan last year for £50: www.limekilnchandlers.co.uk/sterling-alternator-to-battery-charger.htmlIt's an old version of their current model, but serves my purposes well. I think there's a fairly limited and diminishing market for them nowadays, as they are not suitable for a modern smart alternator, so you may also be able to pick up a bargain. Until I started monitoring the charge current, I was unaware of just how slow an alternator is to get charge back into a depleted battery. After an initial surge into a discharged battery for just a minute or so, the rest of the time the current is only a few amps. One option would be to change the regulator for a higher voltage output, for very little cost and effort. |
| |
Sometimes, others may not understand why you like a car so much. Sometimes, you may not even understand why you like a car so much. But none of that matters; all that matters is that you like the car, and having it makes you happy.
|
|
jimi
Club Retro Rides Member
Posts: 2,239  Member is Online
|
|
|
|
Alternators aren't designed to recharge a flat battery they are designed to maintain batteries that are near a full state of charge. Increasing the charge voltage above the standard regulator voltage isn't something I would recommend, it won't do a standard lead acid battery the slightest bit of good and can be quite dangerous, anything above gassing voltage (around 14.6v) is liable to cook the battery and has been known to cause them to explode. I was working at a bench in my workshop (possibly 10x15 ft) offshore when a large heavy duty 12v Cat battery I was recharging blew its top off, not an experience I'd recommend to anyone  Clean pants were almost required  |
| |
Black is not a colour ! .... Its the absence of colour
|
|
|
|
glenanderson
Club Retro Rides Member
Posts: 4,361
Club RR Member Number: 64
|
|
|
|
Yes matfenwick that’s the kind of thing I am considering. Although this model appears to be the best way for my application: Alternator charge splitter Instead of the alternator being connected directly to the main battery, and the auxiliary one simply being connected to them both by the split charge relay when the engine is running, you connect the alternator to this box, and it sends the charge current to each battery as required, but with a priority to the main one. The key with these, apparently, is that there’s no voltage drop and that batteries are never actually connected together, so you can’t get the situation where the one in the lower state of charge prevents the other from charging at all. |
| |
My worst worry about dying is my wife selling my stuff for what I told her it cost...
|
|
Nathan
Club Retro Rides Member
Posts: 5,650
Club RR Member Number: 1
|
|
|
|
|
Your charging issues sound exactly the same as what I had, ended up just using the truck more (well it is now the daily).
I've got the simple relay split system but having ran night heaters in suff before I knew it's tend to use power when off (usually via the display), running an isolator off the second batteries fuse board feed (where all my AUX is wired) resolved the issue.
|
| |
|
|
|
|
|
Jul 22, 2024 17:05:54 GMT
|
|
I have two batteries in my land rover and went the the most basic setup I could think of as electrickery is tricky!
I got a big changeover switch (think they are designed for boats) so I can select which battery gets charged and therefore also which battery gets used when camping. It works well but you do need to remember to switch it over manually. Also when it's parked up I can turn both off as a security measure.
|
| |
|
|
glenanderson
Club Retro Rides Member
Posts: 4,361
Club RR Member Number: 64
|
|
|
|
There are various ways around the issue, to be sure. I want to find one that hits the Goldilocks zone of minimal day-to-day faff, minimal chance of getting caught out with a flat battery, minimal effort to get installed as I already have too many outstanding jobs to do to waste time on side quests, and last of all getting value out of whatever I spend… Anyway, other than fitting an isolator for the night heater when it’s not in use, I won’t be doing anything else for a little while as I just don’t really have the time. So, a bit more done today. Pleased to report that the replacement pulleys and new belt are all good. The vibration from the old, bent, crank pulley has gone, as has the persistent squeaky mismatched belt noise. Dipstick 2.0 fitted ok too; I can now check the oil level without burning or lacerating myself trying to reach down through the inlet pipework. 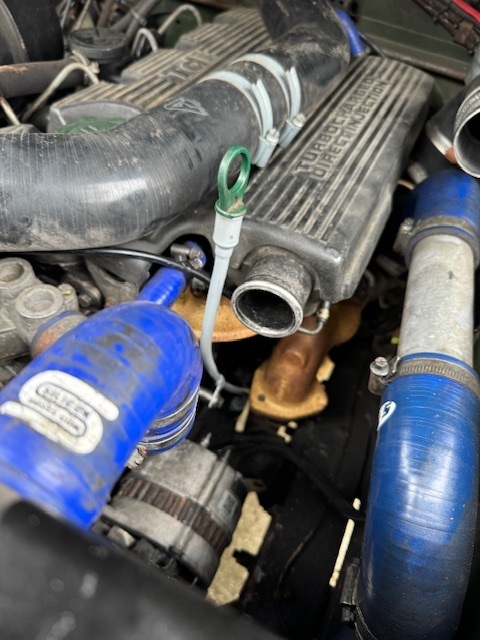 I looked at adjusting the wastegate a bit, but things are so tight under there I really couldn’t see any way to do it without removing the manifold again, and I just couldn’t face doing that right now. Even getting access to fit the boost controller is going to be a struggle, so I decided to leave that job for another day. I then refitted the inlet hoses, but when test running the engine it was apparent that the air cleaner was moving about a fair bit more than I remembered. I have it mounted on a set of rubber bobbins on a bracket on the timing case. Closer inspection showed that the current curse of short lived rubber stuff had struck again. 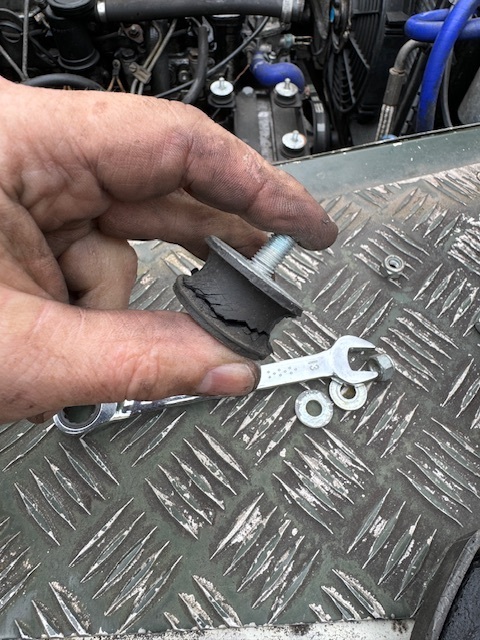 Four years and about 20,000 miles. I gave the issue some thought. The housing is rubber mounted on the donor vehicles, but to the bodywork. I think I can safely rigidly mount it to the engine, as it will be moving in harmony with it, not stationary relative to it. Anyway, I couldn’t just throw the rubber bobbins out and bolt it straight down as that would have meant clearance and alignment issues. So I had a womble through the scrap pile. No suitable round bar stock, but I did have this nice piece of 20mm thick aluminium offcut… 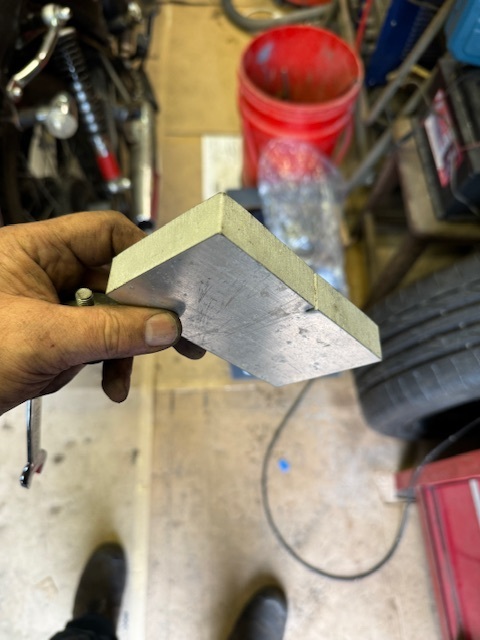 Some measuring, marking, drilling and cutting ensued. Leaving me with four rough chunks that I could clamp together using a bolt as a mandrel. 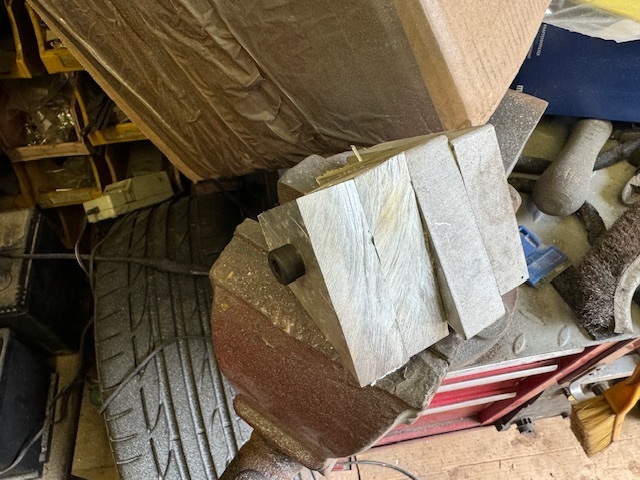 This could then get mounted up in the lathe… 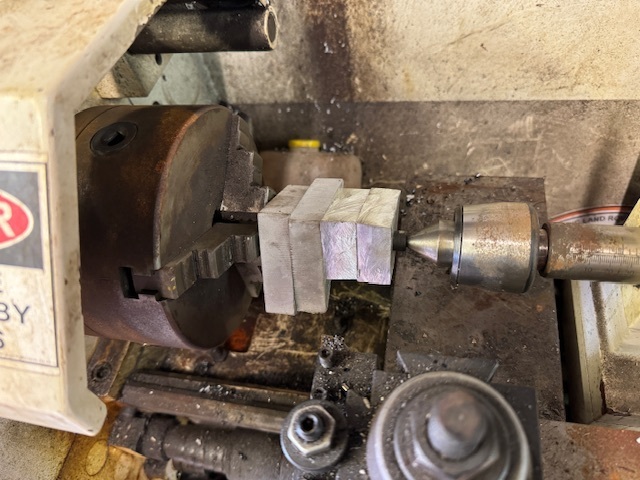 And I then spent an hour or so reducing the bulk of it to swarf. 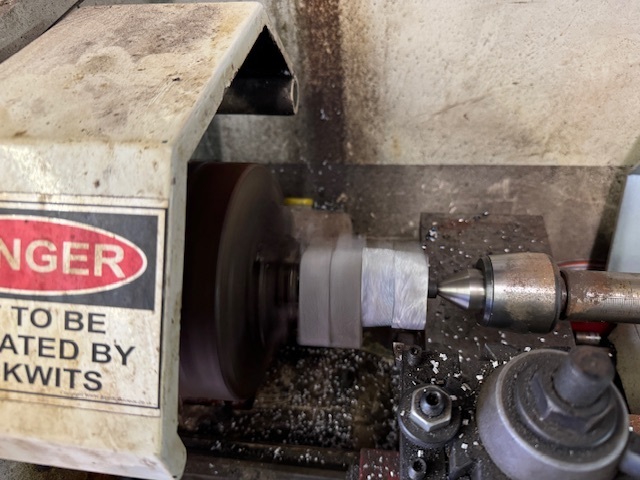 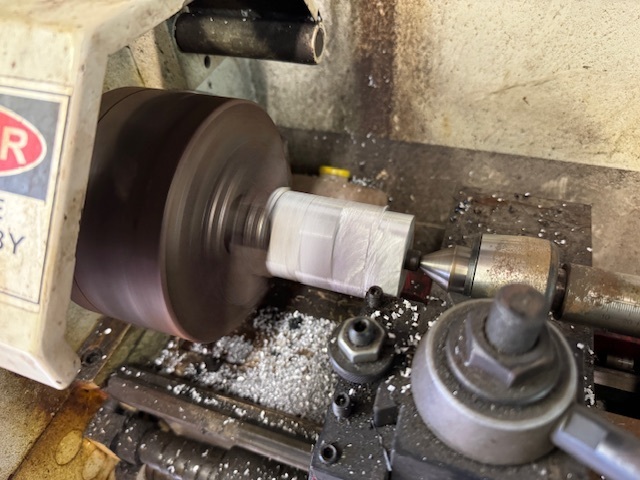 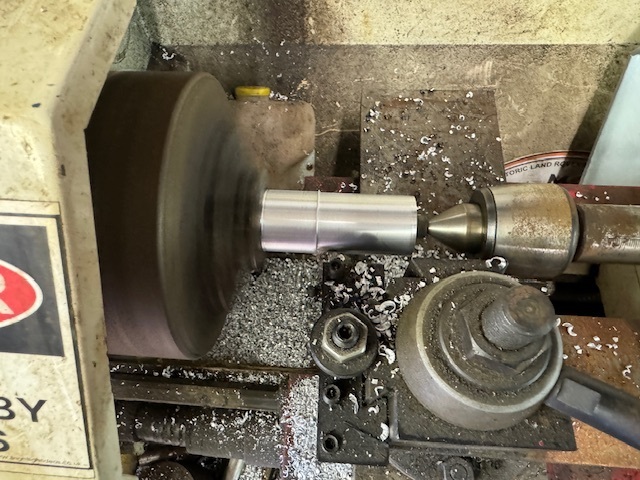 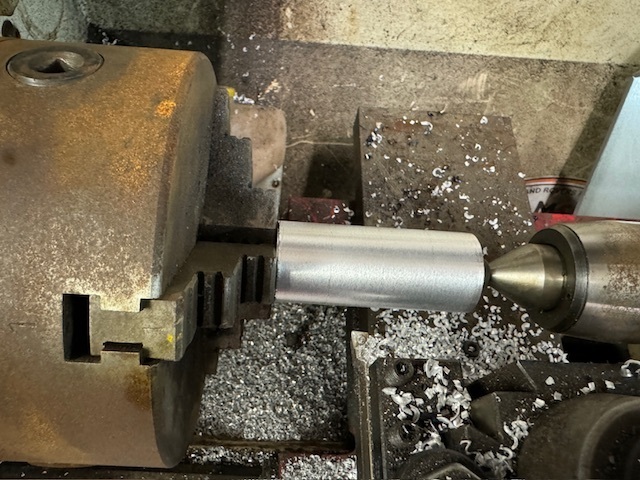 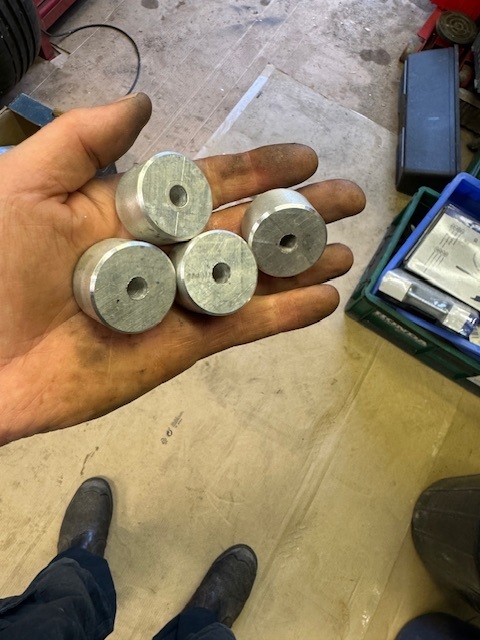 This allowed me to bolt the air cleaner back in. No more wobbling about. 👍 I also adjusted the inlet hose so that it was away from the fan a little more and not rubbing on the intercooler hose. I might look at making a new mount to sit the air cleaner in the gap under the passenger wing, but for now this will do. 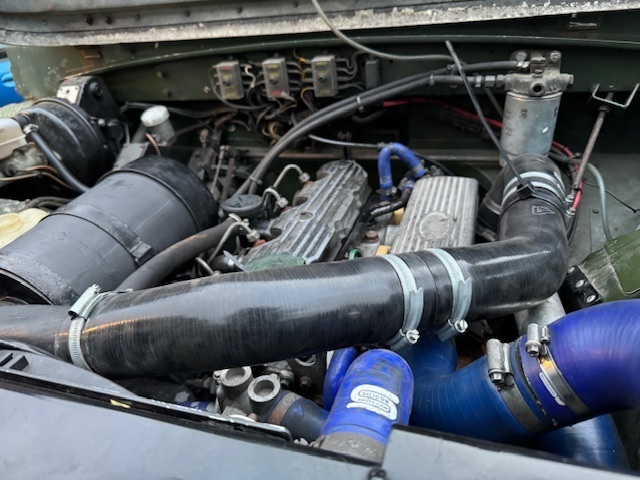 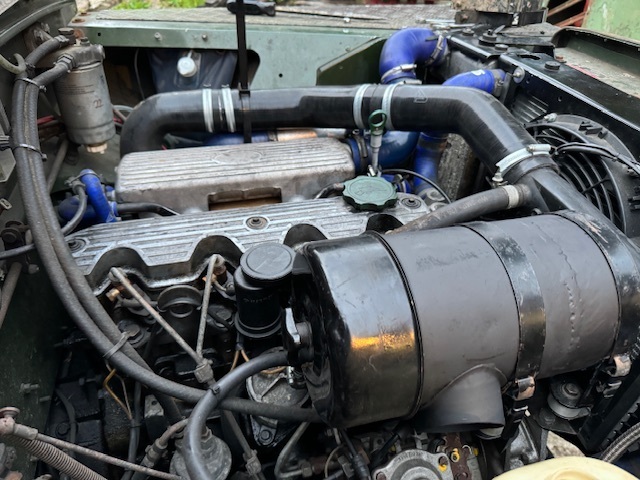 |
| |
My worst worry about dying is my wife selling my stuff for what I told her it cost...
|
|
|
|
|
|
|
|
Hi Glen, I just read the previous pages’ entries because I’m wondering what brought the charging issues to the fore? Are there parasitic drains that rob the battery when the truck is not in use? Or are you running extra accessories/devices which gobble up lots of watts? Or does it all begin with the crankshaft pulley diameter not being friendly to the alternator?
I’m just trying to get up to speed (smiley face icon).
Cheers, John
|
| |
|
|
glenanderson
Club Retro Rides Member
Posts: 4,361
Club RR Member Number: 64
|
|
|
|
|
Hi John.
I think that there’s no single factor causing it. It’s a combination of not doing enough miles, most of those miles being done at low speeds with lights/wipers/heater etc going, a slipping belt, parasitic drain from the night heater, and a very unsophisticated split charging arrangement that can’t allow the alternator to put the current where it really needs to go.
Hopefully the revised belt and pulleys will cure some of it, and an isolator on the night heater will be a big help too. If I still run into problems because I’m not driving it enough then I’ll look into a more sophisticated split charging arrangement, and combine that with setting up some kind of simple “shore supply” whereby I can just hook it up to the mains overnight and have a built in charging system to bring things back up to 100% without having to muck about with lifting seats and lugging mains chargers around.
I’m off a couple more days this week, so I’ll be getting on with the fluids change and some more stuff today.
|
| |
My worst worry about dying is my wife selling my stuff for what I told her it cost...
|
|
|
|
|
|
|
Alternators aren't designed to recharge a flat battery they are designed to maintain batteries that are near a full state of charge. Increasing the charge voltage above the standard regulator voltage isn't something I would recommend, it won't do a standard lead acid battery the slightest bit of good and can be quite dangerous, anything above gassing voltage (around 14.6v) is liable to cook the battery and has been known to cause them to explode. I was working at a bench in my workshop (possibly 10x15 ft) offshore when a large heavy duty 12v Cat battery I was recharging blew its top off, not an experience I'd recommend to anyone  Clean pants were almost required  I agree that you need to be sensible about it, but the regulators are often available with a choice of output voltages. I went from a 14V to 14.5, which didn't seem to my logic to be dangerously high. It'd be interesting to see the charge current before and after the charge splitter that glenanderson is thinking about, as that seems like it should be a help. My experience with the one Sterling product suggests they are well made. |
| |
Sometimes, others may not understand why you like a car so much. Sometimes, you may not even understand why you like a car so much. But none of that matters; all that matters is that you like the car, and having it makes you happy.
|
|
jimi
Club Retro Rides Member
Posts: 2,239  Member is Online
|
|
Jul 26, 2024 12:49:48 GMT
|
Charge voltages seem to vary from one manufacturer to another, Toyota quote (for the MR2) 13.9V - 15.1V at idle - 2000rpm (no load) mine runs at 14.2. When fault finding car alternator charging systems I tend to work on the basis of anything from 13.8 - 14.5 is OK, anything lower or higher needs investigating. Especially if it's above battery gassing voltage (14.6) it's also worth bearing in mind that the alternator voltage will drop with temperature, so if the engine bay/alternator is very hot the output voltage will drop, using Mr T's figures above the range would drop to 13.4 - 14.3V. You should be perfectly fine with 14.5v  |
| |
Black is not a colour ! .... Its the absence of colour
|
|
glenanderson
Club Retro Rides Member
Posts: 4,361
Club RR Member Number: 64
|
|
|
|
Sometimes I really have to question my own sanity. 🙄 In the back of the Land-Rover, on the passenger side, there’s a locker. I don’t use it much for a couple of reasons. Since I mounted a seat across the top of it, getting into it is a challenge, despite having removed the lid. Also, whatever you put in there always ends up filthy dirty and soaking wet. Having decided that I am reviewing the rear seating setup, and not having the bench seat at the back any more, I was left with a gaping hole and a locker that looked like the black hole of Calcutta. So I gave it a good scrub out. This revealed a slightly cleaner black hole, without a great deal of paint. So I removed the rubbing strip and set to with a can of etch primer and then a couple of coats of white paint. 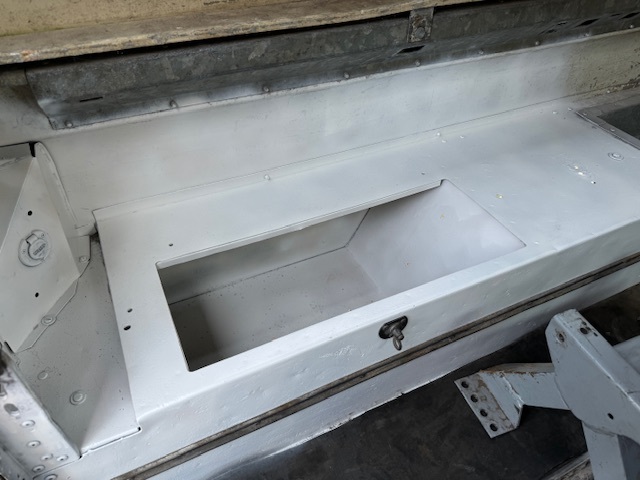 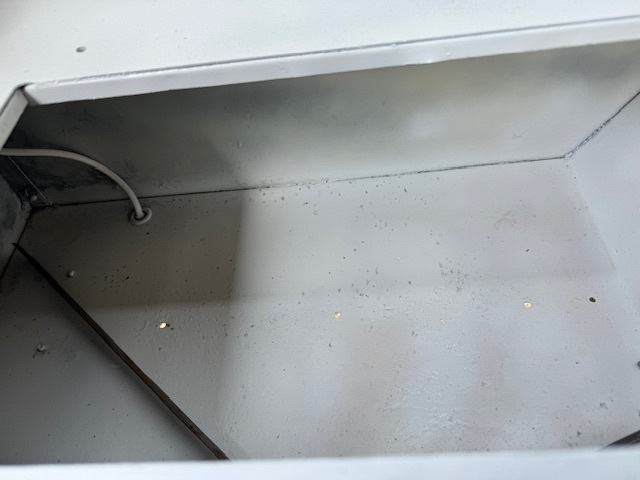 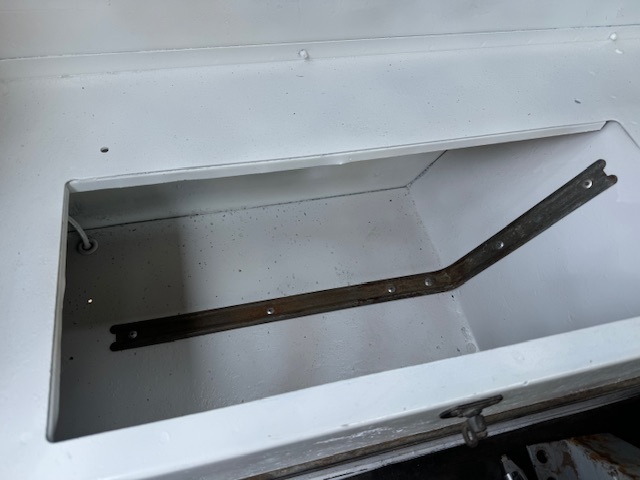 Much better. I then rooted through the stores to try and find a lid. I’m not sure where the original one has gone, but I did find a halfway reasonable one so I thought I’d use it. 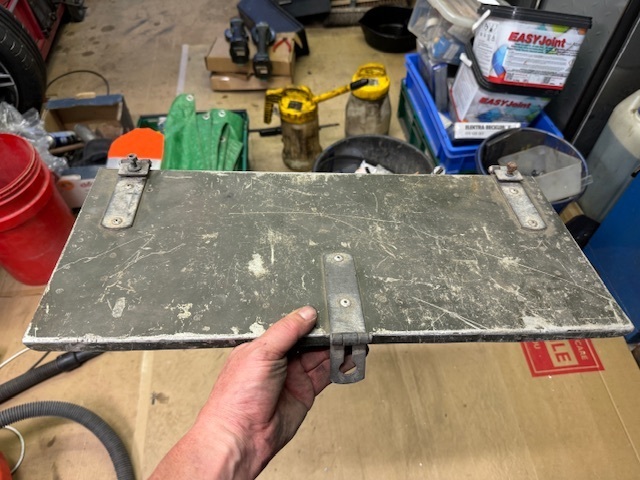 Initially, I thought I’d just sling it on. But then I started thinking about a way to let stuff dry out rather than just festering away in there. I had a rumble around and found a piece of perforated aluminium sheet that looked interesting. 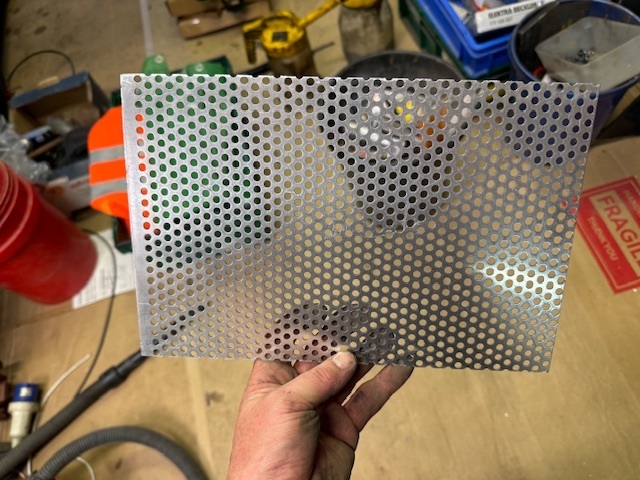 My first thought was to cut a couple of large rectangular holes in the lid, and to use the perforated sheet to fill them. However, a bit of investigation showed that whatever grade alloy the sheet was, it was pretty soft. I didn’t want to dramatically weaken the lid as they’re easily enough bent as it is. 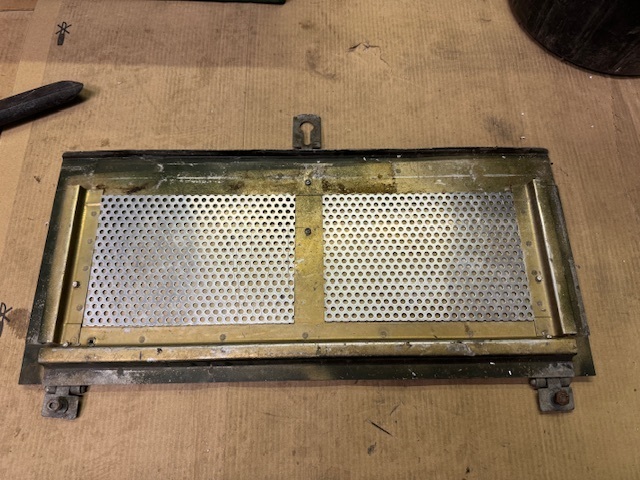 Looking at it with the two bits of sheet underneath the lid though, I thought it would be an option to use the perforated sheet first as a template to drill through the lid, and then as a stiffener to replace some of the strength lost from drilling all the holes. So I set to. 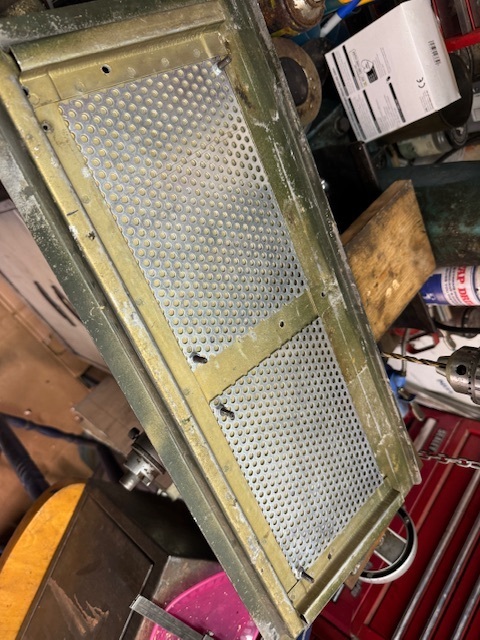 I bolted the sheet in temporarily so that it didn’t move. Each piece had 19x23 5mm holes. I may have slightly underestimated the length of time it was going to take me to drill 874 holes. Then to de-burr the resulting 1,748 sharp edges. Plus all the sharp edges thrown up on the alloy sheet. An eternity later I had this. 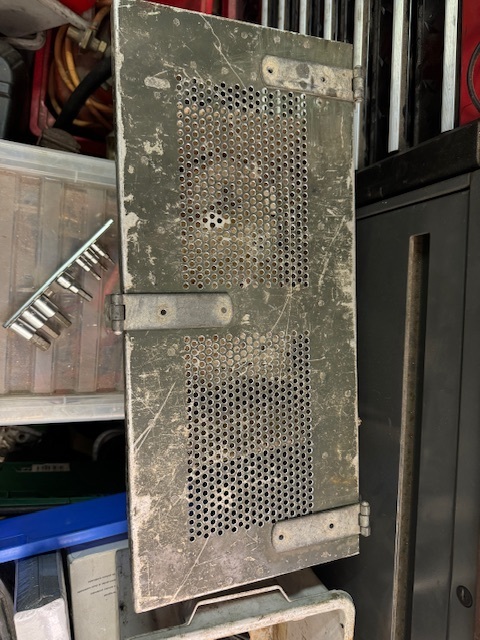 Which, after some paint, looked like this. 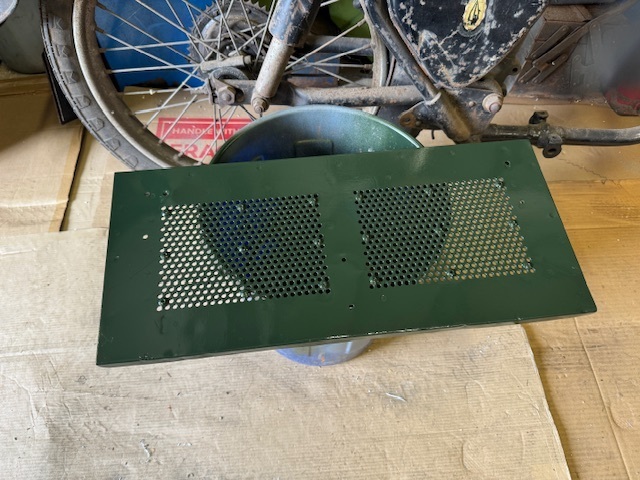 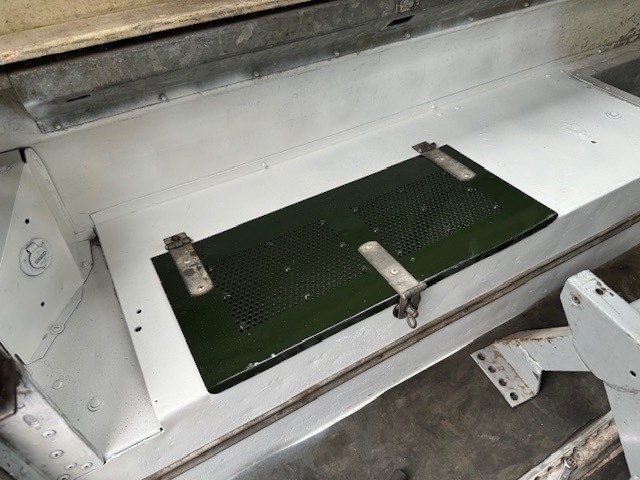 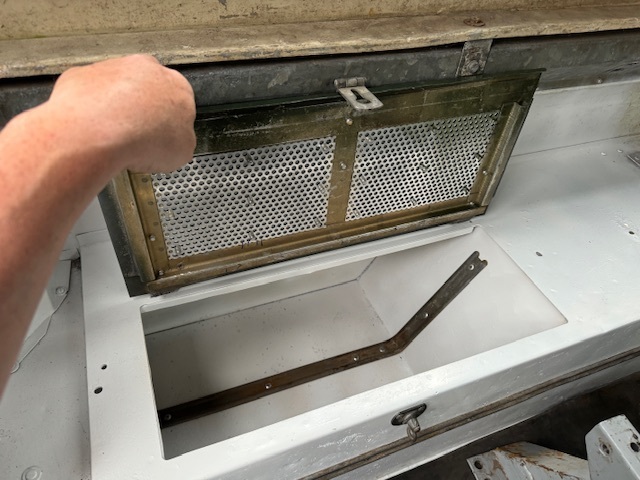 The overall effect of which I’m very pleased with. Only time will tell if it actually works, or if the hours of labour were in vain. 🙄 After that, I went and laid down in a darkened room for a bit. 🤣 |
| |
My worst worry about dying is my wife selling my stuff for what I told her it cost...
|
|
glenanderson
Club Retro Rides Member
Posts: 4,361
Club RR Member Number: 64
|
|
|
|
The next job, after the lay down, was to finish the service. I thought I had changed the fuel filter last year, but the date on it suggests otherwise. 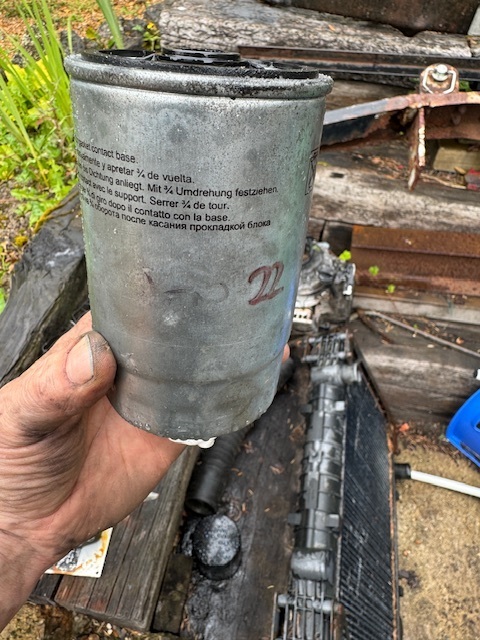 Attempting to prime the system up afterwards resulted in failure. The injection pump on these engines will run quite happily with a failed lift pump as long as the system doesn’t lose its prime, and that’s just what appeared to have happened here. No matter what I tried, I couldn’t get fuel up to the filter. Fortunately, the spare engine from forkliftfred had what looked like a nearly new one bolted to it, so it got robbed. 😀 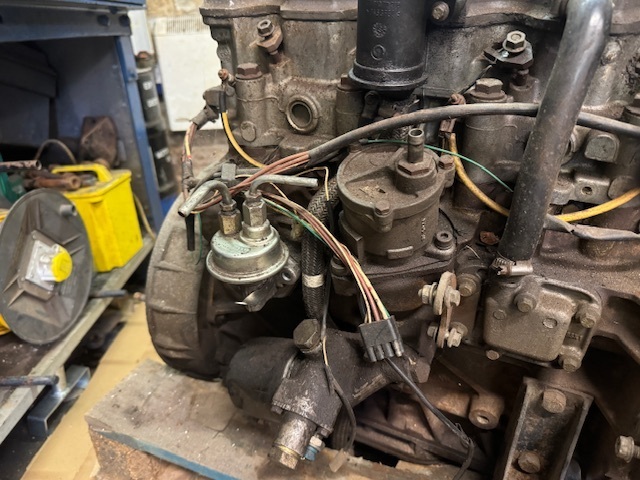 This cured the issue and we were back in business. I have had several of these pumps fail over the years, so have decided it will be prudent to keep at least one in my spares cache from now on. With the engine back running again, I moved on to fitting an accessory that I have been trying to track down for years, and only recently managed to do so. 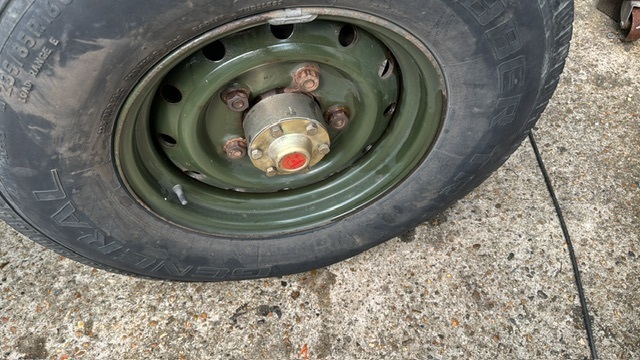 These are automatic free-wheeling hubs. I’m really not a fan of the conventional manual ones, because of their unfortunate habit of leaving you stranded if you suffer a rear halfshaft failure. These, however, don’t leave you open to such issues. They do have their own shortcomings, particularly if you use 4WD a lot, but for someone like myself who does very little (if any) off-roading, they’re pretty useful. I didn’t take any pictures of the fitting process because I was using my camera to film it. Once I have edited the footage into something halfway watchable I’ll post a link. 😀👍 Moving on to today, I tried to make some progress on the steering box issue. Having previously turned down the end of the Series 3 Land-Rover outer column so that it would take the 1980’s era 90/110 switchgear, I had to further modify the end by machining a slot in it to engage with the moulded locating tab that stops the assembly spinning around the column. 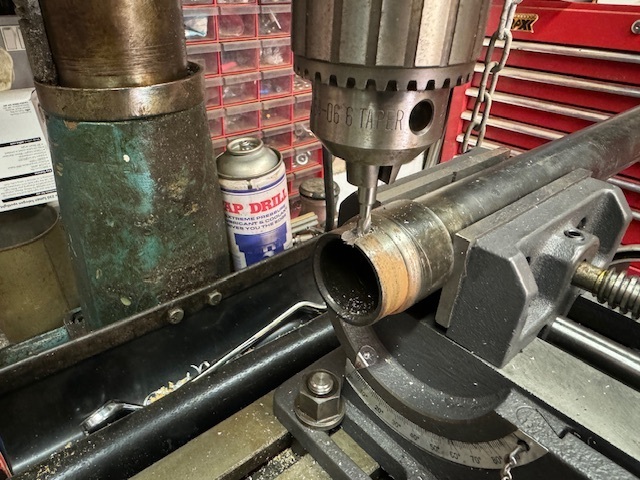 This simple task had been holding me up for weeks, firstly because I needed to buy a suitable slot-drill for my milling machine, secondly because I needed something vice like to hold the column in while I machined it, thirdly because I then needed to get some studs and T-nuts to hold that down to the bed, and fourthly in the time I had spent organising all that I’d mislaid the slot drill. Anyway, once I had finally got that out of the way, I could look at fitting the switches. This assembly will put the indicators, horn, dipswitch and wipers all within easy reach without having to take a hand off the wheel to operate them. It will also allow me to flash the main beam should I need to, something that the floor operated dipswitch doesn’t allow. I started by trimming some of the excess away from the switch mount. 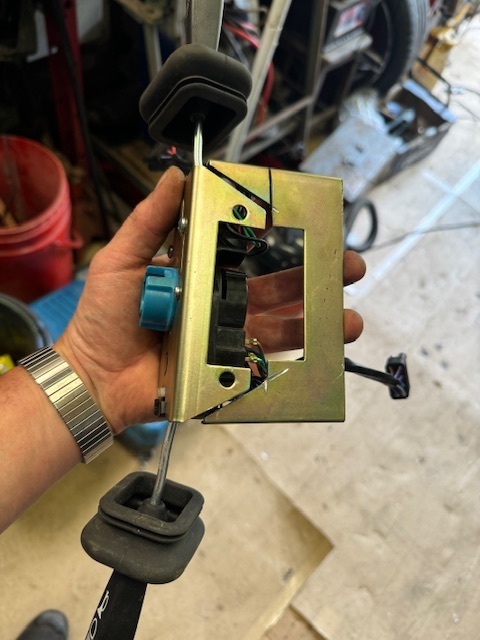 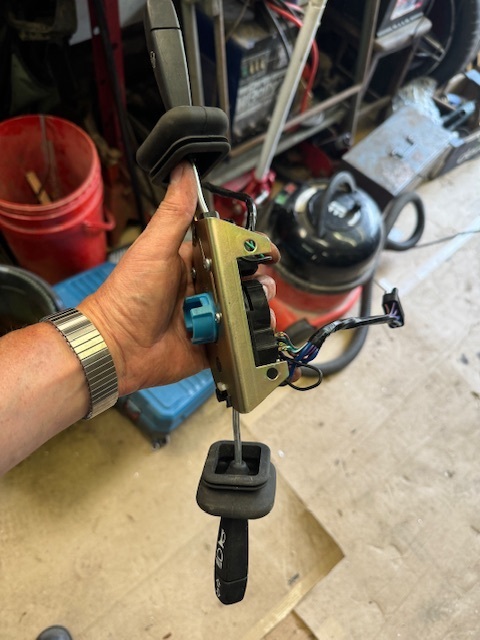 This will let everything fit neatly into an MGB steering column cowl. 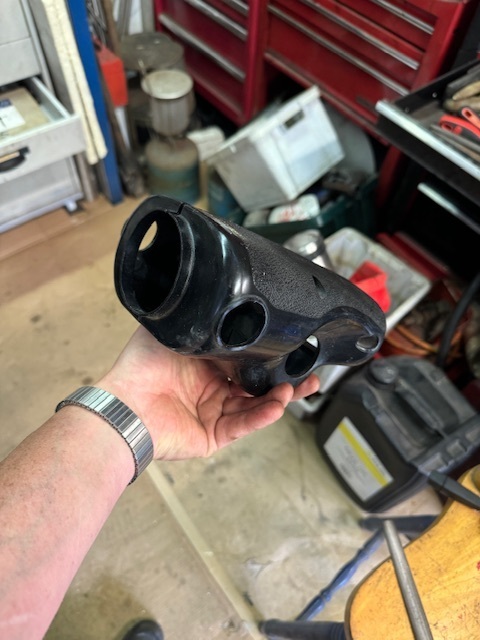 The later Land-Rover column has the provision for a steering lock and, although the standard lock/ignition switch won’t work with the MGB cowl, an early Range-Rover one looked like it would be worth a try, so I bought one to see… …Well, it would have, except that it needed a column outer diameter of about 40mm, and the Land-Rover’s one was only about 35mm. Cue some more Wombling. I rescued the remains of the old steering column from the DAF lorry I broke, to see if it could yield anything useful. The bit where the DAF’s lock fitted was a little too big, the hole where the locking mechanism went through was a little too small, and the bore up the centre only 31mm… all of which were problems that could be resolved by removing more metal; which is something that I can do. 🤣 So, first job was to cut a chunk out of the DAF column and stick it in the lathe. Then bore out the hole on the side for the lock mechanism. 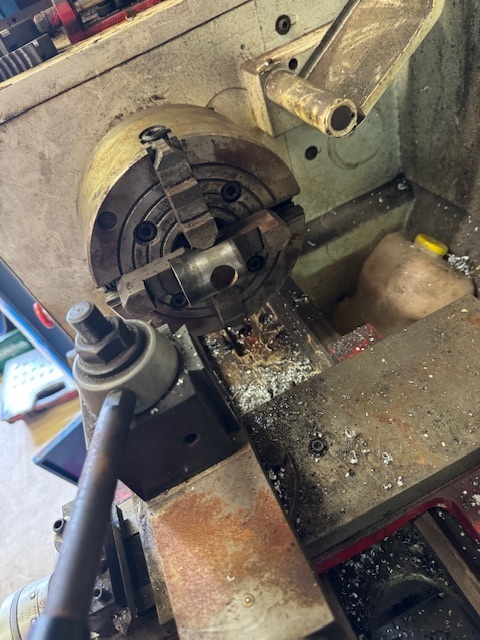 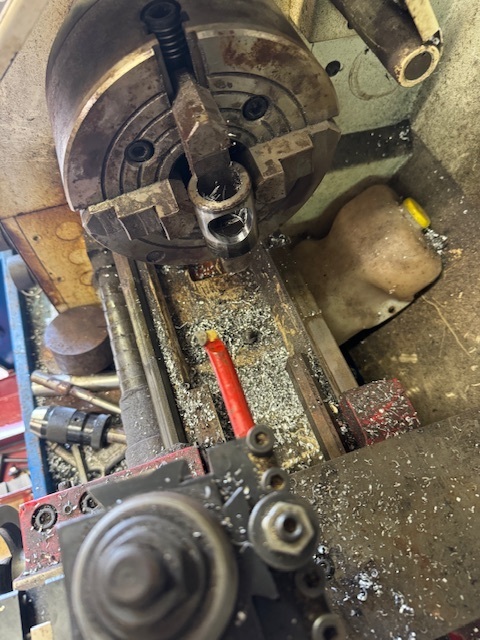 With that done, and still chucked up to ensure concentricity the hole for the clamp’s locating pin could be drilled. 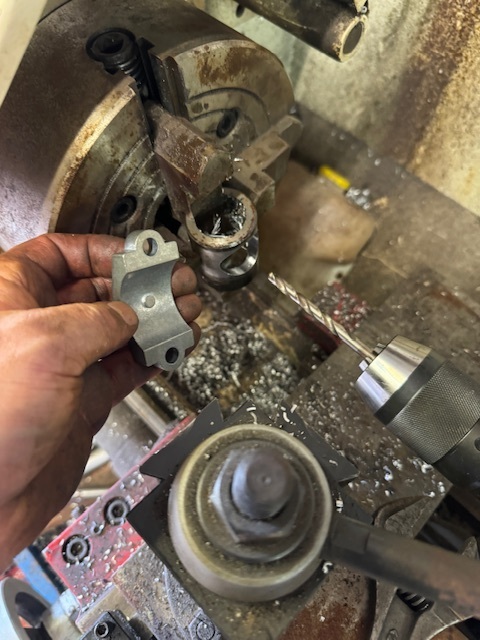 Then reduce the outer diameter so that the switch fitted snugly. 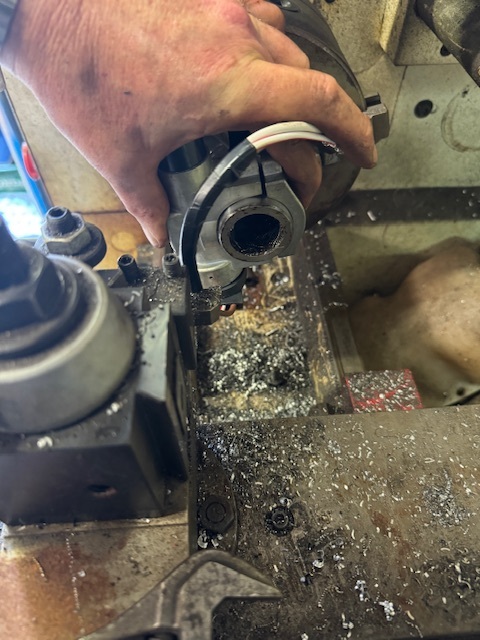 And bore the inside diameter out to fit neatly over the Land-Rover column. 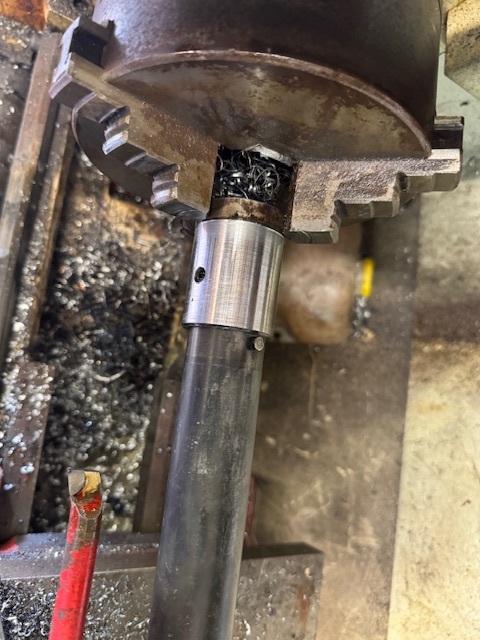 Finally, trim it to length and de-burr. 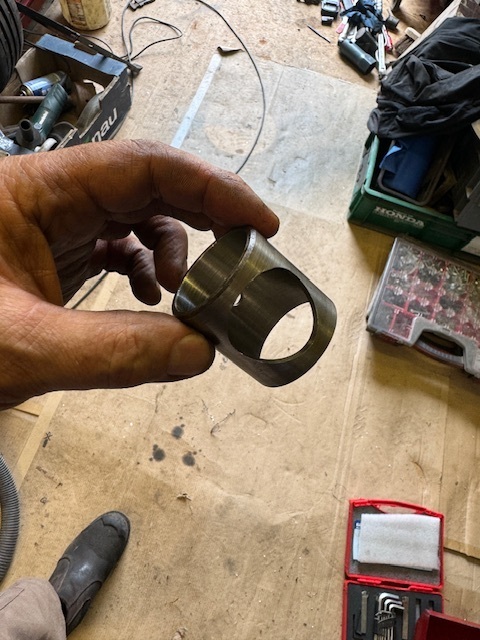 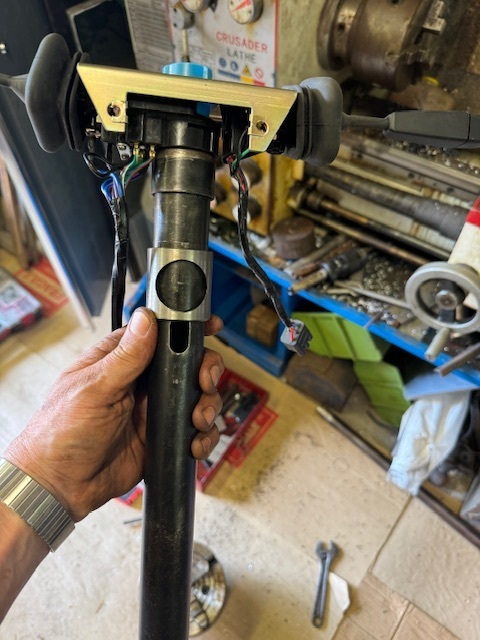 I need to reassemble the steering box before I can really go much further and I am running out of time to get it completed before the trip, so I think I’ll just focus on adjusting the current steering box, finishing the oil changes and remaking the rear seat mounting now. Once that’s done and the Land-Rover is ready to go I will return to it if I have time. It would be nice to have got all the modifications done to the outer steering column and a coat of paint on it before I go away, so that it is nicely cured and ready for fitting when I get home. That's your lot for now. 😀👍 Oh, and the charging issues seem to be improved with the revised belt and pulley, and the temporary disconnection of the heater. I suspect that they will reappear when the nights draw in and I start using lights etc, but for now we’re all ok. |
| |
My worst worry about dying is my wife selling my stuff for what I told her it cost...
|
|
|
|


