|
|
|
Apr 25, 2020 14:42:26 GMT
|
Hi All,
As some of you may have seen on my thread for my 2.4 Econo Jag MK2 the car has now been moved into storage (just as we went into lockdown) in readiness to move house which is all on hold.
As i'm now here with nothing to do i'm going to have a go at replacing the door skins and repairing the door bottoms.
One thing i've always had trouble with when repairing MK2 Jag doors is that the skin that you buy only goes around 3/4 of the way up the door and you have to join it all the way along. Every time i've done this it hasn't gone particuarly well so i'm asking for advice from the experts on here (think of you particuarlly Grumpynortherner).
When i've done this in the past i've cut the door skin slightly longer, joggled the edge and then lapped the door skin onto it, this means any water running down the inside of the door won't run into the joint.
I think part of my problem is too much heat, any advice for cooling it down (apart from going slowly which I try to do), maybe blowing it with an airline between welds? I also wondered if part of the problem might be that joggling the existing door skins straightens it so the curve is wrong.
Any advice or am I just not very good at this :-)
|
| |
|
|
|
|
|
|
|
Apr 25, 2020 14:46:19 GMT
|
|
Just as an aside, one other thing i've found is that using tiger seal or any form of PU compound in the doors causes problems if you then try to weld the edges of the doors up to get the gaps right.
I think spot welding through it is probably ok but if you get it really hot it seems to change and start eating through the metal, i've seen this on a few doors now so I know its not just a one off.
|
| |
|
|
|
|
|
Apr 25, 2020 15:20:00 GMT
|
|
Ok - Yes you are correct in the respect that by swaging the original panel will reduce any horizontal curvature / bow across the door - but you can check for this before commencing with a straight edge across the profile - the way in which I manage this it place small vertical cuts into the proposed swaged area - extending just beyond the swage - therefore reliving the possibility of the swage reducing the horizontal curvature - if done at say 75 - 100mm centres you should be fine - You could attempt a butt weld but from experience I don't think that you will any better off - I control heat distortion through the welding process with a airline & blow gun - literally the welding torch in one hand and the blow gun in the other - cycling the spacings between the welds keeping at least 150mm intervals between a completed tack / weld at anyone time - I also use the air line & blow gun with the dressing back with the flap wheel to keep the panel cool - If you can avoid it I would not recommend placing a sealer between the door frame & the skin until I had the door repaired - rehung on the car and gapped correctly - I tend to apply it neatly and wipe it in to the dressed skin edge - You are working on a car that holds consistently tight aperture gapping on the doors with very little tolerance & adjustment and its by far not an easy task to undertake - From what I have seen of your work to date you are more than competent at undertaking this task - just probably take a lot more time than what you would for say stitching a floor pan in - I take it you are using a MIG - but is it transformer or inverter based ?
|
| |
Last Edit: Apr 25, 2020 17:51:19 GMT by Deleted
|
|
|
|
|
Apr 25, 2020 17:24:16 GMT
|
|
Thanks Grumpynorthener, so would you seam weld the joint where you have swaged it (using a series of tacks as described above) or would you leave a gap between them in the finished product.
I've done as described above (leaving 150mm between the tacks) on the last set and still got distortion, I think I need to go slower and use the air gun to take the heat out.
The mig I use is a Clarke 150TE which is transformer based but to be honest I don't think its the welders fault, I think its operator error.
I'm going to attempt (probably unwisely) to replace the skin without the car as a reference as I only have the door, the car is down at my mums so I can't go to it to work.
I've take a load of measurements before starting so it will be interesting to see the end result and how well it fits. If its the same as the ones I have done with the car present it will still need a load of work to make the edges anything like reasonable.
|
| |
|
|
|
|
|
Apr 25, 2020 18:23:48 GMT
|
|
|
| |
|
|
|
|
|
Apr 25, 2020 19:42:19 GMT
|
|
Hi Grumpynortherner, thanks for the response and the pictures, thats really helpful.
I guess i've always tried to fully weld it as I was concerned that it might be concieved as a bit of a bodge just to tack it, its good to see that a master craftsman like yourself does it this way. I think this will definately help.
I will put some pictures up when I get to fit the skin, i'm doing repairs to the bottom.
It will be interesting to see if all my measuring works and it looks anything like the aperture in the car when I come to reunite them!
|
| |
|
|
goldnrust
West Midlands
Minimalist
Posts: 1,872
|
|
|
|
When I did mine, I did just a normal fully seamed butt weld. The end result wasn’t perfection, but I was happy enough with them. As usual for thin panels I did a series of overlapping tacks rather than trying to seam them. I did managed to get less distortion than on previous attempts, I don’t know if it made a difference but I put the welds on in a different order to usual. Normally I’d tack up the panel till I had a spot of weld every 2-3” then I’d put a other tack next to each of those, working across the panel, say going left to right. Then I’d go back over to the left and put a 3rd tack next to each of my other two and then a 4th and so on till the whole seam was welded up. This time I put the tacks on in a different pattern, just looking for the biggest gap each time. So I put a tack 1/2 across the panel, then at 1/4 and 3/4, then at 1/8, 3/8, 5/8 and 7/8 and so on. As the gaps got smaller I jumped about the panel a bit more to whoever ever seemed coolest. It did seem to keep it shape better than some of the other seams on thin curved stuff I’ve tried before. Other than that I'm gonna say don’t fear the hammer  . For so long I thought that if I was good at welding I’d not need to do much grinding or any hammer and dolly work, but when you get into the real world you see that it’s a necessary part of any repair, and a lot of the perfect professional welds you see have had that treatment, but it’s just not talked about. |
| |
|
|
|
|
|
Apr 26, 2020 16:46:04 GMT
|
|
i am in middle of skinning 2 beetle doors and just finished doing a camper van half skin
|
| |
|
|
|
|
|
Apr 26, 2020 16:49:12 GMT
|
|
|
| |
|
|
Dez
Club Retro Rides Member
And I won't sit down. And I won't shut up. And most of all I will not grow up.
Posts: 11,712
Club RR Member Number: 34
|
Fitting MK2 jag door skinDez
@dez
Club Retro Rides Member 34
|
Apr 27, 2020 12:56:20 GMT
|
|
Using cold air to cool hot metal to prevent distortion is extraordinarily bad advice.
It’s a literally a technique that is used to deliberately distort metal (heating and quenching to shrink metal).
Never do that unless you are deliberately trying to shrink a high spot.
|
| |
|
|
|
|
|
|
|
Apr 27, 2020 16:32:20 GMT
|
|
I've done a little bit more and looking at the photos above and what I have I think my problem may be that i'm trying to join the skin at the top on the curve and the skin isn't correctly curved at the top, I will try and get some photos later.
The problem is that the doors tend to be so rotten that you can't get away with changing just the bottom, there is a support around halfway up that has a felt pad between the door and skin and of course this rots out, on this door its even rotten at the top.
I need to find a way of curving the top consistently.
|
| |
|
|
|
|
|
Apr 27, 2020 16:35:40 GMT
|
Using cold air to cool hot metal to prevent distortion is extraordinarily bad advice. It’s a literally a technique that is used to deliberately distort metal (heating and quenching to shrink metal). Never do that unless you are deliberately trying to shrink a high spot. I can see both sides of the discussion, if done right it could help to remove some of the heat to stop the distortion spreading but I take the point that if overcooled it could cause shrinkage.
I guess thats why panel beating is a skill and not something anyone can do.
The guy I bought my MK2 from is on here, he is restoring a Porsche 911 Targa and his metalwork skills are out of this world. I've seen them first hand and the guy is a Jedi Knight of bodywork whereas i'm the Homersimpson of bodywork!
|
| |
|
|
|
|
|
|
|
Using cold air to cool hot metal to prevent distortion is extraordinarily bad advice. It’s a literally a technique that is used to deliberately distort metal (heating and quenching to shrink metal). Never do that unless you are deliberately trying to shrink a high spot. Dez - I fully appreciate that you are entitled your opinion, theories, methods & practices - I also fully appreciate that you operate in a professional capacity - However, so do many others whom also have their opinions , theories, methods & practices - my hard long earnt skills came from a hugely talented & very widely experienced classic car restorer whom had been practicing his trade for several decades before sharing his knowledge with myself for which I am hugely thankful - I have been practising the said same taught skills for some 43 years now - never had a problem - always maintained close tolerance profiles by utilising this method and I am quite happy for my work to continue to do the talking - Has will countless others utilising the same methods in a professional capacity - Chris |
| |
Last Edit: Apr 28, 2020 7:15:56 GMT by Deleted
|
|
|
|
|
|
|
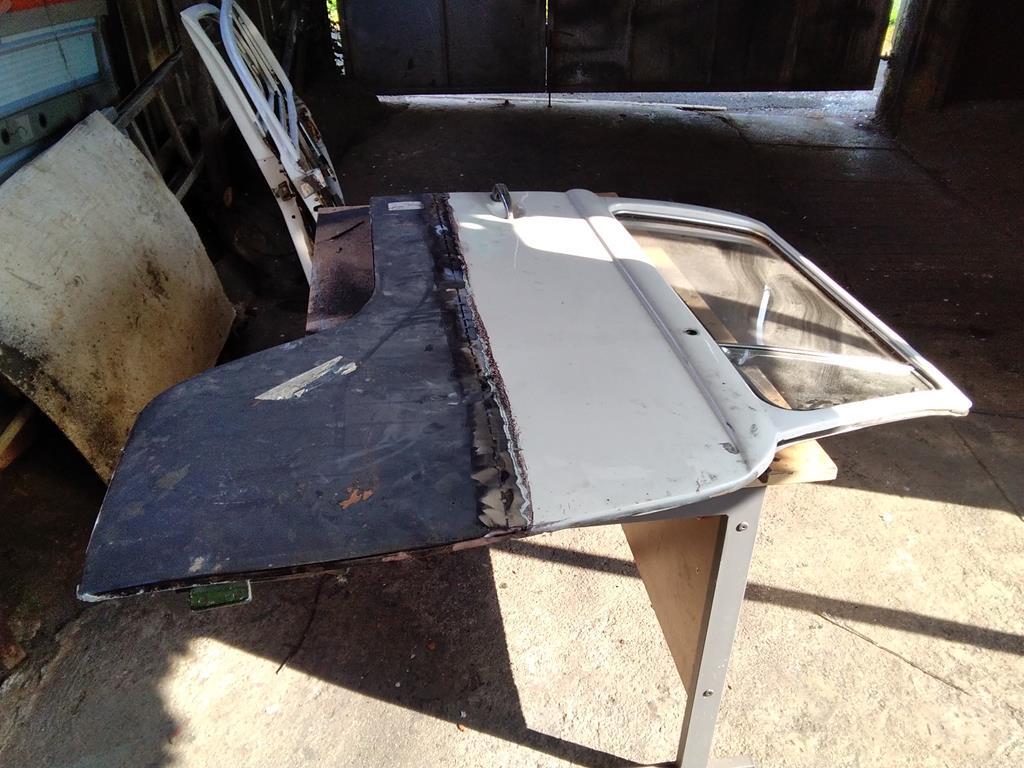
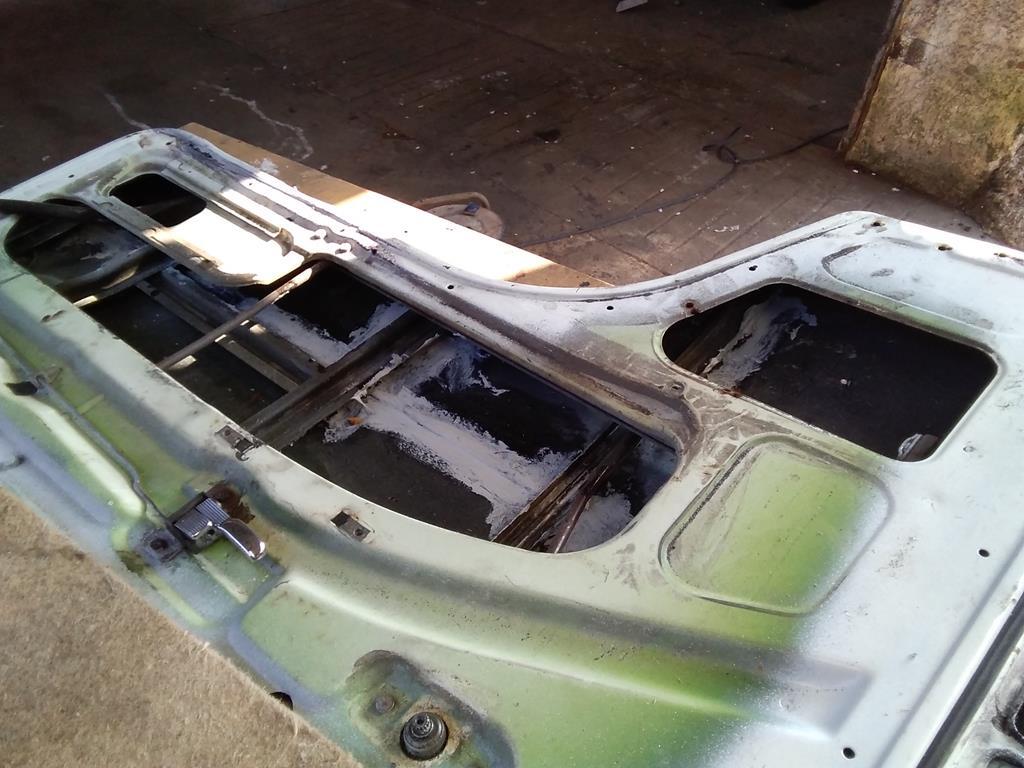
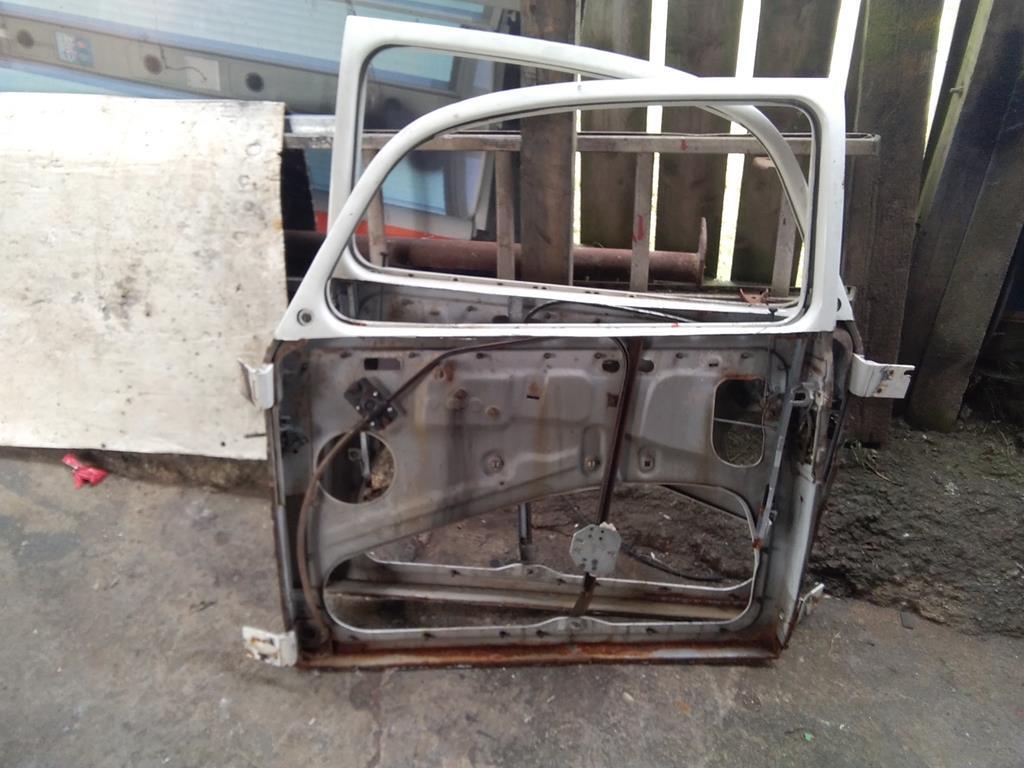
Right so here are some pictures of what i'm up against with the offside front door.
The rear corner has rotted off completely.
The front corner isn't looking much better i'm afraid.
The top front corner is also looking a bit the worst for wear, note also the hole cut in the outer skins so I could heat up the captive nuts to get the door off as they were siezed solid.
The inside of the front at the bottom is looking very rough.
The inside of the rear is AWOL.
One strange this is that as far as I can tell this door never had any drain holes/slots in it. As this is a later car it should have had two slots in it with a cover plate welded on and there is no evidence that this was ever in place. The holes arn't where they should be comparing it to the other door and there is no evidence of new metal being welded in or filler used to cover these up. If this is the case this would explain which this door has rotted so badly.
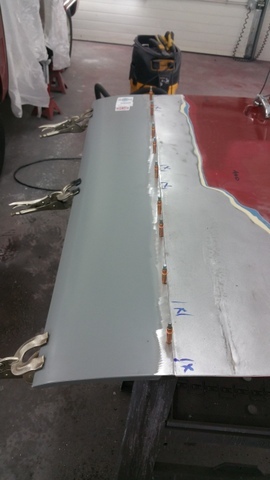
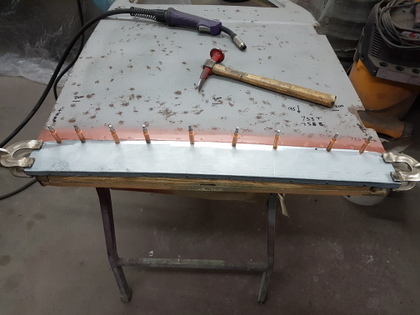
After the stripdown and inspection a lot of measurements were taken and the repairs started.
The bottom was cut back to sound metal.
A new bottom was fabricated and tacked in.
A rear corner outer piece was fabricated and tacked in.
This was adjusted to suit the measurements taken before stripdown and then another piece was made to replace the corner.
The inside corner of the door was rotten so a new piece was made up, i'm quite pleased with how this turned out considering I don't have most of my tools as they are all in storage ready for moving house once the lockdown is over (whenever that might be). This was made with a panel beating hammer, a dolly, a small vice loosely fixed to a workmate (benches have all gone) and an old wood chisel.
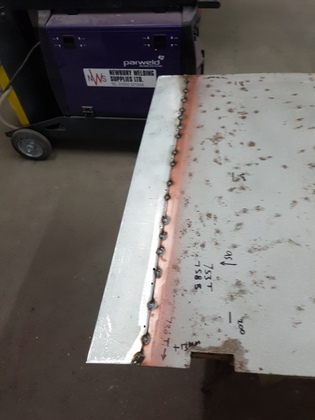
This was then tacked in.
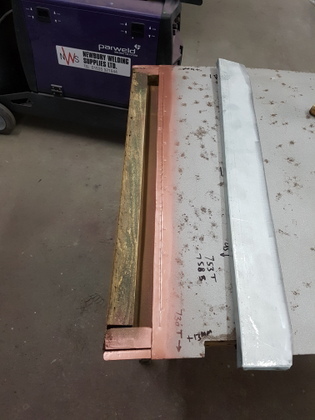
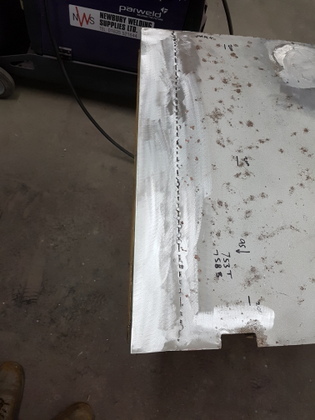
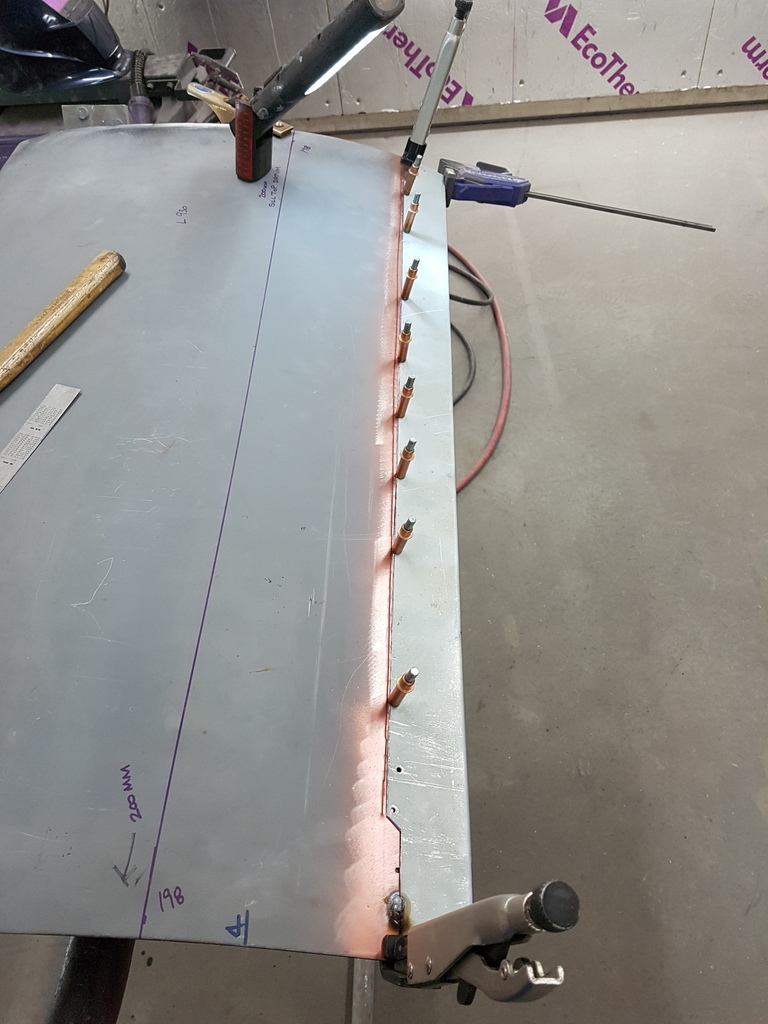
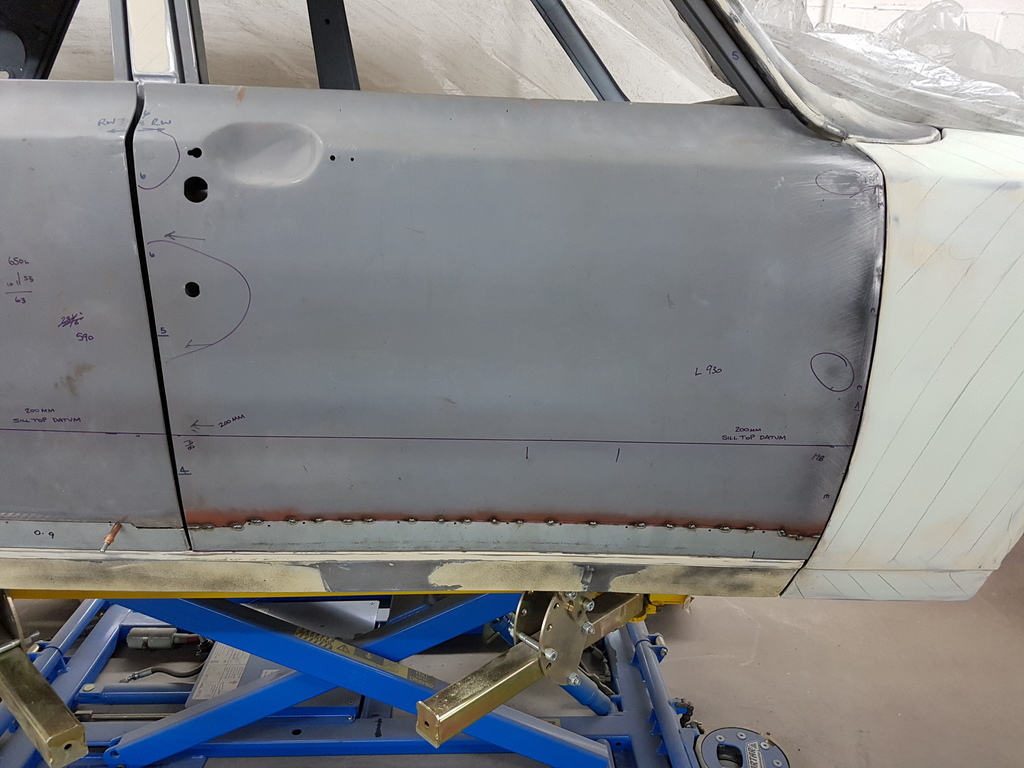
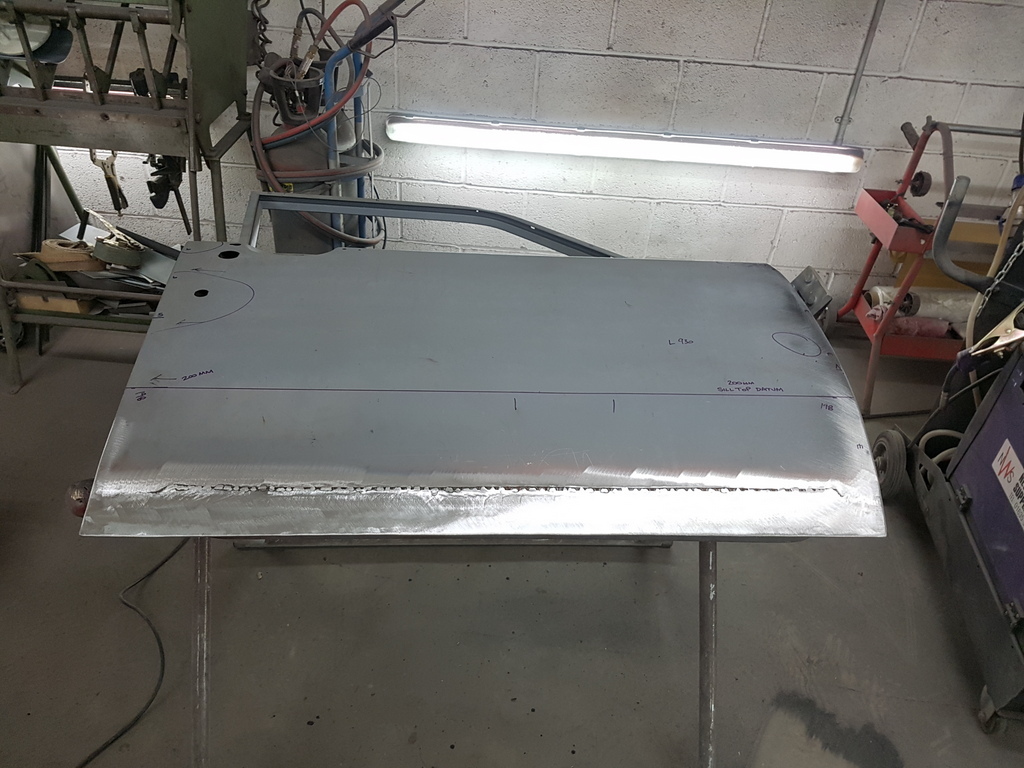
An outer piece and bottom piece were then welded in to the measurements taken previously.
The inner stiffner for the hinge was replaced. Although this photo makes the outer flange look bent it is reasonably straight when a steel rule is held up to it.
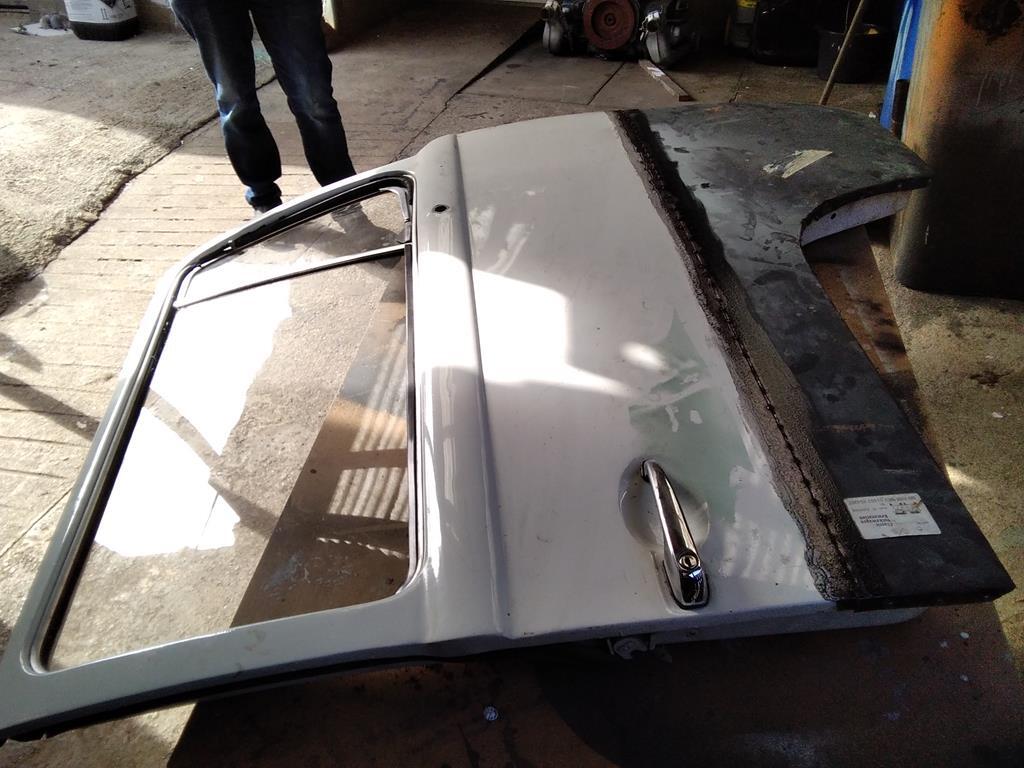
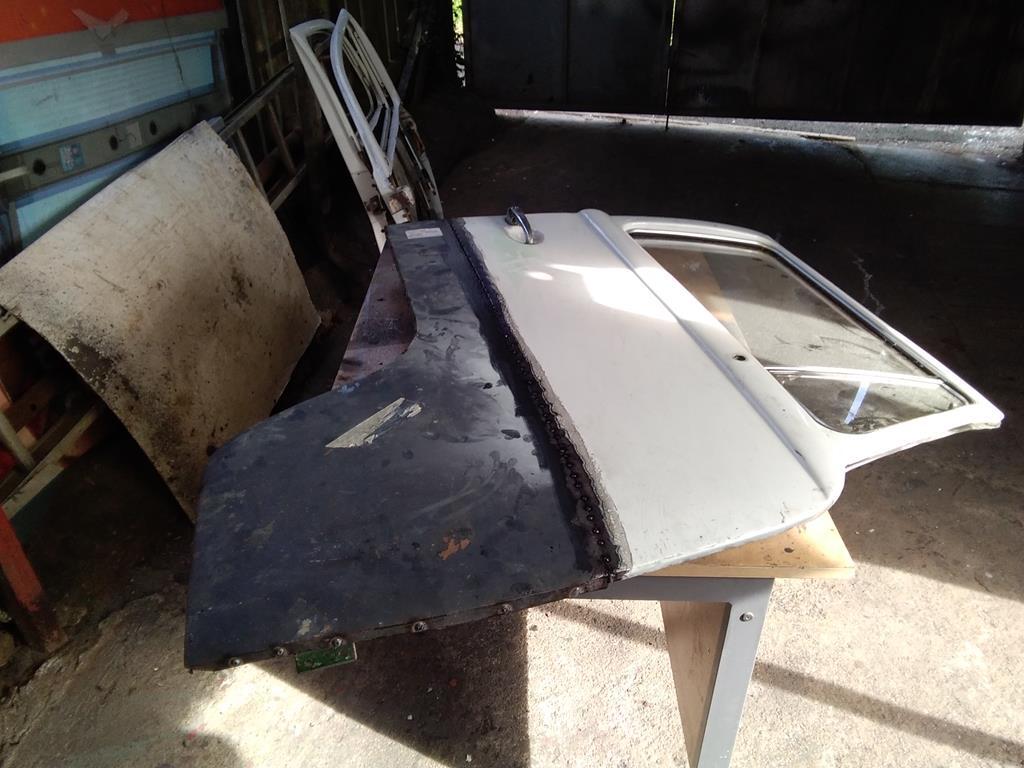
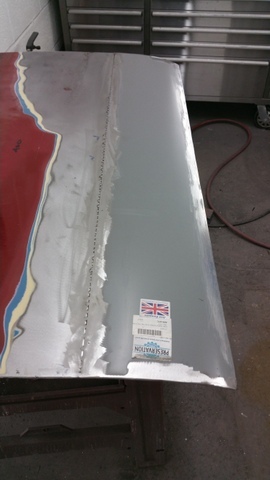
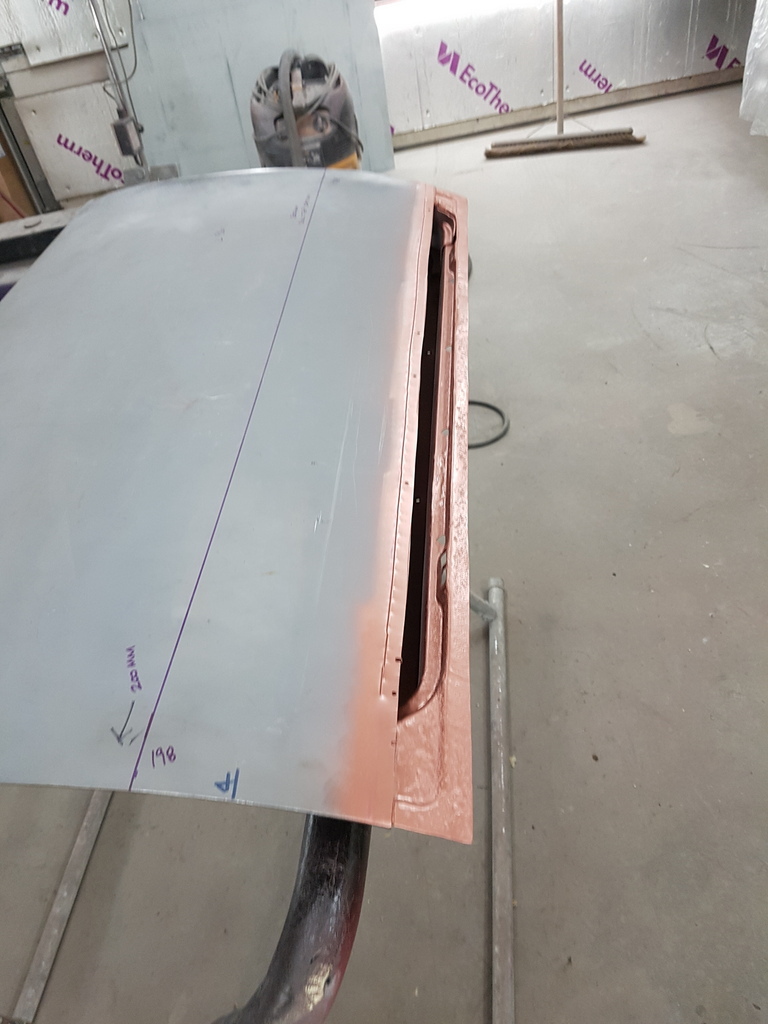
There are a few more repairs to the frame that I plan to get on with later today but moving on to the skin, I trial fitted this and found this:
It seems that the skin goes in in the middle, this isn't correct as it should be slightly curved outwards. The problem seems to be that the skins aren't curved correctly at the top and it would be better to cut them on the flat section of the door (maybe 100-150mm further down), however on this door the rot was so advanced I needed to cut it as far up as possible.
Hopefully the other doors won't be as bad (this is by far the worst).
|
| |
|
|
goldnrust
West Midlands
Minimalist
Posts: 1,872
|
|
|
|
Frame repairs coming along well there  It is weird to have no drain slots. My Daimler is a late car too, and I'm sure the replacement front doors I bought were earlier models as they were different to mine, but they definitely still had drain slots. Some of the cover plates had rotted off, but they clearly had been there originally. I'm not sure I understand the geography of the last picture, where you say the skin doesn't line up? Sound like you've already got some ideas of the solution though, which is definitely half the battle! |
| |
|
|
|
|
|
|
|
Frame repairs coming along well there It is weird to have no drain slots. My Daimler is a late car too, and I'm sure the replacement front doors I bought were earlier models as they were different to mine, but they definitely still had drain slots. Some of the cover plates had rotted off, but they clearly had been there originally. I'm not sure I understand the geography of the last picture, where you say the skin doesn't line up? Sound like you've already got some ideas of the solution though, which is definitely half the battle! Hi, the MK2 doors seem to have two types of drains, the very early ones have circular holes with cover plates pop riveted over them. I think these are the same as the MK1 Jag.
The later ones have two slots in each door with a right angled plate welded to the door.
I think if this one didn't have drain holes its likely to have been a mistake at the factory rather than intentional.
The last picture is a straight edge running across the door skin just below the hole for the push button on the handle. The door should curve outwards along this length so the straight edge should rock on the middle but its sat on the outside edges of the door and low in the middle. Its kind of hard to explain :-) I will try and get some better pictures of it.
|
| |
|
|
|
|
|
|
|
|
I don't suppose that you have the opposite side door with you that you can compare the straight edge profile against by any chance ?
|
| |
Last Edit: Apr 29, 2020 7:47:28 GMT by Deleted
|
|
|
|
|
|
|
|
I wouldn't be suprised if cutting the old skin has caused the stresses left in it from it's original forming to pull it out of shape, does it take much effort to push it out straight from behind? If not I suspect welding it together with it pushed out straight from behind (using a wooden batton to get an even push)will lock it back into the original shape.
|
| |
|
|
|
|
|
Apr 29, 2020 10:44:21 GMT
|
I don't suppose that you have the opposite side door with you that you can compare the straight edge profile against by any chance ? Hi yes, I have the other one which is how I know its not right. I could really do with a profile gauge to check, i've ordered one on e-bay but it won't be here till next week. |
| |
|
|
|
|
|
Apr 29, 2020 10:46:29 GMT
|
I wouldn't be suprised if cutting the old skin has caused the stresses left in it from it's original forming to pull it out of shape, does it take much effort to push it out straight from behind? If not I suspect welding it together with it pushed out straight from behind (using a wooden batton to get an even push)will lock it back into the original shape. The problem is that the new skin doesn't seem to have the correct curve at the top, I think that they arn't really meant to be joined as far up as I am doing, I think they should probably be joined on a more flat part, however, this door was so rotten that I need to use as much of it as I can. The door is totally rotten as you can see and anyone with any sense would have bought a better one.
Fortunatly I don't have much sense so you all get to watch me struggle with it :-)
|
| |
|
|
|
|


 . For so long I thought that if I was good at welding I’d not need to do much grinding or any hammer and dolly work, but when you get into the real world you see that it’s a necessary part of any repair, and a lot of the perfect professional welds you see have had that treatment, but it’s just not talked about.